important safety precautions - theinformr.com safety precautions 1 ... turning the phone on and off...
TRANSCRIPT

IMPORTANT SAFETY PRECAUTIONS
1
IMPO
RTAN
T SA
FETY PREC
AUT
ION
S
Read these simple guidelines. Breaking the rules may be dangerous or illegal. Further detailed information isgiven in this user guide.
WARNING! Violation of the instructions may cause serious injury or death.
1. Never use an unapproved battery since this could damage the phone and /or battery and couldcause the battery to explode.
2. Never place your phone in a microwave oven as it will cause the battery to explode.
3. Do not dispose of your battery by fire or with hazardous or flammable materials.
4. Make sure that no sharp-edged items such as animal’s teeth, nails, come into contact with thebattery. There is a risk of this causing a fire.
5. Store the battery out of reach of children.
6. Be careful that children do not swallow any parts of the phone. This could cause asphyxiation orsuffocation.

IMPORTANT SAFETY PRECAUTIONS
2
IMPO
RTAN
T SA
FETY PREC
AUT
ION
S
1. Unplug the power cord and charger during lightning storms to avoid electric shock or fire.
2. When riding in a car, do not leave your phone or set up the hands-free kit near to the air bag. Ifwireless equipment is improperly installed and the air bag is activated, you may be seriouslyinjured.
3. Do not use a hand-held phone while driving.
4. Do not use the phone in areas where its use is prohibited. (For example: aircraft)
5. Do not expose the battery charger or adapter to direct sunlight or use it in places with highhumidity, such as a bathroom.
6. Never store your phone in temperatures less than -20°C (-4°F) or greater than 50°C (122°F).
7. Do not use harsh chemicals (such as alcohol, benzene, thinners, etc.) or detergents to clean yourphone. There is a risk of this causing a fire.
8. Do not drop, strike, or shake your phone severely. Such actions may harm the internal circuitboards of the phone.
9. Do not use your phone in high explosive areas as the phone may generate sparks.
10. Do not damage the power cord by bending, twisting, pulling or heating. Do not use the plug ifit is loose as it may cause a fire or electric shock.
3
IMPO
RTAN
T SA
FETY PREC
AUT
ION
S
1. Do not place any heavy items on the power cord. Do not allow the power cord to be crimped asit may cause fire or electric shock.
2. Do not handle the phone with wet hands while it is being charged. It may cause an electricshock or seriously damage your phone.
3. Do not disassemble the phone.
4. Do not place or answer calls while charging the phone as it may short-circuit the phone and/orcause electric shock or fire.
5. Only use the batteries, antennas and chargers provided by LG. The warranty will not be appliedto products provided by other suppliers.
6. Only authorized personnel should service the phone and its accessories. Faulty installation orservice may result in accidents and consequently invalidate the warranty.
7. Do not hold or let the antenna come in contact with your body during a call.
8. An emergency call can be made only within a service area. For an emergency call, make sure thatyou are within a service area and that the phone is turned on.

CO
NT
ENT
S
CONTENTS
4
IMPORTANT SAFETYPRECAUTIONS 1
CONTENTS 4
Welcome 9
Important Information 9
FCC Part 15 Class B Compliance 9
Industry Canada Compliance 9
Technical Details 10
FCC RF Exposure Information 11
Bodily Contact During Operation 11
Vehicle-Mounted External Antenna
(Optional, if available.) 11
Caution 11
Phone Overview 12
Menus Overview 14
Getting Started with YourPhone 16
The Battery 16
Installing the Battery 16
Removing the Battery 16
Charging the Battery 16
Battery Charge Level 16
Turning the Phone On and Off 17
Turning the Phone On 17
Turning the Phone Off 17
Signal Strength 17
Screen Icons 18
Making Calls 19
Correcting Dialing Mistakes 19
Redialing Calls 19
Receiving Calls 19
Quick Access to Convenient Features 20
Vibrate Mode 20
Lock Mode 20
Mute Function 20
Volume Quick Adjustment 21
Call Waiting 21
Caller ID 21
Speed Dialing 22
Some of contents in this user guide maybe different from your phonedepending on the software of the phone or your service provider. Featuresand specifications might be subject to change without prior notice.

5
CO
NT
ENT
S
Entering and EditingInformation 23
Text Input 23
Text Input Examples 24
Using Abc (Multi-tap) Text Input 24
Using T9 Mode Text Input 25
Using the Next Key(T9Word) 25
Adding Words to the T9 Database 25
Contacts in Your Phone’sMemory 26
Contacts Entries 26
The Basics of Storing Contacts Entries 26
Options to Customize Your Contacts 27
Adding or Changing the Group 27
Editing Contacts Entries 29
Adding Another Phone Number 29
Deleting 31
Phone Numbers With Pauses 32
Searching Your Phone’s Memory 33
Making a Call From Your Phone’s
Memory 34
Using Phone Menus 35
Menu Access 35
Contacts 35
Access and Options 35
1. List Entries 35
2. New Entry 36
3. Groups 36
4. Speed Dials 37
5. Voice Dials 37
6. Erase all Contacts 37
Call History 38
Access and Options 38
1. All Calls 38
2. Dialed Calls 39
3. Received Calls 39
4. Missed Calls 39
5. Call Timers 40
6. Data Connections 40
7. Erase History 40
CO
NT
ENT
S
CONTENTS
6
Messaging 41
1. Voice Mail 42
2. Text and Multimedia 42
1. Send New 42
2. Inbox 43
3. Outbox/Sent 44
4. Templates 45
5. Drafts 45
6. Saved 46
7. Erase Messages 46
8. Settings 47
9. Memory Info 48
3. Web Alerts 48
4. E-mail 48
5. IM & Chat 49
6. Short Codes 49
Wireless Web 49
Music & Media 51
1. Music 51
1.1 Music Player 51
1.2 My Music List 52
1.3 Memory Info 52
2. Ringtones 52
3. Wallpaper 52
4. Video 52
5. Camera 52
1.1 Take Photo 52
1.2 Take Video 53
6. My Albums 54
1.1 Sound Album 54
1.2 Picture Album 54
1.3 Video Album 55
1.4 Online Album 55
1.5 External Memory 55
7. TV & Radio 55
8. Memory Info 56
Shop 56
Games 56
Tools & Apps 57
1. Get New 57
2. Calculator 57
3. Alarm Clock 58
4. Scheduler 58
5. Notepad 59
6. EZ Tip Calc 59
7. World Clock 59
8. Voice Memo 60

7
CO
NT
ENT
S
Settings 61
1. Sound 61
1.1 Ringers 61
1.2 Keypad 62
1.3 Volume 62
1.4 Alerts 63
2. Display 63
2.1 Banner 63
2.2 Wallpaper 64
2.3 Backlight 64
2.4 Keypad light 64
2.5 Clock Format 64
2.6 Menu Style 65
2.7 Dialing font 65
3. Games / Tools 65
3.1 Backlight Settings 65
3.2 Volume 65
3.3 Notifications 65
3.4 Others 66
3.5 Memory Info 66
4. Others 66
4.1 Nav. Key Shortcuts 66
4.2 Call Setup 66
4.3 Language 67
4.4 TTY Mode 67
4.5 Data Setup 69
4.6 Memory Info 70
5. BluetoothTM 70
5.1 Power 70
5.2 Device List 71
5.3 Discovery Mode 71
5.4 Device Name 71
5.5 Bluetooth Info 72
6. System 72
6.1 Phone Info 72
6.2 System 72
6.3 Security 73
7. Airplane Mode 74
CONTENTS
8
CO
NT
ENT
S
Safety 75
TIA(TelecommunicationsIndustry Association) SafetyInformation 75
Exposure to Radio Frequency Signal 75
Antenna Care 75
Phone Operation 75
Tips on Efficient Operation 76
Driving 76
Electronic Devices 76
Pacemakers 76
Persons with Pacemakers: 76
Hearing Aids 77
Other Medical Devices 77
Health Care Facilities 77
Vehicles 77
Posted Facilities 77
Aircraft 77
Blasting Areas 77
Potentially Explosive Atmosphere 78
For Vehicles Equipped with an Air Bag 78
Charger and Adapter Safety 78
Battery Information and Care 78
Safety Information 79
Explosion, Shock, and Fire Hazards 79
General Warnings and Cautions 80
FDA Consumer Update 81
Consumer Information on SAR 88
ACCESSORIES 90
Warranty Information 91
Index 93
WELC
OM
E
Thank you for choosing the advanced and compact LG 8100 cellular phone, designed to operate with thelatest digital mobile communication technology, CodeDivision Multiple Access (CDMA). Along with the manyadvanced features of the CDMA system, such as greatlyenhanced voice clarity, this phone offers:
1. Large, easy-to-read, 8-line backlit LCD with statusicons.
2. Paging, messaging, Voice Mail and Caller ID.
3. 27-key keypad.
4. Long battery standby and talk time.
5. Menu-driven interface with prompts for easy operationand configuration.
6. Any Key Answer, Auto Answer, Auto Retry, One-TouchDial and speed dialing with 99 memory locations.
7. Bluetooth and Music & Media functionalities
8. Bilingual capabilities (English and French)
Important InformationThis user’s guide provides important information onthe use and operation of your phone. Please read allthe information carefully prior to using the phone forthe best performance and to prevent any damage toor misuse of the phone. Any unapproved changes ormodifications will void your warranty.
FCC Part 15 Class B Compliance This device and its accessories comply with part 15of FCC rules. Operation is subject to the followingtwo conditions: (1) This device and its accessoriesmay not cause harmful interference, and (2) thisdevice and its accessories must accept anyinterference received, including interference thatcauses undesired operation.
Industry Canada Compliance This phone complies with Industry Canada RSS 133.This phone complies with the Class B limits for radionoise emissions as set out in the interference causingstandard entitled "Digital Apparatus" ICES-003 ofIndustry Canada.
WELCOME
9

10
WELC
OM
E
WELCOME
CDMA Standard
Basic AirInterface
TIA/EIA-95A
TSB-74
ANSI J-STD-008
TIA/EIA-IS2000
CDMA Dual-Mode Air Interface
14.4kbps radio link protocol and
inter-band operations
IS-95 adapted for PCS frequency band
CDMA2000 1xRTT Air Interface
MAS-BS
PCSC-RS
Intersystem operations
Nom-signaling data comm.
CDMA2000 High Rate Packet DataAir Interface1xEVDO Inter-OperabilitySpecification for CDMA2000 AccessNetwork InterfacesRecommended Minimum PerformanceStandards for CDMA2000 High RatePacket Data Access TerminalTest Application Specification(TAS) forHigh Rate Packet Data Air Interface
TIA/EIA/IS-634
TIA/EIA/IS/651
TIA/EIA/IS-41-C
TIA/EIA/IS-124
TIA/EIA/IS-856
TIA/EIA/IS-878
TIA/EIA/IS-866
TIA/EIA/IS-890
TIA/EIA/IS-96-B
TIA/EIA/IS-99
TIA/EIA/IS-637
TIA/EIA/IS-657
IS-801
TIA/EIA/IS-707-A
Speech CODEC
Async Data and Fax
Short message service
Packet Data
Position Determination Service HighSpeed Packet Data
Network
Service
1x EVDO
Relatedinterface
Designator DescriptionTechnical DetailsThe LG 8100 is an all digital phone that operates onboth Code Division Multiple Access (CDMA)frequencies: cellular services at 800 Mhz andPersonal Communication Services (PCS) at 1.9 Ghz.
CDMA technology uses a feature called DSSS(Direct Sequence Spread Spectrum) that enablesthe phone to keep communication from beingcrossed and to use one frequency channel bymultiple users in the same specific area. This resultsin a 10-fold capacity increase when compared withanalog mode. In addition, features such as soft /softer handoff, hard Handoff, and dynamic RF powercontrol technologies combine to reduce callinterruptions.
The Cellular and PCS CDMA networks consist ofMSO (Mobile Switching Office), BSC (Base StationController), BTS (Base Station TransmissionSystem), and MS (Mobile Station). The followingtable lists some major CDMA standards.
* TSB -74: Protocol between an IS-95A system andANSI J-STD-008
1xRTT system receives twice as many subscribers inthe wireless section as IS-95. Its battery life is twiceas long as IS-95. High-speed data transmission isalso possible.

WELC
OM
E
FCC RF Exposure InformationWARNING! Read this information before operatingthe phone.
In August 1996, the Federal CommunicationsCommission (FCC) of the United States, with its action inReport and Order FCC 96-326, adopted an updatedsafety standard for human exposure to Radio Frequency(RF) electromagnetic energy emitted by FCC regulatedtransmitters. Those guidelines are consistent with thesafety standard previously set by both U.S. andinternational standards bodies.
The design of this phone complies with the FCCguidelines and these international standards.
Bodily Contact During OperationThis device was tested for typical use with the back of thephone kept 0.6 inches (1.5 cm) from the body. Tocomply with FCC RF exposure requirements, a minimumseparation distance of 0.6 inches (1.5 cm) must bemaintained between the user’s body and the back of thephone, including the antenna, whether extended orretracted. Third-party belt-clips, holsters and similaraccessories containing metallic components should not
be used. Avoid the use of accessories that cannotmaintain 0.6 inches (1.5 cm) distance between the user’sbody and the back of the phone and have not beentested for compliance with FCC RF exposure limits.
Vehicle-Mounted External Antenna(Optional, if available.)
A minimum separation distance of 8 inches (20 cm) mustbe maintained between the user / bystander and thevehicle-mounted external antenna to satisfy FCC RFexposure requirements. For more information about RFexposure, visit the FCC website at www.fcc.gov.
CautionUse only the supplied and approved antenna. Use ofunauthorized antennas or modifications could impair callquality, damage the phone, void your warranty and/orresult in violation of FCC regulations.
Do not use the phone with a damaged antenna. If adamaged antenna comes into contact with the skin aminor burn may result. Contact your local dealer for areplacement antenna.
11

12
PHO
NE O
VERVIEW
PHONE OVERVIEW
Earpiece
Navigation Keys
Right Soft Key
END/PWR KeySide Camera KeyBACK KeySpeaker Key
Microphone
Lock Mode Key
Alphanumeric Keypad
Flip
LCD Screen
Headset Jack
Left Soft Key
Side Keys
SEND Key
Voice Dial/Voice Memo Key
Vibrate Mode KeyMiniSD Memory Card Slot
Camera Lens
Flash
External Display
Multifunctionalkeys

PHO
NE O
VERVIEW
13
Earpiece
Flip Open the case to answer an incoming call andclose to end the call.
LCD Screen Displays messages and indicator icons.
Left Soft Key Use to access the menu assigned tothe left screen of the phone.
Headset Jack
BACK Key Press to delete a single space or character.Press and hold to delete entire words. Press this keyonce in a menu to go back one level.
SEND Key Use to place or answer calls.
Side Keys Use to adjust the ringer volume in standbymode and the earpiece volume during a call.
Voice Dial/Voice Memo Key Press once to accessthe Voice Dial. Press and hold for two seconds ormore to access Voice Memo.
Vibrate Mode Key Use to set the mode (fromstandby mode press and hold for about 3seconds).
Navigation Keys Use for quick access to Messaging,All Calls.
Right Soft Key Use to access the menu assigned tothe right screen of the phone.
Side Camera Key Use for quick access to Camerafunction (Press and hold for about 3 seconds to usecamera function on the outside/inside display).
END/PWR Key Use to turn the power on/off and toend a call. Also use to return to the main menudisplay screen.
Speaker Key Use for quick access to SpeakerPhoneMode(from standby mode press and hold for about3 seconds)
Alphanumeric Keypad Use to enter numbers andcharacters and select menu items.
MiniSD Memory Card Slot Accommodates optionalminiSD memory cards.
Lock Mode Key Use to set the lock function (fromstandby mode press and hold for about 3seconds).
Microphone Camera Lens
Flash External Display
Multifunctional keys

14
MEN
US O
VERVIEW
MENUS OVERVIEW
1. Contacts 1. List Entries2. New Entry3. Groups4. Speed Dials5. Voice Dials6. Erase all Contacts
2. Call History1. All Calls2. Dialed Calls3. Received Calls4. Missed Calls5. Call Timers
1. Last Call2. Life Time
6. Data Connections1. Data Transferred2. Connection Time
7. Erase History1. All Calls2. Dialed Calls3. Received Calls4. Missed Calls
3. Messaging1. Voice Mail2. Text and Multimedia
1. Send New2. Inbox3. Outbox/Sent4. Templates5. Drafts6. Saved7. Erase Messages8. Settings9. Memory Info
3. Web Alerts4. E-mail5. IM & Chat6. Short Codes
4. Wireless Web
5. Music & Media1. Music
1.Music Player2.My Music List3.Memory Info
2. Ringtones3. Wallpaper4. Video5. Camera
1.Take Photo2.Take Video
6. My Albums1.Sound Album2.Picture Album3.Video Album4.Online Album5.External Memory
7. TV & Radio8. Memory Info

MEN
US O
VERVIEW
15
6. Shop
7. GamesGet New
8. Tools & AppsGet NewCalculatorAlarm ClockSchedulerNotepadEZ Tip CalcWorld ClockVoice Memo
9. Settings 1. Sound
1. Ringers2. Keypad3. Volume4. Alerts
2. Display1. Banner2. Wallpaper3. Backlight4. Keypad light5. Clock Format6. Menu Style7. Dialing font
3. Games / Tools1. Backlight Settings2. Volume3. Notifications4. Others5. Memory Info
4. Others1. Nav. Key Shortcuts2. Call Setup3. Language4. TTY Mode5. Data Setup6. Memory Info
5. Bluetooth1. Power2. Device List3. Discovery Mode4. Device Name5. Bluetooth Info
6. System1. Phone Info2. System3. Security
7. Airplane Mode
16
GETTING STARTED WITH YOUR PHONE
GET
TIN
G STA
RTED
WIT
H YO
UR PH
ON
E
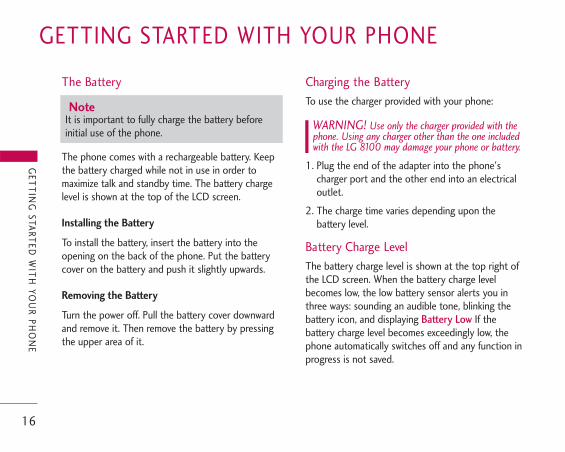
The Battery
The phone comes with a rechargeable battery. Keepthe battery charged while not in use in order tomaximize talk and standby time. The battery chargelevel is shown at the top of the LCD screen.
Installing the Battery
To install the battery, insert the battery into theopening on the back of the phone. Put the batterycover on the battery and push it slightly upwards.
Removing the Battery
Turn the power off. Pull the battery cover downwardand remove it. Then remove the battery by pressingthe upper area of it.
Charging the BatteryTo use the charger provided with your phone:
WARNING! Use only the charger provided with thephone. Using any charger other than the one includedwith the LG 8100 may damage your phone or battery.
1. Plug the end of the adapter into the phone'scharger port and the other end into an electricaloutlet.
2. The charge time varies depending upon thebattery level.
Battery Charge LevelThe battery charge level is shown at the top right ofthe LCD screen. When the battery charge levelbecomes low, the low battery sensor alerts you inthree ways: sounding an audible tone, blinking thebattery icon, and displaying Battery Low If thebattery charge level becomes exceedingly low, thephone automatically switches off and any function inprogress is not saved.
Note It is important to fully charge the battery beforeinitial use of the phone.

17
GET
TIN
G STA
RTED
WIT
H YO
UR PH
ON
E
Turning the Phone On and Off
Turning the Phone On
1. Install a charged battery or connect the phone toan external power source such as a cigarette lightercharger or hands-free car kit.
2. Press for a few seconds until the LCD screenlights up.
Turning the Phone Off
1. Press and hold until the display turns off.
Signal StrengthCall quality depends on the signal strength in yourarea. The signal strength is indicated on the screenas the number of bars next to the signal strengthicon: The more bars, the better the signal strength. Ifthe signal quality is poor, move to an open area. Ifyou are in a building, the reception may be betternear a window.
Fully DischargedFully Charged
Note Like any other radio device, avoid anyunnecessary contact with the antenna while yourphone is on.
18
GETTING STARTED WITH YOUR PHONE
GET
TIN
G STA
RTED
WIT
H YO
UR PH
ON
E
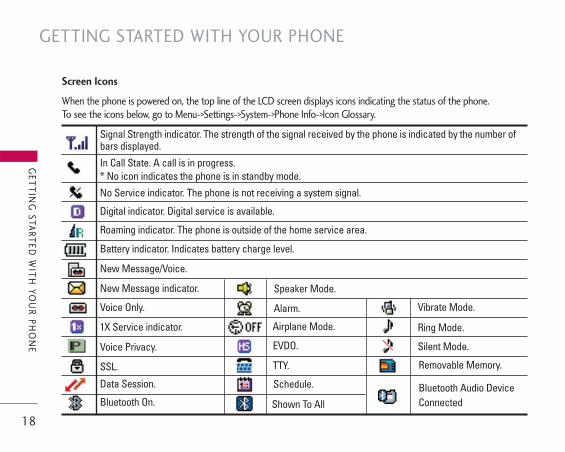
Screen Icons
When the phone is powered on, the top line of the LCD screen displays icons indicating the status of the phone.To see the icons below, go to Menu->Settings->System->Phone Info->Icon Glossary.
Signal Strength indicator. The strength of the signal received by the phone is indicated by the number ofbars displayed.
Digital indicator. Digital service is available.
Roaming indicator. The phone is outside of the home service area.
1X Service indicator.
New Message indicator.
Battery indicator. Indicates battery charge level.
New Message/Voice.
In Call State. A call is in progress.* No icon indicates the phone is in standby mode.
No Service indicator. The phone is not receiving a system signal.
Voice Privacy.
Data Session.
Vibrate Mode.
Ring Mode.
Silent Mode.
Alarm.
Removable Memory.
Bluetooth Audio DeviceConnected
Airplane Mode.
Voice Only.
Schedule.
Speaker Mode.
TTY.
EVDO.
SSL.
Bluetooth On. Shown To All

19
GET
TIN
G STA
RTED
WIT
H YO
UR PH
ON
E
Making Calls1. Make sure the phone is turned on. If not, press
for about 3 seconds.
2. Enter the phone number (include the area code ifneeded).
3. Press .
lf the phone is locked, enter the lock code.Call Failed - indicates the call did not go through.
4. Press to end the call.
Correcting Dialing Mistakes
If you make a mistake while dialing a number, pressonce to Delete the last digit entered or hold
down for at least 2 seconds to delete all digits.
Redialing Calls
1. Press twice to redial the last number youdialed. The last 90 numbers are stored in the callhistory list and you can also select one of these toredial.
Receiving Calls
1. When the phone rings or vibrates, press toanswer.
2. Press to end the call.
Note If you press Left Soft Key [Quiet] while thephone is ringing, the ringing or vibration is mutedfor that call.
NoteIf you press Right Soft Key [Ignore] while thephone is ringing, the call will end.

20
QUICK ACCESS TO CONVENIENT FEATURES
QU
ICK
ACC
ESS TO C
ON
VENIEN
T FEAT
URES
Vibrate ModeUse Vibrate Mode in public places. When Vibrate Mode is
set, is displayed on the screen, the key tones are
silent, and the phone is set to vibrate.
Vibrate Mode Quick Activation
1. From standby mode press for 3 seconds.
Vibrate Mode Quick Cancellation
1. Press to switch to Normal Mode.
Lock ModeUse Lock Mode to prevent others from using yourphone. When Lock Mode is set, your 4-digitpassword is required to use the phone.
Lock Mode Quick Activation
1. From standby mode, press for 3 seconds.
Lock Mode Quick Cancellation
1. Press Right Soft Key Unlock then enter your4-digit password.
Mute FunctionThe Mute function prevents the other party fromhearing your voice, but allows you to hear the otherparty.
Mute Quick Activation
1. Press Left Soft Key [Mute] during a call.
Mute Quick Cancellation
1. Press Left Soft Key [Unmute] again.
Note By default, the lock code/password is the last 4 digitsof your phone number. You can change thiscode/password in Security menu.

21
QU
ICK
ACC
ESS TO C
ON
VENIEN
T FEAT
URES
Volume Quick AdjustmentUse the side keys to adjust the earpiece and mastervolumes. The upper key increases the volume and thelower key decreases the volume.� Earpiece volume can be adjusted during a call.
Call WaitingYour cellular service may offer call waiting. While acall is in progress, two beeps indicate anotherincoming call. When call waiting is enabled, you mayput the active call on hold while you answer theother incoming call. Check with your cellular serviceprovider for more information about this function.
1. Press to receive a waiting call.
2. Press again to switch between calls.
Caller IDCaller ID displays the number of the person calling whenyour phone rings. If the caller’s identity is stored inContacts, the name appears on the screen. Check withyour service provider to ensure they offer this feature.
Note Key beep volume is adjusted through the Menu.
Note When the flip is open, you can press (LowerSide Key) for 3 seconds to set Sounds Off mode.Press (Upper Side Key) to switch to NormalMode.

22
QUICK ACCESS TO CONVENIENT FEATURES
QU
ICK
ACC
ESS TO C
ON
VENIEN
T FEAT
URES
Speed DialingSpeed dialing is a convenient feature that allows youto make phone calls quickly and easily with a fewkeystrokes. Your phone recalls the number from yourContacts, displays it briefly and then dials it. SpeedDial number 1 is for Voice Mail.
Dialing Single Digit Speed Dials (from 1 to 9)
Press and hold the Speed Dial number.
OR
Enter the Speed Dial number and press .
Dialing Double Digit Speed Dials (from 10 to 99)
Press the first digit and then press and hold the keyof the last digit.
OR
Enter the first and second digits and press .

ENTERING AND EDITING INFORMATION
23
ENT
ERING
AN
D ED
ITIN
G IN
FORM
ATIO
N
Text InputYou can input and edit your Banner, Schedule,Contacts and Messages.
Key Functions
� Left Soft Key : Press to scroll access the followingtext input modes: T9Word / Abc / 123 / Symbols
� Shift : Press to change case.• T9 text: T9Word > T9WORD > T9word• Abc text: Abc > ABC > abc
� Next : In T9 mode, press to display othermatching words.
� Space : Press to complete a word and insert aspace.
� Clear : Press to delete a single space or character.Hold to delete words.
� Punctuation : In T9 mode, press to insertpunctuation in a word and complete a sentence.
Text Input Modes
There are four modes for entering text, numbers,special characters and punctuation. In a text entryfield, pressing Left Soft Key displays a pop-uplist of text modes.
T9Word (T9) Mode
Use to type text using one keystroke per letter. The phone translates keystrokes into common wordsby using the letters on each key and a compresseddatabase.
Abc (Multi-tap) Mode
Use to add words to the T9 database.
123 (Numbers) Mode
Use to type numbers using one keystroke pernumber.
Symbols Mode
Use to insert special characters or punctuation.There are 38 special characters including “SP” whichinserts a space and “LF” which forces the text to thenext line.

24
ENTERING AND EDITING INFORMATION
ENT
ERING
AN
D ED
ITIN
G IN
FORM
ATIO
N
Changing Letter Case
Using T9 and Abc text input modes you can set thecapitalization. Press to reach the following:
Initial Cap (T9Word / Abc)
Only the first letter is capitalized. and subsequentletters are lower case.
Caps Lock (T9WORD / ABC)
All letters are capitalized.
Lower Case (T9word / abc)
All letters are in lower case.
Text Input Examples
Display the text modes and select a text mode:
1. In a text entry field, press Left Soft Key todisplay text modes.
2. Press to highlight the text input mode youwant to use.
3. Press to select the highlighted text input
mode.
Using Abc (Multi-tap) Text Input
1. Press Left Soft Key to change to Abc mode.
2. Press to change to ABC Caps Lock.
3. Press . LG is displayed.

25
Using T9 Mode Text Input
1. Press Left Soft Key to change to T9Wordmode.
2. Press .
3. Press to complete the word and add a space.
4. Press .
Call the office. is displayed.
Using the Next Key(T9Word)
After you have finished entering a word, if the worddisplayed is not the one you want, press todisplay additional choices of words from thedatabase.
1. Press . Good is displayed.
2. Press .The display gives you additional choices such as:Home, Gone, Hood, etc.
Adding Words to the T9 Database
If a word is not in the T9 database, add it by usingAbc (Multi-tap) mode text entry.
1. Press Left Soft Key to change to Abc (Multi-tap) mode.
2. Press . Bop is displayed.
3. Press Left Soft Key to change to T9Wordmode to add the word Bop to the T9 database.
4. Press to delete the existing word.
5. Press .Cop is displayed.
6. Press . Bop is displayed.
ENT
ERING
AN
D ED
ITIN
G IN
FORM
ATIO
N

26
CONTACTS IN YOUR PHONE’S MEMORY
CO
NTAC
TS IN
YOU
RPH
ON
E’S MEM
ORY
Contacts Entries
This allows you to have an easy access to your mostfrequently dialed phone numbers. You may store upto 500 entries with up to 5 phone numbers each.Each entry may be up to 22 characters. Each phonenumber may be up to 48 digits.
The Basics of Storing Contacts Entries
1. From standby mode, enter thephone number you want to save(up to 48 digits).
2. Press Left Soft Key [Save].
3. Use to select NewContact or Update ExistingContact and press .
4. Use to select the type ofphone number and press . Mobile 1 / Home / Work /Mobile 2 / Fax
5. Enter a name for the phonenumber (up to 22 characters)and press .
A confirmation message isdisplayed briefly.
6. The phone number reappearson screen. Press to exit,
to call the number, or RightSoft Key [Options].
Note Use Update Existing Contact to add anotherphone number to a contact already stored inmemory.
Note To skip name entry, press to go to the nextstep.
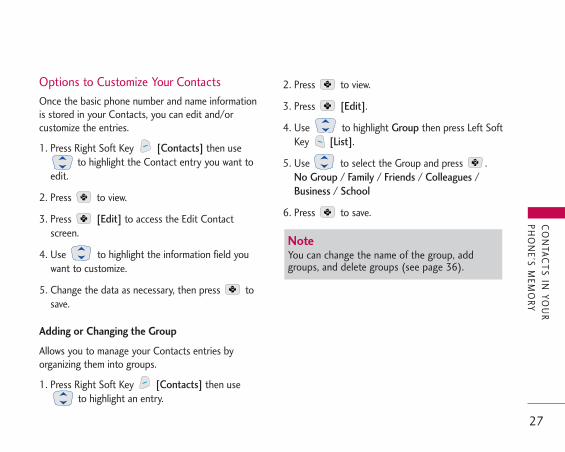
Options to Customize Your ContactsOnce the basic phone number and name informationis stored in your Contacts, you can edit and/orcustomize the entries.
1. Press Right Soft Key [Contacts] then useto highlight the Contact entry you want to
edit.
2. Press to view.
3. Press [Edit] to access the Edit Contactscreen.
4. Use to highlight the information field youwant to customize.
5. Change the data as necessary, then press tosave.
Adding or Changing the Group
Allows you to manage your Contacts entries byorganizing them into groups.
1. Press Right Soft Key [Contacts] then useto highlight an entry.
2. Press to view.
3. Press [Edit].
4. Use to highlight Group then press Left SoftKey [List].
5. Use to select the Group and press .No Group / Family / Friends / Colleagues /Business / School
6. Press to save.
27
CO
NTAC
TS IN
YOU
RPH
ON
E’S MEM
ORY
Note You can change the name of the group, addgroups, and delete groups (see page 36).

28
CONTACTS IN YOUR PHONE’S MEMORY
CO
NTAC
TS IN
YOU
RPH
ON
E’S MEM
ORY
Changing the Call Ringtone
Allows you to identify who is calling by settingdifferent ringtones for different phone numbers inyour Contacts. It is automatically set to the defaultringtone when the Contact is saved.
1. Press Right Soft Key [Contacts] then useto highlight an entry.
2. Press to view.
3. Press [Edit].
4. Use to highlight Ringtone and press LeftSoft Key [List].
5. Use to select Category of Ringtone andpress .
6. Use to select Ringtone and press Left SoftKey [Set].
Adding or Changing the Picture ID
Allows the phone to display a picture to identify thecaller.
1. Press Right Soft Key [Contacts] then useto highlight an entry.
2. Press to view.
3. Press [Edit].
4. Use to highlight Picture and press Left SoftKey [List].
5. Use to select No Picture, Picture Album orWallpaper and press .
6. Press Left Soft Key to select.

29
CO
NTAC
TS IN
YOU
RPH
ON
E’S MEM
ORY
Adding or Changing the Email
Allows you to enter an Email address associated withthe Contact entry.
1. Press Right Soft Key [Contacts] then useto highlight an entry.
2. Press to view.
3. Press [Edit].
4. Use to highlight Email 1 or Email 2.
5. Enter an Email address and press to save.
Adding Speed Dial
1. Press Right Soft Key [Contacts] then useto highlight an entry.
2. Press to view.
3. Press [Edit].
4. Use to highlight the phone number youwant to set with a Speed Dial and press Right SoftKey [Options].
5. Use to select Set Speed Dial and press .
6. Use to highlight the Speed Dial digit andpress .
7. Press to save.
Editing Contacts Entries
Adding Another Phone Number
From the Standby Mode
1. From standby mode, enter the phone number youwant to save (up to 48 digits).
2. Press Left Soft Key [Save].
3. Use to highlight Update Existing Contactand press .
4. Use to highlight the existing Contact entryand press .
5. Use to highlight the type of phone numberand press .Mobile1 / Home / Work / Mobile2 / Fax
30
CONTACTS IN YOUR PHONE’S MEMORY
CO
NTAC
TS IN
YOU
RPH
ON
E’S MEM
ORY
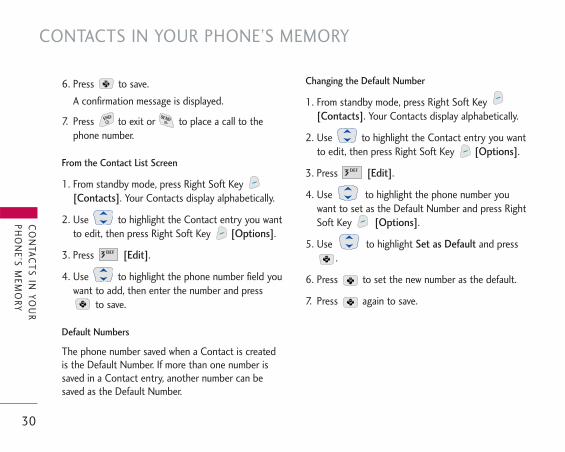
6. Press to save.
A confirmation message is displayed.
7. Press to exit or to place a call to thephone number.
From the Contact List Screen
1. From standby mode, press Right Soft Key [Contacts]. Your Contacts display alphabetically.
2. Use to highlight the Contact entry you wantto edit, then press Right Soft Key [Options].
3. Press [Edit].
4. Use to highlight the phone number field youwant to add, then enter the number and press
to save.
Default Numbers
The phone number saved when a Contact is createdis the Default Number. If more than one number issaved in a Contact entry, another number can besaved as the Default Number.
Changing the Default Number
1. From standby mode, press Right Soft Key [Contacts]. Your Contacts display alphabetically.
2. Use to highlight the Contact entry you wantto edit, then press Right Soft Key [Options].
3. Press [Edit].
4. Use to highlight the phone number youwant to set as the Default Number and press RightSoft Key [Options].
5. Use to highlight Set as Default and press.
6. Press to set the new number as the default.
7. Press again to save.
31
CO
NTAC
TS IN
YOU
RPH
ON
E’S MEM
ORY
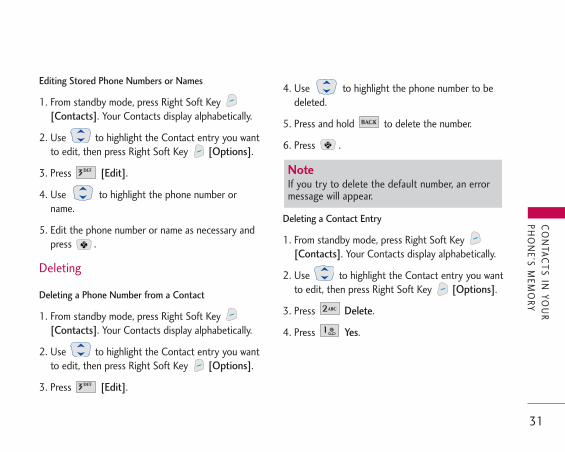
Editing Stored Phone Numbers or Names
1. From standby mode, press Right Soft Key [Contacts]. Your Contacts display alphabetically.
2. Use to highlight the Contact entry you wantto edit, then press Right Soft Key [Options].
3. Press [Edit].
4. Use to highlight the phone number orname.
5. Edit the phone number or name as necessary andpress .
Deleting
Deleting a Phone Number from a Contact
1. From standby mode, press Right Soft Key [Contacts]. Your Contacts display alphabetically.
2. Use to highlight the Contact entry you wantto edit, then press Right Soft Key [Options].
3. Press [Edit].
4. Use to highlight the phone number to bedeleted.
5. Press and hold to delete the number.
6. Press .
Deleting a Contact Entry
1. From standby mode, press Right Soft Key [Contacts]. Your Contacts display alphabetically.
2. Use to highlight the Contact entry you wantto edit, then press Right Soft Key [Options].
3. Press Delete.
4. Press Yes.
Note If you try to delete the default number, an errormessage will appear.
32
CONTACTS IN YOUR PHONE’S MEMORY
CO
NTAC
TS IN
YOU
RPH
ON
E’S MEM
ORY
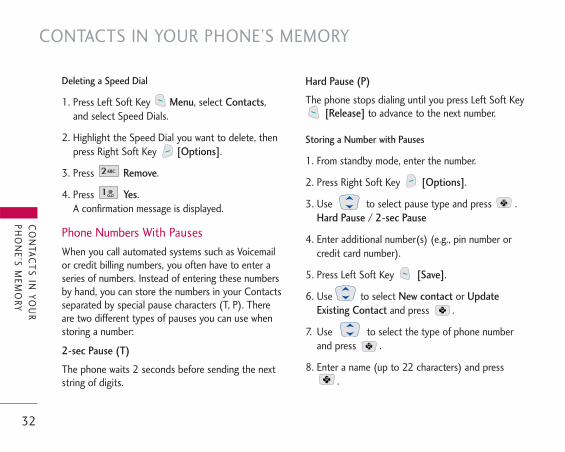
Deleting a Speed Dial
1. Press Left Soft Key Menu, select Contacts,and select Speed Dials.
2. Highlight the Speed Dial you want to delete, thenpress Right Soft Key [Options].
3. Press Remove.
4. Press Yes.A confirmation message is displayed.
Phone Numbers With PausesWhen you call automated systems such as Voicemailor credit billing numbers, you often have to enter aseries of numbers. Instead of entering these numbersby hand, you can store the numbers in your Contactsseparated by special pause characters (T, P). Thereare two different types of pauses you can use whenstoring a number:
2-sec Pause (T)
The phone waits 2 seconds before sending the nextstring of digits.
Hard Pause (P)
The phone stops dialing until you press Left Soft Key[Release] to advance to the next number.
Storing a Number with Pauses
1. From standby mode, enter the number.
2. Press Right Soft Key [Options].
3. Use to select pause type and press .Hard Pause / 2-sec Pause
4. Enter additional number(s) (e.g., pin number orcredit card number).
5. Press Left Soft Key [Save].
6. Use to select New contact or UpdateExisting Contact and press .
7. Use to select the type of phone numberand press .
8. Enter a name (up to 22 characters) and press.
33
CO
NTAC
TS IN
YOU
RPH
ON
E’S MEM
ORY
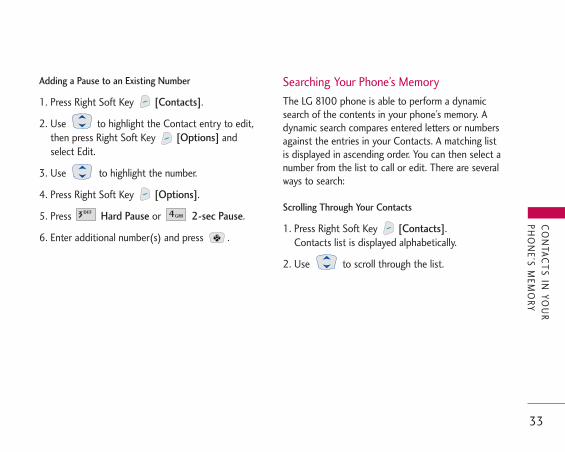
Adding a Pause to an Existing Number
1. Press Right Soft Key [Contacts].
2. Use to highlight the Contact entry to edit,then press Right Soft Key [Options] andselect Edit.
3. Use to highlight the number.
4. Press Right Soft Key [Options].
5. Press Hard Pause or 2-sec Pause.
6. Enter additional number(s) and press .
Searching Your Phone’s MemoryThe LG 8100 phone is able to perform a dynamicsearch of the contents in your phone’s memory. Adynamic search compares entered letters or numbersagainst the entries in your Contacts. A matching listis displayed in ascending order. You can then select anumber from the list to call or edit. There are severalways to search:
Scrolling Through Your Contacts
1. Press Right Soft Key [Contacts].Contacts list is displayed alphabetically.
2. Use to scroll through the list.

34
CONTACTS IN YOUR PHONE’S MEMORY
CO
NTAC
TS IN
YOU
RPH
ON
E’S MEM
ORY
Searching by Letter
1. Press Right Soft Key [Contacts].Contacts list is displayed alphabetically.
2. Press (or press repeatedly) the key on the keypadthat corresponds with the search letter.
Making a Call From Your Phone’s MemoryOnce you have stored phone numbers into yourContacts, you can place calls to those numbersquickly and easily.
� Press after you have searched for a phonenumber in Contacts or Recent Calls.
� Use Speed Dialing (see page 37).
From Contacts
1. Press Right Soft Key [Contacts].
2. Use to select the Contact entry then press.
3. Use to select the phone number.
4. Press to place the call.
From Recent Calls
1. Press Left Soft Key Menu.
2. Select Call History.
3. Use to select the type of recent call, thenpress .
All Calls / Dialed Calls / Received Calls / Missed Calls
4. Use to select the phone number.
5. Press to place the call.
Note Pressing will dial the Default Number of theContact entry. If multiple numbers are saved inthe Contact entry, you may need to use toselect the phone number that you want to call.

USING PHONE MENUS
35
USIN
G PH
ON
E MEN
US
Menu AccessPress Left Soft Key [Menu] to have access tonine phone menus. There are two methods ofaccessing menus and submenus:
� Use the navigation key to highlight and select, or
� Press the number key that corresponds to thesubmenu.
ContactsThe Contacts menu allows you to store names,phone numbers and other information in yourphone’s memory.
Access and Options
1. Press Left Soft Key [Menu].
2. Press Contacts.
3. Select a sub-menu.
1. List Entries2. New Entry
3. Groups4. Speed Dials5. Voice Dials6. Erase all Contacts
1. List EntriesAllows you to view your Contacts list.
1. Press , , .
2. Options from here:
� Press to scroll through your Contactsalphabetically.
� Press Right Soft Key [Options] to select oneof the following:New Message / Delete / Edit / Delete All
� Press Left Soft Key [New] to store a NewEntry.
� Press [View] to view the contact information.

2. New EntryAllows you to add a new number to your Contacts.
1. Press , , .
2. Enter the name and press .
3. Use to select the phone number type.
4. Enter the number and press .
3. GroupsAllows you to view your grouped Contacts, add a newgroup, change the name of a group, delete a group,or send a message to everyone in the selected group.
1. Press , , .
2. Press to highlight a group to view, thenpress .
� Press Left Soft Key [New] to add a new groupto the list.
� Use to highlight a group then press RightSoft Key [Options] to change the name of thegroup or delete the group.Delete / Message / Rename Group / Set GroupRingtone / Delete All
� Press [View] to view the contact information.
USING PHONE MENUS
36
USIN
G PH
ON
E MEN
US
Note Using this submenu, the number is saved as a newContact. To save the number into an existingContact, edit the Contact entry.
Note For more detailed information, see page 26.

37
USIN
G PH
ON
E MEN
US
4. Speed DialsAllows you to view your list of Speed Dials ordesignate Speed Dials for numbers entered in yourContacts.
1. Press , , .
2. Use to highlight the Speed Dial position,and press .
3. Use to highlight the Contact then press.
5. Voice DialsAllows you to view the list of numbers programmedwith voice dialing or add a Voice Dial command to anumber stored in your Contacts.
1. Press , , .
2. Options from here:
� Press Left Soft Key [New] to record a newVoice Dial command. Follow the phone’s prompts.
� Select if you want to start recording whenthe pop up message is displayed.
6. Erase all ContactsAllows you to erase all of your Contacts at once.
1. Press , , .
2. Press Yes.
Note Recordings should be made in a normal useposition (speaker by your ear and microphonenear your mouth) while using a clear voice.Hands-free car kits or headsets should be used ifthe phone is primarily used with them.
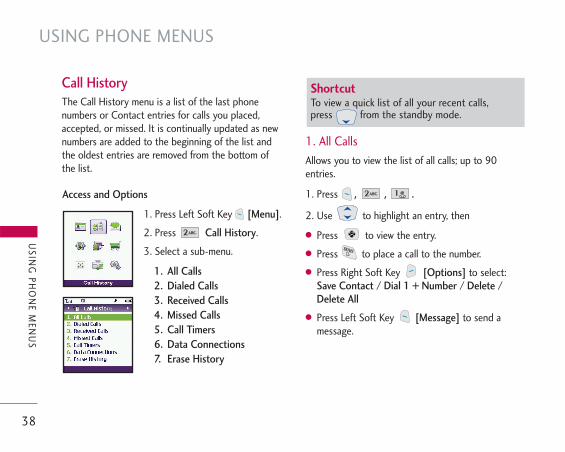
Call HistoryThe Call History menu is a list of the last phonenumbers or Contact entries for calls you placed,accepted, or missed. It is continually updated as newnumbers are added to the beginning of the list andthe oldest entries are removed from the bottom ofthe list.
Access and Options
1. Press Left Soft Key [Menu].
2. Press Call History.
3. Select a sub-menu.
1. All Calls2. Dialed Calls3. Received Calls4. Missed Calls5. Call Timers6. Data Connections7. Erase History
1. All CallsAllows you to view the list of all calls; up to 90entries.
1. Press , , .
2. Use to highlight an entry, then
� Press to view the entry.
� Press to place a call to the number.
� Press Right Soft Key [Options] to select:Save Contact / Dial 1 + Number / Delete / Delete All
� Press Left Soft Key [Message] to send amessage.
USING PHONE MENUS
38
USIN
G PH
ON
E MEN
US
Shortcut To view a quick list of all your recent calls, press from the standby mode.
39
USIN
G PH
ON
E MEN
US
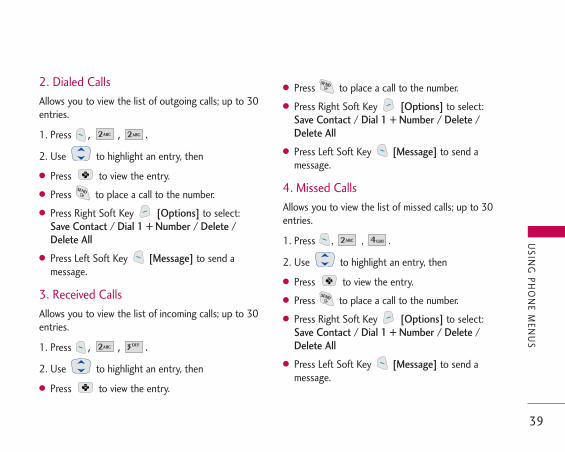
2. Dialed CallsAllows you to view the list of outgoing calls; up to 30entries.
1. Press , , .
2. Use to highlight an entry, then
� Press to view the entry.
� Press to place a call to the number.
� Press Right Soft Key [Options] to select:Save Contact / Dial 1 + Number / Delete / Delete All
� Press Left Soft Key [Message] to send amessage.
3. Received CallsAllows you to view the list of incoming calls; up to 30entries.
1. Press , , .
2. Use to highlight an entry, then
� Press to view the entry.
� Press to place a call to the number.
� Press Right Soft Key [Options] to select:Save Contact / Dial 1 + Number / Delete / Delete All
� Press Left Soft Key [Message] to send amessage.
4. Missed CallsAllows you to view the list of missed calls; up to 30entries.
1. Press , , .
2. Use to highlight an entry, then
� Press to view the entry.
� Press to place a call to the number.
� Press Right Soft Key [Options] to select:Save Contact / Dial 1 + Number / Delete / Delete All
� Press Left Soft Key [Message] to send amessage.

5. Call TimersAllows you to view the duration.
1. Press , , .
2. Use to highlight a call list.
Last Call / Life Time
6. Data ConnectionsAllows you to view the list of received andtransmitted data calls.
1. Press , , .
2. Use to highlight a data call list.
Data Transferred / Connection Time
7. Erase HistoryAllows you to erase selected call list(s).
1. Press , , .
2. Use to highlight the list of calls to erase,then press .
All Calls / Dialed Calls / Received Calls / Missed Calls
3. Press Yes.
USING PHONE MENUS
40
USIN
G PH
ON
E MEN
US

41
USIN
G PH
ON
E MEN
US
MessagingAccess and Options
1. Press Left Soft Key [Menu].
2. Press Messaging.
3. Select a sub-menu.
1. Voice Mail2. Text and Multimedia3. Web Alerts4. E-mail5. IM & Chat6. Short Codes
Text messages, picture messages, and the voice mailbox become available as soon as the phone ispowered on.
� Check types of messages by pressing the messagekey .
� Make a call to the callback number by pressingduring an Inbox message check.
The phone can store up 521 messages(1 voice mail, 50inbox text messages, 100 inbox picture messages, 100inbox picture notification messages, 50 outbox/sent textmessages, 50 outbox/sent picture messages, 50template messages, 50 draft messages, 20 saved textmessages, 50 saved picture messages). The informationstored in the message is determined by phone mode andservice capability. Other limits to available characters permessage may exist. Please check with your serviceprovider for system features and capabilities.
New Message Alert
There are three ways your phone alerts you to newmessages.
1. The phone displays a message on the screen.
2. One of 14 ring types is heard, if selected.
3. The message icon ( ) is displayed on thescreen.
NoteIf you receive the same message twice, yourphone deletes the older one and the new one isstored as a Duplicate.

1. Voice MailAllows you to view new voice messages recorded inthe Voicemail box. When you have a new voicemessage, your phone will alert you.
Checking Your Voicemail Box
1. Press , , .
2. Options from here:
� Press Left Soft Key [Clear] to deleteinformation, and then press Yes.
� Press to listen to the message(s).
2. Text and Multimedia
1. Send New
Allows you to send text messages and picturemessages. Each message has a destination andinformation. These are dependent upon the type ofmessage you want to send.
The Basics of Sending a Message
1. Press , , , .
2. Enter the phone number of the recipient or theemail address.
Press Right Soft Key [Options].
Select the option(s) to customize.
� Contacts to select a recipient from your Contactslist.
� Call History to select a recipient from your CallHistory.
� Group to select a recipient from your Group.
� Set as Cc
� Set as Bcc
3. Press .
4. Enter the subject and press .
5. Type your message.
Press Right Soft Key [Options].
Select the option(s) to customize.
USING PHONE MENUS
42
USIN
G PH
ON
E MEN
US
NoteTo send a message, press .

43
USIN
G PH
ON
E MEN
US
� Add to select Quick Text or Signature.
� Save As to select Draft or Template.
� Settings to select Priority Level or CallbackNumber.
� Save Quick Text
6. Use to highlight Picture or Video and LeftSoft Key [Add].
Use to select Picture Album or Video Album.
Select Picture or Video and press Left Soft Key[Select].
7. Use to highlight Sounds and Left Soft Key[Add].
Use to select Sound Album.
Select Sound and press Left Soft Key [Select].
Press Right Soft Key [Options].
Select the option(s) to customize.
� Preview to take a look at your message beforesending.
� Remove to select Picture, Video, Sound or Slide.
� Save As to select Draft or Template.
� Settings to select Priority Level, Delivery Report,Read Report or Slide Timer.
� Add Slide to add slide to your message.
8. Press [Send].A sending screen is displayed.
2. Inbox
The phone alerts you in 3 ways when you receive anew message:
� By displaying a message notification on thescreen.
� By sounding a beep or vibrating, if set.
� By displaying .
NoteA disclaimer is displayed
"Cannot insert Video and Picture in the SameMessage." when you try to add video and picturein one message.

Received text messages and picture messages may besearched and the contents viewed. Receivedmessages are displayed from newest to oldest.
Out of Memory Warning
If the memory is full, no more messages can bereceived until enough memory space becomesavailable. The warning message is displayed and newmessages are not accepted.
Viewing Your Inbox
1. Press , , , .
2. Use to highlight a message and press .
3. Options from here:
� Left Soft Key [Reply].
� Right Soft Key [Options].
Delete Deletes the selected messagefrom the Inbox.
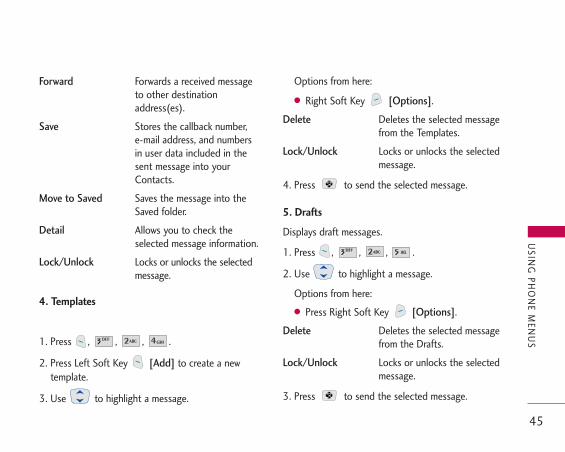
Forward Forwards a received message toother destination address(es).
Save Stores the callback number,e-mail address, and numbers
in user data included in thereceived message into yourContacts.
Move to Saved Saves the message into theSaved folder.
Detail Allows you to check thereceived message information.
Lock/Unlock Locks or unlocks the selectedmessage.
3. Outbox/Sent
Up to 50 sent messages can be stored in Outbox/SentView lists and contents of sent messages and verifywhether the transmission was successful or not.
1. Press , , , .
2. Use to highlight an Outbox/Sent message.
3. Options from here:
� Left Soft Key [Resend].
� Right Soft Key [Options].
Delete Deletes the selected message.
USING PHONE MENUS
44
USIN
G PH
ON
E MEN
US
45
USIN
G PH
ON
E MEN
US
Forward Forwards a received messageto other destinationaddress(es).
Save Stores the callback number,e-mail address, and numbersin user data included in thesent message into yourContacts.
Move to Saved Saves the message into theSaved folder.
Detail Allows you to check theselected message information.
Lock/Unlock Locks or unlocks the selectedmessage.
4. Templates
1. Press , , , .
2. Press Left Soft Key [Add] to create a newtemplate.
3. Use to highlight a message.
Options from here:
� Right Soft Key [Options].
Delete Deletes the selected messagefrom the Templates.
Lock/Unlock Locks or unlocks the selectedmessage.
4. Press to send the selected message.
5. Drafts
Displays draft messages.
1. Press , , , .
2. Use to highlight a message.
Options from here:
� Press Right Soft Key [Options].
Delete Deletes the selected messagefrom the Drafts.
Lock/Unlock Locks or unlocks the selectedmessage.
3. Press to send the selected message.

6. Saved
Displays saved messages.
1. Press , , , .
2. Use to highlight a message.
Options from here:
� Press Right Soft Key [Options].
Delete Deletes the selected messagefrom the Saved.
Forward Forwards a message to otherdestination address(es).
Detail Allows you to check theselected message information.
Lock/Unlock Locks or unlocks the selectedmessage.
3. Press to view the message.
7. Erase Messages
Allows you to erase all messages stored in your Inbox,Outbox/Sent, Templates, Drafts or Saved messages.You can also erase all messages at the same time.
1. Press , , , .
� Press [Inbox] to erase all messages storedin the Inbox.
� Press [Outbox/Sent] to erase allmessages stored in Outbox/Sent.
� Press [Templates] to erase all messagesstored in the Templates.
� Press [Drafts] to erase all messagesstored in the Drafts.
� Press [Saved] to erase all messagesstored in the Saved messages.
� Press [All Messages] to erase allmessages stored in the Inbox, Outbox/Sent,Templates, Drafts or Saved messages.
2. Press Yes.
USING PHONE MENUS
46
USIN
G PH
ON
E MEN
US

47
USIN
G PH
ON
E MEN
US
8. Settings
Allows you to configure ten settings for messages.
1. Press , , , .
2. Use to highlight a setting, then press .
Save to Outbox Auto Save / Prompt / Do Not Save
Auto Delete Inbox On / Off
Quick Text 12 predefined phrases
Default Entry Mode T9Word / Alpha / Number
Auto Download On / Off
Message Priority High / Normal / Low
Delivery Report On / Off
Read Report On / Off
Callback # Set your callback number.
Signature Enter your signature.
Message Settings Sub-Menu Descriptions
Save to Outbox
Allows you to automatically save sent messages inOutbox when transmitted.
Auto Delete Inbox
Allows you to automatically delete read messageswhen you exceed the storage limit.
Quick-Text
Allows you to display, edit and add text phrases.These text strings allow you to reduce manual textinput into messages.
Default Entry Mode
Allows you to select the default input methodincluding T9Word, Alpha, Number.
Auto Download
Allows you to auto display the content whenreceiving a message.

Message Priority
Gives priority to the message.
Delivery Report
Set delivery report to let you know if your message isdelivered to the recipient.
Read Report
Set read report, and you can check out if yourmessage has been read by the recipient.
Callback #
Allows you to automatically send a designatedcallback number when you send a message.
Signature
Allows you to create and/or edit the signature.
9. Memory Info
Provides you with the memory information of the allmessages stored in each folder.
1. Press , , , .
2. Use .
3. Web AlertsWeb Alert is special links or message provided fromthe carrier to inform you of special offers, bulletinsand announcements.
1. Press , , .
4. E-mailAllows you to send an E-mail by Get New or byOnline e-mail. Contact your service provider foravailability.
1. Press , , .
2. Use to select Get New or Online e-mailthen press .
USING PHONE MENUS
48
USIN
G PH
ON
E MEN
US

49
USIN
G PH
ON
E MEN
US
5. IM & ChatAllows you to send and receive instant message atany time. Allows you to chat with internet messangerusers.
1. Press , , .
6. Short CodesShows you the Short Codes List
1. Press , , .
Directory / Templates
Wireless WebThe MacroBrowser feature allows you to view internetcontent, especially designed for your mobile phone.Access and selections within this feature aredependent upon your service provider. For specificinformation on MacroBrowser access through yourphone, contact your service provider.
Access and Options
Allows you to initiate a MacroBrowser session.
1. Press Left Soft Key [Menu].
2. Press Wireless Web.After a few seconds, you seethe Home Page.
Overview
The MacroBrowser allows the user to use a variety ofInternet services. Using the MacroBrowser on thephone allows you to:
Send and receive Internet e-mail.
� Browse and search the World Wide Web via webpages especially designed for wireless phonecustomers.
� Set bookmarks to directly access your favoritesites.
� Retrieve information, such as stock quotes andflight schedules from the Internet.
Quality of Browser
Browsing the web via the phone is not like using yourhome computer. Site providers have selected only thecritical aspects of their site to present to wirelessphone users and have removed most graphics.
Ending the MacroBrowser Session
You can end a MacroBrowser session by pressing.
Navigating through the Browser
While using the MacroBrowser, you will find thefollowing content:
� Numbered options (some options may not benumbered);
� Links embedded in content;
� Text or numeric input;
� Simple text.
You can act on the options or the links by using theSoft Keys.
USING PHONE MENUS
50
USIN
G PH
ON
E MEN
US

51
USIN
G PH
ON
E MEN
US
Music & Media
Access and Options
1. Press Left Soft Key [Menu].
2. Press Music & Media.
3. Select a sub-menu.
1. Music2. Ringtones3. Wallpaper4. Video5. Camera6. My Albums7. TV & Radio8. Memory Info
1. Music
1.1 Music Player
Allows you to listen to your stored music byconnecting to TELUS mobile music.
1. Press , , , .
� my vault Stores music.
� play You can start music and listen to it bypressing this key.
� settings You can control settings sorted by MusicPlayer, List Display and Language. Check yourfavorite.
� shop Go to shop when you want to enjoy newmusic and download it to your vault .
� song library Displays the list of music you have onyour phone.
By pressing the Left Soft Key, you can exit the menu.
By pressing the Right Soft Key, you have a wide rangeof options for each menu.
NoteMiniSD card sold separately.

USING PHONE MENUS
52
USIN
G PH
ON
E MEN
US
1.2 My Music List
Displays the music files you have.
1. Press , , , .
1.3 Memory Info
Provides the memory information.
1. Press , , , .
2. RingtonesAllows you to download new Ringtones.
1. Press , , .
2. Press to Get New.
3. WallpaperAllows you to download new Wallpaper.
1. Press , , .
2. Press to Get New.
4. VideoAllows you to download new Video.
1. Press , , .
2. Press to Get New.
5. CameraView, take and trade your digital pictures and videoright from your wireless phone.
1.1 Take Photo
1. Press , , , .
2. Set the brightness , zoom , flash ,and press Right Soft Key [Options] to changeother settings.
NoteFrom Take Photo mode, you can change to TakeVideo mode by pressing the Side Camera Key .
NotePress and holding the Side Camera Key fromstandby mode is a hot key to Take Photo.
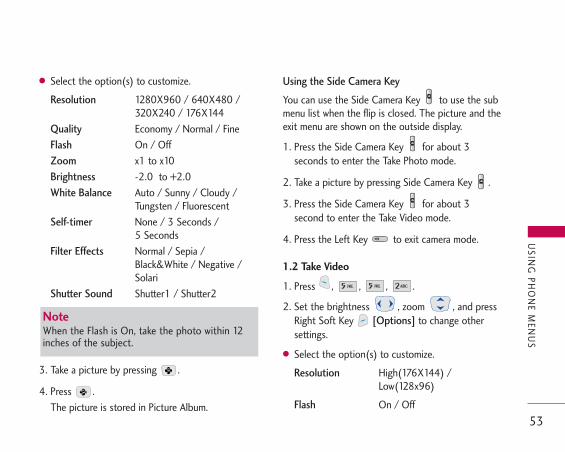
� Select the option(s) to customize.
Resolution 1280X960 / 640X480 /320X240 / 176X144
Quality Economy / Normal / Fine
Flash On / Off
Zoom x1 to x10
Brightness -2.0 to +2.0
White Balance Auto / Sunny / Cloudy /Tungsten / Fluorescent
Self-timer None / 3 Seconds / 5 Seconds
Filter Effects Normal / Sepia /Black&White / Negative /Solari
Shutter Sound Shutter1 / Shutter2
3. Take a picture by pressing .
4. Press .
The picture is stored in Picture Album.
Using the Side Camera Key
You can use the Side Camera Key to use the submenu list when the flip is closed. The picture and theexit menu are shown on the outside display.
1. Press the Side Camera Key for about 3seconds to enter the Take Photo mode.
2. Take a picture by pressing Side Camera Key .
3. Press the Side Camera Key for about 3second to enter the Take Video mode.
4. Press the Left Key to exit camera mode.
1.2 Take Video
1. Press , , , .
2. Set the brightness , zoom , and pressRight Soft Key [Options] to change othersettings.
� Select the option(s) to customize.
Resolution High(176X144) /Low(128x96)
Flash On / Off
53
USIN
G PH
ON
E MEN
US
NoteWhen the Flash is On, take the photo within 12inches of the subject.

Zoom x1 to x10
Brightness -2.0 to +2.0
White Balance Auto / Sunny / Cloudy /Tungsten / Fluorescent
Video Type Normal Video / MMS Video
3. Press to begin recording, and again to stop.
4. Press . The recorded video is stored in VideoAlbum.
6. My Albums
1.1 Sound Album
1. Press , , , .
2. Select your desired sound with and pressRight Soft Key [Options].
3. Select one of the following options:
Send Message Sends a message.
Delete Yes / No
Rename Rename the selected Sound.
Move Yes / No
Copy Yes / No
Delete All Yes / No
Details Name / Size / Type
Upload Online Album Accesses the Online Album.
1.2 Picture Album
Allows you to view pictures stored in the phone.
1. Press , , , .
2. Select your desired picture with and pressRight Soft Key [Options].
Send Message Sends a message.
Delete Yes / No
Rename Rename the selected picture.
Move Yes / No
Copy Yes / No
Delete All Yes / No
Icon View(List View)
Details Name / Size / Resolution /Type
USING PHONE MENUS
54
USIN
G PH
ON
E MEN
US

Set As Main wallpaper / sub wallpaper / Picture ID
Upload Online Album Accesses the Online Album.
1.3 Video Album
Allows you to view videos stored in the phone.
1. Press , , , .
2. Select your desired video with and pressRight Soft Key [Options].
Send Message Sends a message.
Delete Yes / No
Rename Rename the selected video.
Move Yes / No
Copy Yes / No
Delete All Yes / No
Details Name / Size / Resolution /Type
Set As Wallpaper
Upload Online Album Accesses the Online Album.
1.4 Online Album
Access the Online Album.
1. Press , , , .
1.5 External Memory
Provides the folders for Picture, Video, Sound andMusic, when you insert the miniSD Card into thePhone.
1. Press , , , .
2. Select your desired folder with then press.
Picture / Video / Sound / Music
7. TV & RadioAllows you to access and enjoy the service provider’scontents.
1. Press , , .
2. Press to Get New.
After a few seconds, you can see the Home Page.
3. Press to access TELUS mobile TV.
55
USIN
G PH
ON
E MEN
US

8. Memory Info
Provides the memory information.
1. Press , , .
Shop
Access and Options
1. Press Left Soft Key [Menu].
2. Press Shop.
After a few seconds, you seethe Home Page.
Games
Access and Options
1. Press Left Soft Key [Menu].
2. Press Games.
3. Select a sub-menu.
Get New
USING PHONE MENUS
56
USIN
G PH
ON
E MEN
US

57
USIN
G PH
ON
E MEN
US
Tools & Apps
Access and Options
1. Press Left Soft Key [Menu].
2. Press Tools & Apps.
3. Select a sub-menu.
Get NewCalculatorAlarm ClockSchedulerNotepadEZ Tip CalcWorld ClockVoice Memo
1. Get New
1. Press , .
2. Scroll to Get New and press .After a few seconds, you will see the Home Page.
2. CalculatorYou can enter numbers up to the second decimalplace.
1. Press , .
2. Scroll to Calculator and press .
3. Enter data.
� Use keypad to enter numbers.
� Use to enter decimals.
� Use to enter brackets.
� Press Left Soft Key to clear the entry.
� Press Right Soft Key to enter algebraicoperators.
� Use Navigation Key to enter operators.
� Press to complete equation.

USING PHONE MENUS
58
USIN
G PH
ON
E MEN
US
3. Alarm ClockYour phone comes with a built-in alarm clock withmultiple alarm capabilities.
1. Press , .
2. Scroll to Alarm Clock and press .
3. Press Left Soft Key New to add a new alarm.
4. Use to select Off / Manual / 10 Min Later/ 20 Min Later / 30 Min Later / 1 Hour Laterthen press .
5. Set the time for alarm and press .
6. Press to select one of the following:Once / Daily / Mon~Fri / Sat~Sun
7. Use to highlight Ring (ring type setting),press Left Soft Key List, and select yourdesired ring.
8. Use to select Note then type your noteusing the numeric keypad .
9. Press .
4. SchedulerAllows you to conveniently keep and access youragenda(s). Simply store your appointments and yourphone will alert you with a reminder of yourappointment.
1. Press , .
2. Scroll to Scheduler and press .
3. Using your navigation key, highlight the day towhich you would like to add an event and pressLeft Soft Key New.
4. Enter your schedule information including:
� Date � Time � Subject
� Reminder(On Time / 15 minutes before /30 minutes before / 1 hour before / 1 daybefore / 3 days before / 1 week before /No Reminder)
� Repeat
� Expiration(No Expiration / Set Expiration)
5. Press .

59
USIN
G PH
ON
E MEN
US
5. NotepadAllows you to add, read, edit, and erase notes toyourself.
1. Press , .
2. Scroll to Notepad and press .
3. Press Left Soft Key New to write a new note.
4. Type your note using the numeric keypad andpress .
6. EZ Tip CalcAllows you to quickly and easily calculate the amountsfor a bill with the amount of the bill, the amount ofthe tip, and the number of people as variables.
1. Press , .
2. Scroll to EZ Tip Calc and press .
3. Use your keypad and navigation key to enter thebill amount and desired tip percentage. Thecorrect tip will be calculated instantly.
4. If you’re splitting the check, highlight Split andenter the number of people in your party. (Anequal split of the bill will be calculated anddisplayed.)
7. World ClockAllows you to determine the current time in anothertime zone or country.
1. Press , .
2. Scroll to World Clock and press .
3. Use to move the cross hairs across the map
or press Right Soft Key [Cities] to enter a
specific city.
4. Press Left Soft Key [Set DST] to set Daylight
Saving Time for the selected city.
USING PHONE MENUS
60
USIN
G PH
ON
E MEN
US
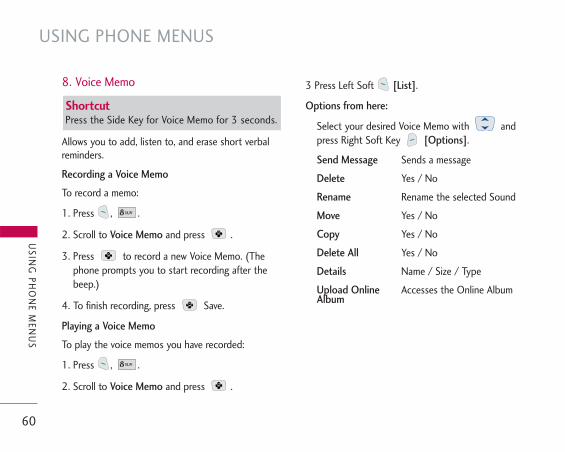
8. Voice Memo
Allows you to add, listen to, and erase short verbalreminders.
Recording a Voice Memo
To record a memo:
1. Press , .
2. Scroll to Voice Memo and press .
3. Press to record a new Voice Memo. (Thephone prompts you to start recording after thebeep.)
4. To finish recording, press Save.
Playing a Voice Memo
To play the voice memos you have recorded:
1. Press , .
2. Scroll to Voice Memo and press .
3 Press Left Soft [List].
Options from here:
Select your desired Voice Memo with andpress Right Soft Key [Options].
Send Message Sends a message
Delete Yes / No
Rename Rename the selected Sound
Move Yes / No
Copy Yes / No
Delete All Yes / No
Details Name / Size / Type
Upload Online Accesses the Online AlbumAlbum
ShortcutPress the Side Key for Voice Memo for 3 seconds.
61
USIN
G PH
ON
E MEN
US
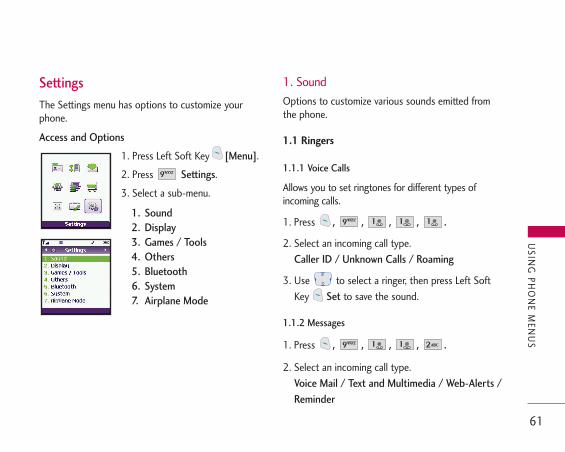
SettingsThe Settings menu has options to customize yourphone.
Access and Options
1. Press Left Soft Key [Menu].
2. Press Settings.
3. Select a sub-menu.
1. Sound2. Display3. Games / Tools4. Others5. Bluetooth6. System7. Airplane Mode
1. SoundOptions to customize various sounds emitted fromthe phone.
1.1 Ringers
1.1.1 Voice Calls
Allows you to set ringtones for different types ofincoming calls.
1. Press , , , , .
2. Select an incoming call type.
Caller ID / Unknown Calls / Roaming
3. Use to select a ringer, then press Left Soft
Key Set to save the sound.
1.1.2 Messages
1. Press , , , , .
2. Select an incoming call type.
Voice Mail / Text and Multimedia / Web-Alerts /Reminder

USING PHONE MENUS
62
USIN
G PH
ON
E MEN
US
3. Use to select a ringer, then press Left Soft
Key Set to save the sound.
1.1.3 Meeting / Silent Mode
1. Press , , , , .
2. Use to set the setting, then press tosave the change. On / Off
1.2 Keypad
1.2.1 Keypad Sound
1. Press , , , , .
2. Use to adjust the volume of the keypad, thenpress to save the change.
1.2.2 DTMF Length
Allows you to set the DTMF Length and touch toneplayback speed.
1. Press , , , , .
2. Use to select a length, then .
Short Sends out a tone for a fixed period of
time even if you keep the key pressed.
Long Sends out a continuous tone for as long
as you keep the key pressed.
1.3 Volume
1.3.1 Master
Allows you to set master volume settings.
1. Press , , , , .
2 Use to adjust the volume, then press tosave the change.
1.3.2 Earpiece
Allows you to set earpiece volume settings.
1. Press , , , , .
2 Use to adjust the earpiece volume, thenpress to save the change.

63
USIN
G PH
ON
E MEN
US
1.3.3 Power On/Off
Allows you to set the phone to sound a tone whenthe phone is powered on and off.
1. Press , , , , .
2. Use to set the alert tone, then press tosave the change. On / Off
1.4 Alerts
1. Press , , , .
1.4.1 Service Change
Alerts you when service changes. Phone displaysEntering Service Area or Leaving Service Areamessage.
1.4.2 Minute Beep
Alerts you 10 seconds before the end of everyminute during a call.
1.4.3 Call Connect
Alerts you when the call is connected.
1.4.4 Call Lost
Alerts you when the call is disconnected.
1.4.5 No Service
No service is supported.
2. Use to set the alert setting, then press to save the change. On / Off
2. DisplayOptions to customize the phone's display screen.
2.1 Banner
Allows you to enter a string of up to 13 characterswhich display on the LCD screen.
1. Press , , , .
2. Use to select On, then press .
3. Enter your banner text, then press .

2.2 Wallpaper
Allows you to choose the kind of background to bedisplayed on the phone.
1. Press , , , .
2. Select a sub-menu and press .
Main Display / Front Display
3. Select from different images, then press .
4. Press Left Soft Key [Set].
2.3 Backlight
Allows you to set the duration for illuminating theLCD backlight.
1. Press , , , .
2. Select a sub-menu and press .
Main Display / Front Display
3. Use to select a setting, then press tosave the change.
7 Seconds / 15 Seconds / 30 Seconds / Always On / Always Off
2.4 Keypad light
Allows you to set the duration for illuminating thephone's keypad.
1. Press , , , .
2. Use to select a setting, then press tosave the change.
7 Seconds / 15 Seconds / 30 Seconds / Always On / Always Off
2.5 Clock Format
Allows you to choose the clock format displayed onthe LCD screen.
1. Press , , , .
2. Select a sub-menu and press .
Main Display / Front Display
2. Use to select the clock format, then press.
Main Display: Off / Small Digital / Big Digital /Analog
Front Display: Normal / Analog / Minimize
USING PHONE MENUS
64
USIN
G PH
ON
E MEN
US

65
USIN
G PH
ON
E MEN
US
2.6 Menu Style
Allows you to view the Menus as icons or in a listformat.
1. Press , , , .
2. Use to select a menu format, then press .
Icon / List
2.7 Dialing font
Allows you to set the size and color of the font forcalling digits.
1. Press , , , .
2. Use to choose a setting, then press .
Normal / Large
3. Games / Tools
3.1 Backlight Settings
Allows you to set the duration for illuminating thebacklight.
1. Press , , , .
2. Use to select a setting, then press tosave the change.
7 Seconds / 15 Seconds / Always On / AlwaysOff
3.2 Volume
Allows you to set volume settings.
1. Press , , , .
2 Use to adjust the volume, then press tosave the change.
3.3 Notifications
Allows you to set notification settings.
1. Press , , , .
2. Select a sub-menu and press .
Voice Mail / Messages
3. Use to set the alert setting, then press to save the change. On / Off
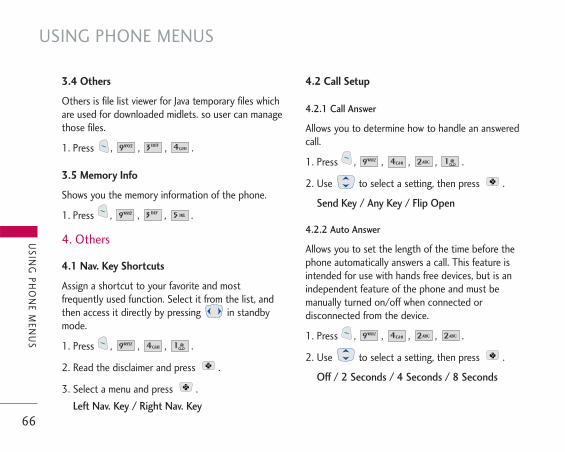
3.4 Others
Others is file list viewer for Java temporary files whichare used for downloaded midlets. so user can managethose files.
1. Press , , , .
3.5 Memory Info
Shows you the memory information of the phone.
1. Press , , , .
4. Others
4.1 Nav. Key Shortcuts
Assign a shortcut to your favorite and mostfrequently used function. Select it from the list, andthen access it directly by pressing in standbymode.
1. Press , , , .
2. Read the disclaimer and press .
3. Select a menu and press .
Left Nav. Key / Right Nav. Key
4.2 Call Setup
4.2.1 Call Answer
Allows you to determine how to handle an answeredcall.
1. Press , , , , .
2. Use to select a setting, then press .
Send Key / Any Key / Flip Open
4.2.2 Auto Answer
Allows you to set the length of the time before thephone automatically answers a call. This feature isintended for use with hands free devices, but is anindependent feature of the phone and must bemanually turned on/off when connected ordisconnected from the device.
1. Press , , , , .
2. Use to select a setting, then press .
Off / 2 Seconds / 4 Seconds / 8 Seconds
USING PHONE MENUS
66
USIN
G PH
ON
E MEN
US

67
USIN
G PH
ON
E MEN
US
4.2.3 Auto Prepend
Allows you to add Dial 1+ Number to Options inrecent calls list. If you choose Dial 1+ Number inrecent calls list, Terminal displays dialing screen andshows 1+ Number on the screen regardless of callingdigits condition.
1. Press , , , , .
2. Use to select a setting, then press .
On / Off
4.2.4 Auto Redial
Allows you to set the length of time the phone waitsbefore automatically redialing a number when theattempted call fails.
1. Press , , , , .
2. Use to select a setting, then press .
Off / Every 10 Seconds / Every 30 Seconds /Every 60 Seconds
4.3 Language
Allows you to set the bilingual feature according toyour preference. Choose between English and French.
1. Press , , , .
2. Use to select English or French, then press.
4.4 TTY Mode
Allows you to attach a TTY device enabling you tocommunicate with parties also using a TTY device. Aphone with TTY support is able to translate typedcharacters to voice. Voice can also be translated intocharacters and then displayed on the TTY.
* TTY : Text Telephone. (or Teletypewriter for Deaf).
1. Press , , , .
2. Read the disclaimer and press .
3. Use to select a setting, then press .
TTY Full / TTY + Talk / TTY + Hear / TTY Off

USING PHONE MENUS
68
USIN
G PH
ON
E MEN
US
1. TTY Full :
Users who cannot talk and hear send and receivea text message through TTY equipment.
2. TTY + Talk :
Users who can talk but cannot hear receive a textmessage and send voice through TTY equipment.
3. TTY + Hear :
Users who can hear but cannot talk send a textmessage and receive voice through TTY equipment.
4. TTY Off :
Normal users send and receive without TTYequipment.
Connecting TTY Equipment and a Terminal
1. Connect a TTY cable to TTY connection on theterminal. (TTY connection location is same as thehands free ear jack)
2. Enter the phone menu and set up the desired TTYmode. (For a TTY mode, see the following)
3. After setting a TTY mode, check the LCD screen ofthe phone for the TTY icon.
Menu User FeatureTransmission/
ReceivingMode
When makingcommunications
with a normalterminal
TTYFull
Forhearing-
/verbally-impaired
text messagetransmission,text message
receiving
operatorrequired
TTY+Talk
Forhearing-impaired
Verbal
voicetransmission,text message
receiving
TTY+Hear
Forverbally-impaired
audible
text messagetransmission,
voicereceiving
operatorrequired
TTYOff
For regularusers
voicetransmission,
voicereceiving
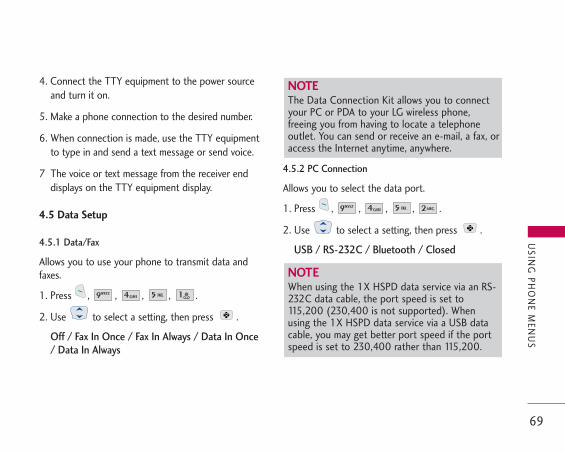
4. Connect the TTY equipment to the power sourceand turn it on.
5. Make a phone connection to the desired number.
6. When connection is made, use the TTY equipmentto type in and send a text message or send voice.
7 The voice or text message from the receiver enddisplays on the TTY equipment display.
4.5 Data Setup
4.5.1 Data/Fax
Allows you to use your phone to transmit data andfaxes.
1. Press , , , , .
2. Use to select a setting, then press .
Off / Fax In Once / Fax In Always / Data In Once/ Data In Always
4.5.2 PC Connection
Allows you to select the data port.
1. Press , , , , .
2. Use to select a setting, then press .
USB / RS-232C / Bluetooth / Closed
69
USIN
G PH
ON
E MEN
US
NOTEThe Data Connection Kit allows you to connectyour PC or PDA to your LG wireless phone,freeing you from having to locate a telephoneoutlet. You can send or receive an e-mail, a fax, oraccess the Internet anytime, anywhere.
NOTE When using the 1X HSPD data service via an RS-232C data cable, the port speed is set to115,200 (230,400 is not supported). Whenusing the 1X HSPD data service via a USB datacable, you may get better port speed if the portspeed is set to 230,400 rather than 115,200.

4.5.3 Do Not Disturb
Allows you not to receive incoming calls during thedata transfer.
1. Press , , , , .
2. Read the disclaimer and press .
3. Use to select a setting, then press .
On / Off
4.6 Memory Info
Shows you the memory information of the phone.
4.6.1 Common Memory
1. Press , , , , .
4.6.2 Reserved Memory
1. Press , , , , .
5. BluetoothTM
The LG 8100 is compatible with devices that supportthe Bluetooth headset and hands-free profile(s)*.You may create and store 20 pairings within the LG 8100 and connect to one device at a time. Theapproximate communication range for Bluetoothwireless technology is up to 30 feet (10 meters).
5.1 Power
Allows you to set the power On/Off.
1. Press , , , .
2. Use to select a setting, then press .
On / Off
USING PHONE MENUS
70
USIN
G PH
ON
E MEN
US
NOTERead user guide of each bluetooth accessory thatyou are trying to pair with your phone becausethe instructions may be different.
NOTEIf you turn on My Visibility, your device is able tobe searched by other in-range Bluetooth devices.

5.2 Device List
Pairing is the process that allows the handset tolocate, establish and register 1-to-1 connection withthe target device.
For pairing new Bluetooth device
1. Press , , , .
2. Follow the Bluetooth accessory instructions to setthe device to pairing mode.
3. Press Right Soft Key for New. Select SearchNew .
4. If Bluetooth is set to off, you will be prompted toturn power on. Select Yes .
5. The device will appear in the Found Devices menuonce it has been located. Highlight the device andpress .
6. The handset will prompt you for the passkey.Consult the Bluetooth accessory instructions forthe appropriate passkey (typically “0000”). Enterthe passkey and press .
7. Once pairing is successful, select Yes toconnect with the device.
8. Once connected, you will see the device listed inthe Paired Devices menu and the Bluetoothconnected icon will show at the top of theLCD screen.
5.3 Discovery Mode
Allows you to set On (60 secs) / Off.
1. Press , , , .
2. Use to select a setting, then press .
On(60 secs) / Off
5.4 Device Name
Allows you edit the name of the bluetooth name.
1. Press , , , .
2. Press to clear the existing name.
71
USIN
G PH
ON
E MEN
US
NOTEBy default, your device’s Bluetooth functionalityis turned off.
3. Use the numeric keypad to enter a new customname.
4. Press to save and exit.
5.5 Bluetooth Info
Allows you to view the information of the bluetoothsuch as Name, Power (On/Off) and Address.
1. Press , , , .
6. SystemOptions for specific system network settings.
6.1 Phone Info
The Phone Info menu provides you with specificinformation pertaining to your phone model.
6.1.1 My Number
Allows you to view your phone number.
1. Press , , , , .
6.1.2 SW Version
Allows you to view the SW Version, HW Version, PRLVersion and Browser Version.
1. Press , , , , .
6.1.3 Serving System
Identifies the channel number of a system that isserved and a SID Number. This information is only fortechnical support.
1. Press , , , , .
6.1.4 Icon Glossary
Allows you to view all the icons and their meanings.
1. Press , , , , .
6.2 System
The System menu allows you to designate specificsystem network settings.
6.2.1 Set Mode
Allows you to set up the phone producer’s
USING PHONE MENUS
72
USIN
G PH
ON
E MEN
US

management environment. Leave the default settingunless you want to alter the system selection asinstructed by your service provider.
1. Press , , , , .
2. Use to select a setting, then press .
Home Only / Automatic A / Automatic B
6.2.2 Set NAM
Allows you to select the phone's NAM (NumberAssignment Module) if the phone is registered withmultiple service providers.
1. Press , , , , .
2. Use to select a NAM, then press . NAM 1 / NAM 2
6.2.3 Call Guard
Call Guard alerts you when roaming charges apply.
1. Press , , , , .
2. Use to select a setting, then press .
On / Off
6.3 Security
Allows you to secure the phone electronically.
6.3.1 Lock Phone
Keeps your phone from unauthorized use. Once thephone is locked, it is in restricted mode until the lockcode is entered. You can receive phone calls and stillmake emergency calls. You can modify the lock codeusing the New Lock code within the Security menu.
1. Press , , , .
2. Enter the 4-digit password.
The lock code is commonly the last 4 digits ofyour phone number.
3. Press Lock Phone.
4. Use to select a setting, then press .
Unlock The phone is never locked.
Lock The phone is always locked. Whenlocked, you can only receive incomingcalls or make emergency calls.
On Power Up The phone is locked when it isturned on.
73
USIN
G PH
ON
E MEN
US

6.3.2 Change Lock
Allows you to change to a new four-digit lock code.
1. Press , , , .
2. Enter the 4-digit password.
The lock code is commonly the last 4 digits ofyour phone number.
3. Press Change Lock.
4. Enter a old four-digit lock code.
5. Enter a new four-digit lock code.
6. Enter the new lock code again to confirm theoriginal entry.
6.3.3 Reset Defaults
Allows you to reset your phone to the factory defaultsettings.
1. Press , , , .
2. Enter the 4-digit password.
The lock code is commonly the last 4 digits ofyour phone number.
3. Press Reset Defaults.
4. Read the screen message, then press .
5. Press Revert to change your phone settingsback to the factory defaults or press Cancelto exit without changing.
7. Airplane ModeAirplane Mode allows you to use many of yourphone’s features, such as Games, Notepad, VoiceMemos, etc., when you are in an airplane or in anyother area where making or receiving calls or data isprohibited. When your phone is in Airplane Mode, itcannot send or receive any calls or access onlineinformation.
1. Press , , .
2. Use to select a setting, then press .
On / Off
USING PHONE MENUS
74
USIN
G PH
ON
E MEN
US

SAFETY
75
SAFET
Y
TIA(Telecommunications IndustryAssociation) Safety InformationThe following is the complete TIA Safety Informationfor wireless handheld phones.
Exposure to Radio Frequency Signal
Your wireless handheld portable phone is a low powerradio transmitter and receiver. When it is ON, itreceives and also sends out Radio Frequency (RF)signals. In August, 1996, the Federal CommunicationsCommissions (FCC) adopted RF exposure guidelineswith safety levels for handheld wireless phones.Those guidelines are consistent with the safetystandards previously set by both U.S. andinternational standards bodies:
� ANSI C95.1 (1992) *
� NCRP Report 86 (1986)
� ICNIRP (1996)
� Health Canada, Safety Code 6, 1999.
Those standards were based on comprehensive andperiodic evaluations of the relevant scientificliterature. For example, over 120 scientists, engineers,and physicians from universities, government healthagencies, and industry reviewed the available body ofresearch to develop the ANSI Standard (C95.1).
The design of your phone complies with the FCCguidelines, IC Regulations (and those standards).
Antenna Care
Use only the supplied or an approved replacementantenna. Unauthoriaed antennas, modifications, orattachments could damage the phone and mayviolate FCC regulations.
Phone Operation
NORMAL POSITION: Hold the phone as you wouldany other telephone with the antenna pointed upand over your shoulder.

SAFETY
76
SAFET
Y
Tips on Efficient Operation
For your phone to operate most efficiently:
Do not touch the antenna unnecessarily when thephone is in use. Contact with the antenna affects callquality and may cause the phone to operate at ahigher power level than otherwise needed.
Driving
Check the laws and regulations on the use of wirelessphones in the areas where you drive and always obeythem. Also, if using your phone while driving, pleaseobserve the following:
� Give full attention to driving -- driving safely isyour first responsibility;
� Use hands-free operation, if available;
� Pull off the road and park before making or answeringa call if driving conditions or the law so require.
Electronic Devices
Most modern electronic equipment is shielded fromRF signals. However, certain electronic equipmentmay not be shielded against the RF signals from yourwireless phone.
Pacemakers
The Health Industry Manufacturers Associationrecommends that a minimum separation of six inchesbe maintained between a handheld wireless phoneand a pacemaker to avoid potential interference withthe pacemaker. These recommendations areconsistent with the independent research by andrecommendations of Wireless Technology Research.
Persons with Pacemakers:
� Should ALWAYS keep the phone more than sixinches from their pacemaker when the phone isturned ON;
� Should not carry the phone in a breast pocket;
� Should use the ear opposite the pacemaker tominimize the potential for interference;
� Should turn the phone OFF immediately if there isany reason to suspect that interference is takingplace.

Hearing Aids
Some digital wireless phones may interfere with somehearing aids. In the event of such interference, youmay want to consult your service provider (or call thecustomer service line to discuss alternatives.)Optional for each phone manufacturer.
Other Medical Devices
If you use any other personal medical device, consultthe manufacturer of your device to determine if it isadequately shielded from external RF energy. Yourphysician may be able to assist you in obtaining thisinformation.
Health Care Facilities
Turn your phone OFF in health care facilities whenany regulations posted in these areas instruct you todo so. Hospitals or health care facilities may useequipment that could be sensitive to external RFenergy.
Vehicles
RF signals may affect improperly installed orinadequately shielded electronic systems in motorvehicles. Check with the manufacturer or itsrepresentative regarding your vehicle. You should alsoconsult the manufacturer of any equipment that hasbeen added to your vehicle.
Posted Facilities
Turn your phone OFF in any facility where postednotices so require.
Aircraft
FCC and Transport Canada regulations prohibit usingyour phone while in the air. Switch OFF your phonebefore boarding an aircraft.
Blasting Areas
To avoid interfering with blasting operations, turnyour phone OFF when in a “blasting area” or in areasposted: “Turn off two-way radio”. Obey all signs andinstructions.
77
SAFET
Y
Potentially Explosive Atmosphere
Turn your phone OFF when in any area with apotentially explosive atmosphere and obey all signsand instructions. Sparks in such areas could cause anexplosion or fire resulting in bodily injury or evendeath.
Areas with a potentially explosive atmosphere areoften, but not always marked clearly. Potential areasmay include: fueling areas (such as gasoline stations);below deck on boats; fuel or chemical transfer orstorage facilities; vehicles using liquefied petroleumgas (such as propane or butane); areas where the aircontains chemicals or particles (such as grain, dust,or metal powders); and any other area where youwould normally be advised to turn off your vehicleengine.
For Vehicles Equipped with an Air Bag
An air bag inflates with great force. DO NOT placeobjects, including either installed or portable wirelessequipment, in the area over the air bag or in the airbag deployment area. If in-vehicle wireless equipmentis improperly installed and the air bag inflates, seriousinjury could result.
Charger and Adapter Safety� The charger and adapter are intended for indoor
use only.
� Do not expose the battery charger or adapter todirect sunlight or use it in places with highhumidity, such as a bathroom.
Battery Information and Care� Please dispose of your battery properly or take it
to your local wireless carrier for recycling.
� Do not dispose of your battery by fire or withhazardous or flammable materials..
� Never use an unapproved battery since this coulddamage the phone and/or battery and couldcause the battery to explode.
� The battery does not need to be fully dischargedbefore recharging.
� Use only LG-approved chargers specific to yourphone model since they are designed to maximizebattery life.
� Do not disassemble or short-circuit the battery.
SAFETY
78
SAFET
Y

� Keep the battery’s metal contacts clean.
� Replace the battery when it no longer providesacceptable performance. The battery can berecharged several hundred times beforereplacement.
� Recharge the battery after long periods of non-useto maximize battery life.
� Battery life will vary due to usage patterns andenvironmental conditions.
� Use of extended backlighting, MiniBrowser, anddata connectivity kits affect battery life andtalk/standby times.
Safety InformationPlease read and observe the following information forsafe and proper use of your phone and to preventdamage. Also, keep the user’s guide in an accessibleplace at all the times after reading it.
Explosion, Shock, and Fire Hazards� Unplug the power cord and charger during
lightning storms to avoid electric shock or fire.
� Make sure that no sharp-edged items such asanimal’s teeth, nails, come into contact with thebattery. There is a risk of this causing a fire.
� Do not use harsh chemicals(such as alcohol,benzene, thinners, etc.) or detergents to cleanyour phone. There is a risk of this causing a fire.
� When riding in a car, do not leave your phone orset up the hands-free kit near to the air bag. Ifwireless equipment is improperly installed and theair bag is activated, you may be seriously injured.
� Do not handle the phone with wet hands while itis being charged. It may cause an electric shock orseriously damage your phone.
� Do not drop, strike, or shake your phone severely.Such actions may harm the internal circuit boardsof the phone.
� Be careful that children do not swallow any partssuch as rubber plugs (earphone, connection partsof the phone, etc.). This could cause asphyxiationor suffocation.
� Do not use your phone in high explosive areas asthe phone may generate sparks.
79
SAFET
Y

� Do not put your phone in a place subject toexcessive dust and keep the minimum requireddistance between the power cord and heat sources.
� Unplug the power cord prior to cleaning yourphone, and clean the power plug pin when it is dirty.
� Do not damage the power cord by bending,twisting, pulling, or heating. Do not use the plug ifit is loose as it may cause a fire or electric shock.
� When using the power plug, ensure that it is firmlyconnected. If it is not, it may cause excessive heator fire.
� Do not place any heavy items on the power cord.Do not allow the power cord to be crimped as itmay cause fire or electric shock.
� Do not disassemble the phone.
� Do not place or answer calls while charging thephone as it may short-circuit the phone and/orcause electric shock or fire.
� If you put your phone in a pocket or bag withoutcovering the receptacle of the phone (power plugpin), metallic articles (such as a coin, paperclip orpen) may short-circuit the phone. Always cover thereceptacle when not in use.
� Do not short-circuit the battery. Metallic articlessuch as a coin, paperclip or pen in your pocket orbag may short-circuit the + and – terminals of thebattery (metal strips on the battery) upon moving.Short-circuit of the terminal may damage thebattery and cause an explosion.
� Never place your phone in a microwave oven as itwill cause the battery to explode.
General Warnings and Cautions� Only use the batteries, antennas, and chargers
provided by LG. The warranty will not be appliedto products provided by other suppliers.
� Store the battery in a place out of reach ofchildren.
� Using a damaged battery or placing a battery inyour mouth may cause serious injury.
� Do not place items containing magneticcomponents such as a credit card, phone card,bank book or subway ticket near your phone. Themagnetism of the phone may damage the datastored in the magnetic strip.
� Do not hold or let the antenna come in contactwith your body during a call.
SAFETY
80
SAFET
Y

� Talking on your phone for a long period of timemay reduce call quality due to heat generatedduring use.
� When the phone is not used for a long periodtime, store it in a safe place with the power cordunplugged.
� Using the phone in proximity to receivingequipment (i.e., TV or radio) may causeinterference to the phone.
� Only authorized personnel should service thephone and its accessories. Faulty installation orservice may result in accidents and consequentlyinvalidate the warranty.
� Do not use the phone if the antenna is damaged.If a damaged antenna contacts skin, it may cause aslight burn. Please contact an LG AuthorizedService Center to replace the damaged antenna.
� Do not use the phone in areas where its use isprohibited. (For example: aircraft).
� Do not immerse your phone in water. If thishappens, turn it off immediately and remove thebattery. If the phone does not work, take it to anLG Authorized Service Center.
FDA Consumer UpdateThe U.S. Food and Drug Administration’sCenter for Devices and RadiologicalHealth Consumer Update on MobilePhones:
1. Do wireless phones pose a health hazard?
The available scientific evidence does not show thatany health problems are associated with usingwireless phones. There is no proof, however, thatwireless phones are absolutely safe. Wireless phonesemit low levels of radiofrequency energy (RF) in themicrowave range while being used. They also emitvery low levels of RF when in the Main Menu Screen.Whereas high levels of RF can produce health effects(by heating tissue), exposure to low level RF thatdoes not produce heating effects causes no knownadverse health effects. Many studies of low level RFexposures have not found any biological effects.Some studies have suggested that some biologicaleffects may occur, but such findings have not beenconfirmed by additional research. In some cases,other researchers have had difficulty in reproducingthose studies, or in determining the reasons forinconsistent results.
81
SAFET
Y

2. What is the FDA's role concerning the safety ofwireless phones?
Under the law, the FDA does not review the safety ofradiation-emitting consumer products such as wirelessphones before they can be sold, as it does with newdrugs or medical devices. However, the agency hasauthority to take action if wireless phones are shownto emit radiofrequency energy (RF) at a level that ishazardous to the user. In such a case, the FDA couldrequire the manufacturers of wireless phones tonotify users of the health hazard and to repair,replace, or recall the phones so that the hazard nolonger exists.
Although the existing scientific data do not justifyFDA regulatory actions, the FDA has urged thewireless phone industry to take a number of steps,including the following:
� Support needed research into possible biologicaleffects of RF of the type emitted by wireless phones;
� Design wireless phones in a way that minimizes anyRF exposure to the user that is not necessary fordevice function; and
� Cooperate in providing users of wireless phoneswith the best possible information on possibleeffects of wireless phone use on human health.
The FDA belongs to an interagency working group ofthe federal agencies that have responsibility fordifferent aspects of RF safety to ensure coordinatedefforts at the federal level. The following agenciesbelong to this working group:
� National Institute for Occupational Safety andHealth
� Environmental Protection Agency
� Occupational Safety and Health Administration
� National Telecommunications and InformationAdministration
The National Institutes of Health participates insome interagency working group activities, as well.
The FDA shares regulatory responsibilities for wirelessphones with the Federal Communications Commission(FCC). All phones that are sold in the United Statesmust comply with FCC safety guidelines that limit RFexposure.
The FCC relies on the FDA and other health agenciesfor safety questions about wireless phones.
SAFETY
82
SAFET
Y
The FCC also regulates the base stations that thewireless phone networks rely upon. While these basestations operate at higher power than do the wirelessphones themselves, the RF exposures that people getfrom these base stations are typically thousands oftimes lower than those they can get from wirelessphones. Base stations are thus not the subject of thesafety questions discussed in this document.
3. What kinds of phones are the subject of thisupdate?
The term “wireless phone” refers here to handheldwireless phones with built-in antennas, often called“cell”, “mobile”, or “PCS” phones. These types ofwireless phones can expose the user to measurableradiofrequency energy (RF) because of the shortdistance between the phone and the user’s head.These RF exposures are limited by FCC safetyguidelines that were developed with the advice of theFDA and other federal health and safety agencies.When the phone is located at greater distances fromthe user, the exposure to RF is drastically lowerbecause a person's RF exposure decreases rapidlywith increasing distance from the source. Thesocalled “cordless phones,” which have a base unit
connected to the telephone wiring in a house,typically operate at far lower power levels, and thusproduce RF exposures far below the FCC safetylimits.
4. What are the results of the research donealready?
The research done thus far has produced conflictingresults, and many studies have suffered from flaws intheir research methods. Animal experimentsinvestigating the effects of radiofrequency energy(RF) exposures characteristic of wireless phones haveyielded conflicting results that often cannot berepeated in other laboratories. A few animal studies,however, have suggested that low levels of RF couldaccelerate the development of cancer in laboratoryanimals. However, many of the studies that showedincreased tumor development used animals that hadbeen genetically engineered or treated withancercausing chemicals so as to be pre-disposed todevelop cancer in the absence of RF exposure. Otherstudies exposed the animals to RF for up to 22 hoursper day. These conditions are not similar to theconditions under which people use wireless phones,so we don’t know with certainty what the results of
83
SAFET
Y

such studies mean for human health. Three largeepidemiology studies have been published sinceDecember 2000. Between them, the studiesinvestigated any possible association between theuse of wireless phones and primary brain cancer,glioma, meningioma, or acoustic neuroma, tumors ofthe brain or salivary gland, leukemia, or othercancers. None of the studies demonstrated theexistence of any harmful health effects from wirelessphone RF exposures. However, none of the studiescan answer questions about long-term exposures,since the average period of phone use in thesestudies was around three years.
5. What research is needed to decide whether RFexposure from wireless phones poses a healthrisk?
A combination of laboratory studies andepidemiological studies of people actually usingwireless phones would provide some of the data thatare needed. Lifetime animal exposure studies couldbe completed in a few years. However, very largenumbers of animals would be needed to providereliable proof of a cancer promoting effect if oneexists. Epidemiological studies can provide data that
is directly applicable to human populations, but 10or more years follow-up may be needed to provideanswers about some health effects, such as cancer.This is because the interval between the time ofexposure to a cancer-causing agent and the timetumors develop — if they do — may be many, manyyears. The interpretation of epidemiological studies ishampered by difficulties in measuring actual RFexposure during day-to-day use of wireless phones.Many factors affect this measurement, such as theangle at which the phone is held, or which model ofphone is used.
6. What is the FDA doing to find out more aboutthe possible health effects of wireless phone RF?
The FDA is working with the U.S. National ToxicologyProgram and with groups of investigators around theworld to ensure that high priority animal studies areconducted to address important questions about theeffects of exposure to radio frequency energy (RF).The FDA has been a leading participant in the WorldHealth Organization International ElectromagneticFields (EMF) Project since its inception in 1996. Aninfluential result of this work has been thedevelopment of a detailed agenda of research needs
SAFETY
84
SAFET
Y

that has driven the establishment of new researchprograms around the world. The project has alsohelped develop a series of public informationdocuments on EMF issues. The FDA and the CellularTelecommunications & Internet Association (CTIA)have a formal Cooperative Research andDevelopment Agreement (CRADA) to do research onwireless phone safety. The FDA provides the scientificoversight, obtaining input from experts ingovernment, industry, and academic organizations.CTIA-funded research is conducted throughcontracts with independent investigators. The initialresearch will include both laboratory studies andstudies of wireless phone users. The CRADA will alsoinclude a broad assessment of additional researchneeds in the context of the latest researchdevelopments around the world.
7. How can I find out how much radio frequencyenergy exposure I can get by using my wirelessphone?
All phones sold in the United States must complywith Federal Communications Commission (FCC)guidelines that limit radio frequency energy (RF)exposures. The FCC established these guidelines inconsultation with the FDA and the other federalhealth and safety agencies. The FCC limit for RFexposure from wireless telephones is set at a SpecificAbsorption Rate (SAR) of 1.6 watts per kilogram(1.6 W/kg). The FCC limit is consistent with thesafety standards developed by the Institute ofElectrical and Electronic Engineering (IEEE) and theNational Council on Radiation Protection andMeasurement. The exposure limit takes intoconsideration the body’s ability to remove heat fromthe tissues that absorb energy from the wirelessphone and is set well below levels known to haveeffects. Manufacturers of wireless phones must reportthe RF exposure level for each model of phone to theFCC. The FCC website (http://www.fcc.gov/oet/rfsafety) gives directions for locating the FCCidentification number on your phone so you can findyour phone’s RF exposure level in the online listing.
85
SAFET
Y

8. What has the FDA done to measure the radiofrequency energy coming from wireless phones?
The Institute of Electrical and Electronic Engineers(IEEE) is developing a technical standard formeasuring the radio frequency energy (RF) exposurefrom wireless phones and other wireless handsetswith the participation and leadership of FDAscientists and engineers. The standard,“Recommended Practice for Determining the Spatial-Peak Specific Absorption Rate (SAR) in the HumanBody Due to Wireless Communications Devices:Experimental Techniques,” sets forth the firstconsistent test methodology for measuring the rateat which RF is deposited in the heads of wirelessphone users. The test method uses a tissuesimulatingmodel of the human head. Standardized SAR testmethodology is expected to greatly improve theconsistency of measurements made at differentlaboratories on the same phone. SAR is themeasurement of the amount of energy absorbed intissue, either by the whole body or a small part ofthe body. It is measured in watts/kg (or milliwatts/g)of matter. This measurement is used to determinewhether a wireless phone complies with safetyguidelines.
9. What steps can I take to reduce my exposure toradio frequency energy from my wirelessphone?
If there is a risk from these products — and at thispoint we do not know that there is — it is probablyvery small. But if you are concerned about avoidingeven potential risks, you can take a few simple stepsto minimize your exposure to radio frequency energy(RF). Since time is a key factor in how much exposurea person receives, reducing the amount of time spentusing a wireless phone will reduce RF exposure. If youmust conduct extended conversations by wirelessphone every day, you could place more distancebetween your body and the source of the RF, sincethe exposure level drops off dramatically withdistance. For example, you could use a headset andcarry the wireless phone away from your body or usea wireless phone connected to a remote antenna.Again, the scientific data do not demonstrate thatwireless phones are harmful. But if you are concernedabout the RF exposure from these products, you canuse measures like those described above to reduceyour RF exposure from wireless phone use.
SAFETY
86
SAFET
Y

10. What about children using wireless phones?
The scientific evidence does not show a danger tousers of wireless phones, including children andteenagers. If you want to take steps to lowerexposure to radio frequency energy (RF), themeasures described above would apply to childrenand teenagers using wireless phones. Reducing thetime of wireless phone use and increasing thedistance between the user and the RF source willreduce RF exposure. Some groups sponsored byother national governments have advised thatchildren be discouraged from using wireless phonesat all. For example, the government in the UnitedKingdom distributed leaflets containing such arecommendation in December 2000. They notedthat no evidence exists that using a wireless phonecauses brain tumors or other ill effects. Theirrecommendation to limit wireless phone use bychildren was strictly precautionary; it was not basedon scientific evidence that any health hazard exists.
11. What about wireless phone interference withmedical equipment?
Radio frequency energy (RF) from wireless phonescan interact with some electronic devices. For thisreason, the FDA helped develop a detailed testmethod to measure electromagnetic interference(EMI) of implanted cardiac pacemakers anddefibrillators from wireless telephones. This testmethod is now part of a standard sponsored by theAssociation for the Advancement of Medicalinstrumentation (AAMI). The final draft, a joint effortby the FDA, medical device manufacturers, and manyother groups, was completed in late 2000. Thisstandard will allow manufacturers to ensure thatcardiac pacemakers and defibrillators are safe fromwireless phone EMI. The FDA has tested hearing aidsfor interference from handheld wireless phones andhelped develop a voluntary standard sponsored bythe Institute of Electrical and Electronic Engineers(IEEE). This standard specifies test methods andperformance requirements for hearing aids andwireless phones so that no interference occurs whena person uses a “compatible” phone and a“compatible” hearing aid at the same time. Thisstandard was approved by the IEEE in 2000. The
87
SAFET
Y

FDA continues to monitor the use of wireless phonesfor possible interactions with other medical devices.Should harmful interference be found to occur, theFDA will conduct testing to assess the interferenceand work to resolve the problem.
12. Where can I find additional information?
For additional information, please refer to thefollowing resources:
FDA web page on wireless phones(http://www.fda.gov/cdrh/phones/index.html)
Federal Communications Commission (FCC) RFSafety Program (http://www.fcc.gov/oet/rfsafety)
International Commission on Non-lonizing RadiationProtection (http://www.icnirp.de)
World Health Organization (WHO) International EMFProject(http://www.who.int/emf)
National Radiological Protection Board (UK)(http://www.nrpb.org.uk/)
Consumer Information on SAR(Specific Absorption Rate)
This Model Phone Meets the Government’sRequirements for Exposure to Radio Waves. Yourwireless phone is a radio transmitter and receiver. Itis designed and manufactured not to exceed theemission limits for exposure to radio frequency (RF)energy set by the Federal CommunicationsCommission of the U.S. Government. These limitsare part of comprehensive guidelines and establishpermitted levels of RF energy for the generalpopulation. The guidelines are based on standardsthat were developed by independent scientificorganizations through periodic and thoroughevaluation of scientific studies. The standardsinclude a substantial safety margin designed toassure the safety of all persons, regardless of ageand health.
The exposure standard for wireless mobile phonesemploys a unit of measurement known as theSpecific Absorption Rate, or SAR. The SAR limit setby the FCC is 1.6 W/kg. Tests for SAR areconducted using standard operating positionsspecified by the FCC with the phone transmitting at
SAFETY
88
SAFET
Y

its highest certified power level in all testedfrequency bands. AlthoughSAR is determined at thehighest certified power level, the actual SAR level ofthe phone while operating can be well below themaximum value. Because the phone is designed tooperate at multiple power levels to use only thepower required to reach the network, in general, thecloser you are to a wireless base station antenna,the lower the power output.
Before a phone model is available for sale to thepublic, it must be tested and certified to the FCCthat it does not exceed the limit established by thegovernment-adopted requirement for safe exposure.The tests are performed in positions and locations(e.g., at the ear and worn on the body) as requiredby the FCC for each model.
The highest SAR value for this model phone whentested for use at the ear is 1.17 W/kg and whenworn on the body, as described in this user guide, is0.621 W/kg (body-worn measurements differamong phone models, depending upon availableaccessories and FCC/IC requirements). While theremay be differences between SAR levels of variousphones and at various positions, they all meet the
government requirement for safe exposure. TheFCC has granted an Equipment Authorization forthis model phone with all reported SAR levelsevaluated as in compliance with the FCC RFemission guidelines. SAR information on this modelphone is on file with the FCC and can be foundunder the Display Grant section ofhttp://www.fcc.gov/oet/fccid after searching onFCC ID BEJLX5400. Additional information onSpecific Absorption Rates (SAR) can be found onthe Cellular Telecommunications IndustryAssociation (CTIA) website at http://www.wow-com.com.
* In the United States and Canada, the SAR limitfor mobile phones used by the public is 1.6watts/kg (W/kg) averaged over one gram of tissue.The standard incorporates a substantial margin ofsafety to give additional protection for the publicand to account for any variations in measurements.
89
SAFET
Y

ACCESSORIES
90
ACC
ESSORIES
Battery ChargerThe battery charger, allows you topower your phone using.
Battery Standard battery is available.
Cigarette Lighter ChargerThe cigarette lighter charger allows you to operate the phone and trickle charge the phone’s battery from your vehicle.
Hands-Free Car Kit (Portable)The hands-free car kit enables you to attach the phone to the power jack in your car, providing you with hands-free operation.
HeadsetConnects to your phone, allowing hands-free operation. Includes earpiece, microphone, and integrated call answer / termination button. You can use this stereo handsetto listen to music through music player.
Holster
There are a variety of accessories available for your mobile phone. Consult your local dealer for availability.

WARRANTY INFORMATION
91
1. WHAT THIS WARRANTY COVERS :
LG offers you a limited warranty that the enclosedsubscriber unit and its enclosed accessories will befree from defects in material and workmanship,according to the following terms and conditions:
(1) The limited warranty for the product extendsfor ONE (1) year beginning on the date ofpurchase of the product by the original enduser.
(2) The limited warranty extends only to theoriginal end user of the product and is notassignable or transferable to any subsequentpurchaser/end user.
(3) This warranty is good only to the original enduser of the product during the warranty periodas long as it is in Canada.
(4) Upon request from LG, the consumer mustprovide information to reasonably prove thedate of purchase.
(5) During the applicable warranty period, LG willrepair or replace at LG’s sole option, withoutcharge to the original end user, any defectivecomponent part of the phone or accessory.
(6) LG may, use rebuilt, reconditioned, or new partsor components when repairing any product orreplace a product with a rebuilt, reconditionedor new product.
2. WHAT THIS WARRANTY DOES NOT COVER :
(1) Defects or damages resulting from use of theproduct in other than its normal and customarymanner.
(2) Defects or damages from abnormal use,abnormal conditions, improper storage,exposure to moisture or dampness,unauthorized modifications, unauthorizedconnections, unauthorized repair, misuse,neglect, abuse, accident, alteration, improperinstallation, or other acts which are not thefault of LG, including damage caused by spills offood or liquids.
(3) Breakage or damage to antennas unless causeddirectly by defects in material or workmanship.
(4) If the carrier’s or manufacturer’s CustomerService Centre was not notified by the end userof the alleged defect or malfunction of theproduct, during the warranty period.
WA
RRAN
TY IN
FORM
ATIO
N

WARRANTY INFORMATION
92
WA
RRAN
TY IN
FORM
ATIO
N
(5) Products which have had their serial numbersremoved or made illegible.
(6) Damage resulting from use of non-LG approvedaccessories.
(7) All plastic surfaces and all other externallyexposed parts that are scratched or damageddue to normal customer use.
(8) Products serviced by non-authorized persons orcompanies.
Notes:
(1) This limited warranty is in lieu of all otherwarranties, express or implied either in fact orby operations of law, statutory or otherwise,including, but not limited to any impliedwarranty of merchantability or fitness for aparticular purpose.
(2) Shipping damage is the sole responsibility ofthe shipping company.
3. EXCLUSION OF LIABILITY :
No other express warranty is applicable to thisproduct. THE DURATION OF ANY IMPLIEDWARRANTIES, INCLUDING THE IMPLIEDWARRANTY OF MARKETABILITY, IS LIMITED TOTHE DURATION OF THE EXPRESS WARRANTYHEREIN. LG ELECTRONICS CANADA, INC. SHALLNOT BE LIABLE FOR THE LOSS OF THE USE OFTHE PRODUCT, INCONVENIENCE, LOSS OR ANYOTHER DAMAGES, DIRECT ORCONSEQUENTIAL, ARISING OUT OF THE USEOF, OR INABILITY TO USE, THIS PRODUCT ORFOR ANY BREACH OF ANY EXPRESS OR IMPLIEDWARRANTY, INCLUDING THE IMPLIEDWARRANTY OF MERCHANTABILITY APPLICABLETO THIS PRODUCT.
4. HOW TO GET WARRANTY SERVICE :
To obtain warranty service, please call thefollowing telephone number from anywhere inCanada:
LG Electronics Canada, Inc.
Tel. 1-888-542-2623

INDEX
93
IND
EX
AACCESSORIES 90
Airplane Mode 74
Alarm Clock 58
Alerts 63
All Calls 38
BBacklight 64
Backlight Settings 65
Banner 63
Battery Charge Level 16
Battery Information andCare 78
BluetoothTM 70
Bluetooth Info 72
CCalculator 57
Call History 38
Call Setup 66
Call Timers 40
Call Waiting 21
Caller ID 21
Camera 52
Charger and AdapterSafety 78
Charging the Battery 16
Clock Format 64
Consumer Information on SAR 88
Contacts 35
Contacts Entries 26
DData Connections 40
Data Setup 69
Device List 71
Device Name 71
Dialed Calls 39
Dialing font 65
Discovery Mode 71
Display 63
EE-mail 48
Erase all Contacts 37
Erase History 40
EZ Tip Calc 59
FFDA Consumer Update 81
GGames 56
Games / Tools 65
Get New 57
Groups 36
HHard Pause (P) 32
IIM & Chat 49
IMPORTANT SAFETY
PRECAUTIONS 1
KKeypad 62
Keypad light 64
LLanguage 67
List Entries 35
Lock Mode 20
MMaking Calls 19
Memory Info 56, 66, 70
Menu Access 35
Menu Style 65
Menus Overview 14
Messaging 41
Missed Calls 39
Music & Media 51
Music Player 51

INDEX
94
IND
EX
Mute Function 20
My Albums 54
NNav. Key Shortcuts 66
New Entry 36
Notepad 59
Notifications 65
OOthers 66
PPhone Info 72
Phone Overview 12
Power 70
RReceived Calls 39
Receiving Calls 19
Redialing Calls 19
Ringers 61
Ringtones 52
SSafety Information 79
Scheduler 58
Screen Icons 18
Security 73
Settings 47, 61
Shop 56
Short Codes 49
Signal Strength 17
Sound 61
Speed Dialing 22
Speed Dials 37
System 72
TText and Multimedia 42
Text Input 23
Text Input Modes 23
The Battery 16
TIA(TelecommunicationsIndustry Association)Safety Information 75
Tools & Apps 57
TTY Mode 67
Turning the Phone On and Off 17
TV & Radio 55
VVibrate Mode 20
Video 52
Voice Dials 37
Voice Mail 42
Voice Memo 60
Volume 62, 65
Volume Quick Adjustment 21
WWallpaper 52, 64
Warranty Information 91
Web Alerts 48
Wireless Web 49
World Clock 59