industrial wood finishing - tikkurila · 2016-07-01 · industrial wood finishing 1 hereafter,...
TRANSCRIPT

L I V I N G F O R W O O D
Industrial wood finishing
T I K K U R I L A O Y I N D U S T R Y I N D U S T R I A L W O O D F I N I S H I N G
Industrial woodfinishing
T I K K U R I L A O Y I N D U S T R Y I N D U S T R I A L W O O D F I N I S H I N G
Industrial woodfinishing
Editorial staffKaj Fagerholm
Heidi HirveläMinna Ihamäki-Laitinen
Erkki KeränenKeijo Korhonen
Leena Manni-RantanenArto NummelaAnu Passinen
Publisher Tikkurila Oy, Industry
Copyright © 2010 Tikkurila OyISBN 978-952-5030-43-3
First edition
LayoutKeijo Korhonen
Tanja Peltola
Printed byTikkurila Oy
T I K K U R I L A O Y I N D U S T R Y I N D U S T R I A L W O O D F I N I S H I N G
Table of contents
1. Basic information on paints and lacquers .............................................................................................. 11.1 Binders ................................................................................................................................................. 1
1.1.1 Amino resins ................................................................................................................................ 11.1.2 Alkyd resins ................................................................................................................................. 11.1.3 Epoxy resins ............................................................................................................................... 11.1.4 Urethane resins (isocyanate-hardened) ..................................................................................... 21.1.5 Nitrocellulose ............................................................................................................................... 21.1.6 Cellulose acetobutyrate (CAB) .................................................................................................... 21.1.7 UV-hardened acrylate resins ....................................................................................................... 21.1.8 Water-borne binders, i.e. dispersions ......................................................................................... 2
1.2 Pigments and fillers .............................................................................................................................. 21.3 Thinners ................................................................................................................................................ 31.4 Additives ............................................................................................................................................... 3
2. Different types of coatings and their application methods ................................................................... 42.1 Putties ................................................................................................................................................... 42.2 Stains .................................................................................................................................................... 42.3 Wood preservatives .............................................................................................................................. 42.4 Lacquers............................................................................................................................................... 5
2.4.1 Sanding sealers .......................................................................................................................... 52.4.2 Top lacquers ................................................................................................................................ 5
2.5 Paints .................................................................................................................................................... 52.6 Hardeners ............................................................................................................................................. 52.7 Thinners ................................................................................................................................................ 6
3. Wood structure and different types of wood ........................................................................................... 73.1 Wood .................................................................................................................................................... 7
3.1.1 The structure of wood ................................................................................................................. 73.1.2 Branches ..................................................................................................................................... 8
3.2 Properties of wood................................................................................................................................ 83.2.1 The living wood ........................................................................................................................... 83.2.2 Humidity ...................................................................................................................................... 83.2.3 Temperature ................................................................................................................................ 83.2.4 Time ............................................................................................................................................. 8
3.3 Wood species ....................................................................................................................................... 93.3.1 Pine ............................................................................................................................................. 93.3.2 Spruce ......................................................................................................................................... 93.3.3 Birch ............................................................................................................................................ 93.3.4 Oak ............................................................................................................................................ 103.3.5 Ash ............................................................................................................................................ 103.3.6 Other wood species .................................................................................................................. 10
3.4 Board materials .................................................................................................................................. 113.4.1 Fibreboards ............................................................................................................................... 113.4.2 MDF and HDF boards ............................................................................................................... 113.4.3 Plywood ..................................................................................................................................... 113.4.4 Chipboards ............................................................................................................................... 12

T I K K U R I L A O Y I N D U S T R Y I N D U S T R I A L W O O D F I N I S H I N G
4. Special requirements of different base materials in finishing work .................................................. 134.1 MDF board .......................................................................................................................................... 134.2 HDF board .......................................................................................................................................... 134.3 Plywood .............................................................................................................................................. 134.4 Solid wood .......................................................................................................................................... 14
4.4.1 Pine and spruce ........................................................................................................................ 144.4.2 Oak and ash .............................................................................................................................. 144.4.3 Birch .......................................................................................................................................... 144.4.4 Tropical hardwood ..................................................................................................................... 14
5. Sanding .................................................................................................................................................... 155.1 Sanding methods ............................................................................................................................... 155.2 Sanding belts...................................................................................................................................... 155.3 Instructions for sanding ...................................................................................................................... 16
6. Finishing and coating methods and equipment ................................................................................... 186.1 Spraying and spraying equipment ..................................................................................................... 18
6.1.1 Spraying booths ........................................................................................................................ 186.1.2 Conventional spraying ............................................................................................................. 196.1.3 Airless spraying ......................................................................................................................... 196.1.4 Air-assisted airless spraying ..................................................................................................... 206.1.5 Electrostatic centrifugal method ............................................................................................... 206.1.6 Electrostatic spraying ................................................................................................................ 206.1.7 Spraying with heated coating ................................................................................................... 216.1.8 High-volume conventional spraying (HVLP spraying) .............................................................. 216.1.9 Two-component spraying .......................................................................................................... 226.1.10 Automatic spraying ................................................................................................................. 226.1.11 Robot spraying ........................................................................................................................ 23
6.2 Coating methods ................................................................................................................................ 246.2.1 Curtain coating .......................................................................................................................... 246.2.2 Vacuum coating ........................................................................................................................ 246.2.3 Roller coating application ......................................................................................................... 256.2.4 Dipping ...................................................................................................................................... 256.2.5 Drum-coating ............................................................................................................................ 25
7. Finishing lines ......................................................................................................................................... 267.1 Window industry ................................................................................................................................. 267.2 Door industry ...................................................................................................................................... 277.3 Parquet industry ................................................................................................................................. 287.4 Moulding industry ............................................................................................................................... 297.5 Finishing sawn timber ......................................................................................................................... 297.6 Kitchen furniture industry ................................................................................................................... 307.7 Furniture industry ................................................................................................................................ 307.8 Other types of wood industry ............................................................................................................. 31
8. Drying and hardening .............................................................................................................................. 328.1 Air drying ............................................................................................................................................ 328.2 Heat drying ......................................................................................................................................... 328.3 Drying and hardening......................................................................................................................... 328.4 Physical drying ................................................................................................................................... 328.5 Chemical drying ................................................................................................................................. 32

T I K K U R I L A O Y I N D U S T R Y I N D U S T R I A L W O O D F I N I S H I N G
8.6 Heat transfer ....................................................................................................................................... 328.6.1 Conduction ................................................................................................................................ 328.6.2 Convection ................................................................................................................................ 328.6.3 Radiation ................................................................................................................................... 33
9. Drying equipment (ovens) ...................................................................................................................... 349.1 Drying tunnels .................................................................................................................................... 349.2 Multilayer ovens .................................................................................................................................. 349.3 IR ovens .............................................................................................................................................. 359.4 Gas IR ................................................................................................................................................. 359.5 MOS-drying ........................................................................................................................................ 359.6 UV ovens ............................................................................................................................................ 369.7 UVITEC® curing .................................................................................................................................. 369.8 Electron-beam dryers (EB dryers) ...................................................................................................... 379.9 Dry-air equipment ............................................................................................................................... 379.10 UV-LED curing .................................................................................................................................. 37
10. Testing the finished paint surface ........................................................................................................ 38
11. Paint standards for wooden surfaces .................................................................................................. 39
12. Health and safety at work; Environmental protection ........................................................................ 4012.1 Health and safety within the paint industry ...................................................................................... 4012.2 Package markings ............................................................................................................................ 40
12.2.1 Reactive products ................................................................................................................... 4012.2.2 Products which are hazardous to health ................................................................................. 4012.2.3 Products which are hazardous to the environment ................................................................. 40
12.3 Safety data sheets ............................................................................................................................ 4112.4 Fire safety ......................................................................................................................................... 4112.5 Using paints...................................................................................................................................... 42
13. Objects to be coated and recommended paint combinations .......................................................... 4313.1 Furniture ..................................................................................................................................... 4313.2 Fixtures ....................................................................................................................................... 4313.3 Internal doors ............................................................................................................................. 4413.4 Lamella parquets ....................................................................................................................... 4413.5 Windows and exterior doors ...................................................................................................... 4413.6 Mouldings, frames and panels ................................................................................................... 4513.7 Exterior claddings ...................................................................................................................... 4513.8 Beams ........................................................................................................................................ 4613.9 Plywood ...................................................................................................................................... 4613.10 Fibreboard ................................................................................................................................ 46
14. Coating costs and cost calculations ................................................................................................... 47
15. General instructions before finishing .................................................................................................. 50
16. Some of the most common concepts in painting............................................................................... 52

T I K K U R I L A O Y I N D U S T R Y I N D U S T R I A L W O O D F I N I S H I N G
17. Tinting systems ...................................................................................................................................... 55
18. Solving finishing problems ................................................................................................................... 5718.1 Orange-peel surface ........................................................................................................................ 5718.2 Poor coverage .................................................................................................................................. 5718.3 Paint film breakage in the curtain coating ........................................................................................ 5718.4 Air bubbles during painting .............................................................................................................. 5818.5 Air bubbles during the drying phase ............................................................................................... 5818.6 Ineffective drying and soft paint surface .......................................................................................... 5818.7 Surface cracking (reticular) .............................................................................................................. 5918.8 Surface cracking (grain-aligned) ..................................................................................................... 5918.9 Sagging ............................................................................................................................................ 5918.10 Colour differences in painting ........................................................................................................ 5918.11 Colour differences in lacquering .................................................................................................... 6018.12 Colour differences in staining ......................................................................................................... 6018.13 Gloss variations .............................................................................................................................. 6018.14 Wrinkling (shrinkage linking) .......................................................................................................... 6118.15 Mat blotches ................................................................................................................................... 6118.16 Stripes............................................................................................................................................. 6118.17 Impurities and unwanted material on the paint surface ................................................................. 6218.18 Craters (Repulsion)......................................................................................................................... 6218.19 Poor adhesion................................................................................................................................. 6218.20 Greasiness (Sweating) ................................................................................................................... 6318.21 Light blotches on the lacquer surface ............................................................................................ 6318.22 Rough surface ................................................................................................................................ 63
19. Colours ................................................................................................................................................... 6419.1. Colour is light ................................................................................................................................... 6419.2. Colour made visible ......................................................................................................................... 6519.3. Colour formation .............................................................................................................................. 66
19.3.1 Additive colour formation ........................................................................................................ 6619.3.2 Subtractive colour formation ................................................................................................... 66
19.4. Defining and measuring colour ....................................................................................................... 6619.5. Differences in colour ........................................................................................................................ 6719.6. Metamerism ..................................................................................................................................... 67

1I N D U S T R I A L W O O D F I N I S H I N G
Hereafter, paints and lacquers will be referred to simply as paint. Paints can be categorized according to
their various properties, such as the binders, diluents or drying method in question. Among the various binding agents are amino resins, alkyd resins, latexes i.e. dispersions, epoxy resins and urethane resins. Based on the type of thinner, paints can be divided into water-borne, solvent-borne and solvent-free (100 %) paints. Furthermore, based on the drying method, they can be divided into physical-drying paints, oxidative-drying paints and reaction paints.
Paints and lacquers comprises several different raw materials that can be divided into four groups: binders, pigments and fillers, solvents and additives. All of these have particular significance in terms of the properties of the paints and lacquers in the tin, when applied, and as a completed surface.
1.1 Binders
The purpose of a binder is to bind together the paint’s other ingredients, and to make the paint adhere to its substrate. Binders are either solid or liquid polymers. Solid binders with a high viscose content are diluted to the appropriate liquidity before the paint is manufactured. A binder can also consist of tiny polymer particles in water (dispersion).
The binder determines the paint’s resistance properties and its adhesion capacity with respect to the substrate. For this reason, the categorization of paints is generally based on the type of binder.
The following is a description of the binder types – and their drying times – most commonly used in the wood industry.
1.1.1 Amino resinsCarbamide and melamine resins are the most commonly used amino resins. Carbamide resins dry quickly, but their chemical resistance is not as good as that of melamine resins. Since melamine resins do not react as quickly to the addition of acid, the pot life of the paint can be prolonged by decreasing carbamide resins and increasing melamine resins.
Due to the influence of heat or an acid catalyst, amino resins dry by reacting to another binder and to
themselves. Amino resins always contain formaldehyde, which is released when the paint dries. The formaldehyde released from the dried film can be recognized by its pungent smell. When the paint dries, the formaldehyde emission is reduced. Amino resins are too fragile to be used as such, and are therefore combined with binders that give the paint elasticity.
1.1.2 Alkyd resinsAlkyds are polyesters that contain fatty acids originating in vegetable oils, such as linseed oil, soybean oil, castor oil, or tall oil fatty acids. By varying the raw materials, different types of alkyds can be manufactured that are either solvent-borne or dispersed in water. Alkyds containing drying oil (such as linseed oil or soybean oil) or fatty acids from drying oils (such as tall oil fatty acid) are used for air-drying paints.
While alkyd paints dry, solvents or water evaporate and the binder reacts with the oxygen in the air. In catalytic paints, alkyds manufactured from non-drying oils or fatty acids are used. By changing the quantity of the alkyd, the hardness of the paint can be adjusted. Paints intended for indoor use are made harder than those suitable for outdoor use. Alkyds reacts chemically with amino resins, building up a product whose mechanical properties, as well as chemical resistance, are excellent. To some degree, alkyds of this type also react with the oxygen in the air, resulting in an even higher degree of chemical resistance.
Urethane alkyds are also oxidative-drying binders, whose properties resemble those of alkyds. Their abrasion and chemical resistance is slightly higher than that of alkyds.
Water-borne alkyds are used in base paints intended for outdoor use in particular.
1.1.3 Epoxy resinsIn epoxy resins, polyamides and polyamines are generally used as hardeners. Polyamides provide better water resistance than polyamines, but dry more slowly.
A binder can be dissolved in water or a solvent, or can be solvent-free. As their UV resistance is relatively poor, epoxy paints are generally used as primers, for example under polyurethane paints.
1. Basic information on paints and lacquers
2 T I K K U R I L A O Y I N D U S T R Y I N D U S T R I A L W O O D F I N I S H I N G
1.1.4 Urethane resins (isocyanate-hardened)Urethane resins dry aided by a chemical reaction.
Polyurethane paints can be either of the one-component or the two-component type. They can also be water-borne.
As one-component lacquers dry, the isocyanate they contain reacts with air humidity.
Such paints are generally not manufactured, since the paint’s pigments contain some moisture that reacts with the binder when the paint is stored. For the same reason, gloss-reducing flatting agents cannot be added to lacquers.
In two-component paints, the binder can be either polyester-type or acrylate. Acrylate-based paints dry faster than those that are polyester-based. They also require less hardener, but their chemical resistance is lower.
Aliphatic isocyanates lead to slow drying, but the resulting paint yellows to a lesser degree. Aromatic isocyanates are clearly better suited to indoor paints.
1.1.5 NitrocelluloseNitrocellulose, i.e. cellulose nitrate is made of cotton or wood. Nitrocellulose paints dry physically as solvents evaporate from the paint film. As a binder, nitrocellulose is both hard and fragile. Therefore, flexible binders or plastizers must be added to nitrocellulose paints for elasticity. Nitrocellulose can also be added to acid catalysed paints to speed up the drying process.
1.1.6 Cellulose acetobutyrate (CAB)Cellulose acetobutyrate does not yellow like nitrocellulose. This makes it suitable for lacquers that are applied on top of paints, since this does not alter the shade of the paint. CAB lacquers applied to wood retain the wood’s pale color, but are not suitable for application on dark wood species or dark stains.
1.1.7 UV-hardened acrylate resinsIn manufacturing UV-hardened acrylate resins, the acrylic acid is allowed to react with another resin. This is how epoxy acrylates, polyester acrylates and polyurethane acrylates are made, for example. These binders harden in a few seconds in the UV oven as a result of UV radiation. Such binders are also used in water-borne products of the dispersion type.
1.1.8 Water-borne binders, i.e. dispersionsAcrylates form the most important binder type, polystyrene acrylates being a cost-effective alternative. Polyurethane dispersions are also used to improve chemical and abrasion resistance. Due to their high price, however, their use is limited. The binder is dispersed in water as small particles. In physical terms, latex paint dries when its water evaporates and the particles stick together, forming a cohesive film. Dispersion paints continue to gain in importance in terms of solvent emission reduction.
1.2 Pigments and fillers
Pigments provide tone and coverage. Pigments and fillers can be manufactured in different ways.
Although materials found in nature, such as red iron oxide, calcite, talcum and kaolin, can be pulverized, most pigments are manufactured synthetically.
Pigments protect paint film and wood from the sun’s UV radiation. They are traditionally divided into inorganic and organic pigments. For example, inorganic pigments include iron oxides, carbon black and titanium dioxide. Titanium dioxide is the most commonly used pigment in the paint industry. Organic pigments include phthalocyanine blue and green pigments, for example.
Inorganic pigments generally provide good coverage, although their coloring capacity is not as good as that of organic pigments. Organic pigments are brighter in color; in addition, their resistance properties vary greatly.
Pigments are used for making tinting colorants used for tinting various base paints. Different base paints either contain a precisely defined quantity of white titanium-oxide pigment, or none at all. Tinting colorants and the tinting system produce an almost limitless quantity of shades from a few base paints.
Fillers do not provide coverage, since their refractive index is too close to the refractive index of the paint’s binders. When dry, fillers are normally white, but when fully wetted with binders they become transparent. They are used to adjust the paint’s viscosity, and the hardness, gloss, filling capacity, and mechanical and physical properties of the paint film. Among the most commonly used fillers are calcite, kaolin and talcum. Synthetic amorphous silica is the most commonly used flatting agent.
T I K K U R I L A O Y I N D U S T R Y 3I N D U S T R I A L W O O D F I N I S H I N G
1.3 Thinners
Except for water, thinners are Volatile Organic Compounds (VOC). They may consist of individual solvents or solvent mixtures. Thinners reduce the paint’s viscosity to the desired level.
Thinners are used to control the paint’s application properties, leveling and drying. Thinners evaporate from the painted surface as the paint dries. The solvents contained in the paint determine the paint’s fire classification. Furthermore, the volatility characteristics of solvents determine the paint’s application properties, film formation, leveling and drying.
The dissolving power of solvents varies in such a way that different solvents dissolve different binders. Both the product data sheet and label will indicate the most suitable thinner for the paint. Indeed, the wrong thinner can ruin the paint, for example due to the binder not maintaining its soluble form, but solidifying in the paint instead. Therefore, the solvent that is the slowest to evaporate in the paint must always be that which is suitable for the paint’s binder mixture – otherwise the paint’s gloss will be significantly reduced.
In water-borne paints as well, small quantities of slowly evaporating solvents are generally used. In such a case, they are called co-solvents. These soften the binder particles and make them stick together to form a cohesive film during the drying phase. The harder the binder, the more co-solvents are needed in the paint in order for the paint to form a cohesive film without cracks and border grooves. The co-solvents used slow down the drying of the paint.
1.4 Additives
Additives are used to improve the different properties of paint. Paint products generally contain very small quantities of additives, although they can critically improve the various properties of the paint. Additives may also be necessary for facilitating the manufacture of paint.
In alkyd paints, driers are used to speed the drying of the paint film. Thickeners are used in water-borne products. Thickeners provide the paint with the desired viscosity and prevent it from sagging when applied. Anti-mould agents are added to outdoor products. In addition, dispersion agents may be used to facilitate the grinding of pigments into the paint; levelling agents may be used to provide a smoother painted surface without fish eyes. Wetting agents are used to ascertain that the paint is capable of wetting the substrate in order to produce a cohesive and even paint film. Adding anti-foaming agents will ensure that no air bubbles remain in the paint film. Photo initiators are added to UV products in order to allow them to dry in the UV light.

4 T I K K U R I L A O Y I N D U S T R Y I N D U S T R I A L W O O D F I N I S H I N G
Paint products can be divided into different groups based on their intended purpose of use. In the wood
industry, putties, stains, wood stains, wood perservatives, lacquers, paints, hardeners and thinners are commonly used.
2.1 Putties
Products that are very thick in terms of their viscosity are commonly called putties. They are used for fillingthe holes, crevices and cracks in raw wood, and for trimming the wood surface. The putty must be easy to apply, filling capacity, and as non-shrinking as possible. Putties can be applied either with a putty knife or capacity using a putty box and either a light or heavy putty machine.
Alkyd resins, nitro cellulose, latex and epoxy and urethane resins can be used as binders for putty. Putties are available in either colorless or white form, or in various brown colors resembling those of different wood species.
2.2 Stains
Stains are soluble dyestuffs or pigments or solvents that contain pigments. They are used to stain wood surfaces without covering the structure and pattern of the wood. Due to the low surface tension of stains, a deep and even staining is achieved in most types of wood. Stains
are normally not used alone – instead, one or two layers of lacquer are applied on top.Different shades of stains are available based on several different color cards. Both solvent-borne and water-borne stains are available on the market. The following should be borne in mind when staining:• Check whether a current color model is available in order to ascertain whether the resulting shade is correct. Stain color models fade, yellow, or change color due to the passing of time and because of light exposure.• Wood species and different timber lots affect the final colour of the stain. Check to ensure that the stain used accomplishes the right shade of colour for the wood material used.• Sanding affects the final shade and appearance of the stain on the wood. A coarser sanding will open the wood’s cell tissue more, enhancing the absorption of the stain into the wood and colouring it more evenly. Sanding too finely may close the wood surface, causing some of the stain to remain wet on top of the wood. This will lead to a blotchy appearance, especially in large items.• The application method affects the strength of the stain.• The chosen lacquer type affects the final shade of the stain.• Stains can be diluted with a solvent, causing the color to become a lighter shade.• Stains can also be mixed with lacquer, giving the stained surface a more even colour. However, the stain will no longer highlight the differences between spring and summer growth rings. Color differences appearing on unevenly coloured wood can be evened out in the same way.• A wetting lacquer is the primary choice for use on top of stain.• The sanding of the sealer is facilitated by the use of stains that cause the substrate to swell as little as possible.
2.3 Wood preservatives
Wood preservatives are finishing materials, whose purpose is to protect a wood surface in outdoor use from mould, decay, fungal organisms and bluing. Wood
2. Different types of coatings and their application methods
Figure 1. Putty knives used for applying putty.

5I N D U S T R I A L W O O D F I N I S H I N G
stains ordinarily contain a binder and organic biocides. A wood preservative should penetrate deep into the
wood and prevent it from absorbing excessive moisture. The deeper the active ingredients are made to penetrate, the better they will protect the wood material. In order for the wood preservative to be absorbed as deeply into the wood as possible, the product’s viscosity must be low. A vacuum device can also be used to enhance absorption, the low pressure pushing the wood stain into the wood. Wood stains may be used in either colourless or colourful form. Tinted wood preservatives contain weatherproof coloured pigments.
2.4 Lacquers
Lacquers are finishing materials that form a transparent film as they dry. The wood industry commonly uses acid-catalysed, polyurethane, water-borne and UV-hardening lacquers.
The substrate and the structure and form of the item to be coated affect the choice of lacquer and finishing method. Furthermore, the compatibility of the lacquer and wood type must also be taken into consideration, since incompatibility may cause colour disturbances, among other things. For example, acid catalysed lacquer will turn green on palisander. Pre-treatment, drying and gluing of the substrate also impact on the end result of lacquering.
Using thin lacquers, i.e. those with low solids content, produces a result – as the lacquer penetrates into the pores of the wood – that adapts to the form of the wood surface. In open-grained wood, thin lacquer should always be used in order to avoid the formation of air-bubbles. When lacquers with a high solid content, and/or thick layers of lacquer are used, the wood’s surface will easily adopt a “dead” appearance.
2.4.1 Sanding sealersThe most important properties of sanding sealers are easy sanding and quick drying. The wood industry commonly uses one-component sealers that are easy to use and quick to dry.
Due to wetting, the wood substrates colors will turn more or less dark depending on the type of lacquer used. This wetting causes the substrate to darken. A stronger wetting of the wood may be desirable when lacquering stained surfaces or dark wood species. When lacquering light coloured wood species, less wetting is desirable, allowing the wood substrate to remain naturally light. The degree of lightness can be increased by mixing a white titanium-dioxide pigment with the lacquer – this will
also reduce the yellowing that results from the impact of UV light.
2.4.2 Top lacquersThe most important properties of top lacquers are mechanical abrasion resistance and chemical resis-tance. Lacquers suitable for outdoor use must also be weather resistant and able to withstand the dimensional changes of the wood, which means they must be elastic. A similar elasticity is required of lacquers intended for humid conditions.
2.5 Paints
Ordinarily, the same raw materials are used in paints as in lacquers. The main difference between the two is that in paints, coloured pigments are used, while in lacquers they are not. The pigments provide the shade and coverage characteristic of paints. Shades of colour are created in a controlled manner using a tinting machine, tinting formulas, different coloured pigments and base paints. In addition, paints have a better filling capacity; they also protect the substrate more effectively against e.g. UV light.
Often, it is mistakenly thought that paint will cover up all defects discovered in the substrate during pre-treatment. In painting, preparatory work and choosing the right method and paint is a prerequisite for a high-quality end result.
There are sealers and top paints, just as there are priming and top lacquers. The most important properties of primers are easy sandability, quick drying and good filling capacity. Correspondingly, the most important properties of top paints are mechanical abrasion resistance and chemical resistance.
2.6 Hardeners
Hardeners are substances that are mixed into the paint, producing a hardening reaction. Hardeners can be divided into hardeners and catalysts. A hardener participates in the drying reaction, forming a film with either the lacquer or the paint. On the other hand, a catalyst only catalyzes, i.e. speeds up the reaction – it does not participate in the reaction itself.
In polyurethane and epoxy coatings, a hardener is used as a second component, while in acid catalysed coatings a catalyst is used. In dosing both the hardener and the catalyst, detailed instructions should be closely adhered to in order to obtain a successful result. The amount of hardener required is always calculated individually for each product.
2. Different types of coatings and their application methods

6 T I K K U R I L A O Y I N D U S T R Y I N D U S T R I A L W O O D F I N I S H I N G
2.7 Thinners
Thinners are used primarily for achieving a form for the coating which allows it to be applied on the desired substrate. They are also used to dissolve the binder and give the coating good leveling properties. Thinners can also be used to affect the wetting of the substrate and to facilitate the formation of a flawless film by adjusting the speed of evaporation. As a result of quick evaporation, the film settles quickly. Slower evaporation allows the film to level off more evenly, but also introduces a greater risk of sagging.
In an industrial line, painted products containing slowly evaporating solvents also become more difficult to stack. The thinner is often chosen bearing in mind the customer line speed and the stacking speed.
Thinner is usually a mixture of fast, medium and slow solvents. The dissolving power of the solvent may be limited to one or more types of binder.
Thinners are formulated in order to ensure that each coating receives the intended properties. For different paints and lacquers, only the thinner intended for a given paint or lacquer should be used. Most finishing problems occur as a result of unsuitable thinners or their being used in the wrong quantity. When using thinners, the recommendations mentioned in the product data sheet should be followed. Issues related to the protection of workers and the environment also affect the choice of thinner.

T I K K U R I L A O Y I N D U S T R Y 7I N D U S T R I A L W O O D F I N I S H I N G
3.1 Wood
In finishing, different wood species have different properties. For the best possible result, one should be aware of the special properties of various wood species before finishing. The properties of different wood species also determine for which use each species is best suited. Birch, for example, is relatively hard and elastic, which is why it is often used as veneer in plywood and bent furniture structures. On the other hand, its resistance to humidity and decay are low, and it is not therefore recommended for outdoor use as such.
Wood species suitable for outdoor use include spruce, larch and pine. They withstand changes in humidity without cracking. Also, their wood material is resinous, which protects them against external strain. However, unfinished wood material is never recommended for use outdoors. Coniferous wood may, however, be used for indoor products, such as panels, while pine may be used in furniture.
3.1.1 The structure of wood
Wood’s structure consists of the core, core wood, heartwood, sapwood and bark. The core, which consists primarily of starch, stores nutrients for the next phase of annual growth and branches. In the lower trunk, the core is dead. Core wood, which consists of the 10-15 innermost annual rings,
has a different cellular structure to later rings. This wood always contains knots and cracks easily. In terms of its quality, it is the weakest part of the trunk. Heartwood is dead wood material that acts as a supporting “pillar” for the living sapwood. In many wood species, heartwood is darker than sapwood, and is usually the most valuable part of the trunk. As
the tree grows sturdier, the share of heartwood grows. Sapwood, i.e. the laburnum, is living wood, where water and nutrients are transferred from the roots to the top. In light wood species, such as spruce, birch and aspen, heartwood and sapwood are barely distinguishable from one another. The bark consists of several layers, and is the outermost layer of the trunk.
Springwood, summerwood, annual rings, pith rays, and the phloem and cambium located under the bark layer also form distinct parts of the structure of wood. Springwood is formed early in the growth season, as the tree begins to create new annual growth. Springwood can be distinctly seen as a lighter ring in the wood material. In hardwood, the width of springwood is almost constant regardless of the speed of growth of the tree.
Summerwood is formed in the wood material during the summer. It is darker in color than springwood, due to the tree growing faster during the spring, and having a looser cell structure compared to the summer growth season. In softwood, the width of summerwood is almost constant. Moreover, dense and hard wood is desirable in terms of quality. Good-quality hardwood is the result of fast growth, while slow growth is advantageous for softwood. Together, springwood and summerwood are known as the annual rings. Summerwood is harder than springwood, and therefore the quantity of summerwood in the wood material has a significant impact on the wood’s resistance properties. Thicker cell walls and smaller lumens also contribute to the better resistance properties of summerwood, making it denser than springwood.
In the cross-sectional area of many wood species, thin lines can be seen running radially from the core toward the perimeter. These are known as pith rays – their task is to transfer water and nutrients from the surface layer to the living, interior parts of the trunk. The size of pith rays varies according to the wood species. In many wood species, pith rays are invisible to the naked eye, whereas in others, such as oak, they are clearly visible. When the wood is split in line with the ray, a mirror image of the pith rays can be seen in the splitting surface. This kind of decorative patterning is typical of oak and maple, among others.
3. Wood structure and different types of wood
Figure 2. The structure of wood
8 T I K K U R I L A O Y I N D U S T R Y I N D U S T R I A L W O O D F I N I S H I N G
into consideration when designing structures and details. Springwood is more porous than summerwood, which means it shrinks more drastically when drying. As a result of intense drying, the wood material splits crosswise. With finishing, the wood’s reactivity to humidity can be limited and the useful life of wood products thereby extended.
3.2.2 HumidityThe moisture content of wood has a significant impact on the wood’s strength below the saturation point. Generally speaking, the strength properties of wood improve when the moisture content diminishes. The moisture content of wood intended for indoor use should be 8-12%, while that of wood intended for outdoor use should be 12-15%. Before the wood is processed and finished, its moisture content should be within the aforementioned limits in order to ensure the high quality and longevity of the final product.
Storing and using wood in humid circumstances for long periods of time exposes it to damage caused by mould, fungi and decomposition. In practice, this can be prevented using a well-functioning finishing compound and well-designed structures.
3.2.3 TemperatureThe mechanical properties of wood diminish upon heating. When exposed to high temperatures for long periods, the strength properties of wood diminish. Nowadays, this is used to advantage in treating wood thermally. The strength properties of thermally treated wood are not as good as those of untreated wood – although at the same time, the humidity resistance, dimensional stability and decay and fungal resistance properties improve.
3.2.4 TimeAging does not diminish wood’s capacity for resistance. With age, however, micro-organisms that live in wood, as well as a continuous load, diminish its resistance properties. Constant changes in circumstances and strain diminish resistance more than stable circumstances and strain. Therefore, it is important – especially when external stress is present – to protect the wood surface by using finishing materials.
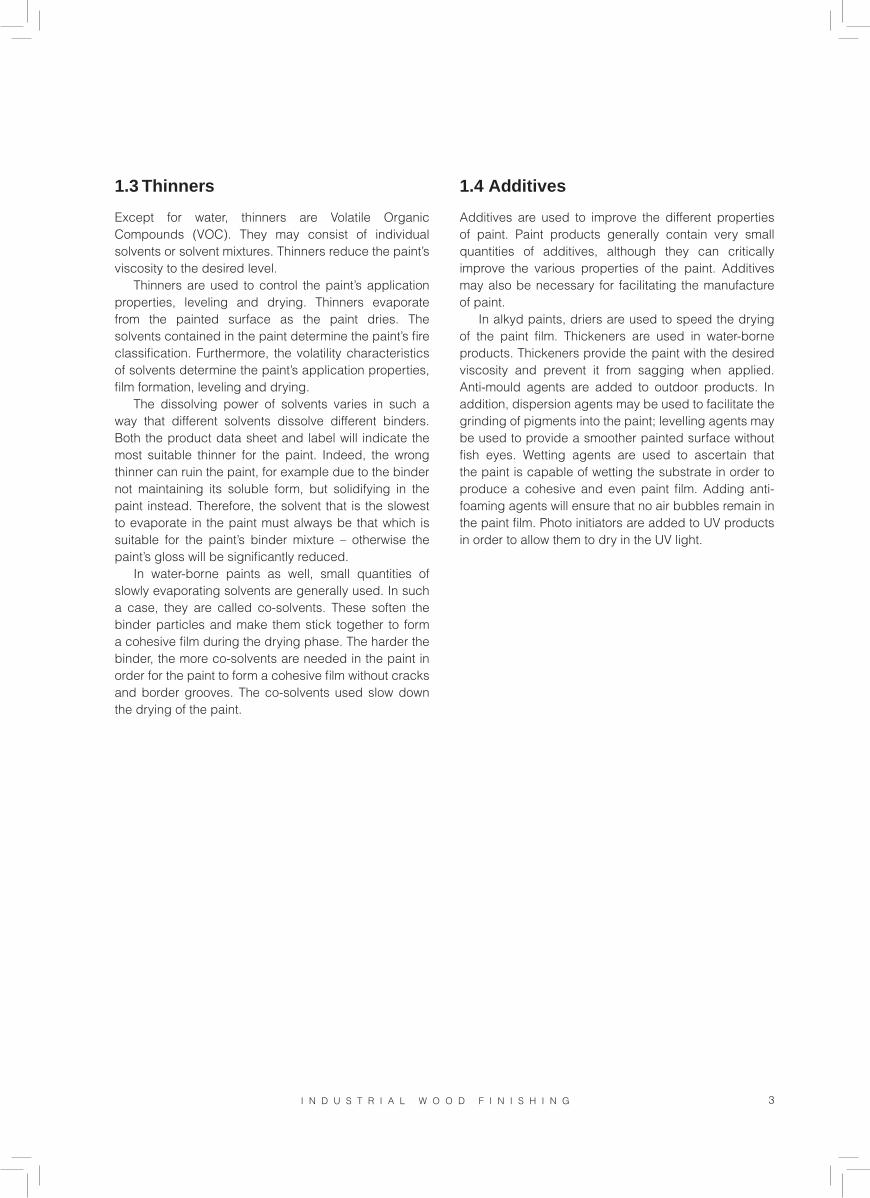
3.1.2 BranchesNormally, branches develop at the root of the top growth; hence, they originate in the core. These kinds of branches are known as core branches. In coniferous trees, these branches grow in regular layers known as curly branches. The growth of branches in spruces is not quite as regular – instead, smaller sprigs grow in between layers of branches. These are often called pin branches in sawn timber. The core branches of deciduous trees do not develop as regularly – instead, they branch out without a set order.
In terms of finishing, the branches of hardwood trees have no significance. However, the branches of coniferous trees present special requirements for finishing. Coniferous wood felled in the spring, early in the growing season, is likely to continue transferring the tree’s nutrients for a long time after the tree has been felled. In a coniferous tree, this kind of resinous material is apt to seep out rather easily at the knots. Resin as such does not cause quality defects in finishing, but the extractives released from the knot color the finishing material yellow. This is particularly visible when the goal of finishing is to lighten the wood material or paint it white. The shade of the knot changes to yellow after only a few months of aging. This yellowing of the knot cannot be completely prevented; it is possible, however, to slow down the dyeing by choosing the right finishing materials.
3.2 Properties of wood
3.2.1 The living woodWood is an anisotropic substance, i.e. it swells and shrinks in different directions in different ways. Longitudinally, its reactivity to humidity is low, although its transverse reactivity may be high. This must be taken
Figure 3. Pine branches.
T I K K U R I L A O Y I N D U S T R Y 9I N D U S T R I A L W O O D F I N I S H I N G
3.3 Wood speciesThe most common wood species used in the wood industry include pine, spruce, birch, oak, beech and ash. In addition, several other wood species are used for various purposes, based on properties such as appearance, lightness and resistance capacity. In addition to the aforementioned wood species, aspen, elm, juniper, linden, rowan, goat willow, alder, bird cherry and maple are used in the wood industry. Some wood species cannot be used due to lack of sufficient quantities of wood material in good condition.
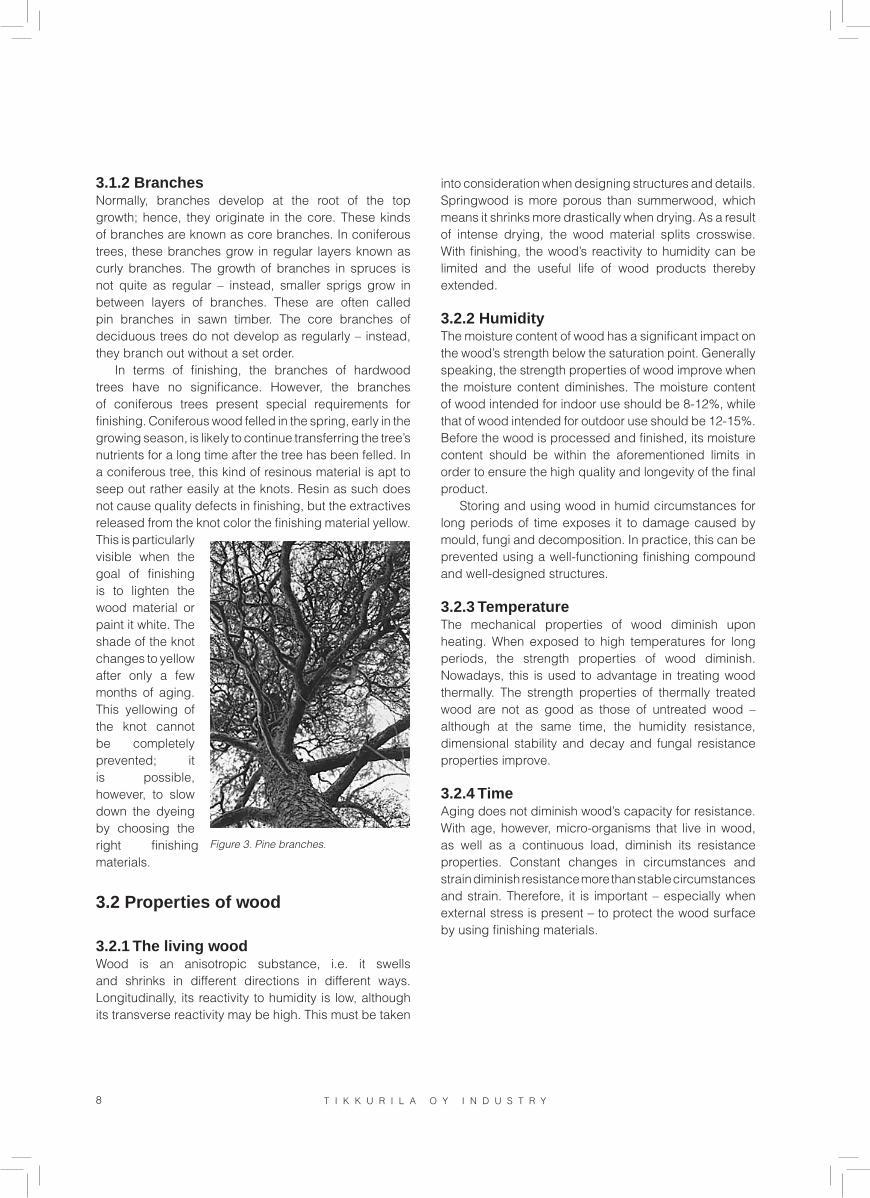
3.3.1 PinePine has spread to nearly all of Europe, and vast areas of Siberia. Dark heartwood is relatively decay-resistant, while sapwood is lighter. On the other hand, pinewood is quite hard – to a large extent due to its rapid growth speed. Pinewood is therefore not very elastic and breaks easily.
Wood withstands fluctuations in humidity relatively well without cracking. Pinewood that is suitable for the carpentry industry comes from a tree that has a breast-height diameter of at least 25 cm, and where the portions that are knotless, dry-knotted and healthy-knotted are clearly visible. Air-dry timber weighs approximately 540 kg/m3. High-quality pinewood is evenly colored.
Pinewood is used for interior decoration, carpentry products, boat building and as a raw material in the log, construction and packaging industries. It is also used for manufacturing furniture, panels, windows and doors, and as a raw material for decorative and utility items. Additionally, it is used for making moldings, cakes of glue boards, panels and wood boards.
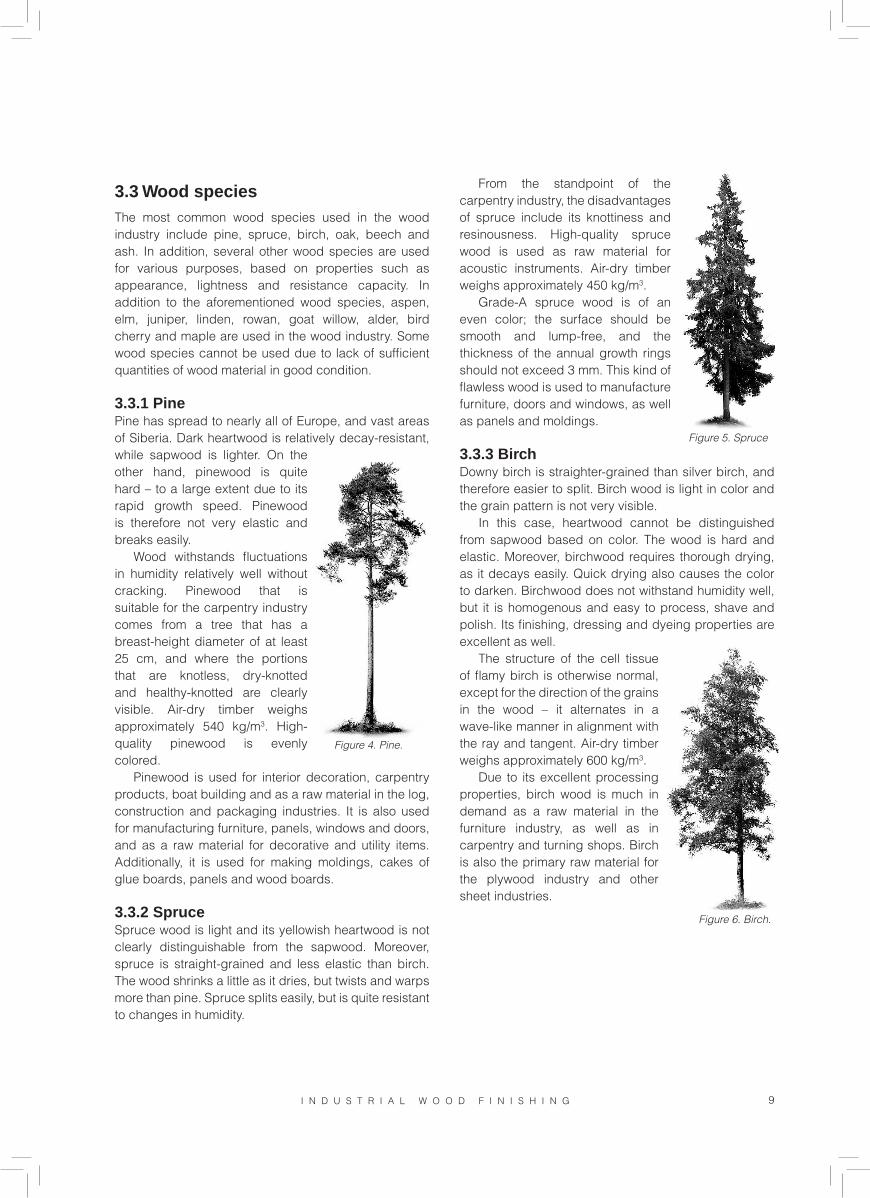
3.3.2 SpruceSpruce wood is light and its yellowish heartwood is not clearly distinguishable from the sapwood. Moreover, spruce is straight-grained and less elastic than birch. The wood shrinks a little as it dries, but twists and warps more than pine. Spruce splits easily, but is quite resistant to changes in humidity.
From the standpoint of the carpentry industry, the disadvantages of spruce include its knottiness and resinousness. High-quality spruce wood is used as raw material for acoustic instruments. Air-dry timber weighs approximately 450 kg/m3.
Grade-A spruce wood is of an even color; the surface should be smooth and lump-free, and the thickness of the annual growth rings should not exceed 3 mm. This kind of flawless wood is used to manufacture furniture, doors and windows, as well as panels and moldings.
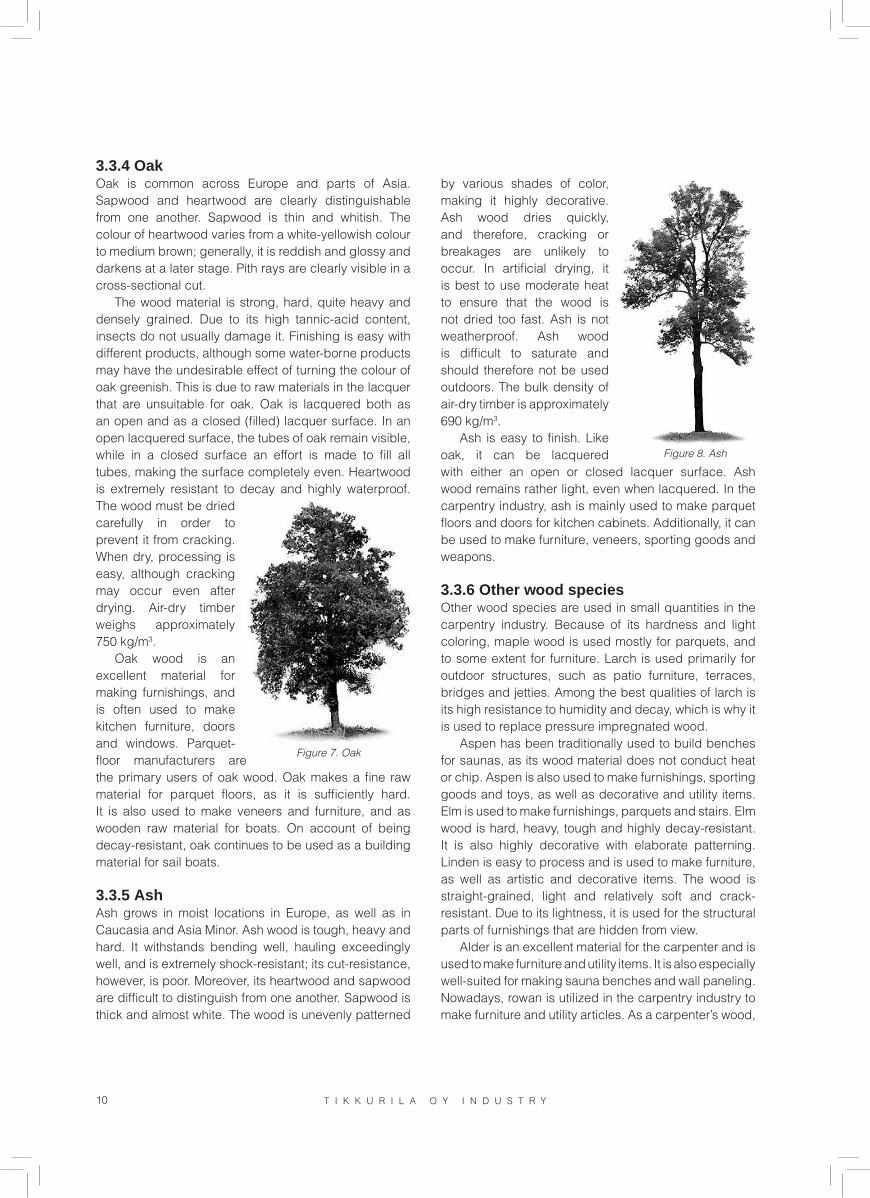
3.3.3 BirchDowny birch is straighter-grained than silver birch, and therefore easier to split. Birch wood is light in color and the grain pattern is not very visible.
In this case, heartwood cannot be distinguished from sapwood based on color. The wood is hard and elastic. Moreover, birchwood requires thorough drying, as it decays easily. Quick drying also causes the color to darken. Birchwood does not withstand humidity well, but it is homogenous and easy to process, shave and polish. Its finishing, dressing and dyeing properties are excellent as well.
The structure of the cell tissue of flamy birch is otherwise normal, except for the direction of the grains in the wood – it alternates in a wave-like manner in alignment with the ray and tangent. Air-dry timber weighs approximately 600 kg/m3.
Due to its excellent processing properties, birch wood is much in demand as a raw material in the furniture industry, as well as in carpentry and turning shops. Birch is also the primary raw material for the plywood industry and other sheet industries.
Figure 4. Pine.
Figure 5. Spruce
Figure 6. Birch.
10 T I K K U R I L A O Y I N D U S T R Y I N D U S T R I A L W O O D F I N I S H I N G
3.3.4 OakOak is common across Europe and parts of Asia. Sapwood and heartwood are clearly distinguishable from one another. Sapwood is thin and whitish. The colour of heartwood varies from a white-yellowish colour to medium brown; generally, it is reddish and glossy and darkens at a later stage. Pith rays are clearly visible in a cross-sectional cut.
The wood material is strong, hard, quite heavy and densely grained. Due to its high tannic-acid content, insects do not usually damage it. Finishing is easy with different products, although some water-borne products may have the undesirable effect of turning the colour of oak greenish. This is due to raw materials in the lacquer that are unsuitable for oak. Oak is lacquered both as an open and as a closed (filled) lacquer surface. In an open lacquered surface, the tubes of oak remain visible, while in a closed surface an effort is made to fill all tubes, making the surface completely even. Heartwood is extremely resistant to decay and highly waterproof. The wood must be dried carefully in order to prevent it from cracking. When dry, processing is easy, although cracking may occur even after drying. Air-dry timber weighs approximately 750 kg/m3.
Oak wood is an excellent material for making furnishings, and is often used to make kitchen furniture, doors and windows. Parquet-floor manufacturers are the primary users of oak wood. Oak makes a fine raw material for parquet floors, as it is sufficiently hard. It is also used to make veneers and furniture, and as wooden raw material for boats. On account of being decay-resistant, oak continues to be used as a building material for sail boats.
3.3.5 AshAsh grows in moist locations in Europe, as well as in Caucasia and Asia Minor. Ash wood is tough, heavy and hard. It withstands bending well, hauling exceedingly well, and is extremely shock-resistant; its cut-resistance, however, is poor. Moreover, its heartwood and sapwood are difficult to distinguish from one another. Sapwood is thick and almost white. The wood is unevenly patterned
by various shades of color, making it highly decorative. Ash wood dries quickly, and therefore, cracking or breakages are unlikely to occur. In artificial drying, it is best to use moderate heat to ensure that the wood is not dried too fast. Ash is not weatherproof. Ash wood is difficult to saturate and should therefore not be used outdoors. The bulk density of air-dry timber is approximately 690 kg/m3.
Ash is easy to finish. Like oak, it can be lacquered with either an open or closed lacquer surface. Ash wood remains rather light, even when lacquered. In the carpentry industry, ash is mainly used to make parquet floors and doors for kitchen cabinets. Additionally, it can be used to make furniture, veneers, sporting goods and weapons.
3.3.6 Other wood speciesOther wood species are used in small quantities in the carpentry industry. Because of its hardness and light coloring, maple wood is used mostly for parquets, and to some extent for furniture. Larch is used primarily for outdoor structures, such as patio furniture, terraces, bridges and jetties. Among the best qualities of larch is its high resistance to humidity and decay, which is why it is used to replace pressure impregnated wood.
Aspen has been traditionally used to build benches for saunas, as its wood material does not conduct heat or chip. Aspen is also used to make furnishings, sporting goods and toys, as well as decorative and utility items. Elm is used to make furnishings, parquets and stairs. Elm wood is hard, heavy, tough and highly decay-resistant. It is also highly decorative with elaborate patterning. Linden is easy to process and is used to make furniture, as well as artistic and decorative items. The wood is straight-grained, light and relatively soft and crack-resistant. Due to its lightness, it is used for the structural parts of furnishings that are hidden from view.
Alder is an excellent material for the carpenter and is used to make furniture and utility items. It is also especially well-suited for making sauna benches and wall paneling. Nowadays, rowan is utilized in the carpentry industry to make furniture and utility articles. As a carpenter’s wood,
Figure 7. Oak
Figure 8. Ash
T I K K U R I L A O Y I N D U S T R Y 11I N D U S T R I A L W O O D F I N I S H I N G
the value of rowan is on the rise, due to the wood’s relative hardness, resilience and elasticity. Bird cherry is used to some extent in furniture making. This wood is relatively soft, elastic and easy to process, giving it the properties required of a wood suited to bendable structures. The basic color of curly birch is a light yellowish tone, with inconsistent patterning. Its annual rings are wavy and blotched with brown curly cells. The wood is hard and difficult to process. It is used for high-quality interior decorating and furniture; to some extent it is also used to make parquet floors.
In addition to these domestic wood species, many other wood species are used in Finland, as well as in other countries – some of them grow wild in Europe, and some in Asia and Africa. Some of the best-known foreign wood species include mahogany, teak, merbau, acacia, walnut, abachi, doussie and wenge. When finishing untypical wood species, it is recommended that an adhesion test be performed in advance, since these wood species may contain wood tanning materials that reduce adhesive capacity. This also represents an opportunity to check the dyeing capacity of the wood before finishing larger surfaces.
3.4 Board materials
Various board materials are used in the wood industry as wall materials, in door and window constructions and as a framework for furniture and furnishings.
3.4.1 FibreboardsThe raw material for fibreboard comes primarily from wood industry waste wood. Paper wood from birch is also used to some extent. Fibreboards are divided into three groups according to their densities: hardboards in excess of 800 kg/m3, semi-hard boards of 300-800 kg/m3 and soft boards under 350 kg/m3.
Fibreboards are intended for inside lining, while soft boards are also used as thermal insulation and windshield panels.
In Finland, fibreboard is manufactured using what is known as the wet process. Wood chips are fiberized and the resulting pulp pulverized. The binding between the fibers is based primarily on couching. Water is added to the fibers; sometimes alongside additives such as glue. The wet pulp is directed into a wire, where excessive water is squeezed out of it. After the fibrous web has passed through the back-up cylinders, it is cut into sheets that are either dried (soft boards) or pressed (hard and semi-hard boards). After pressing, the sheets
are heat-treated in order to increase their stength.
3.4.2 MDF and HDF boardsMDF and HDF boards are frequently used in objects where different patterns are created on the board material surface. The kitchen furniture industry uses MDF boards (Medium Density Fibreboard) in painted doors. To some extent, MDF boards are also used in furniture parts with a level surface, such as table tops when it is desirable to rework the edges of the pieces to make them more prominent. HDF boards (High Density Fibreboard) are used in objects that require a higher degree of humidity resistance than that of MDF, for example, in exterior doors.
MDF board is manufactured in the same way as fibreboard (3.4.1). The main difference is the multiplicity of the wood used in MDF boards. Different wood species and their mixtures, as well as poor-quality wood, twigs, thin waste wood, hardwood and any wood material not used by the wood industry can be used in MDF boards. The properties of MDF boards, then, are the sum total of all the materials used to manufacture them.
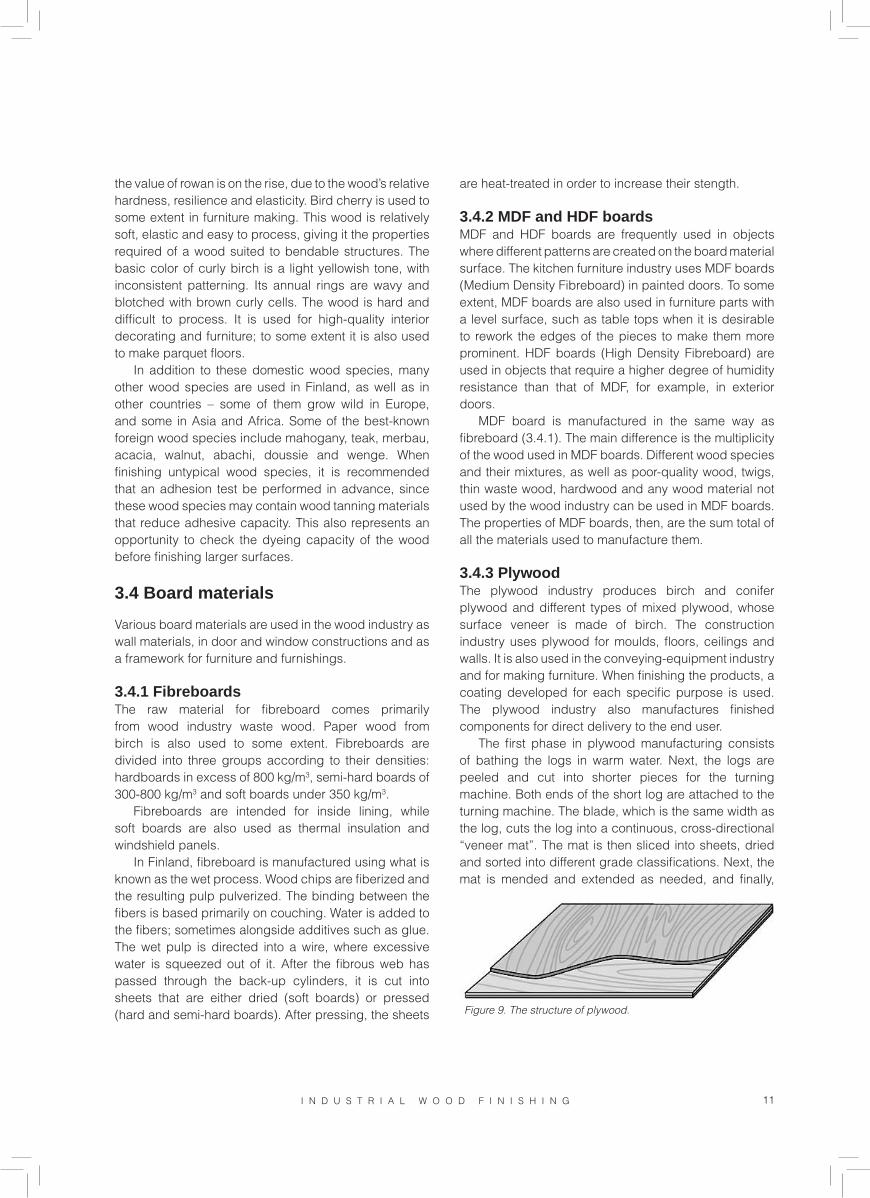
3.4.3 PlywoodThe plywood industry produces birch and conifer plywood and different types of mixed plywood, whose surface veneer is made of birch. The construction industry uses plywood for moulds, floors, ceilings and walls. It is also used in the conveying-equipment industry and for making furniture. When finishing the products, a coating developed for each specific purpose is used. The plywood industry also manufactures finished components for direct delivery to the end user.
The first phase in plywood manufacturing consists of bathing the logs in warm water. Next, the logs are peeled and cut into shorter pieces for the turning machine. Both ends of the short log are attached to the turning machine. The blade, which is the same width as the log, cuts the log into a continuous, cross-directional “veneer mat”. The mat is then sliced into sheets, dried and sorted into different grade classifications. Next, the mat is mended and extended as needed, and finally,
Figure 9. The structure of plywood.

12 T I K K U R I L A O Y I N D U S T R Y
glued into boards. The boards are then pressed, dried and sawn to measure. The surfaces are also sanded and often refined with different coatings.
3.4.4 ChipboardsChipboard is made of wood chips and sawdust, and is used for many different purposes: in construction, it is used for structures, interior decorating boards, lining, and fixed furnishings; in the construction-carpentry industry, chipboard is used for furniture and closets. The furniture industry uses chipboard as a framework for flat parts of furniture.
Chipboard manufacturing begins with drying the wood chips and sorting them according to size. Then, the chips are joined together with glue that hardens when heated. The chip and glue mixture is strewn to form layers of pre-form sheets, which are hot-pressed into a continuous sheet. Next, the sheets are cooled and the edges sawn. Finally, the sheets are cut into saleable size, sanded and sorted. When manufactured, the sheets contain either three or multiple layers – the chips that form the surface layer are generally thinner and smaller than those in the middle layer.
OSB (Oriented Strand Board) is a large chipboard, in which the wood strands are oriented longitudinally. This board was developed in North America, and European production is growing rapidly. OSB is commonly used in some European countries, even for lining outside walls. In terms of its purposes of use, OSB competes with conifer plywood.
Figure 10. The structure of chipboard made of wood chips and sawdust.
T I K K U R I L A O Y I N D U S T R Y 13I N D U S T R I A L W O O D F I N I S H I N G
This section addresses the special requirements and properties of the wood materials most commonly
used in finishing work in the wood industry.
4.1 MDF board
Nowadays, the furniture industry frequently uses MDF board for kitchen and other furniture. In kitchen furnishings, MFD boards are used to make doors, and in furniture, multiform pieces of sheets.
In kitchen furniture, most door models are grooved, i.e. the dense MDF surface material is cut open with the CNC machine blade. The resulting coarser MDF sheet material presents the toughest challenge in terms of finishing. When painted, the cut MDF board moistens, raising the grains upright. This is highly visible when using water-borne paints.
The result is that the bottom of the cut groove is one of the most challenging objects for finishing work. The best quality is achieved by ensuring that the cutting blades and equipment are in the best possible condition when cutting the board. Problems that occur while cutting the board cannot be corrected at the finishing stage.
In practice, the best result in painting a groove is achieved by using solvent-borne paints and by sanding the bottom of the groove after each finishing treatment. Customarily, a combination of two primers and one top-paint is used for grooves.
In water-borne systems, the best result is achieved by spraying a very thin first layer and drying it quickly. The first layer is not sanded; instead, a second, thick layer is painted on top of it using a primer, which is sanded before painting the top coat. These measures aim to prevent grain-raising from occurring twice. A water-borne product will raise the grain upon each application. In terms of furniture parts, the same rules apply as in doors of kitchen furniture made of MDF.
4.2 HDF board
HDF board is used especially in manufacturing exterior doors. The material is denser than the MDF board, making it easier to paint. Also, grain-raising is not as pronounced. When compared to paints used for kitchen
furnishings, the difference is that paints used for HDF are typically outdoor-proof. Otherwise, painting an HDF board does not differ from painting an MDF board.
4.3 Plywood
Plywood is made primarily of rotary-cut veneer by gluing veneers on top of one another, with the grains crosswise. Rotary-cut veneer presents unique requirements for finishing plywood. It is full of grain-aligned cracks containing a lot of air. These cracks are clearly visible when staining the plywood with certain stains.
The air in the cracks creates air bubbles in the lacquered or painted surface. This may constitute a significant visual defect, especially in boards intended for interior decorating purposes. In technical plywood, small air bubbles do not affect other properties of the paint surface. These air bubbles can be eliminated by pre-heating the board, changing to a slower thinner or slowing down the drying process.
Crack defects that emerge during staining are difficult to correct. Indeed, these defects emerge only after staining – the flawed appearance is caused by the stain being absorbed into the edges of the crack in a different manner to even surfaces. Generally, the crack remains lighter than the rest of the surface. An effort can be made to correct staining errors by adding stain in the sealer and top lacquer, enabling the masking of the contrast between the lightness of the crack and the rest of the surface. Another correction method is to add lacquer to the stain before beginning the staining, causing the stain’s more even absorption into different parts of the surface veneer.
In other respects, the finishing of plywood is similar to that of veneered boards.
4. Special requirements of different base materials in finishing work

14 T I K K U R I L A O Y I N D U S T R Y I N D U S T R I A L W O O D F I N I S H I N G
4.4 Solid wood
4.4.1 Pine and sprucePine and spruce are nowadays commonly used as a lining material for both the exteriors and interiors of buildings. Additionally, furniture made of pinewood continues to be popular, especially in Central Europe. When finishing the surface of pine and spruce, the focus of attention should be on the drying temperature. The surface temperature of resinous wood species in the drying oven should not exceed +35°C, as the resin in the wood will then retreat from the wood’s surface, causing a visual defect on the paint and lacquer surface. Momentarily, pine and spruce may withstand temperatures as high as +50°C without any problems arising in their resin.
Pine is also frequently used for making window parts. In such parts, particularly when using water-borne paints, one of the most frequently occurring problems is the yellowing of the knots caused by the resinous material. This yellowing happens over time and can never be completely prevented. Different types of paint prevent the appearance of the yellowing in different ways. This defect, however, is aesthetic only, and the paint film is highly resistant to external stress, even after the yellowing has begun.
4.4.2 Oak and ashIn oak and ash, the grain structure is open and relatively deep. Air is easily retained in the pores of these wood species; in the drying zone, it leaves the wood, breaking the lacquered surface and creating air bubbles. Air-bubble creation is customarily prevented by pre-heating and using slower thinners.
Oakwood contains tannic acid; water-borne lacquer may dye it green. In such an instance, the wood material does not withstand certain ingredients in the lacquer. In order to prevent such dyeing, a different product must be used for base sealing, or another type of lacquer used. The dyed lacquer layer must be sanded off totally and lacquering begun again from the start.
4.4.3 BirchAs a light wood species of even quality, birch is relatively easy to finish. Indeed, growing use of transparent shades of color has made achieving an even surface more difficult. Since the difference in color in springwood and summerwood in birch is so slight, glazing colours – especially in dark shades – is not recommended. Birch will look better when stained conventionally.
Should glazing colours, however, be the only alternative, it is best to test the desired shade on a wood sample first. If the wood sample appears blotchy, the intermediate sanding of the birch must be made either coarser or finer. If the surface is too coarse, stain will be absorbed unevenly; if the surface is too fine, stain will remain in puddles on top of it. Differences in color can be evened out by adding glazing colours color in the surface lacquer.
4.4.4 Tropical hardwoodUnusual tropical wood species have become more common in the parquet industry and in terrace furnishings. The finishing of these wood species can be performed as with normally used finishing materials. However, they are most frequently oiled in order to retain and even deepen their characteristic colour tone.
However, in some tropical wood species the high oil content makes it difficult for the lacquer to adhere to the wood surface. In such instances, the only way to determine adhesive capacity is to conduct a test lacquering using different products. The paint manufacturer can also perform its own product development in terms of special adhesive sealers suitable for particular wood species.

T I K K U R I L A O Y I N D U S T R Y 15I N D U S T R I A L W O O D F I N I S H I N G
alternative support material is backing material made of cloth-woven thread; it is stronger and more stable. Cloth material is recommended for objects which require a very strong and elastic backing material. Cloth materials can be divided into elastic, soft, strong, extremely strong and polyester cloths.
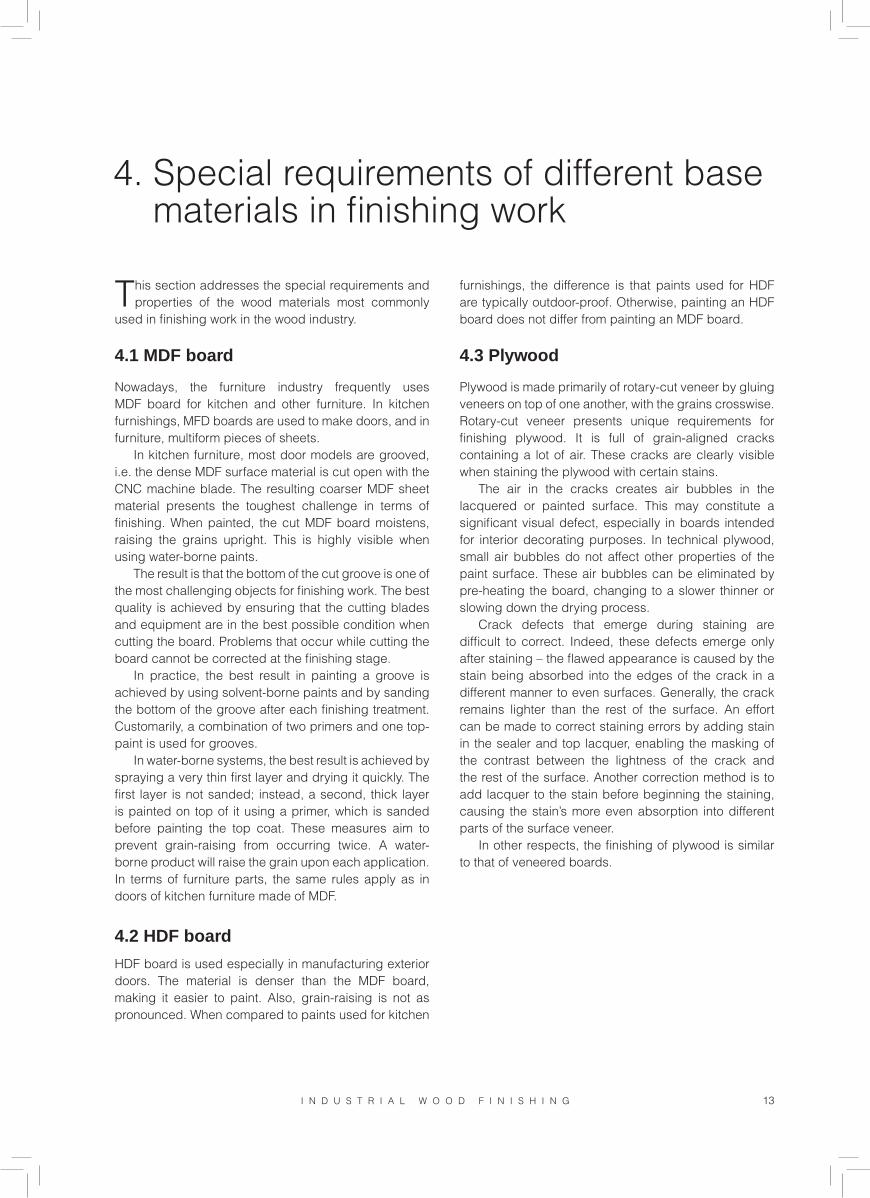
Both natural and synthetic grains and abrasives are available. Synthetic grains are harder and more durable. They are therefore used more frequently, especially in sanding machines. Grains are graded based on a hardness scale from 1 to 10, where the hardest material – diamond – has a value of 10. The most commonly used grains include aluminum oxide and silicon carbide, and to some extent zirconium oxide. Harder grains may be necessary when sanding harder wood materials, such as oak, ash, maple and merbau.
In sand papers, the roughness of the belt is indicated through numerical values. In wood sanding and intermediate sanding, degrees of roughness vary between P16-P1000, where the smaller numbers indicate a coarser sanding, and the larger numbers indicate finer sanding. Calibration and exhaust sanding are normally performed at a roughness of between P36-P60, as an effort is made to remove wood or paint material as effectively is possible.
The sanding roughness generally used in wood sanding is between P80-P220. In sanding, it is customary to move in the direction of finer sanding one step at a time. If calibration sanding is performed at a roughness
Success in wood sanding depends on many factors, such as the wood species, wood quality, the
roughness and velocity of the sanding belt, the backing paper, and the direction of sanding. Success in sanding is always measured by the total sum of the optimal circumstances achieved in all of the factors involved. For example, increasing the speed of the sanding belt does not necessarily improve sanding quality, since at a high belt velocity, the grit overheats and may break, causing the wood surface to burn.
5.1 Sanding methods
In making wooden products, several different sanding methods are needed. These may include calibration sanding, wood sanding, intermediate sanding or exhaust sanding. In industrial finishing, all of these methods may be required. The surface quality is primarily affected by wood sanding and intermediate sanding, whose purpose it is to prepare the wood surface for finishing, and to even out the sealer or primer layer for applying the top coat. Calibration sanding is used to balance the differences in the thickness of sheet-like pieces. Exhaust sanding is primarily used prior to repainting, or in removing a failed finish. Sanding can also be separated into manual and mechanical sanding. The same basic principles apply in each case, although manual sanding is used more frequently for multiform pieces, such as chairs; in such instances sanding belts with a cloth-woven backing are also used more often.
5.2 Sanding belts
The sanding belt consists of a backing material, grains and a binder. The properties of the different parts can be altered and combined to achieve a different sanding result.
Paper is largely used as back material on account of its cost-effectiveness. The thickness of paper may vary. There are six different grades of paper from A to F – the difference is in the weight in grams per m2, and therefore also in thickness. Grade A paper is under 90 g/m2 and Grade F paper is over 250 g/m2. Another
5. Sanding
Aluminium-oxide-based grains yield a plough-like sanding result.
Silicon-carbide based grains yield a shaving-like cutting result.
Figure 11.

16 T I K K U R I L A O Y I N D U S T R Y I N D U S T R I A L W O O D F I N I S H I N G
of P60, the next sanding phase can be done at a roughness of P80 or P100, i.e. when moving forward, one stage of roughness can be skipped. Should the shift be made from P60 directly to P120, the scratches caused by the coarser sanding may remain visible in the finalized surface.
When moving onto the final stage in wood sanding before finishing, a finer degree of coarseness is used. Oak and pine are normally finalized on the relatively coarse P150 belt, while birch, beech, ash and other wood species are normally finalized at a belt coarseness of P180 and even P220.
In intermediate sanding, the roughness normally used is between P220-P1000. The finer the wood sanding before finishing, the finer the roughness that can be used in intermediate sanding. When beginning intermediate sanding, it is best to adhere to the rule of not skipping more than one degree of roughness at a maximum.
The abrasive is glued to the back material with a binder, such as animal-based glue. However, in industrial production plastic glue is most commonly used nowadays, as it is more resistant to the heat created during sanding. The surface structure of sanding products alternates between a closed and open surface structure. In a closed surface structure, the grains are close to one another; in a semi-open surface structure they are a little further apart; and in an open structure they are quite far apart. In coniferous wood species, an open surface structure is often used, preventing the resinous wood material from blocking the sanding-belt structure as quickly as when a closed surface structure is used.
In intermediate sanding, stearate-coated belts can be used, when the desired result is a surface of extremely
high quality. Sanding with stearate-coated belts is less aggressive in the beginning and the result is more even throughout the service-life of the belt. Also, the belt surface is dust and dirt repellent, making it less likely to become clogged. As a result, the belt is more durable, thereby reducing the total costs of sanding. However, the use of stearate belts in old sanding machines is not necessarily recommended. The reason for this is that in old machines the belt is likely to become overheated, as the melting point of stearate is between 110-140°C, depending on the material used. In order to function at optimal capacity, the belt must be efficiently cooled.
Using antistatic belts reduces dust problems. With cleaner machines, sanding belts and surfaces, finishing will yield better results. A reduced dust load enhances the working environment, as well as safety, since the risk of a dust explosion is reduced.
5.3 Instructions for sanding
The item to be sanded must be of an even thickness •throughout in surface sanding.
Do not use excessive power when sanding. With too •much power, the sharp grits will break and slow down the sanding. Light sanding will also produce a better-looking surface, reducing the consumption of lacquer or paint. This saves electricity as well.
To save on sand paper, use an elastic sanding pad •or roller. An appropriate elasticity can be achieved by using thick rubber of 40-50 Shore hardness. This makes surface sanding easier and prolongs the service life of the sanding belt. In calibration sanding, a significantly harder rubber material is used in order to achieve sufficient processing capacity.
Pre-sand the wood so that it is completely free of glue, •dirt and possible scratches. Especially when water-borne stains are used, glue remains will not always dye as well as when using solvent-borne stains.
The sanding must be appropriately divided between •pre-sanding and fine-sanding. If, for example, a system with three sanding belts is used, the first belt can be used to remove 60% of the stock removal produced by the total sanding, while the second and third belts are used to remove 30% and 10%, respectively. In a two-belt system, the division can be 75% with the first sanding belt, and 25% with the second belt. If separate sanding machines are used, the objects can be turned around between sanding phases, and the sanding can be done in the opposite direction.
Fine-sand only until the traces of pre-sanding have •disappeared – no more. This will result in the best
Figure 12. Different surface structures.
Closed surface structure.
Semi-open surface structure.
Open surface structure.
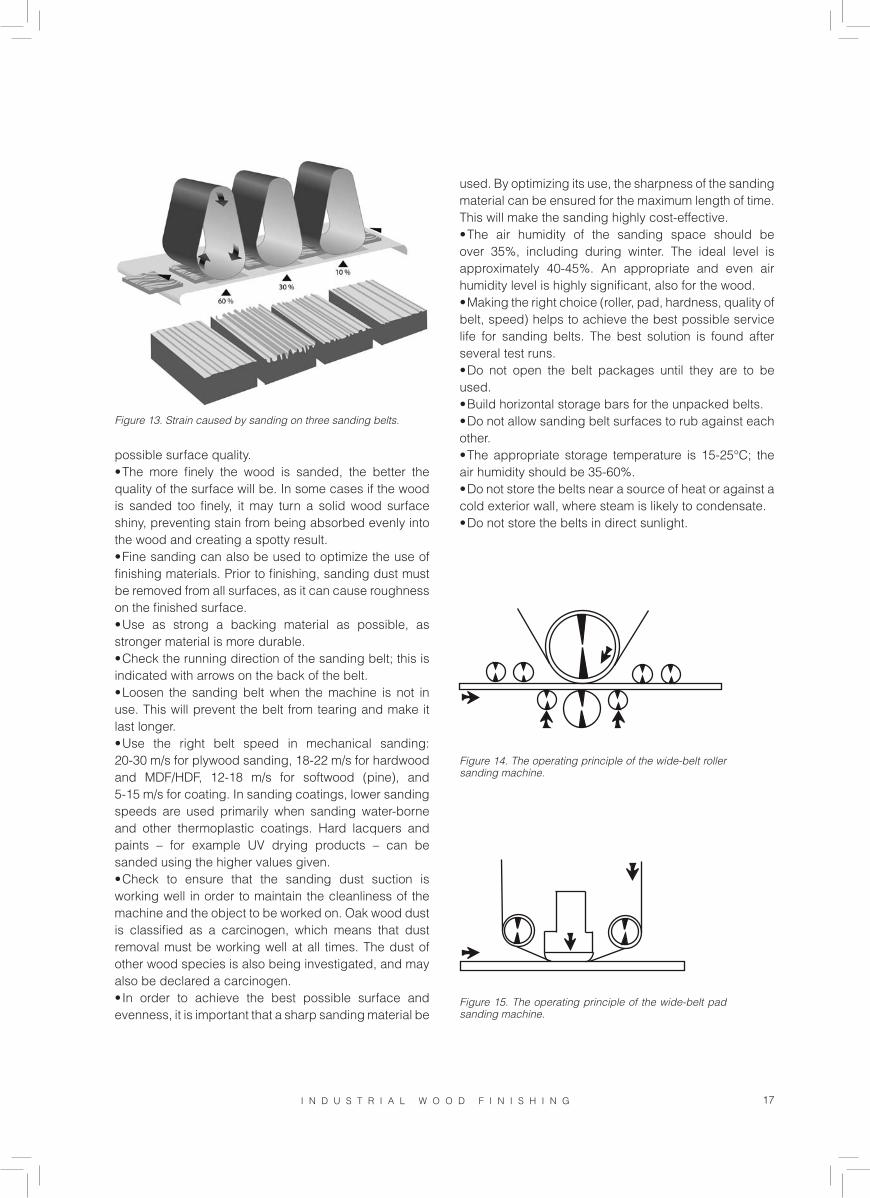
T I K K U R I L A O Y I N D U S T R Y 17I N D U S T R I A L W O O D F I N I S H I N G
Figure 14. The operating principle of the wide-belt roller sanding machine.
Figure 15. The operating principle of the wide-belt pad sanding machine.
possible surface quality.The more finely the wood is sanded, the better the •
quality of the surface will be. In some cases if the wood is sanded too finely, it may turn a solid wood surface shiny, preventing stain from being absorbed evenly into the wood and creating a spotty result.
Fine sanding can also be used to optimize the use of •finishing materials. Prior to finishing, sanding dust must be removed from all surfaces, as it can cause roughness on the finished surface.
Use as strong a backing material as possible, as •stronger material is more durable.
Check the running direction of the sanding belt; this is •indicated with arrows on the back of the belt.
Loosen the sanding belt when the machine is not in •use. This will prevent the belt from tearing and make it last longer.
Use the right belt speed in mechanical sanding: •20-30 m/s for plywood sanding, 18-22 m/s for hardwood and MDF/HDF, 12-18 m/s for softwood (pine), and 5-15 m/s for coating. In sanding coatings, lower sanding speeds are used primarily when sanding water-borne and other thermoplastic coatings. Hard lacquers and paints – for example UV drying products – can be sanded using the higher values given.
Check to ensure that the sanding dust suction is •working well in order to maintain the cleanliness of the machine and the object to be worked on. Oak wood dust is classified as a carcinogen, which means that dust removal must be working well at all times. The dust of other wood species is also being investigated, and may also be declared a carcinogen.
In order to achieve the best possible surface and •evenness, it is important that a sharp sanding material be
used. By optimizing its use, the sharpness of the sanding material can be ensured for the maximum length of time. This will make the sanding highly cost-effective.
The air humidity of the sanding space should be •over 35%, including during winter. The ideal level is approximately 40-45%. An appropriate and even air humidity level is highly significant, also for the wood.
Making the right choice (roller, pad, hardness, quality of •belt, speed) helps to achieve the best possible service life for sanding belts. The best solution is found after several test runs.
Do not open the belt packages until they are to be •used.
Build horizontal storage bars for the unpacked belts. •Do not allow sanding belt surfaces to rub against each •
other.The appropriate storage temperature is 15-25°C; the •
air humidity should be 35-60%.Do not store the belts near a source of heat or against a •
cold exterior wall, where steam is likely to condensate.Do not store the belts in direct sunlight. •
Figure 13. Strain caused by sanding on three sanding belts.

6
5
47
3
3
2
1
1. Pumppu 2, Ejektori3, Poistoilma4, Vesikalvo
5. Ylivuotoreuna6. Riippukuljetin7. Vedenerotuslamellit
18 T I K K U R I L A O Y I N D U S T R Y I N D U S T R I A L W O O D F I N I S H I N G
6. Finishing and coating methods and equipment
6.1 Spraying and spraying equipment
6.1.1 Spraying boothsWhen the objective is to achieve as excellent spraying result as possible, spraying must be performed in a spraying booth. The primary purpose of a spraying booth is to remove the over-sprayed paint particles and solvents from the work space in order to make the work environment more comfortable. The spraying booth must also remove lacquer and paint particles from outgoing air and thereby protect the environment against impurities.
Both dry and wet filtration booths are available. In a wet filtration booth, exhaust air is conducted into water, into which chemicals have been added. As a result, paint particles either rise to the surface or sink to the bottom. The choice of chemical type depends on the type of paint and products used.
In a dry filtration booth, exhaust air goes through a dry filter that consists of sheets or disposable filters made, for example, from paper or fiber glass and placed in a labyrinth-like pattern. The separation capacity of dry filters is 70-90%. Since the pressure difference is small, at approximately 10 kPa, the air flow is relatively low (0.5 m/s using a regular sprayer and 0.3 m/s using an electrostatic sprayer). A dry filter is used primarily in small-
Painting methodOperating
efficiency % Loss
%
Powder coating 97 – 99 1 – 3
Roll 97 – 99 1 – 3
Roller coating 97 – 99 1 – 3
Brush 95 – 97 3 – 5
Curtain coating 95 – 97 3 – 5
Dousing 95 – 97 3 – 5
Vacuum 95 – 97 3 – 5
Dipping 90 – 95 5 – 10
Bell 85 – 95 5 – 15
Hot air conventional spraying statics, 135 kV 85 – 90 10 – 15
Cold air-assisted Airless statics, 75 kV 70 – 80 20 – 30
Hot air conventional spraying statics, 75 kV 70 – 80 20 – 30
Cold air conventional spraying statics, 75 kV 60 – 70 30 – 40
Hot Airless 55 – 70 30 – 45
Cold Airless 50 – 60 40 – 50
Hot air conventional spraying 45 – 55 45 – 55
Cold air conventional spraying 30 – 40 60 – 70
Pump1.
Ejector2.
Exhaust air3.
Water curtain4.
Overflow edge5.
Conveyor6.
Lamella water separators7.
Figure 16. The operating principle of the wet filtration booth.Table 1. Operating efficiency of different painting methods and overspray.
The most important criteria for choosing finishing equipment are dictated by the requirements of
the products manufactured and the factory’s overall finishing needs. This issue will be further addressed in the section entitled Finishing lines. In order to build a well-functioning finishing line, one must also be familiar with the properties of the individual application devices. Each device has its pros and cons that affect its ability to function in the line. Finishing materials may also give additional requirements.
One of the most critical attributes of any device is its operating efficiency. Operating efficiency in painting refers to that portion of the paint to be transferred onto the surface to be painted. However, operating efficiency is always a theoretical numerical value that varies a great deal, depending, for example, on the shape of the product to be painted, line velocity, air circulation and the person who performs the painting work.

T I K K U R I L A O Y I N D U S T R Y 19I N D U S T R I A L W O O D F I N I S H I N G
scale production, although dry booths have become more commonplace, even in larger production facilities, due to their being more economical to operate.
Normally, in a large production facility, the majority of finishing work takes place in a line dedicated to the purpose. A spraying booth is used, for example, in edging the products, or to apply special colors and paint small quantities. Depending on the paint products used, the separated sediment that settles in the bottom or rises to the surface of the wet filtratine booths may be hazardous waste. Therefore, it cannot be deposited in a waste disposal site, and must be brought to a hazardous waste disposal plant to be destroyed. This constitutes a separate cost item for the company. A laboratory specializing in such investigations can determine whether the sediment qualifies for deposit at a waste disposal site.
6.1.2 Conventional spraying Conventional spraying is based on dispersing paint by using compressed air. Compressed air must be as free from condensation and impurities as possible. Compressed air guns have controls for adjusting the width of the spray and fine-tuning the quantity of paint.
The advantages of air conventional spraying include:Even thickness of film. •Formation of a high-quality surface. •Quick adjustment of paint quantity and spray •
pattern.May be used with most types of paint. •Low purchasing and operating costs. •
The disadvantages of conventional spraying include:Low capacity. •Requires large quantities of diluents. •Large over-spraying. •Large formation of paint mist. •Substantial loss of paint. •
Before starting actual spraying, it must be ascertained that the has a suitable viscosity. In addition, the compatibility of the spray gun’s nozzle combination with the intended paint must be checked. The spray pattern, known as the fan, is adjusted by test-spraying on a flat board, for example. At the same time, the amount of paint and pressure are adjusted to the desired level.
6.1.3 Airless sprayingIn airless spraying, the coating is dispersed as mist by using significant differences in pressure levels. The high-pressure coating is pressed through the small opening in the nozzle (see the tables on pages 19 and 20), whence it is dispersed as mist, due to the difference in pressure. The required pressure is generated with a piston pump or a membrane pump. The spraying pressure is usually 70-140 bars.Based on their driving power and operation, airless spraying can be divided into the following categories:
Pressure-operated devices based on piston • pumps.
Electrical devices based on membrane pumps. •Combustion-engine-equipped membrane pumps. •Electrical mechanically driven piston pumps. •Electrical hydraulic-oil piston pumps. •
The advantages of airless spraying include:High capacity. •High viscosity may be used. •Quantity of paint is minor. •A single spraying generates a thicker dry film than •
when air conventional spraying is used.
Figure 17. Conventional spraying
Material to besprayed
Nozzle Spray gun filter diameter
Ø
Wood stains and other products of lowviscosity
0,007” (0,180 mm)
0,011” (0,280 mm)
0,084 mm
0,100 mm0,150 mm
Alkyd paints and acid catalysed paints
0,013” (0,330 mm)
0,015” (0,380 mm)
0,100 mm0,150 mm0,150 mm0,310 mm
Latexes, epoxies andother thick-film paints
0,018” (0,460 mm)
0,021” (0,530 mm)
0,023” (0,580 mm)
0,026” (0,660 mm)
0,310 mm
0,310 mm
0,310 mm
0,310 mm
Fire-retardant paints,spray fillers,special coatings
0,054” (1,370 mm) 0,560 mm
The nozzle spraying angle is chosen according to the shape of the structure to be painted. The most frequently used spraying angle in wood-industry painting is 40°-50°.
Table 2. Dimensions of the nozzle used in high-pressure spraying and the piston nozzle diameters when spraying different types of paints and coatings.

20 T I K K U R I L A O Y I N D U S T R Y I N D U S T R I A L W O O D F I N I S H I N G
The disadvantages of airless spraying include:Some types of paint sag easily. •The spray gun cannot be used to adjust the shape •
of the fan; instead, adjustments are performed by choosing a suitable nozzle. Fine tuning can be done by adjusting the product’s viscosity and by varying the application pressure.
Purchase price is high compared to conventional • sprays.
6.1.4 Air-assisted airless sprayingIn air-assisted high-pressure spraying, both high-pressure and conventional spraying are used to advantage. This method differs from high-pressure spraying in, for example, the following ways:
- The pressure ratio of the feeder pump is 1:15 (1:30 in high-pressure spraying)- The effective pressure is 30-70 bars (100-140 bars in super-high-pressure spraying)
In air-assisted super-high-pressure spraying, the high-pressure nozzle is used to create a fan, into which atomizing air is blown at a pressure of 2-3 bars while the feeding rate is 35-50 l/min.
6.1.5 Electrostatic centrifugal methodUsing this method, the coating is fed into the centre of a rotating plate or bell that rotates at a speed as high s 50.000 r/min (see Figure 19). As a result of the centrifugal force involved, the coating is carried to the edge of the plate, where it is dispersed into particles and charged with electricity. Compressed air may be used to assist in directing the coating mist in the desired direction.
The coating mist is drawn on the surface of the grounded object as a layer equal in film thickness throughout. The paint loss is minor.
6.1.6 Electrostatic sprayingElectrostatic spraying utilizes the electrostatic field that forms between two objects of different voltage levels (see Figure 20).
The more powerful the electric field, the larger is the desired electrostatic impact. The intensity of the field is dependent on the following factors:
1.The voltage between the spray-gun and the object.
The object to be coated is grounded and the difference in voltage is formed by charging the coating particles. In spray-guns, 60 kV voltages are commonly used, since at higher voltages the sprayer draws some of the particles toward himself.
Figure 19. Electrostatic centrifugal method
Figure 18. Airless spraying.
Increase in pressure
Increasein density
Highviscosity
Increase intemperature
Increase insurface tension
Evenness of spray Improves No significance Deteriorates Improves No significance
Capacity Increases Decreases Decreases Increases No effect
Spraying angleEnlarges to acertain point
No significance Diminishes Enlarges Diminishes
Drop size Diminishes No significance Enlarges Diminishes Enlarges
Spray velocity Increases Decreases Decreases Increases No significance
Spray impact force Increases No significance Decreases Increases No significance
Nozzle erosion Increases No significance Decreases Increases No significance
Table 3. Effects of changes in airless spraying.

T I K K U R I L A O Y I N D U S T R Y 21I N D U S T R I A L W O O D F I N I S H I N G
Figure 20. Electrostatic spraying.
2.The spraying distanceThe shorter the distance, the stronger is the electric
field. In practice, however, the spray-gun should not be brought too close to the object. Depending on the kind of device used, the most appropriate distance is 50-250 mm.
Since the electrical conductivity of wood is poor, due to the low humidity levels (8-12%) used in the furniture industry, an appropriate grounding is not achieved.
The conductivity of the coating used for electrostatic spraying of wood must not be as low as the conductivity used for spraying a metal object – instead, an effort is made to use the conductivity of the coating itself to direct the charge to the ground. In order to do so, the coating must always begin at the grounding point.
Should the electrostatic system fail to function properly, improvements may be sought by, for example:
Increasing moisture level of the wood. •Enhancing surface-conductivity of the wood •
(priming coat).Increasing the relative humidity of air in the spraying •
space.Using several clean grounding points. •Using smaller-size hangers. •Reducing the particle size of the coating. •Reducing the air flow in the spraying space. •
Both water-borne and solvent-borne coatings are available for the electrostatic spraying of wood. Electrostatic spraying may be combined with other spraying methods (Airless spraying, conventional spraying, bell spraying etc.). The advantages of this method include:
Minimal overspray. •The object to be coated does not need to be sprayed •
from all sides (time savings).
The special equipment needed and the difficulty of spraying the inside corners may be numbered among the disadvantages of the method.
6.1.7 Spraying with heated coatingIn order to make the spraying of the coating as easy as possible, its viscosity can be reduced. In most cases, varying quantities of water or solvents are added in order to achieve the appropriate viscosity. Another method is to heat the coating (to 40-80°C) before spraying in order to make it sufficiently fluid. Warming the paint allows for savings in water or solvent; also, the coating to be sprayed does not need to be diluted quite as much. The solid content of the coating is increased; thereby the filling capacity of the coating is increased, it provides better coverage, does not sag as easily, and dries faster.
Conventional spraying, airless spraying and electrostatic spraying can be done using heated coating. Heating is based on water, steam, electricity or warm air, depending on the device used.
6.1.8 High-volume conventional spraying(HVLP spraying)This method is based on conventional spraying. The difference, when compared to normal conventional spraying, is that the pressure used is lower, which reduces the back stroke.
In HVLP-spray guns, the coating is atomised by using a large amount of air and low pressure. The air nozzle of a customary spray gun has numerous, small holes. The air nozzle of the HVLP spray gun has a few large holes, and the pistol is equipped with large air channels that cause smaller resistance to air.
In regular compressed air spray guns, a pressure of 3-5 bars is used to atomise the coating. In HVLP spray guns, a pressure of only 0.5-0.7 bars and a large amount of air atomise the coating equally efficiently.
High PressureAir Spray
Figure 21. Airless spraying.

22 T I K K U R I L A O Y I N D U S T R Y I N D U S T R I A L W O O D F I N I S H I N G
With this method, it is possible to heat the atomising as well. Since in this case the coating is not heated, it will last for a long time without gelling. This method has all the benefits of thermal spraying.
6.1.9 Two-component sprayingThis method is commonly used for fast-drying two-component coatings. The primary task of the two-component device is to dose the paint and hardener and mix them prior the spray gun. Due to the coating drying so fast, the part of the equipment where the paint is mixed with the hardener must be washed immediately after finishing the job. For this reason, two-component devices are equipped with a washing pump.
The two-component spraying equipment consists of a working pump, a dosing pump and a mixing unit (static, dynamic). Additional equipment available includes feeding pumps, heaters and washing pumps.
The benefits of this method include:Always the right mixing ratio.• The mixture is always of even quality.• Only a small amount of solvent is needed.• The system is a closed one.• The amount of paint loss is reduced.• The containers are large.• Safety at work is improved.• Colors can be changed at reduced labor costs.• Washing time is shortened.•
6.1.10 Automatic sprayingCoating can be rationalized in the same way as other production methods, for example, through automation. Automatic spraying makes sense when there are long series of similar objects in need of coating. The shape and raw material of the object, and the type of paint to be used, determine the choice of spraying method. The most important requirement of an automatic equipment is reliability of service.
Among the advantages of automatic spraying are the following:
Large capacity. •Even quality. •Reduced labor costs. •Painting is highly economical. •A better working environment. •
The linear, traverse and carousel spraying machines are among the most commonly used automatic equipments. In automatic linear spraying, there are usually three fixed spray guns located above the line. The speed of the linear spraying line is about 30-50 m/min.
A traverse is a machine that moves spraying guns in a linear direction at a constant speed. Normally, the
High Volume-LowPressure Spray
High PressureAir Spray
Figure 23. Airless spraying.
Figure 24. High-volume low-pressure spraying.
High Volume-LowPressure Spray
Figure 22. High-volume low-pressure spraying.
RUISKU-TETTUMAALI
TAKAISINLYÖNTI SI
IRTO
-H
YÖT
YSU
HD
E
HU
KK
AH
UK
KA
HU
KK
AH
UK
KA
RUISKU-TETTUMAALI
TAKAISINLYÖNTI SIIRTO-
HYÖTYSUHDE
HAJOITUSILMApaineessa 4.1 baria
DUOTECHpaineessa 0.7 baria
RUISKU-TETTUMAALI
TAKAISINLYÖNTI SI
IRTO
-H
YÖT
YSU
HD
E
HU
KK
AH
UK
KA
HU
KK
AH
UK
KA
RUISKU-TETTUMAALI
TAKAISINLYÖNTI SIIRTO-
HYÖTYSUHDE
HAJOITUSILMApaineessa 4.1 baria
DUOTECHpaineessa 0.7 baria
Figure 25. Atomising air at a pressure of 4.1 bars.
Figure 26. Duotech at a pressure of 0.7 bars.
SPRAYEDPAINT
SPRAYEDPAINT
TRA
NS
MIS
SIO
NE
FFIC
IEN
CY
TRANSMISSIONEFFICIENCY
BACKSTROKE
BACKSTROKE
LOS
SLO
SS
LOS
SLO
SS
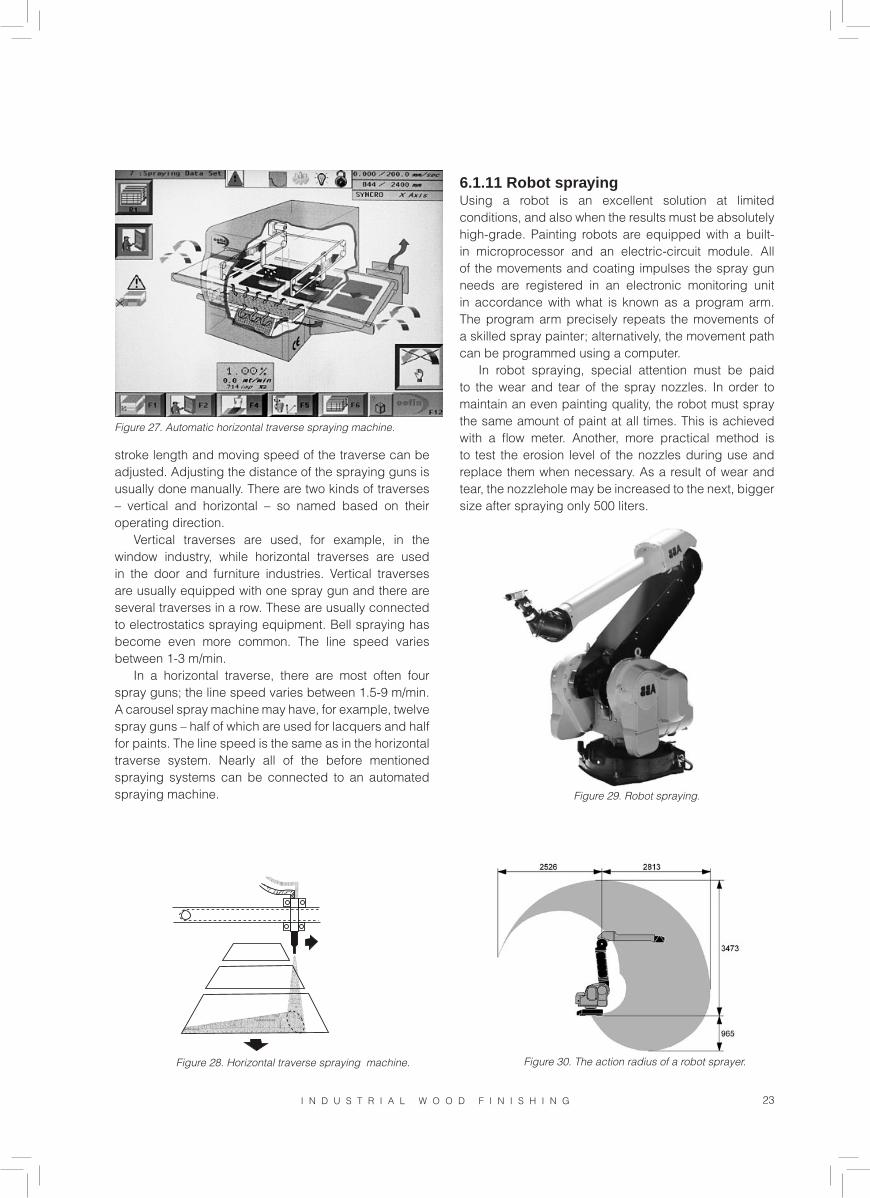
T I K K U R I L A O Y I N D U S T R Y 23I N D U S T R I A L W O O D F I N I S H I N G
stroke length and moving speed of the traverse can be adjusted. Adjusting the distance of the spraying guns is usually done manually. There are two kinds of traverses – vertical and horizontal – so named based on their operating direction.
Vertical traverses are used, for example, in the window industry, while horizontal traverses are used in the door and furniture industries. Vertical traverses are usually equipped with one spray gun and there are several traverses in a row. These are usually connected to electrostatics spraying equipment. Bell spraying has become even more common. The line speed varies between 1-3 m/min.
In a horizontal traverse, there are most often four spray guns; the line speed varies between 1.5-9 m/min. A carousel spray machine may have, for example, twelve spray guns – half of which are used for lacquers and half for paints. The line speed is the same as in the horizontal traverse system. Nearly all of the before mentioned spraying systems can be connected to an automated spraying machine.
6.1.11 Robot sprayingUsing a robot is an excellent solution at limited conditions, and also when the results must be absolutely high-grade. Painting robots are equipped with a built-in microprocessor and an electric-circuit module. All of the movements and coating impulses the spray gun needs are registered in an electronic monitoring unit in accordance with what is known as a program arm. The program arm precisely repeats the movements of a skilled spray painter; alternatively, the movement path can be programmed using a computer.
In robot spraying, special attention must be paid to the wear and tear of the spray nozzles. In order to maintain an even painting quality, the robot must spray the same amount of paint at all times. This is achieved with a flow meter. Another, more practical method is to test the erosion level of the nozzles during use and replace them when necessary. As a result of wear and tear, the nozzlehole may be increased to the next, bigger size after spraying only 500 liters.
Figure 27. Automatic horizontal traverse spraying machine.
Figure 29. Robot spraying.
Figure 30. The action radius of a robot sprayer.VaakaraverssiruiskuautomaattiFigure 28. Horizontal traverse spraying machine.

24 T I K K U R I L A O Y I N D U S T R Y I N D U S T R I A L W O O D F I N I S H I N G
6.2 Coating methods
6.2.1 Curtain coatingThe curtain coating machine is a very fast painting equipment, and can be used for work at several different line speeds. When painting with a typical curtain coating machine, the mat speed is 70 m/min, while the speed of the painting line is normally 10-20 m/min. The curtain coating machine is usually equipped with an accelerator mat, causing the speed under the curtain film to be higher than on the line itself. Flat surfaces and slightly profiled panels and moldings are especially well suited for curtain coating machine. Due to its large capacity, a curtain coating machine can be used separately; or it can be connected to the entire coating-line system.
The amount of coating to be applied can be adjusted exactly by changing the pump pressure, the distance between the curtain coating lips and the speed of the conveyor mat. Since the loss of material is minimal in comparison to spraying, coating with a curtain coating machine is an economical alternative. A very even coating result is achieved by keeping the viscosity of the coating at the standard level during coating. An automatic viscosity meter can be attached to the curtain coating machine to keep the viscosity at such a level. It is important that the curtain coating machine is not kept in a draughty location, since this may cause the coating film to flutter, and – in the worst case scenario – to break completely.
Coating additives, the purpose of which is to level the coating film, may cause the surface tension of the coating to drop too low, causing the film to cut off. In a traditional curtain coating machine, the application rate may vary between 70-170 g/m2. The viscosity may vary from 30 seconds to 60 seconds when measured with DIN 4 cup. The same is true for a machine known as an overflow-curtain coating machine, which is more effective than a traditional curtain coating machine in terminating any foam and air bubbles the coating may contain.
Curtain coating machine with roller was developed primarily for water-borne and UV hardening products. They are more likely to foam than other products, especially in curtain coating machines. Roller curtain coater allow for smaller application rate (40-120 g/m2) than other types of curtain coating machines. Small application amounts are difficult to applicate in practice, since thin films are very sensitive to air draught.
6.2.2 Vacuum coatingThe vacuum machine is specifically intended for water-borne and UV hardening coatings. This machine is not suited for solvent-borne products, due primarily to the fast evaporation of certain solvents.
Objects, for which a vacuum coating is most suitable, include moldings, frames and claddings. One of the advantages of this method is that the coating penetrates every place of the object being worked on. In vacuum treatment, the coating is pumped into the coating chamber. The coating is then atomized using suction air and suctioned out of the chamber from above and allowed back into circulation. In this way, an even paint mist is formed inside the chamber; the item to be coated is then feeded through the mist. During this process, it will be coated all-over. The object then exits the coating chamber through a precisely measured opening, which wipes the extra coating off the object’s surface. The suction air flowing into the chamber along the object’s surface carries the extra coating with it, back into the chamber and into circulation.
The amount of coating that remains on the surface of the object depends on the following factors, among others:
The amount of coating in the coating chamber • basin.
The speed of the air current at the exit opening. • (the greater the speed, the larger the amount of coating that is drawn back into the chamber).
The speed at which the item passes through • (the slower the speed at which the object moves, the
Figure 31. Vacuum-coating device suitable for water-borne and UV-hardening coatings.

25I N D U S T R I A L W O O D F I N I S H I N G
more time there will be for the coating to be drawn back into circulation).
The surface quality of the object to be processed • (smooth/uneven).
The quality of the coating used (viscosity, adhesive •capacity etc.).
The popularity of vacuum machine is increasing significantly; moreover, coatings of an ever more reliable functioning capacity have been developed for them.
6.2.3 Roller coating applicationRoller coater is an alternative to the curtain coater for even surfaces. This method is quick, simple and economical. On the other hand, one roller can be used to apply a maximum of approximately 35-45 g/m2. Normally, a double roller is required in order to achieve application rates of 30-80 g/m2.
In a roller coater, the paint is pumped in between the dosing roller and the spreading roller. In such a case, the rollers are rotating in opposite directions in terms of one another (direct feeding). Since the circumferential speed of the spreading rollers is greater than that of the dosing roller, the coating becomes “polished” in between the rollers, and forms an even film on the dosing roller. The thickness of the film can be adjusted by changing the amount of pressure between the rollers, or by changing the running speed of the dosing roll.
In a direct run, slowing down the running speed of the dosing roller reduces the amount paint, while speeding up the rotating speed increases that amount.
In a reverse run (i.e. indirect feeding), the changes are the other way around. The viscosity of the coating also affects the application rate.
In order to even out the structure of the coating surface – especially in normal direct-rolling – the dosing roller can also be rotated in the reverse direction. This reduces the application rate, which is usually approximately 7-15 g/m2.
In a roller coater, a higher-viscosity coating is used than in other methods. This results in a higher solid content, which partially compensates for the smaller amount spread.
Since the solid content of UV hardening products, for example, is 100%, they produce an excellent filling rate for surface with only small amounts application in top lacquering, the amounts applicated can be as small as 5-10 g/m2.
Several different-quality rubber rollers are available for roller coaters. Some are more sensitive to certain solvents than others. If the wrong solvent is used for washing the rollers, they are in danger of swelling as a result. If only 100% UV-products are used on the rollers, only a few annual washings is needed.
6.2.4 DippingDipping is a quick and simple coating method. It is particularly well suited for priming. Items, for example windows and furniture parts, can be dipped in the dipping basin either in parts or assembled. During dipping, single-component products are ordinarily used – nowadays, they are also mostly water-borne. Double-component acid catalysed coatings are also suitable for dipping, provided that a catalyzer especially intended for dipping is used. In dipping, the viscosity of the coating is usually 15-20 s/DIN4.
6.2.5 Drum-coatingDrum-coating is used primarily for finishing small pieces. The object to be coated is placed in a rotating drum, into which a sufficient amount of coating is sprayed or poured. After coating is completed, the objects are dried sufficiently to enable their handling; such drying is done by blowing warm air into the drum. Drum-coating can also be done in a static container. The coating used must be of the single-component type.
Direct run
Reverse run
Figure 32. In roller coating machine, the rollers can be rotated either clockwise or counter-clockwise, depending on the kind of surface structure desired

26 T I K K U R I L A O Y I N D U S T R Y I N D U S T R I A L W O O D F I N I S H I N G
7. Finishing lines
As the need arises for large-capacity wood finishing, the shift must be made from painting a single object
to line-painting. Depending on the product, either horizontal lines for flat and longitudinal objects may be used; for large pieces, vertical lines may be used. Horizontal lines are used in the board industry, and for finishing flat furniture and longitudinal objects, such as mouldings, panels and frames. Vertical lines are used in the door, window and chair industries.
In finishing lines, all of the aforementioned finishing methods, from dipping basins to vacuums, and from automatic sprayers to roller coating machines, may be used. Designing a finishing line is always based on the shape of the objects to be coated, the required capacity, the finishing materials used, as well as other circumstances particular to the company.
The decision on whether to design a horizontal or vertical line is usually based on the shape of the object to be treated. In kitchen furniture production, the objects are usually flat and grooved. Finishing these types of pieces is normally best done with an automatic sprayer. A curtain coating machine could be an option, but in most cases the depth of the groove and the edge profile are too multi-shaped to be handled with a curtain coating machine. This would require that the edges be handled in large volumes before proceeding to the finishing line – which is unlikely to be economically feasible. Using an automatic sprayer allows for the treatment not only of flat surfaces, but of edges as well – in this way, the bottom of the groove is sure to be thoroughly lacquered or painted.
Doors too are flat objects. Some doors have a profile, while others are known as flush doors. However, the door industry uses both vertical and horizontal lines. A vertical line has the advantage of large capacity and needs only a small space at the drying stage. Depending on the painting system used and the doors’ intended purpose of use, each line type has its advantages. In manufacturing interior flush doors, roller coating machine and UV-drying materials can be used, allowing for a relatively short, flat object line while maintaining its high capacity. In roller coating machine lines, finishing the edges must be done as a separate work phase, or the paint or lacquer surface must be replaced by a edging strip. The drying ovens usually consist of flash off, drying and cooling units. In this section, the equipment assembly –
the drying oven – includes all three parts, although this is not always mentioned separately.
7.1 Window industry
In the window industry, objects may be finished as individual parts or as assembled pre-form frames. The advantage of finishing the individual parts is that all wood surfaces receive all finishing layers. When assembled, the ends of the corner joints are left without finishing – this may diminish the overall high quality of the finishing work.
A system based on applying three treatments is recommended for windows: one layer of wood stain and two layers of paint or tinted lacquer. The wood stain may be applied on a separate line by dipping; after that the wood stain is dried at room temperature or in a warm oven. This is followed by placing the parts onto a vertical line, where the first layer of paint is applied with what is known as the flow-coating machine. After this, the objects are given a round in the oven, and during the second round the final surface layer is sprayed with vertical automatic spraying machine onto both sides of the objects. An electrostatic device may also be used for spraying, in which case both sides can be painted from the same spraying direction.
Depending on the capacity need, the aforementioned line can also be built as a continuous line, where the flow-coating device is followed by a separate oven; the rest of the line is the same as before. If pine is used as the raw material for windows, the maximum allowable temperature of the ovens is approximately 45 °C in order to keep the resin in the pine from causing problems.
Different variations of the same system may be used, such as:
Dip + dip + automatic spraying machine. •Flow coating + flow coating + automatic spraying •
machine.Flow coating + automatic spraying machine + •
sanding + automatic spraying machine.Automatic spraying machine + automatic spraying •
machine + sanding + automatic spraying machine.

T I K K U R I L A O Y I N D U S T R Y 27I N D U S T R I A L W O O D F I N I S H I N G
Different products are available for different application methods. When dipping and flow-coating methods are used, the viscosity of the products is usually relatively low, and additives are used to prevent foaming. When spraying methods are used, the viscosity of the products is higher; therefore the products are thixotropic, which makes it easier to apply thicker layers without sagging. Depending on the properties of the products, and when thicker layers are applied, the objects must be sanded between applications; as a result, the adhesion is improved and the surface will be as even as possible.
When parts are painted, the frames used in Finnish window models can also be painted on a flat object line. In such a case, linear spraying lines are in common use. It is easier to operate than the traverse sprayer – the sprayers are static and turned in a way that allows a sufficient amount of paint to be applied to all sides of the object. Following the sprayer, the next in line is a lateral shift and drying in a flat or multilayer oven or on a wheeled rack.
When assembled, windows to be coated can be painted using the above-mentioned equipment and methods, except for the linear spraying line. In the ovens, the objects usually turn 45° or 90°, depending on the line, in order to enable the use of a smaller drying oven. At the same time, however, the impact of the air circulation on the drying process diminishes, as the surfaces of the objects move further away from the air inlets on the oven walls. In designing the oven, it is important to ensure adequate air circulation, especially when water-borne products are used.
In terms of already assembled window parts, attention must be paid to ensuring the appropriate hanging position, as well as to the profile design. The parts must be in a skewed position in order for the extra wood stain or paint to freely drain into the collection basins.
Any drain drops must hit a spot where they cause no aesthetic or operational disadvantage.
7.2 Door industry
Industrial painting of doors is performed when the doors are ready and assembled on either vertical or horizontal lines; the door frames are usually painted on linear spraying lines. Vertical lines are used primarily for extensively profiled and heavy exterior doors. Profiled inner doors with a lighter construction and flush doors are ordinarily painted and lacquered on horizontal lines.
In profiled doors, primed door skins have become quite common; these are hot-pressed and glued to the door frame. Skins are normally painted with water-borne acrylate paint before arriving at the door factory. Depending on the painting quality, roller coating with water-borne paint can be used as the first paint layer on profiled doors. After this, one layer of acid catalysed paint can be applied with a curtain coating machine or automatic spraying machine. When painting brown door skin, at least two layers of paint are usually needed, with an intermediate sanding in between. After the pieces have been painted, they go into the drying oven, where the temperature can be as high as 80-90°C. The door frame is made of pine wood, which temporarily tolerates relatively high temperatures.
For flush doors, a similar painting system can be used, although the most efficient way of painting them is to use the roller coaters machine line and UV-drying paints. The line then consists of roller coating followed by UV lamps to dry the 100% UV product in a few seconds. The UV paint can be dried completely and after drying an intermediate sanding must be performed. Alternatively, the UV paint can be gelled using only half of the energy capacity, allowing for running the next layer of paint without sanding.
The following line is an example of a well-functioning solution. The devices in the line are listed in the running order:
Sanding machine for finishing the wood surface. •Light-putty roller. •UV oven (gallium, gelling). •Roller coater. •UV oven (gallium, gelling). •Roller coater. •UV oven (gallium and mercury, drying). •Sanding machine for intermediate sanding. •Roller coater. •UV oven (gallium gelling). •
Figure 33. A factory line.
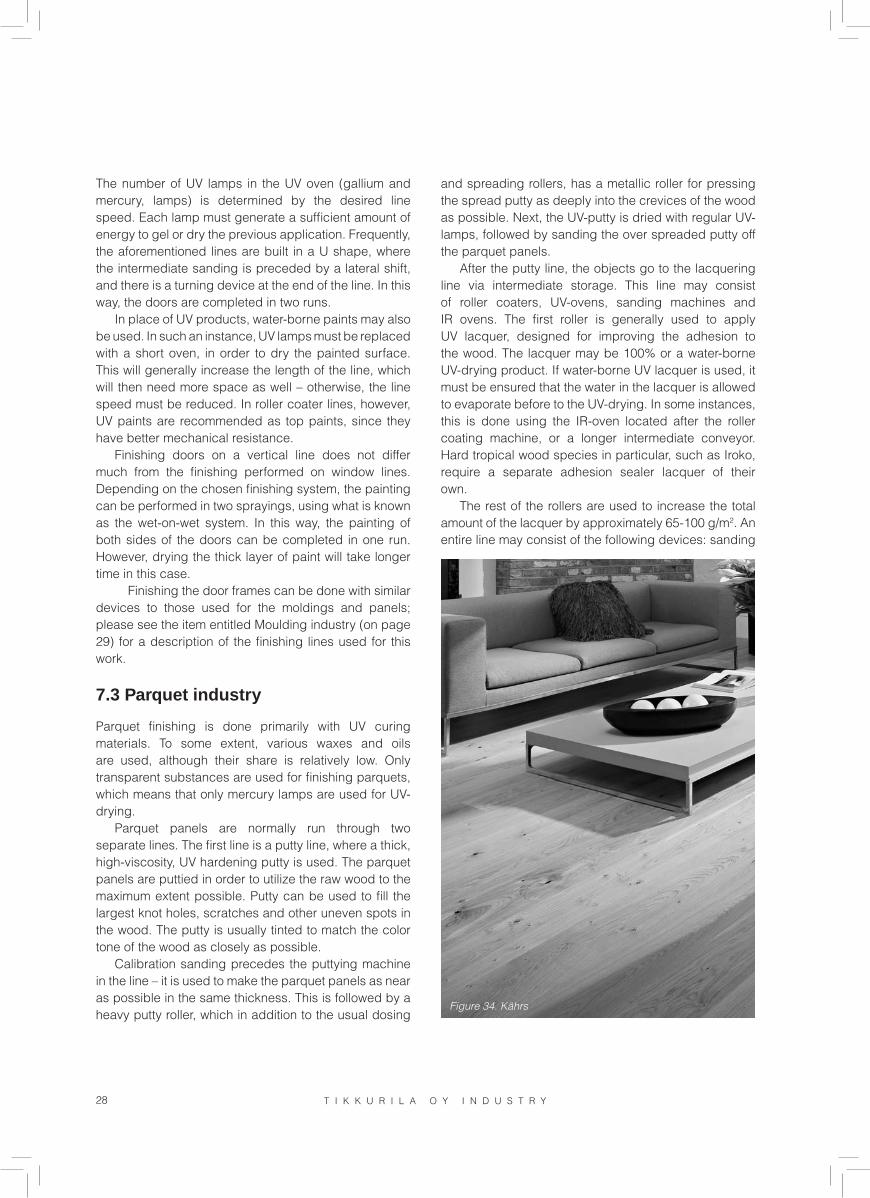
28 T I K K U R I L A O Y I N D U S T R Y I N D U S T R I A L W O O D F I N I S H I N G
The number of UV lamps in the UV oven (gallium and mercury, lamps) is determined by the desired line speed. Each lamp must generate a sufficient amount of energy to gel or dry the previous application. Frequently, the aforementioned lines are built in a U shape, where the intermediate sanding is preceded by a lateral shift, and there is a turning device at the end of the line. In this way, the doors are completed in two runs.
In place of UV products, water-borne paints may also be used. In such an instance, UV lamps must be replaced with a short oven, in order to dry the painted surface. This will generally increase the length of the line, which will then need more space as well – otherwise, the line speed must be reduced. In roller coater lines, however, UV paints are recommended as top paints, since they have better mechanical resistance.
Finishing doors on a vertical line does not differ much from the finishing performed on window lines. Depending on the chosen finishing system, the painting can be performed in two sprayings, using what is known as the wet-on-wet system. In this way, the painting of both sides of the doors can be completed in one run. However, drying the thick layer of paint will take longer time in this case.
Finishing the door frames can be done with similar devices to those used for the moldings and panels; please see the item entitled Moulding industry (on page 29) for a description of the finishing lines used for this work.
7.3 Parquet industry
Parquet finishing is done primarily with UV curing materials. To some extent, various waxes and oils are used, although their share is relatively low. Only transparent substances are used for finishing parquets, which means that only mercury lamps are used for UV-drying.
Parquet panels are normally run through two separate lines. The first line is a putty line, where a thick, high-viscosity, UV hardening putty is used. The parquet panels are puttied in order to utilize the raw wood to the maximum extent possible. Putty can be used to fill the largest knot holes, scratches and other uneven spots in the wood. The putty is usually tinted to match the color tone of the wood as closely as possible.
Calibration sanding precedes the puttying machine in the line – it is used to make the parquet panels as near as possible in the same thickness. This is followed by a heavy putty roller, which in addition to the usual dosing
and spreading rollers, has a metallic roller for pressing the spread putty as deeply into the crevices of the wood as possible. Next, the UV-putty is dried with regular UV-lamps, followed by sanding the over spreaded putty off the parquet panels.
After the putty line, the objects go to the lacquering line via intermediate storage. This line may consist of roller coaters, UV-ovens, sanding machines and IR ovens. The first roller is generally used to apply UV lacquer, designed for improving the adhesion to the wood. The lacquer may be 100% or a water-borne UV-drying product. If water-borne UV lacquer is used, it must be ensured that the water in the lacquer is allowed to evaporate before to the UV-drying. In some instances, this is done using the IR-oven located after the roller coating machine, or a longer intermediate conveyor. Hard tropical wood species in particular, such as Iroko, require a separate adhesion sealer lacquer of their own.
The rest of the rollers are used to increase the total amount of the lacquer by approximately 65-100 g/m2. An entire line may consist of the following devices: sanding
Figure 34. Kährs
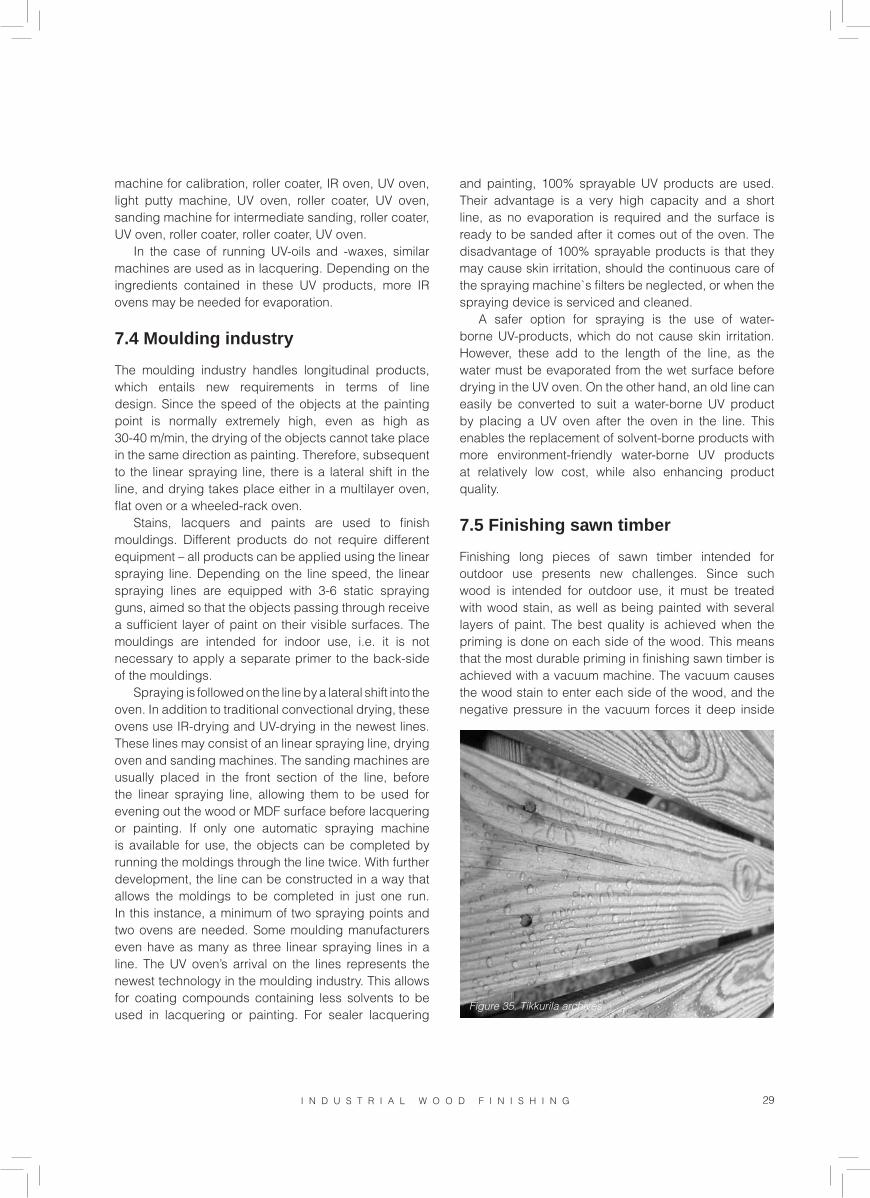
T I K K U R I L A O Y I N D U S T R Y 29I N D U S T R I A L W O O D F I N I S H I N G
and painting, 100% sprayable UV products are used. Their advantage is a very high capacity and a short line, as no evaporation is required and the surface is ready to be sanded after it comes out of the oven. The disadvantage of 100% sprayable products is that they may cause skin irritation, should the continuous care of the spraying machine`s filters be neglected, or when the spraying device is serviced and cleaned.
A safer option for spraying is the use of water-borne UV-products, which do not cause skin irritation. However, these add to the length of the line, as the water must be evaporated from the wet surface before drying in the UV oven. On the other hand, an old line can easily be converted to suit a water-borne UV product by placing a UV oven after the oven in the line. This enables the replacement of solvent-borne products with more environment-friendly water-borne UV products at relatively low cost, while also enhancing product quality.
7.5 Finishing sawn timber
Finishing long pieces of sawn timber intended for outdoor use presents new challenges. Since such wood is intended for outdoor use, it must be treated with wood stain, as well as being painted with several layers of paint. The best quality is achieved when the priming is done on each side of the wood. This means that the most durable priming in finishing sawn timber is achieved with a vacuum machine. The vacuum causes the wood stain to enter each side of the wood, and the negative pressure in the vacuum forces it deep inside
machine for calibration, roller coater, IR oven, UV oven, light putty machine, UV oven, roller coater, UV oven, sanding machine for intermediate sanding, roller coater, UV oven, roller coater, roller coater, UV oven.
In the case of running UV-oils and -waxes, similar machines are used as in lacquering. Depending on the ingredients contained in these UV products, more IR ovens may be needed for evaporation.
7.4 Moulding industry
The moulding industry handles longitudinal products, which entails new requirements in terms of line design. Since the speed of the objects at the painting point is normally extremely high, even as high as 30-40 m/min, the drying of the objects cannot take place in the same direction as painting. Therefore, subsequent to the linear spraying line, there is a lateral shift in the line, and drying takes place either in a multilayer oven, flat oven or a wheeled-rack oven.
Stains, lacquers and paints are used to finish mouldings. Different products do not require different equipment – all products can be applied using the linear spraying line. Depending on the line speed, the linear spraying lines are equipped with 3-6 static spraying guns, aimed so that the objects passing through receive a sufficient layer of paint on their visible surfaces. The mouldings are intended for indoor use, i.e. it is not necessary to apply a separate primer to the back-side of the mouldings.
Spraying is followed on the line by a lateral shift into the oven. In addition to traditional convectional drying, these ovens use IR-drying and UV-drying in the newest lines. These lines may consist of an linear spraying line, drying oven and sanding machines. The sanding machines are usually placed in the front section of the line, before the linear spraying line, allowing them to be used for evening out the wood or MDF surface before lacquering or painting. If only one automatic spraying machine is available for use, the objects can be completed by running the moldings through the line twice. With further development, the line can be constructed in a way that allows the moldings to be completed in just one run. In this instance, a minimum of two spraying points and two ovens are needed. Some moulding manufacturers even have as many as three linear spraying lines in a line. The UV oven’s arrival on the lines represents the newest technology in the moulding industry. This allows for coating compounds containing less solvents to be used in lacquering or painting. For sealer lacquering
Figure 35. Tikkurila archives.

30 T I K K U R I L A O Y I N D U S T R Y I N D U S T R I A L W O O D F I N I S H I N G
the wood, providing the wood with excellent protection against moulds and fungi.
The vacuum in the line is followed by a lateral shift into the oven. Since the wooden material being treated is usually resinous coniferous wood, the maximum allowable temperature of the oven is approximately 45°C. Following the oven, the next layer of a finely-sawn surface can be painted without intermediate sanding. Painting is performed using similar linear spraying lines to those used in the molding industry. After painting, the timber goes into the oven via a lateral shift. The ovens are either of the multilayer type or flat ovens. Sawn timber can also be treated with automatic spraying machines only.
7.6 Kitchen furniture industry
With respect to kitchen furniture, finishing work is nowadays performed on doors and kitchen worktops. Frame materials are normally made of chipboard that has a melamine surface. In bathrooms and other damp spaces, moisture-resistant laminated chipboard is used. Medium Density Fibreboard is the primary material for painted doors, while solid wood and veneer is used for stained and lacquered doors.
Line operations are largely based on the same principles as lines on which horizontal doors are processed. As more color shades become available, staining and special colors are finished in separate lines. This type of line may consist of a Fladder-type sanding machine, an automatic spraying machine and a drying oven. The drying temperature may be a relatively high 60-80°C, since the materials generally used withstand heat very well. When pine doors are manufactured, the temperature must be lowered.
Lacquering and painting lines function on the same principle as in staining, for example. First, a Fladder-type sanding is performed, followed by an automatic spraying machine and a drying oven, which can be either a multilayer or a flat oven. Of the two, a flat oven is used more frequently these days than a multilayer layer oven. In place of Fladder-sanding, different types of brush sanding machines may also be used.
In lacquering lines, water-borne UV lacquers are used instead of solvent-borne lacquers. Therefore, the drying oven’s principal purpose in a lacquering line is water evaporation, and the final drying is performed using UV lamps. When water-borne UV lacquers are used exclusively, there is no need for a separate cooling section, since UV lacquered products may be stacked while still warm.
7.7 Furniture industryAssembly line solutions in the furniture industry depend largely on the company’s product selection. A company which manufactures chairs exclusively may invest in an electro static line with conveyer, while one that offers comprehensive interior decorating services must finish multi-form pieces – in the latter instance, one line may not be enough.
Most chair manufacturers solve the problem by having a spraying system combined with a traverse line and a drying oven; the spraying system is most often an electro static system. Electrostatics enables a higher effeciency, since in spraying chairs, the amount of overspray – especially in the case of already assembled chairs – increases too much when traditional methods are used. Some manufacturers combine electrostatics with the use of a robot, allowing for further savings in materials costs.
If water-borne products are used, traditional spraying methods combined with different recycling systems can also be used. These include the cold wall, lack-in-lack or cylinder-wall systems. The purpose of all of these is to allow for collecting the over-sprayed material and filtering and reusing it in spraying. This increases the material’s utilization ratio as high as 90%.
Flat pieces are normally finished in roller coater lines using 100% UV-products. In furniture, edge finishing is normally done in stacks before the line-run, using a manual spray in the spraying booth. If there are many different edge profiles – making processing in stacks difficult – a regular automatic spraying line may be used. In this way, the edges can be treated while the lacquer or paint is being applied to the flat surface.
There are many different parts to a piece of furniture – finishing these may demand special procedures. Some special parts may exist in such quantities as to make it more sensible, as well as more economical, to design particular finishing equipment exclusively for them, using the dipping method, for example.
T I K K U R I L A O Y I N D U S T R Y 31I N D U S T R I A L W O O D F I N I S H I N G
7.8 Other types of wood industryThe choice of equipment for other types of wood industry is largely based on the demands posed by the objects being produced. Each solution is then unique and company-specific, and may not lend itself to being applied to another type of industrial enterprise. All application methods may be used, including dipping, a rinsing machine, curtain coater, spraying systems, roller coaters, vacuum etc. From the company’s point of view, it is extremely important to assess the construction and operating costs of the assembly line and compare them to the expected operating life of the line.

32 T I K K U R I L A O Y I N D U S T R Y I N D U S T R I A L W O O D F I N I S H I N G
8. Drying and hardening
In order for the coating to be applied on the substrate, it must be in liquid form. In principle, drying and
hardening means the transformation of fluid coatings into solid ones by way of the evaporation of the solvents and/or the binders reacting chemically.
8.1 Air drying
Most coatings used for industrial coating of wood may be dried or hardened at room temperature. The drying time is affected by changes in temperature, air circulation and air humidity.
8.2 Heat drying
Drying at elevated temperatures accelerates the drying process and enhances film formation. In order to accelerate such drying, the heat and radiation energy should be increased, thereby accelerating evaporation and chemical reactions. Heat will quickly increase the surface temperature of the object, and the drying time of the coating will be significantly shortened. An increase of 10 degrees Celsius in the drying temperature will shorten the drying time by approximately half. Extremely short drying times are only achieved at temperatures exceeding 50°C.
8.3 Drying and hardening
A single coating normally contains several binders, enabling its drying properties to be adjusted to suit the existing drying line, for example. The solvents the coating contains also play a role in the drying reaction.
8.4 Physical drying
Certain binders, such as nitrocellulose and cellulose-acetobutyrate, dry by evaporating solvents. The film may be dissolved again using solvents. Drying is accelerated using elevated temperatures.
8.5 Chemical drying
Based on a chemical reaction, alkyd-amino-resin-based binder compounds and two-component polyurethanes dry and harden to form an insoluble film as a result of the effect of an acid catalystor isocyanate hardener. The evaporation of the solvents and the reaction accelerates at elevated temperatures. Synthetic alkyds and oils dry and harden as the solvents are eliminated and the binder reacts (oxidizes) with the oxygen in the air. The drying speed can be accelerated to only a limited extent by increasing the temperature.
8.6 Heat transfer
Generally, in drying coating, more than one heat transfer method is used and several may be used simultaneously. In the drying ovens, both air circulation (= convection) and IR emitters (= radiation) are often present. In addition, the air circulating in the oven is often heated with water-circulation heaters (= convection).
8.6.1 ConductionHeat is conducted from the warmer object to the colder one. For example, a pre-heated substrate warms up the coating film. Solvents evaporate faster and the film begins to harden from the bottom up.
8.6.2 ConvectionAir flowing through heated surfaces warms up the coated object. By enhancing air circulation with blowers and by directing the air current onto the object with a steering plate, heat transfer is achieved faster. The surface temperature rises more quickly and solvents are evaporated more efficiently.

T I K K U R I L A O Y I N D U S T R Y 33I N D U S T R I A L W O O D F I N I S H I N G
8.6.3 RadiationIn radiation, energy is transferred electromagnetically. Radiation strikes a surface, is absorbed therein and transformed into heat. Radiation has different wavelengths; in drying ovens infra-red radiation (IR), ultra-violet radiation (UV), electron beam radiation (EB) and microwave radiation (MOS) are used.
A long-wave IRL emitter is sometimes called a dark emitter. It is used in conjunction with convection drying, for example, where heated oven surfaces provide heat by emitting radiation onto the coated object. Medium-length IR radiation (IRM) is achieved with an IR emitter; by changing the temperature, it is often possible to adjust the radiation power continuously.
Short wave IRK radiation is also used to some extent. It can be adjusted continuously very fast, and the radiation power is greater than that achieved with an IRM emitter.
UV-hardening means hardening a UV-reactive substance with UV-light, which affects the reactive ingredients in UV-products, i.e. the photoinitiators which, as they disintegrate, cause the binder to cross link (polymerize). Lacquers and colourless UV-products dry without any problem, using UV-radiation. The pigments
used in paints either absorb or reflect UV-radiation. White and light colour shades dry well with UV-radiation, whereas drying some dark, brown and red color shades is difficult using this method.
In electron beam radiation (EB), the substrate is not heated; instead, the energy affects only the coating, which can be a clear lacquer or a pigmented product.
The common denominator for all heat emitters is that the distance between the heat source and the object has a major impact on drying. In addition, radiation energy works only when it comes into contact with the surface.
MOS radiation is generally used to enhance water evaporation before the actual flash-off zone. It is not used for solvent-borne products.
Wood Wood
Lacquer
IR-radiation is either short- (IRK), middle- (IRM) or long-wawe (IRL)
IRK IRM IRLConvection
IRR IRLConvection
IRM
0,38 0,76 2µ m 4µ 1 mm
LightShort
IRMiddle
IRLong-wave IR
Gammaradiation
X-rayradiation
UV radiation IR- radiation
Radio waves
1 nm 1 µm 1 mm 1 m 1 km
Figure 36. IR radiation is either short-wave (IRK), medium-wave (IRM) or long-wave radiation.

34 T I K K U R I L A O Y I N D U S T R Y I N D U S T R I A L W O O D F I N I S H I N G
The need for drying ovens is dictated primarily by the plant’s production volume and type. A
variety of drying ovens is available from a simple, low-temperature wheeled-rack drying room to technically sophisticated drying ovens. Companies must adhere to strict requirements in terms of the working environment, which means that in general the drying oven must be one that dries the coating at a location other than where employees are working. Ventilation is always a part of drying-oven operation – it removes the solvents or water that has evaporated during the drying process, from the oven or work space. Environmental regulations, reducing VOC solvents, and the desire for faster drying times impact on the product development of drying equipment and coatings.
9.1 Drying tunnels
Regardless of their structure, drying tunnels are frequently divided into different zones:
1. Pre-heating zoneIn the pre-heating zone, objects are heated before finishing; and are placed in front of the actual finishing equipment. The intent is, for example, to remove air from the pores of an open-grained wood substrate, speed up the evaporation of solvents and level the surface temperature of the objects to be coated before the actual finishing.
2. Evaporation or flash-off zoneIn the evaporation zone, the coating is allowed to even out and penetrate the porous parts of the substrate. Also, any air bubbles caused by the spraying will burst, and some of the solvents are removed through evaporation. In this way, holes caused by air bubbles are prevented from occurring in the finished surface and the surface quality is left more even. In the evaporation zone, it is very important to have a sufficiently large amount of air – approximately 20,000 m3 per hour. Within the evaporation zone, the speed and temperature of the air must not climb too high. Generally, the air velocity is approximately 1-2 m/s and the air temperature approximately 30-35°C
3. Drying zoneIn the drying zone, a clearly higher air velocity and higher temperatures are used than in an evaporation zone. In this zone, the remaining solvents evaporate from the coating film. In two-component products, chemical drying begins when the majority of the solvents have evaporated. It is important that the drying advance sufficiently far in the oven in order for the coated objects to be dry for handling on stacking. Should the film continue to contain too much solvent at the drying stage, they may cause the surface to boil. IR-radiation is also used in the drying zone to fasten drying.
4. Cooling zoneIn this zone, the object is cooled to a temperature that allows handling and stacking (under 35°C). It should be noted that, since in the drying oven heat is stored inside heavy, massive objects, the surface temperature should not exceed 35°C, even in stacks. Cooling is an important part of drying, since in water-borne dispersion, acid catalysed and polyurethane paints the drying reaction may not have been completed; in such a case, stacking may cause shiny spots to appear on the paint surface. If the temperature inside the stacks is too high, the painted objects may stick to one another or cause dent marks in the items at the bottom of the stacks. The amount of air required for circulation in the cooling zone is approximately 25,000 m3 per hour.
9.2 Multilayer ovens
Multilayer ovens are based on convection heat. In comparison to drying tunnels, their greatest advantage lies in the relatively small floor area they require considering their capacity. Multilayer ovens usually have three, four or six segments. Operations can be divided depending
9. Drying equipment (ovens)
Figure 37. A layer oven.

35I N D U S T R I A L W O O D F I N I S H I N G
on the type of product or paint being used. In a three-segment dryer, the first segment is used for evaporation, the second for drying and the third for cooling. In other dryer types, the segments for evaporation, drying and cooling can be divided according to need.
The maximum temperature of a multilayer oven in the drying zone is usually approximately 80°C. The lead-time varies from 60 minutes to 90 minutes. The drying time is relatively long compared to the 10-15 minutes required in drying tunnels. For this reason, the number of layer dryers in use has continuously diminished.
9.3 IR ovens
In infrared radiation (IR), the wavelength varies between 0.76 µm–1 mm. The wavelengths of IR emitters are towards the lower end of the radiation range. In IR dryers, either IRK, IRM, IRL, NIR or OIR radiation is used. Of these, the first three refer to the traditional division based on wavelength. L stands for long (4-10 µm), M stands for medium length (2-4 µm) and K for short (0.76-2 µm) radiation.
The surface temperature of the IRK-emitter is approximately 3,200°C, of which 10% is convection heat and 90% radiation heat. The corresponding values in an IRM emitter are approximately 800°C, 50% and 50%; and in an IRL emitter approximately 200°C, 90% and 10%. IRK and IRM emitters require cooling in order to remain in good condition. With age, the heat emitted resembles convection heat.
In the most modern ovens, a NIR emitter is placed in the front section of the oven for quick removal of the solvents in the paint film. The NIR emitter must be followed by an evaporation zone. The wavelength of an NIR emitter is close to the IRL wavelength; it usually works in cycles to prevent the paint surface in the front section of the oven from heating up too much. This might cause a film to form on the surface too early; it might also cause disturbances in drying.
The specialty of the OIR (Optimized IR) emitter is its adjustable wavelength. With the help of different emitter materials and power feeding, an exact wavelength area particular to each type of paint and substrate material can be found to ensure the most effective drying for the type of paint used. In this way, the drying line can be maximally shortened.
The most commonly used IR emitter is IRM. The shorter the wavelength of the IR radiation, the more effectively it penetrates the substrate. For this reason,
using IR radiation is not recommended for heat-sensitive wood species, such as spruce and pine. IRK radiation may be used, for example, on fibre board or MDF-board. The radiation emitted by IR emitters always proceeds in a direct line. Therefore, IR ovens are at their best when used for drying flat products and the emitters can be brought to a very close proximity to the object’s surface.
In comparison to convection ovens, the advantages of IR ovens include:
Shorter drying times. •Less energy needed. •Less space required. •Only the surface is heated, making cooling the •
objects easier.
IR-ovens also require evaporation and cooling zones for smooth operation.
Some putties, water-borne products and stains can be dried directly with IR. IRM ovens are often used to preheat the objects as well.
9.4 Gas IR
In some oven types, IR radiation is accomplished by burning gas and oxygen in a cell-like structure. The oven is connected to electric preheating to increase the temperature of the fuel cell matrix sufficiently high – after that, the flow of gas and oxygen sustains the burning. The burning reaction is so called flameless burning; it generates both heat and IRK radiation. The burning temperature helps in controlling the wavelength of the IR-radiation that is generated. In this way one can search for the optimum range for the finishing material used. Since the cell matrix is hot, it also burns any solvents evaporating from the surface, thus reducing total solvent emissions. The IR gas oven can be used with both solvent-borne and water-borne products.
9.5 MOS-drying
MOS means drying based on microwaves of a certain wave length in a separate MOS oven. MOS is used with water-borne products to evaporate water from the wood surface as fast as possible. The microwaves mobilize the water molecules in a way that allows it to steam off the paint surface quickly. The advantage of this method is an accelerated drying system, where the water wets

36 T I K K U R I L A O Y I N D U S T R Y I N D U S T R I A L W O O D F I N I S H I N G
the wood or MDF surface for a shorter period, reducing grain-raising. MOS is used in the evaporation zone, and a regular drying and cooling zone are needed afterwards.
9.6 UV ovens
The use of UV products and ovens in wood finishing has increased significantly in recent years. This is due not only to environmental factors, but also to the rapid development of equipment and products. In addition, UV ovens clearly require less space than other types of oven.
In a UV oven, products dry and harden in approximately five seconds. Hardening is based on the quick reaction of the photoinitiator, binder and any monomer caused by the UV light. The photoinitiator acts as the catalyst for the reaction, divided into two reaction-sensitive parts in the UV light. These particles, together with the binder and monomer, begin to form long chains, of which the lacquer or paint surface is comprised.
Different photoinitiators are used in lacquers and paints due to the properties of the titanium-oxide in the paints. Consequently, two different types of UV lamps – mercury and gallium – are also used in the UV oven.
Mercury lamps are intended primarily for drying clear lacquers. Their power range is between 80-120 W/cm, and they function in the 350-360 nm wavelength area. With age, UV lamps lose some of their output capacity, resulting in the lamps eventually generating too little energy to dry UV lacquer. The service life of the lamps is approximately 2,000 hours, after which they must be replaced with new ones.
Gallium lamps are used to dry pigmented products and thicker layers. They function in the
400-450 nm wavelength area. Mercury lamps are also needed for drying paints. Gallium lamps dry UV-products in greater depth, whereas mercury lamps give better surface hardness to the paint.
Used UV-lamps can be reused as what are known as gelling lamps. As a lacquer layer is run on the first roller of a UV-roller coating line, it ca n be gelled using half of the amount of energy indicated in the product data sheet. Using the next roller, another layer of lacquer can be run on top of the gelled lacquer layer without intermediate sanding. After the lacquer layer has been dried using the right amount of energy, it must always be sanded before running the next layer in order to ascertain the intercoat adhesion of the layers of lacquers.
UV-lamps require cooling; equipment suppliers normally take this into consideration in factory installations. When running too hot, UV-lamps lose some of their power. UV-drying does not ordinarily require an evaporation zone. Specialty products, where solvents have been used to adjust viscosity, as well as water-borne UV-drying products, constitute an exception. A problematic issue in UV-drying is the drying of different shades of paint shades. Some dark brown shades absorb UV-energy, preventing the drying of the paint surface.
9.7 UVITEC®-curing
New drying methods for 3D objects have been sought for a long time. Regular UV-curing has not been effective, due to problems in extending the UV rays to all of the surfaces, as well as the great distance of the lamps from the surface to be dried. UVITEC® drying represents the newest technology, where low-capacity UV lamps are used to cure mostly water-borne, UV-curing materials in carbon dioxide gas. The gas eliminates the negative effect of the oxygen in the air. Oxygen tends to react with the binder on the surface of the UV product, making the polymer chain short and the mechanical properties of the surface poor.
Carbon dioxide gas has been conducted into a UV-dipping basin, into which the objects travel along the conveyer. The objects are immersed in the gas; thus, a high level of UV radiation can be achieved in the gas using lamps and highly reflective mirrors. Hardening takes around a minute; the output capacity of the lamps being approximately 20 W/cm.
Figure 38. UV-drying oven.

T I K K U R I L A O Y I N D U S T R Y 37I N D U S T R I A L W O O D F I N I S H I N G
9.8 Electron-beam dryers (EB dryers)
The process known as Electron-Beam Curing (EBC) involves drying the coating with electron rays. This process is not widely used in industry. One reason for the scarcity of EBC equipment lies in high investment cost. The newest equipment is simpler, requiring an acceleration voltage of approximately 150 kV; investment costs still remain relatively high, however. EB radiation is achieved as a result of the transfer of energy generated by the accelerated electrons. As the electrons penetrate the coating, immediate polymerization (hardening) takes place via a radical mechanism. EB drying does not take place while oxygen is present and nitrogen is therefore needed to keep the oxygen out of the drying space.
Among the advantages of EB equipment are the following:
- The need for energy is 20-50 times less than in thermal drying.
- Production speed is high.- Thick layers of coating can be dried regardless of
the color shade applied.- The end result is of high quality.
9.9 Dry-air equipment
A drying oven has been developed for water-borne products, where quick drying is based on drying the air in use. Air can be dried by cooling or using moisture-absorbing substances, for example. During cooling, air dries while it releases water bound to it; the water is collected in a separate drain basin. Cold and dry air are heated to the required temperature of 35-50°C and conducted into the drying oven. The oven may be cyclic, but it is more often a chamber-type oven, where the evaporation and drying conditions are monitored automatically.
Drying is begun at the lower temperature of 35°C combined with a fast rate of air circulation. Dry air has the capacity to bind more moisture to itself than regular room air, thereby enhancing evaporation and drying in the oven. The moistened air is re-cooled, causing it to release the bound moisture. The chamber method is a closed process, i.e. the amount of air used for drying remains the same throughout, allowing for major energy savings. With the cold-drying method, the time required to dry water-borne products package dry temperature can be shortened to a mere 15 minutes.
Other dry-air drying ovens operate based on the same principle. In these, the air can be dried with
various moisture-absorbing salts or other substances. The speed of drying is based on the air’s large capacity to absorb the water contained in the paint.
9.10 UV-LED curing
The technology of UV-LED lamps is developing rapidly. At the moment, UV-LED technology can be used to cure both 100% and water-borne UV products in an inert, i.e. an oxygen-free state.
The advantages of UV-LED technology include:- Reduced need for energy (4 W/cm).- Lamps may be turned on and off at short intervals –
the surface does not become heated.
Due to its properties, UV-LED technology is best suited to the coating applications of heat-sensitive materials. Major benefits can also be derived in terms of energy savings. However, the speed of curing is in the same category as traditional UV.
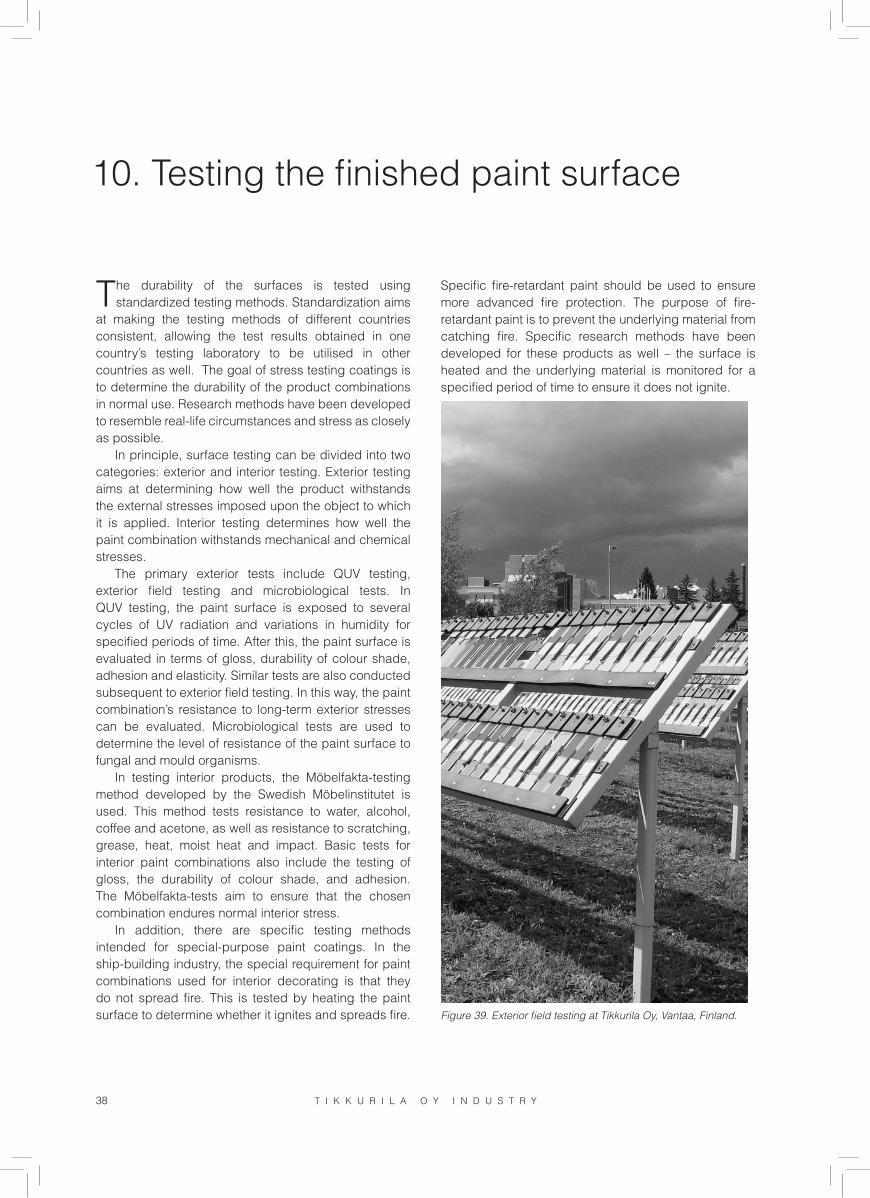
38 T I K K U R I L A O Y I N D U S T R Y I N D U S T R I A L W O O D F I N I S H I N G
10. Testing the finished paint surface
The durability of the surfaces is tested using standardized testing methods. Standardization aims
at making the testing methods of different countries consistent, allowing the test results obtained in one country’s testing laboratory to be utilised in other countries as well. The goal of stress testing coatings is to determine the durability of the product combinations in normal use. Research methods have been developed to resemble real-life circumstances and stress as closely as possible.
In principle, surface testing can be divided into two categories: exterior and interior testing. Exterior testing aims at determining how well the product withstands the external stresses imposed upon the object to which it is applied. Interior testing determines how well the paint combination withstands mechanical and chemical stresses.
The primary exterior tests include QUV testing, exterior field testing and microbiological tests. In QUV testing, the paint surface is exposed to several cycles of UV radiation and variations in humidity for specified periods of time. After this, the paint surface is evaluated in terms of gloss, durability of colour shade, adhesion and elasticity. Similar tests are also conducted subsequent to exterior field testing. In this way, the paint combination’s resistance to long-term exterior stresses can be evaluated. Microbiological tests are used to determine the level of resistance of the paint surface to fungal and mould organisms.
In testing interior products, the Möbelfakta-testing method developed by the Swedish Möbelinstitutet is used. This method tests resistance to water, alcohol, coffee and acetone, as well as resistance to scratching, grease, heat, moist heat and impact. Basic tests for interior paint combinations also include the testing of gloss, the durability of colour shade, and adhesion. The Möbelfakta-tests aim to ensure that the chosen combination endures normal interior stress.
In addition, there are specific testing methods intended for special-purpose paint coatings. In the ship-building industry, the special requirement for paint combinations used for interior decorating is that they do not spread fire. This is tested by heating the paint surface to determine whether it ignites and spreads fire.
Specific fire-retardant paint should be used to ensure more advanced fire protection. The purpose of fire-retardant paint is to prevent the underlying material from catching fire. Specific research methods have been developed for these products as well – the surface is heated and the underlying material is monitored for a specified period of time to ensure it does not ignite.
Figure 39. Exterior field testing at Tikkurila Oy, Vantaa, Finland.

39I N D U S T R I A L W O O D F I N I S H I N G
11. Paint standards for wooden surfaces
For testing paint surfaces suitable for outdoor use, the current standard EN 927, Sections 1, 2, 3, 4
and 5 are complied with. Based on this standard, the basic principles for testing paint surfaces suitable for exterior painting are delineated. After one year of external stress, treatment paint combinations must meet the requirements set out by the standard in terms of the following properties:
- Difference in specular gloss; EN ISO 2813- Colour difference; ISO 7724-3- Blistering (swellings in the surface layer); EN ISO
4628-2- Flaking; EN ISO 4628-5- Cracking, EN ISO 4628-4- Chalking, paint peeling off; EN ISO 4628-6- Growth of mould; EN ISO 4628-1- Adhesion; EN 927-3, Appendix B- General impression; EN ISO 4628-1
No similar pan-European interior standard is yet in use. However, standard EN 15060 has been drawn up; its purpose is to facilitate the selection of a treatment combinations. The standard has not been taken into active use in all countries. The testing of paint and lacquer surfaces is still largely carried out according to the Swedish Möbelfakta methods. In its quality standards, IKEA makes reference to research methods similar to those of Möbelfakta, thereby making these methods widely spread.
Based on Möbelfakta, the resistance of the coating is examined in terms of the following properties:
- Resistance to water; EN 12720- Resistance to grease; EN 12720- Resistance to grease and scratching; SS 83 91 22- Resistance to scratching; SS 83 91 17- Resistance to alcohol; EN 12720- Resistance to dry heat; EN 12722- Resistance to wet heat; EN 12721- Resistance to water at the borders; SS 83 91 20- Resistance to sweat; NS 8061
Figure 40. Tikkurila archives.

40 T I K K U R I L A O Y I N D U S T R Y I N D U S T R I A L W O O D F I N I S H I N G
12. Health and safety at work; Environmental protection
12.1 Health and safety within the paint industry
A large portion of industrial paint products contain substances that are hazardous to health and may cause injury to the user, if he or she is not aware of the product’s safety risks. The warnings on the product packaging label, as well as safety data sheet informs paint-product users of the possible health hazards posed by the use of the product, as well as the protective measures to be taken in order to avoid harmful effects.
The composition of paint products and their label markings are influenced by a range of different national and EU region regulation and directives. Among the EU provisions are the REACH-regulation (1907/2006), the Dangerous Substances Directive (67/548/EEC) and the Dangerous Preparation Directive (1999/45/EU). At the moment, extensive legislative changes are underway; each operator must be aware of them inasmuch as they concern him or her.
The operator must always exercise sufficient diligence and caution in order to prevent health and environmental hazards. Product users must be aware of the risks involved. In addition, the operator must opt for the least hazardous product of the alternatives available. Moreover, the manufacturer, importer, distributor or other operator, who releases the chemical onto the market, must draw up a safety data sheet pertaining to the product.
Basic information regarding the hazards involved in using paint products, as well as the necessary protective measures – such as using a respiratory protective mask, the need for skin protection, etc. – are included on the packaging label. Further information is available in safety data sheets and product data sheets.
12.2 Package markings
The warnings printed on the paint-product label provide information on the risks involved in using the product. Reactivity, and health and environmental hazard symbols are shown in the warning section of the label. These are
complemented by R-phrases indicating hazard and S-phrases indicating general safety measures. Industrial paints may fall into the following hazard categories:
12.2.1 Reactive products
12.2.2 Products which are hazardous to health
12.2.3 Products which are hazardous to the environment
On the warning symbol, a black image always appears against an orange background.
FlammableHighly flammable
Oxidizing
Dangerous for the environment
HarmfulIrritant
Corrosive Toxic

41I N D U S T R I A L W O O D F I N I S H I N G
12.3 Safety data sheetsMore detailed information on the composition of the paint product, its properties, as well as the hazards involved in using the product, and the necessary protective measures are displayed in the safety data sheet concerning the product. All safety data sheets pertaining to products that contain substances that are hazardous to health and which are used on the work site must be kept in a place where workers can peruse them at any time.
According to the current rules and regulations, the safety data sheet contains the following information:
Identification of the substance/preparation and 1. of the company/undertaking
Hazards identification2. Composition/information on ingredients.3. First aid measures4. Fire-fighting measures5. Accidental release measures6. Handling and storage7. Exposure controls/personal protection8. Physical and chemical properties9. Stability and reactivity10. Toxicological information11. Ecological information12. Disposal considerations13. Transport information14. Regulatory information15. Other information16.
Old safety data sheets dated prior to June 1, 2007, whose headings differ from the above, may be delivered up until December 1, 2010, provided there are no significant changes in the product properties prior to that date.
However, the safety data sheets may not express any views concerning the special circumstances at the work site. Air conditioning, the safety of the work methods used and the adequacy of the protective measures must always be considered on a case-by-case basis at each work site. By adhering to the instructions given and using common sense, all paint products may be safely used. Eventually – as a result of what are known as exposure scenarios conducted on the basis of registering the substances used and estimating the potential hazard according to the REACH regulation – an opinion will be expressed regarding risk-management measures as well. However, several more years are expected
to elapse before these types of extended safety data sheets become available.
12.4 Fire safety
The solvent vapour from flammable liquids or spraying mist may – when combined with oxygen in the right ratio – form a flammable mixture. The properties of the vapour from different solvents vary to some degree; however, in terms of fire safety, it is critically important that the protection category of spray-painting equipment, pumps and other like electrical equipment is appropriate to the ignitability and explosiveness properties of the paint products in use. All work that produces fire sparks, such as welding and flame cutting, etc. is absolutely forbidden in the vicinity of painting work.
The mixture of solvent vapour and oxygen may be ignited by an open flame, welding spark, or another type of spark, for example one generated by the discharge of electricity. For this reason, all spray-painting equipment and tools must be absolutely well grounded in order to allow for the safe discharge of the electricity generated by the flow of liquids etc.
Basic information on the flammable and explosive properties of paint products is contained in the product data sheets and safety data sheets. In order to maintain personnel and fire safety, continuing education, guidance and counselling of operations personnel in terms of appropriate and careful use of the products and working methods is of primary importance.
On the other hand, safety also requires careful monitoring and ongoing process development in order to eliminate hazardous properties. Using water-borne and solvent-free products will significantly reduce the paint shop’s fire-safety risks.
Porous cleaning waste, spray mist and other substances containing a binder that dries by oxidizing – such as linseed oil, lacquer or alkyd resin – pose a particular fire safety risk. This type of waste may self-ignite, if the heat generated while the binder dries is not released into the environment. This may happen, for instance, when cleaning paint dust from a dry spraying booth immediately after spraying and collecting a large mass of waste in a dry container. In such a case, the reaction continues, generating heat which may ignite the burning materials mixed in with the waste. This can be prevented by adding water so that it is level with the surface of the waste. This type of material must be stored outside the plant facilities at all times, especially during periods when the facility is not being monitored.
42 T I K K U R I L A O Y I N D U S T R Y I N D U S T R I A L W O O D F I N I S H I N G
12.5 Using paintsNational laws and decrees and pan-European decrees limit and guide the use of certain finishing materials. VOC directives are among the provisions that govern painting.
Two VOC directives are currently in force: 1999/13/EU, which limits the use of solvents in certain industrial operations; and 2004/42/EU, which defines the maximum allowable VOC content of ready-to-use paint mixtures in products intended to be used for buildings. Of the two, industrial operations are more restricted by the first-mentioned directive, known as the industrial VOC directive.
The fundamental purpose of new provisions – such as the biocide directive, the REACH regulation and global harmonization of classification of chemicals (the CLP regulation) – is to limit the use of hazardous substances and protect the environment, as well as the manufacturers and users - including the end users - of chemical substances. All directives, laws and regulations will impact the use of chemicals in paints. At the same time, the operational properties of paints will change, requiring the further development of the related operating conditions as well.
More comprehensive information on labour protection and environmental protection is available in Industrial Coatings’ environmental and safety guide for industrial finishing. Additionally, painting operations are guided by e.g. Finnish Standard SFS 3358: Painting; Facilities, operation, maintenance, fire-fighting equipment and guidance on classification of hazardous areas.
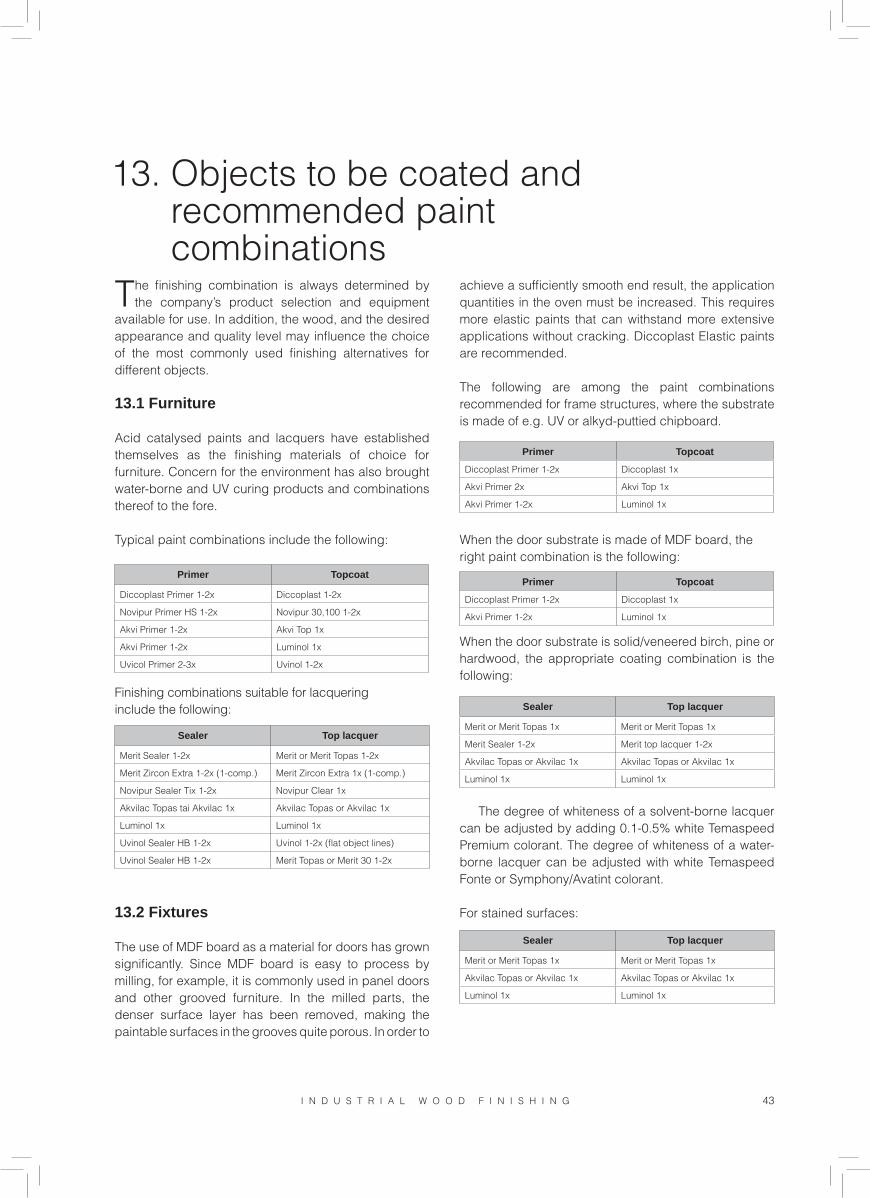
T I K K U R I L A O Y I N D U S T R Y 43I N D U S T R I A L W O O D F I N I S H I N G
13. Objects to be coated and recommended paint combinationsThe finishing combination is always determined by
the company’s product selection and equipment available for use. In addition, the wood, and the desired appearance and quality level may influence the choice of the most commonly used finishing alternatives for different objects.
13.1 Furniture
Acid catalysed paints and lacquers have established themselves as the finishing materials of choice for furniture. Concern for the environment has also brought water-borne and UV curing products and combinations thereof to the fore.
Typical paint combinations include the following:
Finishing combinations suitable for lacqueringinclude the following:
13.2 Fixtures
The use of MDF board as a material for doors has grown significantly. Since MDF board is easy to process by milling, for example, it is commonly used in panel doors and other grooved furniture. In the milled parts, the denser surface layer has been removed, making the paintable surfaces in the grooves quite porous. In order to
achieve a sufficiently smooth end result, the application quantities in the oven must be increased. This requires more elastic paints that can withstand more extensive applications without cracking. Diccoplast Elastic paints are recommended.
The following are among the paint combinations recommended for frame structures, where the substrate is made of e.g. UV or alkyd-puttied chipboard.
When the door substrate is made of MDF board, theright paint combination is the following:
When the door substrate is solid/veneered birch, pine or hardwood, the appropriate coating combination is the following:
The degree of whiteness of a solvent-borne lacquer can be adjusted by adding 0.1-0.5% white Temaspeed Premium colorant. The degree of whiteness of a water-borne lacquer can be adjusted with white Temaspeed Fonte or Symphony/Avatint colorant.
For stained surfaces:
Primer Topcoat
Diccoplast Primer 1-2x Diccoplast 1-2x
Novipur Primer HS 1-2x Novipur 30,100 1-2x
Akvi Primer 1-2x Akvi Top 1x
Akvi Primer 1-2x Luminol 1x
Uvicol Primer 2-3x Uvinol 1-2x
Primer Topcoat
Diccoplast Primer 1-2x Diccoplast 1x
Akvi Primer 2x Akvi Top 1x
Akvi Primer 1-2x Luminol 1x
Primer Topcoat
Diccoplast Primer 1-2x Diccoplast 1x
Akvi Primer 1-2x Luminol 1x
Sealer Top lacquer
Merit Sealer 1-2x Merit or Merit Topas 1-2x
Merit Zircon Extra 1-2x (1-comp.) Merit Zircon Extra 1x (1-comp.)
Novipur Sealer Tix 1-2x Novipur Clear 1x
Akvilac Topas tai Akvilac 1x Akvilac Topas or Akvilac 1x
Luminol 1x Luminol 1x
Uvinol Sealer HB 1-2x Uvinol 1-2x (flat object lines)
Uvinol Sealer HB 1-2x Merit Topas or Merit 30 1-2x
Sealer Top lacquer
Merit or Merit Topas 1x Merit or Merit Topas 1x
Merit Sealer 1-2x Merit top lacquer 1-2x
Akvilac Topas or Akvilac 1x Akvilac Topas or Akvilac 1x
Luminol 1x Luminol 1x
Sealer Top lacquer
Merit or Merit Topas 1x Merit or Merit Topas 1x
Akvilac Topas or Akvilac 1x Akvilac Topas or Akvilac 1x
Luminol 1x Luminol 1x

44 T I K K U R I L A O Y I N D U S T R Y I N D U S T R I A L W O O D F I N I S H I N G
13.3 Interior doorsInterior doors are a typical object for fast-drying products. Water-borne or water-borne UV products are gaining ground as coating lines are rebuilt to accommodate water-borne products.
Solvent-borne paint combinations:
Water-borne and water-borne UV paint combinations:
Lacquer combinations:
13.4 Lamella parquetsFor lacquering parquet floors, highly durable UV hardening lacquers are best. These are ordinarily applied in roller coater lines. Parquet lacquers are generally developed according to customer and line-specific requirements. The various requirements include adhesion, abrasion resistance, sandability and surface appearance. For maintenance lacquering of UV lacquer, the most common parquet lacquers – such as Parketti Ässä (Parquet Ace) – are appropriate when preceded by a good sanding. Uvipar parquet lacquers are developed to suit specific lines, and are used for priming and top lacquering.
13.5 Windows and exterior doors
The surface structure of wood changes quickly when affected by sun light. For wood, painting provides the best protection against sun light. White pigments efficiently light and prevent them from penetrating the wood surface. In painting, white shades are recommended, as they keep the wood’s surface temperature as low as is possible. High temperatures in wet wood promote the growth of various types of fungi. On a warm summer
day, dark-painted wood surfaces reach temperatures as high as 70°C, while the temperature of a white surface remains at approximately 40°C.
Wood swells and shrinks as its moisture content level varies, causing considerable stress to the paint surface. The paint must withstand the variations in the wood’s dimensions. An effort is made to minimize water absorption through the finishing treatment of the wood surface. Special attention must be paid to protecting the joining points and end surfaces. In wood structures, long-term humidity of over 20% must be avoided, as this would expose the wood to fungal spores.
Tikkurila has developed a new generation water-borne Pinja Flex paint combination for painting windows and exterior doors.
The advantages of this combination include the following:
These products fulfil future labour protection and •environmental protection provisions. The products are water-borne and thus minimize solvent emissions.
The water-borne window-paint film is permanently •elastic, living well alongside the wood up to dimension changes of 7-8%.
The water-borne window-paint film allows water vapour •penetration; yet it is water repellent.
The water-borne paint film is exceedingly weather- •resistant. The paint surface withstands long-term outdoor stress without losing its gloss or colour shade.
Pinja Flex paints can be sprayed using all common spraying methods. A completely dry surface that can withstand severe stacking conditions is achieved by drying the topcoat in 35-45°C for at least 1-2 hours, and then cooling the surfaces before stacking. Pinja Flex is part of the Temaspeed Fonte tinting system.
Recommended for painting and glazing:
Primer Topcoat
Diccoplast Primer 1-2x Diccoplast 1x
Dicco Surf 1-2x Dicco Astral 1x
Primer Topcoat
Pinja Flex Primer 1-2x Pinja Flex 1-2x
Dicco Flex 1-2x Dicco Flex 1-2x
Diccodur Primer 1-2x Dicco Flex 1x
Glazing Lacquering
Pinjasol 1x Merit Jahti 2-3x
Pinja Wood Stain Pinjalac Solid 1-3x
Primer Topcoat
Akvi Primer 1-2x Akvi Top 1x
Akvi Primer 1-2x Luminol 1x
Sealer Top lacquer
Merit or Merit Topas 1x Merit or Merit Topas 1x
Merit Sealer 1-2x Merit or Merit Topas 1x
Akvilac Line 25 1x Akvilac Line 25 1x
Luminol 1x Luminol 1x

T I K K U R I L A O Y I N D U S T R Y 45I N D U S T R I A L W O O D F I N I S H I N G
13.6 Mouldings, frames and panels
The vigorous rate of construction in recent years has seen the emergence of several companies that specialize in treating elongated timber. Most commonly, these companies use a linear spraying line where a thixotropic paint is best suited for this application method.
Suitable paint and lacquer combinations:
13.7 Exterior claddings
The starting point for improving the weather resistance of wood is keeping the level of humidity in the structures as low and even as possible. This can be promoted by the following means:
Eaves and visors.• Appropriate eave cutters and down pipes.• A tall enough socle.• Correct placement of the window.• Adequate inclination of the window lead.• Rainproof structure.• Dryable facade.• No water- and humidity-collecting surfaces, seams •
or grooves.The windows are tightly glassed.• Drip beaks at the ends of panels.• Finishing of cross-cut surfaces.• Solid fastening; avoid cracking the wood when •
nailing.Appendages are appropriately fastened to the •
facades.Priming is done sufficiently soon, preferably before •
installation.
Unprotected timber is stored away from rain and • drain water.
Manufacturing and pre-treating done inside a warm factory hall, instead of outdoors, clearly improve the painting quality and prolong the product’s service life.
The coating result is affected by the choice of substrate:a) An effort should be made to use heartwood as a raw material if pine is used.
Surface panels always present problems • (knots and annual rings).
Spruce is preferable to pine. • b) Dry sawing is done by band sawing; the feeding speed is moderate (< 50 m/min).
Wood structure has an impact.• c) Depending on the product, profiling – or at a minimum, the slight elimination of corners, resulting in a flawless surface.d) In connection with planing, a procedure known as grinding may be used. This will give the surface a slight resemblance to a round-cut surface and then adhesion is excellent.e) Moisture content of the panels must be under 20%.f) The cutting time of the tree affects fungal growth.g) Water-storage of wood prevents blue stain growth, but enhances bacterial activity.
In order to facilitate painting work and to reduce costs, several different types of finishing equipment have been developed. The use of industrially finished timber yields undeniable benefits:
• The first treatment – which is critically important in terms of the end result – takes place under controlled circumstances.• Timber is always treated on at least three sides, ensuring that, for example, tongue-and-groove surface-sawn timber will receive finishing treatment throughout.• Timber can easily be treated with wood stain.• Knot lacquering can be done quickly before priming.• Nowadays, construction work is performed year round and painted wood elements are installed at a time when finishing cannot be done outdoors.
Tikkurila Oy has developed a water-borne finishing combination, Pinja 2+, specifically for industrial priming. Pinja Oil is a water-borne primer that penetrates deep into the wood, providing excellent protection against blue stain and mould. Pinja Pro Primer is a water-borne
Primer Topcoat
Diccoplast Primer Tix 1-2x Diccoplast Tix 1x
Akvi Primer Tix 1-2x Akvi Top 1x
Akvi Primer Tix 1-2x Luminol 1x
Glazing Lacquering
Pinja Color 1x Pinjalac Solid 1-3x
Pinja Wood Stain 1x Pinjalac Solid 1-3x
Sealer Top lacquer
Merit or Merit Topas 1x Merit or Merit Topas 1x
Akvilac Line 25 1x Akvilac Line 25 1x
Luminol 1x Luminol 1x

46 T I K K U R I L A O Y I N D U S T R Y I N D U S T R I A L W O O D F I N I S H I N G
13.10 FibreboardMuch attention is paid these days to environmental and air protection. The authorities have also tightened the rules and regulations considerably. In order to reduce environmental hazards, an effort should be made to use paint combinations that are either completely solvent free or contain less solvents. Tikkurila’s water-borne Akvi products – either by themselves or combined with Diccoplast acid catalysed paint or UV hardening Uvinol products – are the modern paint combinations for fibreboard.
A. Smooth board
B. Moulded board
primer that can be used as a primer for both oil and water-borne paints, making it both user and environment friendly. Pinja Pro Primer is available in the Avatint tinting system. It suits most painting equipment; spray and vacuum equipment are among them.
We recommend the following paint combination:
13.8 Beams
Wood beams must have excellent resistance to humidity. Suitable coatings include the following:
13.9 Plywood
Painted plywood is used primarily for objects that are subjected to extreme stress. Therefore, the paint must perform exceedingly well in terms of elasticity, strength, mould resistance and ability to withstand steam cleaning. Epoxy paints and the polyurethane paints in the Diccodur series are best suited for this purpose.
These coatings are among those used for finishing plywood:
Primer Topcoat
Pinja Oil 1x + Pinja Pro Primer 1x
1x with any of Tikkurila’s most common exterior house paints (e.g. Pika-Teho, Ultra, Vinha, Teho)
Coating
Pinja Color 1x + Pinjalac Solid 2-3x
Pinjasol 1x + Merit Jahti urethane lacquer 2x
Lacquering Edge painting
Akvilac Topas or Akvilac Top lacquer 2-3x Akvi RMS 2-3x
Merit Top lacquer 1-3x
Uvinol -lacquer, normally 4-5 roller coaters
Primer Lacquering
Akvi Board, according to the line Akvi Board, according to the line, or Uvinol Board, according to the line
Primer Topcoat
Akvi Primer 1-2x Diccoplast, Akvi Top or an alkyd paint

T I K K U R I L A O Y I N D U S T R Y 47I N D U S T R I A L W O O D F I N I S H I N G
14. Coating costs and cost calculations
The total industrial finishing costs per square metre consist of several different cost factors. Significant
among these are the costs of facilities, equipment and personnel (coating, goods handling and quality-control personnel). Additionally, there are costs associated with energy and the environment (waste-water purification, waste management, etc.). Often, repair costs associated with finishing are left unnoticed. These costs may arise from processing the wood, the finishing method itself, a poorly performing paint combination or intermediate sanding.
Each company has its own cost structure. It is interesting to note, however, that the choice of an appropriate coating can affect several of these costs. The choice of appropriate coating equipment also has a significant impact on the total costs of finishing.
The price of the coating, which is often used when comparing different coatings, is only a fraction of the total costs of coating. In fact, the price per litre of industrial coating says very little about what the finished surface will cost. The price of the coating in the can is a different matter to the price of the coating on the finished surface. Therefore, the per-litre price in itself is not an appropriate basis for choosing an industrial coating.
In the wood industry, the amount applied to flat objects is measured using scales. The piece to be measured is fed normally through the painting line; before drying, the amount of paint applied on the sample piece is measured (g/area of measuring sample). It is recommended that the size of the measuring piece be kept to one that is easily converted into square metres, for example, 50 mm x 200 mm. Alternatively, a table can be prepared based on the area of a standard piece – placing the table on the wall will allow you to quickly determine to the gram the amount applied in g/m2.
Indirectly, the measuring value g/m2 may be used when calculating coating costs. When evaluating the quality and durability properties of the surface, the g/m2 value is instructional only. The properties of the painted surface are determined according to the thickness of the film. The specific gravity (kg/l) of paint varies according to how many raw materials with high specific gravity the paint contains. These heavy ingredients do not necessarily improve the quality properties of the finished surface. When comparing different paints, it is recommended that the g/m2 measuring result always be
converted into film thickness (µm).In a hanging conveyor line, measuring the amount
applied is usually done with a wet-film comb. The test sample is fed into the painting device and after painting the amount of wet paint applied is measured with a wet-film comb. The measurement result is indicated by that part of the gauge’s tooth that still becomes wet from the applied compound. The thickness of the dry film can be calculated when the solids content of the mixture used is known in terms of percent by volume.
Below are a few examples of different cost and film-thickness calculations. The samples show how coating costs are calculated. The prices, weights, volumes and mixture ratios used are examples only.
Table 4. One-component solvent-borne lacquer.
Price of lacquer € 6.50/lSolids content 30 weight %Specific gravity of lacquer 0.95 kg/lPrice of thinner € 3.50/lSpecific gravity of thinner 0.85 kg/lMixture ratio (in volumes) 100 parts lacquer 20 parts thinner
In the Volume column, all ingredients to be mixed in the lacquer mixture are added up. The weight of the lacquer is calculated according to the formula; volume x specific gravity = 10 l x 0.95 kg/l = 9.5 kg. In terms of lacquer, the amount of solids is: weight of lacquer x solids content (as percentage of weight) = 9.5 kg x 0.30 = 2.85 kg.
The price of the lacquer is calculated directly from the price per litre: Volume x price of lacquer = 10 l x 6,50 €/l= 65,00 €.Price per litre of the mixture 72,00 € / 12 l = 6,00 €/lPrice per kilo of the mixture 72,00 € / 11,2 kg = 6,42 €/kgPrice per kilo of dry film 72,00 € / 2,85 kg = 25,26 €/kg
Mixture Volume( l )
Weight( kg )
Solids( kg )
Price( € )
Lacquer 10 9,5 2,85 65,00
Thinner 2 1,7 - 7,00
Total 12 11,20 2,85 72,00

48 T I K K U R I L A O Y I N D U S T R Y I N D U S T R I A L W O O D F I N I S H I N G
Materials cost of lacquer: If the amount applied is 120 g/m2 of wet compound, the price of the film = 120 g/m2 x 6.42 €/kg = 0.12 kg/m2 x 2 €/kg = 0.77€/m2.Solids content of the mixture as percentage of weight(2.85 kg / 11.2 kg) x 100 = 25.45 weight %.
If you would like to know how thick a coat of paint can be achieved with one application, you need to know – in addition to the preceding information – the solids content of the lacquer as percentage by volume. You will also need to calculate the specific gravity of the lacquer mixture.The specific gravity of the lacquer compound is 11.2 kg / 12 l = 0,93 kg/l.
If the solids content of the lacquer is 26, the volume % can be calculated as follows:- Wet application = 0.12 kg/m2 / 0.93 kg/l = 0.129 l/m2, since 1 l = 1 dm3, the result is 0.129 dm3 / 100 dm2 = 0.00129 dm = 129 µm.- Consequently, the thickness of the dry film is 129 µm x 26 volume % = 34 µm.
Table 5. Two-component solvent-borne paint.
Price of paint 7.50 €/lSolids content 70 weight %, 64 volume %Specific gravity 1.25 kg/lPrice of hardener 8.90 €/lSolid content 56 weight %, 50 volume %Specific gravity 0.97 kg/lPrice of thinner 3.50 €/lSolids content 0 weight %, 0 volume %Specific gravity 0.87 kg/lMixture ratios 100 parts paint 20 parts hardener 10 parts thinnerMixture price per litre 192,60 € / 26 = 7,41 €/lMixture price per kg 192,60 € / 30,62 = 6,29 €/kgDry film price per kg 192,60 € / 19,67 = 9,79 €/kg
What are the material costs of paint, if the desired goal is 50 µm dry film with one application?Solid content of mixture:(20 x 0.64 + 4 x 0.50 + 2 x 0.00 %) / 26 = 57 volume %.The specific gravity of the paint mixture is 30.62 kg / 26 l = 1.18 kg/l.
- Wet application is derived by dividing the desired amount of application by the solids content of the paint mixture (volume %) = 50 µm / 0.57 = 88 µm of wet mixture.
- The materials cost is derived as follows: 88 µm x 7.41 €/l = 88 x 10-6 m x 7.41 €/l x 10-3 m3 = 0.65 €/m2.
Even though the above examples concern different types of products, it is evident from them that low cost per litre in itself does not entail lower materials cost. The price per litre of the paint product is clearly higher than that of lacquer; in spite of this, the materials cost per square metre is less, and at the same time, an even thicker paint film is achieved using paint.
In the above calculations, the costs for only one layer are calculated. In normal finishing work, the products are painted at least twice, thereby approximately doubling the material costs of the total quantities of paint and lacquer used. Also, only the share of the paint to be applied to the surface of the object is calculated, i.e. it is a theoretical calculation of cost.
On roller coater lines, and when curtain coating machines are used, efficiency as high as 90-99% is achieved, while in some finishing methods, the efficiency may drop as low as 30-40% – for example, in spraying chairs. If the share of loss is not taken into consideration, a large portion of material costs will be excluded. It is important to assess loss when the costs of different finishing methods are compared before selecting a method to be used.
In practice, the chemical reaction between different binders and the hardeners used also impact the film thickness. The result is that as the film dries, it also shrinks. Shrinkage can amount to as much as 10% of the layer thickness.
The wood material used also makes a considerable impact on paint-layer thickness. Paint compounds are also absorbed into the wood also in order to achieve the best possible adhesion. Of course, the paint layers absorbed into the wood of course reduce the thickness
Mixture Volume( l )
Weight( kg )
Solids( kg )
Price( € )
Paint 20 25,00 17,50 150,00
Hardener 4 3.88 2,17 35,60
Thinner 2 1,74 - 7,00
Total 26 30,62 19,67 192,60
T I K K U R I L A O Y I N D U S T R Y 49I N D U S T R I A L W O O D F I N I S H I N G
of the paint film. If, afterwards, you wish to measure – with a microscope or an ultrasound device – the thickness of the paint film achieved, you will discover that it varies a great deal in different places. This is because the wood surface is never even; the cell structure of oak, for example, may have differences exceeding 1 mm.
It is best, then, to check the material costs and total costs of finishing throughout the process. By following the current trends in technical development, considerable savings can be achieved by changing materials or investing in equipment.

50 T I K K U R I L A O Y I N D U S T R Y I N D U S T R I A L W O O D F I N I S H I N G
15. General instructions before finishing
Before starting finishing work, the product data sheets and Safety Data Sheet should always be carefully
reviewed, especially when using a product for the first time.
Mix wellPigments and matting agents may stratify while in storage. Mix the bottom sediment well; otherwise gloss and shade variations may occur. Lacquers may also incur “invisible” bottom sediment; in such a case, the product must be mixed well in order to achieve an even gloss. Wait a moment before applying the thinned coating to allow it to “settle”; this will help avoid foaming and other problems after application.
Mixing two-component productsTwo-component products must also be mixed well before adding the hardener. This ensures that the hardener is evenly mixed with the paint.• Mix the opened can before adding the hardener or thinner. Mixing the paint/lacquer is particularly important when using thixotropic products. By mixing, “false thixotropy” is removed, and excessive dilution of the product is avoided.• Check also to ensure the paint temperature corresponds to the temperature in the painting space. By checking the temperature the appropriate viscosity level is ascertained from the start, and variations in thinner quantity can be avoided.• Add the hardener directly into the paint and begin mixing. PLEASE NOTE! Avoid adding the thinner at the same time, as doing so may hinder the mixing of the paint and the hardener.• Mix thoroughly until the hardener has completely disappeared from the paint surface. The mixing time generally varies between 30-60 seconds. If possible, mix by machine, as this will ensure the mixing is even and shorten the required mixing time.• Add the right amount of thinner and mix in well with the paint mixture. The mixing time may now be cut in half.• Wait for approximately 10-15 minutes before mixing the paint mixture once again, and check to ascertain the viscosity is correct – the paint mixture is now ready for use.
Add the right amount of the right hardenerIt is important to follow the recommendations for two-component products. Too little hardener slows down the drying, or in the case of polyurethane paints, may result in too soft an end result. Too much hardener makes the coating surface too hard and causes it to crack easily. In acid catalysed products, excess hardener will usually rise to the surface as mildew.
When using acid catalysed products, mix the coating in a separate containerThe two-component coating, which contains the hardener, may turn a reddish-brown colour when stored in the container it was delivered in. It is best to store the mixture in a container made of polyethene or stainless steel.
Check to make sure that the substrate is cleanOil-, wax- and silicone-based impurities cause wetting problems or glossy blotches and hinder drying.
Check to make sure that the sealer or primer is not sanded through at any pointSanding through may cause absorption, grain raising and an uneven gloss. Determine the coating quality according to the requirements of the substrate, coating equipment and the finished surface.
Check the viscosityViscosity should be measured at 20-25°C. If the coating has been stored in cold temperatures, more thinner will need to be added and the mixture will acquire inappropriate properties. Excessive thinning reduces the solid content of the mixture; obtaining sufficient thickness of the dry film may be impossible.
Check the shadePrior to finishing large pieces, the shade should be checked on smaller test samples. Especially when staining large surfaces, a fresh shade sample should be available for use.

51I N D U S T R I A L W O O D F I N I S H I N G
Check the glossCheck the gloss when beginning finishing where a product or a new batch is used for the first time. Inadequate mixing prior to use may cause differences in gloss in the finished surface.
Use the recommended thinnerThe coating requires a certain amount of thinning (solvents) in order to function well with different application devices. Different thinners may be used with different paints and lacquers; their appropriateness should be checked before use. Using general thinners in special circumstances is possible – they may, however, cause disturbances in drying, or variances in shade or gloss.
Determine the amount to be appliedThe amount to be applied is calculated according to the desired end result, depending on coverage, type of wood and other requirements in terms of appearance. By coating a test sample, you will obtain an understanding of how much coating is required on the substrate. In order to determine the amount to be applied you may simply test-paint a sheet of paper 20 cm x 50 cm (=0.1m2) or 20 cm x 25 cm (0.05 m2) in size. A sheet of paper can be attached to a flat surface using nails that have been hammered through a board from its rear side. Weigh the sheet of paper before and after coating. The amount to be applied is indicated in grams in terms of the difference in weight before and after coating by multiplying the result by 10 or 20.
In a curtain coating machine, both the viscosity and the amount applied must checked. This should be done when starting, when adding coating and at least once an hour throughout the work process. Automatic viscosity adjusting devices that can be attached to both curtain coater and roller coater machines are available on the market.
Check the pot lifeWhen hardener is added to two-component coating, hardening begins. The time required for doubling the viscosity is known as pot life. Pot life varies from a few hours to several days, depending on the product. For this reason, pot life should always be ascertained from the product data sheet. The excess product may be usable on the next day. In that case, it should be used to obtain a new mixture that consists of one part of the old mixture and two parts of the new one. In this way, the coating will maintain its original properties, including gloss.
Read and follow the warnings!

52 T I K K U R I L A O Y I N D U S T R Y I N D U S T R I A L W O O D F I N I S H I N G
16. Some of the most common concepts in painting
This guide, as well as paint-product labels, product data sheets and Safety Data Sheet contain some
special terminology. This glossary defines some of the principal concepts in order to facilitate the proper use of paint products and to enable the painter to complete the work without difficulty.
One-componentThe paint dries either physically, or an internal hardener has been added to it during the manufacturing phase. There is no need to add hardener during the mixing phase.
Two-componentThis is a paint to which the amount of hardener indicated in the product data sheet must always be added. With adding the hardener the paint dries and forms a cohesive surface that protects the substrate against stress. Without the hardener, drying does not take place; the surface remains sticky, and does not acquire the required resistance properties.
Acid catalysed lacquer or paintA paint product, whose binders consist of various resins which harden due to the influence of catalytic acid. The reaction starts after the acid has been added and the pH level drops. The acid does not react with the binder.
Acrylate, acrylate polymerAcrylate is a binder that is commonly used in water-borne products, among others.
CoverageThe capacity of the paint film to cover the differences between the dark and light areas of the substrate is known as coverage. Coverage is estimated by applying a paint film of a certain thickness on what is known as hiding power paper, on which a black check pattern is printed against a white background. Coverage is assessed by comparing the paint’s capacity to cover the black-and-white check pattern on the paper.
DensityDensity indicates the weight of one litre of paint at 23°C. The unit of density is kg/l as defined according to the standard SFS 3635.
DispersionDispersion is the name used for effective mixing in paint manufacturing. Paints are manufactured in a dissolver. At the end of its rotating axle is a sheet metal gear used to generate sufficient shear force to grind the pigments that have been added to the paint.
Dry-film thicknessThe thickness of the coating remaining on the substrate (µm) when the solvents have evaporated and the film has hardened.
Evaporation timePlease see Flash-off time below.
Filling capacityFilling capacity refers to the capacity of the paint product to cover up the unevenness of the substrate. This is dependent on the paint’s solids content and tendency to be absorbed into the substrate. If the paint has poor filling capacity, several layers must be applied in order to obtain the desired surface evenness.
Flash-off timeSubsequent to painting and prior to drying at an elevated temperature, the solvents must be evaporated from the paint film. The time it takes for the solvents to evaporate is called Flash-off time. Evaporation time depends on the type of paint, its solvent composition, film thickness, temperature and ventilation. Without sufficient flash-off time, the paint surface may boil while in the drying zone.
Gloss levelThe gloss level indicates the capacity of the paint surface to reflect light. Gloss can be defined in terms of different angles of reflection. Generally, the wood industry uses the 60° reflection angle. Measurement is

53I N D U S T R I A L W O O D F I N I S H I N G
performed according to standard SFS 3632/60°. Other commonly used measuring angles are 20° and 85°. The 20° measuring angle can be used when measuring gloss levels over 70; the 85° angle is used when measuring gloss levels under 10.
Gloss level Nominal marking
90 ≤ x Full gloss 80 ≤ x < 90 High gloss 60 ≤ x < 80 Gloss 35 ≤ x < 60 Semi gloss 10 ≤ x < 35 Semi matt 5 ≤ x < 10 Matt x < 5 Full matt
HardenerAn ingredient added to the paint portion of two-component paints that causes a hardening reaction. The choice of hardener can be used to control the application and drying properties of paint.
High-solid productsThe solids content of high-solid products is higher at the application phase than that of normal paints. The solids content of high-solid paints is over 70% by volume while that of high-solid lacquers is over 55% by volume.
MetamerismThe apparent change in colour shade due to a change in lighting circumstances, for example when moving from outdoors to fluorescent lighting.
NitrocelluloseCellulose polymer (binder) is made from cotton and the cellulose in wood. Lacquers are made by dissolving nitrocellulose in solvents. Another name for nitrosellulose is sellulose nitrate
Operating viscosityOperating viscosity indicates the paint product’s viscosity after the hardener and the thinner have been added. The paint mixture must have the right operating viscosity in order to avoid possible defects.
Pulverized products (Powder coating)Paint which is sprayed in pulverized form; it forms a paint film during thermal heating.
Pot lifeThe pot life of two-component products is the time required for the viscosity of a ready-to-use paint mixture to double (e.g. 20 s/DIN 4 cup – 40 s/DIN 4 cup).
Solids contentThe solids content of paint products can be indicated either as percentage by volume or percentage by weight. As percentage by volume, the solids content signifies the ratio of the paint’s non-volatile ingredients to the total volume of the paint quantity. The solids content is defined according to SFS standard 3637.
The solids content can also be expressed as percentage by weight. This refers to the ratio of the weight of the non-volatile ingredients to the total weight of the paint quantity.When application quantities and film thicknesses are defined, the solids content of the paint mixture must be calculated based on the solids content of the individual ingredients.
Shelf lifeShelf life is the period of time during which the coating material retains its usability in the original, sealed containers in the proper transport and storage conditions; when the temperature varies between + 3°C and +30°C.
SolventA component in solvent-borne paints, whose purpose is to dissolve the solid binders (resins) and polymers and to reduce their viscosity.
Solvent-free paintsPaints that do not contain solvents; for example solvent-free epoxies and 100 % UV products.
Structural surfaceA structural surface is a dried paint film that has been made uneven and nodular by using additives. The paint film is often matt and covers up the unevenness of the substrate.

54 T I K K U R I L A O Y I N D U S T R Y I N D U S T R I A L W O O D F I N I S H I N G
Theoretical coverageThe theoretical coverage of use is indicated by m2/l, and can be calculated as percentage by volume based on the solids content percentage (sc %) and the desired thickness of the dry film (dft, micrometres µm). The theoretical coverage of use is derived using the formula 10 * sc % /dft. For example, sc (by volumes) % = 65% and dft = 60 µm. In such a case, the theoretical economy of use is (10 * 65/60) = 10.8 m2/l. In actuality, the painting methods and conditions, the shape of the object to be painted, the surface quality and the painter’s occupational skill have an impact on the actual coverage. The actual economy of use is always smaller than the theoretical one.
ThinnerA thinner is a volatile fluid, solvent, water or a combination thereof. It is used to dilute (decrease the viscosity of) paint. Thinners evaporate from the paint surface during the spraying and drying phase. The properties of thinners are significant in terms of the application and drying properties of paints.
ThixotropyWhen the shear force increases – as is the case in a spray nozzle – the paint reacts in such a way that its viscosity drops momentarily and picks up again after a while. This type of paint is easy to spray and will also even out; it does not sag as readily on vertical surfaces.
Tinting systemA precise, quick and economical manufacturing method of coloured paints suitable for products for which basic paints exist. The tinting system consists of tinting pastes, basic paints, tinting-formula files, a tinting machine and mixer (shaker).
UV-dryingPaints and lacquers that are specially developed for UV-drying are dried with UV-lamp radiation. These products attain the required chemical and mechanical properties only subsequent to the UV-radiation.
UV-protectionThe UV-rays in sunlight cause yellowing in wood. Lacquers that contain a UV-protective compound may reduce the capacity of UV-radiation to penetrate the lacquer film, and thus slow down and decrease such yellowing.
UV-radiationShort-wave radiation of light whose wave length is 180- 380 nanometres. UV-radiation is invisible to the human eye; it is emitted by the sun and special lamps (UV-ovens).
ViscosityIn measuring viscosity, the DIN (SFS EN 456) measuring method is commonly used. Measuring viscosity is based on the substance being fluid enough to run through a small hole. Viscosity indicates the time in seconds required for the paint product to run through the hole in the cup. DIN4 measurement of viscosity is performed using a 1 dl cup; at the bottom of the cup is a hole with a 4 mm diameter. Measuring cups with a larger hole may also be used, e.g. DIN6 or DIN8, where the diameters of the holes are 6 mm and 8 mm respectively.
VOC (Volatile Organic Compound)Volatile organic compounds; the VOC count indicates the quantity of volatile organic compounds in grams per one litre of paint (numerical value g/l).
Water-borne binderA solid polymer (binder) that has been dispersed as tiny particles in water.
Wetting lacquer (non-wetting lacquer)Generally, lacquers are wetting. This property is due to the binder they contain, which – as it wets natural-coloured wood – darkens the colour slightly. Stained surfaces are normally lacquered with wetting lacquer.
Non-wetting lacquer is used when it is desirable to retain the natural lightness of light-coloured wood. Non-wetting lacquer alters the colour shade of stains, and therefore it is not used on top of them.
Whitening paste (White lacquering)Often, a whitened birch or pinewood surface is desirable. In that case, a white titanium-dioxide paste recommended by the manufacturer can be added to the lacquer in order to achieve a whiter result.

T I K K U R I L A O Y I N D U S T R Y 55I N D U S T R I A L W O O D F I N I S H I N G
A tinting system is the most economical way of manufacturing a wide colour range of colour shades
based on customer needs. The tinting system consists of base paint, colourants, a tinting machine, formula management software and a mixer. A spectrophotometer can be connected to the computer and formula management system to allow the measurement of the customer’s samples in order to generate a new colour formula based on the colour sample.
Tikkurila Oy Industry uses four tinting systems, all of which fall under the Temaspeed service concept. Temaspeed is Tikkurila’s service concept for professionals who use industrial paints. Through its pan-European Temaspeed resale network, Tikkurila offers an extensive selection of high-quality products, technical service and product delivery. In order to cater to different types of paint and different visual requirements in terms of appearance, the following tinting systems are available: Temaspeed Premium, Temaspeed Fonte, Temaspeed Dicco Color and Temaspeed Akvi Tone.
The Temaspeed Premium is a solvent-borne tinting system intended for tinting solvent-borne paints. The Premium system includes 12 colourants and two base paints – white TAL and the clear TCL. The number of base paints has been reduced to two on account of the excellent colour-saturation of the colourants. Having two base paints helps dealers reduce costs and stock level.
The Premium system is used to tint Temadur, Temacoat, Temalac, Diccoplast and Dicco Flex products, among others. For special shades, special base paints – containing, for example, larger or smaller aluminium particles – are available. Aluminium base paints can be used to make shimmering metallic colours – something that cannot be accomplished with regular base paints or colourants.
The Temaspeed Fonte tinting system is intended for water-borne products. Fonte colourants are suitable for tinting all industrial, water-borne products. These colourants produce the best possible tinting result, and also affect the product’s other properties, such as drying time. The Fonte tinting system consists of 15 colourants that can be used to produce thousands of different colour shades. Fonte colourants are used to tint metal-industry products, such as Fontelac, Fontecoat and Fontedur, and wood-industry products in the Akvi and Pinja product series. There are also universal tinting systems on the market; they are suitable for both solvent- and water-borne products. With using these systems, some poor qualities, such as a stronger tendency of the pigment to sink to the bottom, lesser colour saturation and compatibility problems must be accepted.
The water-borne Temaspeed Dicco Color tinting system has been developed exclusively for tinting wood industry stains. Stains are required in many different shades, and often in small quantities at a time. For this reason, the most economical method of manufacturing stain shades involves using a tinting system. In addition to 10 stain solutions, the system contains a colourless stain solution, a tinting machine and formula management software. The viscosity of the solvents is very low – thereby differing from normal colourants and allowing the stains to be absorbed into the wood evenly.
17. Tinting systems
Figure 41. Temaspeed HA 200 automatic tinting machine.

56 T I K K U R I L A O Y I N D U S T R Y I N D U S T R I A L W O O D F I N I S H I N G
The Temaspeed Akvi Tone tinting system has been developed for tinting water-borne, transparent wood stains, window lacquers and stains. The system includes 10 colourants, clear stain solution, a tinting machine and formula management software. Due to their excellent weather-resistance, exterior stain shades have a higher resistance to sunlight than Dicco Color stains.
The Colour Management Software contains tinting formulae for the most common domestic and international industrial paint colour cards, such as RAL and NCS. Shades are available in their thousands, and their numbers are growing along with the new colour cards and the latest trends. For special colour shades and customer-specific colours new colour formulae can be produced using a spectrophotometer and formula management software.
Tinting is done using either a manual or an automatic tinting machine. Weighing is also possible, but requires considerably more time and increases the margin of error. For tinting the colourant a hole is punched into the lid of the base paint. In accordance with the formula for the desired colour shade, the tinting machine dispenses
the correct colourant in the correct quantities into the base paint. When the tinting is completed, the hole is closed with a special plastic plug in order to prevent the tinted paint from splashing out of the can when the can is shaked. The can of base paint – to which the colourants have been added – is shaken to mix the contents by rotating or shaking it in a shaker. The end result is the proper colour shade in ready-to-sell packaging.
Industrial manufacturing of small quantities of special shades is very expensive. For this reason, there are numerous tinting and distribution points in Finland and around Europe. Tinting allows the customer to obtain the desired batch of paint quickly and flexibly. The accuracy of the colour shades is excellent, facilitating the purchase of supplemental quantities without interrupting painting work. Furthermore, the customer’s and the distributors storage needs decrease, since it is unnecessary to keep every possible colour shade in storage. Purchasing small batches of paint becomes easier and quicker, which also means considerable cost savings.
Figure 42. Temaspeed Prima automatic tinting machine.

T I K K U R I L A O Y I N D U S T R Y 57I N D U S T R I A L W O O D F I N I S H I N G
Finishing work ordinarily proceeds without incident. In some cases, however, problematic situations may be encountered where a solution is not readily available. This section explains various surface defects and their
causes and provides guidance for solving them. The defect is explained under the heading. The cause is explained in the left-hand column of the table, and the suggested solution in the right-hand column.
18.1 Orange-peel surface
The paint surface does not smooth out; instead it resembles the surface structure of an orange, i.e. it is covered with a minor, slightly slanting unevenness.
Repair: Sand the uneven surface smooth and matt by using an intermediate sanding paper. Perform repair lacquering as per the suggested solutions.
18.2 Poor coverage
The paint surface does not cover up the shade differences in the substrate, or the shade is wrong.
Repair: Sand the uneven surface smooth and matt by using an intermediate sanding paper. Perform repair lacquering as per the suggested solutions.
18.3 Paint film breakage in the curtain coating
The paint film does not remain even during the curtain coating machine run; from time to time, breakages occur.
Repair: Sand down the failed surface until smooth by removing the entire paint film. Repaint using the curtain coating machine.
18. Solving finishing problems
Cause of the surface defect Suggested solution
The wrong thinner has been used in the paint, or the amount of thinner is insufficient.
Use the product-specific thinner mentioned in the product data sheet. Add thinner to reduce operating viscosity and to improve evenness.
The difference in temperature of the surface and the paint is too great. Level off the difference in temperature of the surface and the paint.
The pressure during spraying is too high, or the spray gun is at an improper distance from the surface.
Correct the spraying pressure and distance.
The air circulation in the flash-off and drying oven is too high. Lower the air circulation in the oven to allow the paint surface to even out.
The relative humidity of air is too low, and drying occurs too quickly. Increase the relative humidity in the space or use a slower thinner.
Cause of the surface defect Suggested solution
The primer is visible – either too light or too dark – underneath the topcoat. Use a tintable primer. Tint the primer with the topcoat.
Too much thinner has been added to the paint. Make a new batch of paint using a smaller amount of thinner.
The pressure during spraying is too high, or the spray gun is at an inappropriate distance from the surface.
Correct the spraying pressure and distance.
The paint has been poorly mixed, and the pigments are in the bottom of the can.
Re-mix the paint or make a new batch of paint.
Cause of the surface defect Suggested solution
The curtain head is too high. Lower the curtain head if possible.
Air bubbles or foam form in the paint. Lower the curtain head and place a drainage sheet in the drop chute to decrease the height from which the paint drops down. Check to make sure that the pump does not mix air with the paint.
The air circulation is too brisk near the curtain coater. Close the painting facility doors or build a wind shelter at the point of the curtain head.
Unwanted material has been mixed in with the paint. Filter the paint batch, clean the curtain coating machine or take a new batch of paint into use.
The paint viscosity is too low. Thin paint will not retain an even film. Make a new, thicker batch of paint and mix some of it with the old batch.
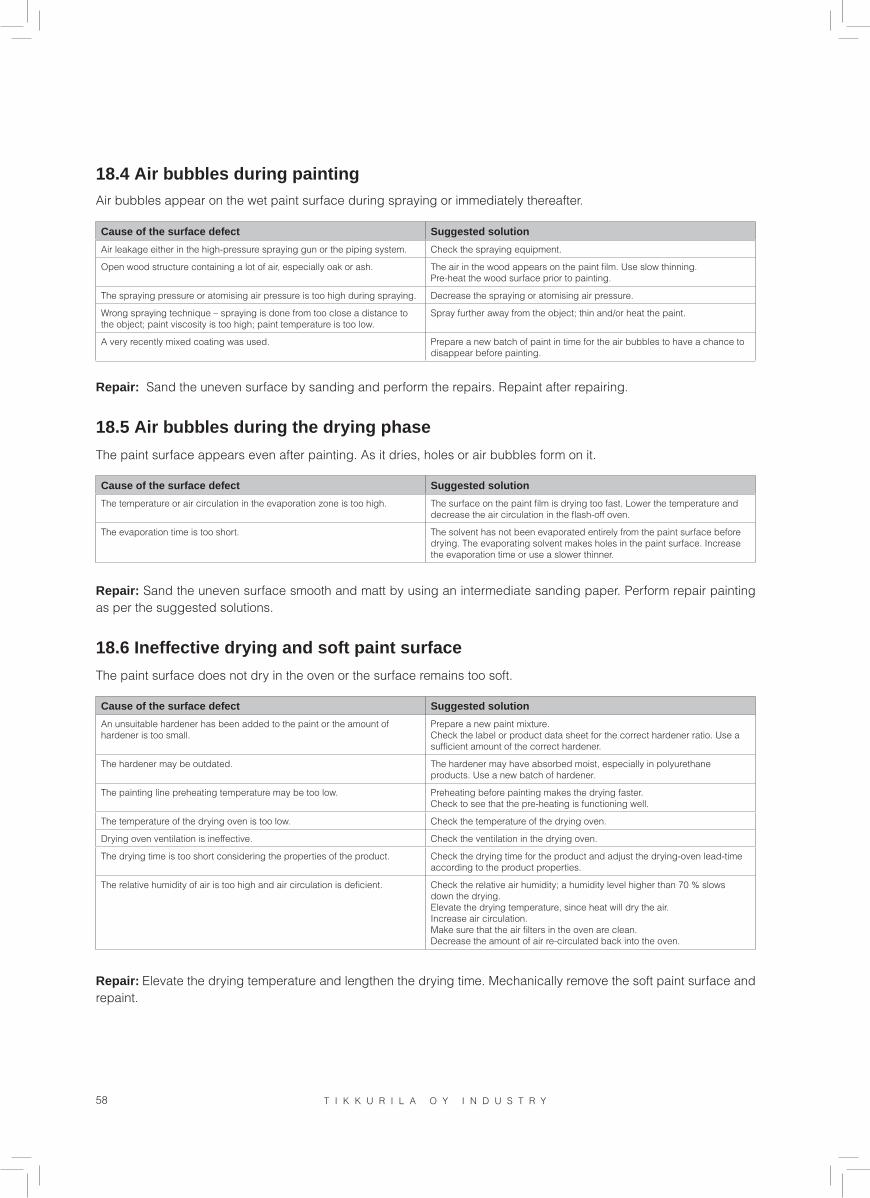
58 T I K K U R I L A O Y I N D U S T R Y I N D U S T R I A L W O O D F I N I S H I N G
18.4 Air bubbles during paintingAir bubbles appear on the wet paint surface during spraying or immediately thereafter.
Repair: Sand the uneven surface by sanding and perform the repairs. Repaint after repairing.
18.5 Air bubbles during the drying phase
The paint surface appears even after painting. As it dries, holes or air bubbles form on it.
Repair: Sand the uneven surface smooth and matt by using an intermediate sanding paper. Perform repair painting as per the suggested solutions.
18.6 Ineffective drying and soft paint surface
The paint surface does not dry in the oven or the surface remains too soft.
Repair: Elevate the drying temperature and lengthen the drying time. Mechanically remove the soft paint surface and repaint.
Cause of the surface defect Suggested solution
Air leakage either in the high-pressure spraying gun or the piping system. Check the spraying equipment.
Open wood structure containing a lot of air, especially oak or ash. The air in the wood appears on the paint film. Use slow thinning.Pre-heat the wood surface prior to painting.
The spraying pressure or atomising air pressure is too high during spraying. Decrease the spraying or atomising air pressure.
Wrong spraying technique – spraying is done from too close a distance to the object; paint viscosity is too high; paint temperature is too low.
Spray further away from the object; thin and/or heat the paint.
A very recently mixed coating was used. Prepare a new batch of paint in time for the air bubbles to have a chance to disappear before painting.
Cause of the surface defect Suggested solution
The temperature or air circulation in the evaporation zone is too high. The surface on the paint film is drying too fast. Lower the temperature and decrease the air circulation in the flash-off oven.
The evaporation time is too short. The solvent has not been evaporated entirely from the paint surface before drying. The evaporating solvent makes holes in the paint surface. Increase the evaporation time or use a slower thinner.
Cause of the surface defect Suggested solution
An unsuitable hardener has been added to the paint or the amount of hardener is too small.
Prepare a new paint mixture.Check the label or product data sheet for the correct hardener ratio. Use a sufficient amount of the correct hardener.
The hardener may be outdated. The hardener may have absorbed moist, especially in polyurethane products. Use a new batch of hardener.
The painting line preheating temperature may be too low. Preheating before painting makes the drying faster.Check to see that the pre-heating is functioning well.
The temperature of the drying oven is too low. Check the temperature of the drying oven.
Drying oven ventilation is ineffective. Check the ventilation in the drying oven.
The drying time is too short considering the properties of the product. Check the drying time for the product and adjust the drying-oven lead-time according to the product properties.
The relative humidity of air is too high and air circulation is deficient. Check the relative air humidity; a humidity level higher than 70 % slows down the drying.Elevate the drying temperature, since heat will dry the air. Increase air circulation.Make sure that the air filters in the oven are clean. Decrease the amount of air re-circulated back into the oven.

T I K K U R I L A O Y I N D U S T R Y 59I N D U S T R I A L W O O D F I N I S H I N G
18.7 Surface cracking (reticular)The paint surface acquires a reticular surface structure during the drying process.
Repair: Sand off the cracked surface and repaint after executing the suggested solutions.
18.8 Surface cracking (grain-aligned)
Grain- and veneer-aligned cracks appear on the lacquer surface.
Repair: Perform intermediate sanding of the cracked surface and then repaint it.
18.9 Sagging
The paint is sagging along the object’s vertical surfaces and the edges of flat parts.
Repair: Remove the saggings through intermediate sanding and repaint the objects after implementing the suggested solutions.
18.10 Colour differences in painting
When painting with the same batch of paint, colour differences appear on the product.
Repair: Intermediate-sand the topcoat and repaint using checked colour and equipment.
Cause of the surface defect Suggested solution
The application amount is too large. Reduce the application amount and decrease ventilation. The shape of the object may cause too thick a paint layer to accumulate in a certain area. Change the position of the object to be coated.The amount of hardener is too high.
Evaporation is too fast and the drying time is too short. Lengthen the flash-off and drying time.
Air humidity is too high. Decrease the relative air humidity, e.g. by elevating the temperature.
Cause of the surface defect Suggested solution
The paint layer is too thick. Reduce the amount of paint to be applied.Adjust the direction and distance of the automatic spray guns.Make sure that all spraying guns are spreading the right amount of paint.
The viscosity is too low. Use a thicker viscosity or a thixotropic product.
Cause of the surface defect Suggested solution
The painted object has been stored at too low a temperature or in too high a humidity.
Check the storage conditions of the finished products.Select a coating better suited to the conditions. Humidity of the wood or veneer is too high before application.
Cause of the surface defect Suggested solution
The paint batch has not been mixed well before the finishing treatment. Mix the paint batch well before beginning the finishing.
Viscosity varies in different batches of paint. Always use the same viscosity throughout as was used when beginning the work.
The application amount varies in different areas of the product. Adjust the curtain head in curtain coating machine so that an equal amount of paint is applied to all areas.Adjust the spraying guns so that the same amount of paint is applied to all areas. Check to ensure that the operating temperature of the paint is the same throughout the process.
Priming has been done with different colours. The topcoat is not thick enough to cover up the colour differences in the primer.

60 T I K K U R I L A O Y I N D U S T R Y I N D U S T R I A L W O O D F I N I S H I N G
18.11 Colour differences in lacqueringThe colouring of the wood surface is blotchy and clearly a different colour from the rest of the surface.
Repair: Remove the dyed lacquer layer and re-lacquer according to the suggested solutions.
18.12 Colour differences in staining
When staining with the same stain, the colour shade is blotchy, striped or otherwise uneven.
Repair: Sand off the stain from the surface and re-stain after repairing. Minor colour differences can be evened out by adding a maximum of 15% of the stain used to the sealer and/or top lacquer. Water-borne stain is added to water-borne lacquer and solvent-borne stain to solvent-borne lacquer.
18.13 Gloss variations
While using paint from the same batch, gloss varies in different parts of the object or between objects.
Repair: Intermediate-sand the earlier surface and repaint.
Cause of the surface defect Suggested solution
Redness appears in pine when lacquered with an acid catalysed lacquer. Too much time elapsed between the sanding of the wood and the coating. Increase production lead time and decrease intermediate storage time before finishing. Too much hardener has been used. An over-dose colours light wood species. The lacquer has come in contact with iron, for example while stored in a can made of an unsuitable material.
The lacquer had become dyed in the can. Water-borne lacquer has rusted the container and has been dyed brown.Acid-curing lacquer has come in contact with iron, for example while stored in a can made of an unsuitable material.
Cause of the surface defect Suggested solution
A different amount of stain is applied to different areas during spraying. Practice staining a new product and colour before staining a larger product lot.
The sanding is either too fine or too rough. Too fine a sanding may close the wood surface, preventing the stain from being absorbed into the wood evenly. Too rough sanding leaves the wood grains open, causing the wood to absorb stain differently in different areas.
The spraying is either too dry or too wet. Too dry a spraying will dry before it has a chance to evaporate from the wood surface, preventing the colorant from entering the wood. Too wet a spraying leaves puddles on the wood surface, causing uneven absorption.
Stripes in staining. The spraying gun is drawing. Clean or change the nozzle. Adjust the atomising air to attain an even spraying pattern.
Cause of the surface defect Suggested solution
The batch of paint was not mixed thoroughly. Mix the batch of paint thoroughly before preparing the first batch to be used. Doing so will ensure an even gloss throughout the batch.
Application amount varies. Adjust the painting equipment so that an equal amount of paint is distributed in all areas. Check to ensure that the temperature of the paint remains standard when used.
An outdated batch of paint was used. If you are using a batch of paint mixed the day before (two-component products), add a maximum of 30% of the old batch into the new one.
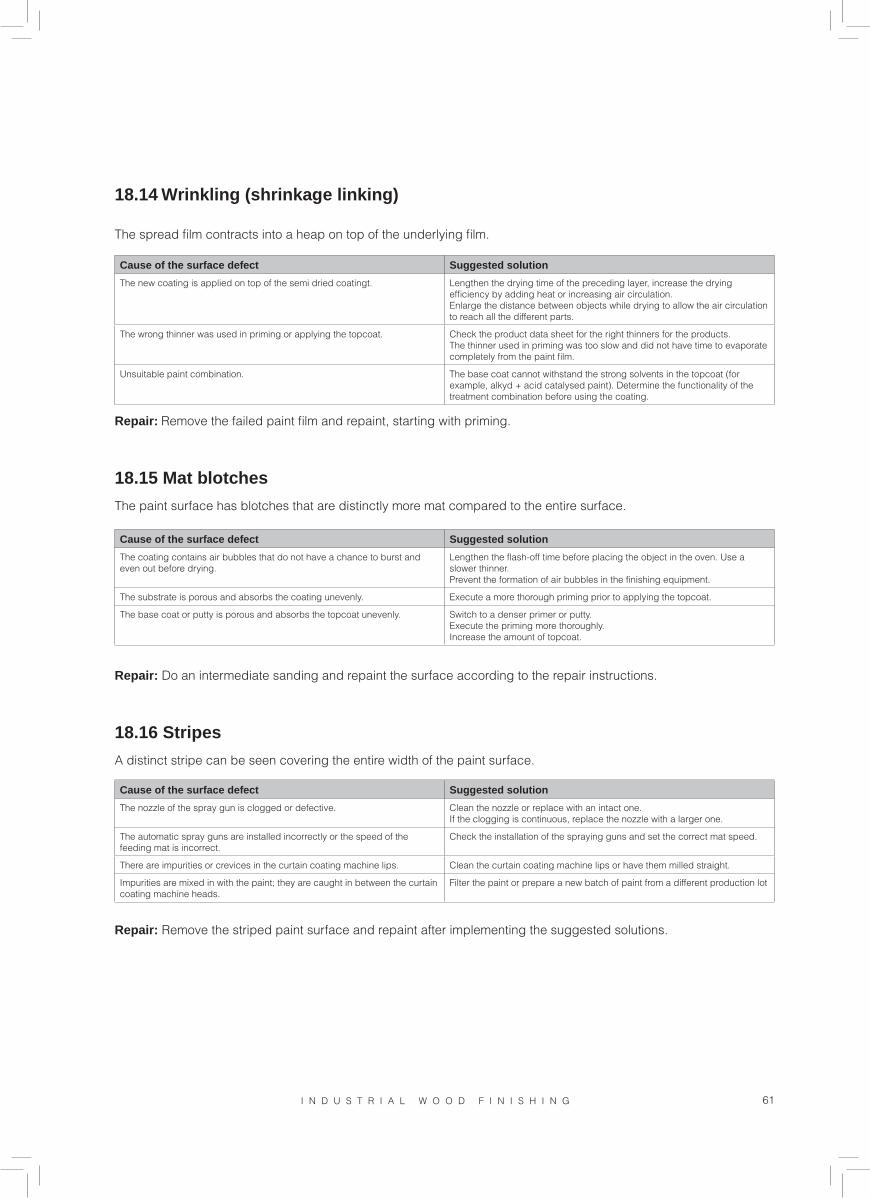
T I K K U R I L A O Y I N D U S T R Y 61I N D U S T R I A L W O O D F I N I S H I N G
18.14 Wrinkling (shrinkage linking)
The spread film contracts into a heap on top of the underlying film.
Repair: Remove the failed paint film and repaint, starting with priming.
18.15 Mat blotches
The paint surface has blotches that are distinctly more mat compared to the entire surface.
Repair: Do an intermediate sanding and repaint the surface according to the repair instructions.
18.16 Stripes
A distinct stripe can be seen covering the entire width of the paint surface.
Repair: Remove the striped paint surface and repaint after implementing the suggested solutions.
Cause of the surface defect Suggested solution
The new coating is applied on top of the semi dried coatingt. Lengthen the drying time of the preceding layer, increase the drying efficiency by adding heat or increasing air circulation.Enlarge the distance between objects while drying to allow the air circulation to reach all the different parts.
The wrong thinner was used in priming or applying the topcoat. Check the product data sheet for the right thinners for the products.The thinner used in priming was too slow and did not have time to evaporate completely from the paint film.
Unsuitable paint combination. The base coat cannot withstand the strong solvents in the topcoat (for example, alkyd + acid catalysed paint). Determine the functionality of the treatment combination before using the coating.
Cause of the surface defect Suggested solution
The coating contains air bubbles that do not have a chance to burst and even out before drying.
Lengthen the flash-off time before placing the object in the oven. Use a slower thinner.Prevent the formation of air bubbles in the finishing equipment.
The substrate is porous and absorbs the coating unevenly. Execute a more thorough priming prior to applying the topcoat.
The base coat or putty is porous and absorbs the topcoat unevenly. Switch to a denser primer or putty. Execute the priming more thoroughly.Increase the amount of topcoat.
Cause of the surface defect Suggested solution
The nozzle of the spray gun is clogged or defective. Clean the nozzle or replace with an intact one. If the clogging is continuous, replace the nozzle with a larger one.
The automatic spray guns are installed incorrectly or the speed of the feeding mat is incorrect.
Check the installation of the spraying guns and set the correct mat speed.
There are impurities or crevices in the curtain coating machine lips. Clean the curtain coating machine lips or have them milled straight.
Impurities are mixed in with the paint; they are caught in between the curtain coating machine heads.
Filter the paint or prepare a new batch of paint from a different production lot

62 T I K K U R I L A O Y I N D U S T R Y I N D U S T R I A L W O O D F I N I S H I N G
18.17 Impurities and unwanted material on the paint surface
There is a disturbing amount of small-size impurities and foreign particles in the paint film.
Repair: Do an intermediate sanding of the trashy surface until rough and repaint according to the repair instructions.
18.18 Craters (Repulsion)
Crater-like areas appear on the paint surface; the paint escapes from them.
Repair: After reviewing the suggested repair solutions, remove the paint surface containing craters and re-apply the treatment. In some cases, the silicone may have been absorbed into the wood, resulting in a re-occurrence of the repulsion.
18.19 Poor adhesion
The topcoat adhesion to the primer is insufficient.
Repair: After reviewing the suggested repair solutions, remove the poorly adhered layer of paint and repaint according to instructions.
Cause of the surface defect Suggested solution
The impurities originate in the paint. Filter the paint until clean from unwanted material.
The impurities originate in the equipment. Dirt comes loose during use and is mixed in with the paint. Remove the paint from the equipment and clean with thinner. When cross-using water-borne and solvent-borne products, the paint that has accumulated in the hose may come loose and form impurities in the paint.
The impurities appear during drying. Unwanted material flies onto the paint surface in the evaporation or drying oven. Clean the ventilation filters in the oven.
Cause of the surface defect Suggested solution
Poor sanding in between paint layers. Sand more thoroughly and more strongly prior to applying the topcoat.
Too long a time elapsed between intermediate sanding and applying the topcoat.
The base coat had a chance to harden too much before the topcoat was applied.
The topcoat is sprayed when too dry; as a result, it does not possess the capacity to adhere adequately to the base coat. The topcoat is too quick to dry.
Increase the amount applied. Adjust the spraying gun controls so that the result is a wet topcoat.
Adding too much hardener to the paint. Check the mixing ratio for the topcoat before finishing.
Too much of the old paint mixture has been used. The paint portion has already had a chance to react partly with the hardener, resulting in a weakened adhesive capacity.
Use only the new paint mixture or add a maximum of 30 % of the old batch into the new one.
The wrong base and topcoat combination was used. Check the compatibility of the paint mixture ingredients from the product data sheet or from the finishing combination.
Cause of the surface defect Suggested solution
There are remnants of silicone or oil on the object’s surface. Inside the factory, release or polishing agents or lubricants have been used, containing silicone or oil.The object’s surface becomes oily due to compressed air.
Discontinue the use of the substance containing silicone or oil.Find out about objects outside of the factory onto which silicone may have been applied. Check to ensure that the compressed air filters are clean.
The thinner is too fast. The paint surface does not have time to settle prior to drying. Switch to a slower thinner.

T I K K U R I L A O Y I N D U S T R Y 63I N D U S T R I A L W O O D F I N I S H I N G
18.20 Greasiness (Sweating)
The finished surface is blotchy, feels greasy and smells sour.
Repair: Remove all of the seating paint film from the entire surface and repaint.
18.21 Light blotches on the lacquer surface
The lacquer surface is not completely clear after drying; instead, milky white spots appear here and there.
Repair: Sand off the milky surface in its entirety and re-lacquer after executing the suggested repairs.
18.22 Rough surface
The paint surface is uneven after drying. It also feels rough to the touch.
Repair: Intermediate-sand the rough surface until smooth and re-coat after implementing the suggested solutions.
Cause of the surface defect Suggested solution
Adding too much hardener for acid catalysed paint. Always check the product data sheet for the correct mixing ratio before finishing.
Cause of the surface defect Suggested solution
In cellulose-based products, air humidity has condensed on the lacquer film during spraying.
Prevent humidity from penetrating the lacquer surface. Dry the air at the spraying point.Switch to a less humidity-sensitive lacquer product.
A thinner incompatible with the lacquer was used. Check the product data sheet for the correct thinner. Use a more slowly evaporating thinner.
The spraying surface of water-borne products is uneven, causing water to remain in some areas of the surface after drying.
Check to ensure that an even, cohesive lacquer surface is achieved on the object’s entire surface during spraying. In water-borne, UV curing products, evaporation prior to the UV-lamps is insufficient, and water remains inside the lacquer film.
Cause of the surface defect Suggested solution
The environment and finishing equipment are dirty or dusty. Clean up the surrounding environment and the equipment used.
The paint mixture was not mixed sufficiently; as a result, more solid ingredients may remain at the bottom of the container.
Mix the paint thoroughly before use.
The spraying gun pressure or nozzle or the spraying distance is incorrect. Set the correct values for spraying. Avoid setting the pressure too high and optimize the nozzle size and spraying distance.The reverse side of the objects may become rough due to the impact of overspray.The paint dries too quickly relative to the spraying values set.

Light Viewer
Object
1013
1012
1011
1010
109
108
107
106
1014
1016
1015
1017
1018
1019
0.1 Å
1 Å0.1 nm
Infrared
Short-wawe infrared
Long-waweinfrared
Radar
Termalinfrared
Micro wawes
1000 MHz
UHF
FM
VHF7-13
VHF2-6
500 MHz
100 MHz
50 MHz
Radio, TV
Ultraviolet
Visible light
X-rays
Gamma rays
Long wawes
AM
Wav
elen
gth
Freq
uenc
y (H
z)
{
{
1 nm
10 nm
100 nm
1000 nm1 µm
10 µm
100 µm
{ 1000 µm
1 cm
10 cm
1 mm
1 m
10 m
100 m
1000 m
400 nm
500 nm
600 nm
700 nm
Crest of a wave
Hollow of a wave
64 T I K K U R I L A O Y I N D U S T R Y I N D U S T R I A L W O O D F I N I S H I N G
19. Colours
19.1. Colour is light
The world we live in is full of colour. Colour provides a means for brightening up our environment. Colours and the way we use them in decorating directly affect our moods and feelings. Compatible colours create a harmonious balance and put us in a good mood.
Light is a pre-requisite for colour – in darkness we do not see colours. The sun radiates light and is the primary source of it. However, most objects in our environment do not radiate light. They are what are known as secondary sources of light. We notice them and their colours only when light. Seeing light requires three things: light, object and a viewer. The colour shade and object we see are formed as a result of their synergy.
Light consists of radiation that travels at an exceedingly high speed – approximately 300,000 kilometres per second. More precisely, light consists of electromagnetic vibration, which ripples out from its source in a wave-like fashion. Like a water wave, each light wave has a crest – and a hollow.
Waves are classified either according to length or the number of vibrations per second. Wavelength is defined in kilometres, metres, centimetres, millimetres, nanometres or picometres. The number of vibrations per second – i.e. their frequency – is measured in hertz, Hz.
Figure 43. Seeing colour.
Figure 44. A light wave.
Figure 45. An electromagnetic spectrum.
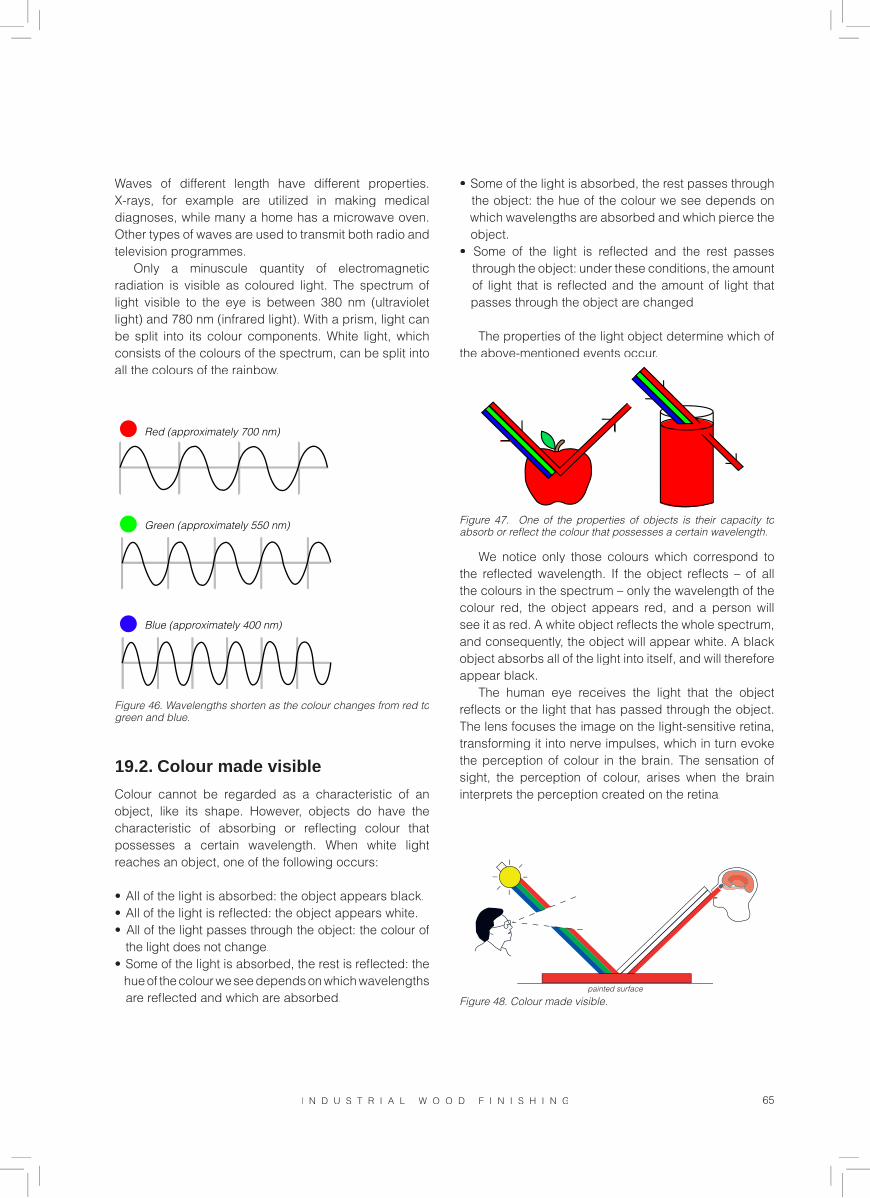
65I N D U S T R I A L W O O D F I N I S H I N G
Waves of different length have different properties. X-rays, for example are utilized in making medical diagnoses, while many a home has a microwave oven. Other types of waves are used to transmit both radio and television programmes.
Only a minuscule quantity of electromagnetic radiation is visible as coloured light. The spectrum of light visible to the eye is between 380 nm (ultraviolet light) and 780 nm (infrared light). With a prism, light can be split into its colour components. White light, which consists of the colours of the spectrum, can be split into all the colours of the rainbow.
19.2. Colour made visible
Colour cannot be regarded as a characteristic of an object, like its shape. However, objects do have the characteristic of absorbing or reflecting colour that possesses a certain wavelength. When white light reaches an object, one of the following occurs:
All of the light is absorbed: the object appears black.• All of the light is reflected: the object appears white.• All of the light passes through the object: the colour of • the light does not change. Some of the light is absorbed, the rest is reflected: the • hue of the colour we see depends on which wavelengths are reflected and which are absorbed.
Some of the light is absorbed, the rest passes through • the object: the hue of the colour we see depends on which wavelengths are absorbed and which pierce the object. Some of the light is reflected and the rest passes • through the object: under these conditions, the amount of light that is reflected and the amount of light that passes through the object are changed.
The properties of the light object determine which of the above-mentioned events occur.
We notice only those colours which correspond to the reflected wavelength. If the object reflects – of all the colours in the spectrum – only the wavelength of the colour red, the object appears red, and a person will see it as red. A white object reflects the whole spectrum, and consequently, the object will appear white. A black object absorbs all of the light into itself, and will therefore appear black.
The human eye receives the light that the object reflects or the light that has passed through the object. The lens focuses the image on the light-sensitive retina, transforming it into nerve impulses, which in turn evoke the perception of colour in the brain. The sensation of sight, the perception of colour, arises when the brain interprets the perception created on the retina.
Red (approximately 700 nm)
Green (approximately 550 nm)
Blue (approximately 400 nm)
Figure 46. Wavelengths shorten as the colour changes from red to green and blue.
Figure 47. One of the properties of objects is their capacity to absorb or reflect the colour that possesses a certain wavelength.
painted surface
Figure 48. Colour made visible.

66 T I K K U R I L A O Y I N D U S T R Y I N D U S T R I A L W O O D F I N I S H I N G
The retina inside the eye contains two types of cells – rods and cones – each of which specializes in detecting light of different strengths. Rod cells detect details in very dim lighting and recognize the difference between brightness and darkness. Cone cells are shorter than rods, and it is cones that enable us to distinguish colours. The relative majority of cone cells are located in the fovea – they can also be found in much sparser concentrations in the border areas of the retina. There are three types of cone cells that are sensitive to the different wavelengths of light. Some of them react to light between 400-500 nm, making them sensitive to blue light. Other cone cells “see” the light between 500-600 nm, i.e. only green light. The third type of cone cell is sensitive to red light, which occurs between 600-700 nm. This collection of rods and cones makes the human eye sensitive to such a degree that it is able to receive and distinguish millions of colours.
In the early 19th century, the scientist Thomas Young stated that the human eye perceives light as a mixture of three main colours (red, green and blue). This characteristic is utilized, for example, in computer screens. The computer can be used to establish what is known as the RGB value (R = red, G = green and B = blue) for all colour hues. The RGB values are based on additive colour formation.
19.3. Colour formation
19.3.1 Additive colour formationAdditive colour formation means placing different colour lights on top of one another. The principle of additive colour formation is utilized in colour TV, computer screens and theatres when all colours of the visible spectrum are produced. The principle can easily be explained with three slide projectors, each of which forms one additive basic colour on the screen. The three main colours of light are red, green and blue. A mixture of the main colours forms the colour white. The new colour areas created are of a lighter hue than their components.
19.3.2 Subtractive colour formationSubtractive colour formation is discussed, for example, in connection with tinting paints. If colorants – such as paints – are combined instead of lights, the mixed colour areas are always darker than their components. Some of the white is removed in order to attain the desired co-lour. The main colours include blue, red and yellow. A mixture of the main colours is black in theory, but brown in actuality.
19.4. Defining and measuring colourColour shades can be assessed with the eye or with a measurement device. Among the advantages of defining colour with a device are recording the colours measured, repeatability and secure functioning; the background and lighting do not influence the measured result. Therefore, it is best to use a spectrophotometer to check the colour shade. The spectrophotometer is based on the three-colour system. It measures the red, green and blue measurement values of each object and communicates them via a computer. With the measured values, the colour can be replicated on a computer screen, for example.
The colours found in nature are never pure colour shades – they contain all the sub-areas of the visible wavelength. The colour of an object depends on which wavelength area it reflects the most. A more exact measured result of the colours in nature is obtained with a spectrophotometer – a numerical measured result, i.e. a reflective graph is obtained for each colour shade, allowing the different shades to be distinguished
Figure 50. Subtractive colour formation.
Figure 49. Additive colour formation.

T I K K U R I L A O Y I N D U S T R Y 67I N D U S T R I A L W O O D F I N I S H I N G
from one another. The spectrophotometer’s sensor measures the value of the colour shade within several wavelength areas. A reflective graph can be run of the measured result; a computer can be used to convert it into numerical L*a*b values (CIELab, the colour space definition of the International Commission on Illumination (Comission Internationale de l’Eclairage). In this kind of colour space, the image of a colour impression is presented using three components: hue, saturation and brightness.
The measurement values of the spectrophotometer are indicated with the letters L, a, and b – where L stands for the degree of lightness-darkness, a stands for the red-green axis, and b for the yellow-blue axis. With these numerals each colour hue can be defined in the colour space, which is often depicted as a colour ball. The hue changes when circling the ball – saturation increases the further outward you go from the interior; white is located at the “north pole” of the ball, while black is located at the “south pole”.
19.5. Differences in colour
In colour space, colour differences are calculated as the hue value distance and are indicated with a dE marking. The dE value is not, however, an absolute value – its correctness depends on the colour area measured. In light and white hues the dE value must be under 0.5 in order for the hue to look the same. In the red colour area a colour difference corresponding to a dE value as high as 3.0 may appear to be the same. An effort is underway to improve the accuracy of describing colour hues. More recent modelling methods, such as CMC2:1 and CIE2000 are also in use.
19.6. Metamerism
Light always influences the colour we see. This change of colour in different lighting is called metamerism – it may seem that an object changes colour when the source of lighting changes. Metamerism is observed under three different types of standard lighting conditions – daylight, incandescent light and fluorescent light. When shades are manufactured according to colour models, an effort is made to make the new colour appear the same in all of the above-mentioned lighting conditions. If a colour model is highly metameric, the shade is synchronized only in daylight or in the lighting conditions in which the product is most often used.

68 T I K K U R I L A O Y I N D U S T R Y
Sources
Helsinki Technical School (Heltech), Käpylä education unit, Chromatics teaching materials, 2005
Internet: http//www.puuinfo.fi/, http://www.puuproffa.fi/
Mirka Oy: Tehokasta puunhiontaa (Effective wood sanding), 2005.
Photographs:
KährsPenope OyTikkurila archives
Tikkurila OyP.O. Box 53, FI-01301 Vantaa, Finland
Telephone +358 9 857 [email protected]
www.tikkurila.com

REG.NO. FI - 000001
T I K K U R I L A O Y I N D U S T R Y
Tikkurila OyP.O. Box 53, FI-01301 Vantaa, Finland
Telephone +358 9 857 [email protected]
www.tikkurila.com
High quality and eco-efficiency of our products are Tikkurila’s first priority
Since 1991, the high quality of Tikkurila’s products and
services has been guaranteed by a quality management
system in accordance with the ISO 9001 standard. The
components of high quality are competent personnel, strong
product development, advanced automation of production
technology, and fast and reliable delivery.
At Tikkurila, environmental, health and safety issues have
been brought together under the same management system
as issues pertaining to quality – operational development is
critically important and the goal is continuous improvement.
Tikkurila’s operational methods meet the requirements of the
International environmental management standard ISO 4001,
and the Occupational Health and Safety Standard OHSAS
18001, as well as the conditions of the Eco-Management
and Audit Scheme (EMAS) of the European Union.
In addition, the company follows the social responsibility
principles laid out in the “Tikkurila, the Environment and
Community Programme”. Our aim is to enhance the well-
being of all of our stakeholders and the well-being of the
environment throughout our operations.
Tikkurila’s own environmental programme is based on the
chemical industry’s international environmental, health and
safety programme entitled Responsible Care.
.