installation instructions hisun 800 - sure grip · hisun 800 1 4 5 2 3 1. support rod 2. main body/...
TRANSCRIPT
Hisun 800
1
4
5
2
3
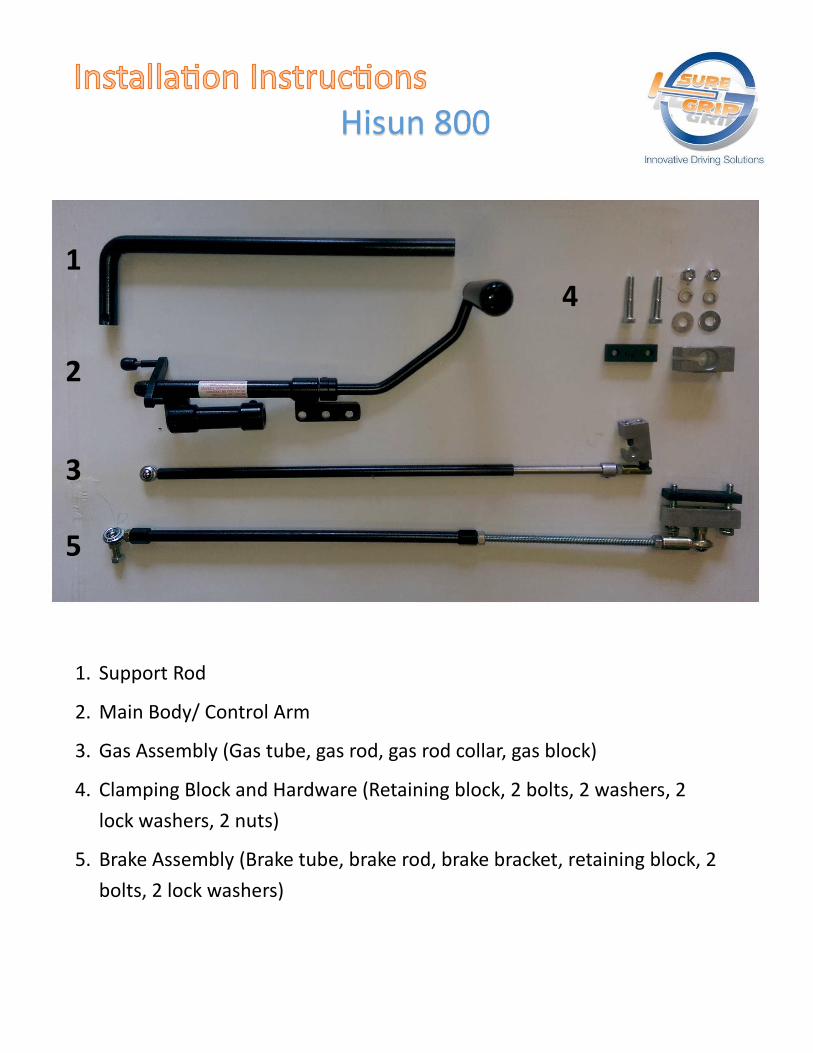
1. Support Rod
2. Main Body/ Control Arm
3. Gas Assembly (Gas tube, gas rod, gas rod collar, gas block)
4. Clamping Block and Hardware (Retaining block, 2 bolts, 2 washers, 2
lock washers, 2 nuts)
5. Brake Assembly (Brake tube, brake rod, brake bracket, retaining block, 2
bolts, 2 lock washers)

Step 1: Bolt the clamping block
to the structure underneath
dash to the right of the steering
column. To do so drill two 3/8”
holes into the structure indicated
in the picture below.
A-ach the clamping block with the
bolts and hardware provided. There
should be :
1 Clamping Block 2 Washers
2 5/16” Bolts 2 Lock Washers
1 Retaining Block
Step 2: Once you have mounted
the clamping block you can then
posi4on your support rod so that
your hand controls will be in an
op4mal posi4on.
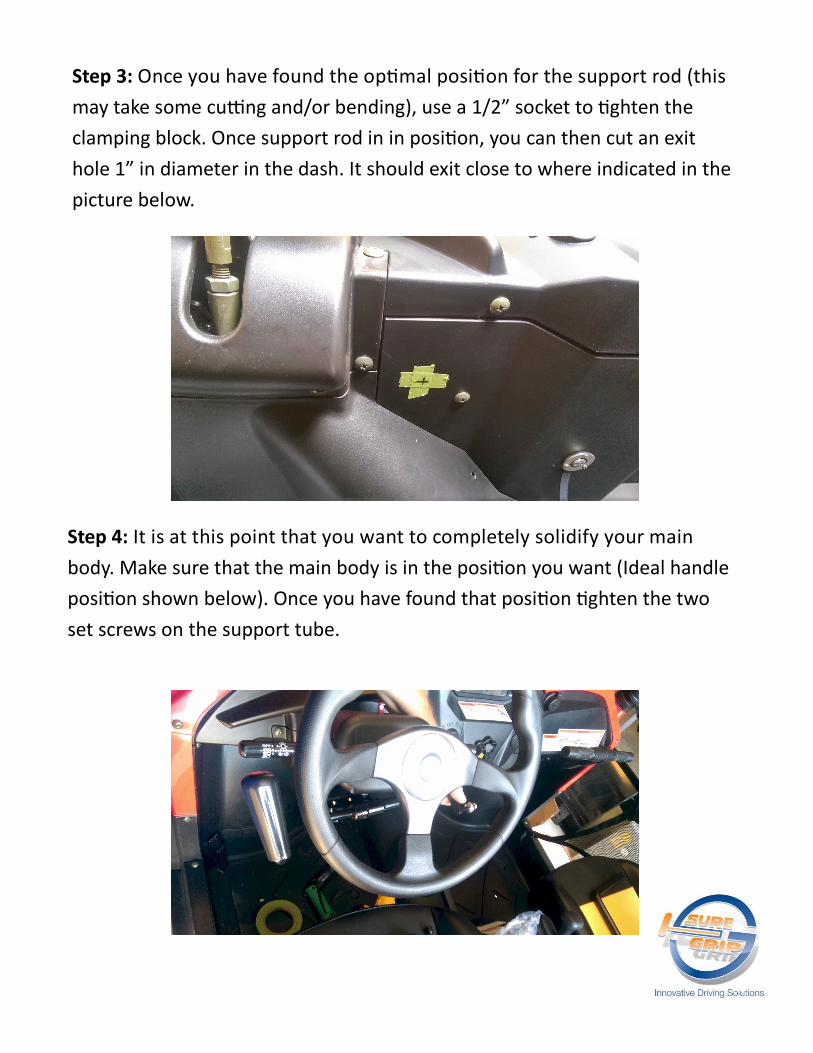
Step 3: Once you have found the op4mal posi4on for the support rod (this
may take some cu5ng and/or bending), use a 1/2” socket to 4ghten the
clamping block. Once support rod in in posi4on, you can then cut an exit
hole 1” in diameter in the dash. It should exit close to where indicated in the
picture below.
Step 4: It is at this point that you want to completely solidify your main
body. Make sure that the main body is in the posi4on you want (Ideal handle
posi4on shown below). Once you have found that posi4on 4ghten the two
set screws on the support tube.
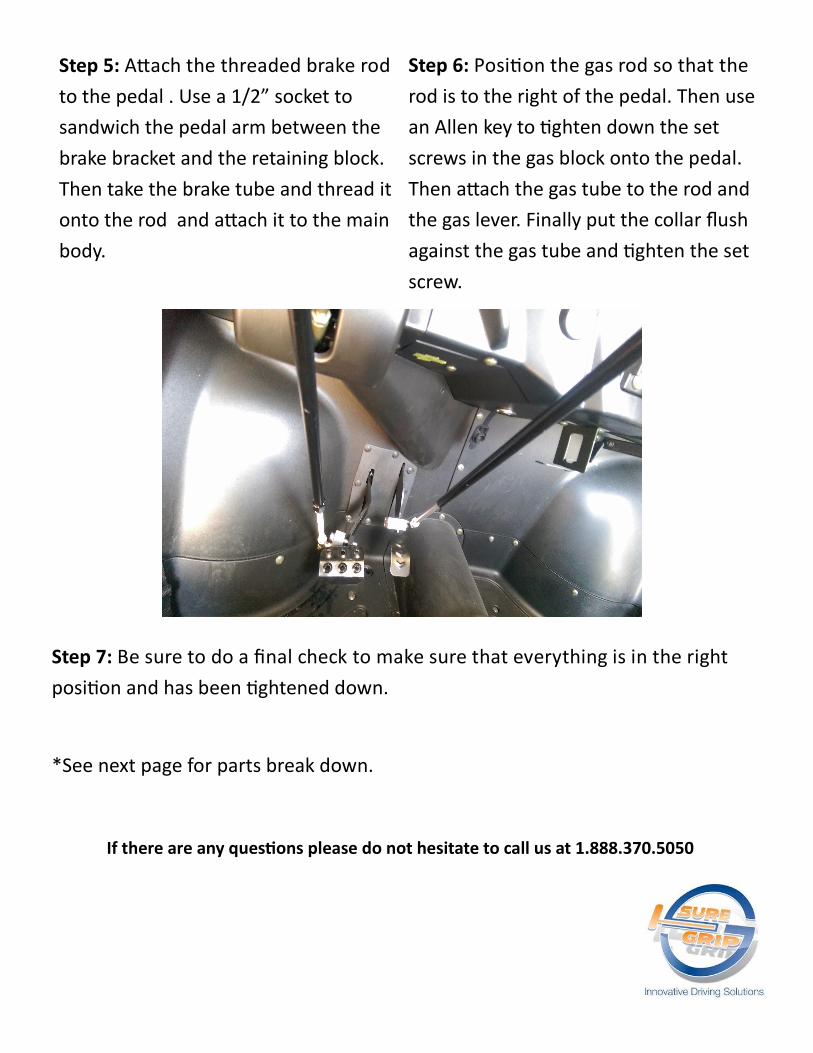
Step 5: A-ach the threaded brake rod
to the pedal . Use a 1/2” socket to
sandwich the pedal arm between the
brake bracket and the retaining block.
Then take the brake tube and thread it
onto the rod and a-ach it to the main
body.
Step 6: Posi4on the gas rod so that the
rod is to the right of the pedal. Then use
an Allen key to 4ghten down the set
screws in the gas block onto the pedal.
Then a-ach the gas tube to the rod and
the gas lever. Finally put the collar flush
against the gas tube and 4ghten the set
screw.
If there are any ques�ons please do not hesitate to call us at 1.888.370.5050
Step 7: Be sure to do a final check to make sure that everything is in the right
posi4on and has been 4ghtened down.
*See next page for parts break down.