instructions for continued...
TRANSCRIPT
Document No: ICA-355-00-011 Rev: IR
Date: November 19, 2008 Page 1 of 12
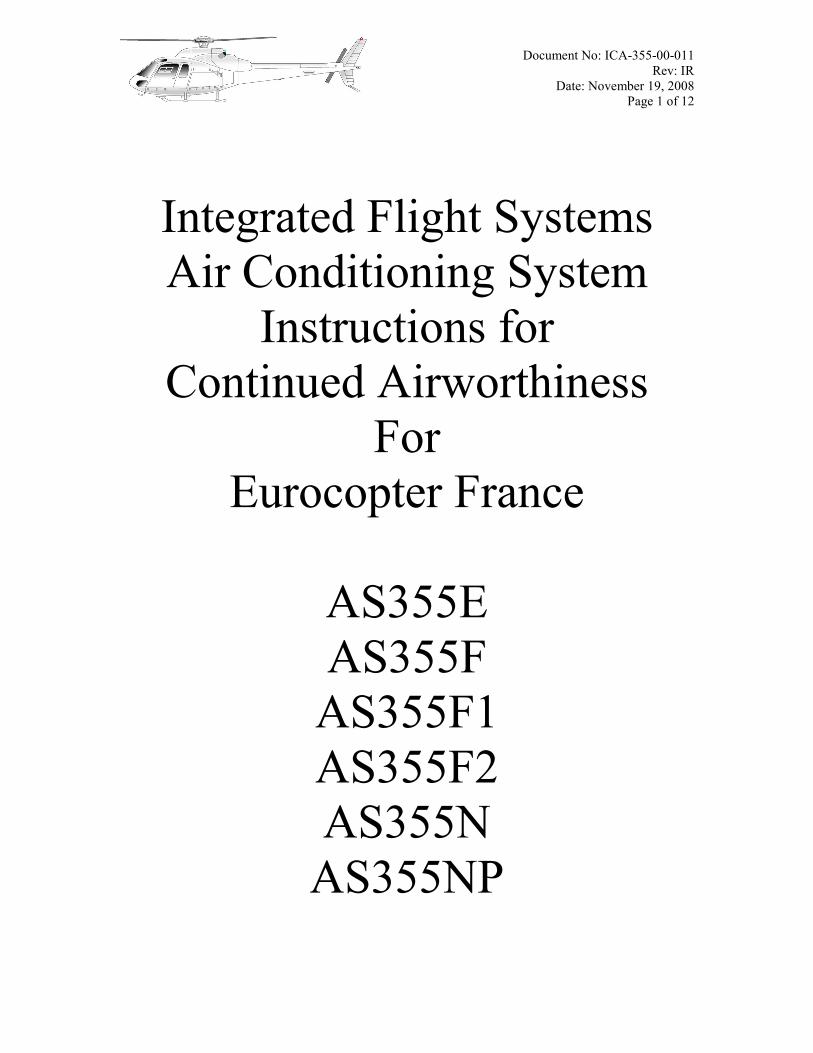
Integrated Flight Systems Air Conditioning System
Instructions for Continued Airworthiness
For Eurocopter France
AS355E AS355F AS355F1 AS355F2 AS355N
AS355NP
Document No: ICA-355-00-011 Rev: IR
Date: November 19, 2008 Page 2 of 12
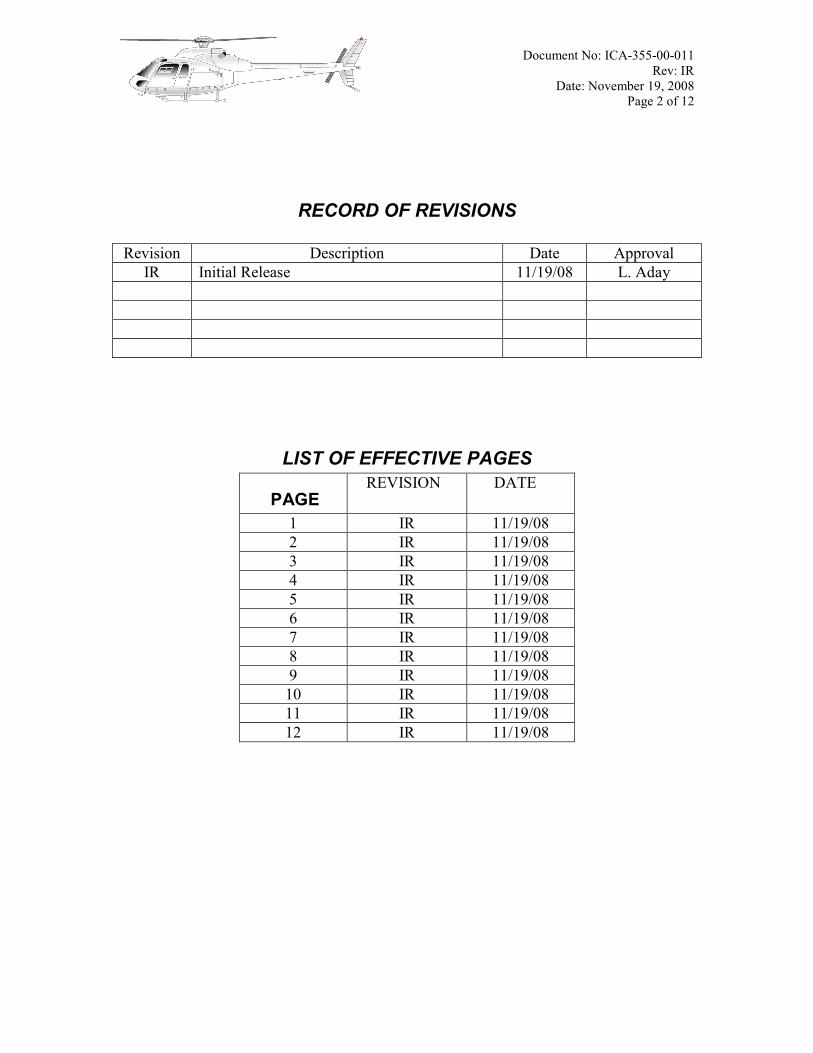
RECORD OF REVISIONS Revision Description Date Approval
IR Initial Release 11/19/08 L. Aday
LIST OF EFFECTIVE PAGES
PAGE REVISION DATE
1 IR 11/19/08 2 IR 11/19/08 3 IR 11/19/08 4 IR 11/19/08 5 IR 11/19/08 6 IR 11/19/08 7 IR 11/19/08 8 IR 11/19/08 9 IR 11/19/08 10 IR 11/19/08 11 IR 11/19/08 12 IR 11/19/08

Document No: ICA-355-00-011 Rev: IR
Date: November 19, 2008 Page 3 of 12
INSTRUCTIONS FOR CONTINUED AIRWORTHINESS
FOR INTEGRATED FLIGHT SYSTEMS AS355 SERIES AIR CONDITIONING SYSTEM
Aircraft Make: Eurocopter France Aircraft Model: AS355E, AS355F, AS355F1, AS355F2, AS355N, AS355NP
1. Introduction: Kit #355-00-011 is applicable to all models of the SA355 helicopter. It is a system utilizing R-134a (non-CFC type) refrigerant. This kit is compatible with utility, corporate, and EMS configuration. An Integrated Flight Systems unit is designated to be as maintenance free as possible. It incorporates in the design components that have proven themselves to be highly reliable.
2. Description: The Integrated Flight Systems Air Conditioning System is a vapor
(R134 refrigerant) recovery system. The compressor uses existing mounting points on the transmission case. To improve efficiency, two evaporators are used for this system, one mounted forward of the co-pilot, the other in the aft right-hand cargo compartment. Also, two 24-volt fan motors are used to circulate the cabin air through the evaporators. Air distribution for the aft evaporator is accomplished through the ducts in the cabin. The ducts are equipped with directional valves. The condenser is mounted in the right handside baggage area. A single 27-volt fan motor circulates air through the condenser. The air enters through the intake screen on the side baggage door of the aircraft and exits at a second hole through the outlet air screen.
The system is activated by an On/Off switch in the pilot’s compartment and a selector switch to provide high or low air velocity distribution options.
3. Operation: The air conditioning installation consists of a belt driven vapor cycle
air-conditioning system using R-134A as the refrigerant. The air conditioning system provides for cabin comfort during all
operations, both on the ground and in flight. During ground operations when the engines are running, cooling may be provided. Controls for the air conditioning system are located on or near the instrument panel. Three switches are provided. The Master Control Selector consists of a rocker type switch, labeled “A/C”, “OFF”, and “FAN”. Selecting the “A/C” position turns on the system’s dual evaporator fans, and condenser blower, and belt driven compressor. The second rocker switch is “HIGH”, “MED”, “LOW” evaporator fan speed selection for the forward cockpit. The aft evaporator has a separate fan speed 2 position switch, HI/LOW, located in aft cabin.

Document No: ICA-355-00-011 Rev: IR
Date: November 19, 2008 Page 4 of 12
4. Servicing Information: All components are readily accessible for inspection or
servicing. Major components are accessed as follows: A. Compressor: Remove transmission cowling in accordance with DGAC
Maintenance Manual. B. Condenser/Condenser Blower: Remove baggage compartment floor in
accordance with DGAC Maintenance Manual. C. Forward Evaporator/Evaporator Blower: Remove co-pilot’s rudder pedals
accordance with DGAC Maintenance Manual. D. Aft Evaporator/Evaporator Blower: Located above left baggage
compartment. Open right-hand transition cowl compartment door. E. Service Ports/Sight Glass: Located in left baggage compartment. Open
baggage compartment door.
Charging Refrigerant (R-134a) Into System: A. DANGER: R-134a, practically liquid R-134a, should never be allowed to
come in contact with the eyes or skin. Under normal conditions, R-134a as a gas or vapor is in inert substance and non-poisonous. A flame-type leak detector should never be used because of the danger of fire or explosion around an aircraft. Several electronic leak detectors are available on the market.
B. Never heat a cylinder of R-134a to produce additional pressure or to squeeze that last bit of refrigerant from the cylinder. If the cylinder has become cooled to the point where additional refrigerant cannot be obtained from it. The only approved method is to place the entire cylinder in a container of warm water. Do Not Exceed 120 Degrees Fahrenheit.
C. Never attempt to repair a leak requiring brazing or soldering within the aircraft structure as fire or explosion can result. Remove the entire assembly from the aircraft to a safe location before attempting such a procedure.
D. Should R-134a come in contact with the eyes or skin, DO NOT attempt first aid beyond the immediate washing of the eye or skin with clear water. A doctor should be contacted immediately for diagnosis and treatment even though the injury may be considered slight. REPEAT - DO NOT attempt first aid for this condition.
E. The refrigerant used in this system is R-134a and no other refrigerant is to be considered. Normal safety practices, such as wearing of gloves and the use of goggles should be utilized.
F. Charging of the system is a simple procedure whether on initial or recharging after leakage repair. A set of refrigerant gauges with a minimum of three hoses should be connected to the high side and low side service ports provided.
G. The sight glass is located in the #6 line in the ceiling of the baggage compartment.

Document No: ICA-355-00-011 Rev: IR
Date: November 19, 2008 Page 5 of 12
Oil Charging: R-134a Refrigerant A. Prior to the use of R-134a refrigerant, R-12 refrigerant was used in all IFS
systems. The PROPERTIES OF R-134A REFRIGERANT AND THE VARIOUS TYPES OF OIL USED WITH THIS REFRIGERANT ARE COMPLETELY DIFFERENT.
B. The oils with R-134a DO NOT dissolve into the R-134a. For this reason, additional oil, other than that in the compressor should NOT be added to a new system. This is particularly true when Abarrier type hose@ is utilized.
C. The Sanden compressor uses a 500 viscosity SP-20 type oil (ISO 100 100° O.A.T. or higher/ISO 68 100° or lower) or an AESTER@ type oil (yellow label). No other type oil can be utilized, especially APAG@ types.
Initial Charging: A. Tighten any leaking connections or make repairs as necessary to eliminate
leaks. Shut off and disconnect hose from the refrigerant cylinder. Connect the hose to a refrigerant mounted on a cylinder of dry nitrogen. Purge the regulator to center manifold hose. Close low side valve (left) at manifold. Failure to do so can cause pressure to flow to the low side (left) gauge.. Failure of gauge can result. Pressurize system to 250-PSI minimum, 300-PSI maximum.
B. After the system has been rechecked with the leak detector and it is determined that no leaks exist, disconnect the charging hose from the manifold set to the cylinder of nitrogen. Open the valves allowing the R-134a and nitrogen within the system to be collected into an EPA approved recycling until (expelling of refrigerant is not allowed).
C. Connect a vacuum pump to the center manifold hose. Open both valves and evacuate the systems for a minimum of twenty minutes. After twenty minutes of vacuum at seal level. (NOTE: For each 1,000 foot rise in altitude above sea level, a decrease below 30" of vacuum of 1" per one thousand feet rise in altitude will occur).
Adding R-134a Refrigerant to System: A. Close both the manifold valves and connect the center charging hoses to a
cylinder of R-134a. Open the valves of the cylinder. Purge the charging hose by loosening it at the charging manifold=s center hose. ONLY THE HIGH SIDE VALVE OF THE CHARGING MANIFOLD MAY NOW BE OPENED.
B. The combination of the vacuum still existing and the pressure in the R-134a cylinder transfers the R-134a from the cylinder into the system, on the high side only, without the compressor running. If a scale is available, the cylinder may be pre-weighted and 2.0 pounds of refrigerant R-134a added to the system. No additional refrigerant should be added after the system is in operation. Close manifold.
Document No: ICA-355-00-011 Rev: IR
Date: November 19, 2008 Page 6 of 12
C. The system is now ready for operation. This must be performed on the flight line with engine at 100%. As soon as the “A/C” Master Control Switch is turned to “A/C” all 28 VDC evaporator blowers will immediately begin operation. If after the system has been in the “A/C” mode for at least 2 minutes and cooling is not being accomplished, then check all circuit breakers. Determine that 28 VDC power is available for control circuitry. Check the operation of the relays and contacts.
D. If, after the system has been in the “A/C” mode for at least 2 minutes and
cooling is not being accomplished, then check all circuit breakers. Determine that 28 VDC power is available for control circuitry. Check operations of the relays and contacts.
E. After the compressor has come on line, the entire system is operational with
the manifold valve closed on the high side. The R-134a cylinder valve should be closed initially in order to get an accurate reading on the low side gauge of the “system pressure”. The reading on the gauge should not be allowed to go below 10 PSI, as this will indicate that the low-pressure safety switch is possibly set to low. It will disconnect the electrical power to the compressor clutch if allowed to open. Open of close the cylinder valve as required to monitor the flow of R-134a from the cylinder into the low side of the system, if additional R-134a is needed. Should additional charging be required, do so with the cylinder in the upright position. Charging the system, if required, until the system reads 28 PSI on low side, if O.A.T. is 80 degrees Fahrenheit or lower. It should be noted that pressure on the low side with the R-134a cylinder valve closed.
F. At this point, the minimum amount of R-134a is in a system and charging should cease. If the outside air temperature is 85 degrees Fahrenheit or more, you should check the high side pressure if it is 295 PSI or higher, you should remove a small amount of Freon to bring the system down to 290 PSI. THE REFRIGERANT CHARGE SHOULD NOT EXCEED 2.5 POUNDS.
G. The optimum method of determining the correct charge using at least two digital thermometers and place them near the return air and the discharge air of each evaporator. R-134a can then be added or deleted as required, until the highest T.D. is noted per the paragraph below. At that time, the correct amount of refrigerant is installed (but do not exceed 290 PSI).

Document No: ICA-355-00-011 Rev: IR
Date: November 19, 2008 Page 7 of 12
H. A test should be completed noting the average cabin temperature, the temperature on the return or entering air to all evaporators and the discharge air form the evaporators at the nearest point. If a Temperature Differential (T.D.) of less than 20 degrees Fahrenheit, with a humidity of 30% or less at sea level, the system should be considered as having possible defects, which will need investigation. At altitudes above sea level, less than 20 degrees Fahrenheit temperature difference may be recorded at humidity of 30% or more. This is due to less dense air moving more rapidly through the evaporators.
I. If the system is found to be completely empty of R-134a, a set of charging gauges should be connected to both high and low side service ports and to a cylinder of R-134a. Purge the charging hoses from the cylinder to the service ports with R-134a vapor. Open both the low and high side charging valves and allow pressure from the cylinder to equalize through the system until at least 50 PSI is noted. Utilizing an electronic leak detector, check all fittings on the system to determine the point of leakage. Any fitting indicating an oily or dirty condition is a prime suspect.
5. Maintenance Instructions: An Integrated Flight Systems unit is designated to be
as maintenance free as possible. It incorporates in the design components that have proven themselves to be highly reliable. It is suggested that at each periodic inspection, whether at 50 or 100 hour intervals, at least a visual inspection be accomplished to the following items; to fulfill with inspection criteria per Appendix D, Far-43: Para A, Para B, 2, Para C, 1, 7, Para D, 2, 7, 9, and Para F, G, I, 2, 3, J.
A. Compressor B. Compressor Clutch Bearing C. Compressor Mount D. Refrigerant Hose and Fittings E. Evaporator Fans and Mountings F. Condenser Blowers and Mountings G. Condense/Evaporator Coils
Compressor: i) In addition to the above inspection, the compressor should be inspected for
a true turning and free clutch. One mechanic should turn the main rotor blade while another observes the belt and clutch faceplate. Turn system to “A/C” and check magnetic operation of clutch plate. An independent #14 wire may be necessary from the compressor to an airframe ground in order to ensure that the clutch engages in a positive manner.
ii) If clutch plate and pulley show signs of excessive heat, replace clutch pulley assembly, bearing, and coil.
iii) The compressor mounts should be inspected for possible cracks, deterioration and that all bolts are firmly attached.
iv) Check condition of belt. Inspect for cracks, deterioration, separation, worn or flat spots. Change belt whenever any of these conditions exist. Change every one year or one thousand hours, which ever comes first.
Document No: ICA-355-00-011 Rev: IR
Date: November 19, 2008 Page 8 of 12
Hoses: i) Inspect hoses for general condition, cuts or swelling. Replace as required.
Security of clamps and Anti-chaff material.
Evaporators: i) Forward evaporator blower motor is a permanent magnetic type. No
repair can be made, motor must be discarded. ii) Aft evaporator blower motor is a permanent magnetic blower motor. It
has removable brushes. If brush length is 5/16" or less, replace. Inspect every 200 hours.
iii) Run both of the evaporator blowers in the “FAN” position and perform visual inspection of the assemblies to see that foreign materials have not been ingested into the blowers, which might cause blade damage. The blowers should also be run at the various speeds available to check motor operation.
iv) The fins of the evaporator coils should be checked for cleanliness and that they are straight. If damage has occurred to the fins, a fin comb should be utilized to put them in “like new” condition.
v) Condenser:
i) The two (2) brushes are located under caps on each side of the blower motor. Inspect, remove, replace and check brushes every 200 hours for wear. If brush length is 5/16” or less, replace brushes.
ii) NOTE: TAKE CARE WHEN INSTALLING BRUSHES THAT BRAIDED POSITIVE LEAD DOES NOT CONTACT HOUSING, CAUSING SHORT.
iii) The fins of the condenser coil a well as the evaporator coil should be checked for cleanliness and that they are straight. If damage has occurred to the fins, a fin comb should be utilized to put them in like new condition.
6. Troubleshooting Information:
General: A. Should the system not perform as expected, either because of
unreasonably erratic pressure readings, total lack of cooling or reduced cooling, it will be necessary to use the trouble shooting information if the A&P mechanic is unfamiliar with corrections.
B. The high and low-pressure switches should be checked if electrical power is lost to the compressor clutch. These are in series, and they should be checked from their electrical source, which are 20-amp condenser blower circuit breakers.
C. Always check system R-134a pressure first, as leaking unit may have caused the low-pressure switch to open. This switch is set to open at 8 PSI and close at 22 PSI. It requires that pressure, or greater, to close.
Document No: ICA-355-00-011 Rev: IR
Date: November 19, 2008 Page 9 of 12
D. Failure of the condenser blower or coil blockage could result in high side
switch opening. Both switches are designed to reset automatically. E. NOTE: Internal blockage of the high-pressure side of the refrigerant
system can cause a very low-pressure reading at the “low side” service gage and may also cause a low-pressure reading at the “high side” service gage. This can occur when either or both of the two (2) expansion valves in the system closes the receiver/drier were clogged.
Compressor:
A. The compressor installed is a Model #SD-505 manufactured by Sanden International.
B. A copy of Sanden Service Manual can be found on the Sanden website at www.sanden.com.
C. No maintenance, other than “clutch bearing” or “coil replacement” should be attempted in the field.
Evaporators:
A. If either the forward evaporator fan or aft evaporator blower fails to run, confirm that the Aircraft Master Switch is in the “ON” position and the Air Conditioning control Switch is placed to “FAN”. IF the fan/blower still does not run, determine that electrical power is available to the aircraft from an outside power source, such as a GPU or the aircraft power source. Inspect the circuit breakers in the Master Air Conditioning Electrical Panel. Determine if electrical power is being supplied to the wire, which is the power source to each motor. If power is available, it will be necessary to test with a voltmeter that electrical power is being supplied directly to the motor by the appropriate wire. If power is being supplied, and the motor is properly grounded, then it can be assumed that the motor has failed.
B. On the forward motor, P/N 050052, the evaporator assembly needs to be removed to allow removal of the motor. The motor may be obtained from Integrated Flight Systems and installed in the same manner.
C. Always check system R-134a pressure first, as a leaking unit may have caused the low-pressure switch to open. This switch is set to open at 8 PSI and close at 22 PSI. It requires that pressure, or greater, to close.
D. On the aft motor, P/N 050143, the screws in the motor support loosen to allow removal of the motor. The motor may be obtained from Integrated Flight Systems and installed in the same manner.
E. NOTE: The Aft Evaporator Blower SHOULD NOT BE DISASSEMBLED other than to inspect the brushes. The Motor is ordered as a UNIT.
Document No: ICA-355-00-011 Rev: IR
Date: November 19, 2008 Page 10 of 12
Condenser:
A. The condenser blowers may be checked by placing the Aircraft Master Switch in the “ON” position and then placing the Air Conditioning Control Switch to the “A/C” position. If one or both 25-amp circuit breakers are not open, then power should be supplied directly to the condenser blower, which is mounted in the right side baggage area.
B. If air is not being exhausted from both fans, a voltmeter should be utilized to determine if the power is being supplied through the switch and relay to the appropriate wire. Check that all electrical terminals are secure and that power is directed to the motor’s terminals. Inspect ground. If it is determined that the motor or motors have failed, the screws holding the blower assembly in place should be removed. The blower assembly must be removed as an entire assembly.
Receiver/Drier:
A. The receiver/drier may be replaced, if required, by discharging the R-134a from the system through a refrigerant hose or set of charging gauges. Again, all R-134a refrigerants MUST BE CAPTURED. Normally, the receiver/drier will not need replacement unless one of two factors is present:
i) The system has been left open for sometime and may be contaminated by air and/or moisture.
ii) The receiver/drier has become plugged which is evident by a large temperature differential on either side of the receiver/drier. Normally, the liquid line to and from it would be of approximately equal temperature and will be quite warm. IF one side is relatively warm and the other side is very cool or attempts to frost, then blockage of the receiver/drier has been determined. The receiver/drier should be removed and a new one installed in its place. The P/N is 090016-5 (“O” ring type). The charging instructions should be followed in recharging the system.
Expansion Valves:
A. The Expansion Valves are of “O” ring type. Both expansion valves are identical. “O” ring type P/N 090002-“O”.
B. NOTE: THE EXPANSION VALVES OF THE ABOVE “PART NUMBER” CONTAIN A “CHARGE” IN THE HEAD OF THE VALVE, CONTAINING R-134A.
C. It is EXTREMELY IMPORTANT that the sensing bulb be clamped tightly to the suction return line in the same manner as removed. Also, the line is to be clean, so good contact takes place between the sensing bulb and the line. This area must be re-insulated as in the original manner. Leak test and recharge.
Hoses:
A. Nylon “barrier type” hose with “Bubble” crimped ferrules are utilized with “O” ring fittings. They are found at all fitting locations and should be inspected. For security crimped fitting for leakage, and obvious defects.

Document No: ICA-355-00-011 Rev: IR
Date: November 19, 2008 Page 11 of 12
Low Pressure Switch:
A. This switch is a non-adjustable type (normally open) and relocated to an area under the cabin floor. P/N 050107 (set at 7 PSI out, 22 PSI in) is utilized. The switch will automatically reset to the closed position as soon as pressure is applied in PSI, greater than the cut-in point. Non-adjustable switches are located under the cabin floor.
High Pressure Switch:
A. High-pressure switch is identified under P/N 090004. It is a “normally closed” switch, which “opens” on a rise in pressure that exceeds the switches upper limit. Once the pressure has been reduced below the switches upper design point, it will again close, automatically.
System Operation Limitations:
A. Below 60 degrees Fahrenheit, it may be found that the air conditioning compressor will not come on line and remain in operation. This is due to that fact that coolness of the air available across the condenser does not allow the refrigerant system to maintain sufficient low side pressure to keep the safety low-pressure switch from tripping the compressor “of line”.
7. Removal and Replacement Information: The Integrated Flight Systems Air
Conditioning Kit is installed and removed in accordance with Installation Instructions provided per Kit PN (See Diagrams).
8. Diagrams:
Kit PN: 355-00-011 (CORPORATE/EMS CONFIGURATION)

Document No: ICA-355-00-011 Rev: IR
Date: November 19, 2008 Page 12 of 12
9. Special Inspection Requirements: No special inspections are required for this
system. 10. Application of Protective Treatments: No special treatments are required after
inspection and/or maintenance.
11. Data: Torque values for all attachment hardware are listed in the Integrated Flight Systems Installation Instructions Document Number INST-355-00-011.
12. List of Special Tools: No special tools are required for inspection or maintenance
of this system. 13. Recommended Overhaul Periods: No additional overhaul time limitations are
required for this system.
14. Airworthiness Limitation: No additional Airworthiness Limitations are required for this system.
15. ICA Revision: Any revisions to these instructions will be made available at the Production Approval Holders website: www.integratedflightsys.com.
NOTE: The Airworthiness Limitations section is FAA Approved and specifies maintenance required under § 43.16 and § 91.403 of the Federal Aviation Regulations unless an alternative program has been FAA Approved.