jug blender standmixer - beko · please read this user manual first! ... your product which has...
TRANSCRIPT

TBN6602W
Jug Blender StandmixerUser Manual
01M-8832803200-4915-01
EN DE FR TR ES PL RO
Please read this user manual first!Dear Customers,Thank you for selecting an Beko product. We hope that you get the best results from your product which has been manufactured with high quality and state-of-the-art technology. Therefore, please read this entire user manual and all other accompanying documents carefully before using the product and keep it as a reference for future use. If you handover the product to someone else, give the user manual as well. Follow all warnings and information in the user manual.
Meanings of the symbolsFollowing symbols are used in the various section of this manual:
C Important information and useful hints about usage.
AWARNING: Warnings for dangerous situations concerning the safety of life and property.
Materials are intended to be in contact with food.
Do not immerse the appliance, power cord or power plug in water or in other liquids.
Potection class against electric shock.
This product has been produced in environmentally-friendly, state-of-the-art facilities.
Complies with the WEEE Directive. It does not contain PCB.Made in P.R.C.
3 / 64 ENJug Blender Standmixer / User Manual
CONTENTS
1 Important instructions for safety and environment 4
1.1 General safety . . . . . . . . . . . . . . . . . . . . . . . . . . . . . . 41.2 Compliance with the WEEE Directive and
disposal of waste products . . . . . . . . . . . . . . . . 51.3 Package information . . . . . . . . . . . . . . . . . . . . . . . 51.4 Things to do for energy saving . . . . . . . . . . . . . 5
2 Jug Blender Standmixer 62.1 Overview . . . . . . . . . . . . . . . . . . . . . . . . . . . . . . . . . . . 62.2 Technical data . . . . . . . . . . . . . . . . . . . . . . . . . . . . . . 6
3 Operation 73.1 Blending . . . . . . . . . . . . . . . . . . . . . . . . . . . . . . . . . . . .7
4 Information 94.1 Tips for blending . . . . . . . . . . . . . . . . . . . . . . . . . . . 94.2 Cleaning and care . . . . . . . . . . . . . . . . . . . . . . . . . . 94.3 Storage. . . . . . . . . . . . . . . . . . . . . . . . . . . . . . . . . . . . 104.4 Handling and transportation. . . . . . . . . . . . . . 10
4 / 64 EN Jug Blender Standmixer / User Manual
This section contains safety instructions that will help protect from risk of personal injury or property damage. Failure to follow these instructions invalidates the granted warranty.
1.1 General safety• This appliance complies with the
international safety standards. • This appliance can be used by
people who have limited physical, sensory or mental capacity or who do not have knowledge and experience, provided that they are supervised or they understand the instructions with regard to safe use of the product and potential dangers.
• Do not use it if the power cable, blades or the appliance itself is damaged. Contact an authorised service.
• Only use the original parts or parts recommended by the manufacturer.
• Do not attempt to dismantle the appliance.
• Do not operate or place any part of this appliance or its parts on or near hot surfaces.
• Do not use the device for hot food. • Your mains power supply should
comply with the information supplied on the rating plate of the appliance.
• Do not use the appliance with an extension cord.
• Do not touch the plug of the appliance with damp or wet hands.
• Do not pull the power cable when unplugging the appliance.
• Unplug the appliance before cleaning, disassembly, accessory replacement and wait for it to stop completely.
• When emptying the container, during cleaning and grabbing chopping blades with bare hands serious injuries could result due to incorrect use. Use the plastic section trying to hold the chopping blade.
• Never touch blades while using the appliance. There is the possibility of injury due to incorrect usage.
• After cleaning, dry the appliance and all parts before connecting it to mains supply and before attaching the parts.
1 Important instructions for safety and environment
5 / 64 ENJug Blender Standmixer / User Manual
• Do not immerse the appliance, power cable, or power plug in water or any other liquids.
• If you keep the packaging materials, store them out of the reach of children.
• Children shall not use the appliance. Keep the appliance out of the reach of children.
1.2 Compliance with the WEEE Directive and disposal of waste products
This product does not include harmful and prohibited materials specified in the “Regulation for Supervision of the Waste Electric and Electronic Appliances” issued by the Ministry of Environment and
Urban Planning. Complies with the WEEE Regulation. This appliance has been manufactured with high quality parts and materials which can be reused and are suitable for recycling. Therefore, do not dispose the appliance with normal domestic waste at the end of its service life. Take it to a collection point for the recycling of electrical and electronic equipment. Ask the local authority in your area for these collection points. Help protect the environment and natural resources by recycling used products.
1.3 Package informationPackage of the product is made of recyclable materials in accordance with our national legislation. Do not dispose of the packaging materials together
with the domestic or other wastes. Take them to the packaging material collection points designated by the local authorities.
1.4 Things to do for energy savingCut the solid food into small pieces before placing them in the appliance as stated in the user manual. Follow the other instructions and times specified in the manual. Select low speed levels if suitable for the food to be prepared. Switch off and unplug the appliance after using it.
1 Important instructions for safety and environment
6 / 64 EN Jug Blender Standmixer / User Manual
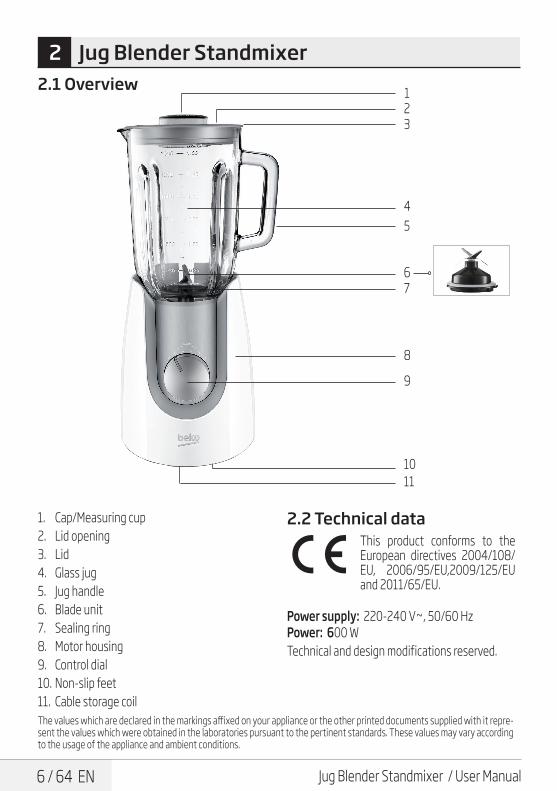
2 Jug Blender Standmixer2.1 Overview
The values which are declared in the markings affixed on your appliance or the other printed documents supplied with it repre-sent the values which were obtained in the laboratories pursuant to the pertinent standards. These values may vary according to the usage of the appliance and ambient conditions.
1. Cap/Measuring cup2. Lid opening3. Lid4. Glass jug5. Jug handle6. Blade unit7. Sealing ring8. Motor housing9. Control dial10. Non-slip feet11. Cable storage coil
2.2 Technical dataThis product conforms to the European directives 2004/108/EU, 2006/95/EU,2009/125/EU and 2011/65/EU.
Power supply: 220-240 V~, 50/60 HzPower: 600 WTechnical and design modifications reserved.
123
4
8
76
5
9
1011
7 / 64 ENJug Blender Standmixer / User Manual
3 Operation
AWARNING: Switch off the appliance and disconnect from supply before changing accessories or approaching parts that move in use.
1. Remove all packaging and stickers materials and dispose of them according to the applicable legal regulations.
2. Take the entire unit of the motor housing (8) and place it on a level surface, e.g. on the kitchen counter.
3. Now set the glass jug (4) with the opening facing down on a level surface.
4. Remove the blade unit (6) carefully by turning it counterclockwise and lifting it by holding it from the sides of the unit.
AWARNING: Do not remove the blade unit by lifting it from the blades.
AWARNING: The blade unit is very sharp! Handle the blade unit with utmost care, especially during cleaning, in order to avoid injuries.
5. Clean all parts, with the exception of the motor housing as described in “Cleaning and Care”.
6. Then re-assemble the jug blender in the reverse order.
7. Put the glass jug D on the motor housing (8).
CMake sure that the notches on the bottom of the glass jug fit those in the motor housing.
8. Cut the food into small pieces before using the appliance.
3.1 Blending 1. Place the device on an even and dry surface.
The non-slip feet (10) ensure the stability of the appliance.
2. Make sure that the power cord is disconnected from the power supply and the control dial I is on “0” before putting food into the glass jug (4).
3. Take the glass jug (4) from the motor housing (8) by lifting the glass jug (4) upwards and open the lid.
4. Now put the ingredients to be blended in the glass jug (4). The ingredients should only be about 2-5 cm long.
C Add water to ensure the jug blender functions smoothly.
CMix 3 units of hard food and 2 units of water in order to have a smooth jug blender experience (i.e: 60 gr hard food 40 ml water).
AWARNING: Do not put or blend hot food or liquids in the glass jug. If you process soup, make sure that the liquid temperature does not exceed 40°C.
AWARNING: To process crushed ice, we suggest you to start with three quarters of ice in the jug and add 15 ml of cold potable water.
A WARNING: Don´t try to crush ice without adding water to the jug.
AWARNING: Never let the jug blender operate while empty (without food).
8 / 64 EN Jug Blender Standmixer / User Manual
3 Operation
AWARNING: Never let the jug blender operate without the glass jug on the motor housing.
5. Close the lid (3). Make sure that the cap/ measuring cup (1) is inside the lid opening and is secured.
6. Place the glass jug (4) upright onto the motor housing (8).
AWARNING: Never move or turn the glass jug after it is properly seated in the place.
7. Connect the power plug to a suitable power outlet.
8. The cutting speed can be variably adjusted with the control dial (9).
C To operate the blender at the low speed, turn the control dial (9) to “1”.
CIf you want to blend with a higher speed, turn the control dial (9) to the desired speed level (2-4).
CFor short pulses of blending with a high speed, turn the control dial (9) to “P”. When you release the control dial (9), the blender will stop and return to “0” automatically.
CIf ingredients are to be added during the blending process, then add them through the opening in the lid (2). To do this, take out the cap/measuring cup (1).
9. After the desired consistency of the blended food has been reached, turn the control dial (9) to 0 to switch off the blender
AWARNING: Never run the blender for longer than 1 minute, otherwise it would overheat.
AWARNING: After running the appliance for 1 minute, let it cool down before using it again.
AWARNING: Be sure the motor is switched off and has completely stopped before removing the glass jug (4) from the motor housing (8).
AWARNING: Do not place any utensil (scraper, fork, etc.) in the glass jug while blender is operating.
10. Pull the power plug out of the power outlet.11. Take the glass jug (4) off from the motor
housing (8) by lifting the glass jug upwards (do not try to rotate it) and open the lid (3).
12. Take off the lid and pour the mixture into glasses or other containers.
9 / 64 ENJug Blender Standmixer / User Manual
4 Information
4.1 Tips for blending • To add ice cubes to mixtures while the blender
is operating, add one cube at a time through the cap (1). Wait a few seconds before adding the next ice cube so that the blender can properly blend the ice.
• To add food while the blender is operating, remove the cap (1) and drop the ingredients through the opening. Be sure to cut the food into about 2-5 cm pieces to fit through the opening. Replace the cap (1) when you have finished adding ingredients.
• When blending solid food, such as raw vegetables, cooked or uncooked meat and fruits always cut them into no larger than 2-5 cm pieces before placing them into the glass jug. Blend no more than 2 cups of these food at a time. This will speed the blending process and reduce wear on the blending blades.
• Always place liquid ingredients in the glass jug first, unless a recipe specifically states otherwise.
• To blend beverages, place all ingredients in the glass jug at the same time.
• Avoid overblending. Usually, you will need to blend for a few seconds.
• Overblending may cause food to become mushy.
4.2 Cleaning and care
AWARNING: Never use petrol solvents, abrasive cleaners, metal objects or hard brushes to clean the appliance.
AWARNING: The blades of the cutter unit are very sharp! Handle the blades with utmost care in order to avoid injuries.
A WARNING: Never clean the appliance with your bare hands.
AWARNING: Clean the jug blender after each use. Do not let any food remnants harden on and inside the jug blender. This will make it more difficult to clean it later.
AWARNING: Do not use boiling water. The blade assembly bearings have been designed with a lifetime lubricant; exposure to boiling water may damage these bearings and shorten the life of the blender.
1. Turn the appliance off and disconnect it from wall socket.
2. Allow the appliance to cool down.3. Remove the glass jug D from the motor housing
(8). Rinse with water to remove any large food particles that may have accumulated in the glass jug.
C You can use the measuring cup (1) to remove the blender blade.
4. Turn the glass container over and place it on a level, non-slip surface. Attach the measuring cup (1) by placing it over the cutting blade unit (6). Remove the cutting blade unit (6) by turning it with the measuring cup in the direction of the “open lock symbol” (counterclockwise). Glass container, lid and measuring cup can now be washed in the dishwasher. Carefully rinse the cutting blade unit under running water.
5. To place the blade unit (6) back to the glass container (4), turn the blade unit (6) to the locking “ ” direction (clockwise) using the measuring cup (1).
6. Replace the glass jug (4) on the motor housing (8).
7. Place 1 to 1 ½ cups warm water with some drops of mild cleanser into the glass jug (4) and switch to speed “4” for a few seconds. Remove the glass jug from the motor housing and rinse with water. Repeat as necessary.
10 / 64 EN Jug Blender Standmixer / User Manual
4 Information
CDo not immerse the motorized base or blade unit in liquid, or place them in the dishwasher. Only the lid and the glass jug may be immersed and placed in the dishwasher.
8. Use a damp soft cloth and some mild cleanser to clean the exterior of the appliance.
9. Wipe the blender base, cutter unit (6) and lid with a lint free cloth before the next usage.
4.3 StorageIf you do not plan to use the appliance for a long period of time, please store it carefully. Make sure the appliance is unplugged and completely dry. Store the appliance in a cool, dry place. Make sure the appliance is kept out of the reach of children.
4.4 Handling and transportation
• During handling and transportation, carry the appliance in its original packaging. The packaging of the appliance protects it against physical damages.
• Do not place heavy loads on the appliance or the packaging. The appliance may be damaged.
• Dropping the appliance will render it non-operational or cause permanent damage.
Bitte lesen Sie zuerst diese Anleitung!Sehr geehrte Kundin, sehr geehrter Kunde,Vielen Dank, dass Sie sich für ein Beko-Produkt entschieden haben. Wir hoffen, dass Sie mit diesem Produkt, das mit den höchsten Qualitätsanforderungen und der modernsten Technologie hergestellt wurde, beste Ergebnisse erzielen. Bitte lesen Sie die gesamte Bedienungsanleitung und alle anderen Begleitdokumente aufmerksam, bevor Sie das Produkt verwenden; bewahren Sie sie zum künftigen Nachschlagen sicher auf. Wenn Sie das Produkt an einen Dritten weitergeben, händigen Sie bitte auch diese Anleitung aus. Befolgen Sie alle Warnhinweise und Informationen in dieser Anleitung.
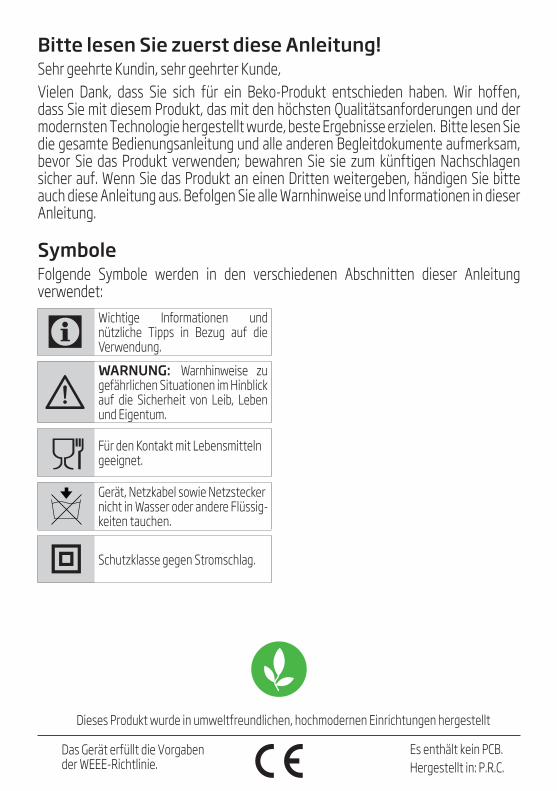
SymboleFolgende Symbole werden in den verschiedenen Abschnitten dieser Anleitung verwendet:
CWichtige Informationen und nützliche Tipps in Bezug auf die Verwendung.
AWARNUNG: Warnhinweise zu gefährlichen Situationen im Hinblick auf die Sicherheit von Leib, Leben und Eigentum.
Für den Kontakt mit Lebensmitteln geeignet.
Gerät, Netzkabel sowie Netzstecker nicht in Wasser oder andere Flüssig-keiten tauchen.
Schutzklasse gegen Stromschlag.
Dieses Produkt wurde in umweltfreundlichen, hochmodernen Einrichtungen hergestellt
Das Gerät erfüllt die Vorgaben der WEEE-Richtlinie.
Es enthält kein PCB.Hergestellt in: P.R.C.
12 / 64 DE Standmixer / Bedienungsanleitung
INHALT
1 Wichtige Anweisungen zu Sicherheit und Umwelt 13
1.1 Allgemeine Sicherheit . . . . . . . . . . . . . . . . . . . . . 131.2 Konformität mit der WEEE-Richtlinie und
Entsorgung von Altprodukten . . . . . . . . . . . . 151.3 Informationen zur Verpackung . . . . . . . . . . . . 151.4 Hinweise zum Energiesparen . . . . . . . . . . . . . 15
2 Standmixer 162.1 Übersicht . . . . . . . . . . . . . . . . . . . . . . . . . . . . . . . . . . 162.2 Technische Daten . . . . . . . . . . . . . . . . . . . . . . . . . 16
3 Betrieb 173.1 Vorbereitung . . . . . . . . . . . . . . . . . . . . . . . . . . . . . . 173.2 Mixen . . . . . . . . . . . . . . . . . . . . . . . . . . . . . . . . . . . . . . 17
4 Informationen 194.1 Tipps zum Mixen . . . . . . . . . . . . . . . . . . . . . . . . . . 194.2 Reinigung und Pflege . . . . . . . . . . . . . . . . . . . . . 194.3 Lagerung. . . . . . . . . . . . . . . . . . . . . . . . . . . . . . . . . . 20
13 / 64 DEStandmixer / Bedienungsanleitung
Dieser Abschnitt enthält Sicher-heitsanweisungen, die beim Schutz vor Personen- und Sachschäden helfen. Bei Nichtbeachtung dieser Anwei-sungen erlischt die gewährte Ga-rantie.
1.1 Allgemeine Sic-herheit• Dieses Gerät erfüllt die internatio-
nalen Sicherheitsstandards. • Dieses Gerät kann von Personen
mit eingeschränkten körperlichen, sensoriellen oder mentalen Fähigkeiten oder ohne spezielles Wissen oder Erfahrung verwendet werden, sofern sie beaufsichtigt werden oder die Anweisungen zum sicheren Umgang mit dem Produkt und dessen potenzielle Gefahren verstehen. Kinder dürfen nicht mit dem Gerät spielen.
• Verwenden Sie das Produkt nicht, falls Netzkabel, Klingen oder Gerät selbst beschädigt sind. Wenden Sie sich dann an einen autorisierten Serviceanbieter.
• Nur Originalteile und vom Hersteller empfohlene Teile verwenden.
• Nicht versuchen, das Gerät zu de-montieren.
• Das Gerät und dessen Zubehör nicht auf oder in der Nähe von hei-ßen Oberflächen betreiben oder platzieren.
• Das Gerät nicht mit heißen Le-bensmitteln benutzen.
• Die Stromversorgung muss mit den Angaben am Typenschild des Gerätes übereinstimmen.
• Das Gerät nicht mit einem Verlän-gerungskabel verwenden.
• Berühren Sie Stecker und Gerät nicht mit feuchten oder nassen Händen.
• Beim Trennen des Gerätes nicht am Netzkabel selbst ziehen.
• Ziehen Sie vor der Reinigung, De-montage und Auswechslung von Zubehör den Netzstecker und warten Sie, bis das Gerät vollstän-dig zum Stillstand gekommen ist.
• Beim Leeren des Behälters, wäh-rend der Reinigung und bei der Handhabung der Klingen mit bloßen Händen können in Folge unsachgemäßer Benutzung ernsthafte Verletzungen auftre-ten. Halten Sie die Klinge nur am Kunststoffteil.
1 Wichtige Anweisungen zu Sicherheit und Umwelt

14 / 64 DE Standmixer / Bedienungsanleitung
1 Wichtige Anweisungen zu Sicherheit und Umwelt
• Berühren Sie die Klingen niemals, während das Gerät in Betrieb ist. Bei unsachgemäßer Verwendung besteht Verletzungsgefahr.
• Das Gerät und sämtliche Zubehörteile nach der Reinigung gründlich trocknen, bevor es mit der Stromversorgung verbunden wird und bevor Teile abgenommen oder angebracht werden.
• G e rät , N et z ka b e l s ow i e Netzstecker nicht in Wasser oder andere Flüssigkeiten tauchen.
• Falls Sie die Verpackungsmateria-lien aufheben möchten, bewahren Sie sie außerhalb der Reichweite von Kindern auf.
• Kinder dürfen das Gerät nicht benutzen. Halten Sie das Gerät von Kindern fern.
15 / 64 DEStandmixer / Bedienungsanleitung
1.2 Konformität mit der WEEE-Richtlinie und Entsorgung von Altprodukten
Dieses Produkt enthält keine der in der vom Ministerium für Umwelt und Städte-planung ausgestellten „Regulierung zur Überwachung von elektrischen und elek-tronischen Altgeräten“ angegebenen
gefährlichen bzw. verbotenen Materialien. Das Gerät erfüllt die Vorgaben der WEEE-Richtlinie. Dieses Gerät wurde aus hochwertigen Teilen und Materialien hergestellt, die wiederverwendet werden können und zum Recycling geeignet sind. Deshalb darf das Gerät am Ende seiner Einsatzzeit nicht mit dem normalen Hausmüll entsorgt wer-den. Geben Sie das Gerät bei einer Sammelstelle ab, die für das Recycling von elektrischen und elektronischen Geräten zuständig ist. Erkundigen Sie sich bei der örtlichen Behörde in Ihrer Region nach diesen Sammelstellen. Durch das Recycling von Altgeräten tragen Sie zum Schutz der Umwelt und der natürlichen Rohstoffe bei. 1.3 Informationen zur Verpackung
Die Verpackung des Produkts wurde ge-mäß unserer nationalen Gesetzgebung aus wiederverwertbaren Materialien hergestellt. Entsorgen Sie die Verpa-
ckungsmaterialien nicht mit dem Hausmüll oder anderem Müll. Bringen Sie sie zu einer von der Stadtverwaltung bereitgestellten Sammelstelle für Verpackungsmaterial.
1.4 Hinweise zum EnergiesparenFeste Lebensmittel in kleine Stücke schneiden und wie in der Bedienungsanleitung angegeben in das Gerät geben. Befolgen Sie die in der An-leitung angegebenen Anweisungen und Zeiten. Wählen Sie immer nur die jeweils erforderliche höchste Geschwindigkeitsstufe. Schalten Sie das Gerät nach der Benutzung aus und ziehen Sie den Netzstecker.
1 Wichtige Anweisungen zu Sicherheit und Umwelt
16 / 64 DE Standmixer / Bedienungsanleitung
2 Standmixer 2.1 Übersicht
Die am Gerät oder in der Dokumentation angegebenen Werte wurden nach maßgeblichen Standards unter Laborbedingungen ermittelt. Diese Werte können je nach Einsatz- und Umgebungsbedingungen variieren.
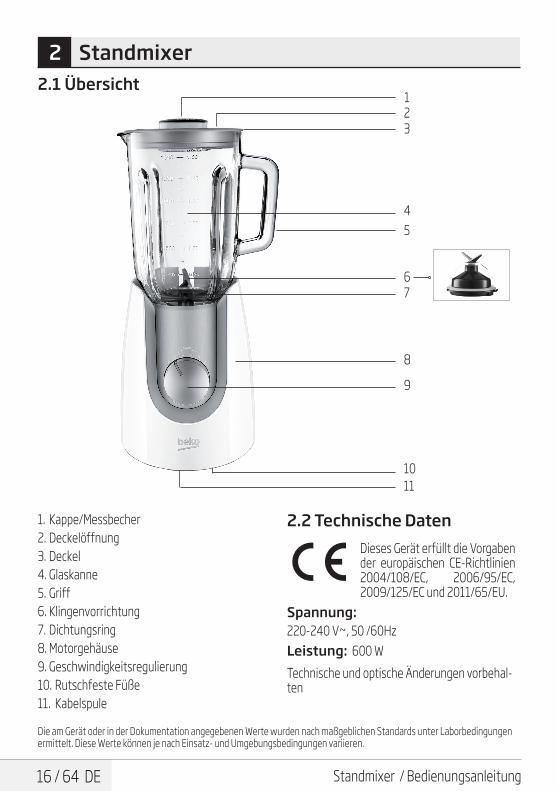
1. Kappe/Messbecher2. Deckelöffnung3. Deckel4. Glaskanne5. Griff6. Klingenvorrichtung7. Dichtungsring8. Motorgehäuse9. Geschwindigkeitsregulierung10. Rutschfeste Füße11. Kabelspule
2.2 Technische DatenDieses Gerät erfüllt die Vorgaben der europäischen CE-Richtlinien 2004/108/EC, 2006/95/EC, 2009/125/EC und 2011/65/EU.
Spannung: 220-240 V~, 50 /60HzLeistung: 600 WTechnische und optische Änderungen vorbehal-ten
123
4
8
76
5
9
1011
17 / 64 DEStandmixer / Bedienungsanleitung
3 Betrieb
3.1 Vorbereitung
AWARNUNG: Gerät vor dem Wechsel oder dem Entfernen von Teilen, die während der Benut-zung in Bewegung sind, ausschal-ten und von der Stromversorgung trennen.
1. Alle Verpackungsmaterialien und Aufkleber entfernen und diese entsprechend den gesetzlichen Vorschriften entsorgen.
2. Das gesamte Motorgehäuse (8) nehmen und auf einen ebenen Untergrund, z. B. eine Arbeitsplatte, stellen.
3. Stellen Sie den Glasbehälter (4) mit der Öffnung nach unten auf eine ebene Oberfläche.
4. Klingenvorrichtung (6) vorsichtig entfernen; hierzu die Klingenvorrichtung (6) entgegengesetzt des Uhrzeigersinns drehen und anschließend an den Seiten anheben.
AWARNUNG: Klingenvorrichtung nicht durch Anheben anden Klingen entfernen.
AWARNUNG: Die Klingenvorrich-tung ist sehr scharf! Bei der Hand-habung der Klingenvorrichtung ist zur Vermeidung von Verletzungen äußerste Vorsicht geboten, vor al-lem beim Reinigen.
5. Alle Teile mit Ausnahme des Motorgehäuses wie im Abschnitt „Reinigung und Pflege“ beschrieben reinigen.
6. Dann Standmixer in umgekehrter Reihenfolge wieder montieren.
7. Glasbehälter (4) auf das Motorgehäuse stellen.
CStellen Sie sicher, dass die Kerben an der unteren Seite des Glasbehälters den entsprechenden im Motorge-häuse gegenüberliegen.
8. Lebensmittel vor Einsatz des Gerätes in kleine Stücke schneiden.
3.2 Mixen1. Gerät auf einen ebenen, trockenen
Untergrund stellen. Die rutschfesten Füße (10)gewährleisten Stabilität des Gerätes.
2. Sicherstellen, dass das Netzkabel aus der Steckdose gezogen ist und die Geschwindigkeitsregulierung (9) auf „0“ steht; erst dann Lebensmittel in den Glasbehälter (4) geben.
3. Glasbehälter (4) vom Motorgehäuse (8) entfernen; dazu Glasbehälter (4) nach oben abheben; Deckel öffnen.
4. Zu vermischende Zutaten in den Glasbehälter (4) geben. Die Zutaten sollten nur ca. 2 bis 5 cm lang sein.
CZur Sicherstellung eines reibungs-losen Mixbetriebs Wasser hinzuge-ben.
CZur Erzielung guter Ergebnisse 3 Einheiten harter Zutaten und 2 Ein-heiten Wasser vermischen (d. h. 60 g harte Zutaten zu 40 ml Wasser)
A
WARNUNG: Keine heißen Le-bensmittel oder Flüssigkeiten in den Glasbehälter geben bzw. ver-mischen. Bei der Verarbeitung von Suppen sicherstellen, dass die Tem-peratur der Flüssigkeit 40 °C nicht überschreitet.
18 / 64 DE Standmixer / Bedienungsanleitung
3 Betrieb
AWARNUNG: Zur Herstellung von zerstoßenem Eis Behälter zu drei Viertel mit Eis befüllen und 15 ml kal-tes Trinkwasser hinzugeben.
A WARNUNG: Kein Eis ohne Hinzu-gabe von Wasser zerkleinern.
AWARNUNG: Standmixer niemals leer (ohne Lebensmittel) in Betrieb nehmen.
AWARNUNG: Standmixer niemals ohne Glasbehälter am Motorgehäu-se in Betrieb nehmen.
5. Deckel C schließen. Sicherstellen, dass sich die Kappe/Messbecher (1) in der Deckelöffnung befindet und gesichert ist.
6. Glasbehälter (4) aufrecht auf das Motorgehäuse (8) anbringen.
AWARNUNG: Glasbehälter nicht mehr bewegen oder drehen, nach-dem er richtig platziert ist.
7. Netzkabel an eine geeignete Steckdose anschließen.
8. Die Schneidgeschwindigkeit kann variabel mit der Geschwindigkeitsregulierung (9) angepasst werden.
CZum Betreiben des Mixers bei gerin-ger Geschwindigkeit die Geschwin-digkeitsregulierung (9) auf „1“ ein-stellen.
CZum Vermischen mit höherer Ge-schwindigkeit die Geschwindig-keitsregulierung (9) auf die ge-wünschte Geschwindigkeitsstufe (2 bis 4) einstellen.
CZum kurzen Pulsieren bei hoher Geschwindigkeit die Geschwindig-keitsregulierung (9) auf „P“ einstel-len. Bei Loslassen der Geschwin-digkeitsregulierung (9) stoppt der Mixer und kehrt automatisch auf „0“ zurück.
CFalls Zutaten während des Betriebs hinzugegeben werden sollen: Zuta-ten durch die Öffnung im Deckel (2) hinzugeben. Dazu Kappe/Messbe-cher (1) herausnehmen.
9. Nachdem die vermischten Zutaten die gewünschte Konsistenz erreicht haben, die Geschwindigkeitsregulierung (9) zum Ausschalten des Mixers auf 0 einstellen.
AWARNUNG: Mixer niemals länger als 1 Minute benutzen; andernfalls droht eine Überhitzung.
AWARNUNG: Bei einem Betrieb von mehr als 1 Minute vor erneuter Nutzung abkühlen lassen.
AWARNUNG: Vor Entfernen des Glasbehälters D vom Motorgehäu-se (8) sicherstellen, dass der Motor ausgeschaltet und zum vollständi-gen Stillstand gekommen ist.
AWARNUNG: Während des Be-triebs keine Utensilien (Schaber, Ga-bel etc.) in den Glasbehälter stecken.
10. Netzstecker aus der Steckdose ziehen.11. Glasbehälter (4) vom Motorgehäuse (8)
entfernen; dazu Glasbehälter (3) nach oben abheben (nicht drehen); Deckel öffnen.
12. Deckel abnehmen und die fertige Zubereitung in Gläser oder andere Behälter einschenken.
19 / 64 DEStandmixer / Bedienungsanleitung
4 Informationen
4.1 Tipps zum Mixen • Eiswürfel können während des Mixerbetriebs
über die Kappe (1) hinzugegeben werden. Vor Hinzugabe des nächsten Eiswürfels einige Sekunden warten, damit der Standmixer das Eis richtig vermischen kann.
• Lebensmittel während des Mixerbetriebs durch Entfernen der Kappe (1) und Eingeben der Zutaten durch die Öffnung hinzugeben. Darauf achten, die Lebensmittel in ca. 2 bis 5 cm große Stücke zu zerkleinern, damit sie durch die Öffnung passen. Kappe (1) nach Abschluss der Zugabe von Zutaten wieder anbringen.
• Beim Mixen fester Lebensmittel, wie z. B. rohem Gemüse, gekochten oder ungekochten Fleischs und Obstes, die Zutaten vor der Eingabe in den Glasbehälter immer in nicht mehr als 2 bis 5 cm große Stücke zerkleinern. Nicht mehr als 2 Tassen derartiger Zutaten gleichzeitig mixen. Dies beschleunigt das Mixen und reduziert den Verschleiß der Klingen.
• Immer zuerst flüssige Zutaten in den Glasbehälter geben, sofern nicht explizit anders im Rezept angegeben.
• Zum Vermischen von Getränken alle Zutaten gleichzeitig in den Glasbehälter geben.
• Übermäßiges Mischen meiden. Normalerweise sind wenige Sekunden erforderlich.
• Übermäßiges Vermischen kann die Lebensmittel breiig machen.
4.2 Reinigung und Pflege
AWARNUNG: Zur Reinigung des Gerätes niemals Benzin, Lösungs-mittel, Scheuermittel oder harte Bürsten verwenden.
AWARNUNG: Die Klingen sind sehr scharf! Klingen zur Vermei-dung von Verletzungen besonders vorsichtig handhaben.
A WARNUNG: Gerät niemals mit bloßen Händen reinigen.
AWARNUNG: Standmixer nach jedem Einsatz reinigen. Darauf ach-ten, dass keine Lebensmittelreste am oder im Standmixer antrocknen. Andernfalls kann dies später die Rei-nigung erschweren.
A
WARNUNG: Kein kochendes Wasser verwenden. Die Klingen-montagelager sind mit einer Le-bensdauerschmierung versehen; kochendes Wasser kann diese Lager beschädigen und die Lebenszeit des Mixers verkürzen.
1. Gerät ausschalten und Netzstecker aus der Steckdose ziehen.
2. Gerät abkühlen lassen. 3. Glasbehälter (4) vom Motorgehäuse (8)
entfernen. Zum Entfernen großer Speisereste, die sich möglicherweise im Glasbehälter angesammelt haben, mit Wasser ausspülen.
CZur leichteren Reinigung können Sie die Klingenvorrichtung (6) aus dem Glasbehälter (4) entfernen. Nutzen Sie hierzu den Messbecher (1).
4. Stellen Sie den Glasbehälter um und platzieren Sie ihn auf eine ebene, rutschfeste Fläche. Befestigen Sie den Messbecher (1) durch Aufstecken an der Klingenvorrichtung (6). Entfernen Sie die Klingenvorrichtung (6) durch Drehen derselben mit dem Messbecher (1) in Richtung „Schloss-offen-Symbol“ (entgegen dem Uhrzeigersinn). Der Glasbehälter,Deckel und Messbecher können jetzt in der Spülmaschine gereinigt werden. Die Klingen können vorsichtig abgespült werden.
5. Zum erneuten Anbringen nach der Reinigung am Glasbehälter (4) drehen Sie die Klingenvorrichtung (6) mit dem Messbecher (1)in Schließrichtung „ “ (im Uhrzeigersinn).
20 / 64 DE Standmixer / Bedienungsanleitung
4 Informationen
6. Glasbehälter (4), wieder am Motorgehäuse (8)anbringen.
7. 1 bis 1 ½ Tassen warmes Wasser mit einigen Tropfen mildem Reinigungsmittel in den Glasbehälter (4) geben und Geschwindigkeit einige Sekunden auf Stufe „4“ einstellen. Glasbehälter vom Motorgehäuse entfernen und mit Wasser ausspülen. Bei Bedarf wiederholen.
CMotorisierte Basis und Klingenvor-richtung nicht in Flüssigkeiten ein-tauchen oder im Geschirrspüler rei-nigen. Nur Deckel und Glasbehälter können in Flüssigkeiten getaucht und im Geschirrspüler gereinigt werden.
8. Außenflächen des Gerätes mit einem weichen,feuchten Tuch und einem sanften Reinigungsmittel reinigen.
9. Motorgehäuse (8), Klingenvorrichtung (6) und Deckel vor der nächsten Benutzung mit einem fusselfreien Tuch abwischen.
4.3 LagerungWenn das Gerät längere Zeit nicht benutzt wird, sollte es sorgfältig aufbewahrt werden. Darauf achten, dass der Netzstecker gezogen wird und das Gerät komplett trocken ist. Das Gerät an einem kühlen, trockenen Ort lagern. Das Gerät sollte sich immer außerhalb der Reich-weite von Kindern befinden.
Avant toute chose, veuillez lire ce manuel d’utilisation !Chers clients,Merci d’avoir choisi les produits Beko. Nous espérons que ce produit, fabriqué dans des installations modernes et soumis à un processus de contrôle qualité rigoureux, vous offre les meilleures performances possibles. C’est pourquoi nous vous recommandons, avant d’utiliser ce produit, de lire attentivement ce manuel et tous les autres documents fournis et de les conserver soigneusement pour toute consultation future. Si vous confiez le produit à quelqu’un d’autre, n’oubliez pas de lui remettre également le manuel d’utilisation. Veillez à bien respecter les consignes et les instructions figurant dans le manuel d’utilisation.
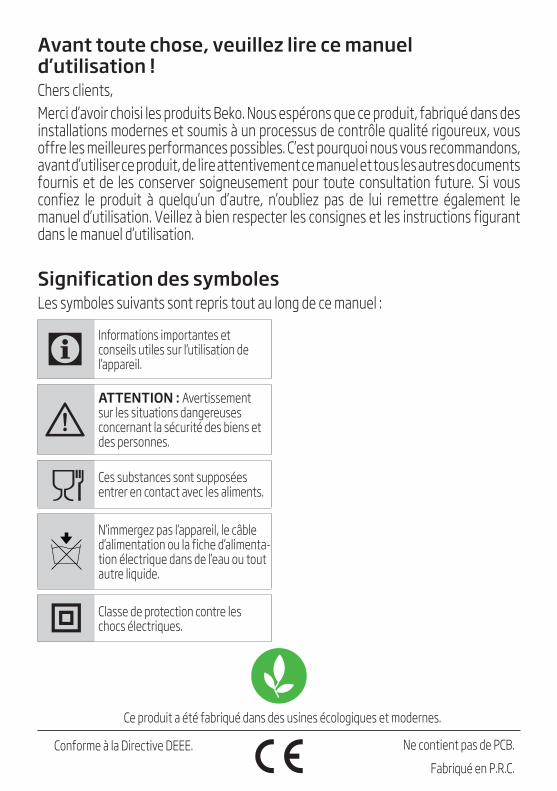
Signification des symbolesLes symboles suivants sont repris tout au long de ce manuel :
CInformations importantes et conseils utiles sur l’utilisation de l’appareil.
AATTENTION : Avertissement sur les situations dangereuses concernant la sécurité des biens et des personnes.
Ces substances sont supposées entrer en contact avec les aliments.
N’immergez pas l’appareil, le câble d’alimentation ou la fiche d’alimenta-tion électrique dans de l’eau ou tout autre liquide.
Classe de protection contre les chocs électriques.
Ce produit a été fabriqué dans des usines écologiques et modernes.
Conforme à la Directive DEEE. Ne contient pas de PCB.Fabriqué en P.R.C.

22 / 64 FR Blender / Manuel d’utilisation
TABLE DES MATIÈRES
1 Sécurité et installation 231.1 Consignes générales de sécurité . . . . . . . . . . 231.2 Conformité avec la directive DEEE et mise au
rebut des produits usagés . . . . . . . . . . . . . . . . 241.3 Information sur l›emballage . . . . . . . . . . . . . . . 241.4 Astuces pour faire des économies
dݎnergie . . . . . . . . . . . . . . . . . . . . . . . . . . . . . . . . . . 24
2 Blender 252.1 Vue d'ensemble. . . . . . . . . . . . . . . . . . . . . . . . . . . . 252.2 Données techniques . . . . . . . . . . . . . . . . . . . . . . 25
3 Fonctionnement 263.1 Mixage. . . . . . . . . . . . . . . . . . . . . . . . . . . . . . . . . . . . . 26
4 Informations 284.1 Conseils pour le mixage . . . . . . . . . . . . . . . . . . . 284.2 Nettoyage et entretien. . . . . . . . . . . . . . . . . . . . 284.3 Rangement. . . . . . . . . . . . . . . . . . . . . . . . . . . . . . . . 294.4 Manipulation et transport. . . . . . . . . . . . . . . . . 29
23 / 64 FRBlender / Manuel d’utilisation
1 Sécurité et installation
Cette section contient les consignes de sécurité qui aident à se prémunir contre les risques de dommages corporels ou de dégâts matériels. Le non-respect de ces consignes annule la garantie.
1.1 Consignes générales de sécurité• Cet appareil est conçu selon les
normes internationales de sécu-rité.
• Cet appareil peut être utilisé par les personnes à capacités physiques, sensorielles ou mentales réduites ou qui manquent d’expérience et de connaissances concernant l’ap-pareil, à condition qu’elles soient supervisées ou qu’elles aient re-çues les consignes concernant l’utilisation sûre de l’appareil et as-similées les dangers encourus. Les enfants ne doivent pas jouer avec l’appareil.
• N’utilisez pas l’appareil si le câble d’alimentation, les lames ou l’ap-pareil lui-même est endommagé. Contactez un service agréé.
• Utilisez uniquement des pièces d’origine ou pièces recomman-dées par le fabricant.
• N’essayez pas de démonter l’appa-reil.
• Ne faites jamais fonctionner ou n’installez aucun composant de cet appareil au-dessus ou à proxi-mité de surfaces chaudes.
• N’utilisez pas l’appareil pour traiter des aliments chauds.
• Assurez-vous que votre source d’alimentation électrique soit conforme aux informations spéci-fiées sur la plaque signalétique de votre appareil.
• Ne branchez pas l’appareil sur une rallonge.
• Ne touchez jamais la prise élec-trique avec les mains humides ou mouillées.
• Ne tirez pas sur le câble d’alimen-tation de l’appareil pour le débran-cher de l’alimentation.
• Débranchez l’appareil avant le nettoyage, le démontage ou le remplacement des accessoires et attendez qu’il soit à l’arrêt complet.

24 / 64 FR Blender / Manuel d’utilisation
1 Sécurité et installation
• Lorsque vous videz le réservoir, de sérieuses blessures résultant d’un mauvais usage peuvent sur-venir pendant le nettoyage si vous attrapez les lames du hachoir à mains nues. Utilisez la partie en plastique lorsque vous essayez de tenir les lames du hachoir.
• Ne touchez jamais les lames lorsque vous utilisez l’appareil. Le mauvais usage de l’appareil peut entraîner des blessures.
• Après le nettoyage, séchez l’appa-reil et tous ses composants avant de le brancher sur le secteur et d’y ajouter les accessoires.
• Ne plongez pas l’appareil, le câble d’alimentation ou la prise d’ali-mentation électrique dans l’eau ou tout autre liquide.
• Si vous conservez le matériel d’emballage, tenez-le hors de la portée des enfants.
• Les enfants ne doivent pas utiliser l’appareil. Tenez l’appareil hors de portée des enfants.
1.2 Conformité avec la directive DEEE et mise au rebut des produits usagés
Ce produit ne contient pas de substances dangereuses et prohibées, telles que dé-crites dans la « Directive réglementant les déchets d’équipements électriques et élec-troniques » émanant du Ministère de l’Envi-
ronnement et de l’Aménagement urbain. Conforme à la Directive DEEE. Cet appareil a été fabriqué avec des pièces et du matériel de qualité supérieure, suscep-tibles d’être réutilisés aux fins de recyclage. Par conséquent, à la fin de sa durée de vie, il ne doit pas être mis au rebut aux côtés de déchets domestiques ordinaires. Au contraire, il doit être éliminé dans un point de collecte réservé au recyclage d’appareils électriques et électroniques. Consultez les autorités locales de votre région pour connaître les points de recyclage. Participez à la protection de l’environne-ment et des ressources naturelles grâce au recyclage des produits usagés. 1.3 Information sur l›emballage
L’emballage du produit est fait à partir de matériaux recyclables, conformément à notre Règlementation nationale. Ne jetez pas les éléments d’emballage avec les dé-
chets domestiques et autres déchets. Déposez-les dans un des points de collecte d’éléments d’embal-lage que vous indiquera l’autorité locale dont vous dépendez.1.4 Astuces pour faire des économies d›énergieCoupez les aliments solides en morceaux avant de les placer dans l’appareil comme indiqué dans le manuel d’utilisation. Suivre les autres instructions et les du-rées spécifiées dans le manuel. Sélectionnez un ni-veau de vitesse bas si le type de nourriture que vous préparez le permet. Mettez hors tension et débran-cher l’appareil après l’avoir utilisé.

25 / 64 FRBlender / Manuel d’utilisation
2 Blender
Les valeurs indiquées sur les inscriptions apposées sur votre appareil ou les autres documents fournis avec le produit sont des valeurs obtenues en conditions de laboratoire, conformément aux normes en vigueur. Ces valeurs peuvent varier selon l’utilisation de l’appareil et les conditions environnantes.
1. Verre mesureur2. Ouverture du couvercle3. Couvercle4. Verseuse en verre5. Poignée du broc6. Lames7. Anneau de scellage8. Emplacement du moteur9. Commande10. Revétement antidérapant11. Rouleau d’embobinage du càble
2.2 Données techniquesCe produit est conforme aux Directives européennes 2004/108/EC, 2006/95/EC, 2009/125/EC et 2011/65/EU.
Alimentation : 220-240 V~, 50/60 HzPuissance : 600 W
Modifications relatives à la technique et à la conception réservées.
2.1 Vue d'ensemble123
4
8
76
5
9
1011
26 / 64 FR Blender / Manuel d’utilisation
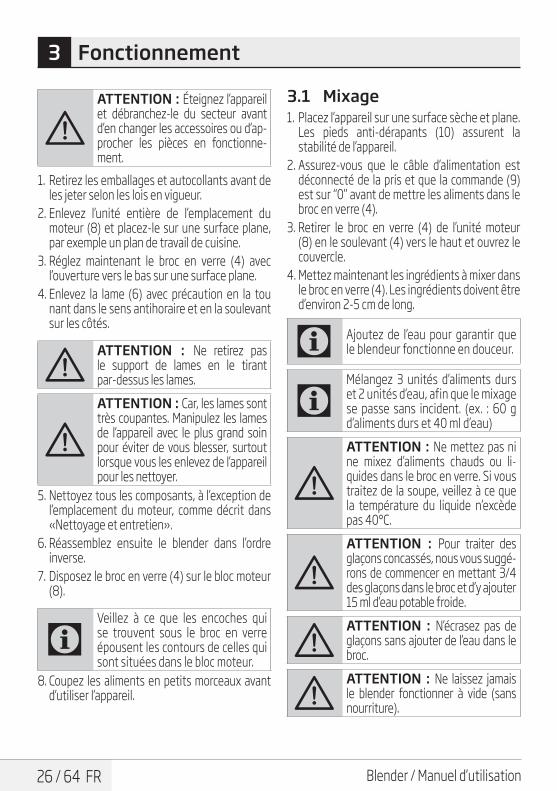
AATTENTION : Éteignez l’appareil et débranchez-le du secteur avant d’en changer les accessoires ou d’ap-procher les pièces en fonctionne-ment.
1. Retirez les emballages et autocollants avant de les jeter selon les lois en vigueur.
2. Enlevez l’unité entière de l’emplacement du moteur (8) et placez-le sur une surface plane, par exemple un plan de travail de cuisine.
3. Réglez maintenant le broc en verre (4) avec l’ouverture vers le bas sur une surface plane.
4. Enlevez la lame (6) avec précaution en la tou nant dans le sens antihoraire et en la soulevant sur les côtés.
AATTENTION : Ne retirez pas le support de lames en le tirant par-dessus les lames.
AATTENTION : Car, les lames sont très coupantes. Manipulez les lames de l’appareil avec le plus grand soin pour éviter de vous blesser, surtout lorsque vous les enlevez de l’appareil pour les nettoyer.
5. Nettoyez tous les composants, à l’exception de l’emplacement du moteur, comme décrit dans «Nettoyage et entretien».
6. Réassemblez ensuite le blender dans l’ordre inverse.
7. Disposez le broc en verre (4) sur le bloc moteur (8).
CVeillez à ce que les encoches qui se trouvent sous le broc en verre épousent les contours de celles qui sont situées dans le bloc moteur.
8. Coupez les aliments en petits morceaux avant d’utiliser l’appareil.
3.1 Mixage1. Placez l’appareil sur une surface sèche et plane.
Les pieds anti-dérapants (10) assurent la stabilité de l’appareil.
2. Assurez-vous que le câble d’alimentation est déconnecté de la pris et que la commande (9) est sur “0” avant de mettre les aliments dans le broc en verre (4).
3. Retirer le broc en verre (4) de l’unité moteur (8) en le soulevant (4) vers le haut et ouvrez le couvercle.
4. Mettez maintenant les ingrédients à mixer dans le broc en verre (4). Les ingrédients doivent être d’environ 2-5 cm de long.
C Ajoutez de l’eau pour garantir que le blendeur fonctionne en douceur.
CMélangez 3 unités d’aliments durs et 2 unités d’eau, afin que le mixage se passe sans incident. (ex. : 60 g d’aliments durs et 40 ml d’eau)
AATTENTION : Ne mettez pas ni ne mixez d’aliments chauds ou li-quides dans le broc en verre. Si vous traitez de la soupe, veillez à ce que la température du liquide n’excède pas 40°C.
AATTENTION : Pour traiter des glaçons concassés, nous vous suggé-rons de commencer en mettant 3/4 des glaçons dans le broc et d’y ajouter 15 ml d’eau potable froide.
AATTENTION : N’écrasez pas de glaçons sans ajouter de l’eau dans le broc.
AATTENTION : Ne laissez jamais le blender fonctionner à vide (sans nourriture).
3 Fonctionnement

27 / 64 FRBlender / Manuel d’utilisation
3 Fonctionnement
AATTENTION : Ne laissez jamais fonctionner le mixer sans que le broc en verre soit placé sur l’unité moteur.
5. Fermez le couvercle (3). Assurez-vous que le bouchon ou verre mesureur (1) est à l’intérieur de l’ouverture du couvercle et bien fixé.
6. Mettez le broc en verre (4) sur l’unité moteur (8).
AATTENTION : Ne tournez jamais le broc en verre une fois qu’il est bien inséré à sa place.
7. Branchez la prise à une source d’alimentation adaptée.
8. La vitesse de mixage peut être ajustée avec la commande (9) .
CPour faire fonctionner le blender à faible vitesse, tournez la com-mande (9) sur “1”.
CSi vous souhaitez mixer à grande vi-tesse, tournez la commande (9) sur le niveau de vitesse désiré (2-4).
CPour de petites impulsions de mixage à grande vitesse, tournez la commande (9) sur “P”. Lorsque vous relâchez la commande (9) , le blender s’arrête et retourne auto-matiquement sur “0”.
CSi des ingrédients doivent être ajoutés durant le processus de mixage, ajoutez-les par l’ouverture du couvercle (2) . Pour ce faire, sor-tez le bouchon ou verre mesureur (1) .
9. Après que les aliments mixés ont atteint la consistance désirée, tournez la commande (9) jusqu’à 0 pour éteindre le blender.
AATTENTION : Ne faites jamais fonctionner le blender pendant plus de une minute, sinon il connaîtra une surchauffe.
AATTENTION : Après l’avoir fait fonctionner pendant une minute, laissez l’appareil se refroidir avant de l’utiliser à nouveau.
AATTENTION : Veillez à ce que le moteur soit éteint et complètement à l’arrêt avant de sortir le broc en verre (4) du bloc moteur (8).
AATTENTION : Ne placez aucun ustensile (grattoir, fourchette, etc.) dans le broc en verre pendant que fonctionne le blender.
10. Débranchez le cable de la prise.11. Retirez le broc en verre (4) de l’unité moteur
(8) en le soulevant vers le haut (n’essayez pas de le faire tourner) et ouvrez le couvercle (3) .
12. Retirez le couvercle et versez le mélange dans des verres ou d’autres récipients.
28 / 64 FR Blender / Manuel d’utilisation
4 Informations
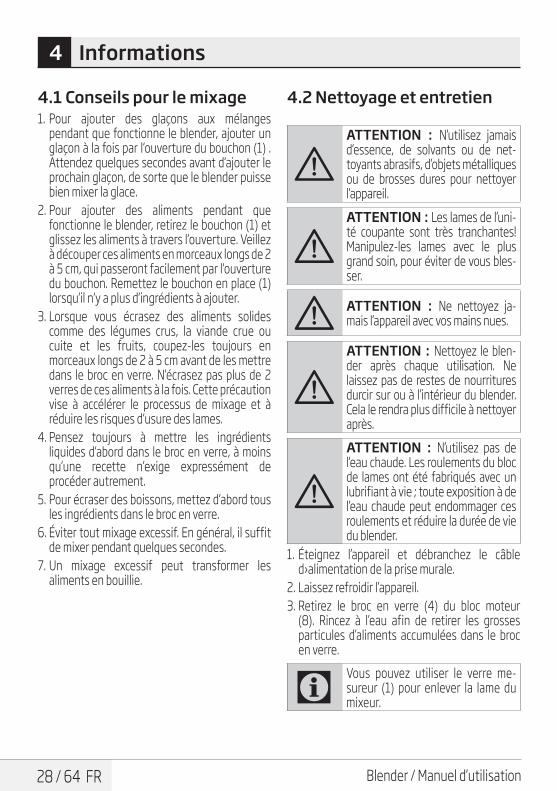
4.1 Conseils pour le mixage1. Pour ajouter des glaçons aux mélanges
pendant que fonctionne le blender, ajouter un glaçon à la fois par l‘ouverture du bouchon (1) . Attendez quelques secondes avant d‘ajouter le prochain glaçon, de sorte que le blender puisse bien mixer la glace.
2. Pour ajouter des aliments pendant que fonctionne le blender, retirez le bouchon (1) et glissez les aliments à travers l‘ouverture. Veillez à découper ces aliments en morceaux longs de 2 à 5 cm, qui passeront facilement par l‘ouverture du bouchon. Remettez le bouchon en place (1) lorsqu‘il n‘y a plus d‘ingrédients à ajouter.
3. Lorsque vous écrasez des aliments solides comme des légumes crus, la viande crue ou cuite et les fruits, coupez-les toujours en morceaux longs de 2 à 5 cm avant de les mettre dans le broc en verre. N‘écrasez pas plus de 2 verres de ces aliments à la fois. Cette précaution vise à accélérer le processus de mixage et à réduire les risques d‘usure des lames.
4. Pensez toujours à mettre les ingrédients liquides d‘abord dans le broc en verre, à moins qu‘une recette n‘exige expressément de procéder autrement.
5. Pour écraser des boissons, mettez d‘abord tous les ingrédients dans le broc en verre.
6. Éviter tout mixage excessif. En général, il suffit de mixer pendant quelques secondes.
7. Un mixage excessif peut transformer les aliments en bouillie.
4.2 Nettoyage et entretien
AATTENTION : N’utilisez jamais d’essence, de solvants ou de net-toyants abrasifs, d’objets métalliques ou de brosses dures pour nettoyer l’appareil.
AATTENTION : Les lames de l’uni-té coupante sont très tranchantes! Manipulez-les lames avec le plus grand soin, pour éviter de vous bles-ser.
A ATTENTION : Ne nettoyez ja-mais l’appareil avec vos mains nues.
AATTENTION : Nettoyez le blen-der après chaque utilisation. Ne laissez pas de restes de nourritures durcir sur ou à l’intérieur du blender. Cela le rendra plus difficile à nettoyer après.
A
ATTENTION : N’utilisez pas de l’eau chaude. Les roulements du bloc de lames ont été fabriqués avec un lubrifiant à vie ; toute exposition à de l’eau chaude peut endommager ces roulements et réduire la durée de vie du blender.
1. Éteignez l’appareil et débranchez le câble d›alimentation de la prise murale.
2. Laissez refroidir l’appareil.3. Retirez le broc en verre (4) du bloc moteur
(8). Rincez à l’eau afin de retirer les grosses particules d’aliments accumulées dans le broc en verre.
CVous pouvez utiliser le verre me-sureur (1) pour enlever la lame du mixeur.

29 / 64 FRBlender / Manuel d’utilisation
4 Informations
4. Replacez le broc en verre (1) sur le bloc moteur (6) .
5. Vous pouvez utiliser le verre mesureur (1) pour enlever la lame du mixeur.
6. Pour remplacer la lame (6) dans le broc en verre (4) ,tourner la lame (6) dans le sens de ferneture „ “ (sens horaire) l’aide du verre mesureur (1) .
7. Replacez le broc en verre (4) sur le bloc moteur (8) .
8. Placez 1 verre à 1 ½ d’eau tiède avec quelques gouttes de détergent doux dans le broc en verre (4) et passez à la vitesse “4” pendant quelques secondes. Retirez le broc en verre du bloc moteur et rincez-le à l’eau. Au besoin, reprenez cette procédure.
CÉvitez de plonger le socle conte-nant le moteur ou les lames dans un liquide ou de les placer dans le lave-vaisselle. Seuls le couvercle et le broc en verre peuvent être immer-gés et introduits dans le lave-vais-selle.
9. Utilisez un chiffon doux et humide pour nettoyer la partie externe de l’appareil.
10. Essuyez le socle du blender, l’unité coupante et le couvercle à l’aide d’un chiffon libre, avant le prochain usage.
4.3 RangementVeuillez conserver soigneusement votre appareil si vous ne comptez pas l’utiliser pendant une pé-riode prolongée. Veillez également à ce qu’il soit débranché et entièrement sec. Conservez-le dans un lieu frais et sec. Assurezvous de tenir l›appareil hors de portée des enfants.
4.4 Manipulation et transport • Pendant la manipulation et le transport,
portez toujours l’appareil dans son emballage d’origine. L’emballage de l’appareil le protège des dommages physiques.
• Ne placez pas de charge lourde sur l’appareil ou sur l’emballage. Cela pourrait l’endommager.
• Toute chute de l’appareil peut le rendre non opérationnel ou l’endommager de façon permanente.
Lütfen önce bu kılavuzu okuyun!Değerli Müşterimiz,Beko ürününü tercih ettiğiniz için teşekkür ederiz. Yüksek kalite ve teknoloji ile üretilmiş olan ürününüzün size en iyi verimi sunmasını istiyoruz. Bunun için, bu kılavuzun tamamını ve verilen diğer belgeleri ürünü kullanmadan önce dikkatle okuyun ve bir başvuru kaynağı olarak saklayın. Ürünü başka birisine verirseniz, kullanma kılavuzunu da birlikte verin. Kullanma kılavuzunda belirtilen tüm bilgi ve uyarıları dikkate alarak talimatlara uyun.
Sembollerin anlamlarıBu kullanma kılavuzunun çeşitli kısımlarında aşağıdaki semboller kullanılmıştır:
C Cihazın kullanımıyla ilgili önemli bilgiler ve faydalı tavsiyeler.
AUYARI: Can ve mal güvenliğiyle ilgili tehlikeli durumlar konusunda uyarılar.
Gıda ile temasa uygundur.
Cihazı, elektrik kablosunu veya elektrik fişini suya ya da diğer sıvılara batırmayın.
Elektrik çarpmasına karşı koruma.
Bu ürün, çevreye saygılı modern tesislerde doğaya zarar vermeden üretilmiştir.
AEEE Yönetmeliğine Uygundur. PCB içermez.Menşei: P.R.C.
31 / 64 TRHazneli Blender / Kullanma Kılavuzu
İÇİNDEKİLER
1 Önemli güvenlik ve çevre talimatları 32
1.1 Genel güvenlik . . . . . . . . . . . . . . . . . . . . . . . . . . . . . 321.2 AEEE yönetmeliğine uyum ve atık ürünün
elden çıkarılması . . . . . . . . . . . . . . . . . . . . . . . . . . 331.3 Ambalaj bilgisi . . . . . . . . . . . . . . . . . . . . . . . . . . . . . 331.4 Enerji tasarrufu için yapılması gerekenler . 33
2 Hazneli Blender 342.1 Genel bakış . . . . . . . . . . . . . . . . . . . . . . . . . . . . . . . . 342.2 Teknik veriler . . . . . . . . . . . . . . . . . . . . . . . . . . . . . . 34
3 Kullanım 353.1 Hazırlık . . . . . . . . . . . . . . . . . . . . . . . . . . . . . . . . . . . . 353.2 Karıştırma . . . . . . . . . . . . . . . . . . . . . . . . . . . . . . . . 35
4 Bilgiler 374.1 Karıştırma için ipuçları . . . . . . . . . . . . . . . . . . . . . 374.2 Temizleme ve bakım . . . . . . . . . . . . . . . . . . . . . . 374.3 Saklama . . . . . . . . . . . . . . . . . . . . . . . . . . . . . . . . . . . 384.4 Taşıma ve nakliye . . . . . . . . . . . . . . . . . . . . . . . . . 38
32 / 64 TR Hazneli Blender / Kullanma Kılavuzu
1 Önemli güvenlik ve çevre talimatları
Bu bölümde, yaralanma ya da maddi hasar tehlikelerini önlemeye yardımcı olacak güvenlik talimatları yer almaktadır. Bu talimatlara uyulmaması halinde her türlü garanti geçersiz hale gelir.
1.1 Genel güvenlik• Bu cihaz, uluslararası güvenlik
standartlarına uygundur. • Cihaz, fiziksel, algısal ve zihinsel
yetenekleri azalmış veya tecrübe ve bilgi eksikliği olan kişiler tarafından gözetim altında veya cihazın güvenli bir şekilde kullanımına ve karşılaşılan ilgili tehlikelerin anlaşılmasına dair talimat verilirse kullanılabilir. Çocuklar cihazla oynamamalıdır.
• Elektrik kablosu, cihaz veya cihazın bıçağı hasarlıysa kullanmayın. Yetkili servise başvurun.
• Sadece orijinal parçaları veya üretici tarafından tavsiye edilen parçaları kullanın.
• Cihazı parçalarına ayırmayın. • Cihazı veya parçalarını sıcak
yüzeylerin üzerinde veya yanında çalıştırmayın ya da bu yüzeylerin üstüne koymayın.
• Sıcak yiyecekler için cihazı kullanmayın.
• Şebeke güç kaynağınız cihazın tip etiketinde belirtilen bilgilere uygun olmalıdır.
• Cihazı uzatma kablosuyla kullanmayın.
• Elleriniz nemli veya ıslakken cihazın fişine dokunmayın.
• Cihazın fişini çıkartırken kablosundan çekmeyin.
• Temizlik, sökme, aksesuar yerleştirme işlemlerinden önce cihazın fişini prizden çekin ve tamamen durmasını bekleyin.
• Kabı boşaltırken, temizlik esnasında ve parçalama bıçağına çıplak el ile dokunurken hatalı kullanımdan ötürü ciddii yaralanmalar meydana gelebilir. Parçalama bıçağını sadece plastik kısmından tutmaya çalışarak dikkatli tutun.
• Cihazı kullanırken bıçaklarına kesinlikle dokunmayın. Hatalı kullanım nedeniyle yaralanma ihtimali vardır.
• Temizlik sonrasında, elektriğe bağlamadan ve parçalarını takmadan önce, cihazı ve tüm parçalarını kurutun.
33 / 64 TRHazneli Blender / Kullanma Kılavuzu
1 Önemli güvenlik ve çevre talimatları
• Cihazı, elektrik kablosunu veya elektrik fişini suya ya da diğer sıvılara batırmayın.
• A m b a l a j m a l z e m e l e r i n i s a k l ı y o r s a n ı z ç o c u k l a r ı n ulaşamayacağı bir yerde muhafaza edin.
• Çocuklar cihazı kullanmamalıdır. Cihazı ve elektrik kablosunu, çocukların ulaşamayacağı bir yerde muhafaza edin.
1.2 AEEE yönetmeliğine uyum ve atık ürünün elden çıkarılması
Bu ürün, T.C. Çevre ve Şehircilik Bakanlığı tarafından yayımlanan “Atık Elektrikli ve Elektronik Eşyaların Kontrolü Yönetmeliği”nde belirtilen zararlı ve yasaklı maddeleri içermez. AEEE
Yönetmeliğine uygundur. Bu ürün, geri dönüşümlü ve tekrar kullanılabilir nitelikteki yüksek kaliteli parça ve malzemelerden üretilmiştir. Bu nedenle, ürünü, hizmet ömrünün sonunda evsel veya diğer atıklarla birlikte atmayın. Elektrikli ve elektronik cihazların geri dönüşümü için bir toplama noktasına götürün. Bu toplama noktalarını bölgenizdeki yerel yönetime sorun. Kullanılmış ürünleri geri kazanıma vererek çevrenin ve doğal kaynakların korunmasına yardımcı olun.
1.3 Ambalaj bilgisiÜrünün ambalajı, Ulusal Mevzuatımız gereği geri dönüştürülebilir malzemelerden üretilmiştir. Ambalaj atığını evsel veya diğer atıklarla birlikte
atmayın, yerel otoritenin belirttiği ambalaj toplama noktalarına atın.
1.4 Enerji tasarrufu için yapılması gerekenlerKatı gıdaları cihaza eklemeden önce, kılavuzda belirtildiği gibi küçük parçalar halinde kesin. Kılavuzda belirtilen diğer talimatlara ve sürelere uyun. Hazırlanacak gıda için uygunsa düşük hız kademelerini seçin. Kullanımdan sonra cihazı kapatın ve fişini prizden çekin.
34 / 64 TR Hazneli Blender / Kullanma Kılavuzu
2 Hazneli Blender2.1 Genel bakış
Ürününüz üzerinde bulunan işaretlemelerde veya ürünle birlikte verilen diğer basılı dökümanlarda beyan edilen değerler, ilgili standartlara göre laboratuvar ortamında elde edilen değerlerdir. Bu değerler, ürünün kullanım ve ortam şartlarına göre değişebilir.
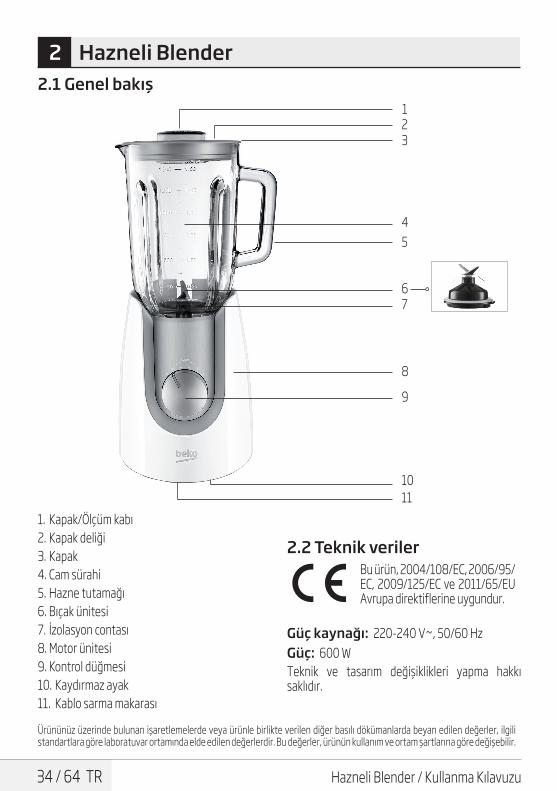
1. Kapak/Ölçüm kabı 2. Kapak deliği 3. Kapak 4. Cam sürahi 5. Hazne tutamağı 6. Bıçak ünitesi 7. İzolasyon contası 8. Motor ünitesi 9. Kontrol düğmesi 10. Kaydırmaz ayak 11. Kablo sarma makarası
2.2 Teknik verilerBu ürün, 2004/108/EC, 2006/95/EC, 2009/125/EC ve 2011/65/EU Avrupa direktiflerine uygundur.
Güç kaynağı: 220-240 V~, 50/60 HzGüç: 600 WTeknik ve tasarım değişiklikleri yapma hakkı saklıdır.
123
4
8
76
5
9
1011
35 / 64 TRHazneli Blender / Kullanma Kılavuzu
CParçalayıcınız, küçük miktarlardaki gıdaları işlemden geçirmek için tasarlanmıştır ve başka bir amaç için kullanılmamalıdır.
CKahve çekirdeği, hindistan cevizi, hububat, buz veya kemik gibi son derece sert malzemeleri parçalamak için kullanmayın. Bitkilerin saplarını, cevizin kabuğunu ve etin kemiğini, sinirini ve kıkırdağını çıkarın.
C Kullanılmadığı zaman cihazın fişi çekilmelidir.
3.1 Hazırlık
AUYARI: Aksesuarları değiştirme-den veya kullanım halinde hareket eden parçalara yaklaşmadan önce cihazı kapatın ve fişini prizden çekin.
1. Tüm ambalaj ve etiket malzemelerini çıkarın ve yürürlükteki yasal düzenlemelere uygun olarak atın.
2. Cihazın tamamını motor ünitesinden çıkarın (8) ve mutfak tezgahı gibi düz bir zemine koyun.
3. Cam hazneyi (4) aşağı doğru ağzı düz bir zemine bakacak şekilde tutun.
4. Bıçak ünitesini (6) ölçüm kabı (1) ile dikkatlice saat yönünün tersine çevirip, kenarlarından kaldırarak çıkarın.
A UYARI: Bıçak ünitesini bıçaklardan tutarak kaldırmayın.
AUYARI: Bıçak ünitesi çok keskindir! Yaralanmaları önlemek için özellikle temizlik işlemi esnasında bıçak ünitesini dikkatli bir şekilde tutun.
5. “Temizlik ve Bakım” bölümünde tarif edildiği şekilde motor ünitesi haricindeki tüm parçaları temizleyin.
6. Şimdi de işlemleri tersinden uygulayarak hazneli blender’ın parçalarını birleştirin.
7. Cam hazneyi (4) motor ünitesine (8) yerleştirin.
CCam haznenin altındaki çentiklerin motor ünitesinin içindekilerle iç içe gelmesine dikkat edin.
8. Cihazı kullanmadan önce gıdaları küçük parçalar halinde kesin.
3.2 Karıştırma 1. Cihazı düz ve kuru bir zemine koyun. Kaydırmaz
ayaklar (10) cihazın dengede durmasını sağlar. 2. Yiyecekleri cam hazneye koymadan önce cihazın
elektrik kablosunun prizden çıkarıldığından ve kontrol düğmesinin (9) “0” konumunda olduğundan emin olun (4).
3. Cam hazneyi (4) motor ünitesinden (8) çıkarmak için (4) yukarı doğru kaldırın ve kapağı açın.
4. Şimdi karıştırılacak olan malzemeleri cam haznenin içerisine koyun (4). Malzemeler en fazla 2-5 cm uzunluğunda olmalıdır.
C Hazneli blender’ın sorunsuz çalış-masını sağlamak için su ekleyin.
CSarsıntısız bir hazneli blender deneyimi için 3 ölçek sert gıdaya 2 ölçek su ilave edin. (yani: 60 gr sert gıda için 40 ml su)
AUYARI: Cam hazneye sıcak gıda veya sıvı koymayın veya haznede bu tür yiyecekler karıştırmayın. Çorba işleyecekseniz sıvı sıcaklığının 40°C’yi geçmediğinden emin olun.
3 Kullanım
36 / 64 TR Hazneli Blender / Kullanma Kılavuzu
3 Kullanım
AUYARI: Kırılmış buz işlemek için hazneye üç çeyrek buz ve 15 ml soğuk içme suyu ilave etmenizi öneririz.
A UYARI: Hazneye su ilave etmeden buz kırmaya çalışmayın.
A UYARI: Hazneli blender’ı asla içi boş (yiyecek olmadan) çalıştırmayın.
AUYARI: Cam hazne motor ünitesi üzerinde değilse hazneli blender’ı kesinlikle çalıştırmayın.
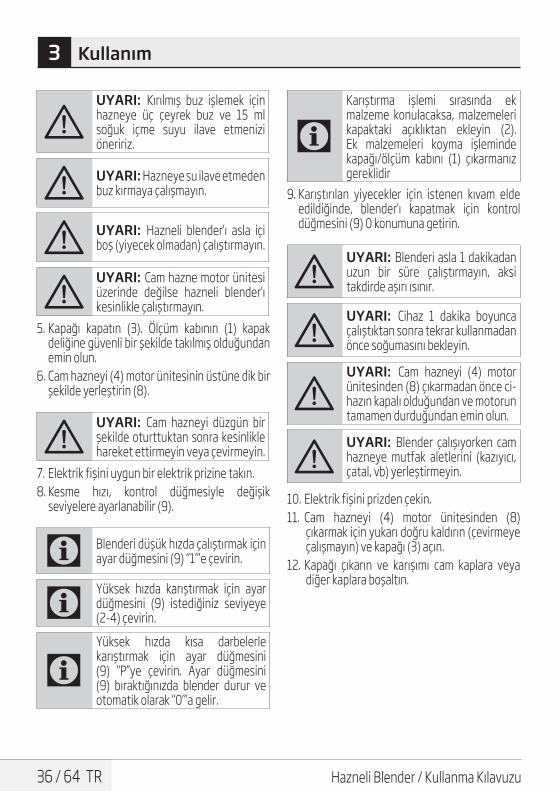
5. Kapağı kapatın (3). Ölçüm kabının (1) kapak deliğine güvenli bir şekilde takılmış olduğundan emin olun.
6. Cam hazneyi (4) motor ünitesinin üstüne dik bir şekilde yerleştirin (8).
AUYARI: Cam hazneyi düzgün bir şekilde oturttuktan sonra kesinlikle hareket ettirmeyin veya çevirmeyin.
7. Elektrik fişini uygun bir elektrik prizine takın. 8. Kesme hızı, kontrol düğmesiyle değişik
seviyelere ayarlanabilir (9).
C Blenderi düşük hızda çalıştırmak için ayar düğmesini (9) “1”’e çevirin.
CYüksek hızda karıştırmak için ayar düğmesini (9) istediğiniz seviyeye (2-4) çevirin.
CYüksek hızda kısa darbelerle karıştırmak için ayar düğmesini (9) “P’’ye çevirin. Ayar düğmesini (9) bıraktığınızda blender durur ve otomatik olarak “0”’a gelir.
CKarıştırma işlemi sırasında ek malzeme konulacaksa, malzemeleri kapaktaki açıklıktan ekleyin (2). Ek malzemeleri koyma işleminde kapağı/ölçüm kabını (1) çıkarmanız gereklidir
9. Karıştırılan yiyecekler için istenen kıvam elde edildiğinde, blender’ı kapatmak için kontrol düğmesini (9) 0 konumuna getirin.
AUYARI: Blenderi asla 1 dakikadan uzun bir süre çalıştırmayın, aksi takdirde aşırı ısınır.
AUYARI: Cihaz 1 dakika boyunca çalıştıktan sonra tekrar kullanmadan önce soğumasını bekleyin.
AUYARI: Cam hazneyi (4) motor ünitesinden (8) çıkarmadan önce ci-hazın kapalı olduğundan ve motorun tamamen durduğundan emin olun.
AUYARI: Blender çalışıyorken cam hazneye mutfak aletlerini (kazıyıcı, çatal, vb) yerleştirmeyin.
10. Elektrik fişini prizden çekin. 11. Cam hazneyi (4) motor ünitesinden (8)
çıkarmak için yukarı doğru kaldırın (çevirmeye çalışmayın) ve kapağı (3) açın.
12. Kapağı çıkarın ve karışımı cam kaplara veya diğer kaplara boşaltın.
37 / 64 TRHazneli Blender / Kullanma Kılavuzu
4 Bilgiler
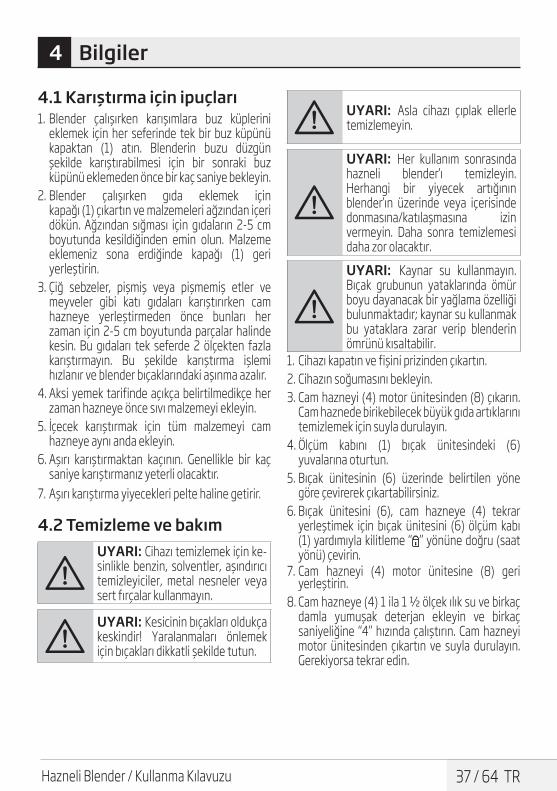
4.1 Karıştırma için ipuçları1. Blender çalışırken karışımlara buz küplerini
eklemek için her seferinde tek bir buz küpünü kapaktan (1) atın. Blenderin buzu düzgün şekilde karıştırabilmesi için bir sonraki buz küpünü eklemeden önce bir kaç saniye bekleyin.
2. Blender çalışırken gıda eklemek için kapağı (1) çıkartın ve malzemeleri ağzından içeri dökün. Ağzından sığması için gıdaların 2-5 cm boyutunda kesildiğinden emin olun. Malzeme eklemeniz sona erdiğinde kapağı (1) geri yerleştirin.
3. Çiğ sebzeler, pişmiş veya pişmemiş etler ve meyveler gibi katı gıdaları karıştırırken cam hazneye yerleştirmeden önce bunları her zaman için 2-5 cm boyutunda parçalar halinde kesin. Bu gıdaları tek seferde 2 ölçekten fazla karıştırmayın. Bu şekilde karıştırma işlemi hızlanır ve blender bıçaklarındaki aşınma azalır.
4. Aksi yemek tarifinde açıkça belirtilmedikçe her zaman hazneye önce sıvı malzemeyi ekleyin.
5. İçecek karıştırmak için tüm malzemeyi cam hazneye aynı anda ekleyin.
6. Aşırı karıştırmaktan kaçının. Genellikle bir kaç saniye karıştırmanız yeterli olacaktır.
7. Aşırı karıştırma yiyecekleri pelte haline getirir.
4.2 Temizleme ve bakım
AUYARI: Cihazı temizlemek için ke-sinlikle benzin, solventler, aşındırıcı temizleyiciler, metal nesneler veya sert fırçalar kullanmayın.
AUYARI: Kesicinin bıçakları oldukça keskindir! Yaralanmaları önlemek için bıçakları dikkatli şekilde tutun.
A UYARI: Asla cihazı çıplak ellerle temizlemeyin.
A
UYARI: Her kullanım sonrasında hazneli blender’ı temizleyin. Herhangi bir yiyecek artığının blender’ın üzerinde veya içerisinde donmasına/katılaşmasına izin vermeyin. Daha sonra temizlemesi daha zor olacaktır.
AUYARI: Kaynar su kullanmayın. Bıçak grubunun yataklarında ömür boyu dayanacak bir yağlama özelliği bulunmaktadır; kaynar su kullanmak bu yataklara zarar verip blenderin ömrünü kısaltabilir.
1. Cihazı kapatın ve fişini prizinden çıkartın. 2. Cihazın soğumasını bekleyin. 3. Cam hazneyi (4) motor ünitesinden (8) çıkarın.
Cam haznede birikebilecek büyük gıda artıklarını temizlemek için suyla durulayın.
4. Ölçüm kabını (1) bıçak ünitesindeki (6) yuvalarına oturtun.
5. Bıçak ünitesinin (6) üzerinde belirtilen yöne göre çevirerek çıkartabilirsiniz.
6. Bıçak ünitesini (6), cam hazneye (4) tekrar yerleştimek için bıçak ünitesini (6) ölçüm kabı (1) yardımıyla kilitleme “ ” yönüne doğru (saat yönü) çevirin.
7. Cam hazneyi (4) motor ünitesine (8) geri yerleştirin.
8. Cam hazneye (4) 1 ila 1 ½ ölçek ılık su ve birkaç damla yumuşak deterjan ekleyin ve birkaç saniyeliğine “4” hızında çalıştırın. Cam hazneyi motor ünitesinden çıkartın ve suyla durulayın. Gerekiyorsa tekrar edin.
38 / 64 TR Hazneli Blender / Kullanma Kılavuzu
4 Bilgiler
CMotorlu taban ünitesini veya bıçak ünitesini su veya sıvı içine daldırmayın veya bulaşık makinesinde yıkamayın. Sadece kapak ve cam haznesi suya daldırılabilir ve bulaşık makinesinde yıkanabilir.
9. Cihazın dış kısmını temizlemek için nemli ve yumuşak bir bez ve az miktarda yumuşak bir temizleme maddesi kullanın.
10. Cihazı bir sonraki kullanımdan önce blender tabanını, kesici ünitesini (6) ve kapağı lif bırakmayan bir bezle silin.
4.3 Saklama Cihazı uzun süre kullanmayı düşünmüyorsanız, lütfen dikkatli bir şekilde saklayın. Cihazın fişinin çıkarıldığından ve tamamen kuru olduğundan emin olun. Cihazı serin ve kuru bir yerde saklayın. Cihazın, çocukların ulaşamayacağı bir yerde muhafaza edildiğinden emin olun.
4.4 Taşıma ve nakliye • Taşıma ve nakliye sırasında cihazı orijinal
ambalajı ile birlikte taşıyın. Cihazın ambalajı, cihazı fiziksel hasarlara karşı koruyacaktır.
• Cihazın veya ambalajının üzerine ağır cisimler koymayın. Cihaz zarar görebilir.
• Cihazın düşürülmesi durumunda cihaz çalışmayabilir veya kalıcı hasar oluşabilir.
Por favor, ¡lea este manual de usuario primero!Estimados clientes,Gracias por escoger un producto Beko. Esperamos que obtenga los mejores resultados de nuestro producto, que ha sido fabricado con gran calidad y con tecnología de vanguardia. Por tanto, le aconsejamos que lea este manual de usuario con atención y todos los demás documentos adjuntos antes de utilizar el aparato y que lo guarde para futuras consultas. Si va a entregar este aparato a otra persona, proporciónele también el manual del usuario. Siga todas las advertencias e instrucciones incluidas en este manual de usuario.
Significado de los símbolosLos símbolos siguientes se usan en las diversas secciones del presente manual:
C Información importante y consejos útiles sobre su uso.
AADVERTENCIA: Advertencias de situaciones peligrosas sobre la seguridad de las personas y la propiedad.
Los materiales están diseñados para estar en contacto con la comida.
No sumerja el aparato, el cable eléctrico o el enchufe en agua ni en ningún otro líquido.
Cristal de protección contra descargas eléctricas.
Este aparato ha sido fabricado en unas instalaciones respetuosas con el medio ambiente y en instalaciones de vanguardia.
Cumple con la Directiva RAEE. No contiene policlorobifenilos (PCV).País de origen: P.R.C.
40 / 64 ES Batidora de vaso / Manual de usuario
CONTENIDO
1 Instrucciones importantes para la seguridad y el medio ambient 41
1.1 Seguridad general . . . . . . . . . . . . . . . . . . . . . . . . . 411.2 Cumple con de la Directiva RAEE y
eliminación de residuos. . . . . . . . . . . . . . . . . . . 421.3 Información de embalaje . . . . . . . . . . . . . . . . . . 42
2 Batidora de vaso 432.1 Información general . . . . . . . . . . . . . . . . . . . . . . . 432.2 Datos técnicos. . . . . . . . . . . . . . . . . . . . . . . . . . . . . 43
3 Funcionamiento 443.1 Batido . . . . . . . . . . . . . . . . . . . . . . . . . . . . . . . . . . . . 44
4 Información 464.1 Tipos de batido . . . . . . . . . . . . . . . . . . . . . . . . . . . . 464.2 Limpieza y cuidados. . . . . . . . . . . . . . . . . . . . . . . 464.3 Almacenaje. . . . . . . . . . . . . . . . . . . . . . . . . . . . . . . . 474.4 Manejo y transporte . . . . . . . . . . . . . . . . . . . . . . 47

41 / 64 ESBatidora de vaso / Manual de usuario
1 Instrucciones importantes para la seguridad y el medio ambient
Esta sección contiene instrucciones de seguridad que ayudarán a la protección contra los riesgos de lesiones personales o daño a la propiedad. El incumplimiento de estas instrucciones causará la pérdida de la garantía.
1.1 Seguridad general• Este aparato cumple con los es-
tándares internacionales sobre seguridad.
• Las personas cuyas facultades físicas, sensoriales o mentales estén mermadas o que carezcan de la experiencia o conocimien-tos necesarios sobre el aparato pueden usar el aparato, siempre y cuando lo hagan bajo supervi-sión o reciban la información per-tinente sobre su uso seguro y los peligros asociados.
• No use el aparato si el cable de alimentación o el aparato mismo están dañados. Contacte con un servicio de atención al cliente au-torizado.
• Sólo use las piezas originales o las piezas recomendadas por el fabri-cante.
• No trate de desmontar el aparato. • No utilice el aparato ni coloque
ninguna parte de él o ninguno de sus componentes en superficies calientes o cerca de de ellas.
• No utilice el aparato para comida caliente.
• Su fuente de alimentación debe ser conforme a la información que se indica en la placa de datos del aparato.
• No utilice este aparato con un cable alargador.
• No toque el cable o el aparato con las manos mojadas o húmedas.
• No tire del cable de alimentación cuando desenchufe el aparato.
• Desenchufe el aparato antes de limpiarlo, desmontarlo y recambiar accesorios y espere hasta que se detenga por completo.

42 / 64 ES Batidora de vaso / Manual de usuario
1 Instrucciones importantes para la seguridad y el medio ambiente
• Cuando vacíe el recipiente, podría sufrir graves heridas debido al uso incorrecto de coger las cuchillas de picado con las manos sin pro-tección durante la limpieza. Use la sección de plástico para aguantar la cuchilla de picado.
• Nunca toque las cuchillas mien-tras use el aparato. Hay la posibi-lidad de sufrir heridas debido a un uso incorrecto.
• Después de limpiarlo, seque el aparato y todas las piezas antes de conectarlo a la red de alimen-tación y antes de acoplarle las pie-zas.
• No sumerja el aparato, el cable eléctrico o el enchufe en agua ni en ningún otro líquido.
• Si guarda el material de embalaje, manténgalo fuera del alcance de los niños.
• Los niños no deben usar el apa-rato. Mantenga el aparato fuera del alcance de los niños.
1.2 Cumple con de la Directiva RAEE y eliminación de residuos.
Este producto no incluye los materiales nocivos y prohibidos especificados en la normativa para la supervisión de los residuos de aparatos eléctricos y electrónicos de desecho (RAEE),
promulgada por el Ministerio de Medio Ambiente y Planificación Urbanística. Cumple con la Directiva WEEE. En la fabricación de este producto se han empleado piezas y materiales de alta calidad, que pueden reutilizarse y reciclarse. Por lo tanto, no arroje este producto a la basura junto con sus residuos domésticos normales al final de su vida útil. Llévelo a un punto de recogida para el reciclado de sus componentes eléctricos y electrónicos. Diríjase a la autoridad local de su zona para obtener la dirección de dichos puntos de recogida. Ayude a proteger el medio ambiente reciclando los productos usados.
1.3 Información de embalajeEl embalaje del producto está fabricado con material reciclable de acuerdo con las normativas nacionales sobre medio ambiente. No se deshaga del material de
embalaje ni de los desechos domésticos o de otro tipo. Llévelos a los puntos de recogida de material de embalaje designados por las autoridades locales.
43 / 64 ESBatidora de vaso / Manual de usuario
2 Batidora de vaso2.1 Información general
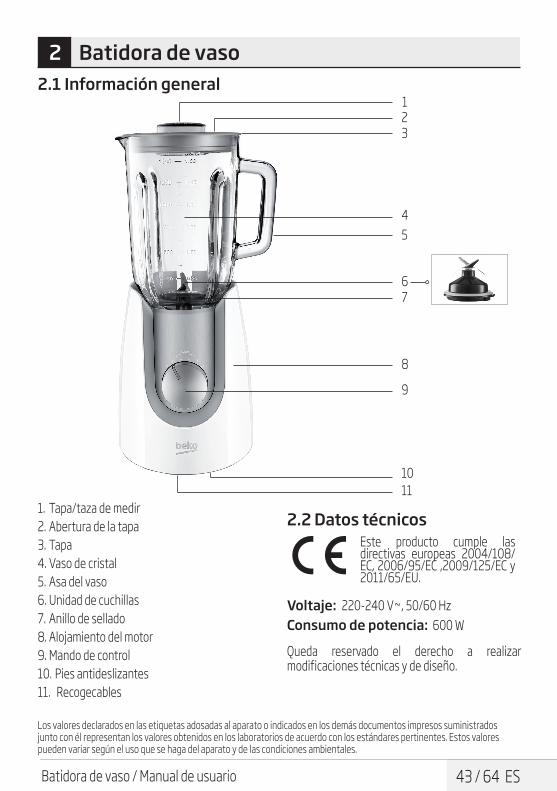
Los valores declarados en las etiquetas adosadas al aparato o indicados en los demás documentos impresos suministrados junto con él representan los valores obtenidos en los laboratorios de acuerdo con los estándares pertinentes. Estos valores pueden variar según el uso que se haga del aparato y de las condiciones ambientales.
1. Tapa/taza de medir 2. Abertura de la tapa 3. Tapa 4. Vaso de cristal 5. Asa del vaso 6. Unidad de cuchillas 7. Anillo de sellado 8. Alojamiento del motor 9. Mando de control 10. Pies antideslizantes 11. Recogecables
2.2 Datos técnicosEste producto cumple las directivas europeas 2004/108/EC, 2006/95/EC ,2009/125/EC y 2011/65/EU.
Voltaje: 220-240 V~, 50/60 HzConsumo de potencia: 600 W
Queda reservado el derecho a realizar modificaciones técnicas y de diseño.
123
4
8
76
5
9
1011
44 / 64 ES Batidora de vaso / Manual de usuario
3 Funcionamiento
AATENCIÓN: Apague el aparato y desconéctelo de la alimentación antes de cambiar los accesorios o manipular alguna de las piezas en movimiento.
1. Retire todos los materiales de embalaje y las etiquetas adhesivas, y deshágase de ellos según la legislación vigente al respecto.
2. Extraiga la unidad del alojamiento del motor (8) y colóquela sobre una superficie plana, por ejemplo la encimera de la cocina.
3. A continuación, coloque el vaso de cristal (4) sobre una superficie nivelada con la abertura mirando hacia abajo.
4. Retire con cuidado la unidad de cuchillas (6) haciéndola girar hacia la derecha y levántela sujetándola por los lados.
AATENCIÓN: No retire la unidad de cuchillas levantándola por las cuchillas.
AATENCIÓN: La unidad de cuchillas está muy afilada. Para evitar lesiones, manéjela con el máximo cuidado, sobre todo durante la limpieza.
5. Limpie todas las piezas, con la excepción del alojamiento del motor, según se explica en la sección “Limpieza y cuidados”.
6. A continuación, vuelva a montar la batidora de vaso siguiendo los pasos en orden inverso.
7. Ponga el vaso de cristal (4) en la unidad del motor (8).
CAsegúrese de que las muescas del fondo del vaso de cristal coincidan con las del alojamiento del motor.
8. Corte los alimentos en trozos pequeños antes de usar el aparato.
3.1 Batido 1. Coloque el aparato en una superficie uniforme
y seca. Los pies antideslizantes J garantizan la estabilidad del aparato.
2. Asegúrese de que el cable de corriente no esté conectado a la red de alimentación y de que el mando de control I esté en la posición “0” antes de depositar alimentos en el vaso de cristal (4).
3. Saque el vaso de cristal D del alojamiento del motor H levantando el vaso de cristal D y abra la tapa.
4. A continuación, deposite en el vaso de cristal los ingredientes que desee batir D . Los ingredientes deben alcanzar únicamente una altura de entre 2 y 5 cm aproximadamente.
CAñada agua para asegurarse de que la batidora de vaso obtenga unos resultados óptimos.
CMezcle 3 partes de alimentos sólidos y 2 partes de agua para obtener resultados homogéneos. (p. ej.: 60 g de alimentos sólidos y 40 ml de agua)
AATENCIÓN: No deposite ni bata alimentos (sólidos o líquidos) calientes en el vaso de cristal. Si está preparando sopa, asegúrese de que la temperatura del líquido no rebase los 40 ºC.
AATENCIÓN: Para triturar hielo, recomendamos empezar con tres cuartas partes de hielo en el vaso y añadir 15 ml de agua potable fría.
A ATENCIÓN: No triture hielo sin añadir agua al vaso.
45 / 64 ESBatidora de vaso / Manual de usuario
3 Funcionamiento
AATENCIÓN: No ponga en funcionamiento la batidora de vaso si este está vacío (sin alimentos).
AATENCIÓN: No ponga en funcionamiento la batidora de vaso si el vaso de cristal no está colocado sobre el alojamiento del motor.
5. Cierre la tapa (3). Asegúrese de que la tapa/taza de medir (1) se encuentre bien sujeta en el interior de la apertura de la tapa.
6. Ponga el vaso de cristal (4) en posición vertical sobre la unidad del motor (8).
AATENCIÓN: Jamás desplace o haga girar el vaso de cristal una vez esté correctamente asentado en su sitio.
7. Conecte el enchufe a una toma de corriente adecuada.
8. La velocidad de corte puede ajustarse mediante el mando de control (9).
CPara usar la batidora a velocidad lenta, sitúe el mando de control (9) en la posición “1”.
CSi desea batir a una velocidad superior, sitúe el mando de control (9) en la posición que desee (2 a 4).
CPara usar la batidora a pulsos cortos de alta velocidad, sitúe el mando de control (9) en la posición “P”. Cuando suelte el mando de control (9), la batidora se detendrá y regresará la posición “0” automáticamente.
CSi va a añadir nuevos ingredientes durante el proceso de batido, hágalo a través de la abertura de la tapa (2). Para ello, retire la tapa/taza de medir (1).
CPuede pulsar el interruptor de funcionamiento (1) intermitentemente para activar la función “PULSE” del aparato, que le proporcionará un picado de mayor calidad.
9. Una vez obtenida la consistencia deseada para los alimentos batidos, ponga el mando de control (9) en la posición “0” para apagar la batidora de vaso.
AATENCIÓN: Jamás haga funcionar la batidora de forma continua durante más de 1 minuto, de lo contrario se recalentaría.
AATENCIÓN: SI usa el aparato durante más de 1 minuto, deje que se enfríe antes de volver a utilizarlo.
AATENCIÓN: Asegúrese de que el motor esté apagado y se haya detenido por completo antes de retirar el vaso de cristal (4) del alojamiento del motor (8).
AATENCIÓN: No coloque ningún utensilio (rascador, tenedor, etc.) en el vaso de cristal mientas la batidora esté en funcionamiento.
10. Retire el enchufe de la toma de corriente. 11. Levante el vaso de cristal (4) (sin hacerlo girar)
para retirarlo de la unidad de motor (8) y abra la tapa (3).
12. Retire la tapa y vierta la mezcla en vasos u otros recipientes.
46 / 64 ES Batidora de vaso / Manual de usuario
4 Información
4.1 Tipos de batido • Para añadir cubitos de hielo a mezclas con la
batidora en funcionamiento, añada los cubitos de uno en uno a través de la tapa (1). Espere unos segundos antes de añadir el siguiente cubito para darle tiempo a la batidora de mezclar el hielo adecuadamente.
• Para añadir alimentos con la mezcladora en funcionamiento, retire la tapa (1) y vierta los ingredientes a través de la abertura. Asegúrese de cortar los alimentos en piezas de entre 2 y 5 cm para que quepan a través de la abertura. Vuelva a colocar la tapa (1) una vez haya acabado de añadir los ingredientes.
• Cuando bata alimentos sólidos, como por ejemplo verduras crudas, carnes crudas o cocinadas y fruta, córtelos siempre en trozos de entre 2 y 5 cm como máximo antes de depositarlos en el vaso de cristal. Bata el equivalente a 2 tazas de alimentos por vez como máximo. De esta manera acortará el proceso y reducirá el desgaste de las cuchillas.
• Vierta los ingredientes líquidos siempre en primer lugar, a no ser que esté preparando una receta que indique lo contrario.
• Para batir bebidas, vierta todos los ingredientes en el vaso de cristal al mismo tiempo.
• Evite batir en exceso. Lo habitual es que basten unos segundos.
• Un batido excesivo hará que la mezcla final quede pastosa.
4.2 Limpieza y cuidados
AATENCIÓN: No utilice petróleo, disolventes, limpiadores abrasivos, objetos metálicos o cepillos duros para limpiar el aparato.
AATENCIÓN: Las cuchillas de la unidad de cuchillas están muy afiladas. Para evitar lesiones, manéjelas con el máximo cuidado.
A ATENCIÓN: No limpie el aparato con las manos desnudas.
AATENCIÓN: Lave la batidora de vaso tras cada uso. No deje que los restos de los alimentos se sequen en el interior de la batidora de vaso, ya que serán más difíciles de eliminar después.
A
ATENCIÓN: No utilice agua hirviendo. Los cojinetes del conjunto de cuchillas han sido diseñados con un lubricante que dura toda su vida útil; la exposición al agua hirviendo dañará estos cojinetes y acortarán la vida útil de la batidora.
1. Apague el aparato y desconéctelo de la toma de corriente de la pared.
2. Deje que el aparato se enfríe. 3. Retire el vaso de cristal (4) de la unidad del
motor (8). Enjuague con agua para retirar los restos de alimentos que hayan podido quedar en el vaso de cristal.
C Puede usar la taza de medir (1) para retirar la cuchilla de la batidora.
4. Coloque la taza de medir (1) en los asientos de la unidad de cuchillas (6).
47 / 64 ESBatidora de vaso / Manual de usuario
4 Información
5. Puede retirar la unidad de cuchillas (6) girando en la dirección que se indica en ella.
6. Para colocar la unidad de cuchillas (6) de nuevo en el contenedor de cristal (4), gire la unidad de cuchillas (6) en la dirección de bloqueo “ ” (en el sentido de las agujas del reloj) con la ayuda de la taza de medir (1).
7. Vuelva a colocar el vaso de cristal (4) en la unidad del motor (8).
8. Vierta entre 1 y 1 ½ tazas de agua caliente con algunas gotas de limpiador suave en el vaso de cristal (4) y ponga la batidora en la velocidad “4” durante unos segundos. Retire el vaso de cristal del alojamiento del motor y enjuáguelo con agua. Repita el proceso en caso necesario.
CNo sumerja la base con el motor o la unidad de cuchillas en líquidos ni las lave en el lavavajillas. Solo la tapa y el vaso de cristal pueden lavarse en el lavavajillas y sumergirse en agua sin problemas.
9. Utilice un trapo húmedo con un poco de producto de limpieza suave para limpiar el exterior del aparato.
10. Pase un paño sin pelusa por la base de la batidora, la unidad de corte (6) y la tapa antes del siguiente uso.
4.3 AlmacenajeSi no va a utilizar el aparato durante un periodo prolongado de tiempo, guárdelo cuidadosamente. Asegúrese de que el aparato esté desenchufado y completamente seco. Guarde el aparato en un lugar fresco y seco. Mantenga el aparato fuera del alcance de los niños.
4.4 Manejo y transporte • Durante el manejo y el transporte, lleve el
aparato en su embalaje original. El embalaje del aparato lo protege de daños físicos.
• No coloque cargas pesadas en el aparato o en el embalaje. El aparato podría dañarse.
• Dejar caer el aparato causará que éste no funcione o causará un daño permanente.
Proszę najpierw przeczytać instrukcję obsługi.Szanowni Klienci!Dziękujemy za wybranie produktu firmy Beko. Mamy nadzieję, że wyrób ten, wyprodukowany przy użyciu najnowszych technologii wysokiej jakości, okaże się w najwyższym stopniu zadowalający. Przed użyciem urządzenia należy uważnie przeczytać całą instrukcję obsługi oraz towarzyszące jej dokumenty i zachować ją do wglądu na przyszłość. Przekazując wyrób innemu użytkownikowi, proszę oddać mu również niniejszą instrukcję. Proszę przestrzegać wszystkich ostrzeżeń i informacji w tej instrukcji obsługi.
Znaczenie symboliW niniejszej instrukcji stosuje się następujące symbole:
C Ważne informacje i przydatne wskazówki dotyczące użytkowania.
AOSTRZEŻENIE: Ostrzeżenia dotyczące sytuacji zagrażających bezpieczeństwu, życiu i mieniu.
Materiały te przeznaczone są do kontaktu z żywnością.
Urządzenia ani przewodu zasilania nie wolno zanurzać w wodzie lub w innym płynie.
Klasa ochrony przed porażeniem elektrycznym.
Urządzenie zostało wyprodukowane w bezpiecznych dla środowiska, nowoczesnych zakładach.
Wyrób zgodny z Dyrektywą WEEE. Nie zawiera bifenyli polichlorowanych (PCB).Kraj pochodzenia: P.R.C..
49 / 64 PLBlendera Dzbankowego / Instrukcja obsługi
SPIS TREŚCI
1 Bezpieczeństwo i Ustawienie 50
1.1 Ogólne zasady zachowania bezpieczeństwa. . . . . . . . . . . . . . . . . . . . . . . . . . . 50
1.2 Zgodność z dyrektywą WEEE i pozbywanie się zużytych wyrobów . . . . . . . 51
1.3 Informacje o opakowaniu. . . . . . . . . . . . . . . . . . 511.4 Oszczędzanie energii . . . . . . . . . . . . . . . . . . . . . . 51
2 Blendera dzbankowego 522.1 Opis ogólny . . . . . . . . . . . . . . . . . . . . . . . . . . . . . . . . 522.2 Dane techniczne . . . . . . . . . . . . . . . . . . . . . . . . . . 52
3 Obsługa 533.1 Przygotowanie . . . . . . . . . . . . . . . . . . . . . . . . . . . . 533.2 Blendowanie . . . . . . . . . . . . . . . . . . . . . . . . . . . . . . 53
4 Informacja 554.1 Wskazówki miksowania . . . . . . . . . . . . . . . . . . . 554.2 Czyszczenie i konserwacja . . . . . . . . . . . . . . . . 554.3 Przechowywanie. . . . . . . . . . . . . . . . . . . . . . . . . . 564.4 Przenoszenie i transport . . . . . . . . . . . . . . . . . . 56
50 / 64 PL Blendera Dzbankowego / Instrukcja obsługi
1 Bezpieczeństwo i UstawienieRozdział ten zawiera instrukcje zachowania bezpieczeństwa, które ułatwią zabezpieczenie się przed obrażeniami ciała lub uszkodzeniem mienia. Nieprzestrzeganie tych instrukcji powoduje unieważnienie udzielonej gwarancji.
1.1 Ogólne zasady zachowania bezpieczeństwa• Urządzenie jest zgodne z
międzynarodowymi normami bezpieczeństwa.
• Urządzenie może być używane przez osoby niepełnosprawne fizycznie, psychicznie lub umysłowo, a także osoby bez doświadczenia lub wiedzy w zakresie obsługi urządzenia, o ile znajdują się one pod nadzorem lub zostały szczegółowo poinstruowane o bezpiecznym korzystaniu z urządzenia i potencjalnych zagrożeniach.
• Nie należy używać uszkodzonego urządzenia lub urządzenia z uszkodzonym przewodem zasilającym. Należy skontaktować się z autoryzowanym punktem serwisowym.
• Należy stosować wyłącznie oryginalne lub zalecane przez producenta części zamienne.
• Nie należy próbować rozkładać tego urządzenia na części.
• Nie należy używać tego urządzenia ani umieszczać żadnej jego części na gorących powierzchniach, ani w ich pobliżu.
• Nie wolno używać urządzenia do gorących potraw.
• Zasilanie z domowej sieci elektrycznej powinno być zgodne z informacjami podanymi na tabliczce znamionowej tego urządzenia.
• Z tym urządzeniem nie należy używać przedłużaczy.
• Nie wolno dotykać wtyczki urządzenia mokrymi lub wilgotnymi dłońmi.
• Nie należy wyjmować wtyczki z gniazdka, ciągnąc za przewód zasilający.
• Przed czyszczeniem, zmianą akcesoriów lub przed demontażem urządzenia należy odczekać, aż ruchome elementy przestaną się obracać, a następnie odłączyć zasilanie.
51 / 64 PLBlendera Dzbankowego / Instrukcja obsługi
1 Bezpieczeństwo i Ustawienie• Podczas opróżniania zbiornika,
czyszczenia lub chwytania ostrzy należy zachować ostrożność, aby uniknąć obrażeń. Element z ostrzem należy chwytać za plastikową część.
• Pod żadnym pozorem nie dotykać ostrzy, gdy urządzenie jest włączone. Nieprawidłowe użytkowanie może być przyczyną obrażeń.
• Po czyszczeniu, a przed podłączeniem tego urządzenia do zasilania i założeniem akcesoriów, należy osuszyć wszystkie elementy.
• U r z ą d z e n i a , p r z e w o d u zasilającego ani wtyczki nie wolno zanurzać w wodzie ani w innym płynie.
• Opakowanie urządzenia należy przechowywać poza zasięgiem dzieci.
• Urządzenie nie powinno być obsługiwane przez dzieci. Urządzenie należy chronić przed dostępem dzieci.
1.2 Zgodność z dyrektywą WEEE i pozbywanie się zużytych wyrobów
Wyrób ten nie zawiera materiałów szkodliwych ani zabronionych określonych w „Rozporządzeniu dot. nadzorowania odpadów urządzeń elektrycznych i elektronicznych” wydanym przez Ministerstwo Środowiska i
Urbanistyki. Wyrób zgodny z Rozporządzeniem WEEE. Urządzenie wykonano z części i materiałów wysokiej jakości, które mogą być odzyskane i użyte jako surowce wtórne. W związku z tym po zakończeniu użytkowania nie należy pozbywać się go razem z innymi odpadami domowymi. Należy przekazać wyrób do punktu zbiórki urządzeń elektrycznych i elektronicznych na surowce wtórne. Informacje o lokalizacji takich punktów zbiórki można uzyskać od władz miejscowych. Odzyskując surowce z używanych wyrobów, pomagamy chronić środowisko naturalne.
1.3 Informacje o opakowaniuOpakowanie urządzenia wykonano z materiałów nadających się do recyklingu zgodnie z przepisami krajowymi. Nie wyrzucaj materiałów opakowaniowych do śmieci wraz
z innymi odpadkami domowymi. Oddaj je w jednym z wyznaczonych przez władze lokalne punktów zbiórki materiałów opakowaniowych.
1.4 Oszczędzanie energiiPrzed umieszczeniem produktów w urządzeniu należy je rozdrobnić, zgodnie ze wskazówkami umieszczonymi w instrukcji obsługi. Należy postępować zgodnie z pozostałymi wskazówkami zawartymi w instrukcji obsługi i przestrzegać zalecanego czasu pracy urządzenia. W miarę możliwości należy używać najniższych prędkości pracy urządzenia. Po zakończeniu pracy należy wyłączyć urządzenie i odłączyć je od zasilania.
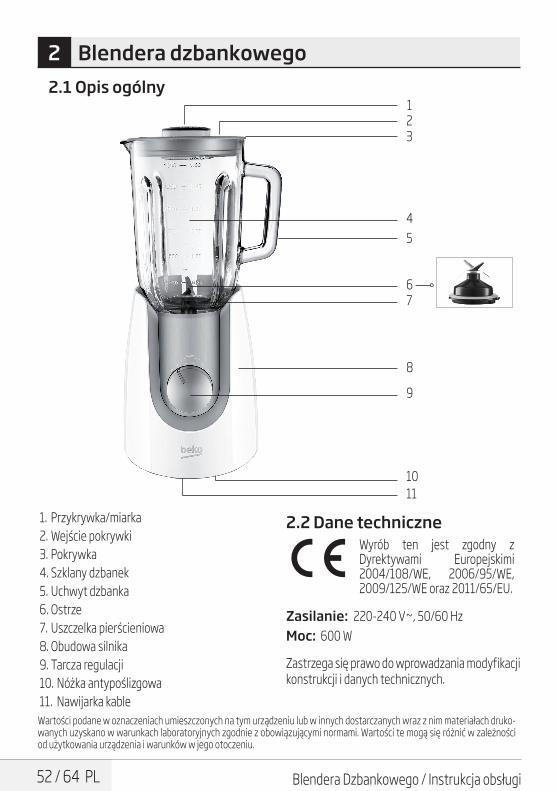
52 / 64 PL Blendera Dzbankowego / Instrukcja obsługi
2 Blendera dzbankowego
Wartości podane w oznaczeniach umieszczonych na tym urządzeniu lub w innych dostarczanych wraz z nim materiałach druko-wanych uzyskano w warunkach laboratoryjnych zgodnie z obowiązującymi normami. Wartości te mogą się różnić w zależności od użytkowania urządzenia i warunków w jego otoczeniu.
1. Przykrywka/miarka 2. Wejście pokrywki 3. Pokrywka 4. Szklany dzbanek 5. Uchwyt dzbanka 6. Ostrze 7. Uszczelka pierścieniowa 8. Obudowa silnika 9. Tarcza regulacji 10. Nóżka antypoślizgowa 11. Nawijarka kable
2.2 Dane techniczneWyrób ten jest zgodny z Dyrektywami Europejskimi 2004/108/WE, 2006/95/WE, 2009/125/WE oraz 2011/65/EU.
Zasilanie: 220-240 V~, 50/60 HzMoc: 600 W
Zastrzega się prawo do wprowadzania modyfikacji konstrukcji i danych technicznych.
2.1 Opis ogólny123
4
8
76
5
9
1011
53 / 64 PLBlendera Dzbankowego / Instrukcja obsługi
3 Obsługa
3.1 Przygotowanie
AOSTRZEŻENIE: Wyłączaj urządzenie i odłączaj je od sieci przed wymianą akcesoriów i dotykaniem części, które poruszają się przy jego pracy.
1. Zdejmij całe opakowanie oraz naklejki i wyrzucić je zgodnie z obowiązującymi przepisami prawa.
2. Wyjmij całe urządzenie z obudowy silnika (8) i postaw je na równej powierzchni, np. na blacie kuchennym
3. Teraz na równej powierzchni ustaw szklany dzbanek tak, (4) aby otwór był skierowany w dół.
4. Ostrożnie wyjmij ostrze (6) obracając je w kierunku przeciwnym do ruchu wskazówek zegara i podnosząc uchwyciwszy za boki zespołu ostrza.
AOSTRZEŻENIE: Nie wyjmuj ostrza podnosząc za ostre krawę-dzie.
AOSTRZEŻENIE: Ostrze jest bardzo ostre! Aby uniknąć obrażeń należy zachować ostrożność w czasie obsługi zespołu ostrza, szczególnie podczas czyszczenia.
5. Wyczyścić wszystkie części, z wyjątkiem obudowy silnika, jak to opisano w części „Czyszczenie i konserwacja”.
6. Następnie, w odwrotnej kolejności, ponownie złóż blender dzbankowy.
7. Postaw dzbanek szklany (4) na obudowie silnika (8).
CUpewnić się, że nacięcia w dnie dzbanka szklanego pasują do karbów w obudowie silnika.
8. Przed włożeniem produktów do blendera należy je pokroić na małe cząstki.
3.2 Blendowanie 1. Umieścić urządzenie na równej i suchej
powierzchni. Nóżki anty-poślizgowe (10) zapewnią stabilność urządzenia.
2. Przed włożeniem produktów do szklanego dzbanka należy sprawdzić, czy przewód zasilania jest odłączony od zasilania i czy tarcza regulacji (9) jest ustawiona na „0“ (4).
3. Zdejmij szklany dzbanek (4) z obudowy silnika (8) podnosząc go (4) i otwórz pokrywkę.
4. Do szklanego dzbanka włóż składniki (4). Powinny mieć maksymalną długość około 2 - 5 cm.
C Dodać wody, aby blender pracował bez zakłóceń.
CWymieszaj 3 części stałej żywności z 2 częściami wody, aby miksowanie przebiegało gładko. tzn. 60 g stałej żywności, 40 ml wody)
AOSTRZEŻENIE: Do szklanego dzbanka nie wolno wkładać ani w nim miksować gorących produktów, czy płynów. Jeśli przygotowujesz zupę, upewnij się, że temperatura płynu nie przekracza 40 ° C.
AOSTRZEŻENIE: Aby przygo-tować kruszony lód, proponujemy zacząć od trzech czwartych lodu w dzbanku i dodać 15 ml zimnej wody pitnej.
AOSTRZEŻENIE: Nie próbuj kruszyć lodu bez dolania wody do dzbanka.
AOSTRZEŻENIE: Nigdy nie wolno używać pustego blendera dzbankowego (bez produktów).
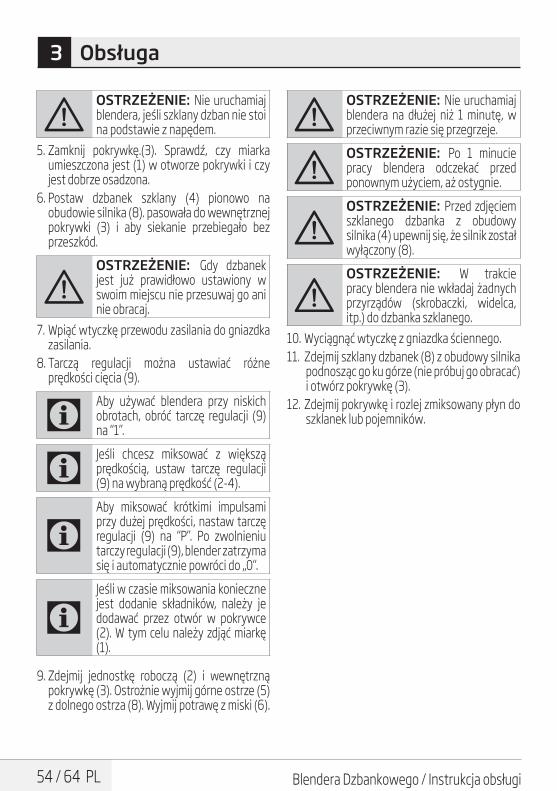
54 / 64 PL Blendera Dzbankowego / Instrukcja obsługi
AOSTRZEŻENIE: Nie uruchamiaj blendera, jeśli szklany dzban nie stoi na podstawie z napędem.
5. Zamknij pokrywkę.(3). Sprawdź, czy miarka umieszczona jest (1) w otworze pokrywki i czy jest dobrze osadzona.
6. Postaw dzbanek szklany (4) pionowo na obudowie silnika (8). pasowała do wewnętrznej pokrywki (3) i aby siekanie przebiegało bez przeszkód.
AOSTRZEŻENIE: Gdy dzbanek jest już prawidłowo ustawiony w swoim miejscu nie przesuwaj go ani nie obracaj.
7. Wpiąć wtyczkę przewodu zasilania do gniazdka zasilania.
8. Tarczą regulacji można ustawiać różne prędkości cięcia (9).
CAby używać blendera przy niskich obrotach, obróć tarczę regulacji (9) na “1”.
CJeśli chcesz miksować z większą prędkością, ustaw tarczę regulacji (9) na wybraną prędkość (2-4).
CAby miksować krótkimi impulsami przy dużej prędkości, nastaw tarczę regulacji (9) na “P”. Po zwolnieniu tarczy regulacji (9), blender zatrzyma się i automatycznie powróci do „0“.
CJeśli w czasie miksowania konieczne jest dodanie składników, należy je dodawać przez otwór w pokrywce (2). W tym celu należy zdjąć miarkę (1).
9. Zdejmij jednostkę roboczą (2) i wewnętrzną pokrywkę (3). Ostrożnie wyjmij górne ostrze (5) z dolnego ostrza (8). Wyjmij potrawę z miski (6).
3 Obsługa
AOSTRZEŻENIE: Nie uruchamiaj blendera na dłużej niż 1 minutę, w przeciwnym razie się przegrzeje.
AOSTRZEŻENIE: Po 1 minucie pracy blendera odczekać przed ponownym użyciem, aż ostygnie.
AOSTRZEŻENIE: Przed zdjęciem szklanego dzbanka z obudowy silnika (4) upewnij się, że silnik został wyłączony (8).
AOSTRZEŻENIE: W trakcie pracy blendera nie wkładaj żadnych przyrządów (skrobaczki, widelca, itp.) do dzbanka szklanego.
10. Wyciągnąć wtyczkę z gniazdka ściennego. 11. Zdejmij szklany dzbanek (8) z obudowy silnika
podnosząc go ku górze (nie próbuj go obracać) i otwórz pokrywkę (3).
12. Zdejmij pokrywkę i rozlej zmiksowany płyn do szklanek lub pojemników.

55 / 64 PLBlendera Dzbankowego / Instrukcja obsługi
4 Informacja
4.1 Wskazówki miksowania • Aby dodać kostki lodu do mieszanek podczas
pracy blender, dodawaj je po jednej na raz poprzez przykrywkę (1). Odczekaj kilka sekund przed dodaniem następnej kostki, aby blender mógł właściwie wymieszać lód.
• Aby dodać żywność w trakcie pracy blendera, zdejmij przykrywkę (1) i wrzucaj składniki przez otwór. Upewnij się, że produkty do miksowania są pocięte na kawałki około 2-5 cm, aby zmieściły się w otwór. Po zakończeniu dodawania składników (1) z powrotem załóż przykrywkę.
• Przeznaczoną do mieszania żywności stałą, taką jak surowe warzywa, mięso gotowane lub surowe oraz owoce, przed włożeniem do szklanego dzbanka pokrój na kawałki nie większe niż 2-5 cm. Mieszaj na raz nie więcej niż 2 kubki takich produktów. Przyspieszy to proces mieszania i zmniejszy zużycie ostrzy mieszających.
• O ile przepis nie stanowi inaczej, zawsze najpierw nalewaj do dzbanka szklanego składniki płynne.
• Aby mieszać napoje, wlewaj do dzbanka szklanego wszystkie składniki w tym samym czasie.
• Unikaj nadmiernego wymieszania. Zwykle wystarcza kilka sekund miksowania.
• Nadmierne wymieszanie sprawia, że potrawa staje się papkowata.
4.2 Czyszczenie i konserwacja
AOSTRZEŻENIE: Do czyszczenia ekspresu nie wolno używać benzyny, rozpuszczalników ani szorstkich proszków do czyszczenia, przedmiotów metalowych ani twardych szczotek.
AOSTRZEŻENIE: Ostrza blendera są bardzo ostre! Aby się nie skaleczyć, obchodź się z nimi bardzo ostrożnie.
A OSTRZEŻENIE: Nigdy nie czyścić urządzenia gołymi rękami.
A
OSTRZEŻENIE: Po każdym użyciu należy czyścić blender. Nie wolno dopuścić do stwardnieniu w blenderze dzbankowym jakichkolwiek resztek żywności. Utrudni to późniejsze czyszczenie urządzenia.
AOSTRZEŻENIE: Nie używaj wrzątku. Łożyska zespołu ostrza zaopatrzono w permanentne smarowanie; kontakt z wrzącą wodą może je uszkodzić i skrócić żywotność blendera.
1. Wyłącz czajnik i wyjmij wtyczkę z gniazdka. 2. Pozostaw urządzenie do wystygnięcia. 3. Zdejmij szklany dzbanek (4) z obudowy silnika
(8). Przemyj wodą aby usunąć wszelkie duże cząstki żywności, które zebrały się w dzbanku szklanym.
C Do wyjęcia ostrzy mieszających można użyć miarki (1).

56 / 64 PL Blendera Dzbankowego / Instrukcja obsługi
4 Informacja
4. Można wyjąć ostrze (6) obracając je we wskazaną na nim stronę.
5. Aby umieścić ostrze (6) z powrotem w szklanym pojemniku (4), obróć ostrze (6) w stronę zamykania “ ” (zgodnie ze wskazówkami zegara) przy pomocy miarki (1).
6. Postaw szklany dzbanek z powrotem (4) na obudowie silnika (8).
7. Do dzbanka szklanego nalej 1 do 1 ½ szklanki ciepłej wody z kilkoma kroplami łagodnego środka czyszczącego (4) i na kilka sekund załącz blender na prędkość “4”. Zdejmij dzbanek szklany z obudowy silnika i wypłucz wodą. W razie potrzeby powtórz te czynności.
CNie zanurzaj obudowy silnika ani zespołu ostrza w żadnym płynie, ani nie wkładaj ich do zmywarki. Zanurzać i wkładać do zmywarki można tylko pokrywkę i szklany dzbanek.
8. Urządzenie na zewnątrz wyczyść miękką, wil gotną ściereczką i delikatnym środkiem do mycia.
9. Przed następnym użyciem wytrzyj podstawę blendera, zespół ostrza (6) i pokrywkę gładką ściereczką.
4.3 PrzechowywanieJeśli jest planowane nieużywanie tego urządzenia przez dłuższy czas, należy starannie je przechować. Upewnić się, czy urządzenie jest odłączone od zasilania i zupełnie suche. Przechowuj toster w chłodnym i suchym miejscu. Urządzenie to należy chronić przed dostępem dzieci.
4.4 Przenoszenie i transport • Urządzenie należy przenosić i transportować w
oryginalnym opakowaniu. Zabezpiecza ono • urządzenie przed fizycznymi uszkodzeniami. • Nie wolno umieszczać ciężkich ładunków
na urządzeniu lub opakowaniu. Może to spowodować uszkodzenie żelazka parowego.
• Upuszczenie żelazka może spowodować jego awarię lub trwałe uszkodzenie.

Vă rugăm să citiţi mai întâi acest manual de utilizare!Stimate client,Vă mulţumim pentru că aţi ales un produs Beko. Sperăm să obţineţi cele mai bune rezultate de la produsul dumneavoastră, care a fost fabricat la o calitate înaltă şi cu tehnologii performante. În acest scop, vă rugăm să citiţi cu grijă şi în întregime acest manual de utilizare şi toate celelalte documente însoţitoare înainte de a utiliza produsul şi să le păstraţi pentru consultări ulterioare. Dacă transmiteţi produsul altei persoane, oferiţi-i şi manualul de utilizare. Respectaţi toate avertismentele şi informaţiile din manualul de utilizare.Semnificaţia simbolurilorUrmătoarele simboluri sunt utilizate în diverse părţi ale acestui manual de utilizare:
C Informaţii importante sau sfaturi utile privind utilizarea.
AAVERTISMENT: Avertismente pentru situaţii periculoase cu privire la siguranţa vieţii şi a proprietăţii.
Potrivit pentru contactul cu alimentele.
Nu imersaţi produsul, cablul de alimentare sau ştecherul în apă sau alte lichide.
Clasă de protecție pentru şoc electric.
Acest produs a fost produs în unităţi moderne care sunt prietenoase cu mediu înconjurător.
Acest produs este conform cu reglementarea WEEE.
Nu conţine PCB.Fabricate în P.R.C
58 / 64 RO Blender de masă / Manual de utilizare
CONŢINUT
1 Instrucțiuni importante de siguranță și mediu înconjurător 59
1.1 Siguranţă generală . . . . . . . . . . . . . . . . . . . . . . . . 591.2 Conform Directivei WEEE şi de eliminare a
produselor reziduale. . . . . . . . . . . . . . . . . . . . . . . 601.3 Informaţii despre ambalaj . . . . . . . . . . . . . . . . . 601.4 Lucruri de făcut pentru reducerea de
energie . . . . . . . . . . . . . . . . . . . . . . . . . . . . . . . . . . . . 60
2 Blenderul dumneavoastră 612.1 Prezentare generală. . . . . . . . . . . . . . . . . . . . . . . 612.2 Date tehnice. . . . . . . . . . . . . . . . . . . . . . . . . . . . . . . 61
3 Utilizarea 623.1 Utilizarea . . . . . . . . . . . . . . . . . . . . . . . . . . . . . . . . . . 623.2 Poziția «P» . . . . . . . . . . . . . . . . . . . . . . . . . . . . . . . . 63
4 Curățarea și întreținerea 644.1 Curăţarea . . . . . . . . . . . . . . . . . . . . . . . . . . . . . . . . . . 644.2 Depozitarea . . . . . . . . . . . . . . . . . . . . . . . . . . . . . . . 644.3 Manevrarea şi transportul. . . . . . . . . . . . . . . . . 64
59 / 64 ROBlender de masă / Manual de utilizare
Această secţiune conţine instrucţiuni privind siguranţa, care au rolul de a preveni vătămările corporale şi pagubele materiale. Nerespectarea acestor instrucţiuni invalidează garanţia furnizată.
1.1 Siguranţă generală• Acest produs este conform cu
standardele internaţionale de siguranţă.
• Acest produs poate fi utilizat de către persoanele ale căror capacități fizice, perceptive sau mentale sunt diminuate sau de persoanele care sunt neexperimentate sau nu cunosc informații despre produs atâta timp cât aceştia sunt supravegheați sau instruiți cu privire la utilizarea în siguranță a produsului şi la pericolelor care le întâlnesc.
• Nu utilizaţi produsul atunci când cablul de alimentare, lamele sau produsul este avariat. Contactaţi un service autorizat.
• Utilizaţi doar componente originale sau componente recomandate de către producător.
• Nu încercaţi să demontaţi produsul.
• Nu utilizați sau plasați orice componentă/e ale acestui produs pe sau lângă suprafețe fierbinți.
• Nu utilizați acest produs pentru alimentele fierbinți.
• Tensiunea de alimentare ale prizelor trebuie să corespundă cu informaţiile furnizate pe eticheta produsului.
• Nu utilizaţi produsul cu un prelungitor.
• Nu atingeţi ştecherul aparatului cu mâinile umede.
• În momentul când scoateţi din priză, nu trageţi de cablu.
• Decuplați produsul înainte de curățare, dezasamblare, înlocuire accesorii şi aşteptați ca produsul să se oprească complet.
• În momentul când goliți recipientul, în timpul curățării şi prinderii lamelelor de tocare cu mâinile goale pot rezulta vătămări grave datorită unei utilizări incorecte. În momentul când doriți să țineți lamele de tocare, utilizați secțiunea din plastic.
1 Instrucțiuni importante de siguranță și mediu înconjurător
60 / 64 RO Blender de masă / Manual de utilizare
• În momentul când utilizați produsul, nu atingeți nciciodată lamele. Există posibilitatea de vătămare datorită unei utilizări incorecte.
• După curățare, uscați produsul şi toate componentele înainte de a-l conecta la priza principală şi înainte de a ataşa componentele.
• Nu imersaţi produsul, cablul de alimentare sau ştecherul în apă sau alte lichide.
• Dacă menţineţi materialele de ambalare, depozitaţi-le departe de copii.
• Copii nu trebuie să se joace cu produsul. Menţineţi produsul departe de copii.
1.2 Conform Directivei WEEE şi de eliminare a produselor reziduale.
Acest produs nu conţine materiale periculoase sau interzise specificate în ”Regulamentul pentru Supervizare a Produselor Electrice şi Electronice Reziduale” eliberat de către Ministerul
Mediului şi Planificării Urbane. Conform Directivei WEEE. Acest produs a fost fabricat folosind componente şi materiale de înaltă calitate, care pot fi refolosite şi reciclate. Aşadar, la sfârşitul perioadei sale de utilizare, nu aruncaţi produsul împreună cu gunoiul menajer. Duceţi-l la un centru de colectare pentru reciclarea echipamentelor electrice şi electronice. Adresaţi-vă autorităţii locale din zona dumneavoastră pentru aceste puncte de colectare. Contribuiţi la protejarea mediului şi a resurselor naturale prin reciclarea produselor uzate.
1.3 Informaţii despre ambalajAmbalajul produsului este fabricat din materiale reciclabile conform Legislaţiei Naţionale. Ambalajele nu trebuie aruncate împreună cu gunoiul menajer
sau alt tip. Duceţi-le la punctele de colectare destinate ambalajelor amenajate de către autorităţile locale.
1.4 Lucruri de făcut pentru reducerea de energieÎnainte de introducerea alimentelor în produs, tăiați alimentele solide în bucăți mici după cum este menționat în manualul de utilizare. Respectați celelalte instrucțiuni şi timpii specificați în manual. Selectați nivelele de viteză scăzută dacă sunt potrivite pentru alimentele care urmează a fi preparate. După utilizare, opriți aparatul şi deconectați-l.
1 Instrucțiuni importante de siguranță și mediu înconjurător

61 / 64 ROBlender de masă / Manual de utilizare
2 Blenderul dumneavoastră2.1 Prezentare generală
Valorile care sunt declarate pe eticheta produsului aplicată pe aparatul dumneavoastră sau alte documente imprimate furnizate cu acesta reprezintă valorile care au fost obţinute în laborator conform standardelor corespunzătoare. Aceste valori pot varia în funcţie de utilizarea produsului şi condiţiile ambientale.
1. Cupă de măsurare2. Deschidere capac3. Protecție4. Recipient din sticlă5. Mâner vas6. Lamă de tăiere7. Inel de silicon8. Unitate motor9. Buton de reglare al vitezei10. Picioruşe antiderapante11. Bază de înfăşurare al cablului
(sub produs)
2.2 Date tehnice
Acest produs este conform Directivelor Europene 2004/108/CE, 2006/95/CE, 2009/125/CE şi 2011/65/UE.
Tensiune: 220-240 V~, 50/60 HzPutere: 600 W
Modificări tehnice şi de proiectare rezervate.
123
4
8
76
5
9
1011
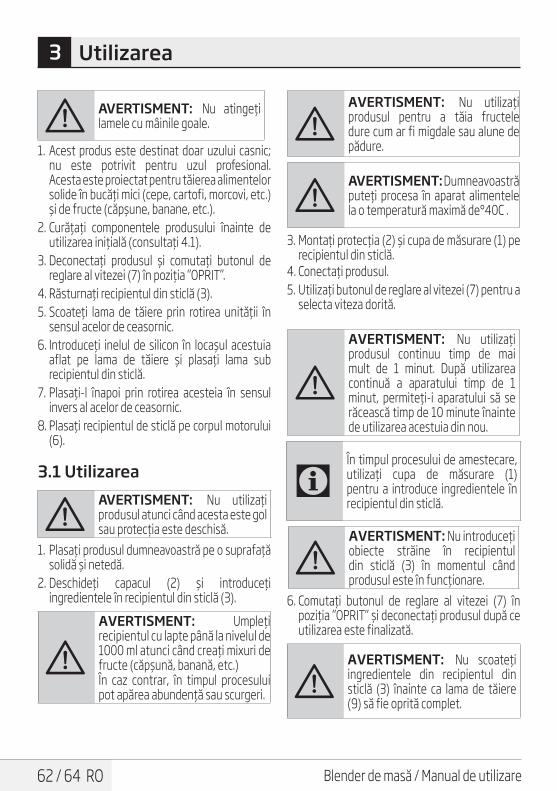
62 / 64 RO Blender de masă / Manual de utilizare
3 Utilizarea
A AVERTISMENT: Nu atingeți lamele cu mâinile goale.
1. Acest produs este destinat doar uzului casnic; nu este potrivit pentru uzul profesional. Acesta este proiectat pentru tăierea alimentelor solide în bucăți mici (cepe, cartofi, morcovi, etc.) şi de fructe (căpşune, banane, etc.).
2. Curățați componentele produsului înainte de utilizarea inițială (consultați 4.1).
3. Deconectați produsul şi comutați butonul de reglare al vitezei (7) în poziția ”OPRIT”.
4. Răsturnați recipientul din sticlă (3).5. Scoateți lama de tăiere prin rotirea unității în
sensul acelor de ceasornic.6. Introduceți inelul de silicon în locaşul acestuia
aflat pe lama de tăiere şi plasați lama sub recipientul din sticlă.
7. Plasați-l înapoi prin rotirea acesteia în sensul invers al acelor de ceasornic.
8. Plasați recipientul de sticlă pe corpul motorului (6).
3.1 Utilizarea
AAVERTISMENT: Nu utilizați produsul atunci când acesta este gol sau protecția este deschisă.
1. Plasați produsul dumneavoastră pe o suprafață solidă şi netedă.
2. Deschideți capacul (2) şi introduceți ingredientele în recipientul din sticlă (3).
AAVERTISMENT: Umpleți recipientul cu lapte până la nivelul de 1000 ml atunci când creați mixuri de fructe (căpşună, banană, etc.) În caz contrar, în timpul procesului pot apărea abundență sau scurgeri.
AAVERTISMENT: Nu utilizați produsul pentru a tăia fructele dure cum ar fi migdale sau alune de pădure.
AAVERTISMENT: Dumneavoastră puteți procesa în aparat alimentele la o temperatură maximă de°40C .
3. Montați protecția (2) şi cupa de măsurare (1) pe recipientul din sticlă.
4. Conectați produsul.5. Utilizați butonul de reglare al vitezei (7) pentru a
selecta viteza dorită.
A
AVERTISMENT: Nu utilizați produsul continuu timp de mai mult de 1 minut. După utilizarea continuă a aparatului timp de 1 minut, permiteți-i aparatului să se răcească timp de 10 minute înainte de utilizarea acestuia din nou.
CÎn timpul procesului de amestecare, utilizați cupa de măsurare (1) pentru a introduce ingredientele în recipientul din sticlă.
AAVERTISMENT: Nu introduceți obiecte străine în recipientul din sticlă (3) în momentul când produsul este în funcționare.
6. Comutați butonul de reglare al vitezei (7) în poziția ”OPRIT” şi deconectați produsul după ce utilizarea este finalizată.
AAVERTISMENT: Nu scoateți ingredientele din recipientul din sticlă (3) înainte ca lama de tăiere (9) să fie oprită complet.
63 / 64 ROBlender de masă / Manual de utilizare
3 Utilizarea
7. Scoateți recipientul din sticlă (3) prin tragerea acestuia de corpul acesteia (4).
8. Deschideți capacul (2) şi scoateți ingredientele.
3.2 Poziția «P»Utilizarea produsului cu ajutorul butonului de reglare al vitezei (7) aflat în poziția ”P” timp de 1-2 secunde este denumit ”PULSARE”.Mențineți butonul de reglare al vitezei (7) în poziția ”P” pentru amestecarea cu pulsații scurte de viteză ridicată. În momentul când eliberați butonul, butonul de reglare al vitezei (7) revine automat în poziția ”OPRIT”, iar produsul începe să se oprească.

64 / 64 RO Blender de masă / Manual de utilizare
4 Curățarea și întreținerea
4.1 Curăţarea1. Înainte de curăţare decuplaţi produsul.2. Aşteptați ca accesoriile utilizate să se oprească
complet.3. Scoateți accesoriul din recipient după scoaterea
recipientului din sticlă (3) din produs (consultați 3.3).
4. Curățați alimentele reziduale din recipientul din sticlă (3) sub apă curentă.
5. După montarea accesoriului de tăiere în recipientul din sticlă (3), înlocuiți recipientul de sticlă (3.4) pe corpul (4).
6. Umpleți complet sau până la jumătate recipientul din sticlă (3) cu apă călduță şi câteva picături de lichid de vase şi utilizați produsul la cea mai mare viteză pentru câteva secunde.
7. Apoi scoateți şi clătiți recipientul din sticlă.
CRecipientul din sticlă (3) şi protecțiile pot fi spălate în maşina de spălat vase.
AAVERTISMENT: Nu imersați corpul (4) în apă. Dumneavoastră îl puteți şterge cu un material textil moale.
AAVERTISMENT: Lama de tăiere (9) este ascuțită. În timpul curățării, nu țineți de marginea tăioasă sau imersați în apă.
4.2 Depozitarea • Dacă nu doriţi să utilizaţi produsul pentru o
perioadă lungă de timp, depozitaţi-l cu grijă. • Înainte de depozitarea produsului, decuplați-l. • Depozitaţi produsul într-o loc uscat şi răcoros. • Mențineți aparatul şi cablul de alimentare
departe de copii.
4.3 Manevrarea și transportul. • În timpul manevrării şi transportului,
transportați produsul în ambalajul său original. Ambalajul produsului îl protejează împotriva avariilor fizice.
• Nu plasați sarcini grele pe aparat sau pe ambalaj. Produsul poate fi avariat.
• Aruncarea produsul îl poate face inoperațional sau cauza avarii permanente.


www.beko.com
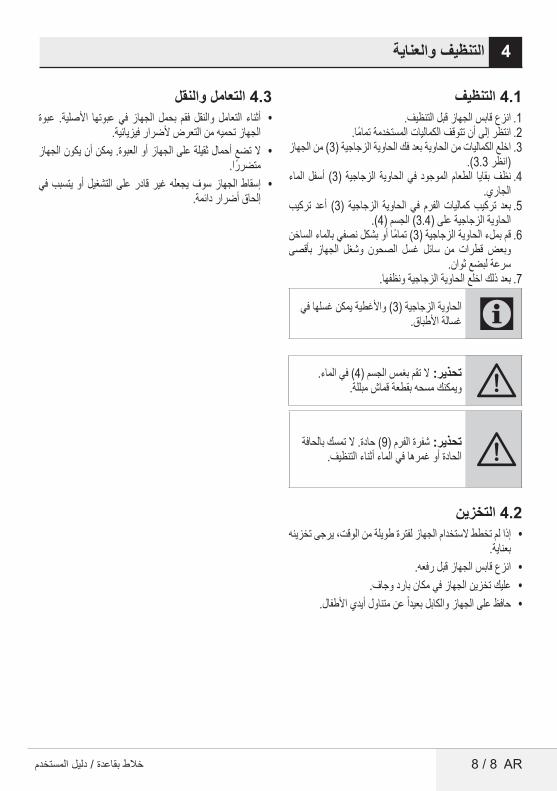
8 / 8 ARخالط بقاعدة / دليل المستخدم
التنظيف والعناية 4
4.1 التنظيفانزع قابس الجهاز قبل التنظيف.. 1انتظر إلى أن تتوقف الكماليات المستخدمة تماما.. 2اخلع الكماليات من الحاوية بعد فك الحاوية الزجاجية )3( من الجهاز . 3
)انظر 3.3(.الماء . 4 أسفل )3( الزجاجية الحاوية في الموجود الطعام بقايا نظف
الجاري.تركيب . 5 أعد )3( الزجاجية الحاوية في الفرم كماليات تركيب بعد
الحاوية الزجاجية على )3.4( الجسم )4(.قم بملء الحاوية الزجاجية )3( تماما أو بشكل نصفي بالماء الساخن . 6
بأقصى الجهاز وشغل الصحون غسل سائل من قطرات وبعض سرعة لبضع ثوان.
بعد ذلك اخلع الحاوية الزجاجية ونظفها.. 7
C الحاوية الزجاجية )3( واألغطية يمكن غسلها فيغسالة األطباق.
A .تحذير: ال تقم بغمس الجسم )4( في الماءويمكنك مسحه بقطعة قماش مبللة.
A تحذير: شفرة الفرم )9( حادة. ال تمسك بالحافةالحادة أو غمرها في الماء أثناء التنظيف.
4.2 التخزينإذا لم تخطط الستخدام الجهاز لفترة طويلة من الوقت، يرجى تخزينه •
بعناية. انزع قابس الجهاز قبل رفعه. •عليك تخزين الجهاز في مكان بارد وجاف. •حافظ على الجهاز والكابل بعيدا عن متناول أيدي األطفال. •
4.3 التعامل والنقلعبوة • األصلية. عبوتها في الجهاز بحمل فقم والنقل التعامل أثناء
الجهاز تحميه من التعرض ألضرار فيزيائية.ال تضع أحمال ثقيلة على الجهاز أو العبوة. يمكن أن يكون الجهاز •
متضررا.يتسبب في • أو التشغيل قادر على الجهاز سوف يجعله غير إسقاط
إلحاق أضرار دائمة.
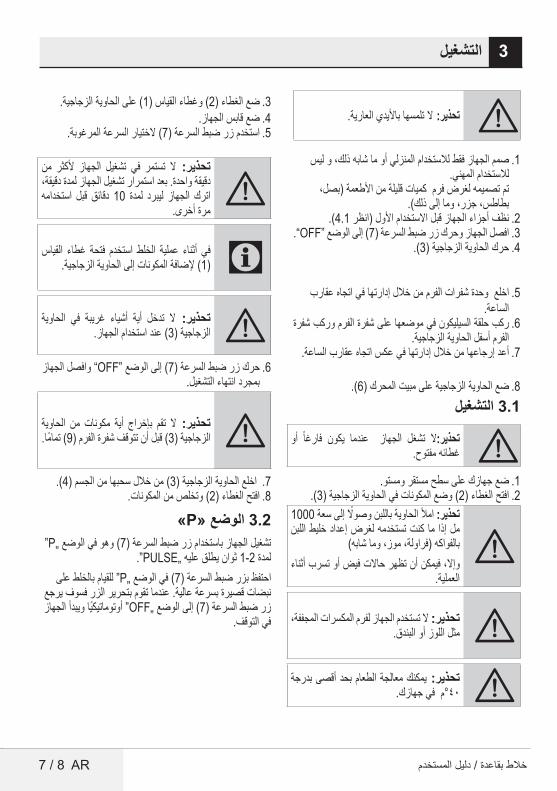
7 / 8 AR خالط بقاعدة / دليل المستخدم
التشغيل 3
A.تحذير: ال تلمسها باأليدي العارية
صمم الجهاز فقط لالستخدام المنزلي أو ما شابه ذلك، و ليس . 1
لالستخدام المهني.تم تصميمه لغرض فرم كميات قليلة من األطعمة )بصل،
بطاطس، جزر، وما إلى ذلك(.نظف أجزاء الجهاز قبل االستخدام األول )انظر 4.1(. . 23 ..”OFF“ افصل الجهاز وحرك زر ضبط السرعة )7( إلى الوضعحرك الحاوية الزجاجية )3(.. 4
اخلع وحدة شفرات الفرم من خالل إدارتها في اتجاه عقارب . 5الساعة.
ركب حلقة السيليكون في موضعها على شفرة الفرم وركب شفرة . 6الفرم أسفل الحاوية الزجاجية.
أعد إرجاعها من خالل إدارتها في عكس اتجاه عقارب الساعة.. 7
ضع الحاوية الزجاجية على مبيت المحرك )6(.. 83.1 التشغيل
A أو فارغا يكون عندما الجهاز تشغل تحذير:ال غطائه مفتوح.
ضع جهازك على سطح مستقر ومستو.. 1افتح الغطاء )2( وضع المكونات في الحاوية الزجاجية )3(.. 2
Aتحذير: امأل الحاوية باللبن وصوال إلى سعة 1000 اللبن مل إذا ما كنت تستخدمه لغرض إعداد خليط
بالفواكه )فراولة، موز، وما شابه(وإال، فيمكن أن تظهر حاالت فيض أو تسرب أثناء
العملية.
A ،تحذير: ال تستخدم الجهاز لفرم المكسرات المجففةمثل اللوز أو البندق.
A تحذير: يمكنك معالجة الطعام بحد أقصى بدرجة40°م في جهازك.
ضع الغطاء )2( وغطاء القياس )1( على الحاوية الزجاجية.. 3ضع قابس الجهاز.. 4استخدم زر ضبط السرعة )7( الختيار السرعة المرغوبة.. 5
Aمن ألكثر الجهاز تشغيل في تستمر ال تحذير: دقيقة واحدة. بعد استمرار تشغيل الجهاز لمدة دقيقة، استخدامه قبل دقائق 10 لمدة ليبرد الجهاز اترك
مرة أخرى.
C القياس غطاء فتحة استخدم الخلط عملية أثناء في )1( إلضافة المكونات إلى الحاوية الزجاجية.
A الحاوية في غريبة أشياء أية تدخل ال تحذير: الزجاجية )3( عند استخدام الجهاز.
حرك زر ضبط السرعة )7( إلى الوضع “OFF” وافصل الجهاز . 6بمجرد انتهاء التشغيل.
A الحاوية من مكونات أية بإخراج تقم ال تحذير: الزجاجية )3( قبل أن تتوقف شفرة الفرم )9( تماما.
اخلع الحاوية الزجاجية )3( من خالل سحبها من الجسم )4(. . 7افتح الغطاء )2( وتخلص من المكونات. . 8
»P« 3.2 الوضع “P„ تشغيل الجهاز باستخدام زر ضبط السرعة )7( وهو في الوضع
.“PULSE„ لمدة 2-1 ثوان يطلق عليهاحتفظ بزر ضبط السرعة )7( في الوضع „P“ للقيام بالخلط على
نبضات قصيرة بسرعة عالية. عندما تقوم بتحرير الزر فسوف يرجع زر ضبط السرعة )7( إلى الوضع „OFF“ أوتوماتيكيا ويبدأ الجهاز
في التوقف.
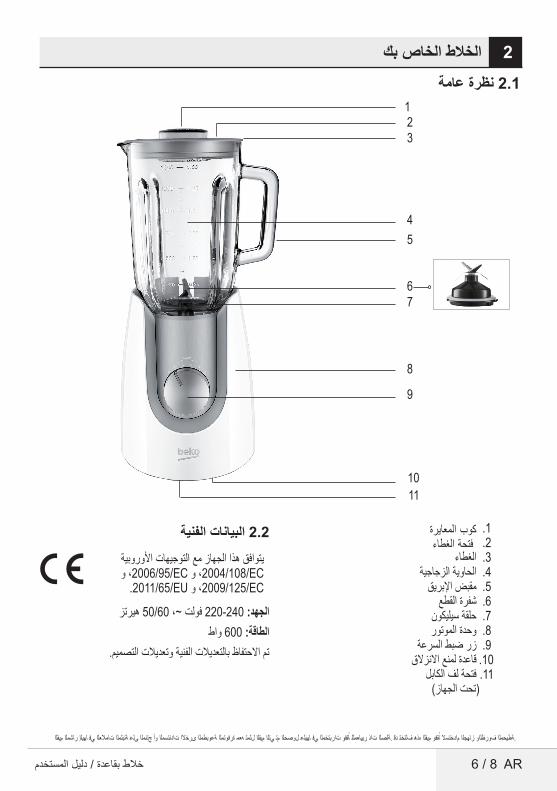
6 / 8 ARخالط بقاعدة / دليل المستخدم
2 الخالط الخاص بك
2.1 نظرة عامة
اقفو تاربتخملا يف اهيلع لوصحلا مت يتلا ميقلا لثمت هعم ةرفوتملا ةعوبطملا ىرخالا تادنتسملا وأ جتنملا ىلع ةتبثملا تامالعلا يف اهيلإ راشملا ميقلا اقفو ميقلا هذه فلتخت دق .ةلصلا تاذ ريياعملل .ةطيحملا فورظلاو زاهجلا مادختسال
كوب المعايرة. 1 فتحة الغطاء. 2الغطاء. 3الحاوية الزجاجية. 4مقبض اإلبريق. 5شفرة القطع. 6حلقة سيليكون. 7وحدة الموتور. 8زر ضبط السرعة. 9
قاعدة لمنع االنزالق. 10 فتحة لف الكابل. 11
)تحت الجهاز(
2.2 البيانات الفنية
يتوافق هذا الجهاز مع التوجيهات األوروبية EC/2004/108، و EC/2006/95، و
.2011/65/EU 2009/125، و/EC
الجهد: 240-220 فولت ~، 50/60 هيرتزالطاقة: 600 واط
تم االحتفاظ بالتعديالت الفنية وتعديالت التصميم.
123
4
8
76
5
9
1011
5 / 8 AR خالط بقاعدة / دليل المستخدم
1 تعليمات هامة للسالمة والبيئة
WEEE 1.2 متوافق مع تشريعاتوتشريعات التخلص من المنتجات الفاسدة.
هذا المنتج ال يشمل مواد مؤذية أو محظورة من تلك المشار الكهربائية النفايات على اإلشراف “تشريعات في إليها واألجهزة اإللكترونية” المصدرة من وزارة البيئة والتخطيط العمراني. متوافق مع تشريعات WEEE. تم تصنيع هذا إعادة يمكن الجودة عالية ومواد أجزاء من الجهاز استخدامها وهي مناسبة إلعادة التدوير. ولذلك، ال تتخلص من الجهاز في النفايات المنزلية العادية بعد انتهاء فترة خدمته. بل عليك أخذه إلى اسأل واإللكترونية. الكهربائية األجهزة تدوير إلعادة التجميع نقطة السلطات المحلية في منطقتك عن نقاط التجميع. ساعد على حماية البيئة
والموارد الطبيعية بإعادة تدوير المنتجات المستخدمة.
1.3 معلومات التعبئةالتدوير قابلة إلعادة مواد من المنتج تعبئة مواد صنعت مع التعبئة مواد من تتخلص ال الوطنية. للقوانين وفقا النفايات المنزلية أو النفايات األخرى. خذها إلى نقاط جمع
مواد التعبئة المخصصة لذلك من السلطات المحلية.
1.4 أشياء تقوم بها لتوفير الطاقةبالشكل الجهاز قبل وضعها في إلى قطع صغيرة الطعام تقطيع عليك الموضح في دليل المستخدم. احرص على اتباع تعليمات أخرى وااللتزام إذا منخفضة سرعة مستويات اختر الدليل. في الموضحة باألوقات كانت مناسبة إلعداد الطعام. أوقف الجهاز وانزع قابس الطاقة منه بعد
االستخدام.
4 / 8 ARخالط بقاعدة / دليل المستخدم
التي السالمة تعليمات على القسم هذا يحتوي أو األفراد إصابة خطر تجنب على ستساعدك
اإلضرار بالممتلكات. عدم اتباع هذه التعليمات يؤدي إلى إبطال الضمان
الممنوح.
1.1 السالمة العامةيخضع هذا الجهاز مع المعايير الدولية للسالمة. •يمكن استخدام هذا الجهاز من طرف األشخاص •
ذهنية، أو حسية، أو بدنية، إعاقة لديهم الذين أنهم أو معرفة طالما لديهم خبرة ليس الذين أو يخضعوا لرقابة فيما يتعلق بسالمة استخدام المنتج مخاطر يفهمون أو لذلك وفقا توجيههم يتم أو
استخدام المنتج. ال تستخدم الجهاز إذا كان كابل الطاقة أو الشفرات •
الخدمة بمركز اتصل عطب. به الجهاز أو المعتمد.
توصي • التي األصلية األجزاء تستخدم سوى ال بها جهة التصنيع.
ال تحاول أبدا فك الجهاز. •هذا • من جزء أي وضع أو بتشغيل أبدا تقم ال
الجهاز على أو بالقرب من األسطح الساخنة. ال تستخدم الجهاز لتسخين الطعام. •ينبغي أن تتوافق امدادات الطاقة الخاصة بك مع •
المعلومات المقدمة على لوحة تصنيف الجهاز. ال تستخدم الجهاز على كابل تمديد خارجي. •ال تلمس الجهاز أبدا ويداك مبتلتان أو رطبتان. •ال تسحب كابل الكهرباء عند فصل الجهاز. •انزع قابس الجهاز قبل التنظيف أو فكه أو استبدال •
الكماليات وانتظر إلى أن يتوقف تماما.
عند القيام بتفريغ الوعاء وأثناء التنظيف واإلمساك •بشفرات الفرم باأليدي المجردة فيمكن أن تتعرض بشكل االستخدام عد عن ناتجة بالغة إلصابات سليم. استخدم الجزء البالستيكي لمحاولة اإلمساك
بشفرة الفرم. استخدام • عند بالشفرات باإلمساك مطلقا تقم ال
الجهاز. يمكن أن تتعرض لإلصابة جراء سوء االستخدام.
وجميع • الجهاز جفف التنظيف من االنتهاء بعد األجزاء قبل توصيله بالتيار وقبل تثبيت األجزاء.
ال تغمر الجهاز أو كابل الطاقة أو قابس الطاقة في •المياه أو في أي سوائل أخرى.
حافظ على مواد التغليف بعيدا عن متناول أيدي •األطفال.
على • حافظ الجهاز. استخدام لألطفال يجوز ال الجهاز بعيدا عن متناول أيدي األطفال
1 تعليمات هامة للسالمة والبيئة
3 / 8 AR خالط بقاعدة / دليل المستخدم
المحتويات
4 1 تعليمات هامة للسالمة والبيئة
1.1 السالمة العامة.................................... 4
1.2 متوافق مع تشريعات WEEE وتشريعات5 ................... التخلص من المنتجات الفاسدة.
1.3 معلومات التعبئة.................................. 5
1.4 أشياء تقوم بها لتوفير الطاقة..................... 5
6 2 الخالط الخاص بك
6 ....................................... 2.1 نظرة عامة
2.2 البيانات الفنية..................................... 6
7 التشغيل 3
7 ........................................... 3.1 التشغيل
7 ...................................... "P" 3.2 الوضع
8 التنظيف والعناية 4
4.1 التنظيف........................................... 8
4.2 التخزين........................................... 8
8 .................................... 4.3 التعامل والنقل
يرجى قراءة دليل المستخدم هذا أوال!عزيزي العميل،
شكرا لك على شرائك لمنتجات Beko. نأمل أن تحصل على افضل النتائج من جهازك والذي قد تم تصنيعه بأعلى جودة وبأحدث التقنيات. وعلى ذلك، يرجى قراءة كامل دليل المستخدم هذا وجميع المستندات المصاحبة له بعناية قبل استخدام المنتج واالحتفاظ به كمرجع لالستخدام المستقبلي. إذا
قمت بتسليم الجهاز لشخص آخر، أعطه دليل المستخدم أيضا. اتبع التحذيرات والمعلومات في دليل المستخدم.معاني الرموز
تستخدم الرموز التالية في أجزاء متعددة من دليل المستخدم هذا:
C.معلومات هامة و تنويهات مفيدة عن االستخدام
A تحذير: تحذيرات بشأن مواقف خطيرة تتعلق بسالمةالحياة والمنشآت.
.ماعطال ةسمالمل بسانم
في الطاقة قابس أو الطاقة كابل أو الجهاز تغمر ال المياه أو في أي سوائل أخرى.
فئة الحماية من الصعقة الكهربائية.
تم إعداد هذا المنتج في مرافق حديثة وصديقة للبيئة.
.WEEE يتوافق هذا الجهاز مع تشريعات .PCB ال يحتوي على
صنع في جمهورية الصين الشعبية

www.beko.com
TBN6602W
01M-8834013200-4915-01
ةدعاقب طالخمدختسملا ليلد
AR