k-botics team 2809 pre-season and post-season manual · pdf filek-botics team 2809 pre-season...
TRANSCRIPT

K-Botics Team 2809Pre-Season and Post-Season Manual
R. BearseK. Wood
C. JohnsonJ. Riley
K - B o t i c s P r e - S e a s o n / P o s t - S e a s o n M a n u a l
w w w. k b o t i c s . c a P a g e 1 o f 140 @ f r c 2 8 0 9

Introduction! 4
About our team! 4
Mentor Restructuring and Recruitment (August)! 5
Managing a Large Team! 6
Record Keeping! 6
Communication! 6
Keeping People Involved! 7
Activity Planning! 7
Other Ideas! 7
Branding Your Team! 8
Pre-Season Activities! 9
Pre-Season Training! 9
Communication Workshops! 10
Setting the Stage for Chairman’s.! 10
Skills Development Portfolio! 11
Pre-Season Training Details:! 12
Team development lesson! 15
Pre-Season Challenge: There and Back Again! 25
Community Service and Fundraising Activities! 29
Leadership Retreat! 33
Tips for planning a leadership retreat! 36
How to Plan a Skills Development Outdoor Course! 37
Outreach ! 39
Demonstrations! 39
FLL mentorship ! 40
Post-Season Activities! 49
Charity involvement! 49
Appendix A: Pre-Season Technical Activities! 50
Birdhouse Activity Preparation! 50
Building the birdhouse! 51
Arduino and Boe-Bot Preparation! 62
Conducting the activity:! 62
K - B o t i c s P r e - S e a s o n / P o s t - S e a s o n M a n u a l
w w w. k b o t i c s . c a P a g e 2 o f 140 @ f r c 2 8 0 9

Programming the Arduino board.! 64
Electronics Activity Preparation! 70
Prototyping Electronic Circuits.! 71
Sensor Programming Preparation! 78
Sensor Programming! 80
Humpty Dumpty Challenge! 81
Introduction to Technical Drawings! 83
K-Botics CAD Training Part 1! 89
K-Botics CAD Training Part 2! 117
Appendix B: Communication and Teamwork Activities! 121
K-Bot Talks Introduction! 121
How to Plan a Good Talk! 121
“Be An Expert, Except When You’re Not” - a lesson in credibility! 123
“Say What you Do and Do What You Say” - a lesson in integrity! 124
“Make an Intentional Statement (not a non-statement)” - a lesson in clear communication!124
“ Speak Personally” - how to engage an audience! 125
“Be Who You Are” - a lesson in respect, acceptance, and integrity! 125
Leadership Camp Team Building Activities! 129
Group Decision Making Workshop (Kick-Off for Pre-Season Challenge)! 131
How to Evaluate Prototypes! 132
Appendix C: Pre-Season Challenge “There and Back Again” Resources! 133
Scroll! 133
Kickoff Information! 134
Field Drawings! 137
Materials! 140
K - B o t i c s P r e - S e a s o n / P o s t - S e a s o n M a n u a l
w w w. k b o t i c s . c a P a g e 3 o f 140 @ f r c 2 8 0 9

IntroductionThe purpose of this document is to outline what we did in our 2013 pre-season, to give the reasoning and philosophy behind our program, and to provide a model for other teams to follow.
About our teamK-Botics is run out of KCVI, a mid-sized high school in Kingston Ontario Canada. We are currently in our sixth season. Over the past 5 years we have learned a great deal, benefited from experienced mentors, and worked hard to create an identity for ourselves within our school, community, and FIRST.
We’ve participated at Championships 4 times, qualifying twice through Engineering Inspiration, once through Rookie All-Star, and last year through Chairman’s.
Our team culture is one of inclusion and diversity. Anyone can join the team, and we will work together to find a place for everyone to thrive. Our numbers are increasing year by year. This pre-season we had 72 members!
The 2012-2013 season was challenging for the team, as teachers were not participating in extracurricular activities, so the team was led by non-teaching mentors, many of whom were not returning the following year.
This year marked a few changes:• recruiting new mentors• hands-on pre-season skill building activities• communication and teamwork training• overnight team-building and visioning retreat• 6 week build season (pre-season challenge)• community service and fundraising projects• FLL mentorship and program development
K - B o t i c s P r e - S e a s o n / P o s t - S e a s o n M a n u a l
w w w. k b o t i c s . c a P a g e 4 o f 140 @ f r c 2 8 0 9

Mentor Restructuring and Recruitment (August)
Enthusiastic, caring, knowledgeable mentors are the backbone of our team.
We started fresh this year. Each mentor, new and returning, applied with a resumé, and were interviewed by our senior mentorship team to see where their talents would fit best with the group. References were collected, and police checks were kept on file.
Mentor training took place to introduce all mentors to our team rules/procedures and team culture. A code of conduct was signed by all mentors.
All first year mentors are “in training” and are supported by senior mentors during the season. It takes an entire season to really understand what FIRST is all about! We designed the pre-season so that mentors could take the lead in an area of comfort.
We restructured our senior mentorship team to include one lead mentor, and also a sr. mentor in charge of student development. With a very large team, it is important to have someone who is looking out for each individual’s growth and involvement.
Alongside university, college and grad school students, parents, and teachers, we recruited industry professionals to join our team as mentors. This increases the long-term sustainability of our mentorship team and provides excellent mentorship for our university students as they transition into the working world.
The mentor team restructuring has evolved as our team numbers have grown. With a larger team, more structure is required to ensure communication and accountability.
K - B o t i c s P r e - S e a s o n / P o s t - S e a s o n M a n u a l
w w w. k b o t i c s . c a P a g e 5 o f 140 @ f r c 2 8 0 9

Managing a Large TeamRecord KeepingWe have a very large group of students who show up when they can. We track attendance as well as keeping records of contributions made. This information can be useful to decide who is eligible to travel with the team to competition.
We use a finger print scanner to track attendance on a given day. Students sign in and out easily. We not only know if they were present or absent on a given day, but students will also have a tally of minutes at the end of the year. This is useful for them to know for scholarship applications etc.
We have also got a sticker chart on the wall to track who is participating in our non-robotics related events (fundraising, community service etc)
CommunicationWe use several modes of communication for our team. We have Google groups (email lists) for parents, students and mentors. We send weekly emails to everyone during build season and as competitions approach. We also have Facebook groups for the team, and one for mentors. These are used for day to day discussions and planning.
We have a website that tells the story of our team. Our blog documents the daily activities of the team for those who were not able to get to the meetings. Our resources page hosts white papers we have created, as well as forms needed by team members. There’s also a calendar available there that shows all our upcoming activities.
In the school we use the TV screens, display case, and a bulletin board outside our room to show what we’re up to.
The wider world can find out about our activities via online sources. We have a public Facebook page and also we tweet from @frc2809.
K - B o t i c s P r e - S e a s o n / P o s t - S e a s o n M a n u a l
w w w. k b o t i c s . c a P a g e 6 o f 140 @ f r c 2 8 0 9

Keeping People InvolvedIn a large group it is easy for people to feel that their contribution is small, and not needed. We strive to include as many people as possible in a meaningful way, which takes a bit of work.
We didn’t have the materials, space, or the person-power to have all the team work on the same activities at the same time.
The team split up into groups and rotated through several activities each meeting.
Each team member set goals for the season, for both technical and non-technical areas, and we checked in with them during the season to ensure that they were on track to meet their goals.
Activity Planning
Ensure that the materials are prepared and packaged in “kits” for each group.
Prepare a sheet of instructions for groups to follow. This will eliminate many questions during the activity.
Other Ideas
Have snacks. We’re a happier team when we’re well fed. Cut snacks into really small pieces!
K - B o t i c s P r e - S e a s o n / P o s t - S e a s o n M a n u a l
w w w. k b o t i c s . c a P a g e 7 o f 140 @ f r c 2 8 0 9

Branding Your TeamIt is important to give some thought to your team image, and how your team is being perceived by the public, other teams, and the team members.
Team logos and colours should be visible on all communication, from letterhead to websites, twitter profiles, T-Shirts, signs on the pit structure.
Branding is more than just images; branding deals with cultivating a positive feeling or emotion from an interaction with the team. Positive interactions with a website, a twitter feed, an email go a long way in establishing the reputation of a team. In person, the positive interactions with team members and mentors will go even farther for establishing your brand.
The K-Botics team has selected purple and blue as our team colours. Purple was chosen to honour the engineering profession, and blue was chosen as it is one of our school colours. Our logo integrates gears into the school’s bear paw logo (our mascot is the “blue bear”), and a K for K-Botics.
We make a habit of wearing our purple team shirts on meeting days. This ensures that many pictures taken on a day-to-day basis will showcase our team colours. It also raises our visibility in the school. There are a growing number of purple shirts walking the halls.
Our HatsK-Bots are known for our knitted hats! The hats are each unique--suiting the personality of the wearer. They are knit by team members, and given at a random surprise moment. Each K-Bot has a story about when they got their hat.
We have a team rule not to talk about or ask for a hat--if that happens that person goes to the bottom of the list (and there is a list--a google document that tracks who made each hat)
Many K-Bots wear their hats all the time--in class, outside all winter, at competition--one even wore his hat on a trip down south, and he was
identified on the plane by a FIRST participant from another city who had seen us at competition. Our hats stand out in a crowd!
We teach knitting lessons during our down time, and many or our K-Bots have taken up knitting as a hobby, and an interesting design opportunity. Knitting is a great activity for the long bus rides to competitions, and in the stands.
K - B o t i c s P r e - S e a s o n / P o s t - S e a s o n M a n u a l
w w w. k b o t i c s . c a P a g e 8 o f 140 @ f r c 2 8 0 9

Pre-Season ActivitiesPre-Season TrainingK-Botics Pre-Season activities started the first week of school. We were keen to start up early in the year to attract grade 9 students before they had already joined other teams.
We met weekly, on Mondays from 5:00 PM until 9:00 PM for skill building workshops during the first 7 weeks, and a pre-season challenge for the next 6 weeks. Having a pre-season that is so long and involved helps to bond the students together, and also allows enough time for them to try many different areas before deciding what they’d like to try for build season.
Technical Skills (See Appendix A for plans)The workshops we provided focused on technical skills in mechanical/electrical/programming, paired with a hands-on activity, communication skills, and team-building activities. During each meeting we worked to introduce new members to our team culture and history.
This year, on the technical side, we emphasized the entire design process, from brainstorming to prototyping, using CAD, then 3D printing or using our new CNC mill to create the parts.
On the non-technical side, understanding that our team would be large in the 2014 season, we developed a strategy to keep students engaged and focused on team building. We had also learned, from previous years, that there was some disconnect between the technical side of the team and the message that was being delivered through outreach in the community, for example. Because our students are diverse, and have many commitments outside robotics, a student who can free up enough time to be the mechanical lead, for example, may not be able to participate in Relay for Life. The intent this year was to bring those two groups together and build from a common vision established in pre-season. This also served as the focus for our Chairman’s presentation.
K - B o t i c s P r e - S e a s o n / P o s t - S e a s o n M a n u a l
w w w. k b o t i c s . c a P a g e 9 o f 140 @ f r c 2 8 0 9

Communication Workshops
These workshops laid the foundation for team communication from the outset. Topics covered included: • “Be An Expert, Except When You’re Not” - a lesson in credibility; • “Say What you Do and Do What You Say” - a lesson in integrity; • “Make an Intentional Statement” - a lesson in clear communication; • “ Speak Personally” - how to engage an audience; • “Be Who You Are” - a lesson in respect, acceptance, and integrity; • “Respect your Audience” - how to talk to different types of people; • “Be An Advocate” - how and why you might stand for something.
The advantage of doing this in pre-season was two-fold: it set the tone for the year and it gave the mentors a point of reference for any intervention required through the stressful time of build. We saw significant improvement over last year in the ability of our members to avoid and resolve conflict, express their concerns, and work through issues in a respectful manner.
Setting the Stage for Chairman’s.We believe that every individual is unique and has a fabulous story to tell. In that same way, we feel that every FIRST team is unique and can tell an equally fabulous story. It has always been important to us to understand what our own story is and tell it the best way we can. To that end, we took the entire team through three two exercises:
Past: K-Bot JeopardyWith over 50 new members we wanted to be able to engage them in our history as a team. We used our statistics and fun facts to create “K-Bot Jeopardy”. Divided in teams with new and old member we played a typical game of Jeopardy and left lots of room for storytelling in between rounds. It was a great way to get new and old members working together as well as convey our story in an interactive way.
Present: K-Bot WordsAfter a few weeks, we planned a team bonding and leadership trip to a camp. At that time, we divided the group into teams of 6. Each team was given various sizes of paper and markers. They were to write what K-Botics meant to them: most important ideas on big paper, less important on smaller paper - and arrange them in a way that was meaningful. Each group then presented to the other groups. In the end, all ideas were brought together to form the foundation of what the K-Bots, collectively, feel the team is about. This has served as the foundation for our Chairman’s submission. In this way, it reflects all members of the team.
K - B o t i c s P r e - S e a s o n / P o s t - S e a s o n M a n u a l
w w w. k b o t i c s . c a P a g e 10 o f 140 @ f r c 2 8 0 9

Skills Development PortfolioThis is going to be the hardest tool to get the students to use. Included in Appendix B are some suggested “development” sheets. To lead the students into this exercise it is key to get them to identify skills they are proficient in and skills they wish to improve.
Remember, the most important part of this exercise is to persuade the students that they can do anything they want. They can and should be encouraged to challenge themselves to develop skills they think they are “bad” at. We need to start this dialogue by talking a lot about self talk. If we believe we can never be good at a skill we will not develop it for any want of trying. We must break down this negative self talk and get our students to really believe in success. This can be done right through the level of university professor, but it is easier the earlier we can start the correct self-talk. It is not “I am bad at math”, the correct version is “I have yet to find the right approach to excel at math”, or something similar. It is key at this point to use examples from your own lifelong learning, preferably something that is close and personal. It is important for the students to see you open up your vulnerable side if you wish them to develop this skill set.
On to the manual. The sheets are fairly self explanatory, but do go through them with the students. They identify what we are good at in a skill, and how we wish to improve it, and most importantly the “evidence” we will use to establish our success. This evidence must be tangible and achievable, this is important to work hard with the students on. In my experience it is almost key to do a real case study on your own skills and use this for the students as an example. Try to chose a skill with ephemeral evidence and try to then set up clear identifiable evidentiary goals. This will help the students no end. I emphasize again that sharing is important.
Why a skills development portfolio?I emphasize to the students the importance of this. Later in their professional careers they will be required to keep evidentiary portfolios, for example as teachers and as engineers by accreditation bodies. Learning at this stage to do this, and having such a portfolio from early on is of great benefit. It also will help them develop their university applications and develop in life as a whole. There are many ways to phrase the importance of this, but such a portfolio will also simply help them get more out of FIRST and robotics.
Outcomes:I feel this exercise this year was too late in the day. Both in terms of placement, but also it was done after a talk by “robobird girl” a local celebrity robot builder who made the robot birds that were a success on Indiegogo. I am not sure as I chose not to follow up, but I suspect these portfolios were not used by the K-Bots this year. My personal learning experience was if we choose to bring these in next year or in future it will be essential to start the manual from day 1 and really help students to evolve them. I feel being able to add pages for each session we do, be it handout notes given to the students or feedback forms they build themselves during each activity we do in this arena will help them. I feel we may have a better solution to this idea next year and consider it a work in progress. (This is the K-Botics mentors “area for development”).K - B o t i c s P r e - S e a s o n / P o s t - S e a s o n M a n u a l
w w w. k b o t i c s . c a P a g e 11 o f 140 @ f r c 2 8 0 9

Pre-Season Training Details:New Member Meeting
We recruit new members at the start of the school year with announcements, posters, and word of mouth. We meet with our returning students early in the first week of school to prepare them for being leaders, and welcoming to our new members.
We hosted a New Member Meeting in the second week of school. The goal was to showcase our club to anyone who might be interested in joining.
All activities were led by returning team members.
• Introduction to FIRST and to K-Botics from the student point of view
• Workshop tours and showing past robots• Robot driving in the hallway• Name Games and Team Building Games• Design Challenge: Egg Drop using limited materials.• Videos from past seasons
We outlined our season’s schedule for pre-season and build. Permission forms and rules were distributed.
K - B o t i c s P r e - S e a s o n / P o s t - S e a s o n M a n u a l
w w w. k b o t i c s . c a P a g e 12 o f 140 @ f r c 2 8 0 9
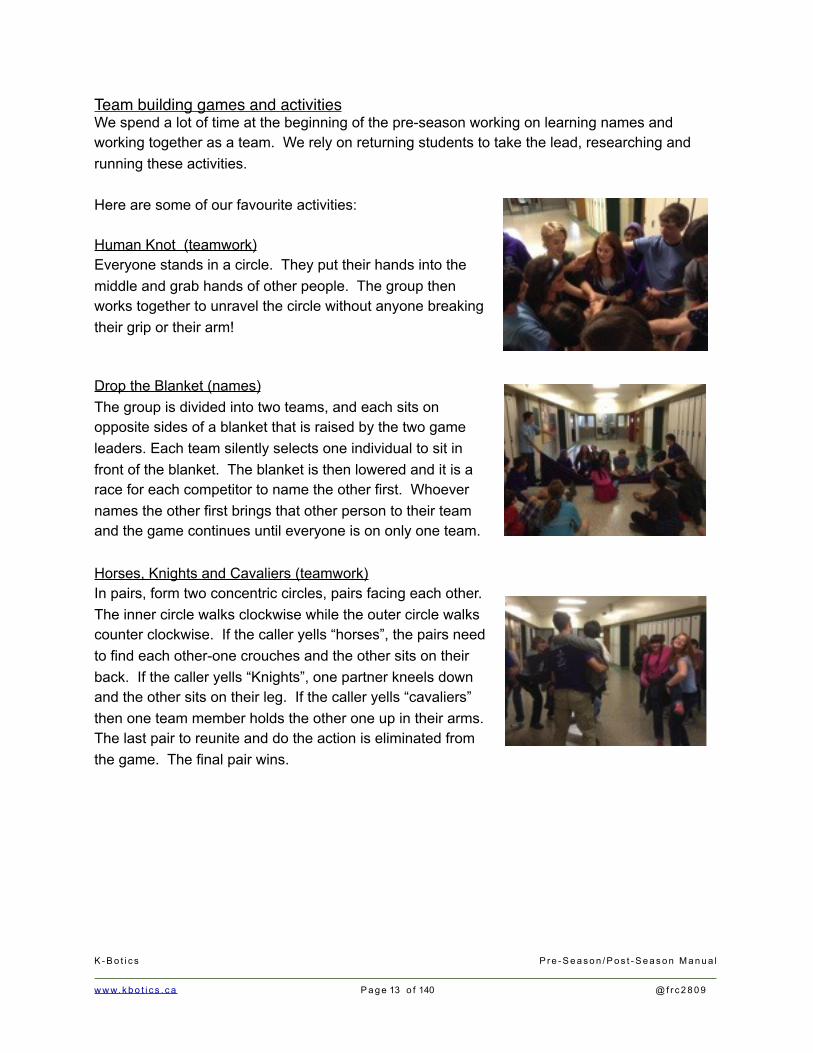
Team building games and activitiesWe spend a lot of time at the beginning of the pre-season working on learning names and working together as a team. We rely on returning students to take the lead, researching and running these activities.
Here are some of our favourite activities:
Human Knot (teamwork)Everyone stands in a circle. They put their hands into the middle and grab hands of other people. The group then works together to unravel the circle without anyone breaking their grip or their arm!
Drop the Blanket (names)The group is divided into two teams, and each sits on opposite sides of a blanket that is raised by the two game leaders. Each team silently selects one individual to sit in front of the blanket. The blanket is then lowered and it is a race for each competitor to name the other first. Whoever names the other first brings that other person to their team and the game continues until everyone is on only one team.
Horses, Knights and Cavaliers (teamwork)In pairs, form two concentric circles, pairs facing each other. The inner circle walks clockwise while the outer circle walks counter clockwise. If the caller yells “horses”, the pairs need to find each other-one crouches and the other sits on their back. If the caller yells “Knights”, one partner kneels down and the other sits on their leg. If the caller yells “cavaliers” then one team member holds the other one up in their arms. The last pair to reunite and do the action is eliminated from the game. The final pair wins.
K - B o t i c s P r e - S e a s o n / P o s t - S e a s o n M a n u a l
w w w. k b o t i c s . c a P a g e 13 o f 140 @ f r c 2 8 0 9

Week 1: Technical topic: Measurement and Tool use. Activity: Building bird houses
We want to make sure that everyone has experience following instructions, measuring, and safely using hand drills and the drill press as well as screw drivers. Students paired up and made a bird house to bring home.
Communication Topic: “Be An Expert, Except When You’re Not” - a lesson in credibility
When communicating ideas in our team and interacting with judges, it is important to realize what you know, and what you do not know. We want our team to recognize that nobody knows everything, and that it is ok to tell people that they do not know the answer/solution to a problem.
We are the experts when it comes to our own teams, so we can tell our own story with credibility for the Chairman’s presentation.
Other Activity: Robot DrivingWe like to get people driving as early as possible in the season. It is an opportunity to show students what’s inside a robot, and give them a chance on the controls. We teach lessons like how to change batteries, and other things as they happen.
We want to have as many people experienced in running the robots as possible. This facilitates more robot demos, and more practice sessions during robotics meetings.
K - B o t i c s P r e - S e a s o n / P o s t - S e a s o n M a n u a l
w w w. k b o t i c s . c a P a g e 14 o f 140 @ f r c 2 8 0 9

Week 2:Technical topic: Arduino and BOE-Bot ProgrammingActivity: Introduction to BOE Bots
Students join our team to build robots. Our goal is to get them comfortable with programming logic as early as possible. BOE bots are small enough and simple enough to use with limited assistance. Within one session groups were successful at programming their robot to turn and to make a figure-8.
Communication topic: “Say What you Do and Do What You Say” - a lesson in integrity
Integrity is an important value to reinforce within a group. Discussions focusing on examples of integrity will lead to the discussion of other areas of concern for teenagers.
The introduction of moral dilemma type questions will serve as a basis for discussion. Early on in the season, discussions like these are a good way for students to get to know each other based on more than first impressions and superficial things.
Team development lessonThis is perhaps the hardest lesson to do well. It relies entirely on the students, in my experience it is a great time for high school children and it can be amazing how much they know. Below I will give an outline of my basic lesson plan. I will note that on the day one can skip sections of this depending on how well the students are taking to it. The idea here is to overdesign the time window. If you run out
of things to do this can work not so well.
We need to have ground rules established when working in groups. We need to be positive, encouraging, and ensure that everyone takes turns. We want to stay on topic too, and avoid going off on tangents.
K - B o t i c s P r e - S e a s o n / P o s t - S e a s o n M a n u a l
w w w. k b o t i c s . c a P a g e 15 o f 140 @ f r c 2 8 0 9

Teamwork: Groups (of up to 6 people) discuss what teamwork is, and what are the elements of good teams. They will then present their top 2-3 ideas to the group, and a full group discussion will happen after this.
Each group will then pick an idea that was presented by another group. They should discuss what that idea means to their own team.
A different person should then go up and present these ideas to the group. (In order to encourage everyone to participate in the presentations, we called on the “least comfortable presenters” to do the presenting--they all received very positive feedback, and were encouraged to present again sometime).
At this point in the season it is important to discuss how to give good feedback.• comment on the information or the delivery, but never the person.• sandwich any constructive criticism with some positive feedback as well.
Groups go through a variety of phases. The first is forming, when people get together, establish the rules for their interactions, and begin to feel comfortable expressing themselves. The next is storming where conflicts will arise, and need to be mediated and worked through according to the agreed-upon methods, norming then follows, when groups begin to work together with little conflict, and finally performing is the last stage where we hope to be at the end of the season. It takes time to go through the stages of group development, which is part of the reason we have such a long pre-season.We also learned that there is a cycle of knowledge as you begin learning something new. Everyone starts off not knowing that they don’t know something. That is the unconscious incompetent stage. The next stage is where you recognize that you don’t understand something; the conscious incompetent stage. After more learning, there is the conscious competent stage, where you are aware that you know something because you are thinking K - B o t i c s P r e - S e a s o n / P o s t - S e a s o n M a n u a l
w w w. k b o t i c s . c a P a g e 16 o f 140 @ f r c 2 8 0 9

about the task while you are doing it, much as a beginning reader will sound out the words one at a time. The final stage is the unconscious competent stage, where things are second nature to you, much like how you can now read without sounding out each word.
As people progress through the pre-season, they will build skills, but also develop the awareness of the skills that they lack. It can become frustrating for new members, particularly new members who join in grade 11 or 12, as they are very aware of not having the same skills as their peers.
OutcomesThis particular activity was one of the most successful as far as I went. I was fascinated to discover that the students were not only highly capable of developing a list of attributes of good teams, they were all in agreement over a strong core set of these and were capable of articulating how this skill or attribute should look in a good team. As an exercise I think the students were not sure how this helped them to a certain extent, after all it was an easy task. But I noted that, as it was for me, it is often the case that stating the obvious is sometimes necessary to actually use the obvious.
A key lesson point I also used is to multitask every skills exercise. When it came to presenting the group results from each mini session I chose each time to ask someone new and someone ‘uncomfortable with presenting’ to present. I presented the environment as one that was safe, and set ground rules for interaction and it was refreshing to see some of the more shy and subdued students step up, but not just step up, happily step up to present. This in and of itself I would consider a major outcome for this session. Also I consider it a key component to utilize in all skills sessions, try to multi-task each session and try every time to get the students to step outside their comfort zone. As long as you can make FIRST a safe environment to do this, you can make it a powerful environment for student development.
K - B o t i c s P r e - S e a s o n / P o s t - S e a s o n M a n u a l
w w w. k b o t i c s . c a P a g e 17 o f 140 @ f r c 2 8 0 9

Week 3:Technical topic: Introduction to Electronics:
To get an idea of how electric circuits work, we introduced the team to wiring and basic circuitry components. Students followed the lesson plan and wired breadboards to make LEDs blink when a switch is pressed.
The final project is to make a “Magic 8 Ball” type device to answer yes or no questions by seeing which LED lights up.
Extension activities are available.
Team building topic: K-Botics Jeopardy
Now that our team is in its 6th season, there are no longer members of our team who were present in our first year. We strive to hold on to our roots, share our stories and traditions, and help our new members feel a part of our “inside jokes”. We played a game of K-Botics jeopardy to test our returning students, and to teach our newcomers a bit about our team.
We divided our group into teams, and sat the teams two by two in rows. The first question is chosen by one of the pairs, and asked to each of the pairs that are in the front row. They need to write down the answer, and put their hand up first. If they get it correct, they earn the point value of the question. The pairs in the front then stand up and move to the back, and everyone else shuffles forward. The movement between questions helped keep people active and involved.
K - B o t i c s P r e - S e a s o n / P o s t - S e a s o n M a n u a l
w w w. k b o t i c s . c a P a g e 18 o f 140 @ f r c 2 8 0 9

Week 4:Technical topic: Introduction to Technical DrawingOur design process begins with the formation of ideas, followed quickly with drawings. Students learned how isometric and orthographic drawings relate to 3D objects. They practiced creating drawings, and using drawings to build objects.
This workshop is a good foundation before starting CAD, manufacturing drawings, 3D printing or CNC activities.
Communication Activity: “Make an Intentional Statement” - a lesson in clear communication
In all communication between team mates, with another team, with judges, and in the Chairman’s presentation, it is important to make statements that are clear and precise. In this activity we look at the difference between statements and non-statements, and we practice describing our team and our robot with intentional statements. We want all of our words to make an impact.
Teamwork activity: Indoor exercises in teams skills
Our example here was a straightforward task. Elevate a half liter water bottle off the ground using only flip chart paper and scotch tape. Now the catch is each piece of flip chart paper and each piece of tape have a price tag. Each structure is judged on some equation of “price”, “height” , “aesthetics” and “teamwork”. Said equation may well result in a level playing field of scores, but the importance of this exercise is to look at team dynamics and work with the students on this after the exercise – what did you do well and what did you notice for next time. In all this we are looking to make build season more successful. This is something that can be drawn out at any time. It is better to do the storming part of team
formation now than when we have 6 weeks to build a robot? This indoor process is a good side activity to have on hand during preseason to teach some skills and have fun at the same time. It is key to break away at times from the more ‘lecture style’ skills development process.K - B o t i c s P r e - S e a s o n / P o s t - S e a s o n M a n u a l
w w w. k b o t i c s . c a P a g e 19 o f 140 @ f r c 2 8 0 9

Outcomes:Well you can see from the pictures, including the ‘epic fail’ of the mentor team for 2809-- yes our mentors had their own team for this exercise and they epically failed to lift the bottle--all the students succeeded with some quite spectacular designs and some extremely simple models. A lot of fun was had in this exercise, but timing is everything. The groups that attempted this challenge earlier in the evening was able to focus better and were more engaged and learned more from the experience.
Overall outcomes in each team were different. One notable example springs to mind. In one session a group had an impasse at working together, in fact they had to be taken outside the room to resolve their team differences. It was interesting because initially it was a highly negative experience, one particular girl and boy could not work together, they were at loggerheads. However when removed to the outside of the room it rapidly became apparent that they were going to ‘have’ to do this and when they actually did they produced one of the best team results and one of the most elegant solutions.
K - B o t i c s P r e - S e a s o n / P o s t - S e a s o n M a n u a l
w w w. k b o t i c s . c a P a g e 20 o f 140 @ f r c 2 8 0 9

Week 5: Communication topic: “Be An Advocate”-how and why you might stand for something
We want all of our team members to be confident, and to know how to stand up for themselves and their peers. By addressing what it means to be an advocate, we open the floor to discussion. Often students are looking for a forum to discuss meaningful topics, and we strive to be that safe space for discussion.
The activity associated with this topic is a questionnaire that each student and mentor fills out. The questions will illuminate areas of skill, areas of interest, areas in which the individual would like to grow. There is an opportunity for each student to self-advocate--to tell us what they would like to accomplish over the year, and what support they think they will need along the way.
Information received from this survey was used when teams were created for the pre-season challenge, and were also referred to from time to time by the student-development mentor who checked in with students throughout the year.
Teamwork activity: Rube Goldberg Design challenge
This challenge, done in small groups, was to pop a balloon using 10 steps. Teams were given a limited time, and a selection of materials to make the wildest craziest process to pop a balloon. Balloons were not given out until testing time.
This challenge not only called for team work and good communication, but it also forced groups to think creatively, and use the materials on hand.
K - B o t i c s P r e - S e a s o n / P o s t - S e a s o n M a n u a l
w w w. k b o t i c s . c a P a g e 21 o f 140 @ f r c 2 8 0 9

Week 6:Technical topic: K-Botics CAD Tutorial
Following up on the introduction to technical drawing tutorial, we introduced CAD modeling with our tutorial. We provide a CAD Certificate for those who complete the tutorial and final project.
Experienced students were a big help to new members during this activity.
Communication Topics: “Speak Personally”-how to engage an audience “Be Who You Are” -a lesson in respect, acceptance and integrity
Due to scheduling and time constraints, we joined the two workshops together. These two pair particularly well since they are dealing with who you are, and how to speak personally. These two lessons should be tailored to fit the particular dynamic of your team.
Technical topic: Introduction to SensorsFollowing the BOE Bot introduction, we introduced sensors to allow the BOE Bots to better interact with their environment. As BOE Bot sensors were introduced, we discussed the different types of sensors that exist, and what kinds of sensors we have used on our FRC robots over the years.
It is never too early to understand the logic of a feedback loop, and to consider not only what you would like your robot to do, but whether it is a reasonable task that can be accomplished using your programming skills and the sensors available.
K - B o t i c s P r e - S e a s o n / P o s t - S e a s o n M a n u a l
w w w. k b o t i c s . c a P a g e 22 o f 140 @ f r c 2 8 0 9

Week 7:Technical topic: Introduction to Servo Motors. Activity: Humpty Dumpty Challenge
Using all the skills learned in earlier workshops, students tackled a design challenge using BOE Bots. The new element in this task was the use of a servo motor.
By scaffolding the challenge with earlier workshops, even new members of the team felt confident approaching the task.
Many different creative approaches were used to rescue “Humpty Dumpty” (a ping pong ball) from the wall.
Communication Topic: “Respect your Audience” -how to talk to different types of people
Leading up to the pre-season build challenge, we want every group to understand how to give a good presentation. Knowing your audience, understanding their expectations, and presenting your best work, are all important aspects of any presentation.
Other activity: Guest speaker (local robotics entrepreneur)
We want to expose our students to all the possibilities that robotics can lead to in their future. We invited a guest speaker, a local robotics entrepreneur, to show the robotic toys that she is making.
She outlined how she became interested in robotics and how she learned what she learned. Her prototyping and manufacturing techniques were of interest to our group, as well as how she used sensors and programming to make her toys interactive.
K - B o t i c s P r e - S e a s o n / P o s t - S e a s o n M a n u a l
w w w. k b o t i c s . c a P a g e 23 o f 140 @ f r c 2 8 0 9

Field TripWe recognize the value of connecting with local areas of interest, and our sponsors. This year we connected with the outreach department of the Queen’s University Faculty of Engineering and Applied Science, and had a tour of the machine shop and a meeting with several competitive design teams.
We saw the Space Engineering Team and saw how robots can be used on other planets. The Formula SAE car showed us how to design for speed, and the Baja buggy showed a rugged design.
We were impressed by the manufacturing techniques on show, particularly the water-jet cutter.
K - B o t i c s P r e - S e a s o n / P o s t - S e a s o n M a n u a l
w w w. k b o t i c s . c a P a g e 24 o f 140 @ f r c 2 8 0 9

Pre-Season Challenge: There and Back Again
We created a 6 week design challenge for our team to complete. The goal was to mimic all the aspects of a FIRST build season, from robot building to presenting to a panel of judges. Students were divided into 7 smaller teams who would compete for both the design and robot performance trophies.
The challenge, based on Lord of the Rings, was revealed on kick-off day by means of a scroll. The goal was to transport “the one ring” (a pingpong ball decorated with a gold sharpie) from The Shire, to Mount Doom where it would be destroyed. Points were awarded for getting the ball to the end, depositing it in the different levels of “goals”, and the time it took to do so.
Each group was given a kit of parts, and a BOE Bot to use, similar to how our team is given a kit of parts and a kit frame. They could spend a maximum of $20 on any additional parts they wanted to put on their robot. Most groups used materials found in the room, working from scrap metal, Lexan, and wood. Many groups prototyped parts and then by using CAD and our 3D printer and new CNC mill, could manufacture custom parts for their robots.
At the final presentation day, groups were required to not only demonstrate their robots but also present their best design feature, and the process by which they came to that design. This mirrored doing a “Chairman’s presentation” or talking to judges in the pit area.
K - B o t i c s P r e - S e a s o n / P o s t - S e a s o n M a n u a l
w w w. k b o t i c s . c a P a g e 25 o f 140 @ f r c 2 8 0 9

Pre-Season Challenge Details:Meetings continued to be on Mondays from 5:00PM until 9:00PM, however some groups got together to meet during the week at lunch time, or on their own time to build and test their ideas.
We encouraged each group to follow the design process: • understand the challenge• brainstorm for ideas• prototype• build• refine the design • program• troubleshoot.
K - B o t i c s P r e - S e a s o n / P o s t - S e a s o n M a n u a l
w w w. k b o t i c s . c a P a g e 26 o f 140 @ f r c 2 8 0 9

The game board was designed to fit on a standard sheet of plywood. We built two fields because our group was so large. Teams were given the CAD drawings of the field at kick-off, and had to interpret them, much like how field drawings are interpreted at the start of a FIRST build season. They relied on their skill reading orthographic drawings learned in the pre-season.
The teams got access to the field on week 3, signing up for 10 minutes segments.During the 6 weeks of the pre-season challenge, there were opportunities for each group to use their technical skills and teamwork and communication skills that were taught in the pre-season workshops.
Mentors checked in with all teams from time to time to monitor progress. Formal meetings were held on week 4 to discuss progress and areas of conflict. The pre-season challenge was a chance to work through issues in group dynamics before we entered the FIRST build season.
Workshops were held to address areas of common concern, including how to give a good presentation. A run-through of the presentations took place on weeks 5 and 6 to ensure that groups were prepared before presenting on the final night.
K - B o t i c s P r e - S e a s o n / P o s t - S e a s o n M a n u a l
w w w. k b o t i c s . c a P a g e 27 o f 140 @ f r c 2 8 0 9

The presentation day occurred in December, before the winter holidays. Judges were brought in, two represented our sponsors, one from the school board technology program, and a fourth from the robotics program at our local college.
Presentations by each group occurred in the auditorium of the school. Groups had 5 minutes to present, using a powerpoint presentation.
Each group had two runs on the field tables to show what their robots could do. The progress on the field was broadcast onto the big screen, and two commentators explained the progress of each robot. A referee kept a close eye for any rule breaks, and documented these on score sheets. Field reset crews ensured that each table was returned to the original condition after each run.
Parents and siblings came to watch the event, and also take part in a parent meeting to discuss the upcoming build season while the judges deliberated.
There were two trophies up for grabs at the final presentation. One was for the best robot performance, and the other was for the best robot design, decided by the panel of judges after hearing presentations and examining the robots.
K - B o t i c s P r e - S e a s o n / P o s t - S e a s o n M a n u a l
w w w. k b o t i c s . c a P a g e 28 o f 140 @ f r c 2 8 0 9

Community Service and Fundraising ActivitiesActivities that we do together, where we help each other and other people, help to build character, teamwork, and collective memories that bind our team together.
Bottle DrivesOur team is based out of a high school that is very close to the student housing area for Queen’s University. During several points in the year, we coordinate bottle drives to raise money for our team, and to help clean up the student area.
We meet on a Sunday (to take full advantage of any weekend drinking) and start collecting around noon, going door to door. Groups of K-Bots go with a parent volunteer with a car, and take all donations of bottles/cans or money. We have learned to bring a donation jar with us to collect spare change!
The bottles and cans are brought back to the school parking lot where we sort bottles and crush cans. Another parent volunteer drives the sorted bottles/cans to the Beer Store to exchange them for money.
Tips: • check first how your beer store prefers items to be
sorted--make a sign for your sorting crew.• give the beer store warning before your bottle drive
happens--sometimes they’ll have extra staff on hand.• Have boxes for bottles, clear plastic garbage bags for
cans--we crush cans and bag them in groups of 200, marking the number on the bag with a sharpie.
• Bring hand sanitizer for the group
K - B o t i c s P r e - S e a s o n / P o s t - S e a s o n M a n u a l
w w w. k b o t i c s . c a P a g e 29 o f 140 @ f r c 2 8 0 9

Shoreline Clean Up
We have participated many times in the Great Canadian Shoreline Clean Up, coordinated by Loblaws and the Vancouver Aquarium. We sign up for an area of shoreline in Kingston, and coordinate a clean up in the fall and again in the spring. We encourage K-Bots and family to come together and build community through this event.
The clean up is more than just picking up garbage and recycling. We must document the findings, and report these online to be tabulated with the data from across the country.
CN Tower climbThis year one of our mentors climbed the CN Tower to raise money for the United Way and also for K-Botics. We sold stairs, at a price of $5 each. Not only did this fundraiser raise money for our team, but it also raised the profile of K-Botics and FIRST in the wider community.
K - B o t i c s P r e - S e a s o n / P o s t - S e a s o n M a n u a l
w w w. k b o t i c s . c a P a g e 30 o f 140 @ f r c 2 8 0 9

Fish Fry FundraiserWe have been hosting fish fry fundraising dinners for the past few years. We make cole slaw, beans, drinks and desserts, and Mike Mundell’s fries up the fish for us.
We sell tickets to the school, parents, community and team members, and then we all gather together to enjoy a feast! We have had such success that we need two sittings now!
It is great to see other local FRC team members and FLL teams come to support us at these dinners.
Along with a dinner, guests can also try driving our robot, and get a tour of our workspace.
A fish fry is a fun way to build community with our team and expose our city to FIRST.
Cook BookOur team is known for our team dinners. We have a very supportive parent community who have come together to provide a meal for us each time we met during build season. Not only are the meals delicious, but they are also healthy.
We heard often that other teams were eating pizza for six weeks, and we wanted to do something about that. This year we have compiled a lot of the recipes from our parent community, and are publishing them in a K-Botics Cook Book.
K - B o t i c s P r e - S e a s o n / P o s t - S e a s o n M a n u a l
w w w. k b o t i c s . c a P a g e 31 o f 140 @ f r c 2 8 0 9

Parent Appreciation Pasta Night
To show how much we value the contributions of our parent community, we cook them dinner one evening during build season.
As a team we plan the menu, go shopping for ingredients, prepare the meal and serve it. For some team members this is a first opportunity to cook. This year we served pasta for 100 people! Along with being a great meal, we also have a robot demo, workspace tours, and a few speeches, from students and mentors explaining what K-Botics and FIRST means to them.
We take advantage of these opportunities to inspire younger siblings to join our team, and for parents to become mentors or ask their workplaces to become sponsors.
It is important for us to give back to our supporters. We invite not only our parents and families, but also the school custodians who take care of our workspace.
The K-Bots learn cooking, and teamwork skills during this event, as well as the importance of appreciation!
K - B o t i c s P r e - S e a s o n / P o s t - S e a s o n M a n u a l
w w w. k b o t i c s . c a P a g e 32 o f 140 @ f r c 2 8 0 9

Leadership RetreatThis fall we initiated a K-Botics leadership retreat. We find that our team really starts to come together and gel after competition season, when we go away overnight, and we hoped to start off the season with such an opportunity for team cohesion and bonding to occur.We left after school on a Friday, and parents/mentors drove our team to a small summer camp
that we rented for the evening and following day. There were many structured activities, but also time for the group to get together and play outside.
Several senior K-Bots led games and team building activities. We played capture the flag, varieties of chain tag, frisbee, and several problem solving activities with a blanket.
One had a group stand on the blanket, get off, fold it in half, and get back on. The challenge was to keep folding it up until it was tiny, and to keep everyone standing on it.
Another had the group standing on the blanket, and challenged them to fold the blanket over while standing on it. For an extra challenge, start with a smaller blanket, or fold it up to make it narrow before starting.
We held a campfire in the evening, and sang songs together. We roasted marshmallows and made s’mores, we stargazed and enjoyed the quiet of the night.
K - B o t i c s P r e - S e a s o n / P o s t - S e a s o n M a n u a l
w w w. k b o t i c s . c a P a g e 33 o f 140 @ f r c 2 8 0 9

Spending an extended period of time together, eating, sleeping, playing together will bond a group through common experience. We wanted to structure the bonding, and use our time to introduce our team culture to the newer members.
Our senior mentors led visioning activities to help determine the priorities of the team.
The large group was split into several smaller groups. Each person was given two index cards and were instructed to individually write the most important aspects of our group. After everyone wrote these words, the group discussed the relative importance of each of the words. Conflict resolution skills were introduced at this point to help groups come to an agreement on the prioritized list. Words of greater importance were written on larger pieces of paper. When all groups were done their lists, they explained them to the entire group.
K - B o t i c s P r e - S e a s o n / P o s t - S e a s o n M a n u a l
w w w. k b o t i c s . c a P a g e 34 o f 140 @ f r c 2 8 0 9

Mentor led team building activities challenged the students with a variety of group tasks:Develop a group communication strategy to lead your blind group silently along a rope on the ground that trailed amongst the trees. One member is permitted to keep their eyes open during the activity.
Groups learned to trust one another, and to make a plan together. The leader learned to look out for the group members.
Rescue a teddy bear from the middle of a rope circle using only a single (very long) piece of rope. Nobody is allowed to enter the roped off circle. The teddy bear is not allowed to touch the ground once it is lifted up.
For this activity, it is required to think creatively and try ideas. Teamwork is required to execute the solution. Another activity had two ropes set out in almost parallel lines. They were about 5 feet apart at the start and about 6 feet apart at the end.
Devise a plan to walk along the length of the ropes to cross the “bridge”. The problem was that there needed to be a biological link from one rope to the other at all times. There are several workable solutions to this challenge.
Compete in a 7 legged race! The groups could devise any plan to have only seven legs on the ground. There were some creative solutions, but most groups ended up falling down laughing.
K - B o t i c s P r e - S e a s o n / P o s t - S e a s o n M a n u a l
w w w. k b o t i c s . c a P a g e 35 o f 140 @ f r c 2 8 0 9

Tips for planning a leadership retreat
Timing: Holding a retreat in mid October was good for us. The weather was warm enough for us to spend time outside, but cold enough to keep swimming off the table as an activity.
Duration: One night was sufficient for our group. Our goal was to keep the team active for the entire time. Down time would lead to potential formation of cliques which would be counter productive. Everyone was very tired by the end of the 24 hours.
Weather: Have a rainy day contingency plan for your activities, and make sure that there is adequate indoor space for your group, OR make sure that everyone has proper rain gear and continue on outside
Meals: We arranged to book the camp with meals included. This is preferable for us since all the mentors wanted to participate in the activities.
Activities: Have activities for large groups and small groups. Encourage the formation of different small groups during the retreat so that everyone can meet each other. Include returning students to take the lead planning some activities. Our focus was to motivate grade 11s who are making the change to “Sr. Students” to take on significant leadership roles. Grade 12s are already looked up to because they are the oldest and usually the most experienced.
Have a mix of activities. Include physical activities to tire them out, as well as quieter activities. Let everyone excel at something over the course of the retreat.
Create happy memories for everyone to look back on!
K - B o t i c s P r e - S e a s o n / P o s t - S e a s o n M a n u a l
w w w. k b o t i c s . c a P a g e 36 o f 140 @ f r c 2 8 0 9

How to Plan a Skills Development Outdoor CourseAn assumption underlying this course is having sufficient mentors to break down the student groups into functional units. It is noted that the implication here is that groups should number 6 or less. This number is specifically chosen as it is regarded often in the literature as the largest functional groups size to not require an appointed or emergent leader. This is an essential of most dynamics that we will cover in this manual, it is targeted as it allows all students to participate and develop without interruption.
Appendix B contains a sample course set to the background story of Dr Who, chosen as this particular sci-fi tv character is popular among the K-Bots, giving a reference point to the students that is not to do with team development activities. The method behind this is to try to keep a distraction of the focus away from the team skills being used in each task and have the students approach the tasks a little more naturally, certainly initially.
The objective of the ‘course’ is to pass the students through a set of tasks which challenge them directly to act and use skills which either physically or mentally require them to work together. A good example of this is the leaning into each other exercise created by the ‘bridge’ scenario. Here two students at a time must trust each other and lean in. Overall however one is more interested in the team dynamic.
Each ‘exercise’ stage in the course is followed by a debrief. The objective of the mentor here is NOT to tell the team how well they did or did not behave as a team. The mentors role is to facilitate the team through discussing and identifying how they worked well together and what areas they have for improvement. It is important to get the students to try to focus on developmental areas in the following challenges. What is interesting, but should be left to the students to realize, is that ‘developing’ in one area may end up with a previously good area ‘weakening’. This is a learning process, an excellent opportunity to develop new team work skills.
The final task in our Dr Who scenario is a semi-competitive exercise involving a ‘seven legged race’ it is interesting how the students manage this, and a video can be seen on our blog. The key take home though at the end of this exercise is how much fun this last task is for the students. If they ‘fail’ a lot on the course this can lead to negative learning, making the last task ‘super fun’ is essential. As we will discuss in the section on teaching students feedback, learning is always best achieved by positive surrounding the ‘learning’ component.
Designing your own courseThere are no fixed rules to this process. We offer Dr Who as a guideline, but the tasks here contained were specific to available tools and available facilities. I note here that it is often fun to include many ‘extra’ tools for the students as well as those needed for an “ideal” solution. This can lead to fun problem solving and also learning experiences in how we approach a problem. K - B o t i c s P r e - S e a s o n / P o s t - S e a s o n M a n u a l
w w w. k b o t i c s . c a P a g e 37 o f 140 @ f r c 2 8 0 9

Remember it is OK to fail a given task, it is understanding why and having fun failing that is important. If they aren’t enjoying themselves they certainly aren’t learning in this exercise. Other key points for designing your activities: they will take longer than you foresee, don’t try to ‘squeeze’ in too much. The students will do some pretty bizarre things, and that is ok, what do they learn from it is what matters. Remember to have a ‘wet weather’ alternative for indoors, there is nothing worse than a weather failure. Although many of these kinds of activities can be done in the rain. The internet is a great resource for extra activities.
Be sure to prepare mentors well for the activities. It is essential that all mentors are really up to speed with the ideas behind the tasks and also have a good idea what ‘facilitating’ learning looks like in this context. We ourselves are not all experts in this and it would be good to have a pre-event training session with the mentors to really help improve the student experience.
OutcomesThis was a successful day in terms of the K-Bots having a lot of fun. The breakdown into teams worked well and they really enjoyed the ‘assault course’. I feel that a lot of indirect learning was done, there was definite improvement over time and I felt that we did see some actual learning as we went along. I also feel that the success in later activities such as the pre-season challenge may be a reflection in part on this activity. I did learn that you could do this in a day at school if you had to. But I strongly recommend the “getting away from it” component that we were able to introduce. I feel being away from a normal environment really helps with conscious and unconscious introspection that we were seeking to achieve here.
Multi-day activities:Do you have more than one day? AWESOME, you have graduated to a ‘super’ class of team building activities. ‘Large group’ activities. Here the groups can come together into one or two groups (you need to combine at least 4 teams into one ‘big team’. Here they should be given tasks that can be spread out by them over the day, overlapping events between teams is fun.
This kind of activity can be driven to lead the teams to ‘clues’ to uncover a mystery of some kind. I have in the past had clues to a final activity involving triangulating flares in the night sky to build a triangle to locate the center of which to discover the “grand prize”. Such activities may depend on the age of your students, but could also be designed for a daytime exercise using landmarks. Again, here it is time to deploy the internet. The hard part of this activity is the ‘review’ period. Here it is ideal to get the groups to periodically reflect on its behavior as a team. This can be done either during the exercise or after. Ideally with more than one ‘super team’ a second “grand challenge” is to present the team’s learning to the other team in a semi formal manner. This can help students to really tie up what they have learned
K - B o t i c s P r e - S e a s o n / P o s t - S e a s o n M a n u a l
w w w. k b o t i c s . c a P a g e 38 o f 140 @ f r c 2 8 0 9

OutreachDemonstrationsWe showed our robot on Grade 9 day, and parent teacher night, and also to several FLL teams who have come to visit. Each time we demonstrate the robot we are not only inspiring more people to consider joining our team, but we are also showing what an amazing program is available at our high school.
Demonstrations also help give newer members experience at the robot controls, and the technical aspects of the robot like changing batteries and troubleshooting any problems that may occur.
Ideas for demo locations:• Team events (parent appreciation night etc)• School events (information nights, parent teacher
interviews, relay for life, etc)• Invite FLL teams to visit• Local mall• sponsors• elementary schools• science fairs/science rendezvous exhibitions• girl guide/boy scout groups
K - B o t i c s P r e - S e a s o n / P o s t - S e a s o n M a n u a l
w w w. k b o t i c s . c a P a g e 39 o f 140 @ f r c 2 8 0 9

FLL mentorshipK-Bots mentored several FLL teams this year. Our K-Bots did more than simply helping out day to day at meetings. They took part in planning the activities, working on teamwork skills and communication amongst the team members, and helping the teams learn about programming and building techniques.
Here are some ideas presented by our K-Bots for what worked at their team.
Rideau Public School LEGO Club:
At Rideau Public school a club of about 30 members has been meeting for three years. Out of this group there are two FLL teams, the Rideau Rhinos and the Rhino bots who have competed this year and 2 years ago at the Kingston FLL Regional competition. They also send 6-8 teams to the Limestone District Skills Competition, a few years ago one of the Rideau teams won and represented the school board at the Ontario Skills competition.
The team is mentored by K-Bots: Wesley, Sawyer, Mateo and Katy
Club mechanics: The club meets one day a week to work on a challenge that is presented to them at the start of the meeting. They break up into groups of four to build, program and test their robots. During the FLL season, students will be invited to join one of the two FLL teams and will meet on alternate days to work on FLL challenges. The FLL students also help out the junior FLL students with their project.
The challenges given to the club consist of a combination of:
• line following• pushing blocks• collecting smaller objects• ultrasonic detection• throwing balls• making the robot dance• using the touch sensor to sense walls • various programming tools such as wait blocks, loops
and switches.
K - B o t i c s P r e - S e a s o n / P o s t - S e a s o n M a n u a l
w w w. k b o t i c s . c a P a g e 40 o f 140 @ f r c 2 8 0 9

Examples of Challenges we used.
Tee-Ball. The robot starts at the bottom of the purple line. The robot must drive up to the ball and hit it to roll into one of the goals. Teams are encouraged to try to hit the ball into the harder goals.
Red Block Collection: The robot starts behind the purple line, collects the red blocks and pushes them into the yellow square. A black line is provided for line following.
Car Push. The robot can start anywhere and must push one or both of the cars into the hole in the wall.
Person Maze. The robot starts in the gray rectangle and must drive around the maze collecting the people and dropping them off in the pink zone. Teams should try not to move the wood. Students that can successfully group all of the people in the pink zone and have them all standing are declared maze masters.K - B o t i c s P r e - S e a s o n / P o s t - S e a s o n M a n u a l
w w w. k b o t i c s . c a P a g e 41 o f 140 @ f r c 2 8 0 9

Pushing Ring. The robot must push the motor car from one side of the wall to the other.
Pushing Loop. The Robot must be able to continuously push the cart while line following in a loop.
The Rainbow Road Challenge (This one is one of our favourites). The robot starts in the green zone and must drive through the rainbow road and knock down the post at the end. The road is made up of very many coloured buttons arranged along a black line. Make sure to reset the field every time a robot tries!
Sumo Robot Competition. Two robots face off on in a match to see who can push the other out of the circle first. Robots can push and flip other the other robot but may not damage its systems.
K - B o t i c s P r e - S e a s o n / P o s t - S e a s o n M a n u a l
w w w. k b o t i c s . c a P a g e 42 o f 140 @ f r c 2 8 0 9

FLL Rookie Team: Team High Tech
Neighbourhood all-girls team started by our Federal Member of Parliament
Mentored by K-Bots: Katy, Lizzie and Olivia
Qualified, and competed at the provincial competition.
Team Building Activities: Every meeting we would have a team building exercise. We would choose a leader, and give the group a task to do while following the leader’s instructions. The mentors would then mark them using the FLL judging sheets so they would see their improvement over the course of the season.Task Ideas: cleaning up dishes after dinner (dinner was part of our meeting), building a structure out of popsicle sticks, or learning a song.
Communications as a group: Early in the season, we noticed that during group brainstorming, the conversation often got monopolized by a few students, while the rest had troubles expressing their ideas. To solve this problem, during brainstorming, we used a cup or marker as the ‘microphone’. This meant that unless you held the object, you were silent and listening. It worked pretty well, as the object was passed around in one direction, giving everyone a chance to speak in a fair fashion. Students could skip their turn, but there were no upset feelings about the fairness of getting to speak all the time because it was clear that everyone’s opinions were valued equally.
K - B o t i c s P r e - S e a s o n / P o s t - S e a s o n M a n u a l
w w w. k b o t i c s . c a P a g e 43 o f 140 @ f r c 2 8 0 9

Learning Lines for Presentations: In order to help the students learn the lines for the project aspect of FLL, we had them run lines together in small groups (in keeping with their roles, but small groups to keep the chaos to a minimum and allow the students to focus). To aid in remembering, the students worked the lines as though they were a song, or in an accent, or while miming their words. The above methods work for actors and FLL students alike.
Cooperation: During some parts of the season, the students did not get along while working on tasks together. For example, while building a prop for their presentation, extra communication and teamwork guidance was needed. To make it more fun to practice working together, the students sat in a row, one student near the supplies and one student at the assembly end, the other student in the middle. They worked with three pieces at a time, politely asking the person next to them to ask the person with the supplies to (for example) “please pass two popsicle sticks”. The students would perform this task as a team, then shift places (everyone moves left one position). Likening it to a robotic assembly machine - for fun and thematic purposes – the students each had to play a specific role in building and use excellent communication to complete the task.
Learning about LEGO and robot building: Some students had trouble diving into the fun of building a LEGO robot because they were shy about not having done it before. As any FLL mentor will tell you, clean-up is essential for productivity. During clean up the parts were organized, but in the process we asked students to build different parts in several ways. For example, one week they had to build a lifting arm three ways with two, three and four pieces not including fasteners. They then had to name each piece (while the LEGO pieces do not have official names, we developed somewhat of a system for this, eg. “7 hole
straight beam”). This activity exposed the newer students to working with the LEGO and how to communicate during the building process, in addition to helping with organization – it is easier to have an organized LEGO box if the students can say “I got that part from the _________ container."
K - B o t i c s P r e - S e a s o n / P o s t - S e a s o n M a n u a l
w w w. k b o t i c s . c a P a g e 44 o f 140 @ f r c 2 8 0 9

Programming: To introduce the students to NXT programming, something many had never done before, we ran little challenges that would get programmed and then checked over by a mentor. After briefly explaining all of the icons used in programming, we gave a list of things the robot needed to perform in two levels of difficulty:
Example: Straight forward, 2 rotations; stop; wait for touch sensor to be pressed; turn right for 3 seconds; drive backwards 1 rotation.
Example: Make the robot drive a course that involves a 10 cm drive forward, a wall, a left turn of 90 degrees and a backwards drive of 30 cm, if the robot travels 5 cm per rotation. This demonstrates more typical LEGO programming to accomplish a task.
LEGO club at Module Vanier Unit
This club has competed in past years in the FLL competition, and also the SKILLS Canada LEGO Robotics competition. Last year, the club did not run, as there was no teacher to supervise. This year, the team is not competing in FLL, but instead, they are building skills and interest among the grade 7 and 8 students involved, and will compete at the SKILLS Canada competition. In 2011 this team, mentored by K-Bots, qualified locally, then competed at the provincial level of the SKILLS Canada competition
where they won a silver medal for LEGO mechanics.
Mentored by K-Bots: Sam, Michael
This year we created two LEGO Robotics skill building challenges to run with our team. We want them to be prepared for competition, and also to experience the design process similar to what K-Bots do during pre-season and build. We added a presentation component where the students need to present their design ideas to the mentors on challenge day.
K - B o t i c s P r e - S e a s o n / P o s t - S e a s o n M a n u a l
w w w. k b o t i c s . c a P a g e 45 o f 140 @ f r c 2 8 0 9

One challenge was a beginner challenge, the “Sumo Ring”. The point of the challenge was to see how well the teams could work together, and to see what skills they already had.
The rules of this challenge were fairly basic. Points were awarded for how far back from the center of the board you were able to push the other robot. The scoring was based on the teamwork, cooperation and the strength/speed of the robot.
Teams scored 15 points for pushing the opponent back the minimal amount. The farther the robot was pushed, the more points were earned up to 100 points for being able to push the opponent from the ring.
If robots got pushed out of the ring, or if robots didn’t move for 10 seconds the robots would be reset.
Round robin competitions allowed each team to face off against each other team. This round was followed by semifinals where the teams who were able to amass the most points out of three rounds moved on to the final round. The final rounds were won by the robot who won 3 out of 5 bouts. A “bronze medal game” was played for the losers of the semi-final rounds.
Students learned many principles of design and teamwork during the challenge.
The intermediate challenge was a bit more complicated. Robots were required to drive from the starting area to pick up a ball. Robots then could either go and pick up the bonus ball, or drop off the one original ball into a bucket on the other side of the field (20 points). If the bonus ball was also scored 15 points were won. If both balls ended up in the bucket the robot could go grab a pillar from the middle of the board. If the pillar was brought all the way to the finish area on the opposite side of the board from the bucket, the robot earned 50 points. If any obstacles were touched, or if contact was made with the pillar before putting both balls into the bucket, the robots lost points. 2 points were deducted if a small obstacle was hit. 5 points were deducted if a medium obstacle was hit. 10 points were lost if the big obstacle and pillar were hit before the two balls were in the basket.
K - B o t i c s P r e - S e a s o n / P o s t - S e a s o n M a n u a l
w w w. k b o t i c s . c a P a g e 46 o f 140 @ f r c 2 8 0 9
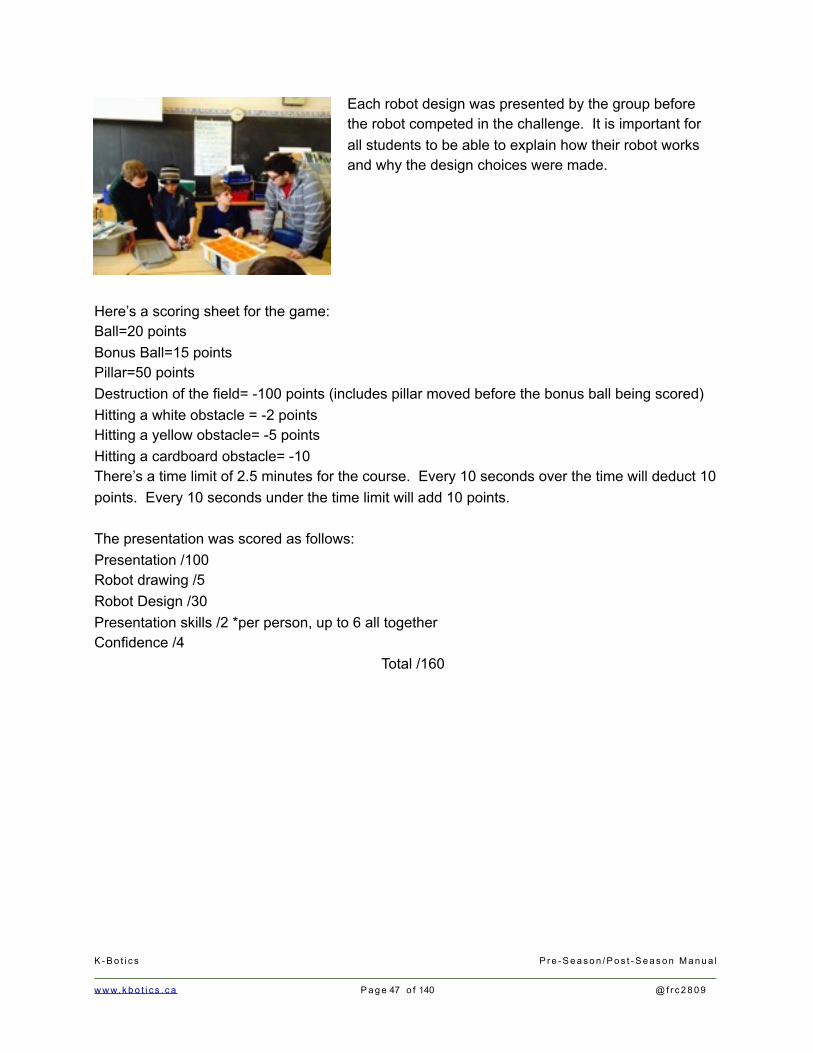
Each robot design was presented by the group before the robot competed in the challenge. It is important for all students to be able to explain how their robot works and why the design choices were made.
Here’s a scoring sheet for the game:Ball=20 pointsBonus Ball=15 pointsPillar=50 pointsDestruction of the field= -100 points (includes pillar moved before the bonus ball being scored)Hitting a white obstacle = -2 pointsHitting a yellow obstacle= -5 pointsHitting a cardboard obstacle= -10There’s a time limit of 2.5 minutes for the course. Every 10 seconds over the time will deduct 10 points. Every 10 seconds under the time limit will add 10 points.
The presentation was scored as follows:Presentation /100Robot drawing /5Robot Design /30Presentation skills /2 *per person, up to 6 all togetherConfidence /4 Total /160
K - B o t i c s P r e - S e a s o n / P o s t - S e a s o n M a n u a l
w w w. k b o t i c s . c a P a g e 47 o f 140 @ f r c 2 8 0 9

FLL Team: Centennial Comets
School based Rookie FLL team, formed from members of the LEGO club at Centennial Public School
Mentored by K-Bots: Jenny, and Wesley
Competed at the Kingston Regional Competition
There are 14 members in the Centennial Public School LEGO club, and this is their first year competing in FLL. Most of the Centennial comets didn’t have any experience with LEGO robotics/FLL. So we started the season with learning and developing their core values. Then we divided the large group into several smaller groups and had them organize their kits to get familiar with all of the parts. The groups looked up robots that they wanted to build, and they worked together to build them. After the robots were built the team learned simple programming skills from the mentors and experienced members of the team. Mentors taught the groups how to measure and control the distance travelled with their robots. Once the groups were comfortable programming, the coaches and mentors created little challenges for the groups to test out their skills before moving on to the FLL mat.
Challenge ideas: start simple!1. Go 6 rotations clockwise then go forward 5 rotations2. Navigate through a maze drawn on a big piece of paper.
To pick which small group would represent the school at the FLL competition we had a mini tournament to simulate what it would be like at the competition and decide what group would go. Each little group ran their project presentation in front of judges (K-Bot mentors), then they did a core values challenge which was also judged, then they ran their robot program on the field table like it would be done in the real competition.
It was really fun mentoring the team, there was a lot of laughter throughout the season along with times of hardship and frustration.
“Overall it was amazing watching the kids grow each week, I’m really glad I had the chance to do this and I will for sure continue mentoring the team in the years to come!” -Jenny, grade 9
K - B o t i c s P r e - S e a s o n / P o s t - S e a s o n M a n u a l
w w w. k b o t i c s . c a P a g e 48 o f 140 @ f r c 2 8 0 9

Post-Season ActivitiesDuring build season we put on hold many of our non-robot-related activities so we can focus on preparation for competition. After competition season is over we begin our post-season activities.
Charity involvementIn our post-season we do demos and participate in outreach activities and school activities such as Relay for Life and The Inside Ride.
We have taken an interest in cancer charities. Not only have several team members lost loved ones to the disease, but we are celebrating one of our own who is a cancer survivor!
Our team promotes doing good, and being active in charities. We take on activities that are suggested by team members and are meaningful to them. In years past we have participated in the city-wide door to door food drive.
We are currently involved in raising money to support STEM initiatives in the developing world through KIVA micro loans. To date we have made 33 loans, lending $800 to support people in 22 countries! It feels good to make a difference.
K - B o t i c s P r e - S e a s o n / P o s t - S e a s o n M a n u a l
w w w. k b o t i c s . c a P a g e 49 o f 140 @ f r c 2 8 0 9

Appendix A: Pre-Season Technical ActivitiesBirdhouse Activity Preparation
The following preparation is required before the activity:- Clear enough work space- Ensure that sufficient tools are available:
o Screwdriverso Drills and drill bits (1/4” and 1/8”)o Clampso Safety glasseso Drill press with 1¼” spade bit
- Prepare materials:o 16 screws per birdhouse (1¼” or 1½”)o 1x6 lumber, about 60” per birdhouseo Cut the material on a chop saw using jigso Don’t store the wood too long or it will warp
- Build a jig for the drill press:o See picture on page 3 of the instructionso I added a bracket to hold the far end of the board down while drilling (i.e. the
board slides under the bracket at the far end and is then clamped to the jig with one C-clamp
Conducting the activity:- Before the activity:
o General safety talk and “quiz”o Drill safety talk and “quiz”o Everyone submits quiz as record of training
- Supervision:o One mentor supervising the drill press at all timeso Other mentors circulating, helping as necessary
- After the activity:o Leave enough time for clean upo Point out notes on the last page (mounting, cleaning, not sanding, not painting,
no perch)o Relate accurate measurement and drilling skills to robot constructiono Talk about differences drilling metal (e.g. use centre punch, use proper drill bits,
be careful with swarf, secure work piece, etc.)We did this with about 28 students at a time, and 4 mentors. Students worked in pairs and made 1 or 2 birdhouses (some didn’t want one). We would recommend at least 2 hours.
K - B o t i c s P r e - S e a s o n / P o s t - S e a s o n M a n u a l
w w w. k b o t i c s . c a P a g e 50 o f 140 @ f r c 2 8 0 9

Building the birdhouse
TIPS:• Measure and mark all holes with a pencil X before drilling.• Drill as straight as possible through the wood.• Pre-drill every screw or the wood will split!• Look at the example if you are not sure.
The design is based on this plan from www.birdwatching-bliss.com:
K - B o t i c s P r e - S e a s o n / P o s t - S e a s o n M a n u a l
w w w. k b o t i c s . c a P a g e 51 o f 140 @ f r c 2 8 0 9

How to read fractions of an inch on a measuring tape:
Measure and drill drainage holes in the floor:
K - B o t i c s P r e - S e a s o n / P o s t - S e a s o n M a n u a l
w w w. k b o t i c s . c a P a g e 52 o f 140 @ f r c 2 8 0 9

Measure and mark the centre of the entrance in the front:
K - B o t i c s P r e - S e a s o n / P o s t - S e a s o n M a n u a l
w w w. k b o t i c s . c a P a g e 53 o f 140 @ f r c 2 8 0 9

Measure and pre-drill screw holes in the front:(Make the holes about the size of the shaft of the screw.)
K - B o t i c s P r e - S e a s o n / P o s t - S e a s o n M a n u a l
w w w. k b o t i c s . c a P a g e 54 o f 140 @ f r c 2 8 0 9

Measure and drill the air vents and screw holes in the two sides:
K - B o t i c s P r e - S e a s o n / P o s t - S e a s o n M a n u a l
w w w. k b o t i c s . c a P a g e 55 o f 140 @ f r c 2 8 0 9

K - B o t i c s P r e - S e a s o n / P o s t - S e a s o n M a n u a l
w w w. k b o t i c s . c a P a g e 56 o f 140 @ f r c 2 8 0 9

Measure and pre-drill the screw holes in the back:
K - B o t i c s P r e - S e a s o n / P o s t - S e a s o n M a n u a l
w w w. k b o t i c s . c a P a g e 57 o f 140 @ f r c 2 8 0 9

Measure and pre-drill the screw holes in the roof
K - B o t i c s P r e - S e a s o n / P o s t - S e a s o n M a n u a l
w w w. k b o t i c s . c a P a g e 58 o f 140 @ f r c 2 8 0 9

Birdhouse Assembly:Clamp your “roof” piece to the edge of the bench to provide a straight edge to help you align parts.
Position your floor and left side as shown and pre-drill through your existing holes into the edges of the floor (if you don’t pre-drill, the wood will split).
Make sure the drill is level! You might want someone to hold it while you drill. Don’t drill fingers!
TIP: If the floor has a slight curve, make it curve up in the middle, so any water flows off.
Attach the left side to the floor with 2 screws.
Pre-drill and attach the right side with 2 screws the same way.
K - B o t i c s P r e - S e a s o n / P o s t - S e a s o n M a n u a l
w w w. k b o t i c s . c a P a g e 59 o f 140 @ f r c 2 8 0 9

Attach the front with 4 screws. Drill first so the wood doesn’t split:
Position the back by lining up the bottom of the feeder with the line you drew on the back:
Attach the back with 4 screws. Again, pre-drill first.
K - B o t i c s P r e - S e a s o n / P o s t - S e a s o n M a n u a l
w w w. k b o t i c s . c a P a g e 60 o f 140 @ f r c 2 8 0 9

Attach the roof with 2 screws down into the front and 2 screws in from the back. When you pre-drill these, try to line up the drill with the piece you are drilling into:
You are done!
You can drill holes in the back for mounting the birdhouse (about 1” from the top and bottom).
The sides can tilt out for cleaning by loosening the two bottom screws:
You should not paint or stain the birdhouse, as that could be toxic.
You can sand the edges, but leave the entrance hole quite rough so the birds can grip it.
Don’t put a “perch” on the front because that only makes it easier for predators to get in.
Mount the birdhouse about 5 feet from the ground.K - B o t i c s P r e - S e a s o n / P o s t - S e a s o n M a n u a l
w w w. k b o t i c s . c a P a g e 61 o f 140 @ f r c 2 8 0 9

Arduino and Boe-Bot PreparationThe following preparation is required before the activity:
- Prepare and assemble Boe-Bots with Arduino Shieldo Boe-Bot:
http://parallax.com/product/130-35000o Arduino Uno:
https://www.sparkfun.com/products/11021
- Install Arduino programming software
- See the online tutorials:o http://learn.parallax.com/shieldrobot
- Materials needed per group:o Assembled Boe-Boto Batterieso USB cableo LED
- I move the right servo from connector 13 to connector 11 (see next page for more info)
Conducting the activity:- Before the activity:
o Explain switch positions: 1 to program, 2 to driveo Be careful not to drive off the tableo Don’t turn the wheels by hand (bad for the gears in the servo)o The USB cable will power everything. Only plug in the battery pack when
unplugging from the computer.- Supervision:
o Not much supervision required.o You sometimes need to re-calibrate the “off” position of the servos
http://learn.parallax.com/node/185 I use a really long, thin Phillips screwdriver to do this on the robot.
o If it still won’t drive straight, you may need to tweak the angle of the bracket holding the trailing wheel a tiny bit with pliers
- After the activity:o Leave enough time for clean upo Put all electronics back, unplug power and remove batterieso *** If the power plug to the Arduino is left in, the batteries will die very quickly
even if the switch is in position 0 (that turns of the shield but not the Arduino itself)We did this with about 30 students at a time, and 2 mentors. Students worked in pairs. We would recommend about 1½ - 2 hours.K - B o t i c s P r e - S e a s o n / P o s t - S e a s o n M a n u a l
w w w. k b o t i c s . c a P a g e 62 o f 140 @ f r c 2 8 0 9

Twitching Boe-Bot fix
According to Parallax:
“A servo connected to port 13 may twitch during startup. The Arduino blinks its onboard LED connected to digital pin 13 after reset. Digital pin 13 also controls a servo if it’s connected to port 13, so it may twitch in response to this on/off signal when the program restarts.”
A solution to this is to switch the Left Servo from pin 13 to pin 11:
In ALL of your sketches (programs), you will then need to change the left servo pin number to 11:
servoLeft.attach(13);
K - B o t i c s P r e - S e a s o n / P o s t - S e a s o n M a n u a l
w w w. k b o t i c s . c a P a g e 63 o f 140 @ f r c 2 8 0 9
Move Left Servo connector to here.
Change this to 11 in ALL of your sketches.

Programming the Arduino board.Flash an LED.Set the power switch to position ‘0’
Find the DIGITAL connector pins (black connector under the word PARALLAX).
Find the GND and pin 13 (beside each other).
Insert an LED with the short leg in GND and the long leg in pin 13.
Plug in the USB cable.
On the computer, select Start Programs Arduino
Type up the following program
// Blinking LED
void setup(){ pinMode(13, OUTPUT);}
void loop(){ digitalWrite(13, HIGH); delay(1000); digitalWrite(13, LOW); delay(1000);}
Click the upload button ( ).
If it says “COM port 4 not found”, select the last COM port listed (probably COM5).
Wait until it says “Done uploading” … your LED should start flashing. If it does not:
If you get orange messages at the bottom of the programming window, you have mistyped something … check that your program is exactly as shown above (same letters in uppercase and lowercase and no spaces where there aren’t any above. Ask for help if stuck!
Check that your LED is in the right pins and the right way round. If it still doesn’t work, you could have a faulty LED … ask for help!
Anything else … ask for help!
Try changing the program to make the LED flash faster. Can you do Morse code?
K - B o t i c s P r e - S e a s o n / P o s t - S e a s o n M a n u a l
w w w. k b o t i c s . c a P a g e 64 o f 140 @ f r c 2 8 0 9

Send messages to the computer.Create a new Arduino sketch (i.e. program).
Type up the following:
// Send a message to the computer.
void setup(){ Serial.begin(9600); Serial.print("Hello computer!\n");}
void loop(){}
Click the upload button ( ).
Wait until it says “Done uploading” then click the Serial Monitor button ( ).
Press the reset button on the Boe-Bot to get it to repeat the message.
Try changing the message. The \n in the message is a “newline” code, which makes it go to the next line.
The value 9600 is the speed of the communication with the computer (9600 baud, or about 9600 bits per second). If change this, you will get garbage in the Serial Monitor, unless you change the Serial Monitor to match your new speed. The Serial Monitor only has certain standard speeds (from 300 to 115200). 9600 is the default.
Messages can only be sent to the computer while the USB cable is connected. This can be a useful way of testing and debugging programs. There are also some other devices that you can put on your robot (like LCD screens) that communicate in the same way.
K - B o t i c s P r e - S e a s o n / P o s t - S e a s o n M a n u a l
w w w. k b o t i c s . c a P a g e 65 o f 140 @ f r c 2 8 0 9

Moving the robotCreate a new Arduino sketch and type up the following program:
// Turn the left servo (on pin 11) clockwise.
#include <Servo.h> Servo leftServo; // Declare left servo
void setup(){ leftServo.attach(11); // Attach left servo to pin 11 leftServo.writeMicroseconds(1300); // 1.3ms = full speed clockwise} void loop(){}
Click the upload button. When it says “Done uploading”, hold the robot up off the table and switch the power switch to position ‘2’ to see what happens. Note which wheel turns and which direction.
Turn the robot off, and change 1300 to 1700 in the program. Upload and again test to see what changes. Try the following values: 1500, 1525, 1475. See if you can figure out the pattern.
The right servo motor is on pin 12. To make both wheels turn, we need to do 3 things:
1. Declare the right servo:
a. Directly below the leftServo declaration, add a similar line to declare rightServo
2. Attach the right servo:
a. Directly below the line that attaches leftServo to pin 11, add a similar line to attach rightServo to pin 12.
3. Send the right servo a speed command:
a. Directly below the line containing leftServo.writeMicroseconds, add a similar line to write the value 1300 to rightServo.
Upload this and see if it works … try to make the robot drive forward. Be really careful when testing the robot that it does not fall off the table! You should end up with a program similar to the one shown on the next page:
K - B o t i c s P r e - S e a s o n / P o s t - S e a s o n M a n u a l
w w w. k b o t i c s . c a P a g e 66 o f 140 @ f r c 2 8 0 9

// Drive the boe-bot forward.
#include <Servo.h> Servo leftServo; // Declare left servoServo rightServo; // Declare right servo
void setup(){ leftServo.attach(11); // Attach left servo to pin 11 rightServo.attach(12); // Attach right servo to pin 12 leftServo.writeMicroseconds(1700); // 1.7ms = full speed CCW rightServo.writeMicroseconds(1300); // 1.3ms = full speed CW} void loop(){}
You should always put the power switch back to position ‘1’ for programming … that way it won’t suddenly start driving when you don’t expect it.
Try different combinations to make the robot do the following maneuvers:
Maneuver leftServo rightServoForward 1700 1300BackwardStopTurn left on the spotTurn right on the spotPivot around left wheelPivot around right wheelDrive really slowly forward
K - B o t i c s P r e - S e a s o n / P o s t - S e a s o n M a n u a l
w w w. k b o t i c s . c a P a g e 67 o f 140 @ f r c 2 8 0 9

Driving patternsSo far, we have just given the motors a speed command and let it go like that forever. To make the robot drive in patterns, we need to wait for a certain amount of time and then give it a new speed command.
Create a new Arduino sketch and type up the following program:
// Boe-bot maneuvers: forward, left, right, backward.
#include <Servo.h> Servo leftServo; // Declare left servoServo rightServo; // Declare right servo
void setup(){ leftServo.attach(11); // Attach left servo to pin 11 rightServo.attach(12); // Attach right servo to pin 12
// Full speed forward leftServo.writeMicroseconds(1700); // Full speed CCW rightServo.writeMicroseconds(1300); // Full speed CW delay(2000); // 2 seconds
// Turn left in place leftServo.writeMicroseconds(1300); // Full speed CW rightServo.writeMicroseconds(1300); // Full speed CW delay(600); // 0.6 seconds
// Turn right in place leftServo.writeMicroseconds(1700); // Full speed CCW rightServo.writeMicroseconds(1700); // Full speed CCW delay(600); // 0.6 seconds
// Full speed backward leftServo.writeMicroseconds(1300); // Full speed CW rightServo.writeMicroseconds(1700); // Full speed CCW delay(2000); // 2 seconds
leftServo.detach(); // Stop servo signals rightServo.detach();} void loop(){}
Upload this and see if it works. Be really careful when testing the robot that it does not fall off the table!
When you switch the power switch to position 2, it turns on power to the motors. The program may be in the middle of running when you do this. You can always restart the program by pressing the reset button. You might want to hold reset while you switch it to position 2 and then release it.
K - B o t i c s P r e - S e a s o n / P o s t - S e a s o n M a n u a l
w w w. k b o t i c s . c a P a g e 68 o f 140 @ f r c 2 8 0 9

Beginner ChallengeProgram your robot to drive in a 2 ft square, ending up as close to where it started as possible and facing the same way. Each floor tile is 1 ft.
Intermediate ChallengeProgram your robot to drive in a square figure-8 pattern as shown to the right. Each edge is 1 ft (i.e. one floor tile). It should end up facing the original direction.
Advanced ChallengeYou will be given a pattern for your robot to drive and you will have 2 minutes to re-program your robot to accomplish this. The pattern will be based on a 1ft grid. Each floor tile is 1 ft. In order to be able to change the program that quickly, you should make use of functions, as shown in the example below:
// Boe-bot maneuvers using functions
#include <Servo.h> Servo leftServo; // Declare left servoServo rightServo; // Declare right servo
void setup(){ leftServo.attach(11); // Attach left servo to pin 11 rightServo.attach(12); // Attach right servo to pin 12
forward(); left(); left(); forward();
leftServo.detach(); // Stop servo signals rightServo.detach();} void loop(){}
void forward() // Full speed forward{ leftServo.writeMicroseconds(1700); // Full speed CCW rightServo.writeMicroseconds(1300); // Full speed CW delay(2000); // 2 seconds}
void left() // Turn left in place{ leftServo.writeMicroseconds(1300); // Full speed CW rightServo.writeMicroseconds(1300); // Full speed CW delay(600); // 0.6 seconds}
K - B o t i c s P r e - S e a s o n / P o s t - S e a s o n M a n u a l
w w w. k b o t i c s . c a P a g e 69 o f 140 @ f r c 2 8 0 9

Electronics Activity PreparationThe following preparation is required before the activity:
- Prepare work space- Materials needed per group:
o Breadboardo Power supply (5V – 9V, plug-in or battery)o 555 timer chipo 1 kΩ resistoro 100 kΩ resistoro 2 x 330 Ω resistoro 2 LEDs (different colours)o Pushbutton switcho Wires
- For bonus activities:o 0.1 µF capacitoro 10 µF capacitoro 74161 or 74163 chips (binary counter)o 3 more 330 Ω resistors and 3 more LEDso speaker
Conducting the activity:- Before the activity:
o Electrical and battery safety talk and “quiz”o Talk about electricity: voltage and current, what voltage/current can be
dangerous, resistors, capacitors, and LEDso Talk about static electricity and damage to electronicso Do not allow power supply leads to touch; do not plug in until neededo Different ways of wiring – using same length wires, looping up, as in photos or
use different length wires, running closer to breadboardo Don’t let the magic smoke out (555 timers are pretty tolerant)
- Supervision:o Not much supervision required – check circuits before applying power, disconnect
quickly if it doesn’t work as expected.- After the activity:
o Leave enough time for clean upo Relate to robot electrical construction
Robots use much more power proper gauge wire required things can get very hot battery wires can arc weld themselves together
We did this with about 30 students at a time, and 2-3 mentors. Students worked in pairs. We would recommend about 1.5 - 2 hours.
K - B o t i c s P r e - S e a s o n / P o s t - S e a s o n M a n u a l
w w w. k b o t i c s . c a P a g e 70 o f 140 @ f r c 2 8 0 9

Prototyping Electronic Circuits.The breadboard.The board that you will be using to build electronic circuits is called a “breadboard” or a “prototype board,” because it is used when trying to build the first model of a circuit (the “prototype”). This often involves making a lot of changes, which the breadboard makes easy.
A breadboard has many “sockets” into which the pins of chips, other electronic components and wires can be plugged. In the back of the breadboard, the sockets are connected together in groups as shown below: (do not take them apart!)
This means that if you plug something into one of the five connected sockets, it is automatically connected to the other four sockets in that row. Similarly, it you plug something into one of the long “rails” it is connected to every socket in that rail.
Sometimes the rails are connected the entire length of the breadboard; sometimes they are broken in two as shown above.
K - B o t i c s P r e - S e a s o n / P o s t - S e a s o n M a n u a l
w w w. k b o t i c s . c a P a g e 71 o f 140 @ f r c 2 8 0 9

How it works:If the backing of a breadboard is removed, you can see the connectors inside:
Please do not remove the backing!
The connectors that join the sets of five pins look like:
(The rails are the same, but longer.)
If the plastic part of a breadboard is cut away, you can see how the wires plug into the metal connectors:
K - B o t i c s P r e - S e a s o n / P o s t - S e a s o n M a n u a l
w w w. k b o t i c s . c a P a g e 72 o f 140 @ f r c 2 8 0 9

Circuit diagrams:A circuit diagram is a graphical representation of a circuit. It is not necessarily organized the way that the circuit will be built, but rather to show it in the easiest way to understand.
Some of the symbols used in circuit diagrams are:
The first circuit we are going to build is an LED light flasher, using an integrated circuit (IC) called a “555 timer”. The circuit diagram is:
Pin numbers:Pin numbers on these types of integrated circuits (Dual Inline Package or DIP) start at the top left pin, go down the left side, then back up the right side. For the 555 timer, the pin numbers and names are:
K - B o t i c s P r e - S e a s o n / P o s t - S e a s o n M a n u a l
w w w. k b o t i c s . c a P a g e 73 o f 140 @ f r c 2 8 0 9

Building the circuit:Start by putting your 555 Timer chip onto the breadboard, crossing over the gap in the middle, and with the notch or circle toward the top of the breadboard:
Connect pin 1 to the ground rail of the breadboard (blue line on the left side) and pin 8 to the Vcc (positive power) rail of the breadboard (red line on the right side).
Next connect pin 2 of the timer chip to pin 6 (yellow wire in the picture), and connect pin 4 to the Vcc rail:
K - B o t i c s P r e - S e a s o n / P o s t - S e a s o n M a n u a l
w w w. k b o t i c s . c a P a g e 74 o f 140 @ f r c 2 8 0 9

Now connect a 1 kΩ resistor (colour bands brown-black-red-gold) from pin 7 to the Vcc rail:
Connect pin 2 to the ground rail with a 1 µF capacitor – making sure that the shorter lead (which should have a negative sign with an arrow pointing to it) goes to the ground.
Put the 100kΩ (or 120kΩ) resistor from pin 6 to pin 7 as shown:
100 kΩ = brown-black-yellow-gold 120 kΩ = brown-red-yellow-gold
Connect a 330Ω resistor from pin 3 to an empty row below the IC of the left side. Then connect an LED from that row to ground. Make sure short pin of the LED goes to ground.
Have a mentor check your circuit, and connect the power.
The LED should start flashing. If it does not, disconnect power immediately and get help.
K - B o t i c s P r e - S e a s o n / P o s t - S e a s o n M a n u a l
w w w. k b o t i c s . c a P a g e 75 o f 140 @ f r c 2 8 0 9

Connect another 330Ω resistor from pin 3 of the IC to an empty row on the right side of the breadboard. Connect an LED from that row to the Vcc rail, with the longer pin of the LED going to Vcc.
Test the circuit again. The LEDs should alternate flashing!
Put a switch in your breadboard as shown.
MOVE your 100kΩ (or 120kΩ) resistor so that it goes from pin 7 to one side of the switch.
Connect a wire from the other side of the switch to pin 6 of the chip.
Try out the circuit again …
You now have a random yes/no generator … choose which colour is yes and which is no and ask it a question!
(If it keeps flashing and ignores the switch, try rotating the switch 90°.)
K - B o t i c s P r e - S e a s o n / P o s t - S e a s o n M a n u a l
w w w. k b o t i c s . c a P a g e 76 o f 140 @ f r c 2 8 0 9

More stuff you can do:Use a 0.1 µF capacitor instead of the 1 µF capacitor. It should flash so fast you can’t even see it!
(Now you definitely can’t cheat at the yes/no game.)
Remove the LEDs and replace one of them with a speaker … using the 0.1 µF capacitor.
Remove the LEDs and speaker and build the following binary counter circuit:
K - B o t i c s P r e - S e a s o n / P o s t - S e a s o n M a n u a l
w w w. k b o t i c s . c a P a g e 77 o f 140 @ f r c 2 8 0 9

Sensor Programming PreparationThe following preparation is required before the activity:
- Prepare and assemble Boe-Bots with Arduino Shieldo Boe-Bot:
http://parallax.com/product/130-35000o Arduino Uno:
https://www.sparkfun.com/products/11021- Install Arduino programming software- See the online tutorials:
o http://learn.parallax.com/shieldrobot- Materials needed per group:
o Assembled Boe-Boto Electronics from Boe-Bot kito Batterieso USB cableo For QRD1114:
https://www.sparkfun.com/products/246o For Sharp distance sensor:
https://www.sparkfun.com/products/242- We move the right servo from connector 13 to connector 11 (see last page for more info)
Conducting the activity:- Before the activity:
o Explain switch positions: 1 to program, 2 to driveo Be careful not to drive off the tableo Don’t turn the wheels by hand (bad for the gears in the servo)o The USB cable will power everything. Only plug in the battery pack when
unplugging from the computer.- Supervision:
o Not much supervision required.o You sometimes need to re-calibrate the “off” position of the servos
http://learn.parallax.com/node/185 I use a really long, thin Phillips screwdriver to do this on the robot.
o If it still won’t drive straight, you may need to tweak the angle of the bracket holding the trailing wheel a tiny bit with pliers
- After the activity:o Leave enough time for clean upo Put all electronics back, unplug power and remove batterieso *** If the power plug to the Arduino is left in, the batteries will die very quickly
even if the switch is in position 0 (that turns of the shield but not the Arduino itself)We did this with about 30 students at a time, and 2 mentors. Students worked in pairs. We would recommend about 1½ - 2 hours; more for extra activities.
K - B o t i c s P r e - S e a s o n / P o s t - S e a s o n M a n u a l
w w w. k b o t i c s . c a P a g e 78 o f 140 @ f r c 2 8 0 9

Twitching Boe-Bot fixAccording to Parallax:
“A servo connected to port 13 may twitch during startup. The Arduino blinks its onboard LED connected to digital pin 13 after reset. Digital pin 13 also controls a servo if it’s connected to port 13, so it may twitch in response to this on/off signal when the program restarts.”
A solution to this is to switch the Left Servo from pin 13 to pin 11:
In ALL of your sketches (programs), you will then need to change the left servo pin number to 11:
servoLeft.attach(13);
K - B o t i c s P r e - S e a s o n / P o s t - S e a s o n M a n u a l
w w w. k b o t i c s . c a P a g e 79 o f 140 @ f r c 2 8 0 9
Move Left Servo connector to here.
Change this to 11 in ALL of your sketches.

Sensor ProgrammingRefer to:
http://learn.parallax.com/ShieldRobot
In ALL programs, change servoLeft.attach(13); to servoLeft.attach(11);
Complete:
Chapter 5, Activities 1-3
Chapter 7, Activities 1,2,4
K - B o t i c s P r e - S e a s o n / P o s t - S e a s o n M a n u a l
w w w. k b o t i c s . c a P a g e 80 o f 140 @ f r c 2 8 0 9

Humpty Dumpty ChallengeHumpty Dumpty sat on a wall ... enjoying the view out over a very large cliff.
Of course, we know that Humpty Dumpty is rather clumsy, and we don't want him to have a great fall, because we know that all the king's horses and all the king's men couldn't put Humpty together again.
Your mission is to pull Humpty Dumpty back off the wall before he falls over the cliff. The wall happens to be only 3 1/2 inches tall, but the cliff on the other side is extremely high. Humpty Dumpty probably won't get too hurt falling on the near side of the cliff, but it would be better if you caught him. If you knock Humpty Dumpty over the cliff all the King's lawyers and all the King's solicitors will be after you!
To complicate matters, Humpty Dumpty is not alone. He has friends on either side of him (exactly 4 inches from centre to centre, in fact). You can't knock them over the cliff either.
By the way, Humpty Dumpty and his friends are ping-pong balls, and you have to rescue him using a fully autonomous Boe-Bot. You must start behind a line 12 inches away from the wall. You can use any components from the Boe-Bot electronics kit, and one additional Servo motor. You can also use most hardware and materials from around the lab (ask first to be sure). You must return the Boe-Bot kit and servo motor in its original condition and put everything else away.
Good luck!!
Can Humpty Dumpty be saved?
K - B o t i c s P r e - S e a s o n / P o s t - S e a s o n M a n u a l
w w w. k b o t i c s . c a P a g e 81 o f 140 @ f r c 2 8 0 9

Servo MotorsA normal servo motor can only turn through a range of 180° (unlike the ones that drive the Boe-Bot, which are modified for continuous rotation). Connect your extra servo to the pin 10 connector, with the black wire on the same side as the other servos.
In your Arduino sketch (program), you use the same commands to create and attach the servo as you used for the wheels:#include <Servo.h>Servo servo3;servo3.attach(10);
However, to move the servo motor, use the write() command. You can send it a value between 0 and 180. You will usually want to wait for it to finish before going on to the next movement; a delay() command can be used. For example:Servo3.write(90);delay(500);
The following example program should give you some ideas:#include <Servo.h>
Servo leftServo, rightServo, servo3;
void setup() { servo3.attach(10); leftServo.attach(11); rightServo.attach(12); leftServo.writeMicroseconds(1500); // Stop rightServo.writeMicroseconds(1500); // Stop servo3.write(180); // Move servo fully right delay(500); // Wait for this to happen
leftServo.writeMicroseconds(1700); // Fwd (CCW) rightServo.writeMicroseconds(1300); // Fwd (CW) delay(500); // Wait for this to happen leftServo.writeMicroseconds(1500); // Stop rightServo.writeMicroseconds(1500); // Stop servo3.write(0); // Move servo fully left delay(1000); // Wait for this to happen servo3.detach(); // Done leftServo.detach(); rightServo.detach();}
void loop() {}
K - B o t i c s P r e - S e a s o n / P o s t - S e a s o n M a n u a l
w w w. k b o t i c s . c a P a g e 82 o f 140 @ f r c 2 8 0 9

Introduction to Technical Drawings
Scope: This tutorial introduces isometric and orthographic drawings.
Materials: • isometric dot paper• square dot paper• 3 pieces of plexiglass and tape to form 1/2 rectangular prism• dry erase marker• rulers• pencils• linking cubes or LEGO• plastecine• student package
Preparation:
Photocopy student package.
Assemble the plexiglass into the 1/2 rectangular prism according to the plans below. This will be used for the orthographic drawing tutorial.
tape
K - B o t i c s P r e - S e a s o n / P o s t - S e a s o n M a n u a l
w w w. k b o t i c s . c a P a g e 83 o f 140 @ f r c 2 8 0 9
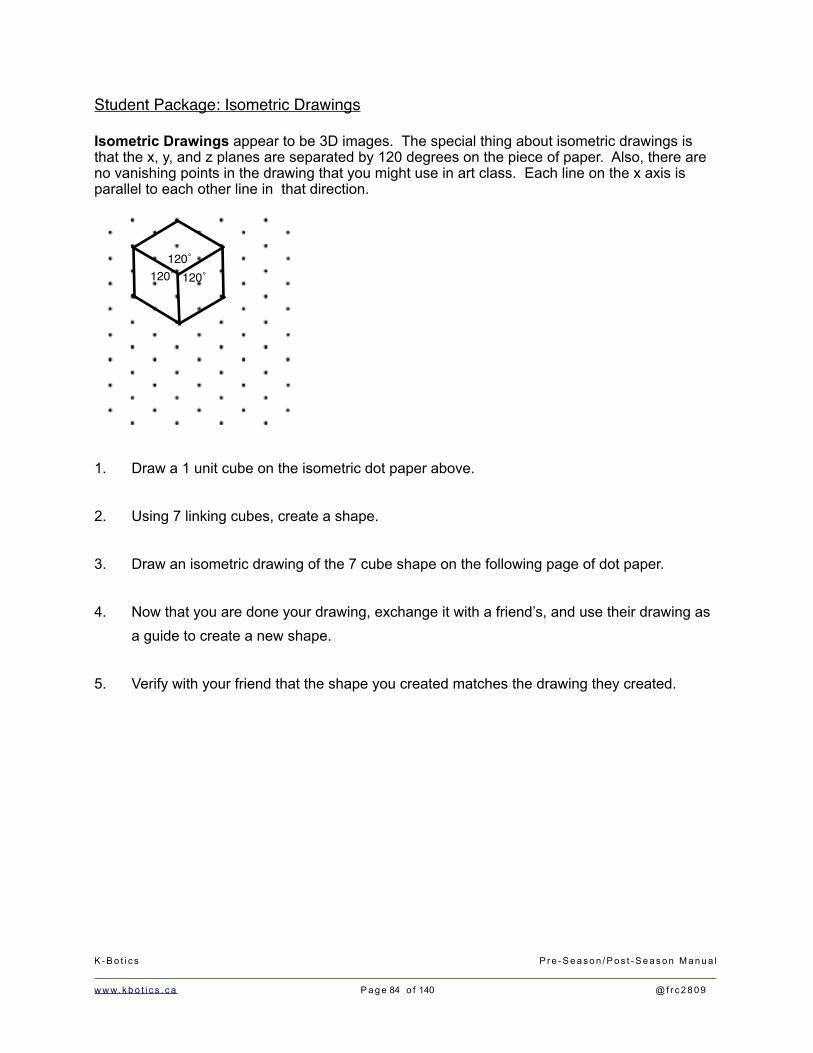
Student Package: Isometric Drawings
Isometric Drawings appear to be 3D images. The special thing about isometric drawings is that the x, y, and z planes are separated by 120 degrees on the piece of paper. Also, there are no vanishing points in the drawing that you might use in art class. Each line on the x axis is parallel to each other line in that direction.
120˚120˚120˚
1. Draw a 1 unit cube on the isometric dot paper above.
2. Using 7 linking cubes, create a shape.
3. Draw an isometric drawing of the 7 cube shape on the following page of dot paper.
4. Now that you are done your drawing, exchange it with a friend’s, and use their drawing as a guide to create a new shape.
5. Verify with your friend that the shape you created matches the drawing they created.
K - B o t i c s P r e - S e a s o n / P o s t - S e a s o n M a n u a l
w w w. k b o t i c s . c a P a g e 84 o f 140 @ f r c 2 8 0 9

K - B o t i c s P r e - S e a s o n / P o s t - S e a s o n M a n u a l
w w w. k b o t i c s . c a P a g e 85 o f 140 @ f r c 2 8 0 9

Orthographic Drawing Tutorial
Sometimes there is ambiguity in isometric drawings. At times, blocks could be present, or missing, but the drawing would not show the difference. An orthographic drawing contains 3 views, each drawn with 2 dimensions. Conventionally, the top, front, and side views are drawn. Visible edges are drawn in solid lines. Hidden edges are drawn in dotted lines. There is no ambiguity in orthographic drawings.
Using the plexiglass 1/2 prism you can see how it is possible make a top, side and front view drawing. Place an object in the box. Use overhead markers to draw what you see when you look through each side of the plexiglass. When you are finished, unfold the plexiglass to see the correctly positioned front, side and top views.
1." Using 7 linking cubes, create a shape.
2." Draw an orthographic drawing of the 7 cube shape on the following page of dot paper.
3." Now that you are done your drawing, exchange it with a friend’s, and use their drawing as a guide to create a new shape.
4." Verify with your friend that the shape you created matches the drawing they created.
K - B o t i c s P r e - S e a s o n / P o s t - S e a s o n M a n u a l
w w w. k b o t i c s . c a P a g e 86 o f 140 @ f r c 2 8 0 9

Orthographic Dot Paper
K - B o t i c s P r e - S e a s o n / P o s t - S e a s o n M a n u a l
w w w. k b o t i c s . c a P a g e 87 o f 140 @ f r c 2 8 0 9

Extension: Given an orthographic drawing, create a 3D object out of plasticine.
K - B o t i c s P r e - S e a s o n / P o s t - S e a s o n M a n u a l
w w w. k b o t i c s . c a P a g e 88 o f 140 @ f r c 2 8 0 9

K-Botics CAD Training Part 1Get Autodesk Inventor
Go to http://students.autodesk.com/ and make an account. Go to the Free Software section and choose Inventor. Select the current year for your version, English for your language and select the appropriate version of windows
A quick way to figure out if you are running 64 bit or not is to navigate to your local drive C:/ (you can get there through “my computer”) and then look to see if you have a folder named Program Files (x86) and Program Files if so then you are running 64 bit windows if you only have one folder called Program Files then you are running 32 bit.
Download the 3 files (it will take a while) and then click on the first one: “AutoCAD_Inventor_Suite_2014_Win_64bit.part1.exe” It will ask for a location and then begin extracting files.
After the files have finished extracting navigate to the folder where you extracted them (most likely called “AutoCAD_Inventor_Suite_2014_Win_64bit” or 32bit) and click on Setup.exe. Wait for the program to launch then choose “Install Products” on the left. Press next. This screen should say “Select the Products to install” You only need Autodesk Inventor and the Content Center Libraries, deselect everything else. Accept the license agreement and then on the next page enter your name and serial key (obtained from the Autodesk student website, if you lose yours just login to your account and go to download Inventor again, it will give you a new key). On the next page you can configure your installation but the default settings should be fine. Press Install and wait while Inventor installs.
Afterwards you may delete the folder where you extracted the installation files (“AutoCAD_Inventor_Suite_2014_Win_64bit” or 32bit) as well as the downloaded files but you may want to keep them in case you need to install on a different computer.
Note: Screenshots are from an earlier version of CAD, do not be alarmed if they don’t match your screen exactly.
K - B o t i c s P r e - S e a s o n / P o s t - S e a s o n M a n u a l
w w w. k b o t i c s . c a P a g e 89 o f 140 @ f r c 2 8 0 9

Lesson 1:Open Autodesk Inventor and from the drop down menu select “New”
In the pop up menu select the “Metric” tab and scroll down to find “Standard (mm).ipt” Every CAD program has different file extensions, for Inventor parts are .ipt assemblies are .iam and 2D drawings are .dwg. For now only worry about .ipt. We are going to do these tutorials in metric but the units can easily be changed to imperial.
Now we have created a new part and Inventor has automatically created a new Sketch for us. Sketches are 2D drawings; the basic work flow of CAD is like this -> create a 2D sketch then create a 3D feature from that sketch.
Select the top left corner “Create a 2D Sketch” then click on a plane to start your sketch.
K - B o t i c s P r e - S e a s o n / P o s t - S e a s o n M a n u a l
w w w. k b o t i c s . c a P a g e 90 o f 140 @ f r c 2 8 0 9

Take a moment to look at the ribbon interface across the top of the screen; we are in the sketch tab. If you are ever confused and can’t find a tool make sure you are in the right tab.
Now it’s time to begin modelling our part. Select the rectangle tool and draw a rectangle, don’t worry about its position or size etc. we’ll take care of that later.
Select the Line tool and draw the following lines in your rectangle, again don’t worry about exactly how they look for now. Make sure that your lines are connected to the rectangle at the end, your cursor should snap to the rectangle when you are close by. Also watch the symbols that Inventor is showing you as you draw, you’ll probably notice the parallel and perpendicular symbols: this is Inventor creating constraints as you draw. Don’t worry we’ll learn more about constraints as we go.
K - B o t i c s P r e - S e a s o n / P o s t - S e a s o n M a n u a l
w w w. k b o t i c s . c a P a g e 91 o f 140 @ f r c 2 8 0 9

Select the Trim tool and click on the line pointed to in the image below:
You should be left with this:
Trim removes lines between or after another line intersects. In this case it removed the portion between the two intersecting lines. Trim is very useful for creating geometry.
K - B o t i c s P r e - S e a s o n / P o s t - S e a s o n M a n u a l
w w w. k b o t i c s . c a P a g e 92 o f 140 @ f r c 2 8 0 9

Next select the circle tool and draw a circle inside the shape we have made. This should be your result:
Before our sketch is finished we need to apply some dimensions and constraints. Dimensions force the given section to be a certain length and constraints for a certain geometric relationship.
You can add a dimension either by clicking on a line itself or by clicking on the lines on either side like the illustration below:
Clicking these 2 lines will allow you to dimension how much should be between them and because the other line is connected its length will change too.
K - B o t i c s P r e - S e a s o n / P o s t - S e a s o n M a n u a l
w w w. k b o t i c s . c a P a g e 93 o f 140 @ f r c 2 8 0 9

Add these dimensions to your sketch:
Next we are going to apply a constraint to the circle. Select horizontal from the constraints.
Pick the center of the circle and then carefully hover along the vertical line at the right end of the rectangle, when you pass the midpoint of this line your cursor will change to a green circle instead of yellow, click to finish the constraint your circle should now be centered vertically in your shape. Apply a dimension of 10 mm between the center of the circle and the vertical line on the right and make the diameter of your circle 10 mm.
K - B o t i c s P r e - S e a s o n / P o s t - S e a s o n M a n u a l
w w w. k b o t i c s . c a P a g e 94 o f 140 @ f r c 2 8 0 9

Finally lets apply a coincident (fancy way of saying in the same place) constraint between the center of the circle and the sketch origin (the intersection of the darker blue lines)
The result should look like this:
I would like to take a moment and mention a few things, first there is no right way to do things in CAD; there are often many ways to accomplish the same thing. I recommend always using the simplest way you can think of. For example we could have used many complicated constraints to make this sketch but instead we used a lot of simple dimensions, this is good for 2 reasons, it was easy to do and easy to understand if we have to come back to edit it later.
In this lesson so far we introduced 2 of the many constraints – horizontal and coincident. The remaining constraints are pretty self-explanatory just think about geometry class!
Also notice how we only needed to dimension 1 side of the rectangle, that’s because Inventor automatically created constraints for us that keep the sides equal to each other. If you try to dimension the other side Inventor will warn you about an over-constraint – this happens when the shape is already fully defined with constraints and dimensions – in other words that side length is already determined: it cannot be anything else or it would disobey the laws of geometry.
Don’t worry about learning every tool in CAD: Neither I nor any of your other mentors know them all; we just know the basics and then we need something else we look at what tools are available and play around until we get our result.K - B o t i c s P r e - S e a s o n / P o s t - S e a s o n M a n u a l
w w w. k b o t i c s . c a P a g e 95 o f 140 @ f r c 2 8 0 9

Let’s finish our part. Click on finish sketch in the top right of the screen. Observe how the view changes to a 3D or isometric view. On the ribbon interface switch to model and then select the extrude tool.
Select the profile of our sketch (it will become shaded light grey), choose 10 mm for the distance and press okay.
You should see this on your screen.
Now look at your screen on the left. A tree view is being created of how your part was made.
At any time you can edit any step of how your part was made, sometimes this works great and we can easily change the part other times when the part is really complicated it doesn’t work so well. There are ways to fix this and work through it but for now let’s just focus on the basics and we can help you with making changes to complicated parts.
K - B o t i c s P r e - S e a s o n / P o s t - S e a s o n M a n u a l
w w w. k b o t i c s . c a P a g e 96 o f 140 @ f r c 2 8 0 9

Click the plus next to Extrusion one and then right click on sketch 1 and select edit sketch.
Change the diameter of the circle to 5mm click finish editing sketch. Observe the result:
K - B o t i c s P r e - S e a s o n / P o s t - S e a s o n M a n u a l
w w w. k b o t i c s . c a P a g e 97 o f 140 @ f r c 2 8 0 9

Now let’s make a new sketch. Click Create 2D sketch and click on the main surface of the part. Your screen should look like this:
Click the circle tool and hover your mouse over the hole through the part when it turns green draw a circle. Make the diameter of that circle 10 mm. Your part should look like this:
Finish the sketch.
K - B o t i c s P r e - S e a s o n / P o s t - S e a s o n M a n u a l
w w w. k b o t i c s . c a P a g e 98 o f 140 @ f r c 2 8 0 9

Make sure you are on the model tab then select extrude. Select the profile of the new circle we just drew then from the extrude pop up select cut and make the distance 5 mm.
Click OK and look at your new part.
Save your part as “lesson1.ipt” you’ll need to submit it later.
K - B o t i c s P r e - S e a s o n / P o s t - S e a s o n M a n u a l
w w w. k b o t i c s . c a P a g e 99 o f 140 @ f r c 2 8 0 9

Before moving on take a few minutes to familiarize yourself with looking at a part in 3D. You can access all the move/rotate/zoom commands from the dock bar on the right of your screen, however I recommend using the keyboard short cuts.
• Pressing in the roller wheel on your mouse will pan or move your view of the part around.
• Holding shift and clicking the roller wheel will let you rotate the view of the part
• rolling the roller wheel will zoom in and out.
You can also use the cube in the upper right corner to select certain viewpoint. It is important to note that you are not moving the part; think of it as moving yourself around the part so you can see different things.
Congratulations you have finished lesson 1 and are well on your way to be CADing robots!
You might not believe me now but CADing is actually quite simple, there may seem like a lot of tools, and there are, but 95% of parts are made using the simple sketch, dimension, extrude, cut process you just learned!
K - B o t i c s P r e - S e a s o n / P o s t - S e a s o n M a n u a l
w w w. k b o t i c s . c a P a g e 100 o f 140 @ f r c 2 8 0 9

Lesson 2:Open Inventor and start a new metric part.
In the new sketch draw this shape (Don’t worry about the exact shape we’ll dimension it later).
Now add these dimensions:
Now try and dimension the angle between these 2 lines by clicking on them:
K - B o t i c s P r e - S e a s o n / P o s t - S e a s o n M a n u a l
w w w. k b o t i c s . c a P a g e 101 o f 140 @ f r c 2 8 0 9

You should get this error:
Because the other side lengths are dimensioned the angle must stay at its current value or else the geometry is impossible. A driven dimension will show up but it cannot be changed it just displays the dimension.
Click cancel and delete the 25 mm dimension of the top line (press esc to make sure you’re not using the dimension tool still if you are having problems doing this, esc is the Inventor “cancel” and resets your tool to be a plain cursor).
Now dimension the angle and make it 120 degrees:
K - B o t i c s P r e - S e a s o n / P o s t - S e a s o n M a n u a l
w w w. k b o t i c s . c a P a g e 102 o f 140 @ f r c 2 8 0 9

Now try and dimension the top line again, you should get this error again:
Hopefully this helps make sense of over constraining the sketch.
Press cancel and finish the sketch. Extrude your part 15 mm.
K - B o t i c s P r e - S e a s o n / P o s t - S e a s o n M a n u a l
w w w. k b o t i c s . c a P a g e 103 o f 140 @ f r c 2 8 0 9
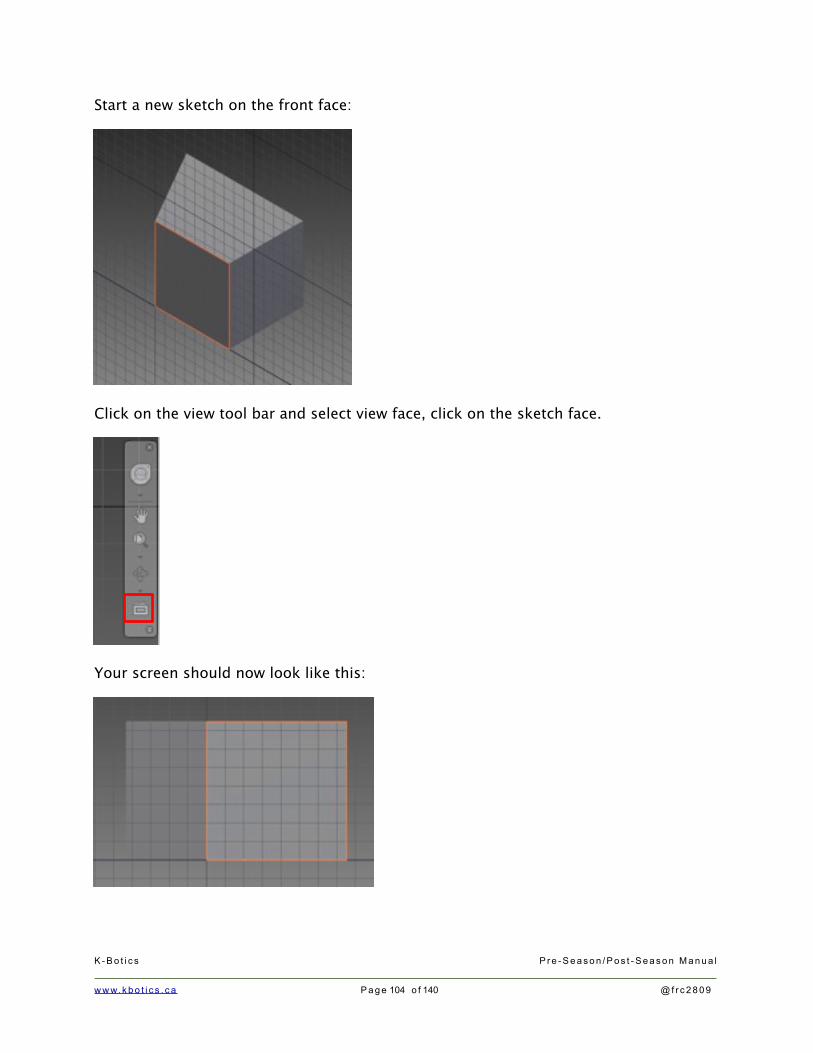
Start a new sketch on the front face:
Click on the view tool bar and select view face, click on the sketch face.
Your screen should now look like this:
K - B o t i c s P r e - S e a s o n / P o s t - S e a s o n M a n u a l
w w w. k b o t i c s . c a P a g e 104 o f 140 @ f r c 2 8 0 9

Draw and dimension this sketch (it’s only 1 line):
Finish the sketch and extrude cut the upper left profile away from your part. Instead of distance in the extrude pop up, change to all, this will cut through all material.
Result:
K - B o t i c s P r e - S e a s o n / P o s t - S e a s o n M a n u a l
w w w. k b o t i c s . c a P a g e 105 o f 140 @ f r c 2 8 0 9
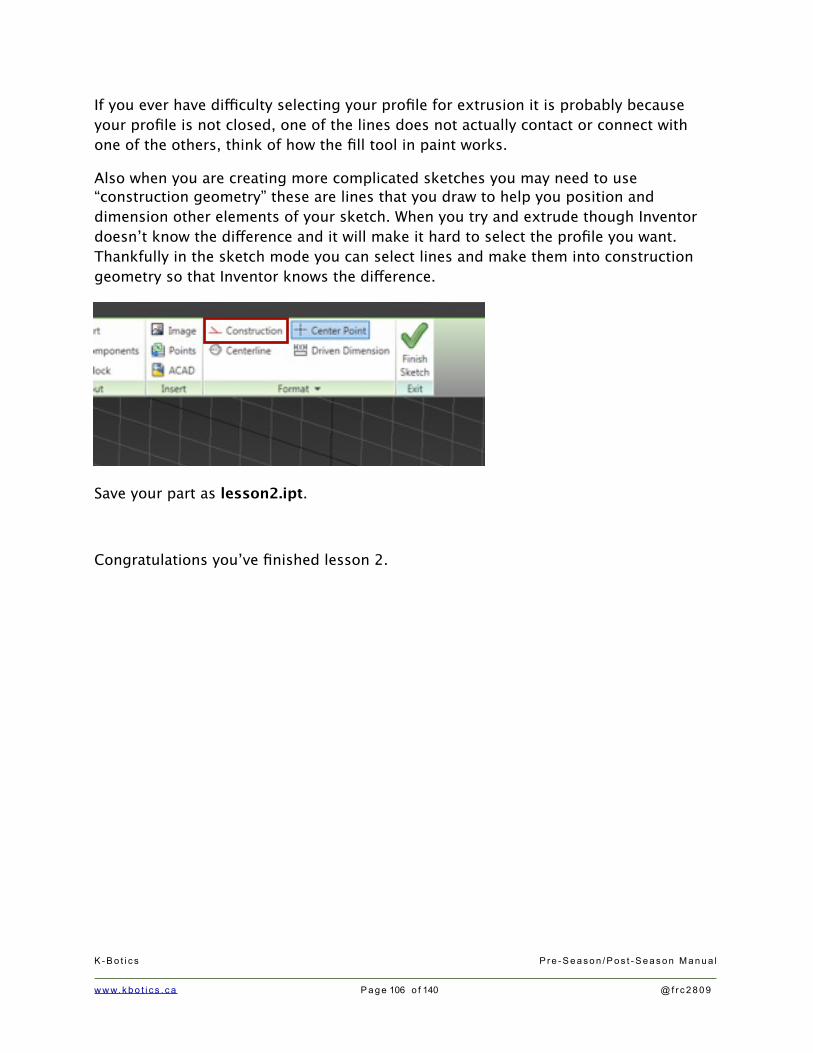
If you ever have difficulty selecting your profile for extrusion it is probably because your profile is not closed, one of the lines does not actually contact or connect with one of the others, think of how the fill tool in paint works.
Also when you are creating more complicated sketches you may need to use “construction geometry” these are lines that you draw to help you position and dimension other elements of your sketch. When you try and extrude though Inventor doesn’t know the difference and it will make it hard to select the profile you want. Thankfully in the sketch mode you can select lines and make them into construction geometry so that Inventor knows the difference.
Save your part as lesson2.ipt.
Congratulations you’ve finished lesson 2.
K - B o t i c s P r e - S e a s o n / P o s t - S e a s o n M a n u a l
w w w. k b o t i c s . c a P a g e 106 o f 140 @ f r c 2 8 0 9

Lesson 3:Open Inventor and start a new metric part.
Draw 2 circles a fair distance apart:
Dimension both these circles to be 20 mm in diameter and then apply a horizontal constraint between the 2 circle centers:
Select the line tool and hover in on the top of the circle right above the center. Observe the tangent symbol that pops up and the dotted line that appears on its way to the
K - B o t i c s P r e - S e a s o n / P o s t - S e a s o n M a n u a l
w w w. k b o t i c s . c a P a g e 107 o f 140 @ f r c 2 8 0 9

other circle. Click and draw the line tangent from one circle to the other. Do the same
for the bottom.
Hover and then click here
The result should look like this:
Now use the trim tool to get rid of the inner circles:
Add dimension of the upper line of 30 mm.
K - B o t i c s P r e - S e a s o n / P o s t - S e a s o n M a n u a l
w w w. k b o t i c s . c a P a g e 108 o f 140 @ f r c 2 8 0 9

We are going to draw 2 new circles, the first one just draw anywhere, for the second one snap it to the center of the arc of one of the end circles:
Now select the coincident constraint and constrain the first circle to the center of the other sides circle. Dimension both circle to 10 mm. This was to demonstrate the difference between letting Inventor generate constraints as you go vs. adding them yourself later.
Select the circle on the right and change it to construction geometry. Finish the sketch.
K - B o t i c s P r e - S e a s o n / P o s t - S e a s o n M a n u a l
w w w. k b o t i c s . c a P a g e 109 o f 140 @ f r c 2 8 0 9

Open the extrude tool and observe only the one circle cut out is part of the geometry, extrude the part 10 mm.
Open the sketch again and return the other circle to non-construction geometry (click on the circle, then click on construction again). Extrude the part again.
Wait the part is the same!
Right click on the extrude feature in the model tree and click edit feature. Select the profile button and then while holding ctrl click on the second circle, this will deselect it from the profile. While you’re in here change the height of the extrusion to 5 mm.
Save your part as lesson3.ipt.
On to lesson 4!
K - B o t i c s P r e - S e a s o n / P o s t - S e a s o n M a n u a l
w w w. k b o t i c s . c a P a g e 110 o f 140 @ f r c 2 8 0 9

Lesson 4:Open Inventor and start a new metric part.
In this lesson we are going to learn the second most common way to make a 3D part from a sketch – a revolution. To demonstrate this we’re going to make a model of the Stanley Cup!
Start a new sketch and draw a long horizontal line, immediately make it construction geometry.
Then draw something like this: (Note: Dotted is construction geometry.)
Notice how if you move your mouse to a point of interest (like the circle center) and then up it tracks your movement, this is to help you create a line from above that will pass through the center of the circle. Inventor will help you like this in lots of ways, you just have to get used to it.
Now let’s do some clean up with trim and add some dimensions (you might need to delete the circle at the end, add the dimensions, and then redraw the circle):
K - B o t i c s P r e - S e a s o n / P o s t - S e a s o n M a n u a l
w w w. k b o t i c s . c a P a g e 111 o f 140 @ f r c 2 8 0 9

Also draw a line from to close the bottom of the profile.
Finish your sketch: instead of clicking on extrude this time pick revolve.
Pick the profile for the profile and then pick the original long construction line for your axis, this should be your result:
Doesn’t look much like the Stanley Cup, but that’s not important. Revolve is a useful tool especially for making shafts!
Save your part as lesson4.ipt
K - B o t i c s P r e - S e a s o n / P o s t - S e a s o n M a n u a l
w w w. k b o t i c s . c a P a g e 112 o f 140 @ f r c 2 8 0 9

Lesson 5: The best way to learn how to CAD is lots and lots of practice! You’ll develop your own style and learn most by modelling lots of things!
For lesson 5 you need to create solid models of the following parts, save them by the name indicated underneath the picture. You need to submit all these drawings to get your K-Botics CAD certificate!
Practise by drawing all these simple shapes:
Just pick dimensions that make your model look close to the picture it doesn’t have to be exact. Save the files using the naming convention simpleA.ipt through simpleF.ipt
K - B o t i c s P r e - S e a s o n / P o s t - S e a s o n M a n u a l
w w w. k b o t i c s . c a P a g e 113 o f 140 @ f r c 2 8 0 9

Model 6 Parts from this page of your choice, again just pick dimensions that make it look similar not exact:
K - B o t i c s P r e - S e a s o n / P o s t - S e a s o n M a n u a l
w w w. k b o t i c s . c a P a g e 114 o f 140 @ f r c 2 8 0 9

Model these 3 Blocks, again picking dimensions that make the part look right. Name files according to the name that appears under the image.
Block-A
Block-B Block-C
K - B o t i c s P r e - S e a s o n / P o s t - S e a s o n M a n u a l
w w w. k b o t i c s . c a P a g e 115 o f 140 @ f r c 2 8 0 9

Final Project:Nice work on getting this far, you’ve almost earned your 2809 CAD certificate and I bet you’ve learned lots and can’t wait to start CADing robots!
At this point you can submit all of your other files to the mentors for marking. To do this put all the files in a folder and create a zip folder by right clicking on that folder and clicking send to and then compression folder. Email this zip file to [email protected]
The last part of the CAD training is a mini project. You need to pick a real world object that you own or have easy access to that has more than 5 different parts to it (be creative and have fun with it!). You can also work in groups but your project must be more complicated then ( number of group members x 5 = minimum number of parts) Once you have picked an object show it to a mentor or take a picture and send it to [email protected] to get it approved.
Once your project has been approved it’s time to get to work. You need to measure and create accurate Inventor parts for each part of your object.
Remember what I said earlier, there are going to be many different ways to do something, no particular approach is best so pick the one that is simplest and that you are most comfortable with. Remember 95% of parts are modelled using a simple sketch-extrude-sketch-cut and so on process. Also if you can think about how the part would be machined from a block of material, this might help you think about how to CAD it and it will help when you are CADing parts we actually have to machine!
When you have built all the parts create a new assembly in Inventor and add your parts to it. Try and see if you can figure out how to assemble your object using assembly constraints. A big part of CAD and of being an engineer is about figuring out how to use new tools using the internet, help documentation and your own brain. For this reason I have left out the instructions on how to make an assembly!
If you get stuck you can email [email protected] or talk to any of the mentors at meetings.
Good Luck!
K - B o t i c s P r e - S e a s o n / P o s t - S e a s o n M a n u a l
w w w. k b o t i c s . c a P a g e 116 o f 140 @ f r c 2 8 0 9

K-Botics CAD Training Part 2When you are finished a sketch and want to fabricate the part, you require orthographic part drawings. These drawings contain all the information required for the machinists to make the part.
When you are satisfied with your part, save it (click on the floppy disk).
Then open a new drawing.
K - B o t i c s P r e - S e a s o n / P o s t - S e a s o n M a n u a l
w w w. k b o t i c s . c a P a g e 117 o f 140 @ f r c 2 8 0 9

Click on Base, and then locate your saved file.
Click on the “Open an existing file”
Be sure that you are looking for inventor files
K - B o t i c s P r e - S e a s o n / P o s t - S e a s o n M a n u a l
w w w. k b o t i c s . c a P a g e 118 o f 140 @ f r c 2 8 0 9

Choose a reasonable scale for your part, so that it (and 2 other views) will fit nicely on your page.
Drag and place your view.
To create the side and top view of your orthographic drawing, click on “Projected” on the tool bar. Click on your base, and then move the mouse vertically upward to see the top view show up. When you are satisfied with the placement, click the screen. Then move your mouse to the side to show the side view of your object.
You can change the placement of the views on the page (distance from the base view vertically/horizontally), but they are still constrained to the base view, as they are just 3 views of the same object. Think back to the plexiglass box we used when we learned about orthographic drawings.
K - B o t i c s P r e - S e a s o n / P o s t - S e a s o n M a n u a l
w w w. k b o t i c s . c a P a g e 119 o f 140 @ f r c 2 8 0 9
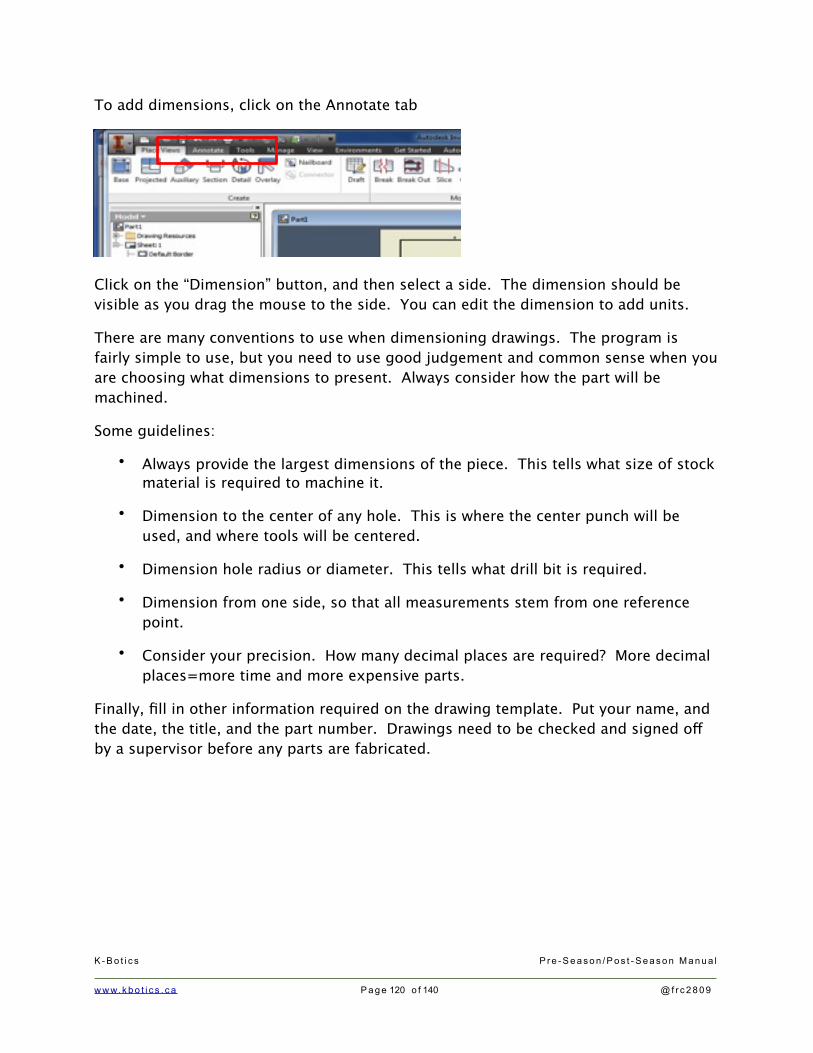
To add dimensions, click on the Annotate tab
Click on the “Dimension” button, and then select a side. The dimension should be visible as you drag the mouse to the side. You can edit the dimension to add units.
There are many conventions to use when dimensioning drawings. The program is fairly simple to use, but you need to use good judgement and common sense when you are choosing what dimensions to present. Always consider how the part will be machined.
Some guidelines:
• Always provide the largest dimensions of the piece. This tells what size of stock material is required to machine it.
• Dimension to the center of any hole. This is where the center punch will be used, and where tools will be centered.
• Dimension hole radius or diameter. This tells what drill bit is required.
• Dimension from one side, so that all measurements stem from one reference point.
• Consider your precision. How many decimal places are required? More decimal places=more time and more expensive parts.
Finally, fill in other information required on the drawing template. Put your name, and the date, the title, and the part number. Drawings need to be checked and signed off by a supervisor before any parts are fabricated.
K - B o t i c s P r e - S e a s o n / P o s t - S e a s o n M a n u a l
w w w. k b o t i c s . c a P a g e 120 o f 140 @ f r c 2 8 0 9

Appendix B: Communication and Teamwork ActivitiesK-Bot Talks Introduction
Each one of our topics have been chosen to build confidence and comfort within our group, and to improve communication skills. The topics are really a spring board to discussion. Every team will have different dynamics and issues to address. The topics chosen were those that would really help our team this year.
We started off each lesson with a lesson objective written on the board. We primed the students in by asking a few questions to develop the context and introduce vocabulary. These questions should be open ended and allow for students to share.
Part of purpose of the activities is to build the level of comfort among the students on the team. By starting lessons with sharing a personal story pertaining to the topic, it will encourage students to also volunteer their own stories later.
Students can help brainstorm a list of examples in their life/books/movies where they’ve seen the topic in action.
There may be a video clip that you would like to show that can address the topic.
When planning activities, allow time for small group work and then large group discussion.
At the end of each session, to consolidate the lessons:• Recall the knowledge (ask a few questions, or ask someone to summarize)• Check for understanding, ask how they can apply the topic to their experience at robotics or
daily life.
How to Plan a Good Talk
Planning a good talk takes some skill, some creativity, and an understanding of your audience. Be sure to plan more activities than your time allows, just in case they take less time than planned. No matter how good your plan is though, sometimes you will need to be flexible and change plans on the fly. Sometimes the best discussions happen when the talk takes on a life of its own.
Remember that in a team, not everyone is at the same age and stage in life, and they are not all going to learn things in the same way. Consider visual, auditory and kinesthetic learners when you are planning--try to have some information presented in all 3 ways. Remember also that the attention span of teenagers varies greatly, and it can be affected by things like: time of day, when they ate, what they ate, who is in the group, how interested they are in the topic, how useful they feel the information is to them, how passionate the presenter is about the subject.
Keep any presentation you give authentic. No two people will present the same information in the same way!
K - B o t i c s P r e - S e a s o n / P o s t - S e a s o n M a n u a l
w w w. k b o t i c s . c a P a g e 121 o f 140 @ f r c 2 8 0 9
With all that in mind, here is a guide to use while planning your talk:
Decide on what your focus is. What are the skills that your group is lacking? What is the group dynamic that you are looking to change? What are the goals of the team? What are some of the things that very successful teams do well?
[5 minutes] Learning Objective: Outline the goals for the talk and why these goals are important in life and in build season. Write the objective on the board so students can see it and refer to it during the talk.
[5 minutes] Background and Priming: Sometimes vocabulary will need to be introduced and clarified to get the entire group up to speed. This could be done by the facilitator, but it is more interactive to have some kind of group discussion to develop or enhance the definition. Note: the facilitator should have a good succinct definition with them as a reference.
[15 minutes] Group Activity: Aim for something that gets the students up and moving, working together, in small groups. We find that groups of up to 6 allow for positive discussion. Once they get larger than that there will often be a “leader” that comes forward, and others that avoid participation. The “hidden curriculum” in all of these talks is actually positive interaction among team members. Allowing mixing and mingling, in a safe environment where there are no put-downs, will build trust among team members, and allow for a more fruitful discussion.
Once students are in groups, you can ask them open questions (questions that require more than a yes or no answer), and have them discuss their ideas and opinions. Providing them with a time-limit on the discussion and asking each group to ensure that everyone speaks will keep them on task. Having each small group report back to the whole group, or having them make a list to share will also keep them focused.
To change up the discussion model, you could have the students change groups between each question. This way they will get to share their opinion with many different people, and hear the opinions of many.
[5 minutes] Group Discussion/Debrief (Consolidation and Review of Learning Objective)Revisit the Learning Objective written on the board. Ask the students to come up with ways that they could demonstrate or apply the learning objective at home/at school/at robotics/in the community.
Encourage team members and mentors to build each other up, by praising (high five, or “good job” etc) their team members when they see them applying the new skill later.
K - B o t i c s P r e - S e a s o n / P o s t - S e a s o n M a n u a l
w w w. k b o t i c s . c a P a g e 122 o f 140 @ f r c 2 8 0 9

Added Tips• Set ground rules before your talk to explain your expectations. Set a signal for getting the
group’s attention, explain that there are times to listen, and times to speak, and that they need to show respect for the person speaking. Establish a positive tone--don’t allow sarcasm or put downs.
• Allow time for fun. There will be moments where the group will get silly--that’s ok. Being silly together helps create bonds and build the sense of togetherness.
• Tell some stories that relate to the topic. Often students will remember stories and then tie them back to the lesson’s focus. They will also get to know you better, and that will build trust and respect.
• Drawing in very shy and anxious people can be a challenge for group discussion activities. Allowing them to form smaller groups (2-3 people) or to choose their own groups (their friends) may be helpful. Sometimes they will need to have a mentor join their group to help them participate fully.
• After your activity is done, spend a few minutes reflecting on what went well, and what could be improved for next time. It will get easier to plan, and easier to present, after you have had a lot of experience.
“Be An Expert, Except When You’re Not” - a lesson in credibilityPhrase: Credibility is important in communication. We listen to people who have credibility.Questions: 1. What does credibility mean?
• “The quality of being believable or worthy of trust• “Truth, expertise, certification”
2. Who has credibility/who doesn’t? Why? [write people and qualities on the board]3. What’s the difference between credibility and popularity? Can you think of someone who
is popular but not credible? Can you think of someone who is credible, but not necessarily popular? [write people and qualities on the board]
4. What are you an expert at? *It is important to know when you are an expert, and when you are not. If you are an expert, speak with confidence. If you are not an expert, don’t pretend to be.
5. Does the audience you are speaking to affect whether you consider yourself an expert? i.e. if you are speaking to 5 year olds, or if you are speaking to astronauts
Group work: In small groups, have each person present for 1 minute on something that they are an expert on. This will help people become better acquainted.
K - B o t i c s P r e - S e a s o n / P o s t - S e a s o n M a n u a l
w w w. k b o t i c s . c a P a g e 123 o f 140 @ f r c 2 8 0 9

“Say What you Do and Do What You Say” - a lesson in integrityPhrase: Integrity is important in communication. We listen to people who have integrity.Questions: 1. What does integrity mean?
• The quality of being honest and having strong moral principles2. Who has integrity? Who doesn’t? Why? [write qualities on the board]3. What is the relationship between integrity and credibility?4. Are there situations where it is difficult to maintain your integrity? What has challenged
you?
Group work: introduce a list of moral dilemmas for small groups to discuss and present to the larger group. (http://listverse.com/2011/04/18/10-more-moral-dilemmas/ has some good examples)
“Make an Intentional Statement (not a non-statement)” - a lesson in clear communication
Phrase: Intention is important in communication. We listen to people who make intentional statements.
Question: 1. What is the difference between a statement and a non-statement?
• A statement is “a definite or clear expression of something”• A non-statement includes meaningless words which confuse the reader/listener.
e.g. “Our team is incredible” could mean that our team is very good, or it could also mean that our team is not credible. <--non-statemente.g. “Our team has performed at the world championships 4 times” is a statement that includes measurable and meaningful information. <--intentional statement
Brainstorm a list of non-statements (relating to the team, or the robot, etc)
Challenge the groups to re-write the information in a clearer more intentional way.
*Note: This topic is very important when speaking to other teams during pit-scouting, when speaking with judges, and when writing and presenting the Chairman’s presentation.
K - B o t i c s P r e - S e a s o n / P o s t - S e a s o n M a n u a l
w w w. k b o t i c s . c a P a g e 124 o f 140 @ f r c 2 8 0 9

“ Speak Personally” - how to engage an audiencePhrase: Personal connection is important in communication. We listen to people with whom we find a personal connection.
Questions:1. What makes you pay attention to a speaker, or writer? What techniques do they use to
keep your attention?2. What are you an expert at? (think back to earlier lesson) 3. How do you feel when people tell stories?
Activity: In a small group, write a paragraph about our robotics team. The first time the paragraph is written, avoid any personal opinion or information. The second time the paragraph is written, add in personal stories, experiences and opinions. These paragraphs should have similar facts. They will be shared with the group.
e.g. “Icecream tastes great. Many people like it” v.s. “The first time I took a delicious spoonful of frozen chocolatey ice cream into my mouth, I couldn’t help but smile, and proceed to eat the entire bowl”
Note: These speaking tips will be helpful in school presentations and also in writing and presenting the Chairman’s report.
“Be Who You Are” - a lesson in respect, acceptance, and integrityPhrase: Uniqueness is important in communication. We listen to people who are unique.
Questions: 1. What are some of your unique abilities/traits/experiences? 2. Have you ever been worried about being different from your friends? What was the
situation? Activity:As a team we celebrate uniqueness. We value the differences that exist because they keep things interesting.
Develop a list of statements that may apply to different segments of your team population. Read the list out one at a time, and all the people who identify with that statement will go to the right side of the room, those who do not identify with that statement will go to the left side of the room.
Once the groups are split up you can ask individuals more information about the specifics, and share stories among the group.
e.g.I am the oldest/only child in my familyI have been in an airplaneK - B o t i c s P r e - S e a s o n / P o s t - S e a s o n M a n u a l
w w w. k b o t i c s . c a P a g e 125 o f 140 @ f r c 2 8 0 9

I have eaten sushiI read magazines from the back to the frontI speak 2 languagesI have a driver’s licenseI play on a competitive team.I have a job.I have volunteered.I can bake a cake.My favourite colour is purple.I get carsick.
This will show people who may think that they are alone/different, that there are others that share similar experiences.
“Respect your Audience” - how to talk to different types of peoplePhrase: Respect is important in communication. We listen to people who give us respect.
Question: 1. What is respect?
• a feeling of deep admiration for someone or something elicited by their abilities, qualities, or achievements.
2. Who is someone who has earned your respect? How did they do that?3. Have you ever had to work hard and earn respect from someone? What was the situation?
How can we show respect for our audience? Be prepared--be on time, be ready for the encounter.Know your audience. Have an idea of their background, and their expectations.Avoid sarcasm or risqué humourInvolve your audience (eye contact, asking questions etc)
K - B o t i c s P r e - S e a s o n / P o s t - S e a s o n M a n u a l
w w w. k b o t i c s . c a P a g e 126 o f 140 @ f r c 2 8 0 9

“Be An Advocate” - how and why you might stand for somethingPhrase: Advocacy is important in communication. We listen to people who are advocates for a good cause. In this workshop you will practice being an advocate for yourself.
Question: 1. What is an advocate?
• a person who argues for or supports a cause or policy• a person who works for a cause or group• a person who argues for the cause of another person in a court of law
"2. Who are some examples of advocates in your life/movies/books? What did they do?
• Atticus Finch• MADD• Erin Brokovich• Mother in the Blind Side
3. What makes a good advocate?• Emotion• Logic• Instinct• Courage
Today you will be an advocate for yourself. You will tell us what you want to accomplish during the robotics season, and what kind of assistance you might need. Set some goals and communicate them to the mentors on the questionnaire.
Consider your areas of skill, and your areas of interest--they might not be the same!
K - B o t i c s P r e - S e a s o n / P o s t - S e a s o n M a n u a l
w w w. k b o t i c s . c a P a g e 127 o f 140 @ f r c 2 8 0 9

K - B o t i c s P r e - S e a s o n / P o s t - S e a s o n M a n u a l
w w w. k b o t i c s . c a P a g e 128 o f 140 @ f r c 2 8 0 9
K-Bo
tics S
tude
nt P
rofil
e 20
14O
ctob
er 1
5th,
201
3
Nam
e
Plea
se in
dica
te y
our i
nter
est a
nd le
vel o
f abi
lity,
for e
ach
of th
e sk
ills,
in th
e fo
llow
ing
way
:CI
RCLE
you
r lev
el o
f int
eres
t.Pu
t a S
TAR
abov
e yo
ur le
vel o
f abi
lity.
No In
tere
st/A
bilit
yPa
ssio
nate
/Cap
able
Elec
tric
al d
esig
n/as
sem
bly
12
34
5
Mec
hani
cal d
esig
n/as
sem
bly
12
34
5
Robo
t Pro
gram
min
g1
23
45
Web
site
Desig
n1
23
45
Data
base
Des
ign
12
34
5
Cons
truc
tion
(fiel
d, p
roto
type
, etc
.)1
23
45
Writ
ing
12
34
5
Spea
king
12
34
5
Editi
ng1
23
45
Com
mun
icat
ion
Desig
n1
23
45
Phot
ogra
phy
12
34
5
Vide
ogra
phy
12
34
5
Out
reac
h1
23
45

Leadership Camp Team Building Activities
Introduction to challenge: The 21st Dr (hologram) (last regeneration)
Talk about how the companions have been trapped here in the dead zone on Gallifrey and the only way to save them is to save the Dr, the companions can guide them but not help them through the safest path to reach the Drs Prison…
Introduction to mentors:Kevin: Brigadier leftbridge stewartRachel : Sarah Jane SmithMe: TurloughBonnie : AceAden: AdricSabrina: NissaMegan : RomanaColleen : Donna NobleStacey : Melanie Bush
Challenges:Rescue Davros: Equip: circle, rope, teddy“Davros (lord/creator of the Daleks) has been turned into a teddy bear, he has been imprisoned at the center of a minefield. Normally the Doctor would not condone rescuing Davros from the Timelords, but he may have information that will help return the memory of the companions. The minefield is dangerous and cannot be weighted, the only equipment available is a long length of rope, possibly 2. We’ll see. Remember to think back to all your training as masters of teamwork and figure out how to rescue Davros without anything touching the ground inside the marked minefield.”Here a rope circle surrounds the ‘prisoner’. (teddy bear) the team must extract the teddy bear without entering the circle(hint the way to achieve is by using the rope like chopsticks)
Rassillon Warrior Walk:Equipment: Blindfolds“As you may be aware from the time of the games some of the Rassillon Warriors remain, they are completely blind but react to sound, any sound. The area ahead is darkened but we can provide a pair of night vision glasses to one of your party, who will have to lead the others, we were able to clear a path through the broken rubble in the area, but remember stray too far from it and the rubble will move, making sound, and then the Rassillon Warrior will be upon you.
K - B o t i c s P r e - S e a s o n / P o s t - S e a s o n M a n u a l
w w w. k b o t i c s . c a P a g e 129 o f 140 @ f r c 2 8 0 9

Think ahead, plan signals to pass down the line to handle corners or obstacles, they have to be silent and they must be timely to turns or obstacles or someone might get lost to the Warrior. The more who survive the better our chances at the hurdles ahead.”Here a path marked by a rope is spread around circuitous territory.
Bridge to the tower… Equipment marked beams.“So here is the bridge over the eternity chasm, fall in and you could be lost forever in time. The thing to remember here is that the bridge has two beams. They must be connected ‘organically’ at all times or the bridge will fall. Taking anyone on it with it. Take your time and plan wisely”Two beams to far apart for one person to span – they must lean against each other in pairs to cross.
Web from the planet of the spiders..“Do any of you remember the Dr’s experience on the planet of the spiders? No – it was in his third regeneration, during his banishment to earth. One of the spiders was brought here during the games. The problem is she left this web. Now if you touch any of the strings you will be paralysed, also after each opening has been used it starts emanating a fine paralysis spray into the gap caused by the organic passage. The result, paralysis if you reuse a hole. Think wisely how you will get each member of the team through, as always more survivors equates to more chances of passing the later trials.”Here a ‘web’ is stretched between two trees, the trick is to make it so some people need to be lifted through higher holes ..
The race: X-legged race.. Organised by the Dr! to escape the dead zone the teams must race across a minefield sensitive to the ‘number of legs’ of an organic creature…
K - B o t i c s P r e - S e a s o n / P o s t - S e a s o n M a n u a l
w w w. k b o t i c s . c a P a g e 130 o f 140 @ f r c 2 8 0 9

Group Decision Making Workshop (Kick-Off for Pre-Season Challenge)Focus : decision makingTask: come up with a pre-season challenge team name It’s a good idea to practice decision making when it is not a high stakes decision
Aspects of decision making: - involvement with decision - involvement with team - personal value of decision - compromise where best for everyone - OWNERSHIP -avoidance....
Basic Brainstorming - fast and furious - keep it fun - involve everyone... Remember to ask everyone for input - 1 scribe
Process - post it notes (to ensure everyone can participate, they can write ideas on post-its. This levels the playing field, so everyone’s ideas are considered without considering who they “belong” to) - when making technical/creative decisions we often need to wear different “hats” - creative hat - auditors hat.... Are there any external factors to consider (image/cost/time) - challenges in implementation hat (technical) - problems hat... Will it work - advantages hat... Upsides over other ideas - grid analysis (this is a more formal way to structure decision making) - place the ideas in the rows - place various factors in the columns, and figure out what is the best choice - others... Hundreds
Common errors trying to avoid: - confirmation bias (tend to seek only positive data) - anchoring (first idea is best idea) - overconfidence bias (easy one?) hard to solve - gamblers fallacy(7 heads in a row, what are the odds on next toss) -'fundamental attribution error' (blame game)... Car crash.. Bad driving vs weather.. -Anthropomorphism to people
Some thoughts on choosing team names: - if you win it's permanent! (we will engrave the name on the trophy) - does it suit everyone in your team? - does it include everyone? - is it 'Politically Correct'? ( e.g. Washington Redskins)
K - B o t i c s P r e - S e a s o n / P o s t - S e a s o n M a n u a l
w w w. k b o t i c s . c a P a g e 131 o f 140 @ f r c 2 8 0 9

How to Evaluate Prototypes
This year we designed and tested 11 prototypes before deciding on our final robot design. After brainstorming ideas, we built and tested the shooter concepts in the gym at school. That was the only place with high enough ceilings. We tested the intake mechanisms on another day in our workshop.
People invest a lot of time, and energy trying to make the prototype they’re working on be the best. They naturally want their prototype to be the one selected. We lessened the emotional attachment people had to their ideas by doing the following things:• We made them aware of the potential for emotional attachment• We encouraged people to work on more than one prototype, and to circulate to see all the
prototypes as they were being built.• We encouraged people to be positive in their comments during this time, adding suggestions
or “have you thought of this?” “have you tried this?”
The meeting where we evaluated the prototypes was structured in a very clear way. We set ground rules of positive comments, no sarcasm or put downs, no discussion of the designers--just the design.
We put a big grid on our white board listing all the prototypes in the rows, and the criteria in the columns. We used the following criteria:• functionality (does it work well?)• size (could it fit with our chassis)• complexity (can we build it?)• time frame (can we build it in time?)• materials (do we have the materials needed?)• price (would the materials/machining cost too much?)• durability (would it stand up during a competition without needing repair?)• repairability (if it needed repairing could it be done quickly? can spare parts be made?)
As we discussed each idea, we asked the group that built the prototype, or the person who “owned” the design concept, to explain the concept and point out the negative aspects of the design first. This forced everyone to think critically about their own design and state the limitations. This approach eliminated hurt feelings too--by pointing out all the negatives about your own idea, there were far fewer negatives to be pointed out by the other team mates.
The design discussion proceeded to other people asking questions about the design and limitations, and possible changes and improvements.
After every person had the opportunity to put in their two cents, the design decision was made by the mentors, and announced at the next build meeting (after the emotions of prototype presentations were gone).
By following this process, everyone was able to be heard, feelings were not hurt, an informed decision was made, and the build season could move into the next phase without delay.
K - B o t i c s P r e - S e a s o n / P o s t - S e a s o n M a n u a l
w w w. k b o t i c s . c a P a g e 132 o f 140 @ f r c 2 8 0 9

Appendix C: Pre-Season Challenge “There and Back Again” ResourcesScroll
K - B o t i c s P r e - S e a s o n / P o s t - S e a s o n M a n u a l
w w w. k b o t i c s . c a P a g e 133 o f 140 @ f r c 2 8 0 9
Forged by Sauron, the Dark Lord, Many years ago.The One Ring is by all adored, But with it comes great woe.
SmEagol’s life was ever changed By this “precious” find.He’s corrupted and deranged, Unfit in form and mind.
Gollum’s precious ring was lost,(You may have heard this tale)‘Twas found by Hobbits as they crossedOver hill and dale.
The ring was brought back to the shireAnd kept for many years, About it Gandalf did inquire, And then explained his fears.
The safety of all Middle Earth cannot be reinstated, Until the ring, of immense worth, Becomes obliterated.
This quest will take you to Mount Doom, Your path you may decide.Over the mountains, through the gloom, Of tunnels or outside.
Beware of Shelob, and her lair, For you travel alone.Samwise Gamgee is not there, This journey is your own!
To destroy it, place the ringWithin Mount Doom’s big crater.The higher up you get the thing, More points you will earn later.
Travel “there and back again” And do it really quicklyThe Longer IT’s in your domain The Ring Makes You more sickly!

Kickoff InformationThere and Back Again
“Three Rings for the Elven-kings under the sky,
Seven for the Dwarf-lords in their halls of stone,
Nine for Mortal Men doomed to die,
One for the Dark Lord on his dark throne
In the Land of Mordor where the Shadows lie.
One Ring to rule them all, One Ring to find them,
One Ring to bring them all and in the darkness bind them
In the Land of Mordor where the Shadows lie.”
- Lord of the Rings, by J.R.R. Tolkien
Warning:Some creative license has been taken with the story. We are sorry if you are offended :)
Goal:Your goal is to help Bilbo the BOE-Bot get the one ring to Mount Doom, destroy it and return safely.
Possible Approaches:Your guide, Smeagol, has suggested three possible paths:
1. Over the mountains of Ephel Dúath, via the steep stairs of Cirith Ungol.2. Following a winding path that leads through Shelob’s lair.3. Trudging through the barren wastes of Gorgoroth
There are, of course, many obstacles in the way.
Mount Doom:When you arrive at Mount Doom, you will discover 3 different ways of putting the ring into the fires and destroying it. The easiest, but least desirable way is to roll it along the ground. There is a medium-level opening which is better, but the highest opening is surely the best way to destroy the ring.
The One Ring:The ring, strangely enough, looks very much like a ping-pong ball at first glance. However, the astute among you will notice that it has a gold band around it.
K - B o t i c s P r e - S e a s o n / P o s t - S e a s o n M a n u a l
w w w. k b o t i c s . c a P a g e 134 o f 140 @ f r c 2 8 0 9

Kit of Parts• Bilbo the BOE-Bot + electronics kit• 1 Servo motor• Additional sensors (reflective IR sensors, distance sensors)
Rules• Do not use anything that is alive.• Do not use extra motors or power sources. Use only the motors and batteries provided
in your kit.• Devices which store energy are permitted provided that they do not start with any stored
energy.• Do not attach your robot to the ramp or field walls.• Do not damage the course.• You must return the BOEBot kit and servo motor in its original condition after the
competition is finished.• You may only touch the robot when it is in the start area.• You may place the “ring” on the ground anywhere in the start area.• The robot and ring must be separated by a minimum distance of 5 cm at the start.• The robot must start on the ground, fully contained within the starting square.• The robot has “reached the finish area” when one of its wheels has fully crossed into the
finish area.• The robot has “returned to the start area” when it has first reached the finish area, and
then the entire robot has crossed back into the starting square.• You may spend a maximum of $20 on additional materials for your robot.
Field
There will be other smaller, movable obstacles such as gravel on the field.The colouring is just for effect. The actual field is made from unpainted lumber.The line is black electrical tape (¾” wide).
K - B o t i c s P r e - S e a s o n / P o s t - S e a s o n M a n u a l
w w w. k b o t i c s . c a P a g e 135 o f 140 @ f r c 2 8 0 9

2D CADSee attached CAD drawings of:
• The field• The bridge• The goal
ScoringYou will have two attempts on the course. The best will count.
• 200 points for getting to the finish area• 100 points getting back to the start area• minus your time in seconds• plus goal scored:
◦ Lower goal: 10◦ Middle goal: 30◦ Upper goal: 60
In the event of a tie, one tie-breaker match will occur.
Competition RequirementsThe final competition will be on December 16thYou will need:
• A team name;• A presentation of your design process, any special features of your robot (mechanical or
programming), what you have learned, and what you would do differently next time• A robot ready to complete the challenge!
K - B o t i c s P r e - S e a s o n / P o s t - S e a s o n M a n u a l
w w w. k b o t i c s . c a P a g e 136 o f 140 @ f r c 2 8 0 9

Field Drawings
1 1
2 2
3 3
4 4
AA
BB
CC
DD
SHEE
T 1
OF
1
DRA
WN
CHEC
KED
QA
MFG
APPR
OVE
D
Kevi
n W
ood
11/1
/201
3
DW
G N
O
Fiel
d D
raw
ing
TITL
E
Mor
dor
Fiel
d D
raw
ing
SIZE C
SCAL
E
K-Bo
tics
2013
-14
Pre-
Seas
on C
halle
nge
REV
Star
tAr
eaFi
nish
Area
96.0
0
9.00
37.7
3
9.00
28.2
7
4.25
25.5
0
1.50
6.94
7.50
7.25
9.
00
9.
00
6.
00
.75
15.0
0
.50
3.50
32.0
0
9.00
36.0
0
43.5
0
46.0
0
47.5
0 52.5
0
67.5
0
74.5
0
1.50
9.00
6.00
13.5
0
12.5
1
34.5
08.50
22.5
0
19.5
0
See
brid
ge a
nd g
oal d
raw
ings
for
fur
ther
dim
ensi
ons.
9.00
K - B o t i c s P r e - S e a s o n / P o s t - S e a s o n M a n u a l
w w w. k b o t i c s . c a P a g e 137 o f 140 @ f r c 2 8 0 9

DET
AIL
ASC
ALE
1 :
1
DET
AIL
BSC
ALE
1 :
1D
ETAI
L C
SCAL
E 1
: 1
A
B
C
1 1
2 2
3 3
4 4
AA
BB
CC
DD
SHEE
T 1
OF
1
DRA
WN
CHEC
KED
QA
MFG
APPR
OVE
D
Kevi
n W
ood
11/1
/201
3
DW
G N
O
Brid
ge
TITL
E
Brid
ge
SIZE C
SCAL
E
K-Bo
tics
2014
Pre
-Sea
son
Chal
leng
e
REV
75.0
0
15.0
0
32.0
0
9.00
3.50
3.50
3.50
3.50
.25
.25
.05
.05
.25
.25
.75
7.25.75
K - B o t i c s P r e - S e a s o n / P o s t - S e a s o n M a n u a l
w w w. k b o t i c s . c a P a g e 138 o f 140 @ f r c 2 8 0 9

1 1
2 2
3 3
4 4
AA
BB
CC
DD
SHEE
T 1
OF
1
DRA
WN
CHEC
KED
QA
MFG
APPR
OVE
D
Kevi
n W
ood
11/2
/201
3
DW
G N
O
Goa
l
TITL
E
Goa
l
SIZE C
SCAL
E
K-Bo
tics
2013
-14
Pres
-Sea
son
Chal
leng
e
REV
1.50
6.00
1.50
.50
.50
.25
.25
2.00.50
2.00.50
2.00
1.50
1.50
8.50
9.00
K - B o t i c s P r e - S e a s o n / P o s t - S e a s o n M a n u a l
w w w. k b o t i c s . c a P a g e 139 o f 140 @ f r c 2 8 0 9

Materials
Extrusion 13 bridge support - 2x4 x 8”
Extrusion 12 bridge support - 2x4 x 12.75”
Extrusion 10,11 2@ taper 0.5-0.25 x 1.5 x 7”
Extrusion 9 goal2x2 x 9”2@ 2x2 x 7” with ½ x ½ slots at 2” and 4”
Extrusion 8 2 rocks @ 9” dia 1 rock @ 6” dia
Extrusion 7 bridge walls – 1x4 – see drawing
Extrusion 6 bridge front walls – 1x4 – see drawing
Extrusion 5 bridge top grooves
Extrusion 4 bridge steep side grooves
Extrusion 3 bridge surfaces – 1x8 – see drawing
Extrusion 2 field walls – 2x4 – see drawing for angled obstacles 2@ 2x4 x 96” 1@ 2x4 x 33” 1@ 2x4 x 24”
Extrusion 1 Base = ½” plywood, 96” x 36”
K - B o t i c s P r e - S e a s o n / P o s t - S e a s o n M a n u a l
w w w. k b o t i c s . c a P a g e 140 o f 140 @ f r c 2 8 0 9