linoleum block impressed clay combining printmaking techniques with ceramics combining printmaking...
TRANSCRIPT

Linoleum Block Impressed ClayLinoleum Block Impressed Clay
Combining Printmaking Techniques
with Ceramics
Combining Printmaking Techniques
with Ceramics

Linoleum BlocksLinoleum Blocks
Normally used to create block prints
similar to wood-cut prints)
Normally used to create block prints
similar to wood-cut prints)
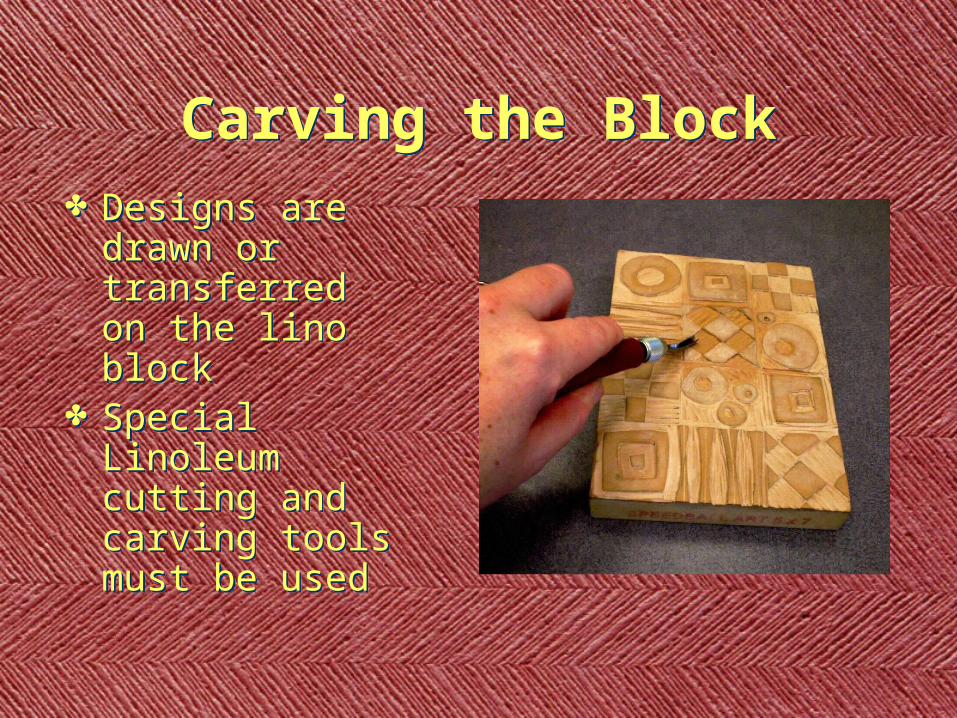
Carving the BlockCarving the Block Designs are
drawn or transferred on the lino block
Special Linoleum cutting and carving tools must be used
Designs are drawn or transferred on the lino block
Special Linoleum cutting and carving tools must be used

Carving the BlockCarving the Block
WRONG!WRONG! CorrectCorrect

Impressing the ClayImpressing the Clay
Roll out your clay into a slab Smooth out any marks on the
surface of the slab Place clay over the carved lino
block Use a roller or sandbag to press
the clay into the carved texture
Roll out your clay into a slab Smooth out any marks on the
surface of the slab Place clay over the carved lino
block Use a roller or sandbag to press
the clay into the carved texture
Making a BoxMaking a Box

The ProcessThe Process
• Roll out four (4) slabs of clay that is at least 4 x 6 inches
• Cut two 4.5 x 4.5 inch squares for the top and bottom
•Score the sides of each slab

The ProcessThe Process
•Cut the lid, add tabs to the lid to hold it in place
•Optional - Add a handle for the lid and feet on the bottom

ExamplesExamples

ExamplesExamples

ExamplesExamples

Project Grading CriteriaProject Grading Criteria
The students will be accessed using a grading rubric with four criteria:
1. Participation and Following Directions 2. Craftsmanship 3. Design 4. Glazing
The students will be accessed using a grading rubric with four criteria:
1. Participation and Following Directions 2. Craftsmanship 3. Design 4. Glazing