managing accounts in elanadmin.melbay.com/content/site161/elan ecommerce account... · web viewelan...
TRANSCRIPT

ELAN E-COMMERCE ACCOUNT MANUAL2015.3 10/1/2015
MANAGING ACCOUNTS IN ELAN
ACCESSING THE E-COMMERCE ACCOUNTS MENU
Currently the E-Commerce Accounts menu resides in the Book module, under Order Processing, in the E-Commerce Orders section. From the Books / Products screen, under Order Processing, select “E-Commerce Orders”. In the menu that appears, select “E-Commerce Accounts Menu”.
SETTING UP PARAMETERS FOR E-COMMERCE ACCOUNTS
Before creating or using E-Commerce Accounts, some things need to be set up for each website in Elan. More than one website may be configured for a single Elan database.
E-COMMERCE ACCOUNT PARAMETERS
This screen allows global configuration for the E-Commerce Accounts feature. Parameters here are the same for all websites using this instance of Elan.
LINK TO GET A GUID FOR AN E-COMMERCE ACCOUNT: This is a URL stub that is used by Elan when creating a Globally Unique Identifier (GUID) for new E-Commerce Accounts. The value of this field depends on the Elan web services hosting environment.
E-COMMERCE ACCOUNT WEBSITE PARAMETERS
More than one website can be created for any instance of Elan. For each website, a series of parameters and defaults need to be set in order for the sites to use Elan E-Commerce Accounts.
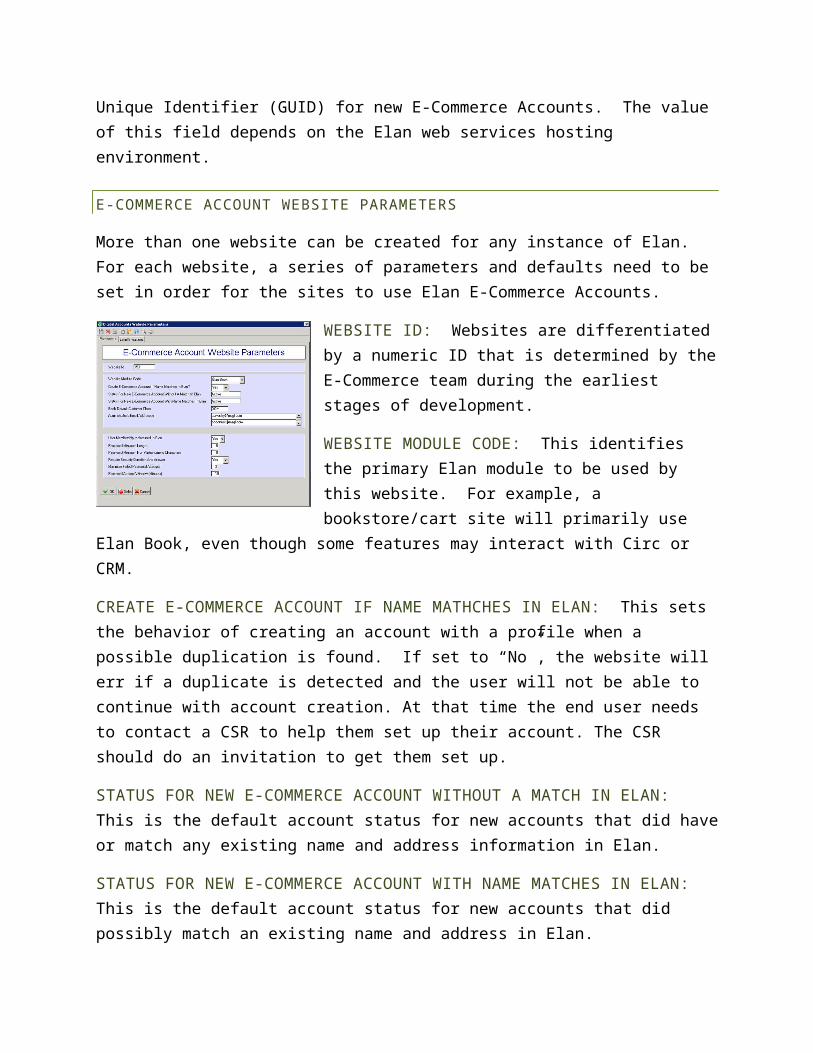
WEBSITE ID: Websites are differentiated by a numeric ID that is determined by the E-Commerce team during the earliest stages of development.
WEBSITE MODULE CODE: This identifies the primary Elan module to be used by this website. For example, a bookstore/cart site will primarily use Elan Book, even though some features may interact with Circ or CRM.
CREATE E-COMMERCE ACCOUNT IF NAME MATHCHES IN ELAN: This sets the behavior of creating an account with a profile when a possible duplication is found. If set to “No”, the website will err if a duplicate is detected and the user will not be able to continue with account creation. At that time the end user needs to contact a CSR to help them set up their account. The CSR should do an invitation to get them set up.
STATUS FOR NEW E-COMMERCE ACCOUNT WITHOUT A MATCH IN ELAN: This is the default account status for new accounts that did have or match any existing name and address information in Elan.
STATUS FOR NEW E-COMMERCE ACCOUNT WITH NAME MATCHES IN ELAN: This is the default account status for new accounts that did possibly match an existing name and address in Elan.
BOOK DEFAULT CUSTOMER CLASS: If a customer class is not initially specified during account creation this default will be used.
ADMINISTRATORS’ EMAIL ADDRESSES: Lists one or more email addresses for administrative notifications sent from Elan. Typically this would include someone from the E-Commerce development team as well as an Elan support rep.
USER MEMBERSHIP MAINTAINED IN ELAN: This will typically be set to “Yes”. If set to “No”, then the actual data for the E-Commerce Account will be stored elsewhere (e.g. a website database) and the information in Elan will only be used to link accounts to name/address information.
PASSWORD MINIMUM LENGTH: The minimum required number of characters for passwords. SET UP YOUR MINIMUM PASSWORD LENGTH TO 6.
Password Minimum Non Alphanumeric Characters: The minimum required number of “special” non-alphanumeric characters (e.g. “$”, “!”, “_”, etc.) in passwords. Can be zero.
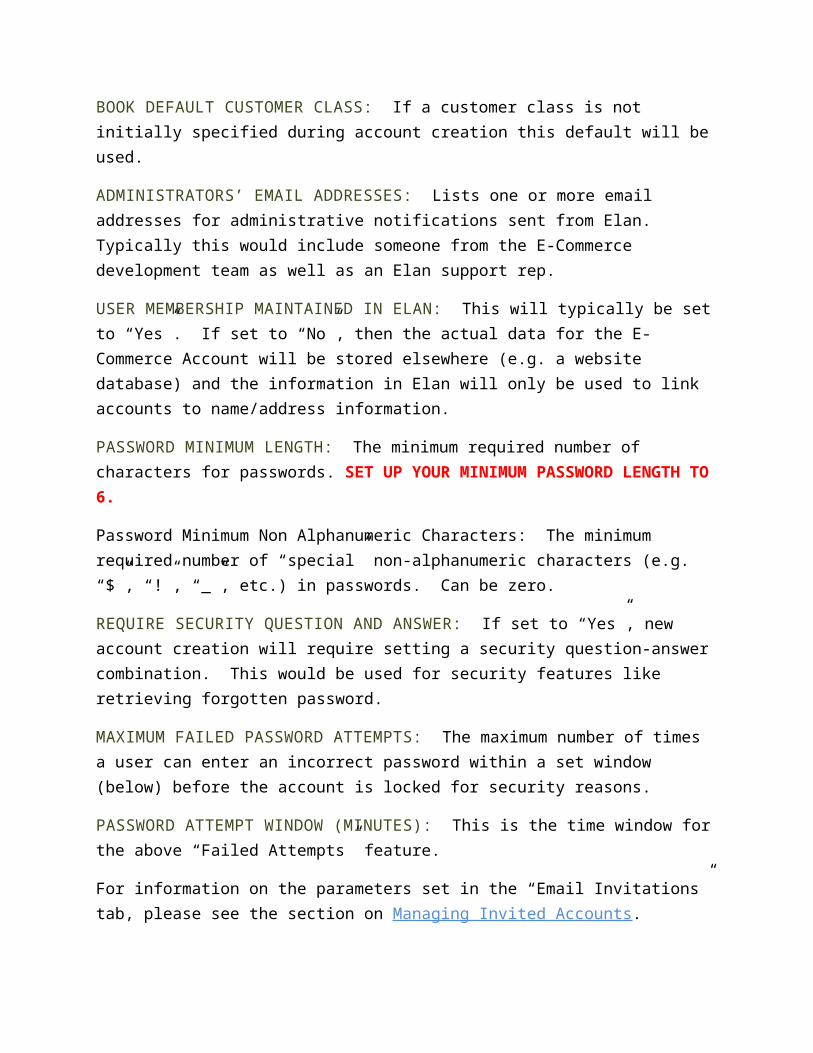
REQUIRE SECURITY QUESTION AND ANSWER: If set to “Yes”, new account creation will require setting a security question-answer combination. This would be used for security features like retrieving forgotten password.
MAXIMUM FAILED PASSWORD ATTEMPTS: The maximum number of times a user can enter an incorrect password within a set window (below) before the account is locked for security reasons.
PASSWORD ATTEMPT WINDOW (MINUTES): This is the time window for the above “Failed Attempts” feature.
For information on the parameters set in the “Email Invitations” tab, please see the section on Managing Invited Accounts.
The country code in SETUP must be set to allow web customers. This example shows the US setup to allow ecommerce accounts to be created under US

HOW TO HANDLE DUPLICATION
There are options on how to handle the duplication
If dupe checking is NO and status for create ecommerce account with name matches is Active, the new account will be created. If this NEW account is found to be a duplicate, the Customer Service person can point the ecommerce account to the correct nameid. The next time the user logs in, they will be connected to the correct account. The NEW account that is a duplicate will need to be merged or discarded.
If dupe checking is NO and status for create ecommerce account with name matches is Active/PendingProfile, a customer service person may review the account and connect it to the correct Elan id before they can make a purchase. User will not be able to login until a customer
service person puts the ecommerce account on ACTIVE. We don't recommend this way because when a user creates an account they will not be able to log in and they won't like being held up.
If dupe checking is YES it will do a dupe check. If a possible match is found by Elan, the user will be given a message by the website to contact customer service. In that case the Elan Customer Service person will:
Create their account for them, they create a username that is not changeable, a password that the user is expected to change, and a security response that the user is expected to change
OR
Create an invitation for them. The user receives the invitation by email and then comes back to the verification page where the create their own username/password/security question.
Recommended:
Dupe checking is YES and the customer service person creates an invitation for those customers who are duplicates.
LOOKING UP AN E-COMMERCE ACCOUNT
Select “E-Commerce Account Inquiry” from the E-Commerce Account Menu. This screen provides quick information for a give account. Enter the Account ID into the “Id” field, or press F3 to search. Use the “Name Maintenance” button to lookup the customer information associated with this account.

CREATING AN E-COMMERCE ACCOUNT FOR AN EXISTING CUSTOMER
Select “Create E-Commerce Account” from the E-Commerce Account Menu. You will first need to enter the Website ID and the customer’s Name ID. (A customer can have only one E-Commerce Account for each website.) The Business Module and Address information will be auto-populated based on these values. Press F3 in the website or name
fields to search.
Next you will enter details for the new account. The fields “Web User Id”, “Web User Email”, and “Password” are always required. The Web User Id is the login user name for the account. The Web User Email is the email address that will be used for account maintenance and lookup. This may not necessarily match any other email addresses associated with this Customer.
The Password Question and Password Answer (sometimes referred to as Security Question and Answer) may be required, depending on the setup for each website.
The Status should be set to “Active” so the user may begin logging in to the website.
EDITING AN E-COMMERCE ACCOUNT
Select “Administrator Account Maintenance” from the E-Commerce Account Menu. This will bring up a search screen to help you find the Account you want to edit. You can search on User Id (login username), the email address for the account (which may be different than any of the email addresses in Name or Address tables), the internal ID of the account, accounts created since a certain date, or the full name or last name of the customer attached to the account (if any).
When you select an account to edit you will be taken to the maintenance screen. You can use this screen to change account data like username and email. You can also change the status of the account (e.g. from Inactive to Active) or clear a lock if a user has been locked out from too many invalid password attempts.

You can change the customer attached to this account by changing the Name Id field (use F3 to search). You cannot attach a Name that already has another Account. Note: if you remove a Name Id, the Account will be locked.
For security reasons, passwords are not directly visible on this screen. In order to change a password, you must use the “Reset Password” feature. This feature creates a system-generated password that can be sent to one or more
recipients (e.g. the user and/or an administrator). Once the user receives this password, they should be urged to change it to something more personal and secure.

E-COMMERCE ACCOUNT REPORTS
To create a report on E-Commerce Accounts, select “E-Commerce Account Report” from the E-Commerce Account Menu and enter the criteria for which you want to report. Selection criteria include accounts created on-or-after a specified date, accounts created on-or-before a specified
date, or accounts with a specified status (e.g. Active, Pending, etc.). Then select the output method of your report (e.g. Screen).
MANAGING INVITED ACCOUNTS
In some cases you may want to invite existing customers to a website and have their E-Commerce Accounts already connected to their customer records (e.g. name, addresses, and orders). This can be done through the Invited Accounts feature. Invited E-Commerce Accounts are first created inside Elan already connect to a Customer Name ID. Then invitations are sent to the email addresses specified for these accounts asking the recipient to “activate” the account on the website. The invitation includes a link to the activation page that will allow them to complete their account setup. This page may also include verification features to ensure that the person creating an account is the actual customer invited.
SETTING UP PARAMETERS FOR EMAIL INVITATIONS
To use Invited Accounts, some parameters must be set up in the E-Commerce Account Website Parameters, on the Invitations tab.
E-COMMERCE ACCOUNT ACTIVATION LINK: This is the website page that will handle activation of an invited account. The invitation email will include a link to this page with a unique key for the invitation.
EMAIL SUBJECT: This is the subject line for the invitation email sent to the customer.

EMAIL BODY: This is the text of the email invitation. To include the link to the activate page, enter “LINK.URL” where you would want this to be displayed.
CREATING AN INDIVIDUAL INVITED E-COMMERCE ACCOUNT
NOTE: To create an invitaion, the account must have a PHONE NUMBER and an EMAIL ADDRESS. To create an Invited Account for a single customer, select “Create Invited E-Commerce Account for A Customer” from the E-Commerce Account Menu. Use this option if you want to create an account for a user, but do not want the email to be automatically generated and sent from Elan.
Enter the ID for the Website for the new account (press F3 to search). Remember, each customer can have only one E-Commerce Account per website. Then enter the Name ID for the customer (or press F3 to search). The name, address, and email list will auto-populate. You must select one of the emails to be used for the E-Commerce Account and the invitation message.
Once you click “OK” (or press F2) the E-Commerce account is created and the selected email address and the invitation text for the website, including the URL, are copied to your clipboard. This information can then be pasted into an email message, modified as desired, and sent to the customer.
Invited accounts created here can also be selected for system-generated emails in the E-Commerce Account Invitations screen (see below) if they are still in the “invited” status.

CREATE E-COMMERCE ACCOUNTS WITH AN INVITED STATUS
Website ID: Id of the website for which accounts should be created.
Select List Name: Optional. If entered, the list should contain a list of name Ids for customers for which accounts should be created. If the list has less than 300 name Ids, the details of the names are displayed in the grid. If 300 or more name Ids, no details are displayed and names cannot be added.
Note you can also put cursor n NameIDs field (first one) type in nameid and it will list for you
Any errors encountered when name Ids in a select list are processed are written to a csv file in the client’s Repository. E.g. \\turud\Repository or W:\DEVDATA for our DEVDATA data account.

ERROR CSV FILE
CREATE E-COMMERCE ACCOUNT INVITATION FOR A CUSTOMER
This is for a one-off. It copies the text of the message to your clipboard, you can paste in your email program and send to the end-user.

DOWNLOAD ACCOUNT INVITATIONS
This generates a CSV that you will use in your email blast client to email the invitations in bulk. This is recommended for a large number of invitations, so you can keep track of OPENS and BOUNCES through your email blast program. If a person verifies their account, it wil not be included on this list, so you can use this to re-email accounts who do not respond.
Website ID: When a create date range is entered, only accounts with this website Id will be selected. When a select list is entered, any account with for a website other than the one specified will be rejected with an error message.
Select List Name: Optional. If entered, the list should contain a list of e-commerce account Ids.
Create date range: Optional. If entered, e-commerce accounts are selected with a create date within the entered range, with a website Id matching the entered website id and with a status of Invited.
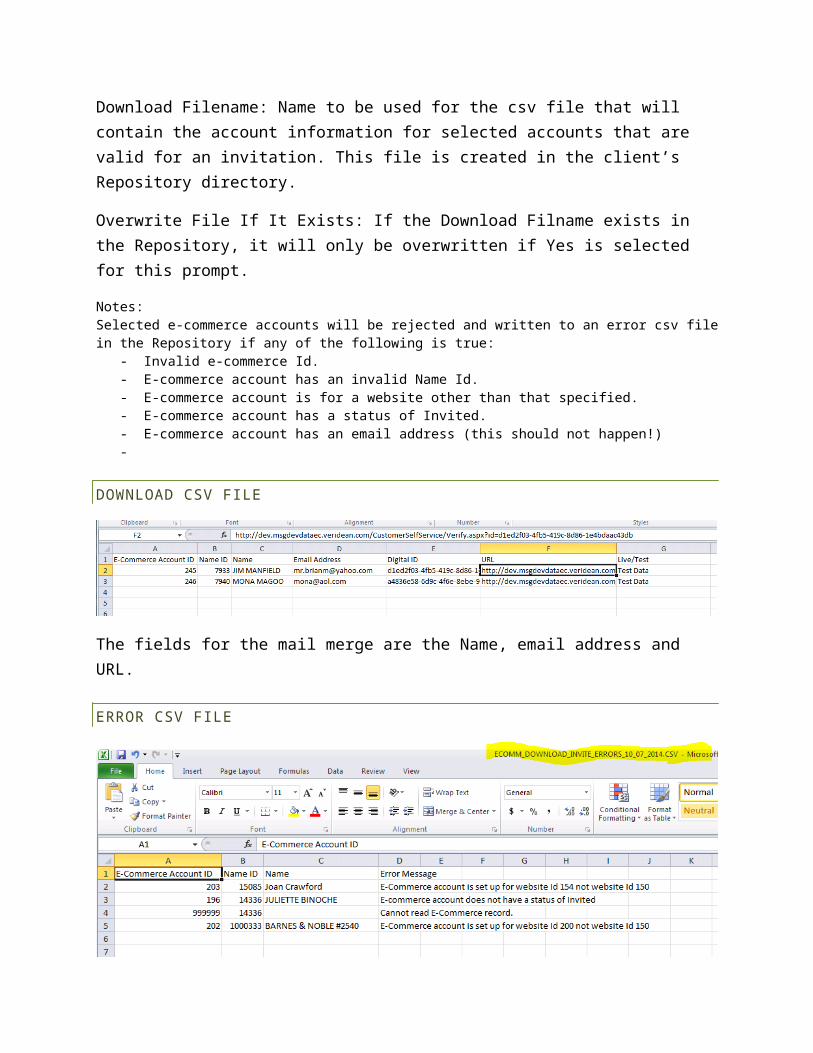
Download Filename: Name to be used for the csv file that will contain the account information for selected accounts that are valid for an invitation. This file is created in the client’s Repository directory.
Overwrite File If It Exists: If the Download Filname exists in the Repository, it will only be overwritten if Yes is selected for this prompt.

Notes:Selected e-commerce accounts will be rejected and written to an error csv file in the Repository if any of the following is true:
- Invalid e-commerce Id.- E-commerce account has an invalid Name Id.- E-commerce account is for a website other than that specified.- E-commerce account has a status of Invited.- E-commerce account has an email address (this should not happen!)-
DOWNLOAD CSV FILE
The fields for the mail merge are the Name, email address and URL.
ERROR CSV FILE

This screen will email the invitations through Elan. It is not recommended because you will have no method(s) to track BOUNCES and UNOPENS as you would with an email blast client.
Website ID: When a create date range is entered, only accounts with this website Id will be selected. When a select list is entered, any account for a website other than the one specified will be rejected with an error message.
Select List Name: Optional. If entered, the list should contain a list of e-commerce account Ids.
Create date range: Optional. If entered, e-commerce accounts are selected with a create date within the entered range, with a website Id matching the entered website id and with a status of Invited.
Notes:Selected e-commerce accounts will be rejected and written to an error csv file in the Repository if any of the following is true:
- Invalid e-commerce Id.- E-commerce account has an invalid Name Id.- E-commerce account is for a website other than that specified.- E-commerce account has a status of Invited.- E-commerce account has an email address (this should not happen!)
ERROR CSV FILE
CREATING ACCOUNTS ONLINE
CREATE AN ACCOUNT WITH A PROFILE
Using this form, new users will be asked for profile information, like name and address, when creating an E-Commerce Account. This form will create Name and Address records in Elan attached to the Account. If Elan finds a potential duplicate with an existing customer, the new information will be flagged for review and de-duplication. Note: If duplicate information is found, it will not be immediately available to the web user. Only after the possible duplication is resolve will any existing information (name, addresses, orders, etc.) be linked to the new account.

SHOPPING CART ADMINISTRATOR
TRANSACTIONS
The cart keeps a log of some transactional information. This is mostly used when there are discrepancies between the order in Elan and the order on the website. It is also used for reporting on how many transacitons per a product ID or by category.
To view a range, enter a start date and end date.
Leave these blank to view all transactions.
You can also list by the:
• TransactionID (confirm code)
• Customer Email
• Customer name (This is the BILLING name)
• ISBN of the product
All these fields are optional. Transactions list most recent backward.
Transactions list as orders with individual line items, so you can see which books were purchased. If you only want to see orders, click the “Show Only Orders” box
If you want to dump the results to an excel spreadsheet, click the “Save to Excel”
If you want to include the detailed user information, click the "Include User Info In Excel" checkbox
Top section, use this to search by a Browse Category ID (classificationSId)
Bottom section. use this to search by the orderID (confirm code) customer email or product id

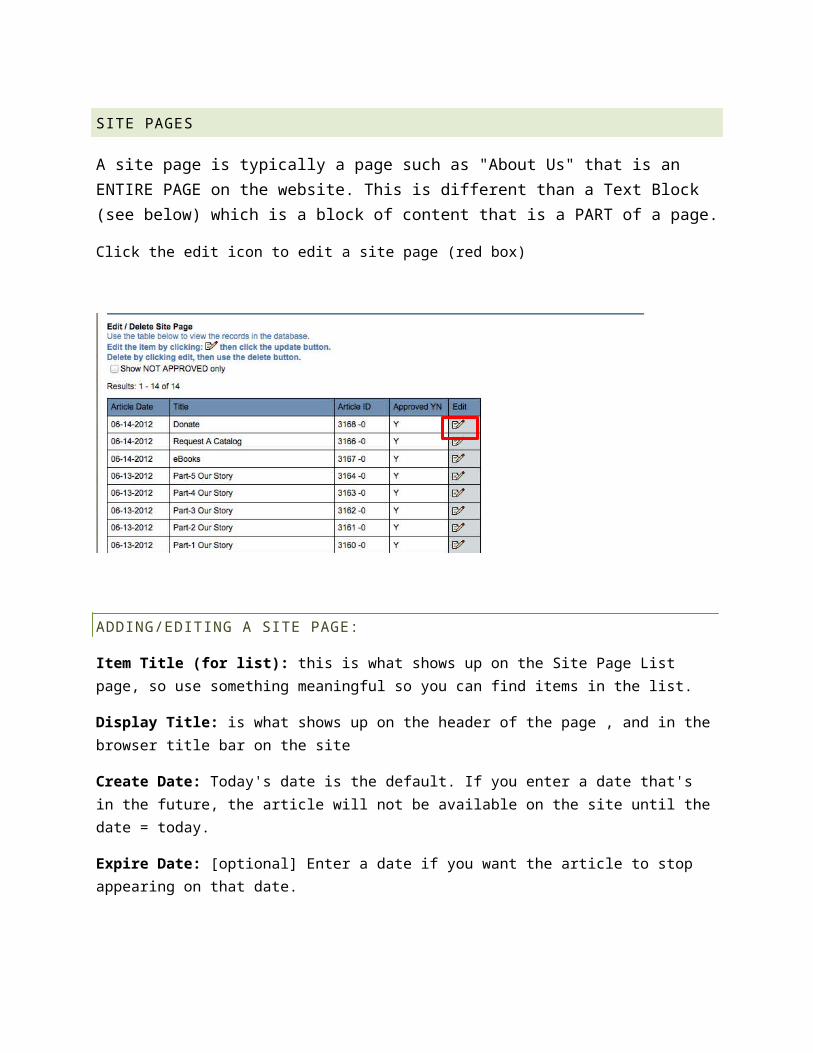
SITE PAGES
A site page is typically a page such as "About Us" that is an ENTIRE PAGE on the website. This is different than a Text Block (see below) which is a block of content that is a PART of a page.
Click the edit icon to edit a site page (red box)
ADDING/EDITING A SITE PAGE:
Item Title (for list): this is what shows up on the Site Page List page, so use something meaningful so you can find items in the list.
Display Title: is what shows up on the header of the page , and in the browser title bar on the site
Create Date: Today's date is the default. If you enter a date that's in the future, the article will not be available on the site until the date = today.
Expire Date: [optional] Enter a date if you want the article to stop appearing on that date.
To see the url for the page, click on the ID in the upper left (underlined in red). It will pop a new window with the page displayed on the site.

WARNING MESSAGE:
If your article is TEXT (in the wysiwyg editor) you may see an orange warning message saying your html is not well-formed. If you receive this message your article will still draw on the site, but may have problems in browsers such as FireFox and Safari. It's best to try to clean up the bad spots if you can. Most of the time its things such as:
<p><b>this is bolding</p></b>
Note that the bolding tag is closed outside the paragraph tag. It should look like this:
<p><b>this is bolding</b></p> so the tags "nest" properly.

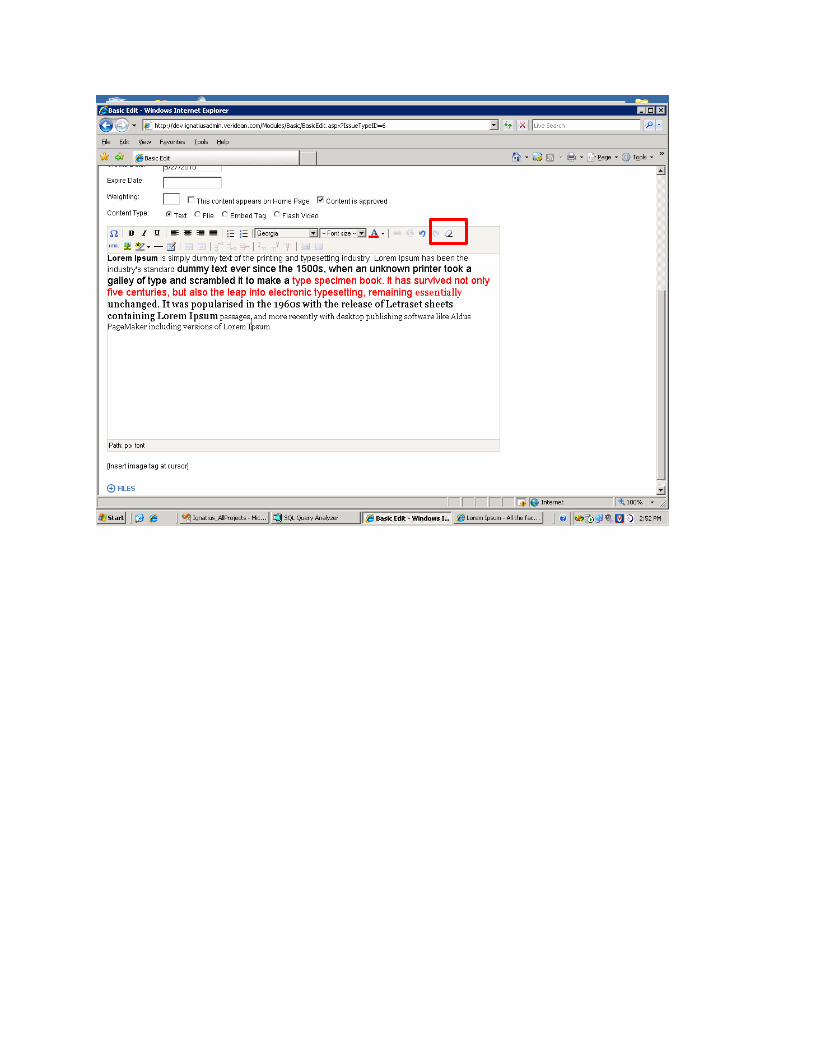
WYSIWYG EDITOR – NOTES
MOST IMPORTANT:
At any time you can erase all formatting by using the eraser button (red) at the far right of the first row.
Before:
Hightlight all text you want to remove formatting, and click the erase button

After (all bolding, colors, font sizes removed)
The eraser does NOT remove links, only styles.

WYSIWYG EDITOR - BUTTONS L TO R – TOP ROW
Ώ symbol: this inserts a special character, you select from the list
B, I, U buttons: bolds, italics, underlines any highlighted text

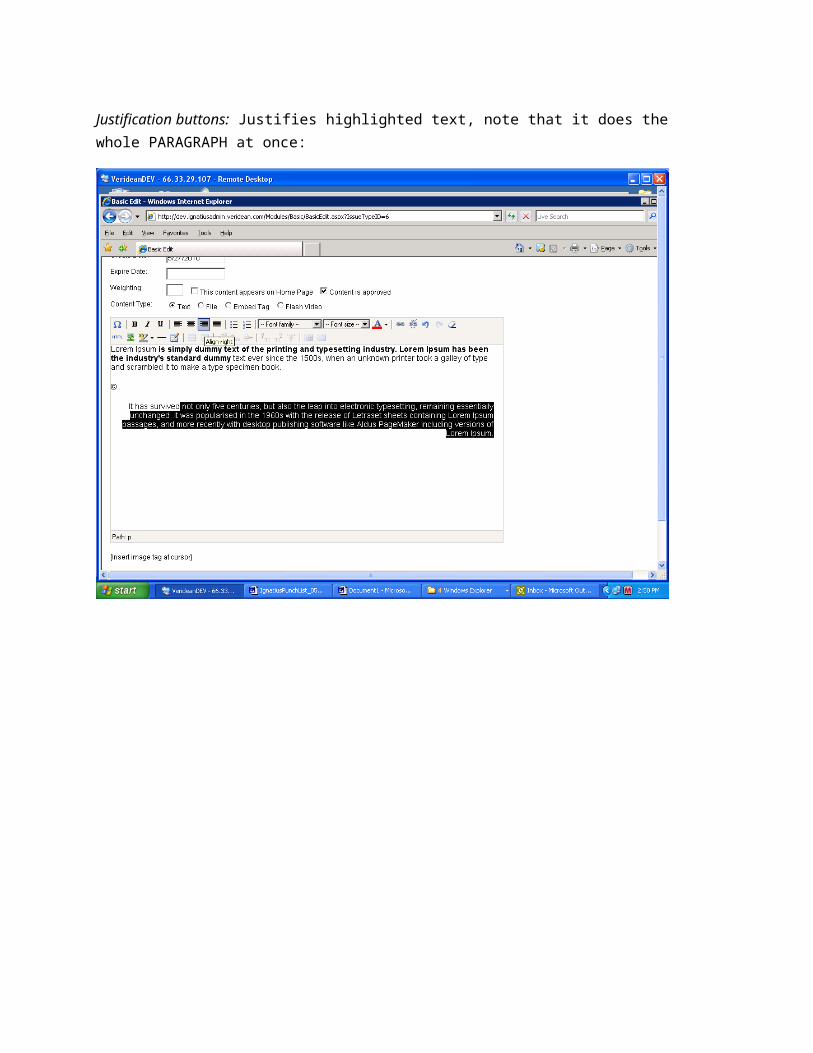
Justification buttons: Justifies highlighted text, note that it does the whole PARAGRAPH at once:
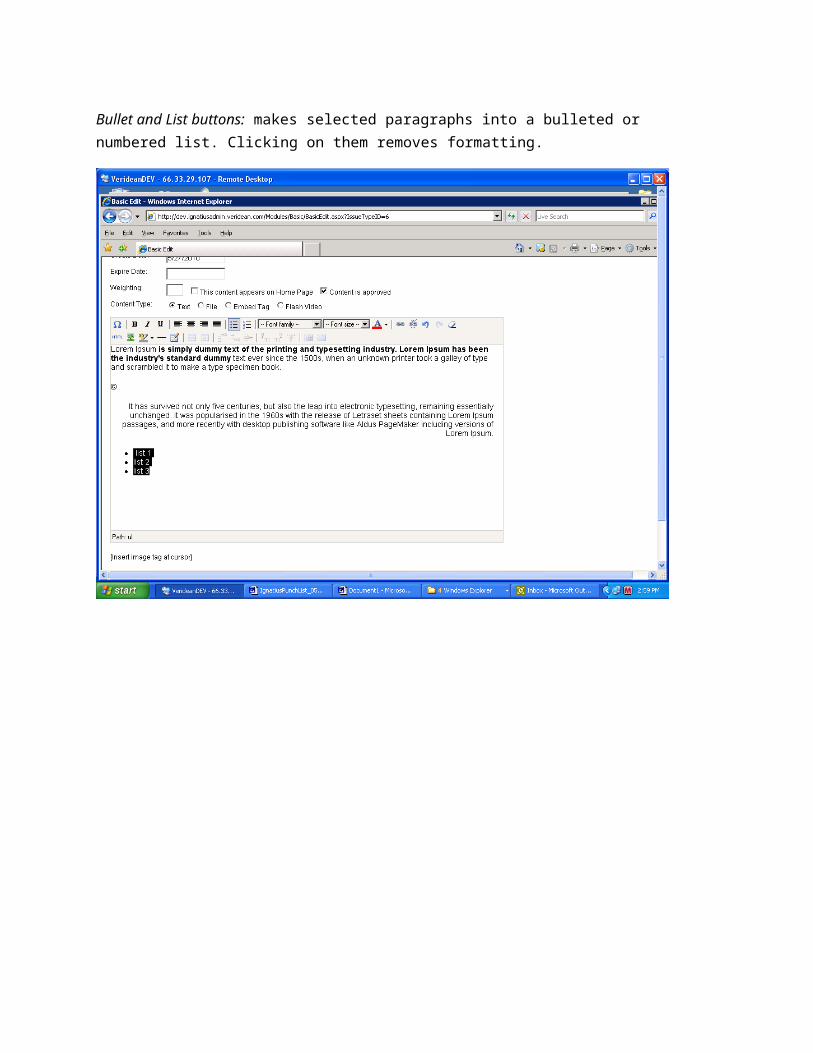
Bullet and List buttons: makes selected paragraphs into a bulleted or numbered list. Clicking on them removes formatting.
Font Family: Changes the typeface. Note if the typeface is not loaded on your computer it will most likely not show up. The best ones to stick with are Times for serif and Arial for sans-serif.

Font Size Dropdown: Alters the size by points, note that points do not equal pixels, so if you alter the size it may look different between Mac and Windows.

Text Color: Drop down the arrow next to the A and select from the palette

Link and Unlink buttons:
These are how you add hyperlinks to text. The linker is also used to make a link and attach a file to it, such as a pdf.
Highlight text you want to link (green), click the chain button (red)
You will get a dialog box. To link to a completely different site, specify the whole link, i.e. http://www.sitename.com
If you are going off-site, it is best to open the link in a new window, so your site stays open and users are not taken away. The google site will appear in a new window if this link is clicked.
If you are linking to another page on your site, use http://www.yoursite.com/yourpage/page.aspx and open in the SAME window, so the user simply navigates to another page on your site.
If you want link to a PDF, so when the user clicks the link, they get the PDF, enter my.pdf in the LINK URL and have the link open in the same window:
Click the insert button when done.
Now click the UPDATE or ADD NEW button at the top of the editor (red):
The system will read the text in the editor, and present you with an opportunity to upload into the links and images in the text.
For example, the my.pdf now shows up in the files area. The link to google does too, just in case you'd like to replace the link with a file (green)

To link your my.pdf placeholder to a pdf from your computer, click the browse button (red) and browse for the file. The file does not have to be a pdf, it can be a word doc, power point, excel or text document.

After browsing, click the UPDATE button again (red)
You'll notice that it changed the name of my.pdf to a number. This means that the file has been uploaded and cataloged on the server.


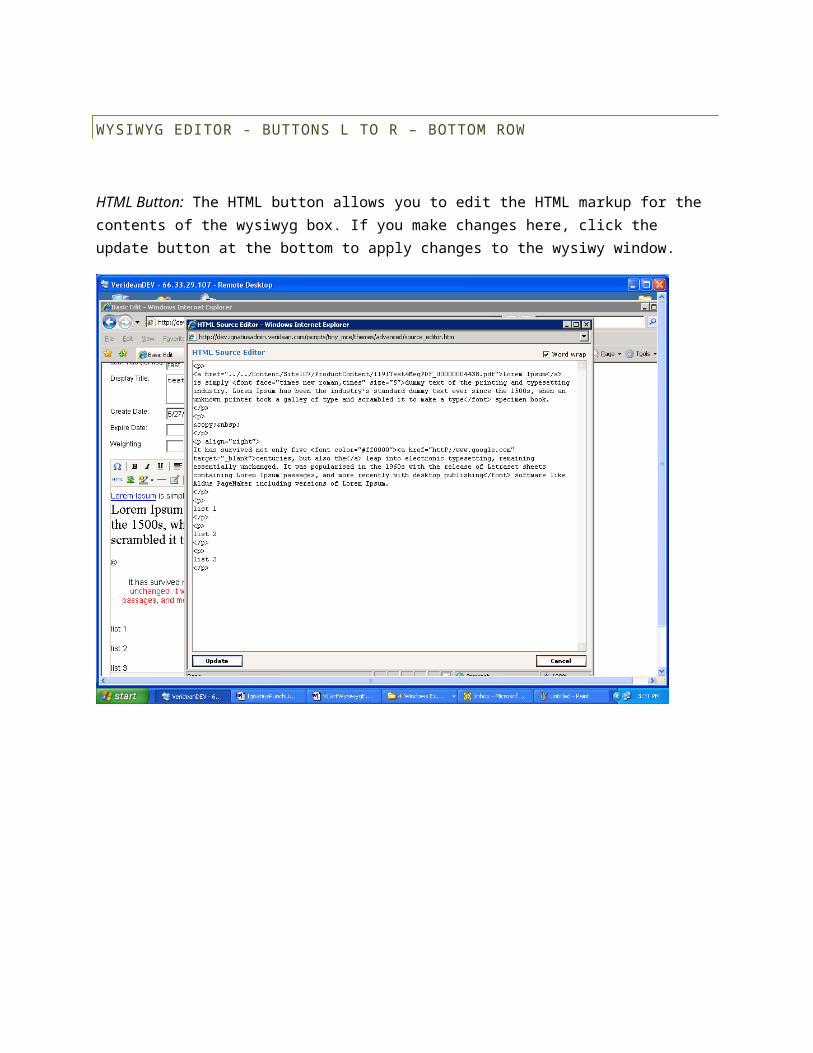
WYSIWYG EDITOR - BUTTONS L TO R – BOTTOM ROW
HTML Button: The HTML button allows you to edit the HTML markup for the contents of the wysiwyg box. If you make changes here, click the update button at the bottom to apply changes to the wysiwy window.
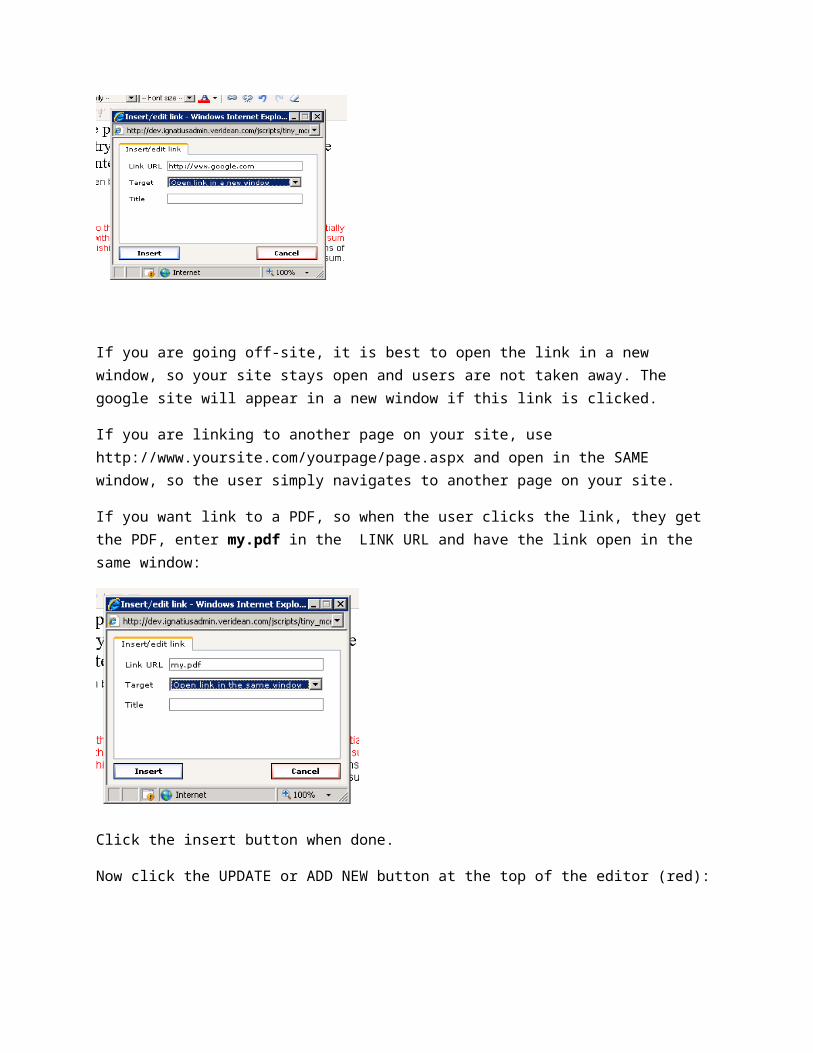
Image Button: This is how you insert or edit an image.
To insert an image, click the button at the position you want the image inserted. Enter my.jpg in the ImageUrl, click the insert button. Then click the UPDATE button at the top (red).

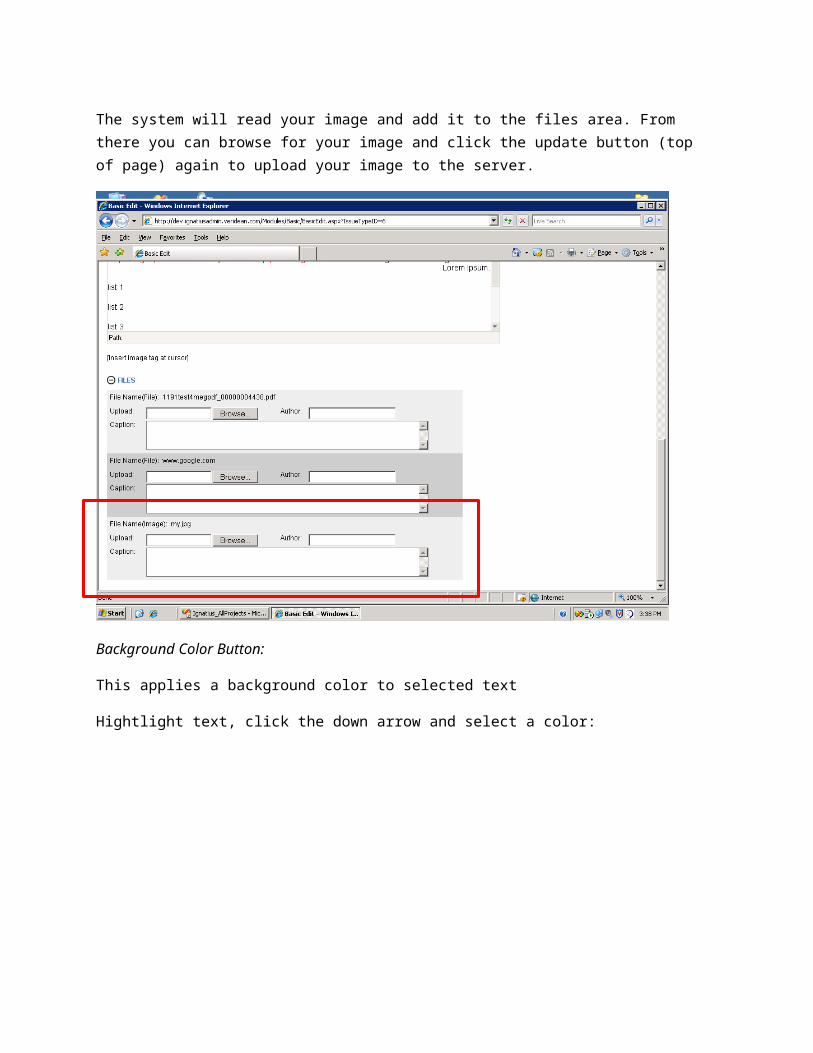
The system will read your image and add it to the files area. From there you can browse for your image and click the update button (top of page) again to upload your image to the server.
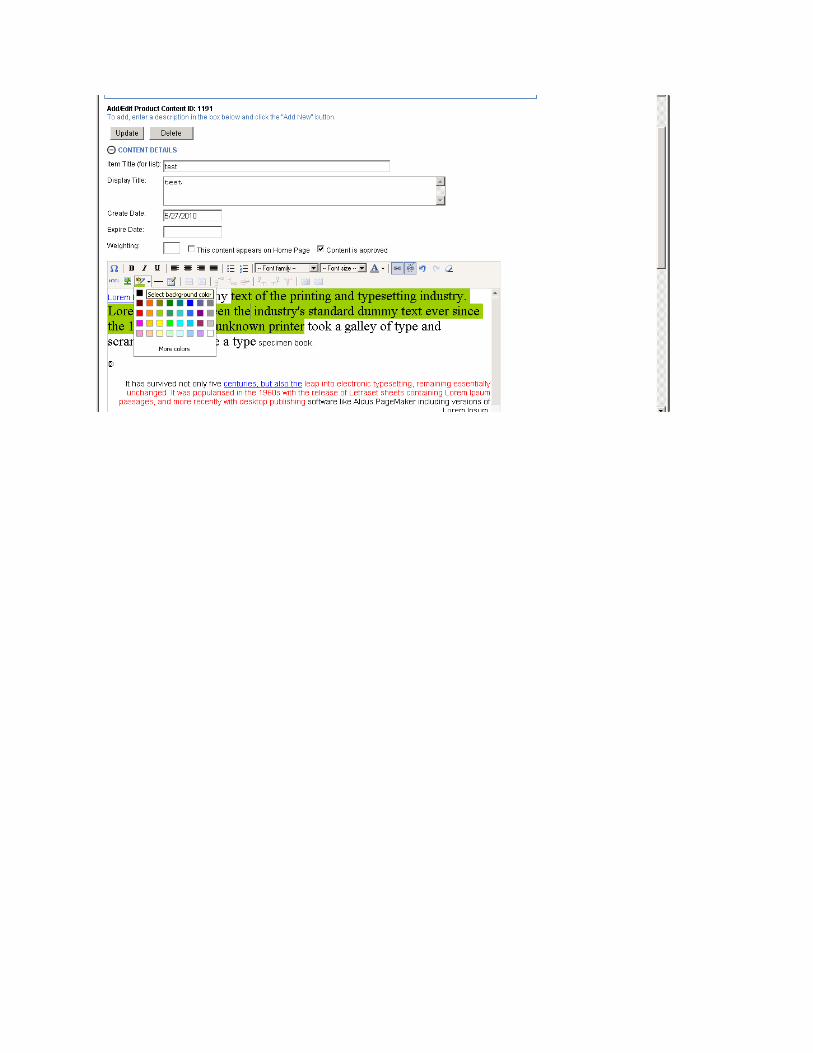
Background Color Button:
This applies a background color to selected text
Hightlight text, click the down arrow and select a color:


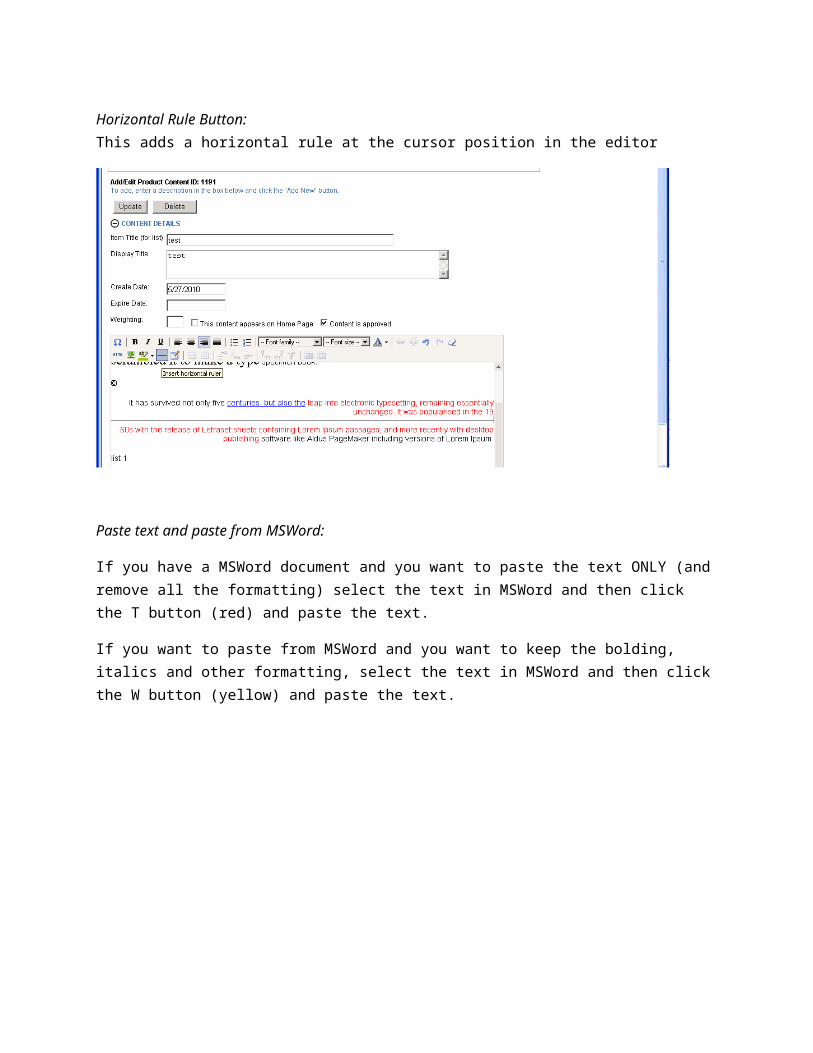
Horizontal Rule Button: This adds a horizontal rule at the cursor position in the editor
Paste text and paste from MSWord:
If you have a MSWord document and you want to paste the text ONLY (and remove all the formatting) select the text in MSWord and then click the T button (red) and paste the text.
If you want to paste from MSWord and you want to keep the bolding, italics and other formatting, select the text in MSWord and then click the W button (yellow) and paste the text.

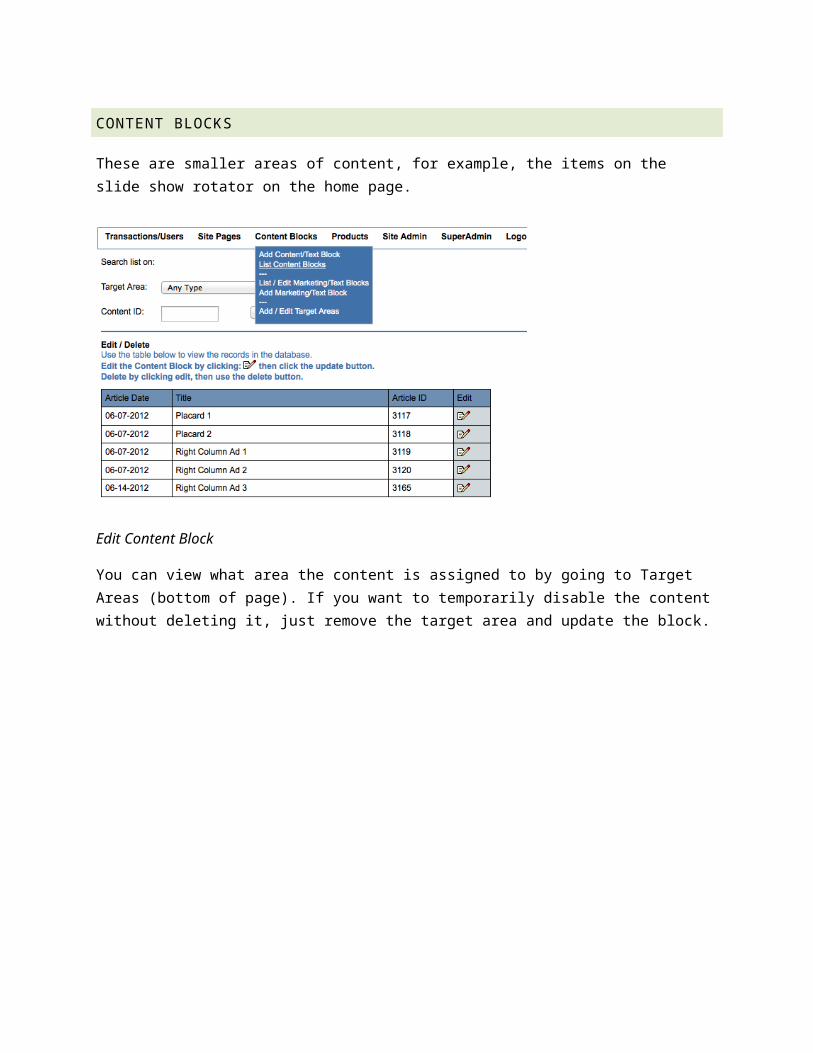
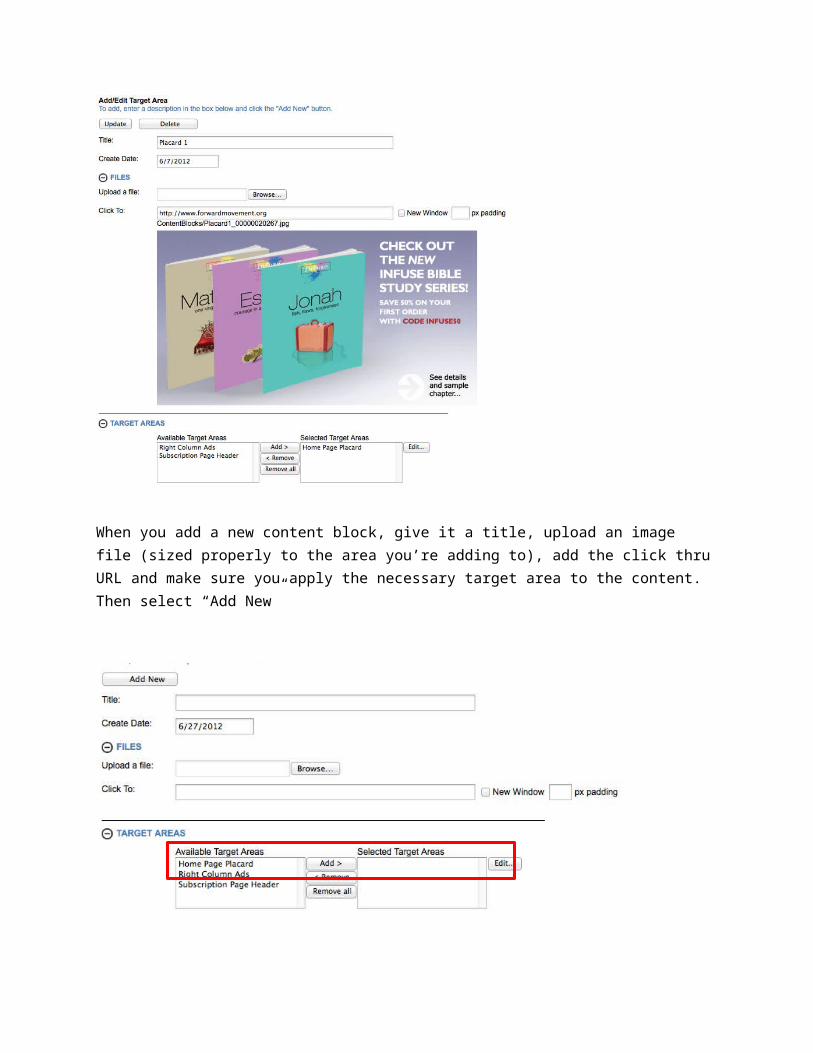
CONTENT BLOCKS
These are smaller areas of content, for example, the items on the slide show rotator on the home page.
Edit Content Block
You can view what area the content is assigned to by going to Target Areas (bottom of page). If you want to temporarily disable the content without deleting it, just remove the target area and update the block.

When you add a new content block, give it a title, upload an image file (sized properly to the area you’re adding to), add the click thru URL and make sure you apply the necessary target area to the content. Then select “Add New”
PRODUCTS MENU
LOOKUP/EDIT PRODUCTS:
Refresh individual products from Elan:
If you put a new book in Elan/Book, it will not be available on the site until the nightly sync.
But, you can use the CMS and pull a new product from Elan/Book down to the webstore by using the top portion of the Lookup/Edit Products page. You can enter the Elan/BookID or the ISBN and click Update. The system will display a message if it cannot find the product in Elan/Book. If that is the case, the product may not be selected “web saleable” in Elan.
To lookup a product, use the lower section. You will get a list of products that match your criteria, you can search by ISBN, title (matches on any word), or the Elan/Book book master ID.
To view the data on an item, click the view button.
Editing a Product:
After you View the product, you are taken to the product detail page that you can edit.
You can delete and upload a new image (red):
Attach Content or Upload a sample:
If you have a piece of content, like a video, and you want to attach it to this product, use the attach content section.
Click EDIT to search for a piece of content to attach. (green)
It will pop a window that displays a list of all the available content to attach.
Find the one you want and then click the LINK checkbox (red), then click "ADD TO CONTENT" (blue) then close the window
Finally click the update button (orange) to attach the content.

If you have sample files such as PDFs that will be displayed below the product image on the product page (Read Sample button), you can upload them in the sample section.
Enter the text you want to be displayed as the link text in the box (red) and then add an ordering for the order you want the list to draw(blue) then browse for the file to upload (green) the click the upload button (orange)
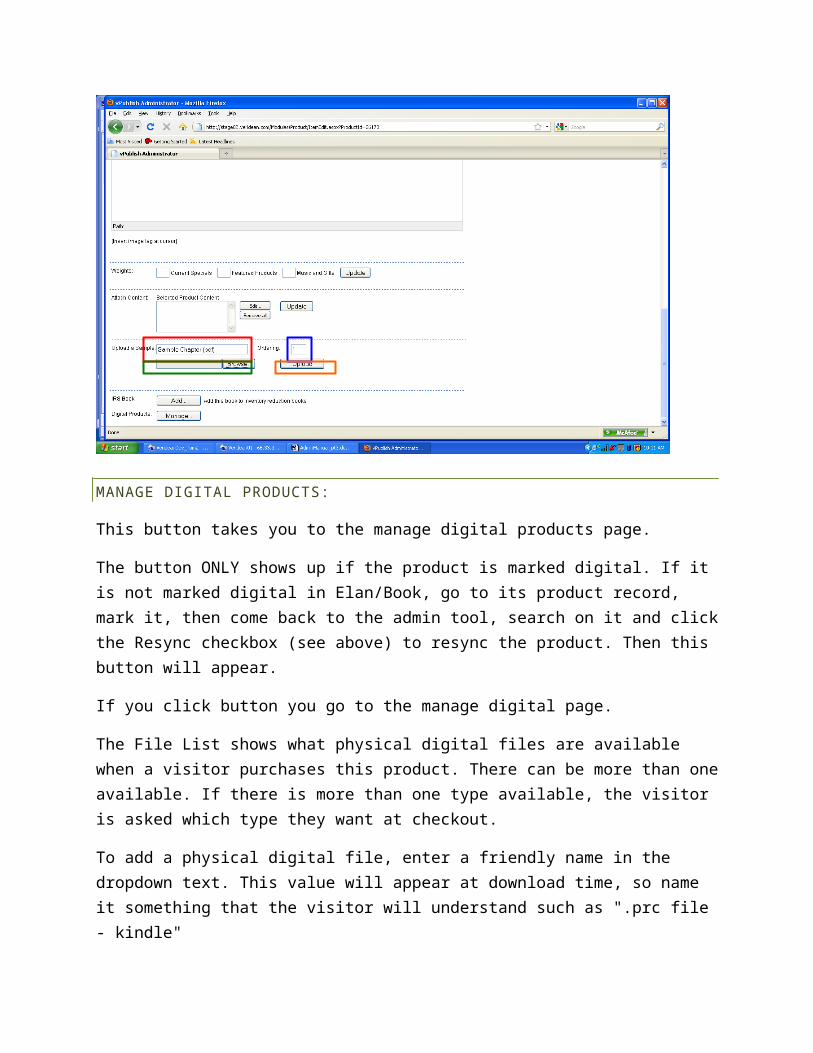
MANAGE DIGITAL PRODUCTS:
This button takes you to the manage digital products page.
The button ONLY shows up if the product is marked digital. If it is not marked digital in Elan/Book, go to its product record, mark it, then come back to the admin tool, search on it and click the Resync checkbox (see above) to resync the product. Then this button will appear.
If you click button you go to the manage digital page.
The File List shows what physical digital files are available when a visitor purchases this product. There can be more than one available. If there is more than one type available, the visitor is asked which type they want at checkout.
To add a physical digital file, enter a friendly name in the dropdown text. This value will appear at download time, so name it something that the visitor will understand such as ".prc file - kindle"
Next to dropdown text is the file type. Select the type that corresponds with the file.
Expire Window: This is the amount of time that the visitor will be able to download the file from the time of purchase
Downloads Allowed. This is the number of times the visitor will be able to successfully download the product.
Fill in those fields and click the browse button to browse for your file.
Click the UPLOAD button to load the file.
Note that if your file is over 100MB you cannot upload it through the browser.
In this case, do not browse for a file, click the "Use Placeholder" checkbox and click the "upload" button.
A file name will be created for this file. It will be flagged on the list in RED. Copy that red text out, and rename your file this same name.
Then FTP the file to the directory where the digital files are stored. This location will be given to you by the administrator.
Once you FTP your file, come back to this page the flag will disappear.

SYNC ALL PRODUCTS:
Products refresh every night. If you make changes and you want them to go out to the site right away you can use this screen to force updates.
Refresh by file:
[not commonly used] If you have a text file of book ids you can upload it here and then run it and all the books listed in the text file will update. The text file requires one Elan/Book id per line
Refresh by Date:
If you want to refresh by the last date the Elan/Book record was edited, you can enter a date here and click run and it will go back to that date. Leave this box empty to resync all products (depending on number of products, this can take up to an hour).
Refresh Browse Categories:
This goes to Elan/Book and resyncs all the browse category data.
Clear Country/Region Cache:
This goes to Elan/Book and pulls down any changes made to the country table in Elan to the website.
Is Refresh Running?
This page will refresh itself and tell you run any of these tasks. It will tell if the task is still running or has ended. If you navigate away from this page and come back you can click the Is Refresh Running? button to see if the task is still running.
Sync Logs
The system keeps logs so if there is a problem fetching a book you can view the logs to try to determine where the problem is.

ADD OR LIST RELATED PRODUCT DESCRIPTIONS :
This is the area where you can upload flash files (flv's) to display with a product or add additional text to a product, or reference an embed tag like a YouTube video.
You CREATE the item, such as the flash item, the you APPLY it to the product on the product edit page (see above on "Attach Content" on the product editor)
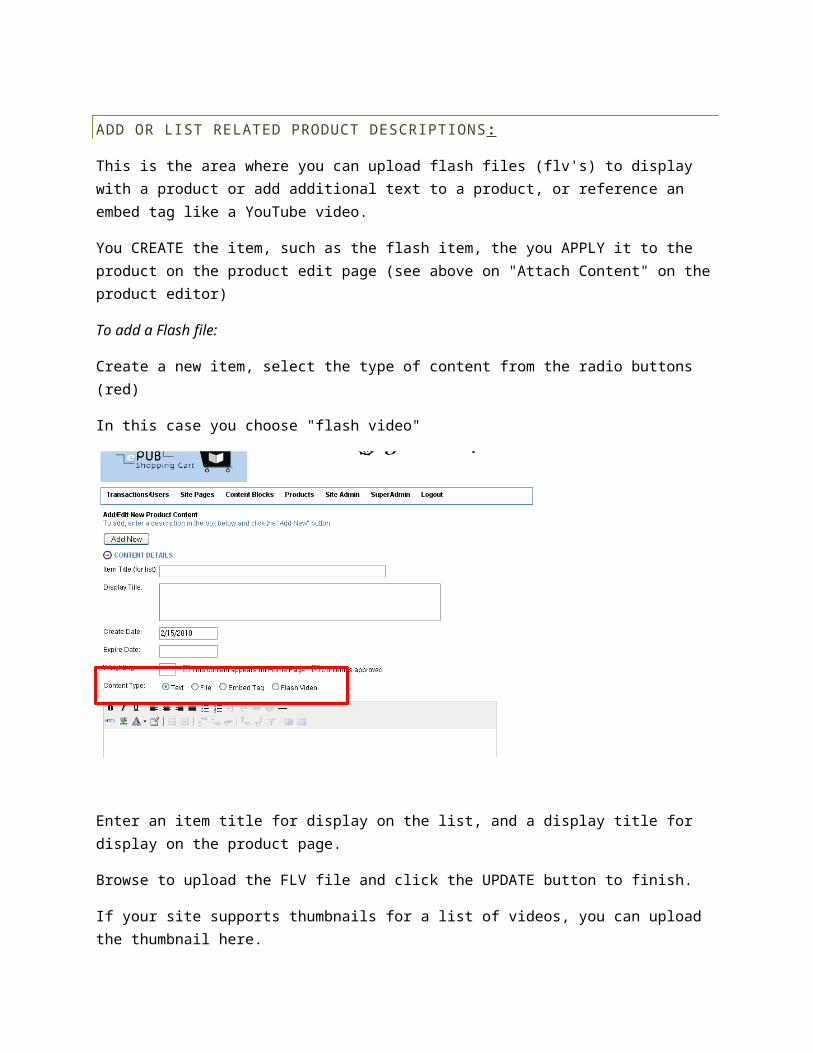
To add a Flash file:
Create a new item, select the type of content from the radio buttons (red)
In this case you choose "flash video"
Enter an item title for display on the list, and a display title for display on the product page.
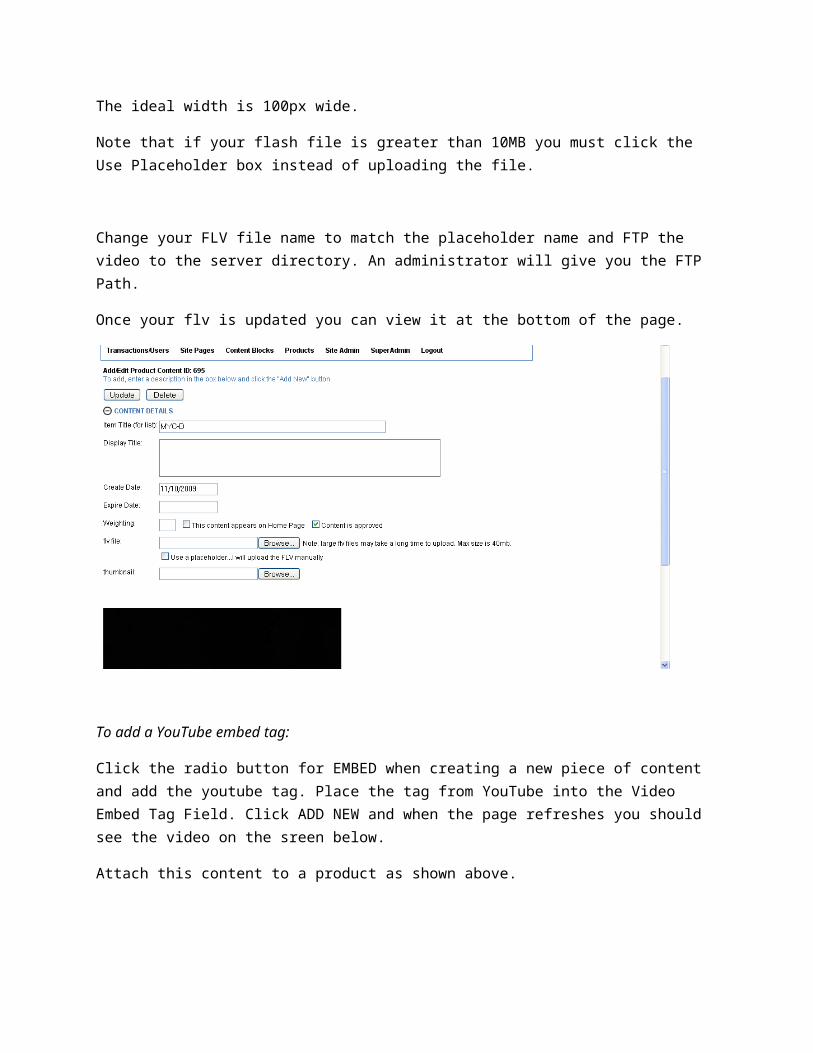
Browse to upload the FLV file and click the UPDATE button to finish.
If your site supports thumbnails for a list of videos, you can upload the thumbnail here.
The ideal width is 100px wide.
Note that if your flash file is greater than 10MB you must click the Use Placeholder box instead of uploading the file.

Change your FLV file name to match the placeholder name and FTP the video to the server directory. An administrator will give you the FTP Path.
Once your flv is updated you can view it at the bottom of the page.
To add a YouTube embed tag:
Click the radio button for EMBED when creating a new piece of content and add the youtube tag. Place the tag from YouTube into the Video Embed Tag Field. Click ADD NEW and when the page refreshes you should see the video on the sreen below.
Attach this content to a product as shown above.

CHECK LINK STATUS OF DIGITAL PRODUCTS.
To make sure all the digital files are linked to physical files directly, you can run this utitlity.
It generates 4 sections:
1) Products flagged in Elan/Book as digital products but the cart has no record of a physical file. Remedy: find the product using Product -> Lookup Edit Product and upload a physical file.
2) Products the cart has a record of the physical product, but the physical file does not exist.
Remedy: find the product using Product -> Lookup Edit Product and delete the physical files, then re-add them.
3) Products the cart has a record of a physical product, but the product is not flagged as digital in Elan/Book. Either: Find the product using Product -> Lookup Edit Product and remove the physical product, or flag the product in Elan/Book as digital and resync the product.
4) Digital products that are OK.

CHECK LINK STATUS OF PRODUCT IMAGES
Run this utility to see which products in the cart do not have an image.
SEARCH/EDIT DIGITAL KEYS
If you have a vistor that did not download their product before the allotted time, you can extend their key.
Search on either the key, the bookid or the transactionid.
Click on the edit link to adjust the download window of time.
To add to the number of days to allow download from the DateCreated, change the download window.
To add to the number of successful downloads allowed, change the downloads allowed per key.
Click UPDATE when done (red)
ADD A DIGITAL KEY FOR A VISITOR
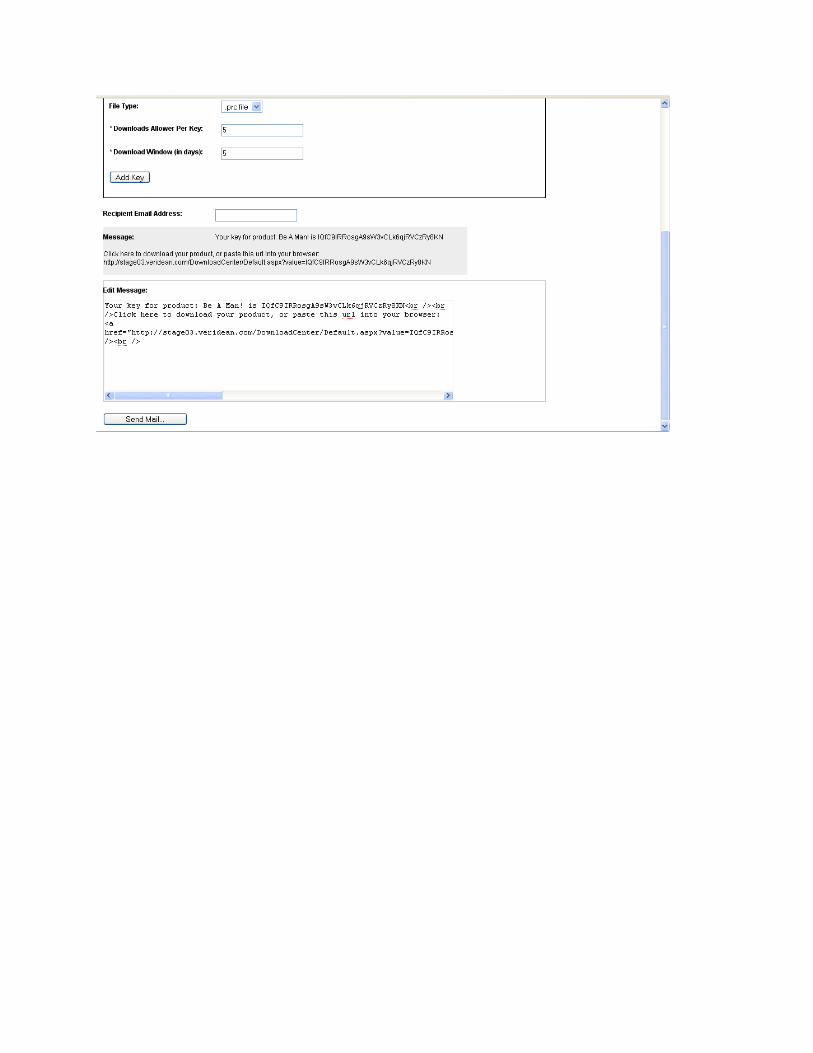
If you want to GIVE AWAY a digital product to a visitor, you can add one here.
Enter the product code and click go. You will see the product stats.
Enter the downloads allowed per key and the download window, and select the file type.
Click add key.
It will generate a key and present you with an email to send to the visitor. Enter their email address. If you want to ADD to the message, make your edits in EditMessage and click send mail.
The key and download link will be sent to the visitor.

SITE ADMIN MENU
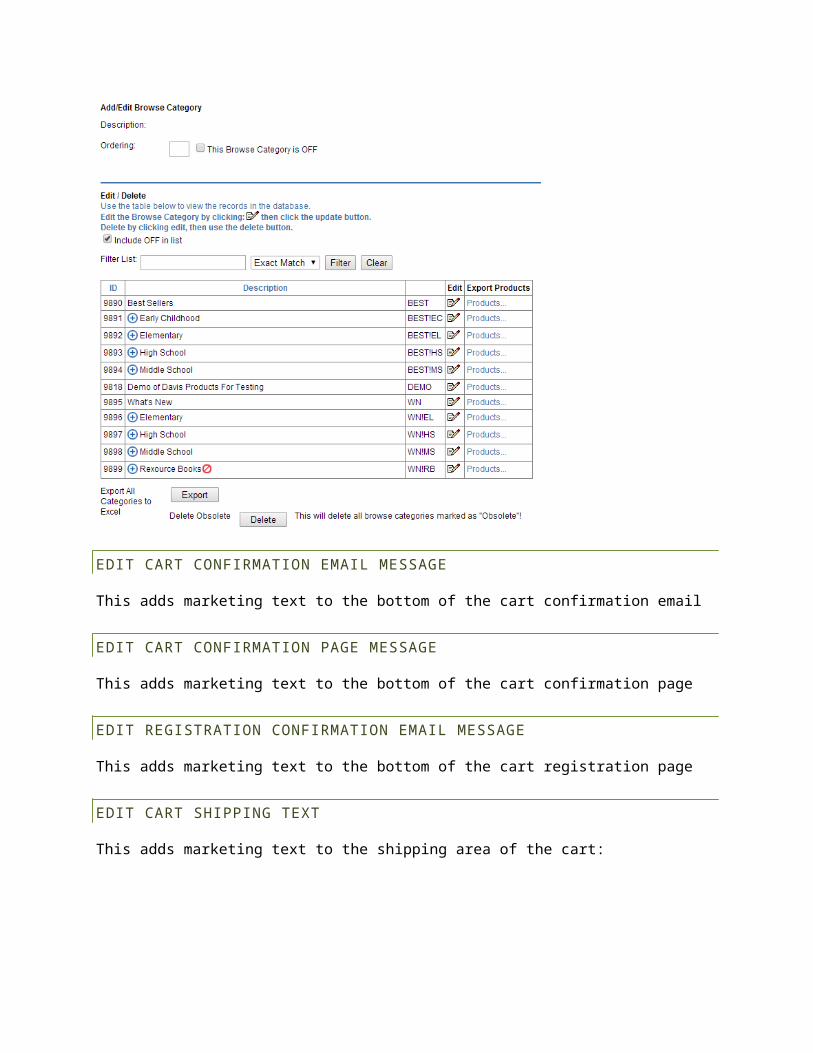
ADD/EDIT BROWSE CATEGORIES
To view the browse categores that are brought over from Elan/Book. If you would like your subcategories to appear in a certain order, you can order them on this screen. This works on subcategories only.
This page also has an ‘Export All Categories to Excel’ – it’s a handy tool.
ADD/EDIT PRODUCT TYPES
This is where you can add and edit your Product Types.
Categories are refreshed from Elan on the nightly task. If a category is removed from Elan, it will become "shut off" in the list. You should delete it once it has been shut off. A red dot indicates that the category has been shut off.
The edit screen for all categorizaiton looks the same. The blue plus sign indicates this is a child category of the one above it

EDIT CART CONFIRMATION EMAIL MESSAGE
This adds marketing text to the bottom of the cart confirmation email
EDIT CART CONFIRMATION PAGE MESSAGE
This adds marketing text to the bottom of the cart confirmation page
EDIT REGISTRATION CONFIRMATION EMAIL MESSAGE
This adds marketing text to the bottom of the cart registration page
EDIT CART SHIPPING TEXT
This adds marketing text to the shipping area of the cart:
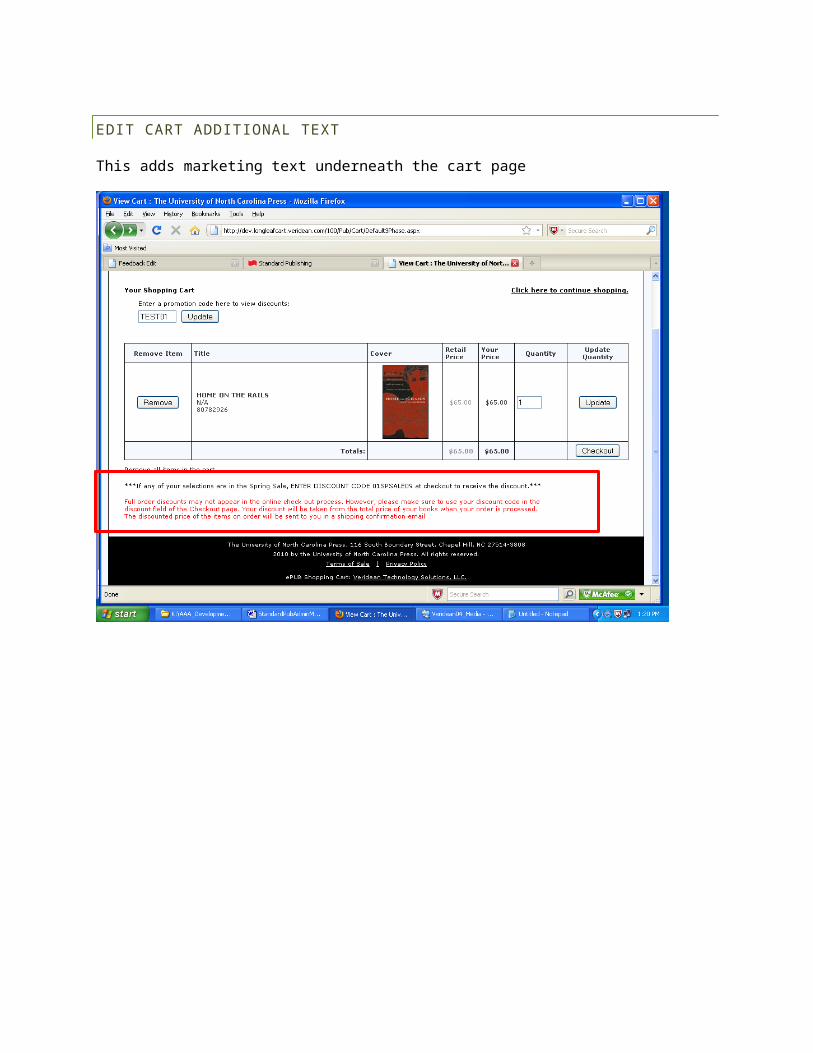
EDIT CART ADDITIONAL TEXT
This adds marketing text underneath the cart page
EDIT SHIPPING TABLE
NOTE: IF YOUR SITE USES ELAN SHIP METHODS FOR SHIPPING, THIS IS NOT INCLUDED. This is ONLY for the simpler way of having ship methods which is cart-only.
Adding New:
For each Elan Ship Method in the cart, there must be one Elan Handling Code
These must exist in Elan, or their calculated values on the cart will return zero.
Friendly Name: The name you give the ship method. This appears in the
shipping dropdown list on the cart
Elan Ship MethodID: Required Enter the Elan Ship Method ID here
Ordering: Requried The order in which they will appear on the dropdown list on the cart
Is Local Country: Check this box if your shipping method applies to the local country.
For example, US clients have the local country as "US" all ship methods that appear
in the cart dropdown when the user's shipping country is "US" should have "local country " checked.
Elan Handling Code ID: Requred The Elan Handling Code ID that is the default for the ship method.
Country: Optional - If entering a handling exception, and the exception only applies to a certain country, select the country here
Item Threshold: Requried, use 1 if you want t apply to all. If the handling code is applied only when there are N items in the cart, Enter N here. For example, if handling code 99 should be applied when there are 5 items in the cart, enter 5 here.
Items are cumulative in that if you have
Handling Code: 90 = 1 item
Handling Code: 90 = 5 items
Handling Code: 99 = 10 items
and the user enters 8 items in the cart, handling code 90 will be appled because it is 5 or over, but less than 10.
Campaign Code: Optional - Enter the campaign code that applies to the handling id.
For example if user enters Campaign Code "01EXEC" the cart will pull the matching

handling code.
Start and End dates: Both are optional. If there is no start or end date, then the
code will always be available. Else it will be available after the start date and before the end date.
Setting up defaults:
There should always be one handling code on a ship method which is the default. This will normally be no dates, item threshold = 1, no country restriction.
There should always be at least one ship method for the local country, and one for outside of the local country (IE one for domestic, one for international)
Editing handling codes:
You can edit a handling code by clicking the "select" link on the first column of the ship table (red)

ADD/EDIT/UPDATE SALE CAMPAIGNS
Here you enter the campaigns you want to stack from Elan Book. You run the campaigns, and the lowest price becomes the sale price.
For example:
W-HC10 - this campaign has all hardcover books 10% off.
WS-120609 - this campaign has all web special items at 15% off.
4 items are in both campaigns, so the larger discount wins and they will display at 15% off.
If you enter these and click Start next to “Do Run/Refresh” it will review the campaigns and set the prices. The prices of the books in WS-120609 will be 15% off and all the rest in W-HC10 are 10% off.
If you click “Go” Show Products of WS-120609 you can see the retail price (green) and the current sale price (green)
It will show you this campaigns sale price (black)
It also show you that there is another campaign with a discount applied (red)
The reason the SiteDiscount does not match this discount is because this discount is EXPIRED and so it is not applied to the final sale price.

There is also a checkbox for where on the site the products will display.
If you want the products from the campaign to display in the list of “On Sale” products, click the EDIT link on the campaign line, click the checkbox and click update.
Sale items do NOT sync nightly, you have to run the campaign whenever you change one in Elan.
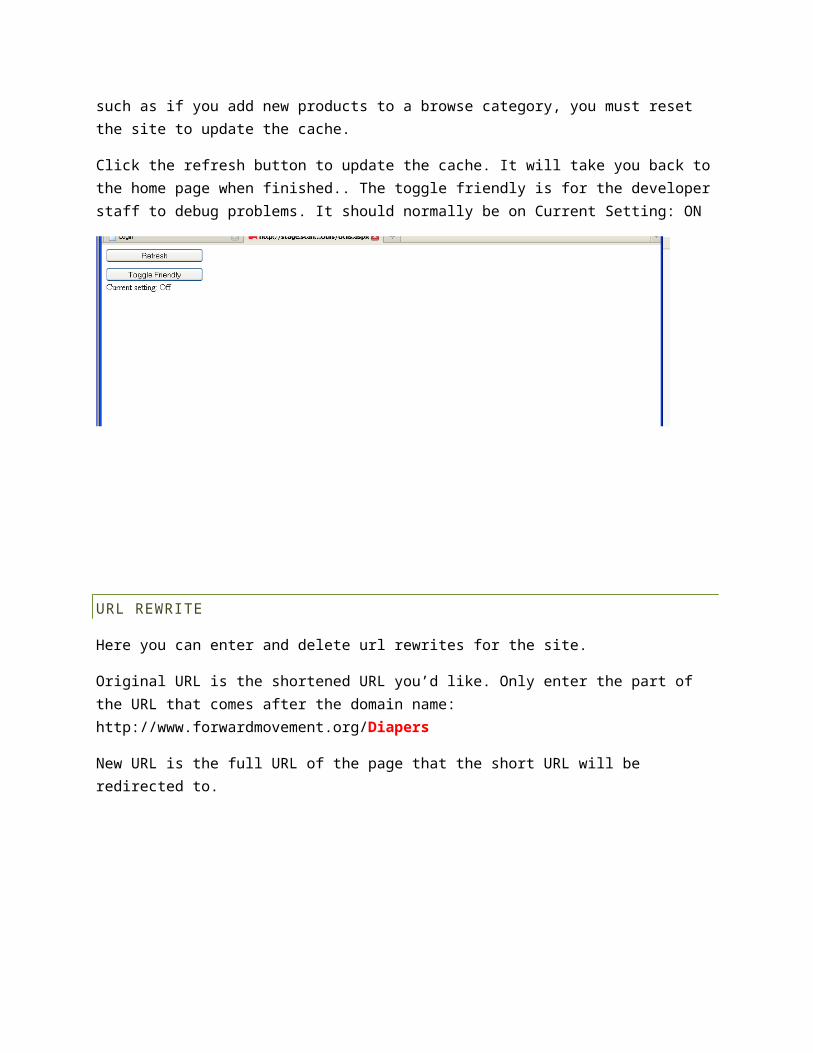
ADMINISTRATIVE UTILITES (BUST CACHE)
Lists on the site, such as the best sellers, large rotator, editors choice are all CACHED for performance. If you change one of these, such as if you add new products to a browse category, you must reset the site to update the cache.
Click the refresh button to update the cache. It will take you back to the home page when finished.. The toggle friendly is for the developer staff to debug problems. It should normally be on Current Setting: ON
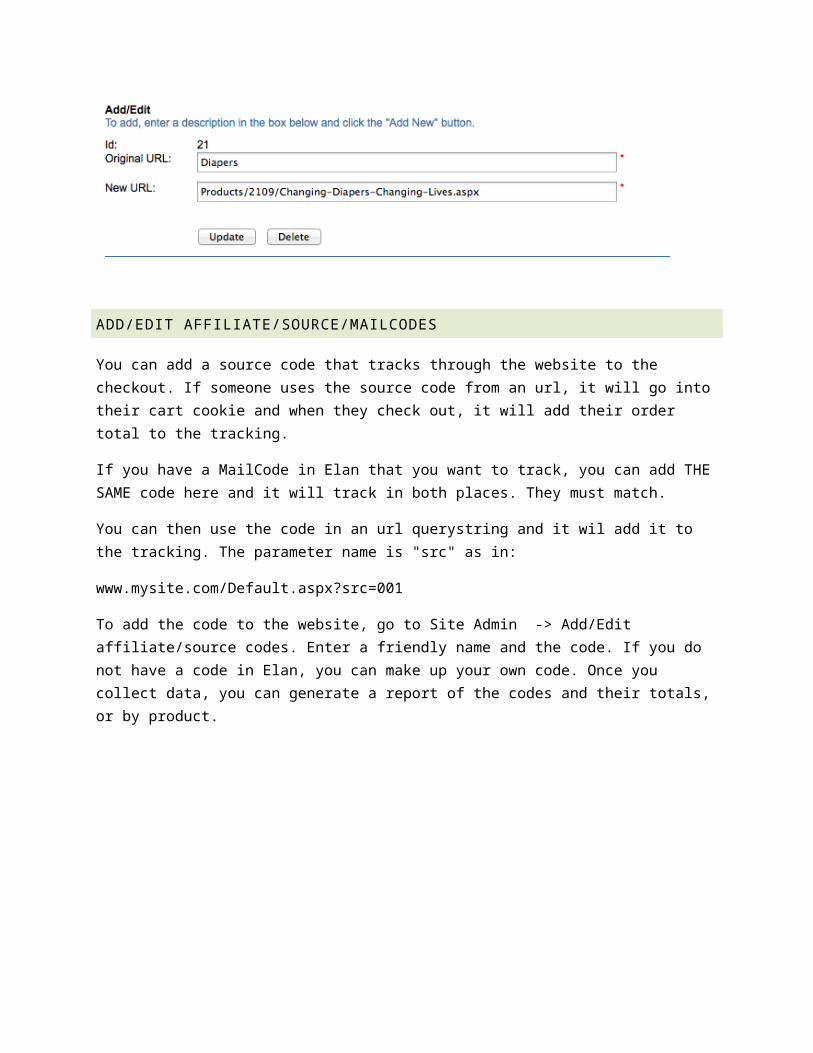
URL REWRITE

Here you can enter and delete url rewrites for the site.
Original URL is the shortened URL you’d like. Only enter the part of the URL that comes after the domain name: http://www.forwardmovement.org/Diapers
New URL is the full URL of the page that the short URL will be redirected to.
ADD/EDIT AFFILIATE/SOURCE/MAILCODES
You can add a source code that tracks through the website to the checkout. If someone uses the source code from an url, it will go into their cart cookie and when they check out, it will add their order total to the tracking.
If you have a MailCode in Elan that you want to track, you can add THE SAME code here and it will track in both places. They must match.
You can then use the code in an url querystring and it wil add it to the tracking. The parameter name is "src" as in:
www.mysite.com/Default.aspx?src=001
To add the code to the website, go to Site Admin -> Add/Edit affiliate/source codes. Enter a friendly name and the code. If you do not have a code in Elan, you can make up your own code. Once you collect data, you can generate a report of the codes and their totals, or by product.
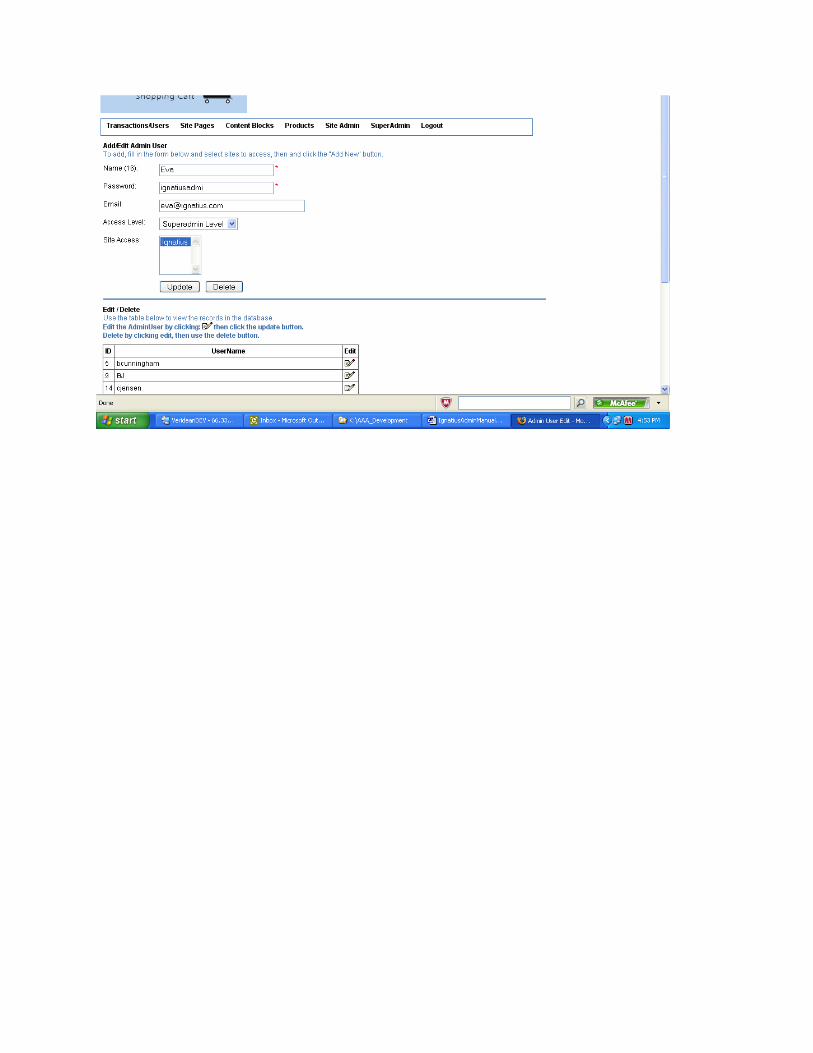
SUPER ADMIN
If the current login is a superadmin access level, then you can add more users.
Enter the username/pw/email and select the access level.
MAKE SURE you click the SiteAccess: Forward Movement so its highlighted BLUE like shown here or else it will not grant access.

HOW TO DO COMMON TASKS
CREATE A LOGIN FOR AN EXISTING ACCOUNT IN ELAN:
An e-commerce account and a customer record in Elan are two different entities joined to enable a site user to login and purchase under their customer record.
The e-commerce account contains information related to logging into a site
Login name password site ID - which site they can log into with these credentials profile email (for resetting their password) Security question and response
Note that WITHIN A SITE, the username must be unique and the profile email address must be unique
You can create and delete e-commerce accounts without affecting any client records in Elan.
To log into a site an checkout as an Elan customer record, the two entities must be joined.

CREATE AN ECOMMERCE ACCOUNT ATTACHED TO AN EXISTING CLIENT
1) Find the client ID using the search tool:
Record the nameid and email address of this client, so you have it ready. You will need it to create the ecommerce account.
Go to E-Commerce Orders -> ecommerce Accounts Menu -> Create E-Commerce Account

enter the website id you want the account for, then the nameid of the client, then click "create account" You can also find an account by clicking the "Name Maintenance" button.

Enter the username, password, email address and security question and response for the user. You can make anything you like for the security question, usually we use "what is your billing zip code?" and you can get the zip code from their client record. You should keep the username and password handy because you will give it to the end or email it to them when done. Make sure you use a temporary password and instruct them to change it, and change their security question after they log in for the first time.
Note the system will not let you create a profile with a username OR an email address that is already in use ON THIS WEBSITE.

CHANGE OR DELETE AN EXISTING E-COMMERCE ACCOUNT.
Go to Ecommerc orders, then e-commerce accounts menu, then adminstrator account maintenance

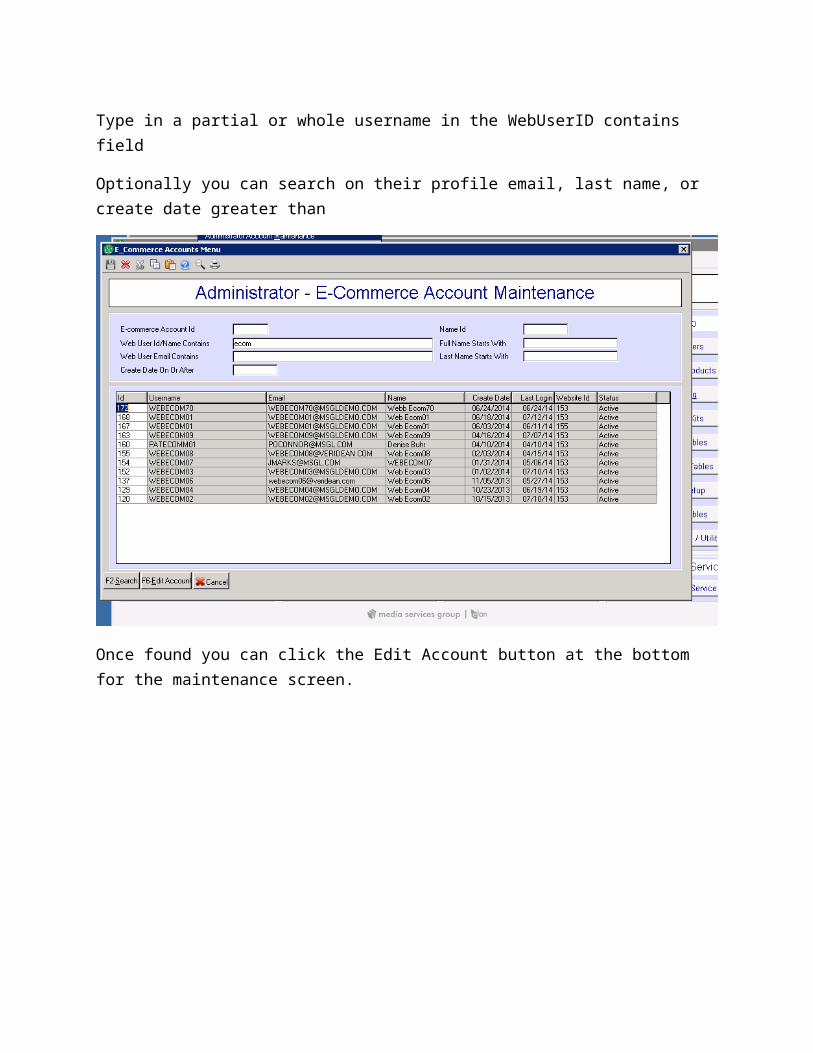
Type in a partial or whole username in the WebUserID contains field
Optionally you can search on their profile email, last name, or create date greater than
Once found you can click the Edit Account button at the bottom for the maintenance screen.
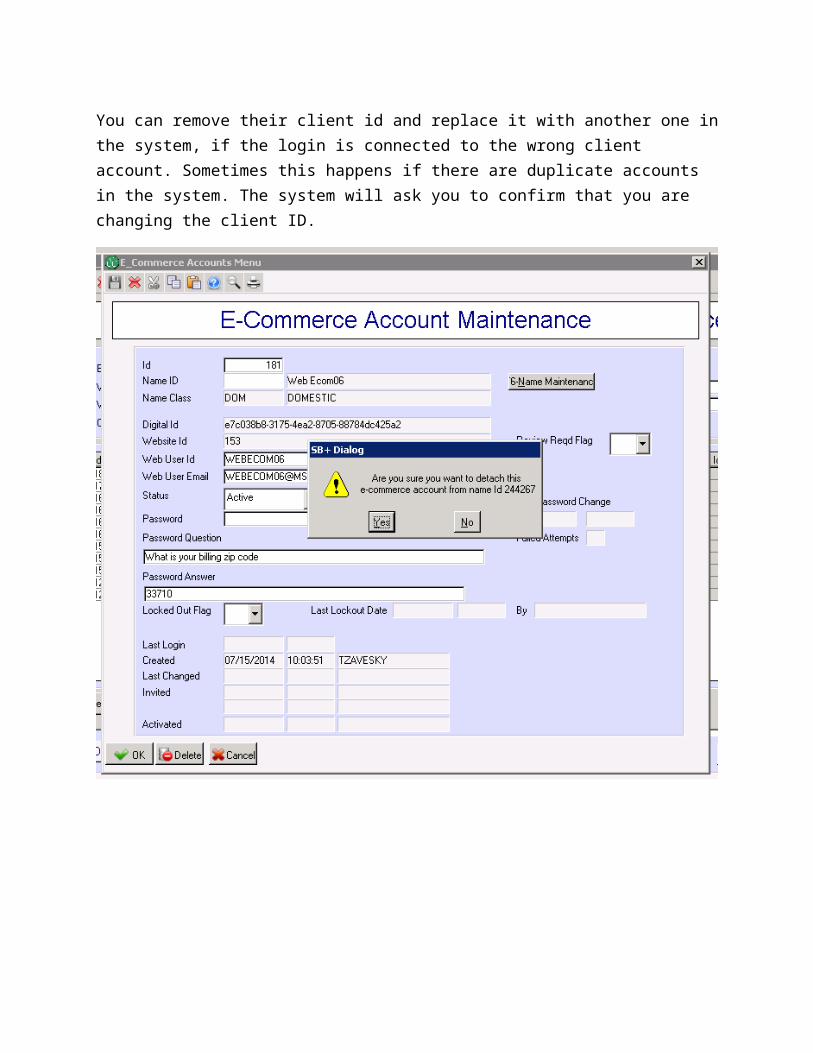
You can remove their client id and replace it with another one in the system, if the login is connected to the wrong client account. Sometimes this happens if there are duplicate accounts in the system. The system will ask you to confirm that you are changing the client ID.
SETTING UP AND SENDING OUT INVITATIONS:
Set up the website invitation verificaton (activation) link. This is the link the user will receive and will click on to verify and activate their e-commerce account. Go to E-Commerce accounts menu -> E-Commerce account website parameters, then type in your website id and hit tab. Then go to the SECOND tab marked "Email Invitations"

You are invited to the DEVDATA website.
Welcome to the DEVDATA website. To activate your account click or paste this link into your browser:
LINK.URL
for the import cart (sites prior to 2014.3), the link will be
https://SITENAME/CustomerSelfService/Verify.aspx
for the live order cart (sites 2014.3 and after)
https://SITENAME/Account/Verify
You can then tailor your message any way you like, bu thou have to put the substitution term LINK.URL somewhere in the text so it will substitute in the link for the verification page.
CREATING INVITATIONS
To create an invitation for a client, you must have these three pieces of information.
Client ID
email address
phone number
The phone number on the account is required for their verification. If the account does not have an email address and phone number you cant do an invitation
CREATE ONE INVITATION AND MAIL IT OUT YOURSELF:
If you have a client call and say they did not get an invitation, or you need to generate ONE invitation, you can create them one at a time. Go to Ecommerce Orders -> Ecommerce Accounts Menu -> Create Ecommerce Account Invitation for a customer. Enter the site id and the name id of the client record.

If created sucessfully, you will see a dialog that says the link is copied to your clipboard. You can then paste (ctrl-v) the link into your email program, and send out the email to the invited client:
you can tailor the message any way you wish.
If you choose to view the account you will notice that the status is INVITED and there is no userid (login). When the invited person verifies and activates their account, this information is filled in.
Note if the end user loses the link or it goes into spam and they can't find it. DELETE the ecommerce account and generate a new invitation.


TO CREATE MANY INVITATIONS AT ONE TIME:
The create screen looks like this when populated. I was able to type these nameids in one by one for a short list. If you have a select list, you can enter the select list name and it will generate all the id's. If you want to skip some name, you can UNCHECK the create box on the right side.
If entered, the select list should contain a list of name Ids for customers for which accounts should be created. If the list has less than 300 name Ids, the details of the names are displayed in the grid. If 300 or more name Ids, no details are displayed and names cannot be added.
Once these are created you have to download to a txt file on the repository. I used this file name, note the extension is CSV!
Any errors encountered when name Ids in a select list are processed are written to a csv file in the client’s Repository.
TestInvitations_11_02_2014.csv

Here is what the export file looks like
Name Email Address URL
ALBION DIST OFFICE
http://dev.upperroom.msgldemo.com/CustomerSelfService/Verify.aspx?id=0d4b52b5-f065-4a95-b5ff-18e1bb1edadc
PSTR KATHLEEN JURY
http://dev.upperroom.msgldemo.com/CustomerSelfService/Verify.aspx?id=9ff3eafc-ffae-4b7e-a8bb-992218346a6a
SARAH GILLETTE [email protected]
http://dev.upperroom.msgldemo.com/CustomerSelfService/Verify.aspx?id=31a134e4-ed98-4cd3-a9df-bb4c22577d77
CALVIN DEESE [email protected]
http://dev.upperroom.msgldemo.com/CustomerSelfService/Verify.aspx?id=fc26e75d-7b0b-48e3-a317-46a179966f55
BARBARA ONDRIZEK [email protected]
http://dev.upperroom.msgldemo.com/CustomerSelfService/Verify.aspx?id=62f41509-1a95-4465-8463-0dcd7420a61d

WENDY TODD [email protected]
http://dev.upperroom.msgldemo.com/CustomerSelfService/Verify.aspx?id=fef3aca3-b69f-4400-876b-546be63a1004
Example error file:

When the user clicks on the link, they are taken to the website where they will verify their account and create their login information and security question and response:
successfully creates account:

If verification is successful the account is changed to active status
If the email invitation is lost or goes into spam, you can send another one

CIRCULATION ECOMMERCE
CIRCULATION ECOMMERCE DEFAULTS
Located in Circ -> Setup -> Circ Parameters -> Circ Ecommerce Defaults.
You must set up the defaults, and each every publication that is available on the website, The default promoiton code is entered, and the max number of copies a customer can purchase off the web.
SITE MAPS / SEO
SITE MAP FILE
/SiteMap.xml
This file is written daily by the system. It contains urls to all current products on the system.
It should be submitted to google. You need to set up a google account and do the submission. We do not manage it for you. In addition, you can supply us with a list of urls you want to include for google. You can see the list by going to
/SiteMap/SiteMap_Generator.aspx
You can also regenerate the site map index at any time from this page.
In addtion we offer other bots an easy way to reach the same index by puttting a tag “product index” in the footer of the site. Some clients want us to remove this link because they don’t understand what it does. We recommend you do not remove it. It can be the difference between a bot such as yahoo indexing your site in a couple visits vs. indexing by crawling the menuing which could take up to 6 months.
You can see the content index on this url. It does not need to be styled because it’s just for bots to follow. This way a bot can reach any title on the site with two hops.
FORWARDING FROM PREVIOUS SITE:
If you are transitioning from an old site we do not set up any forwarding. If you want forwarding set up you must supply the url structure from the older site and tell us the url where you want it forwarded to on the new site. In the case of products or categories, the url structure on the new sites is the same, so a group of old products can theoretically be forwarded to the new product url, so all old product paths would 301 to the new url.
It is your responsibility for having us remove 301 redirects after they age out.
META TAGGING:
There are three default tags to consider:
Site Description: the short ID of the website, should be the site’s brand name. This appears on most pages behind the title of the page, after the colon such as:
The meta keywords, meta description
These tag appear on the home page, and are the default values for pages where the page itself does not populate the tag as in:
<meta id="ctl00_MetaKeywords" name="keywords" content="Protestant, Devotional Items, Church Supplies, Religious Curriculum, Religious Calendars, Religious Planners" />
<meta id="ctl00_MetaDescription" name="description" content="Communications for the Parish, Devotional Items, Church Supplies " />

You should supply these values to us, we place them into a configuration file.
They are important because they drive what appears on google by default:
With proper tags in place
Without proper tags in place:
SPECIFIC PAGES META TAGGING:
CONTENT PAGES:
These pull the group the page is in as keyword content and the first 512 chars of text as description. Note that before the description is rendered the html is removed, so if you have a lot of html in the first 512 chars, it will all be removed and your description may be shorted.
<meta id="ctl00_MetaKeywords" name="keywords" content="About" />
<meta id="ctl00_MetaDescription" name="description" content="Shipping CAN
Orders to Canada:
If you order from Canada, and you choose UPS as your mailing method, please understand that in addition to the UPS charge on this order, UPS will also collect a customs brokerage fee from you upon delivery of the order. Also, keep in mind that if your order delivery time can take longer than to 2-3 weeks.
" />
CATEGORY LIST PAGES:
Title, Meta_Keywords: Uses the category name as the page title and keywords.

Meta_Description comes from the assigned CMS block. If none is assigned then it uses the category name.
To add a description to a category header using the CMS. Go to the cms and add a new text block and assign the browse category to the text block.
Browse categories assigned to headers can appear on any sublevels that do not have descriptions assigned. Let us know if you want that feature ON. It is currently OFF
The header text is in the “Display Title”
If the first line of html is an image, the image will format to the left of the text. If no image is available, the text will expand to fill the gray area. Note this area is usually customized per site so this image may not look like your site
DISPLAY RESULT:
PRODUCT DETAIL PAGE:
Title: from title of book
Meta_Keywords: a concatenation of all categories assigned to the product, includes product type.
Meta_Descripiton: first 512 chars from descripiton, html tagging removed. Note that before the description is rendered the html is removed, so if you have a lot of html in the first 512 chars, it will all be removed and your description may be shorted.
OG (Open Graph tags) for applications such as facebook and twitter. Image is the image of the product, url is the canonical. Descripiton is same as meta_description.

Canonical: Shows bots real path of this document so they can decide what is duplicate content vs the original.
<title>Hope-Full Living The Season Of Advent Booklet : Creative Communications</title>
<meta id="ctl00_MetaKeywords" name="keywords" content="Booklet, Bestsellers, Devotional Items, Seasonal Adult Devotional, Advent Devotions, New Titles, Seasonal, Advent, Advent and Christmas " />
<meta id="ctl00_MetaDescription" name="description" content="Hope-Full Living The Season Of Advent Our lives should be full of hope, even in our later years. The daily devotions in this special edition highlight the message and themes found in Creative&amp;rsquo;s highly popular daily devotional for older adult Christians living life to the fullest. The..." />
<meta property="og:image" content="http://dev.creativep.msgldemo.com/Content/Site174/ProductImages/HF1.jpg" />
<meta property="og:title" content="HopeFull Living The Season Of Advent" />
<meta property="og:url" content="http://dev.creativep.msgldemo.com/Products/HF1/hopefull-living-the-season-of-advent.aspx" />
<meta property="og:description" content="Hope-Full Living The Season Of Advent Our lives should be full of hope, even in our later years. The daily devotions in this special edition highlight the message and themes found in Creative&rsquo;s highly popular daily devotional for older adult Christians living life to the fullest. The..." />
<link rel="canonical" href="http://dev.creativep.msgldemo.com/Products/HF1/hopefull-living-the-season-of-advent.aspx" />