microscopes -...
TRANSCRIPT

Microscopes

• It is estimated that the human race grows
daily by about 214,000 people.
• It takes only 15 watts of electricity going
through a human body to stop the heart.
Common light bulbs run on about 25 to 75
watts of electricity.

Microscopes
Objectives:
•To name the parts of the microscope
and describe their functions
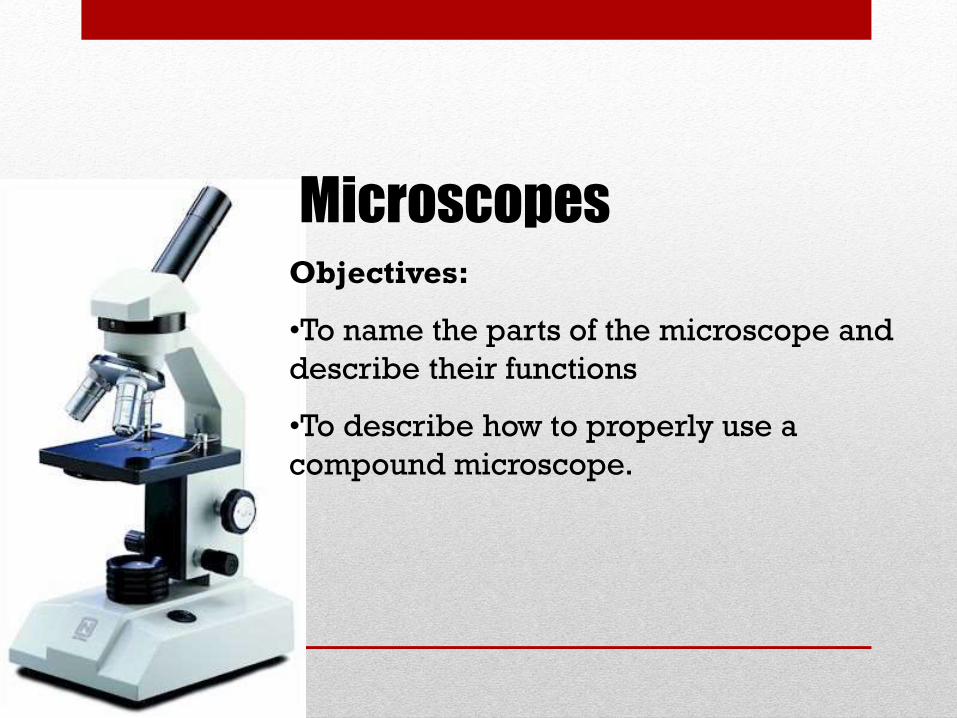
Microscopes Objectives:
•To name the parts of the microscope and
describe their functions
•To describe how to properly use a
compound microscope.

Microscopes
Objectives:
•To name the parts of the microscope
and describe their functions
•To describe how to properly use a
compound microscope.
•To compare a compound to a light
microscope

•Compound Microscope •Dissection Microscope •Scanning Electron Microscope (SEM) •Transmission Electron Microscope (TEM)

• light illuminated • microscope is two dimensional • commonly used. • View of individual cells, even living
ones. • It has high magnification. • it has a low resolution.
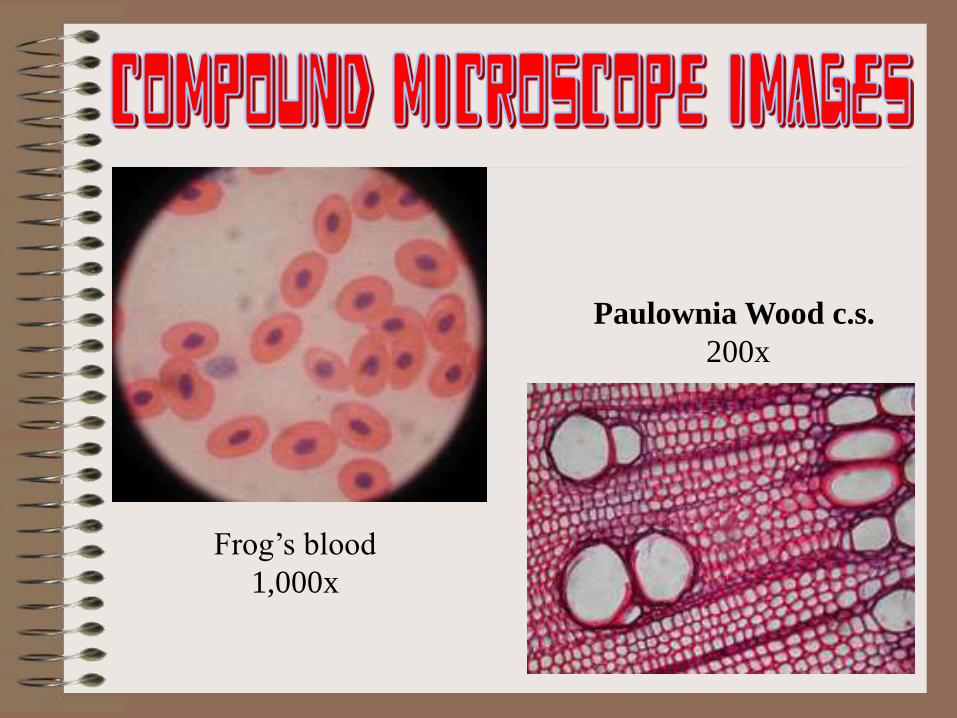
Frog’s blood
1,000x
Paulownia Wood c.s.
200x

• light illuminated.
• image that appears is three
dimensional. It is used for
dissection for larger specimen.
• cannot see individual cells
because it has a low
magnification.
• (also called stereo microscope)
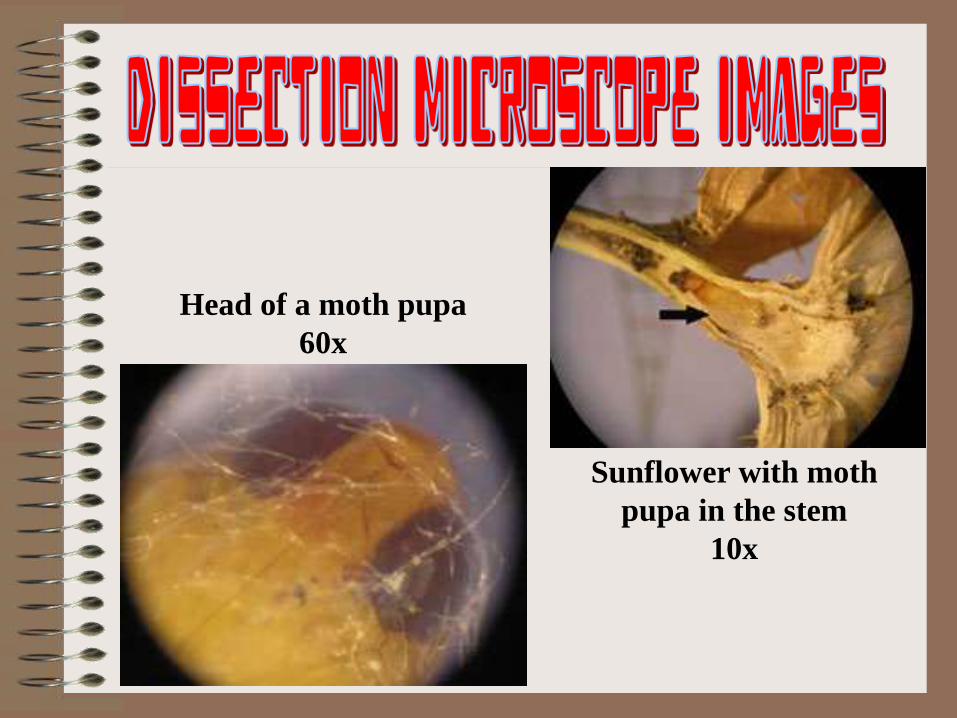
Sunflower with moth
pupa in the stem
10x
Head of a moth pupa
60x
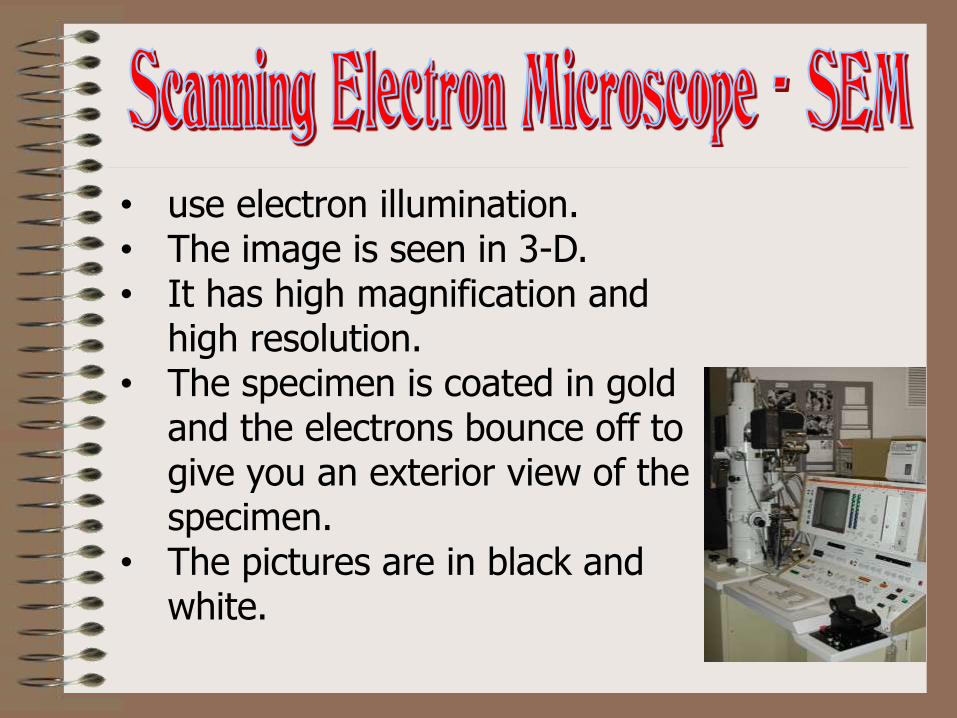
• use electron illumination. • The image is seen in 3-D. • It has high magnification and
high resolution. • The specimen is coated in gold
and the electrons bounce off to give you an exterior view of the specimen.
• The pictures are in black and white.
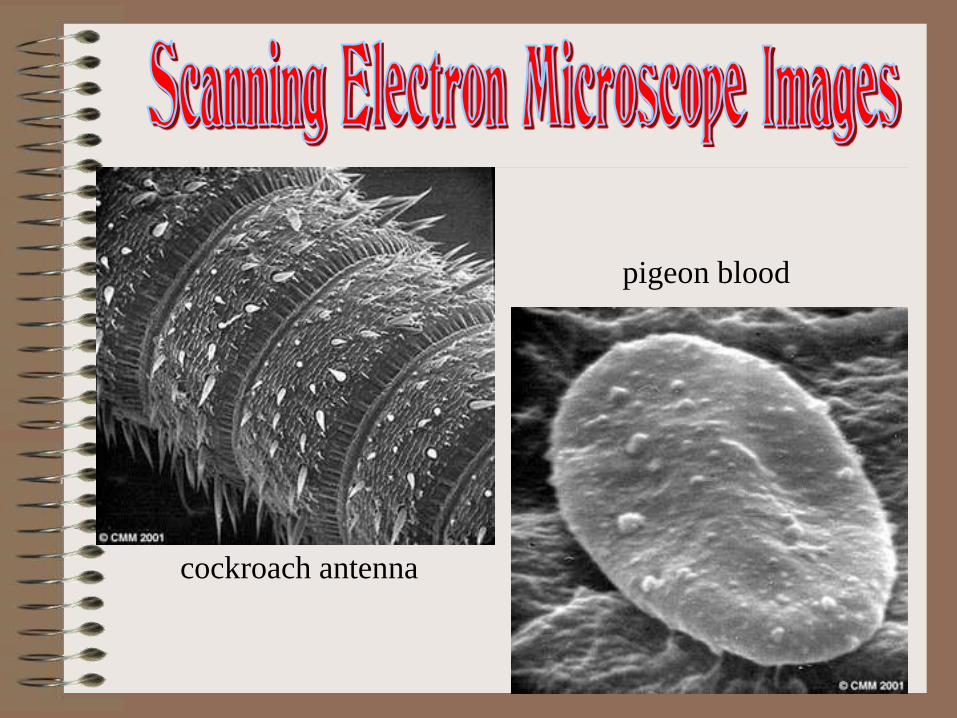
cockroach antenna
pigeon blood

• is electron illuminated. • This gives a 2-D view. • Thin slices of specimen
are obtained. • The electron beams pass
through this. • It has high magnification
and high resolution.
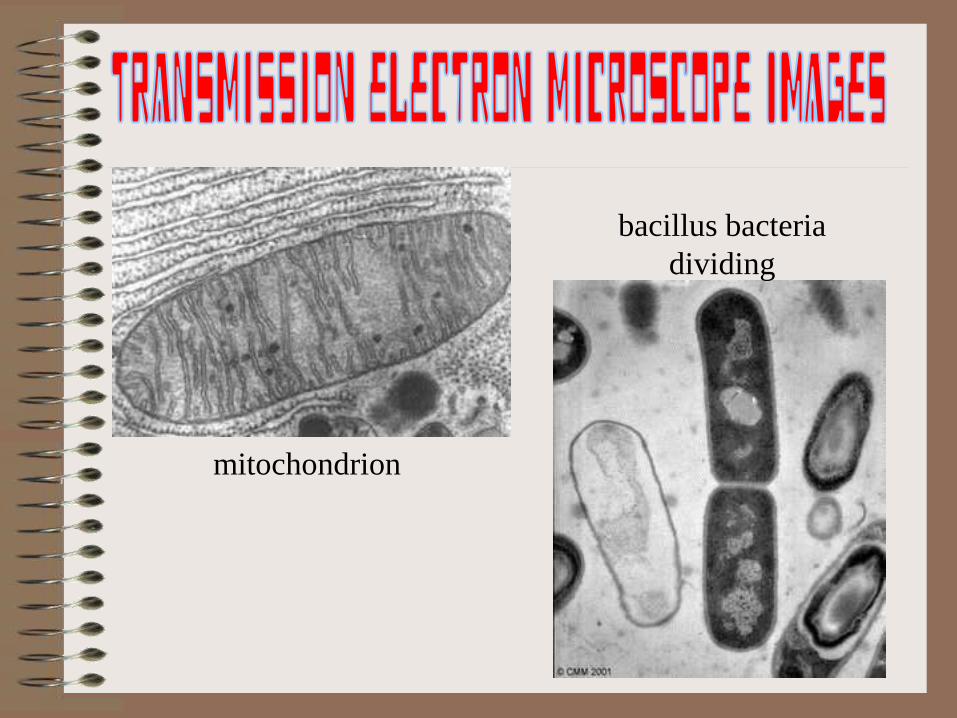
mitochondrion
bacillus bacteria
dividing
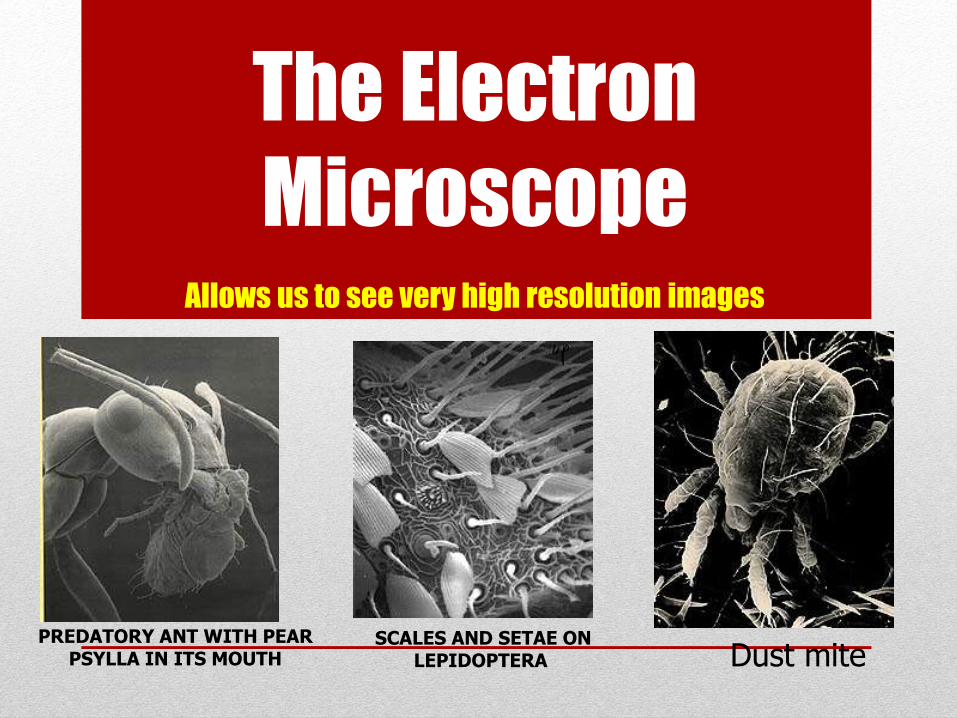
The Electron
Microscope
Allows us to see very high resolution images
PREDATORY ANT WITH PEAR PSYLLA IN ITS MOUTH
SCALES AND SETAE ON LEPIDOPTERA
Dust mite
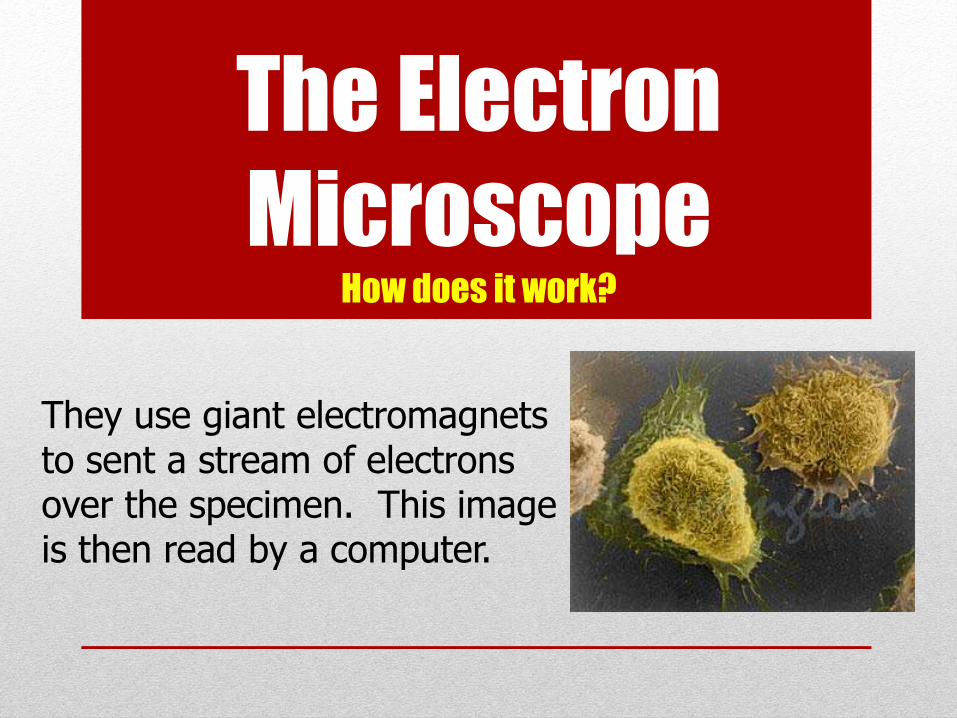
The Electron
Microscope How does it work?
They use giant electromagnets to sent a stream of electrons over the specimen. This image is then read by a computer.
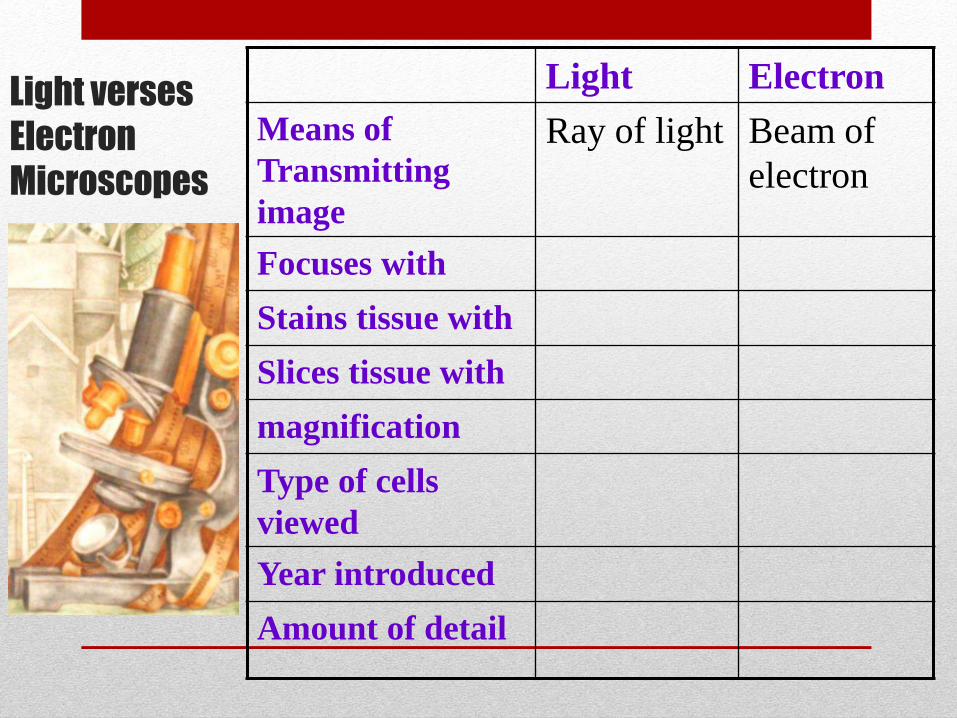
Light verses
Electron
Microscopes
Light Electron
Means of
Transmitting
image
Ray of light Beam of
electron
Focuses with
Stains tissue with
Slices tissue with
magnification
Type of cells
viewed
Year introduced
Amount of detail

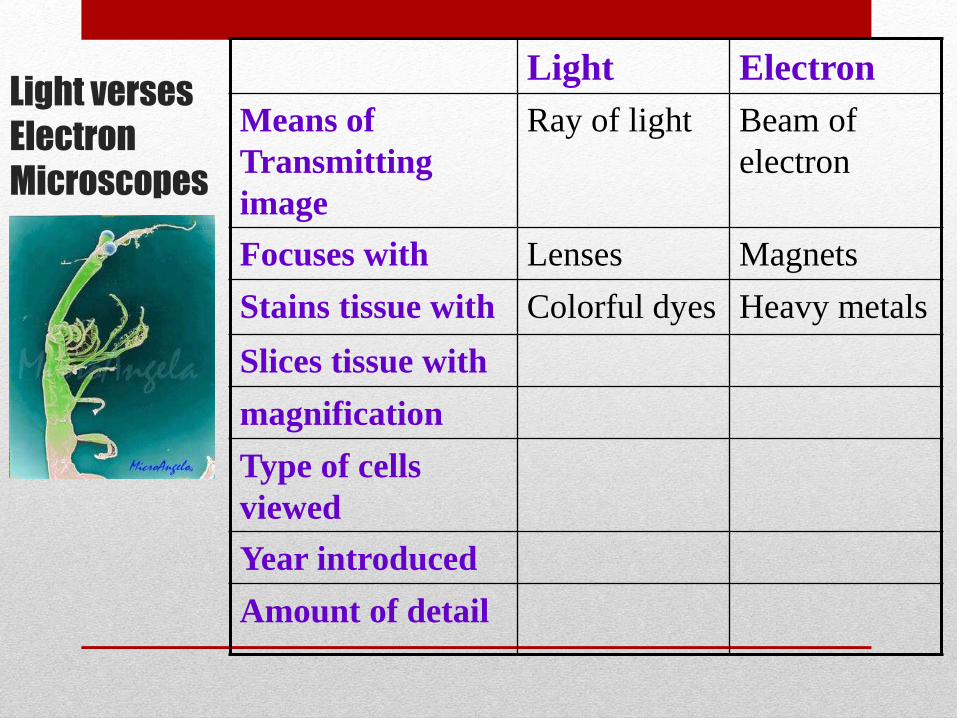
Light verses
Electron
Microscopes
Light Electron
Means of
Transmitting
image
Ray of light Beam of
electron
Focuses with Lenses Magnets
Stains tissue with
Slices tissue with
magnification
Type of cells
viewed
Year introduced
Amount of detail
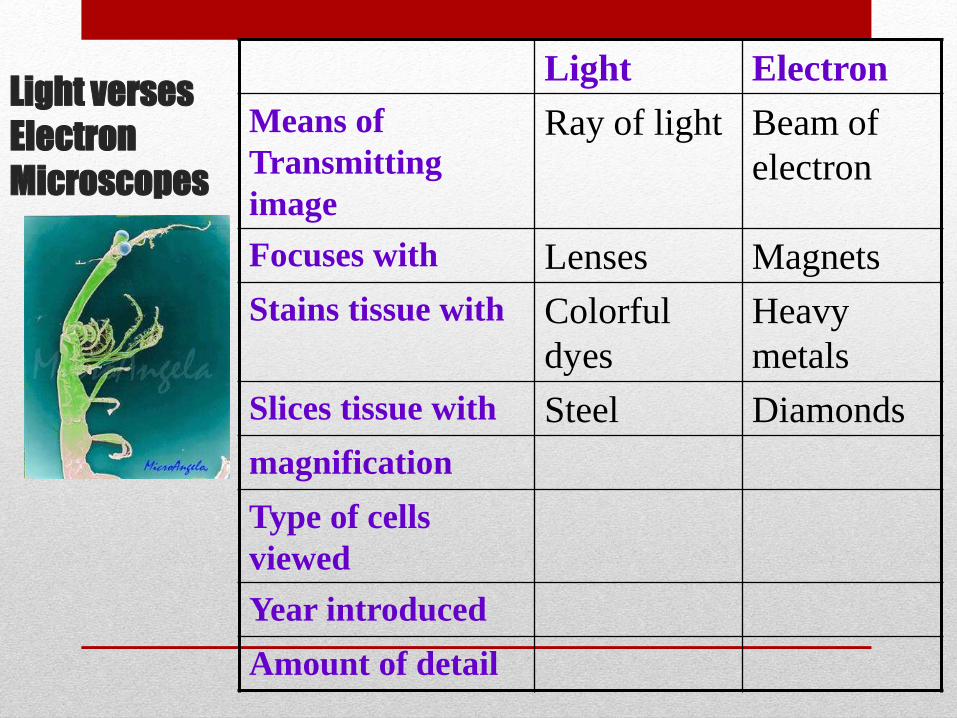
Light verses
Electron
Microscopes
Light Electron
Means of
Transmitting
image
Ray of light Beam of
electron
Focuses with Lenses Magnets
Stains tissue with Colorful dyes Heavy metals
Slices tissue with
magnification
Type of cells
viewed
Year introduced
Amount of detail
Light verses
Electron
Microscopes
Light Electron
Means of
Transmitting
image
Ray of light Beam of
electron
Focuses with Lenses Magnets
Stains tissue with Colorful
dyes
Heavy
metals
Slices tissue with Steel Diamonds
magnification
Type of cells
viewed
Year introduced
Amount of detail

Light verses
Electron
Microscopes
Light Electron
Means of
Transmitting
image
Ray of light Beam of
electron
Focuses with Lenses Magnets
Stains tissue with Colorful dyes Heavy metals
Slices tissue with Steel Diamonds
magnification 2000X 250,000 or
more
Type of cells
viewed
Year introduced
Amount of detail

Light verses
Electron
Microscopes
Light Electron
Means of
Transmitting
image
Ray of light Beam of
electron
Focuses with Lenses Magnets
Stains tissue with Colorful
dyes
Heavy
metals
Slices tissue with Steel Diamonds
magnification 2000X 250,000 or
more
Type of cells
viewed
Living or
dead
Dead only
Year introduced
Amount of detail
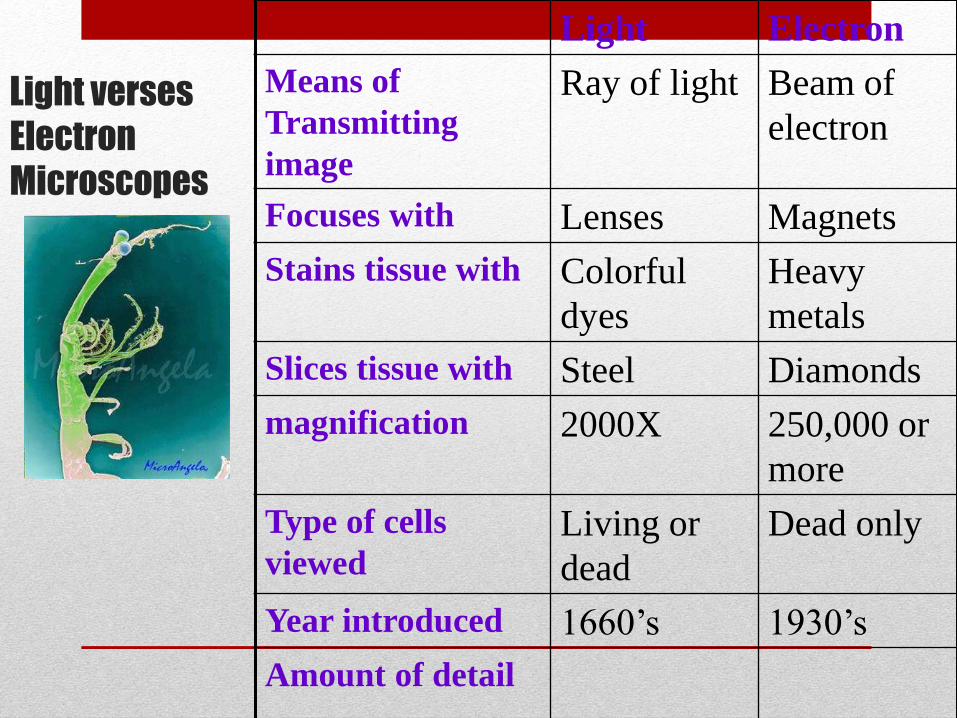
Light verses
Electron
Microscopes
Light Electron
Means of
Transmitting
image
Ray of light Beam of
electron
Focuses with Lenses Magnets
Stains tissue with Colorful
dyes
Heavy
metals
Slices tissue with Steel Diamonds
magnification 2000X 250,000 or
more
Type of cells
viewed
Living or
dead
Dead only
Year introduced 1660’s 1930’s
Amount of detail

Light versus
Electron
Microscopes
Light Electron
Means of
Transmitting
image
Ray of light Beam of
electron
Focuses with Lenses Magnets
Stains tissue with Colorful
dyes
Heavy
metals
Slices tissue with Steel Diamonds
magnification 2000X 250,000 or
more
Type of cells
viewed
Living or
dead
Dead only
Year introduced 1660’s 1930’s
Amount of detail Flat image 3-D image

• Always carry with 2 hands • Never touch the lenses with your fingers. • Only use lens paper for cleaning • Do not force knobs • Keep objects clear of desk and cords • When you are finished with your "scope",
rotate the nosepiece so that it's on the low power objective, roll the stage down to lowest level, rubber band the cord, then replace the dust cover.

Ocular lens
Body Tube
Revolving Nosepiece
Arm
Objective Lens
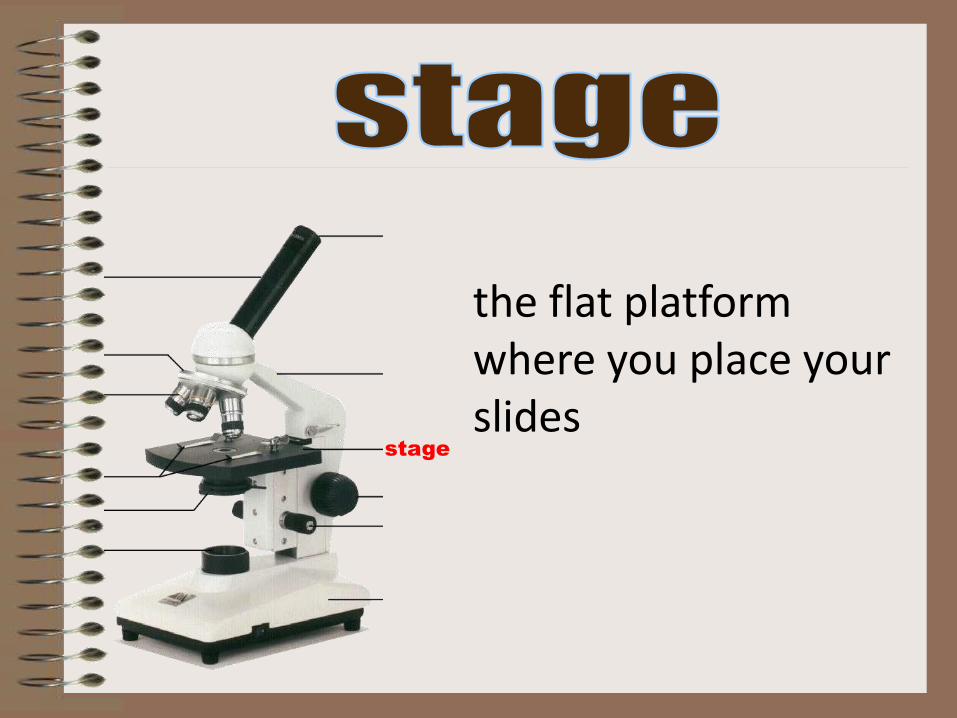
Stage
Stage
Clips Coarse adjustment knob
Fine adjustment knob
Base
Diaphragm
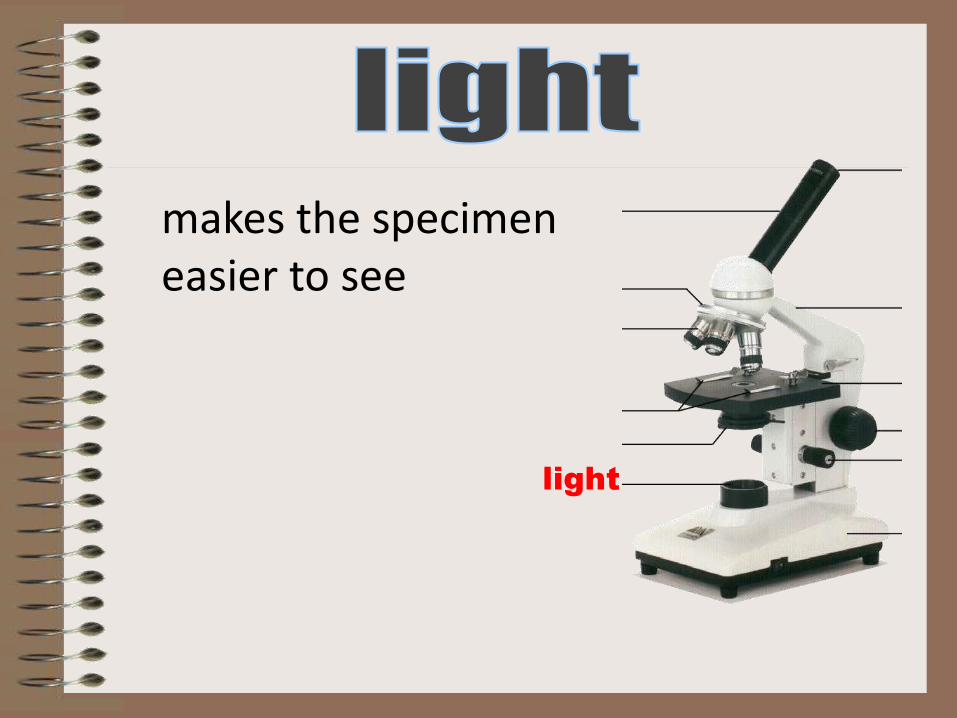
Light

Ocular lens
magnifies; where you look through to see the image of your specimen.
They are usually 10X or 15X power. Our microscopes have an ocular lens power of 10x.

arm
supports the tube and connects it to the base
stage
the flat platform where you place your slides

coarse adjustment knob
moves stage (or body tube) up and down

fine adjustment knob
small, round knob on the side of the microscope used to fine-tune the focus of your specimen after using the coarse adjustment knob

base
the bottom of the microscope, used for support

body tube
connects the eyepiece to the objective lenses

revolving nosepiece
the part that holds two or more objective lenses and can be rotated to easily change power

objective lens
Adds to the magnification
Usually you will find 3 or 4 objective lenses on a microscope. They almost
always consist of 4X, 10X, 40X and 100X powers. When coupled with a 10X (most common)
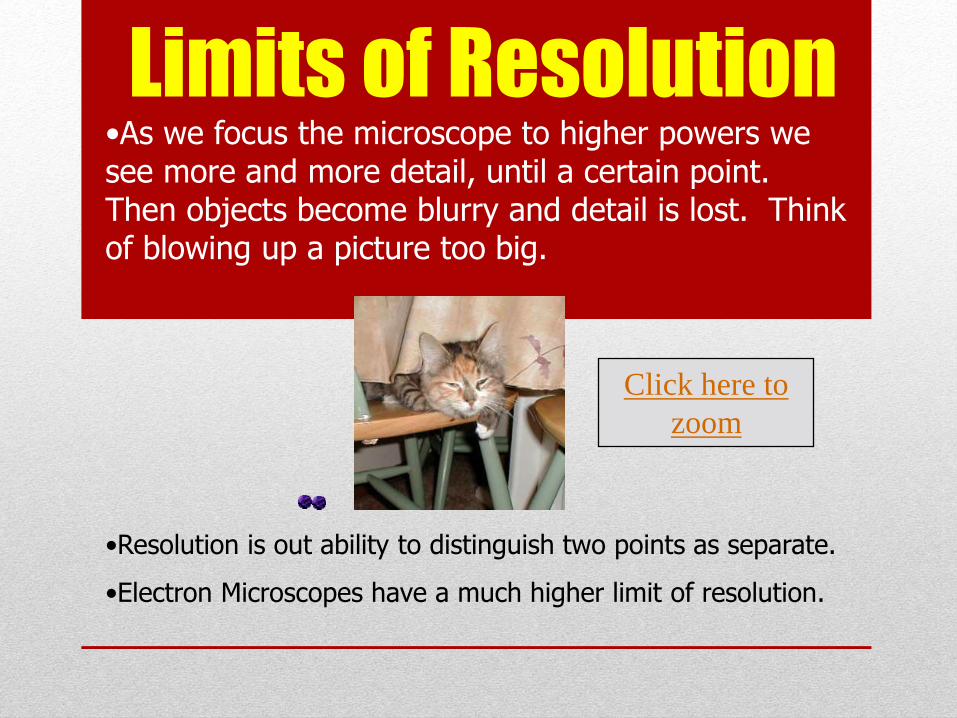
Limits of Resolution •As we focus the microscope to higher powers we see more and more detail, until a certain point. Then objects become blurry and detail is lost. Think of blowing up a picture too big.
•
•Resolution is out ability to distinguish two points as separate.
•Electron Microscopes have a much higher limit of resolution.
Click here to
zoom


objective lenses
The shortest lens is the lowest power, the longest one is the lens with the greatest power. Lenses are color coded.

objective lenses
The high power objective lenses are retractable thereby protecting the lens and the slide.

stage clips
Stage clips hold the slides in place.

diaphragm
• controls the amount of light going through the specimen
• rotating disk under the stage. • has different sized holes and is
used to vary the intensity and size of the cone of light
light
makes the specimen easier to see

• start with the lowest power objective lens first and while looking from the side, crank the lens down as close to the specimen as possible without touching it.
• Now, look through the eyepiece lens and focus upward only until the image is sharp. If you can't get it in focus, repeat the process.
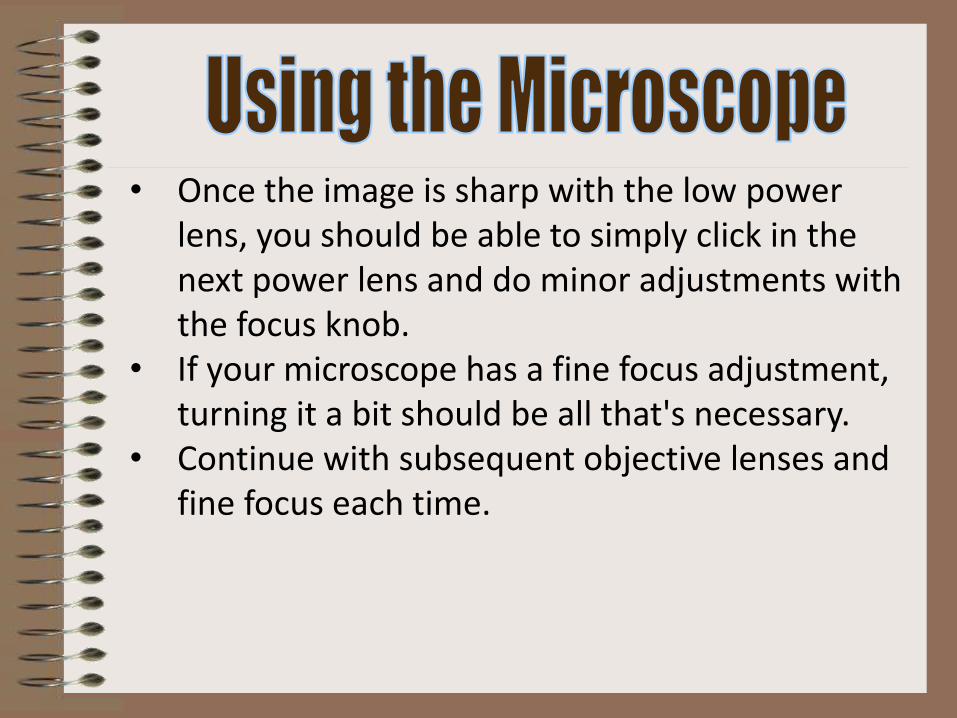
• Once the image is sharp with the low power lens, you should be able to simply click in the next power lens and do minor adjustments with the focus knob.
• If your microscope has a fine focus adjustment, turning it a bit should be all that's necessary.
• Continue with subsequent objective lenses and fine focus each time.

Rotate to 40x objective, locate desired portion of specimen in the center of the field. Refocus very carefully so that the specimen is focused as sharply as possible. (Do not alter focus for the Following steps )

Partially rotate so that 40x and 100x objectives straddle the specimen.

Focus only with fine focus. Hopefully, the specimen will come into focus easily. Do not change focus dramatically.

Clean up!: When you have finished for the day, wipe the objective carefully with lens paper to remove all dirt.
General Procedures Make sure all backpacks are out of the aisles before you get a microscope! Always carry the microscope with one hand on the Arm and one hand on the Base.
· Do not wear your glasses, the microscope will focus to your eyesight!
· Keep both eyes open, your brain will learn to ignore the other eye.
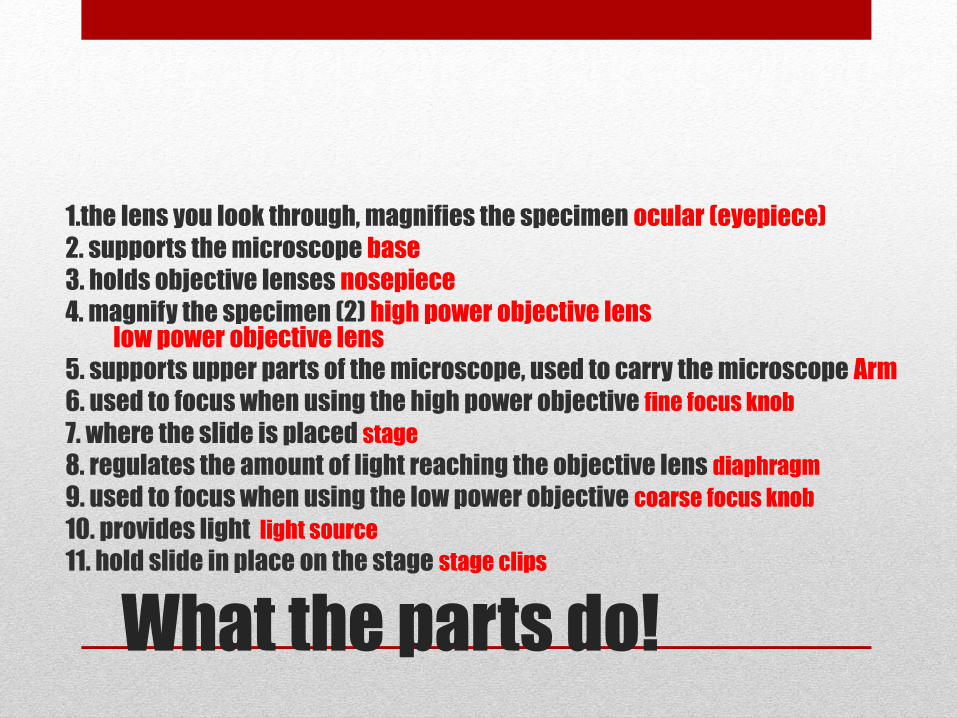
What the parts do!
1.the lens you look through, magnifies the specimen ocular (eyepiece)
2. supports the microscope base
3. holds objective lenses nosepiece
4. magnify the specimen (2) high power objective lens low power objective lens
5. supports upper parts of the microscope, used to carry the microscope Arm
6. used to focus when using the high power objective fine focus knob
7. where the slide is placed stage
8. regulates the amount of light reaching the objective lens diaphragm
9. used to focus when using the low power objective coarse focus knob
10. provides light light source
11. hold slide in place on the stage stage clips
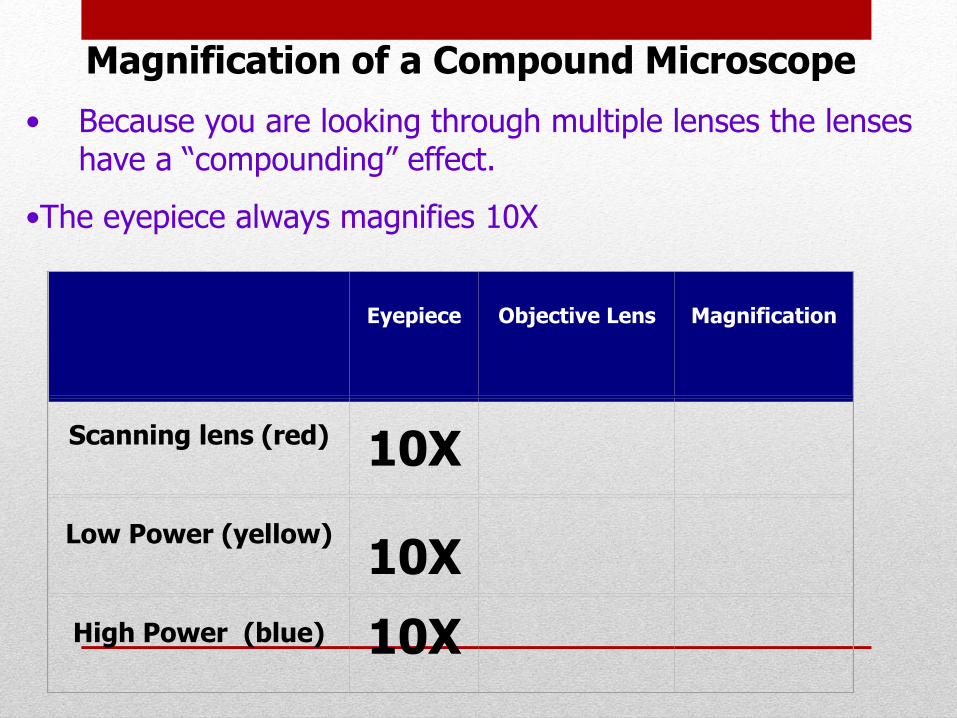
Magnification of a Compound Microscope
• Because you are looking through multiple lenses the lenses have a “compounding” effect.
•The eyepiece always magnifies 10X
Eyepiece
Objective Lens
Magnification
Scanning lens (red)
10X
Low Power (yellow)
10X
High Power (blue)
10X

Magnification of a Compound Microscope
•Each of the objective lenses have their own magnification
Eyepiece
Objective Lens
Magnification
Scanning lens (red)
10X
4X
Low Power (yellow)
10X
10X
High Power (blue)
10X
40X

Magnification of a Compound Microscope
•You then multiply the eyepiece with the objective lens to
determine the total magnification
Eyepiece
Objective Lens
Magnification
Scanning lens (red)
10X
4X
Low Power (yellow)
10X
10X 100X
High Power (blue)
10X
40X
400X
40X

Other Laboratory Techniques
• Staining
• Dyes are added to slides to bring
out detail and stain certain
features.
• Centrifugation
A device that can spin tubes up
to 20,000X/min. This is used to
separate samples (I.e. parts of
cells
• Cell Culture
• Cells of a particular kind are
grown on plates with all their
required nutrients.
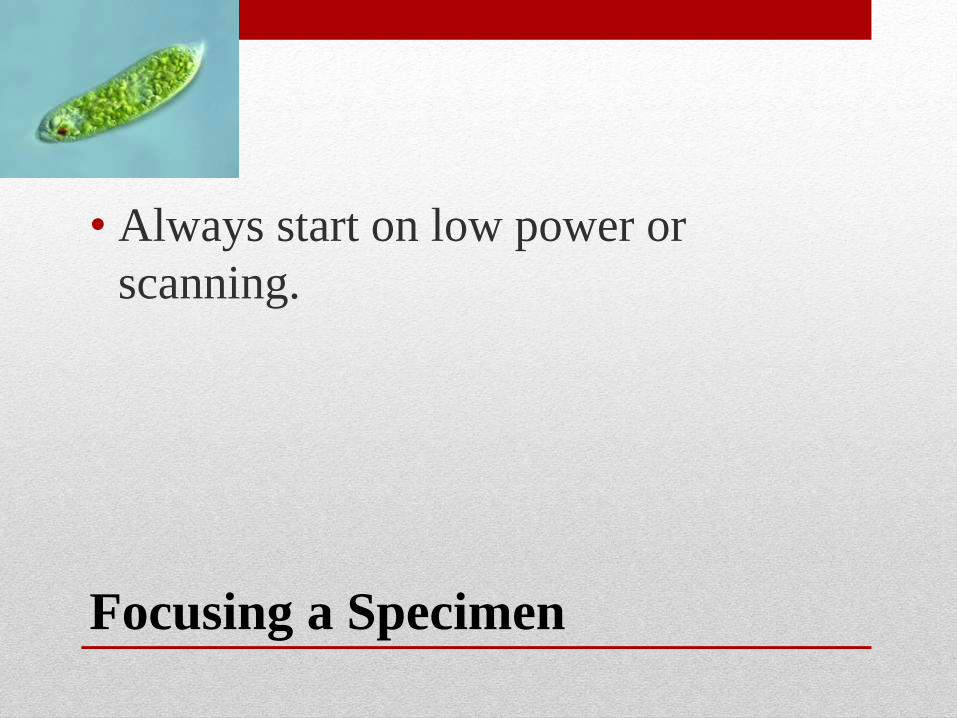
Focusing a Specimen
• Always start on low power or
scanning.

Focusing a Specimen
• Always start on low power or
scanning.
• Focus the specimen using the coarse
adjust.
Focusing a Specimen
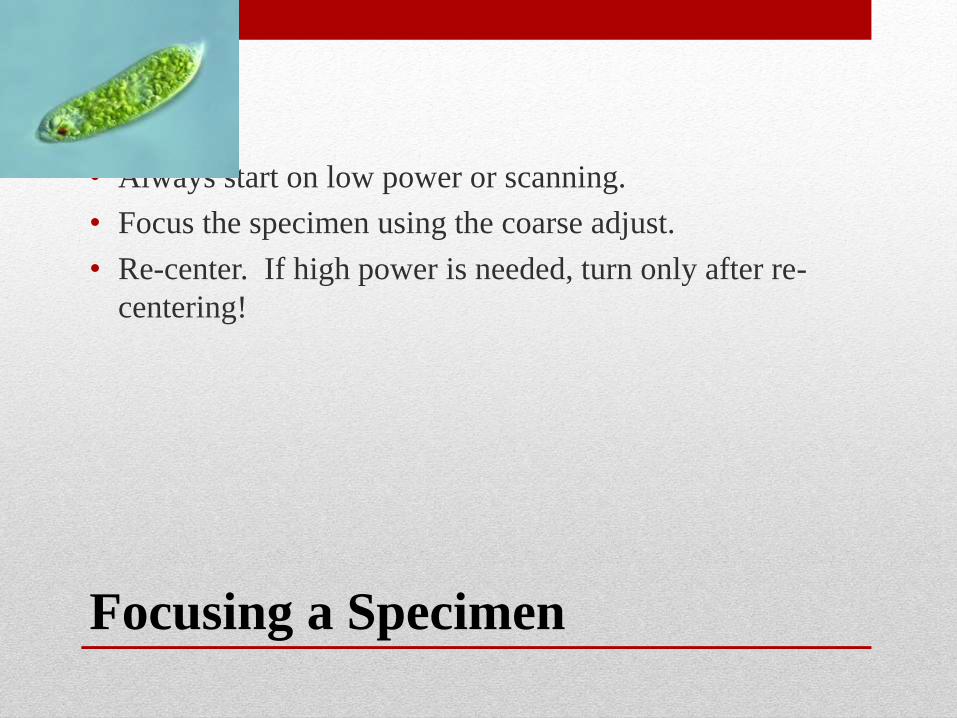
• Always start on low power or scanning.
• Focus the specimen using the coarse adjust.
• Re-center. If high power is needed, turn only after re-
centering!

Focusing a Specimen
• Always start on low power or scanning.
• Focus the specimen using the course adjust.
• Re-center. If high power is needed, turn only after re-
centering!
• Now use the FINE FOCUS ONLY for your final
adjustments.

Making a Wet Mount
1. Gather a very thin slice/piece of whatever your specimen is. All samples should be paper thickness or thinner!
2. Place ONE drop of water directly over the specimen. 3. Place the cover slip at a 45 degree angle with one edge touching the water drop, and let go.
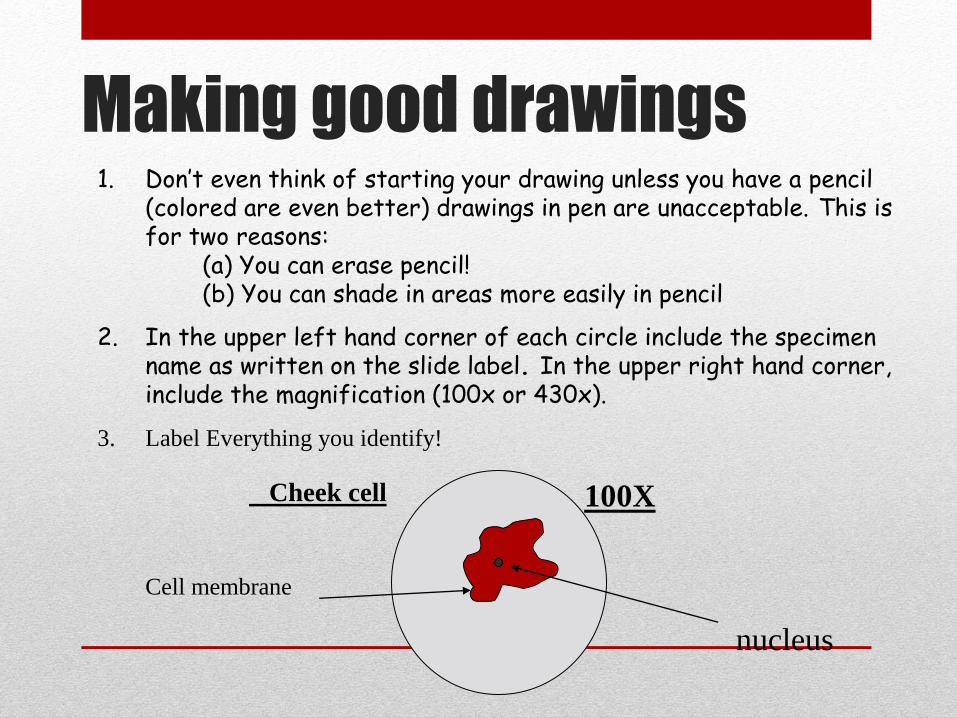
Making good drawings 1. Don’t even think of starting your drawing unless you have a pencil
(colored are even better) drawings in pen are unacceptable. This is for two reasons: (a) You can erase pencil! (b) You can shade in areas more easily in pencil
2. In the upper left hand corner of each circle include the specimen name as written on the slide label. In the upper right hand corner, include the magnification (100x or 430x).
3. Label Everything you identify!
100X Cheek cell
nucleus
Cell membrane