obtfpm- guarantee issuance · 2018-07-06 · urdg - uniform rules for demand guarantees 2. none -...
TRANSCRIPT

User Manual
OBTFPM- Guarantee Issuance Release 14.1.0.0.0 Part Id:E97615-01
pg. 1
Oracle Banking Trade Finance Process Management User Guide Oracle Financial Services Software Limited Oracle Park Off Western Express Highway Goregaon (East) Mumbai, Maharashtra 400 063 India Worldwide Inquiries: Phone: +91 22 6718 3000 Fax: +91 22 6718 3001 www.oracle.com/financialservices/ Copyright ©, 2018, Oracle and/or its affiliates. All rights reserved. Oracle and Java are registered trademarks of Oracle and/or its affiliates. Other names may be trademarks of their respective owners. U.S. GOVERNMENT END USERS: Oracle programs, including any operating system, integrated software, any programs installed on the hardware, and/or documentation, delivered to U.S. Government end users are “commercial computer software” pursuant to the applicable Federal Acquisition Regulation and agency-specific supplemental regulations. As such, use, duplication, disclosure, modification, and adaptation of the programs, including any operating system, integrated software, any programs installed on the hardware, and/or documentation, shall be subject to license terms and license restrictions applicable to the programs. No other rights are granted to the U.S. Government. This software or hardware is developed for general use in a variety of information management applications. It is not developed or intended for use in any inherently dangerous applications, including applications that may create a risk of personal injury. If you use this software or hardware in dangerous applications, then you shall be responsible to take all appropriate failsafe, backup, redundancy, and other measures to ensure its safe use. Oracle Corporation and its affiliates disclaim any liability for any damages caused by use of this software or hardware in dangerous applications. This software and related documentation are provided under a license agreement containing restrictions on use and disclosure and are protected by intellectual property laws. Except as expressly permitted in your license agreement or allowed by law, you may not use, copy, reproduce, translate, broadcast, modify, license, transmit, distribute, exhibit, perform, publish or display any part, in any form, or by any means. Reverse engineering, disassembly, or decompilation of this software, unless required by law for interoperability, is prohibited. The information contained herein is subject to change without notice and is not warranted to be error-free. If you find any errors, please report them to us in writing. This software or hardware and documentation may provide access to or information on content, products and services from third parties. Oracle Corporation and its affiliates are not responsible for and expressly disclaim all warranties of any kind with respect to third-party content, products, and services. Oracle Corporation and its affiliates will not be responsible for any loss, costs, or damages incurred due to your access to or use of third-party content, products, or services

pg. 2
Table of Contents
1.1 Overview of OBTFPM ......................................................................................................................... 3
1.1.1 Benefits ........................................................................................................................................... 3
1.1.2 Key Features ................................................................................................................................... 3
1.2 Guarantee Issuance ............................................................................................................................ 3
1.3 Registration ......................................................................................................................................... 4
1.3.1 Main ................................................................................................................................................. 4
1.4 Scrutiny ............................................................................................................................................... 7
1.4.1 Main ................................................................................................................................................. 7
1.4.2 Scrutiny- Additional Details ........................................................................................................... 12
1.4.3 Scrutiny - Summary ....................................................................................................................... 18
1.5 Data Enrichment................................................................................................................................ 19
1.5.1 Main ............................................................................................................................................... 19
1.5.2 Application Details ......................................................................................................................... 19
1.5.3 GI Details ....................................................................................................................................... 19
1.5.4 Guarantee Details ......................................................................................................................... 23
1.5.5 Preview Message .......................................................................................................................... 25
1.5.6 Additional Details ........................................................................................................................... 26
1.5.7 Summary ....................................................................................................................................... 29
1.6 Guarantee Issuance – Approval ........................................................................................................ 31
1.7 Guarantee Issuance – Acknowledgement ........................................................................................ 32
1.8 Guarantee Issuance – Acknowledgement ........................................................................................ 34
1.9 Guarantee Issuance – Rejection Letter ............................................................................................ 35
1.10 Reference and Feedback .................................................................................................................. 36

pg. 3
Welcome to Oracle Banking Trade Finance Process Management- Guarantee Issuance
Welcome to the Oracle Banking Trade Finance Process Management (OBTFPM) User Manual. This manual provides an overview on the OBTFPM application and takes you through the various steps involved in creating and processing trade finance transactions. This document will guide you on how to create and handle trade finance transaction in OBTFPM. This document is intended for helping you to conveniently create and process trade finance transactions in OBTFPM
1.1 Overview of OBTFPM
OBTFPM is a trade finance middle office platform which enables your bank to streamline the trade finance operations. With OBTFPM, customers can send request for new trade finance transaction either by visiting the branch (Non Online channels) or through SWIFT/Trade Portals/ other external systems (Online Channels). OBTFPM has customer specific templates that enable fast and easy processing of Trade transactions that reoccur periodically.
1.1.1 Benefits
OBTFPM application provides service for the customers and financial institutions. This service helps the corporate clients to manage and control multiple Trade Finance Transactions across the Globe in different currencies. OBTFPM allows you to:
Handle all Trade Finance transactions in a single Platform
Provides audit trail from the creation to closure of the transaction
Amount block support for customer account
Create acknowledgement to Customers
Enable uploading of related documents
Integrated with back end applications for tracking limits, creating limit earmarks and amount
blocks, checking KYC, AML and Sanction checks status
Create, track and close exceptions for the above checks.
1.1.2 Key Features
Stand-alone system agnostic to backend application
Requires very little change to bank’s existing core systems
Faster time to market
Capability to interface with corporate ERP and SWIFT to Corporate
Highly configurable based on corporate specific needs
Flexibility in modifying processes
1.2 Guarantee Issuance
Guarantee Issuance is a Trade Finance transaction where the Applicant approaches a bank and requests the bank to issue a Bank guarantee on their behalf to the beneficiary. Following steps are carried out in OBTFPM during issuance of a guarantee.
Receive and Verify Application and other Documents (Non Online Channel)- Registration Stage
Input Application Details

pg. 4
Upload of related Mandatory and Non Mandatory documents
Verify Documents and Capture Details (Online/Non Online Channels)- Scrutiny Stage
Input/Modify Details of the Guarantee - Data Enrichment Stage
Conduct Legal checks
Check for Limit Approval
Check for Amount Block
Check for Sanctions & KYC
Earmark Limits/Collaterals/Amount Block
Capture Remarks
Draft Guarantee Copy for Legal Verification
Generate Acknowledgement and Draft Guarantee copy to customer
Notify customer on any negative statuses during any of the stages
Handoff to Back Office
Guarantee issuance Process Flow
1.3 Registration
1.3.1 Main
As a registration user, you will be able to register a Guarantee Issuance request. You will also be able to upload relevant documents and verify checklist items.
Initiate
From landing page, either from the ‘Create New’ or from the left menu bar, you will be able to create a new Guarantee Issuance.
On selecting, Guarantee Issuance, a new page will open to capture the details.
As a registration user, you will be providing the basic application details.
Application Details
Received from Applicant Bank: Guarantee Issuance will be received from the applicant or the applicant’s bank. If the request for Guarantee issuance has been received from the applicant’s bank this field has to be checked.
Received from- Customer Id: You can select the customer id of customer from whom the issuance request has been received (applicant’s bank or applicant) as the case may be. System will not display customer ID if 1. Customer KYC status is not valid or
2. If customer is dead or
3. If customer account is frozen.
Customer Name: This field will default the name of the customer whose customer id has been chosen in the Received from – Customer Id field.
Branch: System will default the customer’s home branch. You can edit the defaulted branch to another branch.
Currency Code:
1. You can type the currency code. On entering the first character, the currencies matching the letter will be filtered.
2. You can also select from the drop-down.
Amount: You can input the Guarantee value with decimal places (as per currency type). You can type abbreviations like 1T to display 1,000.00, 1M to display as 1,000,000.00.

pg. 5
Priority: Priority will default based on priority maintenance and you will be allowed to change. The values are High, Medium and Low.
Submission Mode: For transactions created via registration, the submission mode will default as ‘Desk’. you can change the defaulted mode to another mode. Allowed values are Desk, Fax, Email and Courier.
Process Reference Number: Unique sequence number for the transaction. Auto generated by the system based on process name and branch code.
Application Date: System will default the branch’s current date. You can change the date to a back date but not to a future date.
Customer Reference Number: You can input the customer reference.
Guarantee Details
You will be able to optionally fill the details in the Guarantee Details data segment.
Product Code: The product code LOV will have all the product codes applicable for Guarantee Issuance.. You can select appropriate product code.
Product Description: The product description for the product code selected will be displayed.
Guarantee Type: You can choose from one of the following drop down values.
1. Performance Guarantee 2. Tender/Bid Bond Guarantee 3. Advance Payment Guarantee 4. Financial guarantee 5. Retention Money Guarantee 6. OTHERS (you will be able to input narration).
Advising Bank: You can search through LOV. Party type with banks will only be displayed in LOV. The system will display the a)SWIFT code(if available) , b)name and address of the bank On selection of the record if swift code is available, then swift code will be defaulted, if swift code is not available then the bank's name and address to be defaulted. The SWIFT key will be maintained with swift key validation field as 'Y'. If the swift key maintenance value is 'N' then the bank name needs to populated. (If advising bank is not selected, then the guarantee has to be sent directly to the beneficiary).
Purpose of Message: The purpose of message has two options in the pick list 1. Issue 2.Request During Guarantee Issuance, you have the option to choose Issue or Request When Issuing a guarantee based on a counter guarantee, if the incoming MT760 has ‘Request’ in the field 23, only those transactions will be handled through this flow
Validity: you will be able to choose from the below drop down values 1. Limited 2.Unlimited If Validity = 'Limited', then expiry date is mandatory If Validity = 'Unlimited', then expiry date is not mandatory
Bank Guarantee Number: System defaults the contract reference number based on the product code selected
Date of Issue: System will default the branch’s current date. You cannot change this value. System will populate this field with branch date if date of approval is later than date of registration.
Date of Expiry: Cannot be earlier than Issue Date. If expiry date is equal to issue date, override message will be displayed. This field will have value if the value for Validity period is ‘Limited’.
Applicable Rules: System will default URDG and will allow you to change. The values are:
1. URDG - Uniform rules for demand guarantees
2. None - Not subject to any rules

pg. 6
3. ISPR - International Standby Practices
4. OTHR - Others (Details captured as narration)
Applicant Bank: You can search through LOV. Party type with banks will only be displayed in LOV. The system will display the a)SWIFT code(if available) , b)Name and address of the bank On selection of the record if swift code is available, then swift code will be defaulted, if swift code is not available then the bank's name and address to be defaulted. 2. If applicant is chosen as WALKIN customer, then applicant bank must have value
Applicant: 1.If the request is received from customer, then this field will populate customer name for the customer ID captured in the application details data segment. 2. If received from applicant bank, then the applicant details have to be captured here. If customer id of the applicant is not available, then WALKIN customer id has to be used. In case applicant is not customer of the bank, KYC status is not checked for the Applicant.
Beneficiary Name: If beneficiary is a customer of the bank,, then the same is selected from the LOV. In case customer id is not available, then you has to choose WALKIN customer id and enter the beneficiary details. If beneficiary is customer of the bank, system to display override in case KYC status is ‘Not Valid’. Documents and Checklist:
Documents:
You can upload the following documents:
Guarantee Application (Mandatory)
Counter Guarantee (optional)
If Guarantee Application (Mandatory document) is not uploaded, system will display an error message.
Checklist:
You have to verify if Application is signed and stamped
You have to verify Customer Signature
Remarks:
You can capture remarks here that will be seen across the stages. The User ID, date and time of the remarks along with the remarks text will be displayed in Remarks placeholder.
On Submit - Acknowledgment will be issued to the customer through customer’s preferred media. A simple acknowledgment will be sent in case application details alone are captured. A detailed acknowledgement will be sent if Guarantee Details screen is also captured.
In case of request received through online channels, system will send the acknowledgment automatically on receipt of the request.

pg. 7
Action Buttons
After providing required data, you will be able to perform one of the below actions –
a. Submit – On Submit, system will trigger acknowledgement to the customer and give confirmation
message to you for successful submission. Task will get moved to next logical stage of Guarantee Issuance. If mandatory fields have not been captured, system will display error until the mandatory fields have been captured.
b. Hold -The details entered in the screen will be saved and the task will move to a pending stage.
c. Save and Close - The save and close button will enable you to save the details entered and keep the
task in you queue for working later.
d. Cancel – The Task will be cancelled and system will clear the details captured in the screen
1.4 Scrutiny
1.4.1 Main
As a Scrutiny user, you can verify and update request for new Guarantee issuance. The request could have been initiated either through online channels like Portal, SWIFT or other external systems or initiated through non online channels like branch or processing center.
If the request is received through online channel, the request will be processed from scrutiny stage. All data received from online channels will be persisted and populated in respective screens for guarantee issuance.
If the request is received in branch/processing center, the same would have been registered and progressed to scrutiny stage.
Description As a scrutiny user, you will be able to enter/ verify details of Guarantee Issuance request. You will also be able to upload relevant documents and verify checklist items.
1.4.1.1 Application Details
The application details data segment would have values for requests received from both non online and online channels.
All fields displayed under Application details section, would be read only except for the priority field.
Received from Applicant Bank: Read only field. If the request of Guarantee issuance has been received from the applicant’s bank, this field will have value.

pg. 8
Received from- Customer Id: Read-only field. Customer id of customer from whom the issuance request has been received (applicant’s bank or applicant) will be displayed here.
Customer Name: Read-only field. This field will display the name of the customer whose customer id has been chosen in the Customer ID field.
Branch: Read-only field. Customer’s home branch or any other branch where the customer has chosen to get the Guarantee issued will be displayed here.
Currency Code: Read-only field. 3 character currency code is displayed here.
Amount: Read-only field. Guarantee value with decimal places (as per currency type) is displayed here.
Priority: The priority maintained for the customer/ priority chosen by registration user is defaulted, but you can change the value. Values are High, Medium and Low.
Submission Mode: Read-only field. Non-online channel, value captured in registration is displayed.
Online channels- System will display values based on the channel from which request is received. Values are:
SWIFT MT 760, SWIFT MT 798, Portal, Other external systems.
Process Reference Number – Read only - Auto generated by the system based on process name and branch code.
Application Date: Read-only field. The application date is displayed here.
Customer Reference Number – Online channel – Read only field. Non online channel – you can enter or update.
1.4.1.2 GI Details
In this data segment, if registration user has captured input, the same will be available and if not, you have to capture the details.
For requests received through online channels, the details will be auto populated, some of the fields may be editable, and others are read-only.
Template:
For requests received through non-online channels, you can use Template. You can input the Template ID and on tab out, the filed details available in the template will be updated.
VIEW TEMPLATE: When you click on the look up, system will display the templates available for the applicant. You can select the relevant template and the details will be populated. The details pertaining to the subsequent screens (scrutiny and data enrichment screens) will be persisted and populated when you move to the relevant screens.
Before populating the screens, system will check if there are existing values and display a override message ' Value exist already in few fields - Do you want to use the template - Yes/No'. If you click on ‘Yes’, the details pre entered will be over-written with the template values.
USE TEMPLATE: You can directly update the template id or template name and click on the Use Template button. System will validate the Template id or Template Name and populate the relevant values in the screen. If the Template id or Template Name provided is different from the chosen applicant id, system will display an error message, 'Check the Template id/Template Name'. Before populating the screens, system will check if there are existing values and display override message ' Value exist already in few fields - Do you want to use the template - Yes/No'. If you click on ‘Yes’, the details pre entered will be over-written with the template values. I you click ‘No’ - Template will not be used.
Product Code:
Request received through Non online channel – Read only if already captured in Registration stage.
If not captured in registration or if the request is received through online channel: The product code LOV will have all the product codes applicable for Guarantee Issuance. You have to select appropriate product.
Product Description: The product description for the product code selected will be populated.

pg. 9
Guarantee Type:
For requests received through online channel – You can update the details received.
For requests received through non online channel – You can update if details are already captured in Registration stage. You can input the details if not captured already in Registration.
You can choose from one of the following drop down values:
Performance Guarantee
Tender/Bid Bond Guarantee
Advance Payment Guarantee
Financial guarantee
Retention Money Guarantee
OTHERS (you can capture narration).
Advising Bank:
If the request is received through online channel and if value is available for this field, then you can update.
If the request is received through online channel and if value is not available for this field, then you can input.
If the request is received through non-online channel and if value is available for this field, then you can update.
If the request is received through non-online channel and if value is not available for this field, then you can input.
You can search through LOV.
Party type with banks will only be displayed in LOV.
The system will display the
a) SWIFT code (if available),
b) Name and address of the bank
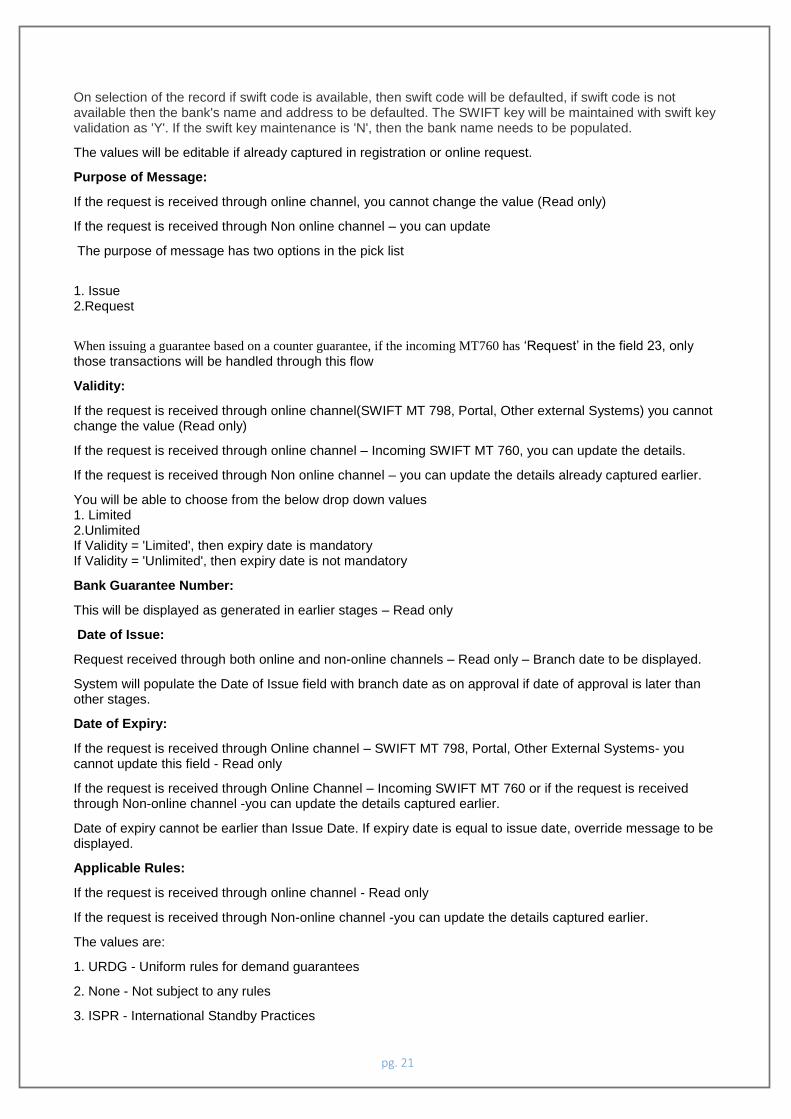
On selection of the record if swift code is available, then swift code will be defaulted, if swift code is not available then the bank's name and address to be defaulted. The SWIFT key will be maintained with swift key validation as 'Y'. If the swift key maintenance is 'N', then the bank name needs to be populated.
The values will be editable if already captured in registration or online request.
Purpose of Message:
If the request is received through online channel, you cannot change the value (Read only)
If the request is received through Non online channel – you can update if already captured in Registration
If not captured in Registration- you can input
The purpose of message has two options in the pick list
1. Issue
2.Request
When Issuing a guarantee based on a counter guarantee, then if the incoming MT760 has ‘Request’ in the field 23,
only those transactions will be handled through this flow
Validity:
If the request is received through online channel - SWIFT MT 798, Portal, Other External Systems you cannot change the value (Read only)
If the request is received through online channel – Incoming SWIFT MT 760, You can input the details.
pg. 10
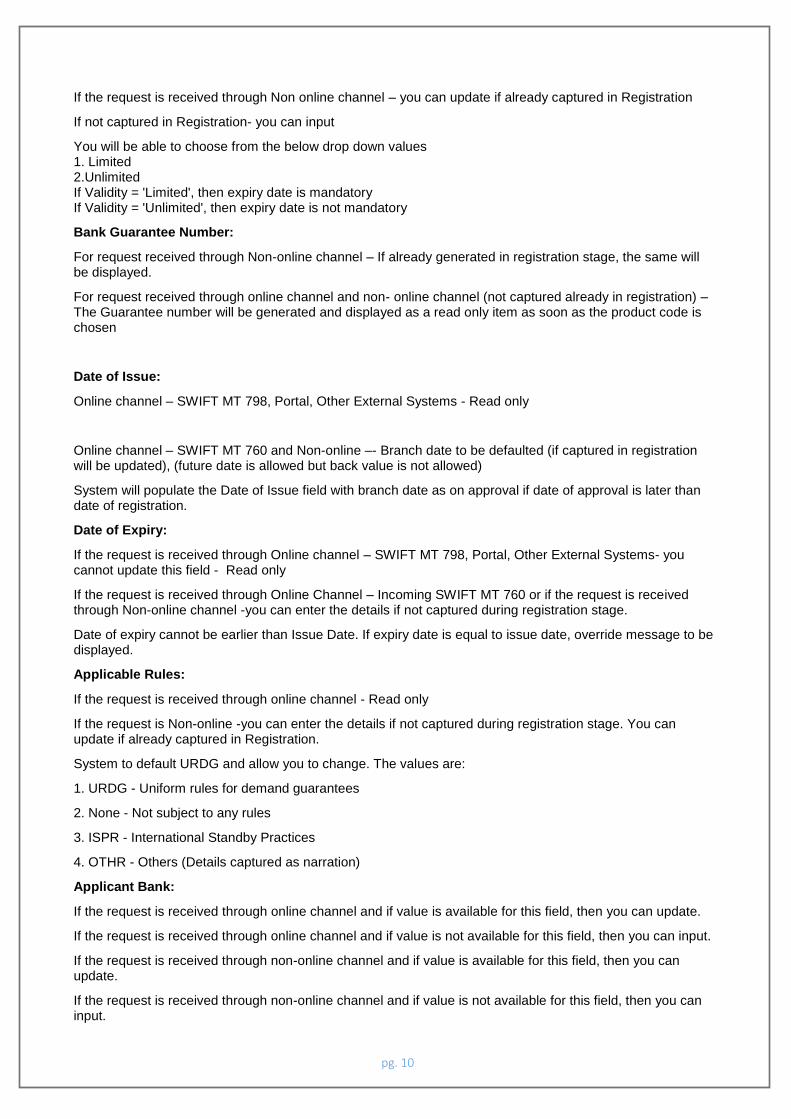
If the request is received through Non online channel – you can update if already captured in Registration
If not captured in Registration- you can input
You will be able to choose from the below drop down values 1. Limited 2.Unlimited If Validity = 'Limited', then expiry date is mandatory If Validity = 'Unlimited', then expiry date is not mandatory
Bank Guarantee Number:
For request received through Non-online channel – If already generated in registration stage, the same will be displayed.
For request received through online channel and non- online channel (not captured already in registration) – The Guarantee number will be generated and displayed as a read only item as soon as the product code is chosen
Date of Issue:
Online channel – SWIFT MT 798, Portal, Other External Systems - Read only
Online channel – SWIFT MT 760 and Non-online –- Branch date to be defaulted (if captured in registration will be updated), (future date is allowed but back value is not allowed)
System will populate the Date of Issue field with branch date as on approval if date of approval is later than date of registration.
Date of Expiry:
If the request is received through Online channel – SWIFT MT 798, Portal, Other External Systems- you cannot update this field - Read only
If the request is received through Online Channel – Incoming SWIFT MT 760 or if the request is received through Non-online channel -you can enter the details if not captured during registration stage.
Date of expiry cannot be earlier than Issue Date. If expiry date is equal to issue date, override message to be displayed.
Applicable Rules:
If the request is received through online channel - Read only
If the request is Non-online -you can enter the details if not captured during registration stage. You can update if already captured in Registration.
System to default URDG and allow you to change. The values are:
1. URDG - Uniform rules for demand guarantees
2. None - Not subject to any rules
3. ISPR - International Standby Practices
4. OTHR - Others (Details captured as narration)
Applicant Bank:
If the request is received through online channel and if value is available for this field, then you can update.
If the request is received through online channel and if value is not available for this field, then you can input.
If the request is received through non-online channel and if value is available for this field, then you can update.
If the request is received through non-online channel and if value is not available for this field, then you can input.

pg. 11
You can search through LOV, Party type with banks will only be displayed in LOV.
The system will display the
SWIFT code (if available) and name and address of the bank
On selection of the record if swift code is available then swift code will be defaulted, if swift code is not available then the bank's name and address to be defaulted.
Applicant:
1. If the request is received through online channel – SWIFT MT 798, Portal, Other External Channels - Read-only
2. If the request is received through Non-online channel – If already captured in registration – Read only
3. If not captured in Registration. - you can input the applicant details.
4. And if the request is received through Online Channel – Incoming SWIFT MT 760 – you have to capture the details.
You can search through LOV,
Party type with customers will only be displayed in LOV.
Only customers who have a valid KYC status will be available for selection in LOV.
If application is received from applicant bank and if applicant is non-customer, then you can choose ‘Walk-in’ customer. In case applicant is not a customer of the bank, then KYC status of the applicant is not checked.
Beneficiary Name:
If the request is received through online channel – SWIFT MT 798, Portal, Other External Channels - Read-only
If the request is received through Non online channel - you can enter the details if not captured during registration stage and you can update if already captured during registration stage.
If the request is received through Online channel – Incoming SWIFT MT 760 – You have to input the details.
If WALKIN CUSTOMER is chosen you will be allowed to edit the details
System to display override if KYC status of beneficiary is not valid (for beneficiaries who are customers of the bank)
Documents and Checklist:
Documents:
Online – Not applicable
Non online – No documents for upload
Checklist:
Online – Not applicable
Non online - Verify documents uploaded
Remarks:
You can capture remarks here that will be seen across the stages. The User ID, date and time of the remarks along with the remarks text will be displayed in Remarks place holder.

pg. 12
Note: This data segment contains certain PII (Personally Identifiable Information) fields and the corresponding field information will be masked in the data segment if the user identification has PII disabled at User maintenance level
Action Buttons
After providing required data you will be able to perform any of the below action –
a. Submit - Submit - On Submit, system will validate for all mandatory field values and the task will move to the next logical stage. If you submit without visiting other mandatory hops, then error message will be displayed and force you to visit mandatory tabs/update mandatory fields
b. Hold - You will be able to retain all the entered data and will not submit the task. Task will remain in Pending state.
c. Reject - On click of Reject, system will display the following Reject Codes:
R1- Documents missing, R2- Signature Missing, R3- Input Error, R4- Insufficient Balance- Limits, R5 - Others. The user would be able to select a Reject code and give a Reject Description.
Other users will be able to see the reject reason in remarks window throughout the process
d. Cancel - You will be able to cancel the DE window and return to dashboard. The data input will not be saved.
e. Next - On click of Next, system will validate for mandatory fields and move the task to the next page. If mandatory fields are missing, system will display error.
1.4.2 Scrutiny- Additional Details
As a Scrutiny user, you can scrutinize Guarantee Issuance request. You can verify and update the basic details in the Additional Details related fields.
Description Based on the details captured so far, as a Scrutiny user, you can check if limits are available for the Guarantee to be issued and capture if any collateral is required. I will also check if the defaulted charges and commission are fine and change them if required.
Application Details
The application details data segment would have values for requests received from both non online and online channels.
All fields displayed under Application details section, would be read only.

pg. 13
1.4.2.1 Limit Details
The various additional details will be available as tile. Each tile can be selected and the respective screen will open for you to capture details.
Limit Details
Customer ID: Applicant’s/Applicant Bank customer ID will get defaulted.
Line ID: .The various lines available and mapped under the customer id gets listed in the dropdown and you can choose the Line ID.
LINE ID-DESCRIPTION will be available for selection along with Line ID. When you click on 'verify', the system will return value if the limit check was ‘successful’ or ‘Limit not Available’, if limit check fails. The outstanding limit after the transaction value will be shown in the limit outstanding amount.
Contribution %: System will default this to 100%. You can change this. If contribution is more than 100%, system will display a override.
System will validate that Limit Contribution% plus Collateral % is not less than 100. Otherwise system will display override.
Contribution Currency: The Guarantee currency will be defaulted in this field
Contribution Amount: Contribution amount will be defaulted based on the contribution%.
Limit Check Response: Response will be ‘Success’ or ‘Limit not Available’
Limit Available Amount: This field will display the value of available limit.ie, limit available without any earmark
1.4.2.2 Collateral Details
Collateral Type: Cash Collateral (CASA) will be the default value available as collateral type. you can select either Cash Collateral or Deposits
Collateral %: You can enter the percentage of collateral to be linked to this transaction. If the value is more than 100% system will display override message.
System will validate that Limit Contribution% plus Collateral % is not less than 100. Otherwise system will display override.
Currency: The Guarantee currency will be defaulted in this field
Contribution Amount: The collateral contribution amount will be populated based on collateral %.
Settlement Account: The CASA accounts of the customer will be listed and you can choose the settlement account. You can verify the balance available in the settlement account by clicking on verify balance button.
Settlement Account Branch: This field defaults the branch in which the selected settlement account is maintained
Documents and Checklist:
Documents: No documents are to be uploaded in this stage.
Checklists: Nil
1.4.2.3 Charges Details
After Guarantee Details on selecting <Next> and landing on the additional tab, the default commission, charges and tax if any will get populated.
If default charges are available under the product, they will be defaulted here with values.
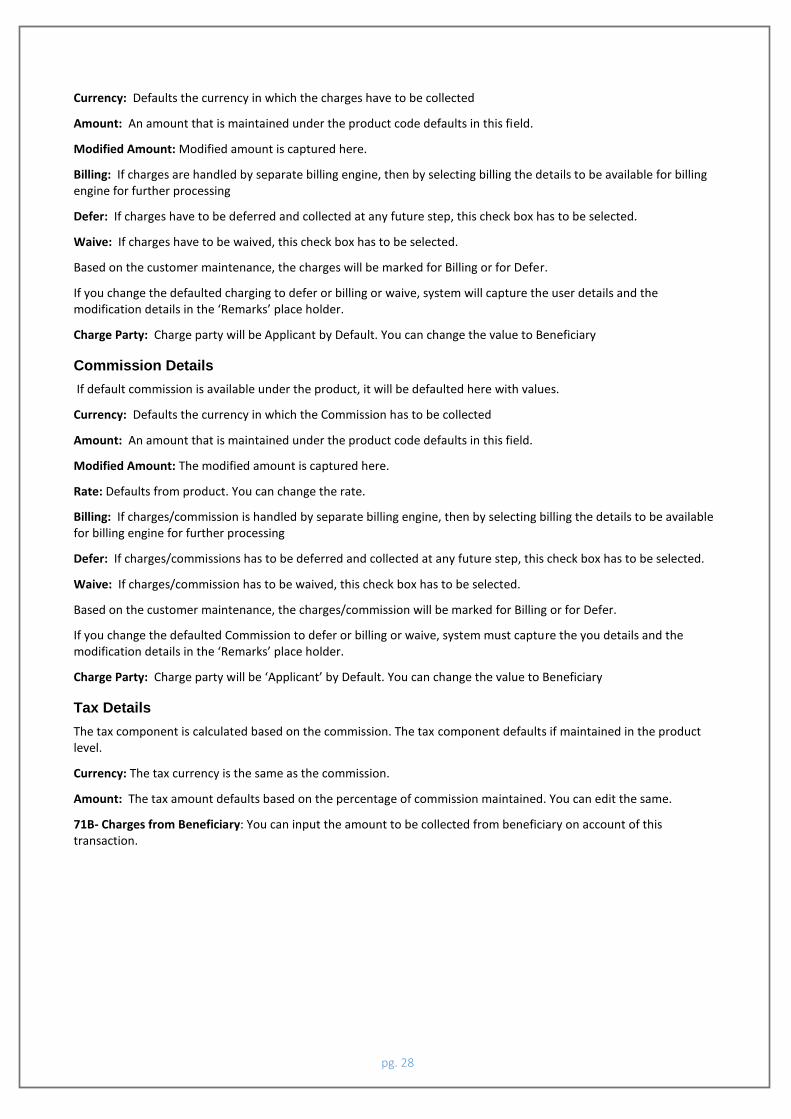
Currency: Defaults the currency in which the charges have to be collected
Amount: An amount that is maintained under the product code defaults in this field.
Modified Amount: Modified amount is captured here.

pg. 14
Billing: If charges are handled by separate billing engine, then by selecting billing the details to be available for billing engine for further processing
Defer: If charges have to be deferred and collected at any future step, this check box has to be selected.
Waive: If charges have to be waived, this check box has to be selected.
Based on the customer maintenance, the charges will be marked for Billing or for Defer.
If you change the defaulted charging to defer or billing or waive, system will capture the user details and the modification details in the ‘Remarks’ place holder.
Charge Party: Charge party will be Applicant by Default. You can change the value to Beneficiary
1.4.2.4 Commission Details
If default commission is available under the product, it will be defaulted here with values.
Currency: Defaults the currency in which the Commission has to be collected
Amount: An amount that is maintained under the product code defaults in this field.
Modified Amount: The modified amount is captured here.
Rate: Defaults from product. You can change the rate.
Billing: If charges/commission is handled by separate billing engine, then by selecting billing the details to be available for billing engine for further processing
Defer: If charges/commissions has to be deferred and collected at any future step, this check box has to be selected.
Waive: If charges/commission has to be waived, this check box has to be selected.
Based on the customer maintenance, the charges/commission will be marked for Billing or for Defer.
If you change the defaulted Commission to defer or billing or waive, system must capture the you details and the modification details in the ‘Remarks’ place holder.
Charge Party: Charge party will be ‘Applicant’ by Default. You can change the value to Beneficiary
1.4.2.5 Tax Details
The tax component is calculated based on the commission. The tax component defaults if maintained in the product level.
Currency: The tax currency is the same as the commission.
Amount: The tax amount defaults based on the percentage of commission maintained. You can edit the same.
71B- Charges from Beneficiary: You can input the amount to be collected from beneficiary on account of this transaction.

pg. 15

pg. 16

pg. 17
Action Button
After providing required data you will be able to perform any of the below action –
a. Submit - On Submit, system will validate for all mandatory field values and the task will move to the next
logical stage. If you submit without visiting other mandatory hops, then error message will be displayed and force you to visit mandatory tabs/update mandatory fields
b. Hold - You can put the task ‘On Hold’. System will retain all the entered data and will not submit the task. Task will remain in Pending state.

pg. 18
c. Reject - On click of Reject, system will display the following Reject codes:
R1- Documents missing, R2- Signature Missing, R3- Input Error, R4- Insufficient Balance- Limits, R5 - Others. You would be able to select a Reject code and give a Reject Description.
Other users will be able to see the reject reason in remarks window throughout the process
d. Cancel - You will be able to cancel the task and return to dashboard. The data input will not be saved.
e. Back – You can go back to the previous page by clicking on Back.
f. Next - On click of Next, system will validate for mandatory fields and move the task to the next page. If
mandatory fields are missing, system will display error.
1.4.3 Scrutiny - Summary
You can review the summary of details captured for Guarantee Issuance request
Description Summary screen will display a set of tiles corresponding to the data segments. Each til will display a list of important fields with values. You will be also able to drill down from summary Tiles into respective data segments and modify the details.
Tiles Displayed in Summary
Main- You will be able to see details about application details and Guarantee Issue details.
Party Details – You will be able to see the party details like beneficiary, advising bank etc.
Limits and Collaterals- You will be able to see captured details of limits and collateral.
Charges- You can see details provided for charges.
Action Buttons
After providing required data you will be able to perform any of the below action –
a. Submit - On Submit, system will validate for all mandatory field values and the task will move to the next logical stage. If you submit without visiting other mandatory hops, then error message will be displayed and force you to visit mandatory tabs/update mandatory fields.
b. Hold - On click of Hold, You will be able to retain all the entered data and put the task on Hold. Task will remain in Pending state.
c. Reject - On click of Reject, system will display the following Reject Codes:

pg. 19
R1- Documents missing, R2- Signature Missing, R3- Input Error, R4- Insufficient Balance- Limits, R5 - Others. You can select a Reject code and give a Reject Description. Other users will be able to see the reject reason in remarks window throughout the process
d. Cancel - You will be able to cancel the task and return to dashboard. The data input will not be saved.
e. Back – On click of Back, system will display the previous page.
1.5 Data Enrichment
1.5.1 Main
You can process Guarantee Issuance request. As part of data enrichment, you can enter/update basic details of the request.
You will be able to enter/update the following fields. Some of the fields that are already having value from registration/online channels may not be editable.
1.5.2 Application Details
The application details data segment would have values for requests received from both non online and online channels.
All fields displayed under Application details section, would be read only except for the priority field.
Received from Applicant Bank: Read only field. If the request of Guarantee issuance has been received from the applicant’s bank, this field will have value.
Received from- Customer Id: Read-only field. Customer id of customer from whom the issuance request has been received (applicant’s bank or applicant) will be displayed here.
Customer Name: Read-only field. This field will display the name of the customer whose customer id has been chosen in the Customer ID field.
Branch: Read-only field. Customer’s home branch or any other branch where the customer has chosen to get the Guarantee issued will be displayed here.
Currency Code: Read-only field. 3 character currency code is displayed here.
Amount: Read-only field. Guarantee value with decimal places (as per currency type) is displayed here.
Priority: The priority maintained for the customer/ priority chosen by earlier user is defaulted, but you can change the value. Values are High, Medium and Low.
Submission Mode: Read-only field. Non-online channel, value captured in registration is displayed.
Online channels- System will display values based on the channel from which request is received. Values are:
SWIFT MT 760, SWIFT MT 798, Portal, Other external systems.
Process Reference Number – Read only - Auto generated by the system based on process name and branch code.
Application Date: Read-only field. The application date is displayed here.
Customer Reference Number – If the request is received through Online channel – Read only field. If the request is received through Non online channel – you can enter or update.
1.5.3 GI Details
In this data segment, if registration/ scrutiny user has captured input, the same will be available and if not, you have to capture the details.
For requests received through online channels, the details will be auto populated, some of the fields may be editable, and others are read-only.

pg. 20
Template:
Templates can be used in this stage if they are not used already in Scrutiny stage.
For requests received through non-online channels, you can use Template. You can input the Template ID and on tab out, the filed details available in the template will be updated.
VIEW TEMPLATE: When you click on the look up, system will display the templates available for the applicant. You can select the relevant template and the details will be populated. The details pertaining to the subsequent screens (scrutiny and data enrichment screens) will be persisted and populated when you move to the relevant screens.
Before populating the screens, system will check if there are existing values and display a override message ' Value exist already in few fields - Do you want to use the template - Yes/No'. If you click on ‘Yes’, the details pre entered will be over-written with the template values.
USE TEMPLATE: You can directly update the template id or template name and click on the Use Template button. System will validate the Template id or Template Name and populate the relevant values in the screen. If the Template id or Template Name provided is different from the chosen applicant id, system will display an error message, 'Check the Template id/Template Name'. Before populating the screens, system will check if there are existing values and display override message ' Value exist already in few fields - Do you want to use the template - Yes/No'. If you click on ‘Yes’, the details pre entered will be over-written with the template values. I you click ‘No’ - Template will not be used.
Product Code:
This filed will be a Read-only field. The registration user or scrutiny user would have captured the value already.
Product Description: The product description for the product will be displayed.
Guarantee Type:
For requests received through online channel – You can update the details received.
For requests received through non online channel – You can update the details already captured. You can choose from one of the following drop down values:
Performance Guarantee
Tender/Bid Bond Guarantee
Advance Payment Guarantee
Financial guarantee
Retention Money Guarantee
OTHERS (you can capture narration).
Advising Bank:
If the request is received through online channel and if value is available for this field, then you can update.
If the request is received through online channel and if value is not available for this field, then you can input.
If the request is received through non-online channel and if value is available for this field, then you can update.
If the request is received through non-online channel and if value is not available for this field, then you can input.
You can search through LOV.
Party type with banks will only be displayed in LOV.
The system will display the
a) SWIFT code (if available),
b) Name and address of the bank
pg. 21
On selection of the record if swift code is available, then swift code will be defaulted, if swift code is not available then the bank's name and address to be defaulted. The SWIFT key will be maintained with swift key validation as 'Y'. If the swift key maintenance is 'N', then the bank name needs to be populated.
The values will be editable if already captured in registration or online request.
Purpose of Message:
If the request is received through online channel, you cannot change the value (Read only)
If the request is received through Non online channel – you can update
The purpose of message has two options in the pick list
1. Issue 2.Request
When issuing a guarantee based on a counter guarantee, if the incoming MT760 has ‘Request’ in the field 23, only
those transactions will be handled through this flow
Validity:
If the request is received through online channel(SWIFT MT 798, Portal, Other external Systems) you cannot change the value (Read only)
If the request is received through online channel – Incoming SWIFT MT 760, you can update the details.
If the request is received through Non online channel – you can update the details already captured earlier.
You will be able to choose from the below drop down values 1. Limited 2.Unlimited If Validity = 'Limited', then expiry date is mandatory If Validity = 'Unlimited', then expiry date is not mandatory
Bank Guarantee Number:
This will be displayed as generated in earlier stages – Read only
Date of Issue:
Request received through both online and non-online channels – Read only – Branch date to be displayed.
System will populate the Date of Issue field with branch date as on approval if date of approval is later than other stages.
Date of Expiry:
If the request is received through Online channel – SWIFT MT 798, Portal, Other External Systems- you cannot update this field - Read only
If the request is received through Online Channel – Incoming SWIFT MT 760 or if the request is received through Non-online channel -you can update the details captured earlier.
Date of expiry cannot be earlier than Issue Date. If expiry date is equal to issue date, override message to be displayed.
Applicable Rules:
If the request is received through online channel - Read only
If the request is received through Non-online channel -you can update the details captured earlier.
The values are:
1. URDG - Uniform rules for demand guarantees
2. None - Not subject to any rules
3. ISPR - International Standby Practices

pg. 22
4. OTHR - Others (Details captured as narration)
Applicant Bank:
If the request is received through online channel and if value is available for this field, then you can update.
If the request is received through online channel and if value is not available for this field, then you can input.
If the request is received through non-online channel and if value is available for this field, then you can update.
If the request is received through non-online channel and if value is not available for this field, then you can input.
You can search through LOV, Party type with banks will only be displayed in LOV.
The system will display the
SWIFT code (if available) and name and address of the bank
On selection of the record if swift code is available then swift code will be defaulted, if swift code is not available then the bank's name and address to be defaulted.
Applicant:
1. If the request is received through online channel – SWIFT MT 798, Portal, Other External Channels - Read-only
2. If the request is received through Non-online channel – If already captured – You can update
4. And if the request is received through Online Channel – Incoming SWIFT MT 760 – You can update
You can search through LOV,
Party type with customers will only be displayed in LOV.
Only customers who have a valid KYC status will be available for selection in LOV.
If application is received from applicant bank and if applicant is non-customer, then you can choose ‘Walk-in’ customer. In case applicant is not a customer of the bank, then KYC status of the applicant is not checked.
Beneficiary Name:
If the request is received through online channel – SWIFT MT 798, Portal, Other External Channels - Read-only
If the request is received through Non online channel - you can update if already captured earlier.
If the request is received through online channel – Incoming SWIFT MT 760 – You can update the details.
If WALKIN CUSTOMER is chosen you will be allowed to edit the details
System to display override if KYC status of beneficiary is not valid (for beneficiaries who are customers of the bank)
Documents and Checklist:
Documents:
No documents for upload in this stage.
Checklist:
Nil
Remarks:
You can capture remarks here that will be seen across the stages. The User ID, date and time of the remarks along with the remarks text will be displayed in Remarks place holder.

pg. 23
Action Buttons
After providing required data you will be able to perform any of the below action –
a. Submit - Submit - On Submit, system will validate for all mandatory field values and the task will move to the next logical stage. If you submit without visiting other mandatory hops, then error message will be displayed and force you to visit mandatory tabs/update mandatory fields
b. Hold - You will be able to retain all the entered data and will not submit the task. Task will remain in Pending state.
c. Reject - On click of Reject, system will display the following Reject Codes:
R1- Documents missing, R2- Signature Missing, R3- Input Error, R4- Insufficient Balance- Limits, R5 - Others. The user would be able to select a Reject code and give a Reject Description.
Other users will be able to see the reject reason in remarks window throughout the process
d. Cancel - You will be able to cancel the DE window and return to dashboard. The data input will not be saved.
e. Next - On click of Next, system will validate for mandatory fields and move the task to the next page. If mandatory fields are missing, system will display error.
1.5.4 Guarantee Details
Application Details
All fields displayed under Application details section, will be read only. The data segment is collapsible.
Guarantee Details
Counter Guarantee Details:
The fields under this data segment are applicable only for online channel – Incoming SWIFT MT 760 – Read only
Other online channels and non- online channels – The field is not applicable.
CG Issuing Bank: System will populate the SWIFT ID/ Name and address of the counter guarantee issuing bank from the incoming SWIFT MT 760 Message.
CG Reference: Reference number of the counter guarantee.
CG Issue Date: Issue date of counter guarantee
CG Sender to Receiver Info: Sender to Receiver information as received from counter guarantee issuing bank.
77C Details of Guarantee:

pg. 24
If the request is received through Online Channel - 1a. For MT760 - The details available under tag 77C of the incoming message will get populated in the 1st row of FFT. 1b. you can add more than one FFT 2a. For MT798 - Sub message MT760 - The details available under tag 77C of the incoming message will get populated in the 1st row of FFT. 2b. you can add more than one FFT 3. For Other external systems/portals: The details provided through the portal will get populated in the 1st row of FFT and you can add additional FFT. Non online channel - 1. You can use FFT code to populate the guarantee text.
2. You can modify the description defaulted from the FFT. 3. You can add more than one FFT
72Z Sender to Receiver Information:
Request received through Online Channel- SWIFT MT 798, Portal and other external systems – System to populate the incoming message. You can add more FFT. You can modify description of FFT.
Request received through online channel – SWIFT MT 760 and Request received through Non-Online channels – You can capture details through FFT. You can modify description of FFT.

pg. 25
Action Button
After providing required data you will be able to perform any of the below action –
a. Submit - On Submit, system will validate for all mandatory field values and the task will move to the next
logical stage. If you submit without visiting other mandatory hops, then error message will be displayed and force you to visit mandatory tabs/update mandatory fields
b. Hold - You can put the task ‘On Hold’. System will retain all the entered data and will not submit the task. Task will remain in Pending state.
c. Reject - On click of Reject, system will display the following Reject codes:
R1- Documents missing, R2- Signature Missing, R3- Input Error, R4- Insufficient Balance- Limits, R5 - Others. You would be able to select a Reject code and give a Reject Description.
Other users will be able to see the reject reason in remarks window throughout the process
d. Cancel - You will be able to cancel the task and return to dashboard. The data input will not be saved.
e. Back – You can go back to the previous page by clicking on Back.
f. Next - On click of Next, system will validate for mandatory fields and move the task to the next page. If
mandatory fields are missing, system will display error
1.5.5 Preview Message
.
As part of this screen, you can have a preview of the draft Guarantee details. You will be able to send the draft for
Verification by your legal team if required. You can also send the draft guarantee for confirmation by the customer if required.
Application Details
All fields displayed under Application details section, would be read only in this screen. The data segment is collapsible.
Preview Message:
Based on the guarantee text captured in the previous screen, guarantee draft is generated in the back office and is displayed in this screen.
Legal Verification Required:
If the guarantee message is to be verified and approved by Legal department before issue, you can select the option for legal verification.
Draft Confirmation Required:

pg. 26
If the guarantee message is to be approved by the customer before issue, then you can select the option for draft confirmation.
Documents and Checklist-
Documents:
No Documents are to be uploaded during this stage.
Checklists:
Nil
Action Buttons
After providing required data, you will be able to perform any of the below action –
a. Submit - On Submit, system will validate for all mandatory field values and the task will move to the next
logical stage. If you submit without visiting other mandatory hops, then error message will be displayed and force you to visit mandatory tabs/update mandatory fields
b. Hold - You can put the task ‘On Hold’. System will retain all the entered data and will not submit the task. Task will remain in Pending state.
c. Reject - On click of Reject, system will display the following Reject codes:
R1- Documents missing, R2- Signature Missing, R3- Input Error, R4- Insufficient Balance- Limits, R5 - Others. You would be able to select a Reject code and give a Reject Description.
Other users will be able to see the reject reason in remarks window throughout the process
d. Cancel - You will be able to cancel the task and return to dashboard. The data input will not be saved.
e. Back – You can go back to the previous page by clicking on Back.
f. Next - On click of Next, system will validate for mandatory fields and move the task to the next page. If
mandatory fields are missing, system will display errorData
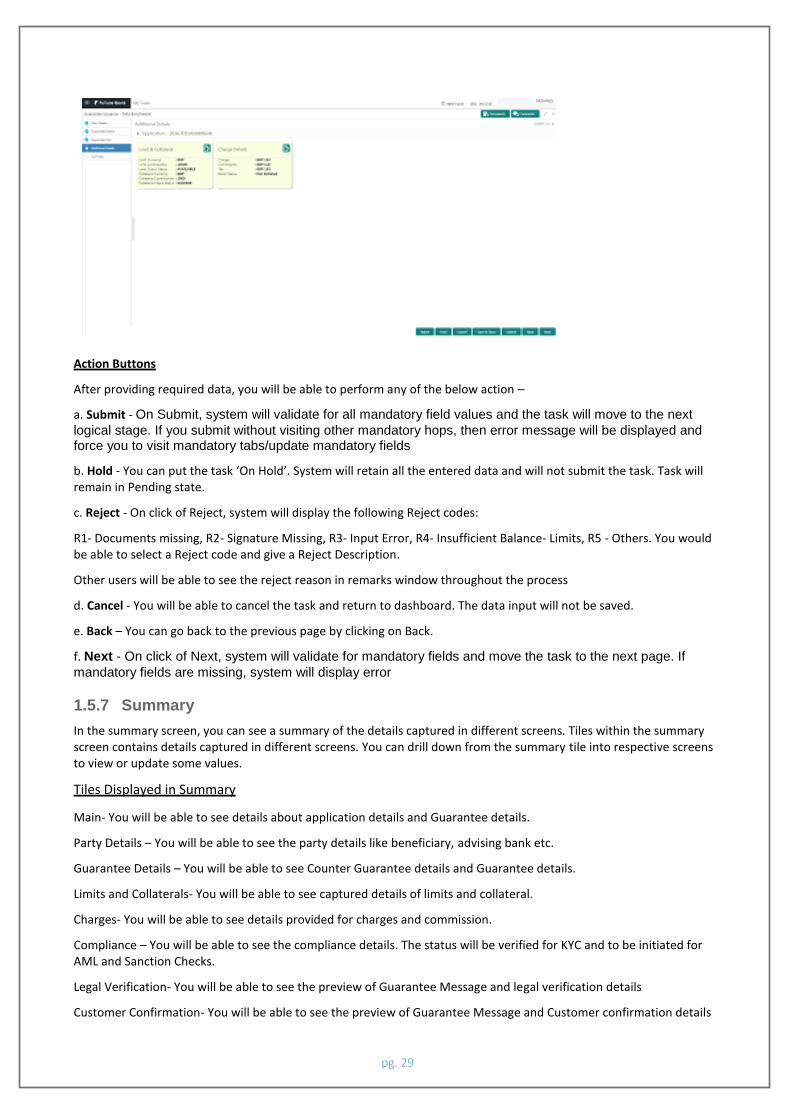
1.5.6 Additional Details
Based on the details captured so far, as a DE user, you can check if limits are available for the Guarantee to be issued and capture if any collateral is required. You can also check if the defaulted charges and commission are fine and change them if required.
Application Details
The application details data segment would have values for requests received from both non online and online channels.

pg. 27
All fields displayed under Application details section, would be read only.
Limit Details
The various additional details will be available as tile. Each tile can be selected and the respective screen will open for you to capture details.
Limit Details
Customer ID: Applicant’s/Applicant Bank customer ID will get defaulted.
Line ID: .The various lines available and mapped under the customer id gets listed in the dropdown and you can choose the Line ID.
LINE ID-DESCRIPTION will be available for selection along with Line ID. When you click on 'verify', the system will return value if the limit check was ‘successful’ or ‘Limit not Available’, if limit check fails. The outstanding limit after the transaction value will be shown in the limit outstanding amount.
Contribution %: System will default this to 100%. You can change this. If contribution is more than 100%, system will display a override.
System will validate that Limit Contribution% plus Collateral % is not less than 100. Otherwise system will display override.
Contribution Currency: The Guarantee currency will be defaulted in this field
Contribution Amount: Contribution amount will be defaulted based on the contribution%.
Limit Check Response: Response will be ‘Success’ or ‘Limit not Available’
Limit Available Amount: This field will display the value of available limit.ie, limit available without any earmark
Collateral Details
Collateral Type: Cash Collateral (CASA) will be the default value available as collateral type. you can select either Cash Collateral or Deposits
Collateral %: You can enter the percentage of collateral to be linked to this transaction. If the value is more than 100% system will display override message.
System will validate that Limit Contribution% plus Collateral % is not less than 100. Otherwise system will display override.
Currency: The Guarantee currency will be defaulted in this field
Contribution Amount: The collateral contribution amount will be populated based on collateral %.
Settlement Account: The CASA accounts of the customer will be listed and you can choose the settlement account. You can verify the balance available in the settlement account by clicking on verify balance button.
Settlement Account Branch: This field defaults the branch in which the selected settlement account is maintained
Documents and Checklist:
Documents: No documents are to be uploaded in this stage.
Checklists: Nil
Charges Details
After Guarantee Details on selecting <Next> and landing on the additional tab, the default commission, charges and tax if any will get populated.
If default charges are available under the product, they will be defaulted here with values.
pg. 28
Currency: Defaults the currency in which the charges have to be collected
Amount: An amount that is maintained under the product code defaults in this field.
Modified Amount: Modified amount is captured here.
Billing: If charges are handled by separate billing engine, then by selecting billing the details to be available for billing engine for further processing
Defer: If charges have to be deferred and collected at any future step, this check box has to be selected.
Waive: If charges have to be waived, this check box has to be selected.
Based on the customer maintenance, the charges will be marked for Billing or for Defer.
If you change the defaulted charging to defer or billing or waive, system will capture the user details and the modification details in the ‘Remarks’ place holder.
Charge Party: Charge party will be Applicant by Default. You can change the value to Beneficiary
Commission Details
If default commission is available under the product, it will be defaulted here with values.
Currency: Defaults the currency in which the Commission has to be collected
Amount: An amount that is maintained under the product code defaults in this field.
Modified Amount: The modified amount is captured here.
Rate: Defaults from product. You can change the rate.
Billing: If charges/commission is handled by separate billing engine, then by selecting billing the details to be available for billing engine for further processing
Defer: If charges/commissions has to be deferred and collected at any future step, this check box has to be selected.
Waive: If charges/commission has to be waived, this check box has to be selected.
Based on the customer maintenance, the charges/commission will be marked for Billing or for Defer.
If you change the defaulted Commission to defer or billing or waive, system must capture the you details and the modification details in the ‘Remarks’ place holder.
Charge Party: Charge party will be ‘Applicant’ by Default. You can change the value to Beneficiary
Tax Details
The tax component is calculated based on the commission. The tax component defaults if maintained in the product level.
Currency: The tax currency is the same as the commission.
Amount: The tax amount defaults based on the percentage of commission maintained. You can edit the same.
71B- Charges from Beneficiary: You can input the amount to be collected from beneficiary on account of this transaction.
pg. 29
Action Buttons
After providing required data, you will be able to perform any of the below action –
a. Submit - On Submit, system will validate for all mandatory field values and the task will move to the next
logical stage. If you submit without visiting other mandatory hops, then error message will be displayed and force you to visit mandatory tabs/update mandatory fields
b. Hold - You can put the task ‘On Hold’. System will retain all the entered data and will not submit the task. Task will remain in Pending state.
c. Reject - On click of Reject, system will display the following Reject codes:
R1- Documents missing, R2- Signature Missing, R3- Input Error, R4- Insufficient Balance- Limits, R5 - Others. You would be able to select a Reject code and give a Reject Description.
Other users will be able to see the reject reason in remarks window throughout the process
d. Cancel - You will be able to cancel the task and return to dashboard. The data input will not be saved.
e. Back – You can go back to the previous page by clicking on Back.
f. Next - On click of Next, system will validate for mandatory fields and move the task to the next page. If
mandatory fields are missing, system will display error
1.5.7 Summary
In the summary screen, you can see a summary of the details captured in different screens. Tiles within the summary screen contains details captured in different screens. You can drill down from the summary tile into respective screens to view or update some values.
Tiles Displayed in Summary
Main- You will be able to see details about application details and Guarantee details.
Party Details – You will be able to see the party details like beneficiary, advising bank etc.
Guarantee Details – You will be able to see Counter Guarantee details and Guarantee details.
Limits and Collaterals- You will be able to see captured details of limits and collateral.
Charges- You will be able to see details provided for charges and commission.
Compliance – You will be able to see the compliance details. The status will be verified for KYC and to be initiated for AML and Sanction Checks.
Legal Verification- You will be able to see the preview of Guarantee Message and legal verification details
Customer Confirmation- You will be able to see the preview of Guarantee Message and Customer confirmation details

pg. 30
Create Template
You can create a new template by using the data captured in the transaction.
Template Name – You can give a name to the Template.
The following fields will be enabled when creating template. When using a template, the field values for same field across the stages will be filled in with the same value. For example, Guarantee Type in Scrutiny and DE stage will be filled in with the same values, when template is applied.
Stage Data Segment Field Name
Registration Main Applicant ID
Registration Main Applicant Name
Registration Main Branch code
Scrutiny GI Details Product Code
Scrutiny GI Details Product Description
Scrutiny GI Details Advising Bank
Scrutiny GI Details Guarantee Type
Scrutiny GI Details Applicable Rules
Scrutiny GI Details Beneficiary Name
Scrutiny GI Details Purpose of Message
Scrutiny GI Details Validity
Data Enrichment Guarantee Details Guarantee Text
Data Enrichment Guarantee Details Sender to Receiver Information
Action Buttons
After providing required data you will be able to perform any of the below actions –
a. Submit - On Submit, system will validate for all mandatory field values and the task will move to the next logical stage. If you submit without visiting other mandatory hops, then error message will be displayed and force you to visit mandatory tabs/update mandatory fields.

pg. 31
b. Hold - On click of Hold, You will be able to retain all the entered data and put the task on Hold. Task will remain in Pending state.
c. Reject - On click of Reject, system will display the following Reject Codes:
R1- Documents missing, R2- Signature Missing, R3- Input Error, R4- Insufficient Balance- Limits, R5 - Others. You can select a Reject code and give a Reject Description. Other users will be able to see the reject reason in remarks window throughout the process
d. Cancel - You will be able to cancel the task and return to dashboard. The data input will not be saved.
e. Back – On click of Back, system will display the previous page.
1.6 Guarantee Issuance – Approval
Approval of a Guarantee Issuance requires one or more users based on the currency and amount of the guarantee being issued.
Authorization Re-Key(This is applicable for the first approver and only for non-online channels)
As an approval user, you will be able to open the Guarantee application document from the Documents window and re-key some of the critical field values from the request in the Re-key screen. System will validate that the re-key values are equal to the values captured in the screen by the users. If the values captured match with the values available in the screen, system will allow you to open the transaction screens for further verification. If the re-key values are different from the values captured, system will display an error message. Some of the fields below will dynamically be available for re-key.
Field Name
Applicant Name
Guarantee Currency, Amount
Beneficiary Name
Expiry Date
Validity
Guarantee Type
Purpose of Message
Advising Bank
Re-key is applicable to the first approver in case of multiple approvers. All approvers will however be able see the summary tiles and the details in the screen by drill down from tiles.
Tiles Displayed in Summary
Main- You will be able to see details about application details and GI details.
Party Details – You will be able to see the party details like beneficiary, advising bank etc.
Guarantee Details – You will be able to see the Counter Guarantee Details and Guarantee Text and Sender to Receiver Information
Limits and Collaterals- You will be able to see details of limits and collateral.
Charges- You will be able to see details of charges, commission and Taxes

pg. 32
Compliance – You will be able to see the compliance details tiles. The status will be verified for KYC, AML and Sanction Checks.
Legal Verification – You will be able to see the message preview details and legal verification initiated details.
Draft Confirmation – You will be able to see the message preview and customer draft confirmation required details.
Remarks- You will be able to see remarks captured by other users and also capture remarks.
Documents – No documents are required for upload in this stage
Checklist – Nil
Based on the transaction value, there will be one or more approvers. After verification, on submit the transaction gets approved and if there are additional approvals, the task will move to the next approver. After all approvals, the system will hand-off the transaction details to the back end system for posting.
Action Buttons
After verifying the details, you will be able to perform any of the below action –
a. Submit - On Submit, system will validate for all mandatory field values and the task will move to the next logical stage.
b. Hold - On click of Hold, You will be able to retain all the entered data and put the task on Hold. Task will remain in Pending state.
c. Reject - On click of Reject, system will display the following Reject codes:
R1- Documents missing, R2- Signature Missing, R3- Input Error, R4- Insufficient Balance- Limits, R5 - Others. You can select a Reject code and give a Reject Description.
Other users will be able to see the reject reason in remarks window throughout the process
d. Cancel - You will be able to cancel the task and return to dashboard. The data input will not be saved.
e. Refer - You will be able to refer the task back to the DE user. System will display the following Refer Codes:
R1- Documents missing, R2- Signature Missing, R3- Input Error, R4- Insufficient Balance- Limits, R5 - Others. You will be able to select a Refer code and give a Refer Description
1.7 Guarantee Issuance – Acknowledgement
To:
<CUSTOMER NAME> DATE: DD-MM-YYYY
<CUSTOMER ADDRESS>
Dear Sir,
SUB: Acknowledgement to your Guarantee Application <CUSTOMER REFERENCE NUMBER> dated <APPLICATION DATE>
This letter is to inform you that we have received your application for Issuance of Guarantee with the below details:
CUSTOMER NAME: <CUSTOMER NAME>
CURRENCY/AMOUNT: <CCY/AMT>
YOUR REFERENCE NO: <CUSTOMER REFERENCE NUMBER>
OUR REF NUMBER: <PROCESS REFERENCE NUMBER>

pg. 33
We have also received the following Documents from you for processing the request:
Document Name 1
2. Document Name 2
n. Document Name n
We have registered your request. Please quote our reference < PROCESS REF NUMBER> in any future correspondence.
This acknowledgement does not constitute issuance of Guarantee.
Thank You for banking with us.
Regards,
<DEMO BANK>
Notice: This document is strictly private, confidential and personal to its recipients and will not be copied, distributed or reproduced in whole or in part, nor passed to any third party. The information contained in this e-mail/ message and/or attachments to it may contain confidential or privileged information. If you are not the intended recipient, any dissemination, use, review, distribution, printing or copying of the information contained in this message and/or attachments to it are strictly prohibited. If you have received this communication in error, please notify us by reply e-mail or telephone and immediately and permanently delete the message and any attachments. Thank you

pg. 34
1.8 Guarantee Issuance – Acknowledgement
To:
<CUSTOMER NAME> DATE: DD-MM-YYYY
<CUSTOMER ADDRESS>
Dear Sir,
SUB: Acknowledgement to your Guarantee Application number <CUSTOMER REFERENCE NUMBER> dated <APPLICATION DATE>
This letter is to inform you that we have received your application for issue of Guarantee with the below details:
CUSTOMER NAME: <CUSTOMER NAME>
CURRENCY/AMOUNT: < CCY/AMT>
YOUR REFERENCE NO: <CUSTOMER REFERENCE NUMBER>
OUR REF NUMBER: <PROCESS REFERENCE NUMBER>
APPLICANT NAME: <APPLLICANT>
BENEFICIARY NAME: <BENEFICIARY>
Bank Guarantee Number: < Bank Guarantee Number>
DATE OF ISSUE: <DATE OF ISSUE>
DATE OF EXPIRY: <DATE OF EXPIRY>
Guaranty Type: <Guarantee Type>
We have also received the following Documents from you for processing the request:
Document Name 1
2. Document Name 2
n. Document Name n
We have registered your request. Please quote our reference < PROCESS REF NUMBER> in any future correspondence.
This acknowledgement does not constitute issuance of Guarantee.
Thank You for banking with us.
Regards,
<DEMO BANK>
Notice: This document is strictly private, confidential and personal to its recipients and will not be copied, distributed or reproduced in whole or in part, nor passed to any third party. The information contained in this e-mail/ message and/or attachments to it may contain confidential or privileged information. If you are not the intended recipient, any dissemination, use, review, distribution, printing or copying of the information contained in this e-mail message and/or attachments to it are strictly prohibited. If you have received this communication in error, please notify us by reply e-mail or telephone and immediately and permanently delete the message and any attachments. Thank you

pg. 35
1.9 Guarantee Issuance – Rejection Letter
FROM:
<BANK NAME>
<BANK ADDRESS>
TO: DATE <DD/MM/YYYY>
<CUSTOMER NAME>
<CUSTOMER ADDRESS>
<CUSTOMER ID>
Dear Sir,
SUB: Your Guarantee Application <Customer Reference Number> under our Process Ref <Process Ref No> - Rejected
Further to your recent Guarantee application request dated <Application Date –DD/MM/YYYY>, under our process ref no <process ref no>, this is to advise you that we will not be able to issue the Guarantee.
After a thorough review of your application and the supporting documents submitted, we have concluded we will not be able to issue the Guarantee due to the below reason
<Reject Reason >
On behalf of Demo Bank, we thank you for your ongoing business and trust we will continue to serve you in future.
For any further queries about details of your Guarantee application review, please contact us at our bank customer support ph.no xxxxxxxxxxxx
Yours Truly
Authorized Signatory

pg. 36
1.10 Reference and Feedback
References
For more information on any related features, you can refer to the following documents:
Oracle Banking Procedure User Guide
Oracle Banking Common Core
Feedback and Support
Oracle welcomes customers' comments and suggestions on the quality and usefulness of the document. Your feedback is important to us. If you have a query that is not covered in this user guide or if you still need assistance, please contact documentation team.