occlusal splint technique - final - learn what the ... · occlusal splint fabrication technique ......
TRANSCRIPT
1 Mount maxillary and mandibular models to precision articulator; i.e., SAM.
2 Prepare the model by defining the anatomical contours with a lab knife and fill voids with a quick setting stone such as Snapstone. Block-out moderate undercuts using Model Bloc, Great Lakes Compound 101 or Great Lakes Block-out Gel which is light curable.
3 Open articulator about 4mm from first tooth contact. Upper and lower cusps of the posterior dentition should not overlap.
4 Place mounted model into the center of the pellet cup. If possible, place pellets around the mounted model from the rim of cup to model at: • posterior segment of gingival margin. • anterior segment 3mm below incisal edges (including cuspids). • heel of model (do not cover palate/lingual areas).
5 Isofolan may be used as a model release or minor blockout agent. Place a sheet of 0.10mm Isofolan material on the pressure chamber and secure it with the clamping frame. Enter the heating time of 25 seconds into the MiniSTAR or Biostar and swing the heating element over the pressure chamber to initiate the heating cycle.
Occlusal Splint Fabrication Technique
Safety glasses should be worn for all lab procedures as well as gloves when handling acrylics. Items featured in this technique are found on the last page.

6 Once the heating cycle is complete, remove the heating element and swing the chamber over the model and lock the chamber in place by turning the locking handle toward the front of the machine to initiate the pressure molding/cooling cycle for 30-60 seconds.
7 At the end of the cooling phase, evacuate the air pressure from the chamber and unlock the chamber by turning the locking handle toward the back of the machine. Slide the clamping frame to the left to release the material and swing the chamber back to its open position.
8 Heat a lab knife with a torch.
9 Cut out and remove excess Isofolan material from perimeter of model.
10 The model with the Isofolan spacer in place is properly positioned in the pellets for thermal-forming the Splint material. Liquid separator is not needed if Isofolan is used.
11 Roughen one side of 2mm Splint Biocryl disc with sandpaper in a handpiece mandrel. Place sanded side of plastic facing the inside of the chamber and clamp in place. Swing the heating element over the pressure chamber to initiate the heating cycle. Heat 2mm material for 60 seconds.
12 Once the heating cycle is complete, remove the heating element and swing the chamber over the model and lock the chamber in place. Cool formed material under pressure for 2-3 minutes. Evacuate the pressure from the chamber. Unlock the chamber and slide the clamping frame to the left to release the formed material. Swing the chamber back to its open position.
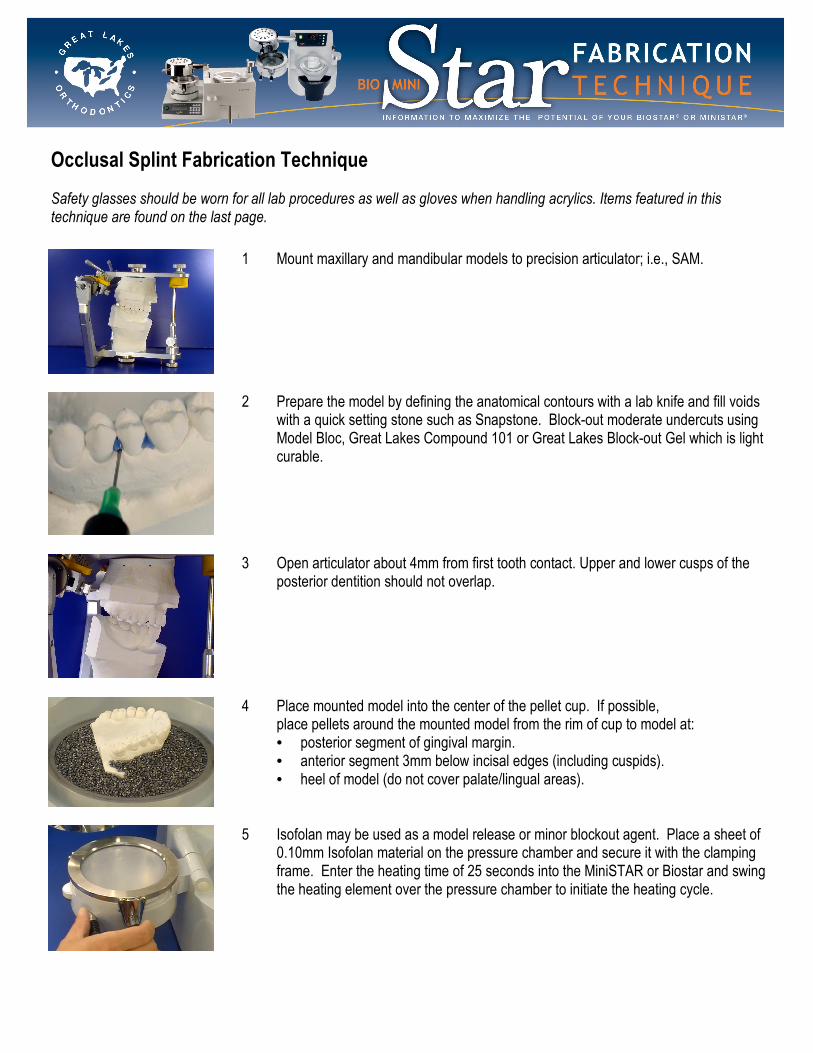
13 Remove model with formed material from machine. Scrape excess pellets back into the pellet cup. Cut out template along pellet/model reference using a ¾” lightning disc with a standard mandrel in a lab handpiece.
14 Place model with template on articulator and equilibrate the template as needed to maintain the required vertical opening set on the articulator.
15 Wax-relieve opposing model with strips of 1mm baseplate wax to protect teeth
during the acrylicing process. This will allow for confirmation of centric stops against splint.
16 Prime template with a thin layer of monomer to retain the acrylic which will be added.
17 Use Splint Biocryl acrylic resin. Measure 20ml powder to be mixed with 10ml liquid. Also, place a small amount of monomer in a resimix cup to help hand-mold these materials later.
18 Mix the measured ingredients in a large resimix cup with a #31 wax spatula.
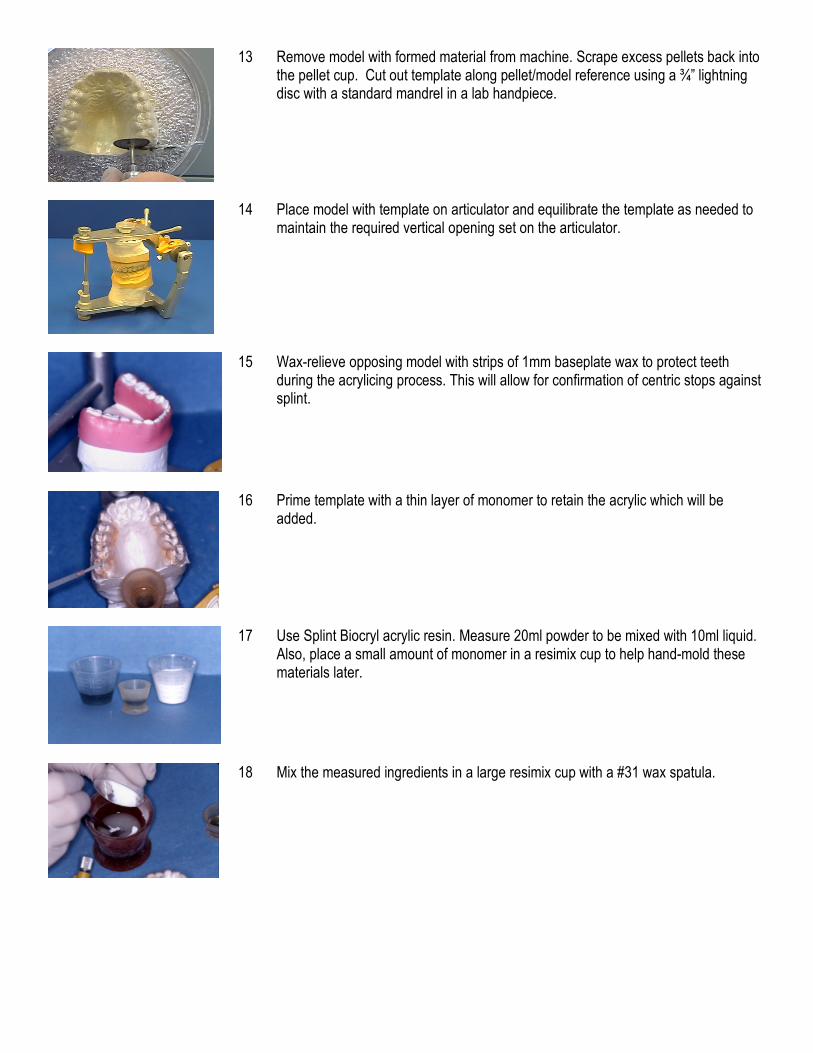
19 Place tight fitting gloves on hands and lubricate with Vaseline. When mixed resin reaches a dough-like consistency, hand form to a horseshoe shape.
20 Apply horseshoe-shaped resin to the occlusal surface of the template.
21 Close the articulator to incisal pin setting. Finger-form acrylic resin to the facial and lingual areas. Use monomer to help finger-form resin.
22 Cure acrylic in humid pressure pot for 15 minutes. Pressure pot temperature should be approximately 120° F and pressure regulated at 20 psi. Remove from the pot and open articulator.
23 Identify lower buccal cusp tip and incisal edge contacts.
24 Rough trim acrylic with grinding stone on a high-speed lathe.
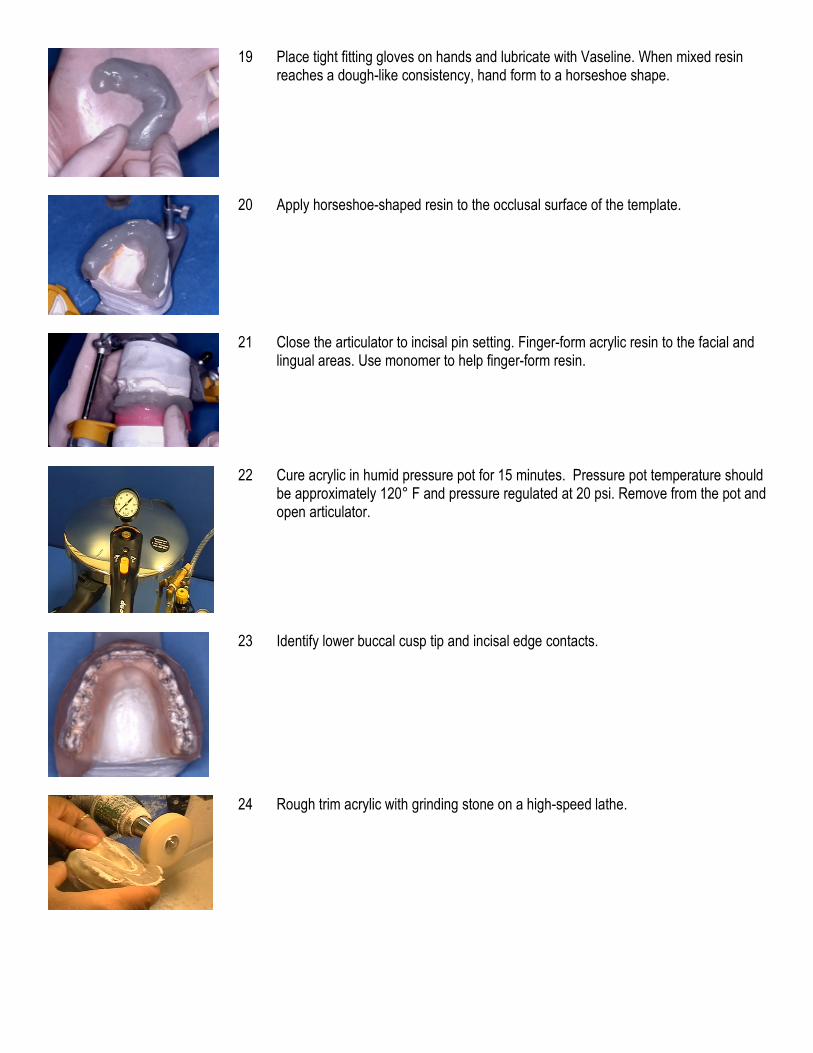
25 Reduce occlusal acrylic with a grinding stone, then with a carbide taper bur in a lab handpiece. If constructing a flat plane splint, trim occlusal acrylic around entire arch to centric contacts. For a splint with a ramp, flatten only centric stops of occluding posteriors. Moderate indexing is removed.
26 Trim the anterior acrylic creating an incisal guide ramp for excursive movements
27 Reduce incisor and cuspid indexing to minimal contact and identify protrusive and lateral movements against the acrylic ramp using articulating paper.
28 Remove high acrylic areas to achieve even contact of occluding anteriors along ramp during excursive movements. Continue this process until the desired contacts are achieved. Close the lower model into the upper splint on the articulator to check shallow references of the mandibular buccal cusp tips.
29 Lightly trim lower anterior contacts for minimal indexing. This will prevent anterior interferences during eccentric movements. Horseshoe lingual area 3-5mm below the gingival margin. Trim the posterior section (facially) 1.5mm gingival to the height of contour of the clinical crowns. Reduce acrylic along the anteriors (facially) to maintain a 2-3mm overlap.
30 With a mandrel and 150-grit sandpaper, smooth trimmed acrylic areas. Make sure the anterior guide ramp and posterior centric stops are lightly sanded so the guidance is not altered.
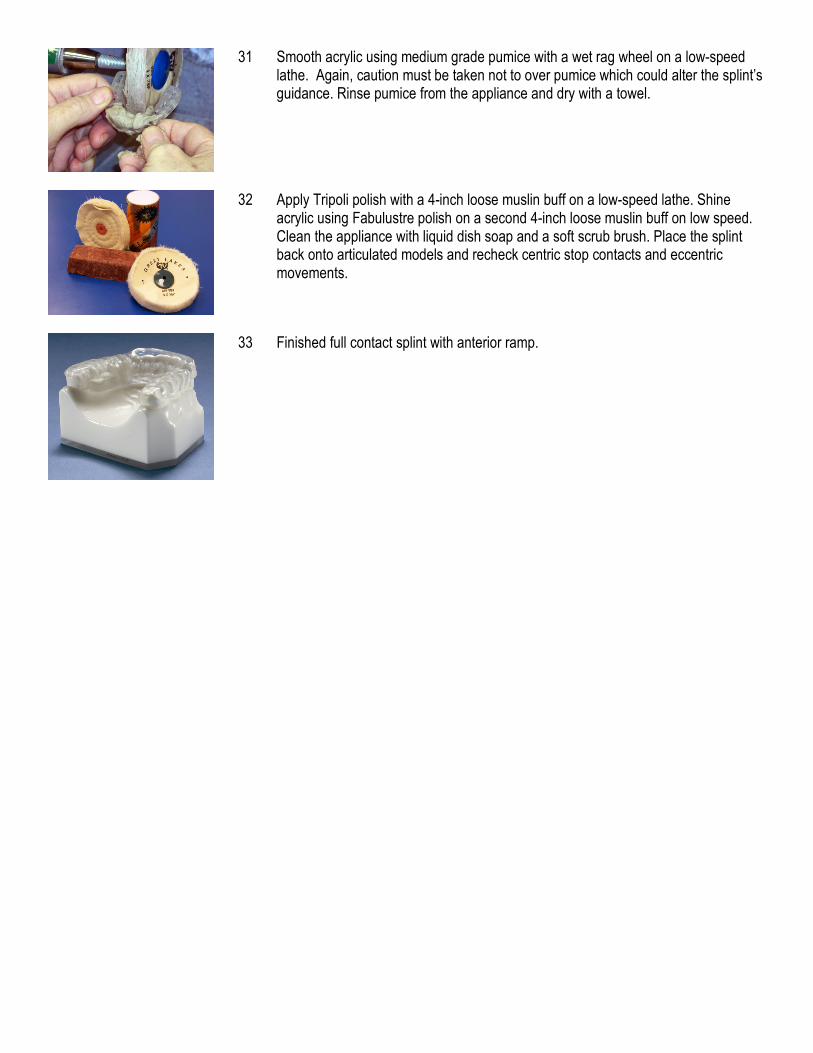
31 Smooth acrylic using medium grade pumice with a wet rag wheel on a low-speed lathe. Again, caution must be taken not to over pumice which could alter the splint’s guidance. Rinse pumice from the appliance and dry with a towel.
32 Apply Tripoli polish with a 4-inch loose muslin buff on a low-speed lathe. Shine acrylic using Fabulustre polish on a second 4-inch loose muslin buff on low speed. Clean the appliance with liquid dish soap and a soft scrub brush. Place the splint back onto articulated models and recheck centric stop contacts and eccentric movements.
33 Finished full contact splint with anterior ramp.

Items featured in technique:
235-009 Astro Spec Safety Glasses (reg./black) 235-062 N-Dex Non-latex Gloves (Med) 050-003 SAM III Articulator 050-153 Axioquick Transfer Bow 050-154 Transfer Stand 050-023 SAM Mounting Plates 215-009 Mounting Stone 190-015 Model Bloc 190-100 Great Lakes Compound 101 006-014 Blue-Blokker Light Cure Material 190-120 Bluephase curing lights (190-110, 190-130) 190-030 ProCure light cure oven 030-002 Isofolan 080-006 Micro torch 080-009 Gas refill 170-005 Lab Knife 175-034 Separator 075-007 Separator Brushes 1.5 & 2mm Splint Biocryl Disks 1.8mm Durasoft (pre-dried) 040-008 Splint Biocryl Acrylic Resin 150-025 Lab Handpiece 085-009 Carbide Taper Bur 085-022 Sandpaper Mandrel 060-007 Sandpaper roll 086-027 3/4" Lightning Disk 085-019 Standard Mandrels 056-006 Occlusal Adjustment tape 260-018 Hygienic No. 3 Wax 165-005 Wax Spatulas (165-004, 165-007) Resimix cups 225-040 GLO Pressure Pot 086-019 Acrylic Grinding stone 180-003 Stone Truer 230-003 Medium Pumice 086-003 Plastic Rag Wheel 180-002 Lathe with Quick Chuck 110-014 Splash pan Light-right side 105-060 Handler Portavac 105-061 Handler Portavac replacement filters 086-002 Muslin Buffs 230-007 Tripoli 230-008 Fabulustre 180-016 Quick-Chuck Threaded Mandrel
800.828.7626 (US & Canada) 716.871.1161 (Worldwide)
716.871.0550 (Fax) E-Mail: [email protected] Website: www.greatlakesortho.com