of the growinggrowing ... · growinggrowing harvestharvest of the first tunnels tomatoes are one...
TRANSCRIPT

growinggrowing harvestharvest
OF THE
F I R S T T U N N E L Swww.FirstTunnels.co.uk
Tomatoes are one of the most popular plants for
UK gardeners to grow. They’re moderately fussy
plants, needing constant feeding, frequent watering,
and a calm and sunny spot. Despite all this they’re
very rewarding, and with so many varieties available
you can try a new one every year if you like. Growing
in your polytunnel lets you grow serious amounts of
tomatoes, and frees you from the few varieties that
will tolerate being grown outdoors. Your biggest
headache will be choosing which ones to grow next;
purple or striped fruit, sharp or sweet, huge and
fleshy or tiny and juicy?
Varieties: ‘Latah’, ‘Red Cluster Pear’, ‘Harbinger’
Sowing: Tomatoes are not difficult to grow from
seed, but the key to getting good results is to give
your plants the longest growing season you can.
In most of the country getting things started early
on a sunny windowsill is fine, but in northerly areas
it is better to buy young plants from a local nursery,
which will have kick-started the whole process for
you using heat and growing lights.
For strong plants without the risk of stunting,
tomato seeds should be sown in modules of seed
compost around the middle of March and given
a warm and well-lit spot, such as an indoor
windowsill, until they can be brought out to the
tunnel some time in April. Sow seeds into 9cm pots,
0.5cm deep. Germination is usually good, so don’t
sow more than two or three to a pot, and thin to the
best plant when they’re 2 or 3cm tall.
TomatoesTomatoes
salads and soupssalads and soups
sun dried or fried?sun dried or fried?
homemade pasta saucehomemade pasta sauce

harvestharvestTomatoesTomatoes
OF THE
keep up to datewith all that’s happening, share hints,
tips and much more...www.facebook.com/polytunnels
VisionTunnel
a section of the First Tunnels site dedicated to video guides
for all aspects of your polytunnelwww.firsttunnels.co.uk
When roots appear at the bottom of the plant pots,
pot your seedlings on into larger pots of potting
compost. Unlike most other plants, tomatoes will
tolerate being planted so deeply that only their top
set of leaves are left above the surface; the buried
portion will sprout more roots, giving a stronger plant.
Wait until the first flowers have formed before you
set tomato plants out into their final growing positions
in the soil beds, or in large pots or grow bags.
When planting tomatoes into the soil beds, dig lots
of fresh compost and a handful of comfrey pellets
into each planting spot. Don’t make the mistake
of crowding in too many plants, as good airflow
round the leaves is vitally important to reduce the
chance of tomato blight (see ‘harvest’ tab)
infecting your tunnel. Leave at least as much space
as the seed merchant recommends, and provide
a support for each plant. Tie them in every 25cm or
so, and nip off any side-shoots that develop from
the leaf joints so that you are left with a single
upright vine.
Tomatoes are hungry plants and need to be fed with
tomato fertilizer starting as soon as the first flowers
appear, but watering is absolutely crucial for
top-quality fruit. Never let the soil dry out – and this
makes growbags less than ideal. If you do opt for
them, use two to make an extra deep one: put one
on top of the other, and push your trowel through
the bottom of the top bag. Your plants will soon find
the hole, and will be glad of the extra moisture on
hot days.
TOTOP TI TIPwhen first flowers appearwhen first flowers appeartime to start usingtime to start usingfertiliser and increasefertiliser and increasewateringwatering
growinggrowingTOTOP TI TIPtie in eachtie in eachplantplant
WATER, WATER...WATER, WATER...and more waterand more waterfor the best fruitfor the best fruit
TOTOP TI TIPinstainstall anl anirrigationirrigationsystemsystem
Big drippamore info

F I R S T T U N N E L Swww.FirstTunnels.co.uk
TomatoesTomatoes growinggrowing
OF THE
Diseases and pests: Tomatoes can be affected by
whitefly, red spider mites, aphids and various foliage
diseases, but by far the most serious problem is
blight, which can occur any time from early July.
Tomato blight starts as a irregular shadowy patches
on the leaves which turn into a watery rot that causes
foliage to collapse, shrivel and turn brown. Blight
spreads quickly in the humid conditions of the tunnel,
but if you spot it early enough you can slow down
its advance by removing infected foliage (burn it, bin
it, or bury it deep inside a hot compost heap) and
spraying the remaining plants with 10g of sodium
bicarbonate (baking soda) in a litre of water.
Harvest from June/July: Unlike shop-bought fruit,
properly ripe tomatoes should give a little when
squeezed gently. Harvest each fruit as it becomes
ripe, levering it up so that the calyx (the little tuft
of green leaves at the top of the fruit) comes with it,
and use within a few days. Fruit kept in the fridge
will keep for a couple of weeks but the flavour
weakens with storage. And what flavour!
Recipe: Tomatoes can be used for loads and loads
of fantastic recipes, find the varieties you like and
grow, grow, grow...
Visit www.FirstTunnels.co.uk for all your polytunnel
products, spares, accessories and guidance.
You can find out about what we’re currently doing
via facebook,www.facebook.com/polytunnels and
through our blog, www.polytunnelgardening.co.uk
© Andy McKee 2011
BLIGHT TOBLIGHT TOP TI TIP
keep a close eye on thekeep a close eye on the
leaves of your plants andleaves of your plants and
remove these leaves asremove these leaves as
soon as possiblesoon as possible
harvestharvest
savour the flavour!savour the flavour!

growinggrowing harvestharvest
OF THE
F I R S T T U N N E L Swww.FirstTunnels.co.uk
Rewarding and generally problem-free, sweetcorn
is easy to grow outside in most of England but
becomes harder the further north you go, with
harvests becoming unreliable any further north than
Yorkshire. Using a polytunnel, however, you can
grow sweetcorn successfully in the Shetland Islands
– and gardeners in the south can use their tunnel
to harvest perfect ears of corn weeks earlier than
their outdoor plants. Sweetcorn loves the rich soil
and protection from high winds inside a polytunnel,
and once germinated they don’t need much attention
beyond keeping them well fed.
Sweetcorn loses sweetness from the moment it is
picked, which means that homegrown corn tastes
far better than corn bought in the supermarket. It
does take up quite a bit of space, but the leaves let
a lot of light through to the ground which means
you can grow other plants (particularly low-growing
legumes like dwarf french beans) between them.
Varieties: Butterscotch (for far northern areas) and
Swift. Keep seed for no longer than a year, as the
quality suffers with storage.
Sowing: Sweetcorn can be sown direct in the tunnel
in mid-May, but for the earliest harvest they should
be started off on a sunny windowsill indoors from
mid-April to early May. Sweetcorn plants hate root
disturbance, so plant them 2.5cm deep in
biodegradable pots, allowing two seeds per tube to
account for failures. Ordinary potting compost is fine.
If you haven't already prepared the bed for sweetcorn,
get it done when you sow: incorporate lots of compost
into the soil and add a handful of bonemeal per square
meter, then water the bed well.
SwSweetcorntcorn
striking GOLD...
striking GOLD...
sweetsweet
fantastic BBQ foodfantastic BBQ food

harvestharvestsweetcornsweetcorn
OF THE
keep up to datewith all that’s happening, share hints,
tips and much more...www.facebook.com/polytunnels
VisionTunnel
a section of the First Tunnels site dedicated to video guides
for all aspects of your polytunnelwww.firsttunnels.co.uk
To make sure that sweetcorn is pollinated properly,
it is best grown in a block rather than in rows or
singly. As soon as roots start to push through the
cardboard, plant the seedlings, pot and all, into their
final positions allowing a minimum spacing of 15cm
x 25cm. As they grow, the plants may produce
side-shoots, but thereʼs no need to remove them.
Once the plants are established, begin feeding with
tomato fertilizer every fortnight, and keep this up
until you harvest. Increase the amount of water you
give once the ears begin to form, but never allow
the bed to become waterlogged. When the tall
feathery 'tassels' (male flowers) appear at the top
of the plants, tap the stems each morning so that
the powdery pollen falls from them.
Diseases and pests: The only likely problem in the
UK is theft – usually by rodents, but if youʼre really
unlucky by badgers or deer – once the corn begins
to ripen. If your tunnel receives unwanted attention,
harvest the remaining ears as soon as possible.

F I R S T T U N N E L Swww.FirstTunnels.co.uk
sweetcornsweetcorn growinggrowing
OF THE
Harvest from July to September. As soon as the silks
on the end of the ears of corn turn brown and start
to shrivel up, you can test to see if the kernels are ripe.
Gently peel one ear open a little to see the kernels,
and pop one with your fingernail. If the liquid is watery,
leave the corn a few more days; if it's creamy, the
corn is ready to harvest. Any ears you don't want right
away will keep best on the plant, but don't leave
them too long. If popping a kernel shows that the
liquid inside is becoming doughy, the corn is overripe –
harvest the rest immediately.
Recipe: By far the tastiest way to enjoy sweetcorn
is to take it straight from the plant to the barbeque.
Twist whole ears from the plant and put them, without
removing any of the outer leaves, into a bucket of
cold water. After leaving them to soak for half an hour
take them out, give them a bit of a shake, and put
them on the BBQ grill for 25 minutes, turning several
times to distribute the heat. The outer leaves will turn
black, but when you peel them away the corn will be
perfect and ready to eat straight away. Just try not to
burn your mouth...
Visit www.FirstTunnels.co.uk for all your polytunnel
products, spares, accessories and guidance.
You can find out about what we’re currently doing
via facebook, www.facebook.com/polytunnels and
through our blog, www.polytunnelgardening.co.uk
© Andy McKee 2011
G R O W I N GG R O W I N GG U I D EG U I D E

growinggrowing harvestharvest
OF THE
F I R S T T U N N E L Swww.FirstTunnels.co.uk
If, like me, you're one of those people who can't
wait for the first strawberries of the year, you can
use your polytunnel to get these delicious morsels
three weeks earlier than anyone else. This is best
done by using an early variety and planting it the
previous summer, to give the root system time
to develop.
Varieties: Honeoye, a vigorous and productive
early variety with some botrytis resistance - vital in
humid weather.
StrawberryStrawberry
TOP TIP lots of compostTOP TIP lots of compostand regular wateringand regular watering
delicious !delicious !

harvestharveststrawberrystrawberry
OF THE
keep up to datewith all that’s happening, share hints,
tips and much more...www.facebook.com/polytunnels
VisionTunnel
a section of the First Tunnels site dedicated to video guides
for all aspects of your polytunnelwww.firsttunnels.co.uk
Dig plenty of compost into the strawberry bed in
early summer, and keep it absolutely free of weeds
until the strawberries are planted. Suppliers send
young plants by post any time from September to
March: make sure you ask for the earliest delivery
slot you can get (which usually means ordering by
telephone). Plants that have time to establish
themselves before growth stops for the winter will
bear fruit earlier, and more heavily, than
spring-planted ones.
When the plants arrive, soak them in water for half
an hour and then plant them so that the crown of the
plant is just level with the surrounding soil, and water
them in well. Keep them well watered (but never
waterlogged) until they show fresh new growth from
the crown. Once this happens they will need less
water until the fruit starts to form (usually in late
March), and won't need feeding at all in their first
year because the bed was composted heavily.
As soon as the fruit begins to form, put straw
beneath the plants to keep the berries up off the
ground and to suppress weed growth. Tunnel-grown
plants produce lots of runners (strong, self-rooting
stems) and these need to be removed throughout
the growing season to stop the bed from becoming
crowded (which promotes fungal diseases).
If you want to keep the plants for a second year (or
even a third) then remove the straw once fruiting
has finished, cut the plants down to 5cm high, and
then proceed as normal. The only difference to
first-year plants is that you will need to feed them
with a general purpose organic fertiliser in the early
spring, and again with tomato feed when the first
flowers appear. Don't keep the plants for more than
three years.

F I R S T T U N N E L Swww.FirstTunnels.co.uk
strawberrystrawberry growinggrowing
OF THE
Diseases and pests: Slugs are best dealt with on
a tunnel-wide basis by controlling habitat and
removing them by hand on humid evenings when
they are most active; if things get out of hand and
you want to use pellets, only use organic ones
which are based on ferrous phosphate and will not
harm the soil.
Moulds are a constant companion of the strawberry
bed, especially in damp, cloudy conditions. They're
best prevented by making sure that the bed never
gets crowded and maintaining good ventilation,
particularly in humid weather. Once mould arrives the
spores spread quickly, so you need to check the
berries on a daily basis and remove any affected fruit
and dead or dying foliage.
Harvest: If your tunnel is visited by birds (and most
are) you will need to protect the fruit by covering it
with lightweight plastic netting, held off the plants with
wire hoops or short lengths of bamboo. Make sure
you choose a wide netting size (19mm or more) to
let the bees pollinate the strawberry flowers.
When you pick the strawberries, pick the calyx (the
green leafy bit at the top of the berry) too, and don't
heap the fruit up in a tiny punnet. This will give you
perfect, undamaged fruit that will keep well for a
few days – provided it makes it to the kitchen!
Recipe: There are so many ways to enjoy this fruit
from cheesecake and crumble to salads and
smoothies. The hardest part is saving enough whilst
picking to actually make something in the kitchen.
Visit www.FirstTunnels.co.uk for all your polytunnel
products, spares, accessories and guidance.
You can find out about what we’re currently doing
via facebook, www.facebook.com/polytunnels and
through our blog, www.polytunnelgardening.co.uk
© Andy McKee 2011
G R O W I N GG R O W I N GG U I D EG U I D E
growinggrowing harvestharvest
OF THE
F I R S T T U N N E L Swww.FirstTunnels.co.uk
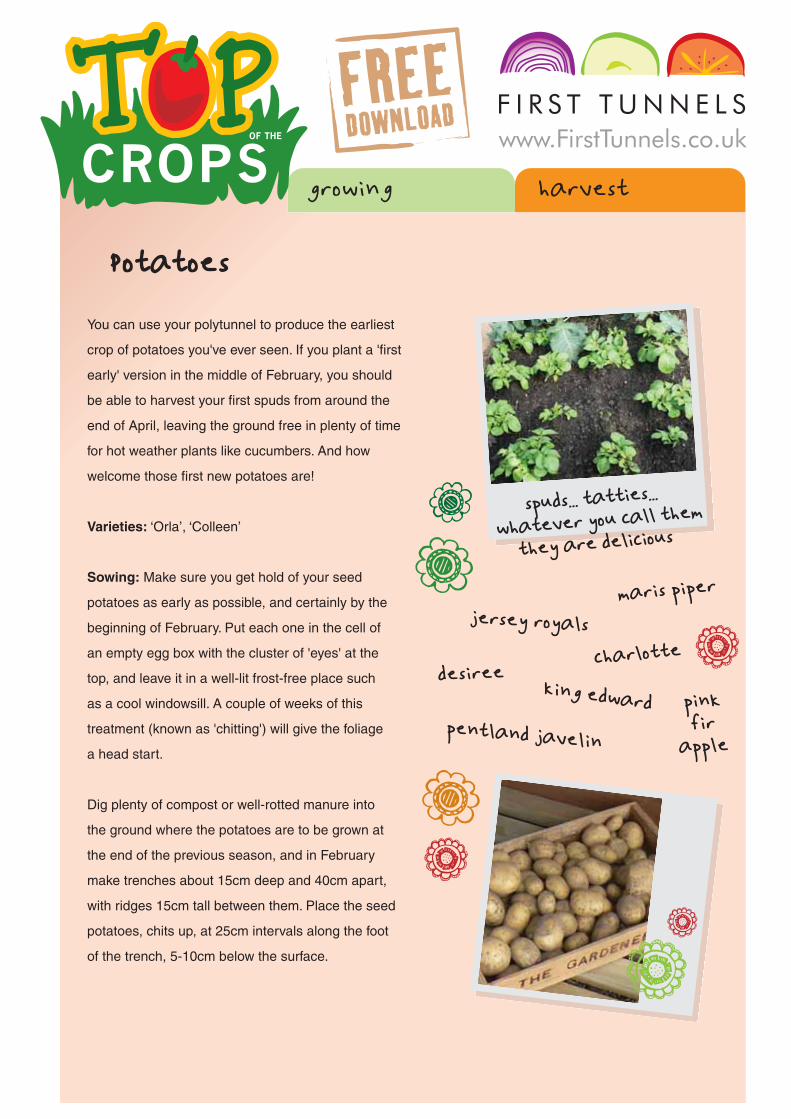
You can use your polytunnel to produce the earliest
crop of potatoes you've ever seen. If you plant a 'first
early' version in the middle of February, you should
be able to harvest your first spuds from around the
end of April, leaving the ground free in plenty of time
for hot weather plants like cucumbers. And how
welcome those first new potatoes are!
Varieties: ‘Orla’, ‘Colleen’
Sowing: Make sure you get hold of your seed
potatoes as early as possible, and certainly by the
beginning of February. Put each one in the cell of
an empty egg box with the cluster of 'eyes' at the
top, and leave it in a well-lit frost-free place such
as a cool windowsill. A couple of weeks of this
treatment (known as 'chitting') will give the foliage
a head start.
Dig plenty of compost or well-rotted manure into
the ground where the potatoes are to be grown at
the end of the previous season, and in February
make trenches about 15cm deep and 40cm apart,
with ridges 15cm tall between them. Place the seed
potatoes, chits up, at 25cm intervals along the foot
of the trench, 5-10cm below the surface.
PotatoesPotatoes
spuds... tatties... spuds... tatties...
whatever you call them whatever you call them
they are delicious they are delicious
jersey royalsjersey royalsmaris pipermaris piper
charlottecharlotte
king edwardking edward
desireedesiree
pentland javelinpentland javelin
pinkpinkfirfir
appleapple
harvestharvestpotatoespotatoes
OF THE
keep up to datewith all that’s happening, share hints,
tips and much more...www.facebook.com/polytunnels
VisionTunnel
a section of the First Tunnels site dedicated to video guides
for all aspects of your polytunnelwww.firsttunnels.co.uk
Once the plants are 10-12cm tall, pull the walls of the
trenches in to cover all but the very tips of them.
Earth them up like this a couple more times, until the
trench has become a ridge with the potatoes growing
out of the top of it, and keep the plants well watered.
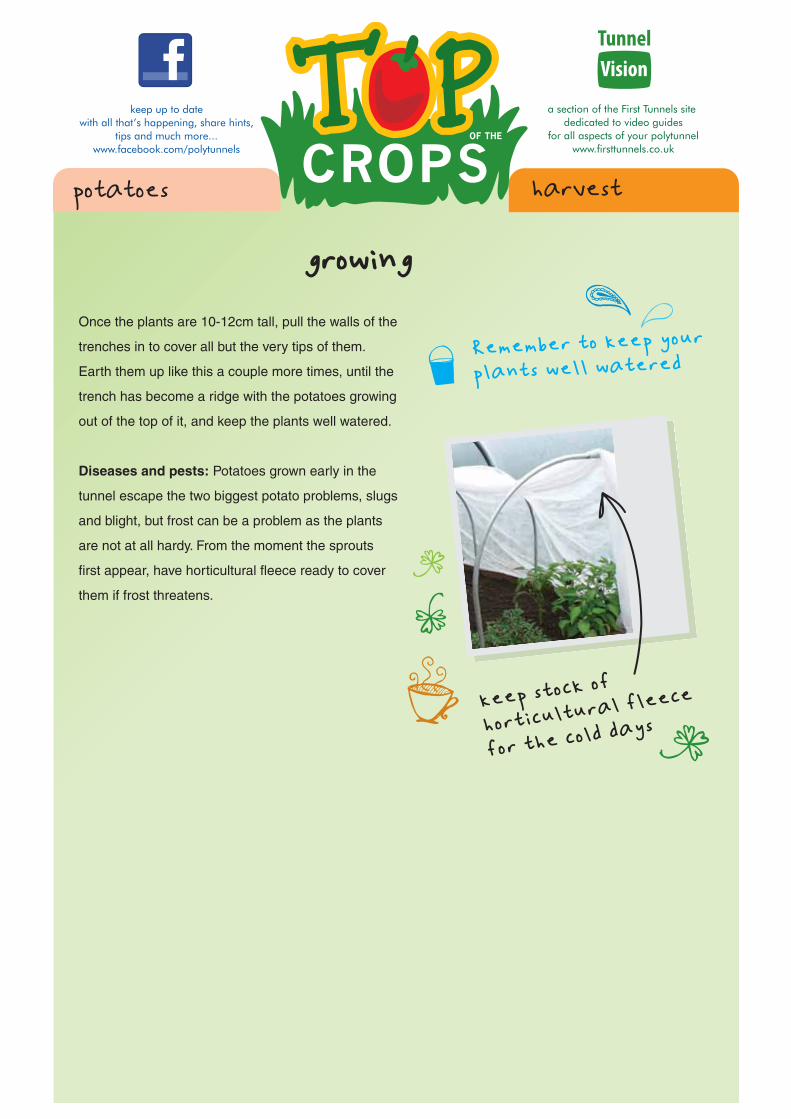
Diseases and pests: Potatoes grown early in the
tunnel escape the two biggest potato problems, slugs
and blight, but frost can be a problem as the plants
are not at all hardy. From the moment the sprouts
first appear, have horticultural fleece ready to cover
them if frost threatens.

F I R S T T U N N E L Swww.FirstTunnels.co.uk
potatoespotatoes growinggrowing
OF THE
You can expect your first potatoes nine or ten weeks
after planting, although in northern tunnels they may
take a little longer. At this point carefully feel in the
earth around the base of the plants, and if you find
tubers that are big enough to take you can remove
a few without disturbing the rest of the plant. Once
they are of a good size, dig the whole plants up as
you need them: take care to get all the tubers, or
they'll sprout right in the middle of whatever you plant
there next!
Recipe: With so many varieties of Potato, it’s
important you plant something that’s going to be
right for how you cook. Whether it’s roasted, chipped,
grated or sliced there are lots to choose from. Then
you can sit back and enjoy the fruits of your labour.
Visit www.FirstTunnels.co.uk for all your polytunnel
products, spares, accessories and guidance.
You can find out about what we’re currently doing
via facebook, www.facebook.com/polytunnels and
through our blog, www.polytunnelgardening.co.uk
© Andy McKee 2011
G R O W I N GG R O W I N GG U I D EG U I D E

growinggrowing harvestharvest
OF THE
F I R S T T U N N E L Swww.FirstTunnels.co.uk
Peppers, and most particularly sweet peppers, are
a hugely underestimated plant for growing in the UK.
This is largely because they don’t do all that well
outside, but in the polytunnel they’re a whole different
story. Vigorous and easy to grow, you can have fresh
peppers from mid July to the end of November – and
they freeze well too.
Varieties: (sweet peppers): ‘Sunnybrook’,
‘Sweet Nardello’; (chilli peppers): ‘Iranian Round’,
‘Early Jalapeño’. Read the seed merchant’s
description carefully, or you may – as I once did –
accidentally grow several kilos of very hot chillis!
Sowing: For a good harvest you need to start
peppers off in modules indoors in February, ideally
at 20-25°C. Sow the seeds thinly 0.5-1cm deep
and put them in a propagator or cover them with
a clear plastic bag, and keep them in the warm until
the seedlings appear in a week or so.
Once white roots appear at the bottom of the module,
replant them in fairly small pots (8cm or so), burying
almost all the stem in the compost as you would for
tomato plants. You'll need to 'pot up' the seedlings
like this several times rather than just moving them
from the module to a large pot. This may seem like
a lot of work but it encourages the plants to form
stronger root systems, which means more fruits.
PeppersPeppers
peppers need potting uppeppers need potting up
ALWAYS read the packetALWAYS read the packetmake sure you grow themake sure you grow theright strength for you!right strength for you!

harvestharvestpepperspeppers
OF THE
keep up to datewith all that’s happening, share hints,
tips and much more...www.facebook.com/polytunnels
VisionTunnel
a section of the First Tunnels site dedicated to video guides
for all aspects of your polytunnelwww.firsttunnels.co.uk
When the weather has warmed up properly (usually
May) move the plants out to their final positions in
the tunnel. This can be in the soil beds (40cm apart
in a rich, well-drained location) or into 5-litre pots.
I mention pots because doing this makes hardly any
difference to the size of the harvest, and the plants
are compact enough to be moved around when you
need the space for something else – handy when
the tunnel is chock full in the summer, as mine tends
to be! The only drawback to doing this is that they're
harder work to water, and dry out fast.
If the plants get a bit leggy it's a good idea to
support them with plant sticks or short pieces of
bamboo, because the stems are typically not as
strong as they look. Once the first flowers appear
the plants will benefit from a feed with tomato
fertilizer every couple of weeks for the rest of
the season.

F I R S T T U N N E L Swww.FirstTunnels.co.uk
pepperspeppers growinggrowing
OF THE
Visit www.FirstTunnels.co.uk for all your polytunnel
products, spares, accessories and guidance.
You can find out about what we’re currently doing
via facebook, www.facebook.com/polytunnels and
through our blog, www.polytunnelgardening.co.uk
© Andy McKee 2011
Diseases and pests: Young seedlings can be
attacked by slugs. Pot-grown plants can usually be
kept in a slug-free location until the growth has
toughened up a bit, but plants in the soil beds may
need to be protected with copper rings for a few
weeks. Peppers can also be prone to aphids and
whitefly at any time in their lives: it pays to check
the plants over every week or so (which is true of
many tunnel plants) and if you find any nasties,
squirt them off with water from a hand sprayer.
Provided you deal with any infestation promptly,
this is probably the only action you'll need to take.
Harvest: For both hot peppers and sweet ones,
the fruits start off green. Some varieties (but not all)
colour up as they ripen, turning red, yellow, orange
or purple. You don't have to wait for the fruit to ripen,
but ripening makes sweet peppers get sweeter and
hot peppers get hotter. Any fruit that you don't collect
can safely be left on the plant until the frosts
approach and should then be brought indoors for
drying or chopping and freezing. Wear gloves when
you handle chilli peppers!
Recipe: There’s a pepper recipe for everyone. From
sweet, light summer salads to fiery chilli and extreme
curries. Peppers add great texture and taste.
G R O W I N GG U I D E
growinggrowing harvestharvest
OF THE
F I R S T T U N N E L Swww.FirstTunnels.co.uk
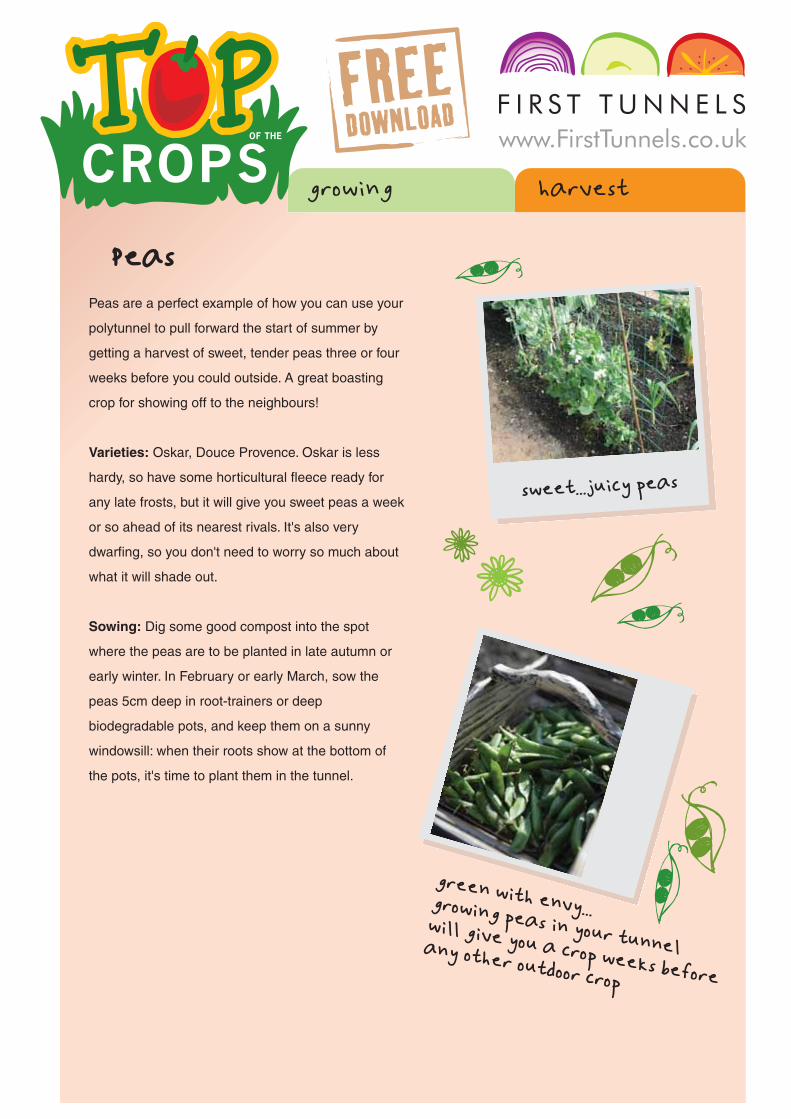
Peas are a perfect example of how you can use your
polytunnel to pull forward the start of summer by
getting a harvest of sweet, tender peas three or four
weeks before you could outside. A great boasting
crop for showing off to the neighbours!
Varieties: Oskar, Douce Provence. Oskar is less
hardy, so have some horticultural fleece ready for
any late frosts, but it will give you sweet peas a week
or so ahead of its nearest rivals. It's also very
dwarfing, so you don't need to worry so much about
what it will shade out.
Sowing: Dig some good compost into the spot
where the peas are to be planted in late autumn or
early winter. In February or early March, sow the
peas 5cm deep in root-trainers or deep
biodegradable pots, and keep them on a sunny
windowsill: when their roots show at the bottom of
the pots, it's time to plant them in the tunnel.
PeasPeas
sweet...juicy peassweet...juicy peas
green with envy...green with envy...growing peas in your tunnel
growing peas in your tunnelwill give you a crop weeks before
will give you a crop weeks beforeany other outdoor crop
any other outdoor crop

harvestharvestpeaspeas
OF THE
keep up to datewith all that’s happening, share hints,
tips and much more...www.facebook.com/polytunnels
VisionTunnel
a section of the First Tunnels site dedicated to video guides
for all aspects of your polytunnelwww.firsttunnels.co.uk
Push pea sticks between the plants to support them,
and tie them to it at intervals in case a late cold snap
makes them go limp: when temperatures rise again
they'll soon recover. Dwarfing peas like Oskar need
less support; I usually just bend offcuts of chicken
wire into a shallow U shape and place them over the
row right after planting, and the plants grow up
through them. If a hard frost is forecast, covering the
row with fleece before dark the previous day will help
them shrug it off.
Diseases and pests: The most common problems
for young pea plants are slugs and aphids, but early
tunnel plantings are usually growing strongly before
either of these become a problem. Mice sometimes
dig plants up looking for what's left of the seeds, but
if you make sure that your tunnel isn't used for
storage this is less likely.

F I R S T T U N N E L Swww.FirstTunnels.co.uk
peaspeas growinggrowing
OF THE
Visit www.FirstTunnels.co.uk for all your polytunnel
products, spares, accessories and guidance.
You can find out about what we’re currently doing
via facebook, www.facebook.com/polytunnels and
through our blog, www.polytunnelgardening.co.uk
© Andy McKee 2011
Pods are ready to pick as soon as you can feel the
peas inside them, and checking them for perfect
ripeness is a great excuse to eat a few raw in the
tunnel. Once picked they begin to lose their
sweetness within a few hours, so don't collect them
until just before they're needed: look carefully up
and down the row to make sure that you don't miss
any, because this makes the plant stop flowering –
which means no more peas!
Recipe: Another incredibly versatile crop, peas
are a fantastic ingredient, accompaniment or even
eaten raw straight from the plant.
G R O W I N GG U I D E

growinggrowing harvestharvest
OF THE
F I R S T T U N N E L Swww.FirstTunnels.co.uk
Onions have been an important part of our diet
since the Bronze Age, and after ripening (also known
as 'curing') are hung for storage through the cold
winter months. However, by the end of the spring,
onions in store have usually started to sprout or rot,
leaving a gap of several months before the first of
the new harvest are ready.
Early overwintering onions (sometimes called
'Japanese onions') were developed to shrink this gap,
but they still don't ripen until July and winter losses
can be high. In the polytunnel, however, overwintering
onions really come into their own, giving bigger and
better bulbs.
Varieties: 'Senshyu Yellow’, ‘Electric’ (Red)
Sowing: For the most reliable results, buy onion sets
rather than seed. Prepare the ground in May by
gently forking plenty of compost or manure into the
top layer of the soil: it should have settled nicely by
the time you come to plant the sets, in July or August.
Plant them with the tops just showing, in rows 10cm
apart for easy weeding. If you're planning on eating
the bulbs early to fill the 'onion gap' set them at
spacings of 5cm within the row, but if you're going to
leave them a bit longer and want bigger bulbs, then
increase that to 10cm.
OnionsOnions
high and dry...high and dry...crops bars are greatcrops bars are greatfor suspending traysfor suspending traysand drying onionsand drying onions
or just hangingor just hanging
them in your tunnelthem in your tunnel
also works wellalso works well

harvestharvestonionsonions
OF THE
keep up to datewith all that’s happening, share hints,
tips and much more...www.facebook.com/polytunnels
VisionTunnel
a section of the First Tunnels site dedicated to video guides
for all aspects of your polytunnelwww.firsttunnels.co.uk
Just keep the onion bed free from weeds and well
watered. On lighter soils, mulching round the bulbs
with compost can help the bed stay moist during
hot weather.
Diseases and pests: Newly planted sets sometimes
succumb to moulds and mildew, so remove any that
seem to be struggling. The emerging leaves are often
attacked by slugs. Once the plants are growing
strongly this won’t bother them, but for the first few
weeks you will need to check the onion bed with
a torch, about an hour after dark, on any humid
evenings. If you can see slugs and snails about
outside, you can guarantee that the ones in the
tunnel will be munching on your onions!

F I R S T T U N N E L Swww.FirstTunnels.co.uk
onionsonions growinggrowing
OF THE
Onions need to ripen before use, otherwise the
flavour can be quite harsh. You can tell when the
bulbs are ripening because the leaves turn yellow
and fall over, but if you need to harvest them earlier
than this, you can cheat; fold the leaves over firmly
at the neck, partly lift the bulbs out of the ground
with a fork, and reduce the amount of water that you
give. After a week or two like this they're ready to
cook with, but if you plan on storing them for a while
then move them to a sunny spot with good air
circulation (I use a suspended shelf in my tunnel)
and leave them for a further two or three weeks,
until the necks have dried out completely. Then you
can braid them for storage if you like, or pop them
into net bags for hanging up somewhere cool and dry.
Recipe: Where to start? Onions are an extremely
flexible ingredient that have masses of uses. You’ll
always find a way to use your onions.
Visit www.FirstTunnels.co.uk for all your polytunnel
products, spares, accessories and guidance.
You can find out about what we’re currently doing
via facebook, www.facebook.com/polytunnels and
through our blog, www.polytunnelgardening.co.uk
© Andy McKee 2011G R O W I N GG R O W I N G
G U I D EG U I D E

growinggrowing harvestharvest
OF THE
F I R S T T U N N E L Swww.FirstTunnels.co.uk
Using the right varieties and a bit of protection you
can harvest top-quality lettuce from your polytunnel
all year round. I tend to eat salad more in the winter
than I do in the summer, spicing up the lettuce with
plants like rocket and mustard.
Varieties: ‘Paris Island’, ‘Rouge d’Hiver’, ‘Webbs’
Sowing: Sow lettuce seeds thinly onto the surface
of seed compost in modules or small pots and barely
cover them with compost. Using a propagator you
can do this at any time of the year, but it is best to
avoid November to January unless your tunnel gets
a lot of light, or unless you can spare some space
on a bright windowsill. Lettuce plants don’t tolerate
dryness so keep the modules nicely damp: in the
summer it is best to sow the seeds deeper – perhaps
as much as 1cm. Once the seedlings have a couple
of pairs of true leaves, plant them out into the soil beds.
Beyond protection from slugs, regular picking and
enough water to stop them drying out, lettuces need
very little attention. Less hardy varieties may need
protection from late frosts in spring.
LettuceLettuce
salad days...salad days...

harvestharvestlettucelettuce
OF THE
keep up to datewith all that’s happening, share hints,
tips and much more...www.facebook.com/polytunnels
VisionTunnel
a section of the First Tunnels site dedicated to video guides
for all aspects of your polytunnelwww.firsttunnels.co.uk
Slugs are the biggest nuisance when you grow
lettuces, and the best strategy is to keep their
numbers down throughout the year by constantly
removing debris, minimizing low, crowded growth,
and removing them by hand on humid evenings.
When you grow lettuces, try to keep the area
around them open and clear, and if necessary
protect the young plants with copper rings.
Some varieties of lettuce are also attractive to
greenfly: at the first sign of trouble squirt them off
with water from a hand sprayer.

F I R S T T U N N E L Swww.FirstTunnels.co.uk
lettucelettuce growinggrowing
OF THE
Visit www.FirstTunnels.co.uk for all your polytunnel
products, spares, accessories and guidance.
You can find out about what we’re currently doing
via facebook, www.facebook.com/polytunnels and
through our blog, www.polytunnelgardening.co.uk
© Andy McKee 2011
For the best yields from your lettuce beds, choose
loose-leafed varieties and pick the outer leaves
constantly to leave a crown of at least four young
leaves untouched. This means you will be
harvesting from several plants at a time, but is much
more efficient than waiting for whole ‘heads’ which
are tremendously attractive to slugs. ‘Pick and come
again’ harvesting (pick, don’t cut) means that you
will probably only need to make three or four sowings
per year – perfect for the lazy gardener!
Recipe: Lettuce is a main stay of so many salads
and also works well for soups.
G R O W I N GG U I D E

growinggrowing harvestharvest
OF THE
F I R S T T U N N E L Swww.FirstTunnels.co.uk
Although there are varieties that can be grown
outside in Britain, cucumbers do much better if grown
under cover. Your polytunnel will allow you to grow
the sprawling plants vertically up a cane or string,
and you’ll be surprised at just how many you will get
– and for how long. For my own family of four,
two plants gives us enough at the beginning and end
of the season, and way too many in the middle.
Recipe book on standby!
Varieties: ‘Cumlaude’ (F1), ‘Burpless Tasty Green’ (F1),
‘Tamra’. There’s a terrific choice though – in future
years you might like to try pickling varieties like Crystal
Lemon too.
Sowing: Prepare the soil by forking in a generous
amount of manure or fresh compost in early spring.
Remember these are going to be tall plants, so think
about the shade they will cast. Cucumber seeds are
expensive and don’t germinate well without heat,
so sow them singly 1cm deep into biodegradable pots
of seed compost a couple of weeks before the last
frost date for your area; you can look this up online.
www.metcheck.com/V40/UK/FREE/frostrisk.asp
Water the compost well, then cover the pots with
cling film and put them on a warm windowsill during
the day, and move it to the airing cupboard at night.
A heated propagator is better if you have one, as it
keeps conditions ideal without the fuss of moving the
pots about.
Once the seeds are up put them in a light, warm place
but do not allow the pots to dry out. As soon as
daytime temperatures in the tunnel reach 21°C
move the seedlings out to a bright area of tunnel
staging for a few days, covering with fleece at night,
to harden off.
CucumberCucumber
up, up and away...up, up and away...
perfect for picklingperfect for pickling

harvestharvestcucumberscucumbers
OF THE
keep up to datewith all that’s happening, share hints,
tips and much more...www.facebook.com/polytunnels
VisionTunnel
a section of the First Tunnels site dedicated to video guides
for all aspects of your polytunnelwww.firsttunnels.co.uk
Cucumbers are very susceptible to cold damage,
so don’t plant them out until the weather has warmed
up. When planting the seedlings, mound the soil up
by 3-5cm and then gently plant a seedling into the
mound, biodegradable pot and all. Mounding the soil
up like this helps prevent moulds and mildew attacking
the base of the stem. Water around the plants to settle
the soil, and protect them with a copper ring for a few
weeks if slugs are a problem. Have some horticultural
fleece ready to protect the plants if the temperature
drops below 10°C; if they are damaged by an
unexpected frost it is usually better to start again,
as frost-stunted plants never fruit well.
As the plants grow give them an organic liquid feed
once a week (or every other watering if you have badly
drained soil) until they reach a height of roughly 30cm,
and twice a week thereafter. Cucumbers are thirsty
plants, so will always need a little extra when you water.
Cucumbers are traditionally grown up a trellis with
side-shoots tied out horizontally to let them get as
much air and light as possible, but you don’t need
to go to so much trouble to get good results. You
can grow them perfectly well up a length of strong
twine tied to a crop bar or clamp: wrap the stem
around it as it grows, tying it on with loose loops
of twine at intervals.
As the plants grow they will produce fruiting
side-shoots, which can be thinned out as much as
you need to to prevent the growth getting too
crowded; nip out the growing tips of any shoots you
want to restrict, just after the fifth leaf. When the
plant reaches the top of its support, nip out the
growing tip.

F I R S T T U N N E L Swww.FirstTunnels.co.uk
cucumbercucumber growinggrowing
OF THE
Diseases and pests: Keep an eye out for aphids
and spray them off as soon as you see them.
Although they are seldom a problem on cucumbers
they can introduce cucumber mosaic virus, which
will stunt or even kill the plant. Cucumbers can also
be affected by mildew, verticillium wilt and red mites.
Harvest: Leaving cucumbers on the vine for too long
reduces the total yield, so once fruiting starts have
a good look through the foliage every few days to
make sure you don’t miss any. When fruiting peaks
(in August) you’ll need a strategy for dealing with
the glut. Cook with them, pickle them, give them
away...or cut them young to avoid drowning in
the things!
Recipe: Cucumbers are a huge part of many salad
and soup recipes. But are probably pickled, pureed
and preserved more than any other vegetable.
Plus a slice or two of fresh cucumber in Pimms is
the perfect summer drink!
Visit www.FirstTunnels.co.uk for all your polytunnel
products, spares, accessories and guidance.
You can find out about what we’re currently doing
via facebook, www.facebook.com/polytunnels and
through our blog, www.polytunnelgardening.co.uk
© Andy McKee 2011
G R O W I N GG R O W I N GG U I D EG U I D E
cool as a cucumbercool as a cucumber

growinggrowing harvestharvest
OF THE
F I R S T T U N N E L Swww.FirstTunnels.co.uk
Growing carrots in the polytunnel is a year-round
affair. Unless you miss a sowing, it’s so easy to
produce baby carrots all year round that you quickly
come to view them as a completely different
vegetable to the big maincrop carrots you grow
outside – indeed some people stop growing outdoor
carrots altogether. You don’t need much space for
carrots either: a 30cm row per adult each time you
sow is plenty.
Varieties: Nantes 2 is a sweet ‘second early’ variety
that gives baby carrots quickly, but won’t become
woody if you accidentally leave some to mature
(and you will).
Sowing: No feeding of the soil is necessary, but it’s
a good idea to dig the soil to a depth of 15cm to
break up any lumps or compaction, then water it
down well. Very heavy soils may need some
leafmould or sand to break them up. Sow the carrot
seeds very thinly in drills 1.5-2cm deep and 20cm
apart, and water them. Use a watering can with
a fine rose to avoid washing the tiny seeds away.
Unless the weather is cool, then I like to cover the
bed with a sack or double thickness of fleece; this
improves germination by helping to keep the soil
moist until the first seedlings appear (which may take
up to three weeks). As soon as the seedlings have
their first true leaves, thin them to 5cm and make
your next sowing. Keep this routine going from
February to the end of August, when you should
make one last larger sowing to see you through the
winter. I don't usually thin this last sowing, but
carefully pull the larger roots first, leaving the others
to stand a little longer.
CarrotsCarrots
all lined up,all lined up,ready to growready to grow
the rabbits will havethe rabbits will haveto get their fix elsewhere,to get their fix elsewhere,your polytunnel shouldyour polytunnel shouldprevent them having theirprevent them having theirmidnight feasts...midnight feasts...

harvestharvestcarrotscarrots
OF THE
keep up to datewith all that’s happening, share hints,
tips and much more...www.facebook.com/polytunnels
VisionTunnel
a section of the First Tunnels site dedicated to video guides
for all aspects of your polytunnelwww.firsttunnels.co.uk
Carrots do not need feeding provided you don’t
plant them in the same spot year after year: the only
attention they need is regular watering, and perhaps
a light dressing of compost if the tops of the roots
begin to turn green.
Diseases and pests: The biggest scourge of carrots
is carrot root fly, which is hardly ever a problem in
polytunnels. Slugs will attack the seedlings if other
food is scarce, but once the plants are growing
strongly they are rarely a problem.
F I R S T T U N N E L Swww.FirstTunnels.co.uk
carrotscarrots growinggrowing
OF THE
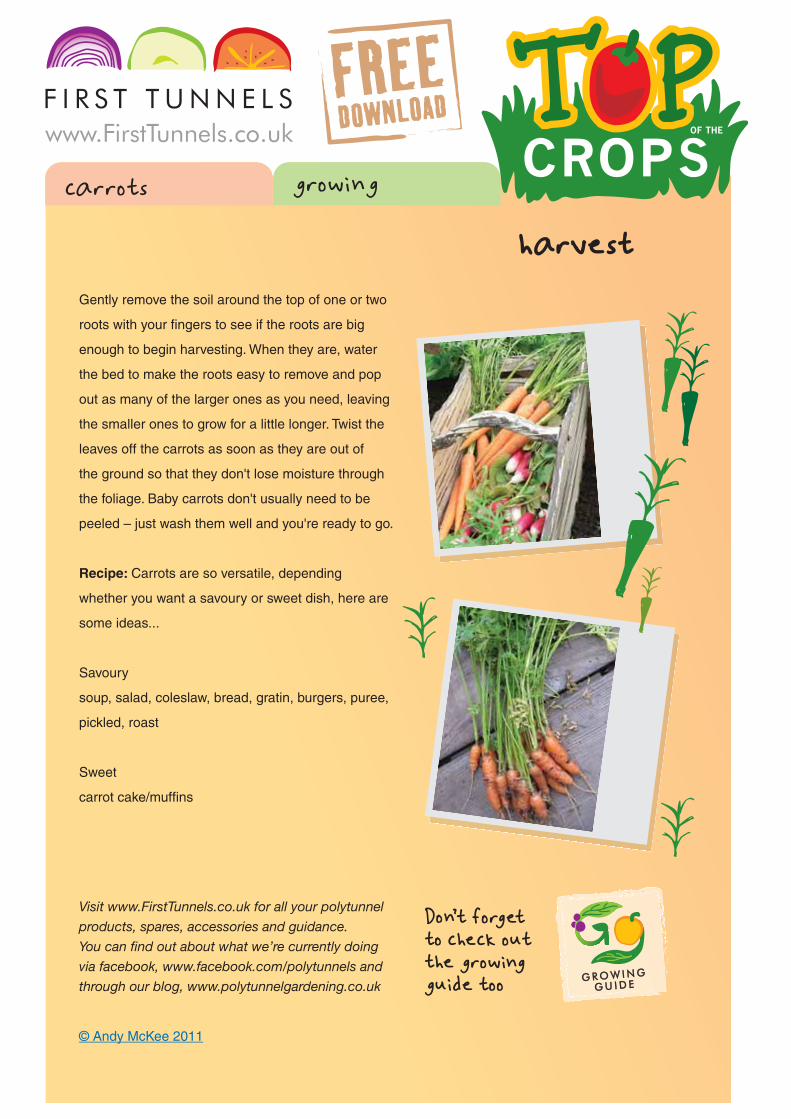
Gently remove the soil around the top of one or two
roots with your fingers to see if the roots are big
enough to begin harvesting. When they are, water
the bed to make the roots easy to remove and pop
out as many of the larger ones as you need, leaving
the smaller ones to grow for a little longer. Twist the
leaves off the carrots as soon as they are out of
the ground so that they don't lose moisture through
the foliage. Baby carrots don't usually need to be
peeled – just wash them well and you're ready to go.
Recipe: Carrots are so versatile, depending
whether you want a savoury or sweet dish, here are
some ideas...
Savoury
soup, salad, coleslaw, bread, gratin, burgers, puree,
pickled, roast
Sweet
carrot cake/muffins
Visit www.FirstTunnels.co.uk for all your polytunnel
products, spares, accessories and guidance.
You can find out about what we’re currently doing
via facebook, www.facebook.com/polytunnels and
through our blog, www.polytunnelgardening.co.uk
© Andy McKee 2011
G R O W I N GG R O W I N GG U I D EG U I D E
growinggrowing harvestharvest
OF THE
F I R S T T U N N E L Swww.FirstTunnels.co.uk
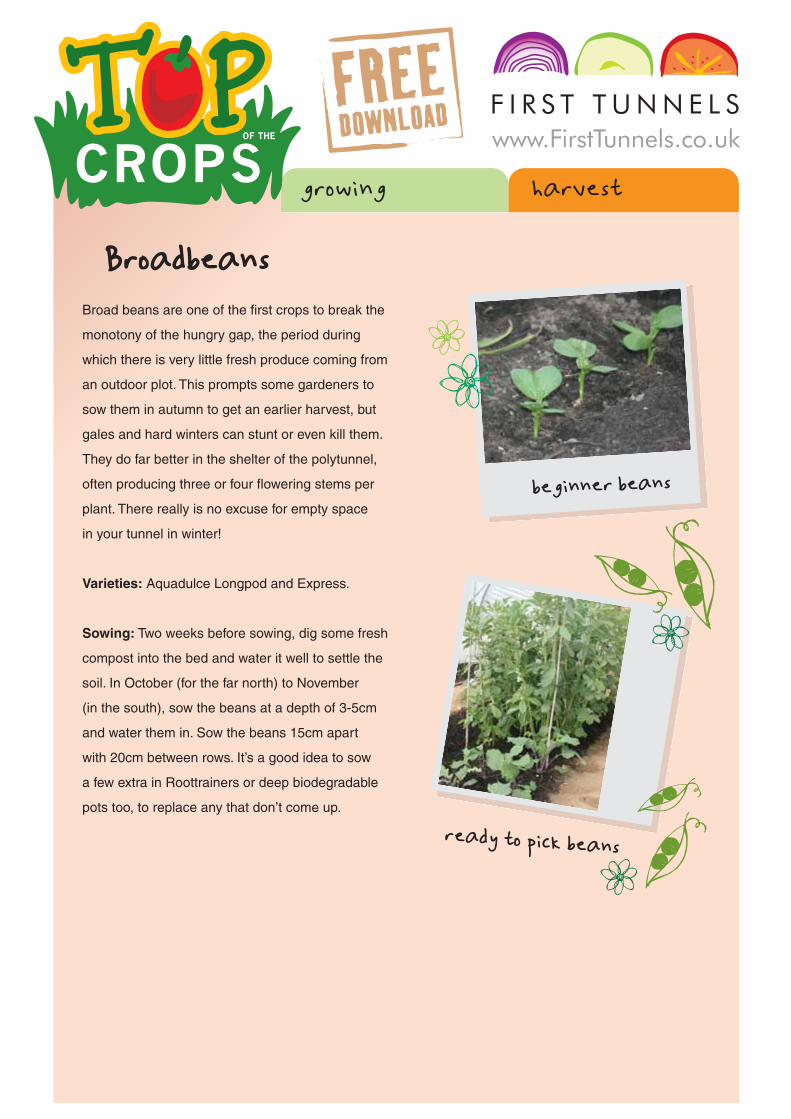
Broad beans are one of the first crops to break the
monotony of the hungry gap, the period during
which there is very little fresh produce coming from
an outdoor plot. This prompts some gardeners to
sow them in autumn to get an earlier harvest, but
gales and hard winters can stunt or even kill them.
They do far better in the shelter of the polytunnel,
often producing three or four flowering stems per
plant. There really is no excuse for empty space
in your tunnel in winter!
Varieties: Aquadulce Longpod and Express.
Sowing: Two weeks before sowing, dig some fresh
compost into the bed and water it well to settle the
soil. In October (for the far north) to November
(in the south), sow the beans at a depth of 3-5cm
and water them in. Sow the beans 15cm apart
with 20cm between rows. It’s a good idea to sow
a few extra in Roottrainers or deep biodegradable
pots too, to replace any that don’t come up.
BroadbeansBroadbeans
beginner beansbeginner beans
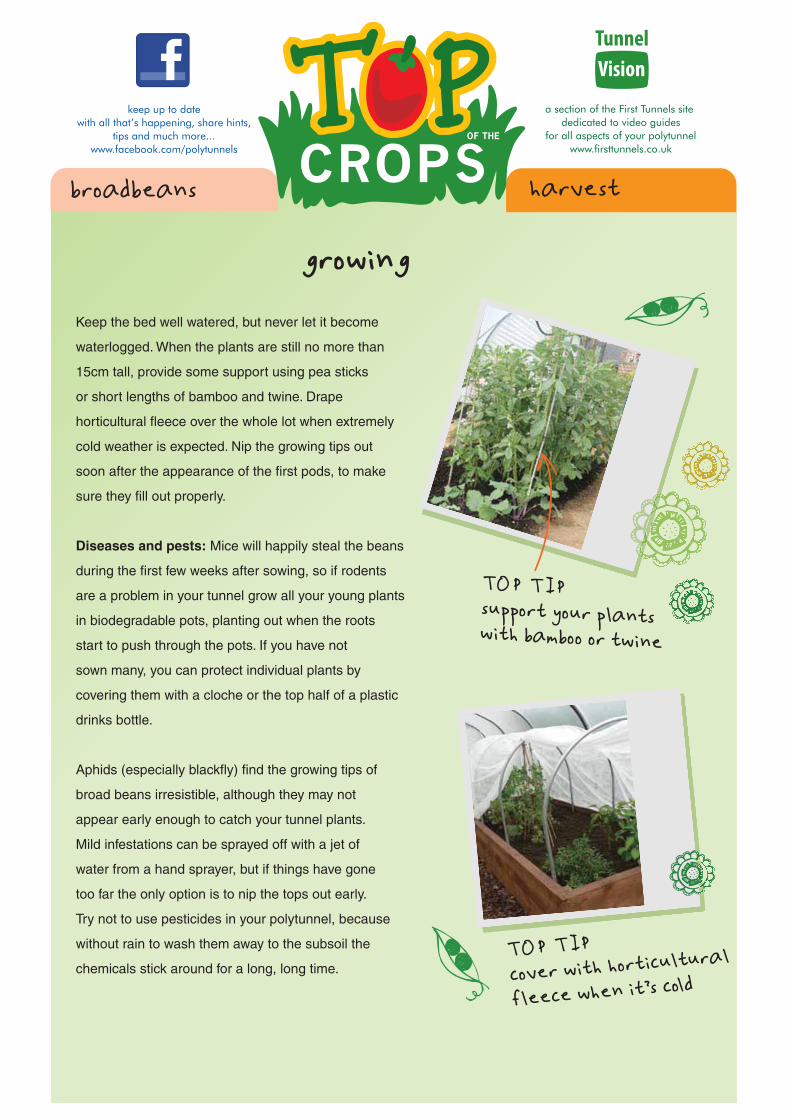
ready to pick beansready to pick beans
harvestharvestbroadbeansbroadbeans
OF THE
keep up to datewith all that’s happening, share hints,
tips and much more...www.facebook.com/polytunnels
VisionTunnel
a section of the First Tunnels site dedicated to video guides
for all aspects of your polytunnelwww.firsttunnels.co.uk
Keep the bed well watered, but never let it become
waterlogged. When the plants are still no more than
15cm tall, provide some support using pea sticks
or short lengths of bamboo and twine. Drape
horticultural fleece over the whole lot when extremely
cold weather is expected. Nip the growing tips out
soon after the appearance of the first pods, to make
sure they fill out properly.
Diseases and pests: Mice will happily steal the beans
during the first few weeks after sowing, so if rodents
are a problem in your tunnel grow all your young plants
in biodegradable pots, planting out when the roots
start to push through the pots. If you have not
sown many, you can protect individual plants by
covering them with a cloche or the top half of a plastic
drinks bottle.
Aphids (especially blackfly) find the growing tips of
broad beans irresistible, although they may not
appear early enough to catch your tunnel plants.
Mild infestations can be sprayed off with a jet of
water from a hand sprayer, but if things have gone
too far the only option is to nip the tops out early.
Try not to use pesticides in your polytunnel, because
without rain to wash them away to the subsoil the
chemicals stick around for a long, long time.
((
F I R S T T U N N E L Swww.FirstTunnels.co.uk
broadbeansbroadbeans growinggrowing
OF THE
Visit www.FirstTunnels.co.uk for all your polytunnel
products, spares, accessories and guidance.
You can find out about what we’re currently doing
via facebook, www.facebook.com/polytunnels and
through our blog, www.polytunnelgardening.co.uk
© Andy McKee 2011
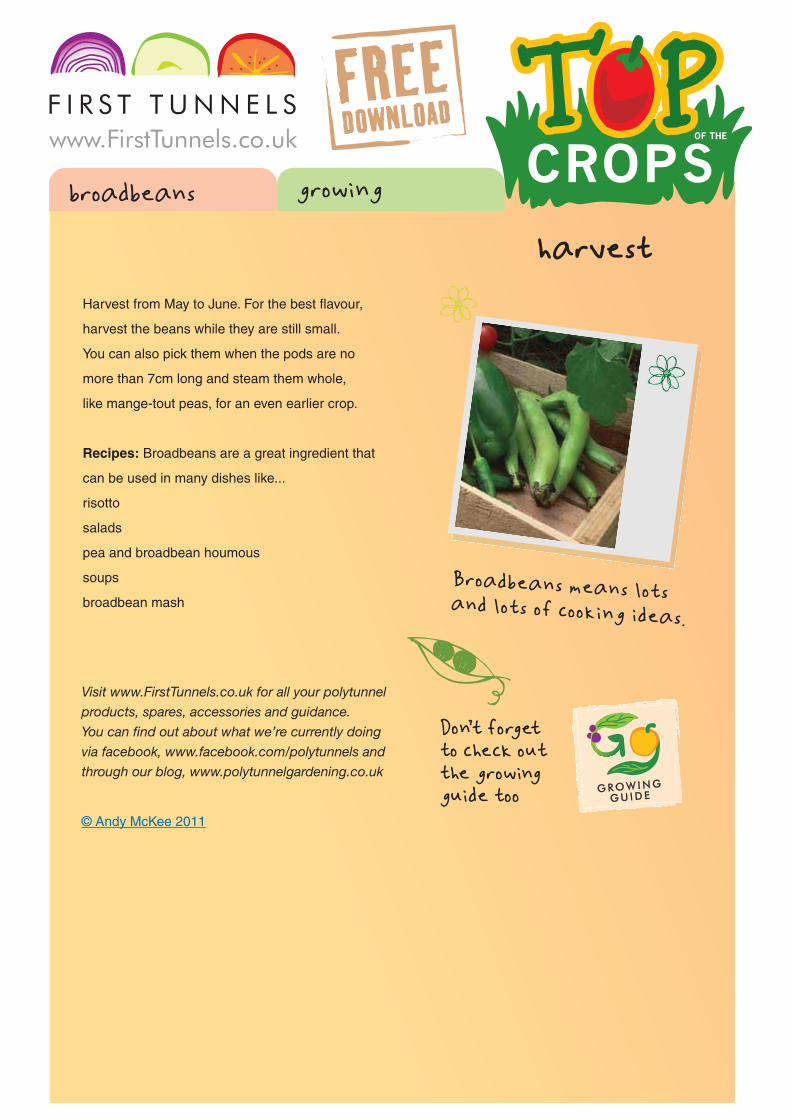
Harvest from May to June. For the best flavour,
harvest the beans while they are still small.
You can also pick them when the pods are no
more than 7cm long and steam them whole,
like mange-tout peas, for an even earlier crop.
Recipes: Broadbeans are a great ingredient that
can be used in many dishes like...
risotto
salads
pea and broadbean houmous
soups
broadbean mash
G R O W I N GG U I D E

growinggrowing harvestharvest
OF THE
F I R S T T U N N E L Swww.FirstTunnels.co.uk
With its sweet, earthy flavour and striking colour,
beetroot is easy to grow outside in the summer.
It also stores well, but the flavour deteriorates a bit.
This is where the polytunnel comes into its own,
because beetroot sown in late summer tolerates the
cold well enough to stand through the coldest of
weather, giving a harvest that stays absolutely fresh
well into the spring. A brilliant crop for beginners!
Varieties: ‘Detroit 2 Bolivar’, ‘Cylindra’
Sowing: Beetroot can be sown in the polytunnel any
time the temperature is over 5°C, but will germinate
much better around 25°C. If you’re sowing when the
weather is cold, use pots or large modules. Sow
several seeds in each at a depth of 1cm, and thin
them to the best plant once the seedlings emerge.
In warmer weather you can sow directly into the soil,
at one seed every 2cm in rows 15cm apart, then
thin to roughly 10cms.
BeetrootBeetroot
wow ! what a colour...wow ! what a colour...
always popular...always popular...in salads...roastedin salads...roastedor just all overor just all overyour face...your face...

harvestharvestbeetrootbeetroot
OF THE
keep up to datewith all that’s happening, share hints,
tips and much more...www.facebook.com/polytunnels
VisionTunnel
a section of the First Tunnels site dedicated to video guides
for all aspects of your polytunnelwww.firsttunnels.co.uk
Once the seedlings are up, beetroot are slow to get
started and don’t like competition. Thin them out
before growth gets crowded and keep the area free
of weeds. Don’t allow the bed to dry out, as this
can make them run to seed.
Diseases and pests: Slugs are likely to be the
biggest problem for young plants, so make sure that
your tunnel is kept free of low, crowded growth
(which encourages them) and consider protecting the
plants until they are big enough to grow away from
any damage.
Leaky pipe - more info

F I R S T T U N N E L Swww.FirstTunnels.co.uk
beetrootbeetroot growinggrowing
OF THE
For the very best flavour, beetroot should be lifted
while they are still small: most varieties go woody
if they are allowed to get too big.
Loosen the ground with a hand fork, lift the whole
plant out, and twist the tops off immediately to stop
the root from drying out. Don't forget that you can
eat the leaves; treat them like chard.
Recipes: Beetroot is incredibly versatile, it can
easily be used to make many things including...
risotto
salads
roast beetroot (with honey)
soups
chutney, relish and puree
beetroot slaw
even make chocolate and beetroot cakes!
Visit www.FirstTunnels.co.uk for all your polytunnel
products, spares, accessories and guidance.
You can find out about what we’re currently doing
via facebook, www.facebook.com/polytunnels and
through our blog, www.polytunnelgardening.co.uk
© Andy McKee 2011
Tuck in, time to enjoyTuck in, time to enjoyyour beets.your beets.
G R O W I N GG R O W I N GG U I D EG U I D E
V ’