oracle integration with ephesoft
TRANSCRIPT

Oracle Integration with Ephesoft Earlier, Ephesoft supported the following databases:
MySQL
Maria DB
SQL Server
Support for Oracle database has been introduced in Ephesoft v4.1.x.x.
You can now install Ephesoft with Oracle database. Oracle database is not shipped with Ephesoft
Installer. You will be prompted by the installer to enter the credentials needed to connect with an
existing Oracle database instance on the system.
Ephesoft supports the following Oracle versions:
Oracle 11.2.0.4
Oracle 12.1.0.2.0
It is important to note that Oracle database is supported only for fresh installation of Ephesoft v4.1.0.0. No upgrades are supported.
Installing Ephesoft Transact v4.1.X.X with Oracle Database This section provides step-by-step procedure for installing Ephesoft Transact v4.1.x.x with Oracle
database.
The steps given below presume that you are performing a fresh installation using Ephesoft Installer Setup.
To perform fresh installation of Ephesoft Transact v4.1.x.x with Oracle database
1. Run Command Prompt as an administrator and execute the command msiexec /i <Ephesoft
Installer Path>.
Or
Double click on Ephesoft_4.1.x.x.msi.
Replace <Ephesoft Installer Path> in the above command with the path of the Ephesoft installer.
For example, E:\Build\SilentInstaller\Ephesoft_4.1.x.x.msi is the path of the Ephesoft installer in the image below.
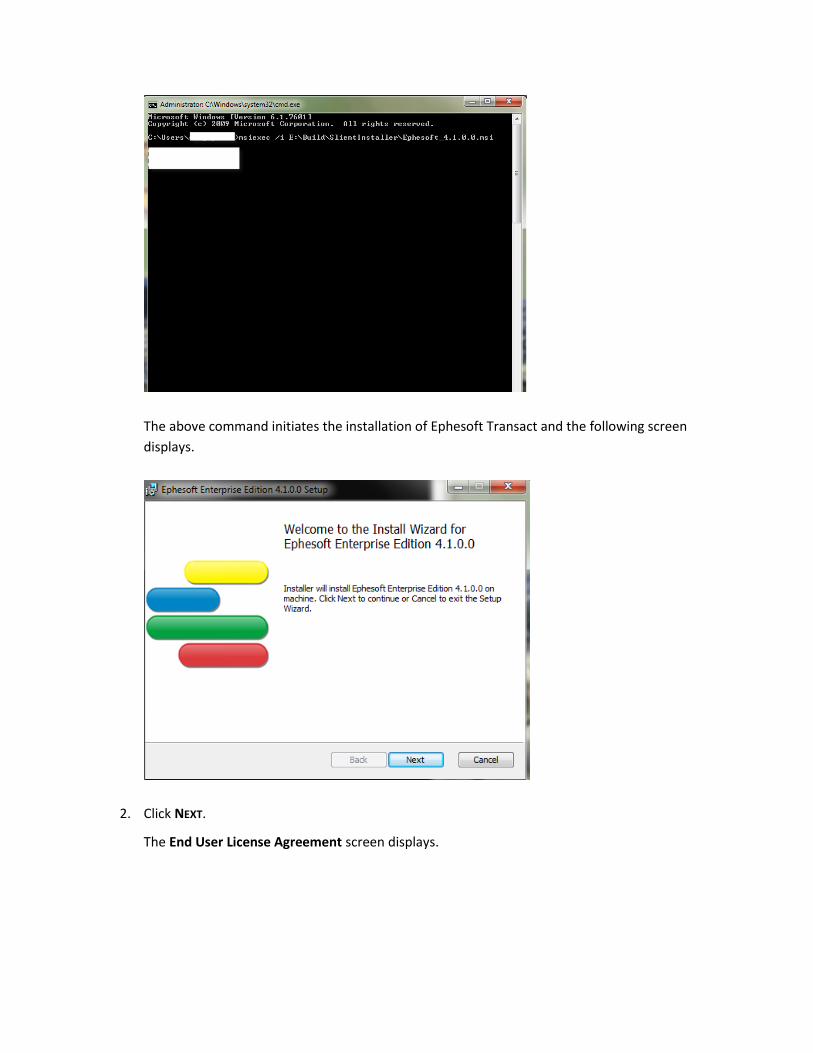
The above command initiates the installation of Ephesoft Transact and the following screen
displays.
2. Click NEXT.
The End User License Agreement screen displays.
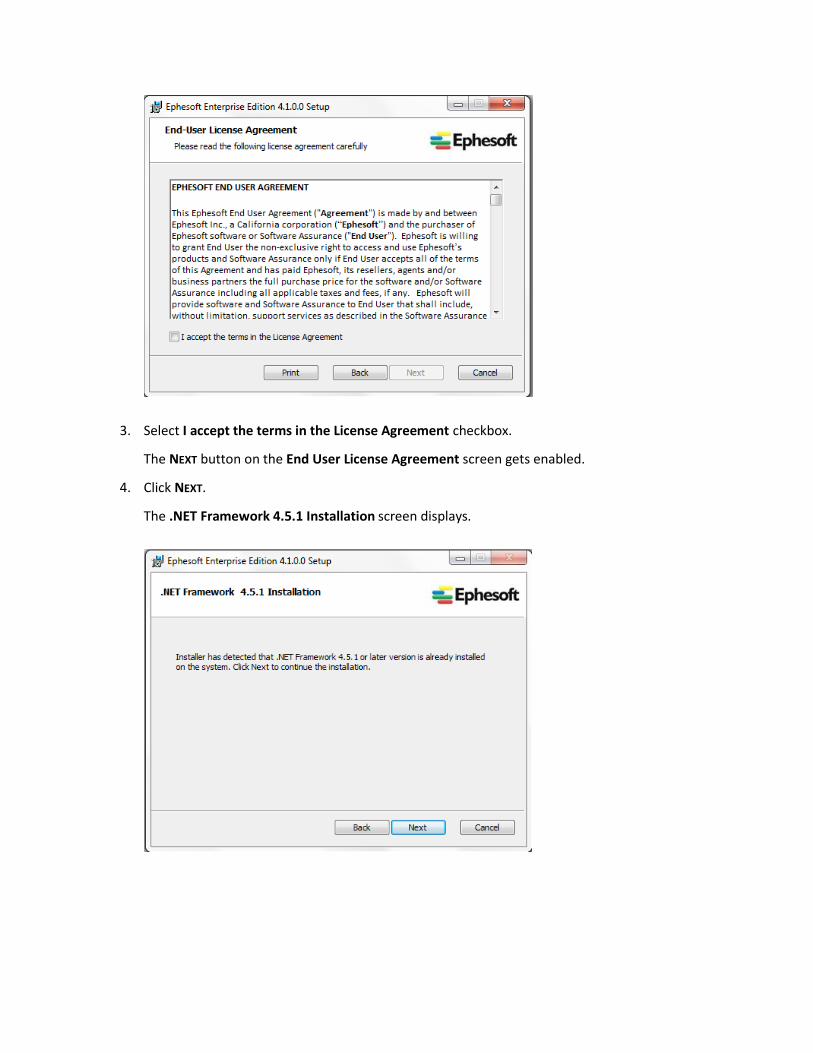
3. Select I accept the terms in the License Agreement checkbox.
The NEXT button on the End User License Agreement screen gets enabled.
4. Click NEXT.
The .NET Framework 4.5.1 Installation screen displays.

If .Net framework 4.5.1 is not installed on your system, the NEXT button on the .NET Framework 4.5.1 Installation screen is disabled and DOWNLOAD button displays. Click DOWNLOAD to download .Net framework 4.5.1.
Clicking DOWNLOAD opens appropriate web link from where you can download .Net framework 4.5.1. Download and install .Net framework 4.5.1 and then re-run Ephesoft installer setup.
If you have .Net framework 4.5.1 installed, proceed to Step 5.
5. Click NEXT on the .NET Framework 4.5.1 Installation screen.
The Ephesoft Prerequisites Installation screen displays.
If Microsoft Visual C++ 2013 and Microsoft Visual C++ 2015 Redistributables are not installed on your system, the NEXT button on the Ephesoft Prerequisites Installation screen is initially disabled. In this case, the installer first installs Microsoft Visual C++ 2013 and Microsoft Visual C++ 2015 Redistributables and then enables the NEXT button. Make sure windows updates are updated on the system.
6. Click NEXT on the Ephesoft Prerequisites Installation screen.
The Install/Configure Database screen displays.

7. Select Oracle Database Server and click NEXT on the Install/Configure Database screen to install
Ephesoft with Oracle database.
The Local/Remote Oracle Server Configuration Information screen displays.
In either case, An SID is required as a prerequisite.
You can choose to install a new Oracle database schema or use an existing schema from the Local/Remote Oracle Server Configuration Information screen. By default, Use existing oracle schema is selected.

a. Select Create new oracle schema and click NEXT on the Local/Remote Oracle Server
Configuration Information screen to create a new schema.
The Local/Remote Oracle Server Configuration screen displays.
The username and password for an existing user who has sufficient privileges to create
tablespaces and new oracle schema should be specified here.
b. Enter the appropriate information in the text fields and click NEXT.
OR,
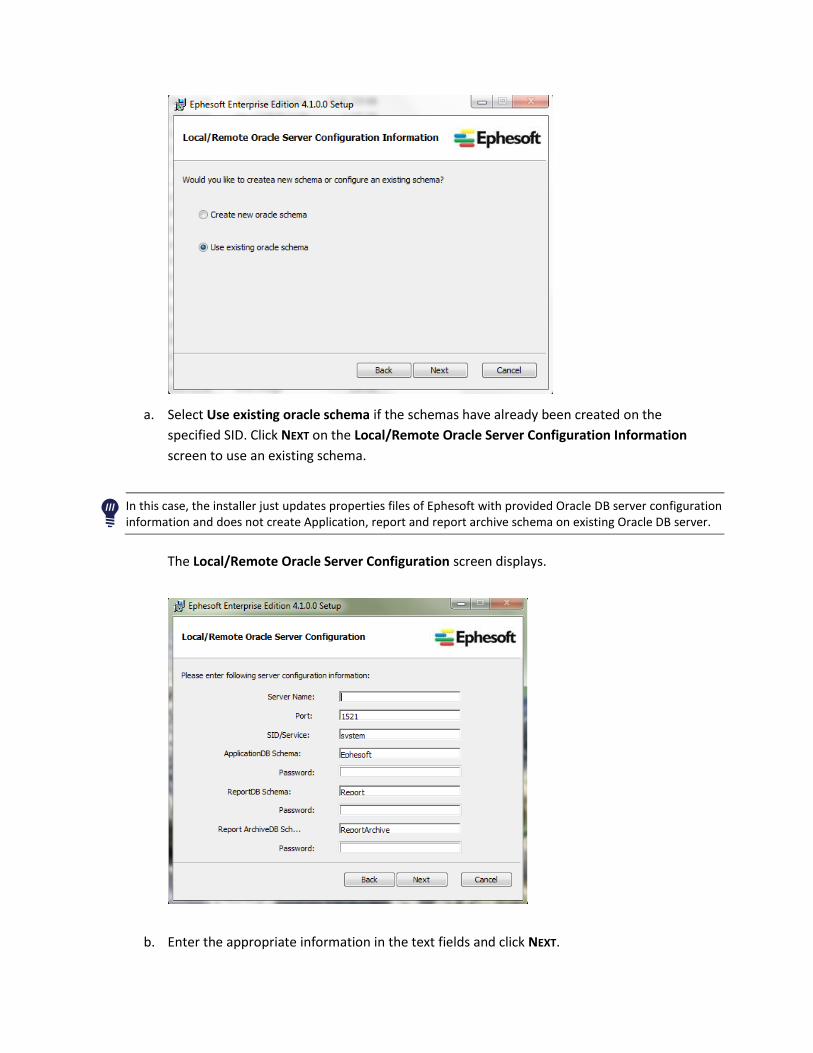
a. Select Use existing oracle schema if the schemas have already been created on the
specified SID. Click NEXT on the Local/Remote Oracle Server Configuration Information
screen to use an existing schema.
In this case, the installer just updates properties files of Ephesoft with provided Oracle DB server configuration information and does not create Application, report and report archive schema on existing Oracle DB server.
The Local/Remote Oracle Server Configuration screen displays.
b. Enter the appropriate information in the text fields and click NEXT.

The Ephesoft Registration Information screen displays.
8. Enter the relevant information and click NEXT on the Ephesoft Registration Information screen.
The Shared Folder Configuration screen displays.
You can choose to configure a new Shared folder or use an existing Shared folder from the Shared Folder Configuration screen. By default, No is selected.
a. Select No and click NEXT on the Shared Folder Configuration screen to install a new Shared
folder along with application setup.

The Destination Folder screen displays.
b. Select the appropriate location to install the Ephesoft system and Share folder and click
NEXT.
The Ready to Install Ephesoft Transact Edition 4.1.0.0 screen displays.
OR,
a. Select Yes and click NEXT on the Shared Folder Configuration screen to use an existing
Shared folder.

In this case, Shared folder path is the path of parent directory of Shared Folders directory.
For example: If existing Shared Folders directory is inside a folder named as share and this folder is shared on system named EPHESOFT, then the shared folder path is \\EPHESOFT\share and not \\EPHESOFT\share\SharedFolders.
The Destination Folder screen displays.
b. Click NEXT.
The Ready to Install Ephesoft Transact Edition 4.1.0.0 screen displays.
9. Click INSTALL.
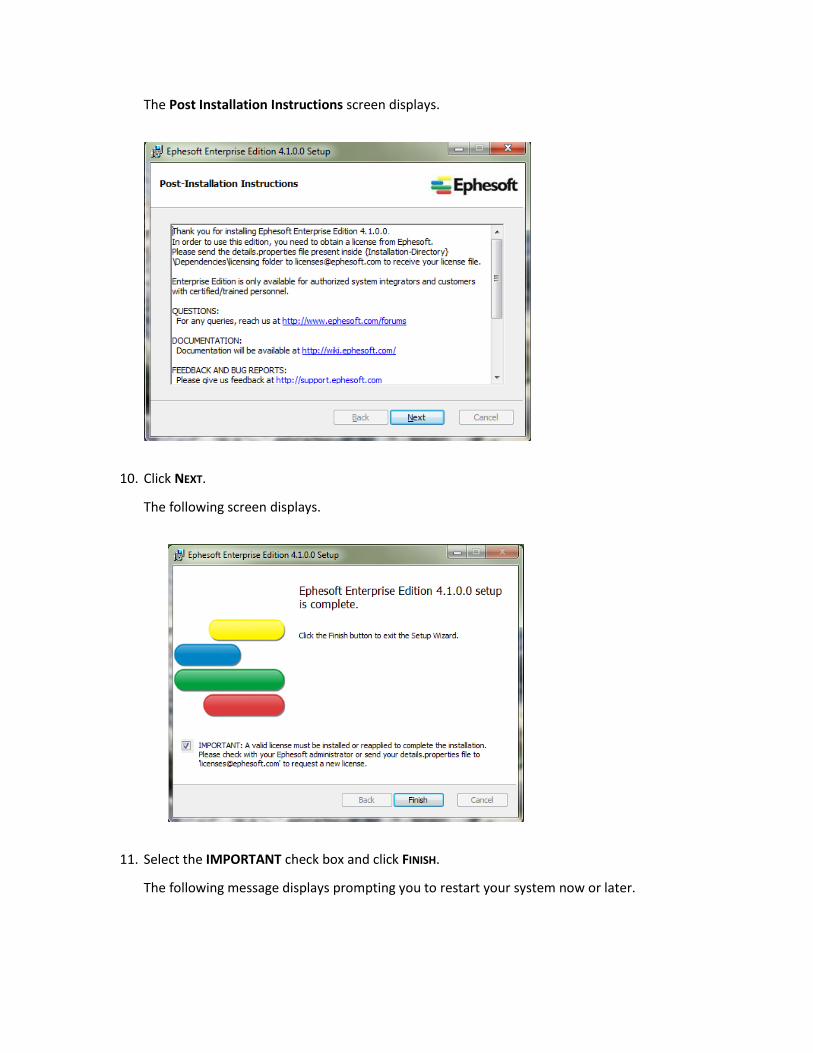
The Post Installation Instructions screen displays.
10. Click NEXT.
The following screen displays.
11. Select the IMPORTANT check box and click FINISH.
The following message displays prompting you to restart your system now or later.
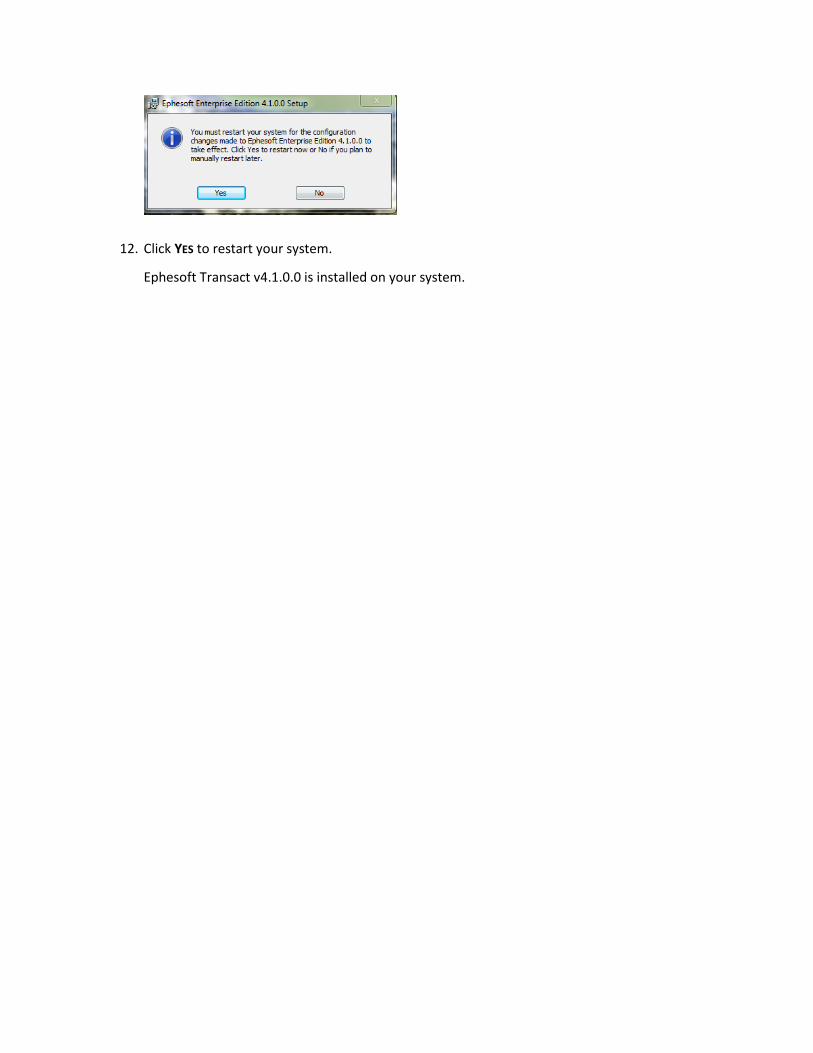
12. Click YES to restart your system.
Ephesoft Transact v4.1.0.0 is installed on your system.