owner’s manual model #06620 “big red”...
TRANSCRIPT

OM06620C.1 ™ & © Char-Griller / A&J Mfg.
™
Contents Safety Warnings……...PG 2 Assembly………….......PG 4 Accessories…………...PG 12 Recipes & Tips……..…PG 13 Meat Cut Chart……..…PG 23
Cooler Surface
~45% Lighter Weight ~40% Lower Price ~9% Larger than “Large”
Triple Wall & Insulation Easy Dump Ash Pan More Durable Legs & Shelves Included
Keep your receipt with this manual for Warranty.
Coals burn up to 24 hours Maintains 200 ̊F to 700 ̊F Temperature
“Burns Long & Hot for Juicy Moist Flavor” “Same Grilling Characteristics as Ceramic”
Indexed Dampers
Heat Gauge
Fold-Down Side Shelves
Triple Wall Steel with Insulation Juicy Moist Meat
Lump Charcoal Best Results and Flavor
Removable Ash Pan Easy Clean Up
Locking Rear Caster and Wheels Easy Mobility
Utensil Hooks
Cast Iron Cooking Grates ▪ Enhances Flavor ▪ Constant & Even Heat ▪ Long-Lasting
Insulated Steel Construction Quick Heat-Up
Easy Forgiving Grill
OWNER’S MANUAL MODEL #06620
COMPARE TO “CERAMIC” GRILL “New Technology allows for Better Cooking”
Porcelain Interior
Become our fan on
Patents Pending
“BIG RED”
Kamado Kooker

OM06620C.1 ™ & © Char-Griller / A&J Mfg. 2
IMPORTANT SAFETY WARNINGS READ ALL SAFETY WARNINGS AND INSTRUCTIONS CAREFULLY
BEFORE ASSEMBLING AND OPERATING YOUR GRILL Use caution when assembling and operating your grill to avoid scrapes or cuts from sharp edges.
Do not use gasoline, kerosene or alcohol for lighting charcoal. Use of any of these or similar products could cause an explosion possibly leading to severe bodily injury.
Do not used lighter fluid on already lit coals.
Keep children & pets away from grill. Supervision is necessary and do not leave grill unattended when in use. Use caution when moving grill to prevent strains. Keep grill at least 15 feet from any combus-tible material (decks, buildings, fences, trees, bushes, etc).
When adding charcoal and/or wood, use extreme caution.
Never move grill when it is in use or when it contains hot coals or ashes, keep the grill in a level posi-tion at all times while in use. ALWAYS latch lid when lid is in closed position.
Do not place grill near flammable liquids, gases or where flammable vapors may be present.
When opening grill, first open slightly to let a small amount of air in for a few seconds. This prevents large amounts of oxygen from getting to suffocated coals which may cause dangerous flash back.
Use caution since flames can flare-up when fresh air suddenly comes in contact with fire. When open-ing the lid, keep hands, face and body safe from hot steam and flame flare-ups.
Removing excess fat before cooking will help prevent flare-ups.
Keep your grill clean to help prevent flare-ups.
Always put charcoal on top of the fire grate and not directly into the bottom of the grill.
Do not exceed a temperature of 700˚ F. Do not allow charcoal and/or wood to rest on the walls of grill. Doing so will greatly reduce the life of the grill
Always wear oven mitts to protect hands from burns, especially when adjusting dampers. Avoid touch-ing hot surfaces.
When opening lid, make sure it is pushed all the way back so it rests against the lid support bracket. Use extreme caution as hood could fall back to a closed position and cause bodily injury.
Close lid and all dampers to help suffocate flame.
Always hold an open lid from the handle to prevent it from closing unexpectedly.
Never leave coals and ashes unattended. Before grill can be left unattended, coals and ashes must be removed. Use caution to protect yourself and property. Carefully place remaining coals and ashes in a noncombustible metal container and saturate completely with water. Allow coals and water to re-main in metal container 24 hours prior to disposing.
To protect against bacteria that could cause illness, keep all meats refrigerated and thaw in refrigera-tor or microwave; keep raw meats separate from other foods; wash everything that contacts raw meats; cook thoroughly; and refrigerate leftovers immediately. Cook meats medium to well done.

OM06620C.1 ™ & © Char-Griller / A&J Mfg. 3
Become our fan on
P.O. Box 30864 Sea Island, GA
31561 912-638-4724
www.CharGriller.com
Warranty Information — Charcoal Grill
Char-Griller® will repair or replace any defective part of its grillers/smokers for a period of up to one year from the date of purchase. Char-Griller® will also repair or replace the body (bottom half) of its grillers/smokers if the metal is rusted through or burned through for a peri-od up to five years. Char-Griller will repair or replace any defective part of its side fire boxes for a period up to one year from the date of purchase. Proof of purchase, proof of purchase date, photo and prepaid return of the item in question may be required. Misuse, abuse, or commercial use nullifies all warranties. Paint/finish is not warranted. Products are not warranted against rust. Warranty applies to original purchaser only whose name appears on credit card, check, or receipt. The warranty is for replacement of defective parts only. Manufacture will not be responsible for damage resulting from accident, alteration, misuse, abuse, hostile environments, improper installation, installation not in accordance with local codes of service of unit. This limited warranty does not cover any scratches, dents , corrosion or discoloring by heat, abrasive and chemical cleaners nor any components used in the installation of the appliance. Save your receipt for all warranty claims.
STOP! CALL FIRST! DO NOT RETURN PRODUCT TO STORE.
Register your Grill online at www.CharGriller.com to insure your satisfaction and for fol-low-up service.
SERIAL # ___________________

OM06620C.1 ™ & © Char-Griller / A&J Mfg. 4
1
2
3
4
5
6
8 9
11 11
12
13
16
17
18 19
20
21
22
23 23
24 25
26 26
15
14
Parts List
10
7
27 28
Item QTY. Part Name Part Number 1 1 THERMOMETER 55-0076 2 1 BEZEL 10-0305 3 1 STACK DAMPER 30-0073 4 1 HOOD 30-0074 5 1 HOOD HINGE 30-0075 6 1 GRILL BODY 30-0076 7 1 LOGO PLATE 10-0302 8 1 HOOD HANDLE 10-0303 9 1 RIGHT HANDLE BRACKET 10-0316
10 1 LEFT HANDLE BRACKET 10-0306 11 2 SIDE SHELF 30-0077 12 1 COOKING GRATE SET 30-0078 13 1 WARMING RACK 20-0041 14 1 GRATE LIFTER 10-0045
Item QTY. Part Name Part Number 15 1 FIRE GRATE 20-0042 16 1 FIRE BOWL 20-1011 17 1 ASH PAN 30-0079 18 3 LEG BRACKET 20-0138 19 1 LEFT FRONT LEG 20-0139 20 1 RIGHT FRONT LEG 20-0140 21 1 REAR LEG 20-0137 22 1 AXLE 10-0048 23 2 WHEEL, 8 INCH 55-0006 24 1 WHEEL, 3 INCH CASTER 55-0011 25 1 BOTTOM SHELF 20-0141 26 2 HUB CAP 55-0007 27 1 O-RING 55-0101 28 1 THERMOMETER GASKET 55-1015

OM06620C.1 ™ & © Char-Griller / A&J Mfg. 5
Hardware:
HARDWARE LIST AND TOOLS REQUIRED (Tools Not Included)
7/16" nut driver
STOP! CALL FIRST! DO NOT RETURN PRODUCT TO STORE. CALL (912) 638-4724. This product has been built to the highest quality standards. Call us should you have any questions not addressed in these instructions, or for service information.
No Returns on Used Grills
CAUTION: Do not attempt to move grill unless the lid is latched, failing to do so may lead to damage or injury.
NOTICE: Read all operating and assembly instructions before attempting to use your grill.
NOTICE: Always have a fire extinguisher near at all times. Maintain and check your fire extinguisher regularly.
Have your grills serial number (located on the back of the grill body or on the leg) when calling.
1/4” LOCK WASH-ER……………...11 PCS
¼-20 HEX NUT……....4 PCS
HAIR COTTER PIN…...2 PCS
UTENSIL HOOK……....6 PCS
¼-20X½” HEX BOLT……………….26 PCS
¼-20x3/4” HEX BOLT WITH THREAD LOCKING COMPOUND ……………………………………………….4 PCS
¼-20 SHOULDER BOLT…………….4 PCS
2/5” FLAT WASHER…………………..2 PCS

OM06620C.1 ™ & © Char-Griller / A&J Mfg. 6
Step 1 Place GRILL BODY upside down and install LEG BRACKETS with three (3) ½ inch hex bolts each. Next install LEGS (3) with two (2) ½ inch hex bolts and two 1/4 inch lock washers each into LEG BRACKETS, DO Not Tighten Bolts Until After Step #3. Screw CASTER onto rear leg, lock CASTER before tightening. Make Sure the leg with the caster is in the back and wheel support braces on the front legs are facing outward.
Step 2 Attach BOTTOM SHELF to LEGS with five 1/2 inch hex bolts and lock washers.
Step 3 Insert AXLE through front LEGS and BOTTOM SHELF. Tighten all bolts.
Step 4
Install one WASHER, COTTER PIN and HUB CAP onto the AXLE then slide the AXLE through
WHEELS and legs as shown. Finish by attaching 2nd WASHER, COTTER PIN and HUB CAP.
Axle Wheel
Washer
Cotter Pin
Hub Cap
Leg Bracket
Leg Bracket
Bottom Shelf Axle
8” Wheel
Grill Body
Caster

OM06620C.1 ™ & © Char-Griller / A&J Mfg. 7
Side Shelf Brackets Left Handle Bracket
Hood Handle
Right Handle Bracket
Shoulder Bolt
Hex Nut
Side Shelf
Step 5 Turn grill upright, LOCK CASTER and place HOOD on the GRILL BODY. Attach hinge on back of HOOD to GRILL BODY using four (4) 3/4 inch hex bolts with thread locking com-pound. Step 6 Attach FRONT HANDLE to HOOD with four (4) 1/2 inch hex bolts. First attach one HANDLE BRACKET to the Lid and then hold the HANDLE in place while attaching the other HANDLE BRACKET to the Lid. HANDLE BRACKETS are left and right handed. Step 7 Attach SIDE SHELVES to SIDE SHELF BRACKETS using two (2) shoulder bolts and two (2) hex nuts for each shelf.
Hood
Grill Body Hex Bolt with thread locking compound
NOTE: Always latch lid when lid is in the closed position, especially while moving.
NOTE: Install nuts towards outer side of shelf bracket. (as shown)

OM06620C.1 ™ & © Char-Griller / A&J Mfg. 8
Step 8 To install ASH PAN, hold ASH PAN up against the bottom of the GRILL BODY from the front with the center pin on the inside. Slide the ASH PAN back and use clips on the sides of the grill to snap into position as shown.
Step 9 Position O-Ring on bottom of damper by rolling it up to the bead. With O-Ring in position, install DAMPER with two (2) 1/2 inch bolts from inside the HOOD. Damper coating will scratch with use. This does not affect the function or performance of the damper. Next, install THERMOMETER GASKET, THERMOMETER and BEZEL with wing nut, as shown be-low. Make sure to calibrate the thermometer first, see page 11.
Damper
Hex Bolt O-Ring
Bezel
Thermometer
Thermometer Gasket

OM06620C.1 ™ & © Char-Griller / A&J Mfg. 9
Step 10 Install: FIRE BOWL, FIRE GRATE, COOKING GRATES and WARMING RACK inside of the low-er body. Step 11 Attach six (6) UTENSIL HOOKS to the underside of the two side shelves (3 each). Use de-pressions in the wood as a starting point for screwing in the UTENSIL HOOKS.
Please Note: No Returns on Used Grills
Utensil Hooks
Utensil Hooks
Fire Bowl
Cooking Grates
Fire Grate
Warming Rack
Side Shelf
Side Shelf

OM06620C.1 ™ & © Char-Griller / A&J Mfg. 10
GRILL PREPARATION & OPERATING INSTRUCTIONS PLEASE NOTE: NO RETURNS ON USED GRILLS
Read all safety warnings and instructions carefully Before assembling and operating your grill.
IMPORTANT! BEFORE YOU USE YOUR GRILL FOR THE FIRST TIME YOU MUST SEASON THE CAST IRON COOKING GRATE. Seasoning Your Cast Iron Cooking Grate:
Before you use your grill it is important to season it, this will burn off coating used to protect your grill during shipping, help protect your cast iron grates from rusting and prepare it for use. First wash your cooking grates in warm soapy water. Rinse thoroughly and dry completely with a towel. DO NOT AIR DRY. NEVER PUT YOUR COOKING GRATE OR ANY PART OF YOUR GRILL IN YOUR DISHWASHER. Once your cooking grate is dry apply a coating of vegetable oil or shortening to your cooking
grate, be sure to coat both sides thoroughly. To finish seasoning your grill start a fire in your grill, we rec-ommend using Lump Charcoal, Heat your grill to 400 ˚F for an hour, this will burn off any chemical resi-dues left from shipping and manufacturing and season your cooking grate. Seasoning should be done periodically to lengthen the life of your cooking grate. TIP: Clean grates while warm using gloves and a baseball sized aluminum foil ball.
Lighting Your Grill: Note: we recommend using Lump Charcoal because they contain no additives or fillers. This makes for
more efficient burning, less ash than charcoal briquettes and much better tasting food. For Regular use: Make a pyramid of Lump Charcoal in the center of the fire grate 1.5—2 lbs. Lump Charcoal (about the
weight of two 12 oz sodas.) Light using fire starters or a charcoal chimney starter. WE RECOMMEND NOT TO USE LIGHTER FLUIDS. Leave LID open until the coals are lit and there is no black smoke com-ing from the coals, Smoke should be clear/white and there should be no flames coming off the coals. Starter sticks (we recommend starter sticks with no kerosene, fats, or scents) should be completely burned before you begin cooking. Adjust dampers to control temperature. More air flow means more heat.
More air flow means more heat.
Fiber Insulation
Air Pocket

OM06620C.1 ™ & © Char-Griller / A&J Mfg. 11
When you are finished grilling: After your are finished grilling you can shut down your grill by closing both dampers and allowing the fire
to suffocate. Emptying the Ashes: ONLY EMPTY ASHES WHILE GRILL IS NOT IS USE. After the fire is completely extinguished wait several hours before emptying the ashes to be sure they are
not still hot. Knock any ashes that did not fall into the ash pan from the fire grate. (if there are pieces of partially burned charcoal on the fire grate you can save them for next time, they are still good). Tap the sides of the fire bowl to knock loose any ash that is on the sides. Unclip the ash pan from the bot-tom of the grill and slide out towards the front. Give the ash pan a few firm taps to loosen any ash that may be stuck. Place the ashes in a metal container and cover with water to ensure there are no lit coals then you can dispose of the ashes. Charcoal is porous and holds moisture, DO NOT leave char-coal in your grill while you are not using it as charcoal or ashes left, especially outside, may reduce the life of your grill.
We encourage you to search the internet for more information about Kamado style cooking.
For lower temperature (250 ˚F and below), long duration grilling and smoking: Use approximately 1lb. of mostly computer mouse or larger sized pieces of Lump Charcoal to build a fire
in the center of the fire grate. Start fire as described above. Once the fire has reached your desired cooking temperature adjust dampers to let less air through, monitor your grill temperature and adjust accordingly.
For High temperature grilling (650 ˚F and above): Use mostly smaller pieces of Lump Charcoal, golf ball sized, and more than you would normally use for
regular grilling (2—3 lbs. Lump Charcoal). After you start a fire as described above leave damper open to maintain a high temperature. Coals will burn more quickly and more can be added by using the re- movable center fire grate.
For Smoking: Follow instructions for lower temperature cooking (250˚F and below). Pre soak wood chips or chunks.
Soak wood chips for 35 minutes. Soak chunks for 1 hour and 30 minutes, or until wood is completely saturated, After grill has reached desired temperature, sprinkle two handfuls of soaked wood chips or chunks over the lit charcoals. Let the chips begin to smoke by closing the lid. You can begin cooking after a few minutes. More soaked chips may be added to the fire later if necessary,
Heat Gauge: This heat gauge is accurate to +/- 10% of the actual temperature. We suggest verifying this with your oven. If you require more precise temperature control, the use of a meat thermometer is recommended.
Fiber Insulation
Air Pocket
Fiber Insulation
Air Pocket
TIP: It is easier to raise the tem-perature than to lower it. As you start to raise your cooking tem-perature, begin closing dampers to ease into desired temperature.
CAUTION: Use extreme care when opening hood at high tem-peratures. Flashback can occur. Slightly open hood, then pause before slowly opening fully.

OM06620C.1 ™ & © Char-Griller / A&J Mfg. 12
™
Qty. Product Price
Smokin' Stone
Pizza Stone
WOK Kooker
U‐Rack
Drip Pan
Remote Thermometer
Poultry Roaster (Chicken)
Poul try Roaster (Turkey)
Gri l l Cover
Apron
Shipping Charge
Total
SHIPPING CHARGES FOR ACCES. Orders up to $25 $9.95 $25 to $50 $12.95
$50 to $75 $16.95 $75 to $150 $23.95 $150 to $300 $28.95
Check or Money Order (Sorry—No C.O.D.s) Check orders will be held 2 weeks before shipment
Prices & policies subject to change. 15% Restocking Fee on all returns No Returns on Used Product. Please visit our website for updated Pricing and Product Availability.
Georgia Customers add a 7% sales tax. Washington State Customers add a 10% sales tax
U-RACK #6204 Upright for roast & butts Upside down for ribs
DRIP PAN #6205 Catch drippings & holds liquid flavors
For extra taste
SMOKIN’ STONE™ #6201 Circulates air around meat & protects meat from direct flame and heat Enhances tastes and tenderness
GRILL COVER #6655 Custom Fit Weather Resistant
POULTRY ROASTER TURKEY # 6207 CHICKEN #6208
REMOTE THERMOMETER # 6206 Monitor temperatures of both meat and smoking chamber up to 572 ̊F. (Withstands up to 695 ̊F) Check the meat and smoking chamber temperatures from inside the house – up to 300 feet away
Visit www.CharGriller.com For Pricing
APRON #8805 2 Pockets Adjustable
PIZZA STONE ~15” #6202 Use as a baking stone
Expiration Date
For Pricing or to Order, Visit: www.CharGriller.com
or CALL: 912-638-4724
or FAX: 912-638-2580
or MAIL: P.O. Box 30864
Sea Island, GA 31561 Visit our online store at:
www.CharGriller.com for more Char-Griller®
Professional Accessories™
Name________________________________________ Street Address_________________________________ City / State / Zip_______________________________ Telephone_________________________ Email_________________________________________
Please bill my credit card:
WOK KOOKER # 6203
“BIG RED”
Kamado Kooker
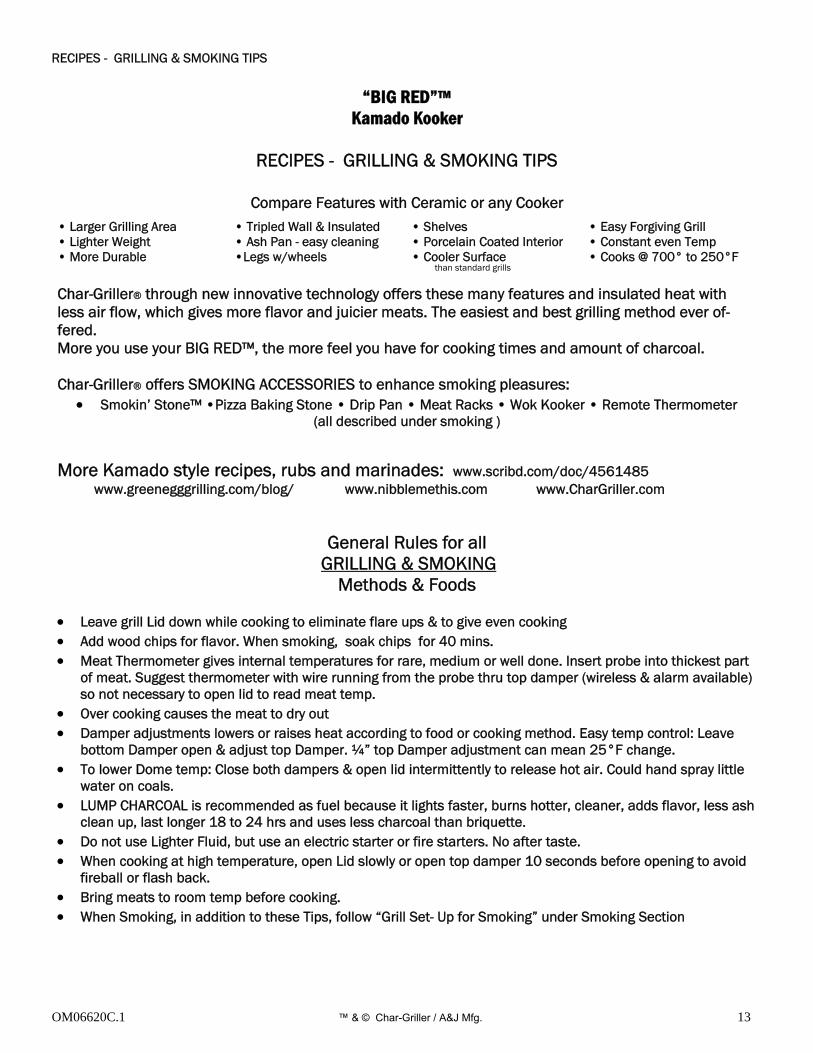
OM06620C.1 ™ & © Char-Griller / A&J Mfg. 13
Compare Features with Ceramic or any Cooker
than standard grills
Char-Griller® through new innovative technology offers these many features and insulated heat with less air flow, which gives more flavor and juicier meats. The easiest and best grilling method ever of-fered. More you use your BIG RED™, the more feel you have for cooking times and amount of charcoal. Char-Griller® offers SMOKING ACCESSORIES to enhance smoking pleasures:
Smokin’ Stone™ •Pizza Baking Stone • Drip Pan • Meat Racks • Wok Kooker • Remote Thermometer (all described under smoking )
More Kamado style recipes, rubs and marinades: www.scribd.com/doc/4561485 www.greenegggrilling.com/blog/ www.nibblemethis.com www.CharGriller.com
General Rules for all GRILLING & SMOKING
Methods & Foods Leave grill Lid down while cooking to eliminate flare ups & to give even cooking Add wood chips for flavor. When smoking, soak chips for 40 mins. Meat Thermometer gives internal temperatures for rare, medium or well done. Insert probe into thickest part
of meat. Suggest thermometer with wire running from the probe thru top damper (wireless & alarm available) so not necessary to open lid to read meat temp.
Over cooking causes the meat to dry out Damper adjustments lowers or raises heat according to food or cooking method. Easy temp control: Leave
bottom Damper open & adjust top Damper. ¼” top Damper adjustment can mean 25°F change. To lower Dome temp: Close both dampers & open lid intermittently to release hot air. Could hand spray little
water on coals. LUMP CHARCOAL is recommended as fuel because it lights faster, burns hotter, cleaner, adds flavor, less ash
clean up, last longer 18 to 24 hrs and uses less charcoal than briquette. Do not use Lighter Fluid, but use an electric starter or fire starters. No after taste. When cooking at high temperature, open Lid slowly or open top damper 10 seconds before opening to avoid
fireball or flash back. Bring meats to room temp before cooking. When Smoking, in addition to these Tips, follow “Grill Set- Up for Smoking” under Smoking Section
RECIPES - GRILLING & SMOKING TIPS
“BIG RED”™
Kamado Kooker
RECIPES - GRILLING & SMOKING TIPS
• Larger Grilling Area • Lighter Weight • More Durable
• Tripled Wall & Insulated • Ash Pan - easy cleaning •Legs w/wheels
• Shelves • Porcelain Coated Interior • Cooler Surface
• Easy Forgiving Grill • Constant even Temp • Cooks @ 700° to 250°F

OM06620C.1 ™ & © Char-Griller / A&J Mfg. 14
GRILLING RECIPES
GRILLING (direct heat above coals)
STEAKS: First trim excess fat and apply dry rub to both sides of Steaks. Sear 1 ½ inch Steaks on the BIG RED™ directly over the coals for 2 or 3 minutes at 650° F. Flip the Steaks and grill for another 2 or 3 minutes. Flip Steaks again and shut both top and bottom dampers and let Steaks remain on grill for another
3 or 4 minutes before removing. Internal meat temperatures: 145° F - Med Rare; 160° F -Med; 170° F -Well Done. Dry rub (per steak): Mix 1/8 cup kosher salt, ¼ tsp white pepper, 1/8 tsp cayenne pepper, 1 tsp
black pepper and apply to both sides. Or Marinate steaks in glass pan with mixture of: ½ cup olive oil, 1/3 cup soy sauce, ¼ cup wine vinegar, 2 tsp lemon juice, 1 tsp dry mustard, 1 minced garlic clove, small minced onion, ¼ tsp pepper for 3 hrs in refrigerator. BURGERS: Grill ½ lb Burgers exactly the same as Steaks except grill for 2 minutes before each flip. Before grilling, mix Burgers with Meat Magic, Worcestershire sauce, ketchup, kosher salt, ground pepper, chopped onions & let sit for 20 minutes at room temperature. MEAT MARINADE: For steaks, chops, and burgers: Combine 1 cup soy sauce, 2 coarsely chopped large onions, and 2 cloves garlic (halved) in an electric blender; cover, process at high speed 1 minute or until mixture is smooth. Stir in ¼ cup bottle gravy coloring (Kitchen Bouquet & Gravy Master) and 2 tsp Beau Monde seasoning (or substitute 1tsp MSG & 1tsp seasoned salt). Marinate meat at room temp for 2 hrs or refrigerate up to 24 hrs in a covered dish. Bring meat to room temp before cooking. RACK of LAMB: A typical rack of lamb is 8 bones and weighs 1 1/2 to 2 pounds. A single rack of lamb is perfect for two people. A big investment, but a fantastic meal. Bottom end has a thick, round piece of meat, which on the rack is like a long, thin roast. Once cut it is like a small pork chop. Ask butcher re-move the thin skin from outside of the rack & cut off the chine bone to make easier to carve. Preparation:
Wrap bare long bones sticking up from rack with foil (to avoid crusting). Do not overcook or cook at too high a temperature because these bones can burn and crumble. Keep the bones up, away from the fire by placing in a “U” Rack.
Remove loose pieces of fat. Dry with paper towel & season with mustard, salt, pepper & garlic Sear lamb quickly over hot fire at 500° F for 3 mins per side then drop heat and/or move the rack
to a cooler part of the grill to let center roast. Creates perfect caramelized crust and keeps center tender and juicy.
Close BIG RED’s ™ lid and let sit for another 5 minutes. Test internal temperature as you go. Do not overcook. Lamb is rare at 120° F; medium 150° F
Remove from BIG RED™ and tent under foil for 10 mins before carving. Allow the rack to gain a couple of degrees after you remove it from the grill. It will continue to cook on the inside
To carve the rack of lamb, stand it up on the meat side with the bones curving away from you. Slide a sharp knife down, between the bones cutting gently through the meat. You should be able to see the bones all the way down along the back side of the rack.

OM06620C.1 ™ & © Char-Griller / A&J Mfg. 15
GRILLING RECIPES
PORK CHOPS: Ingredients 4 Pork Chops; 1 – 1.3” thick pork chops Marinade (olive oil, salt, and pepper, or use Dizzy Pig BBQ Rub and garlic) Preparation sear at very high temperature (steak temp) for 90 seconds per side put on a side plate and let sit for 15-20 minutes return to BIG RED™. Dome temp should be around 400 – 450° F cook 5 minutes per side internal chop temp should be 150 degrees max
CHICKEN: Requires slower grilling.
First, cut and remove the center bone from the chicken. Flatten the breast by pressing flat until the cartilage is broken. Rub olive oil over the chicken and sprinkle thyme, parsley, sage, rosemary, salt & pepper. Grill with skin side down for approximately 17 minutes at 350° F or until skin is crispy; Flip and grill for approximately 28 minutes or until internal chicken temperature is 160° F.
CHICKEN MARINADE: Combine ½ cup soy sauce, ¼ cup vegetable oil, ¼ cup red wine vinegar, 1 tsp oregano, ½ tsp sweet basil, ½ tsp garlic powder w/ parsley, ¼ tsp pepper. Pour over chicken pieces in glass dish. Cover and refrigerate overnight. Use marinade to baste chicken while cooking
CEDAR PLANK SALMON: Ingredients Fresh salmon Dizzy pig BBQ rub Lemon juice Olive oil Preparation Soak planks for 3-4 hrs before cook. Rub salmon with olive oil, dizzy pig raging rub & lemon. Prepare BIG RED™ at 425° Place plank on grill. Once it starts ‘crackling,’ Place salmon on grill (around 5 minutes) For thick salmon filets, estimate about 10 - 13 minutes for the fish to start 'flaking'. .. it will still be a tad underdone in the center. Go 15 - 20 minute if you want it done all the way through HOT DOGS: Grill at 275° F for about 20-30 minutes. Turn them every 5 minutes to achieve a even golden brown and remove when they start to split. SHRIMP (peeled) & CRAYFISH: Place on skewers, coat with melted butter and garlic salt. Grill for 4 minutes on each side or until pink. Cocktail sauce optional. BAKED POTATOES: Rub with butter and wrap in foil and grill with lid down for 50 minutes. Turn after 25 minutes (no need to turn if smoked). Squeeze to check for doneness. CORN (sweet) ON COB: Soak in water for 1 hour & grill at 325° F for 28 to 32 min turning often.
Trim loose silk from the end of the cobs, leave husk on and put on grill. Or, pull husk back, remove silk, apply butter & sprinkle commercial rub. Pull husk back over cob
and tie top with piece of husk. Grill as above. When finished, husk will twist off.

OM06620C.1 ™ & © Char-Griller / A&J Mfg. 16
GRILLING RECIPES WOKKED VEGETABLES: Use a grill “WOK Kooker” with small holes. A favorite combo of veggies is asparagus, mushrooms, sweet onions & pineapple, but other combos work great also. Green beans, red peppers, onions, zucchini is one more example. Possibilities vast, unlimited to imagination. Mushrooms, sweet onions & pineapple add a lot. Slice veggies and put in large bowl for 30 minutes prior to cooking. Then in a small bowl mix up seasonings. Again let imagination run wild. Important to use oil in the mix to “coat” the veggies Mix 2 TBS of each of the following: soy sauce, peanut oil, fish sauce & wine; also mix in 1 tsp of each of the following: garlic (powder or fresh), sugar, favorite rub, lime juice, olive oil pepper.
Pour mixture over veggies and mix in with your hands. Let sit 15-30 minutes. Any longer the salt will take the moisture out of the veggies and they shrink.
Start coals and bring Dome temp between 500 - 600° F. Open lid carefully at high Temp. Place empty Wok Kooker (sprayed with oil) on cooking grate directly above coals & close Lid After 1 min, dump veggies into Wok. Makes a sizzling noise. Spread out veggies & close Lid After 2 or 3 minutes, open and stir well. Should see hint of browning. Close Lid, wait 2 or 3 mins before stirring again. Repeat process until it has a crunch taste. Cooking in a regular Wok is good and you end up with plenty of juices, but it is not the same. There
is something special about the effect high heat, open coals and smoke have.
SMOKING
(Indirect Heat w/ optional Smokin’ Stone™) Combination of thick triple walls & insulation provides ideal insulation for long, slow cooking that ten-derizes all meats. BIG RED™ retains temperature for many hours. Cooking slowly at low temperature for hours is key to great smoking. Smokin’ Stone™ turns BIG RED™ into Convection Oven.
Grill Set-Up for All “SMOKING” Methods & Foods
Smoke long and slow in the 200° to 350° F range Adjust the Dampers for desired temperature Lump Charcoal: (preferred over briquettes) Put several layers in firebox with soaked hickory chips
(soak 40 min to 3 hrs) mixed in or on top of coals for a wood smoke flavor to the meat. Use less Lump Charcoal than you would Briquettes. For slow cooking, (250 to 350°) build small fire and light with Fire Starter at top of the charcoal pile. Light charcoal pile at bottom for high temp fires. Easy to heat up, harder to bring down.
Bring meat to room temp before cooking and use Meat Thermometer to know when done. Also follow all rules above under “General Rules for all Grilling & Smoking”

OM06620C.1 ™ & © Char-Griller / A&J Mfg. 17
*Good for Large Turkey
Pizza Stone used as Smokin’ Stone™
SMOKING RECIPES
SMOKING ACCESSORIES and their Use:
SMOKIN’ STONE™: (sold separately) (heat diffuser for indirect cooking) (sits 2¾” under Cooking Grate on top of Fire Bowl) Circulates air around meat & protects meat from direct flame & heat.
Set-Up grill for smoking in one of the following combinations using Smokin’ Stone™, Drip Pan & Meat Racks.
Drip Pan & Meat Rack on Cooking Grate Drip Pan on Smokin’ Stone™ Drip Pan & Meat Rack on Smokin’ Stone™ Smokin’ Stone™ can be a Pizza Stone or Pizza Stone can be a Smokin’ Stone™. PIZZA BAKING STONE: (sold separately) 15” round stone. Place on Smokin’ Stone™ or Cooking Grate when cooking; Use with or without Smokin’ Stone™ according to cooking method. Pizza Stone can be used as a Smokin’ Stone™ when placed on Cooking Grate; with Drip Pan on top of Pizza Stone; then with Meat & Meat Rack placed inside of Drip Pan;
DRIP PAN: (sold separately) Place under Cooking Grate & on top of the Smokin’ Stone™ (directly under meat) to catch the drippings to add flavor. Or, place Drip Pan on top of Cooking Grate with the Meat Rack placed in the Drip Pan. Add apple juice or beer to Drip Pan if desired.
MEAT RACKS: (sold separately) “U” Rack for roast, ribs or butt; Cone Wire Rack for turkey or chicken. Turn “U” Rack upside down to hold certain meats.
WOK KOOKER: (sold separately) APPROX 11” DIA. WITH HOLES - IDEAL FOR VEGGIES Smoking without SMOKIN’ STONE™ or Pizza Stone: Place Drip Pan on top of Cooking Grate with Meat & Meat Rack placed inside Drip Pan.
SMOKING RECIPES PORK BUTT or VENISON: (set-up grill for smoking; see above) (bone in – 6/9 lbs): Work the rub into the butt until it is moist. Wrap in saran and place in refrigerator for 3 to 5 hours. Cook the butt for 18 hours at 235° F or when internal meat temperature reaches 200°F. Remove & double wrap in foil and let sit 30 minutes before pulling apart. Rub: 1 cup commercial dry BBQ rub and/or deeply inject seasoning of your choice.

OM06620C.1 ™ & © Char-Griller / A&J Mfg. 18
SMOKING RECIPES RACK of BABY BACK RIBS: (set-up grill for smoking; see above) First remove membrane by placing the tip of a meat thermometer between the membrane and a bone near the end of the rack of ribs. Work membrane loose and peel it off. Then wash them.
Apply the rub to all sides and let stand at room temperature for 30 minutes. Smoke for 1½ hr at 325° F. Remove and brush all sides with honey BBQ sauce. Put rib rack in foil pan with 1” apple juice. Cover with foil & cook 1 hr at 325°F or until Pork’s in-
ternal meat temp is: Med 160°F; Well Done 170°F; Insert tooth picks to test tenderness. Remove and serve. To serve later, wrap & refrig, To serve, re-brush honey BBQ sauce & warm
Rub: cup each of dry BBQ rub & honey, 1 ½ cup apple juice and 2 cups honey BBQ sauce.
RIBS - Low & Slow: (set-up grill for smoking; see above) Some prefer direct heat for thicker bark. The following ribs will have texture and ‘bark’ to them. For other hints, visit www.nakedwhiz.com Ingredients: Baby Back Ribs (preferred over side ribs); Mustard and favorite rub; “U” shaped Rib rack Preparation: Use Smokin’ Stone™ for indirect heat
Remove membrane (or have butcher remove). Pliers & grabbing it with a paper towel helps. Rub generously with mustard and favorite rub Stabilize the BIG RED™ to 250° (both vents almost closed) With The BIG RED™ temp stabilized, Cook ribs for five hours. Apply favorite hickory sauce if after five hours, the rub has not formed a nice crust and the meat has not pulled back about an inch on the bone. After 5½ hrs, If rib pulls off easily when twisted, they are done. Or cook 15 mins or done.
RIB ROAST: (set-up grill for smoking; see above) Preparation Directions:
Place 4 lb standing Rib Roast in casserole dish. Rub seasonings to entire roast (as listed) 1 TBS paprika, 3 TBS crushed garlic, 2 TBS Worcestershire & 2 tsp Adolph’s tenderizer. Apply salt & pepper to suit your tastes. Set roast aside in V rack. In casserole dish, mix 1 cup rock salt, 1 TBS flour, one egg wht, 1 TBS water to tacky paste. Place roast back in casserole dish and press the salt/flour mixture on to the roast surface. Con-
tinue to do so until the entire roast surface is covered with the salt/flour mix. Note: Use cheese cloth to hold the salt to the surface of the roast if desired.
Cooking Directions: Over a drip pan with no water, place roast in to roasting rack Cook roast 15 minutes per pound at 500 to 525°F for medium rare Put Meat Thermometer in roast last 30 mins cooking: 145°rare; 160°med; 175°well done When cooking is done, remove roast and allow it to sit uncovered for 10 minutes Let roast set for 10 mins, break shell of salt away from roast & remove. Salt will be brittle and
may have to scraped from meat surface. Let roast sit another 5 mins, slice and serve. Au Jus Sauce:
In 10” skillet or shallow pan place 4 to 6 small chunks of roast along with 3 to 4 TBS water. Stir & heat over med heat until water becomes dark & viscous from the chunks of roast. Add 1 to 2 cups of water and increase heat under pan. When water just starts to boil, add 2 teaspoons of beef bullion crystals. Stir until crystals are completely dissolved. Remove from heat, strain to remove any chunks of roast used for flavoring and serve.

OM06620C.1 ™ & © Char-Griller / A&J Mfg. 19
SMOKING RECIPES
PRIME RIBS: (bone in) (set-up grill for smoking) smaller end often juicier (2 bones = 4 people) Ingredients: mustard, garlic, BBQ rub Preparation
Season prime rib with garlic, pepper, BBQ rub, and wrap in plastic & let sit for at least 1 hr. Place drip pan below to catch drippings Sear the outside for a crust or others prefer to cook at 350° for 3 hours for 8 lb prime rib (use a wireless thermometer) Remove before the prime rib is cooked, tent in foil and let sit for 10 minutes.
TURKEY or WHOLE CHICKEN: (set-up grill for smoking; see above)
Place Bird vertically (up right) on cone wire rack (in Drip Pan) placed directly on Smokin’ Stone™ (w/o cooking Grate) or on Cooking Grate. Can lay bird horizontal in “U” Meat Rack. Apply commercial dry rub, salt and pepper on entire bird and under the skin at neck Place drip pan on Smokin’ Stone™ (under Fire Grate) filled with 2 cups chicken broth, wine, wa-
ter, celery & onion. Cook approx 12 minutes per lb at 325°F until internal meat temp (in breast) is 160°F. Use drippings in the Drip Pan to make gravy. Use up to a 18 lb Turkey or 8 lb Chicken. Carve turkey while on rack. DELICIOUS! (use meat thermometer to know when done)
Follow General Rules for GRILLING & SMOKING and BIG RED’s ™ set-up for SMOKING GRILLED PORK CHOPS: (set-up grill for smoking; see above)
Marinate for 2 two hours (4) pork chops (1.5–1.75 inches thick; approx 1 lb each) in 1 cup or-ange juice, 4 TBS jerk sauce and 2 jiggers rum.
Smoke chops at 275°F until internal meat temp is 135°F. Remove from grill & cover in foil Increase heat in the grill to 600° F Dust the chops with Char Crust original hickory and grill for approx 1 minute per side to give grill
marks and to crisp the fat. APPLE STUFFED BBQ PORK ROAST: (set-up grill for smoking; see above) (5 lb pork tenderloin or loin roast) Wash roast & pat dry.
Cut pockets all around the roast and insert slices of 2 tart apples through the length of the roast. Score roast & rub Tony Chachere’s® Creole Seasoning generously.
In a bowl, combine ½ cup Creole or spicy brown prepared mustard, 1 cup chopped walnuts and 1/8 cup tequila. Work into a paste and coat roast. Cover and chill overnight. Remove covered roast from refrigerator and let warm to room temperature.
Place 2 cups of soaked (overnight, in sealable container, in 7/8 cup tequila) hickory or apple wood chips on Lump Charcoal.
Cook roast for 2 hours at 350° F or until internal meat temperature is 160° F with Drip Pan un-der Cooking Grate on the Smoking’ Stone to catch drippings.
Remove and cover immediately with foil to keep heat and moisture in. Sauce: In a sauce pan, mix drippings from roast, 2 cups half & half cream, 1 cup cream sherry, 1 TBS mustard & 2 TBS Toney Chachere’s Roux & Gravy Mix. Bring to boil, stir constantly to avoid burning and sticking. Reduce heat and simmer 5 minutes. To serve, cut slices of roast at an angle about ¾ inch thick to expose apples. Ladle sauce over roast. (10-12 serving)

OM06620C.1 ™ & © Char-Griller / A&J Mfg. 20
SMOKING RECIPES DOUBLE SMOKED HAM: (set-up grill for smoking - see above) Indirect heat, low/slow cooking) A fully cooked Ham or partially cooked ½ shank variety or shoulder variety (water added can be used, if it does not exceed 23% water added product. Pre-smoked with hickory works best. Update: Use full shank ham if you want. Uncooked ham works well too. Don't limit yourself to ham Glazing Sauce:
Blend ingredients in sauce pan with wire whip. Heat slightly into viscous, thick sauce. ½ cup brown sugar ¼ cup maple syrup (use dark grade B real maple syrup if available) ¼ cup honey 2 Tbsp cider vinegar 1 – 2 Tbsp Worcestershire sauce 2 Tbsp instant coffee granules (use a good brand because it makes a difference) 1 Tbsp dry ground mustard 2 Tbsp orange juice concentrate (a good brand provides better flavor)
Score skin of ham ½” deep in crisscross diamond pattern to allow glazing sauce to penetrate ham. Place ham (un-glazed) into a shallow roasting pan or roasting rack. Add pineapple and cherries if desired on the outside when starting glazing process. Do not tent.
Place water soaked hickory or pecan chunks on coals 5 mins before putting ham on allows max smoke flavor. This is the second cook cycle, the first being the one the processor used. If more smoke flavor is desired, place ham in freezer for 1 to 1 ½ hrs prior to cooking to allow outer edges to start to freeze. Go easy on procedure; don’t want ham frozen hard!
Use a drip pan filled ¾ full when cooking, filled with 50/50 mix of water & orange juice. Cook @ 275°- 300° for 25 to 30 mins per lb. Baste with glazing sauce last hr of cooking time. Continue
cooking until ham reaches a max 140° internal temp. Do not overcook. Remove & allow to sit covered for 20-30 mins before carving. Internal temp will continue to climb to 145°
after removing from BIG RED™. This way, ham will retain moistness and flavor. Blog Update: Remove ham from grill at 135° internal, even if an "uncooked" ham. 135° internal will carry the ham to 145° internal while it rest double wrapped in heavy duty foil for an hour or so. Seals juices in and keeps ham from starting to dry out during resting period. Start cooking at 225°. Let it creep to 250° to 260°. The 275° suggested temp is a bit too high, in my opinion. Spiral cut ham dries out easily. Baste ham with glazing sauce every 10 to 15 mins during the last hr of cooking time. Glazing compound will burn, start glazing the ham at 120° and will only have to apply glaze twice at 30 min intervals. Then you won't lose cooking time trying to apply it every 15 mins. Two applications of glaze will do if you get it into the cut areas. Secret is plenty of smoke and real maple syrup & granular coffee crystals in the glazing sauce.
SWEET KISS of DEATH INJECTABLE HAM MARINADE: takes the ham up 3 notches Ingredients: 1 Cup of Good clean water (if your city or well water has an offensive taste, use bottled water) 1 Cup of light Karo syrup (make sure it is light Karo brand syrup) 1/8 Cup of Amaretto liqueur (use the real stuff it makes a difference) 2 TBS of Watkins brand Butter Pecan extract 1 TBS of Rum extract (again, I used Watkins because of the better taste than store bought) 1 tsp of Orange extract 1 to 2 TBS Vanilla extract (again, I used Watkins because of taste after the first run) Directions for blending:
In medium size sauce pan add water, Karo syrup & Amaretto. Stir frequently & heat slowly to avoid scorching syrup
Add remaining ingredients, stir & heat slowly. When color is uniform & smooth, remove from stove. Cool to rm temp
Directions for use: Wrap ham in 2 layers of plastic wrap before starting the injection process. Using a marinade hypodermic syringe, inject at least 2 fluid oz, up to 3 oz, per lb of meat in a grid pattern
evenly throughout entire ham. Use “Double Smoked Ham” recipe above.

OM06620C.1 ™ & © Char-Griller / A&J Mfg. 21
SMOKING RECIPES
SMOKED VENISON: 1 Venison Roast, Backstrap, Tenderloin or Ham
Ingredients:2/3 Cup Soy Sauce; 1/3 Cup Shao Wine (dry sherry acceptable); 5 Clove Garlic, 1 TBS of one or all if fresh herbs: parsley, mint, oregano, sage, basil, mint; 2 TBS Black Pepper Corns Instruc-tions: Defrost in refrigerator overnight. Backstrap or Roast is large. Steak cut from hams is thinner than beef steak & will cook very quickly. Trim off fat, bones and as much gristle as possible. Crush pepper corns by rolling and pressing them between a cutting board and heavy pot. Chop or slice finely garlic. Cover bottom of marinade pan or dish with marinade, does not need to cover top of venison. Marinade meat 6 to 16 hrs. Turn meat 4 times. Longer & soy sauce flavor will be too strong.
Cook at 350°. Not less than 300° or outside will look unappealing. Over 400° may cause a dry and burned piece of venison. Liquid will not rise to the top of the uncooked meat surface. Game meats are leaner & thinner than steak & cooks faster. Turn when bottom looks like it needs to be turned. Cook until internal meat temperature reaches 140 - 145°.
Ask what butcher calls a roast. Above marinade is great for salmon, beef, chicken or game.
SMOKED VENISON: Place leg of venison in container or “hefty bag”. Marinate 2-4 days, turning daily. Marinate bacon overnight in its marinade. Remove roast from the refrigerator 1 hr before cooking. Sea-son generously with seasoned salt and coarse ground black pepper. Wrap 1 lb. Bacon over the top of the roast, and smoke 20 minutes per pound, or until tender . Do not overcook. VENISON MARINADE: 1 cup Balsamic or wine vinegar, 1 cup olive oil, 2 oz. Worcestershire, ½ oz. Tabas-co, 2 TBS. Season All, 1 to 2 chopped jalapeños, 3 oz. Soy sauce. Bacon Marinade: 2 oz. wine vinegar, 2 oz. Worcestershire, 4 dashes Tabasco. TWICE BAKED POTATOES: (set-up grill for smoking; see above) Wash and coat 4 large bakers with x virgin olive oil and Kosher Salt
Bake for 1 hour at 400° F or until soft. Then cut length wise and gut. Mix all of the following ingredients together: Insides of 4 Potatoes, 1/4 cup milk, 1/2 lb fried &
crumbled bacon, Scallions as you like, 1 Egg, Cheese (Colby/Jack), ½ cup Mayo/ Mir Whip. Place mixture back into the potato shell Bake again for 30 mins at 400°F; Keep potatoes moist because the twice bake will dry out
SMOKED BAKED BEANS: (set-up grill for smoking; see above)
Mix all the following ingredients in a kettle or Dutch oven pot: 2 quarts (64 fl oz) Pork & Beans drained, ¼ lb pork BBQ, ½ of a 4oz can of chopped green chilies, ¼ cup dried onion or ¾ cup fresh onion, ¼ cup BBQ sauce, 1 cup ketchup, 1/8 tsp cayenne pepper, 1/3 cup honey, 1/3 cup Worcestershire sauce, 1/3 cup brown sugar.
Cook uncovered for 3 or 4 hrs (til liquid decreases to desire consistency) at 300 to 375°F Do not stir during cooking. When finished cooking, the beans will appear dark on the surface be-
cause smoke is lying on the top. Stir to mix the beans and serve hot

OM06620C.1 ™ & © Char-Griller / A&J Mfg. 22
BAKING RECIPES
BAKING Bake pizza, bread, cornbread, biscuits, cobblers, cookies and pies. The BIG RED’s ™ design for tempera-ture control along with the Smokin’ Stone™ and Pizza Baking Stone allows the moisture to be drawn from the pizza crust, providing that desired crispy crust. BAKED BREAKFAST PIZZA: Start by smoking center cut bacon on the BIG RED™. Next scramble 4 or 5 eggs on the stove, or use Cast Iron skillet and make on the BIG RED™. While the eggs are cooking, brown several cups of hash browns. Make white gravy pepper heavily. Use a precooked Mama Mary’s pizza crust and spread a layer of white gravy onto it. Next mixed hash browns, eggs and bacon into a bowl and place them onto the pizza crust topped with cheese and more gravy. Cook on your BIG RED’s ™ stone Smokin’ Stone™ at 450° for 13 mins & then it is chow time.
12 inch HOME MADE PIZZA: Ingredients Sauce: 1 Tbsp olive oil, 1/2 onion diced small, 1 clove garlic minced, 1 x 15-oz can whole tomatoes, 1 sprig Fresh Oregano, 1/2 tsp sugar, 1/2 tsp kosher salt, 1/8 tsp ground pepper
Crust: 1½ cups warm water, 2 TBS olive oil, 2 tsp kosher salt, 3 x 3/4 cups bread flour, ½ corn meal, 2 tsp sugar, 2 tsp rapid rise yeast Preparation Sauce:
Heat the oil in a 1-1/2 qt sauce pan. Cook the onion and garlic until softened and translucent, about 3 minutes. Stir as necessary.
Add tomatoes, crush lightly with hands as added. Add juice too. Strip leaves from oregano stem & chop
Add oregano & sugar. Simmer, stir occasionally for about 20-30 mins, until thickened. Add salt /pepper.
If you prefer a non-chunky sauce, puree the ingredients before putting in pot Crust
Purchase ready-made crust or dough, or….. Place ingredients in the order listed into bread machine. Run machine on pizza cycle. To use im-
mediately, move to Pizza Screen (or place in oiled bowl, cover & place in refrigerator until ready to use).
Pizza Add the sauce and other ingredients (if you like) to the crust. The pizza can be cooked two different ways. 1. Preheat grill to 650°. Wet pizza stone (to cool), place pizza on stone and cook 6 mins. 2. If grill cannot achieve hot temp, then pre-heat grill to 350° and cook 15-20 mins (until golden brown) Let sit for 5 minutes and enjoy! Pizza screen will help take pizza on and off grill.

OM06620C.1 ™ & © Char-Griller / A&J Mfg. 23
BAKING RECIPES: HOMEMADE PIZZA & SAUCE: Sauce:
In a skillet, sauté 1 small finely chopped onions in 1 TBS olive oil for a few minutes, then add 1 (15oz) can of crushed tomatoes, 1 tsp salt, black pepper, 1TBS of basil and oregano.
On medium heat, stir from time to time cooking for 20 minutes. Pizza Crust:
Use a precooked Mama Mary’s pizza crust or buy a dough ball or… Pour 1 cup water into processor, add 1 pack (2 ½ tsp) yeast – give a quick pulse. Add 1 cup bread flour (buy best), 1 tsp salt, 1TBS olive oil – give a few quick pulses Add 1 ½ cup more flour and process to form a ball – adding more flour as needed. The dough
should not be sticky, so adjust the flour used to get a fairly firm , smooth dough. Remove from processor bowl & place on a floured surface, knead it a few more times by hand. Place dough in a covered bowl to rise until doubled (plus or minus1 ½ hours) Remove from bowl, punch down & form two balls that can be rolled out into (2) 12” pizzas. (You
may want to fold over the edges, to give an edge crust/rim to contain sauce and ingredients) The Pizza:
Spread sauce on Pizza dough Layer with favorite toppings (cheese, sausage, mushrooms, peppers, onions, anchovies, ect.) Place Pizza on the stone Smoking Plate. Bake Pizza at 400° F for 35 - 40 minutes. Cover Smokin’
Stone™ with cornmeal to keep Pizza from sticking.
ROUND ROUND STEAK TOP ROUND ROAST TOP ROUND STEAK BOTTOM ROUND ROAST TIP ROAST CAP OFF EYE ROUND ROAST TIP STEAK BONELESS RUMP ROAST
CHUCK
BRISKET PLATE
RIB
FLANK
ROUND CHUCK CHUCK EYE ROAST, BONE-LESS TOP BLADE STEAK, BONE-LESS ARM POT ROAST SHOULDER POT ROAST, BONELSS MOCK TENER ROAST BLADE ROAST UNDER BLADE POT ROAST
BRISKET WHOLE BRISKET BRISKET, POINT HALF, CORNED BRISKET, FLAT HALF
PLATE SKIRT STEAK
FLANK FLANK STEAK
FLANK STEAK ROLLS
National Cattlemen’s Beef Association
444 North Michigan Avenue
SHANK SHANK CROSS CUT
SIRLOIN TOP SIRLOIN STEAK SIRLOIN STEAK TENDERLOIN ROAST/STEAK BEEF TRI-TIP The Tri-Tip roast is boneless cut from the bottom sirloin. It is also called a “triangle” roast because of it’s shape.
SHORT LOIN TOP LOIN STEAK T-BONE STEAK PORTERHOUSE STEAK TENERLOIN ROAST/STEAK
SIRLOIN
BEEF CUTS
BELLY
LOIN
PICNIC SHOULDER SPARE RIBS
LEG (HAM)
FOOT
SIRLOIN CENTER LOIN
BLADE END
BOSTON-STYLE SOHOULDER
FOOT
PORK CUTS
RIB RIB ROAST, LARGE END RIB ROAST, SMALL END RIB STEAK, SMALL END RIB EYE STEAK RIB EYE ROAST BACK RIBS
SHORT LOIN

OM06620C.1 ™ & © Char-Griller / A&J Mfg. 24
™
U-RACK #6204 Upright for roast & butts Upside down for ribs
DRIP PAN #6205 Catch drippings & holds liquid flavors
For extra taste
SMOKIN’ STONE™ #6201 Circulates air around meat & protects meat from direct flame and heat Enhances tastes and tenderness
POULTRY ROASTER TURKEY # 6207 CHICKEN #6208
REMOTE THERMOMETER # 6206 Monitor temperatures of both meat and smoking chamber up to 572 ̊F. (Withstands up to 695 ̊F) Check the meat and smoking chamber temperatures from inside the house – up to 300 feet away
APRON #8805 2 Pockets Adjustable
PIZZA STONE ~15” #6202 Use as a baking stone
WOK KOOKER # 6203
For Pricing or to Order, Visit:
www.CharGriller.com or
CALL: 912-638-4724 or
FAX: 912-638-2580 or MAIL:
P.O. Box 30864 Sea Island, GA 31561
Visit our online store at:
www.CharGriller.com for more Char-Griller®
Professional Accessories™
Easy Forgiving Grill
SAME GRILLING CHARACTERISTICS AS CERAMIC Insulated heat requires less air flow across meat, which gives more flavor & taste without drying out. Sear meat up to 700 ̊F or slow cook at 250-360 ̊ F. Yum-Yum Good!
ACCESSORIES TO ENHANCE YOUR KAMADO GRILLING EXPERIENCE
GRILL COVER #6655 Custom Fit Weather Resistant
“BIG RED”
Kamado Kooker