policy configuration: aws > identity and access management · 2018-02-25 · information on the...
TRANSCRIPT

Information on the Palo Alto AWS AMI and the HA configuration steps. This will help avoid future pitfalls when deploying this. Policy Configuration: When deploying HA in AWS, before you do anything else you need to set up a specific role and policy to be deployed with the AMI's. Navigate to AWS > Identity and Access Management:
From there, navigate to the Policies option and select the Create Policy button at the top:

Select the Policy Generator Option:

1. Select Amazon EC2 from the AWS Service Drop-Down. 2. Add the following actions to the Policy:
o ec2:AttachNetworkInterface o ec2:DescribeNetworkInterface o ec2:DetachNetworkInterface o ec2:DescribeInstances
3. Set the ARN to *
The final output should look like below:

Review the policy and give it a name, then press Create Policy:

Role Configuration: Navigate to the Policies option and select the Create Policy button at the top:

Set a new Role Name:

Select the Amazon EC2 Role Type:

Attach the previously made policy (you can type the name of the policy to help filter quicker):
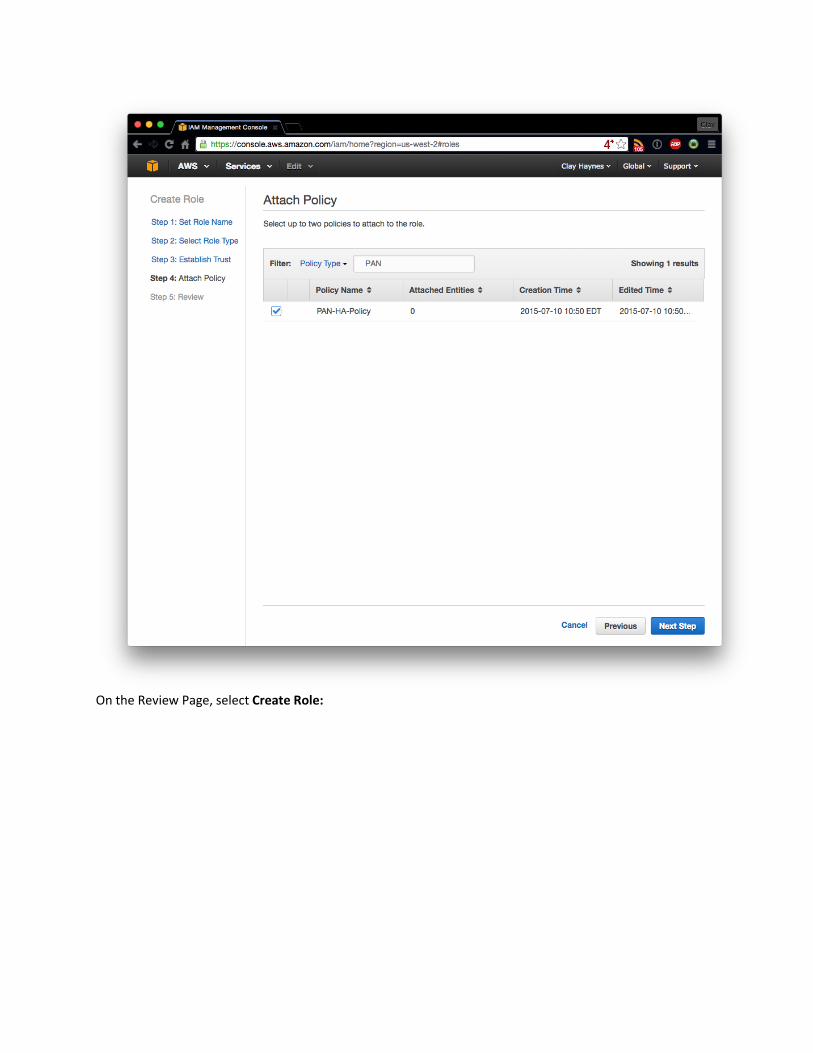
On the Review Page, select Create Role:

Deploying the AMI:
Navigate to Compute > EC2 and select the Launch Instance button. From here navigate to the AWS Marketplace:

Select your instance. If a customer has VM Licenses already, choose the BYOL Option.
Otherwise, choose one of the other options.
In the Instance Type I would just accept the default c3.xlarge. Only certain instances are
compatible:

In the Instance Details set the number of instances to 2, and set the IAM Role created in the
previous step.
*** WARNING – If you do not the set the role here you'll need to start all over again! ***

Proceed with accepting the defaults for all other settings, and then launch the two instances.
Optonally, you may change the security group name and description to something a little
friendlier as well. It will make later steps easier to configure.
*** NOTE – you may be prompted to create a private key for the new AMI's or use an
existing one. Create a new key and save a copy – it'll be used for a SSH connection later ***
Network Settings
We now need to create the interfaces and assign a security policy to allow communication
between the two Palos. Let's start with creating the network interfaces:

Navigate to Network & Security > Network Interfaces and press the Create Network
Interface button. Set a description, subnet, and security group as shown below:
Repeat this until you have all the interfaces needed. You will need at minimum 3 interfaces – one
for each HA interface on each Palo AMI, and another dataplane interface to forward traffic.
From there, assign the interfaces to the Palo AMI's. Each attached interface will be applied in
order as so:
Default interface – eth0 in AWS – mgt interface in PAN
First added interface – eth1 in AWS – ethernet1/1 in PAN
Second added interface – eth2 in AWS – ethernet1/2 in PAN
You can optionally set descriptions of intefaces to help keep track. From there, assign the
interfaces to the AMI's. You will assign eth1 to each Palo AMI, and eth2-eth8 to the primary

Palo AMI. You do NOT need to duplicate interfaces, just apply and assign the remaining
dataplane interfaces to the primary Palo AMI as shown below:
We also need to disable source/dst. checking on each data plane interface (eth1/1-eth1/7). Right
click on each interface (other than the management interface) and select Change Source/Dest.
Check. Set it to Disabled as shown below:
Take note of the private IP's for each interface as we will used them to set up HA:

From here, lets allocate elastic IP's for our Palo AMI's. Navigate to Network & Security >
Elastic IP's and press the Allocate New IP button to allocate two addresses:

From here, associate one address to each AMI. Use the private IP Address of the mgt interface of
each Palo AMI:
Once this is complete, be sure to power off and power back on each Palo Alto unit. Interface
creation is not a hot-swappable feature. You can do this by navigating to Instances > Instances
and right-clicking an AMI and selecting Instance State > Stop. Once the instance is stopped you
can start it back up by right-clicking an AMI and selecting Instance State > Start.
Security Profile Group
Navigate to Network & Security > Security Groups, right click the policy bound to the Palo
AMI's, and select Edit Inbound Rules. From here, you will need to add 4 rules matching all
traffic from the IP Addresses of the Palo Alto Management and HA2 interfaces. Click Add
Rule and set the parameters as shown below (replace 1.2.3.4/32 with the addresses of the
Management and HA2 Interfaces):

Click Save once all 4 rules are added. Review the profile to make sure it looks something like
this:
Setting the Admin password:
You will need to SSH using the private key saved in the previous steps. If you're on OS X/Linux
you will need to reset the permissions on the keyfile:
chmod 600 <keyname.pem>
From there, ssh into both Palo AMI's using the public Elastic IP set on each unit. In OS X/Linux:
ssh -i PAN.pem [email protected]
Once logged in, feel free to configure the admin account just like any other palo:

Setting up HA:
Setting up HA is very similar to setting up HA on a physical device. There are some caveats:
HA1 interface is the management interface
HA2 interface can only be ethernet1/1
No backup HA interfaces are permitted
Preempt MUST be turned on both units
Configure ethernet1/1 to be a HA interface by navigating to Network > Interfaces and clicking
on ethernet1/1. Set the interface type to HA:

From there, navigate to Device > High Availability and set up HA using the following
screenshots:
The Peer Address is the Management interface of the neighboring Palo Alto AMI (eth0 in
the AWS console)

Select the management interface from the drop-down
Set the HA2 interface to ethernet1/1, and use the neighboring AMI's ethernet1/1 address as
the peer (eth1 in the AWS Console). Set the Transport to UDP.
Set the Election Settings. I like using 50 on the primary AMI, and 100 on the secondary
AMI. Make sure Preemptive is selected on both Palo AMIs.

Commit the configuration on both units and confirm that HA comes up:
And that's it! Configure your remaining interfaces like any other Palo. During a failover situation
those interfaces will automatically be detached from the primary Palo AMI and re-attached to the
secondary unit. Once the primary comes back online the interfaces are reattached.