process mapping librariesprocessmapping.com.au/download/process mapping libraries.pdf · 1 the...
TRANSCRIPT
“Our goal at Process Mapping is to ‘Optimise e-Work’, and to make it as an efficient and productive experience as possible for our clients”
Process Mapping Libraries
Reference Guide
November 2006

Process Mapping Libraries.doc Page 2
COPYRIGHT NOTICE Copyright © 2006 Process Mapping Pty Ltd All rights reserved Not to be distributed without the express permission of the author Jerome Pearce - ([email protected]) To request enhancements or report faults, please email [email protected]
LIMIT OF LIABILITY/DISCLAIMER The authors of this publication have used their best efforts in its preparation and make no representations or warranties with respect to the accuracy or completeness of the contents and specifically disclaim any implied warranties or fitness for a particular purpose. The accuracy and the completeness of the information provided herein and the opinions stated herein are not guaranteed or warranted to produce any particular results. The information in this document is subject to change without notice. Process Mapping Pty Ltd shall not be liable for any loss of profit or any other commercial damages, including but not limited to special, incidental, consequential or other damages.
Process Mapping Libraries.doc Page 3
Table of Contents
1 THE PROCESS MAPPING COMMON LIBRARY .....................................................................4 1.1 USING THE PROCESS MAPPING COMMON LIBRARY.......................................................................................... 6
5 THE EDIT GRID LIBRARY ............................................................................................8 1.2 USING THE EDIT GRID LIBRARY....................................................................................................................... 9 5.1 USING THE EDIT GRID LIBRARY ‘TOTAL COLUMNS’ FORM SEGMENT ........................................................... 11
6 THE EDIT FOLDER GRID LIBRARY................................................................................ 12 6.1 USING THE EDIT GRID LIBRARY ‘EDIT FOLDER’ FORM SEGMENT.................................................................. 12
4 EMAIL HTML QUERY REPORT .................................................................................... 13 4.1 SETUP............................................................................................................................................................. 14 4.2 USING THE PROCEDURE.................................................................................................................................. 17
5 ENCRYPTION ........................................................................................................ 21 5.1 USING THE ENCRYPTION LIBRARY ................................................................................................................. 21
6 FORM SCRIPTS ...................................................................................................... 22 1.3 USING THE FORM SCRIPTS LIBRARY............................................................................................................... 23
1.3.1 Set Grid Rows ........................................................................................................................................... 23 1.3.2 Alter Buttons ............................................................................................................................................. 24
7 LIST SCRIPTS ........................................................................................................ 26 7.1 NUMBER LIST FULL........................................................................................................................................ 26
8 PASS VARIABLE ..................................................................................................... 28
9 RECORD CHANGES ................................................................................................. 29
10 REPORTING....................................................................................................... 30
11 THE PROCEDURE DOCUMENTATION ADD-IN ............................................................... 31
12 PASSWORD AUTHENTICATION................................................................................ 32
Process Mapping Libraries.doc Page 4
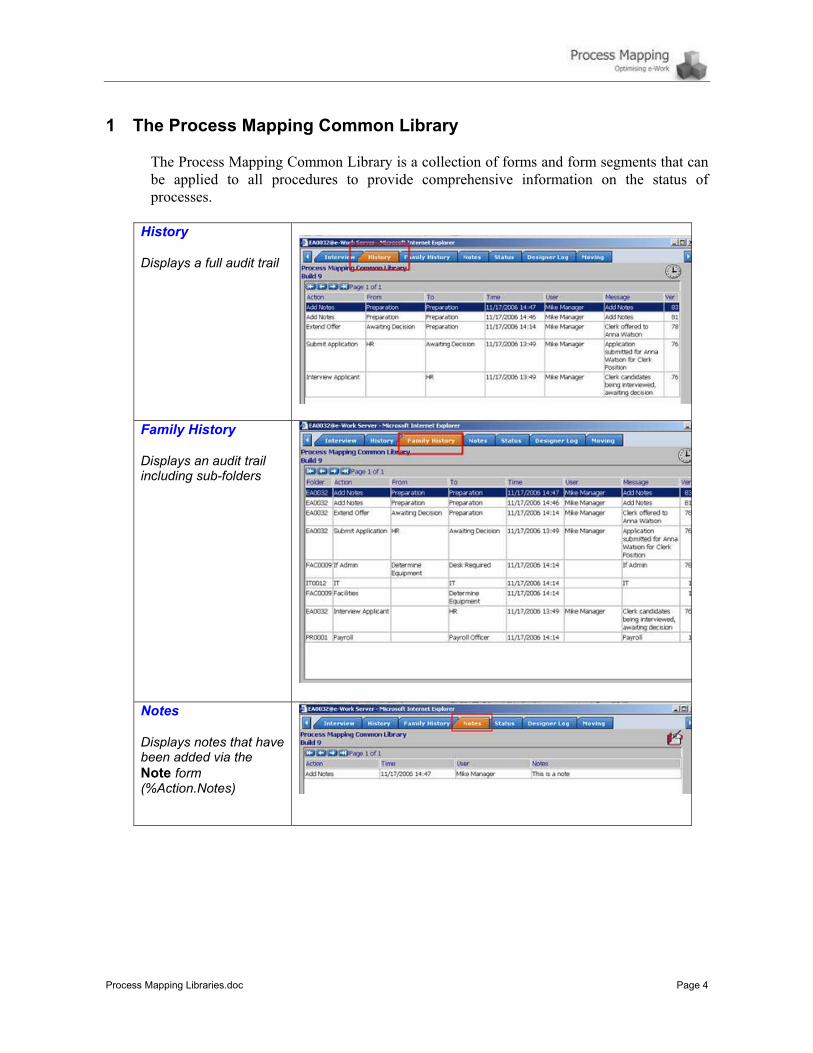
1 The Process Mapping Common Library The Process Mapping Common Library is a collection of forms and form segments that can be applied to all procedures to provide comprehensive information on the status of processes.
History Displays a full audit trail
Family History Displays an audit trail including sub-folders
Notes Displays notes that have been added via the Note form (%Action.Notes)

Process Mapping Libraries.doc Page 5
Status Displays the folder’s current status
Designer Log Displays procedure error diagnostics with a ‘Copy to Clipboard’ button enabling details to be saved in .txt or .doc file format for review purposes to expedite procedure error resolution.
Note This is an %Action.Notes form and is not displayed as a folder page

Process Mapping Libraries.doc Page 6
Moving A JavaScript function that refreshes re-opened Folders currently being moved to another Stage by refreshing the folder window at intervals until the folder has moved.
Folder Details and Common Library Version These form segments are used to display the Library Version as well the Folder’s subject, user details etc.
1.1 Using the Process Mapping Common Library
1 From the Procedure Properties dialog, associate the ‘Process Mapping Common Library’ with a new or existing procedure.
2 Select all Stages in the
procedure and apply the required forms from the library.
Process Mapping Libraries.doc Page 7
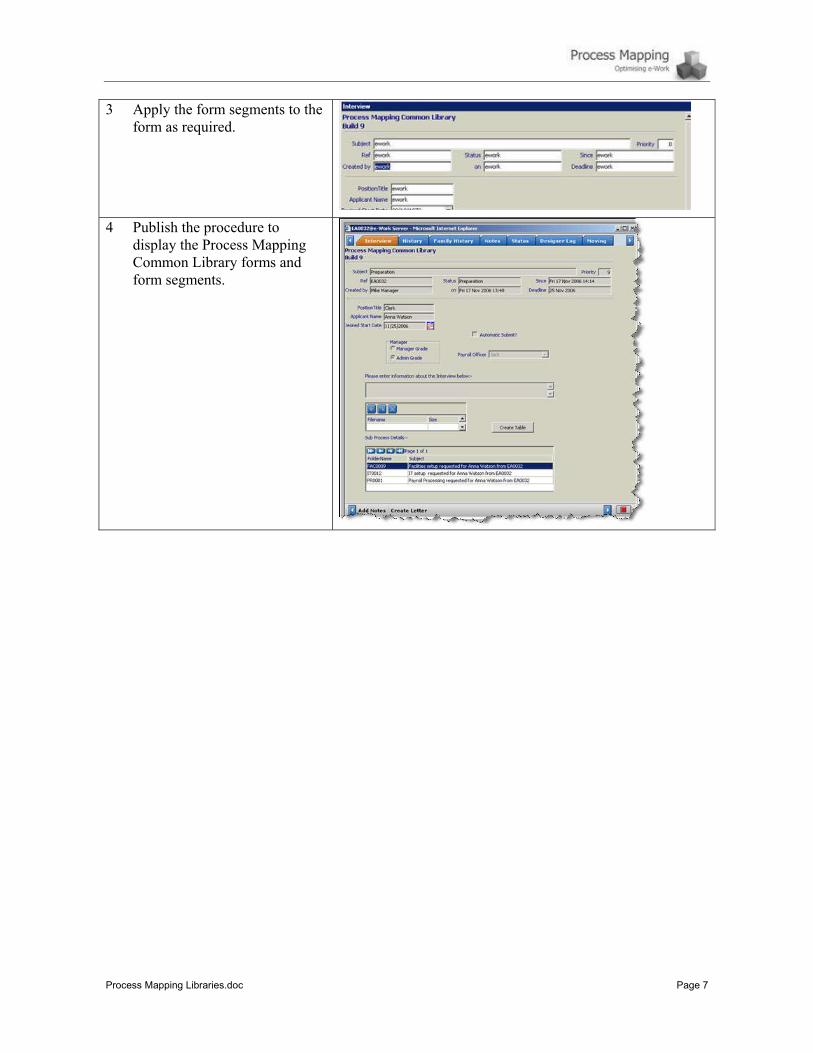
3 Apply the form segments to the form as required.
4 Publish the procedure to
display the Process Mapping Common Library forms and form segments.
Process Mapping Libraries.doc Page 8
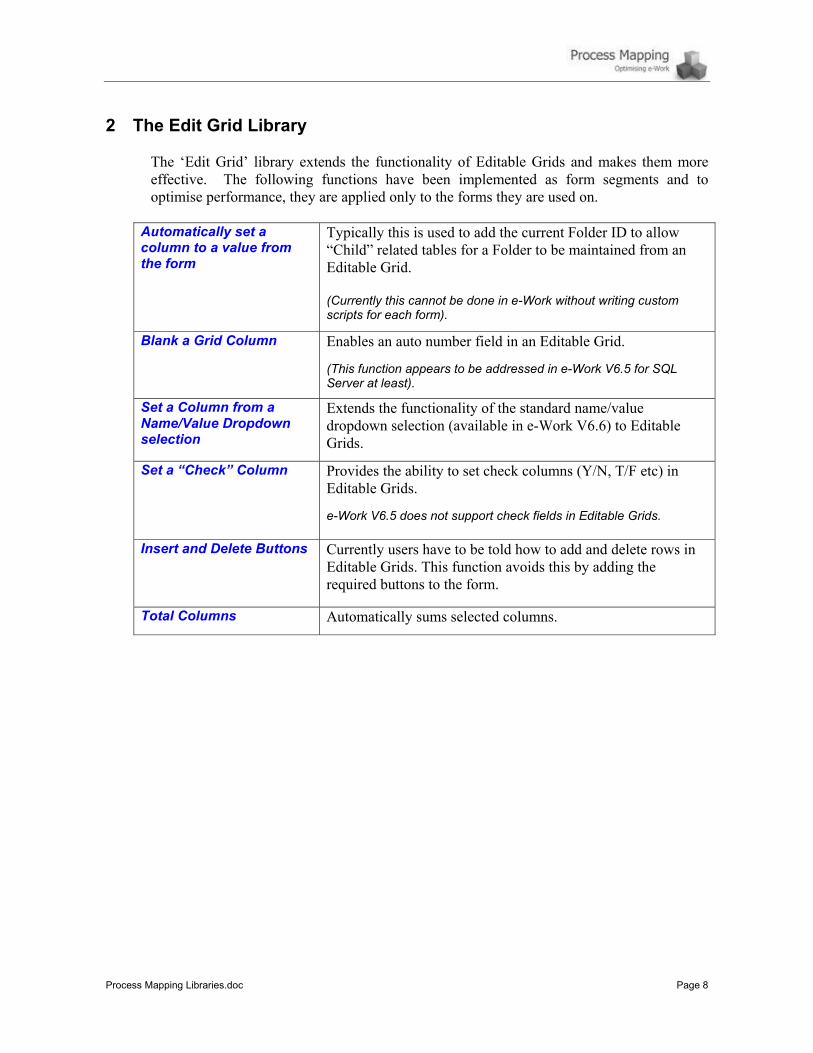
2 The Edit Grid Library The ‘Edit Grid’ library extends the functionality of Editable Grids and makes them more effective. The following functions have been implemented as form segments and to optimise performance, they are applied only to the forms they are used on.
Automatically set a column to a value from the form
Typically this is used to add the current Folder ID to allow “Child” related tables for a Folder to be maintained from an Editable Grid. (Currently this cannot be done in e-Work without writing custom scripts for each form).
Blank a Grid Column Enables an auto number field in an Editable Grid. (This function appears to be addressed in e-Work V6.5 for SQL Server at least).
Set a Column from a Name/Value Dropdown selection
Extends the functionality of the standard name/value dropdown selection (available in e-Work V6.6) to Editable Grids.
Set a “Check” Column Provides the ability to set check columns (Y/N, T/F etc) in Editable Grids. e-Work V6.5 does not support check fields in Editable Grids.
Insert and Delete Buttons Currently users have to be told how to add and delete rows in Editable Grids. This function avoids this by adding the required buttons to the form.
Total Columns Automatically sums selected columns.

Process Mapping Libraries.doc Page 9
2.1 Using the Edit Grid Library
The ‘Demo Edit Grid’ procedure illustrates how the Edit Grid Library features can be applied to a grid. An Admin Form is included which is used to create and populate a custom table - ‘DemoLookup’ with values that can subsequently be selected by the user from the ‘Lookup’ (name/value) dropdown list.
Fig 1 - The ‘Edit’ form
Fig 2 - The ‘Show’ form
Name / Value dropdown

Process Mapping Libraries.doc Page 10
2.2 Using the Edit Grid Library
1. Publish the ‘Demo Edit Grid’ procedure.
2. From the Procedure Properties dialog, check that the ‘Edit Grid’ Library is associated.
1 Open the ‘Demo Edit Lookup’ Admin form and populate the ‘DemoLookup’ custom table with several rows of data.
The ‘DemoLookup’ custom table:-
2 From the Blank Forms
page select the ‘Demo Edit Grid’ blank form.
3 Add several rows of data to review the Grid’s functionality and submit the form.
Process Mapping Libraries.doc Page 11
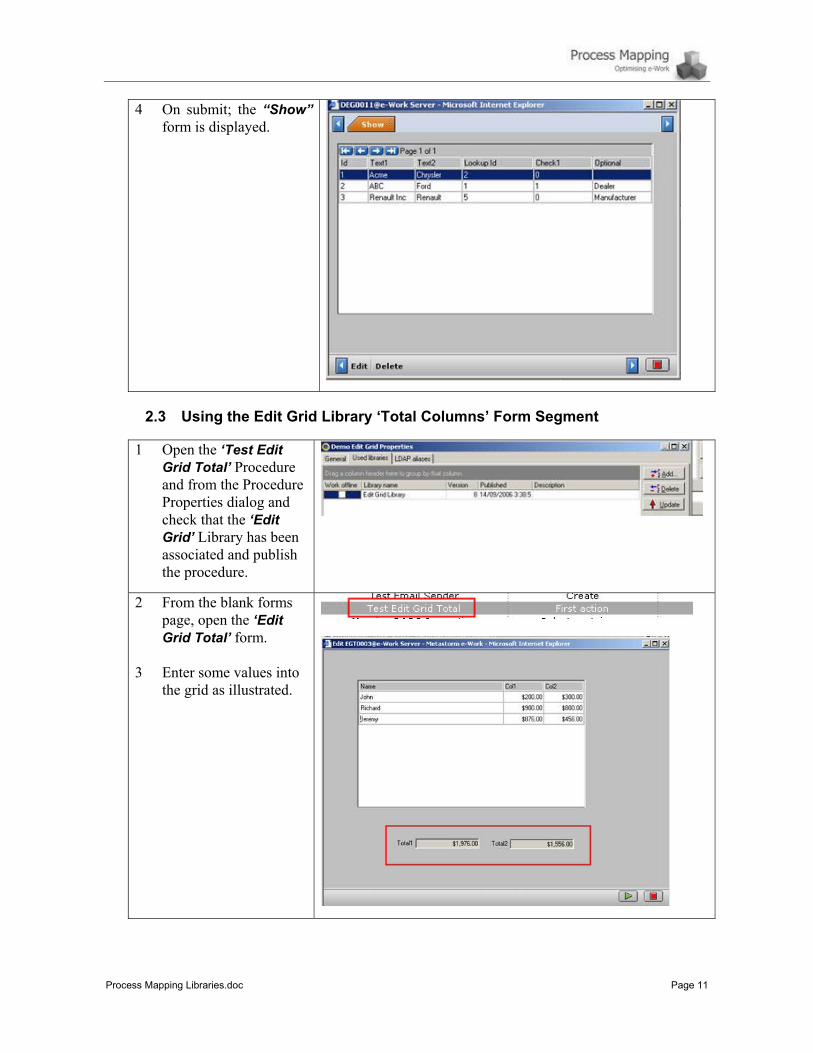
4 On submit; the “Show” form is displayed.
2.3 Using the Edit Grid Library ‘Total Columns’ Form Segment
1 Open the ‘Test Edit Grid Total’ Procedure and from the Procedure Properties dialog and check that the ‘Edit Grid’ Library has been associated and publish the procedure.
2 From the blank forms page, open the ‘Edit Grid Total’ form.
3 Enter some values into the grid as illustrated.

Process Mapping Libraries.doc Page 12
3 The Edit Folder Grid Library The ‘Edit Folder Grid’ library extends the functionality of Editable Grids by automatically recording the FolderID in the first field of the grid (which is hidden). This enables records to be associated with that folder. Without this code this cannot be achieved – i.e. all records will be applicable to all Folders. In the Edit Folder Grid Demo sample procedure, the external table testFolderGrid is created to illustrate this:-
3.1 Using the Edit Grid Library ‘Edit Folder’ Form Segment
1 Open the ‘Test Folder Grid’ Procedure and from the Procedure Properties dialog, check that the ‘Edit Grid’ Library as been associated and publish the procedure.
2 Open the form and enter a few rows of grid data.
3 From Services Manager run the Query - select * from testFolderGrid to review what has
been stored.
Process Mapping Libraries.doc Page 13
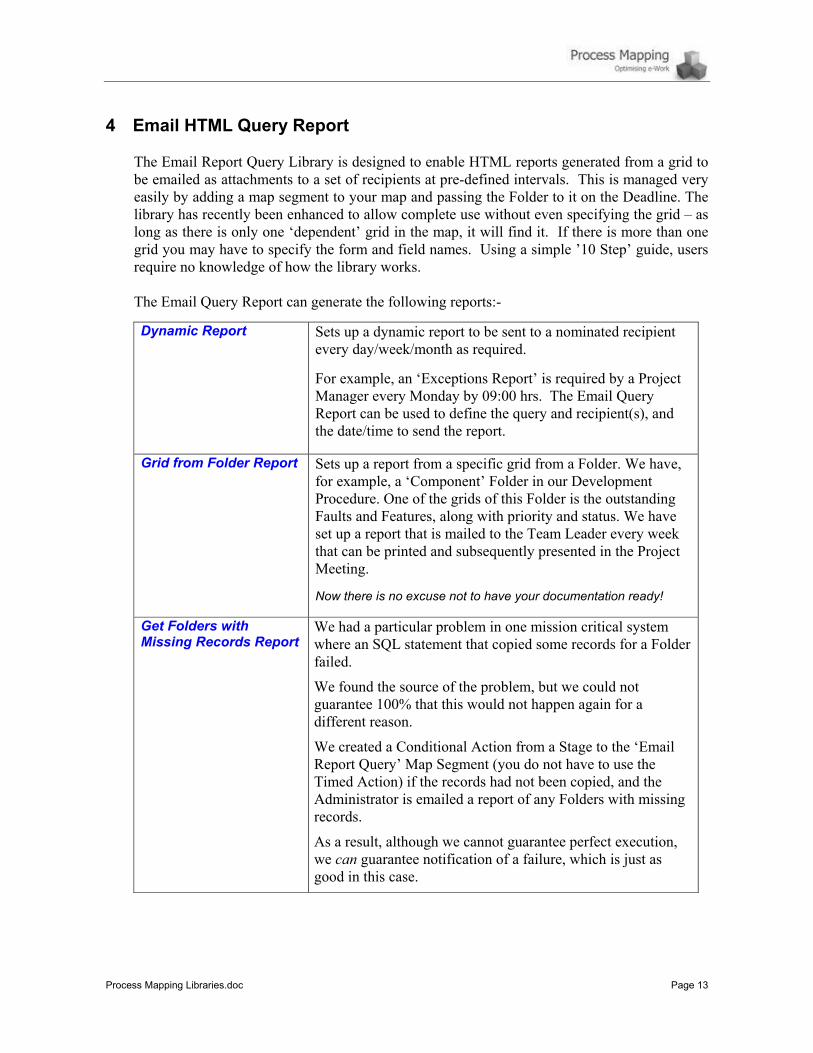
4 Email HTML Query Report
The Email Report Query Library is designed to enable HTML reports generated from a grid to be emailed as attachments to a set of recipients at pre-defined intervals. This is managed very easily by adding a map segment to your map and passing the Folder to it on the Deadline. The library has recently been enhanced to allow complete use without even specifying the grid – as long as there is only one ‘dependent’ grid in the map, it will find it. If there is more than one grid you may have to specify the form and field names. Using a simple ’10 Step’ guide, users require no knowledge of how the library works. The Email Query Report can generate the following reports:-
Dynamic Report Sets up a dynamic report to be sent to a nominated recipient
every day/week/month as required.
For example, an ‘Exceptions Report’ is required by a Project Manager every Monday by 09:00 hrs. The Email Query Report can be used to define the query and recipient(s), and the date/time to send the report.
Grid from Folder Report Sets up a report from a specific grid from a Folder. We have, for example, a ‘Component’ Folder in our Development Procedure. One of the grids of this Folder is the outstanding Faults and Features, along with priority and status. We have set up a report that is mailed to the Team Leader every week that can be printed and subsequently presented in the Project Meeting. Now there is no excuse not to have your documentation ready!
Get Folders with Missing Records Report
We had a particular problem in one mission critical system where an SQL statement that copied some records for a Folder failed.
We found the source of the problem, but we could not guarantee 100% that this would not happen again for a different reason.
We created a Conditional Action from a Stage to the ‘Email Report Query’ Map Segment (you do not have to use the Timed Action) if the records had not been copied, and the Administrator is emailed a report of any Folders with missing records.
As a result, although we cannot guarantee perfect execution, we can guarantee notification of a failure, which is just as good in this case.

Process Mapping Libraries.doc Page 14
4.1 Setup
You can use the “Demo Query Mailing” procedure as an example, or use an existing procedure which employs a grid for dynamic or static reporting. The following example describes each step in detail by creating a procedure from scratch.
1. Create a new procedure.
2. Select the Procedure Properties dialog and associate the ‘Email Query Report’ and Process Mapping Common Libraries.
3. Create a text field and assign the system variable %Subject to this field.
4. Select the blank form and place a grid on it.
5. From the Grid Properties dialog Table(s) field, select the eEvent table and add the following columns:-
eEvent.eMapName eEvent.eActionName eEvent.eToStage eEvent.eEventTime eEvent.eUserName
Process Mapping Libraries.doc Page 15
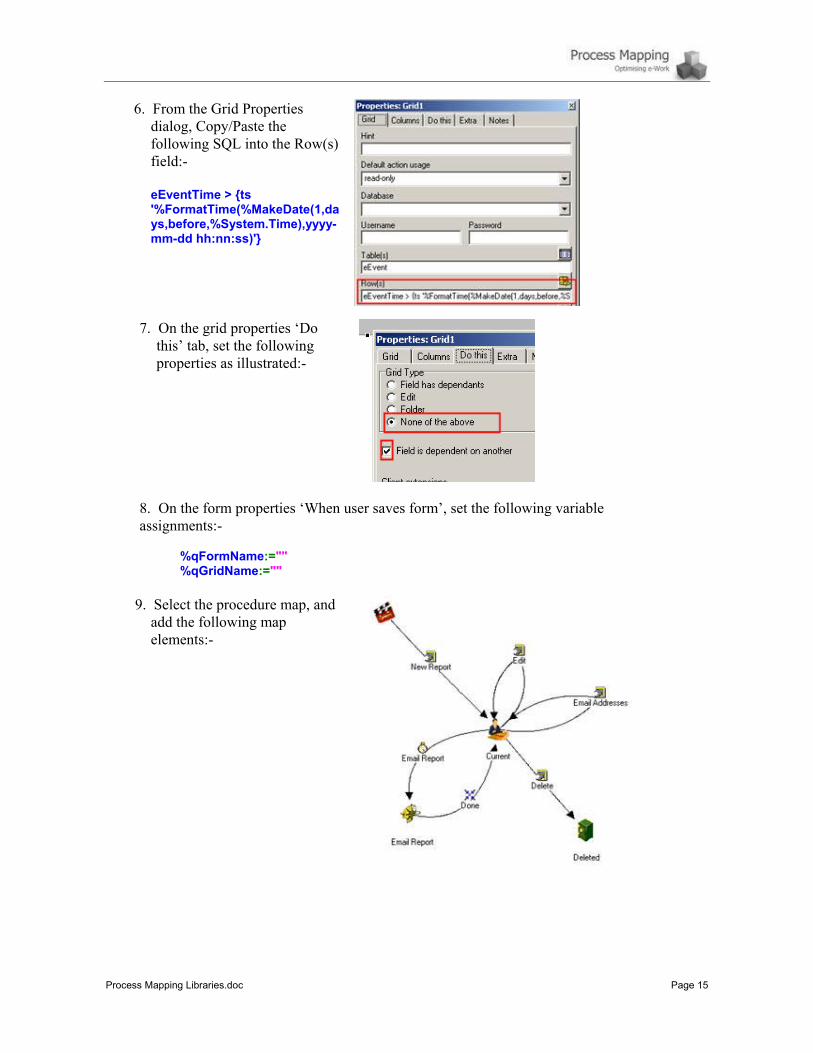
6. From the Grid Properties dialog, Copy/Paste the following SQL into the Row(s) field:-
eEventTime > {ts '%FormatTime(%MakeDate(1,days,before,%System.Time),yyyy-mm-dd hh:nn:ss)'}
7. On the grid properties ‘Do this’ tab, set the following properties as illustrated:-
8. On the form properties ‘When user saves form’, set the following variable assignments:-
%qFormName:="" %qGridName:=""
9. Select the procedure map, and
add the following map elements:-

Process Mapping Libraries.doc Page 16
10. Select the Map Segment “Email Report” and add the ‘Email Query Report’ map segment.
11. On the ‘Edit’ action set the folder deadline to:- %Deadline:=%Never()
12. Set the timed action ‘Email Report’ properties to:-
0 Minutes after %Deadline

Process Mapping Libraries.doc Page 17
13. Add an action to edit the report frequency and recipients.
14. Set the Email Addresses action form properties to the ‘Email Query Report. Query Mailing Details’ form segment from the Library.
15. Select the ‘Email Query Report.Report Details’ form for the Stage ‘Current’:-
16. Publish the procedure.
4.2 Using the Procedure
1. Run the ‘Demo Query Mailing’ query from the Blank Forms list.
2. Submit the form.

Process Mapping Libraries.doc Page 18
3. Set up the mailing details options with the ‘Email Addresses’ action.
4. Select the folder from the
To Do List.
5. Click the Edit button.
6. Select the Report Details
tab to view the report details.

Process Mapping Libraries.doc Page 19
7. At the specified interval, the report is mailed as an attachment.
8. The latest report may be
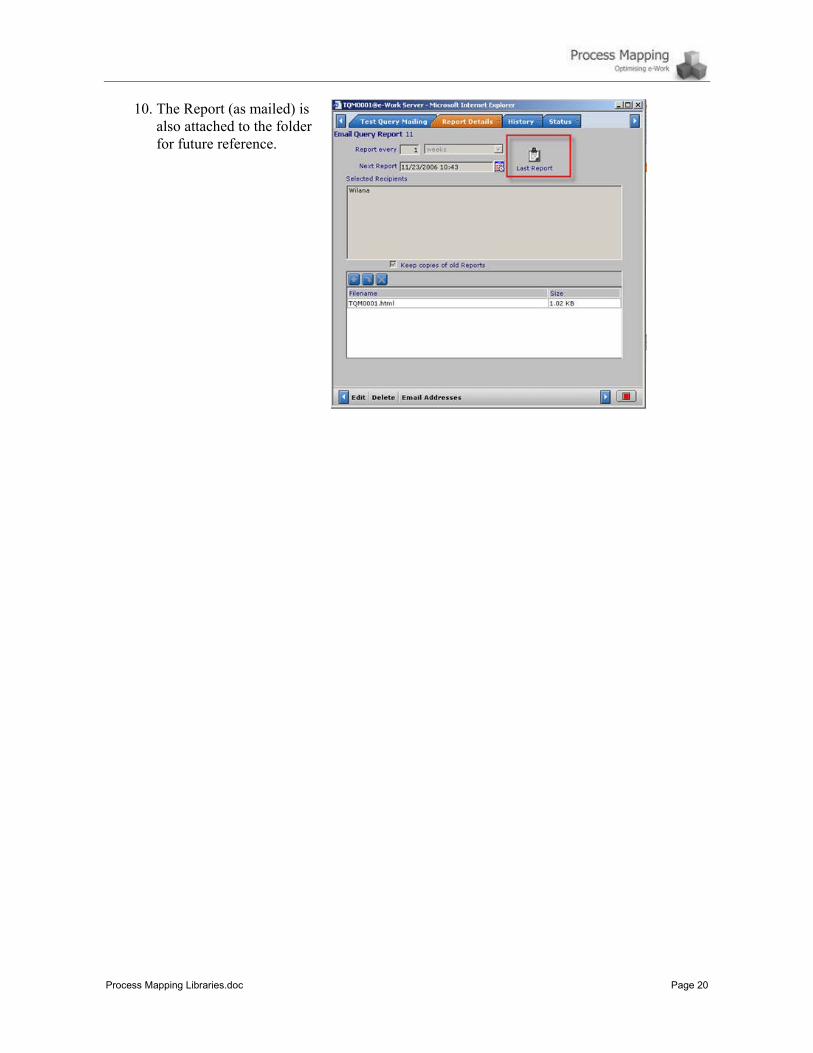
viewed from the clip at the top of the Report Details form.
9. Each time the report is
run, the actual SQL used in the grid selection criteria is stored and can be viewed from the ‘History’ form tab.
Process Mapping Libraries.doc Page 20
10. The Report (as mailed) is also attached to the folder for future reference.

Process Mapping Libraries.doc Page 21
5 Encryption
This library provides effective two-way encryption. Currently, the standard e-Work ‘password’ field only provides one-way encryption which makes the original value impossible to retrieve. This is perfect for some applications, but useless for others. The Encryption library is used in the “System Variable” procedure to allow data such as DSN passwords to be stored in the database in encrypted form for retrieval at runtime.
5.1 Using the Encryption Library
In this example, the Encryption library is associated with the System Variable procedure.
1. Open and publish the ‘System
Variable’ procedure.
2. Select a field of type ‘Text’ check the ‘Encrypted’ checkbox and enter a password as illustrated.
3. Submit the form.
Process Mapping Libraries.doc Page 22
6 Form Scripts
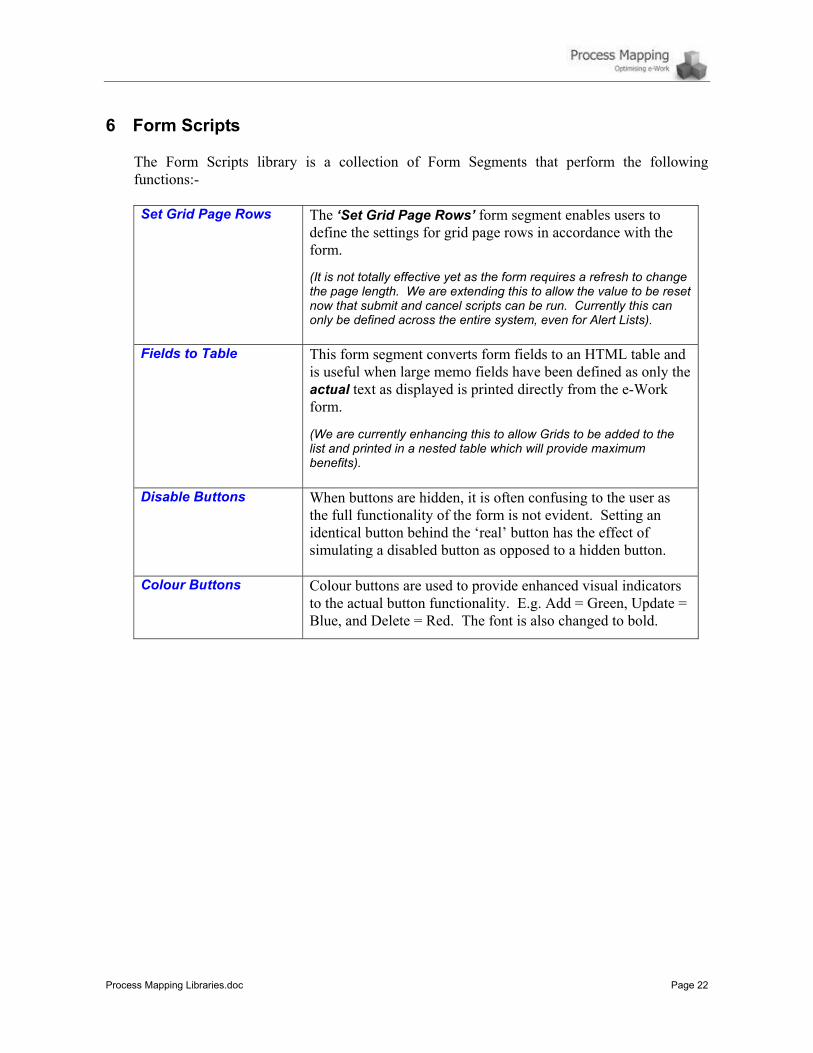
The Form Scripts library is a collection of Form Segments that perform the following functions:- Set Grid Page Rows The ‘Set Grid Page Rows’ form segment enables users to
define the settings for grid page rows in accordance with the form. (It is not totally effective yet as the form requires a refresh to change the page length. We are extending this to allow the value to be reset now that submit and cancel scripts can be run. Currently this can only be defined across the entire system, even for Alert Lists).
Fields to Table This form segment converts form fields to an HTML table and is useful when large memo fields have been defined as only the actual text as displayed is printed directly from the e-Work form. (We are currently enhancing this to allow Grids to be added to the list and printed in a nested table which will provide maximum benefits).
Disable Buttons When buttons are hidden, it is often confusing to the user as the full functionality of the form is not evident. Setting an identical button behind the ‘real’ button has the effect of simulating a disabled button as opposed to a hidden button.
Colour Buttons Colour buttons are used to provide enhanced visual indicators to the actual button functionality. E.g. Add = Green, Update = Blue, and Delete = Red. The font is also changed to bold.

Process Mapping Libraries.doc Page 23
6.1 Using the Form Scripts Library
6.1.1 Set Grid Rows
1. Publish the Forms Scripts
Library.
2. Open the Demo Form Scripts procedure.
3. Select the Procedure Properties dialog, associate the Forms Scripts library and publish the procedure.
4. From the blank forms list select the Demo Grid Rows procedure. In this example, when the form is loaded the page grid rows will be set to 200. This is only visible when you reload this, or any other form for that matter.
5. On the Form Properties – ‘Do this’ tab, change the form load command to:-
OnLoad=SetGridPageRows(5)&Language=Jscript

Process Mapping Libraries.doc Page 24
6. Republish the procedure and test it again. In this example, only 5 rows from the 16,323 returned are displayed:-
IMPORTANT – As the Grid Page Rows value affects all lists across the entire system, once you have tested this, reset the on form load command back to the original setting:-
OnLoad=SetGridPageRows(200)&Language=Jscript
*You may also have to delete the cookies from your browser cache.
6.1.2 Alter Buttons
1. When the form is loaded, the “Disable Buttons” and “Colour Buttons” functions are called:-
OnLoad=DisableButtons("AddD,UpdateD,DeleteD");ColourButtons("Add,Green,Update,Blue,Delete,Red")&Language=JScript
Process Mapping Libraries.doc Page 25
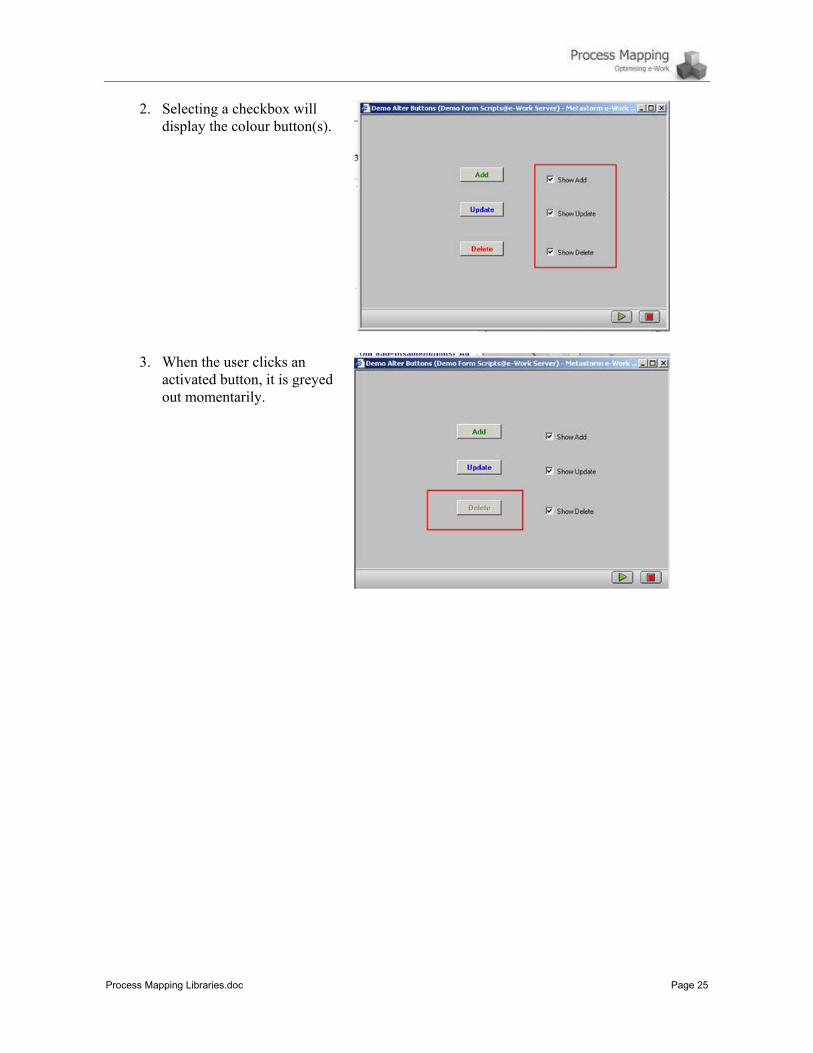
2. Selecting a checkbox will display the colour button(s).
3. When the user clicks an activated button, it is greyed out momentarily.
Process Mapping Libraries.doc Page 26
7 List Scripts
The List Scripts library is a form segment that provides name / value pair list field functionality. (e-Work 6.6 introduced this functionality for dropdown fields. This library allows similar functionality for List fields).
7.1 Number List Full
The Number List Full form illustrates how users can swap between a pair of list box selections.
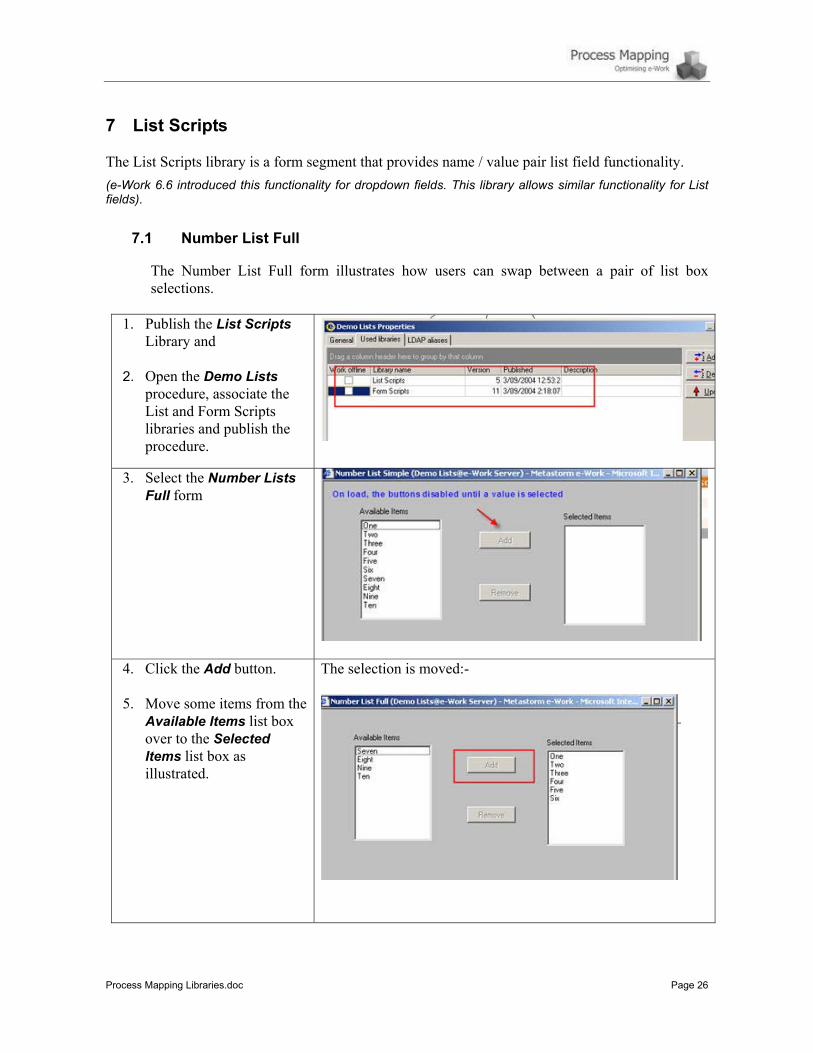
1. Publish the List Scripts
Library and
2. Open the Demo Lists procedure, associate the List and Form Scripts libraries and publish the procedure.
3. Select the Number Lists Full form
4. Click the Add button.
5. Move some items from the
Available Items list box over to the Selected Items list box as illustrated.
The selection is moved:-

Process Mapping Libraries.doc Page 27
6. Submit the form.
On submit the Selected Items list box is displayed:-
7. When the user clicks the
Edit action the Available Items list box is displayed again.
Process Mapping Libraries.doc Page 28
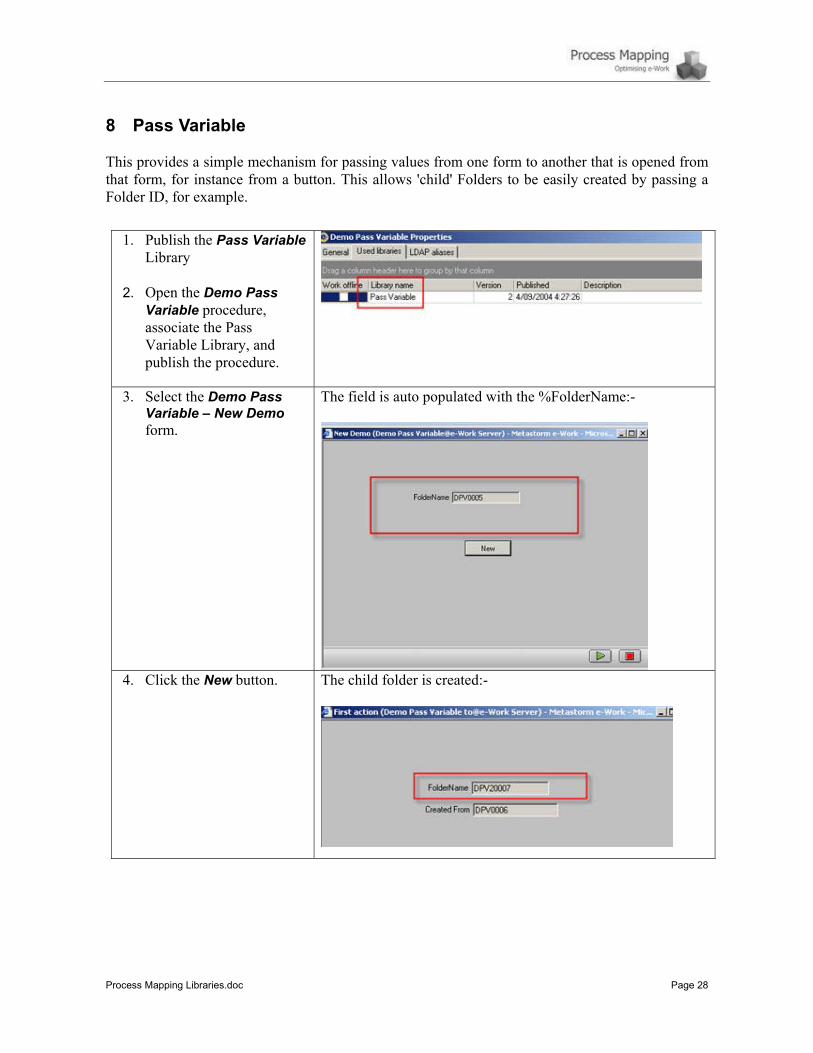
8 Pass Variable
This provides a simple mechanism for passing values from one form to another that is opened from that form, for instance from a button. This allows 'child' Folders to be easily created by passing a Folder ID, for example.
1. Publish the Pass Variable
Library 2. Open the Demo Pass
Variable procedure, associate the Pass Variable Library, and publish the procedure.
3. Select the Demo Pass Variable – New Demo form.
The field is auto populated with the %FolderName:-
4. Click the New button. The child folder is created:-

Process Mapping Libraries.doc Page 29
9 Record Changes
The record changes library allows a fully comprehensive audit trail to be maintained by recording every change to every field on a ‘form submit’ action. The format used is <variable> changed from <old value> to <new value>. (This library is currently being extended to record changes to ‘child’ related tables).
1. Publish the Record Changes
and Process Mapping Common libraries.
2. Publish the Record Changes Procedure and associate both libraries with it.
3. Run the Record Changes process through the web client and enter some values in each of the form fields as illustrated.
4. Submit the form.
5. Open the folder again, make
some changes and view the Notes form from the Common Library.
The full history is displayed. The function is called when user saves form: - %Action.Notes:=%ScriptEval(JScript,,%Procedure.Name,%MapName,"RecordChanges (1)")

Process Mapping Libraries.doc Page 30
10 Reporting The Reporting Library enables charts to be created from Grid data by the simple addition of one Form Segment.
1. Publish the Reporting library.
2. Publish the Demo Reporting Procedure and associate the library.
3. The Demo Reporting procedure is an Admin Form with a grid that reads from the eEvent table.
The Reporting Chart from Grid form segment is added at the top of the form in this example:-
4. Select the Admin Forms
page “Demo Chart” form and select a chart type.
5. Click the “Generate Chart”
button. (You may be warned that ActiveX controls are activated)
The chart is generated:-

Process Mapping Libraries.doc Page 31
11 The Procedure Documentation Add-in
This Add-in tool automatically produces full e-Work procedure documentation directly from the e-Work Designer with one mouse click to an HTML formatted file. The map image may be included together with the Variables, Stages, Actions, Forms, Fields, Roles, Flags and additional table definitions which are all listed in collapsible tables. One particularly useful feature is a matrix of To Do and Watch Lists and Action rights for each map.
Assuming you have a standard e-Work installation, you should be able to register the components by double-clicking the reg.bat batch file in the Documentation Tool directory. You will the see a new option on the Tools menu of the Designer.
1. Open the supplied zip file and copy the contents to the Designer Addins directory, typically C:\Program Files\Metastorm e-Work\Designer\Addins
2. Open a procedure file, select
the 'Procedure Documentation' option from the Tools menu
3. Select a Directory to save the HTML file to.
(Depending on your browser configuration, you may receive an ActiveX control warning). 4. Expand /Collapse the tables
as required.
Process Mapping Libraries.doc Page 32
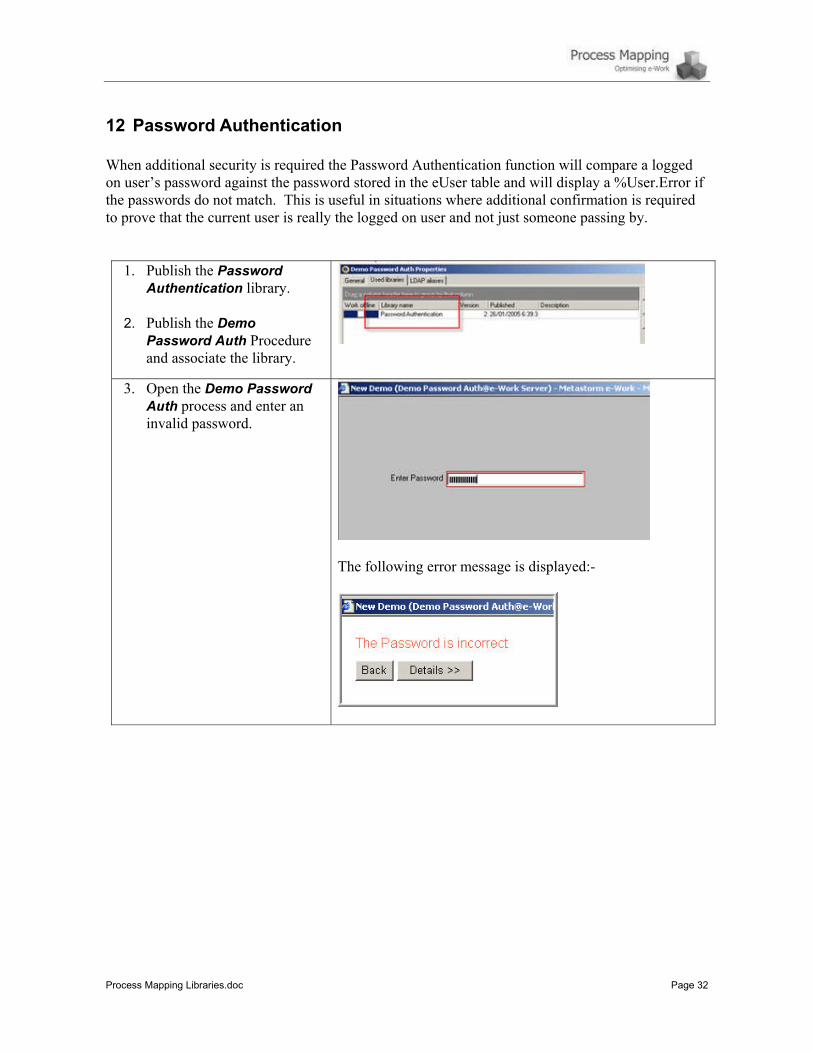
12 Password Authentication
When additional security is required the Password Authentication function will compare a logged on user’s password against the password stored in the eUser table and will display a %User.Error if the passwords do not match. This is useful in situations where additional confirmation is required to prove that the current user is really the logged on user and not just someone passing by.
1. Publish the Password Authentication library.
2. Publish the Demo Password Auth Procedure and associate the library.
3. Open the Demo Password Auth process and enter an invalid password.
The following error message is displayed:-