productionairbox user manual - athensa | · file names, software, documents or terms are written in...
TRANSCRIPT

www.playbox.tv
PRODUCTIONAIRBOX
USER MANUAL (Version: 1.3, September 2014)
This guide explains how to use the basic functionalities of the ProductionAirBox v. 2.1.

2
Legal notice The information in this manual is furnished for informational use only. No part of this manual may be reproduced or transmitted in any form or by any means,
electronic or mechanical, for any purpose, without the prior written permission of DMT Ltd.
The software, described in this manual, is owned by DMT Ltd. It is protected by Bulgarian Copyright Law, as well as by international copyright treaties, and may
be used or copied only in accordance with the license agreement.
DMT Ltd. provides this manual “as is” without any warranty, either express, or implied.
This publication may contain typographical errors or technical inaccuracies. While every precaution has been taken in the preparation of this document, DMT
Ltd. assumes no responsibility for errors or omissions. Nor is any liability assumed for damages, resulting from the use of the information, contained herein.
Changes are periodically made to the information herein. They will be incorporated in new versions of the manual. Please, check the PlayBox website regularly
for User Manual updates.
DMT Ltd. may introduce changes or improvements in the products, described in this manual at any time, without any special notice.
Please, address your comments or questions to:
Digital Media Technologies Ltd.
7 Iskarsko shose Blvd.
Building 15, 5th Floor
1528 Sofia, Bulgaria
Tel.: +359 2 9703050
Fax: +359 2 9717700
www.playbox.tv

3
Contents LEGAL NOTICE ........................................................................................... 2 CONTENTS.................................................................................................. 3 PREFACE...................................................................................................... 4 STYLE CONVENTIONS............................................................................... 5 INTRODUCTION ........................................................................................ 6 QUICK START AND SETUP ....................................................................... 7 USER INTERFACE ....................................................................................... 8 MULTIPLAYER ........................................................................................................................ 9
Right-click .............................................................................................................................................................................................................................. 11 Drag and drop ...................................................................................................................................................................................................................... 11
SINGLEPLAYER .................................................................................................................... 12 Right-click .............................................................................................................................................................................................................................. 14 Drag and drop ...................................................................................................................................................................................................................... 15
FILE MEDIA BROWSER ....................................................................................................... 16 CLIP EDITOR ........................................................................................................................ 17 MENU BAR ............................................................................................... 19 SETTINGS MENU ................................................................................................................ 19
Client Config ......................................................................................................................................................................................................................... 19 Player Config ........................................................................................................................................................................................................................ 19
HELP MENU ........................................................................................................................ 20 MULTIVIEWER .......................................................................................... 21 KEYBOARD SHORTCUTS ........................................................................ 22 APPENDIX – USING PRODUCTIONAIRBOX AND AIRBOX ON THE SAME MACHINE 26 APPENDIX - SERVER MAINTENANCE BEST PRACTICES .................... 27
Weekly: .................................................................................................................................................................................................................................... 27 Monthly: .................................................................................................................................................................................................................................. 27 Quarterly: ............................................................................................................................................................................................................................... 27 Yearly: ...................................................................................................................................................................................................................................... 27

4
Preface Dear PlayBox customer,
Thank you for purchasing our product! We would like to assure you that you have chosen the most cost-effective and versatile TV automation system on the
market. As always, we are trying to stay close to our customers’ needs, making sure they all receive adequate support and satisfaction. Your opinion about our
product is an exceptionally valuable source of information for us. The ease of working with the PlayBox products results mainly from the suggestions and
comments of our current respected customers.
This manual is structured into several sequential chapters, each aiming to ease the installation, fine tuning, and use of our products. We hope that you will enjoy
working with it, and we are anxiously looking forward to receiving your feedback.
Please, send your questions, suggestions, and assistance requests to:
Please send training and demo requests to:
General feedback:
Helpdesk fax number: +359 2 9717700

5
Style Conventions File names, software, documents or terms are written in italics
The data is written in the settings.ini file.
The file is located in C:\Program Files\DMT\AirBox
For further information read Shortcuts reference book.
The VTR is controlled via RS-422.
Direct quotations from the computer screen are presented as follows:
Menu Items and commands
Tab/Page names
Column names (i.e. in a playlist or another grid)
Field names, check boxes
Buttons Screen readings are written in [square brackets]
The keyboard keys are enclosed in <> signs
Terms are defined in the Glossary at the end of the manual
The arrows, used in the setting procedures mean as follows:
A menu item follows;
A page(tab) name follows;
A field name, a check box name, or a value name follows.
Except for arrows, you can distinguish between the relevant menu categories also by the styles, listed above.

6
Introduction
ProductionAirBox provides content playout for News, Live shows, screens and video walls feeding, live production broadcasts and other places where
video/audio content have to be displayed. It is designed to meet the high reliability requirements of broadcast playout.
It allows for any changes during on-air sessions. No clips are locked and you can trim or reposition playlist items during playout. Moreover, playout position
can be changed on-the-fly with commands like next, jump or shuttle. Such changes are performed seamlessly without stopping the current playout session.
One server can be configured with up to four independent players. Each player has separate playlist and playout control. All four SDI interfaces can be assigned
as program or preview outputs. Single channel or Multichannel user interfaces are available to streamline the operation.

7
Quick Start and Setup
Verify all connections and start the workstation;
Make sure that you have suitable content available in the media folders;
Launch ProductionAirBox;
Configure the Client from Settings ➔ Configure Clients by entering the IP Address(es) of the client(s) to be used. You can configure up to 4
clients.
Configure the Players from Settings ➔ Configure Players by selecting the desired Output Boards, Video Standards and Aspect Ratio
Converter Modes to be used
IMPORTANT: ALWAYS configure the Output Boards for the Players before selecting the Board to be used by the MultiViewer!
Select the files you wish to playout and click on the Open button;
Use the File Media Browser to drag-and–drop the desired files to the Players.
Click on the PLAY button;
You should now see ProductionAirBox video on your video output.
Congratulations! You have just launched your first ProductionAirBox playout session!

8
User Interface
The ProductionAirBox user interface looks like the image below:
It consists of three main areas - the Menu Bar, the main area displaying the Player(s) - MultiPlayer or SinglePlayer and the File Media Browser.
NOTE: The ProductionAirBox user interface supports localization. If you want to use ProductionAirBox in another language, please contact your dealer for
more information on the localization options.

9
MULTIPLAYER
When you are in MultiPlayer mode, the User Interface displays all 4 Players in a row. The view of each Player looks like this:
The left area displays the playout counters, preview and the playback control buttons.
The counters are used for displaying the following:
Media Time - This counter displays the time elapsed from the currently playing item.
Remaining Time - This counter displays the remaining time from the currently playing item.
Stop after - This counter displays the time remaining until the playout will be stopped. This is calculated until the end of the playlist or the end of the next
clip item, which has a Stop end clip action added, if such exists.
NOTE: In case the playlist is looped and no Stop end clip action is set for any of the playlist items, this counter will display --:--:--:--.
Playlist time - This counter displays the time elapsed since of the current playout session for the corresponding player, as well as the time remaining until
playout will be terminated.
Also, here you can view the currently playing clip and the next clip to be played.
The preview window is available only if the playlist items are from the local network. Otherwise, an External Preview message will be displayed.
Stop - This button terminates the playback.
Pause/Resume - This button temporarily interrupts/resumes the playback. The playback resumes from the same point on.
Play - This button starts the playback.
Cue - This button interrupts the playback and pauses on the first frame of the selected clip.
10
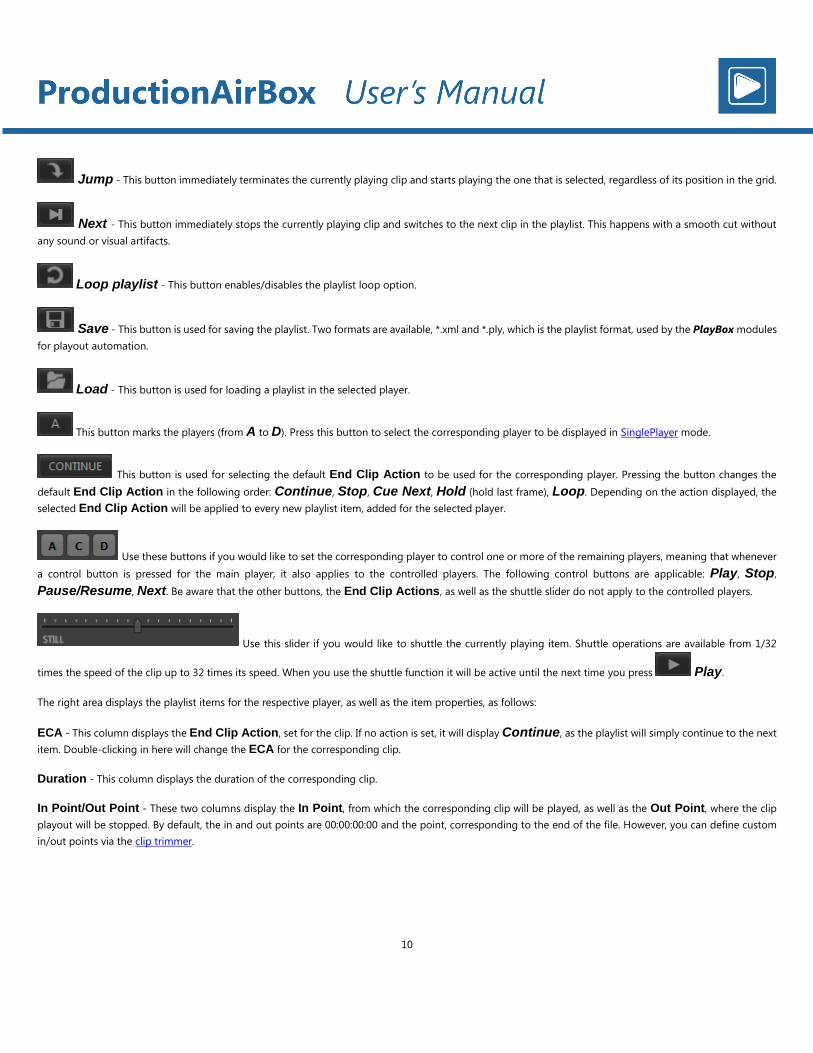
Jump - This button immediately terminates the currently playing clip and starts playing the one that is selected, regardless of its position in the grid.
Next - This button immediately stops the currently playing clip and switches to the next clip in the playlist. This happens with a smooth cut without
any sound or visual artifacts.
Loop playlist - This button enables/disables the playlist loop option.
Save - This button is used for saving the playlist. Two formats are available, *.xml and *.ply, which is the playlist format, used by the PlayBox modules
for playout automation.
Load - This button is used for loading a playlist in the selected player.
This button marks the players (from A to D). Press this button to select the corresponding player to be displayed in SinglePlayer mode.
This button is used for selecting the default End Clip Action to be used for the corresponding player. Pressing the button changes the
default End Clip Action in the following order: Continue, Stop, Cue Next, Hold (hold last frame), Loop. Depending on the action displayed, the
selected End Clip Action will be applied to every new playlist item, added for the selected player.
Use these buttons if you would like to set the corresponding player to control one or more of the remaining players, meaning that whenever
a control button is pressed for the main player, it also applies to the controlled players. The following control buttons are applicable: Play, Stop,
Pause/Resume, Next. Be aware that the other buttons, the End Clip Actions, as well as the shuttle slider do not apply to the controlled players.
Use this slider if you would like to shuttle the currently playing item. Shuttle operations are available from 1/32
times the speed of the clip up to 32 times its speed. When you use the shuttle function it will be active until the next time you press Play.
The right area displays the playlist items for the respective player, as well as the item properties, as follows:
ECA - This column displays the End Clip Action, set for the clip. If no action is set, it will display Continue, as the playlist will simply continue to the next
item. Double-clicking in here will change the ECA for the corresponding clip.
Duration - This column displays the duration of the corresponding clip.
In Point/Out Point - These two columns display the In Point, from which the corresponding clip will be played, as well as the Out Point, where the clip
playout will be stopped. By default, the in and out points are 00:00:00:00 and the point, corresponding to the end of the file. However, you can define custom
in/out points via the clip trimmer.

11
Right-click
Right-clicking on a playlist item invokes a context menu, which includes the following commands:
Set End Clip Action - this command displays an additional menu, which allows you to add an action to be executed when the playout of the selected clip
ends. The available actions are:
Continue - After the end of the clip playout will continue to the next clip.
Stop - After the end of the clip playout will be terminated.
Cue Next - After the end of the clip playout will stop on the first frame of the next clip.
Hold Last Frame - Playout will stop on the last frame of the current clip.
Loop - Playout of the clip will be looped.
Remove Item - this command will delete the item from the playlist.
Insert Item(s) - this command will open a browser window, from which you can select one or multiple items to be added after the currently selected clip.
Clear Playlist - this command will remove all clips from the selected playlist.
Cue here - selecting this command will stop the playout on the first frame of the selected clip.
Jump here - if you select this command the currently playing clip will be terminated and the selected clip will be played.
Edit Clip - selecting this command will invoke the clip trimmer for the corresponding clip.
Preview On - selecting this command will invoke a list of available Players for preview. Selecting one of the players will allow you to preview the playlist on
one of the other players.
NOTE: In order for a Player to be available for preview, you should configure its corresponding output port to be used as preview. This can be done in the
Client Config option of the Settings menu.
Drag and drop
Files can be dragged from the File Media Browser and dropped in the currently displayed Player.

12
SINGLEPLAYER
When you are in SinglePlayer mode, the User Interface looks like this:
The left area displays the playout counters, preview and the playback control buttons.
The counters are used for displaying the following:
Media Time - This counter displays the time elapsed from the currently playing item.
Remaining Time - This counter displays the remaining time from the currently playing item.
Stop after - This counter displays the time remaining until the playout will be stopped. This is calculated until the end of the playlist or the end of the next
clip item, which has a Stop end clip action added, if such exists.

13
NOTE: In case the playlist is looped and no Stop end clip action is set for any of the playlist items, this counter will display --:--:--:--.
Playlist time - This counter displays the time elapsed since of the current playout session for the corresponding player, as well as the time remaining until
playout will be terminated.
Also, here you can view the currently playing clip and the next clip to be played.
The preview window is available only if the playlist items are from the local network. Otherwise, an External Preview message will be displayed.
Stop - This button terminates the playback.
Pause/Resume - This button temporarily interrupts/resumes the playback. The playback resumes from the same point on.
Play - This button starts the playback.
Cue - This button interrupts the playback and pauses on the first frame of the selected clip.
Jump - This button immediately terminates the currently playing clip and starts playing the one that is selected, regardless of its position in the grid.
Next - This button immediately stops the currently playing clip and switches to the next clip in the playlist. This happens with a smooth cut without
any sound or visual artifacts.
Loop playlist - This button enables/disables the playlist loop option.
Save - This button is used for saving the playlist. Two formats are available, *.xml and *.ply, which is the playlist format, used by the PlayBox modules
for playout automation.
Load - This button is used for loading a playlist in the selected player.
- This button marks the currently viewed player. Pressing this button will redirect you to the MultiPlayer mode.
- This button is used for selecting the default End Clip Action to be used for the corresponding player. Pressing the button changes the
default End Clip Action in the following order: Continue, Stop, Cue Next, Hold (hold last frame), Loop. Depending on the action displayed, the
selected End Clip Action will be applied to every new playlist item, added for the selected player.

14
- Use these buttons if you would like to set the corresponding player to control one or more of the remaining players, meaning that whenever
a control button is pressed for the main player, it also applies to the controlled players. The following control buttons are applicable: Play, Stop,
Pause/Resume, Next. Be aware that the other buttons, the End Clip Actions, as well as the shuttle slider do not apply to the controlled players.
- Use this slider if you would like to shuttle the currently playing item. Shuttle operations are available from 1/32
times the speed of the clip up to 32 times its speed. When you use the shuttle function it will be active until the next time you press Play.
The right area displays the playlist items for the respective player, as well as the item properties, as follows:
ECA - This column displays the End Clip Action, set for the clip. If no action is set, it will display Continue, as the playlist will simply continue to the next
item. Double-clicking in here will change the ECA for the corresponding clip.
Duration - This column displays the duration of the corresponding clip.
In Point/Out Point - These two columns display the In Point, from which the corresponding clip will be played, as well as the Out Point, where the clip
playout will be stopped. By default, the in and out points are 00:00:00:00 and the point, corresponding to the end of the file. However, you can define custom
in/out points via the clip trimmer.
The audio levels can also be controlled here. Up to 16 PCM audio channels are available.
The External Player Control can be used for previewing one of the remaining players and using a limited number of playback controls for it: Stop,
Pause, Resume, Play, Next, and Loop Playlist.
Right-click
Right-clicking on a playlist item invokes a context menu, which includes the following commands:
Set End Clip Action - this command displays an additional menu, which allows you to add an action to be executed when the playout of the selected clip
ends. The available actions are:
Continue - After the end of the clip playout will continue to the next clip.
Stop - After the end of the clip playout will be terminated.
Cue Next - After the end of the clip playout will stop on the first frame of the next clip.

15
Hold Last Frame - Playout will stop on the last frame of the current clip.
Loop - Playout of the clip will be looped.
Remove Item - this command will delete the item from the playlist.
Insert Item(s) - this command will open a browser window, from which you can select one or multiple items to be added after the currently selected clip.
Clear Playlist - this command will remove all clips from the selected playlist.
Cue here - selecting this command will stop the playout on the first frame of the selected clip.
Jump here - if you select this command the currently playing clip will be terminated and the selected clip will be played.
Edit Clip - selecting this command will invoke the clip trimmer for the corresponding clip.
Preview On - selecting this command will invoke a list of available Players for preview. Selecting one of the players will allow you to preview the playlist on
one of the other players.
NOTE: In order for a Player to be available for preview, you should configure its corresponding output port to be used as preview. This can be done in the
Client Config option of the Settings menu.
Drag and drop
Files can be dragged from the File Media Browser and dropped in the currently displayed Player.

16
FILE MEDIA BROWSER
You can use the File Media Browser to the right of the User Interface in order to construct your playlist. To do this simply select the folder, where your
media files are contained from the upper part, choose as many files from the bottom, as you wish and drag-and-drop them to the desired player.
If you would like to access files, stored on a different machine, use the upper field of the File Media Browser and enter the address of the corresponding
machine.
NOTE: Enter a network path to access a server or directory which is outside the local network.
Right-clicking in the lower area invokes the following context menu:

17
Use the Append To command to add the selected file(s) to one of the Players. Moving your mouse over the command will invoke an additional menu, from
which you can select the desired Player, where files will be added.
NOTE: To select multiple files hold Shift, to select multiple random files, hold Ctrl on your keyboard.
Use the Preview On command to invoke a list of available Players for preview. Selecting one of the players will allow you to preview the selected clip(s) on
it.
NOTE: In order for a Player to be available for preview, you should configure its corresponding output port to be used as preview. This can be done in the
Client Config option of the Settings menu.
CLIP EDITOR
When you select the Edit Clip option for one of the playlist items, the following dialog will open:
The dialog window displays the Playlist and the Current Trimpoints of the clip to the left. Note that when the latter are different, the
Current Trimpoints will be executed. To the right of the clip preview you can see general information about the video and the audio of
the file.
Use the slider below the preview, as well as the buttons in order to define the desired In and Out points of the video.

18
NOTE: Trimming the video in the Clip Editor will not modify the actual file. Changes are applied only to the playout.
The following buttons are available here:
- Pressing this button would reset the defined In Point to the beginning of the original clip.
- Pressing this button will define the point, where the slider below the preview is currently located as an In Point.
- Pressing this button will rewind the video preview from the point, where the slider is located.
- Pressing this button will stop the playback of the preview.
- Pressing this button will pause/resume the playback of the preview.
- Pressing this button will initiate playout of the clip in the preview.
- Pressing this button will forward the video preview from the point, where the slider is located.
- Pressing this button will define the point, where the slider below the preview is currently located as an Out Point.
- Pressing this button would reset the defined In Point to the end of the original clip.
NOTE: For frame-accurate selection, hold Ctrl while moving the slider. This also works for the buttons above and the keyboard arrows.
From the File browser below you can load a different file.
In the Title field enter a title for the current video.
You can also enter Tape ID for the video in the dedicated field, if applicable.
Enable the ☑ Incomplete check-box in case you are using an incomplete file and you do not want an Out Point to be set.
Once you are ready press OK. Press Cancel to abort changes.

19
Menu Bar
The menu bar contains the following context menus:
SETTINGS MENU
The Settings Menu consists of two commands, which allow you to configure your output clients and your players. Pressing each command invokes the relative
dialog, as displayed below:
Client Config
The Client Config dialog looks like the image below:
☑ Connect To Single Server - If you enable this option you will be allowed to configure only one client and only the first IP Address row will be active.
All four players will then send their outputs to this address.
In the IP Address field enter the address of the desired output server. From the Output drop-down list select the output from which player to be used,
where Output 1 corresponds to Player 1 and so on.
NOTE: You can use the same output more than once and connect it to different servers.
Use the Port Is Preview option if you would like to connect one of the Players to one of your preview screens. This is done via the MultiPlayer option.
In the Media Extensions field you can list the desired file formats, which you would like to be displayed in the File Media Browser.
Player Config
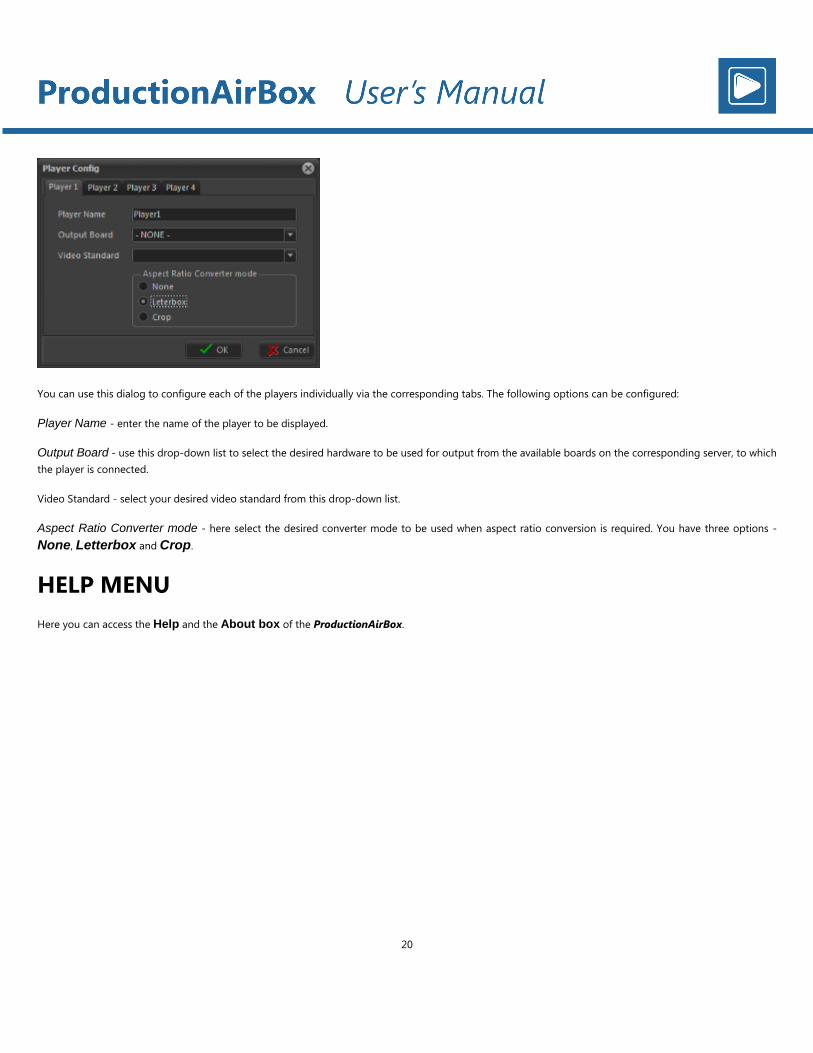
The Player Config looks like the image below:
20
You can use this dialog to configure each of the players individually via the corresponding tabs. The following options can be configured:
Player Name - enter the name of the player to be displayed.
Output Board - use this drop-down list to select the desired hardware to be used for output from the available boards on the corresponding server, to which
the player is connected.
Video Standard - select your desired video standard from this drop-down list.
Aspect Ratio Converter mode - here select the desired converter mode to be used when aspect ratio conversion is required. You have three options -
None, Letterbox and Crop.
HELP MENU
Here you can access the Help and the About box of the ProductionAirBox.

21
MultiViewer
The ProductionAirBox offers a MultiViewer option, which is a dedicated SDI output and allows you to preview all the outputs you are generating on a single
screen. In case you have a spare Board, which you do not use for output, the MultiViewer is a great way to monitor your playout.
To start the MultiViewer you should open the MVConfig.exe file, located in the folder, where your ProductionAirBox is installed. Once you open the file, the
following dialog will be invoked:
From the Board Name drop-down list select the desired board to be used for preview.
NOTE: Never use the same board for preview and output!
From the Resolution drop-down list select the desired resolution to be used for preview. The selected resolution will be applied to each output preview.
Use the Seconds Before Show Red Counter field to set a remaining time, at which the counter of an output to become red. In this way you will be
notified that the playlist of a certain player will finish soon.
Once you configure your MultiViewer, the preview should look like the image below:

22
Keyboard Shortcuts
Context Description Keyboard Shortcut
Multi Player Mode Select Player 1 F1
Multi Player Mode Select Player 2 F2
Multi Player Mode Select Player 3 F3
Multi Player Mode Select Player 4 F4
Multi Player Mode Switch to Single Player 1 CTRL+F1
Multi Player Mode Switch to Single Player 2 CTRL +F2
Multi Player Mode Switch to Single Player 3 CTRL +F3
Multi Player Mode Switch to Single Player 4 CTRL +F4
Single Player Mode Switch to Player 1 F1
Single Player Mode Switch to Player 2 F2
Single Player Mode Switch to Player 3 F3
Single Player Mode Switch to Player 4 F4
Single/Multi Player Refresh Playlist F5
Single/Multi Player Mute / Un Mute (0dB) Output F9
Single/Multi Player Volume Up F8

23
Context Description Keyboard Shortcut
Single/Multi Player Volume Down F7
Single/Multi Player Volume 0dB F6
Single/Multi Player Shuttle x -4 CTRL+NUMPAD 9
Single/Multi Player Shuttle x -2 CTRL+NUMPAD 8
Single/Multi Player Shuttle x -1 CTRL+NUMPAD 7
Single/Multi Player Shuttle x – ½ CTRL+NUMPAD 6
Single/Multi Player Shuttle – STILL CTRL+NUMPAD 5
Single/Multi Player Shuttle x ½ CTRL+NUMPAD 4
Single/Multi Player Shuttle x 1 CTRL+NUMPAD 3
Single/Multi Player Shuttle x 2 CTRL+NUMPAD 2
Single/Multi Player Shuttle x 4 CTRL+NUMPAD 1
Player is paused One Frame Reverse CTRL+LEFT
Player is paused One Frame Forward CTRL+RIGHT
Player is paused One Second Forward CTRL+UP
Player is paused One Second Backward CTRL+DOWN
Single/Multi Player JUMP TO SELECTION J

24
Context Description Keyboard Shortcut
Single/Multi Player CUE TO SELECTION Q
Single/Multi Player Toggle Pause/Play SPACE
Single/Multi Player Toggle Pause/Play MEDIA PLAY PAUSE
Single/Multi Player Toggle Pause/Play reverse SPACE+SHIFT
Single/Multi Player STOP S
Single/Multi Player LOOP L
Single/Multi Player NEXT N
Playlist Selected COPY CTRL+C
Playlist Selected PASTE BELOW CTRL+V
Playlist Selected PASTE ABOVE CTRL+SHIFT+V
Playlist Selected CUT CTRL+X
Playlist Selected SELECT ALL CTRL+A
Playlist Selected DELETE (WITH DIALOG) DEL
Playlist Selected FORCE DELETE CTRL+DEL
Clip Editor FRAME FORWARD (GOP ACCURATE) RIGHT
Clip Editor FRAME FORWARD (FRAME ACCURATE) CTRL+RIGHT

25
Context Description Keyboard Shortcut
Clip Editor FRAME BACKWARD (GOP ACCURATE) LEFT
Clip Editor FRAME BACKWARD (FRAME ACCURATE) CTRL+LEFT
Clip Editor Toggle play/pause SPACE
Clip Editor Play reverse (Repeat will increase speed) J
Clip Editor Play Forward (Repeat will increase speed) L
Clip Editor Pause K
Clip Editor Forward 1 second UP
Clip Editor Backward 1 second DOWN
Clip Editor Go to previous mark H
Clip Editor Go to next Mark ;
Clip Editor Set In point I
Clip Editor Set Out Point O

26
APPENDIX – Using ProductionAirBox and AirBox
on the Same Machine
In general it is not recommended to use ProductionAirBox and AirBox on the same machine. However, in case you do, you should keep in mind that you
CANNOT run the two programs at the same time.
In case your ProductionAirBox is running and you want to switch it off and run AirBox instead, do the following:
1. Go to the Windows Start menu and type in “run.”
2. In the Run dialog that appears type “services.msc” and press OK. The Services dialog will be invoked.
3. Find the PlayBox Production Player service, right-click on it and press Stop.
4. Now you can safely start AirBox.
In case you would like to start using ProductionAirBox again, close AirBox and redo the steps above. This time, however, you should right-click on the
PlayBox Production Player service and press Start.

27
Appendix - Server Maintenance Best Practices
In order to maintain trouble -free system, the following maintenance practices are recommended:
Weekly: Check system for audible and visual (front and power supply LEDs light) alarms
Check that system hard drive (ex. C:\) has at least 10% free space
Make sure that media files are not stored on the desktop or media files are not played from the System Drive (ex. C :\)
Monthly: Weekly Check list PLUS
Check Windows System Logs for Errors
Check the RAID controller ( if installed) for Errors
Clear temporary files
Quarterly: Weekly, Monthly Check lists PLUS
Check Storage for Fragmentation issues
(If Defragmentation is needed - should be performed when Off – Air)
Reboot the system to clear possible internal OS( Windows) inconsistencies
Yearly: Quarterly, Weekly, Monthly Check lists PLUS
Clean server from dust, if necessary (power must be off, if you will open the chassis)
Replace any chassis filters – if applicable
28
Digital Media Technologies Ltd.
7 Iskarsko shose Blvd.
Building 15, 5th Floor
1528 Sofia, Bulgaria
Tel.: +359 2 9703050
Fax: +359 2 9717700
www.playbox.tv
All rights reserved copyright © 1999-2014