puresound 55 recording说明书 - martinroland recording menu.pdf · the multi-function set offers...
TRANSCRIPT

PROFESSIONAL KARAOKE
Pure Sound 55Pure Sound 55 RecordingINPUT S.BASS
MUSIC
b # AUT/S V.C.
MULTIPLEX
b5 b4 b3 b2 b1 #1 #2 #3 #4 #5
AUT/S V.C.S.BASS DVD KOD AUX USB
NEXT
RECORDER
& PLAYERBACKPLAY/PAUSE STOP REC DELE
MP
PROFESSIONAL DIGITAL MIXING AMPLIFIER WITH RECORDER
Pure Sound 55 Recording
LOW LOW
LOW
LOWLOW
OWNER'S MANUAL
PROFESSIONAL DIGITAL ECHO MIXING AMPLIFIER
WITH KARAOKE RECORDER
Thank you for your purchase of our new full concept amplifier. Please read this
manual thoroughly before making connections and turning on the power. Following
the instructions in this manual will enable you to obtain optimum performance and
listening enjoyment from your new amplifier. Please retain this manual for future
reference.
CHARACTERISTICS
The set has two complete, independent, and advanced digital echo processingcircuits. When two singers with different compasses sing simultaneously, Digitalecho will offer different echo effects to fit the timbres of the singers. This systemfully develops the feature of True Stereo Echo Karaoke.
The two microphones respectively offer the function of adjusting echo effects.In addition, Echo tone offers the function of beautifying the sound range of thesinger, making perfect sound range and ending sound. This system help the singerenjoy enormously the delight of singing and express emotions.
With the super output power of each channel, high currency capacity of the powerfilter circuit, the set offers solid power, high-quality timbres, making clear, smooth,and sound-surround music. In addition, with the advanced Echo and Music MixedCircuit System, the set offers high sensitivity of the echo effect, clearness of thesound. The lowest signal noise ratio guarantees natural, clear sound effects. Thesesystems help the singer sing with great ease.
The set is equipped with advanced Channel Heatsink-Blow System and OverheatProtecting, which guarantee the lowest noise ratio. In addition, the set is equippedwith Overload Protection, and Short-circuit Protection. These systems offer protectivefunctions.
The set offers 2 systems Echo Mixing microphone inputs and 1 Direct Tone Circuitmicrophone input for professional DJ/KJ. Besides, the set is equipped with VideoSwitching, and Multiplex (Auto singing mate / Vocal cancel) function. Above all, theset is equipped with unique Super Bass frequency extension mode selection, whichproduces different frequency effects matched to the music broadcasted.The unit offers the newest USB karaoke recording matched with MP3 format to havemore fun when recording your own singing.The multi-function set offers family entertainment and fits commercial Karaoke orvarious Karaoke occasions.
High Precision Dual Echo System
Sound Range Beautified System
Singing With Great Ease
Protective Function
Multi-Applications
1

CAUTION:
TO REDUCE THE RISK OF ELECTRIC SHOCK,DO NOT REMOVE COVER (OR BACK). NOUSER-SERVICEABLE PARTS INSIDE, REFERSERVICING TO QUALIFIED SERVICE PERSONNEL.
CAUTION
DO NOT OPEN!
RISK OF ELECTRIC SHOCK,
The exclamation point within an equilateral triangle isintended to alert you to the presence of importantoperating and maintenance (servicing) instructionsin the literature accompanying the appliance.
The lightning flash with arrowhead symbol, within anequilateral triangle, is intended to alert you to thepresence of uninsulated "dangerous voltage " withinthe product's enclosure that may be of sufficientmagnitude to constitute a risk of electric shock topersons.
Explanation of Graphical Symbols
WARNING:
TO REDUCE THE RISK OF FIRE OR ELECTRIC SHOCK.
DO NOT TO RAIN OR MOISTURE.EXPOSE THIS UNIT
please record the serial number of this unit in the space
below.
Serial No.:
Retain this Owner's Manual in a safe place for future
reference.
The serial number is located on the rear of the unit.
1 Read instructions- All the safety and operating instructions
should be read before the unit is operated.
2 Retain Instructions - The safety and operating instructions
should be retained for future reference.
3 Heed Warnings-All warnings on the units and in the operating
instructions should be adhered to.
4 Follow Instructions - All operations and other instructions
should be followed.
5 Water and Moisture- The unit should not be used near water-
for example, near a bathtub, washbowl, kitchen sink, laundry
tub, in a wet basement, or near a swimming pool, etc.
6 Carts and Stands - The unit should be used only with a cart or
stand that is recommended by the manufacturer.
6A A unit and card combination should be moved
with care. Quick stops, excessive force, and
uneven surfaces may cause the unit and cart
combination to overturn.
7 Grounding or Polarization- Precautions should be taken so
that the grounding or polarization is not defeated.
8 Ventilation - The unit should be situated so that its location
or position does not interfere with its proper ventilation.
For example, the unit should not be situated on a bed, sofa, rug,
or similar surface, that may block the ventilation openings;
or placed in a built-in installation, such as a bookcase or
cabinet that may impede the flow of air through the ventil-
ation openings.
9 Heat- The unit should be situated away from heat sources
such as radiators, stoves, or other appliances that produces
heat.
10 Power Sources - The unit should be connected to a power
supply only of the type described in the operating instruc-
tions or as marked on the unit.
11 Power Cord Protection - Power supply cords should be
routed so that they are not likely to be walked on or pinched
by items placed upon or against them, paying particular att-
ention to cor ds at plugs, convenience receptacles, and the
point where they exit the unit.
12 Cleaning- The unit should be cleaned only as recommended
by the manufacturer.
13 Nonuse Periods-The power cord of the unit should be unplu-
gged from the outlet when left unused for a long period of
time.
14 Object and liquid Entry- Care should be taken so that objects
do not fall into and liquids are not spilled into the inside of
the unit.
15 Damage Requiring Service - The unit should be serviced by
qualified service personnel when:
A. The power supply cord or the plug has been damaged; or
B. Objects have fallen, or liquid has been spilled into the
unit; or
C. The unit has been exposed to rain; or
D. The unit does not appear to operate normally or exhibits
a marked change in performance.
E. The unit has been dropped, or the cabinet damaged.
16 Servicing - The user should not attempt to service the unit
beyond those means described in the operating instructions.
All other servicing should be referred to qualified service
personnel.
17 Power Lines - An outdoor antenna should be located away
from power lines.
IMPORTANT
Model:
2

Pure Sound 55Pure Sound 55 RecordingINPUT S.BASS
MUSIC
b # AUT/S V.C.
MULTIPLEX
b5 b4 b3 b2 b1 #1 #2 #3 #4 #5
AUT/S V.C.S.BASS DVD KOD AUX USB
NEXT
RECORDER
& PLAYERBACKPLAY/PAUSE STOP REC DELE
MP
PROFESSIONAL DIGITAL MIXING AMPLIFIER WITH RECORDER
3
2 3 4 5 6 7 8 9 10 11 12 13
14 15 16 17 18
19 20 21 24
1.Microphone input jacks
2.Input signal attenuators
3.Auto-gain level indicators
4.Microphone volume control
5.Balance control
6.Bass adjust
7.Mid-range adjust
8.Treble adjust
29.USB port (Matched with MP3 format)
30.Play/Pause
31.Stop
32.Record
33.Next
34.Back(Previous)
35.Circulate Broadcast
36.Delete
9.Echo volume control
11.Echo treble control
12.Repeat length control
13.Delay time control
14.Music volume control
15.Balance control
16.Bass adjust
17.Mid-range adjust
18.Treble adjust
FUNCTION CONTROL
19.Remote control sensor
22.Key control button
25.Key Display
MICROPHONES
MUSIC
ECHO
10.Echo bass control
26.Microphone master volume control
27.Music master volume control
MASTER VOLUME
20.Input source selector
23.Auto singing-mate switch
24.Vocal cancel switch
22 23 25 26 27
28.Power ON/OFF switch
POWER CONTROL
KARAOKE RECORDING
28
29 30 31 32 33 34 35 36
21.Super Bass Switch
1
LOW
LOW LOW
LOW
LOW

4
3. SPEAKER SYSTEMS TERMINAL
1.Do not let the bare speaker wires touch each otheror any other metal part as this could damage thisunit and / or speakers.
2.Make sure that the polarity of the speaker wires iscorrect. that is : +and-marking are observed. Ifthese wires are reversed, the sound will be unnaturaland will lack bass.
3.When one speaker system is used, speakers withan impedance of 4 to 8 ohms should be connectedfor used as main amplifier output terminals.Be careful when using two pairs speaker systemat the same time, since use of speakers with animpedance of less than 8 ohms will lead to damage,should use speakers with an impedance of 8 ohmsto 16 ohms.
2. AC POWER FUSE HOLDER
Use T4A fuse.
5.MUSIC OUTPUT TERMINAL
This terminal outputs music sound only from the amplifier.without music tone adjust, and not through master volumecontrol.
6.MIC SIGNAL OUTPUT
This terminal outputs microphones' sound only from theamplifier with mike tone adjust. But not through masterMic volume control.
Before plug-in the power supply, be sure to pick the
voltage of 230V 50Hz or 115V 60Hz correctly.
1. AC POWER SUPPLY
10
2 3 4 5 6 7 8
11
1
12 9
4. HEATSINKING BLOWER OUTLET
Air vents front and rear must not be obstructed.
600 WATTS600 WATTSMUSIC POWERMUSIC POWER
INPUT VOLTAGE
T. H. D.T. H. D.
AC 230V /115VAC 230V /115V
0.05%
RIGHT LEFT
Pure Sound 55Pure Sound 55Recording
LEFT RIGHT
KOD
KOD
DO NOT REMOVE COVER (OR BACK),
NO USER-SERVICEABLE PARTS INSIDE,
REFER SERVICING TO QUALIFIED
SERVICE PERSONNEL.
DO NOT REMOVE COVER (OR BACK),
NO USER-SERVICEABLE PARTS INSIDE,
REFER SERVICING TO QUALIFIED
SERVICE PERSONNEL.
CAUTION
CAUTION: AIR VENTS FRONT AND REAR
MUST NOT BE OBSTRUCTED
8.SOUND-EFFECT DEVICE INPUT/OUTPUT
Use this terminal when connecting external soundeffect devices such as graphic equalizer, poweramplifier.
9.MUSIC SOURCE INPUT
The terminal use to connect sound source, such asDVD CDG KOD AUX etc.The original setting is on DVD position.
11.REAR MIC INPUT JACKS
These jacks are also for connecting microphones.The MIC A is connected to the same circuit as theMIC 1 jack on the front panel. And the MIC B isconnected to the same circuit as the MIC 2 jack onthe front panel.
12. DUAL VOLTAGE SELECTOR
10.VIDEO INPUT/OUT JACKS
Connect input jack with the video output of DVDCDG KOD or AUX etc. And connect output jackwith the video input of the monitor/TV.
Before turn on power switch, be sure the AC voltage
selector is seted to the appropriate AC voltage
according to your area.
7. MIX OUTPUT TERMINAL
This terminal outputs music through music toneadjust and microphone's sound with echo effect,through master volume control. The terminal canbe used to connect MP3 recorder or power amplifier.
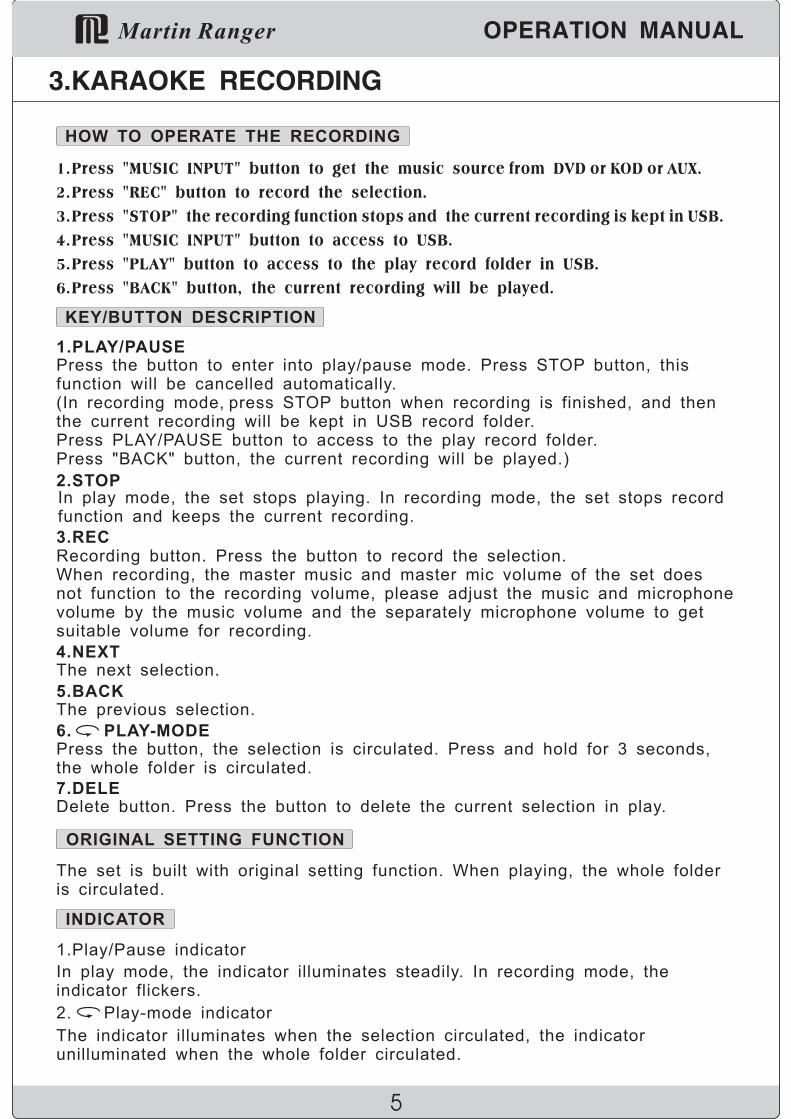
1.PLAY/PAUSE
Press the button to enter into play/pause mode. Press STOP button, thisfunction will be cancelled automatically.(In recording mode, when recording is finished, and thenthe current recording will be kept in USB record folder.Press PLAY/PAUSE button to access to the play record folder.Press "BACK" button, the current recording will be played.)
press STOP button
2.STOP
In play mode, the set stops playing. In recording mode, the set stops recordfunction and keeps the current recording.
3.REC
Recording button. Press the button to record the selection.When recording, the master music and master mic volume of the set doesnot function to the recording volume, please adjust the music and microphonevolume by the music volume and the separately microphone volume to getsuitable volume for recording.
4.NEXT
The next selection.
5.BACK
The previous selection.
6. PLAY-MODE
Press the button, the selection is circulated. Press and hold for 3 seconds,the whole folder is circulated.
7.DELE
Delete button. Press the button to delete the current selection in play.
ORIGINAL SETTING FUNCTION
The set is built with original setting function. When playing, the whole folderis circulated.
INDICATOR
1.Play/Pause indicator
In play mode, the indicator illuminates steadily. In recording mode, theindicator flickers.
2. Play-mode indicator
The indicator illuminates when the selection circulated, the indicatorunilluminated when the whole folder circulated.
5
HOW TO OPERATE THE RECORDING
1.Press "MUSIC INPUT" button to get the music source from DVD or KOD or AUX.
2.Press "REC" button to record the selection.
3.Press "STOP" the recording function stops and the current recording is kept in USB.
4.Press "MUSIC INPUT" button to access to USB.
5.Press "PLAY" button to access to the play record folder in USB.
6.Press "BACK" button, the current recording will be played.
KEY/BUTTON DESCRIPTION
600 WATTS600 WATTSMUSIC POWERMUSIC POWER
INPUT VOLTAGE
T. H. D.T. H. D.
AC 230V /115VAC 230V /115V
0.05%
RIGHT LEFT
Pure Sound 55Pure Sound 55Recording
LEFT RIGHT
KOD
KOD
DO NOT REMOVE COVER (OR BACK),
NO USER-SERVICEABLE PARTS INSIDE,
REFER SERVICING TO QUALIFIED
SERVICE PERSONNEL.
DO NOT REMOVE COVER (OR BACK),
NO USER-SERVICEABLE PARTS INSIDE,
REFER SERVICING TO QUALIFIED
SERVICE PERSONNEL.
CAUTION
CAUTION: AIR VENTS FRONT AND REAR
MUST NOT BE OBSTRUCTED
6
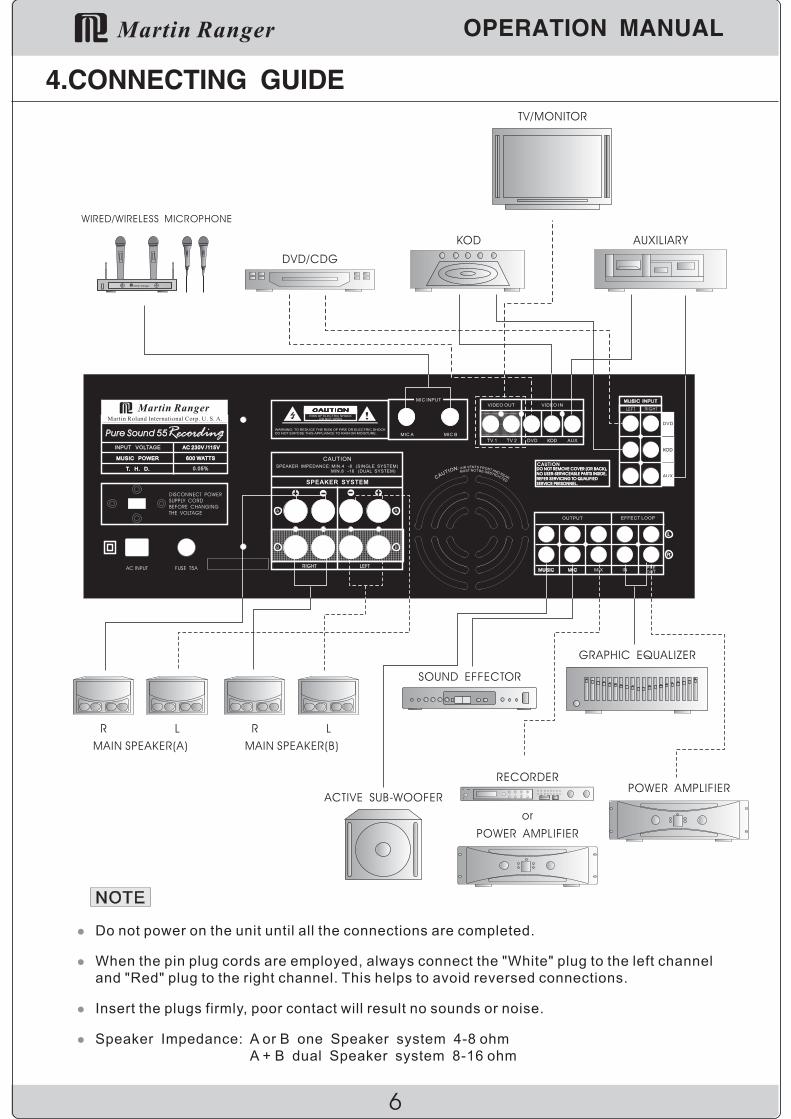
TV/MONITOR
MAIN SPEAKER(A) MAIN SPEAKER(B)
LR LR
AUXILIARY
WIRED/WIRELESS MICROPHONE
KOD
DVD/CDG
SOUND EFFECTOR
ACTIVE SUB-WOOFERPOWER AMPLIFIER
POWER AMPLIFIER
GRAPHIC EQUALIZER
Do not power on the unit until all the connections are completed.
When the pin plug cords are employed, always connect the "White" plug to the left channel
and "Red" plug to the right channel. This helps to avoid reversed connections.
Insert the plugs firmly, poor contact will result no sounds or noise.
Speaker Impedance: A or B one Speaker system 4-8 ohm
A + B dual Speaker system 8-16 ohm
RECORDER
or

7
Specifications and features are subject to changed without notice.
Audio output max. 600W
Mic input sensitivity 15mVExternal devices sensitivity 250mV
Signal / Noise ratio ( with IHF A Fiter ) 90dB
T.H.D. ( 1 kHz. AUX 150mV INPUT ) 0.1%
Frequency Response 25Hz 20KHz
Mic. Tone adjustment 80Hz 15dB
3.5KHz 5dB
12KHz 15dB
Echo tone adjustment 80Hz 15dB
12KHz 15dB
Power source AC115V /60Hz
AC230V /50Hz
Net Weight 33Lbs.
Dimension (WxHxD) 430x155x355mm
Mute switch
Key control
Input source select
Auto singing-mate switch
Microphone mastervolume control
Music volume control
Super Bass switch
MUTE
INPUT SELECT
DVD KOD AUX
MIC
MUSIC
b
#
AUT/S
MULTIPLEX
V.C.
SUPER
BASS
K
E
Y
C
O
N
T
R
O
L
V
O
L
C
O
N
T
R
O
L
Vocal cancel / switch
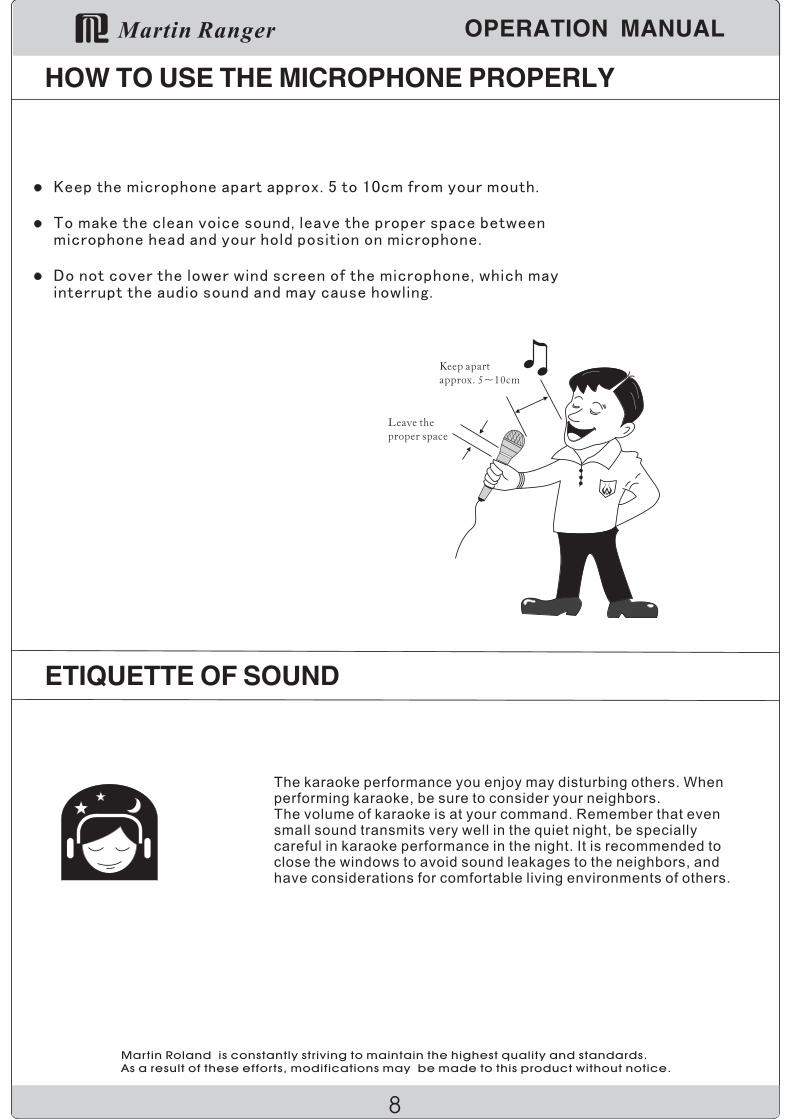
Keep the microphone apart approx. 5 to 10cm from your mouth.
To make the clean voice sound, leave the proper space betweenmicrophone head and your hold position on microphone.
Do not cover the lower wind screen of the microphone, which mayinterrupt the audio sound and may cause howling.
Keep apart
approx. 5~10cm
Leave the
proper space
Martin Roland is constantly striving to maintain the highest quality and standards.
As a result of these efforts, modifications may be made to this product without notice.
8

PROFESSIONAL KARAOKE