range rover evoque 18my - enterthezone.net · the foot, range rover evoque benefits from two...
TRANSCRIPT

RANGE ROVER EVOQUE 18MYHANDOVER AND REFERENCE GUIDE

USING THIS GUIDE . . .
We are continually improving our levels of new-vehicle customer satisfaction. Using the structure and actions shown in this guide will further improve our ratings. Whenever you execute a new-vehicle delivery, in addition to demonstrating its features, there are some other key items that you should take the time to understand, plan and prepare to demonstrate. Some of the actions within this guide are marked with a Red Flag. Actions marked with a Red Flag are designed to further enhance CSI performance for you, your Retailer and for Land Rover. Please refer to the inside rear cover of this guide for further information. This guide should be used in conjunction with the Customer Personalisation Record and Handover Record. Remember that there are additional fields and actions on the checklist that you should cover with your customer.
BEFORE DEMONSTRATING VEHICLE FEATURES . . .
...you must explain the contents of the Owner Literature Pack and identify the supporting booklets provided. Be aware that the Owner Literature Packs are based on vehicles made to the highest level of specification and may describe features or options not fitted to your specific vehicle market or not chosen by your customer.
For further information, check the Owner’s Handbook, the Quick Start Guide and any Owner’s Handbook supplements. Don’t forget: also check the Land Rover website at
www.landrover.com
The information detailed in this asset covers all vehicle and market derivatives and optional equipment, some of which may not be fitted to vehicles in your market. The information contained in this asset was correct at the time it was
created. In the interest of development, the right is reserved to change specifications, design or equipment at any time without notice and without incurring any obligations.
The Bluetooth trademarks are owned by Bluetooth SIG. iPod and iPhone are trademarks of Apple Inc. registered in the U.S and other countries.
Range Rover Evoque 18MY Handover and Reference Guide Excellence Code: QLA900885EN_0717 TOPIx Code: JLR 24 50 21 1E

CONTENTS1 EXTERIOR1.1 Smart Key 1.2 Fuelling 1.3 Luggage Compartment 1.4 Spare Wheel and Tool Kit
2 INTERIOR2.1 Rear Seats and ISOFIX Child Seat Anchor Points 2.2 Child Safety Locks
3 STARTING AND DRIVING3.1 Smart Key Starting 3.2 Transmission 3.3 Electric Parking Brake (EPB) 3.4 Tyres and Tyre Pressure Monitoring System (TPMS) 3.5 Cruise Control, Adaptive Cruise Control, Intelligent Emergency Braking 3.6 Terrain Response 3.7 Timed Climate 3.8 Driving Aids 3.9 Park Assist 3.10 Surround Camera and Tow Assist 3.11 Diesel Particulate Filter (DPF) and Selective Catalytic Reduction (SCR) 3.12 Wade Sensing 3.13 Stop/Start
4 FROM THE DRIVER’S SEAT4.1 Column and Steering Wheel Controls 4.2 Seat and Mirror Memory 4.3 Blind Spot Monitor 4.4 Automatic Headlight with Auto High Beam Assist (AHBA) 4.5 Wipers 4.6 Windows and Sliding Panoramic Roof Blind 4.7 Instrument Panel and Message Centre 4.8 Interior Lights 4.9 Convertible Roof
5 SYSTEMS5.1 Touchscreen Display 5.2 Satellite Navigation 5.3 Bluetooth® 5.4 Climate Control
6 IN-CAR INFOTAINMENT SYSTEM (FRONT AND REAR)6.1 DAB (Digital Audio Broadcasting) Radio 6.2 Media Hub 6.3 CD, DVD and Dual View
7 VOICE CONTROL7.1 Voice Control
8 INCONTROL8.1 Protect: Activation8.2 Protect: Overhead Console Buttons8.3 Protect: InControl Remote Essentials Smartphone app8.4 Protect: InControl Remote Premium Smartphone app8.5 Secure Tracker8.6 Wi-Fi Hotspot8.7 InControl Apps8.8 Connect Pro
9 Appendix9.1 SIM card installation
Range Rover Evoque 18MY Handover and Reference Guide Excellence Code: QAL900885EN_0717 TOPIx Code: JLR 24 50 21 1E

NOTES
………………………………………………………………………………………………………………….....………………...…
………………………………………………………………………………………………………………….....………………...…
………………………………………………………………………………………………………………….....………………...…
………………………………………………………………………………………………………………….....………………...…
………………………………………………………………………………………………………………….....………………...…
………………………………………………………………………………………………………………….....………………...…
………………………………………………………………………………………………………………….....………………...…
………………………………………………………………………………………………………………….....………………...…
………………………………………………………………………………………………………………….....………………...…
………………………………………………………………………………………………………………….....………………...…
………………………………………………………………………………………………………………….....………………...…
………………………………………………………………………………………………………………….....………………...…
………………………………………………………………………………………………………………….....………………...…
………………………………………………………………………………………………………………….....………………...…
………………………………………………………………………………………………………………….....………………...…
………………………………………………………………………………………………………………….....………………...…
………………………………………………………………………………………………………………….....………………...…
………………………………………………………………………………………………………………….....………………...…
………………………………………………………………………………………………………………….....………………...…
………………………………………………………………………………………………………………….....………………...…
………………………………………………………………………………………………………………….....………………...…
………………………………………………………………………………………………………………….....………………...…
………………………………………………………………………………………………………………….....………………...…
………………………………………………………………………………………………………………….....………………...…
………………………………………………………………………………………………………………….....………………...…
………………………………………………………………………………………………………………….....………………...…
………………………………………………………………………………………………………………….....………………...…
………………………………………………………………………………………………………………….....………………...…
………………………………………………………………………………………………………………….....………………...…
Range Rover Evoque 18MY Handover and Reference Guide Excellence Code: QAL900885EN_0717 TOPIx Code: JLR 24 50 21 1E

Range Rover Evoque 18MY Handover and Reference Guide Excellence Code: QAL900885EN_0717 TOPIx Code: JLR 24 50 21 1E
1 - EXTERIOR
1.1 Smart Key Demonstrate and explain: - Smart Key operation including the lock/unlock buttons
- Single and double locking features including the alarm modes
- Single- and multi-point entry
- Locking/unlocking the vehicle using the buttons on the deployable handles
- Emergency unlock
- Warnings and battery replacement
Customer care points
- Single lock is on the first press of the Smart Key lock button; double lock is on the second press.
- With a vehicle that has keyless entry, lock the vehicle using the lock sensor area of the exterior door handle; be sure not to grab the door handle. Touch your finger on the sensor area only (once for a single lock, twice for a double lock).
- A single lock sets the perimeter alarm. A double lock additionally activates interior scanning.
- Single-point entry is a safety feature which when set only unlocks the driver’s door when requested. This can be set to Multi-point entry via the Set-up menu on the Instrument Cluster (2-stage unlocking) or a series of button presses on the Smart Key.
- The internal battery of the Smart Key does not charge whilst in the vehicle. A Message Centre warning will alert the customer when the battery needs replacing. Should the Smart Key cease to function, a mechanical key blade is available to access the vehicle.
NOTE: This system provides keyless entry not keyless exit.
Keyless operation may be affected if the Smart Key is located behind a device with a back-lit LCD screen (such as a smart phone or laptop).
- In the event of the battery discharging or a fault with the keyless locking system, the doors must be locked manually.
- Open the door and locate the emergency lock access cover. Using the emergency key blade, rotate the cover to release it from the door. Remove the cover and store it safely.
- Insert the emergency key blade firmly into the emergency lock. The emergency key blade can now be removed.
- Refit the emergency lock access cover and rotate it clockwise to secure it firmly.
- Repeat the procedure for all other unlocked doors.
NOTE: Previously, the manual door lock has always been positioned on the left hand front door, regardless of hand of drive. It is now positioned on the driver’s door.
Range Rover Evoque 18MY Handover and Reference Guide Excellence Code: QAL900885EN_0717 TOPIx Code: JLR 24 50 21 1E
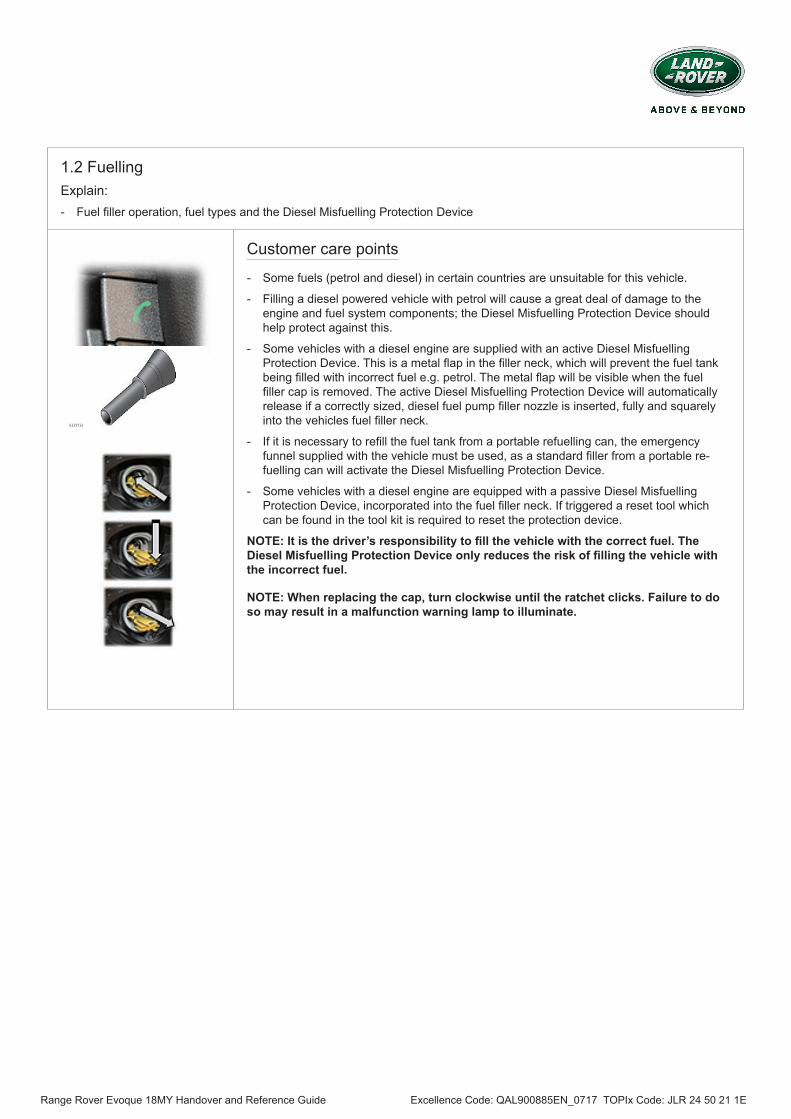
1.2 FuellingExplain: - Fuel filler operation, fuel types and the Diesel Misfuelling Protection Device
Customer care points
- Some fuels (petrol and diesel) in certain countries are unsuitable for this vehicle.
- Filling a diesel powered vehicle with petrol will cause a great deal of damage to the engine and fuel system components; the Diesel Misfuelling Protection Device should help protect against this.
- Some vehicles with a diesel engine are supplied with an active Diesel Misfuelling Protection Device. This is a metal flap in the filler neck, which will prevent the fuel tank being filled with incorrect fuel e.g. petrol. The metal flap will be visible when the fuel filler cap is removed. The active Diesel Misfuelling Protection Device will automatically release if a correctly sized, diesel fuel pump filler nozzle is inserted, fully and squarely into the vehicles fuel filler neck.
- If it is necessary to refill the fuel tank from a portable refuelling can, the emergency funnel supplied with the vehicle must be used, as a standard filler from a portable re-fuelling can will activate the Diesel Misfuelling Protection Device.
- Some vehicles with a diesel engine are equipped with a passive Diesel Misfuelling Protection Device, incorporated into the fuel filler neck. If triggered a reset tool which can be found in the tool kit is required to reset the protection device.
NOTE: It is the driver’s responsibility to fill the vehicle with the correct fuel. The Diesel Misfuelling Protection Device only reduces the risk of filling the vehicle with the incorrect fuel.
NOTE: When replacing the cap, turn clockwise until the ratchet clicks. Failure to do so may result in a malfunction warning lamp to illuminate.

Range Rover Evoque 18MY Handover and Reference Guide Excellence Code: QAL900885EN_0717 TOPIx Code: JLR 24 50 21 1E
1.3 Luggage Compartment Demonstrate and explain: - The three actions that will open and close the luggage compartment plus Powered Gesture Tailgate if specified
Customer care points
- Ensure the customer understands the three methods of releasing the tailgate (using the Smart Key, fascia switch and exterior release button).
NOTE: The tailgate external release switch will operate if all doors are unlocked and the gear selector is in the Park (P) position. If the gear selector is in the Neutral (N) position, the switch will only operate if all doors are unlocked, and the ignition is in convenience mode or switched off.
- To operate the powered version of the tailgate, use the Smart Key, the fascia switch or the external button to open the tailgate. When open, a close can only be performed by using the button located on the underside of the tailgate, or manually.
- On the powered version, the tailgate opening height can be adjusted to prevent contact with a low roof.
NOTE: Object detection is a safety feature on both opening and closing cycles. If an object is detected or the tailgate switch is pressed when it is in motion, the movement will stop.
- Powered Gesture Tailgate will allow the customer to operate the tailgate (both to open and close) from outside the vehicle without needing to physically touch either the vehicle or the Smart Key. Provided that the Smart Key is detected, the tailgate may be operated by making a smooth, simple, upward kick movement underneath either rear side of the vehicle between the wheel arch and the rear of the vehicle.
- The customer requests the tailgate to open or close via a smooth kick and return motion. The kick and return action should be completed within 1 second. After performing the gesture, the customer should pause for a further second, the indicators will flash confirming the command has been accepted and the tailgate will open/close.
NOTE: The Smart Key must be within 1.2m. - Unlike many competitor systems which use a single centre mounted sensor to detect
the foot, Range Rover Evoque benefits from two sensors mounted on either side of the vehicle. This allows kerbside operation, rather than needing to be immediately behind the vehicle.
NOTE: The accessible kerbside placement of the sensors means that the feature cannot be operated from directly behind the rear of the vehicle.NOTE: Make sure that the standing area is stable and not slippery before performing the kick movement. Take care not to make contact with the vehicle, and do not make contact with the vehicle exhaust as it may be hot and cause injury.NOTE: This feature does not replace any existing opening and closing methods.

Range Rover Evoque 18MY Handover and Reference Guide Excellence Code: QAL900885EN_0717 TOPIx Code: JLR 24 50 21 1E
1.4 Spare Wheel and ToolkitExplain: - The location of the spare wheel and the tool kit
Customer care points
- Ensure that the customer understands the specified locations on the vehicle where the jack can be safely used.
- Before using the Tyre repair kit, check repair procedure and cautions detailed within the Owner’s Handbook.
- Advise the customer of the Emergency Roadside Assistance telephone number.

Range Rover Evoque 18MY Handover and Reference Guide Excellence Code: QAL900885EN_0717 TOPIx Code: JLR 24 50 21 1E
2 - INTERIOR
2.1 Rear Seats and ISOFIX Child Seat Anchor PointsDemonstrate and explain: - The rear seat fold feature, the ISOFIX child seat anchor points and the top tether anchor brackets
Customer care points
- When raising the rear seats, make sure the seat belts are correctly routed in the seat belt guides and not trapped behind the seats.
- Make sure that when the seat back is raised, the locking mechanism is fully engaged.
- Both of the outer seat positions on the rear seats are equipped to accept ISOFIX restraints.
NOTE: Child seats unsuitable for the ISOFIX and top tether mounting points may still be used if secured correctly according to the manufacturer’s instructions. Refer to the child seat manufacturer’s website for further details.
2.2 Child Safety LocksDemonstrate and explain: - The location of the child safety locks
Customer care points
- Setting the child safety locks will disable the interior handle. Each rear passenger door operates independently, therefore will need to be set independently.

Range Rover Evoque 18MY Handover and Reference Guide Excellence Code: QAL900885EN_0717 TOPIx Code: JLR 24 50 21 1E
3 - STARTING AND DRIVING
3.1 Smart Key StartingDemonstrate and explain: - The push button start procedure with Smart Key
Customer care points
- There is no need to dock the Smart Key.
- The vehicle will start with the key in a bag or briefcase, providing the bag is not of metal construction and providing the key is not located behind a device with a back-lit LCD screen (such as a smart phone or laptop).
- The vehicle will start when the Smart Key is in any location within the passenger compartment, including the luggage area.
- If you remove the Smart Key from a running vehicle, a warning chime will sound on exit but the vehicle will continue to run. When the engine is stopped, it will not restart until the Smart Key is located inside the vehicle.
- Emergency start procedure should the Smart Key battery become exhausted: Hold the Smart Key against the underside of the steering column with the buttons facing downwards (markings are provided). Press the start button. This action must be carried out while the ‘Smart Key not found’ warning is displayed on the Message Centre (refer to Handbook).
- On diesel powered vehicles, there may be a delay on cranking of up to three seconds (this can be greater than three seconds in very cold climates). This allows the glow plugs to warm up. The engine will then crank automatically until it starts. In low ambient temperatures cranking times may increase.
- Ensure customers are aware of this delay, because pressing the start button a second time will cause the ignition to be switched OFF.
- If the vehicle is fitted with Stop/Start technology, ensure that the customer understands that certain conditions prevent the engine from automatically stopping. Some conditions will cause automatic engine restart. See 3.13 Stop/Start and the Owner’s Handbook for more details.
- Ensure customers with petrol engine vehicles understand that they will experience a short period of high engine speed (1500 rpm) when they first start the vehicle (time will vary depending on engine temperature).

Range Rover Evoque 18MY Handover and Reference Guide Excellence Code: QAL900885EN_0717 TOPIx Code: JLR 24 50 21 1E
3.2 Transmission Demonstrate and explain: - Drive, Sport and Manual shifts
- Gear selector and paddle operation (CommandShift)
Customer care points
- Ensure the customer understands the difference between selecting Sport and Drive. In Sport, the gear change points are altered to provide later up shifts and faster down shifts. When the vehicle is driven enthusiastically, down shifts may down shift two gears at once. Constantly driving in sports mode will have a negative impact on fuel consumption.
- Manual gear selection (using the paddles) status is displayed in the Message Centre.
- The paddles can also be used in Drive(D). To revert to Automatic mode, hold the ‘+’ paddle for approximately two seconds. The transmission automatically reverts after a short period of steady driving without the use of the paddles.
NOTE: Paddle shift can be disabled in Drive through the driving features menu.
- When the vehicle comes to rest and the ignition is switched off, the transmission will automatically select Park(P) regardless of its position before this action.
NOTE: When manoeuvring the vehicle slowly, if at any point the door is accidently opened, the transmission will select Park(P) if it is safe to do so.
3.3 Electric Parking Brake (EPB)Demonstrate and explain: - Operation of Electric Parking Brake (EPB)
Customer care points
- The EPB automatically releases on drive away (when a gear is selected and the throttle is operated).
- The EPB may be manually applied and released using the switch on the centre console.
NOTE: It is only possible to release the EPB when the driver’s door is closed and the driver’s seat belt is fastened.
- In an emergency only, the EPB can be applied with the vehicle in motion by pulling up the switch. This action causes a harsh sound and a warning in the Instrument Cluster. This is not a recommended procedure.
- It is recommended that the Electric Parking Brake should be manually applied only when the vehicle is stationary. To apply the Electric Parking Brake, pull up on the switch. To disengage it, press the foot brake and push down on the switch.
- When the Electric Parking Brake is active, a warning light in the Instrument Cluster is illuminated and will remain illuminated for at least ten seconds after the ignition has been turned OFF.
NOTE: The EPB is automatically applied when the ignition is switched OFF and the vehicle speed is below 3 km/h (2 mph).

Range Rover Evoque 18MY Handover and Reference Guide Excellence Code: QAL900885EN_0717 TOPIx Code: JLR 24 50 21 1E
3.4 Tyres and Tyre Pressure Monitoring System (TPMS)Explain: - Where to find tyre information
- System operation and warnings
Customer care points
- Stress the importance of regular checks on tyre pressures and for abnormal wear.
- Stress the Tyre Pressure Monitoring System (TPMS) is not a substitute for manually checking tyre pressures.
- The TPMS only provides a low tyre pressure warning and does NOT re-inflate the tyres.
- Tyre replacement should be carried out by a Land Rover Retailer or Authorised Repairer to avoid damage to the TPMS sensor.
- The following features can be accessed via the Instrument Cluster menu:
- Recommended cold tyre pressures are displayed under the service menu - Customer can select to display units of Pressure: Kpa, Bar, PSI - The actual pressure of the tyres is displayed under the service menu - Customer can select Load/Comfort pressures
- The sensors in the TPMS system are calibrated and customers should use the Instrument Cluster display to determine actual tyre pressure in preference to a potentially un-calibrated forecourt airline. Tyre pressures should be checked when the tyres are cold.
NOTE: TPMS is now available on all wheel styles (including the temporary spare wheel where specified), and will be fitted as standard where required by legislation (check your market specifications).

Range Rover Evoque 18MY Handover and Reference Guide Excellence Code: QAL900885EN_0717 TOPIx Code: JLR 24 50 21 1E
3.5 Cruise Control, Adaptive Cruise Control (ACC) incorporating Queue Assist with Intelligent Emergency Braking Explain: - Steering Wheel controls
- Functions and operation
Customer care points
- To set, accelerate to the desired speed; press SET/+ button. To increase or decrease the set speed, press the ‘+’ or ‘–’ buttons. To cancel, press the Cancel button or press the brake pedal.
- Cruise Control is inoperative below speeds of 32 km/h (20 mph).
NOTE: If the accelerator pedal is pressed for more than five minutes, Cruise Control is cancelled.
- To set the Follow Mode gap on Adaptive Cruise Control (ACC), use the additional buttons on the steering wheel. This sets a time gap so the distance from the car in front will increase or decrease as the speed increases or decreases.
- After setting ACC, the Engine, Brake and Transmission modules will control the speed and distance between the vehicles.
- ACC now incorporates Queue Assist with Intelligent Emergency Braking.
- Queue Assist follows the vehicle ahead to a standstill and is intended for use in lines of traffic on major roads where minimal steering is required.
- Intelligent Emergency Braking uses the radar unit of the ACC system to detect moving vehicles close ahead. When a collision risk is detected, an audible warning is given and the brake system is prepared for manual braking. If the driver does not apply the brakes, the Intelligent Emergency Braking applies the brakes at up to maximum pressure.
NOTE: The purpose of Intelligent Emergency Braking is to reduce the impact speed when a collision becomes unavoidable.

Range Rover Evoque 18MY Handover and Reference Guide Excellence Code: QAL900885EN_0717 TOPIx Code: JLR 24 50 21 1E
3.6 Terrain ResponseExplain: - Terrain Response and Torque Vectoring by Braking
- How it provides driver-selectable programs that configure on-board systems to assist the driver on different terrains
- All Terrain Progress Control (ATPC)
Customer care points
- Five possible settings: Dynamic, General driving, Grass/Gravel/Snow, Mud & Ruts and Sand. Point out that some of these systems will be useful not only off-road (i.e. Grass/ Gravel/Snow for slippery conditions on-road).
- Driving on-road with one of these programs selected will give the vehicle a very different feel i.e. gear selections, and how the vehicle accelerates.
- Dynamic program is an additional setting, available if the vehicle is specified with Adaptive Dynamics. Associated with a driving style rather than a type of terrain, this program will exploit the vehicle’s full on-road potential. When selected, this program optimises the vehicle’s traction, handling and drivability characteristics for maximum feedback and responsiveness.
- Adaptive Dynamics is a fully automatic feature and has no driver input.
- The Torque Vectoring by Braking system further improves cornering stability and agility. The system uses the car’s brake system to imitate the effect of a torque vectoring differential, constantly balancing the distribution of engine torque between the four wheels during cornering, resulting in improved grip and steering, and a reduced level of understeer. Torque Vectoring by Braking is a fully automatic feature and has no driver input.
- The vehicle is monitored by the system 100 times per second using the car’s Dynamic Stability Control (DSC) module. As the car accelerates through a corner, the system uses yaw sensors to detect when vehicle is starting to understeer. If understeer is detected, engine torque is increased, and imperceptible levels of braking are used to correct the vehicle attitude, and transfer engine torque to the outside wheels which have more grip, thus maintaining traction and steering control.
All Terrain Progress Control (ATPC): - ATPC is an all-road speed control function which works in the forward and reverse
direction. It offers the driver a speed based control where a desired vehicle speed can be set from current speed or from rest without any pedal inputs being required by the driver once the brake is released.
- The feature will offer enhanced functions to control slip and to improve launch, driving traction and braking performance. It will allow the inexperienced driver to utilise the total capability of the vehicle. The operational speed range is 1.8 km/h to 30 km/h.
- ATPC uses the brakes and powertrain as required to maintain the set speed. It is controlled via the cruise control switches and the pedals.
- The ATPC feature is enabled/disabled by the driver via a switch in the centre console.
- From stationary, brake held, driver selects the set speed using the ‘+’ button, on brake pedal release, the vehicle moves towards set speed.
- In motion, the driver selects the set speed using the ‘+’ button (or Resume), which by default will match the current speed.

Range Rover Evoque 18MY Handover and Reference Guide Excellence Code: QAL900885EN_0717 TOPIx Code: JLR 24 50 21 1E
3.6 Terrain Response (Continued)
Whilst ATPC is on, the driver can override by one of the following:
- Throttle Pedal - Driver can override with throttle similar to cruise control to raise the speed but not changing the ATPC set speed. On release of the throttle the vehicle will return to the ATPC set speed.
- Brake Pedal - Driver can override with light braking and modify the vehicle speed, on release of the brake pedal. ATPC will control the drivers selected speed without cancelling ATPC. However, a firm press of the brake will cancel ATPC drive function but retain the descent control braking function as per Hill Descent Control (HDC).
- Cruise Control Steering Wheel Mounted Controls (Set/Increase Speed, Decrease Speed, Resume and Cancel).
3.7 Timed Climate (with/without remote)Explain: - Timed Climate remote control
- Timed Climate
Customer care points
- The Timed Climate remote control has a range of approximately 100m (328ft) for optimum performance. It should be held vertically when operated. A series of flashes on the remote’s LED indicate the vehicle system reaction.
- Illuminates green for 2 seconds when the ON button is pressed, to indicate that the heater operation has been requested.
- Illuminates red for 2 seconds when the OFF button is pressed, to indicate that the heater has stopped.
- Check handbook for additional flash sequences.
- The system has safeguards to prevent excessive battery drain; after 20-30 minutes the system turns OFF automatically. It will not function at all if the battery charge level is too low.
- Timed climate is adjusted on the Touchscreen and can be set to operate twice in each 24 hour period. It can also be set to activate weekly or on individual days.
- The main benefits are in cold conditions when the vehicle is warm and the windows defrosted before the customer enters the vehicle. The engine block is also warmed, helping to improve fuel consumption and emissions.
Range Rover Evoque 18MY Handover and Reference Guide Excellence Code: QAL900885EN_0717 TOPIx Code: JLR 24 50 21 1E
3.8 Driving Aids Explain:
- Traffic Sign Recognition system - Lane Departure Warning system - Lane Keep Assist - Head-Up Display - Driver Condition Monitor
Customer care points
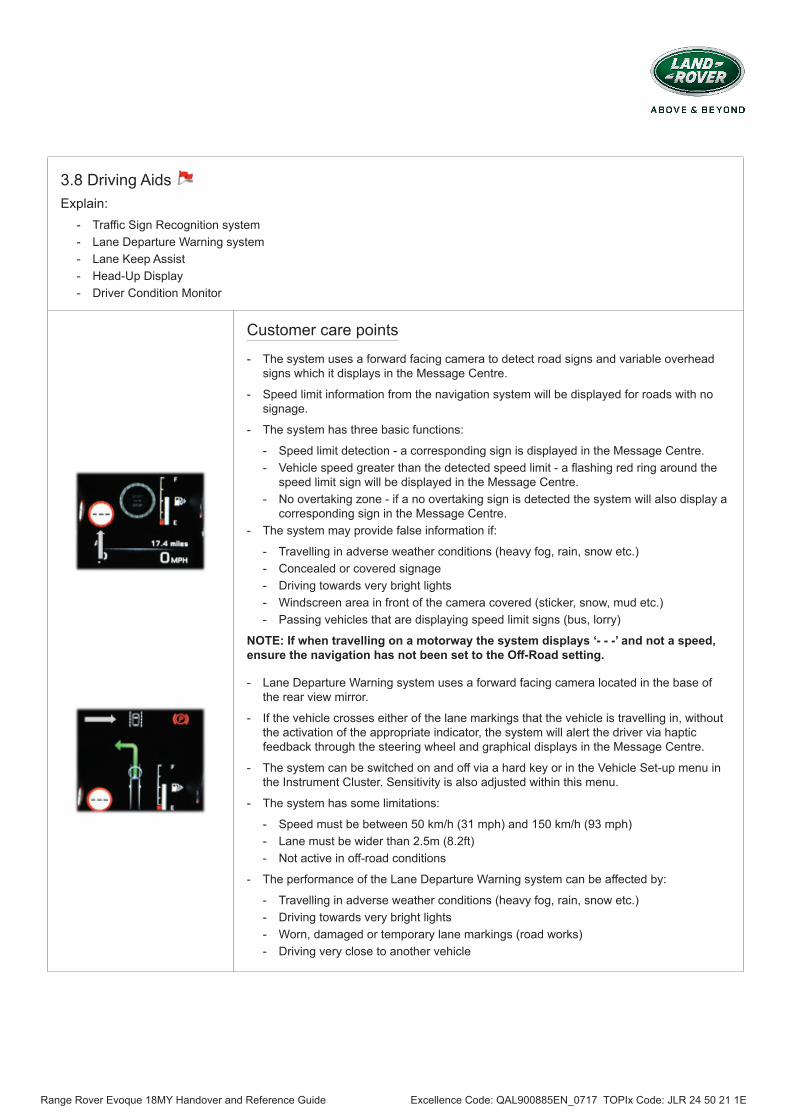
- The system uses a forward facing camera to detect road signs and variable overhead signs which it displays in the Message Centre.
- Speed limit information from the navigation system will be displayed for roads with no signage.
- The system has three basic functions:
- Speed limit detection - a corresponding sign is displayed in the Message Centre. - Vehicle speed greater than the detected speed limit - a flashing red ring around the
speed limit sign will be displayed in the Message Centre. - No overtaking zone - if a no overtaking sign is detected the system will also display a
corresponding sign in the Message Centre. - The system may provide false information if:
- Travelling in adverse weather conditions (heavy fog, rain, snow etc.) - Concealed or covered signage - Driving towards very bright lights - Windscreen area in front of the camera covered (sticker, snow, mud etc.) - Passing vehicles that are displaying speed limit signs (bus, lorry)
NOTE: If when travelling on a motorway the system displays ‘- - -’ and not a speed, ensure the navigation has not been set to the Off-Road setting.
- Lane Departure Warning system uses a forward facing camera located in the base of the rear view mirror.
- If the vehicle crosses either of the lane markings that the vehicle is travelling in, without the activation of the appropriate indicator, the system will alert the driver via haptic feedback through the steering wheel and graphical displays in the Message Centre.
- The system can be switched on and off via a hard key or in the Vehicle Set-up menu in the Instrument Cluster. Sensitivity is also adjusted within this menu.
- The system has some limitations:
- Speed must be between 50 km/h (31 mph) and 150 km/h (93 mph) - Lane must be wider than 2.5m (8.2ft) - Not active in off-road conditions
- The performance of the Lane Departure Warning system can be affected by:
- Travelling in adverse weather conditions (heavy fog, rain, snow etc.) - Driving towards very bright lights - Worn, damaged or temporary lane markings (road works) - Driving very close to another vehicle

Range Rover Evoque 18MY Handover and Reference Guide Excellence Code: QAL900885EN_0717 TOPIx Code: JLR 24 50 21 1E
3.8 Driving Aids (Continued)
NOTE: When driving on country roads with no near side road markings, the display may only show active (green lines) to one side. Both green lines may appear if the system has a kerb to use as a reference.
- Lane Keep Assist: Lane Departure Warning was introduced to Range Rover Evoque at 14MY, and as a further enhancement of this driver aid, Lane Keep Assist was introduced at 16MY.
- The system uses the forward facing camera to detect lane markings ahead of the vehicle. If it detects that the vehicle is getting too close to either the side of its lane, the system will gently but noticeably counter-steer to keep the vehicle in the lane. The driver is always responsible for ultimate control of the vehicle and can override the counter- steering at any time. When the driver activates the turn signal to intentionally change lanes or turn, the function does not intervene.
- The Head-up Display is a laser system, able to project various vehicle data onto the windscreen in the driver’s line of sight.
- The system supports the following data, dependent on features being fitted to the vehicle:
- Road Speed - Gear Position (when in CommandShift mode) - Turn-by-Turn Navigation (for HDD Premium Navigation) - Traffic Sign Recognition – Identified speed limit - Cruise Control Set-Speed - Adaptive Cruise Control Status (including warnings)
- The display can be personalised via the vehicle Set-up menu in the Instrument Panel.
- Driver Condition Monitor increases vehicle safety by constantly monitoring driver inputs (steering, speed, climate setting, cabin button activation – both how frequent and which ones and audio volume) then assesses this against known algorithms of human tiredness.
- Inputs are also constantly measured from systems such as throttle, brakes, lane departure, use of direction indicators etc. to determine if a driver is suffering from tiredness.
- If the system determines that the driver is fatigued, the vehicle displays the warning ‘Take a break!’ in the Instrument Cluster for 30 seconds, along with an audible chime. If driving continues, a further warning displays in the Instrument Panel, again with an audible chime and will remain until the OK button on the steering wheel menu control is pressed.

Range Rover Evoque 18MY Handover and Reference Guide Excellence Code: QAL900885EN_0717 TOPIx Code: JLR 24 50 21 1E
3.9 Park AssistExplain: - Park Assist (Parallel Parking/Perpendicular Parking/Parking Exit)
- 360° Park Distance Control
- Reverse Traffic Detection
Customer care points
- Park Assist is a driving aid only. Due care and attention must be taken during parking manoeuvres.
- Park Assist may not detect:
- Moving objects until they are dangerously close. - Some obstructions such as narrow posts and small objects close to the ground. - Some objects with dark, non-reflective surfaces.
- To activate Parallel Parking, press the Park Assist button while driving forward at less than 30 km/h (18 mph) and at a distance of 0.5 -1.5m (1.6 - 4.9ft) between the vehicle and the line of parked vehicles. When activated, Park Assist searches for a space on the passenger side. To search on the driver’s side, signal a turn in that direction.
- Repeated presses on the Park Assist button will activate Perpendicular Parking or Parking Exit.
- If specified, the 360˚ Park Distance Control is activated automatically:
- When Drive (D) is selected from Park (P) or a forward gear is selected from neutral on a manual transmission.
- If the vehicle speed falls below 10 km/h (6 mph). - When Reverse (R) gear is selected.
- The Parking aid button will illuminate to inform the driver that the system is active.
- To cancel the Parking Aid system press the button.
- Reverse Traffic Detection is a new feature that can be specified to aid parking manoeuvres. It provides additional warnings via the rear view camera screen, a flashing icon in the relevant exterior mirror and an audible warning if the presence of a moving vehicle is detected.
- Reverse Traffic Detection is active only in Reverse and only alerts on approaching vehicles which meet a three seconds or less ‘time to collision’.
NOTE: Reverse Traffic Detection is a standalone system but can only be specified with Blind Spot Monitor as it utilises radar and not the rear Park Assist sensors.

Range Rover Evoque 18MY Handover and Reference Guide Excellence Code: QAL900885EN_0717 TOPIx Code: JLR 24 50 21 1E
3.10 Surround Camera and Tow AssistDemonstrate and explain: - Surround Camera
- Tow Assist
Customer care points
- If the customer has specified Surround Camera and Tow Assist, suggest another appointment is made to take them through the full set up and menus of the camera system.
- When a new or existing trailer configuration is selected, tailer guidance automatically displays on the Touchscreen when Reverse (R) gear is selected. Coloured lines are displayed to indicate the predicted path of both the trailer and vehicle.
- Ensure the customer understands that if the triangular decal (the target sticker) is not fitted in the correct position, Advanced Tow Assist will not operate correctly.
NOTE: This feature may not operate with all trailer designs.
Range Rover Evoque 18MY Handover and Reference Guide Excellence Code: QAL900885EN_0717 TOPIx Code: JLR 24 50 21 1E
3.11 Diesel Particulate Filter (DPF) and Selective Catalytic Reduction (SCR)Explain: - Diesel Particulate Filter (DPF) warning lamp
- Full message and regeneration drive cycle
- Selective Catalytic Reduction (SCR) & Diesel Exhaust Fluid (DEF) top-up and warnings
Customer care points
- Diesel vehicles equipped with a Diesel Particulate Filter (DPF) have more efficient emission control. The particles in the exhaust gases are collected in the filter during normal driving.
- When a DPF message is displayed, accompanied by an amber warning lamp, the filter requires a regeneration cycle to clean itself. This requires the engine to have reached normal operating temperature. Regeneration takes place automatically at an interval of approximately 300-900km (190-560miles) depending on driving conditions.
- Regeneration normally takes 10-20 minutes and is automatically requested by the engine control module if the vehicle is driven steadily at vehicle speeds between 60 km/h to 112 km/h (40mph to 70mph).
- It is possible that the regeneration process will occur at lower vehicle speeds, but the events may take a little longer at a 50 km/h (30 mph) average speed.
NOTE: If regeneration is not successfully carried out, the amber warning lamp will eventually be replaced by a red warning lamp.
NOTE: During regeneration, a small reduction in engine power and increased fuel consumption may be temporarily noticed.
It is essential that retailer staff at the point of delivery explain and confirm to the customer or user of the vehicle that they understand the following:
- In order to comply with latest exhaust emissions requirements (EU6), some vehicles with diesel engines are fitted with a reservoir containing Diesel Exhaust Fluid (DEF). In some markets, Diesel Exhaust Fluid (DEF) is known as AdBlue®.
- It is essential that the Retailer explains to the customer the importance of Diesel Exhaust Fluid (DEF). DEF reduces diesel emissions by using a Selective Catalytic Reduction (SCR) system. For this system to work, it needs an adequate level of Diesel Exhaust Fluid (DEF), often referred to as AdBlue®. If the DEF falls too low, the engine will fail to start.
How often does DEF need to be added?
- DEF consumption varies greatly depending on driving style, road and weather conditions. The average rate of consumption is one litre per 800km (500miles), but that can more than double in some conditions. Ensure customers understand that DEF will be required to be topped up between service visits.
How does a customer know when to add DEF?
- The Message Centre will display a distance countdown when the DEF level becomes too low. From 18MY, it will also indicate how much fluid needs to be added to top up the system. The DEF must be topped up before the distance range falls to zero. The distance until the next DEF refill can be viewed in the Vehicle Information menu. Please note this can only be viewed when the vehicle is stationary, the engine is off and the ignition is on.
- As well as monitoring flow rate, the SCR system monitors the quality of DEF. If the DEF added is not to an ISO 22241-1 or DIN 70070 standard, a warning will notify the driverof a DEF system malfunction. This will require the customer to take corrective action by visiting a Retailer or Authorised Repairer.

Range Rover Evoque 18MY Handover and Reference Guide Excellence Code: QAL900885EN_0717 TOPIx Code: JLR 24 50 21 1E
3.12 Wade Sensing Explain: - When the system should be used
- How to select the system
Customer care points
- Wade Sensing can be turned on and off from the Touchscreen 4x4i or Extra Features menus.
- When selected, the Touchscreen displays current water depth and maximum wading depth. As maximum wading depth approaches, the system will display warnings on the Touchscreen and Instrument Cluster; these will be accompanied by a series of warning tones.
- Wade Sensing should not be used during off-road driving, as rapid increases in water depth cannot be detected in time to deliver a warning message to the driver.
- Wade Sensing is suspended if the vehicle’s speed exceeds 10 km/h (6 mph) or the gradient exceeds ten degrees.
NOTE: The Parking Aid, Park Assist and Stop/Start systems are all disabled when Wade Sensing is operating.
3.11 Diesel Exhaust Fluid (DEF) (Continued) - Diesel Exhaust Fluid (DEF) top-up and warnings
- Catalyst warm up
Customer care points
How does a customer top up the DEF system?
- Customers can either top up DEF themselves or ask their Retailer to fill the system for them. If customers choose to top it up themselves, non-drip 1.89 Litre and 5.0 Litre AdBlue® refill top up bottles can be purchased from any JLR Retailer. If a customer is unable to get to a retailer, 5 or 10 litre top up bottles are widely available. It is essential, however, that any fluid the customer purchases displays the specifications ISO 22241-1 or DIN 70070 and has the appropriate connectors to enable them to top up their system without spillage. Whilst Adblue® DEF is non-toxic, spillage onto the vehicle body, engine or interior should be avoided.
NOTE: DEF is also known as AdBlue®, AUS32 and ARLA 32. - In addition to purchasing non-drip top up bottles from their Retailer or Authorised
Repairer, AdBlue® DEF is readily available from Automotive suppliers and Fuel Stations. If customers choose to purchase top up fluid from these locations, they need to be sure to purchase fluid that meets the ISO, DIN and ARLA/AUS standards. They also need to ensure that the bottles they purchase have the appropriate connectors to avoid spillage.
- Ensure the customer is aware of the “Diesel Technology - Our Environmental Responsibility” leaflet.
- Petrol vehicles Catalyst warm up; ensure the customer understands that they will experience a short period of high engine speed when they first start the vehicle (time will vary depending on engine temperature). This feature has been introduced due to the latest emission requirements and will aid with catalytic converter warm up, thus reducing harmful emissions.

Range Rover Evoque 18MY Handover and Reference Guide Excellence Code: QAL900885EN_0717 TOPIx Code: JLR 24 50 21 1E
3.13 Stop/StartDemonstrate and explain:• The conditions that will prevent an automatic engine stop
• How to switch the system off
Customer care points
Even when activated, it is normal that Stop/Start will not always stop the engine when stationary, and may restart the engine prior to setting off. This is dependent on the variables detailed below.
- The following conditions will prevent an automatic engine stop:
- A shift paddle has been used to select a gear - The external temperature is less than approximately -2°C (32°F) - The external temperature is more than approximately 40°C (104°F) - The engine and /or the gearbox has not reached operating temperature - The driver’s seat belt is not fastened - The Climate Control system requires the engine to be running (for example, in
Defrost mode) - The battery charge is too low to maintain all electrical accessories (for example radio,
air conditioning, seat heating) - The bonnet is open
- To switch the system off, press the Stop/Start button.
- The following conditions will trigger an automatic engine restart:
- The battery charge is too low to maintain all electrical accessories (for example radio, air conditioning, seat heating etc.) without the engine running.
- If the Stop/Start button is pressed while an automatic engine stop is in progress.
NOTE: Driver Exit is a feature which is available only when Stop/Start is on.
- To prevent the vehicle from being inadvertently left in a drivable condition, the vehicle detects when a driver is not present and automatically turns the ignition off.
- If Drive (D) or Sport (S) is selected, the Driver Exit feature turns the vehicle’s ignition off if the driver’s seat belt is unbuckled and the brake pedal is released.
- If Neutral (N) or Park (P) is selected, the Driver Exit feature turns the vehicle’s ignition off if the driver’s seat belt is unbuckled.
- If the driver’s seat belt is unbuckled when the engine is running in Reverse (R), it remains running to make sure that the driver is aware that the vehicle is in a drivable condition.
Range Rover Evoque 18MY Handover and Reference Guide Excellence Code: QAL900885EN_0717 TOPIx Code: JLR 24 50 21 1E
4 - FROM THE DRIVER’S SEAT
4.1 Column and Steering Wheel ControlsDemonstrate and explain: - Steering column adjustment and the operation of the steering wheel controls
Customer care points
- Moving the lever below the steering column fully down allows the desired position for the steering wheel to be found. It can then be locked in position.
NOTE: Manual adjustment only.
- The steering wheel controls on the right side access features on the Instrument Cluster and Adaptive Cruise Control. The left hand controls are dedicated to audio and phone functions. These controls create a safer driving environment by allowing hands-free access to the Instrument Cluster menu, audio features and phone functions.
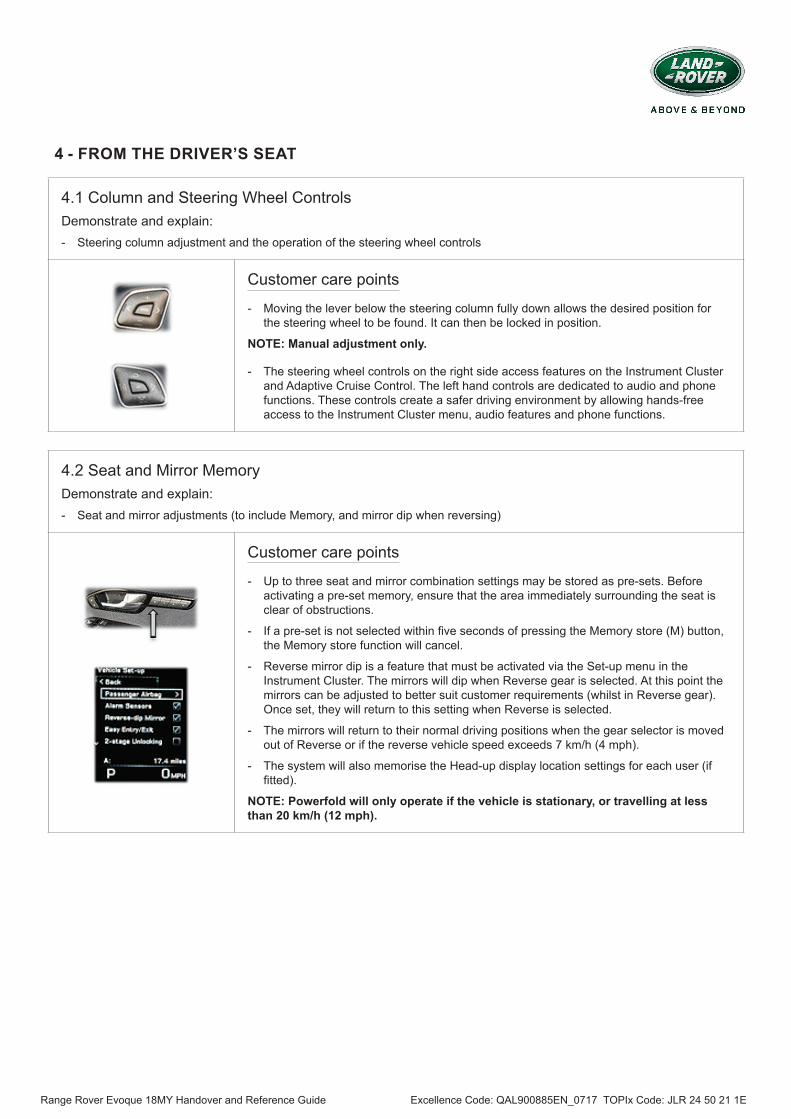
4.2 Seat and Mirror MemoryDemonstrate and explain: - Seat and mirror adjustments (to include Memory, and mirror dip when reversing)
Customer care points
- Up to three seat and mirror combination settings may be stored as pre-sets. Before activating a pre-set memory, ensure that the area immediately surrounding the seat is clear of obstructions.
- If a pre-set is not selected within five seconds of pressing the Memory store (M) button, the Memory store function will cancel.
- Reverse mirror dip is a feature that must be activated via the Set-up menu in the Instrument Cluster. The mirrors will dip when Reverse gear is selected. At this point the mirrors can be adjusted to better suit customer requirements (whilst in Reverse gear). Once set, they will return to this setting when Reverse is selected.
- The mirrors will return to their normal driving positions when the gear selector is moved out of Reverse or if the reverse vehicle speed exceeds 7 km/h (4 mph).
- The system will also memorise the Head-up display location settings for each user (if fitted).
NOTE: Powerfold will only operate if the vehicle is stationary, or travelling at less than 20 km/h (12 mph).

Range Rover Evoque 18MY Handover and Reference Guide Excellence Code: QAL900885EN_0717 TOPIx Code: JLR 24 50 21 1E
4.3 Blind Spot MonitorExplain: - Blind Spot Monitor
Customer care points
- The Blind Spot Monitor system is a supplement to, not a replacement for, a safe driving style and use of the exterior and rear-view mirrors. The icons in either mirror illuminate when a vehicle in an adjacent lane is in an overtaking position.
- On start-up, an amber indicator dot is visible in the mirrors. This shows the system is OK and will disappear when the vehicle speed exceeds 10 km/h (6 mph). If this light is seen again it indicates a system fault and should be accompanied by a warning message.
- If Blind Spot Monitor is disabled using the Instrument Cluster vehicle information and settings menu, the amber light will be permanently ON, and is automatically turned OFF when Reverse (R) gear is selected, when the vehicle is in Park (P), or when the vehicle is travelling below 5km/h (3mph). Under these conditions, an amber warning indicator dot is displayed, provided the vehicle is not fitted with Reverse Traffic Detection.
- Closing Vehicle Sensing is a feature within the Blind Spot Monitor system. The radar detection area is extended to approximately 70m (230ft) and identifies a rapidly approaching vehicle by flashing the warning icon in the appropriate mirror. Once the vehicle enters the area monitored by the Blind Spot Monitor, the icon will illuminate continuously.
NOTE: The system is designed to cover a fixed lane width. If narrow lanes are in use, it may detect objects travelling in non-adjacent lanes.

Range Rover Evoque 18MY Handover and Reference Guide Excellence Code: QAL900885EN_0717 TOPIx Code: JLR 24 50 21 1E
4.4 Automatic Headlights with Auto High Beam Assist (AHBA)Demonstrate and explain: - Master lighting switch (to include auto and delay controls)
- Auto High Beam Assist function and benefits
Customer care points
- All external lights are operated from this switch. If Auto position is selected, the lights will illuminate automatically when low ambient light is detected.
- Headlight courtesy delay - the headlight can be set to remain ON for a selected period after the vehicle is parked. This feature can be used to illuminate the area around the vehicle after parking (set up on rotary control). The Smart Key can also operate this feature.
- Auto High Beam Assist is a convenience feature to encourage greater use of high beam thus promoting safer driving. Once selected, and in sufficiently dark conditions, the system switches on high beam. The system only operates at speeds above 40 km/h (25 mph).
NOTE: Auto dip lights will operate in twilight conditions, Auto High Beam only when fully dark.
- The system uses a camera mounted in the rear view mirror housing. The following conditions may affect the system’s function:
- Highly reflective road signs - Vehicles with dim lights (e.g. bicycles) - Adverse weather conditions - A dirty, damaged or misted windscreen - A sticker on the windscreen
- The system will be cancelled if the headlight courtesy flash is used while Auto High Beam Assist is in use.

Range Rover Evoque 18MY Handover and Reference Guide Excellence Code: QAL900885EN_0717 TOPIx Code: JLR 24 50 21 1E
4.4 Automatic Headlights with Auto High Beam Assist (Continued)Demonstrate and explain: - LED headlights
Customer care points
- If specified the new LED headlights are a significant improvement over standard HID Xenon lighting, they create a hue of illumination more akin to daylight, reducing driver eye fatigue.
- LED lighting lowers the parasitic load on the charging system by some 6%, so in turn lowers CO2 emissions.
- Standard with the LED lights are Land Rover’s adaptive lighting and Auto High Beam Assist systems.

Range Rover Evoque 18MY Handover and Reference Guide Excellence Code: QAL900885EN_0717 TOPIx Code: JLR 24 50 21 1E
4.5 WipersDemonstrate and explain: - Fascia switches
- Wiper functions and features
Customer care points
- The wipers can be operated manually. In automatic mode, the rain sensor determines the automatic variable delay. This can be changed to manual variable delay dependent on switch position. The wiper frequency is also affected by the vehicle speed. If the vehicle speed drops below 2 km/h (1.2 mph) the wipers will switch to the next lowest speed. When the speed increases above 8 km/h (5 mph) the original settings are restored.
- The winter park position parks the wipers in a higher position than normal. This allows the blades to be lifted from the screen to prevent freezing. Details can be found in the vehicle Set-up menu.
4.6 Windows and Sliding Panoramic Roof BlindDemonstrate and explain: - Windows and panoramic roof blind operation
Customer care points
- The windows feature one touch open and one touch close operation. Once the switch is pressed, there is no need to hold it.
- The windows also feature an anti-trap protection to prevent accidental trapping of vulnerable parts of the body or other obstructions in a closing window. If an object is detected, the window will retract.
- If it is still necessary to raise the window after it has retracted, the override procedure is as follows:
1. Attempt to close the window; anti-trap will prevent closure and lower the window/open slightly.
2. Within ten seconds, attempt to raise the window again; anti-trap will prevent closure and lower the window/open the slightly.
3. Attempt to close the window for a third time; this time hold the switch in the close position. Hold until closed.
- The panoramic roof blind has the same features as the windows (one touch and anti-trap).

Range Rover Evoque 18MY Handover and Reference Guide Excellence Code: QAL900885EN_0717 TOPIx Code: JLR 24 50 21 1E
4.7 Instrument Panel and Message CentreDemonstrate and explain: - Message Centre
- Warning lights
- Audible warnings
Customer care points
- There are three levels of messages:
- Primary - with a red warning icon - Secondary - with an amber warning icon - Information
- Messages with the highest importance will be displayed first.
- Advise the customer to check the Handbook should any Primary or Secondary messages appear.
- Low fuel warning is now based on the volume in the tank (not the range) which means that there will no longer be an ‘80 kilometres (50 miles) to empty’ message. The remaining distance depends on the current driving style and the remaining fuel.
NOTE: The seat belt minder message disappears automatically. It may also be cancelled by pressing the OK button on the right hand steering wheel controls. Objects placed on the front passenger seat may activate the warning chime and indicator.
4.8 Interior LightsDemonstrate and explain: - Touch sensing
- Configurable mood lighting
Customer care points
- Touch sensing is used to operate the front interior lamps so ensure the customer understands the operation of the touch sensing. Moving a hand close to (or lightly touching) the lamp will turn it on or off.
- The customer configurable mood lighting which allows personalisation of the vehicle interior at night has been significantly improved with enhanced coverage and light quality.
- All Derivatives - Task Lighting: Illumination to footwell, glovebox, loadspace, white lighting in door releases, overhead console downlighter, front and rear courtesy lights (with delay theatre dimming) and map lights.
- SE, SE Dynamic - Ambient Lighting: Task Lighting as per ‘All Derivatives’, white ambient light bar under armrests (front and rear), single point white light in door bins (front and rear), single point white light in centre console ‘fireplace’.
- HSE, HSE Dynamic, Autobiography - Tri-colour configurable lighting: Task Lighting as per ‘All Derivatives’, light bars under armrests and in door bins (front and rear), light bar in centre console ‘fireplace’.
- The Tri-Colour Ambient lighting is controlled via the vehicle Touchscreen, with a range of ten configurable colours available. The brightness of the ambient lighting is also configurable, and a ‘Stealth’ setting is available to reduce cabin illumination to a minimum.
Range Rover Evoque 18MY Handover and Reference Guide Excellence Code: QAL900885EN_0717 TOPIx Code: JLR 24 50 21 1E
4.9 Convertible RoofDemonstrate and explain: - The location of the convertible roof switch
- Operation of the convertible roof and safety and security features
Customer care points
- Advise the customer that the roof can be raised or lowered at speeds up to 48 km/h (30 mph) taking a mere 18 seconds.
- The glovebox is linked to the vehicle’s central locking system. Therefore, if the car is left unattended and locked with the convertible roof in the lowered position, the glovebox will also be locked providing secure oddment storage.
- The Alarm System is fitted with both perimeter and volumetric protection. It is possible to temporarily disable the volumetric monitoring via the Vehicle Set-up menu for example, if the vehicle is parked and locked with the roof in the lowered position. This function can also be used when a pet is left in the vehicle.
- In order to provide a high level of rollover protection to vehicle occupants, whilst retaining a clean visual appearance to the vehicle in normal use, deployable rollover protection devices are fitted behind the rear seats. In the event of a detected rollover situation, these devices will deploy.
- A windbreak (Option/Accessory) provides additional comfort for the front seat passengers when the convertible roof is in the lowered position. All Range Rover Evoque Convertible models are fitted with fixing bosses in the rear three quarter trim panel to accept the windbreak. When not in use, the windbreak can be folded and stowed in the loadspace.
Range Rover Evoque 18MY Handover and Reference Guide Excellence Code: QAL900885EN_0717 TOPIx Code: JLR 24 50 21 1E
5 - INCONTROL SYSTEMS
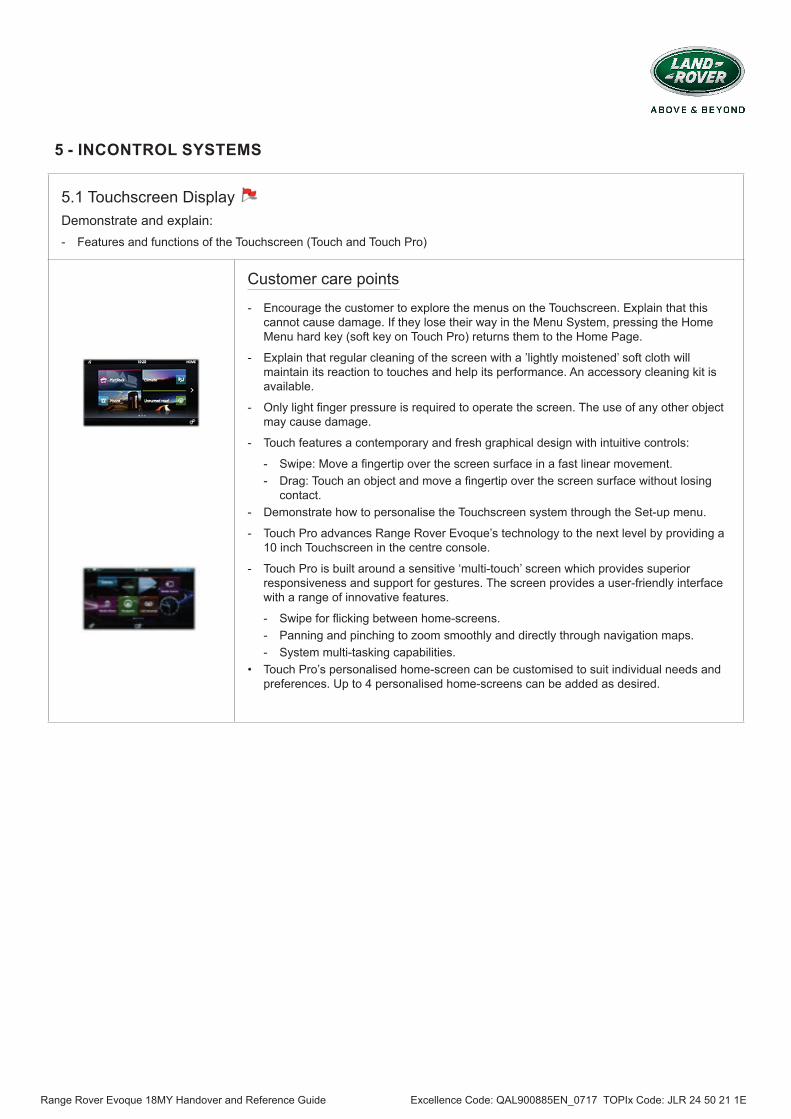
5.1 Touchscreen Display Demonstrate and explain: - Features and functions of the Touchscreen (Touch and Touch Pro)
Customer care points
- Encourage the customer to explore the menus on the Touchscreen. Explain that this cannot cause damage. If they lose their way in the Menu System, pressing the Home Menu hard key (soft key on Touch Pro) returns them to the Home Page.
- Explain that regular cleaning of the screen with a ’lightly moistened’ soft cloth will maintain its reaction to touches and help its performance. An accessory cleaning kit is available.
- Only light finger pressure is required to operate the screen. The use of any other object may cause damage.
- Touch features a contemporary and fresh graphical design with intuitive controls:
- Swipe: Move a fingertip over the screen surface in a fast linear movement. - Drag: Touch an object and move a fingertip over the screen surface without losing
contact. - Demonstrate how to personalise the Touchscreen system through the Set-up menu.
- Touch Pro advances Range Rover Evoque’s technology to the next level by providing a 10 inch Touchscreen in the centre console.
- Touch Pro is built around a sensitive ‘multi-touch’ screen which provides superior responsiveness and support for gestures. The screen provides a user-friendly interface with a range of innovative features.
- Swipe for flicking between home-screens. - Panning and pinching to zoom smoothly and directly through navigation maps. - System multi-tasking capabilities.
• Touch Pro’s personalised home-screen can be customised to suit individual needs and preferences. Up to 4 personalised home-screens can be added as desired.

Range Rover Evoque 18MY Handover and Reference Guide Excellence Code: QAL900885EN_0717 TOPIx Code: JLR 24 50 21 1E
5.2 Satellite Navigation Demonstrate and explain: - Features and functions of the Navigation System (Touch and Touch Pro)
Customer care points
- Explain that access to the navigation screen is from the Home Page by pressing the displayed (‘soft’) NAVIGATION key followed by the ‘Agree Screen’.
- Encourage the customer to use POI or Post Code destinations, which are the easiest methods. There are other destination options such as Address, Map, Coordinates, Previous and Memory.
- Time permitting, demonstrate some of the advanced features of the Navigation System such as Stopovers and Geo Coordinates.
- The Touch system is an SD card Navigation system. The Navigation SD card reader is located in the front centre cubby box.
- Touchscreens (Main, Map, Settings) are visually different to previous systems but the functions are the same or similar with some new additions e.g. 3D City Models and 3D Landmarks.
- Encourage the customer to use POI or Post Code destinations, which are the easiest methods. There are other destination options such as Address, Map, Previous and Memory.
- Demonstrate setting a route preference and explain that if not done correctly, the system may appear to be operating incorrectly. For example, setting ‘Avoid major roads’ will usually lengthen journey times.
- Touch Pro screens (Main, Map, Settings) are visually different to previous systems but the functions are the same or similar with some new additions e.g. 3D and Satellite views.
- The system is equipped with a high speed Intel Quad Core system along with a super-fast access 60GB Solid State Drive (SSD). This combination provides a highly responsive experience.
- This new fully integrated navigation system provides a number of significant advantages over smartphone navigation apps as well as aftermarket portable navigation devices:
- Dead reckoning – this is the most important advantage of a fully integrated system. Being able to always pinpoint accurately the position of the vehicle to ensure appropriate guidance instructions.
- On-board regional maps e.g. Europe – no reliance on a mobile network connection or roaming (if preferred) when travelling outside of your home network.
- Touch Pro also brings a host of features such as; Door-to-door route planning, Commute mode, Fuel finder, Arrival mode, Parking, Real time traffic, Synch and sending, Sharing, Live search and Safety cameras. If the customer is interested it may be advisable to arrange another appointment to better explain these advanced features.
NOTE: Some features require Connect Pro.
Range Rover Evoque 18MY Handover and Reference Guide Excellence Code: QAL900885EN_0717 TOPIx Code: JLR 24 50 21 1E
5.2 Satellite Navigation (Continued)
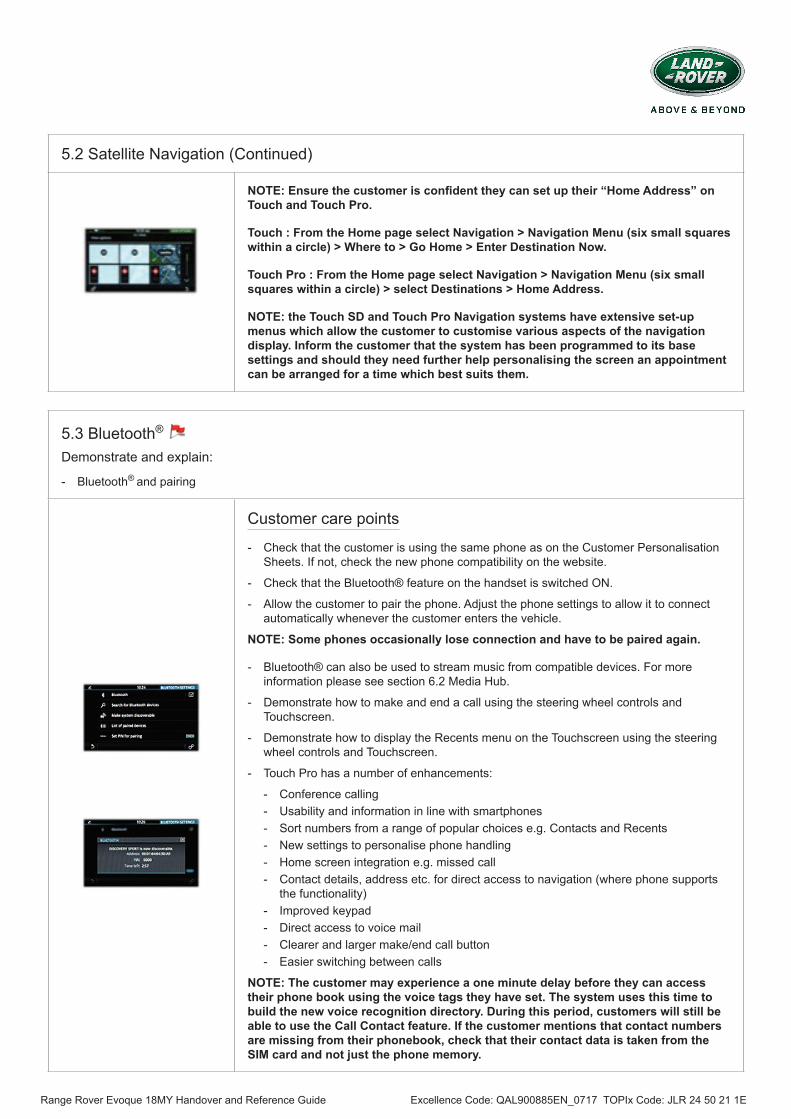
NOTE: Ensure the customer is confident they can set up their “Home Address” on Touch and Touch Pro.
Touch : From the Home page select Navigation > Navigation Menu (six small squares within a circle) > Where to > Go Home > Enter Destination Now.
Touch Pro : From the Home page select Navigation > Navigation Menu (six small squares within a circle) > select Destinations > Home Address.
NOTE: the Touch SD and Touch Pro Navigation systems have extensive set-up menus which allow the customer to customise various aspects of the navigation display. Inform the customer that the system has been programmed to its base settings and should they need further help personalising the screen an appointment can be arranged for a time which best suits them.
5.3 Bluetooth® Demonstrate and explain:
- Bluetooth® and pairing
Customer care points
- Check that the customer is using the same phone as on the Customer Personalisation Sheets. If not, check the new phone compatibility on the website.
- Check that the Bluetooth® feature on the handset is switched ON.
- Allow the customer to pair the phone. Adjust the phone settings to allow it to connect automatically whenever the customer enters the vehicle.
NOTE: Some phones occasionally lose connection and have to be paired again.
- Bluetooth® can also be used to stream music from compatible devices. For more information please see section 6.2 Media Hub.
- Demonstrate how to make and end a call using the steering wheel controls and Touchscreen.
- Demonstrate how to display the Recents menu on the Touchscreen using the steering wheel controls and Touchscreen.
- Touch Pro has a number of enhancements:
- Conference calling - Usability and information in line with smartphones - Sort numbers from a range of popular choices e.g. Contacts and Recents - New settings to personalise phone handling - Home screen integration e.g. missed call - Contact details, address etc. for direct access to navigation (where phone supports
the functionality) - Improved keypad - Direct access to voice mail - Clearer and larger make/end call button - Easier switching between calls
NOTE: The customer may experience a one minute delay before they can access their phone book using the voice tags they have set. The system uses this time to build the new voice recognition directory. During this period, customers will still be able to use the Call Contact feature. If the customer mentions that contact numbers are missing from their phonebook, check that their contact data is taken from the SIM card and not just the phone memory.
Range Rover Evoque 18MY Handover and Reference Guide Excellence Code: QAL900885EN_0717 TOPIx Code: JLR 24 50 21 1E
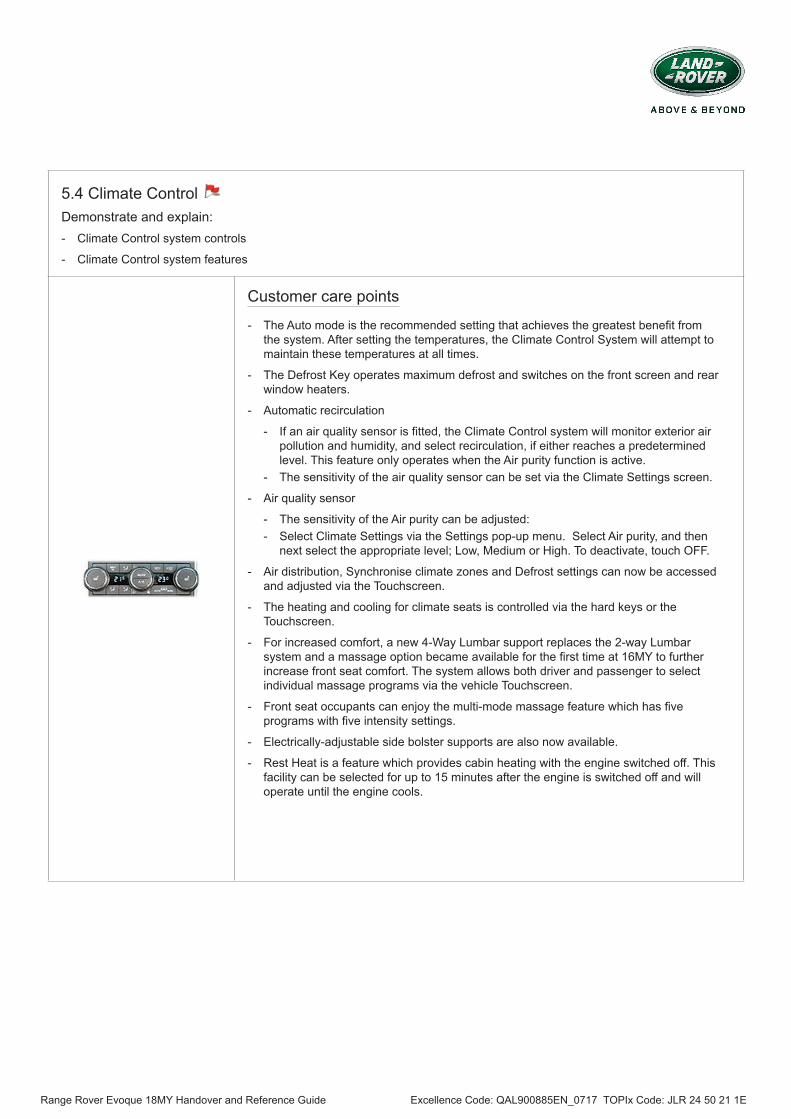
5.4 Climate Control Demonstrate and explain: - Climate Control system controls
- Climate Control system features
Customer care points
- The Auto mode is the recommended setting that achieves the greatest benefit from the system. After setting the temperatures, the Climate Control System will attempt to maintain these temperatures at all times.
- The Defrost Key operates maximum defrost and switches on the front screen and rear window heaters.
- Automatic recirculation
- If an air quality sensor is fitted, the Climate Control system will monitor exterior air pollution and humidity, and select recirculation, if either reaches a predetermined level. This feature only operates when the Air purity function is active.
- The sensitivity of the air quality sensor can be set via the Climate Settings screen.
- Air quality sensor
- The sensitivity of the Air purity can be adjusted: - Select Climate Settings via the Settings pop-up menu. Select Air purity, and then
next select the appropriate level; Low, Medium or High. To deactivate, touch OFF.
- Air distribution, Synchronise climate zones and Defrost settings can now be accessed and adjusted via the Touchscreen.
- The heating and cooling for climate seats is controlled via the hard keys or the Touchscreen.
- For increased comfort, a new 4-Way Lumbar support replaces the 2-way Lumbar system and a massage option became available for the first time at 16MY to further increase front seat comfort. The system allows both driver and passenger to select individual massage programs via the vehicle Touchscreen.
- Front seat occupants can enjoy the multi-mode massage feature which has five programs with five intensity settings.
- Electrically-adjustable side bolster supports are also now available.
- Rest Heat is a feature which provides cabin heating with the engine switched off. This facility can be selected for up to 15 minutes after the engine is switched off and will operate until the engine cools.
Range Rover Evoque 18MY Handover and Reference Guide Excellence Code: QAL900885EN_0717 TOPIx Code: JLR 24 50 21 1E
6 - IN-CAR INFOTAINMENT SYSTEM (FRONT AND REAR)
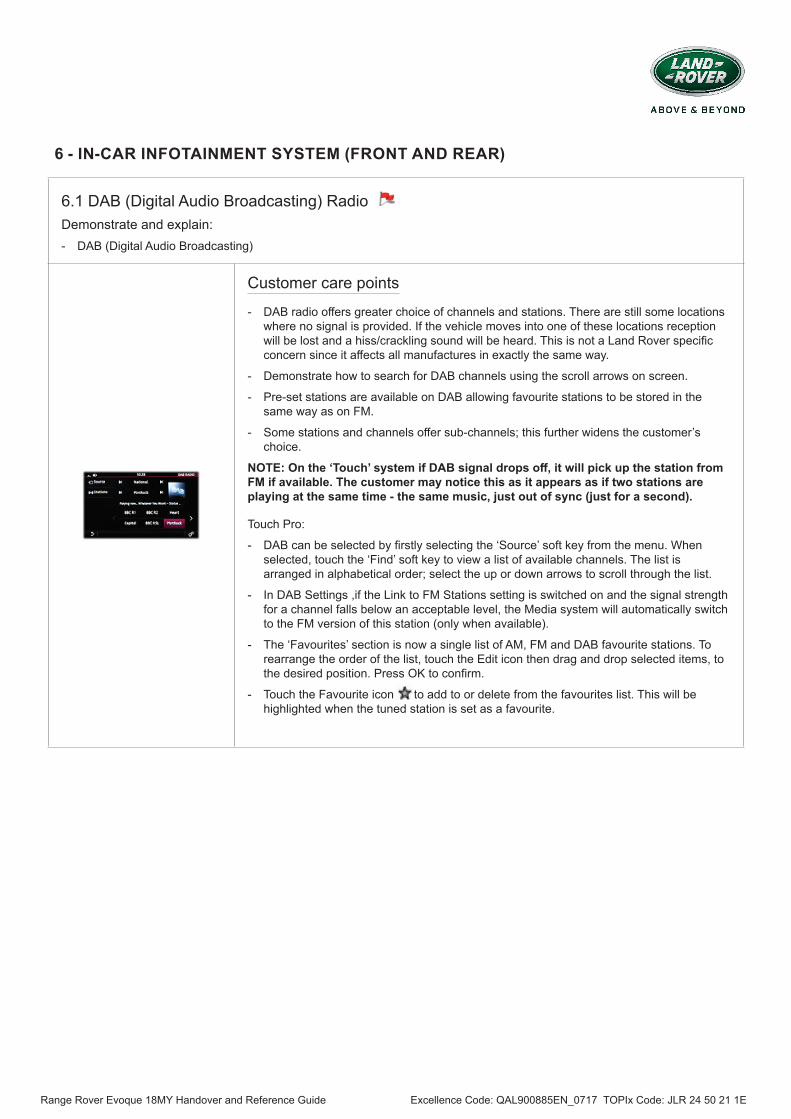
6.1 DAB (Digital Audio Broadcasting) Radio Demonstrate and explain: - DAB (Digital Audio Broadcasting)
Customer care points
- DAB radio offers greater choice of channels and stations. There are still some locations where no signal is provided. If the vehicle moves into one of these locations reception will be lost and a hiss/crackling sound will be heard. This is not a Land Rover specific concern since it affects all manufactures in exactly the same way.
- Demonstrate how to search for DAB channels using the scroll arrows on screen.
- Pre-set stations are available on DAB allowing favourite stations to be stored in the same way as on FM.
- Some stations and channels offer sub-channels; this further widens the customer’s choice.
NOTE: On the ‘Touch’ system if DAB signal drops off, it will pick up the station from FM if available. The customer may notice this as it appears as if two stations are playing at the same time - the same music, just out of sync (just for a second).
Touch Pro:
- DAB can be selected by firstly selecting the ‘Source’ soft key from the menu. When selected, touch the ‘Find’ soft key to view a list of available channels. The list is arranged in alphabetical order; select the up or down arrows to scroll through the list.
- In DAB Settings ,if the Link to FM Stations setting is switched on and the signal strength for a channel falls below an acceptable level, the Media system will automatically switch to the FM version of this station (only when available).
- The ‘Favourites’ section is now a single list of AM, FM and DAB favourite stations. To rearrange the order of the list, touch the Edit icon then drag and drop selected items, to the desired position. Press OK to confirm.
- Touch the Favourite icon to add to or delete from the favourites list. This will be highlighted when the tuned station is set as a favourite.

Range Rover Evoque 18MY Handover and Reference Guide Excellence Code: QAL900885EN_0717 TOPIx Code: JLR 24 50 21 1E
6.2 Media Hub Demonstrate and explain: - Media Hub
Customer care points
Touch: - Connect an iPod® and demonstrate how to navigate through the folders. Customers
familiar with iPod®s will quickly understand the menu structures, which almost mirror those used on the iPod®.
- The Media Hub allows the connection of iPod®s, USB memory sticks and MP3 players. Not all MP3 players are compatible with the system.
- There is one dedicated connection for both iPod®s and USB devices. This is located in the centre cubby box, which also contains a 3.5mm AUX port.
- Once connected the iPod®/USB device is controlled through the Touchscreen. There is no Touchscreen control for the AUX port, which requires manual adjustment of whatever device is connected.
- When connected, the iPod® or iPhone® battery will charge.
- Bluetooth® audio streaming provides wireless play and (dependent on device) music control of a Bluetooth® device using the Touchscreen and the Interactive steering wheel controls.
Touch Pro:
- The Media Hub allows the connection of iPod®s, USB memory sticks and MP3 players. Not all MP3 players are compatible with the system.
- There are two USB 3.0 ports (3 x faster charging than previous systems) which support both iPod®s and USB devices. These are located in the centre cubby box, which may also contain a HDMI/MHL socket and a micro SIM slot for data connectivity.
- Music can now be copied from a device (USB, 32GB max size) as well as a CD. Touch Pro will also rip music at two levels: If “Highest Quality” is selected, this will rip in Lossless and like InControl Touch Plus will limit the amount of albums it can store (10-15). If “Highest Quality” is deselected the system will rip at 256 kbps (Apple standard) allowing many more albums/tracks to be stored. Download time from a device is much quicker (10 seconds for one album approx.).
- Once connected the iPod®/USB device is controlled through the Touchscreen.
- When connected to the media hub via a cable, the iPod® or iPhone® battery will charge.
- Bluetooth® audio streaming provides wireless play and (dependent on device) music control of a Bluetooth® device using the Touchscreen and the Interactive steering wheel controls.
NOTE: With the ignition turned OFF, customers may access the audio system for 3 minutes due to the battery management system.
Range Rover Evoque 18MY Handover and Reference Guide Excellence Code: QAL900885EN_0717 TOPIx Code: JLR 24 50 21 1E
6.3 CD, DVD and Dual View Demonstrate and explain: - CD
- DVD
- Dual View
Customer care points
- Demonstrate how to load a CD/DVD into the player. The centre stack single slot player is used for both CDs and DVDs.
- Some CDs display additional information: Artist, Album, Track Name and Genre but this depends on how the disc has been formatted.
- 15 to 20 CDs in Lossless WAV format providing the highest possible quality can be stored on the SSD. This format is especially suited to the Meridian audio systems. If quantity is more important than quality then the discs can be loaded at 256 kbps AAC format the same as purchased downloads e.g. from iTunes. This will allow between 95-100 CDs to be stored (figures are purely estimates).
- Touch Pro brings widespread support of artist and album artwork to make browsing and selecting music more intuitive when driving. The album art view (Carousel) lets you swipe between albums to jump instantly to any point in your collection. Artwork is shown in most views where available thanks to the on-board Gracenote database (not Bluetooth® audio).
- Touch Pro introduces ‘More like this’ and ‘Queue’ which are new ways to create playlists giving you the opportunity to listen to music relevant to you at the time.
- Video can be loaded onto a USB device and viewed in the vehicle. A USB device docked in the cubby box can be used to view a video on the Touchscreen.
- The system supports MPEG1, MPEG2, WMV9, VC-1, H.264, H.263, MPEG4 ASP, RAW, VP6 and VP8 files.
- Load a DVD disc and demonstrate Dual View, set system to show DVD and Navigation at the same time. Invite customer to view both modes, care not to have a clash of heads if there are two customers in the vehicle at the same time.
- Suggest that another appointment is made to answer any questions that may arise after the customer has had the opportunity to use the system.
NOTE: Touch equipped vehicles do not feature CD, DVD or Dual View.
NOTE: Dual View not available on Convertible.

Range Rover Evoque 18MY Handover and Reference Guide Excellence Code: QAL900885EN_0717 TOPIx Code: JLR 24 50 21 1E
7 - VOICE CONTROL
7.1 Voice Control Demonstrate and explain: - Voice functions
- Voice commands
Customer care points
Touch: - To start a voice session, briefly press the voice button on the steering wheel. The
Teleprompter list will appear on the Touchscreen. To cancel a voice session, press and hold the Voice button.
NOTE: Briefly press the Voice button during a voice session, to interrupt audible feedback, then wait for the tone to sound before giving the next command.
- A teleprompter list provides feedback and available commands for each stage of the voice session.
- A voice symbol indicates that a command is available. Wait for the symbol to appear and a tone to sound before saying a command.
NOTE: As the commands are listed before the system is ready to listen, it is important to wait for the voice symbol to appear, before saying a command.

Range Rover Evoque 18MY Handover and Reference Guide Excellence Code: QAL900885EN_0717 TOPIx Code: JLR 24 50 21 1E
7.1 Voice Control (Continued)
Touch Pro: - The Voice Control system is designed to interact with the majority of the infotainment
system this includes Telephone, USB, CD/DVD, Media library, Radio and Digital tuner devices. The user can dial contacts from their phone book without the need to store Voicetags first.
- Carry out a demonstration: Direct the user to the Voice settings menu (from HOME SCREEN swipe to Extra Features then select Voice). Explain each of the screens in particular the “Tutorial” and the “Command” soft keys, showing many different ways of achieving the same functionality (select a command to get a list of alternatives/synonyms).
- On previous systems when using Voice, the correct commands must be used and a full list of commands for each system is still detailed on the Touchscreen in the voice Commands menu which will help the user in a “step-by-step” process to progress through a dialogue with the system. The new system utilises an industry benchmark voice recognition solution, stored on the systems Solid State Drive (SSD) for instant response and allows Natural speech delivery for English (UK & US) and Chinese Mandarin. More natural phrases can be used, not tied to specific terminology to carry out a specific task e.g. a shift from command and control “Radio tune frequency” to task based approach “Tune to 97.9” or with Natural language reasoning added for UK, US and Chinese (Mandarin) “Can you tune to 97.9 please”.
- Many things can impair the operation of Voice Control, speak naturally in a clear voice (don’t shout) and don’t speak too early. People often speak more slowly and shout when not understood – this actually makes things worse… Strong regional accents, passengers talking at the same time commands are given, windows/ panoramic roof open (road & wind noise) will all have an adverse effect on recognition. Users are advised to keep background noise to a minimum.
- Audible Help is available: Press Voice button and say “Help”. For help on a particular device say the device name followed by “Help” (e.g. radio, phone “help”).
- Voice Tutorial can be accessed from the Touchscreen (Extra Features, Voice, Tutorial), this will provide the customer with a series of short lessons on how to get the best out of their Voice system. This is a spoken tutorial, broadcasted through the cabin speakers.
NOTE : The voice control system has speaker adaption, so is able to continuously adapt to the user. When a new user speaks, the first four or five commands may result in an inaccurate response. The system then adapts to recognise the new user.NOTE : Voice control may not be available in all markets.NOTE: Voice Control is not available on Convertible.
NOTE: If not fitted with Voice Control, pressing the Voice button (where fitted) will mute the audio system.

Range Rover Evoque 18MY Handover and Reference Guide Excellence Code: QAL900885EN_0717 TOPIx Code: JLR 24 50 21 1E
8 - INCONTROL
8.1 Protect: ActivationRetailer to carry out: - Registration
- Connection
- Activation
Retailer care points
- Protect is a standard feature (optional in certain markets) within the Touch and Touch Pro Infotainment systems.
NOTE: The retailer must carry out the following actions before the customer takes ownership of their vehicle.
- Register the customer on the InControl Admin Website using the Vehicle Identification Number (VIN) and customer details, such as their email address and telephone number.
- The InControl Admin Website can be accessed through the Dealer Communication Portal. Once the vehicle and customer information has been entered, the Website will prompt the retailer to go to the vehicle to connect the vehicle to the account. This step can be completed now or at a later point. Ensure the vehicle is in an area with good mobile reception.
NOTE: If the retailer would like to complete the step later, they should not click Get Started.
- Cennect the vehicle to the account. Continue the next step in the InControl Admin Website and click Get Started. When prompted to do so, go to the vehicle and press the Optimised Land Rover Assistance button on the left hand side of the overhead console for ten seconds. The button will flash rapidly once it is pressed and then, after about ten seconds will start to flash more slowly, indicating that it is attempting to connect the user account. Release the button and then there will be a long flash followed by a short flash to indicate success.
- Activate the account by returning to the InControl Admin Website. Confirm the customer details and the system will automatically send the customer an activation e-mail.
- Advise the customer that they need to open the activation email and accept the Terms and Conditions to complete activation. Inform the customer that they should download the Land Rover InControl Remote Smartphone App to enjoy all the InControl Protect features (the Smartphone App is available from Apple iTunes® and Google Play).
- If the customer has their smartphone, encourage them to complete set-up on site.
NOTE: On sign-in, this app will be automatically configured with the correct vehicle settings from Land Rover’s registration system. For example, if a customer has two cars one with Premium functionality and one without, they can use the same app and it will show them the correct feature depending on which car they select. Features and functions are detailed in sections 8.3 and 8.4.
https://lrccaw.incontrol.landrover.com

Range Rover Evoque 18MY Handover and Reference Guide Excellence Code: QAL900885EN_0717 TOPIx Code: JLR 24 50 21 1E
8.2 Protect: Overhead Console ButtonsExplain: - The button operation
Customer care points
- Explain the overhead console button operation and show the customer the location of the SOS Emergency Call button and Optimised Land Rover Assistance button, showing them how to open the button flaps. To use the buttons, press and hold for two seconds. The time taken for the call to connect will depend on the level of mobile network coverage – the button will flash amber to indicate that it is attempting to connect. If it fails to connect the customer should retry.
- In the unlikely event that a customer will need roadside assistance, they can press the Optimised Land Rover Assistance button (left hand side) and will automatically be connected to a Land Rover Assistance operator who will direct the breakdown service directly to their vehicle’s precise GPS location.
In an emergency every second can count.
- If a customer is involved in an accident, Land Rover’s SOS Emergency Call will rapidly bring the emergency services to their exact location.
- This feature can be activated in two ways:
1. In the event of a crash in which the airbags are deployed, the SOS Emergency Call will be sent automatically.
2. A manual SOS Emergency Call can also be made by pressing the SOS button (right hand side) if another emergency should occur e.g. witnessing an accident or a passenger requiring attention.
- The SOS Emergency Call button and the Land Rover Assistance button should only be pressed when assistance is genuinely required.
- Advise the customer that they can view “How To…” videos online to remind themselves of how the features work. These are available at www.landrover.com/InControl.

Range Rover Evoque 18MY Handover and Reference Guide Excellence Code: QAL900885EN_0717 TOPIx Code: JLR 24 50 21 1E
8.3 Protect: InControl Remote Essentials Smartphone appDemonstrate and explain: - The InControl Remote Essentials smartphone app features using the Demo mode
Customer care points
Retailers must have a smartphone loaded with the demo app in order to guide the customer through the features/operation of the InControl Remote Smartphone App. From the landing page demonstrate how to access the various features within the application:
- Check fuel level. - Find your vehicle. - Download your journey logs for business expenses at the touch of a button. - Receive alerts as to your vehicle’s status (vehicle unlocked) allowing you to return
and secure your vehicle.
Advise customer of phone app compatibility with iPhone® 3GS and above (iOS 6 and above) and AndroidTM (AndroidTM v4.0 and above).
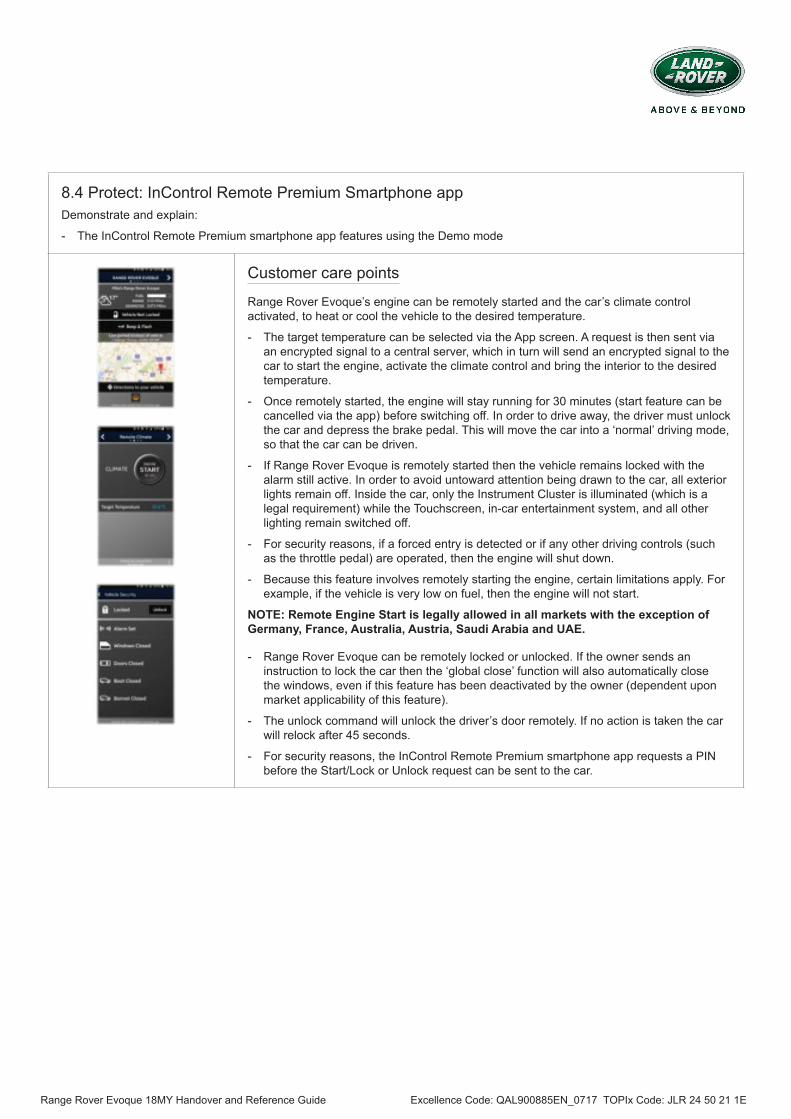
Range Rover Evoque 18MY Handover and Reference Guide Excellence Code: QAL900885EN_0717 TOPIx Code: JLR 24 50 21 1E
8.4 Protect: InControl Remote Premium Smartphone appDemonstrate and explain:
- The InControl Remote Premium smartphone app features using the Demo mode
Customer care points
Range Rover Evoque’s engine can be remotely started and the car’s climate control activated, to heat or cool the vehicle to the desired temperature.
- The target temperature can be selected via the App screen. A request is then sent via an encrypted signal to a central server, which in turn will send an encrypted signal to the car to start the engine, activate the climate control and bring the interior to the desired temperature.
- Once remotely started, the engine will stay running for 30 minutes (start feature can be cancelled via the app) before switching off. In order to drive away, the driver must unlock the car and depress the brake pedal. This will move the car into a ‘normal’ driving mode, so that the car can be driven.
- If Range Rover Evoque is remotely started then the vehicle remains locked with the alarm still active. In order to avoid untoward attention being drawn to the car, all exterior lights remain off. Inside the car, only the Instrument Cluster is illuminated (which is a legal requirement) while the Touchscreen, in-car entertainment system, and all other lighting remain switched off.
- For security reasons, if a forced entry is detected or if any other driving controls (such as the throttle pedal) are operated, then the engine will shut down.
- Because this feature involves remotely starting the engine, certain limitations apply. For example, if the vehicle is very low on fuel, then the engine will not start.
NOTE: Remote Engine Start is legally allowed in all markets with the exception of Germany, France, Australia, Austria, Saudi Arabia and UAE.
- Range Rover Evoque can be remotely locked or unlocked. If the owner sends an instruction to lock the car then the ‘global close’ function will also automatically close the windows, even if this feature has been deactivated by the owner (dependent upon market applicability of this feature).
- The unlock command will unlock the driver’s door remotely. If no action is taken the car will relock after 45 seconds.
- For security reasons, the InControl Remote Premium smartphone app requests a PIN before the Start/Lock or Unlock request can be sent to the car.

Range Rover Evoque 18MY Handover and Reference Guide Excellence Code: QAL900885EN_0717 TOPIx Code: JLR 24 50 21 1E
8.5 Secure TrackerExplain:
- Benefits of adding Secure Tracker
Customer care points
- If the customer has purchased Secure Tracker, explain that in the event of a Theft Notification, the Secure Operating Centre will alert them by phone. Once a theft is confirmed, the Secure Operating Centre will liaise with the police on the customer’s behalf, for a swift and safe recovery of the vehicle.
- Inform the customer of the Service Mode and Transport Mode features. These can be activated through the Remote Smartphone App and allow Stolen Vehicle Tracking to be temporarily disabled by the owner whilst the vehicle is being serviced or, for example, being transported on a ferry.
- Explain that if the customer forgets to activate Service Mode or Transport mode in these situations, then it is likely that a false Theft Notification will be triggered. Similarly, it is important to remember to deactivate Service Mode and Transport Mode once they are no longer required.
8.6 Wi-Fi HotspotExplain:
- Benefits of adding Wi-Fi Hotspot
Customer care points
- If Wi-Fi Hotspot has been purchased, explain that when there is a 4G mobile network coverage, Wi-Fi Hotspot will allow up to eight devices to read emails, browse the internet and download content simultaneously.
- If Wi-Fi Hotspot has been purchased, advise the customer that they will need to obtain an additional SIM card from their mobile service provider. The customer should contact their mobile network provider and ask what steps are necessary to activate the new SIM as these may differ by network.
- Touch:
- Show the driver the SIM card slot and explain how the SIM card is installed.
- Explain that the Wi-Fi set up is completed by using the Wi-Fi Settings, found in the Extra Features menu on the vehicle Touchscreen. This allows the customer to enable / disable the Wi-Fi network and data roaming. The network ID and password will also be displayed here.
- Touch Pro:
- Show the driver the SIM card slot (centre cubby box) and explain how the SIM card is installed.
- Explain that the Wi-Fi set-up is completed by using the Wi-Fi Settings, found in the Settings menu on the vehicle Touchscreen. This allows the customer to enable/disable the Wi-Fi network and data roaming. The network ID and password will also be displayed here.
NOTE: For more details on SIM card installation please refer to section 9 Appendix.

Range Rover Evoque 18MY Handover and Reference Guide Excellence Code: QAL900885EN_0717 TOPIx Code: JLR 24 50 21 1E
8.7 InControl Apps Explain and demonstrate: - Benefits of adding InControl Apps
Customer care points
NOTE: Ensure that if the customer has purchased the InControl Apps feature they have downloaded the InControl launcher app on to their smartphone prior to handover.
- InControl Apps brings the convenience of smartphone apps into the vehicle. By connecting a smartphone with a USB cable to the USB slot and via Bluetooth® (for music streaming apps), apps optimised for in-vehicle use will function on the vehicle’s Touchscreen.
- The smartphone will be charged through the USB cable.
- InControl Apps is supported by Apple iPhone® 5 onwards running iOS7 and Android phones running v4.0 (also known as ‘Ice Cream Sandwich’) onwards.
- A variety of approved vehicle-optimised apps, such as Contacts, Maps, Calendar and Music Player, will be available, with third party vehicle-optimised apps being released over time to ensure a continually fresh and relevant user experience.
NOTE: To establish a connection to the vehicle, the smartphone must be unlocked and the InControl launcher app activated. In the interests of safety, this action should be carried out whilst the vehicle is stationary.
NOTE: App usage may incur data charges on the smartphone.
8.8 Connect Pro Explain and demonstrate: - The benefits of adding InControl Connect Pro
Customer care points
- InControl Connect Pro brings the following connected services and features which are included as part of Pro Services:
- Real Time Traffic Flow, Fuel Price Service, Parking Service, Online Search, Satellite View, Street View, Online Routing, Cloud Sync, Sharing of ETA and places.
- Route Planner & Portal; a dedicated Route Planner App for Android and iOS makes it easy to manage destinations (new or favourites) and routes, as well as literally door-to-door navigation. A web portal also allows destinations and places of interest to be pre-planned and sent to your vehicle.
- Pro Services – Live; Live Apps are fully integrated into the Touch Pro system (stored on the vehicle not a phone) and in tune with the vehicle’s various on-board sensors and systems.
- Apps are downloaded and installed (or updated) to the Touch Pro system via the Live Cloud server. Initially a small selection of vehicle-optimised Live Apps will be available (e.g. Weather, Flight Tracker, News) which will grow over time.

Range Rover Evoque 18MY Handover and Reference Guide Excellence Code: QAL900885EN_0717 TOPIx Code: JLR 24 50 21 1E
9 - APPENDIX
9.1 SIM Card Installation Demonstrate and explain: - How to correctly install a SIM card
WHY IS A SIM CARD REQUIRED?
For Touch Pro vehicles
- When fitted with the Connect Pro pack features such as Wi-Fi Hotspot and Pro Services (including Live Apps where available). This requires installation of a SIM card with a suitable data contract.
For Touch vehicles
- When fitted with the Connect pack only the Wi-Fi Hotspot feature is available. This requires installation of a SIM card with a suitable data contract.
HOW IS THE SIM CARD PROVIDED TO THE CUSTOMER?
- Selected markets (US/Canada/China) have the Data Plan Pro feature which offers a trial data plan that is already included in the vehicle instead of the customer supplying their own. For more information on how this feature is provided, please refer to in market documentation and training.
- For Rest of World markets the customer should supply their own SIM card with a suitable data contract. You can advise our customers to purchase a SIM card with a suitable data contract from a reputable mobile network provider in the market. Many mobile network providers can supply an extra SIM card that is linked to an existing contract for single billing.
WHAT TYPE OF SIM CARD SHOULD BE USED?
- For Touch and Touch Pro / Touch Pro vehicles, the SIM card should be a Micro SIM (3FF size code) with a suitable data contract. Adapters for ‘Nano SIMS’ to fit a Micro SIM slot should not be used. For Touch / Touch Plus equipped vehicles built before 18MY with Wi-Fi Hotspot functionality, a Standard SIM (1FF size code) is required.
NOTE: These SIMs should be unlocked before use.WHERE IS THE SIM INSERTED IN THE VEHICLE, AND HOW IS IT INSERTED?
- The SIM card is inserted into the slot marked with “SIM” or “MICRO SIM” in the centre console cubby box.
- Make sure that the SIM card is fully inserted with the gold connectors facing upwards. When the SIM card is correctly inserted, it should not be sticking out from the slot.
For Touch / Touch Pro vehicles (note: SIM Card position)
Touch Touch Pro

Range Rover Evoque 18MY Handover and Reference Guide Excellence Code: QAL900885EN_0717 TOPIx Code: JLR 24 50 21 1E
9.1 SIM Card Installation (Continued)
- To remove a SIM card, gently push in the end of the SIM card and release. Do not use tweezers or other items to prise the SIM from the slot.
Touch Touch Pro
- When a vehicle is returned to the retailer for resale, make sure to check the SIM card slot is empty and if required remove the SIM card before use.
WHAT IS A SUITABLE DATA CONTRACT?
- It will vary significantly based on the features used, the frequency of use and the length of the journeys. As a very rough guide, typical usage consumes in the region of 100-500 MB of data per month. These features use the greatest amount of data in the following order:
1. Wi-Fi Hotspot2. Satellite Imagery – part of Pro Services3. Street Level Imagery* - part of Pro Services4. Real Time Traffic Information – part of Pro Services5. Live Apps* - part of Pro Services* denotes features that are dependent on market availability. All other features consume far less data of approximately the same amount. Further examples are provided below:
Feature Data Consumption (per minute /event)
Data Consumption (per hour)
Streaming Music 500KB/minute 40MB/hour1 Social Media Post (with photo) 500KBStreaming Video (standard resolution) 4MB/minute 240MBStreaming Video (HD resolution) 15MB/minute 900MB1 Email (no attachment) 35KB1 Email (with attachment) 300KB1 hour web browsing 15MB 15MB
- Data usage can be limited to a specific number of megabytes per month and the customer can monitor the amount of data consumed. Go to Settings > All settings > Features > Connectivity > Mobile settings
- For vehicle/infotainment specific instructions on how to enable mobile data in the vehicle, please refer to the CONNECTIVITY section of the owner handbook or Land Rover owner handbook website: http://www.ownerinfo.landrover.com
Range Rover Evoque 18MY Handover and Reference Guide Excellence Code: QAL900885EN_0717 TOPIx Code: JLR 24 50 21 1E
At the ‘Point of Order’ always . . . - Set realistic expectations as to likely delivery time frame and date. Advise all appropriate personnel of the time frame,
periodically contacting the customer to reconfirm. Advise staff members promptly if there is a change.
- Advise the customer that a comprehensive new-vehicle handover will take approximately 1.5 to 2 hours and ensure that they can commit to this time or offer an alternative. If they are unable to set aside the full time, be clear that they must reschedule the delivery. Be courteous but firm.
- Be sure to request and record all vehicle personalisation preferences using the Customer Personalisation Record, this will ensure that the vehicle will be properly programmed for handover.
Between Sale and Delivery always . . . - Track the order, check the delivery date commitment and reconfirm with the customer.
- Complete the Customer Personalisation Record and record customer preferences for the available settings.
Just before Delivery always . . . - Schedule the vehicle for PDI, personalisation setup, accessory installation, ensure fuel tank is full and to check all details are
correct. Check all when complete.
- The day before delivery, reconfirm delivery arrangements with the customer.
On the day of Delivery always . . . - Set time aside prior to the customer appointment/delivery. Be organised.
- Check the vehicle for general condition, cleanliness, accessories and personalisation preferences.
- Adapt the handover to the time available if the customer is unable to commit to the time scheduled.
- Complete the purchase and finance documents, and sign.
For a more memorable experience, cover the vehicle alongside a welcome board displaying the customer’s name. Take a photo of the key handover. Place a small gift inside the car;
Land Rover memento, flowers, favourite CD/DVD.
- Introduce the customer to the Owner Literature Pack:
- Owner’s Handbook, all applicable supplementary manuals and Service Portfolio
- New-Vehicle Warranty, Corrosion Perforation Warranty, Roadside Assistance
- Service interval requirements
- Introduce the customer to service personnel. If direct introductions are not possible, give the customer a printed sheet providing contact details of the key service personnel.
- If time is short, prioritise the handover feature explanations. Schedule a follow-up appointment to complete and cover the remaining items.
After Delivery . . . - The period of time just after delivery is when most customers have the most questions regarding the operation of their new
vehicle.
- 2 to 4 days - Contact your customer and answer any questions they may have. The customer may be surveyed by Land Rover after delivery.
- 2 to 3 weeks - Now that your customer has become familiar with their new vehicle, contact them again to answer any additional questions. Do not hesitate to schedule an appointment if necessary to provide another opportunity to clarify the operation of any feature that may be unclear. The customer may again be surveyed by Land Rover several weeks after delivery.
