sectional garage door unipro snp - sunus.se · sectional garage door unipro snp assembly and...
TRANSCRIPT

SECTIONAL GARAGE DOOR UNIPRO SNP
Assembly and Operating Instructions
(EU - 2/2)
EN
DE
FR
RU
Technical descriptionAssembly and Operating Instructions
Sectional garage door UniPro SNP / PART 2
Technical documentation - go to PART 1 (EU - 1/2)
Technische BeschreibungMontage und Bedienungsanleitung
Garagensektionaltor UniPro SNP / TEIL 2
Technische Dokumentation - siehe TEIL 1 (EU - 1/2)
Descriptif techniqueNotice de Montage et de Fonctionnement
Porte de garage sectionnelle UniPro SNP / PART 2
Dossier technique - voir PART 1 (EU - 1/2)
Техническое описаниеИнструкция по монтажу и эксплуатацииГаражные секционные ворота UniPro SNP / ЧАСТЬ 2Техническая документация - смотри ЧАСТЬ 1 (EU - 1/2)
DA
FI
Teknisk beskrivelseMonterings- og betjeningsvejledning
Garage ledhejseport UniPro SNP / DEL 2
Teknisk dokumentation - se DEL 1 (EU - 1/2)
SV
Teknisk beskrivningMonterings och Funktions Instruktioner
Sektioneråd garage port UniPro SNP / DEL 2
Teknisk dokumentation - gå till DEL 1 (EU - 1/2)
Tekniset tiedotAsennus- ja käyttöohjeet
Autotallin lamellinosto-ovi UniPro SNP / OSA 2
Tekniset asiakirjat - katso OSA 1 (EU - 1/2)
– page 2
– Seite 7
– page 13
NL
HR
Technische omschrijvingMontage- en gebruikershandleiding
Sectionaal garagedeur UniPro SNP / DEEL 2
Technische documentatie - zie DEEL 1 (EU - 1/2)
Tehnički opis Instrukcija za Instalaciju i Rukovanje
Segmentna garažna vrata UniPro SNP / DIO 2 Tehnička dokumentacija - otići na 1. DIO (EU - 1/2)
– strana 44
– page 49CS
Technický popisNávod k instalaci a obsluze
Sekční garážová vrata UniPro SNP / ČÁST 2
Technická dokumentace - přejděte na ČÁST 1 (EU - 1/2)
– strana 24
– sivu 29
– side 39
NO
Teknisk beskrivelseMontasje og Brukermanual
Garasje leddport UniPro SNP / DEL 2
Teknisk dokument - se DEL 1 (EU - 1/2)
SK
Technický popisNávod na montáž a obsluhu
Garážová brána segmentová UniPro SNP / ČASŤ 2
Technická dokumentácia - prejdite na ČASŤ 1 (EU - 1/2)
– strana 55
– side 60
IT
Descrizione tecnica Istruzioni per l’Installazione e l’Uso
Porta sezionale per garage UniPro SNP / DEL 2
Documentazione tecnica - vedi PARTE 1 (EU - 1/2)
– pagina 65
– side 34
– страница 18
Assembly and Operating Instructions – Sectional garage door UniPro SNP
2
EN
IIiO/BS/SNP/05/2017/ID-95695 Technical description
TABLE OF CONTENTS:1. General information ........................................................................................ 22. Terms and definitions acc. to standard .......................................................... 23. Description of symbols .................................................................................... 24. Assembly recommendations ........................................................................... 35. Required assembly conditions ........................................................................ 36. Installation instructions .................................................................................... 37. Additional requirements ................................................................................. 48. Environmental protection ................................................................................ 49. Door disassembly ............................................................................................ 410. Operating and maintenance instruction ........................................................ 411. Important information and notes .................................................................... 412. Information regarding forbidden door usage ............................................... 413. Door operating instruction .............................................................................. 414. The range of environmental conditions, for which the door has been designed .......................................................................................................... 515. Routine maintenance instruction ..................................................................... 516. Restraints in door operation ............................................................................ 517. Frequently Asked Questions ........................................................................... 6
[A000001] 1. GENERAL INFORMATION The door can be installed and adjusted by at least a COMPETENT person.[C000306] Sectional garage door is intended for installation in single family housing. [B000001] The door is insulated, and is designed to be installed from inside the premises.[B000095] The present Instruction is a document intended for Professional In-stallers or Competent persons. It contains necessary information to ensure safe door installation.The door and its separate parts should be installed according to Assembly and Operating Instruction provided by the manufacturer. Only original fittings supplied together with the door must be used to install the door.Please be familiar with all instructions prior to start with assembly. Please read carefully the present instruction and follow its recommendations. The correct door operation depends from its proper installation to a considerable extend.The Instruction includes the assembly of the door with standard equipment and optional equipment elements. The scope of stand-ard and optional equipment is described in sales offer.[B000024] The door packaging is intended solely to secure the door during transportation. Packaged doors must not be exposed to adverse impact of weather conditions. They must be stored on hardened, dry surface (flat level surface which does not change its properties under internal factors), in enclosed, dry and airy rooms, in the place where they will not be exposed to any other external factors that may cause deterioration of stored doors, components and packaging. It is forbidden to store and warehouse the doors in wet rooms and rooms with fumes harmful for painted and zinc plated coatings.[B000025] Airtight foil packaging must be unsealed when storing the doors to avoid adverse change of microclimate inside the packaging, which can result in the damage of painted and zinc plated coating.[B000002] The selection of fastening elements is determined by the type and structure of the construction material to which the door will be fastened essen-tially. Expansion anchors supplied with the door normally are designed to an-chor in solid materials with compacted structure (e.g. concrete, solid brick). If the doors are mounted to another materials, it is necessary to change the fastening elements for those suitable to anchor in the materials of which the walls and ceiling are made. For this purpose, the installer must follow the guidelines for selection of fastening elements supplied by their manufacturer. [A000003] The Instruction applies to several types of doors. Reference draw-ings may vary in execution details. If it is essential, these details are shown in separate drawings. The Instruction contains all essential information that guarantees safe assembly, operation and proper maintenance of the door.During the assembly all health and safety regulations pertaining to assembly and cutting operations as well as power tools, correspondent to assembly meth-ods, must be strictly observed. The norms, regulations and applicable building documentation should also be considered. During repair works, the door must be protected against plaster, cement and gypsum which may cause stains.Assembly and Operating Instruction is a document intended for the door owner. Once the assembly works are completed, the instruction should be handed over to the owner. The instruction is to be kept in a safe place and protected against damage.If elements supplied by the third party manufacturers and suppliers are used during the assembly, the person assembling the door is considered to be its producer according to EN 13241-1.
Tampering and removing of any door parts is strictly prohibited. It may result in the elements responsible for safe operation being damaged. Unauthorized replacing of door sub-assemblies is strictly prohibited. [A000051] It is not allowed to make any modifications (e.g., shortening) of sealing used in door.[B000096] When installing the drive unit, recommendations of the door manu-facturer, manufacturer of the drive unit and the accessories should be observed. To connect the drive unit, only original subassemblies must be used. [B000003] It is prohibited to obstruct the door movement area. The door opens vertically upwards. Therefore, no obstacles may be located in the way of door opening or closing. It is necessary to ensure that during door movement no persons, especially children, or objects are on its way.
[A000037] 2. TERMS AND DEFINITIONS ACC. TO STANDARDExplanation of warning signs used in the Instruction:
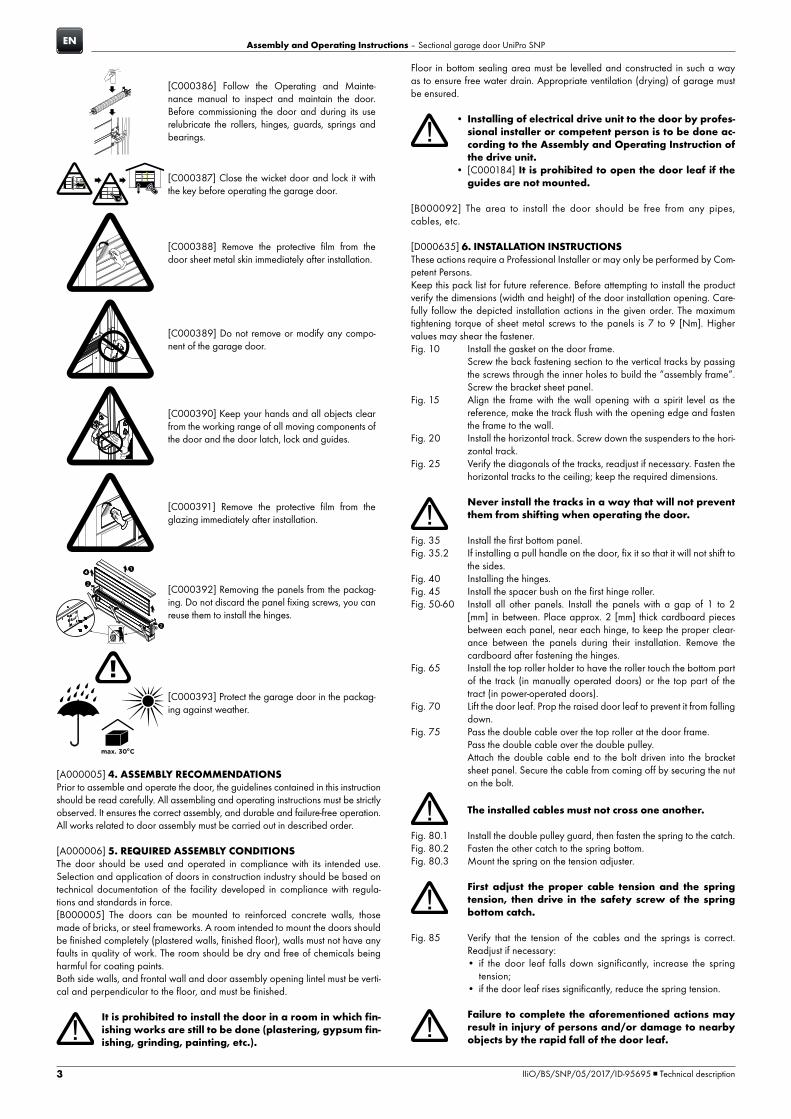
Attention! - warning sign used to denote the attention.
Information - warning sign used to denote important information.
Reference mark - sign referring to a given paragraph in the As-sembly Instruction.
Professional Installer - competent person or organization, offering to third par-ties door installation services, including its improvement (according to EN 12635).Competent person - an appropriately trained person with qualification re-sulting from knowledge and practical experience, and provided with necessary instruction to enable the required installation to be carried out correctly and safely (acc. to EN 12635).Owner - a natural or legal person who has legal title to administer the door, and takes responsibility for its operation and use (acc. to EN 12635). Report Book - a book containing the main data about the door, and which has a specially designated places for records about inspections, tests, maintenance and various repairing works or modifications to the door (according to EN 12635).
[A000052] 3. DESCRIPTION OF SYMBOLS
- option - manually operated - automatic
[A000080]
the indoors, or inner side of the door
the outdoors, or outer side of the door
correct position or action
incorrect position or action
supervision
factory settings
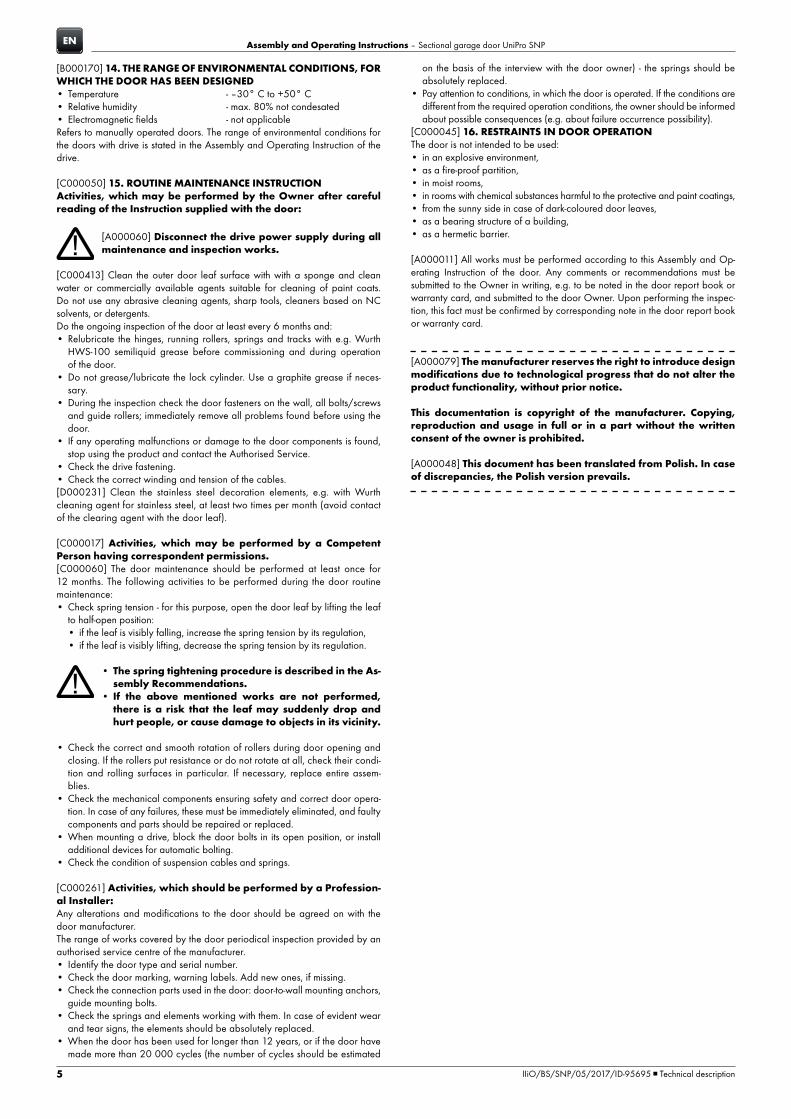
[C000383] Do not stay, pass, run or drive under the door when it is in motion. Before opening or closing, ensure that no persons, and especially children or any objects, are in the path of the moving garage door. No persons, objects or vehicles are allowed to stay within the clearance of the open door.
[C000384] Do not use the garage door to lift any objects or people.
[C000385] Do not use the door when inoperable.
Assembly and Operating Instructions – Sectional garage door UniPro SNP
3
EN
IIiO/BS/SNP/05/2017/ID-95695 Technical description
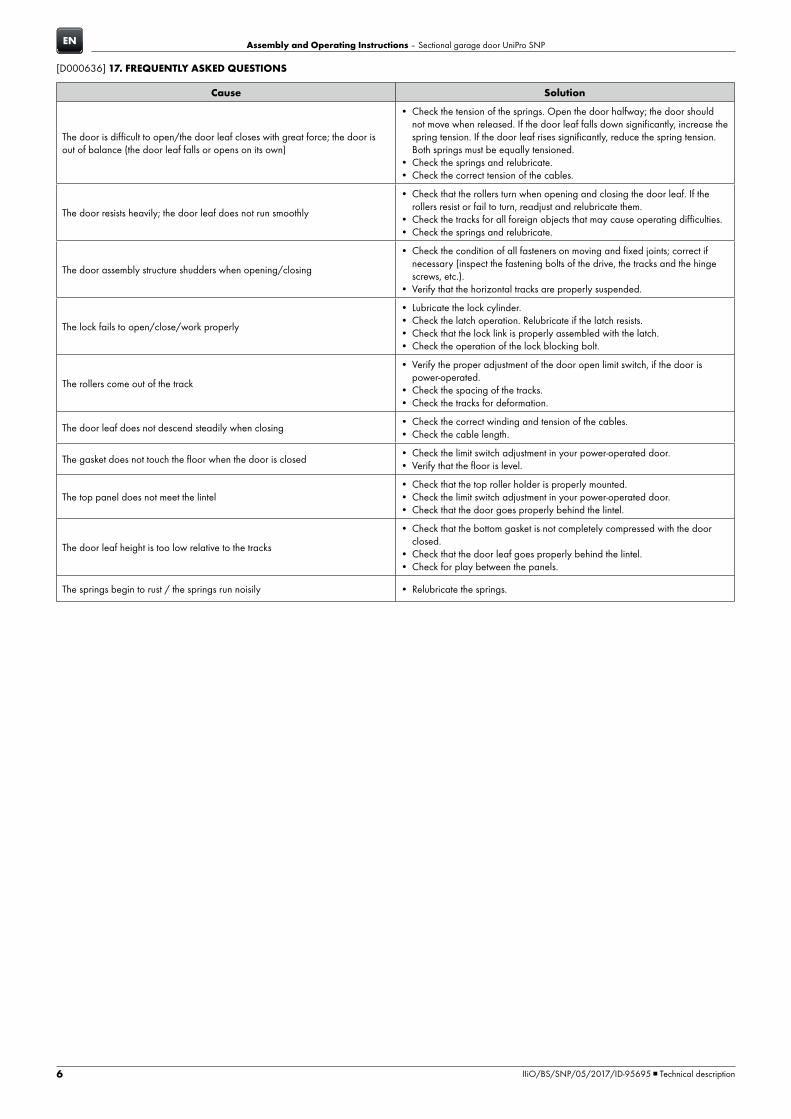
[C000386] Follow the Operating and Mainte-nance manual to inspect and maintain the door. Before commissioning the door and during its use relubricate the rollers, hinges, guards, springs and bearings.
[C000387] Close the wicket door and lock it with the key before operating the garage door.
[C000388] Remove the protective film from the door sheet metal skin immediately after installation.
[C000389] Do not remove or modify any compo-nent of the garage door.
[C000390] Keep your hands and all objects clear from the working range of all moving components of the door and the door latch, lock and guides.
[C000391] Remove the protective film from the glazing immediately after installation.
[C000392] Removing the panels from the packag-ing. Do not discard the panel fixing screws, you can reuse them to install the hinges.
[C000393] Protect the garage door in the packag-ing against weather.
[A000005] 4. ASSEMBLY RECOMMENDATIONSPrior to assemble and operate the door, the guidelines contained in this instruction should be read carefully. All assembling and operating instructions must be strictly observed. It ensures the correct assembly, and durable and failure-free operation. All works related to door assembly must be carried out in described order.
[A000006] 5. REQUIRED ASSEMBLY CONDITIONSThe door should be used and operated in compliance with its intended use. Selection and application of doors in construction industry should be based on technical documentation of the facility developed in compliance with regula-tions and standards in force.[B000005] The doors can be mounted to reinforced concrete walls, those made of bricks, or steel frameworks. A room intended to mount the doors should be finished completely (plastered walls, finished floor), walls must not have any faults in quality of work. The room should be dry and free of chemicals being harmful for coating paints.Both side walls, and frontal wall and door assembly opening lintel must be verti-cal and perpendicular to the floor, and must be finished.
It is prohibited to install the door in a room in which fin-ishing works are still to be done (plastering, gypsum fin-ishing, grinding, painting, etc.).
Floor in bottom sealing area must be levelled and constructed in such a way as to ensure free water drain. Appropriate ventilation (drying) of garage must be ensured.
• Installing of electrical drive unit to the door by profes-sional installer or competent person is to be done ac-cording to the Assembly and Operating Instruction of the drive unit.
• [C000184] It is prohibited to open the door leaf if the guides are not mounted.
[B000092] The area to install the door should be free from any pipes, cables, etc.
[D000635] 6. INSTALLATION INSTRUCTIONSThese actions require a Professional Installer or may only be performed by Com-petent Persons. Keep this pack list for future reference. Before attempting to install the product verify the dimensions (width and height) of the door installation opening. Care-fully follow the depicted installation actions in the given order. The maximum tightening torque of sheet metal screws to the panels is 7 to 9 [Nm]. Higher values may shear the fastener.Fig. 10 Install the gasket on the door frame. Screw the back fastening section to the vertical tracks by passing
the screws through the inner holes to build the “assembly frame”. Screw the bracket sheet panel.
Fig. 15 Align the frame with the wall opening with a spirit level as the reference, make the track flush with the opening edge and fasten the frame to the wall.
Fig. 20 Install the horizontal track. Screw down the suspenders to the hori-zontal track.
Fig. 25 Verify the diagonals of the tracks, readjust if necessary. Fasten the horizontal tracks to the ceiling; keep the required dimensions.
Never install the tracks in a way that will not prevent them from shifting when operating the door.
Fig. 35 Install the first bottom panel. Fig. 35.2 If installing a pull handle on the door, fix it so that it will not shift to
the sides.Fig. 40 Installing the hinges.Fig. 45 Install the spacer bush on the first hinge roller. Fig. 50-60 Install all other panels. Install the panels with a gap of 1 to 2
[mm] in between. Place approx. 2 [mm] thick cardboard pieces between each panel, near each hinge, to keep the proper clear-ance between the panels during their installation. Remove the cardboard after fastening the hinges.
Fig. 65 Install the top roller holder to have the roller touch the bottom part of the track (in manually operated doors) or the top part of the tract (in power-operated doors).
Fig. 70 Lift the door leaf. Prop the raised door leaf to prevent it from falling down.
Fig. 75 Pass the double cable over the top roller at the door frame. Pass the double cable over the double pulley. Attach the double cable end to the bolt driven into the bracket
sheet panel. Secure the cable from coming off by securing the nut on the bolt.
The installed cables must not cross one another.
Fig. 80.1 Install the double pulley guard, then fasten the spring to the catch.Fig. 80.2 Fasten the other catch to the spring bottom.Fig. 80.3 Mount the spring on the tension adjuster.
First adjust the proper cable tension and the spring tension, then drive in the safety screw of the spring bottom catch.
Fig. 85 Verify that the tension of the cables and the springs is correct. Readjust if necessary:• if the door leaf falls down significantly, increase the spring
tension;• if the door leaf rises significantly, reduce the spring tension.
Failure to complete the aforementioned actions may result in injury of persons and/or damage to nearby objects by the rapid fall of the door leaf.

Assembly and Operating Instructions – Sectional garage door UniPro SNP
4
EN
IIiO/BS/SNP/05/2017/ID-95695 Technical description
Fig. 90.4 Attach the latch lock to the latch assembled on the panel and mark the latch engagement holes in the door frame. Drill the latch holes with a Ø 8.5 [mm] bit.
Fig. 90.5 Screw down the latch link lightly on the lock side to permit free latch movement. Fasten the latch side assembly firmly. Glue the tube bushes to the panel. The bushes can be bolted if necessary.
Fig. 95 If the door is manually operated, you can install a cord for easier door closing.
Fig. 100 Install the door lift handle.Fig. 105 If a drive unit is installed, lock the latch open.Fig. 110 Power-operated doors can have the drive link trimmed short to
achieve the full clearance (Hj = Ho - 60).Fig. 115 Before commissioning the door, lubricate the hinges, running roll-
ers and springs with e.g. Wurth HWS-100 semiliquid grease.
[A000007] 7. ADDITIONAL REQUIREMENTSAfter the installation is completed, it must be checked that the door is fitted with CE data plate according to the standard. If this plate is missing, fit the door with such a data plate. After verifying the correct operation of the door, the Assembly and Operating Instruction and door report book, if required, should be handed over to the Owner. [A000015] Activities, which may be performed by the Owner after careful reading of the Assembly and Operating Instruction supplied with the door.
When the door is installed, the protective foil should be immediately removed from the door leaf. Failure to do so will result in a strong adherence of the foil to the door sheet metal under the influence of temperature and sun rays. This will make it impossible to remove the foil and may lead to coating deterioration.
[A000008] 8. ENVIRONMENTAL PROTECTIONPackagingElements of packaging (cardboard, plastics, etc.) are classified as waste suitable for recycling. Follow local legislation for specific material before throwing it away. ScrappingThe product consists of many different materials. Most of the materials used are suitable for recycling. Sort it before disposal, and then deliver to refuse collec-tion and disposal area for recycling.
Follow local legislation for specific material before scrapping.
[A000009] Remember! Recycling of packaging materials saves natural resources and reduces the amount of wastes.
[A000118] This equipment is labelled according to the Waste Electrical and Electronic Equipment Directive 2012/19/EC.This labelling states that once used, the equipment must not be disposed of with household waste. The equipment user must bring the waste equipment to author-ised WEEE collectors. The collectors, including local collection points, retailers and community units form an appropriate system for handing over the WEEE.Proper disposal of waste electrical and electronic equipment helps avoiding the consequences to human health and environment cause by hazardous compo-nents and improper landfilling or processing of waste equipment. [C000033] 9. DOOR DISASSEMBLY • Open the door and secure the leaf against falling down.• Release the tension of door springs. • Carefully close the leaf.• Perform the assembly procedure in the reverse order.
[A000029] 10. OPERATING AND MAINTENANCE INSTRUCTIONThe Assembly and Operating Instruction is a documentation intended for the door owner.Please read carefully this instruction and follow its recommendations. The instruction includes information ensuring safe usage, operation and maintenance of the door.
[A000010] 11. IMPORTANT INFORMATION AND NOTES
• Please carefully keep this instruction.• All operating activities must be performed according to the door
Assembly and Operating Instruction.• Occupational health and safety regulations and recommendations
included in the Assembly and Operating Instruction must be ob-served during all works related to the door inspections and repairs.
• It is prohibited to change any door components or parts.
[B000006] 12. INFORMATION REGARDING FORBIDDEN DOOR USAGE
• It is forbidden to open the door if the guides are not mounted.• It is forbidden to obstruct the door movement area. When operat-
ing the door, make sure there are no people, especially children, or objects within the door movement area.
• It is forbidden for people to stay, or leave cars or other objects in a clearance of the opened door.
• It is prohibited to stay, walk, run or drive under the moving door.• It is prohibited to use the door leaf to lift objects or people.• Do not allow children to play with equipment. Transmitters for
door operation must be kept away from children. Transmitters should be kept in dry, moisture-free places.
• It is forbidden to modify or remove any door components! This may cause damage to parts ensuring the door safe usage.
• [C000260] It is forbidden to install any additional infill or thermal insulation in the door leaf without the manufacturer’s written con-sent. Springs are precisely adjusted to the door leaf weight, and all additionally mounted elements may cause its overload and incorrect door operation.
• [B000013] When the door is installed, the protective foil should be immediately removed from the door leaf. Failure to do so will result in a strong adherence of the foil to the door sheet metal un-der the influence of sun rays. This will make it impossible to remove the foil and may lead to paint coating deterioration.
• Doors with electric drive must be opened according to drive As-sembly and Operating Instruction.
• [B000008] The door should be protected against harmful agents (including corrosive agents, like acids, alkali, salts), which may damage the paint coating and metal. The door should also be protected against plaster, paints and solvents which may cause stains, during finishing or repairing the room.
[C000011] 13. DOOR OPERATING INSTRUCTION
• It is prohibited to obstruct the door movement area. The door opens vertically upwards. Therefore, no obstacles may be located in the way of door opening or closing. It is necessary to ensure that during door movement no persons, especially chil-dren, or objects are on its way.Caution! Risk of accident.
• [A000053] It is prohibited to keep using the defective door. It is particularly forbidden to operate the door, if there is any visible damage of counterbalancing springs, mounting elements or any other parts responsible for safe door operation.
• [A000062] Any self-retained repairs of the door are prohibited.• [B000103] IMPORTANT! Damage due to temperature
difference.Difference between external (ambient) temperature and internal (premises) temperature may lead to deformation of the door ele-ments (bimetallic effect). In this case door operation may result in its damage.
• [B000007] It is prohibited to keep using the door, if any faults in its operation, or damage of its components are found. In this case, immediately put the door out of service, and contact the author-ized service centre.
[C000012] Check the proper mounting of the door according to As-sembly and Operating Instruction before its first opening.The door is mounted properly when its leaf/curtain moves smoothly and its op-eration is easy.[B000104] Manually-operated garage doors should be opened and closed smoothly, without sharp jerks that negatively influence its durability and safe op-eration.[C000399] Opening - the door should be operated manually, using the rel-evant outside or inside handles/ pulls. Improper operation of the door may cause accident.Closing - the door should be closed manually by pushing it vigorously using the handle. As a result, the door self-locking bolts will latch on proper door frame elements.Door bolting (lock) - as standard the door is equipped with a lock, which may be bolted by turning the key counter clockwise 360° (if the door does not feature a drive unit).Door unbolting (lock) - use the key or blocking bolt:• from outside - turn the key 360° clockwise,• from inside - move upwards the blocking bolt, located next to the lock insert,
and simultaneously turn the handle to the right.
Assembly and Operating Instructions – Sectional garage door UniPro SNP
5
EN
IIiO/BS/SNP/05/2017/ID-95695 Technical description
[B000170] 14. THE RANGE OF ENVIRONMENTAL CONDITIONS, FOR WHICH THE DOOR HAS BEEN DESIGNED • Temperature - –30° C to +50° C• Relative humidity - max. 80% not condesated• Electromagnetic fields - not applicableRefers to manually operated doors. The range of environmental conditions for the doors with drive is stated in the Assembly and Operating Instruction of the drive.
[C000050] 15. ROUTINE MAINTENANCE INSTRUCTIONActivities, which may be performed by the Owner after careful reading of the Instruction supplied with the door:
[A000060] Disconnect the drive power supply during all maintenance and inspection works.
[C000413] Clean the outer door leaf surface with with a sponge and clean water or commercially available agents suitable for cleaning of paint coats. Do not use any abrasive cleaning agents, sharp tools, cleaners based on NC solvents, or detergents.Do the ongoing inspection of the door at least every 6 months and: • Relubricate the hinges, running rollers, springs and tracks with e.g. Wurth
HWS-100 semiliquid grease before commissioning and during operation of the door.
• Do not grease/lubricate the lock cylinder. Use a graphite grease if neces-sary.
• During the inspection check the door fasteners on the wall, all bolts/screws and guide rollers; immediately remove all problems found before using the door.
• If any operating malfunctions or damage to the door components is found, stop using the product and contact the Authorised Service.
• Check the drive fastening.• Check the correct winding and tension of the cables.[D000231] Clean the stainless steel decoration elements, e.g. with Wurth cleaning agent for stainless steel, at least two times per month (avoid contact of the clearing agent with the door leaf).
[C000017] Activities, which may be performed by a Competent Person having correspondent permissions.[C000060] The door maintenance should be performed at least once for 12 months. The following activities to be performed during the door routine maintenance:• Check spring tension - for this purpose, open the door leaf by lifting the leaf
to half-open position:• if the leaf is visibly falling, increase the spring tension by its regulation,• if the leaf is visibly lifting, decrease the spring tension by its regulation.
• The spring tightening procedure is described in the As-sembly Recommendations.
• If the above mentioned works are not performed, there is a risk that the leaf may suddenly drop and hurt people, or cause damage to objects in its vicinity.
• Check the correct and smooth rotation of rollers during door opening and closing. If the rollers put resistance or do not rotate at all, check their condi-tion and rolling surfaces in particular. If necessary, replace entire assem-blies.
• Check the mechanical components ensuring safety and correct door opera-tion. In case of any failures, these must be immediately eliminated, and faulty components and parts should be repaired or replaced.
• When mounting a drive, block the door bolts in its open position, or install additional devices for automatic bolting.
• Check the condition of suspension cables and springs.
[C000261] Activities, which should be performed by a Profession-al Installer:Any alterations and modifications to the door should be agreed on with the door manufacturer.The range of works covered by the door periodical inspection provided by an authorised service centre of the manufacturer. • Identify the door type and serial number.• Check the door marking, warning labels. Add new ones, if missing.• Check the connection parts used in the door: door-to-wall mounting anchors,
guide mounting bolts.• Check the springs and elements working with them. In case of evident wear
and tear signs, the elements should be absolutely replaced.• When the door has been used for longer than 12 years, or if the door have
made more than 20 000 cycles (the number of cycles should be estimated
on the basis of the interview with the door owner) - the springs should be absolutely replaced.
• Pay attention to conditions, in which the door is operated. If the conditions are different from the required operation conditions, the owner should be informed about possible consequences (e.g. about failure occurrence possibility).
[C000045] 16. RESTRAINTS IN DOOR OPERATIONThe door is not intended to be used:• in an explosive environment,• as a fire-proof partition,• in moist rooms,• in rooms with chemical substances harmful to the protective and paint coatings,• from the sunny side in case of dark-coloured door leaves,• as a bearing structure of a building,• as a hermetic barrier.
[A000011] All works must be performed according to this Assembly and Op-erating Instruction of the door. Any comments or recommendations must be submitted to the Owner in writing, e.g. to be noted in the door report book or warranty card, and submitted to the door Owner. Upon performing the inspec-tion, this fact must be confirmed by corresponding note in the door report book or warranty card.
[A000079] The manufacturer reserves the right to introduce design modifications due to technological progress that do not alter the product functionality, without prior notice.
This documentation is copyright of the manufacturer. Copying, reproduction and usage in full or in a part without the written consent of the owner is prohibited.
[A000048] This document has been translated from Polish. In case of discrepancies, the Polish version prevails.
Assembly and Operating Instructions – Sectional garage door UniPro SNP
6
EN
IIiO/BS/SNP/05/2017/ID-95695 Technical description
[D000636] 17. FREQUENTLY ASKED QUESTIONS
Cause Solution
The door is difficult to open/the door leaf closes with great force; the door is out of balance (the door leaf falls or opens on its own)
• Check the tension of the springs. Open the door halfway; the door should not move when released. If the door leaf falls down significantly, increase the spring tension. If the door leaf rises significantly, reduce the spring tension. Both springs must be equally tensioned.
• Check the springs and relubricate. • Check the correct tension of the cables.
The door resists heavily; the door leaf does not run smoothly
• Check that the rollers turn when opening and closing the door leaf. If the rollers resist or fail to turn, readjust and relubricate them.
• Check the tracks for all foreign objects that may cause operating difficulties. • Check the springs and relubricate.
The door assembly structure shudders when opening/closing
• Check the condition of all fasteners on moving and fixed joints; correct if necessary (inspect the fastening bolts of the drive, the tracks and the hinge screws, etc.).
• Verify that the horizontal tracks are properly suspended.
The lock fails to open/close/work properly
• Lubricate the lock cylinder. • Check the latch operation. Relubricate if the latch resists. • Check that the lock link is properly assembled with the latch. • Check the operation of the lock blocking bolt.
The rollers come out of the track
• Verify the proper adjustment of the door open limit switch, if the door is power-operated.
• Check the spacing of the tracks. • Check the tracks for deformation.
The door leaf does not descend steadily when closing• Check the correct winding and tension of the cables. • Check the cable length.
The gasket does not touch the floor when the door is closed• Check the limit switch adjustment in your power-operated door. • Verify that the floor is level.
The top panel does not meet the lintel• Check that the top roller holder is properly mounted. • Check the limit switch adjustment in your power-operated door. • Check that the door goes properly behind the lintel.
The door leaf height is too low relative to the tracks
• Check that the bottom gasket is not completely compressed with the door closed.
• Check that the door leaf goes properly behind the lintel. • Check for play between the panels.
The springs begin to rust / the springs run noisily • Relubricate the springs.

34
SV
IIiO/BS/SNP/05/2017/ID-95695 Teknisk beskrivning
Monterings och Funktions Instruktioner – Sektioneråd garage port UniPro SNP
INNEHÅLLSFÖRTECKNING:1. Allmän information .......................................................................... 342. Termer och definitioner enligt standarden ........................................... 343. Symbolförklaring ............................................................................. 344. Monteringsanvisningar .................................................................... 355. Nödvändiga monteringsvillkor .......................................................... 356. Monteringsanvisningar .................................................................... 357. Ytterligare krav ............................................................................... 358. Miljöskydd ..................................................................................... 369. Demontering .................................................................................. 3610. Anvisningar för bruk och underhåll .................................................... 3611. Viktig information och anmärkningar ................................................. 3612. Förbjuden användning av porten ....................................................... 3613. Bruksanvisning för garageporten ....................................................... 3614. Omfattning av miljöförhållanden, för vilka porten är avsedd .................. 3615. Anvisningar för löpande underhåll ..................................................... 3616. Begränsningar för användning av garageporten ................................. 3717. Vanliga frågor ................................................................................ 38
[A000001] 1. ALLMÄN INFORMATION Montering och reglering av porten får endast utföras av en BEHÖRIG person.[C000306] Takskjutporten är avsedd för montering till enfamiljsbostäder.[B000001] Porten är en isolerad produkt och avsedd för montering från insidan.[B000095] Dessa installationsanvisningar är avsedda för professionella instal-latörer eller behöriga personer. Denna montage- och driftsinstruktion innehller uppgifter som behövs för säker installation av porten.Porten och dess enskilda komponenter skall installeras i enlighet med tillverkarens Installations-och driftsanvisningar För att installera porten bör endast originala fästelement används levererade till-sammans med porten.Före montering skall man läsa hela manualen. Läs igenom denna manual nog-grant och följ dess rekommendationer. Väl fungerande av porten är i stort sätt beroende av dess korrekta installation.Instruktionen omfattar installation av porten med standardutrust-ning och artiklar av tillvalsutrustning. Omfattning av standard- och tillvalsutrustning beskrivs i handel erbjudandet.[B000024] Portens förpackning är avsedd endast för skydd under transport. Förpackade garageportar kan inte utsättas för ogynnsamma atmosfäriska förhål-landen. De skall förvaras på en hård torr yta (ytan plan, horisontell, som ändrar inte sina egenskaper under påverkan av interna faktorer), i slutna utrymmen, torrt och luftigt, på ett ställe där de inte utsätts för sådana externa faktorer som kan orsaka försämring av lagrade portar, komponenter och förpackningar. Det är oacceptabelt att förvara och lagra portar i fuktiga utrymmen, innehållande ångor skadliga för lack och zink beläggningar.[B000025] För lagringsperioden skall lufttät folieförpackning lösas för att und-vika negativa förändringar i mikroklimatet inuti förpackningen, vilket i sin tur kan leda till skador på lack och zink beläggningar.[B000002] Typ och struktur av byggmaterial till vilket portar skall fästas avgör i stort sätt valet av fästelement. Skruvar ingående tillsammans med garageporten i standardleverans är avsedda för montering i massiva material med kompakt struktur (t.ex. betong, massivt tegel). Vid montering av portarna till andra material är det nödvändigt att byta fästelement till andra som är lämpliga för montering i de materialen av vilka väggar och tak är tillverkade. För detta ändamål måste montören följa riktlinjer för valet av fästelement tillhandahållna av tillverkaren.[A000003] Denna anvisning gäller för montering av flera typer av portar. De schematiska ritningarna kan skilja sig med avseende på detaljerna i utförandet. I nödvändiga fall visas dessa detaljer i separata ritningar.Anvisningen innehåller nödvändig information som garanterar monterings- och användningssäkerhet samt lämpligt underhåll av porten.Under installationen bör man följa säkerhetsföreskrifterna för montering, metallbe-arbetning, arbeten med elverktyg beroende på monteringsteknik, samt ta hänsyn till gällande normer, föreskrifter och relevant byggdokumentation. Vid renoveringsarbeten bör porten skyddas mot stänk av puts, cement eller gips som kan lämna fläckar.Monterings- och bruksanvisning är ett dokument som riktar sig till portens ägare. Efter avslutad montering bör den överlämnas till ägaren. Monterings- och bruks-anvisningen bör skyddas mot skador och förvaras på säker plats.Om komponenter levererade av olika tillverkare eller leverantörer utnyttjas för montering av porten, anses installatören som portens tillverkare, i enlighet med den europeiska standarden EN 13241-1.Portens konstruktionselement får inte ändras eller tas bort. Detta skulle kunna orsaka skador på de delar som garanterar portens säkra bruk. Portens kompo-nenter får inte ändras.[A000051] Det är förbjudet att göra modifikationer (t.ex. förkortning) tätningar använda i porten.[B000096] Vid montering av motordrift skall man följa tillverkarens rekommen-dationer. För att ansluta drivsystemet skall man använda endast beståndsdelar i original.[B000003] Blockera inte portens rörelseområde. Porten öppnas vertikalt. Och därför kan det inte finnas några hinder i närheten medan porten skall öppnas eller stängs. Man skall förvissa sig att det inte finns några människor, särskilt barn eller föremål under portens rörelse.
[A000037] 2. TERMER OCH DEFINITIONER ENLIGT STANDARDENFörklaring till symboler som används i manualen:
Varning! - tecken betydande uppmärksamhet.
Observera - tecken betydande värdefull information.
Hänvisning - hänvisningstecken till en viss punkt i denna manual.
Professionell installatör - behörig person eller enhet som tillhandahåller tjänster till tredje man i samband med installation av portar, inklusive deras för-bättring (enligt EN 12635).Behörig person - en person som är vederbörligen utbildad, med kvalifikationer som följer av kunskap och praktisk erfarenhet, och försedd med nödvändiga instruktioner för att möjliggöra korrekt och säker installation (enligt EN 12635).Ägare - fysisk eller juridisk person som har äganderätt att förfoga över porten och är ansvarig för dess drift och underhåll (enligt EN 12635). Rapporteringsbok - bok som innehåller väsentliga uppgifter för en bestämd port och där finns plats för anteckningar över kontroller, provningar, underhåll och reparation eller modifiering av porten.(enligt EN 12635).
[A000052] 3. SYMBOLFÖRKLARING
- valmöjlighet - manuell - automatisk
[A000080]
utrymmets interiör eller portens insida
portens omgivning eller portens utsida
korrekt läge eller åtgärd
felaktig läge eller åtgärd
kontroll
fabriksinställning
[C000383] Vistas, passera, spring eller kör inte un-der porten när den är i rörelse. Innan öppning eller stängning så försäkra dig om att inga människor, och speciellt barn eller föremål, är i vägen för gara-geporten. Inga människor, föremål eller fordon får vistas inom portens rörelseområde.
[C000384] Använd inte garageporten för att lyfta föremål eller människor.
[C000385] Använd inte porten när den inte fung-erar.
[C000386] Följ Användnings- och underhållsin-struktionerna för att kontrollera och underhålla por-ten. Smörj valsar, gångjärn, lås, fjädrar och lager innan porten tas i bruk och under användande.
[C000387] Stäng sidodörren och lås den med nyckeln innan du använder porten.
35
SV
IIiO/BS/SNP/05/2017/ID-95695 Teknisk beskrivning
Monterings och Funktions Instruktioner – Sektioneråd garage port UniPro SNP
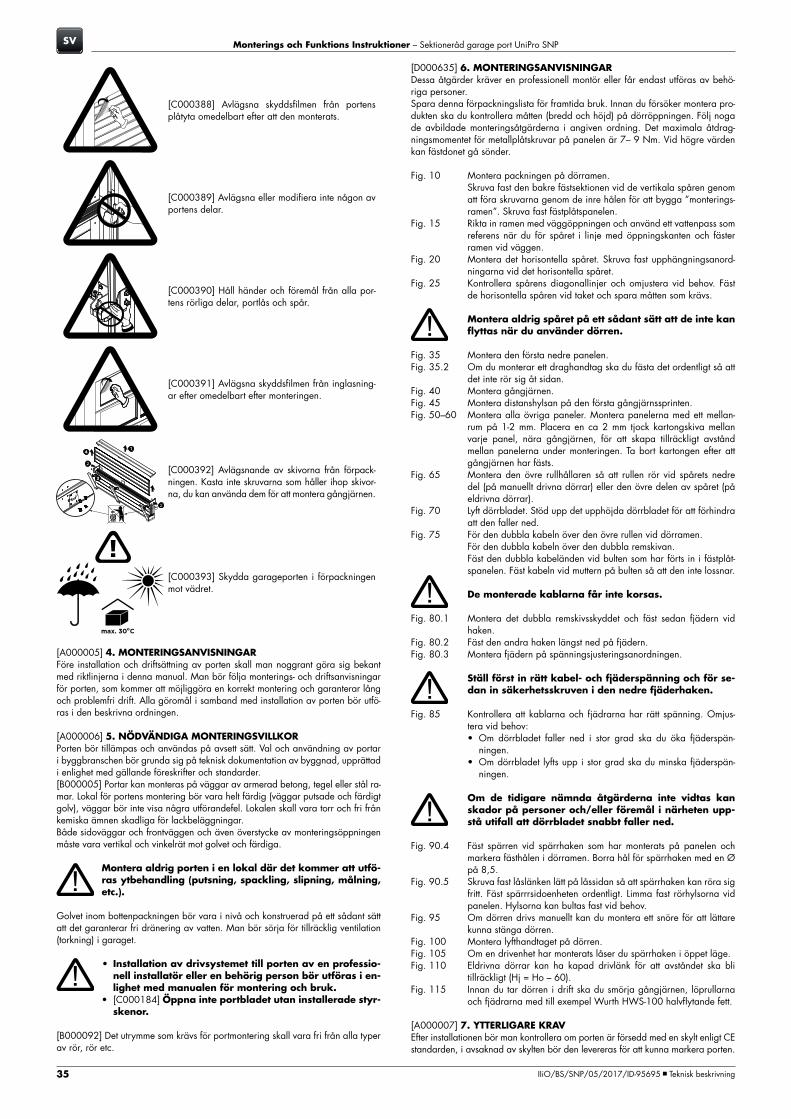
[C000388] Avlägsna skyddsfilmen från portens plåtyta omedelbart efter att den monterats.
[C000389] Avlägsna eller modifiera inte någon av portens delar.
[C000390] Håll händer och föremål från alla por-tens rörliga delar, portlås och spår.
[C000391] Avlägsna skyddsfilmen från inglasning-ar efter omedelbart efter monteringen.
[C000392] Avlägsnande av skivorna från förpack-ningen. Kasta inte skruvarna som håller ihop skivor-na, du kan använda dem för att montera gångjärnen.
[C000393] Skydda garageporten i förpackningen mot vädret.
[A000005] 4. MONTERINGSANVISNINGARFöre installation och driftsättning av porten skall man noggrant göra sig bekant med riktlinjerna i denna manual. Man bör följa monterings- och driftsanvisningar för porten, som kommer att möjliggöra en korrekt montering och garanterar lång och problemfri drift. Alla göromål i samband med installation av porten bör utfö-ras i den beskrivna ordningen.
[A000006] 5. NÖDVÄNDIGA MONTERINGSVILLKORPorten bör tillämpas och användas på avsett sätt. Val och användning av portar i byggbranschen bör grunda sig på teknisk dokumentation av byggnad, upprättad i enlighet med gällande föreskrifter och standarder.[B000005] Portar kan monteras på väggar av armerad betong, tegel eller stål ra-mar. Lokal för portens montering bör vara helt färdig (väggar putsade och färdigt golv), väggar bör inte visa några utförandefel. Lokalen skall vara torr och fri från kemiska ämnen skadliga för lackbeläggningar.Både sidoväggar och frontväggen och även överstycke av monteringsöppningen måste vara vertikal och vinkelrät mot golvet och färdiga.
Montera aldrig porten i en lokal där det kommer att utfö-ras ytbehandling (putsning, spackling, slipning, målning, etc.).
Golvet inom bottenpackningen bör vara i nivå och konstruerad på ett sådant sätt att det garanterar fri dränering av vatten. Man bör sörja för tillräcklig ventilation (torkning) i garaget.
• Installation av drivsystemet till porten av en professio-nell installatör eller en behörig person bör utföras i en-lighet med manualen för montering och bruk.
• [C000184] Öppna inte portbladet utan installerade styr-skenor.
[B000092] Det utrymme som krävs för portmontering skall vara fri från alla typer av rör, rör etc.
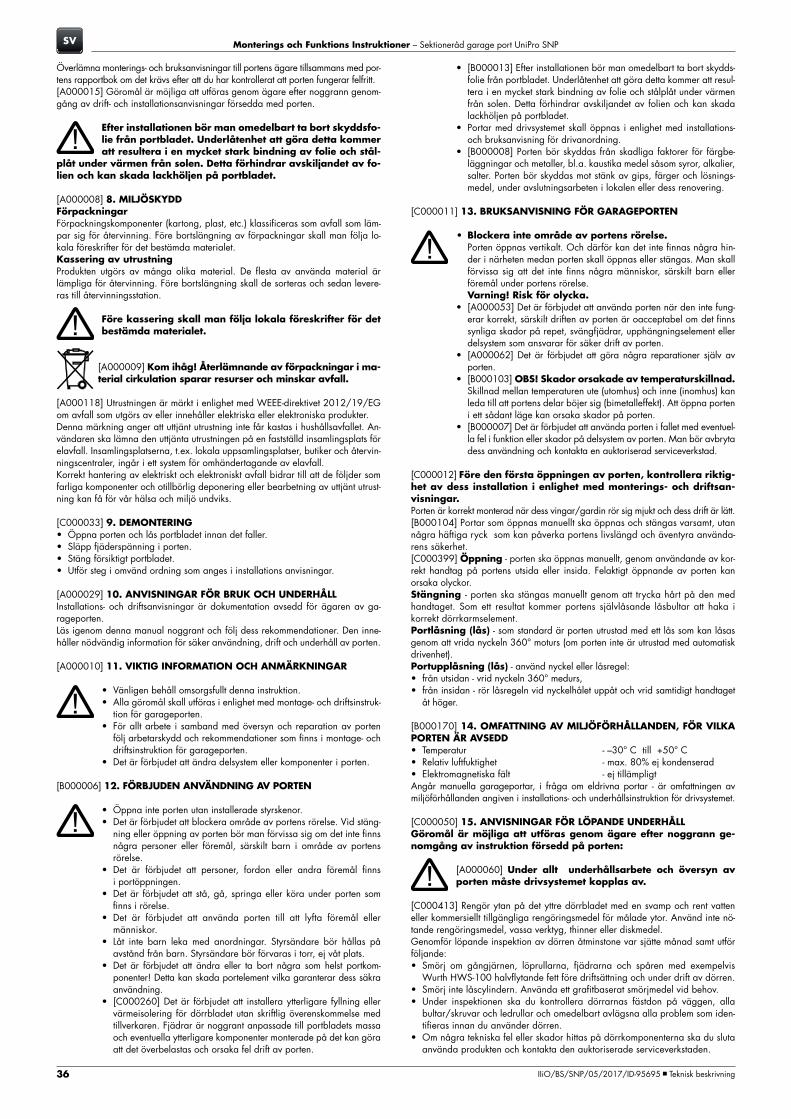
[D000635] 6. MONTERINGSANVISNINGARDessa åtgärder kräver en professionell montör eller får endast utföras av behö-riga personer. Spara denna förpackningslista för framtida bruk. Innan du försöker montera pro-dukten ska du kontrollera måtten (bredd och höjd) på dörröppningen. Följ noga de avbildade monteringsåtgärderna i angiven ordning. Det maximala åtdrag-ningsmomentet för metallplåtskruvar på panelen är 7– 9 Nm. Vid högre värden kan fästdonet gå sönder.
Fig. 10 Montera packningen på dörramen.Skruva fast den bakre fästsektionen vid de vertikala spåren genom att föra skruvarna genom de inre hålen för att bygga ”monterings-ramen”. Skruva fast fästplåtspanelen.
Fig. 15 Rikta in ramen med väggöppningen och använd ett vattenpass som referens när du för spåret i linje med öppningskanten och fäster ramen vid väggen.
Fig. 20 Montera det horisontella spåret. Skruva fast upphängningsanord-ningarna vid det horisontella spåret.
Fig. 25 Kontrollera spårens diagonallinjer och omjustera vid behov. Fäst de horisontella spåren vid taket och spara måtten som krävs.
Montera aldrig spåret på ett sådant sätt att de inte kan flyttas när du använder dörren.
Fig. 35 Montera den första nedre panelen. Fig. 35.2 Om du monterar ett draghandtag ska du fästa det ordentligt så att
det inte rör sig åt sidan.Fig. 40 Montera gångjärnen.Fig. 45 Montera distanshylsan på den första gångjärnssprinten. Fig. 50–60 Montera alla övriga paneler. Montera panelerna med ett mellan-
rum på 1-2 mm. Placera en ca 2 mm tjock kartongskiva mellan varje panel, nära gångjärnen, för att skapa tillräckligt avstånd mellan panelerna under monteringen. Ta bort kartongen efter att gångjärnen har fästs.
Fig. 65 Montera den övre rullhållaren så att rullen rör vid spårets nedre del (på manuellt drivna dörrar) eller den övre delen av spåret (på eldrivna dörrar).
Fig. 70 Lyft dörrbladet. Stöd upp det upphöjda dörrbladet för att förhindra att den faller ned.
Fig. 75 För den dubbla kabeln över den övre rullen vid dörramen. För den dubbla kabeln över den dubbla remskivan. Fäst den dubbla kabeländen vid bulten som har förts in i fästplåt-
spanelen. Fäst kabeln vid muttern på bulten så att den inte lossnar.
De monterade kablarna får inte korsas.
Fig. 80.1 Montera det dubbla remskivsskyddet och fäst sedan fjädern vid haken.
Fig. 80.2 Fäst den andra haken längst ned på fjädern.Fig. 80.3 Montera fjädern på spänningsjusteringsanordningen.
Ställ först in rätt kabel- och fjäderspänning och för se-dan in säkerhetsskruven i den nedre fjäderhaken.
Fig. 85 Kontrollera att kablarna och fjädrarna har rätt spänning. Omjus-tera vid behov:• Om dörrbladet faller ned i stor grad ska du öka fjäderspän-
ningen.• Om dörrbladet lyfts upp i stor grad ska du minska fjäderspän-
ningen.
Om de tidigare nämnda åtgärderna inte vidtas kan skador på personer och/eller föremål i närheten upp-stå utifall att dörrbladet snabbt faller ned.
Fig. 90.4 Fäst spärren vid spärrhaken som har monterats på panelen och markera fästhålen i dörramen. Borra hål för spärrhaken med en Ø på 8,5.
Fig. 90.5 Skruva fast låslänken lätt på låssidan så att spärrhaken kan röra sig fritt. Fäst spärrrsidoenheten ordentligt. Limma fast rörhylsorna vid panelen. Hylsorna kan bultas fast vid behov.
Fig. 95 Om dörren drivs manuellt kan du montera ett snöre för att lättare kunna stänga dörren.
Fig. 100 Montera lyfthandtaget på dörren.Fig. 105 Om en drivenhet har monterats låser du spärrhaken i öppet läge.Fig. 110 Eldrivna dörrar kan ha kapad drivlänk för att avståndet ska bli
tillräckligt (Hj = Ho – 60).Fig. 115 Innan du tar dörren i drift ska du smörja gångjärnen, löprullarna
och fjädrarna med till exempel Wurth HWS-100 halvflytande fett.
[A000007] 7. YTTERLIGARE KRAVEfter installationen bör man kontrollera om porten är försedd med en skylt enligt CE standarden, i avsaknad av skylten bör den levereras för att kunna markera porten.
36
SV
IIiO/BS/SNP/05/2017/ID-95695 Teknisk beskrivning
Monterings och Funktions Instruktioner – Sektioneråd garage port UniPro SNP
Överlämna monterings- och bruksanvisningar till portens ägare tillsammans med por-tens rapportbok om det krävs efter att du har kontrollerat att porten fungerar felfritt.[A000015] Göromål är möjliga att utföras genom ägare efter noggrann genom-gång av drift- och installationsanvisningar försedda med porten.
Efter installationen bör man omedelbart ta bort skyddsfo-lie från portbladet. Underlåtenhet att göra detta kommer att resultera i en mycket stark bindning av folie och stål-
plåt under värmen från solen. Detta förhindrar avskiljandet av fo-lien och kan skada lackhöljen på portbladet.
[A000008] 8. MILJÖSKYDDFörpackningarFörpackningskomponenter (kartong, plast, etc.) klassificeras som avfall som läm-par sig för återvinning. Före bortslängning av förpackningar skall man följa lo-kala föreskrifter för det bestämda materialet.Kassering av utrustningProdukten utgörs av många olika material. De flesta av använda material är lämpliga för återvinning. Före bortslängning skall de sorteras och sedan levere-ras till återvinningsstation.
Före kassering skall man följa lokala föreskrifter för det bestämda materialet.
[A000009] Kom ihåg! Återlämnande av förpackningar i ma-terial cirkulation sparar resurser och minskar avfall.
[A000118] Utrustningen är märkt i enlighet med WEEE-direktivet 2012/19/EG om avfall som utgörs av eller innehåller elektriska eller elektroniska produkter.Denna märkning anger att uttjänt utrustning inte får kastas i hushållsavfallet. An-vändaren ska lämna den uttjänta utrustningen på en fastställd insamlingsplats för elavfall. Insamlingsplatserna, t.ex. lokala uppsamlingsplatser, butiker och återvin-ningscentraler, ingår i ett system för omhändertagande av elavfall.Korrekt hantering av elektriskt och elektroniskt avfall bidrar till att de följder som farliga komponenter och otillbörlig deponering eller bearbetning av uttjänt utrust-ning kan få för vår hälsa och miljö undviks. [C000033] 9. DEMONTERING• Öppna porten och lås portbladet innan det faller.• Släpp fjäderspänning i porten. • Stäng försiktigt portbladet.• Utför steg i omvänd ordning som anges i installations anvisningar.
[A000029] 10. ANVISNINGAR FÖR BRUK OCH UNDERHÅLLInstallations- och driftsanvisningar är dokumentation avsedd för ägaren av ga-rageporten.Läs igenom denna manual noggrant och följ dess rekommendationer. Den inne-håller nödvändig information för säker användning, drift och underhåll av porten.
[A000010] 11. VIKTIG INFORMATION OCH ANMÄRKNINGAR
• Vänligen behåll omsorgsfullt denna instruktion.• Alla göromål skall utföras i enlighet med montage- och driftsinstruk-
tion för garageporten.• För allt arbete i samband med översyn och reparation av porten
följ arbetarskydd och rekommendationer som finns i montage- och driftsinstruktion för garageporten.
• Det är förbjudet att ändra delsystem eller komponenter i porten.
[B000006] 12. FÖRBJUDEN ANVÄNDNING AV PORTEN
• Öppna inte porten utan installerade styrskenor.• Det är förbjudet att blockera område av portens rörelse. Vid stäng-
ning eller öppning av porten bör man förvissa sig om det inte finns några personer eller föremål, särskilt barn i område av portens rörelse.
• Det är förbjudet att personer, fordon eller andra föremål finns i portöppningen.
• Det är förbjudet att stå, gå, springa eller köra under porten som finns i rörelse.
• Det är förbjudet att använda porten till att lyfta föremål eller människor.
• Låt inte barn leka med anordningar. Styrsändare bör hållas på avstånd från barn. Styrsändare bör förvaras i torr, ej våt plats.
• Det är förbjudet att ändra eller ta bort några som helst portkom-ponenter! Detta kan skada portelement vilka garanterar dess säkra användning.
• [C000260] Det är förbjudet att installera ytterligare fyllning eller värmeisolering för dörrbladet utan skriftlig överenskommelse med tillverkaren. Fjädrar är noggrant anpassade till portbladets massa och eventuella ytterligare komponenter monterade på det kan göra att det överbelastas och orsaka fel drift av porten.
• [B000013] Efter installationen bör man omedelbart ta bort skydds-folie från portbladet. Underlåtenhet att göra detta kommer att resul-tera i en mycket stark bindning av folie och stålplåt under värmen från solen. Detta förhindrar avskiljandet av folien och kan skada lackhöljen på portbladet.
• Portar med drivsystemet skall öppnas i enlighet med installations- och bruksanvisning för drivanordning.
• [B000008] Porten bör skyddas från skadliga faktorer för färgbe-läggningar och metaller, bl.a. kaustika medel såsom syror, alkalier, salter. Porten bör skyddas mot stänk av gips, färger och lösnings-medel, under avslutningsarbeten i lokalen eller dess renovering.
[C000011] 13. BRUKSANVISNING FÖR GARAGEPORTEN
• Blockera inte område av portens rörelse. Porten öppnas vertikalt. Och därför kan det inte finnas några hin-der i närheten medan porten skall öppnas eller stängas. Man skall förvissa sig att det inte finns några människor, särskilt barn eller föremål under portens rörelse.Varning! Risk för olycka.
• [A000053] Det är förbjudet att använda porten när den inte fung-erar korrekt, särskilt driften av porten är oacceptabel om det finns synliga skador på repet, svängfjädrar, upphängningselement eller delsystem som ansvarar för säker drift av porten.
• [A000062] Det är förbjudet att göra några reparationer själv av porten.
• [B000103] OBS! Skador orsakade av temperaturskillnad.Skillnad mellan temperaturen ute (utomhus) och inne (inomhus) kan leda till att portens delar böjer sig (bimetalleffekt). Att öppna porten i ett sådant läge kan orsaka skador på porten.
• [B000007] Det är förbjudet att använda porten i fallet med eventuel-la fel i funktion eller skador på delsystem av porten. Man bör avbryta dess användning och kontakta en auktoriserad serviceverkstad.
[C000012] Före den första öppningen av porten, kontrollera riktig-het av dess installation i enlighet med monterings- och driftsan-visningar.Porten är korrekt monterad när dess vingar/gardin rör sig mjukt och dess drift är lätt.[B000104] Portar som öppnas manuellt ska öppnas och stängas varsamt, utan några häftiga ryck som kan påverka portens livslängd och äventyra använda-rens säkerhet.[C000399] Öppning - porten ska öppnas manuellt, genom användande av kor-rekt handtag på portens utsida eller insida. Felaktigt öppnande av porten kan orsaka olyckor.Stängning - porten ska stängas manuellt genom att trycka hårt på den med handtaget. Som ett resultat kommer portens självlåsande låsbultar att haka i korrekt dörrkarmselement.Portlåsning (lås) - som standard är porten utrustad med ett lås som kan låsas genom att vrida nyckeln 360° moturs (om porten inte är utrustad med automatisk drivenhet).Portupplåsning (lås) - använd nyckel eller låsregel:• från utsidan - vrid nyckeln 360° medurs,• från insidan - rör låsregeln vid nyckelhålet uppåt och vrid samtidigt handtaget
åt höger.
[B000170] 14. OMFATTNING AV MILJÖFÖRHÅLLANDEN, FÖR VILKA PORTEN ÄR AVSEDD• Temperatur - –30° C till +50° C• Relativ luftfuktighet - max. 80% ej kondenserad• Elektromagnetiska fält - ej tillämpligtAngår manuella garageportar, i fråga om eldrivna portar - är omfattningen av miljöförhållanden angiven i installations- och underhållsinstruktion för drivsystemet.
[C000050] 15. ANVISNINGAR FÖR LÖPANDE UNDERHÅLLGöromål är möjliga att utföras genom ägare efter noggrann ge-nomgång av instruktion försedd på porten:
[A000060] Under allt underhållsarbete och översyn av porten måste drivsystemet kopplas av.
[C000413] Rengör ytan på det yttre dörrbladet med en svamp och rent vatten eller kommersiellt tillgängliga rengöringsmedel för målade ytor. Använd inte nö-tande rengöringsmedel, vassa verktyg, thinner eller diskmedel.Genomför löpande inspektion av dörren åtminstone var sjätte månad samt utför följande: • Smörj om gångjärnen, löprullarna, fjädrarna och spåren med exempelvis
Wurth HWS-100 halvflytande fett före driftsättning och under drift av dörren.• Smörj inte låscylindern. Använda ett grafitbaserat smörjmedel vid behov.• Under inspektionen ska du kontrollera dörrarnas fästdon på väggen, alla
bultar/skruvar och ledrullar och omedelbart avlägsna alla problem som iden-tifieras innan du använder dörren.
• Om några tekniska fel eller skador hittas på dörrkomponenterna ska du sluta använda produkten och kontakta den auktoriserade serviceverkstaden.
37
SV
IIiO/BS/SNP/05/2017/ID-95695 Teknisk beskrivning
Monterings och Funktions Instruktioner – Sektioneråd garage port UniPro SNP
• Kontrollera drivenhetens fästdon.• Kontrollera att spolningen och spänningen av kablarna är korrekt.[D000231] Minst två gånger i månaden bör man rengöra portens dekorativa element utförda i rostfritt stål med rengörings- och vårdmedel för rostfritt stål, t.ex. Wurth (undvik att preparatet kommer i kontakt med portbladets yta).
[C000017] Göromål möjliga att utföras av en behörig person med lämpliga behörigheter:[C000060] Översynen bör utföras minst en gång på 12 månader.Inom standard underhållstjänster ingår:• Kontrollera fjäderspänning - öppna porten genom att lyfta portbladet till halva
höjden:• Om portbladet har sjunkit betydligt bör man öka fjäderspänningen genom
att justera. • Om portbladet har lyft sig betydligt bör man minska fjäderspänningen ge-
nom att justera.
• I fråga om fjäderspänning finns det lämpliga anvis-ningar i avsnittet om installationen.
• I fall man inte utför dessa arbeten, finns det en risk, att portbladet sjunker ned plötsligt och det orsakar skada på personer eller skador på föremål i närheten.
• Kontrollera om rullarna vrider sig under öppning och stängning av portbladet. Om rullarna motstår eller inte vrider sig alls, kontrollera deras tillstånd, särskilt löpytan. Om det behövs, bör hela delsystemen bytas ut.
• Under översynen bör man kontrollera de mekaniska delsystem som påverkar säker och effektiv drift av porten. I fall fastställande av vilka som helst defekter bör de omedelbart avhjälpas, och felfungerande delsystem eller delar bör repareras eller ersättas.
• När du monterar drivenheten, spärra portens reglar i öppet-läge eller montera extra anordning med automatisk spärr.
• Kontrollera skicket på rep och fjädrar.
[C000261] Göromål som kräver en professionell installatör:Eventuella ändringar och modifieringar av porten bör bestämmas av tillverkaren.Omfattning av arbeten som omfattas av periodisk översyn utförd av tillverkarens auktoriserad service.• Identifiera typ av garageporten, Serie nr.• Kontrollera märkning av porten, varningstexter, i deras frånvaro bör komplet-
teras.• Kontrollera fästelement som används i porten: monteringsbultar för att montera
porten i väggen, skruvar för styrskenor.• Kontrollera fjädrar och element som samverkar med dem, vid uppenbara
tecken på slitage är det viktigt att byta ut slitna komponenter.• I fall porten har varit i drift över 12 år eller den har utfört mer än 12 000 cyklar
(antal cyklar bör bestämmas på grund av samtal med portanvändare) - fjädrar bör ovillkorligen bytas.
• Var uppmärksam på de förhållanden under vilka porten drivs, när de villkor avviker från krävda driftsförhållanden, ägaren bör informeras om möjliga kon-sekvenser (t.ex. möjligheten av misslyckande).
[C000045] 16. BEGRÄNSNINGAR FÖR ANVÄNDNING AV GARAGE-PORTENPorten är inte avsedd att användas:• i en explosiv atmosfär,• som brandsäkra skott,• i fuktiga utrymmen,• i lokaler med farliga kemikalier för skyddande beläggningar och färg,• på solbelysta sidan vad det gäller mörka färger använda på portbladets be-
klädnad,• som stödkonstruktion av byggnaden,• hermetisk vägg.
[A000011] Alla göromål skall utföras i enlighet med montage- och driftsinstruk-tion för garageporten. Eventuella kommentarer och rekommendationer bör över-lämnas skriftligt till ägaren, till exempel anteckning i rapporteringsboken eller på garantikortet och levereras till ägaren av garageporten. Efter att ha utfört översyn bör detta bekräftas i en rapporteringsbok eller i garantisedeln.
[A000079] Tillverkaren förbehåller sig rätten till konstruktionsänd-ringar som tjänar tekniska utvecklingen och inte ändrar produk-tens funktionalitet utan varsel.
Dokumentationen tillhör tillverkaren, eftertryck och användning helt eller delvis utan skriftligt tillstånd är förbjuden.
[A000048] Detta dokument har översatts från Polska. Vid avvikel-ser gäller den Polska versionen.
38
SV
IIiO/BS/SNP/05/2017/ID-95695 Teknisk beskrivning
Monterings och Funktions Instruktioner – Sektioneråd garage port UniPro SNP
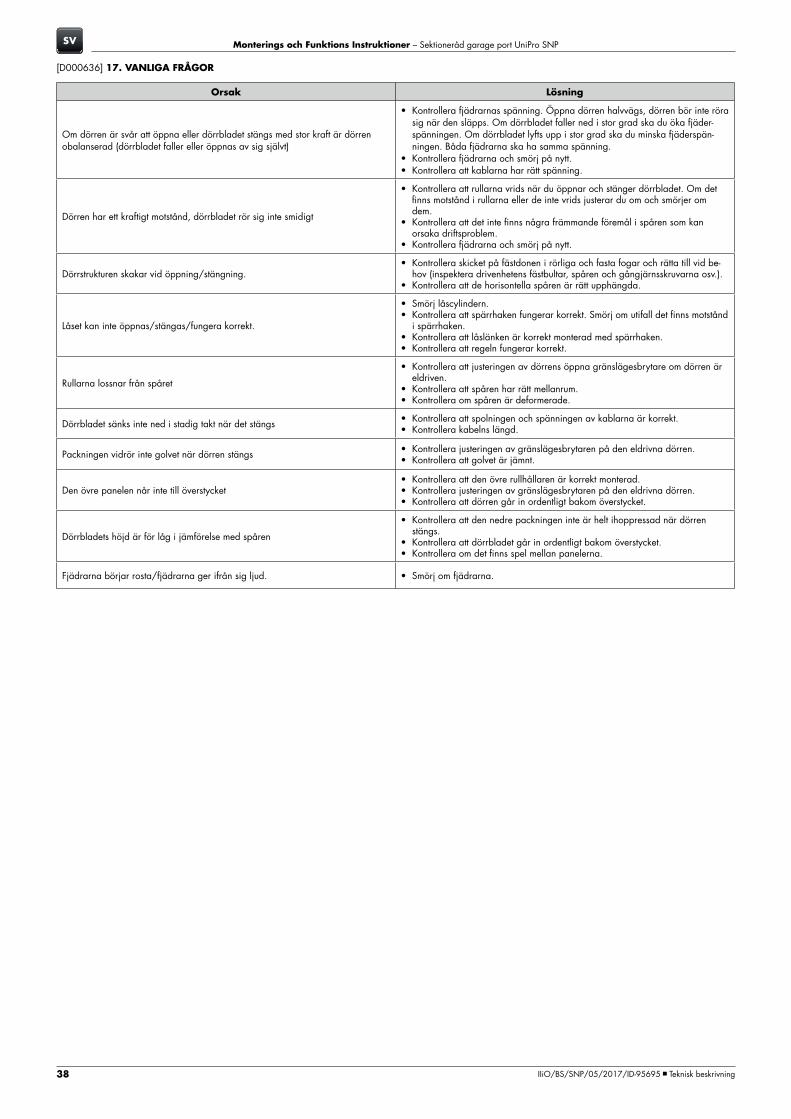
Orsak Lösning
Om dörren är svår att öppna eller dörrbladet stängs med stor kraft är dörren obalanserad (dörrbladet faller eller öppnas av sig självt)
• Kontrollera fjädrarnas spänning. Öppna dörren halvvägs, dörren bör inte röra sig när den släpps. Om dörrbladet faller ned i stor grad ska du öka fjäder-spänningen. Om dörrbladet lyfts upp i stor grad ska du minska fjäderspän-ningen. Båda fjädrarna ska ha samma spänning.
• Kontrollera fjädrarna och smörj på nytt. • Kontrollera att kablarna har rätt spänning.
Dörren har ett kraftigt motstånd, dörrbladet rör sig inte smidigt
• Kontrollera att rullarna vrids när du öppnar och stänger dörrbladet. Om det finns motstånd i rullarna eller de inte vrids justerar du om och smörjer om dem.
• Kontrollera att det inte finns några främmande föremål i spåren som kan orsaka driftsproblem.
• Kontrollera fjädrarna och smörj på nytt.
Dörrstrukturen skakar vid öppning/stängning.• Kontrollera skicket på fästdonen i rörliga och fasta fogar och rätta till vid be-
hov (inspektera drivenhetens fästbultar, spåren och gångjärnsskruvarna osv.). • Kontrollera att de horisontella spåren är rätt upphängda.
Låset kan inte öppnas/stängas/fungera korrekt.
• Smörj låscylindern. • Kontrollera att spärrhaken fungerar korrekt. Smörj om utifall det finns motstånd
i spärrhaken. • Kontrollera att låslänken är korrekt monterad med spärrhaken. • Kontrollera att regeln fungerar korrekt.
Rullarna lossnar från spåret
• Kontrollera att justeringen av dörrens öppna gränslägesbrytare om dörren är eldriven.
• Kontrollera att spåren har rätt mellanrum. • Kontrollera om spåren är deformerade.
Dörrbladet sänks inte ned i stadig takt när det stängs • Kontrollera att spolningen och spänningen av kablarna är korrekt. • Kontrollera kabelns längd.
Packningen vidrör inte golvet när dörren stängs • Kontrollera justeringen av gränslägesbrytaren på den eldrivna dörren. • Kontrollera att golvet är jämnt.
Den övre panelen når inte till överstycket• Kontrollera att den övre rullhållaren är korrekt monterad. • Kontrollera justeringen av gränslägesbrytaren på den eldrivna dörren. • Kontrollera att dörren går in ordentligt bakom överstycket.
Dörrbladets höjd är för låg i jämförelse med spåren
• Kontrollera att den nedre packningen inte är helt ihoppressad när dörren stängs.
• Kontrollera att dörrbladet går in ordentligt bakom överstycket. • Kontrollera om det finns spel mellan panelerna.
Fjädrarna börjar rosta/fjädrarna ger ifrån sig ljud. • Smörj om fjädrarna.
[D000636] 17. VANLIGA FRÅGOR
Assembler:
WIŚNIOWSKI Sp. z o.o. S.K.A.PL 33-311 Wielogłowy 153
TEL. +48 18 44 77 111FAX +48 18 44 77 110
www.wisniowski.plN = 49° 40’ 10” E = 20° 41’ 12”
IIiO/BS/SNP/05/2017/ID-95695/KTM-653A335956951