syrio wamp 1 - europa · document title syrio wamp 1.3 – quick start guide ... register new event...
TRANSCRIPT
SyRIO WAMP 1.3
System for Reporting the Incidents in
Offshore Oil and Gas Operations
– Quick start guide –
Document No: 1
Revision No: 1.3
Revision date: 30/10/2016

Document title SyRIO WAMP 1.3 – Quick start guide
Document version 1
Document revision 1.3
Document date 30/10/2016
Authors Bogdan Vamanu ([email protected])
Stefano Tarantola ([email protected])
Contributors Stefania Contini ([email protected])
Shlomo Wald ([email protected])
Jessica Cavestro ([email protected])

Table of Contents
Table of figures
Introduction ................................................................................................................ 7 1.
Getting started ............................................................................................................ 9 2.
2.1. Prerequisites ............................................................................................................... 9
2.2. Installation .................................................................................................................. 9
2.3. Launch application ...................................................................................................... 9
2.4. Turn off SyRIO WAMP ............................................................................................... 11
2.5. SyRIO WAMP URL ..................................................................................................... 11
SyRIO WAMP – default credentials .......................................................................... 12 3.
Setting up the scene ................................................................................................. 14 4.
4.1. The accident scenario ............................................................................................... 14
4.2. The SyRIO WAMP use case ....................................................................................... 14
4.3. How to read this document ...................................................................................... 15
Reporting the incident .............................................................................................. 16 5.
5.1. Step-by-step procedure ............................................................................................ 16
5.2. Supportive figures ..................................................................................................... 21
Dealing with a rejected report .................................................................................. 25 6.
6.1. Step-by-step procedure ............................................................................................ 25
6.2. Supportive figures ..................................................................................................... 28
Assessment of the report in terms of Major Accident ............................................. 30 7.
7.1. Step-by-step procedure ............................................................................................ 30
7.1.1. Assess (and accept) the report ................................................................................. 31
7.2. Reject report ............................................................................................................. 32
7.3. Supportive figures ..................................................................................................... 33
Annual Report ........................................................................................................... 35 8.
8.1. Annual Report Preparation ....................................................................................... 35
8.1.1. Step-by-step .............................................................................................................. 36
8.1.2. Supportive figures ..................................................................................................... 38
8.2. Annual Report drafting and Exporting. ..................................................................... 39
8.2.1. Step-by-step procedure ............................................................................................ 39
8.2.2. Supporting figures .................................................................................................... 43

Annex I Incident report in the common reporting format – SyRIO generated ..................................... 44
Annex II 2016 Annual Report export file (SPIROS XML) ........................................................................ 50
Annex III SyRIO (WAMP) Configuration ................................................................................................ 52
User registration and the default email settings .............................................................................. 52
Configure the Country, Competent Authority and Admin email ...................................................... 52
Email settings .................................................................................................................................... 53
The database settings ....................................................................................................................... 53
Annex IV UniServer server settings ....................................................................................................... 54
Change the default ports .................................................................................................................. 54
Change the Apache port ............................................................................................................... 54
Change the MySQL port ................................................................................................................ 54
Change the timezone ........................................................................................................................ 55
Change the PHP timezone............................................................................................................. 55
Change MySQL timezone .............................................................................................................. 55

Table of figures
Figure 1. SyRIO WAMP directory structure ............................................................................................ 9
Figure 2 UniServer console ..................................................................................................................... 9
Figure 3. Terms and conditions page .................................................................................................... 10
Figure 4. SyRIO Home page (guest view) .............................................................................................. 10
Figure 5. UniServer icon in system tray ................................................................................................ 11
Figure 6. Incident reporting workflow - Operators and Owners .......................................................... 16
Figure 7. SyRIO Home page ................................................................................................................... 21
Figure 8. (First Offshore Company) Home page ................................................................................... 21
Figure 9. Register new event form - final step ...................................................................................... 21
Figure 10. Registered Events page ........................................................................................................ 21
Figure 11. Event Reporting page ........................................................................................................... 21
Figure 12. Create report draft page ...................................................................................................... 22
Figure 13. Draft control page ................................................................................................................ 22
Figure 14. Section F review ................................................................................................................... 22
Figure 15. Draft control page (first_draft of heli_crash_2016_10_29) after Section F is finalized ...... 23
Figure 16. The Review page .................................................................................................................. 23
Figure 17. Submission confirmation page............................................................................................. 23
Figure 18. The Event Reporting page after the submission of the Incident Report ............................. 24
Figure 19. The First Offshore Company Registered Events page after the submission of the Incident
Report ................................................................................................................................................... 24
Figure 20. New incident reported. Notification email sent to the Competent Authority Assessors .... 24
Figure 21. The Incidents Status Card with the rejected report information......................................... 25
Figure 22. Details block for the rejected report. .................................................................................. 26
Figure 23. First Offshore Company Home page - report rejected ........................................................ 28
Figure 24. Registered Events page with heli_crash_206_10_29 report rejected ................................. 28
Figure 25. Reporting history - rejection justification provided ............................................................. 28
Figure 26. Event reporting page. Details block expanded. Rejection justification available. ............... 28
Figure 27. Incident report re-submitted. Notification email to CA Assessors. ..................................... 29
Figure 28. Incident assessment in terms of Major Accident workflow - Competent Authorities ........ 30
Figure 29. The Competent Authority section of the incident report. ................................................... 31
Figure 30. Assessment in terms of Major Accident finalized. Notification message. ........................... 31
Figure 31. Competent Authority Home page ........................................................................................ 33
Figure 32. Report view .......................................................................................................................... 33
Figure 33. Report view page header ..................................................................................................... 33
Figure 34. Report rejection form .......................................................................................................... 33
Figure 35. Report view page after rejecting the report. ....................................................................... 33
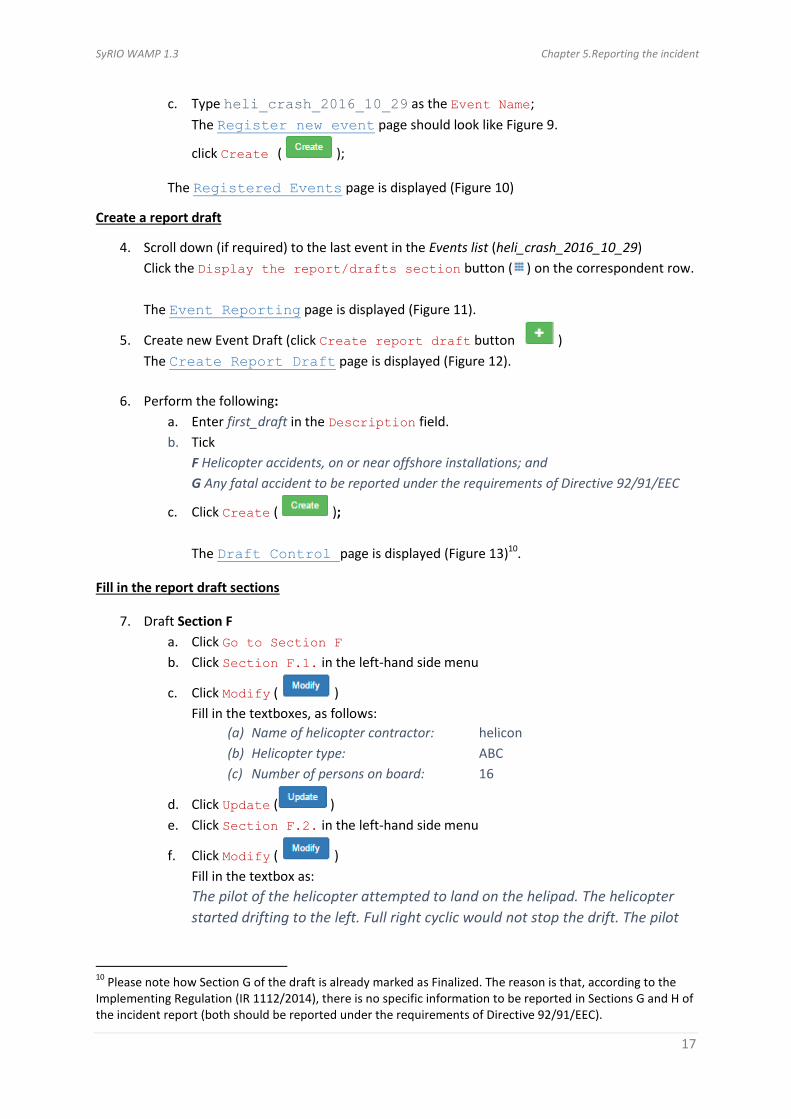
Figure 36. Assessment of incident report page .................................................................................... 34
Figure 37. Assessment of incident report page. Assessing the incident in terms of Major Accident.
The Competent Authority block (Section F). ........................................................................................ 34
Figure 38. Relationship between CA tasks and SyRIO support ............................................................. 35
Figure 39. Automatic event categorization .......................................................................................... 36
Figure 40. Section 4.3 of the CPF Assessment during drafting ............................................................. 37
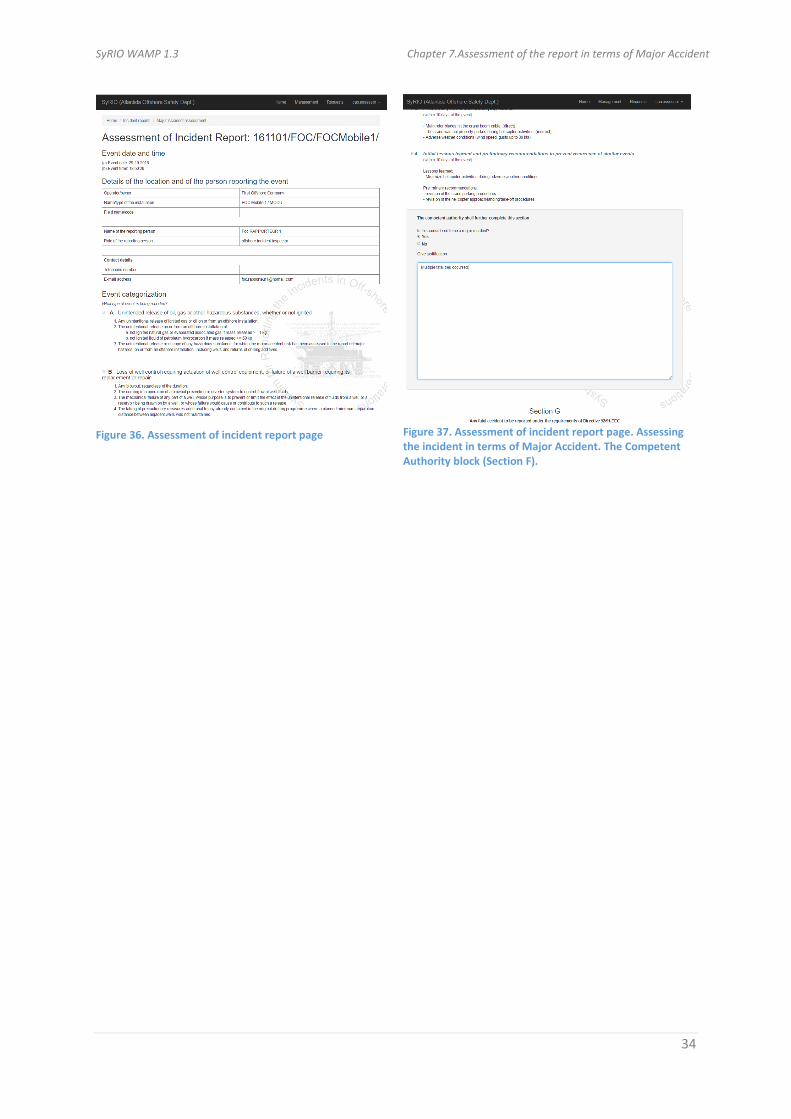
Figure 41. Annual Reports Preparation page. Initial view, no incidents listed. .................................... 38
Figure 42.Annual Report Preparation page. The new incident has been added in the list after
refreshing. ............................................................................................................................................. 38

Figure 43. The CPF Section 4 Incident Assessment page ...................................................................... 38
Figure 44. CPF Assessment Update page .............................................................................................. 38
Figure 45. Generic workflow for Annual Report drafting ..................................................................... 39
Figure 46. Report 'out-of-sync' message in the Annual Report Editor ................................................. 40
Figure 47. Result of updating the installations list (sync report) .......................................................... 40
Figure 48. Notification of data updated (sync report) .......................................................................... 40
Figure 49. Updated section (2.4.) ......................................................................................................... 41
Figure 50. Updated Section 3 of the Annual Report ............................................................................. 42
Figure 51. The Annual Reports page ..................................................................................................... 43
Figure 52. The Annual Report Editor .................................................................................................... 43
Figure 53. The Add/Edit Operation area page ...................................................................................... 43
Figure 54. The Information for Data Normalization Purposes page ..................................................... 43
Figure 55. Annual Report Section 3 Update page ................................................................................. 43
Figure 56. The UniServer console ......................................................................................................... 54
Figure 57. UniServer icon in system tray .............................................................................................. 54

SyRIO WAMP 1.3 Chapter 1.Introduction
7
Introduction 1.SyRIO (System for Reporting the Incidents in the Off-shore Operations) is the IT solution proposed by
the European Commission (DG Energy) to the Member States (MS) to be adopted as the
communication platform of the offshore incidents from the Operators/Owners to the Competent
Authorities, as required by the Offshore Safety Directive (Directive 2013/30/EU, the OSD).
The development of SyRIO has been commissioned by DG Energy to DG JRC Directorate C. Energy,
Transport and Climate (ETC).
DG Energy has distributed SyRIO under the EUPL1 license to all of the Competent Authorities of the
MS. The Competent Authorities should, upon adopting the solution, install SyRIO on their own
servers (application and database), thus becoming the owners of the platform (application and
data).
The WAMP2 distribution of SyRIO is a stand-alone, all-in-one solution that allows running the system
on virtually any Windows operating computer, requiring, at the minimum, nothing less than a USB
stick.
SyRIO WAMP is by default:
- intended to be used mainly for testing and demonstration purposes;
- running locally (on the localhost), i.e. can only be accessed from the physical machine (i.e.
the computer) it runs on3.
SyRIO WAMP comes pre-populated with a set of fictituous assets (i.e. organizations, installations,
users) for facilitating the immediate use of the application. You may login as different stakeholders
(i.e. system administrators, operators/owners or competent authority) and test the application from
different perspectives (e.g. functionality, information privacy, etc.)
In terms of functionality, SyRIO WAMP is an exact replica of the SyRIO Application.
SyRIO WAMP is built around the UniformServerZeroXI 4,5 (UniServer) portable WAMP that provides
for:
- Apache 2.4.16 VC10 OpenSSL/1.0.1p-fips;
- MySQL 5.5.46-community;
- PHP : 5.5.3-5.5.30.
The rest of the document goes as follows: Chapter 2 covers the required procedure for installing and
launching the application. A detailed description of SYRIO WAMP’s predefined users and assets is
provided in Chaper 3. Chapter 4 sets up the scene (the scenario) that will be followed throughout
this document for introducing SyRIO to the readers; indication on how to read this document (i.e.
which section, depending on the current task) is also provided here. Chapters 5 to 8 provide the
step-by-step tutorial on the main usage of the application by the operators / owners (i.e. reporting
an offshore incident) and competent authorities (i.e. assessing reports and drafting the annual
1 EUPL – the European Union Public License. See more at:
https://joinup.ec.europa.eu/community/eupl/og_page/eupl 2 WAMP – Windows Apache MySQL PHP
3 The UniServer can be configured as to serve outside the host machine. For more information check the
documentation at http://forum.uniformserver.com/ and http://wiki.uniformserver.com/ 4 Uniserver XI - http://sourceforge.net/projects/miniserver/files/Uniform%20Server%20ZeroXI/
5 http://www.uniformserver.com/ for the latest version

SyRIO WAMP 1.3 Chapter 1.Introduction
8
report), respectively. The tutorial is presented in a practical manner, in the sense that it covers the
steps that should be followed in the context set in Chapter 4. Some aspects on the customization of
SyRIO and UniServer are addressed in the Annexes.
This document represents a quick start guide. For the sake of minimum complexity and length, many
aspects of the application (in terms of concepts, functionality, management, etc.) are not addressed.
The reader is strongly encouraged to refer to the comprehensive SyRIO User Guide document for a
solid understanding of the SyRIO platform.

SyRIO WAMP 1.3 Chapter 2.Getting started
9
Getting started 2.
2.1. Prerequisites UniServer requires Visual C++ 2008 redistributable package to be installed on your computer.
If the package is missing, you will be prompted when launching the application (see 2.3 Launch
application).
If required, Visual C++2008 can be downloaded from:
http://www.microsoft.com/downloads/en/details.aspx?FamilyID=A5C84275-3B97-4AB7-A40D-
3802B2AF5FC2
2.2. Installation To install SyRIO WAMP unzip the distributed archive file (i.e.
syrio_wamp.zip) in a folder on your hard drive6, at your convenience.
For the rest of this document it is considered that the destination folder is
c:\syrio_wamp. The content of c:\syrio_wamp is given in Figure 1.
2.3. Launch application To launch SyRIO WAMP you should:
1. Launch UniServer;
2. Start the database and application servers (MySQL and Apache, in
this order)
following the procedure below:
1. In Windows Explorer (File Explorer in Windows 8 onwards) navigate to c:\syrio_wamp\
2. Launch (double-click) UniController.exe
If everything ok you should see the UniServer console on
screen (Figure 2).
3. Start MySQL (click the corresponding button)
4. Start Apache (click the corresponding button)
The default browser should open on the:
Terms and Conditions page if this is the first
time you are using the application (Figure 3a); or
SyRIO Home page if the terms and conditions were
already accepted (Figure 4).
Before the first use of the application, you should agree with
the Terms and Conditions. This is required once, and should be done by the system administrator.
6 SyRIO WAMP can also run from a USB stick. For performance reasons, it is recommended, however, to run
the application from a hard drive of your computer.
Figure 2 UniServer console
Figure 1. SyRIO WAMP directory structure

SyRIO WAMP 1.3 Chapter 2.Getting started
10
At the first run, SyRIO generates the default system administrator account with the following
credentials7:
Username: admin
Password: syrio_admin
To agree with the Terms and Conditions:
1. Login with the default system administrator credentials;
2. Tick Agree with Terms and Conditions (at the bottom of the Terms and Conditions
page - Figure 4b)
3. Click .
Your selection is saved and you will be redirected to SyRIO Home page (administrators view). Log
out to return to guest mode (Figure 4).
Figure 4. SyRIO Home page (guest view)
7 You may change the system administrator password at any time, by selecting admin>Account in the top
menu, then choosing Change password.
(a) Guest view (b) Logged in as system administrator
Figure 3. Terms and conditions page

SyRIO WAMP 1.3 Chapter 2.Getting started
11
You are ready now to login as one of the provided users and start using the application. For a list of
the possible users please consult Chapter 3. SyRIO WAMP – default credentials.
If any issues encountered (i.e. port conflicts) please consult Annex IV.
2.4. Turn off SyRIO WAMP SyRIO is a web based application. Therefore, the application is active (i.e. can be accessed from the
web browser) while the servers are running. In the case of SyRIO WAMP the servers are provided by
UniServer.
Hence, for turning off SyRIO WAMP you should turn off the
database and application servers, from the UniServer console. The
procedure is the inverse of the one presented in 2.3 Launch
application, and it goes as follows:
1. Display UniServer console by clicking the UniServer icon in
system tray (Figure 5);
2. Stop MySQL (click the corresponding button)
3. Stop Apache (click the corresponding button)
You may now close the UniServer instance as any other Windows application (i.e. click the x button).
2.5. SyRIO WAMP URL Most probably there will be cases in which you will close all the SyRIO WAMP web pages in your
browser. To access again the application – granted the UniServer’s Apache and MySQL servers are
still serving – you should open a web browser and navigate to:
http://localhost:80808
8 Replace 8080 with the appropriate Apache port, if modified (see Annex IV)
Figure 5. UniServer icon in system tray

SyRIO WAMP 1.3 Chapter 3.SyRIO WAMP – default credentials
12
SyRIO WAMP – default credentials 3.SyRIO WAMP comes pre-populated with a set of actors (i.e. organizations, installations, users) that
enables the immediate use of the application.
Depending on which type of user you want to impersonate, you may choose from the following:
Login as System Administrator:
Username: admin
Password: syrio_admin9
Login as Competent Authority:
1. Username: cao.assessor
Password: password
Roles: CA administrator, CA assessor
2. Username: cao.user
Password: password
Roles: CA user
Login as Operators / Owners:
1. Username: foc.rapp.1
Password: password
Roles: Operators administrator, Operators rapporteur
Organization: First Offshore Organization
Installations: all
2. Username: foc.rapp.2
Password: password
Roles: Installation rapporteur
Organization: First Offshore Organization
Installations: FOC Fixed 1
3. Username: soc.rapp.1
Password: password
Roles: Operators rapporteur
Organization: Second Offshore Organization
Installations: all
4. Username: soc.rapp.2
Password: password
Roles: Installation rapporteur
Organization: Second Offshore Organization
Installations: SOC Mobile 1
The predefined users correspond to a status quo ‘reality’ that allows one to test all of SyRIO
functions: system administrator, Competent Authority (formed from one Organization), two
Operator/Owners Organizations, three installations; one system administrator user, two Competent
Authority users, four Operators/Owners users. Details are provided next.
9 The login password is the actual word password. You may change it at your convenience after login, by
selecting <user name> in the right-hand side of the top menu, then Account.

SyRIO WAMP 1.3 Chapter 3.SyRIO WAMP – default credentials
13
System Administrators
1 System Administrator username: admin password: syrio_admin
Competent Authority Organizations (1)
1. Name The Competent Authority Organization
Address CAO Street 1, Atlantis, 111111 , ATLANTIDA
Users (2) 1. username: cao.assessor
password: password
roles: ca_admin, ca_assessor
2. username: cao.user
password: password
roles: ca_user
Operator / Owners Organizations (2)
1. Name First Offshore Company
Acronym FOC
Address Foc Street 1, Boton, 11111 , ARUBA
Installations (2) 1. Name: FOC Mobile 1
Type: MODU
Flag: Jamaica
2. Name: FOC Fixed 1
Type: FMI – Fixed Manned Installation
Flag: -
Users (2) 1. username: foc.rapp.1
password: password
roles: op_admin, op_rapporteur
2. username: foc.rapp.2
password: password
roles: inst_rapporteur
2. Name Second Offshore Company
Acronym SOC
Address Soc Street 1, Dhaka, 222222 , BANGLADESH
Installations (1) 1. Name: SOC Mobile 1
Type: MODU
Flag: Brunei
Users (2) 1. username: soc.rapp.1
password: password
roles: op_admin, op_rapporteur
2. username: soc.rapp.2
password: password
roles: inst_rapporteur

SyRIO WAMP 1.3 Chapter 4.Setting up the scene
14
Setting up the scene 4.The rest of this document is provided as a tutorial. The objective is to introduce SyRIO to the reader
in a practical manner. By folowing this tutorial, the reader will be able to aquire the sufficient
proficiency to use SyRIO for performing the main tasks required by the Offshore Safety Directive
(Directive 2013/30/EU):
- reporting the offshore incidents in the Common Reporting Format (as per Implementing
Regulation 1112/2014);
- assessing the offshore incidents (as per Implementing Regulation 1112/2014);
- build and export the annual report (the common publication format, IR 1112/2014) based on
the reported incidents.
Throughout this tutorial the reader will impersonate different actors (i.e. operators/owners and
competent authority users), thus getting familiar with SyRIO from the different stakeholders’
perspective.
4.1. The accident scenario In the context of this document we consider a hypothetical offshore accident scenario to be used all
through the step-by-step procedures (Chapters 5,6,7 and 8).
For the sake of preserving the length of this document within practical limits, the scenario is
intentionally kept simple, involving a helicopter accident.
Our intention is to provide the context that will allow you to easily follow each of the subsequent
phases, for a better familiarizing with the SyRIO platform.
The scenario goes as follows:
On 29 October 2016, around 6:50 PM, during the landing procedures on the helipad of FOC Mobile 1
the helicopter started drifting to the left. Full right cyclic would not stop the drift. The pilot attempted
to go around. The main rotor blades impacted a 1” diameter steel cable which was hanging from the
crane boom near the edge of the helipad. After the impact with the steel cable, the helicopter struck
the helipad deck with its main landing gear, then went overboard into the sea. The cabin section
broke apart at the aft end and the nose section bent downward prior to water impact. 17 people
were killed (16 onboard the helicopter, 1 rig member). Weather conditions at the time of the
accident: 45° right forward crosswind of 25 kts gusting to 30 kts; no high waves.
4.2. The SyRIO WAMP use case Throughout the tutorial we will consider the following reporting scenario:
- the accident occurs;
- First Offshore Company (FOC) reports the incident to the Competent Authority;
- The Competent Authority rejects the report in a first phase, requesting more information;
- FOC re-submits the modified report;
- The Competent Authority accepts the resubmitted report.
Will also be assumed that this would be the only incident in the Competent Authority’s jurisdiction.
This will allow us to address the following:
- the Competent Authority prepares for the Annual Report Drafting;
- the Competent Authority drafts and exports the Annual Report.

SyRIO WAMP 1.3 Chapter 4.Setting up the scene
15
4.3. How to read this document Addressing the proposed use case (reporting scenario) in a sequential way invloves performing many
actions impersonating different actors of the system (i.e. operator/owner rapporteurs, competent
authority assessors) interchangeably.
From the structural point of view, however, the information in this document is grouped based on
the type of the actors (operators/owners, and competent authority).
For facilitating the navigation within this document (in respect to the chronological sequence of
events) we provide the correspondence between a given task and the section of this document
addressing the respective task (Table 1).
Table 1. Document sections in respect to tasks
Task (chronological) Actors Section Page
Incident Reporting and Assessment
First Offshore Company (FOC) reports the incident to the Competent Authority
Operators / owners rapporteur
5. Reporting the incident 16
The Competent Authority rejects the report
Competent Authority assessors
7. Assessment of the report in terms of Major Accident
30
7.2. Reject report 32
FOC re-submits the modified report
Operators / owners rapporteur
6.Dealing with a rejected report 25
The Competent Authority accepts the report
Competent Authority assessors
7. Assessment of the report in terms of Major Accident
30
7.1.1. Assess (and accept) the report 31
Annual Report
Competent Authority prepares for the Annual Report Drafting
Competent Authority assessors
8.1. Annual Report Preparation 35
Competent Authority drafts and exports the Annual Report
Competent Authority assessors
8.2. Annual Report drafting and Exporting.
39
At this point we have all set for beginning the practical use of SyRIO.

SyRIO WAMP 1.3 Chapter 5.Reporting the incident
16
Reporting the incident 5.This section presents the entire process of reporting an offshore incident, taking the accident
scenario considered in Chapter 4 as reference.
The workflow follows the generic procedure described in the User Guidance document in the Using
Syrio > The Operators/Owners > Incident reporting section.
Just for overview, the generic process is reproduced in Figure 6 below.
Figure 6. Incident reporting workflow - Operators and Owners
For increased readability, all the supportive figures are grouped in Section 5.2 - Supportive figures.
5.1. Step-by-step procedure The procedure for reporting the incident goes as follows:
Login as rapporteur
1. Open a web browser and navigate to SyRIO (Figure 7)
http://localhost:8080
2. Login as rapporteur of First Offshore Company (oo_rapporteur), using the following
predefined account:
Username: foc.rapp.1
Password: password
The First Offshore Company Home page is displayed (Figure 8)
Register the event
3. Click Incidents > Register new event in the top menu
a. Provide the Event date/time as 2016-10-29 18:50; click Next ( );
b. Select FOC Mobile 1 / MODU in the Installation name/type field;
click Next ( );
SyRIO WAMP 1.3 Chapter 5.Reporting the incident
17
c. Type heli_crash_2016_10_29 as the Event Name;
The Register new event page should look like Figure 9.
click Create ( );
The Registered Events page is displayed (Figure 10)
Create a report draft
4. Scroll down (if required) to the last event in the Events list (heli_crash_2016_10_29)
Click the Display the report/drafts section button ( ) on the correspondent row.
The Event Reporting page is displayed (Figure 11).
5. Create new Event Draft (click Create report draft button )
The Create Report Draft page is displayed (Figure 12).
6. Perform the following:
a. Enter first_draft in the Description field.
b. Tick
F Helicopter accidents, on or near offshore installations; and
G Any fatal accident to be reported under the requirements of Directive 92/91/EEC
c. Click Create ( );
The Draft Control page is displayed (Figure 13)10.
Fill in the report draft sections
7. Draft Section F
a. Click Go to Section F
b. Click Section F.1. in the left-hand side menu
c. Click Modify ( )
Fill in the textboxes, as follows:
(a) Name of helicopter contractor: helicon
(b) Helicopter type: ABC
(c) Number of persons on board: 16
d. Click Update ( )
e. Click Section F.2. in the left-hand side menu
f. Click Modify ( )
Fill in the textbox as:
The pilot of the helicopter attempted to land on the helipad. The helicopter
started drifting to the left. Full right cyclic would not stop the drift. The pilot
10
Please note how Section G of the draft is already marked as Finalized. The reason is that, according to the Implementing Regulation (IR 1112/2014), there is no specific information to be reported in Sections G and H of the incident report (both should be reported under the requirements of Directive 92/91/EEC).

SyRIO WAMP 1.3 Chapter 5.Reporting the incident
18
attempted to go around. The main rotor blades impacted a 1” diameter steel
cable which was hanging from the crane boom near the edge of the helipad.
After impact with the steel cable, the helicopter struck the helipad deck with
its main landing gear, then went overboard into the sea.
The cabin section broke apart at the aft end and the nose section bent
downward prior to water impact.
There was a 45° right forward crosswind of 25 kts gusting to 30 kts.
17 people were killed (16 onboard the helicopter, 1 rig member).
g. Click Update ( )
h. Click Section F.3. in the lefthandside menu
i. Click Modify ( )
Fill in the textbox as follows:
- Main rotor blades hit the crane boom cable. (direct)
- The crane was not properly parked during helicopter activities. (indirect)
- Adverse weather conditions (wind speed, gusts up to 30 kts).
j. Click Update ( )
k. Click Section F.4. in the lefthandside menu
l. Click Modify ( )
Fill in the textbox as:
Lessons learned:
- Minimize helicpoter activities during adverse weather conditions
Preliminary recommendations:
- revision of the crane parking procedures
- revision of the helicopter approach/landing/take-off procedures.
m. Click Update ( )
n. Click on top of the lefthand side menu (Helicopter accidents, on or near
offshore installations) to review the entire report. You should get something
like Figure 14.
Finalize Section
8. Finalize Section F
Click Finalize F ( ); the following message will be displayed:

SyRIO WAMP 1.3 Chapter 5.Reporting the incident
19
Sign the Draft (equivalent with signing the Incident Report)
9. Sign first_draft
a. Click first_draft in the current page’s breadcrumbs section (top of the page)
The Draft Control page of first draft of heli_crash_2015_11_12 event is
displayed11 (Figure 15)
b. Click Review all ( );
The Review page12 is displayed (Figure 16)
c. Scroll down to the bottom of the page
d. Click Sign Incident Report ( );
The draft is signed and the Review page is reloaded.
The following message is displayed:
Submit the Incident Report to the Competent Authority
10. Submit the first_draft (which is equivalent with submitting the heli_crash_2015_11_12
Incident Report13) to the Competent Authority
a. Scroll down to the bottom of the Review page
b. Click Submit Incident Report to the CA ( );
The Submission Confirmation Request (Figure 17) page is displayed.
c. Choose Submit Incident to send the report to the CA.
The event is now submitted to the Competent Authority.
You are redirected to the Event Reporting page (Figure 18). The following
message appears:
At this point the incident report is submitted to the Competent Authority. A notification message on
the submission of a new report is sent by email to the Competent Authority Assessors. The content
of the notification message is given in Figure 20.
To access the email message when running SyRIO WAMP in the default mail settings (see Annex III)
you should:
11
Notice that all the draft’s sections are Finalized; hence, the draft can be Signed. 12
This page contains the entire report (CRF) 13
For details in respect to the relationship between the Incident Report and individual drafts please consult sections Assumptions and concepts > Reporting and assessing incidents in SyRIO and Assumptions and concepts > The Incident Report in the SyRIO User Guide document.

SyRIO WAMP 1.3 Chapter 5.Reporting the incident
20
- navigate to c:\syrio_wamp\www\runtime\mail using Windows Explorer;
- find the (.eml) file corresponding to the message sent by correlating the action date and
time with the name of the file;
- open the .eml file (double-click):
o if you have an email client installed on your computer (e.g. Microsoft Outlook or
Mozzila Thunderbird) the message will be opened using the respective program;
o otherwise, you may use any text editor (e.g. Notepad++) to read the (unformatted)
version of the message.
In this phase of the reporting, the tasks are switching to the members of the competent authority.
The competent authority assessors must, in the first place, to evaluate the quality of the report and
decide whether to accept it or not.
If the report is accepted, the entire process of reporting is considered as finished. Otherwise, the
tasks are back to the operators/owners who must change and re-submit the report.
In the context of this tutorial (Section 4.2. The SyRIO WAMP use case), the next phase is to
impersonate the competent authority assessors and reject the report. This is the subject of Sections
7 Assessment of the report in terms of Major Accident and 7.2. Reject report.

SyRIO WAMP 1.3 Chapter 6.Dealing with a rejected report
21
5.2. Supportive figures
Figure 7. SyRIO Home page
Figure 8. (First Offshore Company) Home page
Figure 9. Register new event form - final step
Figure 10. Registered Events page
Figure 11. Event Reporting page

SyRIO WAMP 1.3 Chapter 6.Dealing with a rejected report
22
Figure 12. Create report draft page
Figure 13. Draft control page
Figure 14. Section F review

SyRIO WAMP 1.3 Chapter 6.Dealing with a rejected report
23
Figure 15. Draft control page (first_draft of
heli_crash_2016_10_29) after Section F is finalized
Figure 16. The Review page
Figure 17. Submission confirmation page

SyRIO WAMP 1.3 Chapter 6.Dealing with a rejected report
24
Figure 18. The Event Reporting page after the submission
of the Incident Report
Figure 19. The First Offshore Company Registered Events
page after the submission of the Incident Report
Figure 20. New incident reported. Notification email sent to the Competent Authority Assessors

SyRIO WAMP 1.3 Chapter 6.Dealing with a rejected report
25
Dealing with a rejected report 6.This section covers the procedure that should be followed by the (operators/owners) rapporteurs
when an incident report is rejected by the competent authority.
In general, the tasks of the rapporteurs are:
- access the report;
- check the rejection justification;
- change the report in accordance with the competent authority requirements;
- re-submit the report.
In the context of this document, the incident report rejected by the competent authority is the one
on the helicopter accident that occurred on board of FOC Mobile 1 on 30/10/2016.
The rejection justification is, in this case, ‘Please provide the total number of people on board of
installation (personnel and other – if any) at the time of the incident in Section F.2.’ (see Section 7.2).
The step-by-step procedure is described next.
6.1. Step-by-step procedure Login as rapporteur
1. Open a web browser and navigate to SyRIO
http://localhost:8080
2. Login as rapporteur of the First Offshore Company
(oo_rapporteur), using the following predefined
account:
Username: foc.rapp.1
Password: password
The First Offshore Company Home page is displayed
(Figure 23);
Please also note how the rejected report is present in
the Incidents Status Card (Figure 21)
Access the report
3. Click Open Incidents Hub
The Registered Events page is displayed (Figure 24)
Please note how the report (i.e. heli_crash_2016_10_29) is marked as rejected ( ) in the
Dates/Status column.
Already at this point you may check the rejection justification by looking at the last event in the
Reporting History (Figure 25); to access Reporting History click in the row corresponding to
Figure 21. The Incidents Status Card with the rejected report information

SyRIO WAMP 1.3 Chapter 6.Dealing with a rejected report
26
heli_crash_2016_10_29. This is, however, not indicated in case of an event with more than one
reporting drafts14.
Check the Rejection justification
4. Click Display Report/Drafts section ( ) in the row corresponding to
heli_crash_2016_10_29.
The Event reporting page is displayed (Figure 26).
5. In the list of the reporting drafts, identify the one rejected by looking for the rejected icon
( ).
In our case, there is just one report draft (i.e. first draft).
Please note that the first draft is open for being edited.
6. Check rejection justification by expanding the Details section of the draft (click Expand icon
– );
The Details block should look like in Figure 22 below.
Figure 22. Details block for the rejected report.
Practically, editing, finalizing, signing and re-submitting the incident report follows the same schema
as when submitting the report for the first time (see 5.1 Step-by-step procedure, point 7 onwards).
The only difference is that only the rejected draft can be chosen for resubmission.
For the sake of the completeness, we will cover the entire process here.
Change the report (draft) according with the requirements of the CA
7. Modify Section F of first draft
a. Go to Section F (click )
b. Click Section F.2. in the left-hand side menu
c. Click Modify ( )
Append the following text at the end of the existing description of the event:
When the accident occurred, there were 35 people on board of the installation, as
follows:
- 35 members of personnel;
- no other persons (e.g. visitors, etc.)
d. Click Update ( )
14
The reporting history tracks all the events related to the drafting of a report. In case of multiple drafts, it can become more difficult to read.

SyRIO WAMP 1.3 Chapter 6.Dealing with a rejected report
27
Finalize Section
8. Finalize Section F
Click Finalize F ( ); the following message will be displayed:
Sign the Draft (equivalent with signing the Incident Report)
9. Sign first_draft
a. Click first_draft in the current page’s breadcrumbs section (top of the page)
The Draft Control page of first draft of heli_crash_2015_11_12 event is
displayed
b. Click Review all ( );
The Review page is displayed.
c. Scroll down to the bottom of the page
d. Click Sign Incident Report ( );
The draft is signed and the Review page is reloaded.
The following message is displayed:
Re-submit the Incident Report to the Competent Authority
10. Submit the first_draft to the Competent Authority
a. Scroll down to the bottom of the Review page
b. Click Submit Incident Report to the CA ( );
The Submission Confirmation Request page is displayed.
c. Choose Submit Incident to send the report to the CA.
The event is now re-submitted to the Competent Authority.
You are redirected to the Event Reporting page (Figure 18). The following
message appears:
At this point the incident report is re-submitted to the Competent Authority. The CA Assessors are
informed via email about the re-submission of the report. The content of the message is given in
(Figure 27).
To access the email file, please follow the procedure described at the end of 5.1. Step-by-step
procedure.

SyRIO WAMP 1.3 Chapter 6.Dealing with a rejected report
28
In the context of this tutorial (Section 4.2. The SyRIO WAMP use case), the next phase is to
impersonate the competent authority assessors and accept the report (i.e. assess the report in terms
of Major Accident). This is the subject of Sections 7 Assessment of the report in terms of Major
Accident and 7.1.1. Assess (and accept) the report.
6.2. Supportive figures
Figure 23. First Offshore Company Home page - report rejected
Figure 24. Registered Events page with heli_crash_206_10_29 report rejected
Figure 25. Reporting history - rejection justification provided
Figure 26. Event reporting page. Details block expanded. Rejection justification available.

SyRIO WAMP 1.3 Chapter 6.Dealing with a rejected report
29
Figure 27. Incident report re-submitted. Notification email to CA Assessors.

SyRIO WAMP 1.3 Chapter 7.Assessment of the report in terms of Major Accident
30
Assessment of the report in terms of Major Accident 7.This section presents the process of assessing an incident report in terms of Major Accident, taking
the scenario considered in Chapter 4 as reference.
The workflow follows the generic procedure described in the User Guidance document in the Using
Syrio > The Competent Authority > Incident Assessment inTerms of Major Accident section.
Just for overview, the generic process is reproduced in Figure 28 below.
Figure 28. Incident assessment in terms of Major Accident workflow - Competent Authorities
The procedure here assumes that the incident report (the helicopter accident) has been reported
(submitted and re-submitted) by the First Offshore Company. This corresponds to Sections 5.
Reporting the incident and 6. Dealing with a rejected report.
7.1. Step-by-step procedure The procedure for assessing an incident report goes as follows:
Login as Competent Authority Assessor
1. Open a web browser and navigate to SyRIO (Figure 7)
http://localhost:8080
2. Login as competent authority assessor (ca_assessor), using the following predefined
account:
Username: cao.assessor
Password: password
The Competent Authority Home page is displayed (Figure 31).
The new incident is displayed in the Tasks list as:

SyRIO WAMP 1.3 Chapter 7.Assessment of the report in terms of Major Accident
31
Display the report
1. Click display>> in the Home page to open the Report view page of the incident report
First Offshore Company / FOC Mobile 1 / MODU / 2016-10-29 18:50:29 (Figure 32).
Review the entire report, either on screen or in the printed form (click then print-out a CPF
copy).
From here you (as competent authority assessor) may either assess and accept (7.1.1) or reject (7.2.
Reject report) the report.
7.1.1. Assess (and accept) the report
The general procedure implies filling out (in the
Assessment of incident report page)
the parts of the report (Figure 29) that are required
to be completed by the Competent Authority
(located, according with the CRF at the end of each
section of the report).
For the case of our incident, the step-by-step
procedure goes as follows:
In the Report View page (Figure 32):
1. Click button in the Report View
page header (Figure 33);
The Assessment of incident
report page is displayed (Figure 36).
2. Scroll down to the end of Section F of the report and:
a. tick Yes;
b. Provide the following text in the Give justification field:
Multiple fatalities occurred.
3. Scroll down to the end of Section G of the report and:
a. tick Yes;
b. Provide the following text in the Give justification field:
Multiple fatalities occurred.
4. Scroll down at the end of the page and click Finalize ( )
The report will be marked as Finalized (from the MA assessment perspective); you will be
redirected to the Report view page and the message in Figure 30 will be displayed.
Figure 30. Assessment in terms of Major Accident finalized. Notification message.
At this phase:
- the incident report is considered accepted by the CA (this is also reflected on the
Operators/Owners side);
Figure 29. The Competent Authority section of the incident report.

SyRIO WAMP 1.3 Chapter 7.Assessment of the report in terms of Major Accident
32
- the responsibilities of the Operator/Owner in terms of reporting the incident are considered
over;
- the incident report is assessed in terms of Major Accident;
- you (as competent authority assessor) may proceed with the next phase in processing the
report (i.e. the preparation of the report to be accounted in the annual report – the
Assessment of the Report in Terms of Section4 of the CPF), subject of Section 8.1.
At this point you may opt for having the incident report exported in a hard-copy printable form (this
is also the recommended best practice). For this:
In the Report View page:
1. Click button in the Report View page header.
The pdf version of the report will be generated, in the common reporting format provided in Annex I
of the Implementing Regulation 1112/2014 (IR 1112/2014). Depending on your web browser and the
browser settings, either:
- the generated file will be downloaded automatically; or
- you will be prompted for a name and the location on your hard drive where the file to be
downloaded.
The CRF pdf of the incident considered in this tutorial is given in Annex II.
In the context of this tutorial (Section 4.2. The SyRIO WAMP use case), this concludes the incident
reporting phase. From this moment on, the FOC rapporteurs have no responsibilities in respect to
the incident reporting.
Considering our scenario, all the future tasks are addressing the competent authority. The next
phase is the preparation of the annual report. This topic makes the subject of Section 8.1. Annual
Report Preparation of Chapter 8.
7.2. Reject report In the Report View page (see 7.1 Display the report):
1. Click button in the Report View page header (Figure 33);
2. Provide the justification for rejecting the report, when prompted (Figure 34) as:
Please provide the total number of people on board of installation (personnel and other – if
any) at the time of the incident in Section F.2.
3. Click in the Reject justification form.
At this point:
- the incident report is marked as rejected (Figure 35);
- the incident report is reopened (on the Operators/Owners side) so that it can be adjusted
based on the rejection justification.

SyRIO WAMP 1.3 Chapter 7.Assessment of the report in terms of Major Accident
33
In the context of this tutorial (Section 4.2. The SyRIO WAMP use case), the next phase is to
impersonate the FOC rapporteurs, modify the report according to the competent authority
requirements and re-submit the modified report. This process is the subject of Chapter 6. Dealing
with a rejected report.
7.3. Supportive figures
Figure 31. Competent Authority Home page
Figure 32. Report view
Figure 33. Report view page header
Figure 34. Report rejection form
Figure 35. Report view page after rejecting the report.
SyRIO WAMP 1.3 Chapter 7.Assessment of the report in terms of Major Accident
34
Figure 36. Assessment of incident report page
Figure 37. Assessment of incident report page. Assessing the incident in terms of Major Accident. The Competent Authority block (Section F).

SyRIO WAMP 1.3 Chapter 8.Annual Report
35
Annual Report 8.This section covers the process of obtaining the Annual Report based on the incident information
using SyRIO. First, a short overview is provided, followed by the step-by-step procedure taking the
scenario considered in Chapter 4 as reference.
For a better understanding of the tasks at hand, the reader is strongly encouraged to consult SyRIO
User Guidance document, especially the Using SyRIO > The Competent Authority > Annual Report
section. The workflow follows the generic procedure described in the afore-mentioned section of
the User Guidance document.
In short, for being able to obtain the Annual Report one (competent authority assessor) must
perform the following tasks:
- the Annual Report preparation – involving the analysis of each individual incident and
preparing that incident for being accounted in the final report; and
- the Annual Report drafting – putting together all the information in the previous phase and
augmenting the report with the additional information (not related to the incidents per se).
Figure 38. Relationship between CA tasks and SyRIO support
SyRIO provides support in each of this phases, as depicted in Error! Reference source not found..
8.1. Annual Report Preparation This phase implies the individual assessment of the incident reports (CRFs) for establishing the
categories (as provided in Section 4 of the CPF) for which the event qualifies. In SyRIO, this process is
called Assessment of the incident report in terms of Section 4 of the CPF or, shortly, CPF Assessment
of an incident.
As a best practice, it is recommended to the competent authority assessors to perform this analysis
immediately (or at short period) after the Assessment in terms of Major Accident of an incident.
Thus, the Competent Authority will be prepared to having the Annual Report for a given year ready
as soon as it is required (i.e. from 1st of January of the consecutive year).

SyRIO WAMP 1.3 Chapter 8.Annual Report (preparation)
36
In the case of our tutorial, the CPF Assessment should only be performed once, since there is only
one incident reported and accepted. The procedure follows.
8.1.1. Step-by-step
This procedure assumes that the report of the helicopter incident has been accepted by the
Competent Authority. Hence, it should follow Section 7.1.1. Assess (and accept) the report.
The procedure goes as follows:
Login as Competent Authority Assessor
1. Open a web browser and navigate to SyRIO (Figure 7)
http://localhost:8080
2. Login as competent authority assessor (ca_assessor), using the following predefined
account:
Username: cao.assessor
Password: password
The Competent Authority Home page is displayed
Go to the Annual Reports Preparation section and Refresh the Incidents List
3. Click the Annual report preparation button ;
The Annual Reports Preparation page is displayed (Figure 41)
4. Click Refresh ( ) to update the incidents list.
SyRIO should detect the newly accepted incident (161101/FOC/FOCMobile1/) and update
the list accordingly.
The Incidents list should look like in Figure 42.
CPF Assess 161101/FOC/FOCMobile1/
5. Click View ( ) to display the CPF Assessment of 161101/FOC/FOCMobile1/
The CPF Section 4 Incident Assessment page is displayed (Figure 43)
Please note how SyRIO has already detected that this incident qualifies for Helicopter
accidents and Fatal accidents (Figure 39)
Figure 39. Automatic event categorization
6. Click Update ( ) to enter the CPF Assessment mode (Figure 44);
7. perform the following:
a. scroll down to the Helicopter accidents and Fatal accidents rows (Section 4.2);
b. tick the checkboxes corresponding to the two rows.
This action has the following consequences:

SyRIO WAMP 1.3 Chapter 8.Annual Report (preparation)
37
- You consider that the incident qualifies for these categories;
- Your selection is the one accounted in the annual report.
In addition, this action means that you agree with the SyRIO findings.
c. scroll down to Section 4.3 Total number of fatalities and injuries;
d. provide the following values (as resulting from the considered accident scenario):
Number of fatalities: 17;
Total number of injuries: 0
Total number of serious injuries: 0
Section 4.3. should look like in Figure 40.
Figure 40. Section 4.3 of the CPF Assessment during drafting
e. scroll down to the bottom of the page and click Update ( ) to save the
changes.
You will be redirected to the CPF Section 4 Incident Assessment page.
Your changes will be reflected in the assessment document.
Finalize the CPF Assessment of 161101/FOC/FOCMobile1/
8. Click Finalize ( ) in the CPF Section 4 Incident Assessment page.
The CPF assessment of 161101/FOC/FOCMobile1/ is finalized and you will be redirected to
the Annual Reports Preparation page. Please note how the incident is also marked
as Finalized in the Incidents List.
Since, in our case:
- the First Offshore Company’s helicopter accident was the only one in our jurisdiction; and
- we have finalized the CPF Assessment of the incident,
the entire phase of preparation for the annual report is completed. We may now proceed with the
actual drafting of the annual report (for 2016, since this is the declared date of the accident). This
subject is covered in Section 8.2, next.
SyRIO WAMP 1.3 Chapter 8.Annual Report (preparation)
38
8.1.2. Supportive figures
Figure 41. Annual Reports Preparation page. Initial view, no incidents listed.
Figure 42.Annual Report Preparation page. The new incident has been added in the list after refreshing.
Figure 43. The CPF Section 4 Incident Assessment page
Figure 44. CPF Assessment Update page

SyRIO WAMP 1.3 Chapter 8.Annual Report (draft & export)
39
8.2. Annual Report drafting and Exporting. The generic workflow when drafting the annual report is given in Figure 45.
Drafting the annual report is a joint effort
between SyRIO and the user (i.e. the
competent authority assessor).
SyRIO takes care of extracting and / or
aggregating the information from the
(finalized!) CPF assessments and/or the
correspondent MA assessments of the
incidents over the reporting period.
The user is required to fill-in the missing
parts, thus completing the jigsaw puzzle of
the Annual Report.
We shall present next the step-by-step
procedure of drafting the annual report, in
the context of this tutorial. Let it be
reminded that, in this phase, it is assumed
that the Annual Preparation phase is
completed (Section 8.1. Annual Report Preparation)
The Annual Report drafting process is described next.
8.2.1. Step-by-step procedure
Login as Competent Authority Assessor
1. Open a web browser and navigate to SyRIO (Figure 7)
http://localhost:8080
2. Login as competent authority assessor (ca_assessor), using the following predefined
account:
Username: cao.assessor
Password: password
The Competent Authority Home page is displayed
Go to the Annual Reports List
3. Click the Annual report drafting button ;
The Annual Reports page is displayed (Figure 51).
The annual report for 2016 should already be in the list (automatically added by SyRIO).
Please note how SyRIO indicates that the 2016 report is ‘out of sync’15 ( ).
Open the Annual Report Editor for 2016
15
SyRIO tracks any changes in the MA Assessments and CPF assessments of the incidents (including the number of the finalized assessments). If any of the changes would cascade itself in the information of the Annual Report the users are informed that the Annual Report is ‘out of sync’.
Figure 45. Generic workflow for Annual Report drafting

SyRIO WAMP 1.3 Chapter 8.Annual Report (draft & export)
40
4. Click View ( ) in the 2016 row.
The Annual Report Editor is displayed (Figure 52).
Report being ‘out-of-sync’ is also indicated at the top of the editor (Figure 46). Therefore, we
should proceed with syncing the report, as follows (steps 5 and 6):
Figure 46. Report 'out-of-sync' message in the Annual Report Editor
Sync the report
5. Click Refresh ( ) and choose Refresh installations.
When the process completes, the page is reloaded and you will be informed about the
(potential) changes in the installations list (Figure 47)
Figure 47. Result of updating the installations list (sync report)
In our case, a new installation (i.e. FOC Mobile 1) has been added.
You may also check (by scrolling to Section 2.3 Mobile installations) that FOC Mobile 1 has
been included in Table 2.3.
6. Click Refresh ( ) and choose Refresh installations.
When the process completes, the page is reloaded and you will be informed about the
completion of the process ()
Figure 48. Notification of data updated (sync report)
You may check the results in Sections 4.1 and 4.2. of the report.
Continue with drafting the report
In this phase, you should provide the additional information cannot be extracted from the individual
reports (assessments). Some of this information is compulsory. To keep this tutorial simple, we shall
only provide the compulsory information.
7. Provide the Geographical area of operation and Duration for FOC Mobile 1 installation, as
follows:
a. scroll to Section 2.3 Mobile installations;
b. click Add operation area button ( );
The Add/Edit Operation Area window (Figure 53) is displayed.

SyRIO WAMP 1.3 Chapter 8.Annual Report (draft & export)
41
Type in the following, in the respective textboxes:
Name: South West Sea
Duration: 2.5
Click Add ( )
The Annual Report Editor is reloaded and the information on FOC Mobile 1 is
updated.
8. Provide the information required in Section 2.4 Information for data normalization
purposes
a. scroll to Section 2.4
b. click Edit ( );
The Information for data normalization purposes page (Figure 54)
is displayed.
Type in the following:
Total number of actual offshore working hours for all installations: 1200
Oil production: 0 toe
Gas production: 0 toe
Click Update ( )
The Annual Report Editor is reloaded and the information in Section 2.4 is updated
(Figure 49).
Figure 49. Updated section (2.4.)
9. Provide the information required in Section 3. Regulatory Functions and Framework
a. scroll to Section 3.
b. click Edit ( );
The Annual Report Section 3 Update page (Figure 55) is displayed.
Type in the following:
In Section 3.1. Inspections
Number of offshore inspections: 2
Man-days spent on installation: 15
Number of inspected installations: 1
In Section 3.2. Investigations
Major accidents: 1
Environmental concerns: 0

SyRIO WAMP 1.3 Chapter 8.Annual Report (draft & export)
42
In Section 3.3. Enforcement actions
none taken
In Section 3.4. Major changes in the
offshore regulatory framework
Rationale: none taken
Click Update ( )
The Annual Report Editor is reloaded
and the information in Section 3 is updated ().
At this point, the Annual Report has all the
information required for being exported as SPIROS
XML file.
Export report as SPIROS XML
In the Annual Report Editor:
10. Click Export as SPIROS XML button
( )
The SPIROS XML file for the 2016 Annual Report (in fact, the annual report export file) is generated
based on the information in the report and following the structure described in the SPIROS XML
Schema16,17. Depending on your web browser and the browser settings, either:
- the generated file will be downloaded automatically; or
- you will be prompted for a name and the location on your hard drive where the file to be
downloaded.
The default file name is syrio_spiros_YYYYMMDD-hhiiss.xml, with YYYYMMDD and hhiiss replaced
with the date and time of the export.
The SPIROS XML generated in this tutorial is given in Annex X.
This concludes the entire tutorial, subject of this document. At this point you have covered the main
functionality of SyRIO, from both the operators and owners and the competent authority
perspective.
The scenario and workflow proposed were, by no means, intended to be comprehensive. You are
strongly encouraged to test the application further, also addressing other capabilities that were left
aside in this document.
16
SPIROS Schema (also known as OSPIS Schema) is the XML schema (xsd) defining the format and the rules that must be followed by an xml file to be accepted as the electronic means of communicating the Annual Report (CPF) to the Commission. The schema has been developed by during the development of the SyRIO and SPIROS reporting platforms. 17
For more information about SPIROS (OSPIS) schema please consult the EUOAG site at http://euoag.jrc.ec.europa.eu/node/108 (requires authentication)
Figure 50. Updated Section 3 of the Annual Report

SyRIO WAMP 1.3 Chapter 8.Annual Report (draft & export)
43
8.2.2. Supporting figures
Figure 51. The Annual Reports page
Figure 52. The Annual Report Editor
Figure 53. The Add/Edit Operation area page
Figure 54. The Information for Data Normalization Purposes page
Figure 55. Annual Report Section 3 Update page
SyRIO WAMP 1.3 Annex I – Incident report in the common reporting format (CRF)
44
Annex I Incident report in the common reporting format – SyRIO
generated
The report starts on the next page.

SyRIO WAMP 1.3 Annex I – Incident report in the common reporting format (CRF)
45

SyRIO WAMP 1.3 Annex I – Incident report in the common reporting format (CRF)
46

SyRIO WAMP 1.3 Annex I – Incident report in the common reporting format (CRF)
47

SyRIO WAMP 1.3 Annex I – Incident report in the common reporting format (CRF)
48

SyRIO WAMP 1.3 Annex I – Incident report in the common reporting format (CRF)
49

SyRIO WAMP 1.3 Annex II – Annual Report export file (SPIROS XML)
50
Annex II 2016 Annual Report export file (SPIROS XML) The following is the content of the Annual Report Export file (the SPIROS XML), which is the output
of the Annual Report drafting phase of the tutorial considered in this document.
In the foreseen framework of the reporting tools SyRIO and SPIROS, the competent authority will
upload this file to the SPIROS platform (hosted by the Commission) and use it as the starting point of
the final annual report.
The information in the file is the one required by the Common Publication Format (see Annex II of
the Implementing Regulation 1112/2014).
The arrangement of the file is according to the structure described in the SPIROS Schema. SPIROS
Schema (previously known as the OSPIS Schema) is the XML schema (xsd) defining the format and
the rules that must be followed by an xml file to be accepted as the electronic means of
communicating the Annual Report (CPF) to the Commission. The schema has been developed by
during the development of the SyRIO and SPIROS reporting platforms.
For more information about SPIROS (OSPIS) schema please consult the EUOAG site at
http://euoag.jrc.ec.europa.eu/node/108 (requires authentication).
<?xml version="1.0" encoding="UTF-8"?>
<common_publication_format xmlns="http://spiros.ec.europa.eu/schemas/1.0">
<section1>
<ms>AA</ms>
<period>2016</period>
<ca>Atlantida Offshore Safety Dept.</ca>
<dra>The Competent Authority Organization</dra>
<contact>
<tel>-</tel>
<email>[email protected]</email>
</contact>
</section1>
<section2>
<fixed_installations>
<operational/>
<decommisioned/>
</fixed_installations>
<mobile_installations>
<mo_inst>
<ident>FOC Mobile 1</ident>
<type>MODU</type>
<y_const>1992</y_const>
<n_beds>53</n_beds>
<op_areas>
<op_area duration="2.5" name="South West Sea"/>
</op_areas>
</mo_inst>
</mobile_installations>
<data_norm>
<working_hours>1200</working_hours>
<production>
<ktoe_total>0</ktoe_total>
<oil u="toe" q="0"/>
<gas u="toe" q="0"/>
</production>
</data_norm>
</section2>
<section3>

SyRIO WAMP 1.3 Annex II – Annual Report export file (SPIROS XML)
51
<s3_1 n_offshore_inspections="2" man_days="15" n_inspected="1"/>
<s3_2 n_major_accidents="1" n_env_concerns="0"/>
<s3_3>
<![CDATA[
none taken
]]>
</s3_3>
<s3_4>
<description>
<![CDATA[
]]>
</description>
<rationale>
<![CDATA[
no need for regulatory cahnges
]]>
</rationale>
<expected_outcome>
<![CDATA[
]]>
</expected_outcome>
<references/>
</s3_4>
</section3>
<section4>
<s4_1 n_major_accidents="1" n_events_total="1"/>
<s4_2>
<s4_2_a s4_2_a_haz="0" s4_2_a_nio="0" s4_2_a_nig="0" s4_2_a_ix="0" s4_2_a_if="0" s4_2_a_total="0"/>
<s4_2_b s4_2_b_wbf="0" s4_2_b_bda="0" s4_2_b_bo="0" s4_2_b_total="0"/>
<s4_2_c s4_2_c_total="0"/>
<s4_2_d s4_2_d_sk="0" s4_2_d_sb="0" s4_2_d_si="0" s4_2_d_total="0"/>
<s4_2_e s4_2_e_total="0"/>
<s4_2_f s4_2_f_total="1"/>
<s4_2_g s4_2_g_total="1"/>
<s4_2_h s4_2_h_total="0"/>
<s4_2_i s4_2_i_total="0"/>
<s4_2_j s4_2_j_total="0"/>
</s4_2>
<s4_3 s4_3_sinj="0" s4_3_inj="0" s4_3_fatalities="17"/>
<s4_4 s4_4_nother="0" s4_4_ncoms="0" s4_4_neere="0" s4_4_nroteq="0" s4_4_nnavaids="0" s4_4_nsds="0" s4_4_nps="0"
s4_4_npcrs="0" s4_4_nds="0" s4_4_nics="0" s4_4_npcs="0" s4_4_nsis="0"/>
<s4_5>
<s4_5_a s4_5_a_other="0" s4_5_a_csf="0" s4_5_a_if="0" s4_5_a_mf-vh="0" s4_5_a_mf-dm="0" s4_5_a_mf-wo="0" s4_5_a_mf-
f="0" s4_5_a_co-ext="0" s4_5_a_co-int="0" s4_5_a_df="0" s4_5_a_total="0"/>
<s4_5_b s4_5_b_other="0" s4_5_b_err-dsgn="0" s4_5_b_err-insp="0" s4_5_b_err-tst="0" s4_5_b_err-mnt="0" s4_5_b_err-op="0"
s4_5_b_total="0"/>
<s4_5_c s4_5_c_other="0" s4_5_c_inq-safelead="0" s4_5_c_inq-sup="0" s4_5_c_inq-pc="0" s4_5_c_inq-com="0" s4_5_c_nc-
ptw="0" s4_5_c_nc-prc="0" s4_5_c_inq-instp="0" s4_5_c_inq-rap="0" s4_5_c_total="0"/>
<s4_5_d s4_5_d_other="0" s4_5_d_ice-icebergs="0" s4_5_d_exc-design-lowvis="0" s4_5_d_exc-design-wave="0" s4_5_d_exc-
design-wind="0" s4_5_d_total="0"/>
</s4_5>
<s4_6>
<![CDATA[
]]>
</s4_6>
</section4>
</common_publication_format>

SyRIO WAMP 1.3 Annex III – SyRIO (WAMP) Configuration
52
Annex III SyRIO (WAMP) Configuration This distribution of SyRIO allows using the application ‘out-of-the-box’. There are some cases when
you would like to change the default configuration. Some of these are presented in the sequel.
User registration and the default email settings SyRIO uses the email notifications in different phases. Of the upmost importance is the User
registration. This process is addressed here.
Users are registered by the system administrator. Nevertheless, a temporary user password is
generated automatically at the same time with the account. An email with the login credentials is
sent to the newly created user, at an address indicated in the registration form.
The result of this process is that, without the actual ‘mailing’ capabilities enabled noone can login
with the new user credentials.
In order to allow registration of new users, the default configuration of SyRIO declares file as the
email transport protocol. In other words, any email generated and sent by SyRIO will be saved on
disk as a file with the .eml extension.
The location of the email files is:
[x:]\syrio_wamp\www\syrio\runtime\mail\
You may open and read the eml file either with an email client (e.g. MS Outlook) if it is installed on
your computer, or using any text editor, at your convenience.
Configure the Country, Competent Authority and Admin email By default the distributed version of SyRIO is country-agnostic, in the sense that the default country
is set as Atlantida (with the hypothetical ISO 3166 alpha-2 code AA).
Moreover, the default administrator email is pointed to a non-existing, dummy addres.
You may change any of this settings in the syrio params file, located at
[x:]\syrio_wamp\www\syrio\config\params.php
The content of the file is:
<?php
return [
'adminEmail' => '[email protected]', // default admin email
'developersEmail' => '[email protected]', // developers' email - do not
// change!!!
'competentAuthority' => 'Atlantida Offshore Safety Dept.', // name of the
// Competent Authority
'competentAuthorityIso2' => 'AA', // country ISO 3166-1 alpha-2 code of the
// country hosting SyRIO
'languages' => [
'en' => 'English',
'it' => 'Italiano',
'ro' => 'Româneşte'
],
'language' => 'en', // the default application language
// country ISO 3166-1 alpha-2 code of the country
// one in 'languages'
// CASE SENSITIVE!
'mail_language' => 'en', // the language used for the automatic emails
'previous_version' => '1.0.20160622', // previous version

SyRIO WAMP 1.3 Annex III – SyRIO (WAMP) Configuration
53
'previous_build' => '2232', // previous build no.
'version' => '1.3.20161019', // version
'build' => '1657' // build no.
];
Email settings By default SyRIO is set to use a ‘file-based’ configuration for email communication (see 0). Shell a
functional email is available, you may set SyRIO to use it from the mail configuration file (located at:
[x:]\syrio_wamp\www\syrio\config\mail.php)
<?php
return [
'class'=>'yii\swiftmailer\Mailer',
'useFileTransport' => true,
'transport' => [
'class' => 'Swift_SmtpTransport',
'host' => 'email.no.mail.com',
'username' => 'username',
'password' => 'password',
//'encryption' => 'tls',
'port' => '25',
]
];
To test the email communication try to Contact the administrators18 and check if:
- You get any error; and
- The message gets to the inbox of the administrator email (admin_email in params.php).
You may find more information about Yii mailing check http://www.yiiframework.com/doc-
2.0/guide-tutorial-mailing.html .
The database settings The Apache root password is syrio_db.
SyRIO WAMP database configuration file (application) is located at:
[x:]\syrio_wamp\www\syrio\config\db.php
The default connection properties are as:
<?php
return [
'class' => 'yii\db\Connection',
'dsn' => 'mysql:host=localhost;port=3307;dbname=syrio_b',
'username' => 'syrio_app',
'password' => 'AB#sh223vdsa!',
'charset' => 'utf8',
];
Please make sure that any modifications of the MySQL port number (see Annex IV) is reflected in
the ‘dsn’ section of the configuration file.
18
Click Contact in SyRIO footer.

SyRIO WAMP 1.3 Annex IV – UniServer server settings
54
Annex IV UniServer server settings The UniServer instance provided with SyRIO WAMP has been
configured as to require no additional intervention of the user when
launching the application. There might be, however, situations in which
the default configuration comes in conflict with other software installed
on your computer or, you might want to change some of the default
server settings.
All the interventions on the servers settings (Apache and MySQL) are
performed from the UniServer console (Figure 56).
You may access the UniServer console either when first launching the
application (double-click the UniController.exe) or, by clicking the
UniServer icon in system tray (Figure 57);
Change the default ports By default SyRIO WAMP uses the following ports:
- Apache: 8080 - MySQL: 3307
The default ports have been adopted to avoid (in most of the cases) the port conflict situations with other software installed on you system. If, however, this situation occurs, you will be promted when starting the Apache and/or MySQL servers. In this case, you will have to provide other values for the SyRIO WAMP port(s) in conflict.
To change the SyRIO WAMP ports follow the procedures below.
Change the Apache port
In the UniServer console:
1. Make sure the Apache server is stopped (red indicator, see Figure 56);
2. Select Apache > Change Apache ports > Change Apache port;
3. Provide a new port number when prompted (e.g. 8081);
Click Ok
4. Start Apache.
Change the MySQL port
In the UniServer console:
1. Make sure the Apache server is stopped (red indicator, see Figure 56);
2. Select MySQL > Change MySQL port;
3. Provide a new port number when prompted (e.g. 3308);
Click Ok
4. Start MySQL.
Figure 57. UniServer icon in system tray
Figure 56. The UniServer console
SyRIO WAMP 1.3 Annex IV – UniServer server settings
55
Change the timezone By default SyRIO WAMP is configured to use the system timezonr for both MySQL and PHP. If you
want to change this behaviour, follow the procedures described next.
Change the PHP timezone
You may change the PHP timezone with the following procedure:
In the UniServer console:
5. Make sure the Apache server is stopped (red indicator, see Figure 56);
6. Select PHP > Edit selected configuration file;
The .ini configuration file will open in your default text editor.
7. Search the configuration file for ‘date.timezone’;
8. Edit the date.timezone value in the [Date] section to suit your choice.
You may add any of the accepted php timezone.
You may find a list of the accepted php5 timezones at
http://www.w3schools.com/php/php_ref_timezones.asp
9. Save the .ini file;
10. Start Apache.
Change MySQL timezone
To change the MySql timezone go through the procedure described next.
In the UniServer console:
1. Make sure the MySQL server is stopped (red indicator, see Figure 56);
2. Select MySQL > Edit Config file my.ini;
The my.ini configuration file will open in your default text editor.
3. Add or edit the following line in the [mysqld] section:
default-time-zone='+hh:00'
where +hh or –hh is the time difference in hours from the UTM.
4. Save the file;
5. Start MySQL server.