system management command
TRANSCRIPT

Command Manual - System Management Quidway S3000-EI Series Ethernet Switches Table of Contents
Huawei Technologies Proprietary
i
Table of Contents
Chapter 1 File System Management Commands ....................................................................... 1-1 1.1 File System ........................................................................................................................ 1-1
1.1.1 cd............................................................................................................................. 1-1 1.1.2 copy......................................................................................................................... 1-1 1.1.3 delete....................................................................................................................... 1-2 1.1.4 dir ............................................................................................................................ 1-3 1.1.5 file prompt................................................................................................................ 1-4 1.1.6 format ...................................................................................................................... 1-5 1.1.7 mkdir........................................................................................................................ 1-5 1.1.8 more ........................................................................................................................ 1-6 1.1.9 move........................................................................................................................ 1-6 1.1.10 pwd........................................................................................................................ 1-8 1.1.11 rename .................................................................................................................. 1-8 1.1.12 reset recycle-bin.................................................................................................... 1-9 1.1.13 rmdir .................................................................................................................... 1-10 1.1.14 undelete............................................................................................................... 1-10
1.2 Configuration File Management Commands ................................................................... 1-12 1.2.1 reset saved-configuration...................................................................................... 1-12 1.2.2 save....................................................................................................................... 1-13
1.3 FTP Server Configuration Commands............................................................................. 1-13 1.3.1 display ftp-server................................................................................................... 1-13 1.3.2 display ftp-user ...................................................................................................... 1-14 1.3.3 ftp server ............................................................................................................... 1-14 1.3.4 ftp timeout.............................................................................................................. 1-15 1.3.5 local-user............................................................................................................... 1-16 1.3.6 password ............................................................................................................... 1-16 1.3.7 service-type ........................................................................................................... 1-17
1.4 FTP Client Commands .................................................................................................... 1-18 1.4.1 ascii ....................................................................................................................... 1-18 1.4.2 binary..................................................................................................................... 1-18 1.4.3 bye......................................................................................................................... 1-19 1.4.4 cd........................................................................................................................... 1-19 1.4.5 cdup....................................................................................................................... 1-20 1.4.6 close ...................................................................................................................... 1-20 1.4.7 debugging.............................................................................................................. 1-21 1.4.8 delete..................................................................................................................... 1-21 1.4.9 dir .......................................................................................................................... 1-22

Command Manual - System Management Quidway S3000-EI Series Ethernet Switches Table of Contents
Huawei Technologies Proprietary
ii
1.4.10 disconnect ........................................................................................................... 1-22 1.4.11 ftp ........................................................................................................................ 1-23 1.4.12 get ....................................................................................................................... 1-23 1.4.13 lcd........................................................................................................................ 1-24 1.4.14 ls.......................................................................................................................... 1-24 1.4.15 mkdir.................................................................................................................... 1-25 1.4.16 open .................................................................................................................... 1-25 1.4.17 passive ................................................................................................................ 1-26 1.4.18 put ....................................................................................................................... 1-27 1.4.19 pwd...................................................................................................................... 1-27 1.4.20 quit....................................................................................................................... 1-28 1.4.21 remotehelp .......................................................................................................... 1-28 1.4.22 rmdir .................................................................................................................... 1-29 1.4.23 user ..................................................................................................................... 1-29 1.4.24 verbose................................................................................................................ 1-30
1.5 TFTP Configuration Commands...................................................................................... 1-30 1.5.1 tftp ......................................................................................................................... 1-30 1.5.2 tftp get ................................................................................................................... 1-31 1.5.3 tftp put ................................................................................................................... 1-31
Chapter 2 MAC Address Table Management Commands......................................................... 2-1 2.1 MAC Address Table Management Commands ................................................................. 2-1
2.1.1 display mac-address aging-time ............................................................................. 2-1 2.1.2 display mac-address ............................................................................................... 2-1 2.1.3 mac-address............................................................................................................ 2-2 2.1.4 mac-address max-mac-count.................................................................................. 2-3 2.1.5 mac-address timer .................................................................................................. 2-4
Chapter 3 Device Management Commands ............................................................................... 3-1 3.1 Device Management Commands ...................................................................................... 3-1
3.1.1 boot boot-loader ...................................................................................................... 3-1 3.1.2 boot bootrom ........................................................................................................... 3-1 3.1.3 display boot-loader.................................................................................................. 3-2 3.1.4 display cpu .............................................................................................................. 3-2 3.1.5 display device.......................................................................................................... 3-3 3.1.6 display environment ................................................................................................ 3-4 3.1.7 display fan ............................................................................................................... 3-5 3.1.8 display memory ....................................................................................................... 3-5 3.1.9 display power .......................................................................................................... 3-6 3.1.10 reboot .................................................................................................................... 3-6 3.1.11 temperature-limit ................................................................................................... 3-7
Chapter 4 System Maintenance Commands .............................................................................. 4-1 4.1 Basic System Configuration and Management Commands.............................................. 4-1

Command Manual - System Management Quidway S3000-EI Series Ethernet Switches Table of Contents
Huawei Technologies Proprietary
iii
4.1.1 clock datetime ......................................................................................................... 4-1 4.1.2 clock summer-time .................................................................................................. 4-1 4.1.3 clock timezone......................................................................................................... 4-3 4.1.4 sysname.................................................................................................................. 4-3
4.2 System Status and System Information Display Commands ............................................ 4-4 4.2.1 display clock ............................................................................................................ 4-4 4.2.2 display current-configuration ................................................................................... 4-5 4.2.3 display debugging ................................................................................................... 4-9 4.2.4 display saved-configuration................................................................................... 4-10 4.2.5 display users ......................................................................................................... 4-12 4.2.6 display version....................................................................................................... 4-13
4.3 System Debug Commands.............................................................................................. 4-13 4.3.1 debugging.............................................................................................................. 4-13 4.3.2 display diagnostic-information............................................................................... 4-14
4.4 Network Connection Test Commands............................................................................. 4-15 4.4.1 ping........................................................................................................................ 4-15 4.4.2 tracert .................................................................................................................... 4-17
4.5 Log Commands................................................................................................................ 4-19 4.5.1 display channel...................................................................................................... 4-19 4.5.2 display info-center ................................................................................................. 4-20 4.5.3 info-center channel name...................................................................................... 4-21 4.5.4 info-center console channel .................................................................................. 4-21 4.5.5 info-center enable ................................................................................................. 4-22 4.5.6 info-center logbuffer .............................................................................................. 4-23 4.5.7 info-center loghost................................................................................................. 4-24 4.5.8 info-center loghost source..................................................................................... 4-24 4.5.9 info-center monitor channel................................................................................... 4-25 4.5.10 info-center snmp channel.................................................................................... 4-26 4.5.11 info-center source ............................................................................................... 4-27 4.5.12 info-center switch-on ........................................................................................... 4-29 4.5.13 info-center timestamp.......................................................................................... 4-30 4.5.14 info-center trapbuffer........................................................................................... 4-30 4.5.15 reset logbuffer ..................................................................................................... 4-31 4.5.16 reset trapbuffer .................................................................................................... 4-32 4.5.17 terminal debugging.............................................................................................. 4-32 4.5.18 terminal logging................................................................................................... 4-33 4.5.19 terminal monitor .................................................................................................. 4-33 4.5.20 terminal trapping ................................................................................................. 4-34
Chapter 5 SNMP Configuration Commands ............................................................................... 5-1 5.1 SNMP Configuration Commands....................................................................................... 5-1
5.1.1 display snmp-agent community............................................................................... 5-1 5.1.2 display snmp-agent ................................................................................................. 5-1

Command Manual - System Management Quidway S3000-EI Series Ethernet Switches Table of Contents
Huawei Technologies Proprietary
iv
5.1.3 display snmp-agent group....................................................................................... 5-2 5.1.4 display snmp-agent mib-view.................................................................................. 5-3 5.1.5 display snmp-agent statistics .................................................................................. 5-4 5.1.6 display snmp-agent sys-info contact ....................................................................... 5-5 5.1.7 display snmp-agent sys-info location ...................................................................... 5-6 5.1.8 display snmp-agent sys-info version....................................................................... 5-6 5.1.9 display snmp-agent usm-user ................................................................................. 5-7 5.1.10 snmp-agent local-engineid .................................................................................... 5-8 5.1.11 snmp-agent community......................................................................................... 5-8 5.1.12 snmp-agent group ................................................................................................. 5-9 5.1.13 snmp-agent mib-view .......................................................................................... 5-10 5.1.14 snmp-agent packet max-size .............................................................................. 5-11 5.1.15 snmp-agent sys-info............................................................................................ 5-11 5.1.16 snmp-agent target-host ....................................................................................... 5-12 5.1.17 snmp-agent trap enable ...................................................................................... 5-13 5.1.18 snmp-agent trap life ............................................................................................ 5-14 5.1.19 snmp-agent trap queue-size ............................................................................... 5-15 5.1.20 snmp-agent trap source ...................................................................................... 5-16 5.1.21 snmp-agent usm-user ......................................................................................... 5-16 5.1.22 undo snmp-agent ................................................................................................ 5-17
Chapter 6 RMON Configuration Commands .............................................................................. 6-1 6.1 RMON Configuration Commands...................................................................................... 6-1
6.1.1 display rmon alarm.................................................................................................. 6-1 6.1.2 display rmon event .................................................................................................. 6-2 6.1.3 display rmon eventlog ............................................................................................. 6-3 6.1.4 display rmon history ................................................................................................ 6-4 6.1.5 display rmon prialarm.............................................................................................. 6-5 6.1.6 display rmon statistics ............................................................................................. 6-7 6.1.7 rmon alarm .............................................................................................................. 6-8 6.1.8 rmon event .............................................................................................................. 6-9 6.1.9 rmon history........................................................................................................... 6-10 6.1.10 rmon prialarm ...................................................................................................... 6-11 6.1.11 rmon statistics ..................................................................................................... 6-12
Chapter 7 NTP Configuration Commands .................................................................................. 7-1 7.1 NTP Configuration Commands.......................................................................................... 7-1
7.1.1 debugging ntp-service............................................................................................. 7-1 7.1.2 display ntp-service sessions ................................................................................... 7-2 7.1.3 display ntp-service status........................................................................................ 7-2 7.1.4 display ntp-service trace ......................................................................................... 7-4 7.1.5 ntp-service access .................................................................................................. 7-4 7.1.6 ntp-service authentication enable ........................................................................... 7-5 7.1.7 ntp-service authentication-keyid.............................................................................. 7-6

Command Manual - System Management Quidway S3000-EI Series Ethernet Switches Table of Contents
Huawei Technologies Proprietary
v
7.1.8 ntp-service broadcast-client .................................................................................... 7-6 7.1.9 ntp-service broadcast-server................................................................................... 7-7 7.1.10 ntp-service max-dynamic-sessions....................................................................... 7-8 7.1.11 ntp-service multicast-client.................................................................................... 7-8 7.1.12 ntp-service multicast-server .................................................................................. 7-9 7.1.13 ntp-service refclock-master ................................................................................. 7-10 7.1.14 ntp-service reliable authentication-keyid............................................................. 7-11 7.1.15 ntp-service source-interface................................................................................ 7-12 7.1.16 ntp-service in-interface disable ........................................................................... 7-12 7.1.17 ntp-service unicast-peer...................................................................................... 7-13 7.1.18 ntp-service unicast-server ................................................................................... 7-14
Chapter 8 SSH Configuration Commands .................................................................................. 8-1 8.1 SSH Configuration Commands.......................................................................................... 8-1
8.1.1 debugging rsa.......................................................................................................... 8-1 8.1.2 debugging ssh server.............................................................................................. 8-1 8.1.3 display rsa local-key-pair public .............................................................................. 8-2 8.1.4 display rsa peer-public-key ..................................................................................... 8-3 8.1.5 display ssh server ................................................................................................... 8-4 8.1.6 display ssh user-information ................................................................................... 8-5 8.1.7 peer-public-key end................................................................................................. 8-5 8.1.8 protocol inbound...................................................................................................... 8-6 8.1.9 public-key-code begin ............................................................................................. 8-7 8.1.10 public-key-code end .............................................................................................. 8-8 8.1.11 rsa local-key-pair create........................................................................................ 8-8 8.1.12 rsa local-key-pair destroy ...................................................................................... 8-9 8.1.13 rsa peer-public-key.............................................................................................. 8-10 8.1.14 ssh server authentication-retries......................................................................... 8-11 8.1.15 ssh server rekey-interval ..................................................................................... 8-11 8.1.16 ssh server timeout............................................................................................... 8-12 8.1.17 ssh user assign rsa-key ...................................................................................... 8-12 8.1.18 ssh user username authentication-type .............................................................. 8-13

Command Manual - System Management Quidway S3000-EI Series Ethernet Switches Chapter 1 File System Management Commands
Huawei Technologies Proprietary
1-1
Chapter 1 File System Management Commands
1.1 File System
1.1.1 cd
Syntax
cd directory
View
User view
Parameter
directory: Destination directory; By default, the directory is the working path configured by the user when the system starts.
Description
Using cd command, you can change the current user configuration path on the Ethernet Switch.
Example
# Change the current working directory of the switch to flash. <Quidway>cd flash:
<Quidway>pwd
flash:
1.1.2 copy
Syntax
copy fileurl-source fileurl-dest
View
User view
Parameter
fileurl-source: Source file name.
fileurl-dest: Destination file name.

Command Manual - System Management Quidway S3000-EI Series Ethernet Switches Chapter 1 File System Management Commands
Huawei Technologies Proprietary
1-2
Description
Using copy command, you can copy a file.
When the destination filename is the same as that of an existing file, the system will ask whether to overwrite it.
Example
# Display current directory information. <Quidway> dir
Directory of *
0 -rw- 595 Jul 12 2001 19:41:50 test.txt
16125952 bytes total (13975552 bytes free)
# Copy the file test.txt and saves it as test.bak.
<Quidway> copy test.txt test.bak
Copy flash:/test/test.txt to flash:/test/test.bak ?[confirm]:y
% Copyed file flash:/test/test.txt flash:/test/test.bak
# Display current directory information.
<Quidway> dir
Directory of *
0 -rw- 595 Jul 12 2001 19:41:50 test.txt
1 -rw- 595 Jul 12 2001 19:46:50 test.bak
16125952 bytes total (13974528 bytes free)
1.1.3 delete
Syntax
delete [ /unreserved ] file-url
View
User view
Parameter
file-url: path and name of the file you want to delete.
Description
Using delete command, you can delete a specified file from the storage device of the Ethernet Switch.
The deleted files are kept in the recycle bin and will not be displayed when you use the dir command. However they will be displayed, using the dir /all command. The files deleted by the delete command can be recovered with the undelete command or deleted permanently from the recycle bin, using the reset recycle-bin command.

Command Manual - System Management Quidway S3000-EI Series Ethernet Switches Chapter 1 File System Management Commands
Huawei Technologies Proprietary
1-3
Note that, if two files with the same name in a directory are deleted, only the latest deleted file will be kept in the recycle bin.
Example
# Delete the file flash:/test/test.txt <Quidway> delete flash:/test/test.txt
Delete flash:/test/test.txt?[Y/N]:
1.1.4 dir
Syntax
dir [ /all ] [ file-url ]
View
User view
Parameter
/all: Display all the files (including the deleted ones).
file-url: File or directory name to be displayed. The file-url parameter supports “*” matching. For example, using dir *.txt will display all the files with the extension txt in the current directory.; By default, display the file information in current path.
Description
Using dir command, you can view the information about the specified file or directory in storage device of Ethernet Switch.
Example
# Display the information about the file flash:/test/test.txt <Quidway> dir flash:/test/test.txt
Directory of flash:/test/
-rwxrwxrwx 1 noone nogroup 971 Sep 20 2003 14:28:52 test.txt
7932928 bytes total (4966400 bytes free)
# Display information of directory flash:/test/
<Quidway> dir flash:/test/
Directory of flash:/test/
-rwxrwxrwx 1 noone nogroup 971 Sep 20 2003 14:28:52 test.txt
7932928 bytes total (4966400 bytes free)
# Display all files with the names starting with "t" in the directory flash:/test/
<Quidway> dir flash:/test/t*
Directory of flash:/test/
-rwxrwxrwx 1 noone nogroup 971 Sep 20 2003 14:28:52 test.txt

Command Manual - System Management Quidway S3000-EI Series Ethernet Switches Chapter 1 File System Management Commands
Huawei Technologies Proprietary
1-4
7932928 bytes total (4966400 bytes free)
# Display information about all the files (including the deleted files) in the directory flash:/test/
<Quidway> dir /all flash:/test/
Directory of flash:/test/
-rwxrwxrwx 1 noone nogroup 971 Sep 20 2003 14:28:52 test.txt
7932928 bytes total (4966400 bytes free)
# Display information of all the files (including the deleted files) with the names starting with "t" in flash:/test/
<Quidway> dir /all flash:/test/t*
Directory of flash:/test/t*
-rwxrwxrwx 1 noone nogroup 971 Sep 20 2003 14:32:49 [text.txt]
7932928 bytes total (4965376 bytes free)
Note: In the output information of dir/all command, as a hint, the name of each deleted file kept in the recycle bin is in a square bracket.
1.1.5 file prompt
Syntax
file prompt { alert | quiet }
View
System view
Parameter
alert: Perform interactive confirmation on dangerous file operations; The default value is alert, which configures to perform interactive confirmation on dangerous file operations.
quiet: Do not prompt for the file operations.
Description
Using file prompt command, you can modify prompt modes of the file operation on the Ethernet switch.
If the prompt mode is set as quiet, that is, no prompt for file operations, some non-recoverable operations may lead to system damage.

Command Manual - System Management Quidway S3000-EI Series Ethernet Switches Chapter 1 File System Management Commands
Huawei Technologies Proprietary
1-5
Example
# Configure the prompt mode of file operation as quiet. [Quidway] file prompt quiet
1.1.6 format
Syntax
format filesystem
View
User view
Parameter
filesystem: Device name.
Description
Using format command, you can format the storage device.
Format operation will cause non-recoverable loss of all the files on the device. Specially, configuration files will be lost after formatting the flash memory.
Example
# Format flash:. <Quidway> format flash:
All data on Flash will be lost , proceed with format ? [Y/N] y
% Now begin to format flash, please wait for a while...
Format winc: completed
1.1.7 mkdir
Syntax
mkdir directory
View
User view
Parameter
directory: Directory name.
Description
Using mkdir command, you can create directory in the specified directory on the storage device.

Command Manual - System Management Quidway S3000-EI Series Ethernet Switches Chapter 1 File System Management Commands
Huawei Technologies Proprietary
1-6
The directory to be created cannot have the same name as that of other directory or file in the specified directory.
Example
# Create the directory dd. <Quidway> mkdir dd
% Created dir dd
1.1.8 more
Syntax
more file-url
View
User view
Parameter
file-url: File name.
Description
Using more command, you can view content of specified file.
At present, file system can display files in the text format.
Example
# Display contents of file test.txt. <Quidway> more test.txt
AppWizard has created this test application for you.
This file contains a summary of what you will find in each of the files that
make up your test application.
Test.dsp
This file (the project file) contains information at the project level and is
used to build a single project or subproject. Other users can share the project
(.dsp) file, but they should export the makefiles locally.
1.1.9 move
Syntax
move fileurl-source fileurl-dest
View
User view

Command Manual - System Management Quidway S3000-EI Series Ethernet Switches Chapter 1 File System Management Commands
Huawei Technologies Proprietary
1-7
Parameter
fileurl-source: Source file name.
fileurl-dest: Destination file name.
Description
Using move command, you can move files.
When the destination filename is the same as that of an existing file, the system will ask whether to overwrite it.
Example
# Display the current directory information. <Quidway> dir
Directory of flash:/
drwxrwxrwx 1 noone nogroup - Jun 22 2002 02:19:16 shit
-rwxrwxrwx 1 noone nogroup 971 Jun 30 2003 11:45:19 vrpcfg.txt
-rwxrwxrwx 1 noone nogroup 4 Aug 27 2003 16:56:56 snmpboots
-rwxrwxrwx 1 noone nogroup 2957562 Sep 20 2003 10:49:57 QX-S5516-VRP31
0-0030.app
drwxrwxrwx 1 noone nogroup - Sep 20 2003 14:27:58 test
<Quidway> dir flash:/test/
Directory of flash:/test/
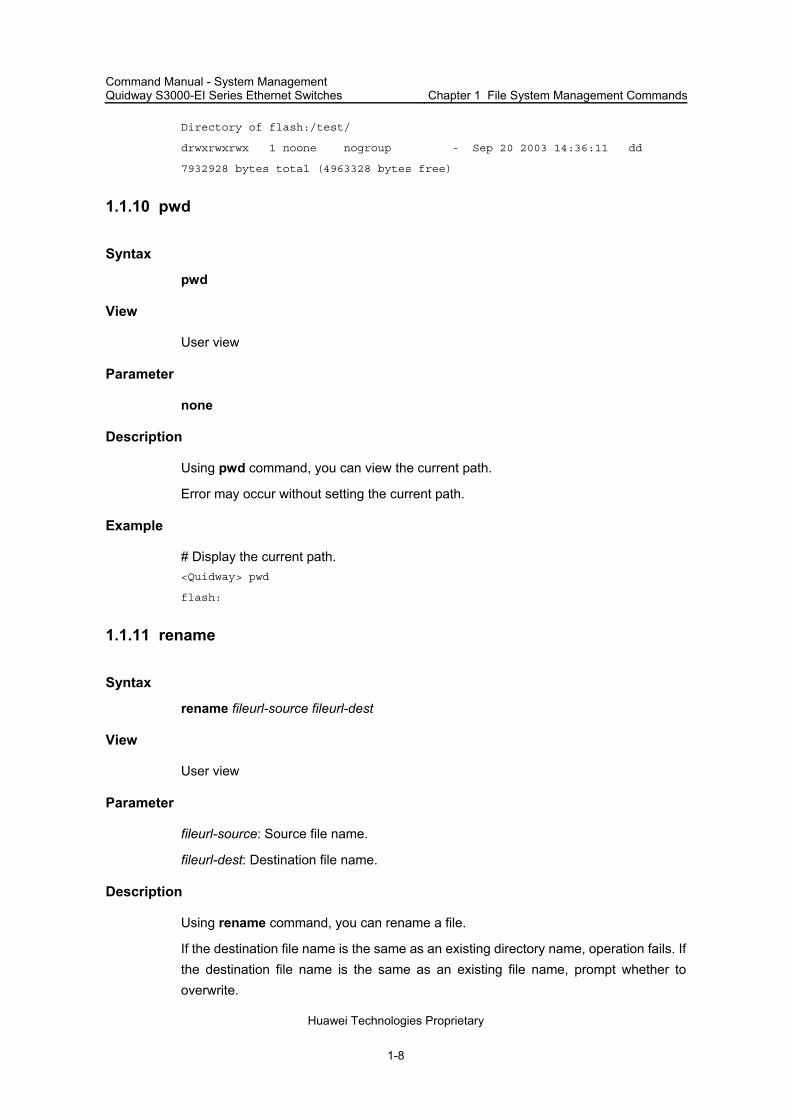
drwxrwxrwx 1 noone nogroup - Sep 20 2003 14:36:11 dd
-rwxrwxrwx 1 noone nogroup 971 Sep 20 2003 14:40:05 sample.txt
7932928 bytes total (4963328 bytes free)
# Move flash:/test/sample.txt to flash:/sample.txt.
<Quidway> move flash:/test/sample.txt flash:/sample.txt
Move flash:/test/sample.txt to flash:/sample.txt ?[Y/N]:y
% Moved file flash:/test/sample.txt to flash:/sample.txt
# Display the directory after moving a file.
<Quidway> dir
Directory of flash:/
drwxrwxrwx 1 noone nogroup - Jun 22 2002 02:19:16 shit
-rwxrwxrwx 1 noone nogroup 971 Jun 30 2003 11:45:19 vrpcfg.txt
-rwxrwxrwx 1 noone nogroup 4 Aug 27 2003 16:56:56 snmpboots
-rwxrwxrwx 1 noone nogroup 2957562 Sep 20 2003 10:49:57 QX-S5516-VRP31
0-0030.app
drwxrwxrwx 1 noone nogroup - Sep 20 2003 14:27:58 test
-rwxrwxrwx 1 noone nogroup 971 Sep 20 2003 14:41:44 sample.txt
7932928 bytes total (4963328 bytes free)
<Quidway> dir flash:/test/
Command Manual - System Management Quidway S3000-EI Series Ethernet Switches Chapter 1 File System Management Commands
Huawei Technologies Proprietary
1-8
Directory of flash:/test/
drwxrwxrwx 1 noone nogroup - Sep 20 2003 14:36:11 dd
7932928 bytes total (4963328 bytes free)
1.1.10 pwd
Syntax
pwd
View
User view
Parameter
none
Description
Using pwd command, you can view the current path.
Error may occur without setting the current path.
Example
# Display the current path. <Quidway> pwd
flash:
1.1.11 rename
Syntax
rename fileurl-source fileurl-dest
View
User view
Parameter
fileurl-source: Source file name.
fileurl-dest: Destination file name.
Description
Using rename command, you can rename a file.
If the destination file name is the same as an existing directory name, operation fails. If the destination file name is the same as an existing file name, prompt whether to overwrite.

Command Manual - System Management Quidway S3000-EI Series Ethernet Switches Chapter 1 File System Management Commands
Huawei Technologies Proprietary
1-9
Example
# Display the current directory information. <Quidway> dir
Directory of flash:/
drwxrwxrwx 1 noone nogroup - Jun 22 2002 02:19:16 shit
-rwxrwxrwx 1 noone nogroup 971 Jun 30 2003 11:45:19 vrpcfg.txt
-rwxrwxrwx 1 noone nogroup 4 Aug 27 2003 16:56:56 snmpboots
-rwxrwxrwx 1 noone nogroup 2957562 Sep 20 2003 10:49:57 QX-S5516-VRP31
0-0030.app
drwxrwxrwx 1 noone nogroup - Sep 20 2003 14:27:58 test
-rwxrwxrwx 1 noone nogroup 971 Sep 20 2003 14:41:44 sample.txt
7932928 bytes total (4963328 bytes free)
# Rename the file sample.txt with sample.bak.
<Quidway> rename sample.txt sample.bak
Rename flash:/sample.txt to flash:/sample.bak ?[Y/N]:y
% Renamed file flash:/sample.txt to flash:/sample.bak
# Display the directory after renaming sample.txt with sample.bak.
<Quidway>dir
Directory of flash:/
drwxrwxrwx 1 noone nogroup - Jun 22 2002 02:19:16 shit
-rwxrwxrwx 1 noone nogroup 971 Jun 30 2003 11:45:19 vrpcfg.txt
-rwxrwxrwx 1 noone nogroup 4 Aug 27 2003 16:56:56 snmpboots
-rwxrwxrwx 1 noone nogroup 2957562 Sep 20 2003 10:49:57 QX-S5516-VRP31
0-0030.app
drwxrwxrwx 1 noone nogroup - Sep 20 2003 14:27:58 test
-rwxrwxrwx 1 noone nogroup 971 Sep 20 2003 14:44:54 sample.bak
7932928 bytes total (4962304 bytes free)
1.1.12 reset recycle-bin
Syntax
reset recycle-bin file-url
View
User view
Parameter
file-url: Name of the file to be deleted.

Command Manual - System Management Quidway S3000-EI Series Ethernet Switches Chapter 1 File System Management Commands
Huawei Technologies Proprietary
1-10
Description
Using reset recycle-bin command, you can permanently delete files from the recycle bin.
The delete command only puts the file into the recycle bin, but reset recycle-bin command will delete this file permanently.
Example
# Delete the file from the recycle bin. <Quidway> reset recycle-bin flash:/p1h_logic.out
Clear flash:/plh_logic.out? [Y/N]:
1.1.13 rmdir
Syntax
rmdir directory
View
User view
Parameter
directory: Directory name.
Description
Using rmdir command, you can cancel a directory.
The directory to be deleted must be empty.
Example
# Delete the directory huawei. <Quidway> rmdir huawei
Rmdir huawei?[Y/N]:y
% Removed directory huawei
1.1.14 undelete
Syntax
undelete file-url
View
User view

Command Manual - System Management Quidway S3000-EI Series Ethernet Switches Chapter 1 File System Management Commands
Huawei Technologies Proprietary
1-11
Parameter
file-url: Name of the file to be recovered.
Description
Using undelete command, you can recover deleted file.
The file name to be recovered cannot be the same as an existing directory name. If the destination file name is the same as an existing file name, prompt whether to overwrite.
Example
# Display the information of all the files (including the deleted ones) in the current directory. <Quidway> dir /all
Directory of flash:/
drwxrwxrwx 1 noone nogroup - Jun 22 2002 02:19:16 shit
-rwxrwxrwx 1 noone nogroup 971 Jun 30 2003 11:45:19 vrpcfg.txt
-rwxrwxrwx 1 noone nogroup 4 Aug 27 2003 16:56:56 snmpboots
-rwxrwxrwx 1 noone nogroup 2957562 Sep 20 2003 10:49:57 QX-S5516-VRP31
0-0030.app
drwxrwxrwx 1 noone nogroup - Sep 20 2003 14:27:58 test
-rwxrwxrwx 1 noone nogroup 971 Sep 20 2003 14:53:32 [sample.bak]
7932928 bytes total (4962304 bytes free)
# Recover the deleted file sample.bak.
<Quidway> undelete sample.bak
Undelete flash:/sample.bak ?[Y/N]:y
% Undeleted file flash:/sample.bak
# Display the information of all the files (including the deleted ones) in the current directory.
<Quidway> dir /all
Directory of flash:/
drwxrwxrwx 1 noone nogroup - Jun 22 2002 02:19:16 shit
-rwxrwxrwx 1 noone nogroup 971 Jun 30 2003 11:45:19 vrpcfg.txt
-rwxrwxrwx 1 noone nogroup 4 Aug 27 2003 16:56:56 snmpboots
-rwxrwxrwx 1 noone nogroup 2957562 Sep 20 2003 10:49:57 QX-S5516-VRP31
0-0030.app
drwxrwxrwx 1 noone nogroup - Sep 20 2003 14:27:58 test
-rwxrwxrwx 1 noone nogroup 971 Sep 20 2003 14:54:16 sample.bak
7932928 bytes total (4962304 bytes free)

Command Manual - System Management Quidway S3000-EI Series Ethernet Switches Chapter 1 File System Management Commands
Huawei Technologies Proprietary
1-12
1.2 Configuration File Management Commands
1.2.1 reset saved-configuration
Syntax
reset saved-configuration
View
User view
Parameter
none
Description
Using reset saved-configuration command, you can erase configuration files from the flash memory of the Ethernet Switch.
Perform this command with cautious. It is suggested to consult technical support personnel first.
Generally, this command is used in the following situations: After upgrade of software, configuration files in flash memory may not match the
new version's software. Perform reset saved-configuration command to erase the old configuration files.
If a used Ethernet Switch is applied to the new circumstance and the original configuration files cannot meet the new requirements, the Ethernet Switch should be configured again. Erase the original configuration files for reconfiguration.
If the configuration files do not exist in the flash memory when Ethernet Switch is electrified and initialized, it will enter setup switch view automatically.
For the related commands, see save, display current-configuration, display saved-configuration.
Example
# Erase the configuration files from the flash memory of Ethernet Switch. <Quidway> reset saved-configuration
This will delete the configuration in the flash memory.
The switch configurations will be erased to reconfigure.
Are you sure?[Y/N]

Command Manual - System Management Quidway S3000-EI Series Ethernet Switches Chapter 1 File System Management Commands
Huawei Technologies Proprietary
1-13
1.2.2 save
Syntax
save
View
User view
Parameter
none
Description
Using save command, you can save the current configuration files to Flash memory.
After finishing a group of configurations and achieving corresponding functions, user should remember to get the current configuration files stored in the flash memory.
For the related commands, see reset saved-configuration, display current-configuration, display saved-configuration.
Example
# Get the current configuration files stored in the flash memory. <Quidway> save
This will save the configuration in the flash memory.
The switch configurations will be written to flash.
Are you sure?[Y/N]
Now saving current configuration to flash memory.
Please wait for a while...
Save current configuration to flash memory successfully.
1.3 FTP Server Configuration Commands
1.3.1 display ftp-server
Syntax
display ftp-server
View
Any view
Parameter
none

Command Manual - System Management Quidway S3000-EI Series Ethernet Switches Chapter 1 File System Management Commands
Huawei Technologies Proprietary
1-14
Description
Using display ftp-server command, you can view the parameters of the current FTP Server. You can perform this command to verify the configuration after setting FTP parameters.
Example
# Display the configuration of FTP Server parameters. <Quidway> display ftp-server
FTP server is running
Max user number 5
User count 0
Timeout value(in minute) 30
1.3.2 display ftp-user
Syntax
display ftp-user
View
Any view
Parameter
none
Description
Using display ftp-user command, you can view the parameters of current FTP user. You can perform this command to examine the configuration after setting FTP parameters.
Example
# Show the configuration of FTP user parameters. <Quidway> display ftp-user
% No ftp user
1.3.3 ftp server
Syntax
ftp sever enable
undo ftp sever

Command Manual - System Management Quidway S3000-EI Series Ethernet Switches Chapter 1 File System Management Commands
Huawei Technologies Proprietary
1-15
View
System view
Parameter
enable: Start FTP Server.
Description
Using ftp server command, you can start FTP Server and enable FTP user logon. Using undo ftp server command, you can close FTP Server and disable FTP user logon.
By default, FTP Server is shut down.
Perform this command to easily start or shut down FTP Server, preventing Ethernet Switch from being attacked by some unknown user.
Example
# Shut down FTP Server. [Quidway] undo ftp server
1.3.4 ftp timeout
Syntax
ftp timeout minute
undo ftp timeout
View
System view
Parameter
minute: Connection timeouts (measured in minutes), ranging from 1 to 35791; By default, the connection timeout time is 30 minutes.
Description
Using ftp timeout command, you can configure connection timeout interval. Using undo ftp timeout command, you can restore the default connection timeout interval.
After a user logs on to an FTP Server and has established connection, if the connection is interrupted or cut abnormally by the user, FTP Server will still hold the connection. The connection timeout can avoid this problem. If the FTP server has no command interaction with a client for a specific period of time, it considers the connection to be failed and disconnect to the client.

Command Manual - System Management Quidway S3000-EI Series Ethernet Switches Chapter 1 File System Management Commands
Huawei Technologies Proprietary
1-16
Example
# Set the connection timeout to 36 minutes. [Quidway] ftp timeout 36
1.3.5 local-user
Syntax
local-user user-name
undo local-user { user-name | all [ service-type { telnet | ftp | lan-access } ] }
View
System view
Parameter
user-name: Specifies a local username with a character string not exceeding 32 characters, excluding “/”, “:”, “*”, “?”, “<” and “>”. The @ character can only be used once in one username. The pure username (the part before @, namely the user ID) cannot exceed 24 characters.
service-type: Specifies the service type. telnet means that: the specified user type is telnet. ftp means that: the specified user type is ftp. lan-access means that the specified user type is lan-access which mainly refers to Ethernet accessing users, 802.1x supplicants for example.
all: All the users.
Description
Using local-user command, you can configure a local user and enter the local user view. Using undo local-user command, you can cancel a specified local user.
By default, no local user.
For the related commands, see display local-user, server-type.
Example
# Add a local user named huawei1. [Quidway] local-user huawei1
[Quidway-user-huawei1]
1.3.6 password
Syntax
password { simple | cipher } password
undo password

Command Manual - System Management Quidway S3000-EI Series Ethernet Switches Chapter 1 File System Management Commands
Huawei Technologies Proprietary
1-17
View
Local user view
Parameter
simple: Specifies to display passwords in simple text.
cipher: Specifies to display passwords in cipher text.
password: Defines a password, which is a character string of up to 16 characters if it is in simple text and of up to 24 characters if it is in cipher text.
Description
Using password command, you can configure a password display mode for local users. Using undo password command, you can cancel the specified password display mode.
If local-user password-display-mode cipher-force has been adopted, the user efforts of using the password command to set the password display mode to simple text (simple) will render useless.
For the related command, see display local-user.
Example
# Set the user huawei1 to display the password in simple text, given the password is 20030422. [Quidway-user-huawei1] password simple 20030422
1.3.7 service-type
Syntax
service-type { telnet [ level level ] | ftp [ ftp-directory directory ] | lan-access }
undo service-type { telnet [ level ] | ftp [ ftp-directory ] | lan-access }
View
Local user view
Parameter
telnet: Specifies user type as Telnet.
level level: Specifies the level of Telnet users. The argument level is an integer in the range of 0 to 3 and defaults to 3.
ftp: Specifies user type as ftp.
ftp-directory directory: Specifies the directory of ftp users, directory is a character string of up to 64 characters.

Command Manual - System Management Quidway S3000-EI Series Ethernet Switches Chapter 1 File System Management Commands
Huawei Technologies Proprietary
1-18
lan-access: Specifies user type to lan-access, which mainly refers to Ethernet accessing users, 802.1x supplicants for example.
Description
Using service-type command, you can configure a service type for a particular user. Using undo service-type command, you can cancel the specified service type for the user.
Example
# Set to provide the lan-access service for the user huawei1. [Quidway-user-huawei1] service-type lan-access
1.4 FTP Client Commands
1.4.1 ascii
Syntax
ascii
View
FTP Client view
Parameter
none
Description
Using ascii command, you can configure data transmission mode as ASCII mode.
By default, the file transmission mode is ASCII mode.
Perform this command if the user needs to change the file transmission mode to default mode.
Example
# Configure to transmit data in the ASCII mode. [ftp] ascii
200 Type set to A.
1.4.2 binary
Syntax
binary
Command Manual - System Management Quidway S3000-EI Series Ethernet Switches Chapter 1 File System Management Commands
Huawei Technologies Proprietary
1-19
View
FTP Client view
Parameter
none
Description
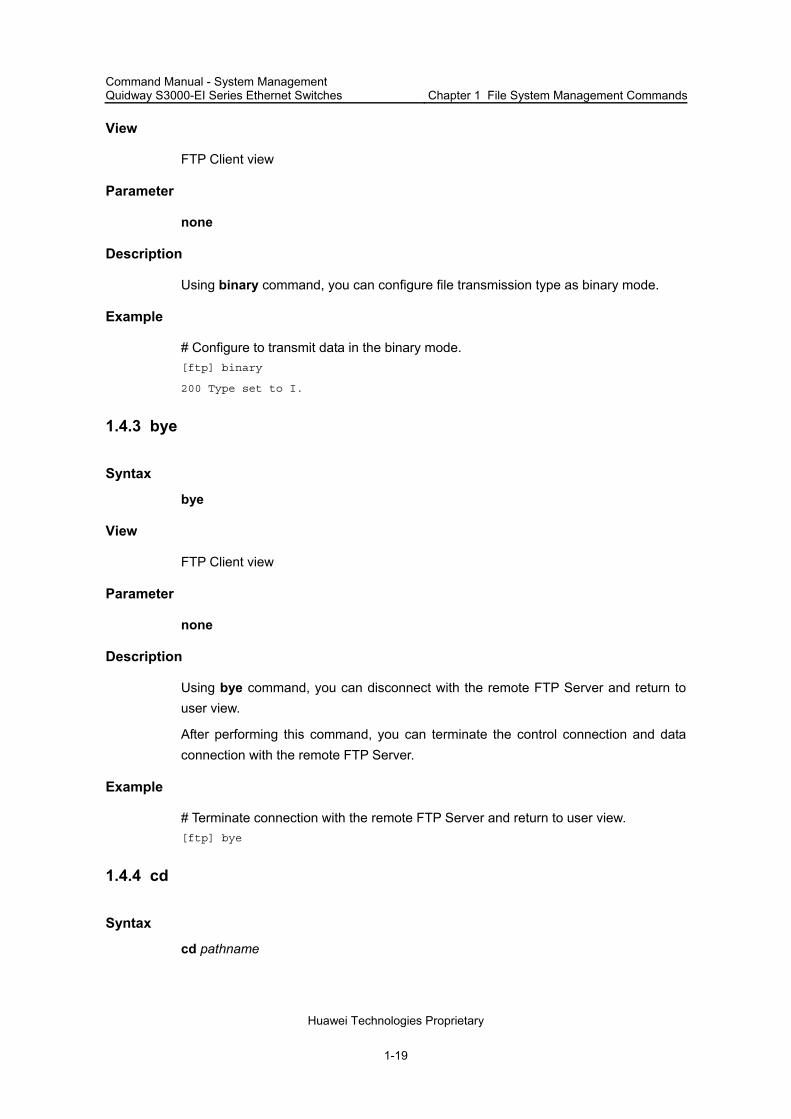
Using binary command, you can configure file transmission type as binary mode.
Example
# Configure to transmit data in the binary mode. [ftp] binary
200 Type set to I.
1.4.3 bye
Syntax
bye
View
FTP Client view
Parameter
none
Description
Using bye command, you can disconnect with the remote FTP Server and return to user view.
After performing this command, you can terminate the control connection and data connection with the remote FTP Server.
Example
# Terminate connection with the remote FTP Server and return to user view. [ftp] bye
1.4.4 cd
Syntax
cd pathname

Command Manual - System Management Quidway S3000-EI Series Ethernet Switches Chapter 1 File System Management Commands
Huawei Technologies Proprietary
1-20
View
FTP Client view
Parameter
pathname: Path name.
Description
Using cd command, you can change the working path on the remote FTP Server.
This command is used to access another directory on FTP Server. Note that the user can only access the directories authorized by the FTP server.
Example
# Change the working path to flash:/temp [ftp] cd flash:/temp
1.4.5 cdup
Syntax
cdup
View
FTP Client view
Parameter
none
Description
Using cdup command, you can change working path to the upper level directory.
This command is used to exit the current directory and return to the upper level directory.
Example
# Change working path to the upper level directory. [ftp] cdup
1.4.6 close
Syntax
close

Command Manual - System Management Quidway S3000-EI Series Ethernet Switches Chapter 1 File System Management Commands
Huawei Technologies Proprietary
1-21
View
FTP Client view
Parameter
none
Description
Using close command, user can disconnect FTP client side from FTP server side without exiting FTP client side view. That is to say, you can terminate the control connection and data connection with the remote FTP Server at the same time.
Example
# Terminate connection with the remote FTP Server and stays in FTP Client view. [ftp] close
1.4.7 debugging
Syntax
debugging
View
FTP Client view
Parameter
none
Description
Using debugging command, you can enable the system debugging functions.
Example
# Enable the system debugging functions. [ftp] debugging
Debug is on.
1.4.8 delete
Syntax
delete remotefile
View
FTP Client view

Command Manual - System Management Quidway S3000-EI Series Ethernet Switches Chapter 1 File System Management Commands
Huawei Technologies Proprietary
1-22
Parameter
remotefile: File name.
Description
Using delete command, you can cancel the specified file.
This command is used to delete a file.
Example
# Delete the file temp.c [ftp] delete temp.c
1.4.9 dir
Syntax
dir [ filename ] [ localfile ]
View
FTP Client view
Parameter
filename: File name to be queried.
localfile: Saved local file name.
Description
Using dir command, you can query a specified file.
If no parameter of this command is specified, then all the files in the directory will be displayed.
Example
# Query the file temp.c and saves the results in the file temp1. [ftp] dir temp.c temp1
1.4.10 disconnect
Syntax
disconnect
View
FTP Client view

Command Manual - System Management Quidway S3000-EI Series Ethernet Switches Chapter 1 File System Management Commands
Huawei Technologies Proprietary
1-23
Parameter
none
Description
Using disconnect command, subscribers can disconnect FTP client side from FTP server side without exiting FTP client side view.
This command terminates the control connection and data connection with the remote FTP Server at the same time.
Example
# Terminate connection with the remote FTP Server and stays in FTP Client view. [ftp] disconnect
1.4.11 ftp
Syntax
ftp [ ipaddress [ port ] ]
View
User view
Parameter
ipaddress: IP address of the remote FTP Server.
port: Port number of remote FTP Server.
Description
Using ftp command, you can establish control connection with the remote FTP Server and enter FTP Client view.
Example
# Connect to FTP Server at the IP address 1.1.1.1 <Quidway> ftp 1.1.1.1
1.4.12 get
Syntax
get remotefile [ localfile ]
View
FTP Client view

Command Manual - System Management Quidway S3000-EI Series Ethernet Switches Chapter 1 File System Management Commands
Huawei Technologies Proprietary
1-24
Parameter
localfile: Local file name.
remotefile: Name of a file on the remote FTP Server.
Description
Using get command, you can download a remote file and save it locally.
If no local file name is specified, it will be considered the same as that on the remote FTP Server.
Example
# Download the file temp1.c and saves it as temp.c [ftp] get temp1.c temp.c
1.4.13 lcd
Syntax
lcd
View
FTP Client view
Parameter
none
Description
Using lcd command, you can view local working path of FTP Client.
Example
# Show local working path. [ftp] lcd
% Local directory now flash:/temp
1.4.14 ls
Syntax
ls [ remotefile ] [ localfile ]
View
FTP Client view

Command Manual - System Management Quidway S3000-EI Series Ethernet Switches Chapter 1 File System Management Commands
Huawei Technologies Proprietary
1-25
Parameter
remotefile: Remote file to be queried.
localfile: Saved local file name.
Description
Using ls command, you can query a specified file.
If no parameter is specified, all the files will be shown.
Example
# Query file temp.c [ftp] ls temp.c
1.4.15 mkdir
Syntax
mkdir pathname
View
FTP Client view
Parameter
pathname: Directory name.
Description
Using mkdir command, you can create a directory on the remote FTP Server.
User can perform this operation as long as the remote FTP server has authorized.
Example
# Create the directory flash:/lanswitch on the remote FTP Server. [ftp] mkdir flash:/lanswitch
1.4.16 open
Syntax
open [ ip-address [ port ] ]
View
FTP Client view

Command Manual - System Management Quidway S3000-EI Series Ethernet Switches Chapter 1 File System Management Commands
Huawei Technologies Proprietary
1-26
Parameter
ip-address: The host name ( a string with a length of 1 to 20 characters ) or the IP address of the remote FTP Server.
port: Port number of remote FTP Server, ranging from 0 to 65535. By default , it is 21.
Description
Using open command, you can establish control connection with the remote FTP Server in the FTP Client view.
Related command: close.
Example
# Establish control connection with the FTP Server, which IP address is 1.1.1.1. [ftp] open 1.1.1.1
Trying ...
Press CTRL+K to abort
Connected.
220-
220 WFTPD 2.0 service (by Texas Imperial Software) ready for new user
User(none):abc
331 Give me your password, please
Password:
230 Logged in successfully
1.4.17 passive
Syntax
passive
undo passive
View
FTP Client view
Parameter
none
Description
Using passive command, you can configure the data transmission mode as passive mode. Using undo passive command, you can configure the data transmission mode as active mode.
By default, the data transmission mode is passive mode

Command Manual - System Management Quidway S3000-EI Series Ethernet Switches Chapter 1 File System Management Commands
Huawei Technologies Proprietary
1-27
Example
# Set the data transmission to passive mode. [ftp] passive
1.4.18 put
Syntax
put localfile [ remotefile ]
View
FTP Client view
Parameter
localfile: Local file name.
remotefile: File name on the remote FTP Server.
Description
Using put command, you can upload a local file to the remote FTP Server.
If the user does not specify the filename on the remote server, the system will consider it the same as the local file name by default.
Example
# Upload the local file temp.c to the remote FTP Server and saves it as temp1.c. [ftp] put temp.c temp1.c
1.4.19 pwd
Syntax
pwd
View
FTP Client view
Parameter
none
Description
Using pwd command, you can view the current directory on the remote FTP Server.

Command Manual - System Management Quidway S3000-EI Series Ethernet Switches Chapter 1 File System Management Commands
Huawei Technologies Proprietary
1-28
Example
# Show the current directory on the remote FTP Server. [ftp] pwd
"flash:/temp" is current directory.
1.4.20 quit
Syntax
quit
View
FTP Client view
Parameter
none
Description
Using quit command, you can terminate the connection with the remote FTP Server and return to user view.
Example
# Terminate connection with the remote FTP Server and returns to user view. [ftp] quit
<Quidway>
1.4.21 remotehelp
Syntax
remotehelp [ protocol-command ]
View
FTP Client view
Parameter
protocol-command: FTP protocol command.
Description
Using remotehelp command, you can view help information about the FTP protocol command.

Command Manual - System Management Quidway S3000-EI Series Ethernet Switches Chapter 1 File System Management Commands
Huawei Technologies Proprietary
1-29
Example
# Show the syntax of the protocol command user. [ftp] remotehelp user
214 Syntax: USER <sp> <username>
1.4.22 rmdir
Syntax
rmdir pathname
View
FTP Client view
Parameter
pathname: Directory name of remote FTP Server.
Description
Using rmdir command, you can cancel the specified directory from FTP Server.
Example
# Delete the directory flash:/temp1 from FTP Server. [ftp] rmdir flash:/temp1
1.4.23 user
Syntax
user username [ password ]
View
FTP Client view
Parameter
username: Logon username.
password: Logon password.
Description
Using user command, you can register an FTP user.
Example
# Log in the FTP Server with username tom and password bjhw. [ftp] user tom bjhw

Command Manual - System Management Quidway S3000-EI Series Ethernet Switches Chapter 1 File System Management Commands
Huawei Technologies Proprietary
1-30
1.4.24 verbose
Syntax
verbose
undo verbose
View
FTP Client view
Parameter
none
Description
Using verbose command, you can enable verbose. Using undo verbose command, you can disable verbose.
By default, verbose is enabled.
Example
# Enable verbose. [ftp]verbose
1.5 TFTP Configuration Commands
1.5.1 tftp
Syntax
tftp { ascii | binary }
View
System view
Parameter
ascii: Text format.
binary: Binary format; By default, the transmission mode is binary.
Description
Using tftp command, you can configure the transmission mode of the TFTP files.
TFTP transmits files in two modes, binary mode for program files and ASCII mode for text files. You can perform this command to configure the file transmission mode. By

Command Manual - System Management Quidway S3000-EI Series Ethernet Switches Chapter 1 File System Management Commands
Huawei Technologies Proprietary
1-31
default, TFTP transmits files in binary mode. Before resetting the mode and restarting the switch, the set mode will not change.
For the related commands, see tftp get, tftp put.
Example
# Transmit the files in text format. [Quidway] tftp ascii
1.5.2 tftp get
Syntax
tftp get //A.A.A.A/xxx.yyy mmm.nnn
View
System view
Parameter
//A.A.A.A/xxx.yyy: Information about the file to be downloaded from the TFTP server. A.A.A.A: IP address of the TFTP server.
mmm.nnn: Specify the filename saved as after downloaded to the switch, which can be different from xxx.yyy.
Description
Using tftp get command, you can download a file xxx.yyy from the specified directory of the TFTP server (at A.A.A.A) and saving it as mmm.nnn on the switch.
For the related commands, see tftp, tftp put.
Example
# Download the file LANSwitch.app from the TFTP server at 1.1.3.214 and save it as vxWorks.app on the local switch. [Quidway] tftp binary
[Quidway] tftp get //1.1.3.214/ LANSwitch.app vxWorks.app
1.5.3 tftp put
Syntax
tftp put mmm.nnn //A.A.A.A/xxx.yyy
View
System view

Command Manual - System Management Quidway S3000-EI Series Ethernet Switches Chapter 1 File System Management Commands
Huawei Technologies Proprietary
1-32
Parameter
mmm.nnn: The file to be uploaded.
//A.A.A.A/xxx.yyy: IP address of the TFTP server and the filename to be saved as.
Description
Using tftp put command, you can upload a file from the switch to the specified directory on the TFTP server (at A.A.A.A) and saving it as mmm.nnn.
For the related commands, see tftp, tftp get.
Example
# Upload the vrpcfg.txt to the TFTP server at 1.1.3.214 and save it as Temp.txt. [Quidway] tftp ascii
[Quidway] tftp put vrpcfg.txt //1.1.3.214/temp.txt

Command Manual - System Management Quidway S3000-EI Series Ethernet Switches
Chapter 2 MAC Address Table Management Commands
Huawei Technologies Proprietary
2-1
Chapter 2 MAC Address Table Management
Commands
2.1 MAC Address Table Management Commands
2.1.1 display mac-address aging-time
Syntax
display mac-address aging-time
View
Any view
Parameter
none
Description
Using display mac-address aging-time command, you can view the aging time of the dynamic entry in the MAC address table.
For the related commands, see mac-address, mac-address timer, display mac-address.
Example
# Display the aging time of the dynamic entry in the MAC address table. [Quidway] display mac-address aging-time
mac-address aging-time: 300s
The above information indicates that the aging time of the dynamic entry in the MAC address is 300s.
2.1.2 display mac-address
Syntax
display mac-address [ mac-addr [ vlan vlan-id ] | [ static | dynamic ] [ interface { interface-name | interface-type interface-num } ] [ vlan vlan-id ] [ count ] ]
View
Any view

Command Manual - System Management Quidway S3000-EI Series Ethernet Switches
Chapter 2 MAC Address Table Management Commands
Huawei Technologies Proprietary
2-2
Parameter
mac-addr: Specify the MAC address.
vlan-id: Specify the VLAN ID.
static: Static table entry, lost after resetting switch.
dynamic: Dynamic table entry, which will be aged.
interface-type: Specify the interface type.
interface-num: Specify the interface number.
interface-name: Specify the interface name.
For details about the interface-type, interface-num and interface-name parameters, refer to the Port Configuration in this manual.
count: the display information will only contain the sum number of MAC addresses in the MAC address table if user choice this parameter when using this command.
Description
Using display mac-address command, you can view MAC address table information.
When managing the Layer-2 addresses of the switch, the administrator can Perform this command to view such information as the Layer-2 address table, address status (static or dynamic), Ethernet port of the MAC address, VLAN of the address, and system address aging time.
For the related commands, see mac-address, mac-address timer.
Example
# Show the information of the entry with MAC address at 00e0-fc01-0101 [Quidway] display mac-address 00e0-fc01-0101
MAC ADDR VLAN ID STATE PORT INDEX AGING TIME
00e0-fc01-0101 1 Learned Ethernet0/1 AGING
2.1.3 mac-address
Syntax
mac-address { static | dynamic } mac-addr interface { interface-name | interface-type interface-num } vlan vlan-id
undo mac-address [ static | dynamic ] [ [ mac-addr ] interface {interface-name | interface-type interface-num } vlan vlan-id ]
View
System view

Command Manual - System Management Quidway S3000-EI Series Ethernet Switches
Chapter 2 MAC Address Table Management Commands
Huawei Technologies Proprietary
2-3
Parameter
static: Static table entry, lost after resetting switch.
dynamic: Dynamic table entry, which will be aged.
mac-addr: Specify the MAC address.
interface-type: interface type;
interface-num: interface number;
interface-name: interface name;
vlan-id: Specify the VLAN ID.
Description
Using mac-address command, you can add/modify the MAC address table entry. Using undo mac-address command, you can cancel MAC address table entry
If the input address has been existed in the address table, the original entry will be modified. That is, replace the interface pointed by this address with the new interface and the entry attribute with the new attribute (dynamic entry and static entry).
All the (MAC unicast) addresses on a certain interface can be deleted. User can choose to delete any of the following addresses: address learned by system automatically, dynamic address configured by user, static address configured by user.
Because the address table is shared in the VLAN domain, you need specify the VLAN of the multicast address and the port of the unicast address, when adding entries to the address table.
For the related commands, see display mac-address.
Example
# Configure the port number corresponding to the MAC address 00e0-fc01-0101 as Ethernet0/1 in the address table, and sets this entry as static entry. [Quidway] mac-address static 00e0-fc01-0101 interface ethernet 0/1 vlan 2
2.1.4 mac-address max-mac-count
Syntax
mac-address max-mac-count count
undo mac-address max-mac-count
View
Ethernet port view

Command Manual - System Management Quidway S3000-EI Series Ethernet Switches
Chapter 2 MAC Address Table Management Commands
Huawei Technologies Proprietary
2-4
Parameter
count: Specify the amount limit to the MAC addresses to be learned. 0 indicates that no address can be learned via the port.
Description
Using mac-address max-mac-count command, you can set a limit to the MAC addresses to be learned by the Ethernet port. Using undo mac-address max-mac-count command, you can cancel the limit.
By default, there is no limit to the MAC addresses learned via the Ethernet port.
The port will stop learning MAC address when the amount reaches the limit specified by the count parameter.
For the related commands, see mac-address, mac-address timer.
Example
# Configure Ethernet0/3 to learn at most 600 addresses. [Quidway-Ethernet0/3] mac-address max-mac-count 600
# Configure no limit to the amount of addresses learned via Ethernet0/3.
[Quidway-Ethernet0/3] undo mac-address max-mac-count
2.1.5 mac-address timer
Syntax
mac-address timer { aging age | no-aging }
undo mac-address timer aging
View
System view
Parameter
aging age: Specifies the aging time (measured in seconds) of the Layer-2 dynamic address table entry, ranging from 10 to 1000000. By default, the aging time is 300 seconds.
no-aging : No aging time.
Description
Using mac-address timer command, you can configure the aging time of the Layer-2 dynamic address table entry. Using undo mac-address timer command, you can restore the default value.

Command Manual - System Management Quidway S3000-EI Series Ethernet Switches
Chapter 2 MAC Address Table Management Commands
Huawei Technologies Proprietary
2-5
Too long or too short aging time set by subscribers will cause the problem that the Ethernet switch broadcasts a great mount of data packets without MAC addresses, which will affect the switch operation performance.
If aging time is set too long, the Ethernet switch will store a great number of out-of-date MAC address tables. This will consume MAC address table resources and the switch will not be able to update MAC address table according to the network change.
If aging time is set too short, the Ethernet switch may delete valid MAC address table.
Example
# Configure the entry aging time of Layer-2 dynamic address table to be 500 seconds. [Quidway] mac-address timer aging 500

Command Manual - System Management Quidway S3000-EI Series Ethernet Switches Chapter 3 Device Management Commands
Huawei Technologies Proprietary
3-1
Chapter 3 Device Management Commands
3.1 Device Management Commands
3.1.1 boot boot-loader
Syntax
boot boot-loader file-url
View
User view
Parameter
file-url: Path and name of APP file.
Description
Using boot boot-loader command, you can configure the app file used for boot of the next time.
Example
# Specify the APP application used for boot of next time. <Quidway> boot boot-loader PLATV100R002B09D002.APP
The specifed file will be booted next time!
<Quidway>
3.1.2 boot bootrom
Syntax
boot bootrom file-url
View
User view
Parameter
file-url: File path and file name of Bootrom.
Description
Using boot bootrom command, you can upgrade bootrom.
Command Manual - System Management Quidway S3000-EI Series Ethernet Switches Chapter 3 Device Management Commands
Huawei Technologies Proprietary
3-2
Example
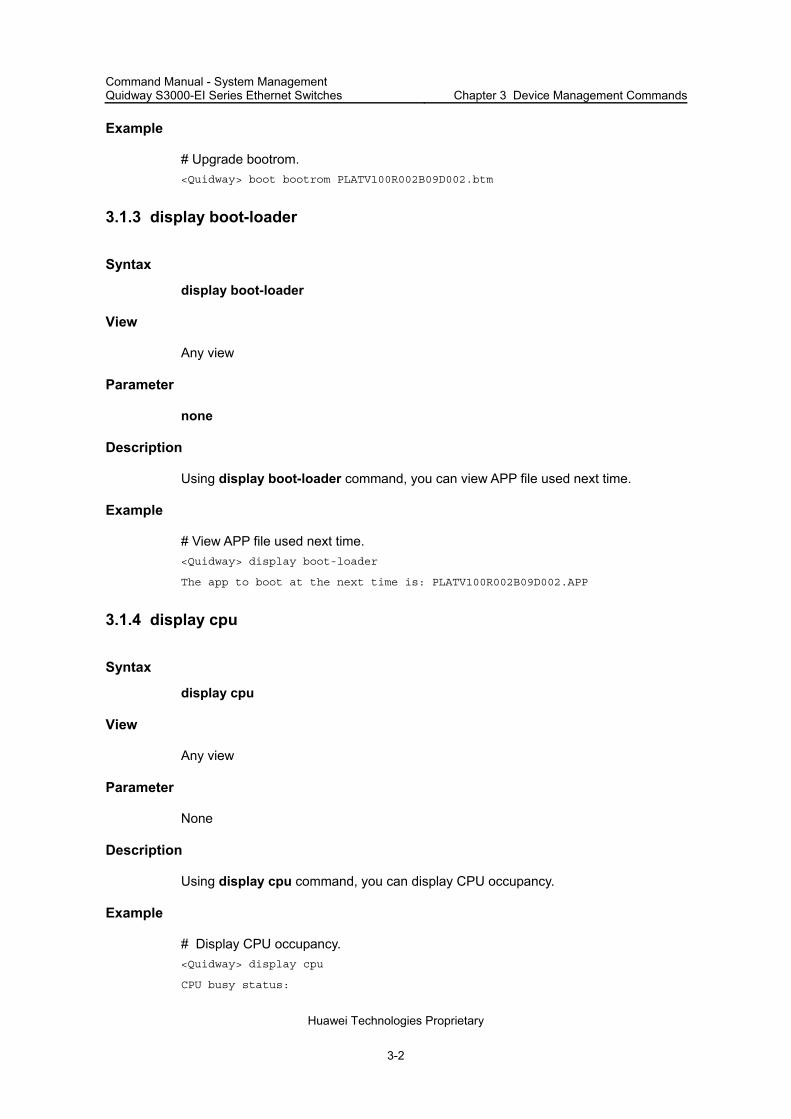
# Upgrade bootrom. <Quidway> boot bootrom PLATV100R002B09D002.btm
3.1.3 display boot-loader
Syntax
display boot-loader
View
Any view
Parameter
none
Description
Using display boot-loader command, you can view APP file used next time.
Example
# View APP file used next time. <Quidway> display boot-loader
The app to boot at the next time is: PLATV100R002B09D002.APP
3.1.4 display cpu
Syntax
display cpu
View
Any view
Parameter
None
Description
Using display cpu command, you can display CPU occupancy.
Example
# Display CPU occupancy. <Quidway> display cpu
CPU busy status:

Command Manual - System Management Quidway S3000-EI Series Ethernet Switches Chapter 3 Device Management Commands
Huawei Technologies Proprietary
3-3
18% in last 5 seconds
19% in last 1 minute
19% in last 5 minutes
Table 3-1 Display information
Field Description
CPU busy status. The busy status of switch
18% in last 5 seconds
19% in last 1 minute
19% in last 5 minutes
The CPU occupancy rate is 18% at last 5 seconds
The CPU occupancy rate is 19% at last 1 minute
The CPU occupancy rate is 19% at last 5 minutes
3.1.5 display device
Syntax
display device
View
Any view
Parameter
none
Description
Using display device command, you can view module type and working status information of each card (including main card and daughter-card).
Perform display device command to display the module type and working status information of a card, including physical card number, physical daughter card number, number of ports, hardware version number, FPGA version number, BOOTROM software version number, application version number, address learning mode, interface card type and interface card type description, etc.
Example
# Show the card information. <Quidway> display device
SlotNo SubSNo PortNum PCBVer FPGAVer CPLDVer BootRomVer AddrLM Type
0 0 24 REV.0 001 002 360 IVL MAIN
The following table describes the displaying information.

Command Manual - System Management Quidway S3000-EI Series Ethernet Switches Chapter 3 Device Management Commands
Huawei Technologies Proprietary
3-4
Table 3-2 Output description of the display device command
Field Description
SlotNo Physical card number
SubSNo Sub physical card number (namely stack card number)
PortNum Number of ports
PCBVer PCB version number
FPGAVer FPGA version number
CPLDVer r Hardware version number
BootRomVer BootROM software version number
AddrLM Address learning mode
Type Interface card type
3.1.6 display environment
Syntax
display environment
View
Any view
Parameter
none
Description
Using display environment command, you can view environment information.
Example
# Display the environment information. <Quidway> display environment
System temperature information (degree centigrade):
----------------------------------------------------
Board Temperature Lower limit Upper limit
0 46 20 80
6 42 10 80
Command Manual - System Management Quidway S3000-EI Series Ethernet Switches Chapter 3 Device Management Commands
Huawei Technologies Proprietary
3-5
3.1.7 display fan
Syntax
display fan [ fan-id ]
View
Any view
Parameter
fan-id: the fan ID.
Description
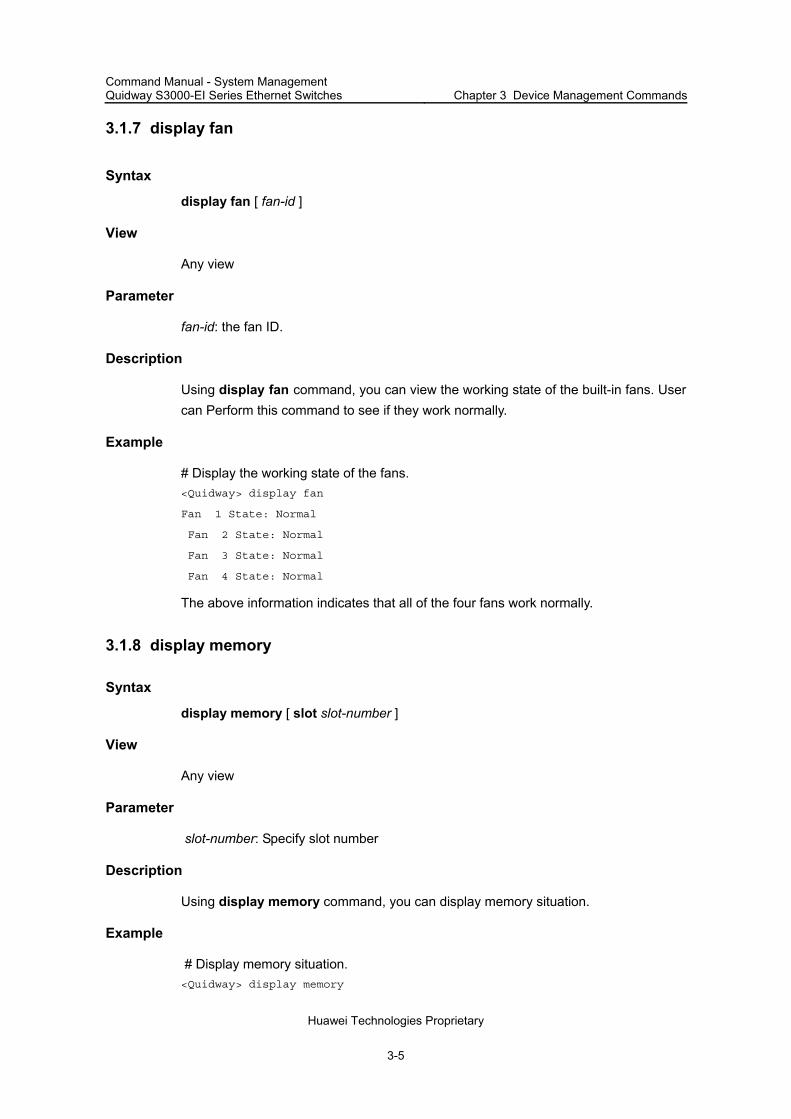
Using display fan command, you can view the working state of the built-in fans. User can Perform this command to see if they work normally.
Example
# Display the working state of the fans. <Quidway> display fan
Fan 1 State: Normal
Fan 2 State: Normal
Fan 3 State: Normal
Fan 4 State: Normal
The above information indicates that all of the four fans work normally.
3.1.8 display memory
Syntax
display memory [ slot slot-number ]
View
Any view
Parameter
slot-number: Specify slot number
Description
Using display memory command, you can display memory situation.
Example
# Display memory situation. <Quidway> display memory

Command Manual - System Management Quidway S3000-EI Series Ethernet Switches Chapter 3 Device Management Commands
Huawei Technologies Proprietary
3-6
System Total Memory(bytes): 32491008
Total Used Memory(bytes): 13181348
Used Rate: 40%
Table 3-3 Display information
Field Description
System Total Memory(bytes) The Total Memory of switch, unit in byte
Total Used Memory(bytes) The Total used Memory of switch, unit in byte
Used Rate The memory used rate
3.1.9 display power
Syntax
display power [ powe-ID ]
View
Any view
Parameter
power-ID: Power ID.
Description
Using display power command, you can view the working state of the built-in power supply.
Example
# Show power state. <Quidway> display power 1
power 1 State: Normal
3.1.10 reboot
syntax
reboot
View
User view

Command Manual - System Management Quidway S3000-EI Series Ethernet Switches Chapter 3 Device Management Commands
Huawei Technologies Proprietary
3-7
Parameter
none.
Description
Using reboot command, you can reset the Ethernet Switch when failure occurs.
Example
# Reboots the Switch. <Quidway> reboot
3.1.11 temperature-limit
Syntax
temperature-limit slot down-value up-value
undo temperature-limit slot
View
User view, system view
Parameter
slot: Physical card number.
down-value: Lower temperature limit.
up-value: Upper temperature limit.
Description
Using temperature-limit command, you can configure temperature limit. Using undo temperature-limit command, you can restore temperature limit to default value.
Example
# Set the lower and upper temperature limit of card 0. <Quidway> temperature-limit 0 10 75
Success temperature limit set

Command Manual - System Management Quidway S3000-EI Series Ethernet Switches Chapter 4 System Maintenance Commands
Huawei Technologies Proprietary
4-1
Chapter 4 System Maintenance Commands
4.1 Basic System Configuration and Management Commands
4.1.1 clock datetime
Syntax
clock datetime HH:MM:SS YYYY/MM/DD
View
User view
Parameter
HH:MM:SS: Current clock. HH ranges from 0 to 23. MM and SS range from 0 to 59.
YYYY/MM/DD: Specify the current year, month and date. YYYY ranges from 1993 to 2035. MM ranges from 1 to 12 and DD ranges from 1 to 31.
Description
Using clock datetime command, you can configure the current date and clock of Ethernet Switch.
By default, the date and clock of Ethernet Switch is set as 0:0:0, 2000/1/1.
The current date and clock of Ethernet Switch must be set in the circumstance that absolute time is strictly required.
For the related commands, see display clock.
Example
# Set the current date of Ethernet Switch to 0:0:0, 2001/01/1. <Quidway> clock datetime 0:0:0 2001/01/01
4.1.2 clock summer-time
Syntax
clock summer-time zone_name { one-off | repeating } start-time start-date end-time end-date offset-time
undo clock summer-time

Command Manual - System Management Quidway S3000-EI Series Ethernet Switches Chapter 4 System Maintenance Commands
Huawei Technologies Proprietary
4-2
View
User view
Parameter
zone_name: Name of the summer time, which is a character with the length ranging 1 to 32.
one-off: Only set the summer time of a certain year.
repeating: Set the summer time of every year starting from a certain year.
start-time: Set start time of the summer time, input like HH:MM:SS (hour/minute/second).
start-date: Set start time of the summer time, input like YYYY/MM/DD (year/month/day).
end-time: Set end time of the summer time, input like HH:MM:SS (hour/minute/second).
end-date: Set end time of the summer time, input like YYYY/MM/DD (year/month/day).
offset-time: Set offset time of the summer time, input like HH:MM:SS (hour/minute/second).
Description
Using clock summer-time command, you can set the name, starting and ending time of the summer time. Using undo clock summer-time command, you can remove the configuration of the summer time.
After the configuration takes effect, the display clock command can be used to check it. Besides, the time of the log or debug information uses the local time after the adjustment of the time zone and summer time.
For the related command, see clock timezone.
Example
# Set the summer time for z2 that starts at 06:00:00 on 08/06/2002 and ends at 06:00:00 on 01/09/2002 with the time adding 1 hour. <Quidway> clock summer-time z2 one-off 06:00:00 2002/06/08 06:00:00 2002/09/01
01:00:00
# Set the summer time for z2 that starts at 06:00:00 on 08/06 and ends at 06:00:00 on 01/09 in each year from 2002 on with the time adding 1 hour.
<Quidway> clock summer-time z2 repeating 06:00:00 2002/06/08 06:00:00
2002/09/01 01:00:00
Command Manual - System Management Quidway S3000-EI Series Ethernet Switches Chapter 4 System Maintenance Commands
Huawei Technologies Proprietary
4-3
4.1.3 clock timezone
Syntax
clock timezone zone_name { add | minus } HH:MM:SS
undo clock timezone
View
User view
Parameter
zone_name: Name of the time zone, which is a character with the length ranging 1 to 32.
add: The time is adding compared with the UTC.
minus: The time is minus compared with the UTC.
HH:MM:SS: Time (hour/minute/second).
Description
Using clock timezone command, you can set the information of the local time zone. Using undo clock timezone command, you can restore to the default Universal Time Coordinated (UTC) time zone.
After the configuration takes effect, the display clock command can be used to check it. Besides, the time of the log or debug information uses the local time after the adjustment of the time zone and summer time.
For the related command, see clock summer-time.
Example
# Set the name of the local time zone as Z5 with the time adding 5 hours compared with the UTC. <Quidway> clock timezone z5 add 05:00:00
4.1.4 sysname
Syntax
sysname sysname
undo sysname
View
System view

Command Manual - System Management Quidway S3000-EI Series Ethernet Switches Chapter 4 System Maintenance Commands
Huawei Technologies Proprietary
4-4
Parameter
sysname: Specify the hostname with a character string with the length ranging from1 to 30 characters.
Description
Using sysname command, you can configure the hostname of Ethernet Switch.
By default, the hostname of Ethernet Switch is Quidway.
Changing the hostname name of Ethernet Switch will affect the prompt of command line interface. E.g. the host name of Ethernet Switch is Quidway, and the prompt in user view is <Quidway>.
Example
# Set the hostname of the Ethernet Switch as QuidwayLANSwitch. [Quidway] sysname QuidwayLANSwitch
[QuidwayLANSwitch]
4.2 System Status and System Information Display Commands
4.2.1 display clock
Syntax
display clock
View
Any view
Parameter
none
Description
Using display clock command, subscribers can obtain information about system data and time from the terminal display.
The maximum date and time the system can display is 23:59:59 9999/12/31.
For the related commands, see clock.
Example
# View the current system date and clock. <Quidway> display clock
15:50:45 UTC Mon 2001/2/12

Command Manual - System Management Quidway S3000-EI Series Ethernet Switches Chapter 4 System Maintenance Commands
Huawei Technologies Proprietary
4-5
4.2.2 display current-configuration
Syntax
display current-configuration [ controller | interface interface-type [ interface-number ] | configuration [ post-system | system | user-interface ] ] [ | { begin | exclude | include } regular-expression ]
View
Any view
Parameter
controller: View the configuration information of controllers.
interface: View the configuration information of interfaces.
interface-type: Type of the interface.
interface-number: Number of the interface.
configuration: View the pre-positive and post-positive configuration information.
post-system: View the pre-positive configuration information.
system: View the configuration information of sysname.
user-interface: View the configuration information of user-interface.
|: Filter the configuration information to be output via regular expression.
begin: Begin with the line that matches the regular expression.
exclude: Exclude lines that match the regular expression.
include: Include lines that match the regular expression.
regular-expression: Define the regular expression.
Description
Using display current-configuration command, you can display the currently effective configuration parameters of the switch.
By default, if some running configuration parameters are the same with the default operational parameters, they will not be displayed.
If a user needs to authenticate whether the configurations are correct after finishing a set of configuration, the display current-configuration command can be used to display the running parameters. Although the user has configured some parameters, but the related functions are not effective, they are not displayed.
When there is much configuration information, you can use the regular expression to filter the output information. For specific rules about the regular expression, refer to the corresponding operation manual.

Command Manual - System Management Quidway S3000-EI Series Ethernet Switches Chapter 4 System Maintenance Commands
Huawei Technologies Proprietary
4-6
For the related command, see save, reset saved-configuration and display saved-configuration.
Example
# View the running configuration parameters of the switch. <Quidway> display current-configuration
#
sysname S3026C
#
radius scheme system
server-type nec
primary authentication 127.0.0.1 1645
primary accounting 127.0.0.1 1646
user-name-format without-domain
domain system
radius-scheme system
access-limit disable
state active
idle-cut disable
self-service-url disable
messenger time disable
domain default enable system
#
local-server nas-ip 127.0.0.1 key nec
#
interface Aux0/0
#
vlan 1
#
interface Ethernet0/1
#
interface Ethernet0/2
#
interface Ethernet0/3
#
interface Ethernet0/4
#
interface Ethernet0/5
#
interface Ethernet0/6

Command Manual - System Management Quidway S3000-EI Series Ethernet Switches Chapter 4 System Maintenance Commands
Huawei Technologies Proprietary
4-7
#
interface Ethernet0/7
#
interface Ethernet0/8
#
interface Ethernet0/9
#
interface Ethernet0/10
#
interface Ethernet0/11
#
interface Ethernet0/12
#
interface Ethernet0/13
#
interface Ethernet0/14
#
interface Ethernet0/15
#
interface Ethernet0/16
#
interface Ethernet0/17
#
interface Ethernet0/18
#
interface Ethernet0/19
#
interface Ethernet0/20
#
interface Ethernet0/21
#
interface Ethernet0/22
#
interface Ethernet0/23
#
interface Ethernet0/24
#
interface NULL0
#
user-interface aux 0
user-interface vty 0 4
#

Command Manual - System Management Quidway S3000-EI Series Ethernet Switches Chapter 4 System Maintenance Commands
Huawei Technologies Proprietary
4-8
return
# View the lines containing the character string “10*” in the configuration information. The “*” indicates that the “0” before it can appear 0 times or multiple consecutive times.
<Quidway> display current-configuration | include 10*
primary authentication 127.0.0.1 1645
primary accounting 127.0.0.1 1646
local-server nas-ip 127.0.0.1 key nec
vlan 1
interface Ethernet0/1
interface Ethernet0/10
interface Ethernet0/11
interface Ethernet0/12
interface Ethernet0/13
interface Ethernet0/14
interface Ethernet0/15
interface Ethernet0/16
interface Ethernet0/17
interface Ethernet0/18
interface Ethernet0/19
interface Ethernet0/21
# View configuration information begin with “user”.
<Quidway> display current-configuration | include ^user
user-interface aux 0
user-interface vty 0 4
# View the pre-positive and post-positive configuration information.
<Quidway> display current-configuration configuration
#
sysname S3026C
#
radius scheme system
server-type nec
primary authentication 127.0.0.1 1645
primary accounting 127.0.0.1 1646
user-name-format without-domain
domain system
radius-scheme system
access-limit disable
state active
idle-cut disable
self-service-url disable

Command Manual - System Management Quidway S3000-EI Series Ethernet Switches Chapter 4 System Maintenance Commands
Huawei Technologies Proprietary
4-9
messenger time disable
domain default enable system
#
local-server nas-ip 127.0.0.1 key nec
#
vlan 1
#
user-interface aux 0
user-interface vty 0 4
#
return
4.2.3 display debugging
Syntax
display debugging [ interface { interface-name | interface-type interface-num } ] [ module-name ]
View
Any view
Parameter
interface-name: Specify the Ethernet port name.
interface-type: Specify the Ethernet port type.
interface-num: Specify the Ethernet port number.
module-name: Specify the module name.
Description
Using display debugging command, you can view the enabled debugging process.
Show all the enabled debugging when there is no parameter.
For the related commands, see debugging.
Example
# Show all the enabled debugging. <Quidway> display debugging
IP packet debugging switch is on.

Command Manual - System Management Quidway S3000-EI Series Ethernet Switches Chapter 4 System Maintenance Commands
Huawei Technologies Proprietary
4-10
4.2.4 display saved-configuration
Syntax
display saved-configuration
View
Any view
Parameter
none
Description
Using display saved-configuration command, you can view the configuration files in the flash memory of Ethernet Switch.
If the Ethernet Switch works abnormally after electrified, execute the display saved-configuration command to view the startup configuration of the Ethernet Switch.
For the related commands, see save, reset saved-configuration, display current-configuration.
Example
# Display configuration files in flash memory of Ethernet Switch. <Quidway> display saved-configuration
#
sysname S3026C
#
radius scheme system
server-type nec
primary authentication 127.0.0.1 1645
primary accounting 127.0.0.1 1646
user-name-format without-domain
domain system
radius-scheme system
access-limit disable
state active
idle-cut disable
self-service-url disable
messenger time disable
domain default enable system

Command Manual - System Management Quidway S3000-EI Series Ethernet Switches Chapter 4 System Maintenance Commands
Huawei Technologies Proprietary
4-11
#
local-server nas-ip 127.0.0.1 key nec
#
interface Aux0/0
#
vlan 1
#
interface Ethernet0/1
#
interface Ethernet0/2
#
interface Ethernet0/3
#
interface Ethernet0/4
#
interface Ethernet0/5
#
interface Ethernet0/6
#
interface Ethernet0/7
#
interface Ethernet0/8
#
interface Ethernet0/9
#
interface Ethernet0/10
#
interface Ethernet0/11
#
interface Ethernet0/12
#
interface Ethernet0/13
#
interface Ethernet0/14
#
interface Ethernet0/15
#
interface Ethernet0/16
#
interface Ethernet0/17
#
interface Ethernet0/18

Command Manual - System Management Quidway S3000-EI Series Ethernet Switches Chapter 4 System Maintenance Commands
Huawei Technologies Proprietary
4-12
#
interface Ethernet0/19
#
interface Ethernet0/20
#
interface Ethernet0/21
#
interface Ethernet0/22
#
interface Ethernet0/23
#
interface Ethernet0/24
#
interface NULL0
#
user-interface aux 0
user-interface vty 0 4
#
return
4.2.5 display users
Syntax
display users [ all ]
View
Any view
Parameter
all: display all users connected to the switch.
Description
Using display users command, you can view information about users connected to the switch.
Example
# Display the status of the current users. <Quidway> display users
UI Delay IPaddress Username
F 0 AUX 0 00:00:00

Command Manual - System Management Quidway S3000-EI Series Ethernet Switches Chapter 4 System Maintenance Commands
Huawei Technologies Proprietary
4-13
4.2.6 display version
Syntax
display version
View
Any view
Parameter
none
Description
Using display version command, you can view such information as software version, issue date and the basic hardware configurations.
Example
# Display the information about the system version. <Quidway> display version
Versatile Routing Platform Software
VRP (R) Software, Version 3.10, RELEASE 0014
Copyright (c) Reserved.
S3026C uptime is 0 week,0 day,3 hours,13 minutes
S3026C with 1 MIPS Processor
64M bytes SDRAM
8192K bytes Flash Memory
Config Register points to FLASH
Hardware Version is REV.0
CPLD Version is 000
Bootrom Version is 120
[Subslot 0] 24 FE Hardware Version is REV.0
4.3 System Debug Commands
4.3.1 debugging
Syntax
debugging { all | module-name [ debugging-option ] }
undo debugging { all | module-name [ debugging-option ] }
Command Manual - System Management Quidway S3000-EI Series Ethernet Switches Chapter 4 System Maintenance Commands
Huawei Technologies Proprietary
4-14
View
User view
Parameter
all: Enable or disable all the debugging.
module-name: Specify the module name.
debugging-option: Debugging option.
Description
Using debugging command, you can enable the system debugging. Using undo debugging command, you can disable the system debugging.
By default, all the debugging processes are disabled.
Ethernet Switch provides various kinds of debugging functions for technical support personnel and experienced maintenance staff to troubleshoot the network.
Enabling the debugging will generate a large amount of debugging information and decrease the system efficiency. Specially, network system may collapse after all the debugging is enabled by debugging all command. So it is not suggested to use the debugging all command. It is convenient for the user to disable all the debugging with undo debugging all command.
For the related commands, see display debugging.
Example
# Enable IP Packet debugging. <Quidway> debugging ip packet
IP packet debugging switch is on.
4.3.2 display diagnostic-information
Syntax
display diagnostic-information
View
Any view
Parameter
none

Command Manual - System Management Quidway S3000-EI Series Ethernet Switches Chapter 4 System Maintenance Commands
Huawei Technologies Proprietary
4-15
Description
Using display diagnostic-information command, you can view the current configuration information about all running modules. You can use all these information to help diagnose and troubleshoot the Ethernet switch.
When the Ethernet switch does not run well, you can collect all sorts of information about the switch to locate the source of fault. However, each module has its corresponding display command, which make it difficult for you to collect all the information needed. In this case, you can use display diagnostic-information command.
Example
# Display all system configuration information <Quidway> display diagnostic-information
This operation may take a few minutes, continue?[Y/N]y
---------------display clock---------------
20:12:39 UTC Mon 2000/5/8
---------------display version---------------
Huawei Versatile Routing Platform Software
VRP (tm) software, Version 3.10
Copyright (c) 2000-2002 HUAWEI TECH CO., LTD.
4.4 Network Connection Test Commands
4.4.1 ping
Syntax
ping [ -a ip-address ] [-c count ] [ -d ] [ -f ] [ -h ttl ] [ -i {interface-type interface-num | interface-name } ] [ ip ] [ -n ] [ - p pattern ] [ -q ] [ -r ] [ -s packetsize ] [ -t timeout ] [ -tos tos ] [ -v ] string
View
Any view
Parameter
-a ip-address: Specify the source IP address to transmit ICMP ECHO-REQUEST.
-c: count specify how many times the ICMP ECHO-REQUEST packet will be transmitted, ranging from 1 to 4294967295.
-d: Configure the socket to be in DEBUGGING mode.
-f: Drop the packets which are larger than the MTU instead of fragmenting them.

Command Manual - System Management Quidway S3000-EI Series Ethernet Switches Chapter 4 System Maintenance Commands
Huawei Technologies Proprietary
4-16
-h ttl: Configure TTL value for echo requests to be sent, range from 1 to 255.
-i: Configure to choose packet sent on the interface.
interface-type: Specify the interface type.
interface-num: Specify the interface number.
interface-name: Specify the interface name.
-n: Configure to take the host parameter as IP address without domain name resolution.
-p: pattern is the hexadecimal padding of ICMP ECHO-REQUEST, e.g. -p ff pads the packet completely with ff.
-q: Configure not to display any other detailed information except statistics.
-r: Record route.
-s packetsize: Specify the length of ECHO-REQUEST (excluding IP and ICMP packet header) in bytes.
-t timeout: Maximum waiting time after sending the ECHO-REQUEST (measured in ms).
-tos tos: Specify TOS value for echo requests to be sent, range from 0 to 255.
-v: Show other received ICMP packets (non ECHO-RESPONSE).
string: Destination host domain name or IP address of the destination host.
ip: Choose IP ICMP packet.
Description
Using ping command, you can check the IP network connection and the reachability of the host.
By default, when the parameters are not specified: The ECHO-REQUEST message will be sent for 5 times. socket is not in DEBUGGING mode. The TTL value for echo requests is 255. host will be treated as IP address first. If it is not an IP address, perform domain
name resolution. The default padding operation starts from 0x01 and ends on 0x09 (progressively),
then performs again. Show all the information including statistics. Routes are not recorded. Send ECHO-REQUEST according to route selection. Default length of ECHO-REQUEST is 56 bytes. Default timeout of ECHO-RESPONSE is 2000ms. Do not display other ICMP packets (non ECHO-RESPONSE). The TOS value of echo requests is 0.

Command Manual - System Management Quidway S3000-EI Series Ethernet Switches Chapter 4 System Maintenance Commands
Huawei Technologies Proprietary
4-17
The ping command sends ICMP ECHO-REQUEST message to the destination. If the network to the destination works well, then the destination host will send ICMP ECHO-REPLY to the source host after receiving ICMP ECHO-REQUEST.
Perform ping command to troubleshoot the network connection and line quality. The output information includes:
Responses to each of the ECHO-REQUEST messages. If the response message is not received until timeout, output "Request time out". Or display response message bytes, packet sequence number, TTL and response time.
The final statistics, including number of sent packets, number of response packets received, percentage of non-response packets and minimal/maximum/average value of response time.
If the network transmission rate is too low, you can increase the response message timeout.
For the related commands, see tracert.
Example
# Check whether the host 202.38.160.244 is reachable. <Quidway> ping 202.38.160.244
ping 202.38.160.244 : 56 data bytes
Reply from 202.38.160.244 : bytes=56 sequence=1 ttl=255 time = 1ms
Reply from 202.38.160.244 : bytes=56 sequence=2 ttl=255 time = 2ms
Reply from 202.38.160.244 : bytes=56 sequence=3 ttl=255 time = 1ms
Reply from 202.38.160.244 : bytes=56 sequence=4 ttl=255 time = 3ms
Reply from 202.38.160.244 : bytes=56 sequence=5 ttl=255 time = 2ms
--202.38.160.244 ping statistics--
5 packets transmitted
5 packets received
0% packet loss
round-trip min/avg/max = 1/2/3 ms
4.4.2 tracert
Syntax
tracert [ -a source-ip ] [ -f first-TTL ] [ -m max-TTL ] [ -p port ] [ -q num-packet ] [ -w timeout ] string
View
Any view
Parameter
-a source-IP: Configure the source IP address used by tracert command.

Command Manual - System Management Quidway S3000-EI Series Ethernet Switches Chapter 4 System Maintenance Commands
Huawei Technologies Proprietary
4-18
-f: Configure to verify the -f switch, first-TTL specifies an initial TTL, ranging from 0 to the maximum TTL.
-m: Configure to verify the -m switch, max-TTL specifies a maximum TTL larger than the initial TTL.
-p: Configure to verify the -p switch, port is an integer host port number. Generally, user need not modify this option.
-q: Configure to verify the -q switch, num-packet is an integer specifying the number of query packets sent, larger than 0.
-w: Configure to verify the -wf switch, timeout is an integer specifying IP packet timeout in seconds, larger than 0.
string: IP address of the destination host or the hostname of the remote system.
Description
Using tracert command, you can check the reachability of network connection and troubleshoot the network. User can test gateways passed by the packets transmitted from the host to the destination.
By default, when the parameters are not specified,
first-TTL is 1,
max-TTL is 30,
port is 33434,
nqueries is 3 and
timeout is 5s.
The tracert command sends a packet with TTL 1, and the first hop will send an ICMP error message back to indicate this packet cannot be transmitted (because of TTL timeout). Then this packet will be sent again with TTL 2, and the second hop will indicate a TTL timeout error. Perform this operation repeatedly till reaching the destination. These processes are operated to record the source address of each ICMP TTL timeout so as to provide a path to the destination for an IP packet.
After ping command finds some error on the network, perform tracert to locate the error.
The output of tracert command includes IP address of all the gateways to the destination. If a certain gateway times out, output "***".
Example
# Test the gateways passed by the packets to the destination host at 18.26.0.115. <Quidway> tracert 18.26.0.115
tracert to allspice.lcs.mit.edu (18.26.0.115), 30 hops max
1 helios.ee.lbl.gov (128.3.112.1) 0 ms 0 ms 0 ms
2 lilac-dmc.Berkeley.EDU (128.32.216.1) 19 ms 19 ms 19 ms
Command Manual - System Management Quidway S3000-EI Series Ethernet Switches Chapter 4 System Maintenance Commands
Huawei Technologies Proprietary
4-19
3 lilac-dmc.Berkeley.EDU (128.32.216.1) 39 ms 19 ms 19 ms
4 ccngw-ner-cc.Berkeley.EDU (128.32.136.23) 19 ms 39 ms 39 ms
5 ccn-nerif22.Berkeley.EDU (128.32.168.22) 20 ms 39 ms 39 ms
6 128.32.197.4 (128.32.197.4) 59 ms 119 ms 39 ms
7 131.119.2.5 (131.119.2.5) 59 ms 59 ms 39 ms
8 129.140.70.13 (129.140.70.13) 80 ms 79 ms 99 ms
9 129.140.71.6 (129.140.71.6) 139 ms 139 ms 159 ms
10 129.140.81.7 (129.140.81.7) 199 ms 180 ms 300 ms
11 129.140.72.17 (129.140.72.17) 300 ms 239 ms 239 ms
12 * * *
13 128.121.54.72 (128.121.54.72) 259 ms 499 ms 279 ms
14 * * *
15 * * *
16 * * *
17 * * *
18 ALLSPICE.LCS.MIT.EDU (18.26.0.115) 339 ms 279 ms 279 ms
4.5 Log Commands
4.5.1 display channel
Syntax
display channel [ channel-number | channel-name ]
View
Any view
Parameter
channel-number: Channel number, ranging from 0 to 9, that is, the system has ten channels.
channel-name: Specify the channel name. the name can be channel6, channel7, channel8, channel9, console, logbuffer, loghost, monitor, snmpagent, trapbuffer.
Description
Using display channel command, you can view the details about the information channel.
Without parameter, display channel command shows the configurations of all the channels.
Example
# Show details about the information channel 0.

Command Manual - System Management Quidway S3000-EI Series Ethernet Switches Chapter 4 System Maintenance Commands
Huawei Technologies Proprietary
4-20
<Quidway> display channel 0
channel number:0, channel name:console
MODU_ID NAME ENABLE LOG LEVEL ENABLE TRAP LEVEL ENABLE DEBUGGING LEVEL
ffff0000 all Y warning Y debugging Y debugging
4.5.2 display info-center
Syntax
display info-center
View
Any view
Parameter
None
Description
Using display info-center command, you can view the configuration of system log and the information recorded in the memory buffer.
If the information in the current log/trap buffer is less than the specified sizeval, display the actual log/trap information.
For the related commands, see info-center enable,info-center loghost,info-center logbuffer,info-center console channel,info-center monitor channel.
Example
# Show the system log information. <Quidway> display info-center
Information Center:enabled
Log host:
173.168.1.10, channel number:2, channel name:loghost,
language:english , host facility local:7
Console:
channel number:0, channel name:console
Monitor:
channel number:1, channel name:monitor
SNMP Agent:
channel number:5, channel name:snmpagent
Log buffer:
enabled, max buffer size:1024, current buffer size:256
current messages:6, channel number:4, channel name:logbuffer
dropped messages:0, overwrote messages:0

Command Manual - System Management Quidway S3000-EI Series Ethernet Switches Chapter 4 System Maintenance Commands
Huawei Technologies Proprietary
4-21
Trap buffer:
enabled, max buffer size:1024, current buffer size:256
current messages:0, channel number:3, channel name:trapbuffer
dropped messages:0, overwrote messages:0
Information timestamp setting:
log - date, trap - date, debug - boot
4.5.3 info-center channel name
Syntax
info-center channel channel-number name channel-name
View
System view
Parameter
channel-number: Channel number, ranging from 0 to 9, that is, system has ten channels.
channel-name: Specify the channel name with a character string not exceeding 30 characters, excluding "-", "/" or "\". .
Description
Using info-center channel name command, you can rename a channel specified by the channel-number as channel-name.
Note that the channel name cannot be duplicated.
Example
# Rename the channel 0 as execconsole. [Quidway] info-center channel 0 name execconsole
4.5.4 info-center console channel
Syntax
info-center console channel { channel-number | channel-name }
undo info-center console channel
View
System view

Command Manual - System Management Quidway S3000-EI Series Ethernet Switches Chapter 4 System Maintenance Commands
Huawei Technologies Proprietary
4-22
Parameter
channel-number: Channel number, ranging from 0 to 9, that is, system has ten channels.
channel-name: Specify the channel name. The name can be channel6, channel7, channel8, channel9, console, logbuffer, loghost, monitor, snmpagent, trapbuffer.
Description
Using info-center console channel command, you can configure the channel through which the log information is output to the console.
By default, Ethernet switches do not output log information to the console.
This command takes effect only after system logging is started.
For the related commands, see info-center enable,display info-center.
Example
# Configure to output log information to the console through channel 0. [Quidway] info-center console channel 0
4.5.5 info-center enable
Syntax
info-center enable
undo info-center enable
View
System view
Parameter
none
Description
Using info-center enable command, you can enable the system log function. Using undo info-center enable command, you can disable system log function.
By default, system log function is enabled.
Only after the system log function is enabled can the system output the log information to the info-center loghost and console, etc.
For the related commands, see info-center loghost, info-center logbuffer, info-center console channel, info-center monitor channel, display info-center.

Command Manual - System Management Quidway S3000-EI Series Ethernet Switches Chapter 4 System Maintenance Commands
Huawei Technologies Proprietary
4-23
Example
# Enable the system log function. [Quidway] info-center enable
4.5.6 info-center logbuffer
Syntax
info-center logbuffer [ channel { channel-number | channel-name } ] [ size buffersize ]
undo info-center logbuffer [ channel | size ]
View
System view
Parameter
channel: Configure the channel to output information to buffer.
channel-number: Channel number, ranging from 0 to 9, that is, system has ten channels.
channel-name: Specify the channel name. The name can be channel6, channel7, channel8, channel9, console, logbuffer, loghost, monitor, snmpagent, trapbuffer.
size: Configure the size of buffer.
buffersize: Size of buffer (number of messages which can be kept); By default, the size of the buffer is 20.
Description
Using info-center logbuffer command, you can configure to output information to the memory buffer. Using undo info-center logbuffer command, you can cancel the information output to buffer
This command takes effect only after the system logging is enabled.
For the related commands, see info-center enable, display info-center.
Example
# Send log information to buffer and sets the size of buffer as 50. [Quidway] info-center logbuffer size 50

Command Manual - System Management Quidway S3000-EI Series Ethernet Switches Chapter 4 System Maintenance Commands
Huawei Technologies Proprietary
4-24
4.5.7 info-center loghost
Syntax
info-center loghost host-ip-addr [ channel { channel-number | channel-name } ] [ facility local-number ] [ language { chinese | english } ]
undo info-center loghost host-ip-addr
View
System view
Parameter
host-ip-addr: IP address of info-center loghost.
channel: Configure information channel of the info-center loghost.
channel-number: Channel number, ranging from 0 to 9, that is, system has ten channels.
channel-name: Specify the channel name. The name can be channel6, channel7, channel8, channel9, console, logbuffer, loghost, monitor, snmpagent, trapbuffer.
facility: Configure the recording tool of info-center loghost.
local-number: Record tool of info-center loghost, ranging from local0 to local7.
language: Set the logging language.
chinese,english: Language used in log file.
Description
Using info-center loghost command, you can configure the IP address of the info-center loghost to send information to it. Using undo info-center loghost command, you can cancel output to info-center loghost.
By default, Ethernet switches do not output information to info-center loghost.
This command takes effect only after the system logging is enabled.
For the related commands, see info-center enable,display info-center.
Example
# Configure to send log information to the UNIX workstation at 202.38.160.1. [Quidway] info-center loghost 202.38.160.1
4.5.8 info-center loghost source
Syntax
info-center loghost source interface-name

Command Manual - System Management Quidway S3000-EI Series Ethernet Switches Chapter 4 System Maintenance Commands
Huawei Technologies Proprietary
4-25
undo info-center loghost source
View
System view
Parameter
source interface-name: set source address of the packets sent to loghost as the address of the interface specified by the interface-name. Normally, the interface should be VLAN interface.
Description
Using info-center loghost source command, you can set source address of the packets sent to loghost as the address of the interface specified by the interface-name. Using undo info-center loghost source command, you can cancel the setting source address of the packets sent to loghost.
This command takes effect only after the system logging is enabled.
For the related commands, see info-center enable, display info-center.
Example
# Set source address of the packets sent to loghost as the address of the VLAN interface 1. [Quidway] info-center loghost source vlan-interface 1
4.5.9 info-center monitor channel
Syntax
info-center monitor channel { channel-number | channel-name }
undo info-center monitor channel
View
System view
Parameter
channel-number: Channel number, ranging from 0 to 9, that is, the system has ten channels.
channel-name: Specify the channel name. The name can be channel6, channel7, channel8, channel9, console, logbuffer, loghost, monitor, snmpagent, trapbuffer.

Command Manual - System Management Quidway S3000-EI Series Ethernet Switches Chapter 4 System Maintenance Commands
Huawei Technologies Proprietary
4-26
Description
Using info-center monitor channel command, you can configure the channel to output the log information to the user terminal. Using undo info-center monitor channel command, you can restore the channel to output the log information to the user terminal to default value.
By default, Ethernet switches do not output log information to user terminal.
This command takes effect only after system logging is started.
For the related commands, see info-center enable,display info-center.
Example
# Configure channel 0 to output log information to user terminal. [Quidway] info-center monitor channel 0
4.5.10 info-center snmp channel
Syntax
info-center snmp channel { channel-number | channel-name }
undo info-center snmp channel
View
System view
Parameter
channel-number: Channel number, ranging from 0 to 9, that is, the system has ten channels. By default, channel 5 is used.
channel-name: Specify the channel name. The name can be channel6, channel7, channel8, channel9, console, logbuffer, loghost, monitor, snmpagent, trapbuffer.
Description
Using info-center snmp channel command, you can configure new channel for transmitting the SNMP information. Using undo info-center snmp channel command, you can restore the channel for transmitting the SNMP information to default value.
For the related commands, see display snmp.
Example
# Configure channel 6 as the SNMP information channel. [Quidway] info-center snmp channel 6

Command Manual - System Management Quidway S3000-EI Series Ethernet Switches Chapter 4 System Maintenance Commands
Huawei Technologies Proprietary
4-27
4.5.11 info-center source
Syntax
info-center source { modu-name | default } channel { channel-number | channel-name } [ { log | trap | debug } * { level severity | state state } * ]
undo info-center source { modu-name | default } channel { channel-number | channel-name }
View
System view
Parameter
modu-name: Module name.
default: All the modules.
log: Log information.
trap: Trap information.
debugging: Debugging information.
level: Level.
severity: Information level, do not output information below this level.
Information at different levels is as follows:
emergencies: Level 0 information, which cannot be used by the system.
alerts: Level 1 information, to be reacted immediately.
critical: Level 2 information, critical information.
errors: Level 3 information, error information.
warnings: level 4 information, warning information.
notifications: Level 5 information, showed normally and important.
informational: Level 6 information, notice to be recorded.
debugging: Level 7 information, generated during the debugging progress.
channel-number: Channel number to be set.
channel-name: Channel name to be set. The name can be channel6, channel7, channel8, channel9, console, logbuffer, loghost, monitor, snmpagent, trapbuffer.
state: Set the state of the information.
state: Specify the state as on or off.

Command Manual - System Management Quidway S3000-EI Series Ethernet Switches Chapter 4 System Maintenance Commands
Huawei Technologies Proprietary
4-28
Description
Using info-center source command, you can add/delete a record to the information channel. Using undo info-center source command, you can cancel the contents of the information channel.
For example, for the filter of IP module log output, you can configure to output the logs at a level higher than warnings to the log host and output those higher than informational to the log buffer. You can also configure to output the trap information on the IP module to a specified trap host, etc.
The channels for filtering in all the directions are specified by this configuration command. All the information will be sent to the corresponding directions through the specified channels. You can configure the channels in the output direction, channel filter information, filtering and redirecting of all kinds of information.
At present, the system distributes an information channel in each output direction by default, shown as follows:
Table 4-1 The default name of information channel
Output direction Information channel name
Console console
Monitor monitor
Info-center loghost loghost
Log buffer logbuf
Trap buffer trapbuf
snmp snmpagent
In addition, each information channel has a default record with the module name “all” and module number as 0xffff0000. However, for different information channel, the default log, trap and debugging settings in the records may be different with one another. Use default configuration record if a module does not have any specific configuration record in the channel.
Example
# Configure to enable the log information of VLAN module in SNMP channel and allows the output of the information with a level higher than emergencies. [Quidway] info-center source vlan channel snmp log level emergencies

Command Manual - System Management Quidway S3000-EI Series Ethernet Switches Chapter 4 System Maintenance Commands
Huawei Technologies Proprietary
4-29
4.5.12 info-center switch-on
Syntax
info-center switch-on { unit-id | master | all } [ debugging | logging | trapping ]*
undo info-center switch-on { unit-id | master | all } [ debugging | logging | trapping ]*
View
System view
Parameter
unit-id: Unit ID of switch.
master: master switch of Fabric.
all: all switches of Fabric.
debugging: Debugging information.
logging: Log information.
trapping: Trap information.
Description
Using info-center switch-on command, you can turn on the information synchronization switch of the specified switch. Using undo info-center switch-on command, you can turn off the information synchronization switch of the specified switch.
After the forming of a Fabric by switches which support the XRN, the log, debugging and trap information among the switches is synchronous. The synchronization process is as follows: each switch sends its own information to other switches in the Fabric and meantime receives the information from others, and then the switch updates the local information to ensure the information coincidence within the Fabric.
The switch provides command line to turn on/off the synchronization switch in every switch. If the synchronization switch of a switch is turned off, it does not send information to other switches but still receives information from others.
Example
# Turn on the trapping information synchronization switch of the unit 2. [Quidway] info-center switch 2 trapping

Command Manual - System Management Quidway S3000-EI Series Ethernet Switches Chapter 4 System Maintenance Commands
Huawei Technologies Proprietary
4-30
4.5.13 info-center timestamp
Syntax
info-center timestamp { log | trap | debugging } { boot | date | none }
undo info-center timestamp { log | trap | debugging }
View
System view
Parameter
log: Log information.
trap: Trap information.
debugging: Debugging information.
boot: Time elapsing after system starts. Format: xxxxxx.yyyyyy, xxxxxx is the high 32 bits of the elapsed time (in milliseconds) after system starts, and yyyyyy is the low 32 bits.
date: Current system date and time. It shows as yyyy/mm/dd-hh:mm:ss in Chinese environment and mm/dd/yyyy-hh:mm:ss in Western language environment.
none: No timestamp format.
Description
Using info-center timestamp command, you can configure the timestamp output format in debugging/trap information. Using undo info-center timestamp command, you can disable the output of timestamp field.
By default, datetime stamp is used.
Example
# Configure the debugging information timestamp format as boot. [Quidway] info-center timestamp debugging boot
4.5.14 info-center trapbuffer
Syntax
info-center trapbuffer [ size buffersize ] [ channel { channel-number | channel-name } ]
undo info-center trapbuffer [ channel | size ]
View
System view

Command Manual - System Management Quidway S3000-EI Series Ethernet Switches Chapter 4 System Maintenance Commands
Huawei Technologies Proprietary
4-31
Parameter
size: Configure the size of the trap buffer.
buffersize: Size of trap buffer (numbers of messages).
channel: Configure the channel to output information to trap buffer.
channel-number: Channel number, ranging from 0 to 9, that is, the system has ten channels.
channel-name: Specify the channel name.
Description
Using info-center trapbuffer command, you can output information to the trap buffer. Using undo info-center trapbuffer command, you can cancel output information to trap buffer.
By default, output information is transmitted to trap buffer and size of trap buffer is 20.
This command takes effect only after the system logging is enabled.
For the related commands, see info-center enable, display info-center.
Example
# Send information to the trap buffer and sets the size of buffer as 30. [Quidway] info-center trapbuffer size 30
4.5.15 reset logbuffer
Syntax
reset logbuffer
View
User view
Parameter
none
Description
Using reset logbuffer command, you can reset information in log buffer.
Example
# Clear information in log buffer. <Quidway> reset logbuffer
Command Manual - System Management Quidway S3000-EI Series Ethernet Switches Chapter 4 System Maintenance Commands
Huawei Technologies Proprietary
4-32
4.5.16 reset trapbuffer
Syntax
reset trapbuffer
View
User view
Parameter
none
Description
Using reset trapbuffer command, you can reset information in trap buffer.
Example
# Clear information in trap buffer. <Quidway> reset trapbuffer
4.5.17 terminal debugging
Syntax
terminal debugging
undo terminal debugging
View
User view
Parameter
none
Description
Using terminal debugging command, you can configure to display the debugging information on the terminal. Using undo terminal debugging command, you can configure not to display the debugging information on the terminal.
By default, the displaying function is disabled.
For the related commands, see debugging.
Example
# Enable the terminal display debugging. <Quidway> terminal debugging

Command Manual - System Management Quidway S3000-EI Series Ethernet Switches Chapter 4 System Maintenance Commands
Huawei Technologies Proprietary
4-33
4.5.18 terminal logging
Syntax
terminal logging
undo terminal logging
View
User view
Parameter
none
Description
Using terminal logging command, you can enable terminal log information display. Using undo terminal logging command, you can disable terminal log information display.
By default, this function is enabled.
Example
# Disable the terminal log display. <Quidway> undo terminal logging
4.5.19 terminal monitor
Syntax
terminal monitor
undo terminal monitor
View
User view
Parameter
none
Description
Using terminal monitor command, you can enable the log debugging/log/trap on the terminal monitor. Using undo terminal monitor command, you can disable these functions.
By default, enable these functions for the console user and disable them for the terminal user.

Command Manual - System Management Quidway S3000-EI Series Ethernet Switches Chapter 4 System Maintenance Commands
Huawei Technologies Proprietary
4-34
This command only takes effect on the current terminal where the commands are input. The debugging/log/trap information can be output to the current terminal, beginning in user view. When the terminal monitor is shut down, no debugging/log/trap information will be displayed in local terminal, which is equals to having performed undo terminal debugging,undo terminal logging,undo terminal trapping commands. When the terminal monitor is enabled, you can use terminal debugging / undo terminal debugging, terminal logging / terminal logging and terminal trapping / undo terminal trapping respectively to enable or disable the corresponding functions.
Example
# Disable the terminal monitor. <Quidway> undo terminal monitor
4.5.20 terminal trapping
Syntax
terminal trapping
undo terminal trapping
View
User view
Parameter
none
Description
Using terminal trapping command, you can enable terminal trap information display. Using undo terminal trapping command, you can disable this function.
By default, this function is enabled.
Example
# Enable trap information display. <Quidway> terminal trapping

Command Manual - System Management Quidway S3000-EI Series Ethernet Switches Chapter 5 SNMP Configuration Commands
Huawei Technologies Proprietary
5-1
Chapter 5 SNMP Configuration Commands
5.1 SNMP Configuration Commands
5.1.1 display snmp-agent community
Syntax
display snmp-agent community [ read | write ]
View
Any view
Parameter
read: display read-only community information.
write: display read-write community information.
Description
Using display snmp-agent community command, you can view the currently configured community names.
Example
# Display the currently configured community names. <Quidway> display snmp-agent community
community name:public
group name:public
storage-type: nonVolatile
community name:tom
group name:huawei
storage-type: nonVolatile
5.1.2 display snmp-agent
Syntax
display snmp-agent { local-engineid | remote-engineid }
View
Any view

Command Manual - System Management Quidway S3000-EI Series Ethernet Switches Chapter 5 SNMP Configuration Commands
Huawei Technologies Proprietary
5-2
Parameter
local-engineid: local engine ID.
remote-engineid: remote engine ID.
Description
Using display snmp-agent engineid command, you can view engine ID of current device.
SNMP engine is the core of SNMP entity. It performs the function of sending, receiving and authenticating SNMP message, extracting PDU, packet encapsulation and the communication with SNMP application, etc.
Example
# Display the engine ID of current device. <Quidway> display snmp-agent local-engineid
SNMP local engineID: 00000009020000000C025808
5.1.3 display snmp-agent group
Syntax
display snmp-agent group [ group-name ]
View
Any view
Parameter
groupname: Group name, ranging from 1 to 32 bytes.
Description
Using display snmp-agent group command, you can view group name, safe mode, state of various views and storage modes.
Example
# Display SNMP group name and safe mode. <Quidway> display snmp-agent group
Group name: huawei
Security model: v2c noAuthnoPriv
Readview: ViewDefault
Writeview: <no specified>
Notifyview :<no specified>
Storage-type: nonVolatile
The following table describes the output fields.

Command Manual - System Management Quidway S3000-EI Series Ethernet Switches Chapter 5 SNMP Configuration Commands
Huawei Technologies Proprietary
5-3
Table 5-1 Output description of the display snmp-agent group command
Field Description
groupname SNMP Group name of the user
Security model The security model adopted by SNMP
readview Read-only MIB view name corresponding to that group
writeview Writable MIB view corresponding to that group
notifyview The name of the notify MIB view corresponding to that group
storage-type Storage type
5.1.4 display snmp-agent mib-view
Syntax
display snmp-agent mib-view [ exclude | include | { viewname mib-view } ]
View
Any view
Parameter
exclude: Display the SNMP mib view excluded.
Include: Display the SNMP mib view included.
viewname: Display the SNMP mib view according to the mib view name.
mib-view: Specify the mib view name.
Description
display snmp-agent mib-view command is used to view the MIB view configuration information of the Ethernet switch.
Example
# Display the information about the currently configured MIB view. <Quidway> display snmp-agent mib-view
View name:mv MIB Subtree:internet
Storage-type: nonVolatile -included active
View name:test MIB Subtree:internet
Storage-type: nonVolatile -included active
View name:ViewDefault MIB Subtree:internet
Storage-type: nonVolatile -included active

Command Manual - System Management Quidway S3000-EI Series Ethernet Switches Chapter 5 SNMP Configuration Commands
Huawei Technologies Proprietary
5-4
View name:ViewDefault MIB Subtree:snmpUsmMIB
Storage-type: nonVolatile -excluded active
View name:ViewDefault MIB Subtree:snmpVacmMIB
Storage-type: nonVolatile -excluded active
View name:ViewDefault MIB Subtree:snmpModules.18
Storage-type: nonVolatile -excluded active
The following table describes the output fields.
Table 5-2 Output description of the display snmp-agent mib-view command
Field Description
View name View name
MIB Subtree MIB subtree
storage-type Storage type
included/excluded Permit or forbid access to an MIB object
active Indicate the line state in the table
Caution:
If the SNMP Agent is disabled, "Snmp Agent disabled" will be displayed after you execute the above display commands.
5.1.5 display snmp-agent statistics
Syntax
display snmp-agent statistics
View
Any view
Parameter
none
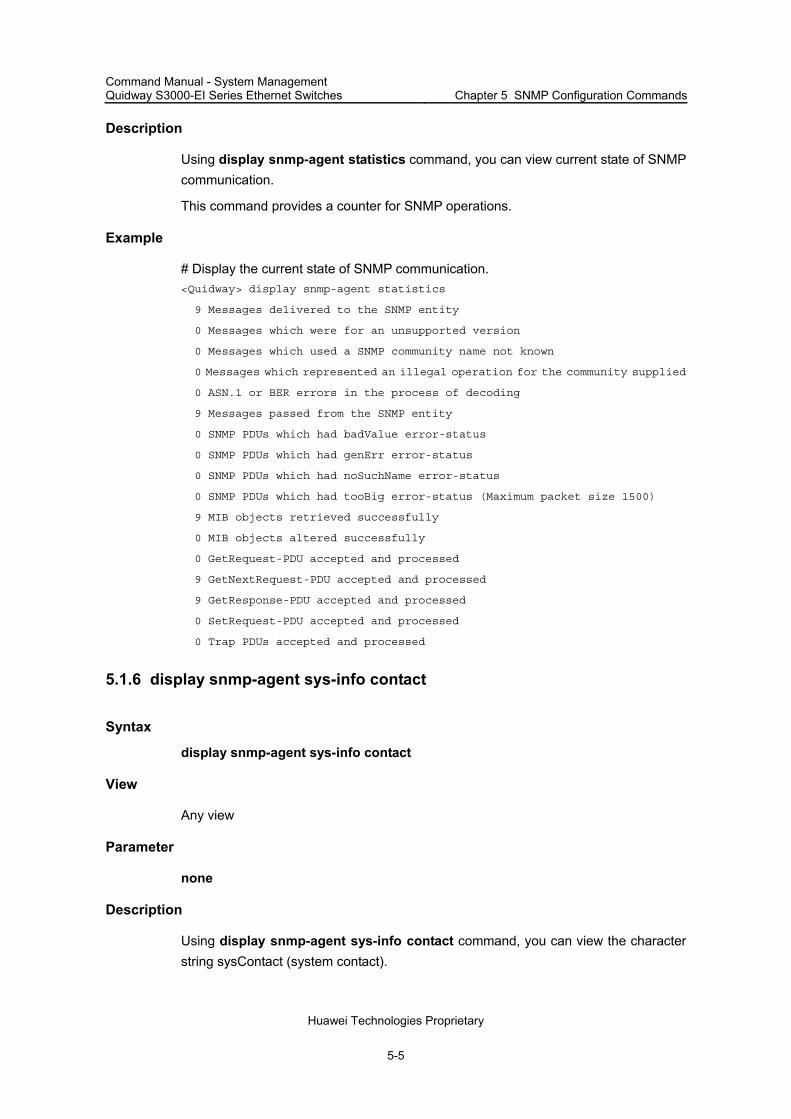
Command Manual - System Management Quidway S3000-EI Series Ethernet Switches Chapter 5 SNMP Configuration Commands
Huawei Technologies Proprietary
5-5
Description
Using display snmp-agent statistics command, you can view current state of SNMP communication.
This command provides a counter for SNMP operations.
Example
# Display the current state of SNMP communication. <Quidway> display snmp-agent statistics
9 Messages delivered to the SNMP entity
0 Messages which were for an unsupported version
0 Messages which used a SNMP community name not known
0 Messages which represented an illegal operation for the community supplied
0 ASN.1 or BER errors in the process of decoding
9 Messages passed from the SNMP entity
0 SNMP PDUs which had badValue error-status
0 SNMP PDUs which had genErr error-status
0 SNMP PDUs which had noSuchName error-status
0 SNMP PDUs which had tooBig error-status (Maximum packet size 1500)
9 MIB objects retrieved successfully
0 MIB objects altered successfully
0 GetRequest-PDU accepted and processed
9 GetNextRequest-PDU accepted and processed
9 GetResponse-PDU accepted and processed
0 SetRequest-PDU accepted and processed
0 Trap PDUs accepted and processed
5.1.6 display snmp-agent sys-info contact
Syntax
display snmp-agent sys-info contact
View
Any view
Parameter
none
Description
Using display snmp-agent sys-info contact command, you can view the character string sysContact (system contact).

Command Manual - System Management Quidway S3000-EI Series Ethernet Switches Chapter 5 SNMP Configuration Commands
Huawei Technologies Proprietary
5-6
Example
# Display the character string sysContact (system contact). <Quidway> display snmp-agent sys-info contact
The contact person for this managed node:
Mr.Wang-Tel:3306
5.1.7 display snmp-agent sys-info location
Syntax
display snmp-agent sys-info location
View
Any view
Parameter
none
Description
Using display snmp-agent sys-info location command, you can view the character string describing the system location.
Example
# Display the system location.
<Quidway> display snmp-agent sys-info location The physical location of this node:
BeiJing China
5.1.8 display snmp-agent sys-info version
Syntax
display snmp-agent sys-info version
View
Any view
Parameter
none
Description
Using display snmp-agent sys-info version command, you can view the version information about the running SMNMP in the system.

Command Manual - System Management Quidway S3000-EI Series Ethernet Switches Chapter 5 SNMP Configuration Commands
Huawei Technologies Proprietary
5-7
Example
# Display the version information of running SNMP <Quidway> display snmp-agent sys-info version
SNMP version running in the system:
SNMPv3
5.1.9 display snmp-agent usm-user
Syntax
display snmp-agent usm-user [ engineid engineid ] [ group groupname ] [ username username ]
View
Any view
Parameter
engineid: display user information with specified engine ID.
username:display user information with specified user name.
groupname:display user information of specified group.
Description
Using display snmp-agent usm-user command, you can view information of all the SNMP usernames in the group username list.
Example
# Display the information of all the current users. <Quidway> display snmp-agent usm-user
User name: authuser
Engine ID: 00000009020000000C025808
UserStatus: active
The following table describes the output fields.
Table 5-3 Output description of the display snmp-agent usm-user command
Field Description
User name Name of SNMP user
Engine ID Character string identifying SNMP device
UserStatus The status of the user, may be active or inactive.

Command Manual - System Management Quidway S3000-EI Series Ethernet Switches Chapter 5 SNMP Configuration Commands
Huawei Technologies Proprietary
5-8
5.1.10 snmp-agent local-engineid
Syntax
snmp-agent local-engineid engineid
undo snmp-agent local-engineid
View
System view
Parameter
local-engineid: Specify an engineID for the local SNMPv3 entity
engineid: Specify the engine ID with a character string, only composed of hexadecimal numbers between 5 and 32 including; By default, the value is "Enterprise Number + device information".
Description
Using snmp-agent local-engineid command, you can configure a name for a local or remote SNMP engine on the Ethernet Switch. Using undo snmp-agent local-engineid command, you can restore the default setting of engine ID.
Device information is determined according to different products. It can be IP address, MAC address or user defined text. However, you must use numbers in hexadecimal form.
Example
# Configure the ID of a local or remote device as 12345. <Quidway> display snmp-agent local-engineid
5.1.11 snmp-agent community
Syntax
snmp-agent community { read | write } community-name [ [ mib-view view-name ] [ acl acl-list ] ]
undo snmp-agent community community-name
View
System view
Parameter
read: Indicate that MIB object can only be read.
write: Indicate that MIB object can be read and written.
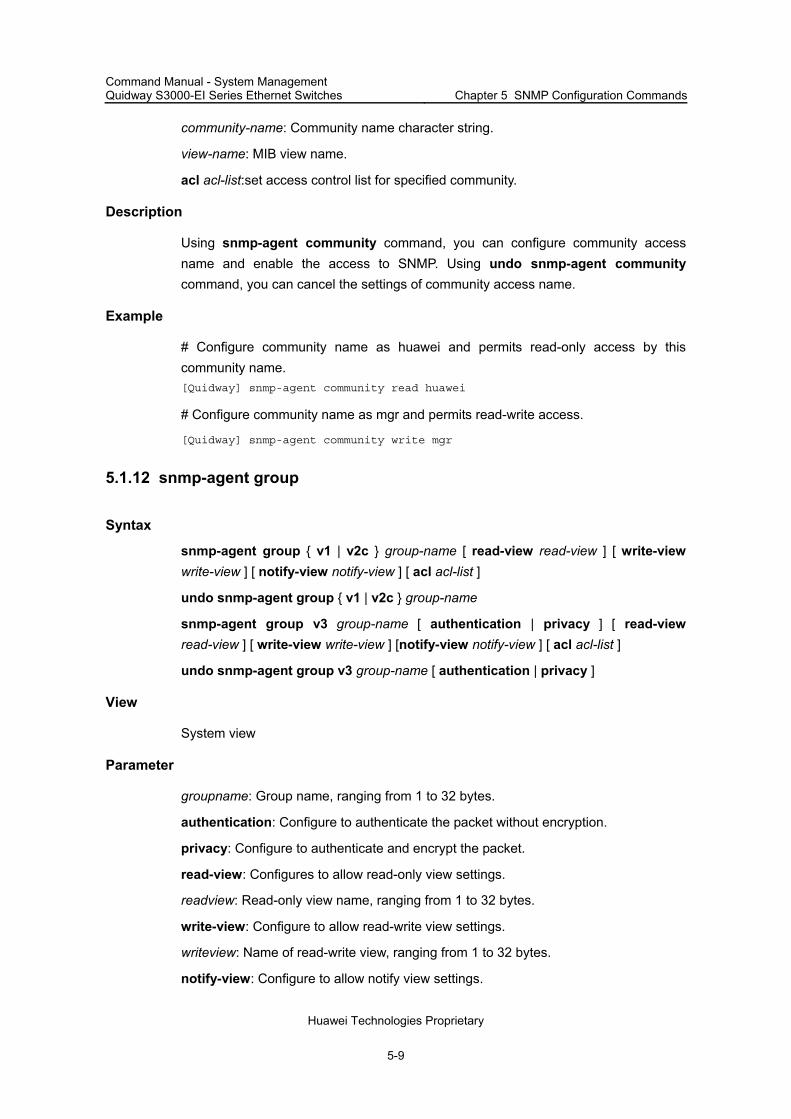
Command Manual - System Management Quidway S3000-EI Series Ethernet Switches Chapter 5 SNMP Configuration Commands
Huawei Technologies Proprietary
5-9
community-name: Community name character string.
view-name: MIB view name.
acl acl-list:set access control list for specified community.
Description
Using snmp-agent community command, you can configure community access name and enable the access to SNMP. Using undo snmp-agent community command, you can cancel the settings of community access name.
Example
# Configure community name as huawei and permits read-only access by this community name. [Quidway] snmp-agent community read huawei
# Configure community name as mgr and permits read-write access.
[Quidway] snmp-agent community write mgr
5.1.12 snmp-agent group
Syntax
snmp-agent group { v1 | v2c } group-name [ read-view read-view ] [ write-view write-view ] [ notify-view notify-view ] [ acl acl-list ]
undo snmp-agent group { v1 | v2c } group-name
snmp-agent group v3 group-name [ authentication | privacy ] [ read-view read-view ] [ write-view write-view ] [notify-view notify-view ] [ acl acl-list ]
undo snmp-agent group v3 group-name [ authentication | privacy ]
View
System view
Parameter
groupname: Group name, ranging from 1 to 32 bytes.
authentication: Configure to authenticate the packet without encryption.
privacy: Configure to authenticate and encrypt the packet.
read-view: Configures to allow read-only view settings.
readview: Read-only view name, ranging from 1 to 32 bytes.
write-view: Configure to allow read-write view settings.
writeview: Name of read-write view, ranging from 1 to 32 bytes.
notify-view: Configure to allow notify view settings.

Command Manual - System Management Quidway S3000-EI Series Ethernet Switches Chapter 5 SNMP Configuration Commands
Huawei Technologies Proprietary
5-10
notifyview: Specify the notify view name, ranging from 1 to 32 bytes.
acl acl-list:Set access control list for this group name.
Description
Using snmp-agent group command, you can configure a new SNMP group, that is, to map SNMP user to SNMP view. Using undo snmp-agent group command, you can cancel a specified SNMP group.
For the following reasons: snmp-agent target-host command automatically generates a notifyview for user
and adds it to the corresponding group. Any change of the SNMP group notify view will affect all the users related to this
group.
Please do not specify the notify view when configuring SNMP group.
Example
# Create an SNMP group named huawei. [Quidway] snmp-agent group v3 huawei.
5.1.13 snmp-agent mib-view
Syntax
snmp-agent mib-view { included | excluded } view-name oid-tree
undo snmp-agent mib-view view-name
View
System view
Parameter
included: Include this MIB subtree.
excluded: Exclude this MIB subtree.
view-name: Specify the view name, with a character string, ranging from 1 to 32 characters.
oid-tree: MIB object subtree. It can be a character string of the variable OID, or a variable name, ranging from 1 to 255 characters.
Description
Using snmp-agent mib-view command, you can create or update the view information. Using undo snmp-agent mib-view command, you can cancel the view information
By default, the view name is v1default. OID is 1.3.6.1.

Command Manual - System Management Quidway S3000-EI Series Ethernet Switches Chapter 5 SNMP Configuration Commands
Huawei Technologies Proprietary
5-11
Both the character string of OID and the node name can be input as parameter.
Example
# Create a view that consists of all the objects of MIB-II. [Quidway] snmp-agent mib-view included mib2 5.6.1.3
5.1.14 snmp-agent packet max-size
Syntax
snmp-agent packet max-size byte-count
undo snmp-agent packet max-size
View
System view
Parameter
byte-count: Specify the size of SNMP packet (measured in bytes), ranging from 484 to 17940. By default, the size is 1500 bytes.
Description
Using snmp-agent packet max-size command, you can configure the size of SNMP packet that the Agent can send/receive. Using undo snmp-agent packet max-size command, you can restore the default size of SNMP packet.
The sizes of the SNMP packets received/sent by the Agent are different in different network environment.
Example
# Set the size of SNMP packet to 1042 bytes. [Quidway] snmp-agent packet max-size 1042
5.1.15 snmp-agent sys-info
Syntax
snmp-agent sys-info { contact sysContact | location syslocation | version { { v1 | v2c | v3 } * | all } }
undo snmp-agent sys-info { [ contact ] [ location ] | version { { v1 | v2c | v3 } * | all } }
View
System view

Command Manual - System Management Quidway S3000-EI Series Ethernet Switches Chapter 5 SNMP Configuration Commands
Huawei Technologies Proprietary
5-12
Parameter
sysContact: Specify a character string describing the system maintaining contact (in bytes), with a length ranging from 1 to 255; By default, the contact information is "HuaWei Beijing China".
sysLocation: Specify a character string to describe the system location; By default, the character string is "Beijing China".
version: version of running SNMP. By default, the version is SNMP V3.
v1:SNMP V1.
v2c:SNMP V2C.
v3:SNMP V3.
all:all SNMP version (includes SNMP V1, SNMP V2C, SNMP V3).
Description
Using snmp-agent sys-info command, you can configure system information such as geographical location of the device, contact information for system maintenance and version information of running SNMP. Using undo snmp-agent sys-info location command, you can restore the default value.
By default, the contact information is "HuaWei Beijing China", the system location is "Beijing China", the SNMP version is SNMP V3.
Example
# Set system location as Building 3/Room 214. [Quidway] snmp-agent sys-info location Building 3/Room 214
5.1.16 snmp-agent target-host
Syntax
snmp-agent target-host trap address udp-domain host-addr [ udp-port udp-port-number ] params securityname community-string [ v1 | v2c | v3 [ authentication | privacy ] ]
undo snmp-agent target-host host-addr securityname community-string
View
System view
Parameter
trap:Specify the host to receive traps or notifications
address:Specify the transport addresses to be used in the generation of SNMP messages.
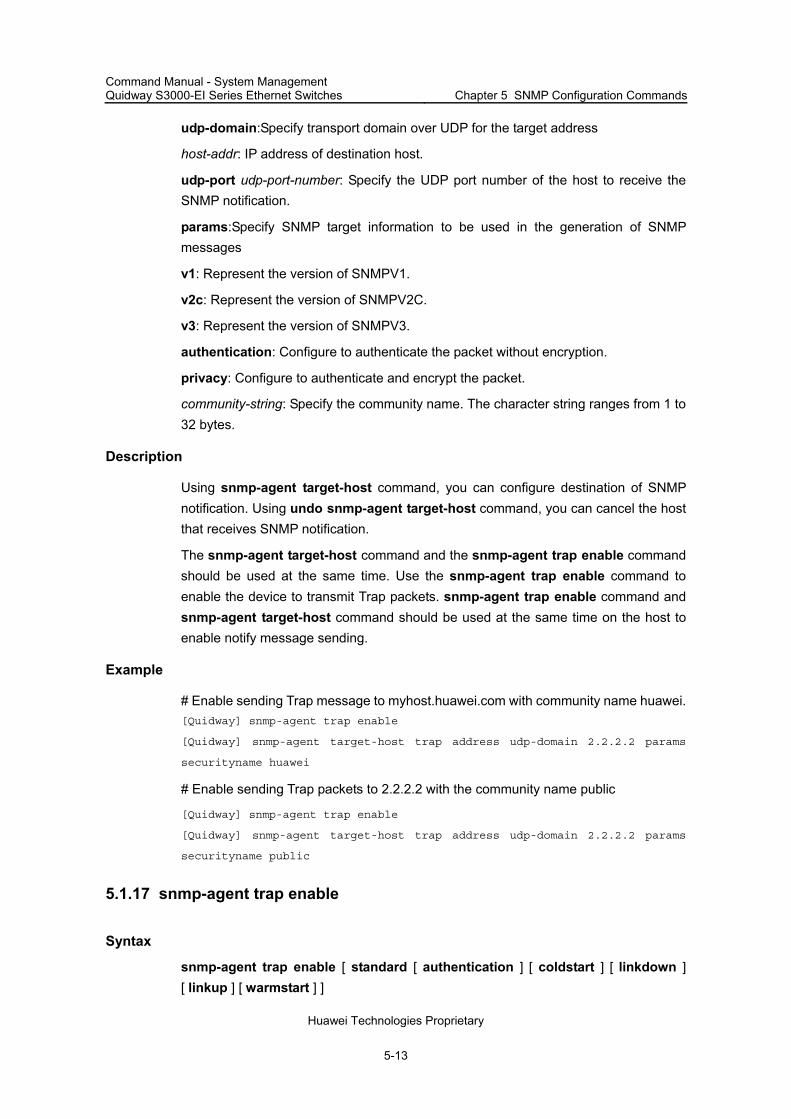
Command Manual - System Management Quidway S3000-EI Series Ethernet Switches Chapter 5 SNMP Configuration Commands
Huawei Technologies Proprietary
5-13
udp-domain:Specify transport domain over UDP for the target address
host-addr: IP address of destination host.
udp-port udp-port-number: Specify the UDP port number of the host to receive the SNMP notification.
params:Specify SNMP target information to be used in the generation of SNMP messages
v1: Represent the version of SNMPV1.
v2c: Represent the version of SNMPV2C.
v3: Represent the version of SNMPV3.
authentication: Configure to authenticate the packet without encryption.
privacy: Configure to authenticate and encrypt the packet.
community-string: Specify the community name. The character string ranges from 1 to 32 bytes.
Description
Using snmp-agent target-host command, you can configure destination of SNMP notification. Using undo snmp-agent target-host command, you can cancel the host that receives SNMP notification.
The snmp-agent target-host command and the snmp-agent trap enable command should be used at the same time. Use the snmp-agent trap enable command to enable the device to transmit Trap packets. snmp-agent trap enable command and snmp-agent target-host command should be used at the same time on the host to enable notify message sending.
Example
# Enable sending Trap message to myhost.huawei.com with community name huawei. [Quidway] snmp-agent trap enable
[Quidway] snmp-agent target-host trap address udp-domain 2.2.2.2 params
securityname huawei
# Enable sending Trap packets to 2.2.2.2 with the community name public
[Quidway] snmp-agent trap enable
[Quidway] snmp-agent target-host trap address udp-domain 2.2.2.2 params
securityname public
5.1.17 snmp-agent trap enable
Syntax
snmp-agent trap enable [ standard [ authentication ] [ coldstart ] [ linkdown ] [ linkup ] [ warmstart ] ]

Command Manual - System Management Quidway S3000-EI Series Ethernet Switches Chapter 5 SNMP Configuration Commands
Huawei Technologies Proprietary
5-14
undo snmp-agent trap enable [ standard [ authentication ] [ coldstart ] [ linkdown ] [ linkup ] [ warmstart ] ]
View
System view
Parameter
standard [ authentication ] [ coldstart ] [ linkdown ] [ linkup ] [ warmstart ]: Configure to send standard Trap messages. authentication: Configure to send SNMP authentication Trap messages. coldstart: Configure to send SNMP cold start Trap messages. linkdown: Configure to send SNMP link down Trap messages. linkup: Configure to send SNMP link up Trap messages. warmstart: Configure to send SNMP warm start Trap messages.
Description
Using snmp-agent trap enable command, you can enable the device to send Trap message. Using undo snmp-agent trap enable command, you can disable Trap message sending.
By default, Trap message sending is disabled.
snmp-agent trap enable command and snmp-agent target-host command should be used at the same time. snmp-agent target-host command specifies which hosts can receive Trap message. However, to send Trap message, at least one snmp-agent target-host command should be configured.
Example
# Enable to send the trap packet of SNMP authentication failure to 10.1.1.1. The community name is huawei. [Quidway] snmp-agent trap enable standard authentication
[Quidway] snmp-agent target-host trap address udp-domain 10.1.1.1 params
securityname huawei
5.1.18 snmp-agent trap life
Syntax
snmp-agent trap life seconds
undo snmp-agent trap life
View
System view

Command Manual - System Management Quidway S3000-EI Series Ethernet Switches Chapter 5 SNMP Configuration Commands
Huawei Technologies Proprietary
5-15
Parameter
seconds: Specify the timeouts, ranging from 1 to 2592000 seconds; By default, the timeout interval is 120 seconds.
Description
Using snmp-agent trap life command, you can configure the timeout of Trap packets. Using undo snmp-agent trap life command, you can restore the default value.
The set timeout of Trap packet is represented by seconds. If time exceeds seconds, this Trap packet will be discarded.
For the related commands, see snmp-agent trap enable, snmp-agent target-host .
Example
# Configure the timeout interval of Trap packet as 60 seconds. [Quidway] snmp-agent trap life 60
5.1.19 snmp-agent trap queue-size
Syntax
snmp-agent trap queue-size length
undo snmp-agent trap queue-size
View
System view
Parameter
length: Length of queue, ranging from 1 to 1000; By default, the length is 100.
Description
Using snmp-agent trap queue-size command, you can configure the information queue length of Trap packet sent to destination host. Using undo snmp-agent trap queue-size command, you can restore the default value.
For the related commands, see snmp-agent trap enable, snmp-agent target-host, snmp-agent trap life.
Example
# Configure the queue length to 200. [Quidway] snmp-agent trap queue-size 200
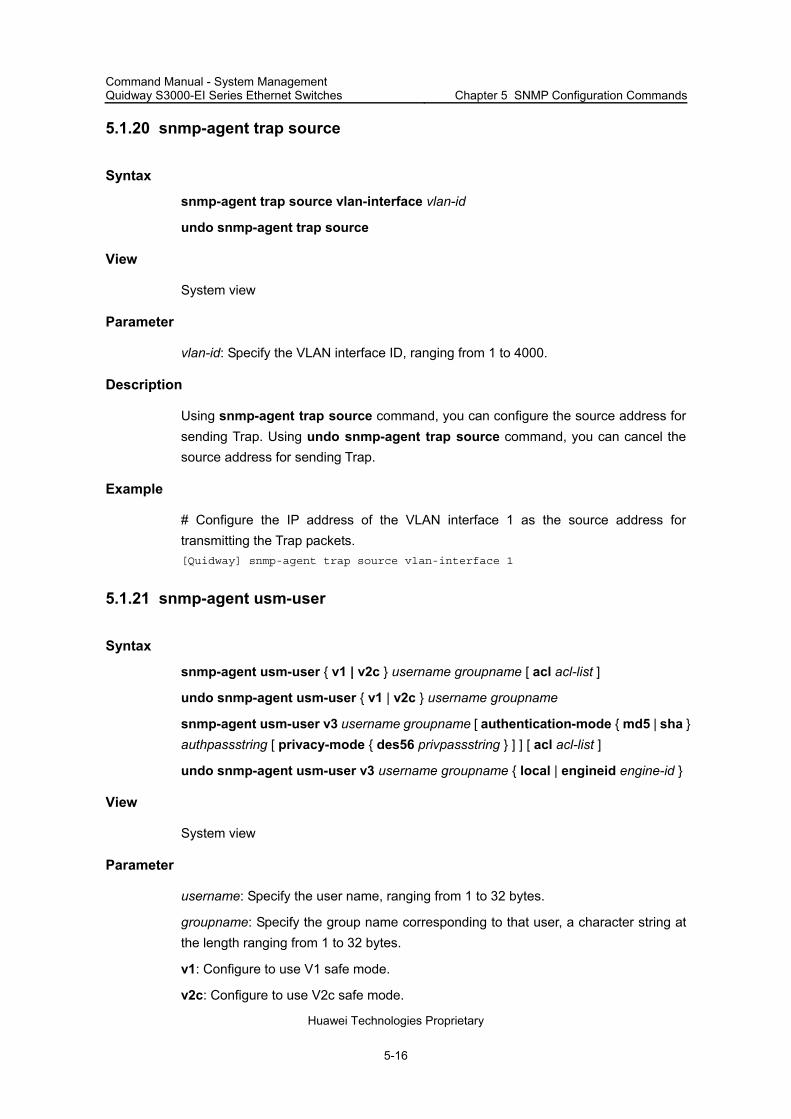
Command Manual - System Management Quidway S3000-EI Series Ethernet Switches Chapter 5 SNMP Configuration Commands
Huawei Technologies Proprietary
5-16
5.1.20 snmp-agent trap source
Syntax
snmp-agent trap source vlan-interface vlan-id
undo snmp-agent trap source
View
System view
Parameter
vlan-id: Specify the VLAN interface ID, ranging from 1 to 4000.
Description
Using snmp-agent trap source command, you can configure the source address for sending Trap. Using undo snmp-agent trap source command, you can cancel the source address for sending Trap.
Example
# Configure the IP address of the VLAN interface 1 as the source address for transmitting the Trap packets. [Quidway] snmp-agent trap source vlan-interface 1
5.1.21 snmp-agent usm-user
Syntax
snmp-agent usm-user { v1 | v2c } username groupname [ acl acl-list ]
undo snmp-agent usm-user { v1 | v2c } username groupname
snmp-agent usm-user v3 username groupname [ authentication-mode { md5 | sha } authpassstring [ privacy-mode { des56 privpassstring } ] ] [ acl acl-list ]
undo snmp-agent usm-user v3 username groupname { local | engineid engine-id }
View
System view
Parameter
username: Specify the user name, ranging from 1 to 32 bytes.
groupname: Specify the group name corresponding to that user, a character string at the length ranging from 1 to 32 bytes.
v1: Configure to use V1 safe mode.
v2c: Configure to use V2c safe mode.

Command Manual - System Management Quidway S3000-EI Series Ethernet Switches Chapter 5 SNMP Configuration Commands
Huawei Technologies Proprietary
5-17
v3: Configure to use V3 safe mode.
authentication-mode: Specify the safety level as authentication required.
md5: MD5 algorithm is adopted in authentication. MD5 authentication uses the 128-digit password. Computation speed of MD5 is faster than that of SHA
sha: SHA algorithm is adopted in authentication. SHA authentication uses the 160-digit password. Computation speed of SHA is slower than that of MD5, but with higher security.
authpassword: Specify the authentication password with a character string, ranging from 1 to 64 bytes.
privacy-mode: Specify the safety level as encrypted.
des56: Specify the authentication protocol as DES.
privpassword: Specify the encryption password with a character string, ranging from 1 to 64 bytes.
acl acl-list:Set access control list for this user based on USM name
Description
Using snmp-agent usm-user command, you can add a new user to an SNMP group. Using undo snmp-agent usm-user command, you can cancel a user from SNMP group.
SNMP engineID (for authentication) is required when configuring remote user for an agent. This command will not be effective without engineID configured.
For V1 and V2C, this command will add a new community name. For V3, it will add a new user for an SNMP group.
Example
# Add a user wang for huawei (an SNMP group), configures to authenticate with MD5 and sets authentication password as pass. [Quidway] snmp-agent usm-user v3 wang huawei authentication-mode md5 pass
5.1.22 undo snmp-agent
Syntax
undo snmp-agent
View
System view
Parameter
none

Command Manual - System Management Quidway S3000-EI Series Ethernet Switches Chapter 5 SNMP Configuration Commands
Huawei Technologies Proprietary
5-18
Description
Using undo snmp-agent command, you can disable all versions of SNMP running on the server.
Perform any command of snmp-agent will enable SNMP Agent.
Example
# Disable the running SNMP agents of all SNMP versions. [Quidway] undo snmp-agent

Command Manual - System Management Quidway S3000-EI Series Ethernet Switches Chapter 6 RMON Configuration Commands
Huawei Technologies Proprietary
6-1
Chapter 6 RMON Configuration Commands
6.1 RMON Configuration Commands
6.1.1 display rmon alarm
Syntax
display rmon alarm [ alarm-table-entry ]
View
Any view
Parameter
alarm-table-entry: Alarm table entry index.
Description
Using display rmon alarm command, you can view RMON alarm information.
For the related commands, see rmon alarm.
Example
# Display the RMON alarm information. <Quidway> display rmon alarm
Alarm table 1 owned by HUAWEI is VALID.
Samples absolute value : 1.3.6.1.2.1.16.1.1.1.4.1 <etherStatsOctets.1>
Sampling interval : 10(sec)
Rising threshold : 1000(linked with event 1)
Falling threshold : 100(linked with event 1)
When startup enables : risingOrFallingAlarm
Latest value : 0
Table 6-1 Output description of the display rmon alarm command
Field Description
Alarm table 1 Index 1 in the alarm table
HUAWEI Owner
VALID The entry corresponding to the index is valid
Samples absolute value
Sampling the absolute value of the node 1.3.6.1.2.1.16.1.1.1.4.1

Command Manual - System Management Quidway S3000-EI Series Ethernet Switches Chapter 6 RMON Configuration Commands
Huawei Technologies Proprietary
6-2
Field Description
Sampling interval The interval of sampling the value
Rising threshold Rising threshold. When sampling value rises from normal value to this threshold, rising threshold alarm will be triggered.
Falling threshold Falling threshold. When sampling value decreases from normal value to this threshold, falling threshold alarm will be triggered.
startup The first trigger
risingOrFallingAlarm The type of the first alarm: Specifies to alarm when exceeding the rising threshold or the falling threshold
6.1.2 display rmon event
Syntax
display rmon event [ event-table-entry ]
View
Any view
Parameter
event-table-entry: Entry index of event table.
Description
Using display rmon event command, you can view RMON events.
The display includes event index in event table, owner of the event, description to the event, action caused by event (log or alarm information), and occurrence time of the latest event (counted on system initiate/boot time in centiseconds).
For the related commands, see rmon event.
Example
# Show the RMON event. <Quidway> display rmon event
Event table 1 owned by HUAWEI is VALID.
Description: null.
Will cause log-trap when triggered, last triggered at 0days 00h:02m:27s.

Command Manual - System Management Quidway S3000-EI Series Ethernet Switches Chapter 6 RMON Configuration Commands
Huawei Technologies Proprietary
6-3
Table 6-2 Output description of the display rmon event command
Field Description
Event table 1 Index 1 in event table
HUAWEI Owner
VALID The entry corresponding to the index is valid
Description Event description
Will cause log-trap when triggered, last triggered at 0days 00h:02m:27s
When the event is triggered, it will cause the log-trap. And the last triggered time is 00h:02m:27s
6.1.3 display rmon eventlog
Syntax
display rmon eventlog [ event-number ]
View
Any view
Parameter
event-number: Entry index of event table.
Description
Using display rmon eventlog command, you can view RMON event log.
The display includes description about event index in event table, description to the event, and occurrence time of the latest event (counted on system initiate/boot time in centisecond).
Example
# Show event log of RMON. <Quidway> display rmon eventlog 1
Event table 1 owned by HUAWEI is VALID.
Generates eventLog 1.1 at 0days 00h:01m:39s.
Description: The 1.3.6.1.2.1.16.1.1.1.4.1 defined in alarm table 1,
less than(or =) 100 with alarm value 0. Alarm sample type is absolute.
Generates eventLog 1.2 at 0days 00h:02m:27s.
Description: The alarm formula defined in private alarm table 1,
less than(or =) 100 with alarm value 0. Alarm sample type is absolute.

Command Manual - System Management Quidway S3000-EI Series Ethernet Switches Chapter 6 RMON Configuration Commands
Huawei Technologies Proprietary
6-4
Table 6-3 Output description of the display rmon eventlog command
Field Description
Event table 1 Index 1 in event table
HUAWEI Owner
VALID The entry corresponding to the index is valid
Description Event description
less than(or =) 100 with alarm value 0
The alarm sample value is less than or equal to 100
Alarm sample type is absolute The type of alarm sampling is absolute
Generates eventLog 1.2 at 0days 00h:02m:27s
The eventlog corresponding to the index 1.2 is generated at 0days 00h:02m:27s.
6.1.4 display rmon history
Syntax
display rmon history [ port-num ]
View
Any view
Parameter
port-num: Ethernet port name.
Description
Using display rmon history command, you can view latest RMON history sampling information (including utility, error number and total packet number).
For the related commands, see rmon history.
Example
# Show the RMON history information. <Quidway> display rmon history ethernet 2/1
History control entry 1 owned by HUAWEI is VALID
Samples interface : Ethernet2/1<ifEntry.642>
Sampling interval : 10(sec) with 10 buckets max
Latest sampled values :
Dropevents :0 , octets :0
packets :0 , broadcast packets :0
multicast packets :0 , CRC alignment errors :0

Command Manual - System Management Quidway S3000-EI Series Ethernet Switches Chapter 6 RMON Configuration Commands
Huawei Technologies Proprietary
6-5
undersize packets :0 , oversize packets :0
fragments :0 , jabbers :0
collisions :0 , utilization :0
Table 6-4 Output description of the display rmon history command
Field Description
History control entry Index number in history control table
HUAWEI Owner
VALID The entry corresponding to the index is valid
Samples interface The sampled interface
Sampling interval Sampling interval
buckets Records in history control table
dropevents Dropping packet events
octets Sent/Received octets in sampling time
packets Packets sent/received in sampling time
broadcast packets Number of broadcast packets
multicast packets Number of multicast packets
CRC alignment errors Number of CRC error packets
undersized packets Number of undersized packets
oversized packets Number of oversized packets
fragments Number of undersized and CRC error packets
jabbers Number of oversized and CRC error packets
collisions Number of collision packets
utilization Utilization
6.1.5 display rmon prialarm
Syntax
display rmon prialarm [ prialarm-table-entry ]
View
Any view
Parameter
prialarm-table-entry:entry of extended alarm table.
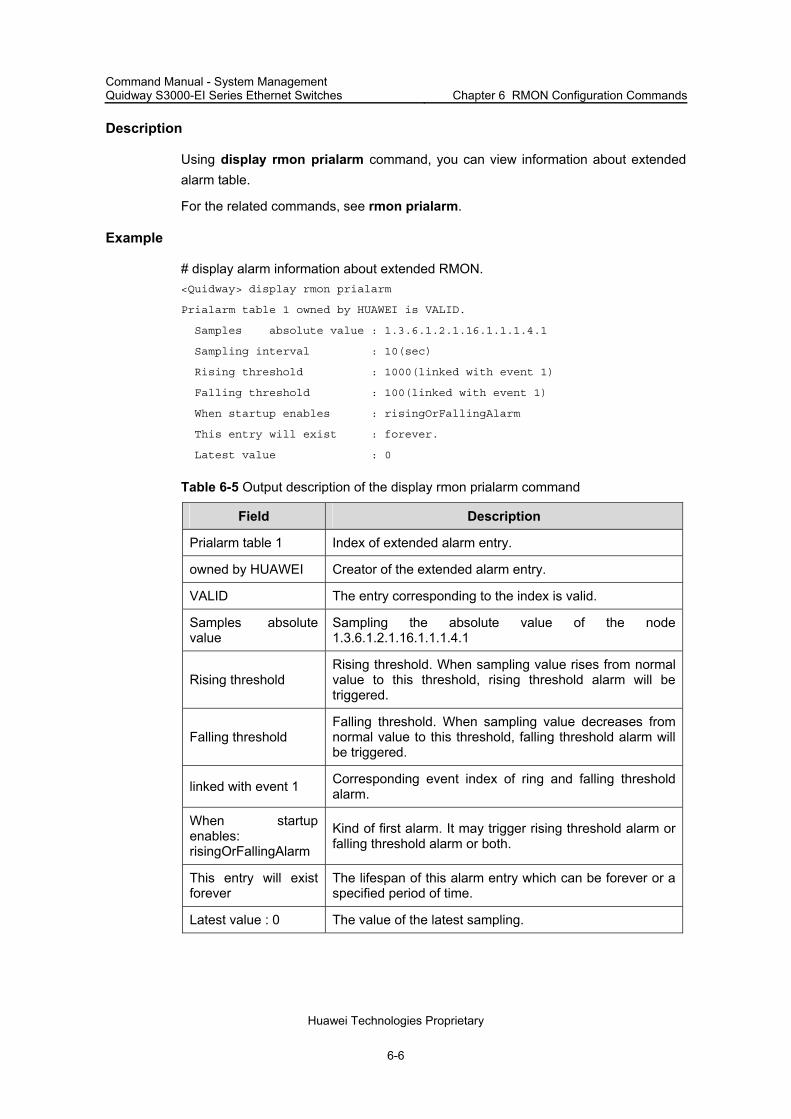
Command Manual - System Management Quidway S3000-EI Series Ethernet Switches Chapter 6 RMON Configuration Commands
Huawei Technologies Proprietary
6-6
Description
Using display rmon prialarm command, you can view information about extended alarm table.
For the related commands, see rmon prialarm.
Example
# display alarm information about extended RMON. <Quidway> display rmon prialarm
Prialarm table 1 owned by HUAWEI is VALID.
Samples absolute value : 1.3.6.1.2.1.16.1.1.1.4.1
Sampling interval : 10(sec)
Rising threshold : 1000(linked with event 1)
Falling threshold : 100(linked with event 1)
When startup enables : risingOrFallingAlarm
This entry will exist : forever.
Latest value : 0
Table 6-5 Output description of the display rmon prialarm command
Field Description
Prialarm table 1 Index of extended alarm entry.
owned by HUAWEI Creator of the extended alarm entry.
VALID The entry corresponding to the index is valid.
Samples absolute value
Sampling the absolute value of the node 1.3.6.1.2.1.16.1.1.1.4.1
Rising threshold Rising threshold. When sampling value rises from normal value to this threshold, rising threshold alarm will be triggered.
Falling threshold Falling threshold. When sampling value decreases from normal value to this threshold, falling threshold alarm will be triggered.
linked with event 1 Corresponding event index of ring and falling threshold alarm.
When startup enables: risingOrFallingAlarm
Kind of first alarm. It may trigger rising threshold alarm or falling threshold alarm or both.
This entry will exist forever
The lifespan of this alarm entry which can be forever or a specified period of time.
Latest value : 0 The value of the latest sampling.

Command Manual - System Management Quidway S3000-EI Series Ethernet Switches Chapter 6 RMON Configuration Commands
Huawei Technologies Proprietary
6-7
6.1.6 display rmon statistics
Syntax
display rmon statistics [ port-num ]
View
Any view
Parameter
port-num: Ethernet port number.
Description
Using display rmon statistics command, you can view RMON statistics.
The displayed information includes collision, CRC (Cyclic Redundancy Check) and queue, undersized or oversized packet, timeout, fragment, broadcast, multicast, unicast, and bandwidth utility.
For the related commands, see rmon statistics.
Example
# Show RMON statistics. <Quidway> display rmon statistics Ethernet 2/1
Statistics entry 1 owned by HUAWEI is VALID.
Interface : Ethernet2/1<ifEntry.642>
Received :
octets :0 , packets :0
broadcast packets :0 , multicast packets:0
undersized packets :0 , oversized packets:0
fragments packets :0 , jabbers packets :0
CRC alignment errors:0 , collisions :0
Dropped packet (insufficient resources):0
Packets received according to length (octets):
64 :0 , 65-127 :0 , 128-255 :0
256-511:0 , 512-1023:0 , 1024-1518:0
Table 6-6 Output description of the display rmon statistics command
Field Description
Interface Port
HUAWEI Owner
VALID The entry corresponding to the index is valid
octets Received/Sent octets in sampling time

Command Manual - System Management Quidway S3000-EI Series Ethernet Switches Chapter 6 RMON Configuration Commands
Huawei Technologies Proprietary
6-8
Field Description
packets Packets received/sent in sampling time
broadcast packets Number of broadcast packets
multicast packets Number of multicast packets
undersized packets Number of undersized packets
oversized packets Number of oversized packets
fragments packets Number of undersized and CRC error packets
jabbers Number of oversized and CRC error packets
CRC alignment errors Number of CRC error packets
collisions Number of collision packets
Dropped packet (insufficient resources) Dropping packet events
6.1.7 rmon alarm
Syntax
rmon alarm entry-number alarm-variable sampling-time { delta | absolute } rising-threshold threshold-value1 event-entry1 falling-threshold threshold-value2 event-entry2 [ owner text ]
undo rmon alarm entry-number
View
System view
Parameter
entry-number: Number of the entry to be added/deleted, ranging from 1 to 65535.
alarm-variable: Specifies the alarm variable with a character string, ranging from 1 to 256, in the OID dotted format, like 1.3.6.1.2.1.2.1.10.1 (or ifInOctets.1).
sampling-time: Specifies the sampling interval, ranging from 5 to 65535 (measured in seconds).
delta: Sampling type is delta.
absolute: Sampling type is absolute.
rising-threshold threshold-value1: Rising threshold, ranging from 0 to 2147483647.
event-entry1: Event number corresponding to the upper limit of threshold, ranging from 0 to 65535.
falling-threshold threshold-value2: Falling threshold, ranging from 0 to 2147483647.

Command Manual - System Management Quidway S3000-EI Series Ethernet Switches Chapter 6 RMON Configuration Commands
Huawei Technologies Proprietary
6-9
event-entry2: Event number corresponding to the falling threshold, ranging from 0 to 65535.
owner text: Specifies the creator of the alarm. Length of the character string ranges from 1 to 127.
Description
Using rmon alarm command, you can add an entry to the alarm table. Using undo rmon alarm command, you can cancel an entry from this table.
In this way, the alarm event can be triggered in the abnormal situations and then decides to log and send trap to the NM station.
Example
# Delete the information of entry 15 from the alarm table. [Quidway] undo rmon alarm 15
6.1.8 rmon event
Syntax
rmon event event-entry [ description string ] { log | trap trap-community | log-trap log-trapcommunity | none } [ owner rmon-station ]
undo rmon event event-entry
View
System view
Parameter
event-entry: Number of the entry to be added/deleted, ranging from 1 to 65535.
description string: Event description. Length of the character string ranges from 1 to 255.
log: Log event.
trap: Trap event.
trap-community: Name of the community that trap message is sent to.
log-trap: Log and trap event.
log-trapcommunity: Name of the community that trap message is sent to.
none: neither log nor trap event.
owner rmon-station: Name of the network management station that creates this entry. The length of the character string ranges from 1 to 127.

Command Manual - System Management Quidway S3000-EI Series Ethernet Switches Chapter 6 RMON Configuration Commands
Huawei Technologies Proprietary
6-10
Description
Using rmon event command, you can add an entry to the event table. Using undo rmon event command, you can cancel an entry from this table.
Event management of RMON defines the way to deal with event number and event-log, send trap message or log while sending trap message. In this way, alarm events may obtain corresponding treatment
Example
# Add the entry 10 to the event table and marks it as log event. [Quidway] rmon event 10 log
6.1.9 rmon history
Syntax
rmon history entry-number buckets number interval sampling-interval [ owner text-string ]
undo rmon history entry-number
View
Ethernet port view
Parameter
entry-number: Number of the entry to be added/deleted, ranging from 1 to 65535.
buckets number: Capacity of the history table corresponding to the control line.
interval sampling-interval: Sampling interval, ranging from 5 to 3600 (measured in seconds).
owner text-string: Creator of the line. Length of the character string ranges from 1 to127.
Description
Using rmon history command, you can add an entry to the history control table. Using undo rmon history command, you can cancel an entry from history control table.
Perform this command to sample, set sample parameter (sample time interval) and storage amounts for a port. RMON will periodically perform data collection and save for query on this port. Sample information includes utility, error number and total packet number.
Example
# Delete the entry 15 from the history control table. [Quidway-Ethernet0/1] undo rmon history 15

Command Manual - System Management Quidway S3000-EI Series Ethernet Switches Chapter 6 RMON Configuration Commands
Huawei Technologies Proprietary
6-11
6.1.10 rmon prialarm
Syntax
rmon prialarm entry-number alarm-var [ alarm-des ] sampling-timer { delta | absolute | changeratio } rising-threshold threshold-value1 event-entry1 falling-threshold threshold-value2 event-entry2 entrytype { forever | cycle cycle-period } [ owner text ]
undo rmon prialarm entry-number
View
System view
Parameter
entry-number: Specifies the entry number, ranging from 1 to 65535.
alarm-var: Specifies the alarm variable, which can be an arithmetic expression of several integer MIB node instances. The node can be OID in dotted notation.
alarm-des: Specifies the alarm description with a length ranging from 0 to 0-127;
sampling-timer: Sets the sampling interval, ranging from 10 to 65535 and measured in seconds.
delta | absolute | changeratio: Specifies the sampling type as delta ratio or absolute ratio.
threshold-value1: Rising threshold value, specified with a number greater than 0.
event-entry1: Corresponding event number to the upper limit threshold value, ranging from 0 to 65535.
threshold-value2: Falling threshold value, specified with a number greater than 0.
event-entry2: Event number corresponding to the falling threshold, ranging from 0 to 65535.
forever | cycle cycle-period: Specifies the type of the alarm instance line.
cycle-period specifies the functional cycle of the instance.
owner text: Specifies the creator of the line. Length of the character string ranges from 1 to 127.
Description
Using rmon prialarm command, you can add an entry to the extended RMON alarm table. Using undo rmon prialarm command, you can cancel an entry from the extended RMON alarm table.
The number of instances can be created in the table depends on the hardware resource of the product.

Command Manual - System Management Quidway S3000-EI Series Ethernet Switches Chapter 6 RMON Configuration Commands
Huawei Technologies Proprietary
6-12
Example
# Delete line 10 from the extended RMON alarm table. [Quidway] undo rmon prialarm 10
6.1.11 rmon statistics
Syntax
rmon statistics entry-number [ owner text-string ]
undo rmon statistics entry-number
View
Ethernet port view
Parameter
entry-number: Number of the entry to be added/deleted, ranging from 1 to 65535.
owner text-string: Creator of the entry. Length of the character string ranges from 1 to127.
Description
Using rmon statistics command, you can add an entry to the statistic table. Using undo rmon statistics command, you can cancel an entry from statistic table.
RMON statistic management concerns the statistics and monitoring of the usage and error on a port. Statistics includes collision, CRC (Cyclic Redundancy Check) and queue, undersized or oversized packet, timeout, fragment, broadcast, multicast, unicast, and bandwidth utility.
Example
# Add the entry 20 to the statistics table of Ethernet1/1. [Quidway-ethernet1/1] rmon statistic 20

Command Manual - System Management Quidway S3000-EI Series Ethernet Switches Chapter 7 NTP Configuration Commands
Huawei Technologies Proprietary
7-1
Chapter 7 NTP Configuration Commands
7.1 NTP Configuration Commands
7.1.1 debugging ntp-service
Syntax
debugging ntp-service { access | adjustment | authentication | event | filter | packet | parameter | refclock | selection | synchronization | validity | all }
undo debugging ntp-service { access | adjustment | authentication | event | filter | packet | parameter | refclock | selection | synchronization | validity | all }
View
User view
Parameter
access: NTP access control debugging.
adjustment: NTP clock adjustment debugging.
all: All NTP debugging functions.
authentication: NTP authentication debugging.
event: NTP event debugging.
filter: NTP filter information debugging.
packet: NTP packet debugging.
parameter: NTP clock parameter debugging.
refclock: NTP reference clock debugging.
selection: NTP clock selection information debugging.
synchronization: NTP clock synchronization information debugging.
validity: NTP remote host validity debugging.
Description
Using debugging ntp-service command, you can debug different NTP services. Using undo debugging ntp-service command, you can disable corresponding debugging function.
By default, no debugging function is enabled.

Command Manual - System Management Quidway S3000-EI Series Ethernet Switches Chapter 7 NTP Configuration Commands
Huawei Technologies Proprietary
7-2
Example
# Enable NTP access control debugging. <Quidway> debugging ntp-service access
7.1.2 display ntp-service sessions
Syntax
display ntp-service sessions [ verbose ]
View
Any view
Parameter
verbose: Indicate to display the detail information about the sessions.
Description
Using display ntp-service sessions command, you can display the status of all the sessions maintained by NTP service provided by the local equipment.
By default, the status of all the sessions maintained by NTP service provided by the local equipment will be displayed.
When you configure this command without the verbose parameter, the Ethernet switch will display the brief information about all the sessions it maintains.
With the verbose parameter configured, Ethernet switch will display the detail information about all the sessions it maintains.
Example
# Display the status of all the sessions maintained by NTP service. <Quidway> display ntp-service sessions
source refid st now poll reach delay offset disp
********************************************************************
[12345]212.125.95.4 131.188.3.221 2 18 64 377 339.8 10.8 0.9
note: 1 source(master),2 source(peer),3 selected,4 candidate,5 configured
7.1.3 display ntp-service status
Syntax
display ntp-service status
View
Any view

Command Manual - System Management Quidway S3000-EI Series Ethernet Switches Chapter 7 NTP Configuration Commands
Huawei Technologies Proprietary
7-3
Parameter
None
Description
Using command display ntp-service status, you can display the NTP service status.
Example
# Display the NTP service status. <Quidway> display ntp-service status
clock status: unsynchronized
clock stratum: 16
reference clock ID: none
nominal frequency: 100.0000 Hz
actual frequency: 100.0000 Hz
clock precision: 2^17
clock offset: 0.0000 ms
root delay: 0.00 ms
root dispersion: 0.00 ms
peer dispersion: 0.00 ms
reference time: 00:00:00.000 UTC Jan 1 1900(00000000.00000000)
The following table describes the outputs:
Table 7-1 NTP service status information
Output Meaning
clock status: unsynchronized
Local clock status: do not synchronize to any remote NTP server.
clock stratum: 16 Indicates the NTP stratum of local clock.
reference clock ID Indicates the address of a remote server of the reference ID, in the case that the local system has been synchronized by a remote NTP server or the ID of some clock source.
nominal frequency Nominal frequency of the local system hardware clock
actual frequency Actual frequency of the local system hardware clock.
clock precision Precision of local system clock
clock offset Offset of the local clock to the NTP server clock
root delay Root delay from local equipment to the master reference clock.
root dispersion Dispersion of the local clock relative to the NTP server clock
peer dispersion Dispersion of the remote NTP server.
reference time Reference timestamp

Command Manual - System Management Quidway S3000-EI Series Ethernet Switches Chapter 7 NTP Configuration Commands
Huawei Technologies Proprietary
7-4
7.1.4 display ntp-service trace
Syntax
display ntp-service trace [ ip-address ]
View
Any view
Parameter
ip-address: Specify the IP address of the NTP server serving as the reference clock source.
Description
Using display ntp-service trace command, you can display the brief information about every NTP server on the way from the local equipment to the reference clock source.
Example
# Display the brief information about every NTP server. <Quidway> display ntp-service trace
server 127.0.0.1,stratum 8, offset 0.000000, synch distance 0.00000
refid 127.127.1.0
7.1.5 ntp-service access
Syntax
ntp-service access { query | synchronization | server | peer } acl-number
undo ntp-service access { query | synchronization | server | peer }
View
System view
Parameter
query: Allow to control query authority.
synchronization: Only allow the server to access.
server: Allow query to server and access.
peer: Full access authority.
acl-number: IP address list number, ranging from 2000 to 2999.
Command Manual - System Management Quidway S3000-EI Series Ethernet Switches Chapter 7 NTP Configuration Commands
Huawei Technologies Proprietary
7-5
Description
Using ntp-service access command, you can set the authority to access the local equipment. Using undo ntp-service access command, you can cancel the access authority settings.
By default, there is no limit to the access.
Set authority to access the NTP services on a local Ethernet Switch. This is a basic and brief security measure, compared to authentication. An access request will be matched with peer, serve, serve only, and query only in an ascending order of the limitation. The first matched authority will be given.
Example
# Give the authority of time request, query control and synchronization with the local equipment to the peer in ACL 2076. [Quidway] ntp-service access peer 2076
# Give the authority of time request and query control of the local equipment to the peer in ACL 2028.
[Quidway] ntp-service access synchronization 2028
7.1.6 ntp-service authentication enable
Syntax
ntp-service authentication enable
undo ntp-service authentication enable
View
System view
Parameter
None
Description
Using ntp-service authentication enable command, you can enable the NTP-service authentication function. Using undo ntp-service authentication enable command, you can disable this function.
By default, the authentication is disabled.
Example
# Enable NTP authentication function. [Quidway] ntp-service authentication enable

Command Manual - System Management Quidway S3000-EI Series Ethernet Switches Chapter 7 NTP Configuration Commands
Huawei Technologies Proprietary
7-6
7.1.7 ntp-service authentication-keyid
Syntax
ntp-service authentication-keyid number authentication-mode md5 value
undo ntp-service authentication-keyid number
View
System view
Parameter
number: Specify the key number and range from 1 to 4294967295.
value: Specify the value of the key with 1 to 32 ASCII characters.
Description
Using ntp-service authentication-keyid command, you can set NTP authentication key. Using undo ntp-service authentication-keyid command, you can cancel the NTP authentication key.
By default, there is no authentication key.
Only MD5 authentication is supported for the NTP authentication key settings.
Example
# Set MD5 authentication key 10 as BetterKey. [Quidway] ntp-service authentication-keyid 10 authentication-mode md5
BetterKey
7.1.8 ntp-service broadcast-client
Syntax
ntp-service broadcast-client
undo ntp-service broadcast-client
View
VLAN interface view
Parameter
None

Command Manual - System Management Quidway S3000-EI Series Ethernet Switches Chapter 7 NTP Configuration Commands
Huawei Technologies Proprietary
7-7
Description
Using ntp-service broadcast-client command, you can configure NTP broadcast client mode. Using undo ntp-service broadcast-client command, you can disable the NTP broadcast client mode.
By default, the NTP broadcast client mode is disabled.
Designate an interface on the local Ethernet Switch to receive NTP broadcast messages and operate in broadcast client mode. The local Ethernet Switch listens to the broadcast from the server. When it receives the first broadcast packet, it starts a brief client/server mode to switch messages with a remote server for estimating the network delay. Thereafter, the local Ethernet Switch enters broadcast client mode and continues listening to the broadcast and synchronizes the local clock according to the arrived broadcast message.
Example
# Configure to receive NTP broadcast packets via Vlan-Interface1. [Quidway] interface vlan-interface1
[Quidway-Vlan-Interface1] ntp-service broadcast-client
7.1.9 ntp-service broadcast-server
Syntax
ntp-service broadcast-server [ authentication-keyid keyid version number ]
undo ntp-service broadcast-server
View
VLAN interface view
Parameter
authentication-keyid: Specify the authentication key.
keyid: Key ID used in broadcast, ranging from 0 to 4294967295.
version: Define NTP version number.
number: NTP version number, ranging from 1 to 3.
Description
Using ntp-service broadcast-server command, you can configure NTP broadcast server mode. Using undo ntp-service broadcast-server command, you can disable the NTP broadcast server mode.
By default, the broadcast service is disabled and number defaults to 3.

Command Manual - System Management Quidway S3000-EI Series Ethernet Switches Chapter 7 NTP Configuration Commands
Huawei Technologies Proprietary
7-8
Designate an interface on the local equipment to broadcast NTP packets. The local equipment runs in broadcast-server mode and regularly broadcasts packets to its clients.
Example
# Configure to broadcast NTP packets via Vlan-Interface1 and encrypt them with Key 4 and set the NTP version number as 3. [Quidway] interface vlan-interface1
[Quidway-Vlan-Interface1] ntp-service broadcast-server authentication-key 4
version 3
7.1.10 ntp-service max-dynamic-sessions
Syntax
ntp-service max-dynamic-sessions number
undo ntp-service max-dynamic-sessions
View
System view
Parameter
number: The maximum sessions can be created locally, ranging from 0 to 100.
Description
Using ntp-service max-dynamic-sessions command, you can set how many sessions can be created locally. Using undo ntp-service max-dynamic-sessions command, you can resume the default maximum session number
By default, a local device allows up to 100 sessions.
Example
# Set the local equipment to allow up to 50 sessions. [Quidway] ntp-service max-dynamic-sessions 50
7.1.11 ntp-service multicast-client
Syntax
ntp-service multicast-client [ ip-address ]
undo ntp-service multicast-client [ ip-address ]
View
VLAN interface view

Command Manual - System Management Quidway S3000-EI Series Ethernet Switches Chapter 7 NTP Configuration Commands
Huawei Technologies Proprietary
7-9
Parameter
ip-address: Specify an multicast IP address of Class D.
Description
Using ntp-service multicast-client command, you can configure the NTP multicast client mode. Using undo ntp-service multicast-client command, you can disable the NTP multicast client mode.
By default, the multicast client service is disabled. ip-address defaults to 224.0.1.1.
Designate an interface on the local Ethernet Switch to receive NTP multicast messages and operate in multicast client mode. The local Ethernet Switch listens to the multicast from the server. When it receives the first multicast packet, it starts a brief client/server mode to switch messages with a remote server for estimating the network delay. Thereafter, the local Ethernet Switch enters multicast client mode and continues listening to the multicast and synchronizes the local clock according to the arrived multicast message.
Example
# Configure to receive NTP multicast packet via Vlan-Interface1 and the multicast group corresponding to these packets located at 224.0.1.1. [Quidway] interface vlan-interface 1
[Quidway-Vlan-Interface1] ntp-service multicast-client 224.0.1.1
7.1.12 ntp-service multicast-server
Syntax
ntp-service multicast-server [ ip-address ] [ authentication-keyid keyid ] [ ttl ttl-number ] [ version number ]
undo ntp-service multicast-server [ ip-address ]
View
VLAN interface view
Parameter
ip-address: Specify a multicast IP address of Class D and default to 224.0.1.1.
authentication-keyid: Specify authentication key.
keyid: Key ID used in multicast, ranging from 0 to 4294967295.
ttl: Define the time to live of a multicast packet.
ttl-number: Specify the ttl of a multicast packet and range from 1 to 255.
version: Define NTP version number.

Command Manual - System Management Quidway S3000-EI Series Ethernet Switches Chapter 7 NTP Configuration Commands
Huawei Technologies Proprietary
7-10
number: Specify NTP version number and range from 1 to 3.
Description
Using ntp-service multicast-server command, you can configure NTP multicast server mode, if no IP address is specified, switch automatically choice the 224.0.1.1 as the multicast IP address. Using undo ntp-service multicast-server command, you can disable NTP multicast server mode, if no IP address is specified, the switch will disable the configuration of the multicast IP address 224.0.1.1.
By default, the multicast service is disabled. IP address defaults to 224.0.1.1 and the version number defaults to 3.
Designate an interface on the local equipment to transmit NTP multicast packet. The local equipment operates in multicast-server mode and multicasts packets regularly to its clients.
Example
# Configure to transmit NTP multicast packets encrypted with Key 4 via Vlan-Interface1 at 224.0.1.1 and use NTP version 3. [Quidway] interface vlan-interface 1
[Quidway-Vlan-Interface1] ntp-service multicast-server 224.0.1.1
authentication-keyid 4 version 3
7.1.13 ntp-service refclock-master
Syntax
ntp-service refclock-master [ ip-address ] [ stratum ]
undo ntp-service refclock-master [ ip-address ]
View
System view
Parameter
ip-address: Specify the reference clock IP address as 127.127.t.u. Here, t ranges from 0 to 37 and u ranges from 0 to 3.
stratum: Specify which stratum the local clock is located at and range from 1 to 15.
Description
Using ntp-service refclock-master command, you can configure an external reference clock or the local clock as an NTP master clock. Using undo ntp-service refclock-master command, you can cancel the NTP master clock settings.
By default, ip-address is not specified and stratum defaults to 1.
Command Manual - System Management Quidway S3000-EI Series Ethernet Switches Chapter 7 NTP Configuration Commands
Huawei Technologies Proprietary
7-11
You can use this command to designate an NTP external reference clock or the local clock as an NTP master clock to provide synchronized time for other equipment. ip-address specifies the IP address of an external clock as 127.127.t.u. If no IP address is specified, the local clock is set as the NTP master clock by default. You can also specify the stratum of the NTP master clock.
Example
# Set the local clock as the NTP master clock to provide synchronized time for its peers and locate it at stratum 3. [Quidway] ntp-service refclock-master 3
7.1.14 ntp-service reliable authentication-keyid
Syntax
ntp-service reliable authentication-keyid number
undo ntp-service reliable authentication-keyid number
View
System view
Parameter
number: Specify the key number, ranging from 1 to 4294967295.
Description
Using ntp-service reliable authentication-keyid command, you can configure the key as reliable. Using undo ntp-service reliable authentication-keyid command, you can cancel the current setting.
By default, no key is configured as reliable.
When you enable the authentication, you can use this command to configure one or more than one keys as reliable. In this case, a client will only get synchronized by a server whichever can provide a reliable key.
Example
# Enable NTP authentication, adopt MD5 encryption, and designate Key 37 BetterKey and configure it as reliable. [Quidway] ntp-service authentication enable
[Quidway] ntp-service authentication-keyid 37 authentication-mode md5
BetterKey
[Quidway] ntp-service reliable authentication-keyid 37
Command Manual - System Management Quidway S3000-EI Series Ethernet Switches Chapter 7 NTP Configuration Commands
Huawei Technologies Proprietary
7-12
7.1.15 ntp-service source-interface
Syntax
ntp-service source-interface { interface-name | interface-type interface-number }
undo ntp-service source-interface
View
System view
Parameter
interface-name: Specify an interface. The source IP address of the packets will be taken from the address of the interface.
interface-type: Specify the interface type and determine an interface with the interface-number parameter.
interface-number: Specify the interface number and determine an interface with the interface-type parameter.
Description
Using ntp-service source-interface command, you can designate an interface to transmit NTP message. Using undo ntp-service source-interface command, you can cancel the current setting.
The source address specifies where the packets are transmitted from.
You can use this command to designate an interface to transmit all the NTP packets and take the source address of these packets from its IP address. If you do not want any other interface to receive the acknowledgement packets, use this command to specify one interface to send all the NTP packets.
Example
# Configure all the outgoing NTP packets to use the IP address of Vlan-Interface1 as their source IP address. [Quidway] ntp-service source-interface Vlan-Interface 1
7.1.16 ntp-service in-interface disable
Syntax
ntp-service in-interface disable
undo ntp-service in-interface disable
View
VLAN interface view

Command Manual - System Management Quidway S3000-EI Series Ethernet Switches Chapter 7 NTP Configuration Commands
Huawei Technologies Proprietary
7-13
Parameter
None
Description
Using ntp-service in-interface disable command, you can disable an interface to receive NTP message. Using undo ntp-service in-interface disable command, you can enable an interface to receive NTP message.
By default, an interface is enabled to receive NTP message.
Example
# Disable Vlan-Interface1 to receive NTP message. [Quidway] interface vlan-interface1
[Quidway-Vlan-Interface1] ntp-service in-interface disable
7.1.17 ntp-service unicast-peer
Syntax
ntp-service unicast-peer ip-address [ version number ] [ authentication-key keyid ] [ source-interface { interface-name | interface-type interface-number } ] [ priority ]
undo ntp-service unicast-peer ip-address
View
System view
Parameter
ip-address: Specify the IP address of a remote server.
version: Define NTP version number.
number: NTP version number, ranging from 1 to 3.
authentication-keyid: Define authentication key.
keyid: Key ID used for transmitting messages to a remote server, ranging from 0 to 4294967295.
source-interface: Specify the name of an interface.
interface-name: Specify the interface name. When a local device sends an NTP message to a peer, the source IP address of the message is taken from the address of the interface.
interface-type: Specify the interface type and determine an interface together with the interface-number parameter.
interface-number: Specify the interface number and determine an interface together with the interface-type parameter.

Command Manual - System Management Quidway S3000-EI Series Ethernet Switches Chapter 7 NTP Configuration Commands
Huawei Technologies Proprietary
7-14
priority: Designate a server as the first choice.
Description
Using ntp-service unicast-peer command, you can configure NTP peer mode. Using undo ntp-service unicast-peer command, you can cancel NTP peer mode.
By default, version number number defaults to 3, the authentication is disabled, and the local server is not the first choice.
This command sets the remote server at ip-address as a peer of the local equipment, which operates in symmetric active mode. ip-address specifies a host address other than an IP address of broadcast, multicast, or reference clock. By operating in this mode, a local device can synchronize and be synchronized by a remote server.
Example
# Configure the local equipment to synchronize or synchronized by a peer at 128.108.22.44. Set the NTP version to 3. The IP address of the NTP packets are taken from that of Vlan-Interface1. [Quidway] ntp-service unicast-peer 131.108.22.33 version 3 source-interface
Vlan-Interface 1
7.1.18 ntp-service unicast-server
Syntax
ntp-service unicast-server ip-address [ version number ] [ authentication-keyid keyid ] [ source-interface { interface-name | interface-type interface-number } ] [ priority ]
undo ntp-service unicast-server ip-address
View
System view
Parameter
ip-address: Specify the IP address of a remote server.
version: Define NTP version number.
number: NTP version number, ranging from 1 to 3.
authentication-keyid: Define authentication key.
keyid: Key ID used for transmitting messages to a remote server, ranging from 0 to 4294967295.
source-interface: Specify the name of an interface.
Command Manual - System Management Quidway S3000-EI Series Ethernet Switches Chapter 7 NTP Configuration Commands
Huawei Technologies Proprietary
7-15
interface-name: Specify the interface name. When a local device sends an NTP message to a peer, the source IP address of the message is taken from the address of the interface.
interface-type: Specify the interface type and determine an interface together with the interface-number parameter.
interface-number: Specify the interface number and determine an interface together with the interface-type parameter.
priority: Designate a server as the first choice.
Description
Using ntp-service unicast-server command, you can configure NTP server mode. Using undo ntp-service unicast-server command, you can disable NTP server mode.
By default, version number number defaults to 3, the authentication is disabled, and the local server is not the first choice.
The command announces to use the remote server at ip-address as the local time server. ip-address specifies a host address other than an IP address of broadcast, multicast, or reference clock. By operating in client mode, a local device can be synchronized by a remote server, but not synchronize any remote server.
Example
# Designate the server at 128.108.22.44 to synchronize the local device and use NTP version 3. [Quidway] ntp-service unicast-server 128.108.22.44 version 3

Command Manual - System Management Quidway S3000-EI Series Ethernet Switches Chapter 8 SSH Configuration Commands
Huawei Technologies Proprietary
8-1
Chapter 8 SSH Configuration Commands
8.1 SSH Configuration Commands
8.1.1 debugging rsa
Command
debugging rsa
undo debugging rsa
View
User view
Parameter
None
Description
Using the debugging rsa command, you can send the detailed information of RSA algorithm, including every process and packet structure, to the information center as debugging information. Using the undo debugging rsa command, you can disable debugging function.
By default, debugging function is disabled.
For the related commands, see rsa local-key-pair create, rsa local-key-pair destroy.
Example
# Enable RSA debugging. <Quidway> debugging rsa
8.1.2 debugging ssh server
Command
debugging ssh server { all | vty index }
undo debugging ssh server { all | vty index }
View
User view

Command Manual - System Management Quidway S3000-EI Series Ethernet Switches Chapter 8 SSH Configuration Commands
Huawei Technologies Proprietary
8-2
Parameter
all: All SSH channels
index: Debugged SSH channels. Optional values depend on the VTY number and they are 0~4.
Description
Using the debugging ssh server command, you can send the negotiation process defined in SSH1.5 protocol to the information center as debugging information and debug a single user interface. Using the undo debugging ssh server command, you can disable debugging function.
By default, debugging function is disabled.
For the related commands, see ssh server authentication-retries, ssh server rekey-interval, ssh server timeout.
Example
# Print debugging information in running SSH <Quidway> debugging ssh server vty 0
00:23:20: SSH0: starting SSH control process
00:23:20: SSH0: sent protocol version id SSH-1.5-Quidway-1.25
00:23:20: SSH0: protocol version id is - SSH-1.5-1.2.26
00:23:20: SSH0: SSH_SMSG_PUBLIC_KEY msg
00:23:21: SSH0: SSH_CMSG_SESSION_KEY msg - length 112, type 0x03
00:23:21: SSH: RSA decrypt started
00:23:21: SSH: RSA decrypt finished
00:23:21: SSH: RSA decrypt started
00:23:21: SSH: RSA decrypt finished
8.1.3 display rsa local-key-pair public
Command
display rsa local-key-pair public
View
Any view
Parameter
None

Command Manual - System Management Quidway S3000-EI Series Ethernet Switches Chapter 8 SSH Configuration Commands
Huawei Technologies Proprietary
8-3
Description
Using the display rsa local-key-pair public command, you can display local key pair and public key of the server. If no key is generated, corresponding information will be prompted, for example, “RSA keys not found”.
For the related command, see rsa local-key-pair create.
Example
# Display local key pair and public key of the server. <Quidway> display rsa local-key-pair public
% Key pair was generated at: 12:26:33 UTC 2002/4/4
Key name: rtvrp_Host
Usage: Encryption Key
Key Data:
30470240 AF7DB1D0 DA78944F 53B7B59B 40D425D0 DC9C57D2 A60916C2 1F165807
08B84DDB 5F4DB8E7 A115B74E 2D41D96C AC61D276 AA027E41 DD48DE64 696E0934
EB872805 02030100 01
% Key pair was generated at: 12:26:45 UTC 2002/4/4
Key name: rtvrp_Server
Usage: Encryption Key
Key Data:
30670260 C05280D9 BA0D56C8 7BE43379 8634CDE7 83ABA9A2 3F36280E 25995487
4FF6AD7A 0E57871C 761E6D92 9914D8C5 CC577388 5B580B94 C2172C8F 36039EED
160A0478 651DED3A 9CCF1AAD D800AAF2 DF7FBEC4 A13ADA59 9E738319 AF366B8B
519D39F5 02030100 01
8.1.4 display rsa peer-public-key
Command
display rsa peer-public-key [ brief | name keyname ]
View
Any view
Parameter
brief: Displays brief information of the remote public key.
keyname: Specifies key name, a string including 0~32 characters.
Description
Using the display rsa peer-public-key command, you can display a designated RSA public key. All public keys will be displayed if no key is specified.
For the related command, see rsa local-key-pair create.

Command Manual - System Management Quidway S3000-EI Series Ethernet Switches Chapter 8 SSH Configuration Commands
Huawei Technologies Proprietary
8-4
Example
# Display a designated RSA public key. <Quidway> display rsa peer-public-key
Address Bits Name
1023 abcd
1024 hq
1024 wn1
1024 hq_all
<Quidway> display rsa peer-public-key name abcd
Key name:abcd
Key address:
Data:
30818602 8180739A 291ABDA7 04F5D93D C8FDF84C 42746319 91C164B0 DF178C55
FA833591 C7D47D53 81D09CE8 2913D7ED F9C08511 D83CA4ED 2B30B809 808EB0D1
F52D045D E40861B7 4A0E1355 23CCD74C AC61F8E5 8C452B2F 3F2DA0DC C48E3306
367FE187 BDD94401 8B3B69F3 CBB0A573 202C16BB 2FC1ACF3 EC8F828D 55A36F1C
DDC4BB45 504F0201 25
8.1.5 display ssh server
Command
display ssh server { session | status }
View
Any view
Parameter
session: Displays SSH sessions.
status: Displays SSH state information.
Description
Using the display ssh server command, you can display SSH state or session information.
For the related commands, see ssh server authentication-retries, ssh server rekey-interval, ssh server timeout.
Example
# Display SSH state and configuration parameters. [Quidway] display ssh server status
SSH version : 1.5
SSH connection timeout : 60 seconds

Command Manual - System Management Quidway S3000-EI Series Ethernet Switches Chapter 8 SSH Configuration Commands
Huawei Technologies Proprietary
8-5
SSH server key generating interval : 1 hours
SSH Authentication retries : 3 times
# Display SSH sessions.
[Quidway] display ssh server session
Connection Version Encryption State Username
VTY0 1.5 DES Session started Quidway
VTY3 1.5 DES Session started router
8.1.6 display ssh user-information
Command
display ssh user-information [ username ]
View
Any view
Parameter
username: Valid SSH user named defined by AAA
Description
Using the display ssh user-information command, you can display information of the user, including username, corresponding key, authentication type. If a username is specified, the system just gives its information.
For the related commands, see ssh user username assign rsa-key, ssh user username authentication-type.
Example
# Display SSH user information. [Quidway] display ssh user-information
Username authentication-type user-public-key-name
Jin rsa jin
hanqi1 password 816pub
8.1.7 peer-public-key end
Command
peer-public-key end
View
RSA public key view

Command Manual - System Management Quidway S3000-EI Series Ethernet Switches Chapter 8 SSH Configuration Commands
Huawei Technologies Proprietary
8-6
Parameter
None
Description
Using the peer-public-key end command, you can finish editing peer public key and quit from RSA public key view to system view.
For the related commands, see rsa peer-public-key, public-key-code end.
Example
# Quit RSA public key view. [Quidway] rsa peer-public-key quidway003
[Quidway-rsa-public-key] peer-public-key end
[Quidway]
8.1.8 protocol inbound
Command
protocol inbound { all | ssh | telnet }
View
VTY user interface view
Parameter
all: Supports both Telnet and SSH protocols.
ssh: Supports only SSH protocol.
telnet: Supports only Telnet protocol.
Description
Using the protocol inbound command, you can configure the protocols supported by a designated user interface.
By default, the system supports both Telnet and SSH protocols.
If SSH protocol is enabled and specified for the user interface, but no local RSA key is configured, SSH cannot take effect yet till you log onto the system next time.
If SSH protocol is specified, to ensure a successful logon, you must configure the AAA authentication using the authentication-mode scheme command. The protocol inbound ssh configuration fails if you configure authentication-mode password and authentication-mode none.
For the related commands, see user-interface vty.

Command Manual - System Management Quidway S3000-EI Series Ethernet Switches Chapter 8 SSH Configuration Commands
Huawei Technologies Proprietary
8-7
Example
# Disable Telnet on vty0 through vty4, only SSH available. [Quidway] user-interface vty 0 4
[Quidway-ui-vty0-4] protocol inbound ssh
# Disable Telnet on vty0, only SSH available.
[Quidway] user-interface vty 0
[Quidway-ui-vty0] protocol inbound ssh
8.1.9 public-key-code begin
Command
public-key-code begin
View
RSA key code view
Parameter
None
Description
Using the public-key-code begin command, you can enter RSA key code view.
Before using this command, you have to create a public key with the rsa peer-public-key command. In the RSA key code view, you can key in desired public key, which consists of hexadecimal characters, with blank space allowed between them, and is generated randomly by the client program supporting SSH.
For the related commands, see rsa peer-public-key, public-key-code end.
Example
# Enter RSA public key view and key in public key. [Quidway] rsa peer-public-key quidway003
[Quidway-rsa-public-key] public-key-code begin
[Quidway-rsa-key-code] 308186028180739A291ABDA704F5D93DC8FDF84C427463
[Quidway-rsa-key-code] 1991C164B0DF178C55FA833591C7D47D5381D09CE82913
[Quidway-rsa-key-code] D7EDF9C08511D83CA4ED2B30B809808EB0D1F52D045DE4
[Quidway-rsa-key-code] 0861B74A0E135523CCD74CAC61F8E58C452B2F3F2DA0DC
[Quidway-rsa-key-code] C48E3306367FE187BDD944018B3B69F3CBB0A573202C16
[Quidway-rsa-key-code] BB2FC1ACF3EC8F828D55A36F1CDDC4BB45504F020125
[Quidway-rsa-key-code] public-key-code end

Command Manual - System Management Quidway S3000-EI Series Ethernet Switches Chapter 8 SSH Configuration Commands
Huawei Technologies Proprietary
8-8
8.1.10 public-key-code end
Command
public-key-code end
View
RSA key code view
Parameter
None
Description
Using the public-key-code end command, you can save the configured public key and return to the RSA public key view from the RSA key code view.
This command terminates the edit process of public key and checks its validity before saving. If the public key contains invalid characters or violates coding rules, corresponding information will be prompted and the current configuration fails. If you have configured valid public key, the system will store it into the public key table.
For the related commands, see rsa peer-public-key, public-key-code begin.
Example
# Exit the RSA key code view and save the configuration. [Quidway-rsa-key-code] public-key-code end
[Quidway-rsa-public-key]
8.1.11 rsa local-key-pair create
Command
rsa local-key-pair create
View
System view
Parameter
None
Description
Using the rsa local-key-pair create command, you can create local RSA host key pair and server key pair.
If you have configured RSA key, the system gives an alarm after using this command and prompts that the existing one will be replaced. The key naming format is switch

Command Manual - System Management Quidway S3000-EI Series Ethernet Switches Chapter 8 SSH Configuration Commands
Huawei Technologies Proprietary
8-9
name plus server and switch name plus host, for example, Quidway_host and Quidway_server. The configuration result of this command will not be stored in the configuration file.
The system prompts you to key in bit range, for which, the server key pair must be at least 128 bits longer than the host key pair. The maximum bit range of both key pairs is 2048 bits and the minimum is 512. If there have been key pairs, the system will prompts you to decide whether to modify them.
For a successful SSH logon, you must configure and generate the local RSA key pairs. To generate local key pairs, you just need to execute the command once, with no further action required even after the system is rebooted.
For the related command, see rsa local-key-pair destroy.
Example
# Create local host key pair and server key pair. [Quidway] rsa local-key-pair create
The key name will be: Quidway_Host
% You already have RSA keys defined for Quidway_Host
% Do you really want to replace them? [yes/no]:y
Choose the size of the key modulus in the range of 512 to 2048 for your Keys.
NOTES: If the key modulus is greater than 512,
It will take a few minutes.
How many bits in the modulus [512]:512
Generating keys...
.....++++++++++++
........................++++++++++++
..........++++++++
............................++++++++
[Quidway]
8.1.12 rsa local-key-pair destroy
Command
rsa local-key-pair destroy
View
System view
Parameter
None

Command Manual - System Management Quidway S3000-EI Series Ethernet Switches Chapter 8 SSH Configuration Commands
Huawei Technologies Proprietary
8-10
Description
Using the rsa local-key-pair destroy command, you can remove all RSA key pairs at the server, including Host key pair and Server key pair.
Acknowledgement information will be promoted before the system clears all RSA key pairs. This command is just a one-time instruction, so the result will not be stored in the configuration file.
For the related commands, see rsa local-key-pair create.
Example
# Remove all key pairs at the server. [Quidway] rsa local-key-pair destroy
% The name for the keys which will be destroyed is Quidway_Host .
% Confirm to destroy these keys? [yes/no]:y
[Quidway]
8.1.13 rsa peer-public-key
Command
rsa peer-public-key key-name
View
System view
Parameter
key-name: Public key name
Description
Using the rsa peer-public-key command, you can enter the RSA public key view.
When using this command together with the public-key-code begin command, you can configure the public key at the client, which is generated randomly by the client program supporting SSH1.5.
For the related commands, see public-key-code begin, public-key-code end.
Example
# Enter the RSA public key view. [Quidway] rsa peer-public-key quidway002
[Quidway-rsa-public]

Command Manual - System Management Quidway S3000-EI Series Ethernet Switches Chapter 8 SSH Configuration Commands
Huawei Technologies Proprietary
8-11
8.1.14 ssh server authentication-retries
Command
ssh server authentication-retries times
undo ssh server authentication-retries
View
System view
Parameter
times: Specifies authentication retry times, in the range of 1~5.
Description
Using the ssh server authentication-retries command, you can define SSH authentication retry times value, which takes effect at next logon. Using the undo ssh server authentication-retries command, you can restore the default retry value.
By default, it is 3.
For the related command, see display ssh server.
Example
# Define the authentication retry times value as 4. [Quidway] ssh server authentication-retries 4
8.1.15 ssh server rekey-interval
Command
ssh server rekey-interval hours
undo ssh server rekey-interval
View
System view
Parameter
hours: Defines key update interval, in the range of 1~24 hours.
Description
Using the ssh server rekey-interval command, you can define update interval of server key pair. Using the undo ssh server rekey-interval command, you can cancel the current setting.
By default, system doesn’t update the server key.

Command Manual - System Management Quidway S3000-EI Series Ethernet Switches Chapter 8 SSH Configuration Commands
Huawei Technologies Proprietary
8-12
For the related commands, see display ssh server.
Example
# Define update interval of server key pair as 3 hours. [Quidway] ssh server rekey-interval 3
[Quidway]
8.1.16 ssh server timeout
Command
ssh server timeout seconds
undo ssh server timeout
View
System view
Parameter
seconds: Defines registration timeout value, in the range of 1~120 seconds.
Description
Using the ssh server timeout command, you can define timeout value for SSH registration authentication, which takes effect at next logon. Using the undo ssh server timeout command, you can restore the default value.
By default, the timeout value is 60 seconds.
For the related commands, see display ssh server.
Example
# Define the registration timeout value as 80 seconds. [Quidway] ssh server timeout 80
8.1.17 ssh user assign rsa-key
Command
ssh user username assign rsa-key keyname
undo ssh user username assign rsa-key
View
System view

Command Manual - System Management Quidway S3000-EI Series Ethernet Switches Chapter 8 SSH Configuration Commands
Huawei Technologies Proprietary
8-13
Parameter
keyname: Configures client public key, consisting of 1~32 characters.
username: Valid local user name or user name defined by remote RADIUS system.
Description
Using the ssh user username assign rsa-key command, you can associate an existing public key with a designated user. Using the undo ssh user username assign rsa-key command, you can delete the association.
For a user who has been associated with a public key, the command associates him/her with the new public key.
The newly configured users take effect at the next logon.
For the related command, see display ssh user-information.
Example
# Associate the key 1 with the zhangsan. [Quidway] ssh user zhangsan assign rsa-key key1
[Quidway]
8.1.18 ssh user username authentication-type
Command
ssh user username authentication-type { all | password | rsa }
undo ssh user username authentication-type
View
System view
Parameter
username: Valid local user name or user name defined by remote RADIUS system.
all: Specifies authentication type as password and RSA.
password: Specifies authentication type as password.
rsa: Specifies authentication type as RSA.
Description
Using the ssh user username authentication-type command, you can define authentication type for a designated user. Using the undo ssh user username authentication-type command, you can restore the default mode in which logon fails.

Command Manual - System Management Quidway S3000-EI Series Ethernet Switches Chapter 8 SSH Configuration Commands
Huawei Technologies Proprietary
8-14
By default, user can’t logon the switch through SSH or TELNET, so you have to specify authentication type for a new user. The new configuration takes effects at the next logon.
For the related commands, see display ssh user-information.
Example
# Specify zhangsan’s authentication type as password. [Quidway] ssh user zhangsan authentication-type password
[Quidway]