table of contents section i access your phone system · pdf filetable of contents section i...
TRANSCRIPT

1
INTER-TEL / MITEL 5000 WINDOWS BASED PROGRAMMING
Table of Contents
Section I Access your phone system Page 2
Section II System Directory Page 3
Changing User Names Page 4
Programming Keys on individual phones
Section III Endpoint Related Information Page 5
Programming Keys for all phones
Forward Paths
Section IV Voice Processor Directory Page 8
Programming Star
Programming Mailboxes
Section V Database Save Page 10

2
Section I
Accessing your phone system programming
From Start/Programs/Inter-tel 5000 DB programming, choose Inter-tel 5000 Session Manager
A window will appear:
Choose the local tab to look at programming or practice your skills before working on the system live. When you are ready to make actual changes to the phone system, choose the network tab.
Make sure the IP address of your phone system is entered in the IP address box.
Click Start.
Your login process will occur at this point, you will see messages as connection to the phone system occurs.
Your system will require a password, enter the password assigned by your Inter-Tel certified technician.
A second window will appear and you are now ready:

3
Section II
Inter-tel 5000 System Directory
Double click on System folder section on left pane. This is where user names and station information
can be modified.
Changing User Names
1. From System folder on left pane, double click on “Devices and Feature Codes”
4
2. Double Click on “Endpoints” from the menu on the left pane.
3. You will now see a selection of existing extensions and names, select the desired extension,
using the scroll bar to the right if necessary.
4. Click once on the “Description” field, the box will open for programming. Enter new name.
Always enter as: Last Name, First Name to assure spell by name directory functions properly.
Press Enter and the system will update.
5. Click once on the “Username” field. Enter new name (this is the information that displays on
the LCD of the phone.) Press Enter and the system will update.
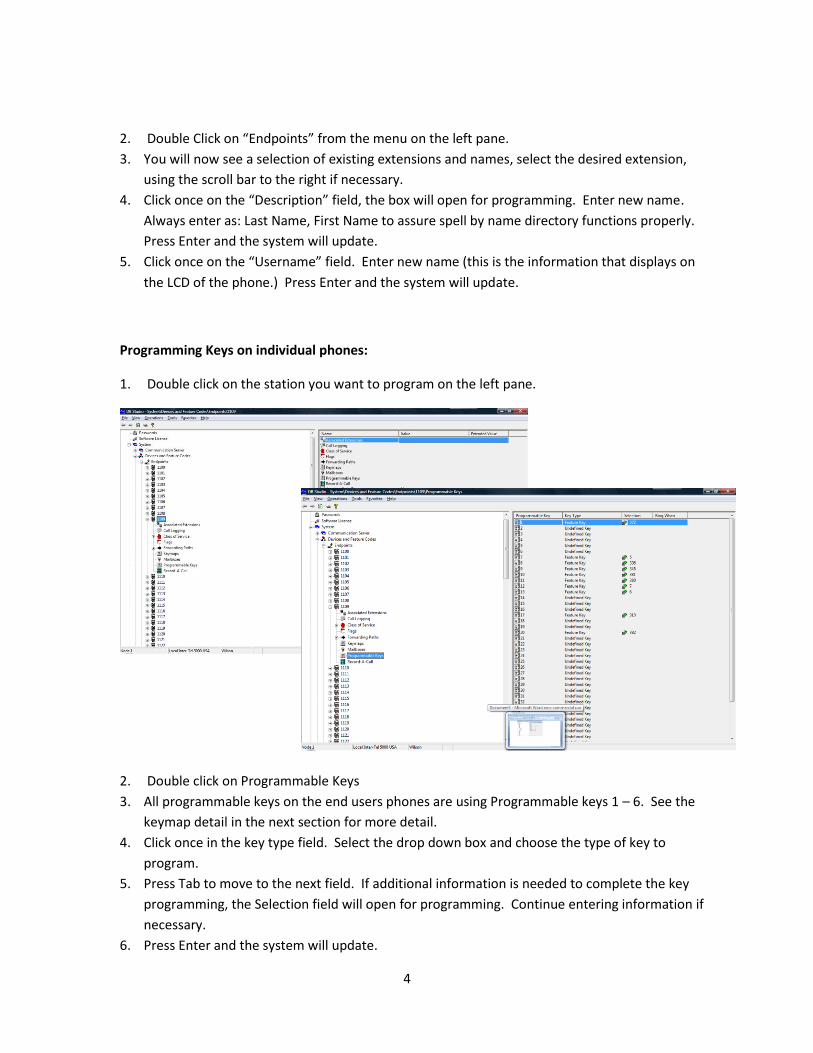
Programming Keys on individual phones:
1. Double click on the station you want to program on the left pane.
2. Double click on Programmable Keys
3. All programmable keys on the end users phones are using Programmable keys 1 – 6. See the
keymap detail in the next section for more detail.
4. Click once in the key type field. Select the drop down box and choose the type of key to
program.
5. Press Tab to move to the next field. If additional information is needed to complete the key
programming, the Selection field will open for programming. Continue entering information if
necessary.
6. Press Enter and the system will update.

5
Section III
Endpoint Related Information
Programming keys for all phones:
1. Keep in mind you will be changing a key for all phones in a keymap group with this
programming:
2. Double click on “Endpoint related information” on the left pane.

6

7
Forward Paths
All phones use one existing path to forward calls to Voice Mail. You can also set up an individual
phone to ring longer before forwarding to Voice Mail or forward one phone to another person.

8
Section IV
Voice Processor Directory
To access Voice Mail Programming click once on Voice Processor on the left pane, click once on
Devices. All parts of routing incoming calls are done from Applications:
Programming STAR:
Scheduled Time-based Application Routing. This is how the phone system sorts calls coming in for
automatic day/night switching. Please see your Inter-tel certified trainer for more information if
your system uses this feature.
Mailboxes:
To Change a password on a mailbox, click once on the mailbox in the left pane. Right click on the
password field and choose change. Enter the desired password.

9
Helpful Information for recording Company Greetings
Left click on Application related information and then Audio text Recordings. Here you will find the
description of each recording.
Use mailbox 5000 to record the greetings.

10
Section V
Backup Database
Go to Operations, then Database Operations. Choose Database Save. Choose the desired backup
location and press Start.