tactical field care tactical combat casualty care 28 october 2013
TRANSCRIPT
Tactical Field Care
Tactical Combat Casualty Care28 October 2013

OBJECTIVES
• STATE the common causes of altered states of consciousness on the battlefield.
• STATE why a casualty with an altered state of consciousness should be disarmed.
• DESCRIBE airway control techniques and devices appropriate to the Tactical Field Care phase.

• DEMONSTRATE the recommended procedure for surgical cricothyroidotomy.
• LIST the criteria for the diagnosis of tension pneumothorax on the battlefield.
• DESCRIBE the diagnosis and initial treatment of tension pneumothorax on the battlefield.
OBJECTIVES

• DEMONSTRATE the appropriate procedure for needle decompression of the chest.
• DESCRIBE the progressive strategy for controlling hemorrhage in tactical field care.
• DEMONSTRATE the correct application of Combat Gauze.
OBJECTIVES

• DEMONSTRATE the appropriate procedure for initiating a rugged IV field setup.
• STATE the rationale for obtaining intraosseous access in combat casualties.
• DEMONSTRATE the appropriate procedure for initiating an intraosseous infusion.
OBJECTIVES

• STATE the tactically relevant indicators of shock in combat settings.
• DESCRIBE the pre-hospital fluid resuscitation strategy for hemorrhagic shock in combat casualties.
• DESCRIBE the management of penetrating eye injuries in TCCC.
• DESCRIBE how to prevent blood clotting problems from hypothermia.
OBJECTIVES

• DESCRIBE the appropriate use of pulse oximetry in pre-hospital combat casualty care
• STATE the pitfalls associated with interpretation of pulse oximeter readings.
• LIST the recommended agents for pain relief in tactical settings along with their indications, dosages, and routes of administration.
• DESCRIBE the rationale for early antibiotic intervention in combat casualties.
OBJECTIVES

• LIST the factors involved in selecting antibiotic drugs for use on the battlefield.
• DISCUSS the management of burns in TFC.• EXPLAIN why cardiopulmonary resuscitation
is not generally used for cardiac arrest in battlefield trauma care.
• DESCRIBE the procedure for documenting TCCC care with the TCCC Casualty Card.
OBJECTIVES
• DESCRIBE the three ISAF categories for evacuation priority
• LIST the nine items in a MEDEVAC request• DISCUSS the rules of thumb for calling for
Tactical Evacuation and the importance of careful calculation of the risk/benefit ratio prior to initiating the call
• DESCRIBE the appropriate procedures for providing trauma care for wounded hostile combatants.
OBJECTIVES

Tactical Field Care• Distinguished from Care Under Fire by:
– A reduced level of hazard from hostile fire – More time available to provide care based
on the tactical situation• Medical gear is still limited to that carried by
the medic or corpsman or unit members (may include gear in tactical vehicles)

• May consist of rapid treatment of the most serious wounds with the expectation of a re-engagement with hostile forces at any moment, or
• There may be ample time to render whatever care is possible in the field.
• Time to evacuation may vary from minutes to several hours or longer.
Tactical Field Care

Battlefield Priorities in the
Tactical Field Care Phase
• This section describes the recommended care to be provided in TFC.
• This sequence of priorities shown assumes that any obvious life-threatening bleeding has been addressed in the Care Under Fire phase.
If this is not the case – address the massive bleeding first.
• After that – care is provided in the sequence shown. This sequence is compatible with the MARCH algorithm found in the USSOCOM Tactical Trauma Protocols.
MARCH
• Massive hemorrhage – control life-threatening bleeding.
• Airway – establish and maintain a patent airway.
• Respiration – decompress suspected tension pneumothorax, seal open chest wounds, and support ventilation/oxygenation as required.

• Circulation – establish IV/IO access and administer fluids as required to treat shock.
• Head injury/Hypothermia – prevent/treat hypotension and hypoxia to prevent worsening of traumatic brain injury and prevent/treat hypothermia.
MARCH

Tactical Field Care Guidelines
1. Casualties with an altered mental status should be disarmed immediately.

Disarm Individuals with Altered Mental Status
• Armed combatants with an altered mental status may use their weapons inappropriately.
• Secure long gun, pistols, knives, grenades, explosives.
• Possible causes of altered mental status are Traumatic Brain Injury (TBI), shock, hypoxia, and pain medications.
• Explain to casualty: “Let me hold your weapon for you while the doc checks you out.”
Tactical Field Care Guidelines
2. Airway Management
a. Unconscious casualty without airway obstruction:
- Chin lift or jaw thrust maneuver
- Nasopharyngeal airway
- Place casualty in recovery position

Tactical Field Care Guidelines
2. Airway Managementb. Casualty with airway obstruction or impending airway
obstruction:- Chin lift or jaw thrust maneuver- Nasopharyngeal airway
- Allow casualty to assume any position that best protects the airway, to include sitting up.
- Place unconscious casualty in recovery position.
- If previous measures unsuccessful:- Surgical cricothyroidotomy (with
lidocaine if conscious)

Nasopharyngeal Airway
• The “Nose Hose,” “Nasal Trumpet,” “NPA”• Excellent success in GWOT• Well tolerated by the conscious patient• Lube before inserting• Insert at 90 degree angle to the face NOT along
the axis of the external nose• Tape it in• Don’t use oropharyngeal airway (‘J’ Tube)
– Will cause conscious casualties to gag– Easily dislodged

Nasopharyngeal Airway

What’s wrong with this NPA insertion?
Nasopharyngeal Airway
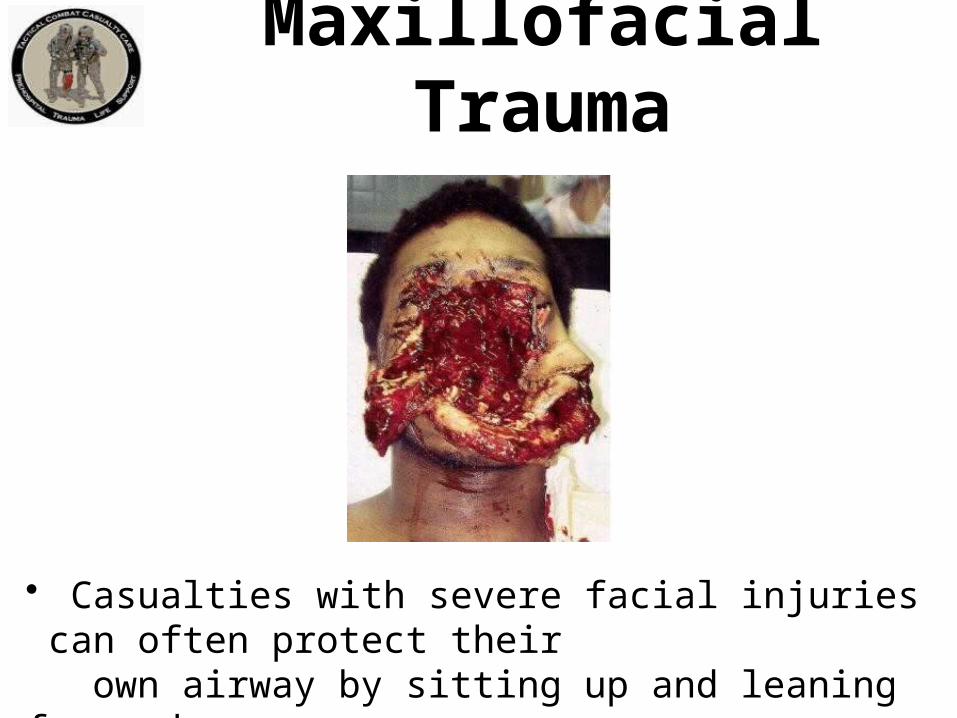
Maxillofacial Trauma
• Casualties with severe facial injuries can often protect their own airway by sitting up and leaning forward.• Let them do it if they can!

Airway Support
Place unconscious casualties in the recovery position after the airway has been opened.

Surgical Airway(Cricothyroidotomy)
• The following series of slides and the video demonstrate a horizontal (transverse) incision technique for performing a surgical airway.
• A vertical (mid-sagittal) incision technique is preferred by many trauma specialists and is recommended in the Iraq/Afghanistan War Surgery textbook.
• Steps are the same except for the orientation of the incision.
• Use a 6.0 tube for the airway

Surgical Airway(Cricothyroidotomy)

Surface Landmarks for Cricothyrotomy
Top of thyroid cartilage
Bottom of thyroid cartilage
Cricothyroid membrane
Cricoid cartilage
Thyroid prominence – Adam’s apple usually visible only in males
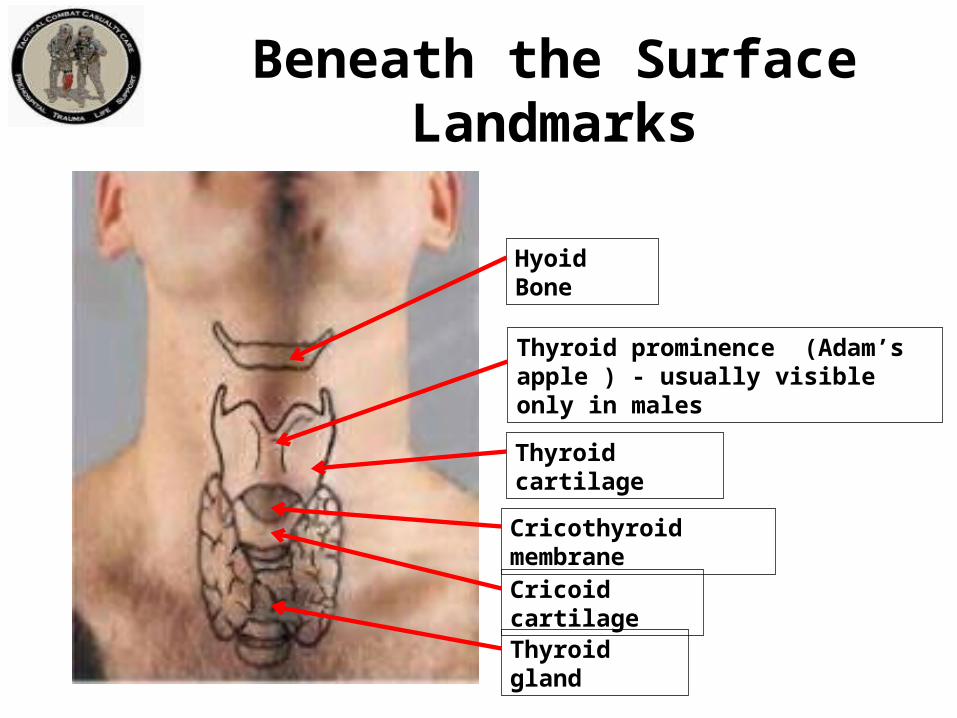
Beneath the Surface Landmarks
Hyoid Bone
Thyroid prominence (Adam’s apple ) - usually visible only in males
Thyroid cartilage
Cricothyroid membrane
Cricoid cartilage
Thyroid gland

Macdonald J C , Tien H C CMAJ 2008;178:1133-1135
Locating the Cric Incision Line

Surgical Incision overCricothyroid Membrane

Incise through the epidermis & dermis
Epidermis
Dermis
Cricothyroidmembrane
Surgical Airway

Epidermis Cricothyroidmembrane
Surgical Airway

Single stabbing incision through cricothyroid membrane
Surgical Airway
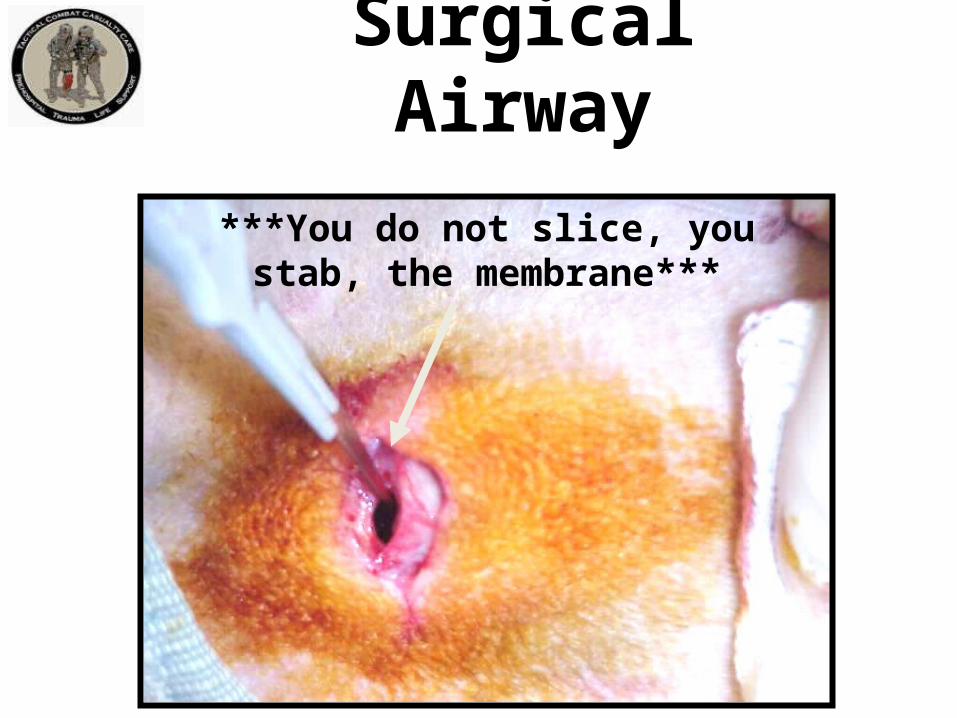
***You do not slice, you stab, the membrane***
Surgical Airway

Insert the scalpel handle and rotate 90 degrees
Surgical Airway

Insert Mosquito hemostat into incision and dilate
Surgical Airway

Insert ET Tube
Insert Endotracheal Tube – direct the tube into the trachea and towards the chest.

Check Placement
Misting in tube

Inflate cuff and REMOVE SYRINGE
Inflating the Cuff
Note: Corpsman/medic may wish to cut ET tube off just above the inflation tube so it won’t be sticking out so far.

Ventilate
Attach Bag

Secure the Tube
At this point, the tube should be taped securely in place with surgical tape.
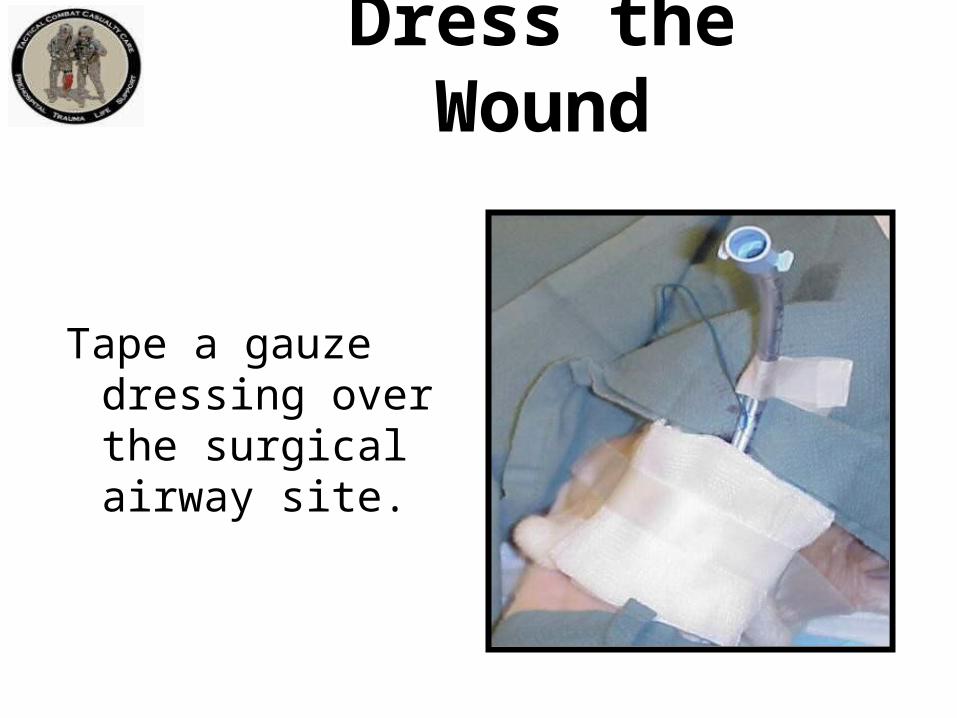
Dress the Wound
Tape a gauze dressing over the surgical airway site.

Repetition and Realismin Cric Training
To prepare for scenarios like this one, combat medics should perform cricothyrotomy at least five times during training on an anatomically realistic model.

Video: Surgical Airway

Video: An Actual Cricothyroidotomy
Courtesy Dr. Peter Rhee,
Univ. of Arizona

QuestionsAirway PracticalNasopharyngeal Airway
Surgical Airway
Tactical Field Care Guidelines
3. Breathing
a. In a casualty with progressive respiratory distress and known or suspected torso trauma, consider a tension pneumothorax and decompress the chest on the side of the injury with a 14-gauge, 3.25-inch needle/catheter unit inserted in the second intercostal space at the midclavicular line. Ensure that the needle entry into the chest is not medial to the nipple line and is not directed towards the heart. An acceptable alternate site is the 4th or 5th intercostal space at the anterior axillary line (AAL).

Management of Open Pneumothorax
3. Breathingb. All open and/or sucking chest wounds should be
treated by immediately applying a vented chest seal to cover the defect. If a vented chest seal is not available, use a non-vented chest seal. Monitor the casualty for the potential development of a subsequent tension pneumothorax. If the casualty develops increasing hypoxia, respiratory distress, or hypotension and a tension pneumothorax is suspected, treat by burping or removing the dressing or by needle decompression.

Tactical Field Care Guidelines
3. Breathing
c. Casualties with moderate/severe TBI should be given supplemental oxygen when available to maintain an oxygen saturation > 90%.

Tension Pneumothorax
• Tension pneumothorax is another common cause of preventable death encountered on the battlefield.
• Easy to treat.• Tension pneumo may occur with entry
wounds in abdomen, shoulder, or neck.• Blunt (motor vehicle accident) or
penetrating trauma (GSW) may also cause.

Pneumothorax
A pneumothorax is a collection of air between the lung and chest wall due to an injury to the chest and/or lung. The lung then collapses as shown.

Side with gunshot wound
A tension pneumothorax is worse. Injured lung tissue acts as a one-way valve, trapping more and moreair between the lung and the chest wall. Pressure buildsup and compresses both lungs and the heart.
Tension Pneumothorax

• Both lung function and heart function are
impaired with a tension pneumothorax, causing
respiratory distress and shock.• Treatment is to let the trapped air under
pressure escape.• Done by inserting a needle into the chest.• 14 gauge and 3.25 inches long is the
recommended needle size.
Tension Pneumothorax

• Question: “What if the casualty does not have a tension pneumothorax when you do your needle decompression?”
• Answer:– If he has penetrating trauma to that side of the
chest, there is already a collapsed lung and blood in the chest cavity.
– The needle won’t make it worse if there is no tension pneumothorax.
– If he DOES have a tension pneumothorax, you will save his life.
Tension Pneumothorax
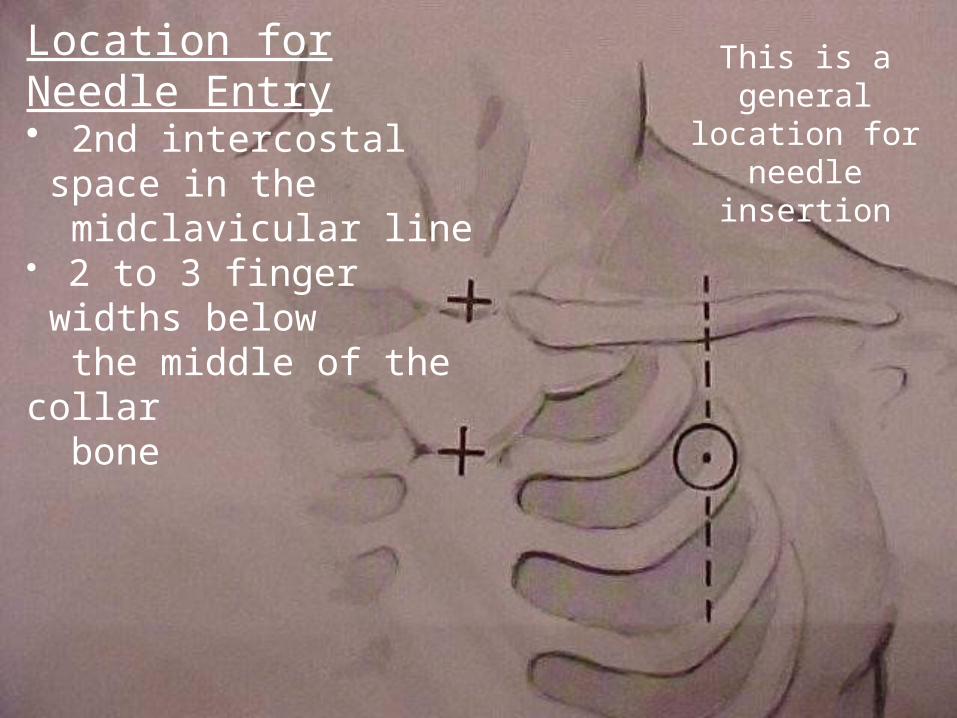
Picture of general location for needle insertion
This is a general location for
needle insertion
Location for Needle Entry• 2nd intercostal space in
the midclavicular line• 2 to 3 finger widths below the middle of the collar bone
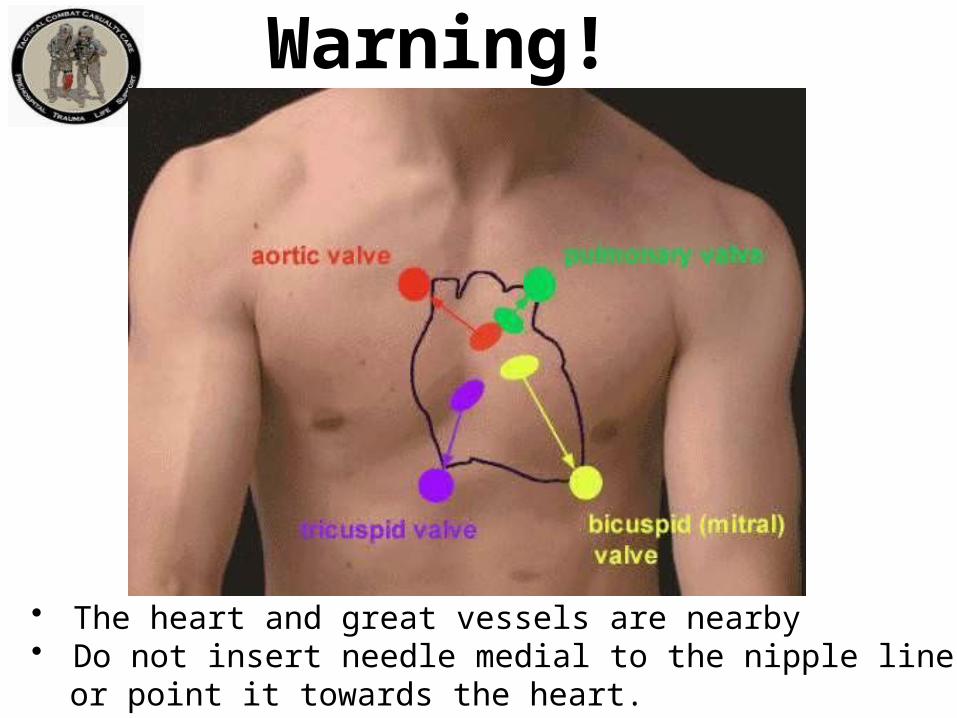
Warning!
• The heart and great vessels are nearby• Do not insert needle medial to the nipple line or point it towards the heart.

Needle Decompression – EnterOver the Top of the Third Rib
Chest wallRib
Intercostal artery &vein
Air collectionLung
Catheter
Needle
• This avoids the artery and vein on the bottom of the second rib.
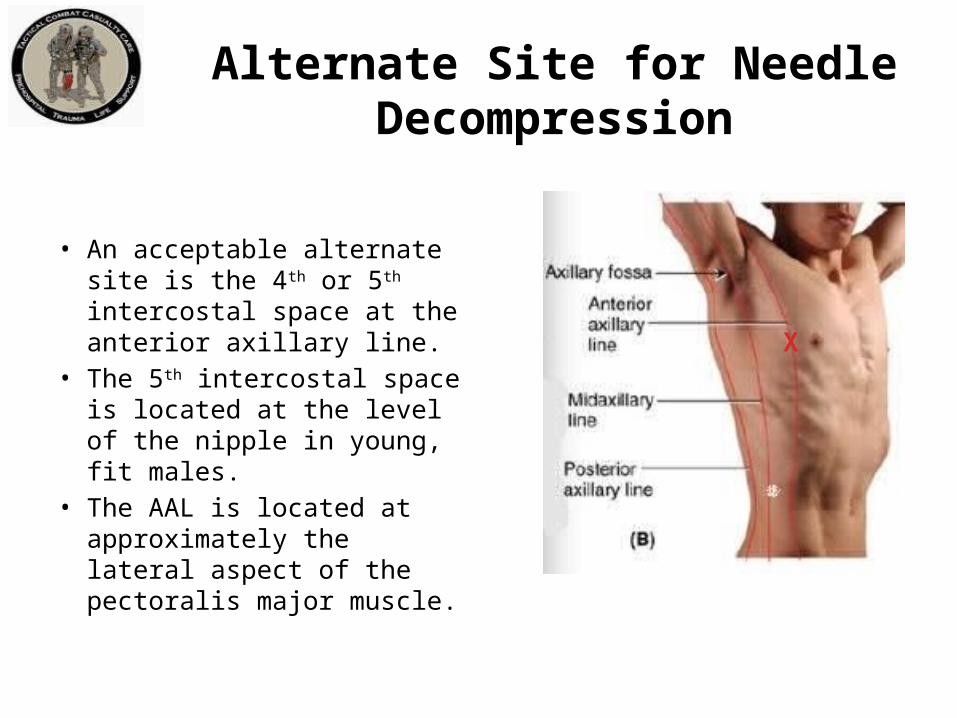
Alternate Site for Needle Decompression
• An acceptable alternate site is the 4th or 5th intercostal space at the anterior axillary line.
• The 5th intercostal space is located at the level of the nipple in young, fit males.
• The AAL is located at approximately the lateral aspect of the pectoralis major muscle.
X

Remember!!!• Tension pneumothorax is a common but easily
treatable cause of preventable death on the
battlefield.
• Diagnose and treat aggressively!

Needle Decompression Practical

Sucking Chest Wound(Open Pneumothorax)
Takes a hole in the chest the size of a nickel or bigger for this to occur.

Open Pneumothorax

Management of Open Pneumothorax
• Input from the USCENTCOM/JTS assessment of prehospital trauma care in Afghanistan questioned the use of unvented chest seals in the treatment of open pneumothorax
• New animal research from both USAISR and Naval Medical Center Portsmouth has shown that vented chest seals work reliably to prevent a tension pneumothorax in the presence of an open pneumothorax and an ongoing air leak from the lung but non-vented chest seals do not

Sucking Chest Wound
• May result from large defects in the chest wall and may interfere with ventilation
• Treat by applying a vented occlusive dressing completely over the defect during expiration.
• Monitor for possible development of subsequent tension pneumothorax.
• Allow the casualty to adopt the sitting position if breathing is more comfortable.

Sucking Chest Wound(Treated)
Key Point: If signs of a tension pneumothorax develop– lift one edge of the seal and allow the tensionpneumothorax to decompress. (“burping” the seal).Alternatively, remove the seal for a few seconds to accomplish the decompression, then re-apply.

Video: Sucking Chest Wound

Sucking Chest Wound(Treated) Video

Questions?

Tactical Field Care Guidelines
4. Bleedinga. Assess for unrecognized hemorrhage and control
all sources of bleeding. If not already done, use a CoTCCC-recommended tourniquet to control life-threatening external hemorrhage that is anatomically amenable to tourniquet application or for any traumatic amputation. Apply directly to the skin 2-3 inches above wound.

Tactical Field Care Guidelines
4. Bleedingb. For compressible hemorrhage not amenable to tourniquet use or
as an adjunct to tourniquet removal (if evacuation time is anticipated to be longer than two hours), use Combat Gauze as the hemostatic agent of choice. Combat Gauze should be applied with at least 3 minutes of direct pressure. Before releasing any tourniquet on a casualty who has been resuscitated for hemorrhagic shock, ensure a positive response to resuscitation efforts (i.e., a peripheral pulse normal in character and normal mentation if there is no traumatic brain injury (TBI). If the bleeding site is appropriate for use of a junctional tourniquet, immediately apply a CoTCCC-recommended junctional tourniquet. Do not delay in the application of the junctional tourniquet once it is ready for use. Combat Gauze applied with direct pressure should be used if a junctional tourniquet is not available or while the junctional tourniquet is being readied for use.

Tactical Field Care Guidelines
4. Bleedingc. Reassess prior tourniquet application.
Expose wound and determine if tourniquet is needed. If so, replace tourniquet over uniform with another applied directly to skin 2-3 inches above wound. If tourniquet is not needed, use other techniques to control bleeding.
Tactical Field Care Guidelines
4. Bleedingd. When time and the tactical situation permit,
a distal pulse check should be accomplished. If a distal pulse is still present, consider additional tightening of the tourniquet or the use of a second tourniquet, side by side and proximal to the first, to eliminate the distal pulse.
Tactical Field Care Guidelines
4. Bleeding
e. Expose and clearly mark all tourniquet sites with the time of tourniquet application. Use an indelible marker.

Tourniquets:Points to Remember
• Damage to the arm or leg is rare if the tourniquet is left on for less than two hours.
• Tourniquets are often left in place for several hours during surgical procedures.
• In the face of massive extremity hemorrhage, it is better to accept the small risk of damage to the limb than to have a casualty bleed to death.

• All unit members should have a CoTCCC-approved tourniquet at a standard location on their battle gear. – Should be easily accessible if wounded – DO
NOT bury it at the bottom of your pack• Tourniquets should be left in their protective
packaging until needed to treat casualties.– Harsh environments may contribute to tourniquet
failure if not left in packaging
Tourniquets:Points to Remember
• Training tourniquets should never be used as mission tourniquets
• Repetitive applications may cause tourniquet failure
Tourniquets:Points to Remember

• When a tourniquet has been applied, DO NOT periodically loosen it to allow circulation to return to the limb.– Causes unacceptable additional blood
loss– It HAS been happening, and caused at
least one near fatality in 2005
Tourniquets:Points to Remember

Tightening the tourniquet enough to eliminate the distal pulse will help to ensure that all bleeding is stopped, and that there will be no damage to the extremity from blood entering the extremitybut not being able to get out.
Tourniquets:Points to Remember

Removing the Tourniquet
Do not remove the tourniquet if:– The extremity distal to the tourniquet has been
traumatically amputated.– The casualty is in shock.– The tourniquet has been on for more than 6 hours.– The casualty will arrive at a medical treatment
facility within 2 hours after time of application.– Tactical or medical considerations make transition
to other hemorrhage control methods inadvisable.
Note: If the casualty will be delayed beyond 2 hours, re-assess the need for the tourniquet at the 2-hour point.

• Consider removing the tourniquet if bleeding can be controlled by other methods.
• Only a combat medic/corpsman/PJ, a PA, or a physician should loosen tourniquets.
Removing the Tourniquet

• Loosen the tourniquet slowly.– Observe for bleeding.
• Apply Combat Gauze to the wound per instructions later in the presentation if wound is still bleeding.
• If bleeding remains controlled, cover the Combat Gauze with a pressure dressing. – Leave loose tourniquet in place.
• If bleeding is not controlled without the tourniquet, re-tighten it.
Removing the Tourniquet

TCCCHemostatic Agent
QuikClot® Combat Gauze™

• Combat Gauze has been shown in lab studies to be more effective than the previous hemostatic agents HemCon® and QuikClot ®.
• Both Army (USAISR) and Navy (NMRC) studies confirmed
Combat Gauze

Courtesy Dr. Bijan Kheirabadi

CoTCCC RecommendationFebruary 2009
• Combat Gauze is the hemostatic agent of choice.
• The previously recommended agent WoundStat ® has been removed from the guidelines as a result of concerns about its safety.
• Additionally, combat medical personnel preferred a gauze-type agent.

• Combat Gauze™ demonstrated an increased ability to stop bleeding over other hemostatic agents.
• There is no exothermic (heat generating) reaction when Combat Gauze™ is applied.
• The cost is significantly less than the previously recommended HemCon®
Combat Gauze

86Combat Medical Systems, LLC, Tel: 910-426-0003, Fax: 910-426-0009, Website: www.combatgauze.com
• Combat Gauze™ is a 3-inch x 4-yard roll of sterile gauze impregnated with kaolin, a material that causes blood to clot.
• It has been found in lab studies to control bleeding that would otherwise be fatal.
Combat Gauze™
NSN 6510-01-562-3325

• Open clothing around the wound.
• If possible, remove excess pooled blood from the wound while preserving any clots already formed in the wound.
• Locate the source of the most active bleeding.
Combat Medical Systems, LLC, Tel: 910-426-0003, Fax: 910-426-0009, Website: www.combatgauze.com
Combat Gauze™ Directions (1) Expose Wound & Identify Bleeding
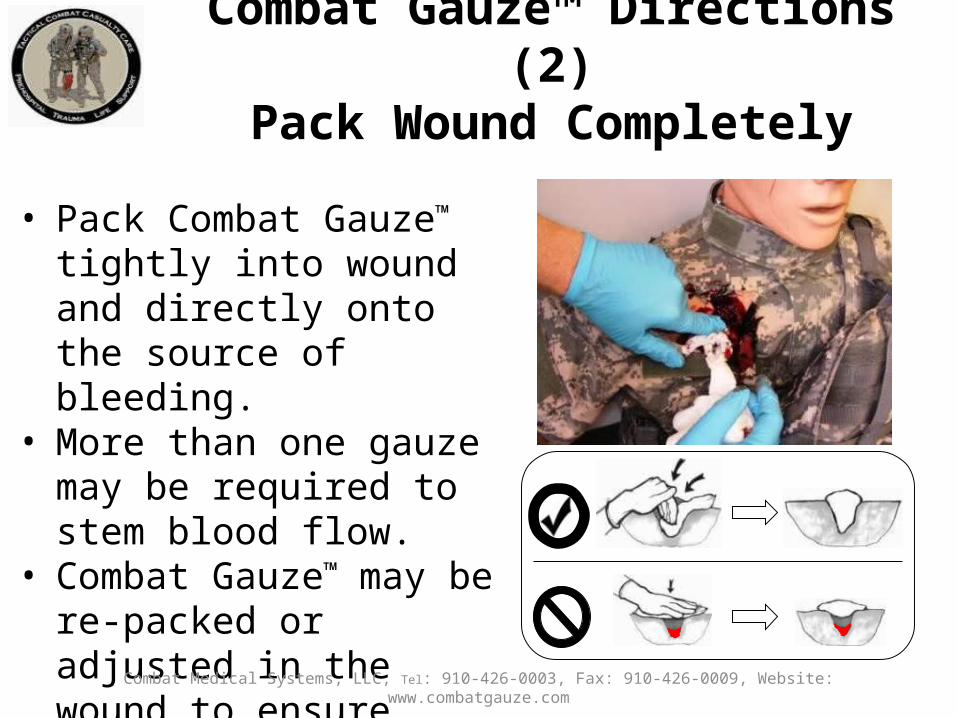
• Pack Combat Gauze™ tightly into wound and directly onto the source of bleeding.
• More than one gauze may be required to stem blood flow.
• Combat Gauze™ may be re-packed or adjusted in the wound to ensure proper placement.
Combat Medical Systems, LLC, Tel: 910-426-0003, Fax: 910-426-0009, Website: www.combatgauze.com
Combat Gauze™ Directions (2)Pack Wound Completely

• Quickly apply pressure until bleeding stops.
• Hold continuous pressure for 3 minutes.
• Reassess to ensure bleeding is controlled.
• Combat Gauze™ may be repacked or a second gauze used if initial application fails to provide hemostasis.
Combat Gauze™ Directions (3)Apply Direct Pressure
Combat Medical Systems, LLC, Tel: 910-426-0003, Fax: 910-426-0009, Website: www.combatgauze.com
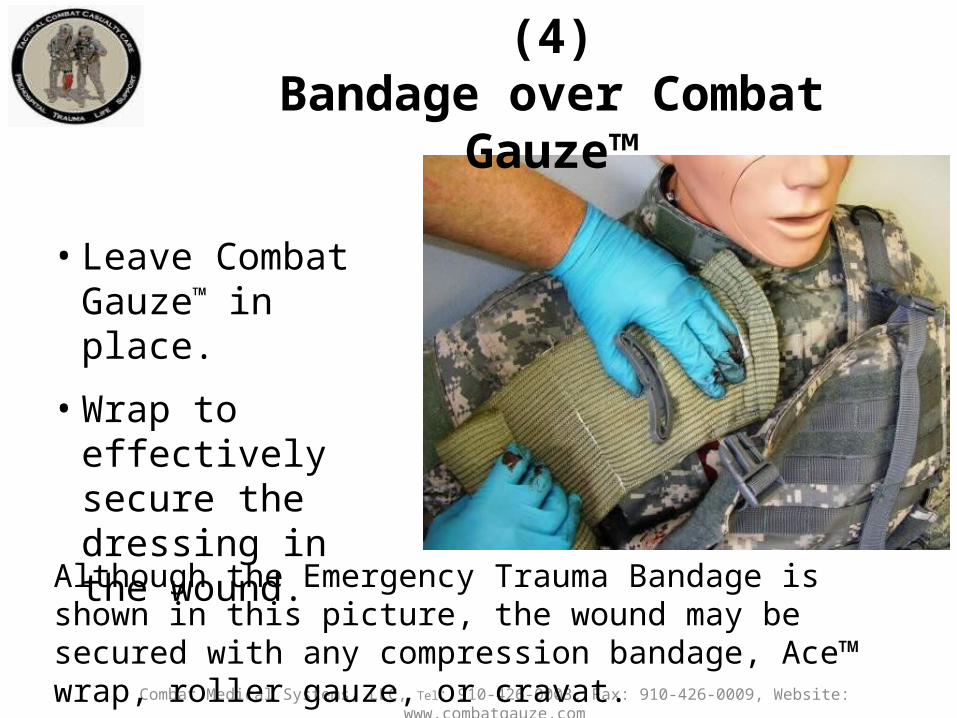
• Leave Combat Gauze™ in place.
• Wrap to effectively secure the dressing in the wound.
Combat Medical Systems, LLC, Tel: 910-426-0003, Fax: 910-426-0009, Website: www.combatgauze.com
Combat Gauze™ Directions (4)Bandage over Combat Gauze™
Although the Emergency Trauma Bandage is shown in this picture, the wound may be secured with any compression bandage, Ace™ wrap, roller gauze, or cravat.

• Do not remove the bandage or Combat Gauze™.
• Transport casualty to next level of medical care as soon as possible.
Combat Gauze™ Directions (5)Transport & Monitor Casualty
Combat Medical Systems, LLC, Tel: 910-426-0003, Fax: 910-426-0009, Website: www.combatgauze.com

Combat Gauze Video

Direct Pressure
• Can be used as a temporary measure.• It works most of the time for external bleeding.• It can stop even carotid and femoral bleeding.• Bleeding control requires very firm pressure.• Don’t let up pressure to check the wound until
you are prepared to control bleeding with a hemostatic agent or a tourniquet!
• Use for 3 full minutes after applying Combat Gauze.
• It is hard to use direct pressure alone to maintain control of big bleeders while moving the casualty.

Questions?

Combat Gauze™ Practical

Junctional Hemorrhage
• Term is used to include:– Groin– Buttocks– Perineum– Axilla– Base of neck

Junctional Tourniquets
Why have these devices only recently been added to TCCC?
This war has been going on for 13 years.
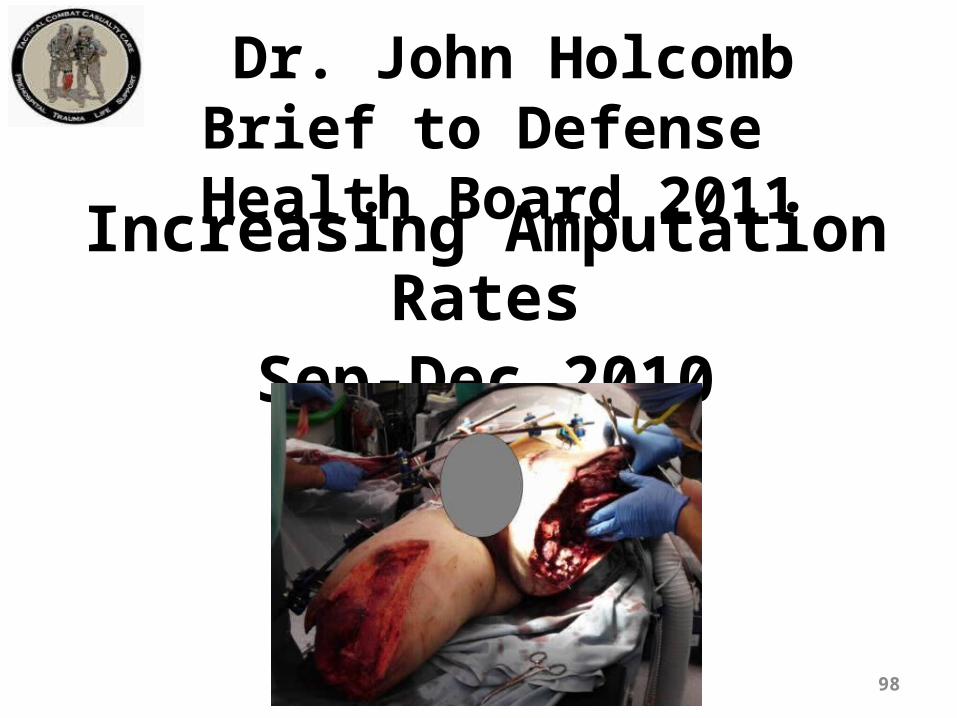
Increasing Amputation RatesSep-Dec 2010
98
Dr. John Holcomb Brief to Defense Health Board 2011

- Amputation rates for evacuated Marines have increased from 6 to 18% over the last 10 months (a 200% increase over baseline.)- The rate in December 2010 was 38%. - The double amputation rate increased by 3 fold in the last 4 months.- Increased genitalia injuries- Most of the amputations are high proximal injuries which are extremely disabling.
7
Amputation Summary Dr. John Holcomb

IEDSIraq vs Afghanistan
• Iraq– Large amount of explosives – recycled 155
shells– Command or vehicle-detonated– Destroy vehicles
• Afghanistan– Smaller amount of explosives– Homemade explosives– Personnel pressure-detonated– Designed to maim

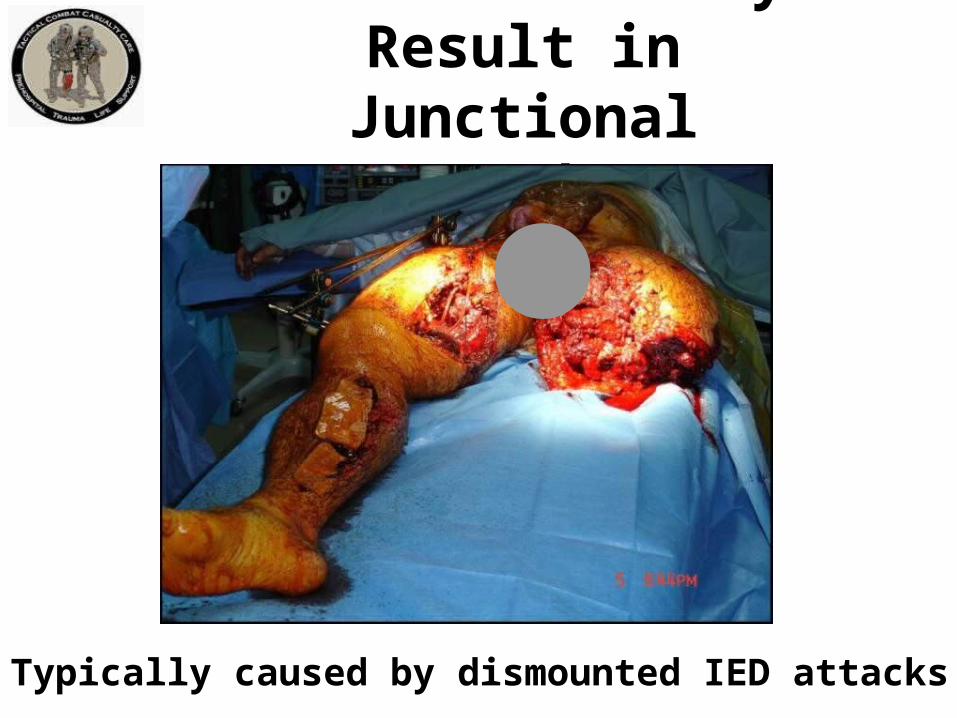
Typically caused by dismounted IED attacks
Wounds that May Result in Junctional Hemorrhage

103DCBI Task Force Report – BG Joseph Caravalho Chair

U.S. Combat Fatalities:Death from Hemorrhage
Eastridge BJ, Mabry RL, Seguin PG, et al. Death on the battlefield (2001-2011): implications for the future of combat casualty care. Journal of Trauma 2012, 73(6) Suppl 5: 431-7.
91%(n=888)
7.9%(n=77) 1.1%
(n=11)0
102030405060708090
100
Hemorrhage Airway Obstruction Tension Pneumothorax
Perc
ent
Physiologic Cause
Extremity [119/888] = 13.5%Junctional [171/888] = 19.2%
Truncal [598/888] = 67.3%

“Groin hemorrhage is the most common type of junctional bleeding where regular tourniquets cannot work.”
Kelly JF, et al.
J Trauma. 2008; 64(suppl 2)
Junctional Hemorrhage

Superficial Anatomyof the Groin
Anterior Superior Iliac Spine
Pubic Tubercle
Inguinal Ligament
Femoral Vessels

Anatomy of the Inguinal Region
Pubic Tubercle
Anterior Superior Iliac Spine
Femoral Artery
External Iliac Artery
Inguinal Ligament
Internal Iliac Artery
Common Iliac Artery
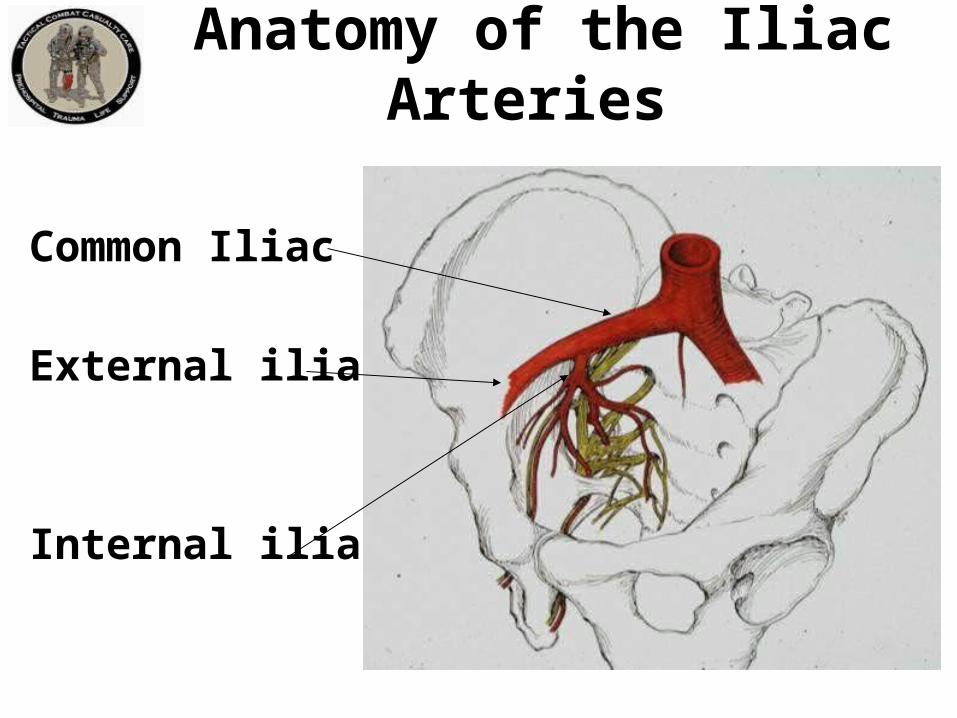
Anatomy of the Iliac Arteries
Common Iliac
External iliac
Internal iliac

TCCC Management of Junctional Hemorrhage
• The three CoTCCC-recommended junctional tourniquets are:– The Combat Ready Clamp (CRoC)– The Junctional Emergency Treatment Tool
(JETT)– The SAM Junctional Tourniquet (SJT)

TCCC Management of Junctional Hemorrhage
Combat Ready Junctional Emergency Sam Junctional Clamp Treatment Tool Tourniquet
• Training materials for all 3 devices are contained in separate modules of the TCCC curriculum

Abdominal Aortic Junctional Tourniquet
• The Abdominal Aortic Tourniquet (a truncal tourniquet) is another option for junctional hemorrhage control.
• It previously had a shorter maximum length of application (1 hour) than the 3 junctional tourniquets listed above. It was also relatively contraindicated in the presence of penetrating abdominal injuries.
• These restrictions have now been removed in a new FDA clearance for the device. • CoTCCC re-evaluation pending

Continued Reassessment!
• Once applied, the junctional tourniquet, as well as the casualty’s other hemorrhage control interventions, must be frequently reassessed to assure continued hemorrhage control.– DO NOT EVER APPLY IT AND
FORGET IT!

Thank You!
113Questions?
Tactical Field Care Guidelines
5. Intravenous (IV) access• Start an 18-gauge IV or saline lock if indicated.• If resuscitation is required and IV access is not
obtainable, use the intraosseous (IO) route.

IV Access – Key Point
• NOT ALL CASUALTIES NEED IVs!– IV fluids not required for minor wounds– IV fluids and supplies are limited – save them for
the casualties who really need them– IVs take time– Distract from other care required– May disrupt tactical flow – waiting 10 minutes to
start an IV on a casualty who doesn’t need it may endanger your unit unnecessarily

IV Access
Indications for IV access
• Fluid resuscitation for hemorrhagic shock or– Significant risk of shock – GSW to torso
• Casualty needs medications, but cannot take them PO:– Unable to swallow – Vomiting– Shock– Decreased state of consciousness

A single 18ga catheter is recommended for access:• Easier to start than larger catheters• Minimizes supplies that must be carried• All fluids carried on the battlefield can be
given rapidly through an 18 gauge catheter.• Two larger gauge IVs will be started later in
hospitals if needed.
IV Access

IV Access – Key Points
• Don’t insert an IV distal to a significant wound!• A saline lock is recommended instead of an IV line
unless fluids are needed immediately.– Much easier to move casualty without the IV line
and bag attached– Less chance of traumatic disinsertion of IV– Provides rapid subsequent access if needed– Conserve IV fluids
• Flush saline lock with 5cc NS immediately and then every 1-2 hours to keep it open

Video: Rugged Field IV Setup (1)Start a Saline Lock and Cover with
Tegoderm® or Equivalent

Video: Rugged Field IV Setup (2)Flush Saline Lock with 5 cc
of IV Fluid
Saline lock must be flushed immediately (within 2-3 minutes), and then flushed every 2 hours if IV fluid is not running.

Video: Rugged Field IV Setup (3)Insert Second Needle/Catheter
and Connect IV

Video: Rugged Field IV Setup (4)Secure IV Line with Velcro Strap

Video: Rugged Field IV Setup (5)Remove IV as Needed for Transport

Questions?
Questions?

Intraosseous (IO) Access
If unable to start an IV and fluids or meds are needed urgently, insert a sternal I/O line to provide fluids.

FAST1® IO Device

FAST1® WarningsFAST1® NOT RECOMMENDED IF: Patient is of small stature:
Weight of less than 50 kg (110 pounds) Less than 12 years old
Fractured manubrium/sternum – flail chest Significant tissue damage at site – trauma, infection Severe osteoporosis Previous sternotomy and/or scar
• NOTE: FAST1® INFUSION TUBE SHOULD NOT BE LEFT IN PLACE FOR MORE THAN 24 HOURS

FAST1® Flow Rates
30-80 ml/min by gravity
120 ml/min utilizing pressure infusion
250 ml/min using syringe forced infusion

1. Prepare site using
aseptic technique:– Betadine– Alcohol
FAST1® Insertion (1)
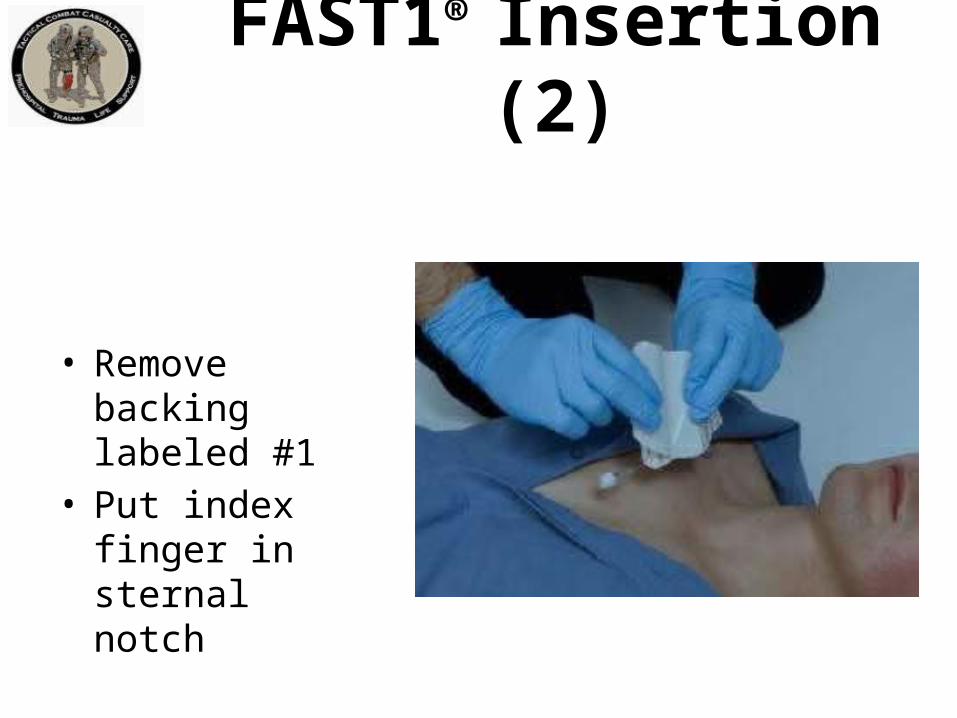
FAST1® Insertion (2)
• Remove backing labeled #1
• Put index finger in sternal notch

• Place Target Patch notch under index finger in sternal notch
• Press down firmly over top of Patch
• Remove backing labeled #2, press Patch down firmly
FAST1® Insertion (3)

• Place introducer needle cluster in target area
• Assure firm grip
• Introducer device must be perpendicular to the surface of the manubrium!
FAST1® Insertion (4)

• Align introducer perpendicular to the manubrium.
• Insert using increasing pressure till device releases. (~60 pounds)
• Maintain 90-degree alignment to the manubrium throughout.
FAST1® Insertion (5)
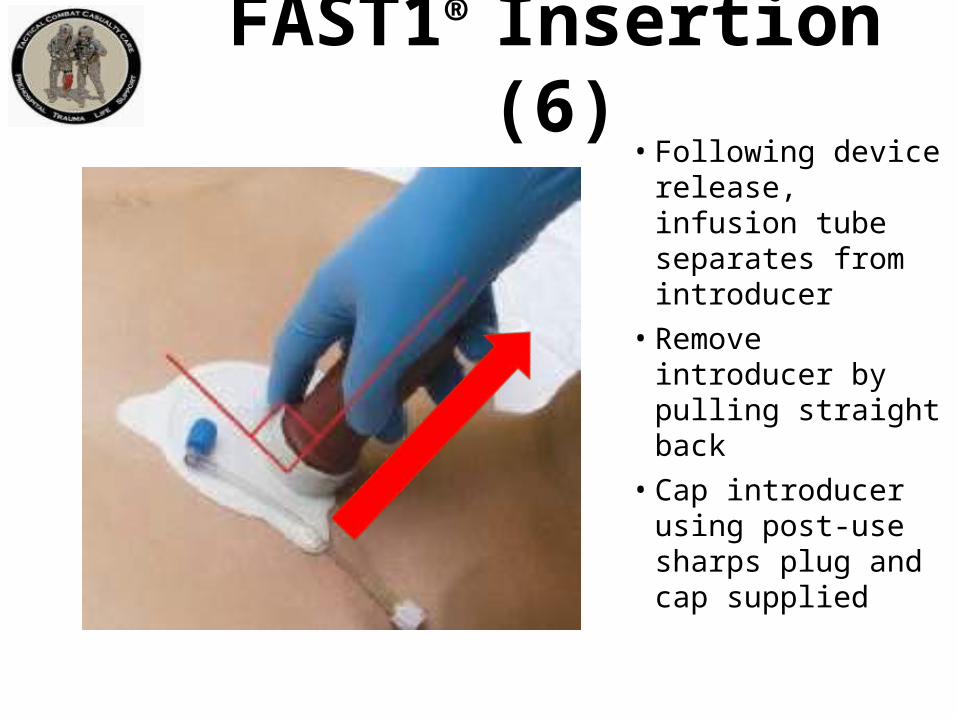
• Following device release, infusion tube separates from introducer
• Remove introducer by pulling straight back
• Cap introducer using post-use sharps plug and cap supplied
FAST1® Insertion (6)

• Connect infusion tube to tube on the target patch
• NOTE: Must flush bone plug with 5 cc of fluid to get flow.
• Assure patency by using syringe to aspirate small bit of marrow.
FAST1® Insertion (7)

• Connect IV line to target patch tube
• Open IV and assure good flow
• Place dome to protect infusion site
FAST1® Insertion (8)

Potential Problems:• Infiltration
– Usually due to insertion not perpendicular to sternum
• Inadequate flow or no flow– Infusion tube occluded with bone plug– Use additional saline flush to clear the bone
plug
FAST1® Insertion (9)

FAST1® Access – Key Points
• DO NOT insert the FAST1® on volunteers as part of training – use the training device provided.
• Should not have to remove in the field – it can be removed at the medical treatment facility.

FAST1® Insertion Video
Key Point Not Shown in Video • Remember to run IV fluids through the IV line
before connecting.

EZ-IO®
• After Pyng FAST1 ®, Vidacare’s EZ-IO ® is the next most commonly used IO device in combat.
• Overall experience with these devices has been favorable.
• Multiple EZ-IO devices are available. It is absolutely essential to use the right device for the chosen anatomical location.
Questions
Questions?IV/IO Practical


ASDHA Letter9 October 2013
“Traumatic hemorrhage remains the leading cause of death on the battlefield….. Joint Theater Trauma experts recommended adding TXA as an adjunct to severe hemorrhage management. Presently, TXA is not FDA-approved for this indication, and as such is considered an off-label use subject to a provider‘s clinical judgment in a practitioner-patient relationship.”

ASDHA Letter9 October 2013
“The Military Services and the Combatant Commands may authorize such use of TXA in the combat environment, consistent with current clinical practice guidelines and appropriate clinical oversight. The Services will accumulate outcome data and monitor adverse events. The Services will establish Service-specific policies regarding TXA administration, develop training and education plans, and assume all costs for implementation. TXA may be obtained through normal class VIII channels.”

6. Tranexamic Acid (TXA) If a casualty is anticipated to need significant blood
transfusion (for example: presents with hemorrhagic shock, one or more major amputations, penetrating torso trauma, or evidence of severe bleeding) – Administer 1 gram of tranexamic acid (TXA) in
100 cc Normal Saline or Lactated Ringer’s as soon as possible but NOT later than 3 hours after injury.
– Begin second infusion of 1 gm TXA after Hextend or other fluid treatment.
Tactical Field Care Guidelines

TXA
• Hemorrhage is the leading cause of preventable death on the battlefield
• Tourniquets and Combat Gauze do not work for internal bleeding
• TXA does!
TXA
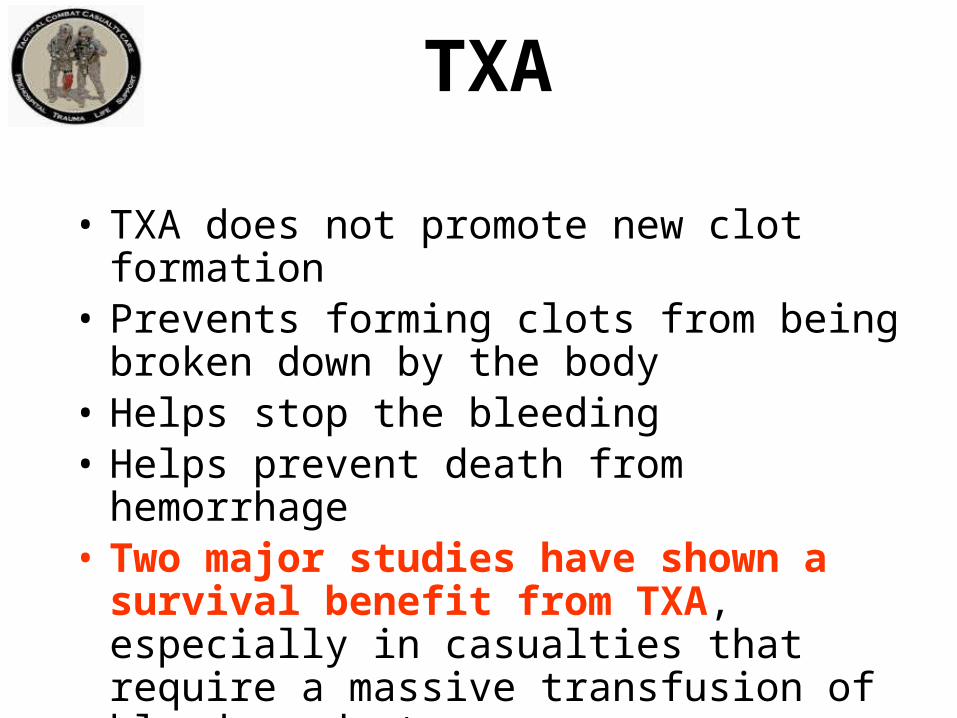
• TXA does not promote new clot formation• Prevents forming clots from being broken down
by the body• Helps stop the bleeding• Helps prevent death from hemorrhage• Two major studies have shown a survival
benefit from TXA, especially in casualties that require a massive transfusion of blood products

TXA
• Survival benefit GREATEST when given within 1 hour of injury
• Survival benefit still present when given within 3 hours of injury
• DO NOT GIVE TXA if more than 3 hours have passed since the casualty was injured – survival is DECREASED by TXA given after this point
• DON’T DELAY WITH TXA!

TXA
• Trade name: Cyklokapron®
• FDA-approved• Possible side effects:
– Nausea, vomiting, diarrhea – Visual disturbances– Possible increase in risk of post-injury blood
clots– Hypotension if given as IV bolus

TXAStorage and Handling
• Recommended temperature range for storage: 59°-86° F
• Must protect this drug from environmental extremes• Store and transport in air conditioned spaces• On missions, carry in small insulated container• In very cold temperatures, carrying TXA next to the
body on missions will protect from cold• Carriage in aid bag also acts as insulator against
temperature extremes• Return to room temperature storage after each mission

• Supplied in 1 gram (1000 mg) ampoules• Should NOT be given with Hextend or through an IV
line with Hextend in it• Inject 1 gram of TXA into a 100-cc bag of normal
saline or lactated ringer’s• Infuse slowly over 10 minutes• Rapid IV push may cause hypotension• If there is a new-onset drop in BP during the infusion
– SLOW DOWN the TXA infusion• Then administer blood products or Hextend
TXAAdministration – 1st Dose

• Typically given after the casualty arrives at a Role II/Role III medical facility
• May be given in field if evacuation is delayed and fluid resuscitation has been completed before arrival at the medical facility
• If still in field or in TACEVAC when fluid resuscitation is complete, give second dose of TXA as directed for the first dose
TXAAdministration – 2nd Dose

Questions?

Tactical Field Care Guidelines
7. Fluid Resuscitation• Assess for hemorrhagic shock; altered mental
status (in the absence of head injury) and weak or absent peripheral pulses are the best field indicators of shock.
a. If not in shock:
- No IV fluids necessary
- PO fluids permissible if conscious and can
swallow

Tactical Field Care Guidelines
7. Fluid Resuscitation
b. If in shock:
- Hextend, 500ml IV bolus
- Repeat once after 30 minutes if still
in shock
- No more than 1000ml of Hextend

Tactical Field Care Guidelines
7. Fluid Resuscitation
c. Continued efforts to resuscitate must be weighed against logistical and tactical considerations and the risk of incurring further casualties.

Tactical Field Care Guidelines
7. Fluid Resuscitation
d. If a casualty with an altered mental status due to suspected TBI has a weak or absent peripheral pulse, resuscitate as necessary to maintain a palpable radial pulse.

What is “Shock?”• Inadequate blood flow to the body tissues• Leads to inadequate oxygen delivery and
cellular dysfunction• May cause death• Shock can have many causes, but on the
battlefield, it is typically caused by severe blood loss
Blood Loss and Shock

Question: How does your body react to blood loss?
Answer: It depends – on how much blood you lose.
Blood Loss and Shock

Normal Adult Blood Volume5 Liters
5 Liters Blood Volume
1 liter by
volume
1 liter by
volume
1 liter by
volume
1 liter by
volume
1 liter by
volume

500cc Blood Loss
4.5 Liters Blood Volume

• Mental State: Alert• Radial Pulse: Full• Heart Rate: Normal or slightly increased• Systolic Blood pressure: Normal• Respiratory Rate: Normal• Is the casualty going to die from this?
No
500cc Blood Loss

4.0 Liters Blood Volume
1000cc Blood Loss

• Mental State: Alert• Radial Pulse: Full• Heart Rate: 100 +• Systolic Blood pressure: Normal lying
down• Respiratory Rate: May be normal• Is the casualty going to die from this?
No
1000cc Blood Loss

3.5 Liters Blood Volume
1500cc Blood Loss

• Mental State: Alert but anxious• Radial Pulse: May be weak• Heart Rate: 100+• Systolic Blood pressure: May be decreased• Respiratory Rate: 30• Is the casualty going to die from this?
Probably not
1500cc Blood Loss

3.0 Liters Blood Volume
2000cc Blood Loss

• Mental State: Confused/lethargic• Radial Pulse: Weak• Heart Rate: 120 +• Systolic Blood pressure: Decreased• Respiratory Rate: >35• Is the casualty going to die from this?
Maybe
2000cc Blood Loss

2.5 Liters Blood Volume
2500cc Blood Loss

• Mental State: Unconscious• Radial Pulse: Absent• Heart Rate: 140+• Systolic Blood pressure: Markedly decreased• Respiratory Rate: Over 35• Is he going to die from this?
Probably
2500cc Blood Loss

Recognition of Shock on the Battlefield
• Combat medical personnel need a fast, reliable, low-tech way to recognize shock on the battlefield.
• The best TACTICAL indicators of shock are:– Decreased state of consciousness (if casualty
has not suffered TBI) and/or– Abnormal character of the radial pulse
(weak or absent)
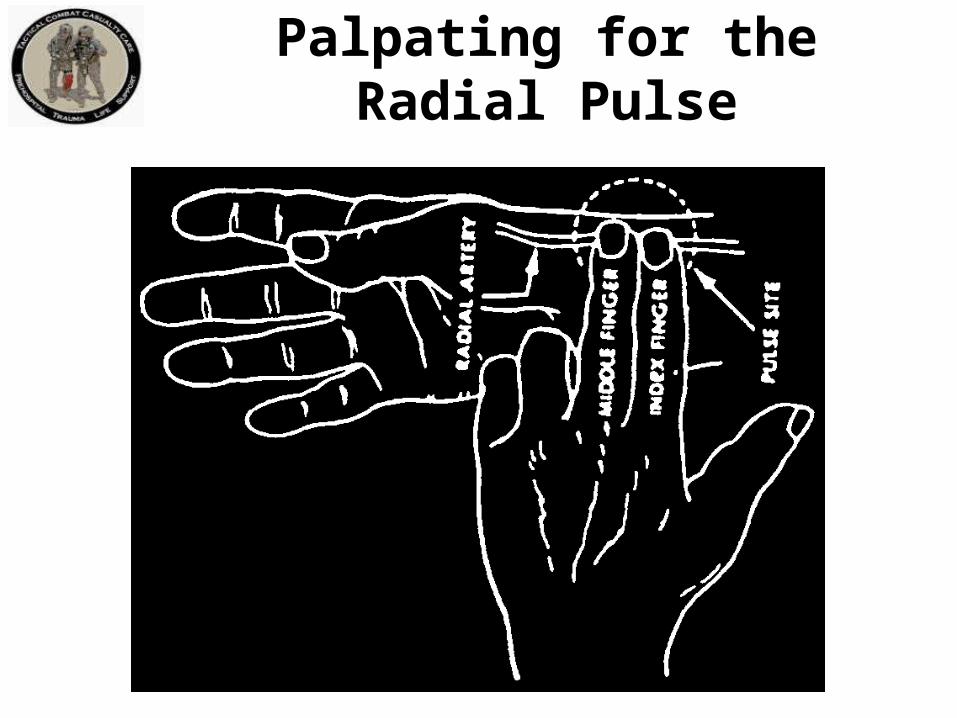
Palpating for the Radial Pulse

Fluid Resuscitation Strategy
If the casualty is not in shock:– No IV fluids necessary – SAVE IV FLUIDS FOR
CASUALTIES WHO REALLY NEED THEM.– PO fluids permissible if casualty can swallow
• Helps treat or prevent dehydration• OK, even if wounded in abdomen
– Aspiration is extremely rare; low risk in light of benefit
– Dehydration increases
mortality

Hypotensive Resuscitation
Goals of Fluid Resuscitation Therapy• Improved state of consciousness (if no TBI)• Palpable radial pulse corresponds roughly to
systolic blood pressure of 80 mm Hg• Avoid over-resuscitation of shock from torso
wounds.• Too much fluid volume may make internal
hemorrhage worse by “Popping the Clot.”

Choice of Resuscitation Fluidin the Tactical Environment
• Why use Hextend instead of the much less expensive Ringer’s Lactate used in civilian trauma?
• 1000ml of Ringers Lactate (2.4 pounds) will yield an expansion of the circulating blood volume of only about 200ml one hour after the fluid is given.
• The other 800ml of RL has left the circulation after an hour and entered other fluid spaces in the body – FLUID THAT HAS LEFT THE CIRCULATION DOES NOT HELP TREAT SHOCK AND MAY CAUSE OTHER PROBLEMS.

Choice of Resuscitation Fluid
• 500ml of 6% hetastarch (trade name Hextend®, weighs 1.3lbs) and will yield an expansion of the intravascular volume of 600-800ml.
• This intravascular expansion is still present 8 hours later – may be critical if evacuation is delayed.
• Hextend® – Less weight to carry for equal effect– Stays where it is supposed to be longer and does the
casualty more good– Less likely to cause undesirable side effects

IV
Crystalloid Fluid ShiftsCELLSCELLS
INT
ER
ST
ITIA
L
VESSEL
W
W
W
W
WW
W
WW
W
WW
W
WW
W
WW
W
WW
W
WW
W
WW
WW
W
WW W
W
W
W
W
W
W
W
W
W
W
W
W
W
W
W
• Small sodium, chloride, potassium, etc. from crystalloids leak through vessel membranes
• In 1 hour, only 25% of crystalloid fluid is still in the vascular space
• For a 1000ml bag, that’s only 250ml still in the vessels
• The rest of the fluid diffuses to the interstitial and intracellular space
LRLRLRLRLRLRLRLRLRLRLRW
LRWater MoleculesLR Molecules

Hextend® Fluid ShiftsCELLSCELLS
INT
ER
ST
ITIA
L
VESSEL
W
W
W
W
WW
W
WW
W
WW
W
WW
W
WW
W
WW
W
WW
W
WW
WW
W
WW W
W
W
W
W
W
W
WW W
W
W
W
W
W
W
• Large Hextend particles remain in the vessels for 8 hours
• Osmotic pressure pulls additional water from the interstitial and intracellular spaces into the vessels
• The expansion resulting from 500ml of Hextend is 500 to 650 ml of blood volume
IVHHHHHHW Water Molecules
Hextend MoleculesH

Compare Fluids• Max dose of Hextend is 1,000ml
(1,600ml of volume expansion effect)
• To get the same effect from crystalloid, it requires 7,000ml PER CASUALTY!
• Which would you rather carry?
• Hextend is preferred as a weight saving advantage for combat trauma
• For hemorrhagic shock, LR is 2nd choice.
Hextend 2.6 lbs
Crystalloid14.4 lbs
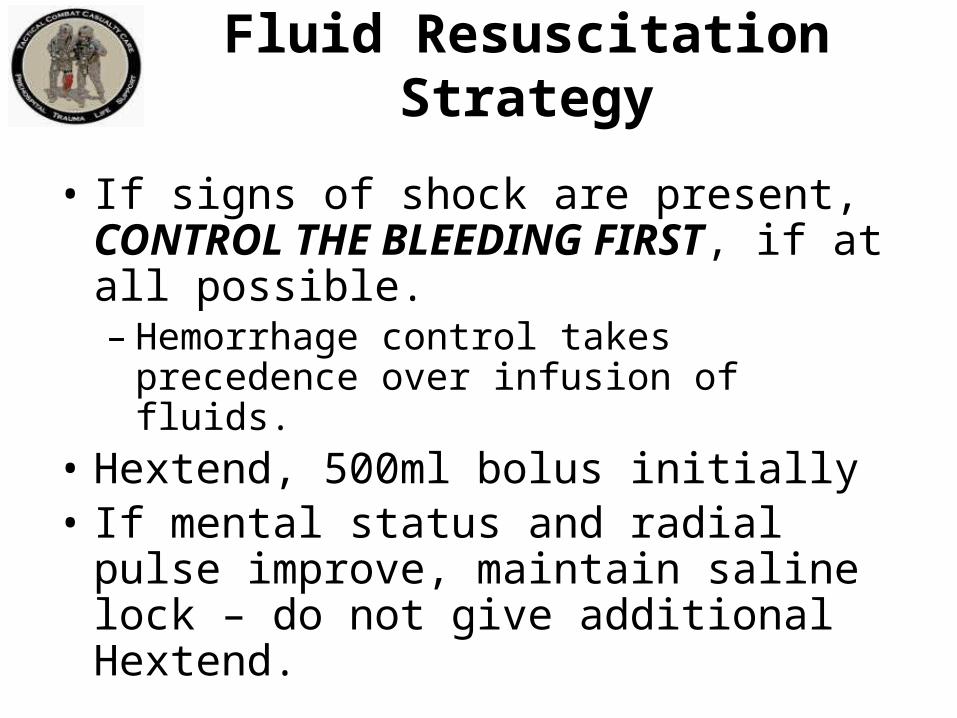
• If signs of shock are present, CONTROL THE BLEEDING FIRST, if at all possible.– Hemorrhage control takes precedence over
infusion of fluids.
• Hextend, 500ml bolus initially• If mental status and radial pulse improve,
maintain saline lock – do not give additional Hextend.
Fluid Resuscitation Strategy

• After 30 minutes, reassess state of consciousness and radial pulse. If not improved, give an additional 500ml of Hextend
• Continued efforts to resuscitate must be weighed against logistical and tactical considerations and the risks of incurring further casualties.
• Hextend has no significant effects on coagulation and immune function at the recommended maximum volume of 1000 ml (for adults)
Fluid Resuscitation Strategy

TBI Fluid Resuscitation
If a casualty with an altered mental status due to suspected TBI has a weak or absent peripheral pulse :– Resuscitate with sufficient Hextend® to
maintain a palpable radial pulse.– Shock increases mortality in casualties with
head injuries.– Must give adequate IV fluids to restore
adequate blood flow to brain.

Questions?

8. Prevention of hypothermia
a. Minimize casualty’s exposure to the elements. Keep protective gear on or with the casualty if feasible.
b. Replace wet clothing with dry if possible. Get the casualty onto an insulated surface as soon as possible.
c. Apply the Ready-Heat Blanket from the Hypothermia Prevention and Management Kit (HPMK) to the casualty’s torso (not directly on the skin) and cover the casualty with the Heat-Reflective Shell (HRS).
Tactical Field Care Guidelines

8. Prevention of hypothermia (cont)d. If an HRS is not available, the previously
recommended combination of the Blizzard Survival Blanket and the Ready Heat blanket may also be used.
e. If the items mentioned above are not available, use dry blankets, poncho liners, sleeping bags, or anything that will retain heat and keep the casualty dry.
f. Warm fluids are preferred if IV fluids are required.
Tactical Field Care Guidelines
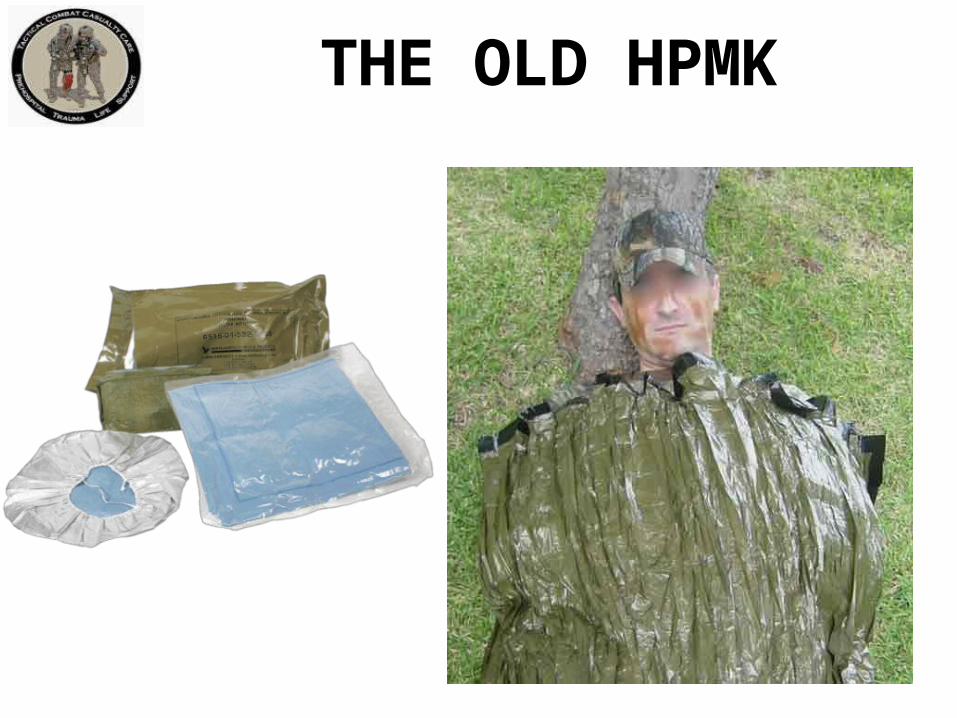
THE OLD HPMK

6 – Cell
“Ready-Heat” Blanket
4- Cell
“Ready-Heat” Blanket
Apply Ready Heat blanket to torso OVER shirt.

Repeat
• Do NOT place the ready-Heat Blanket directly on the skin• Multiple reports of skin burns from this being done• Keep cammie top or T-shirt on• Place Ready-Heat over the fabric

NEW HPMK

Hypothermia Prevention
• Key Point: Even a small decrease in body temperature can interfere with blood clotting and increase the risk of bleeding to death.
• Casualties in shock are unable to generate body heat effectively.
• Wet clothes and helicopter evacuations increase body heat loss.
• Remove wet clothes and cover casualty with hypothermia prevention gear.
• Hypothermia is much easier to prevent than to treat!
Tactical Field Care Guidelines
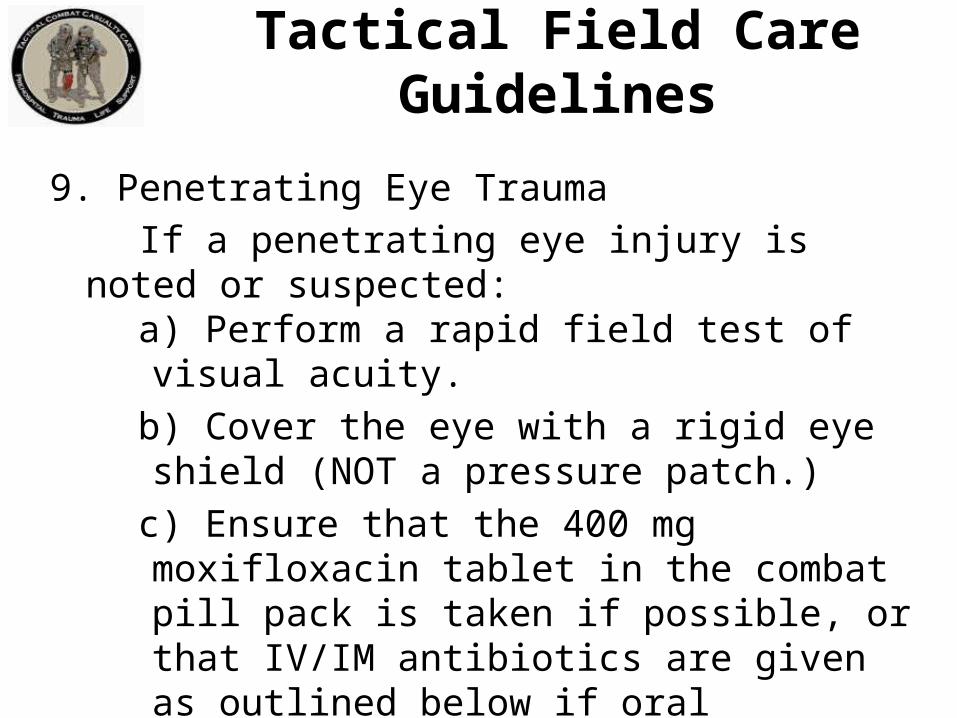
9. Penetrating Eye Trauma
If a penetrating eye injury is noted or suspected: a) Perform a rapid field test of visual acuity.
b) Cover the eye with a rigid eye shield (NOT a pressure patch.)
c) Ensure that the 400 mg moxifloxacin tablet in the combat pill pack is taken if possible, or that IV/IM antibiotics are given as outlined below if oral moxifloxacin cannot be taken.

Checking Vision in the Field
• Don’t worry about charts • Determine which of the following the
casualty can see (start with “Read print” and work down the list if not able to do that.)– Read print– Count fingers– Hand motion– Light perception

Corneal Laceration

Small Penetrating Eye Injury

Protect the eye with a SHIELD, not a patch!

• Use your tactical eyewear to cover the injured eye if you don’t have a shield.
• Using tactical eyewear in the field will generally prevent the eye injury from happening in the first place!
Eye Protection
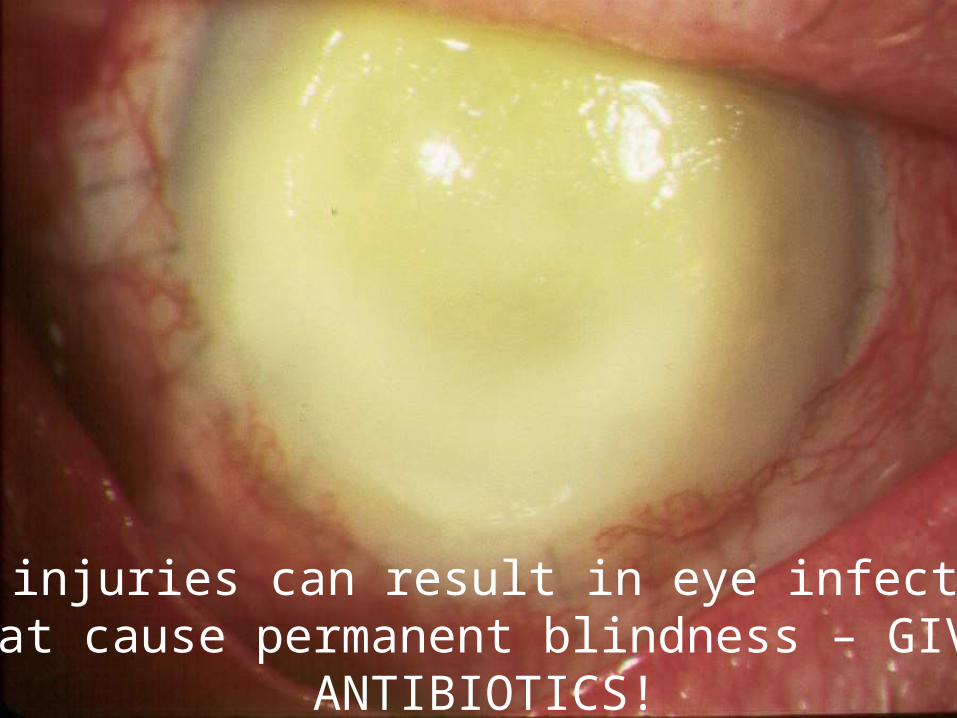
Both injuries can result in eye infections that cause permanent blindness – GIVE
ANTIBIOTICS!

Tactical Field Care Guidelines
10. Monitoring
Pulse oximetry should be available as an adjunct to clinical monitoring. All individuals with moderate/severe TBI should be monitored with pulse oximetry. Readings may be misleading in the settings of shock or marked hypothermia.
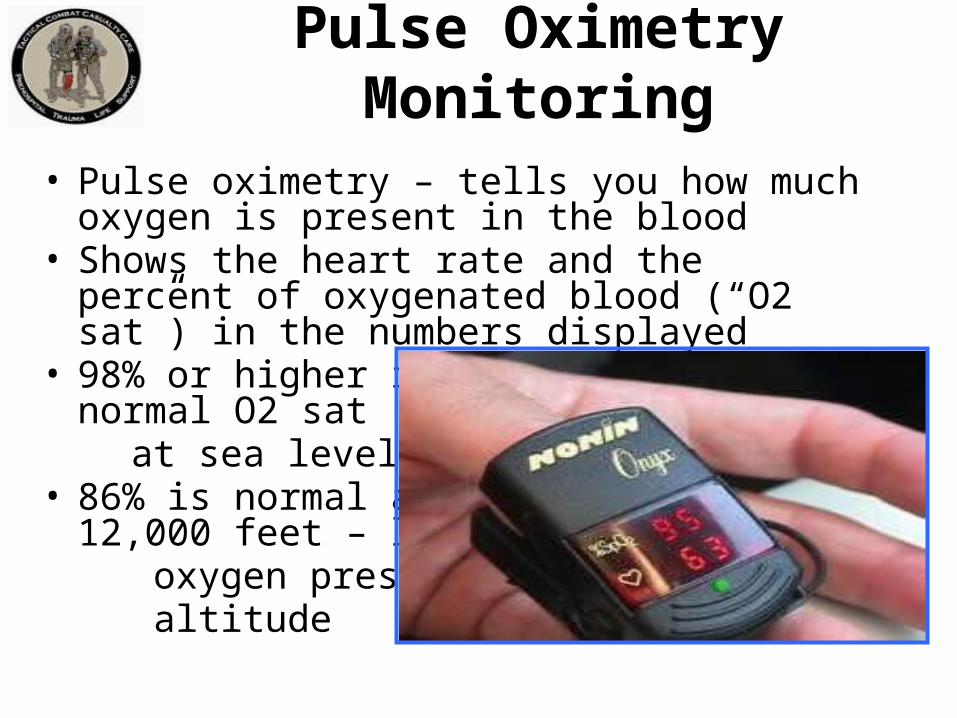
• Pulse oximetry – tells you how much oxygen is present in the blood
• Shows the heart rate and the percent of oxygenated blood (“O2 sat”) in the numbers displayed
• 98% or higher is normal O2 sat
at sea level.• 86% is normal at
12,000 feet – lower oxygen pressure at altitude
Pulse Oximetry Monitoring

Consider using a pulse ox for these types of casualties:• TBI – good O2 sat very important for a good outcome• Unconscious• Penetrating chest
trauma• Chest contusion• Severe blast trauma
Pulse Oximetry Monitoring

Oxygen saturation values may be inaccurate in the presence of:• Hypothermia• Shock• Carbon monoxide
poisoning• Very high ambient light
levels
Pulse Oximetry Monitoring

11. Inspect and dress known wounds.
12. Check for additional wounds.
Tactical Field Care Guidelines

Triple-Option Analgesia
The simplified triple-option approach to battlefield analgesia has three primary goals: 1. To preserve the fighting force 2. To achieve rapid and maximal
relief of pain from combat wounds 3. To minimize the likelihood of
adverse effects on the casualty from the analgesic medication used

Triple-Option Analgesia
13. Tactical Field and TACEVAC Care• Analgesia on the battlefield should
generally be achieved using one of three options depending on the level of the casualty’s pain and the nature of his or her injuries.
Triple-Option AnalgesiaOption 1
Tactical Field and TACEVAC Care:
1) Mild to Moderate Pain
Casualty is still able to fight
- TCCC Combat pill pack:
- Tylenol - 650-mg bilayer caplet, 2
PO every 8 hours
- Meloxicam - 15 mg PO once a day

Triple-Option AnalgesiaOption 2
2) Moderate to Severe Pain Casualty IS NOT in shock or respiratory distress AND Casualty IS NOT at significant risk of developing
either condition - Oral transmucosal fentanyl citrate
(OTFC) 800 ug - Place lozenge between the cheek
and the gum - Do not chew the lozenge
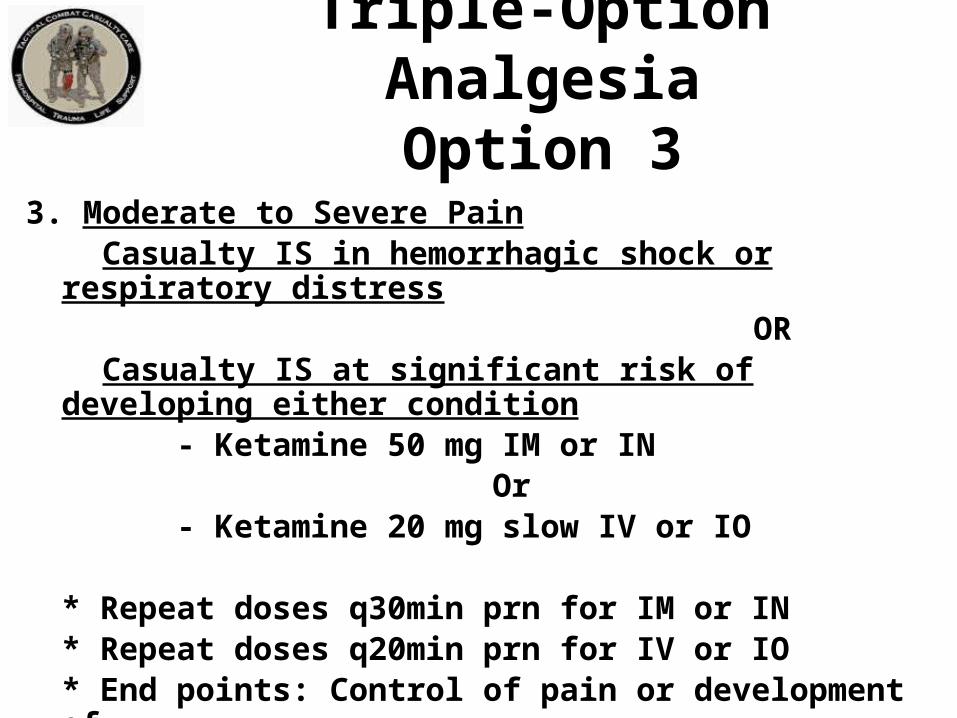
Triple-Option AnalgesiaOption 3
3. Moderate to Severe Pain Casualty IS in hemorrhagic shock or respiratory distress OR Casualty IS at significant risk of developing either condition
- Ketamine 50 mg IM or IN Or
- Ketamine 20 mg slow IV or IO
* Repeat doses q30min prn for IM or IN* Repeat doses q20min prn for IV or IO* End points: Control of pain or development of
nystagmus (rhythmic back-and-forth movement of the eyes)

Analgesia Notes
a. Casualties may need to be disarmed after
being given OTFC or ketamine.
b. Document a mental status exam using the AVPU method prior to administering opioids or ketamine.
c. For all casualties given opiods or ketamine – monitor airway, breathing, and circulation closely
Analgesia Notes
d. Directions for administering OTFC: - Recommend taping lozenge-on-a-stick to casualty’s finger as an added safety measure OR utilizing a safety pin and rubber band to attach the lozenge (under tension) to the casualty’s uniform or plate carrier. - Reassess in 15 minutes - Add second lozenge, in other cheek, as necessary to control severe pain - Monitor for respiratory depression

Analgesia Notes
e. IV Morphine is an alternative to OTFC if IV access has been obtained
- 5 mg IV/IO
- Reassess in 10 minutes.
- Repeat dose every 10 minutes as
necessary to control severe pain.
- Monitor for respiratory depression

Analgesia Notes
f. Naloxone (0.4 mg IV or IM) should be available
when using opioid analgesics.
g. Both ketamine and OTFC have the potential to
worsen severe TBI. The combat medic, corpsman,
or PJ must consider this fact in his or her
analgesic decision, but if the casualty is able to
complain of pain, then the TBI is likely not severe
enough to preclude the use of ketamine or OTFC.

Analgesia Notes
h. Eye injury does not preclude the use of
ketamine. The risk of additional damage to
the eye from using ketamine is low and
maximizing the casualty’s chance for
survival takes precedence if the casualty is
in shock or respiratory distress or at
significant risk for either.

Analgesia Notes
i. Ketamine may be a useful adjunct to reduce the amount of opioids required to provide effective pain relief. It is safe to give ketamine to a casualty who has previously received morphine or OTFC. IV Ketamine should be given over 1 minute.j. If respirations are noted to be reduced after using opioids or ketamine, provide ventilatory support with a bag-valve-mask or mouth-to-mask ventilations.

Analgesia Notes
k. Promethazine, 25 mg IV/IM/IO every 6
hours may be given as needed for nausea or vomiting.
l. Reassess – reassess – reassess!

Additional Points on Battlefield Analgesia

Pain Control – Fentanyl Lozenge
• Does not require IV/IO access• Able to be administered quickly
– Oral transmucosal fentanyl
citrate, 800 µg (between cheek and gum)– VERY FAST-ACTING; WORKS ALMOST
AS FAST AS IV MORPHINE– VERY POTENT PAIN RELIEF

Pain Control – Fentanyl Lozenge
Safety Note:• There is an FDA Safety Warning regarding the use of fentanyl lozenges in individuals who are not narcotic tolerant.• Multiple studies have demonstrated safety when
used at the recommended dosing levels.• Fentanyl lozenges have a well-documented
safety record in Afghanistan and Iraq. BUT NOTE:• DON’T USE TWO WHEN ONE WILL DO!

Ketamine
• At lower doses, potent analgesia and mild sedation• At higher doses, dissociative anesthesia and moderate
to deep sedation• Unique among anesthetics because pharyngeal-
laryngeal reflexes are maintained• Cardiac function is stimulated rather than depressed• Less risk of respiratory depression than morphine and
fentanyl• Works reliably by multiple routes
– IM, intranasal, IV, IO

Ketamine
• Ketamine is recommended for battlefield analgesia in:– The Military Advanced Regional Aesthesia
and Analgesia handbook– USSOCOM Tactical Trauma Protocols– Ranger Medic Handbook– Pararescue Procedures Handbook– Single agent surgical anesthesia in austere
settings and developing countries

Ketamine - Safety
• Very favorable safety profile• Few, if any, deaths attributed to ketamine as a
single agent• FDA Insert:
– "Ketamine has a wide margin of safety; several instances of unintentional administration of overdoses of ketamine (up to ten times that usually required) have been followed by prolonged but complete recovery.”

Ketamine - Side Effects
• Respiratory depression and apnea can occur if IV ketamine is administered too rapidly.
• Providing several breaths via bag-valve-mask ventilation is typically successful in restoring normal breathing.

Pain Medications – Key Points
• Aspirin, Motrin, Toradol, and other nonsteroidal anti-inflammatory medicines (NSAIDS) other than Mobic should be avoided while in a combat zone because they interfere with blood clotting.
• Aspirin, Motrin, and similar drugs inhibit platelet function for approximately 7-10 days after the last dose.
• You definitely want to have your platelets working normally if you get shot.
• Mobic and Tylenol DO NOT interfere with platelet function – this is the primary feature that makes them the non-narcotic pain medications of choice.
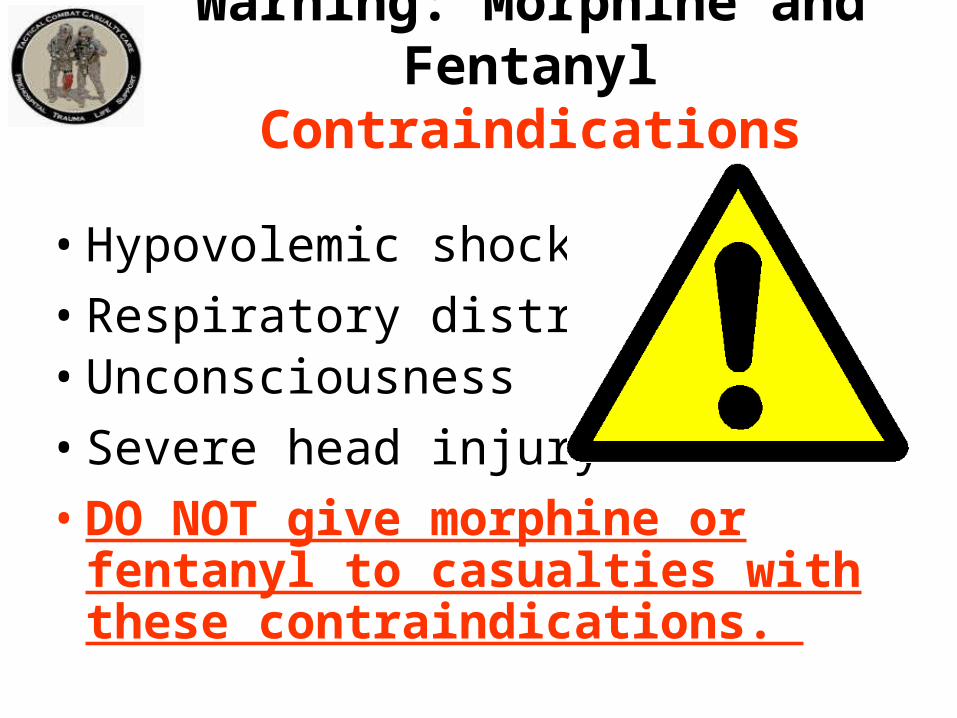
Warning: Morphine and Fentanyl Contraindications
• Hypovolemic shock
• Respiratory distress• Unconsciousness
• Severe head injury
• DO NOT give morphine or fentanyl to casualties with these contraindications.

Warning: Opioids and Benzos
• Ketamine can safely be given
after a fentanyl lozenge
• Some practitioners use
benzodiazepine medications
such as midazolam to avoid
ketamine side effects BUT
• Midazolam may cause respiratory depression, especially when used with opioids
• Avoid giving midazolam to casualties who have previously gotten fentanyl lozenges or morphine

Questions?

Tactical Field Care Guidelines
14. Splint fractures and recheck pulse.

Fractures:Open or Closed
• Open Fracture – associated with an overlying skin wound
• Closed Fracture – no overlying skin wound
Open fracture Closed fracture

Clues to aClosed Fracture
• Trauma with significant pain AND
• Marked swelling
• Audible or perceived snap
• Different length or shape of limb
• Loss of pulse or sensation distally
• Crepitus (“crunchy” sound)

Splinting Objectives
• Prevent further injury• Protect blood vessels and nerves
- Check pulse before and after splinting• Make casualty more comfortable

• Check for other injuries
• Use rigid or bulky materials• Try to pad or wrap if using rigid splint• Secure splint with ace wrap, cravats, belts,
duct tape
• Try to splint before moving casualty
Principles of Splinting

• Minimize manipulation of extremity before splinting
• Incorporate joint above and below
• Arm fractures can be splinted to shirt using sleeve
• Consider traction splinting
for mid-shaft femur fractures
• Check distal pulse and skin
color before and after splinting
Principles of Splinting

Things to Avoid in Splinting
• Manipulating the fracture too much and damaging blood vessels or nerves
• Wrapping the splint too tight and cutting off circulation below the splint

Commercial Splints

Field-Expedient Splint Materials
• Shirt sleeves/safety pins
• Weapons
• Boards
• Boxes
• Tree limbs
• ThermaRest pad

Don’t Forget!
Pulse, motor and sensory checks before and after splinting!

Splinting Practical

Tactical Field Care Guidelines
15. Antibiotics: recommended for all open combat
wounds:
a. If able to take PO meds:
- Moxifloxacin, 400 mg PO one a day
b. If unable to take PO (shock, unconsciousness):
- Cefotetan, 2 g IV (slow push over 3-5 minutes)
or IM, every 12 hours
or
- Ertapenem, 1 g IV/IM once a day

Outcomes: Without Battlefield Antibiotics
• Mogadishu 1993• Casualties: 58• Wound Infections: 16• Infection rate: 28%• Time from wounding to Level II care – 15 hrs.
Mabry et alJ Trauma 2000

Tarpey – AMEDD J 2005: – 32 casualties with open wounds– All received battlefield antibiotics– None developed wound infections– Used TCCC recommendations modified by
availability:• Levofloxacin for an oral antibiotic• IV cefazolin for extremity injuries• IV ceftriaxone for abdominal injuries.
Outcomes: With Battlefield Antibiotics

• MSG Ted Westmoreland• Special Operations Medical Association
presentation 2004• Multiple casualty scenario involving 19 Ranger
and Special Forces WIA as well as 30 Iraqi WIA• 11-hour delay to hospital care• Battlefield antibiotics given• No wound infections developed in this group.
Outcomes: With Battlefield Antibiotics

Recommended for all open wounds on the battlefield!
Battlefield Antibiotics

If casualty can take PO meds• Moxifloxacin 400 mg, one tablet daily
– Broad spectrum – kills most bacteria– Few side effects– Take as soon as possible after life-threatening
conditions have been addressed– Delays in antibiotic administration increase the
risk of wound infections
Battlefield Antibiotics

Combat Pill Pack
Mobic 15mgTylenol ER 650mg, 2 capletsMoxifloxacin 400mg

• Casualties who cannot take PO meds: – Ertapenem 1 gm IV/IM once a day
• IM should be diluted with lidocaine
(1 gm vial ertapenem with 3.2cc lidocaine without epinephrine)
• IV requires a 30-minute infusion time• NOTE: Cefotetan is also a good
alternative, but has been more difficult
to obtain through supply channels
Battlefield Antibiotics

Medication Allergies• Screen your units for drug allergies!• Patients with allergies to aspirin or other
non-steroidal anti-inflammatory drugs should not use Mobic.
• Allergic reactions to Tylenol are uncommon.
• Patients with allergies to flouroquinolones, penicillins, or cephalosporins may need alternate antibiotics which should be selected by unit medical personnel during the pre-deployment phase. Check with your unit physician if unsure.

Tactical Field Care Guidelines
16. Burns
a. Facial burns, especially those that occur in closed spaces, may be associated with inhalation injury. Aggressively monitor airway status and oxygen saturation in such patients and consider early surgical airway for respiratory distress or oxygen desaturation.
b. Estimate total body surface area (TBSA) burned to the nearest 10% using the Rule of Nines. (see third slide)

Superficial burn“First Degree”
Partial thickness burn“Second degree”
Degrees of Burns

Full-thickness burn“Third degree”
Deep(subdermal) burn“Fourth-degree”
Degrees of Burns

Rule of Nines for Calculating Burn Area
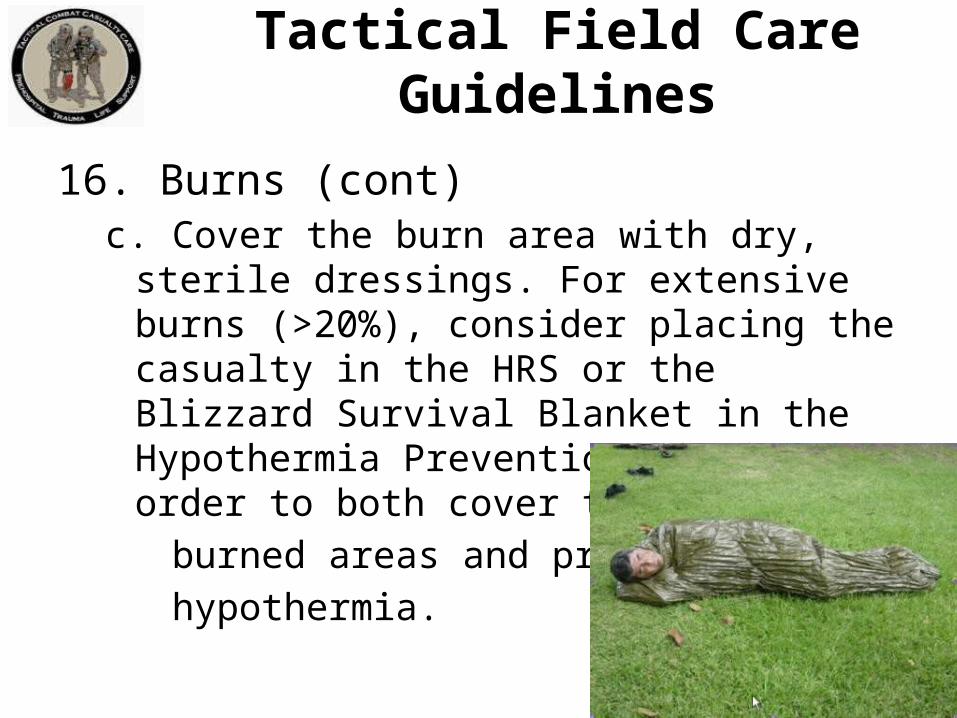
16. Burns (cont)c. Cover the burn area with dry, sterile dressings. For
extensive burns (>20%), consider placing the casualty in the HRS or the Blizzard Survival Blanket in the Hypothermia Prevention Kit in order to both cover the
burned areas and prevent
hypothermia.
Tactical Field Care Guidelines
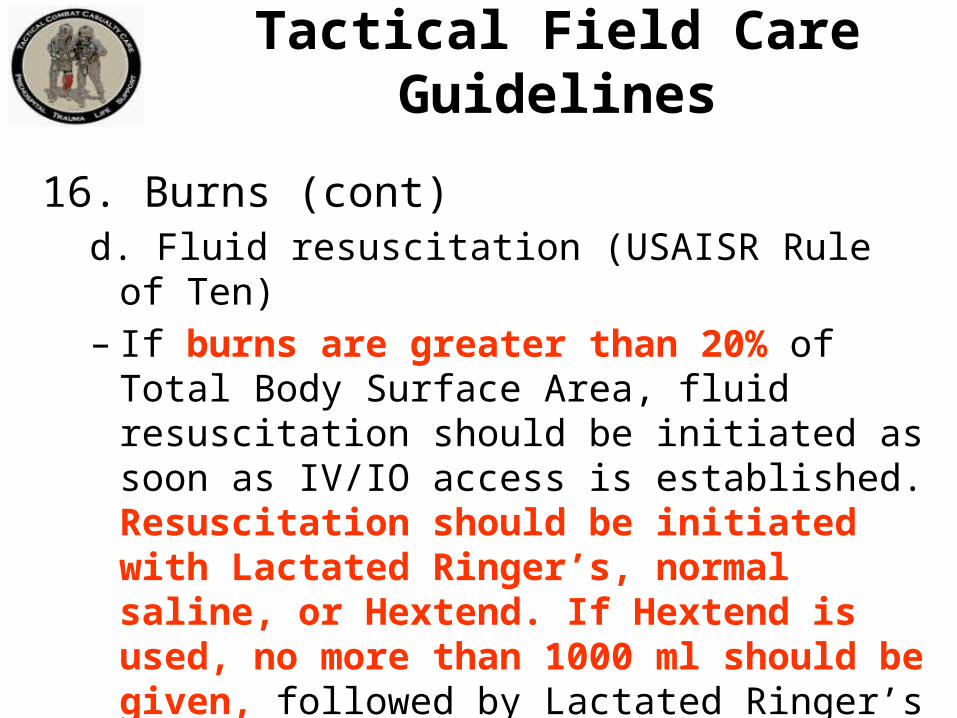
16. Burns (cont) d. Fluid resuscitation (USAISR Rule of Ten)– If burns are greater than 20% of Total Body
Surface Area, fluid resuscitation should be initiated as soon as IV/IO access is established. Resuscitation should be initiated with Lactated Ringer’s, normal saline, or Hextend. If Hextend is used, no more than 1000 ml should be given, followed by Lactated Ringer’s or normal saline as needed.
Tactical Field Care Guidelines

16. Burns (cont)– Initial IV/IO fluid rate is calculated as %TBSA x
10cc/hr for adults weighing 40-80 kg.– For every 10 kg ABOVE 80 kg, increase initial rate
by 100 ml/hr.– If hemorrhagic shock is also present, resuscitation for
hemorrhagic shock takes precedence over resuscitation for burn shock. Administer IV/IO fluids per the TCCC Guidelines in Section 7.
Tactical Field Care Guidelines
16. Burns (cont)
e. Analgesia in accordance with TCCC Guidelines in Section 13 may be administered to treat burn pain.
f. Prehospital antibiotic therapy is not indicated solely for burns, but antibiotics should be given per TCCC guidelines in Section 15 if indicated to prevent infection in penetrating wounds.
Tactical Field Care Guidelines

16. Burns (cont)
g. All TCCC interventions can be performed on or through burned skin in a burn casualty.
These casualties are “Trauma
casualties with burns” - not the other
way around
US Army ISR Burn Center
Tactical Field Care Guidelines

17. Communicate with the casualty if possible.
- Encourage; reassure
- Explain care
Tactical Field Care Guidelines

18. Cardiopulmonary resuscitation (CPR)
Resuscitation on the battlefield for victims of blast orpenetrating trauma who have no pulse, no ventilations,and no other signs of life will not be successful andshould not be attempted. However, casualties with torso trauma or polytrauma who have no pulse or respirations during TFC should have bilateral needle decompression performed to ensure they do not have a tension pneumothorax prior to discontinuation of care. The procedure is the same as described in section 3 above.
Tactical Field Care Guidelines
NO battlefield CPR
CPR

• 138 trauma patients with prehospital cardiac arrest and in whom resuscitation was attempted.
• No survivors• Authors recommended that trauma patients in
cardiopulmonary arrest not be transported emergently to a trauma center even in a civilian setting due to large economic cost of treatment without a significant chance for survival.
Rosemurgy et al. J Trauma 1993
CPR in Civilian Trauma

• CPR performers may get killed• Mission gets delayed• Casualty stays dead
The Cost of AttemptingCPR on the Battlefield

CPR on the Battlefield(Ranger Airfield Operation
in Grenada)
• Airfield seizure operation• Ranger shot in the head by sniper• No pulse or respirations• CPR attempts unsuccessful• Operation delayed while CPR performed• Ranger PA finally intervened: “Stop CPR
and move out!”

Only in the case of cardiac arrests from: – Hypothermia– Near-drowning– Electrocution – Other non-traumatic causes
should CPR be considered prior to the
Tactical Evacuation Care phase.
CPR in Tactical Settings
Traumatic Cardiac Arrest in TCCC
• Mounted IED attack in March 2011• Casualty unconscious from closed head trauma• Lost vital signs prehospital• CPR on arrival at hospital• Bilateral needle decompression done in ER• Rush of air from left-sided tension pneumothorax• Return of vital signs – life saved• This procedure is routinely done by Emergency Medicine
physicians and Trauma Surgeons for trauma victims who lose their pulse and heart rate in the hospital Emergency Department.

Questions?
Tactical Field Care Guidelines
19. Documentation of Care:
Document clinical assessments, treatments rendered, and changes in the casualty’s status on a TCCC Casualty Card (DD Form 1380). Forward this information with the casualty to the next level of care.

• Designed by combat medics• Used in combat since 2002• Replacing DD Form 1380• Only essential information• Can be used by hospital to document
injuries sustained and field treatments rendered
• Heavy-duty waterproof or laminated paper
TCCC Casualty Card

Kotwal et al - 2011
• Eliminating Preventable Death on the Battlefield• In order to know if we are doing the right thing, we
must first know what we did• This paper was enabled by the Ranger TCCC Card

• This card is based on the principles of TCCC.
• It addresses the initial lifesaving care provided at the point of wounding.
• Filled out by whoever is caring for the casualty.
• Its format is simple with a circle or “X” in the appropriate block.
TCCC Casualty Card

TCCC Casualty
Card 2014
Front

TCCC Casualty
Card 2014
Back

TCCC Casualty Card
Being staffed as the new DD 1380 by DHA-MEDLOG, the services, and
Health Affairs

Instructions
• Follow the instructions on the following slides for how to use this form.
• This casualty card should be in each Individual First Aid Kit.
• Use an indelible marker to fill it out.• Attach it to the casualty’s belt loop, or place
it in their upper left sleeve, or the left trouser cargo pocket.
• Include as much information as you can.

• Record each specific intervention in each category.
• If you are not sure what to do, the card will prompt you where to go next.
• Simply circle the intervention you performed.
• Explain any action you want clarified in the remarks area.
Documentation
• The card does not imply that every casualty needs all of these interventions.
• You may not be able to perform all of the interventions that the casualty needs.
• The next person caring for the casualty can add to the interventions performed.
• This card can be filled out in less than two minutes.
• It is important that we document the care given to the casualty.
Documentation

TCCC Card Abbreviations
• DTG = Date-Time Group (e.g. – 160010Oct2009) • NBC = Nuclear, Biological, Chemical• TQ = Tourniquet• GSW = Gunshot Wound• MVA = Motor Vehicle Accident• AVPU = Alert, Verbal stimulus, Painful stimulus, Unresponsive• Cric = Cricothyroidotomy • NeedleD = Needle decompression• IV = Intravenous• IO = Intraosseous• NS = Normal Saline• LR = Lactated Ringers• ABX = Antibiotics

• This electronic AAR is intended to be completed when the first responder returns to base.
• Somewhat more complete than the TCCC Casualty Card
• TCCC AAR should be submitted to the Joint Theater Trauma System Director within 72 hours of casualty evacuation
• Both the TCCC Casualty Card and the TCCC AAR are required by USFOR-A FRAGO 13-139
TCCC After Action Report

TCCC After-
Action Report
March 2014
Questions ?

• Reassess regularly.• Prepare for transport.• Minimize removal of uniform and protective
gear, but get the job done.• Replace body armor after care, or at least keep
it with the casualty. He or she may need it again if there is additional contact.
Further Elements of Tactical Field Care

Casualty movement in TFC may be better accomplished using litters.
Further Elements of Tactical Field Care

Litter Carry Video
• Secure the casualty on the litter
• Bring his weapon

• Still in hazardous environment• Limited medical resources• Hemorrhage control• Airway management• Breathing• Transition from tourniquet to another form
of hemorrhage control when appropriate• Hypotensive resuscitation with Hextend for
hemorrhagic shock• Hypothermia prevention
Summary of Key Points

• Shield and antibiotics for penetrating eye injuries
• Pain control• Antibiotics• Reassure casualties• No CPR• Documentation of care
Summary of Key Points

Questions?
Wear your body armor!

This section is adapted from:Kotwal, R., Montgomery, H. (2011). TCCC Casualty Response Planning. In N. McSwain, J. Salamone, P. Pons, B. Butler & S. Giebner (Eds.), PHTLS Prehospital Trauma Life Support: Military Version, Seventh Edition (pp. 719-735). St. Louis: Elsevier.
Casualty Collection PointOperations
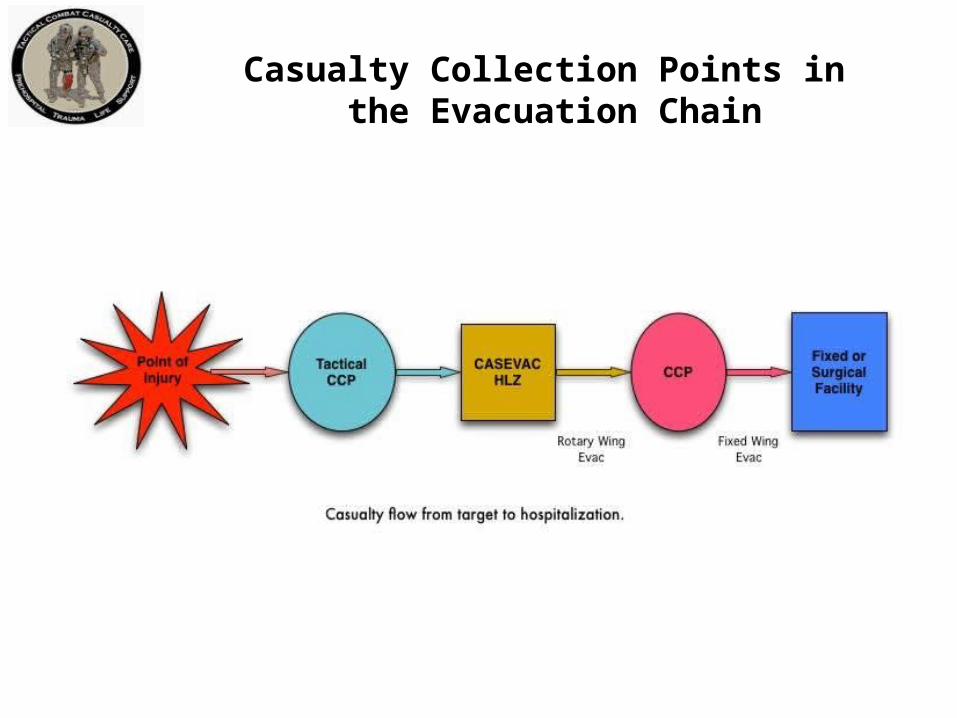
Casualty Collection Points in the Evacuation Chain

CCP Site Selection
• Should be reasonably close to the fight• Located near areas where casualties are likely to occur• Must provide cover and concealment from the enemy • Inside a building or on hardstand (an exclusive CCP
building limits confusion)• Should have access to evacuation routes (foot, vehicle,
aircraft)• Proximal to “Lines of Drift” or paths across terrain that
are the most likely to be used when going from one place to another.
(continued)

• Adjacent to Tactical Choke Points (breeches, HLZ’s, etc…)
• Avoid natural or enemy choke points• Choose an area providing passive security
(inside the perimeter)• Good drainage• Accessible to evacuation assets• Expandable if casualty load increases
CCP Site Selection

CCP Operational Guidelines
• Typically, a First Sergeant (1SG) or Platoon Sergeant (PSG), or equivalent, is given responsibility for casualty flow and everything outside the CCP:– Provides for CCP structure and organization (color
coded with chemlights)– Maintains command & control and battlefield
situational awareness– Controls aid & litter teams, and provides security
(continued)

• First Sergeant (1SG), Platoon Sergeant (PSG) or equivalent:– Strips, bags, tags, organizes, and maintains
casualties’ tactical gear outside of treatment area – Accountable for tracking casualties and equipment
into and out of CCP and reports to higher command
– Moves casualties through CCP entrance/exit choke point which should be marked with an IR chemlight
CCP Operational Guidelines

• Medical personnel are responsible for everything inside the CCP– Triage officer sorts and organizes casualties at
choke point into appropriate treatment categories– Medical officers and medics organize medical
equipment and supplies and treat casualties– EMTs, First Responders, and Aid &Litter Teams
assist with treatment and packaging of casualties
CCP Operational Guidelines

• Casualties with minor injuries should remain with original element or assist with CCP security if possible
• Those killed in action should remain with original element
CCP Operational Guidelines

CCP Operational Guidelines

Questions?
Management of Wounded Hostile Combatants

Objective
• DESCRIBE the considerations in rendering trauma care to wounded hostile combatants.

• No medical care during Care Under Fire• Though wounded, enemy personnel may still
act as hostile combatants– May employ any weapons or detonate any
ordnance they are carrying• Enemy casualties are hostile combatants
until they:– Indicate surrender– Drop all weapons– Are proven to no longer pose a threat
Care for Wounded Hostile Combatants

• Combat medical personnel should not attempt to provide medical care until sure that wounded hostile combatant has been rendered safe by other members of the unit.
• Restrain with flex cuffs or other devices if not already done.
• Search for weapons and/or ordnance. • Silence to prevent communication with
other hostile combatants.
Care for Wounded Hostile Combatants

• Segregate from other captured hostile combatants.
• Safeguard from further injury.• Care as per TFC guidelines for U.S.
forces after above steps are accomplished.
• Speed to the rear as medically and tactically feasible
Care for Wounded Hostile Combatants

QUESTIONS ?

Preparing for Evacuation

NATO/ISAF Standard Evacuation Categories
International Security Assistance Force
SOP #312:• Governs operations in Afghanistan • Follows NATO doctrine • Specifies three categories for casualty
evacuation:• A - Urgent• B - Priority• C - Routine

• CAT A – Urgent (denotes a critical, life-threatening injury)
– Significant injuries from a dismounted IED attack– Gunshot wound or penetrating shrapnel to chest,
abdomen or pelvis– Any casualty with ongoing airway difficulty– Any casualty with ongoing respiratory difficulty– Unconscious casualty
NATO/ISAF Standard Evacuation Categories

• CAT A – Urgent (continued)
– Casualty with known or suspected spinal injury– Casualty in shock – Casualty with bleeding that is difficult to control– Moderate/Severe TBI– Burns greater than 20% Total Body Surface Area
NATO/ISAF Standard Evacuation Categories

• CAT B – Priority (serious injury)– Isolated, open extremity fracture with bleeding
controlled– Any casualty with a tourniquet in place– Penetrating or other serious eye injury– Significant soft tissue injury without major
bleeding– Extremity injury with absent distal pulses – Burns 10-20% Total Body Surface Area
NATO/ISAF Standard Evacuation Categories
• CAT C – Routine (mild to moderate injury)
– Concussion (mild TBI)
– Gunshot wound to extremity - bleeding controlled without tourniquet
– Minor soft tissue shrapnel injury
– Closed fracture with intact distal pulses
– Burns < 10% Total Body Surface Area
NATO/ISAF Standard Evacuation Categories

Tactical Evacuation:Nine Rules of Thumb

TACEVAC 9 Rules of Thumb: Assumptions
• These Rules of Thumb are designed to help the corpsman or medic determine the true urgency for evacuation.
• They assume that the decision is being made at 15-30 minutes after wounding.
• Also that care is being rendered per the TCCC guidelines.
• Most important when there are tactical constraints on evacuation:– Interferes with mission– High risk for team– High risk for TACEVAC platform

Soft tissue injuries are common and may look bad, but usually don’t kill unless associated with shock.
TACEVAC Rule of Thumb #1

Bleeding from most extremity wounds should be controllable with a tourniquet or hemostatic dressing. Evacuation delays should not increase mortality if bleeding is fully controlled.
TACEVAC Rule of Thumb #2

Casualties who are in shock should be evacuated as soon as possible.
Gunshot wound to the abdomen
TACEVAC Rule of Thumb #3

Casualties with penetrating wounds of the chest who have respiratory distress unrelieved by needle decompression of the chest should be evacuated as soon as possible.
TACEVAC Rule of Thumb #4

Casualties with blunt or penetrating trauma of the face associated with airway difficulty should have an immediate airway established and be evacuated as soon as possible.
REMEMBER to let the casualty situp and lean forward if that helps himor her to breathe better!
TACEVAC Rule of Thumb #5

Casualties with blunt or penetrating wounds of the head where there is obvious massive brain damage and unconsciousness are unlikely to survive with or without emergent evacuation.
TACEVAC Rule of Thumb #6

Casualties with blunt or penetrating wounds to the head - where the skull has been penetrated but the casualty is conscious - should be evacuated emergently.
TACEVAC Rule of Thumb #7

Casualties with penetrating wounds of the chest or abdomen who are not in shock at their 15-minute evaluation have a moderate risk of developing late shock from slowly bleeding internal injuries. They should be carefully monitored and evacuated as feasible.
TACEVAC Rule of Thumb #8

TACEVAC Rule of Thumb #9
Casualties with TBI who display “red flag” signs - witnessed loss of consciousness, altered mental status, unequal pupils, seizures, repeated vomiting, visual disturbance, worsening headache, unilateral weakness, disorientation, or abnormal speech – require urgent evacuation to a medical treatment facility.

Required if you want an evacuation from another unit
9-Line Evacuation Request

• Request for resources through tactical aircraft channels.
• NOT a direct medical communication with medical providers
• Significance– Determines tactical resource allocation– DOES NOT convey much useful medical
information
9-Line Evacuation Request

Line 1: Pickup location
Line 2: Radio frequency, call sign and suffix Line 3: Number of casualties by precedence
(evacuation category)
Line 4: Special equipment required
9-Line Evacuation Request

Line 5: Number of casualties by type (litter,
ambulatory)
Line 6: Security at pickup site
Line 7: Method of marking pickup site
9-Line Evacuation Request

Line 8: Casualty’s nationality and status
Line 9: Terrain Description; NBC contamination
if applicable
9-Line Evacuation Request

• Evacuation Categories• Tactical Evacuation Rules of Thumb• 9-Line Evacuation Request
Preparing for EvacuationSummary of Key Points

Questions?

• Recap from Care Under Fire• Your last medical decision during Care
Under Fire:– Placed tourniquet on left stump
• You moved the casualty behind cover and returned fire.
• You provided an update to your mission commander
Convoy IED Scenario

Assumptions in discussing TFC in this scenario:• Effective hostile fire has been suppressed.• Team Leader has directed that the unit will move.• Pre-designated HLZ for helicopter evacuation is
15 minutes away.• Flying time to hospital is 30 minutes.• Ground evacuation time is 3 hours.• Enemy threat to helicopter at HLZ estimated to
be minimal.
Convoy IED Scenario
Next decision (Command Element)?• How to evacuate casualty?
– Helicopter• Longer time delay for ground evacuation• Enemy threat at HLZ acceptable
Convoy IED Scenario

Next decision (Command Element)?• Load first and treat enroute to HLZ or treat
first and load after? – Load and Go – Why?
• Can continue treatment enroute• Avoid potential second attack at ambush
site
Convoy IED Scenario

Casualty is still conscious and has no neck or back pain.
Next decision?– Do you need spinal immobilization?– No
• Not needed unless casualty has neck or back pain– Why?– Low expectation of spinal fracture in the absence of neck
or back pain in a conscious casualty– Speed is critical– NOTE: Casualties who are unconscious from primary
blast trauma should have spinal immobilization if feasible.
Convoy IED Scenario

Ten minutes later, you and the casualty are in a vehicle enroute to HLZ.Next action?• Reassess casualty
– Casualty is now unconscious– No bleeding from first tourniquet site– Other stump noted to have severe bleeding
Convoy IED Scenario

• Next action?– Place tourniquet on 2nd stump
• Next action? – Remove any weapons or ordnance that
the casualty may be carrying.• Next action?
– Place nasopharyngeal airway• Next action?
– Make sure he’s not bleeding heavily elsewhere
– Check for other trauma
Convoy IED Scenario

• Next action?– Establish IV access - need to
resuscitate for shock• Next action?
– Administer 1 gram of tranexamic acid (TXA) in 100 cc NS or LR
– Infuse slowly over 10 minutes
Convoy IED Scenario

• Next action?– Infuse 500cc Hextend
• Next actions– Hypothermia prevention– IV antibiotics– Pulse ox monitoring– Continue to reassess casualty
Convoy IED Scenario

What is your 9-line?Line 1: Grid NS 12345678Line 2: 38.90, Convoy 6Line 3: 1 UrgentLine 4: PRBCs, oxygen, advanced airwayLine 5: 1 litterLine 6: SecureLine 7: VS-17 (Orange Panel)Line 8: U.S. MilitaryLine 9: Flat field
* Some individuals recommend adding a tenth line: the casualty’s vital signs
Convoy IED Scenario

Your convoy has now arrived at the HLZNext steps?• Continue to reassess casualty and prep for helo
transfer– Search casualty for any remaining weapons before
boarding helo– Secure casualty’s personal effects– Document casualty status and treatment
Convoy IED Scenario

Remember
• The TCCC guidelines are not a rigid
protocol.• The tactical environment may require
some modifications to the guidelines.• Think on your feet!

Questions?

Back-Up Slides
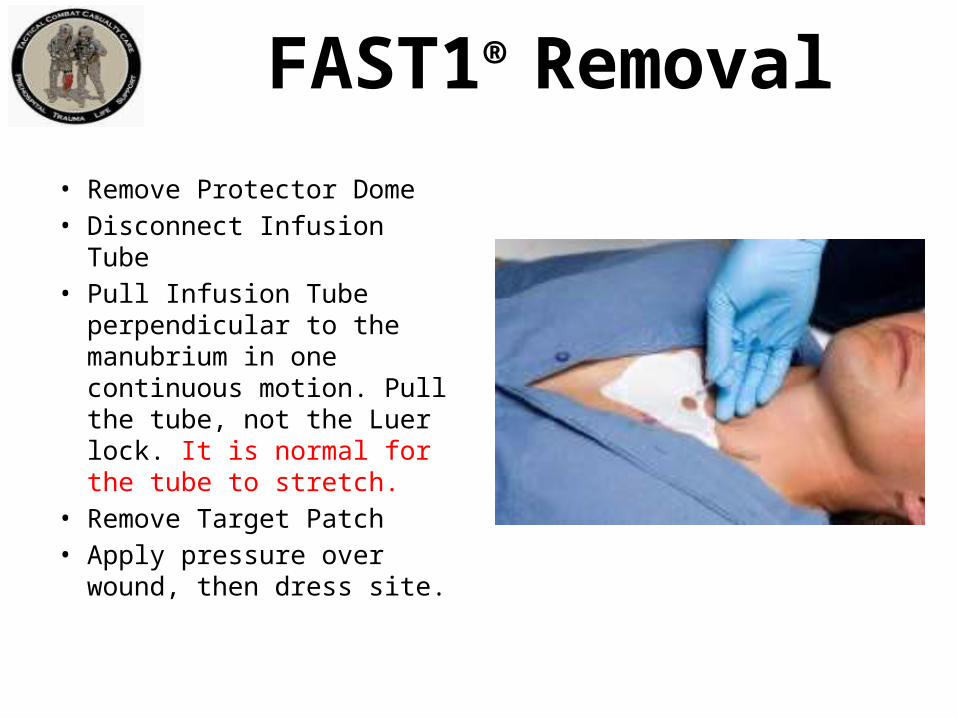
FAST1® Removal
• Remove Protector Dome• Disconnect Infusion Tube• Pull Infusion Tube
perpendicular to the manubrium in one continuous motion. Pull the tube, not the Luer lock. It is normal for the tube to stretch.
• Remove Target Patch• Apply pressure over wound,
then dress site.

Intraosseous Access with theSternal EZ-IO® Needle Set

GREEN = Sternal Access
Sternal Needle/Driver
Limb Needle/Driver
Sternal EZ-IO®

Contraindications:• Fracture of the manubrium• Previous surgical procedure • Manubrial IO within the past 24 – 48 hours • Infection at the insertion site• Inability to locate landmarks or excessive
tissue over the target site
Sternal EZ-IO®

Sternal EZ-IO®

Sternal Notch
Clavicle
Sternal angle (where Manubrium meets Body of Sternum)
Sternal EZ-IO®

Sternal EZ-IO®
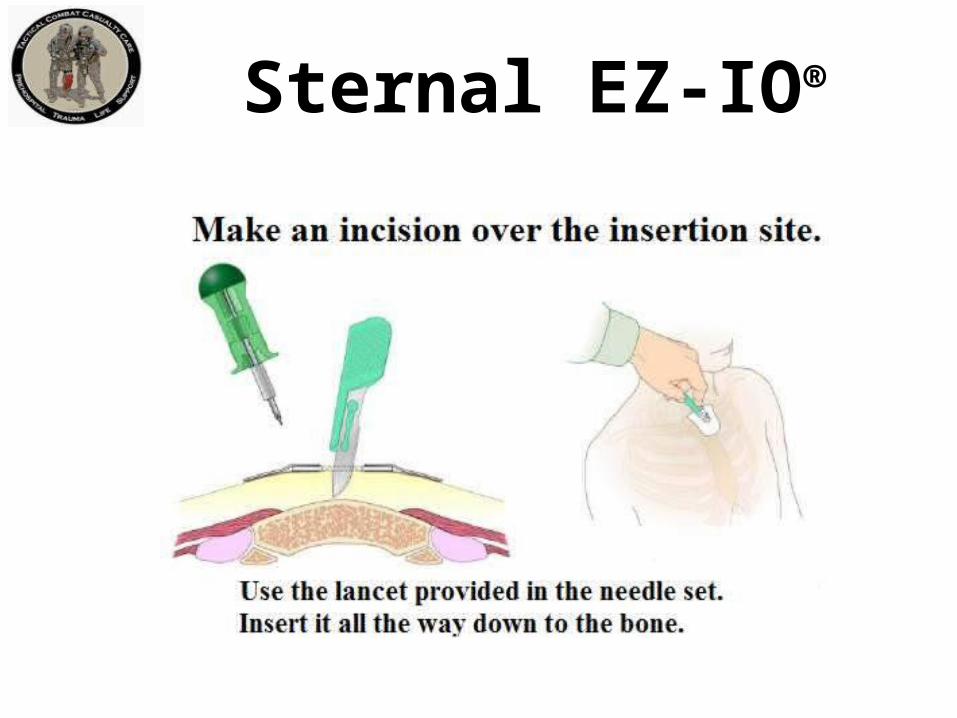
Sternal EZ-IO®

Sternal EZ-IO®

Sternal EZ-IO®

Sternal EZ-IO®

Confirm Catheter Placement
– Firmly seated catheter– Flash of blood or blood
on aspiration*– Pressurized fluids flow
freely– Pharmacologic effects
* May or may not be able to aspirate blood.
Sternal EZ-IO®

Sternal EZ-IO®
Flush the Catheter
•Connect syringe to primed
Extension Set•Flush with 10ml normal saline•Multiple flushes may be
needed•NO FLUSH = NO FLOW

Sternal EZ-IO®
Infuse Fluids with Pressure
• The pressure in the medullary space is about 1/3 of the casualty’s arterial pressure.
• Pressurizing fluids for infusion is required to achieve maximum flow rates.
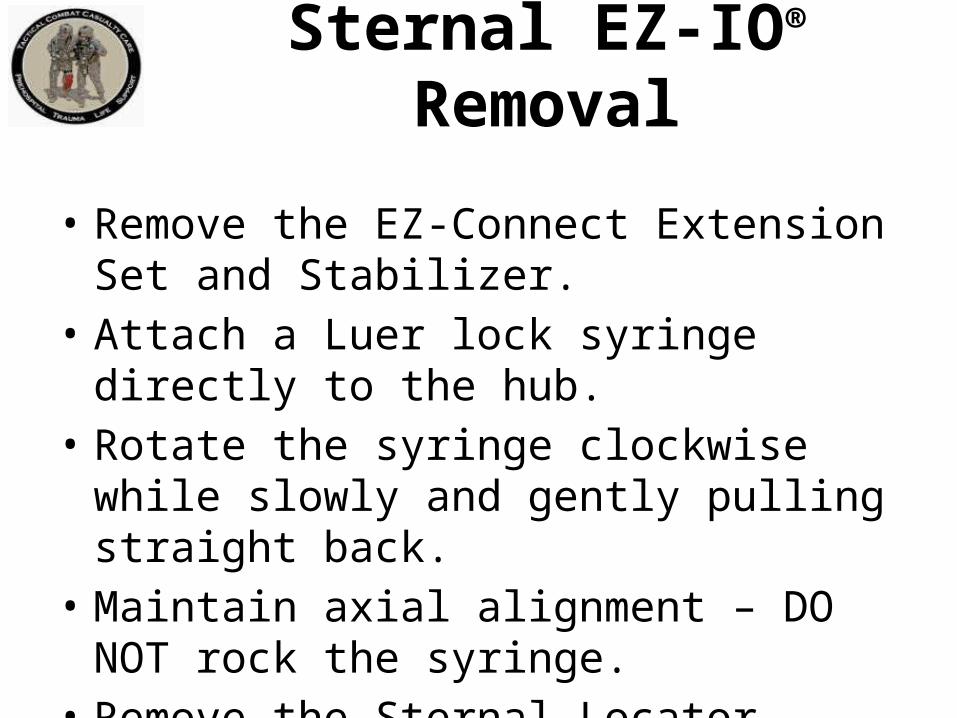
• Remove the EZ-Connect Extension Set and Stabilizer.
• Attach a Luer lock syringe directly to the hub.• Rotate the syringe clockwise while slowly and
gently pulling straight back.• Maintain axial alignment – DO NOT rock the
syringe.• Remove the Sternal Locator.
Sternal EZ-IO® Removal