talend esb development guide - talend real-time open
TRANSCRIPT
Talend ESB DevelopmentGuide
7.3.1Last updated: 2020-02-19
Contents
Copyright........................................................................................................................ 3
Development Environment Setup............................................................................... 4Download Java Development Kit (JDK)...................................................................................................................... 4Download Eclipse IDE for Java EE Developers........................................................................................................4Download Tomcat 7.x (optional).................................................................................................................................. 4Download Maven 3............................................................................................................................................................ 5Install Maven2Eclipse (m2e) Plugin (optional)........................................................................................................6Install soapUI Plugin (optional).................................................................................................................................... 7
Web Services..................................................................................................................8Contract-first development............................................................................................................................................. 8Code-first development..................................................................................................................................................22REST Services.....................................................................................................................................................................30
Camel Routes Overview............................................................................................. 34Use a Camel route........................................................................................................................................................... 34
Talend ESB Services Overview..................................................................................38Service Locator..................................................................................................................................................................38Service Activity Monitoring.......................................................................................................................................... 49

Copyright
Copyright
Adapted for 7.3.1. Supersedes previous releases.
Copyright © 2020 Talend. All rights reserved.
The content of this document is correct at the time of publication.
However, more recent updates may be available in the online version that can be found on TalendHelp Center.
Notices
Talend is a trademark of Talend, Inc.
All brands, product names, company names, trademarks and service marks are the properties of theirrespective owners.
End User License Agreement
The software described in this documentation is provided under Talend 's End User Software andSubscription Agreement ("Agreement") for commercial products. By using the software, you areconsidered to have fully understood and unconditionally accepted all the terms and conditions of theAgreement.
To read the Agreement now, visit http://www.talend.com/legal-terms/us-eula?utm_medium=help&utm_source=help_content
3
Development Environment Setup
Development Environment Setup
Welcome to Talend ESB! This document looks at best practices in developing with Talend ESB, inparticular using Eclipse and Maven as development tools.
While development with the Eclipse IDE is covered within this guide, note the Eclipse-based TalendStudio can also be used instead, as it already includes the development components we'll beconfiguring below.
Different types of web services (JAX-WS and JAX-RS based) will be covered in Web Services on page8, and then we'll explore Camel development in Camel Routes Overview on page 34. Finally,developing with Talend ESB specific services such as Service Activity Monitoring and the ServiceLocator is covered in Talend ESB Services Overview on page 38.
In this chapter we'll look in detail at installing our Eclipse development environment along withassociated tools for development of web services and Camel routes. Note, if you're already workingwith the pre-configured Talend Studio, this process can be skipped.
The following sections in this chapter give details of the software needed.
Download Java Development Kit (JDK)Either Java SE versions 6 or 7 are acceptable and can be obtained from: http://www.oracle.com/technetwork/java/javase/downloads/index.html. As we'll be compiling source files, be sure todownload the JDK and not the JRE version.
Download Eclipse IDE for Java EE DevelopersFrom the Eclipse download page obtain your operating system's version of Eclipse IDE for Java EEDevelopers. Juno is the most recent Eclipse version as the time of this writing, but if you already havethe previous Helios or Indigo versions of Eclipse on your machine that should work fine as well. Afterextracting the application, double-clicking the Eclipse icon located in the Eclipse root directory shouldbring up the IDE; note your specific operating system's version may provide additional convenientoptions (menu items, desktop icons) for activating Eclipse.
After installing, have Eclipse point to the JDK you downloaded in the previous step. This can be doneby selecting menu item: Windows | Preferences and the corresponding Preferences Dialog, selectingJava | Installed JREs from the left-side menu tree.
Download Tomcat 7.x (optional)This guide will show you how to deploy CXF services and Camel routes using Talend ESB's Karaf-based Container. However for testing and debugging it can be helpful to be aware of how to deployon the servlet container Apache Tomcat. Steps involved to deploy a Tomcat installation on yourcomputer:
• Download and uncompress the latest Tomcat release version from the Apache Tomcat site.• Create a $CATALINA_HOME operating system environment variable pointing to the base directory
of Tomcat, and add the $CATALINA_HOME/bin directory to your system path so you can easilystart Tomcat from any system folder.
4
Development Environment Setup
• You'll need to edit the $CATALINA_HOME/conf/tomcat-users.xml file to create an administrativeuser for deploying and undeploying web applications. Define two new roles, manager-script>and manager-gui and add them to either a new user or any existing user, e.g.:
<tomcat-users> <role rolename="manager-script"/> <role rolename="manager-gui"/> <user username="tomcat" password="tomcat" roles="manager-script,manager-gui"/> ...other users and roles...</tomcat-users>
Of course, for a production deployment you'll want to use a username and password differentfrom the easy-to-guess ones above.
• Next let's test your Tomcat installation. Run sh startup.sh (Linux) or startup.bat(Windows) and navigate to http://localhost:8080 from a browser. You should see theTomcat welcome screen indicating a successful activation. Next, shut down Tomcat by runningthe sh shutdown.sh or shutdown.bat commands as appropriate.
Download Maven 3Maven is a very popular project management tool that can be run either from a command-linewindow using simple text commands or directly from the Eclipse IDE itself, using the Maven2Eclipse(m2e) plugin. The Maven Users Center provides a nice overview of working with this tool. Installationsteps:
• Download and uncompress the latest Maven release version from the Apache Maven site.• Create a $MAVEN_HOME operating system environment variable pointing to the base directory of
Maven, and add the $MAVEN_HOME/bin directory to your system path so you can easily executeMaven commands from any command-line directory.
• Add the M2_REPO classpath variable to your Eclipse IDE. Maven downloads source code JARsneeded by your projects to your computer, storing them in what is called your local Mavenrepository, normally the hidden .m2\repository folder in your home directory (i.e., under /home/myusername for Linux or C:\Documents and Settings\myusername on Windows).Eclipse needs to know this location to load dependencies. To add this variable, start Eclipse, andfrom the menu bar, select Window | Preferences | Java | Build Path | Classpath Variables and definean M2_REPO variable pointing to your local repository folder.
• If you installed Tomcat in the previous step, you'll want to edit the $MAVEN_HOME/conf/settings.xml file to add in the Tomcat username and password you configured above, i.e.:
<servers> <server> <id>myTomcat</id> <username>tomcat</username> <password>tomcat</password> </server> ... other server configurations ...</servers>
The myTomcat ID above (any other ID can also be used) is used within Maven pom.xml filesto identify the specific server username/password combination when deploying applicationsto various application servers, in this case Tomcat. As an alternative, this information can bedirectly configured within each Maven project's pom.xml file whenever you will be doing Tomcatdeployment.
5
Development Environment Setup
• Next let's test your Maven installation. Run mvn version from any command-line prompt. Youshould see Maven respond providing the Maven version you downloaded, the JDK version, andvarious other associated information.
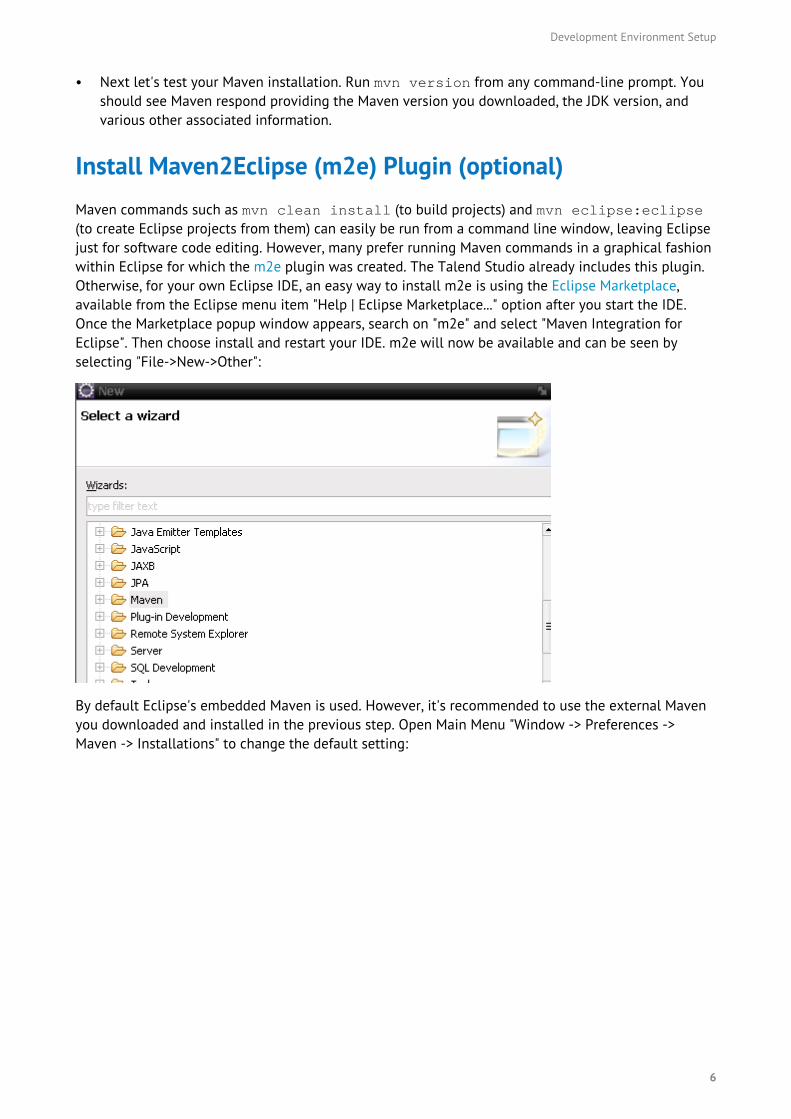
Install Maven2Eclipse (m2e) Plugin (optional)Maven commands such as mvn clean install (to build projects) and mvn eclipse:eclipse(to create Eclipse projects from them) can easily be run from a command line window, leaving Eclipsejust for software code editing. However, many prefer running Maven commands in a graphical fashionwithin Eclipse for which the m2e plugin was created. The Talend Studio already includes this plugin.Otherwise, for your own Eclipse IDE, an easy way to install m2e is using the Eclipse Marketplace,available from the Eclipse menu item "Help | Eclipse Marketplace..." option after you start the IDE.Once the Marketplace popup window appears, search on "m2e" and select "Maven Integration forEclipse". Then choose install and restart your IDE. m2e will now be available and can be seen byselecting "File->New->Other":
By default Eclipse's embedded Maven is used. However, it's recommended to use the external Mavenyou downloaded and installed in the previous step. Open Main Menu "Window -> Preferences ->Maven -> Installations" to change the default setting:
6

Development Environment Setup
Click Add, specify the path of where you installed Maven, and click Ok
Install soapUI Plugin (optional)The soapUI SOAP/REST request/response tool provides an Eclipse plugin for convenient usage of thistool from the IDE. The Talend Studio already includes this plugin by default. If you're instead using astandard Eclipse download, see the soapUI plugin page for instructions on how to install this tool intoyour IDE. You may alternatively find it preferable to run the standalone version of soapUI outside ofEclipse, either their free Open Source version (fine for the purposes of this guide) or their enhancedcommercial soapUI Pro product.
7
Web Services
Web Services
Talend ESB helps you to create new web services or to service-enable your existing applications andinterfaces for use with the Web, using technologies based on Apache CXF.
CXF supports all important web services standards including the following specifications:
• the Java API for XML Web Services (JAX-WS)• the Java API for RESTful Web Services (REST)
JAX-WS defines annotations that allow you to define how your standalone Java application should berepresented in a web services context.
There are three main styles of web services development available with CXF:
1. Contract-first development:
Another JAX-WS option, this time a WSDL (Web Services Description Language) file is used todefine the operations and types a web service provides. This file is often referred to as the webservices contract, and in order to communicate with a web service, you must satisfy the contract.Contract-first development involves starting out by writing a WSDL file (either by hand or with thehelp of tooling), and then generating stub Java class implementations from the WSDL file by usingtools such as those provided by CXF.
2. Code-first development:
Used in JAX-WS development, here we start out with a Java class and then let the web serviceframework handle the job of generating a WSDL contract for you. This method is somewhat easierfor newcomers to web services, as it avoids the need to construct a WSDL, however as you start toadd security policies to your web services you'll probably find direct modification of an existingWSDL contract easier. Note you can also start with code to generate a WSDL and then modify thatWSDL using the contract-first approach, see this article for more details.
3. JAX-RS (REST) services:
REST is a more recent paradigm for simpler HTTP-based services which takes advantage of HTTPverbs (GET, POST, PUT, DELETE), an intuitively designed http URL string, and (in some cases) HTTPmessage body for responses and requests. It's paradigm is so simple that frequently usage of aweb browser alone is sufficient to make and receive REST calls, however REST is not yet up to thelevel of providing the advanced WS-* support (security and reliability) available with JAX-WS.
We look at how to do development using these models in Contract-first development on page 8,Code-first development on page 22 and REST Services on page 30.
A general flowchart would be to:
1. Determine the type of web service you're interested in developing (SOAP or REST).2. If SOAP, choose whether code-first or contract-first.3. Determine the deployment environment (servlet container or OSGi).
Also note the Eclipse-based Talend Studio provides additional graphical options, such as aRouteBuilder, if less programmatic methods of service development are desired.
Contract-first developmentIn this section we'll work through the dev-guide-wsdl-first example available in the TalendESB download, in the examples/talend/cxf folder. This sample web service provides a simple
8

Web Services
SOAP operation called "DoubleIt", which takes an integer in the SOAP request and provides a doublednumber in the response. Both Tomcat and Talend ESB deployment options are shown below.
Project Structure
About this task
This sample is Maven-based and consists of three Maven submodules tied together with a parentpom.xml (Maven configuration) file located in the base directory. (The next section will cover the POMfiles in detail.) The purpose of each of the submodules are as follows:
Submodule Description
service Provides the implementation for the web service provider (WSP) including its WSDL and OSGideployment configuration (the latter ignored with Tomcat deployment.) Used both by the warsubmodule for servlet (Tomcat) deployment and as an OSGi bundle for the Talend RuntimeContainer. This submodule also generates a separate bundle holding the JAX-WS artifacts (WSPservice interfaces and JAXB databinding classes) that will be used by the SOAP client.
war Generates a deployable WAR containing the WSP that can be used with servlet containerssuch as Tomcat or Jetty. Consists mainly of the web.xml and servlet-specific WSP deploymentconfiguration files. The Talend Runtime Container does not use this module.
client Provides a sample SOAP client for making calls against the WSP. After the WSP is deployed(either via servlet or OSGi), this client can be activated simply by navigating to this folder from acommand-prompt window and running mvn exec:exec.
In this section, let's build the project and import it into the Eclipse IDE (the latter step optional, assource files can be viewed and modified using any text editor):
Build the project
Procedure
1. From a command-prompt window, navigate to the examples/talend/cxf/dev-guide-wsdl-first folder and run mvn clean install. You should see a success message similarto:
[INFO] ----------------------------------------------------------------[INFO] Reactor Summary:[INFO] [INFO] Dev Guide Tutorial: WSDL-First Web Service .... SUCCESS [0.197s][INFO] -- Web Service Provider ....................... SUCCESS [4.246s][INFO] -- Service WAR file ........................... SUCCESS [1.143s][INFO] -- SOAP Client ................................ SUCCESS [0.692s][INFO] ----------------------------------------------------------------[INFO] BUILD SUCCESS[INFO] ----------------------------------------------------------------[INFO] Total time: 6.986s
2. Import the project into Eclipse
9
Web Services
We're importing the project into Eclipse to better view and edit the project's source files, not forbuilding and compiling the project--that's still handled by Maven, allowing you to use any IDE fordevelopment.
From the dev-guide-wsdl-first folder run mvn eclipse:clean eclipse:eclipse. Here, the Maven Eclipse Plugin will create the Eclipse project folders allowing for easyimportation of the project into the IDE.
Next, within Eclipse import the three projects into the IDE using File Menu->Import->ExistingProjects Into Workspace and selecting the dev-guide-wsdl-first root folder. You'll see thethree Maven subprojects (client, service, war) that you can bring in. Note as just the submodulesare being imported that the top-level dev-guide-wsdl-first/pom.xml file will not bedirectly accessible from the IDE using this method--you'll need to manually open this file whendesired from the Eclipse File menu.
Maven POM files
This sample consists of four Maven pom.xml files--the top-level pom.xml and one pom.xml file foreach of the three submodules. Because they specify the top-level pom as their parent, the latter threeall inherit the configuration information in the top-level pom.xml file. Also, because the top-level pomexplicitly references each of this submodules, those submodules are processed while running mostMaven commands (such as mvn clean install or mvn eclipse:eclipse) from the projectbase directory. We'll explore this project's pom.xml files in this section.Top-level pom.xml
10
Web Services
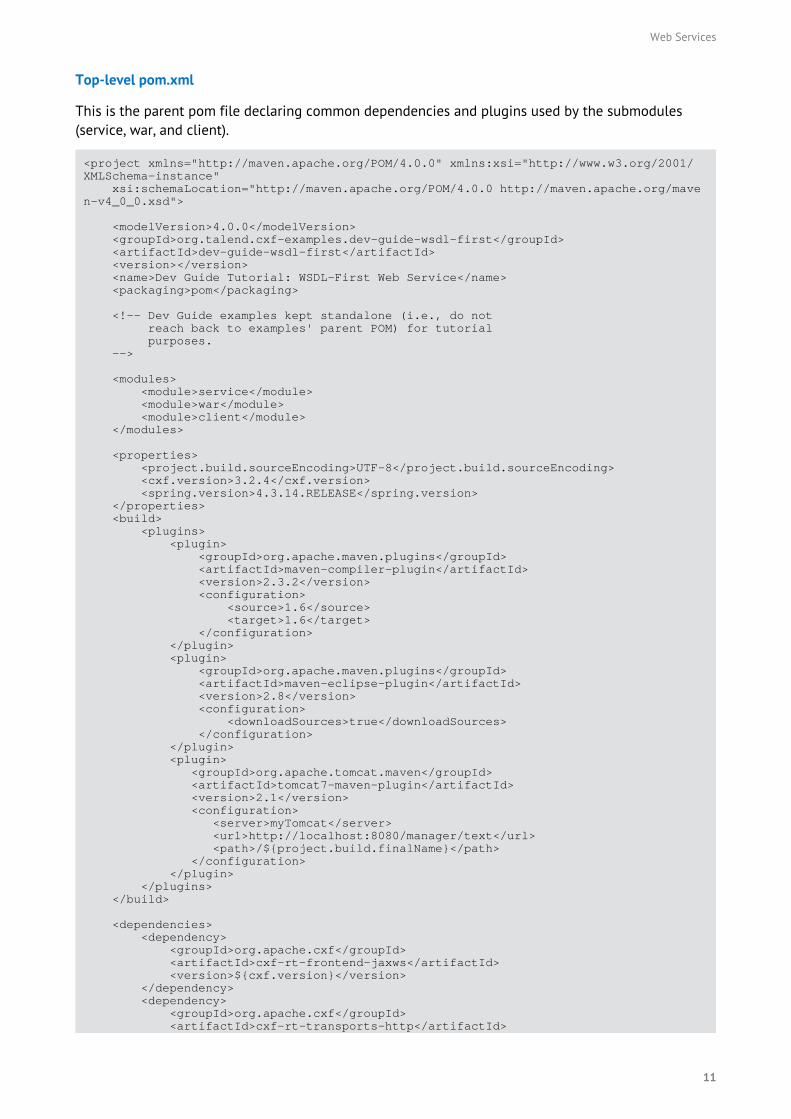
Top-level pom.xml
This is the parent pom file declaring common dependencies and plugins used by the submodules(service, war, and client).
<project xmlns="http://maven.apache.org/POM/4.0.0" xmlns:xsi="http://www.w3.org/2001/XMLSchema-instance" xsi:schemaLocation="http://maven.apache.org/POM/4.0.0 http://maven.apache.org/maven-v4_0_0.xsd">
<modelVersion>4.0.0</modelVersion> <groupId>org.talend.cxf-examples.dev-guide-wsdl-first</groupId> <artifactId>dev-guide-wsdl-first</artifactId> <version></version> <name>Dev Guide Tutorial: WSDL-First Web Service</name> <packaging>pom</packaging>
<!-- Dev Guide examples kept standalone (i.e., do not reach back to examples' parent POM) for tutorial purposes. -->
<modules> <module>service</module> <module>war</module> <module>client</module> </modules>
<properties> <project.build.sourceEncoding>UTF-8</project.build.sourceEncoding> <cxf.version>3.2.4</cxf.version> <spring.version>4.3.14.RELEASE</spring.version> </properties> <build> <plugins> <plugin> <groupId>org.apache.maven.plugins</groupId> <artifactId>maven-compiler-plugin</artifactId> <version>2.3.2</version> <configuration> <source>1.6</source> <target>1.6</target> </configuration> </plugin> <plugin> <groupId>org.apache.maven.plugins</groupId> <artifactId>maven-eclipse-plugin</artifactId> <version>2.8</version> <configuration> <downloadSources>true</downloadSources> </configuration> </plugin> <plugin> <groupId>org.apache.tomcat.maven</groupId> <artifactId>tomcat7-maven-plugin</artifactId> <version>2.1</version> <configuration> <server>myTomcat</server> <url>http://localhost:8080/manager/text</url> <path>/${project.build.finalName}</path> </configuration> </plugin> </plugins> </build>
<dependencies> <dependency> <groupId>org.apache.cxf</groupId> <artifactId>cxf-rt-frontend-jaxws</artifactId> <version>${cxf.version}</version> </dependency> <dependency> <groupId>org.apache.cxf</groupId> <artifactId>cxf-rt-transports-http</artifactId>
11
Web Services
<version>${cxf.version}</version> </dependency> </dependencies>
</project>
service/pom.xml
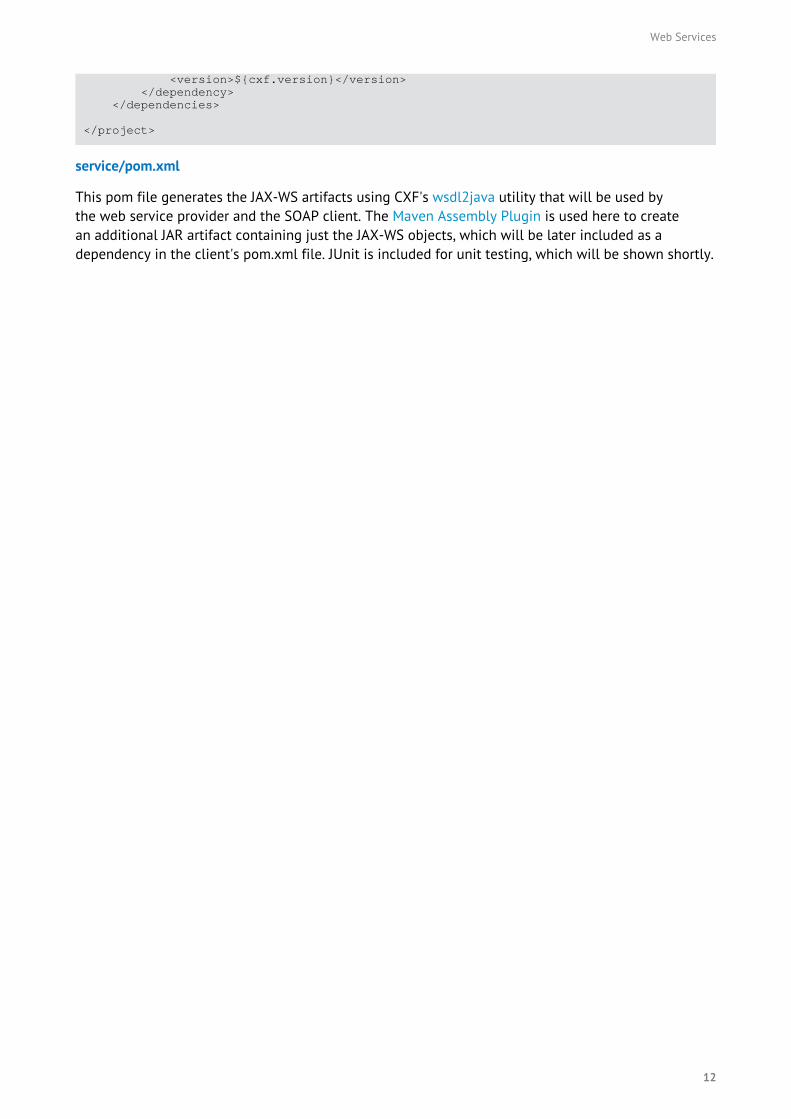
This pom file generates the JAX-WS artifacts using CXF's wsdl2java utility that will be used bythe web service provider and the SOAP client. The Maven Assembly Plugin is used here to createan additional JAR artifact containing just the JAX-WS objects, which will be later included as adependency in the client's pom.xml file. JUnit is included for unit testing, which will be shown shortly.
12
Web Services
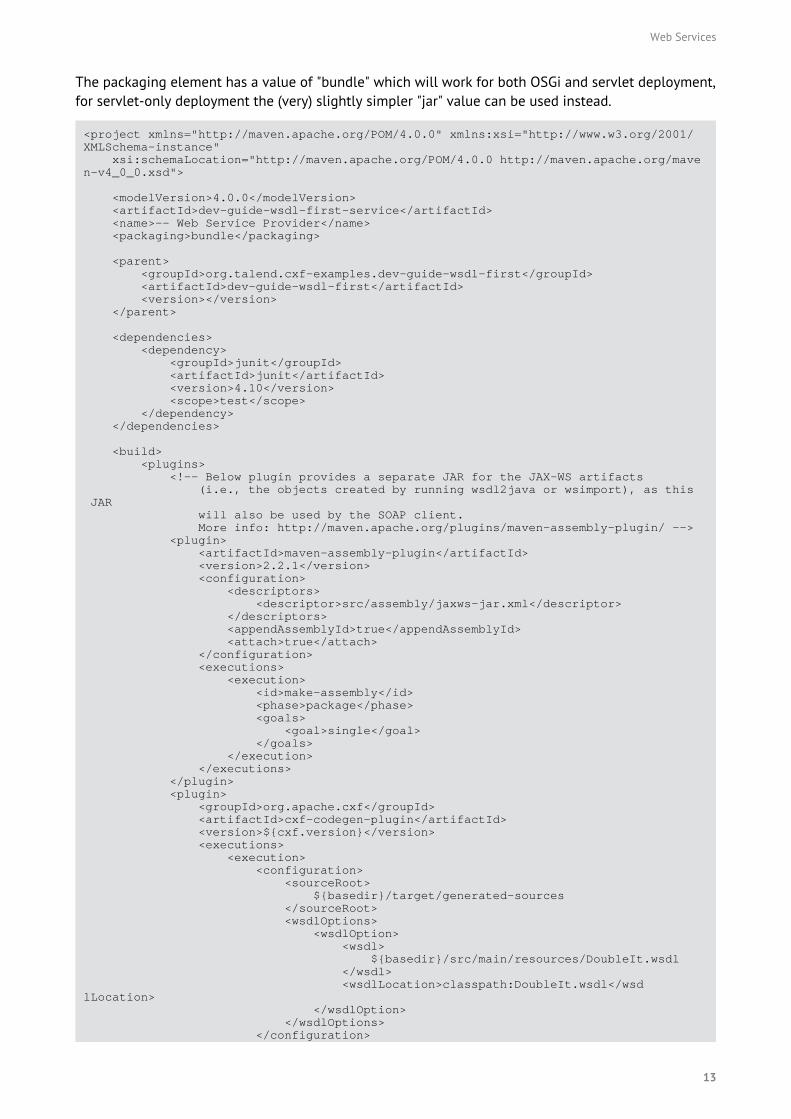
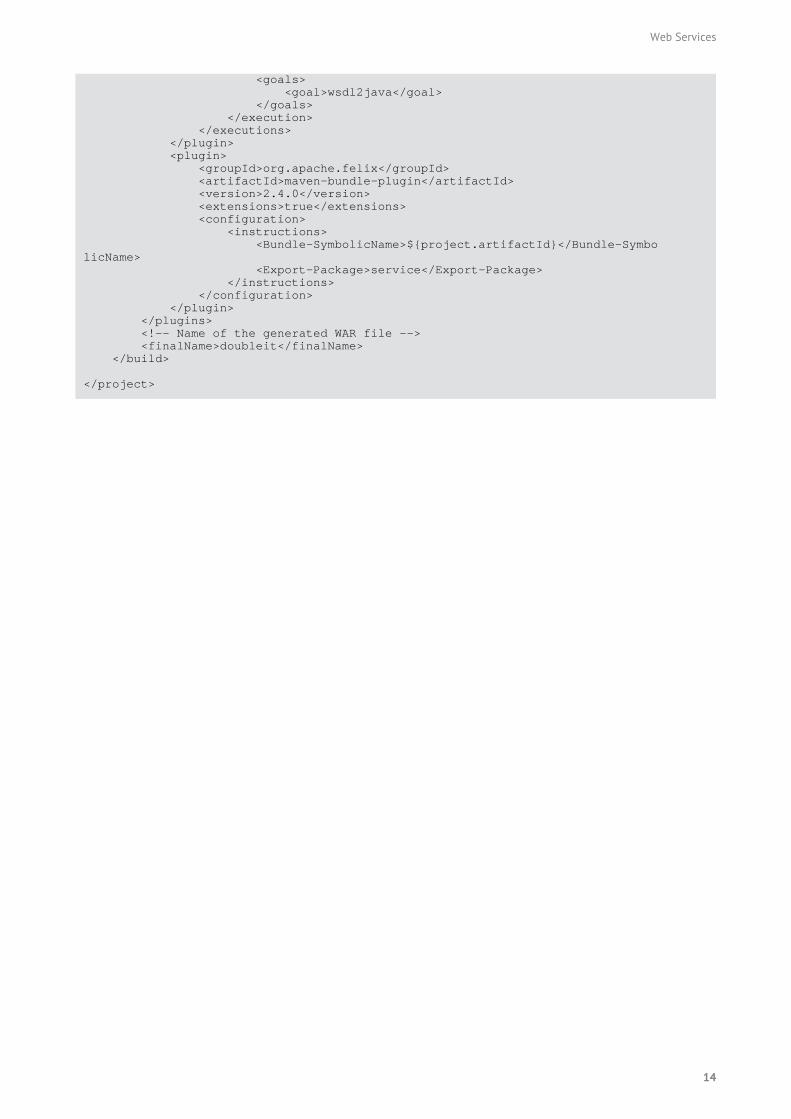
The packaging element has a value of "bundle" which will work for both OSGi and servlet deployment,for servlet-only deployment the (very) slightly simpler "jar" value can be used instead.
<project xmlns="http://maven.apache.org/POM/4.0.0" xmlns:xsi="http://www.w3.org/2001/XMLSchema-instance" xsi:schemaLocation="http://maven.apache.org/POM/4.0.0 http://maven.apache.org/maven-v4_0_0.xsd">
<modelVersion>4.0.0</modelVersion> <artifactId>dev-guide-wsdl-first-service</artifactId> <name>-- Web Service Provider</name> <packaging>bundle</packaging>
<parent> <groupId>org.talend.cxf-examples.dev-guide-wsdl-first</groupId> <artifactId>dev-guide-wsdl-first</artifactId> <version></version> </parent>
<dependencies> <dependency> <groupId>junit</groupId> <artifactId>junit</artifactId> <version>4.10</version> <scope>test</scope> </dependency> </dependencies>
<build> <plugins> <!-- Below plugin provides a separate JAR for the JAX-WS artifacts (i.e., the objects created by running wsdl2java or wsimport), as this JAR will also be used by the SOAP client. More info: http://maven.apache.org/plugins/maven-assembly-plugin/ --> <plugin> <artifactId>maven-assembly-plugin</artifactId> <version>2.2.1</version> <configuration> <descriptors> <descriptor>src/assembly/jaxws-jar.xml</descriptor> </descriptors> <appendAssemblyId>true</appendAssemblyId> <attach>true</attach> </configuration> <executions> <execution> <id>make-assembly</id> <phase>package</phase> <goals> <goal>single</goal> </goals> </execution> </executions> </plugin> <plugin> <groupId>org.apache.cxf</groupId> <artifactId>cxf-codegen-plugin</artifactId> <version>${cxf.version}</version> <executions> <execution> <configuration> <sourceRoot> ${basedir}/target/generated-sources </sourceRoot> <wsdlOptions> <wsdlOption> <wsdl> ${basedir}/src/main/resources/DoubleIt.wsdl </wsdl> <wsdlLocation>classpath:DoubleIt.wsdl</wsdlLocation> </wsdlOption> </wsdlOptions> </configuration>
13
Web Services
<goals> <goal>wsdl2java</goal> </goals> </execution> </executions> </plugin> <plugin> <groupId>org.apache.felix</groupId> <artifactId>maven-bundle-plugin</artifactId> <version>2.4.0</version> <extensions>true</extensions> <configuration> <instructions> <Bundle-SymbolicName>${project.artifactId}</Bundle-SymbolicName> <Export-Package>service</Export-Package> </instructions> </configuration> </plugin> </plugins> <!-- Name of the generated WAR file --> <finalName>doubleit</finalName> </build>
</project>
14

Web Services
war/pom.xml
This pom creates the WAR file that will host the web service if you're using Tomcat. It is not neededfor OSGi deployment, but if you omit adding this file be sure to remove this module from the modulelist in the parent pom.xml.
<project xmlns="http://maven.apache.org/POM/4.0.0" xmlns:xsi="http://www.w3.org/2001/XMLSchema-instance" xsi:schemaLocation="http://maven.apache.org/POM/4.0.0 http://maven.apache.org/maven-v4_0_0.xsd">
<modelVersion>4.0.0</modelVersion> <artifactId>dev-guide-wsdl-first-war</artifactId> <name>-- Service WAR file</name> <packaging>war</packaging> <url>http://maven.apache.org</url>
<parent> <groupId>org.talend.cxf-examples.dev-guide-wsdl-first</groupId> <artifactId>dev-guide-wsdl-first</artifactId> <version></version> </parent>
<dependencies> <dependency> <groupId>org.talend.cxf-examples.dev-guide-wsdl-first</groupId> <artifactId>dev-guide-wsdl-first-service</artifactId> <version></version> </dependency> <dependency> <groupId>org.springframework</groupId> <artifactId>spring-web</artifactId> <version>${spring.version}</version> </dependency> </dependencies>
<build> <plugins> <plugin> <groupId>org.apache.tomcat.maven</groupId> <artifactId>tomcat7-maven-plugin</artifactId> </plugin> <plugin> <artifactId>maven-war-plugin</artifactId> <version>2.1.1</version> <configuration> <webXml>src/main/webapp/WEB-INF/web.xml</webXml> <webResources> <resource> <directory>../service/src/main/resources</directory> <targetPath>WEB-INF/wsdl</targetPath> <includes> <include>*.wsdl</include> </includes> </resource> </webResources> </configuration> </plugin> </plugins> <!-- Name of the generated WAR file --> <finalName>doubleit</finalName> </build>
</project>
15

Web Services
client/pom.xml
This pom file includes as a dependency the JAX-WS artifact jar created above and uses the MavenExec Plugin to activate the SOAP client.
<?xml version="1.0" encoding="UTF-8"?><project xmlns="http://maven.apache.org/POM/4.0.0" xmlns:xsi="http://www.w3.org/2001/XMLSchema-instance" xsi:schemaLocation="http://maven.apache.org/POM/4.0.0 http://maven.apache.org/maven-v4_0_0.xsd">
<modelVersion>4.0.0</modelVersion> <artifactId>dev-guide-wsdl-first-client</artifactId> <name>-- SOAP Client</name> <packaging>jar</packaging>
<parent> <groupId>org.talend.cxf-examples.dev-guide-wsdl-first</groupId> <artifactId>dev-guide-wsdl-first</artifactId> <version></version> </parent>
<dependencies> <dependency> <groupId>org.talend.cxf-examples.dev-guide-wsdl-first</groupId> <artifactId>dev-guide-wsdl-first-service</artifactId> <!-- Classifier below used with Maven Assembly Plugin to specify subset of above artifact needed. --> <classifier>jaxws</classifier> <version></version> </dependency> </dependencies>
<build> <plugins> <plugin> <groupId>org.codehaus.mojo</groupId> <artifactId>exec-maven-plugin</artifactId> <version>1.2</version> <executions> <execution> <goals> <goal>exec</goal> </goals> </execution> </executions> <configuration> <executable>java</executable> <arguments> <argument>-classpath</argument> <classpath /> <argument> client.WSClient </argument> </arguments> </configuration> </plugin> </plugins> </build></project>
Creating the WSDL
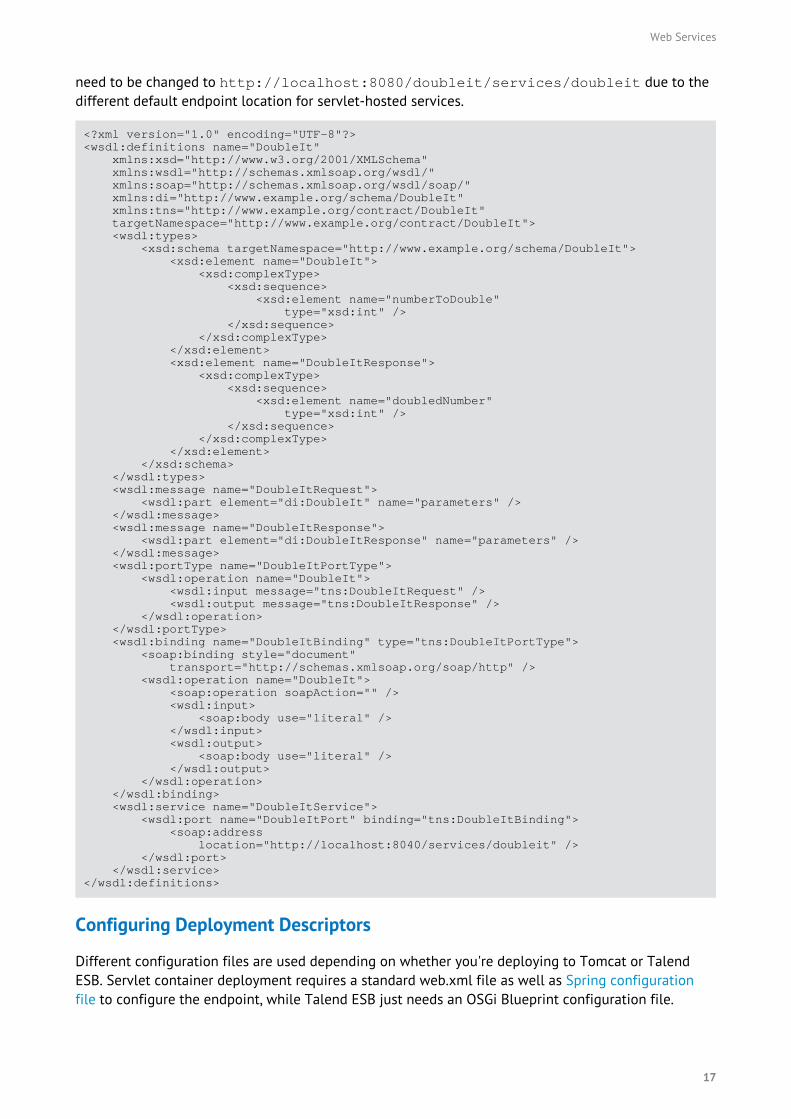
The below WSDL defines a single operation, doubleit supported by this web service endpoint. Thesoap:address location below is used by the SOAP client but ignored by the web service provider. TheWSP generates the endpoint address based on the deployment configuration information below andwill update the soap:address value when viewing the WSDL from a browser. Here, we're configuringthe soap:address value to what it will be using the configuration information in the next steps. It'spresently configured to the address for Talend ESB OSGi deployment, but for Tomcat deployment will
16
Web Services
need to be changed to http://localhost:8080/doubleit/services/doubleit due to thedifferent default endpoint location for servlet-hosted services.
<?xml version="1.0" encoding="UTF-8"?><wsdl:definitions name="DoubleIt" xmlns:xsd="http://www.w3.org/2001/XMLSchema" xmlns:wsdl="http://schemas.xmlsoap.org/wsdl/" xmlns:soap="http://schemas.xmlsoap.org/wsdl/soap/" xmlns:di="http://www.example.org/schema/DoubleIt" xmlns:tns="http://www.example.org/contract/DoubleIt" targetNamespace="http://www.example.org/contract/DoubleIt"> <wsdl:types> <xsd:schema targetNamespace="http://www.example.org/schema/DoubleIt"> <xsd:element name="DoubleIt"> <xsd:complexType> <xsd:sequence> <xsd:element name="numberToDouble" type="xsd:int" /> </xsd:sequence> </xsd:complexType> </xsd:element> <xsd:element name="DoubleItResponse"> <xsd:complexType> <xsd:sequence> <xsd:element name="doubledNumber" type="xsd:int" /> </xsd:sequence> </xsd:complexType> </xsd:element> </xsd:schema> </wsdl:types> <wsdl:message name="DoubleItRequest"> <wsdl:part element="di:DoubleIt" name="parameters" /> </wsdl:message> <wsdl:message name="DoubleItResponse"> <wsdl:part element="di:DoubleItResponse" name="parameters" /> </wsdl:message> <wsdl:portType name="DoubleItPortType"> <wsdl:operation name="DoubleIt"> <wsdl:input message="tns:DoubleItRequest" /> <wsdl:output message="tns:DoubleItResponse" /> </wsdl:operation> </wsdl:portType> <wsdl:binding name="DoubleItBinding" type="tns:DoubleItPortType"> <soap:binding style="document" transport="http://schemas.xmlsoap.org/soap/http" /> <wsdl:operation name="DoubleIt"> <soap:operation soapAction="" /> <wsdl:input> <soap:body use="literal" /> </wsdl:input> <wsdl:output> <soap:body use="literal" /> </wsdl:output> </wsdl:operation> </wsdl:binding> <wsdl:service name="DoubleItService"> <wsdl:port name="DoubleItPort" binding="tns:DoubleItBinding"> <soap:address location="http://localhost:8040/services/doubleit" /> </wsdl:port> </wsdl:service></wsdl:definitions>
Configuring Deployment Descriptors
Different configuration files are used depending on whether you're deploying to Tomcat or TalendESB. Servlet container deployment requires a standard web.xml file as well as Spring configurationfile to configure the endpoint, while Talend ESB just needs an OSGi Blueprint configuration file.
17
Web Services
Configuring Deployment Descriptors for Talend ESB (OSGi)
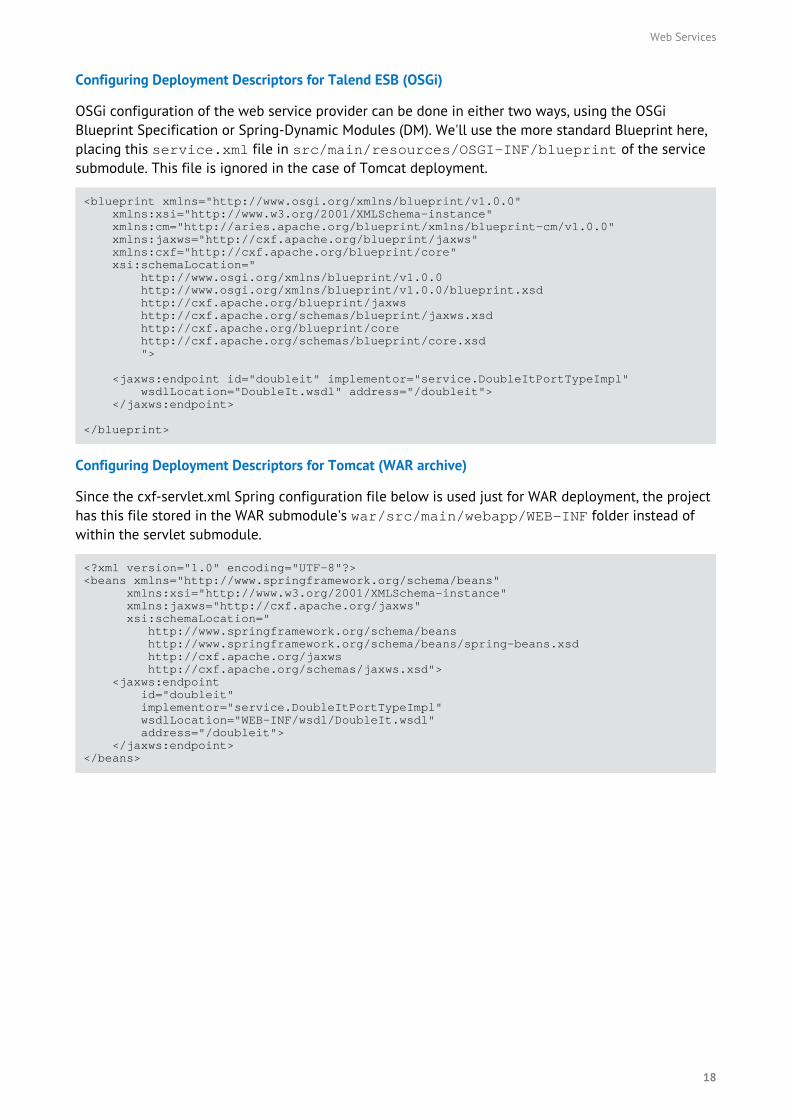
OSGi configuration of the web service provider can be done in either two ways, using the OSGiBlueprint Specification or Spring-Dynamic Modules (DM). We'll use the more standard Blueprint here,placing this service.xml file in src/main/resources/OSGI-INF/blueprint of the servicesubmodule. This file is ignored in the case of Tomcat deployment.
<blueprint xmlns="http://www.osgi.org/xmlns/blueprint/v1.0.0" xmlns:xsi="http://www.w3.org/2001/XMLSchema-instance" xmlns:cm="http://aries.apache.org/blueprint/xmlns/blueprint-cm/v1.0.0" xmlns:jaxws="http://cxf.apache.org/blueprint/jaxws" xmlns:cxf="http://cxf.apache.org/blueprint/core" xsi:schemaLocation=" http://www.osgi.org/xmlns/blueprint/v1.0.0 http://www.osgi.org/xmlns/blueprint/v1.0.0/blueprint.xsd http://cxf.apache.org/blueprint/jaxws http://cxf.apache.org/schemas/blueprint/jaxws.xsd http://cxf.apache.org/blueprint/core http://cxf.apache.org/schemas/blueprint/core.xsd ">
<jaxws:endpoint id="doubleit" implementor="service.DoubleItPortTypeImpl" wsdlLocation="DoubleIt.wsdl" address="/doubleit"> </jaxws:endpoint>
</blueprint>
Configuring Deployment Descriptors for Tomcat (WAR archive)
Since the cxf-servlet.xml Spring configuration file below is used just for WAR deployment, the projecthas this file stored in the WAR submodule's war/src/main/webapp/WEB-INF folder instead ofwithin the servlet submodule.
<?xml version="1.0" encoding="UTF-8"?><beans xmlns="http://www.springframework.org/schema/beans" xmlns:xsi="http://www.w3.org/2001/XMLSchema-instance" xmlns:jaxws="http://cxf.apache.org/jaxws" xsi:schemaLocation=" http://www.springframework.org/schema/beans http://www.springframework.org/schema/beans/spring-beans.xsd http://cxf.apache.org/jaxws http://cxf.apache.org/schemas/jaxws.xsd"> <jaxws:endpoint id="doubleit" implementor="service.DoubleItPortTypeImpl" wsdlLocation="WEB-INF/wsdl/DoubleIt.wsdl" address="/doubleit"> </jaxws:endpoint></beans>
18
Web Services
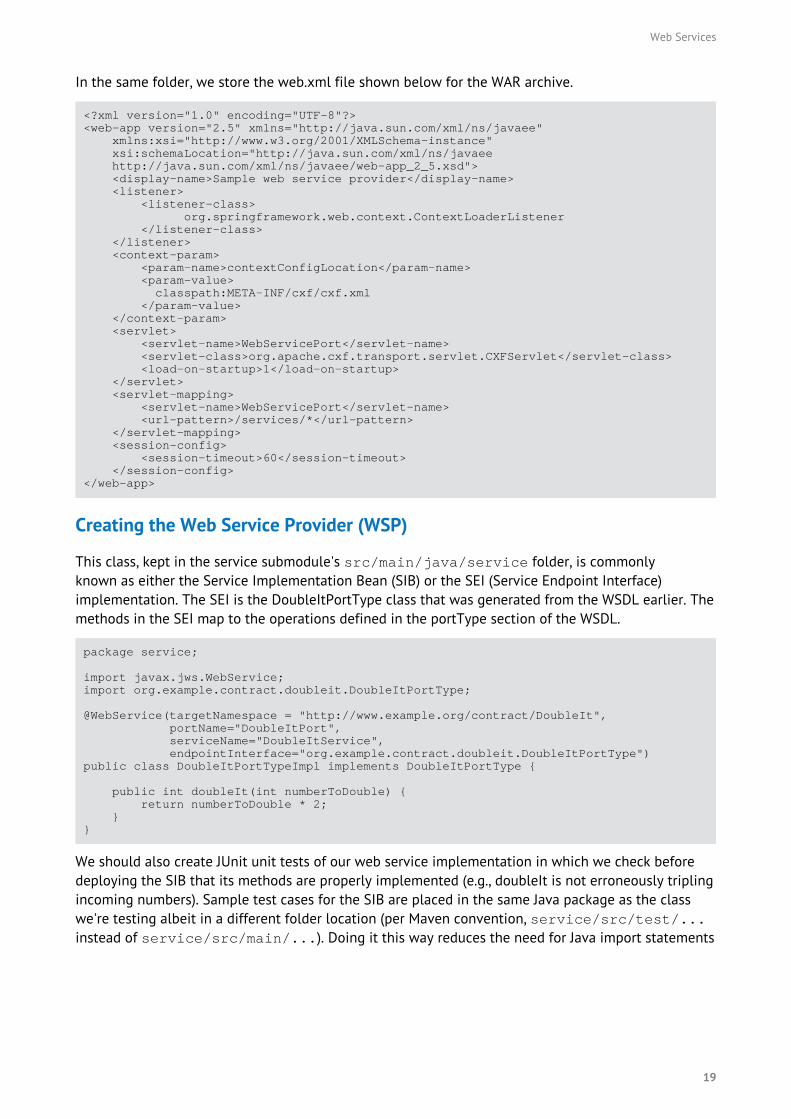
In the same folder, we store the web.xml file shown below for the WAR archive.
<?xml version="1.0" encoding="UTF-8"?><web-app version="2.5" xmlns="http://java.sun.com/xml/ns/javaee" xmlns:xsi="http://www.w3.org/2001/XMLSchema-instance" xsi:schemaLocation="http://java.sun.com/xml/ns/javaee http://java.sun.com/xml/ns/javaee/web-app_2_5.xsd"> <display-name>Sample web service provider</display-name> <listener> <listener-class> org.springframework.web.context.ContextLoaderListener </listener-class> </listener> <context-param> <param-name>contextConfigLocation</param-name> <param-value> classpath:META-INF/cxf/cxf.xml </param-value> </context-param> <servlet> <servlet-name>WebServicePort</servlet-name> <servlet-class>org.apache.cxf.transport.servlet.CXFServlet</servlet-class> <load-on-startup>1</load-on-startup> </servlet> <servlet-mapping> <servlet-name>WebServicePort</servlet-name> <url-pattern>/services/*</url-pattern> </servlet-mapping> <session-config> <session-timeout>60</session-timeout> </session-config></web-app>
Creating the Web Service Provider (WSP)
This class, kept in the service submodule's src/main/java/service folder, is commonlyknown as either the Service Implementation Bean (SIB) or the SEI (Service Endpoint Interface)implementation. The SEI is the DoubleItPortType class that was generated from the WSDL earlier. Themethods in the SEI map to the operations defined in the portType section of the WSDL.
package service;
import javax.jws.WebService;import org.example.contract.doubleit.DoubleItPortType;
@WebService(targetNamespace = "http://www.example.org/contract/DoubleIt", portName="DoubleItPort", serviceName="DoubleItService", endpointInterface="org.example.contract.doubleit.DoubleItPortType")public class DoubleItPortTypeImpl implements DoubleItPortType {
public int doubleIt(int numberToDouble) { return numberToDouble * 2; }}
We should also create JUnit unit tests of our web service implementation in which we check beforedeploying the SIB that its methods are properly implemented (e.g., doubleIt is not erroneously triplingincoming numbers). Sample test cases for the SIB are placed in the same Java package as the classwe're testing albeit in a different folder location (per Maven convention, service/src/test/...instead of service/src/main/...). Doing it this way reduces the need for Java import statements
19
Web Services
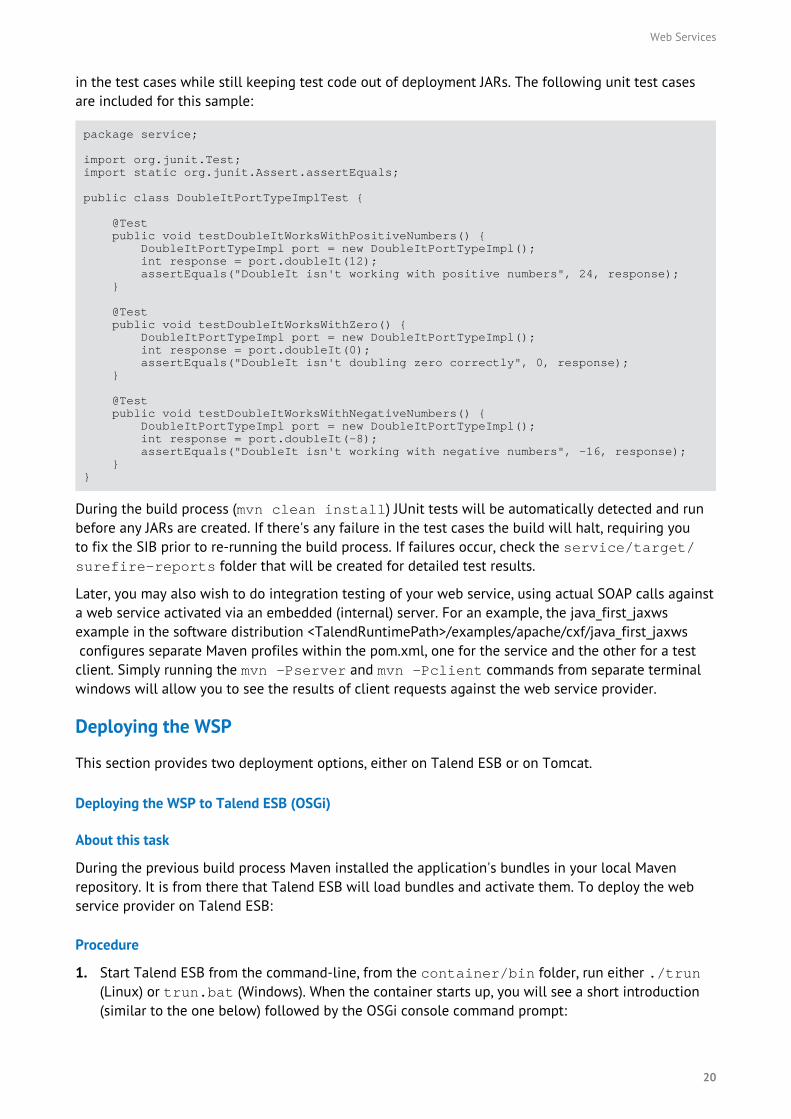
in the test cases while still keeping test code out of deployment JARs. The following unit test casesare included for this sample:
package service;
import org.junit.Test;import static org.junit.Assert.assertEquals;
public class DoubleItPortTypeImplTest {
@Test public void testDoubleItWorksWithPositiveNumbers() { DoubleItPortTypeImpl port = new DoubleItPortTypeImpl(); int response = port.doubleIt(12); assertEquals("DoubleIt isn't working with positive numbers", 24, response); } @Test public void testDoubleItWorksWithZero() { DoubleItPortTypeImpl port = new DoubleItPortTypeImpl(); int response = port.doubleIt(0); assertEquals("DoubleIt isn't doubling zero correctly", 0, response); }
@Test public void testDoubleItWorksWithNegativeNumbers() { DoubleItPortTypeImpl port = new DoubleItPortTypeImpl(); int response = port.doubleIt(-8); assertEquals("DoubleIt isn't working with negative numbers", -16, response); }}
During the build process (mvn clean install) JUnit tests will be automatically detected and runbefore any JARs are created. If there's any failure in the test cases the build will halt, requiring youto fix the SIB prior to re-running the build process. If failures occur, check the service/target/surefire-reports folder that will be created for detailed test results.
Later, you may also wish to do integration testing of your web service, using actual SOAP calls againsta web service activated via an embedded (internal) server. For an example, the java_first_jaxwsexample in the software distribution <TalendRuntimePath>/examples/apache/cxf/java_first_jaxws configures separate Maven profiles within the pom.xml, one for the service and the other for a testclient. Simply running the mvn -Pserver and mvn -Pclient commands from separate terminalwindows will allow you to see the results of client requests against the web service provider.
Deploying the WSP
This section provides two deployment options, either on Talend ESB or on Tomcat.
Deploying the WSP to Talend ESB (OSGi)
About this task
During the previous build process Maven installed the application's bundles in your local Mavenrepository. It is from there that Talend ESB will load bundles and activate them. To deploy the webservice provider on Talend ESB:
Procedure
1. Start Talend ESB from the command-line, from the container/bin folder, run either ./trun(Linux) or trun.bat (Windows). When the container starts up, you will see a short introduction(similar to the one below) followed by the OSGi console command prompt:
20
Web Services
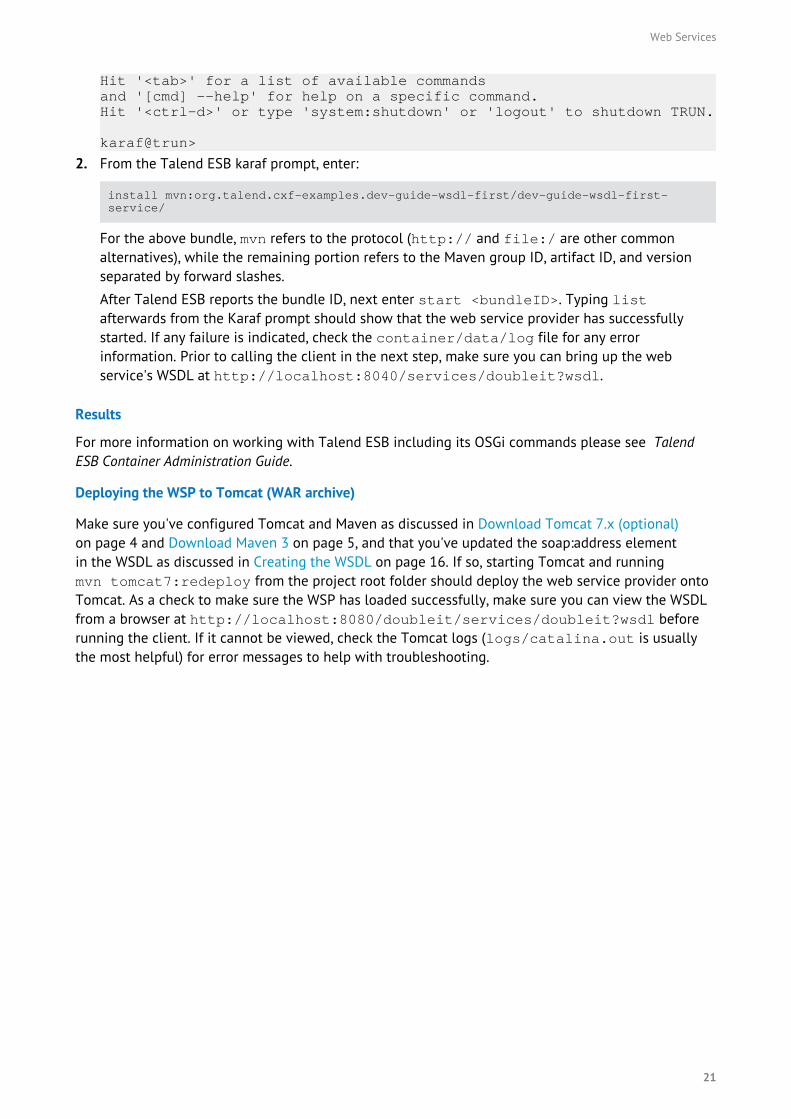
Hit '<tab>' for a list of available commandsand '[cmd] --help' for help on a specific command.Hit '<ctrl-d>' or type 'system:shutdown' or 'logout' to shutdown TRUN.
karaf@trun>
2. From the Talend ESB karaf prompt, enter:
install mvn:org.talend.cxf-examples.dev-guide-wsdl-first/dev-guide-wsdl-first-service/
For the above bundle, mvn refers to the protocol (http:// and file:/ are other commonalternatives), while the remaining portion refers to the Maven group ID, artifact ID, and versionseparated by forward slashes.
After Talend ESB reports the bundle ID, next enter start <bundleID>. Typing listafterwards from the Karaf prompt should show that the web service provider has successfullystarted. If any failure is indicated, check the container/data/log file for any errorinformation. Prior to calling the client in the next step, make sure you can bring up the webservice's WSDL at http://localhost:8040/services/doubleit?wsdl.
Results
For more information on working with Talend ESB including its OSGi commands please see TalendESB Container Administration Guide.
Deploying the WSP to Tomcat (WAR archive)
Make sure you've configured Tomcat and Maven as discussed in Download Tomcat 7.x (optional)on page 4 and Download Maven 3 on page 5, and that you've updated the soap:address elementin the WSDL as discussed in Creating the WSDL on page 16. If so, starting Tomcat and runningmvn tomcat7:redeploy from the project root folder should deploy the web service provider ontoTomcat. As a check to make sure the WSP has loaded successfully, make sure you can view the WSDLfrom a browser at http://localhost:8080/doubleit/services/doubleit?wsdl beforerunning the client. If it cannot be viewed, check the Tomcat logs (logs/catalina.out is usuallythe most helpful) for error messages to help with troubleshooting.
21
Web Services
Running the SOAP Client
The SOAP client is as listed below. It can be activated by navigating to the client folder and runningmvn exec:exec.
package client;
import org.example.contract.doubleit.DoubleItPortType;import org.example.contract.doubleit.DoubleItService;
public class WSClient { public static void main (String[] args) { DoubleItService service = new DoubleItService(); DoubleItPortType port = service.getDoubleItPort();
doubleIt(port, 10); doubleIt(port, 0); doubleIt(port, -10); } public static void doubleIt(DoubleItPortType port, int numToDouble) { int resp = port.doubleIt(numToDouble); System.out.println("The number " + numToDouble + " doubled is " + resp); }}
Code-first developmentCode-first development means starting from an existing Java interface of a web service providerfrom which a WSDL can automatically be generated. Talend ESB, in the examples/talend/cxffolder, provides a dev-guide-java-first sample functionally equivalent to the dev-guide-wsdl-first example explored in the previous section. CXF's Java2ws tool, configured within thecxf-java2ws-plugin Maven plugin, is used for this process. For example, given a simple web serviceinterface:
package service;
import javax.jws.WebService;import javax.jws.WebMethod;
@WebServicepublic interface DoubleItPortType { public int doubleIt(int numberToDouble);}
The code first developer will implement the web service, adding annotations to indicate desired webservice configuration information:
package service;
import javax.jws.WebService;
@WebService(targetNamespace = "http://www.example.org/contract/DoubleIt", endpointInterface = "service.DoubleItPortType", serviceName = "DoubleItService", portName = "DoubleItPort")public class DoubleItPortTypeImpl implements DoubleItPortType {
public int doubleIt(int numberToDouble) { return numberToDouble * 2; }}
22
Web Services
If the Maven pom.xml has the cxf-java2ws-plugin configured as follows:
<plugin> <groupId>org.apache.cxf</groupId> <artifactId>cxf-java2ws-plugin</artifactId> <version>${cxf.version}</version> <executions> <execution> <id>process-classes</id> <phase>process-classes</phase> <configuration> <className>service.DoubleItPortTypeImpl</className> <genWsdl>true</genWsdl> <verbose>true</verbose> </configuration> <goals> <goal>java2ws</goal> </goals> </execution> </executions></plugin>
An autogenerated two-part WSDL supporting this web service will be created, as shown below(certain areas truncated for brevity). The first file, DoubleItPortTypeImpl.wsdl containsmessage input and output information as well as the generic wsdl:portType that lists the methodcalls available. The wsdl:portType value incorporates the name of the web service interface.This interface also provides (from its doubleIt method) the name of the specific operation and itsparameters.
<wsdl:definitions name="DoubleItPortType" targetNamespace="http://service/"> <wsdl:types> <xs:schema elementFormDefault="unqualified" targetNamespace="http://service/" version="1.0"> <xs:element name="doubleIt" type="tns:doubleIt" /> <xs:element name="doubleItResponse" type="tns:doubleItResponse" /> <xs:complexType name="doubleIt"> <xs:sequence> <xs:element name="arg0" type="xs:int" /> </xs:sequence> </xs:complexType> <xs:complexType name="doubleItResponse"> <xs:sequence> <xs:element name="return" type="xs:int" /> </xs:sequence> </xs:complexType> </xs:schema> </wsdl:types> <wsdl:message name="doubleIt"> <wsdl:part name="parameters" element="ns1:doubleIt"/> </wsdl:message> <wsdl:message name="doubleItResponse"> <wsdl:part name="parameters" element="ns1:doubleItResponse"/> </wsdl:message> <wsdl:portType name="DoubleItPortType"> <wsdl:operation name="doubleIt"> <wsdl:input name="doubleIt" message="ns1:doubleIt"/> <wsdl:output name="doubleItResponse" message="ns1:doubleItResponse"/> </wsdl:operation> </wsdl:portType></wsdl:definitions>
23
Web Services
The second file, DoubleItPortType.wsdl imports the former file and provides the explicitwsdl:binding and wsdl:service connection information. The wsdl:service incorporates theservice name and port name values specified on the Java web service implementation above.
<wsdl:definitions name="DoubleItService" targetNamespace="http://www.example.org/contract/DoubleIt"> <wsdl:import namespace="http://service/" location="DoubleItPortType.wsdl"/> <wsdl:binding name="DoubleItServiceSoapBinding" type="ns1:DoubleItPortType"> <soap:binding style="document" transport="http://schemas.xmlsoap.org/soap/http" /> <wsdl:operation name="doubleIt"> <soap:operation soapAction="" style="document" /> <wsdl:input name="doubleIt"> <soap:body use="literal" /> </wsdl:input> <wsdl:output name="doubleItResponse"> <soap:body use="literal" /> </wsdl:output> </wsdl:operation> </wsdl:binding> <wsdl:service name="DoubleItService"> <wsdl:port name="DoubleItPort" binding="tns:DoubleItServiceSoapBinding"> <soap:address location="http://localhost:9090/DoubleItPort" /> </wsdl:port> </wsdl:service></wsdl:definitions>
This sample can be compiled and deployed just as explained in the previous wsdl-first example--onlydifference, for Talend ESB OSGi deployment, to use install mvn:org.talend.cxf-examples.dev-guide-java-first/dev-guide-java-first-service/ as the bundle install string.
In the next Java-first example we'll demonstrate other helpful tools for web services development,including the m2eclipse plugin, Apache CXF's Maven archetypes for creating skeleton code andsoapUI for making test SOAP calls.
CXF Maven Archetypes
About this task
Apache CXF provides a Maven archetype for creating Java-first web services. In the this section we'llexplore using it along with the Eclipse's m2eclipse plugin. Open Eclipse:
Procedure
1. From Main Menu: File>New>Other, Select "Maven Project" under "Maven" category:
24

Web Services
Example
2. Click Next to get the "Select project name and location" screen, accept its defaults, and click Nextagain to get to the "Select an Archetype" dialog. On this page, enter "cxf" in the Filter box andselect the item with group ID of org.apache.cxf.archetype and artifact ID of cxf-jaxws-javafirst:
Example
If the CXF archetype is not already available in your Eclipse installation, add it by selecting AddArchetype... with the following information:
• Archetype Group Id: org.apache.cxf.archetype• Archetype Artifact Id: cxf-jaxws-javafirst• Archetype Version:
25
Web Services
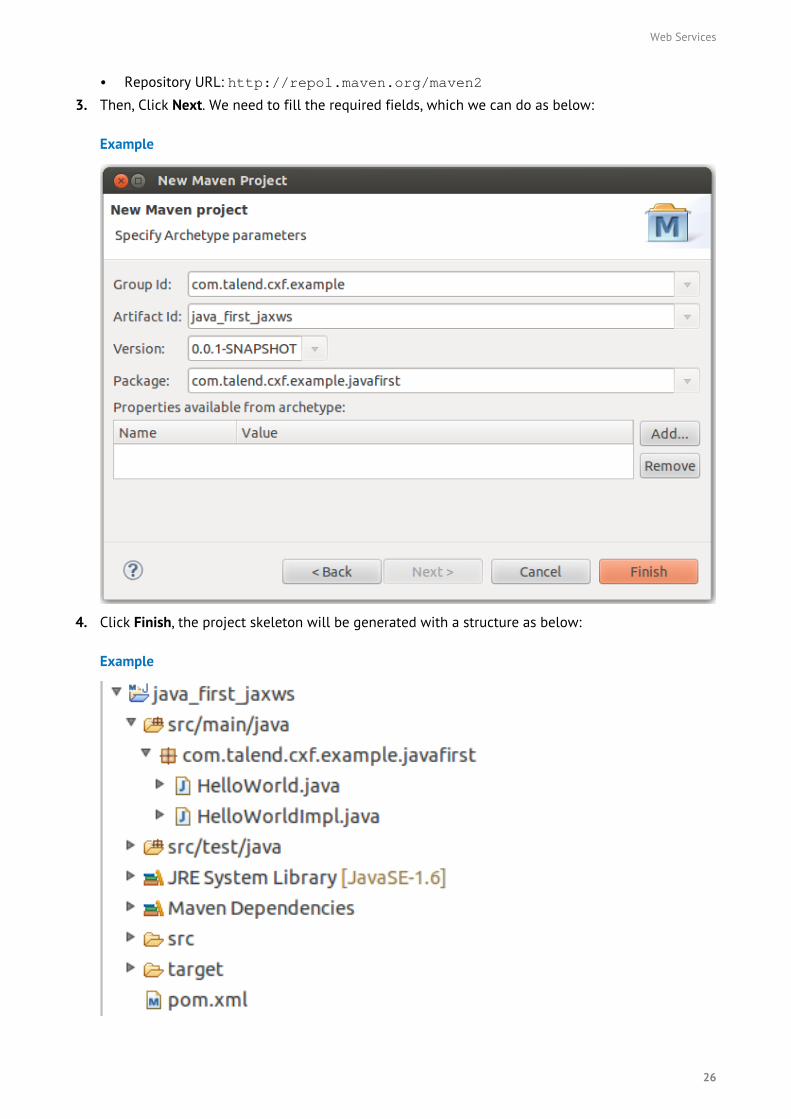
• Repository URL: http://repo1.maven.org/maven2
3. Then, Click Next. We need to fill the required fields, which we can do as below:
Example
4. Click Finish, the project skeleton will be generated with a structure as below:
Example
26
Web Services
Results
We have the project skeleton that we can start from now, and add Java methods to represent webservice operations we wish to implement. "HelloWorld.java" is the simple interface that this archetypegenerates, along with an ready-to-run implementation (HelloWorldImpl.java) of it. Of course both canbe changed when implementing your own web service provider.
Since the CXF Maven archetype does not provide a test SOAP client or provide OSGi deploymentcapability, in the next sections we'll show how to manually add in OSGi configuration as well as usesoapUI to make SOAP calls.
Adding OSGi Capabilities to a Web Service
This chapter shows how to configure a Mavenized web service as an OSGi bundle in Talend ESB, anOSGi container based on Apache Karaf. For more information about Talend ESB, Karaf, and OSGi,please see the Talend ESB Container Administration Guide.
Let's package the java_first_jaxws web service created in the previous section as an OSGibundle. We'll configure an Apache Felix plugin in Maven for this. For more information aboutFelix, please visit http://felix.apache.org; for more information on using Felix with Maven, please referto http://felix.apache.org/site/apache-felix-maven-bundle-plugin-bnd.html.
In order to package the application as a bundle, first we need to add the Felix Maven dependency tothe pom.xml created in the previous section:
<dependency> <groupId>org.apache.felix</groupId> <artifactId>org.osgi.core</artifactId> <version>1.4.0</version></dependency>
Also, we'll need to add the Felix plugin used for creating the bundle. Create a new plugins elementunder the project's build element (not the build / pluginManagement / pluginselement, that is used for configuration outside of Maven's default build process) and add:
<plugin> <groupId>org.apache.felix</groupId> <artifactId>maven-bundle-plugin</artifactId> <extensions>true</extensions> <version>2.3.7</version> <configuration> <instructions> <Bundle-SymbolicName> ${project.groupId}.${project.artifactId} </Bundle-SymbolicName> <Bundle-Name>${project.name}</Bundle-Name> <Bundle-Version>${project.version}</Bundle-Version> <Export-Package>com.talend.cxf.example.javafirst</Export-Package> <Bundle-Activator> com.talend.cxf.example.javafirst.Activator </Bundle-Activator> <Require-Bundle> org.apache.cxf.bundle,org.springframework.beans </Require-Bundle> </instructions> </configuration></plugin>
Since we want to package as an OSGi bundle, also change the packaging element at the top of thepom file from war to bundle. As shown above in Felix's maven-bundle-plugin configurationcom.talend.cxf.example.javafirst is exported as the bundle name and a CXF dependencyis listed. In addition, the "Bundle-Activator" implementation is given. For bundle activation, we'll start
27
Web Services
and stop our service in the Activator's start and stop services respectively. Place the following classwithin the java_first_jaxws project:
Activator.java:
package com.talend.cxf.example.javafirst;
import javax.xml.ws.Endpoint;import org.osgi.framework.BundleActivator; import org.osgi.framework.BundleContext;
public class Activator implements BundleActivator { private Endpoint endpoint;
public void start(BundleContext arg0) throws Exception { try { HelloWorldImpl implementor = new HelloWorldImpl(); String address = "http://localhost:9000/helloWorld"; endpoint = Endpoint.publish(address, implementor); System.out.println("Server is started..."); } catch (Exception e) { e.printStackTrace(); throw e; } }
public void stop(BundleContext arg0) throws Exception { try { endpoint.stop(); } catch (Exception e) { e.printStackTrace(); throw e; } }}
All changes needed have been made. Now let's have Maven create the package:
Select the Run As > Maven Clean and then Run As > Maven Install from the popup menu on pom.xml,or alternatively, mvn clean install from a command prompt located in the project homedirectory. The application will be packaged and installed into your Maven local repository, bydefault located in your hidden <user home>/.m2 directory or otherwise as configured by thelocalRepository field in your ${Maven_HOME}/conf/settings.xml file. You should find itunder ${MavenRepository}/ com/talend/cxf/example/ java_first_jaxws/0.0.1-SNAPSHOT/ java_first_jaxws-0.0.1-SNAPSHOT.jar.
We're now ready to deploy the bundle, which can be done as described in Deploying the WSP toTalend ESB (OSGi) on page 20 except with an install command of:
install mvn:com.talend.cxf.example/java_first_jaxws/0.0.1-SNAPSHOT
Run the list command to make sure the bundle has started (check the logfiles in container/log folder for any errors if not) and ensure you can see the service WSDL at http://localhost:9000/helloWorld?wsdl. If so, we're ready to make SOAP calls to the service using soapUI asshown in the next section.
Making SOAP calls with soapUI
About this task
In this section we'll use soapUI to make SOAP calls to the Talend ESB-hosted web service created inthe previous section. SoapUI's detailed tutorial is recommended for a full understanding of this tool'scapabilities.
28
Web Services
Procedure
1. (Optional) From your browser, you may wish to save the service WSDL to a file, such ashelloWorld.wsdl, for subsequent usage by soapUI. However, soapUI can also easily readWSDLs from HTTP URLs such as http://localhost:9000/helloWorld?wsdl.
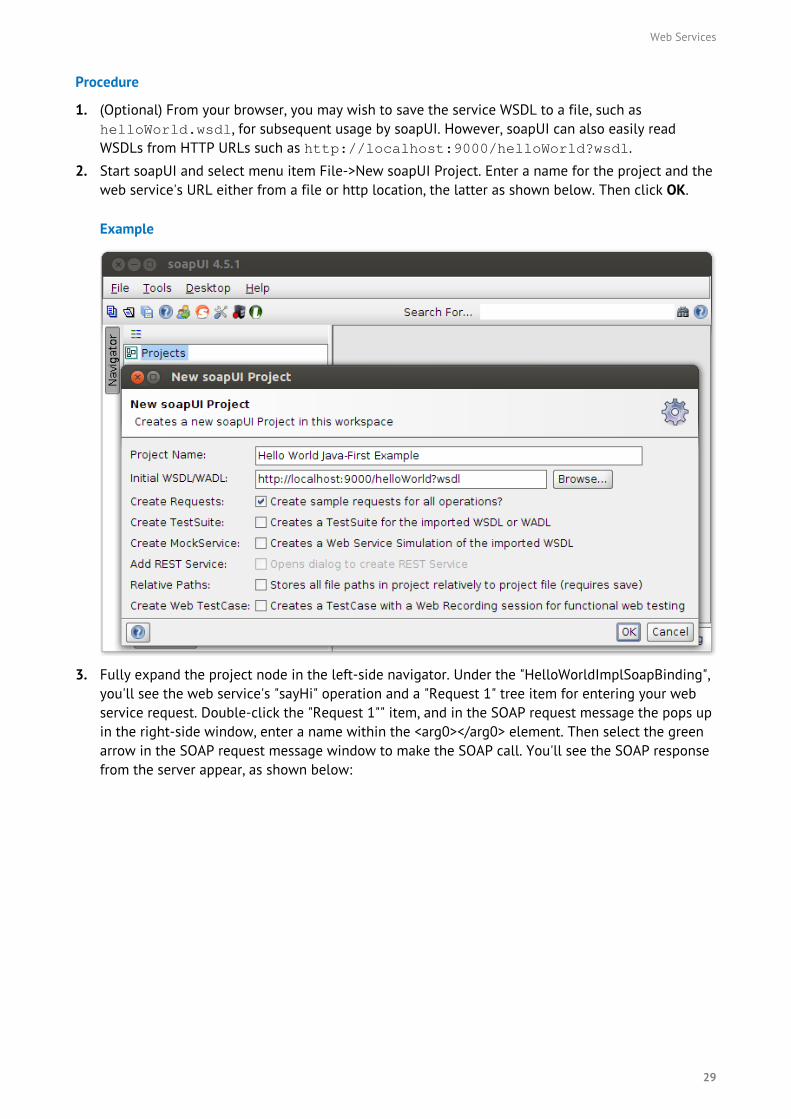
2. Start soapUI and select menu item File->New soapUI Project. Enter a name for the project and theweb service's URL either from a file or http location, the latter as shown below. Then click OK.
Example
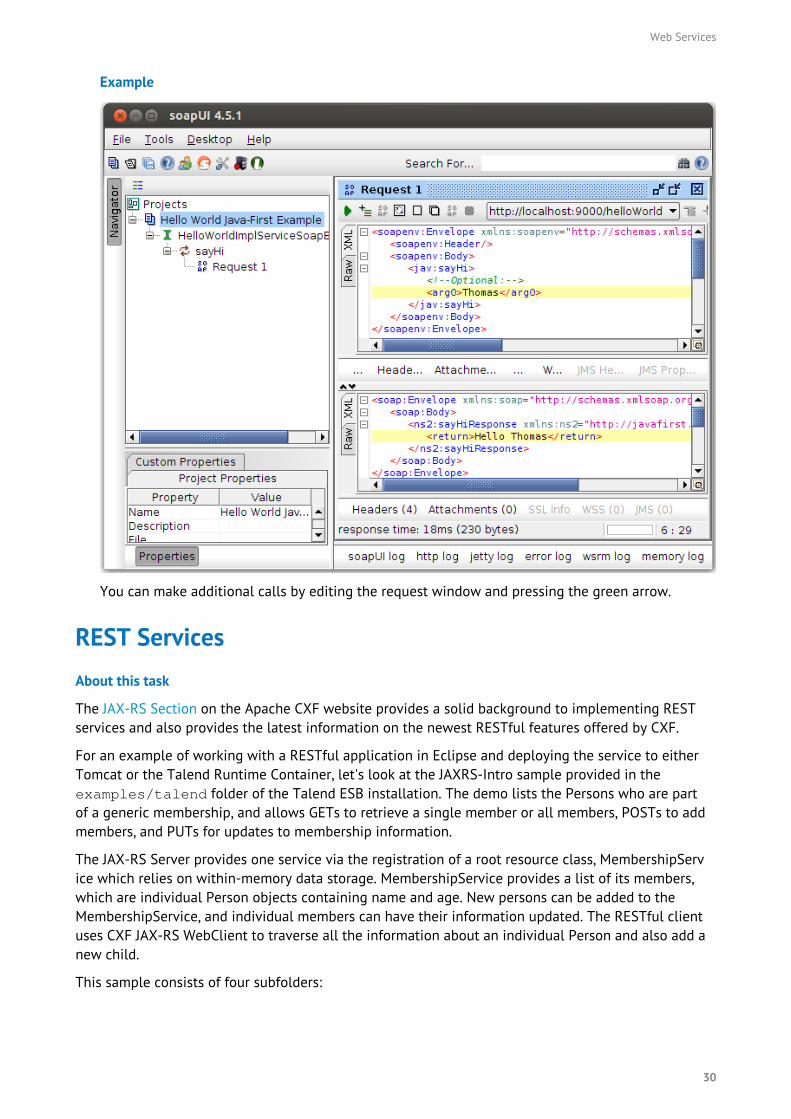
3. Fully expand the project node in the left-side navigator. Under the "HelloWorldImplSoapBinding",you'll see the web service's "sayHi" operation and a "Request 1" tree item for entering your webservice request. Double-click the "Request 1"" item, and in the SOAP request message the pops upin the right-side window, enter a name within the <arg0></arg0> element. Then select the greenarrow in the SOAP request message window to make the SOAP call. You'll see the SOAP responsefrom the server appear, as shown below:
29
Web Services
Example
You can make additional calls by editing the request window and pressing the green arrow.
REST ServicesAbout this task
The JAX-RS Section on the Apache CXF website provides a solid background to implementing RESTservices and also provides the latest information on the newest RESTful features offered by CXF.
For an example of working with a RESTful application in Eclipse and deploying the service to eitherTomcat or the Talend Runtime Container, let's look at the JAXRS-Intro sample provided in theexamples/talend folder of the Talend ESB installation. The demo lists the Persons who are partof a generic membership, and allows GETs to retrieve a single member or all members, POSTs to addmembers, and PUTs for updates to membership information.
The JAX-RS Server provides one service via the registration of a root resource class, MembershipService which relies on within-memory data storage. MembershipService provides a list of its members,which are individual Person objects containing name and age. New persons can be added to theMembershipService, and individual members can have their information updated. The RESTful clientuses CXF JAX-RS WebClient to traverse all the information about an individual Person and also add anew child.
This sample consists of four subfolders:
30
Web Services
Folder Description
client This is a sample client application that uses the CXF JAX-RS API to create HTTP-centric and proxyclients and makes several calls with them.
common This directory contains the code that is common for both the client and the server. POJOs and theREST interface is kept here.
service This is the JAX-RS service holding the Membership root resources packaged as an OSGi bundle.
war This module creates a WAR archive containing the code from common and service modules.
Working with a REST sample in Eclipse
Procedure
1. From a command-line windows, navigate to the jax-rs folder and type mvn clean installeclipse:eclipse. This will create an Eclipse project out of this sample that we can importinto Eclipse.
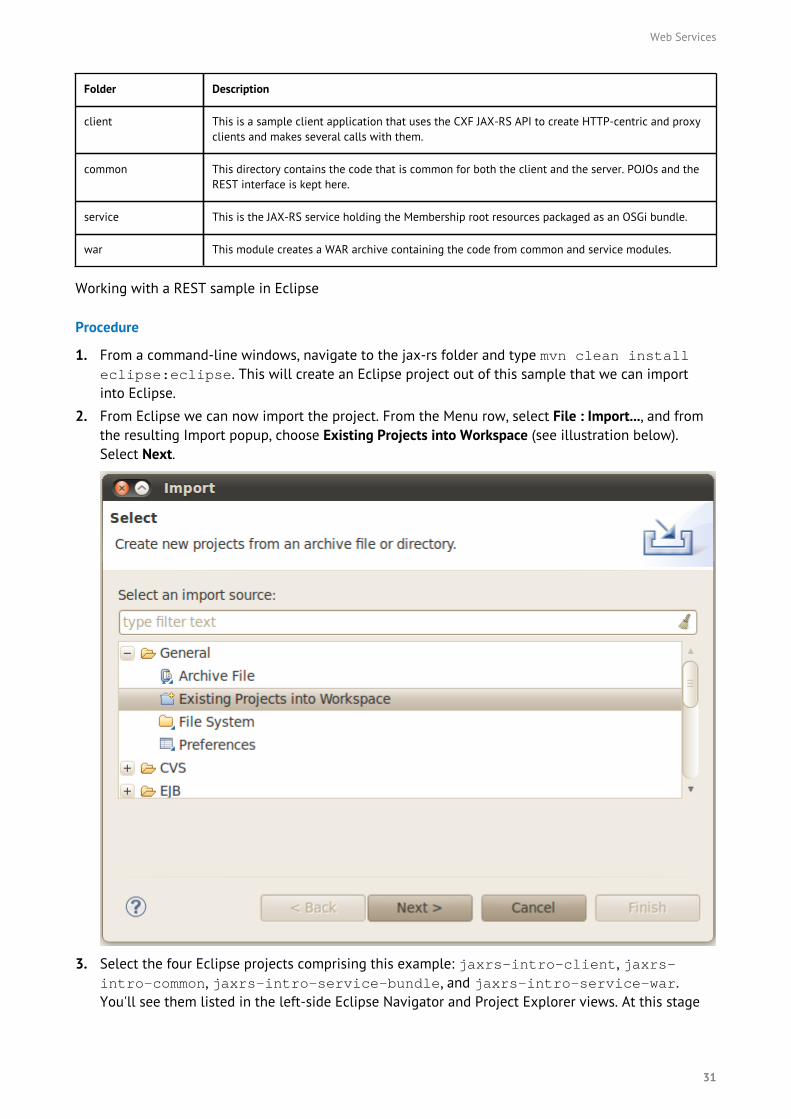
2. From Eclipse we can now import the project. From the Menu row, select File : Import..., and fromthe resulting Import popup, choose Existing Projects into Workspace (see illustration below).Select Next.
3. Select the four Eclipse projects comprising this example: jaxrs-intro-client, jaxrs-intro-common, jaxrs-intro-service-bundle, and jaxrs-intro-service-war.You'll see them listed in the left-side Eclipse Navigator and Project Explorer views. At this stage
31
Web Services
any of the files can be viewed and modified. Be sure to run mvn clean install from thejaxrs-intro folder within a command prompt window after any changes made.
4. Prior to running the client, we'll need to activate the REST service, which we can do in at leasttwo ways:
• To run the example within Talend ESB, we'll need to create the Karaf features file thatcontains the definition for this service. First, from a command prompt navigate to thefeatures folder (sibling to jaxrs-intro) and run mvn clean install. Next, fromthe command prompt enter feature:repo-add mvn:com.talend.sf.examples/osgi/1.0/xml/features to install the features file followed by feature:installtsf-example-jaxrs-intro to install the JAXRS-Intro service.
• To run the example within CXF's internal (Jetty-based) servlet container, navigate to the warfolder and run mvn jetty:run.
5. To run the client, from a command prompt in the jaxrs-intro/client folder, run mvn exec:java.
Working with a REST sample in Eclipse
Procedure
1. From a command-line windows, navigate to the jax-rs folder and type mvn clean installeclipse:eclipse. This will create an Eclipse project out of this sample that we can importinto Eclipse.
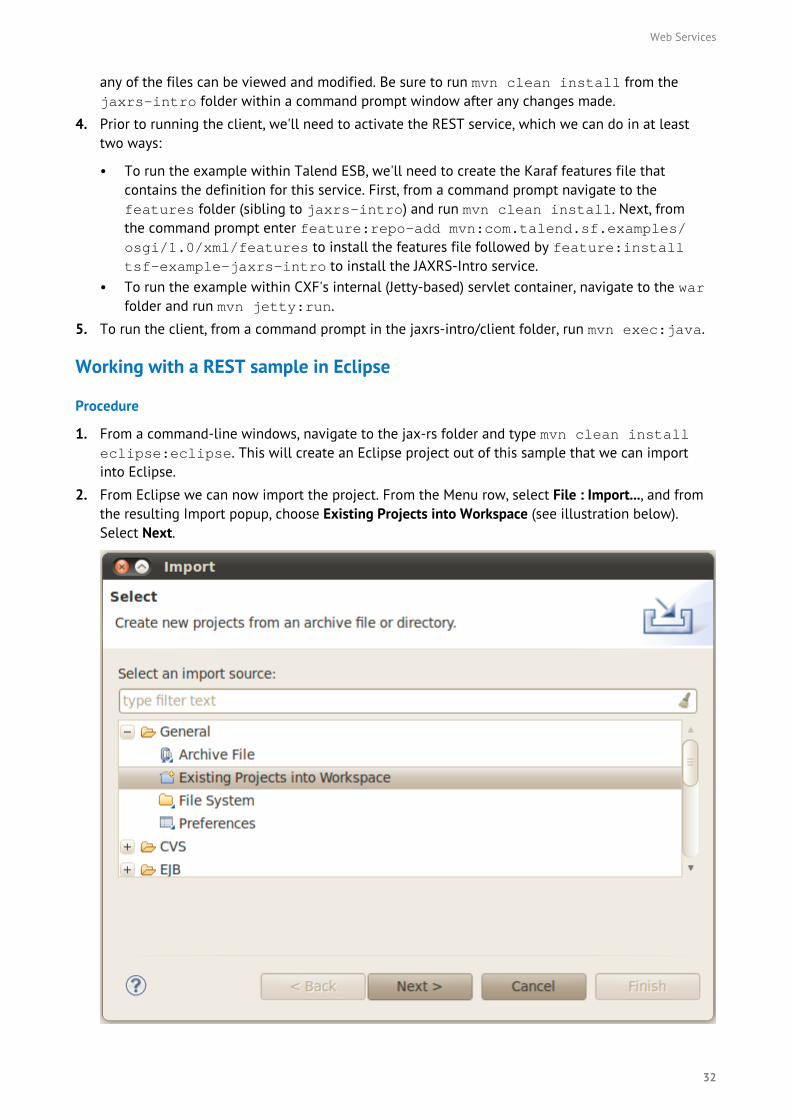
2. From Eclipse we can now import the project. From the Menu row, select File : Import..., and fromthe resulting Import popup, choose Existing Projects into Workspace (see illustration below).Select Next.
32
Web Services
3. Select the four Eclipse projects comprising this example: jaxrs-intro-client, jaxrs-intro-common, jaxrs-intro-service-bundle, and jaxrs-intro-service-war.You'll see them listed in the left-side Eclipse Navigator and Project Explorer views. At this stageany of the files can be viewed and modified. Be sure to run mvn clean install from thejaxrs-intro folder within a command prompt window after any changes made.
4. Prior to running the client, we'll need to activate the REST service, which we can do in at leasttwo ways:
• To run the example within Talend ESB, we'll need to create the Karaf features file thatcontains the definition for this service. First, from a command prompt navigate to thefeatures folder (sibling to jaxrs-intro) and run mvn clean install. Next, fromthe command prompt enter feature:repo-add mvn:com.talend.sf.examples/osgi/1.0/xml/features to install the features file followed by feature:installtsf-example-jaxrs-intro to install the JAXRS-Intro service.
• To run the example within CXF's internal (Jetty-based) servlet container, navigate to the warfolder and run mvn jetty:run.
5. To run the client, from a command prompt in the jaxrs-intro/client folder, run mvn exec:java.
33
Camel Routes Overview
Camel Routes Overview
To demonstrate the usage and deployment of a Camel route within Talend ESB using Eclipse, we'lluse Camel's camel-example-cxf-osgi example, located within the examples/apache/camelfolder of the Talend ESB distribution.
Refer to the following steps:
Use a Camel routeProcedure
1. From a command-line windows, navigate to this folder and type mvn clean installeclipse:eclipse. This will create an Eclipse project out of this sample that we can importinto Eclipse.
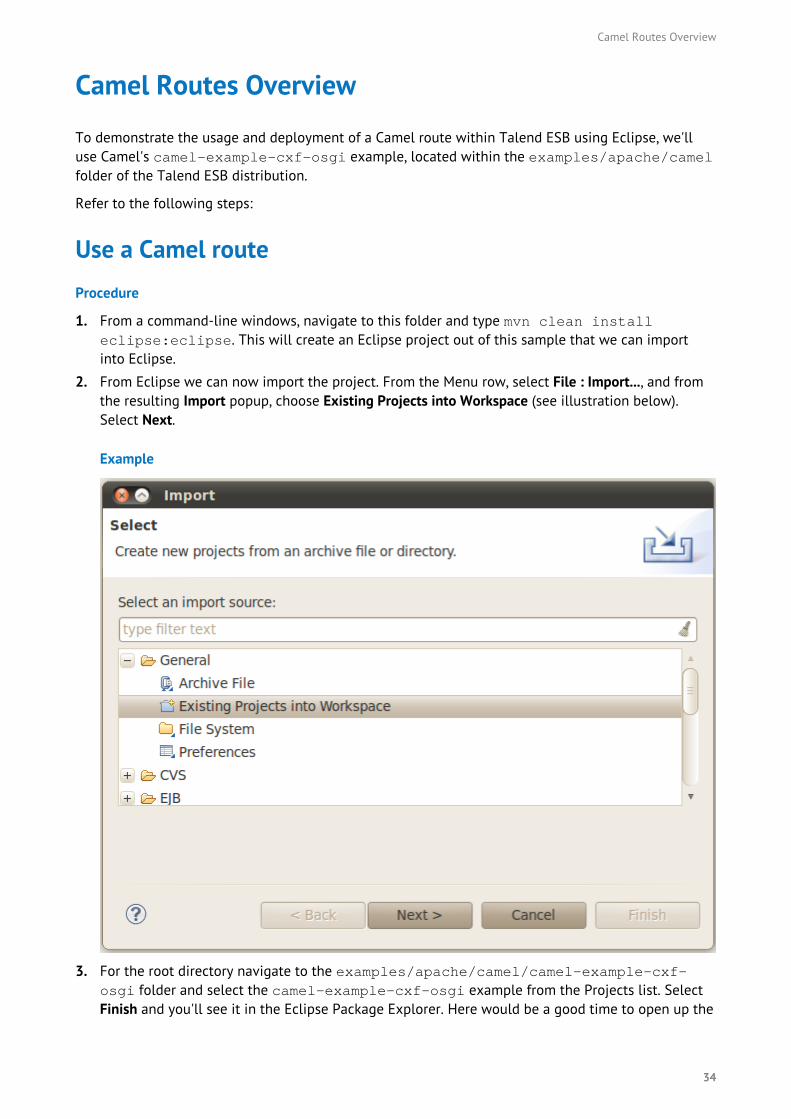
2. From Eclipse we can now import the project. From the Menu row, select File : Import..., and fromthe resulting Import popup, choose Existing Projects into Workspace (see illustration below).Select Next.
Example
3. For the root directory navigate to the examples/apache/camel/camel-example-cxf-osgi folder and select the camel-example-cxf-osgi example from the Projects list. SelectFinish and you'll see it in the Eclipse Package Explorer. Here would be a good time to open up the
34

Camel Routes Overview
project source files and look at the code (this example is explained on the Apache Camel site athttp://camel.apache.org/cxf-example-osgi.html.)
4. As this example runs in the Talend Runtime Container, we'll need to start the container prior torunning this example. Navigate to the <TalendRuntimePath>/container/bin folder andenter trun.bat or ./trun. Enter the following commands at the resulting console to install theexample:
feature:repo-add mvn:org.apache.camel.karaf/apache-camel/2.10.2/xml/featuresfeature:install warfeature:install camel-springfeature:install camel-jaxbfeature:install camel-cxfbundle:install -s mvn:org.apache.camel/camel-example-cxf-osgi/2.10.2
5. Open a web browser and make sure you can view the above web service WSDL at http://localhost:8040/services/camel-example-cxf-osgi/webservices/incident?wsdl before continuing.
6. We'll make a SOAP call using soapUI in this step. Make sure you've already installed soapUI inEclipse as discussed in Development Environment Setup on page 4 (standalone soapUI is alsofine.) From Eclipse, select Menu Item Window | Show View | Other..., and select soapUINavigator from the View list (see illustration below.)
35
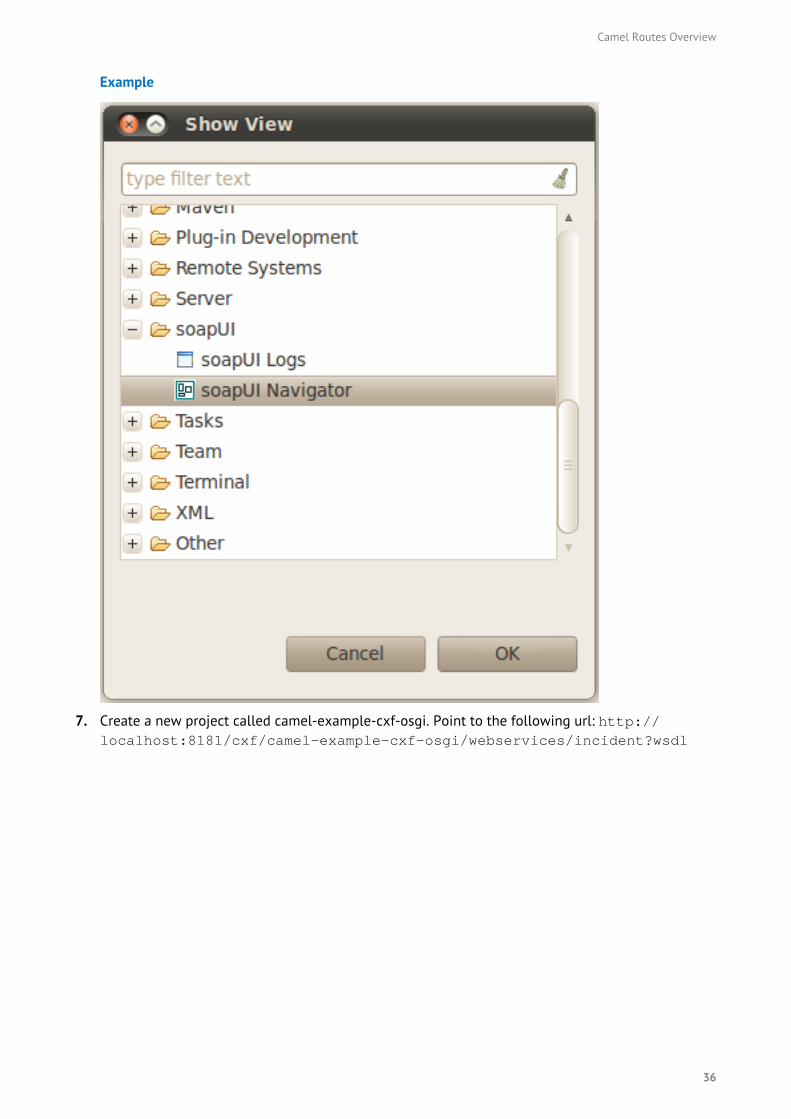
Camel Routes Overview
Example
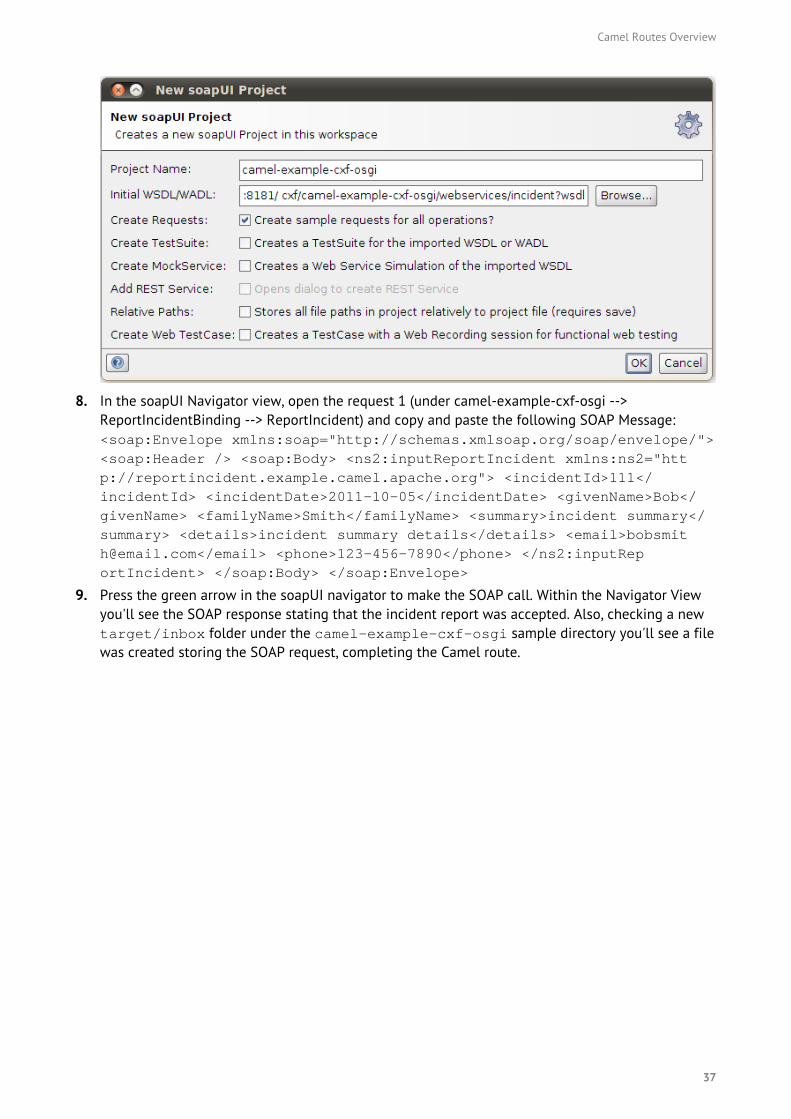
7. Create a new project called camel-example-cxf-osgi. Point to the following url: http://localhost:8181/cxf/camel-example-cxf-osgi/webservices/incident?wsdl
36
Camel Routes Overview
8. In the soapUI Navigator view, open the request 1 (under camel-example-cxf-osgi -->ReportIncidentBinding --> ReportIncident) and copy and paste the following SOAP Message:<soap:Envelope xmlns:soap="http://schemas.xmlsoap.org/soap/envelope/"><soap:Header /> <soap:Body> <ns2:inputReportIncident xmlns:ns2="http://reportincident.example.camel.apache.org"> <incidentId>111</incidentId> <incidentDate>2011-10-05</incidentDate> <givenName>Bob</givenName> <familyName>Smith</familyName> <summary>incident summary</summary> <details>incident summary details</details> <email>[email protected]</email> <phone>123-456-7890</phone> </ns2:inputReportIncident> </soap:Body> </soap:Envelope>
9. Press the green arrow in the soapUI navigator to make the SOAP call. Within the Navigator Viewyou'll see the SOAP response stating that the incident report was accepted. Also, checking a newtarget/inbox folder under the camel-example-cxf-osgi sample directory you'll see a filewas created storing the SOAP request, completing the Camel route.
37
Talend ESB Services Overview
Talend ESB Services Overview
This chapter looks at accessing the Talend ESB services: Service Locator and Service ActivityMonitoring from an Eclipse development environment.
For more details on these services, please see Talend ESB Infrastructure Services Configuration Guide.
Service LocatorThe Service Locator provides service consumers with a mechanism to register, and also discoverservice endpoints at runtime, thus isolating consumers from the knowledge about the physicallocation of the endpoint. Talend ESB uses Apache ZooKeeper as its service locator server. Zookeepercan be used either in standalone, therefore it is located within the Talend ESB distribution at<TalendRuntimePath>/zookeeper or as an OSGi feature in the Talend Runtime Container.Please see http://zookeeper.apache.org/ for more information about ZooKeeper. Also note theexamples folder of the Talend ESB distribution provides a "locator" example you can learn from.
In this section, you learn how to use the Service Locator via a simple greeting example.
Using the Service Locator in non-OSGi environments
If you are using a standard Web application Server (like Tomcat) with ESB JAX-WS based Services,the client component of the Service Locator (locator-<>.jar) is needed to enable your CXF service orconsumer to use the Service Locator. Add this JAR to the classpath or WAR file as appropriate.
Service interface
About this task
Within Eclipse:
Procedure
1. Create a Maven project, following the same steps as , and call it "locator_common" for thepurposes of this example.
2. Remove all default sources, as well as test source folder.
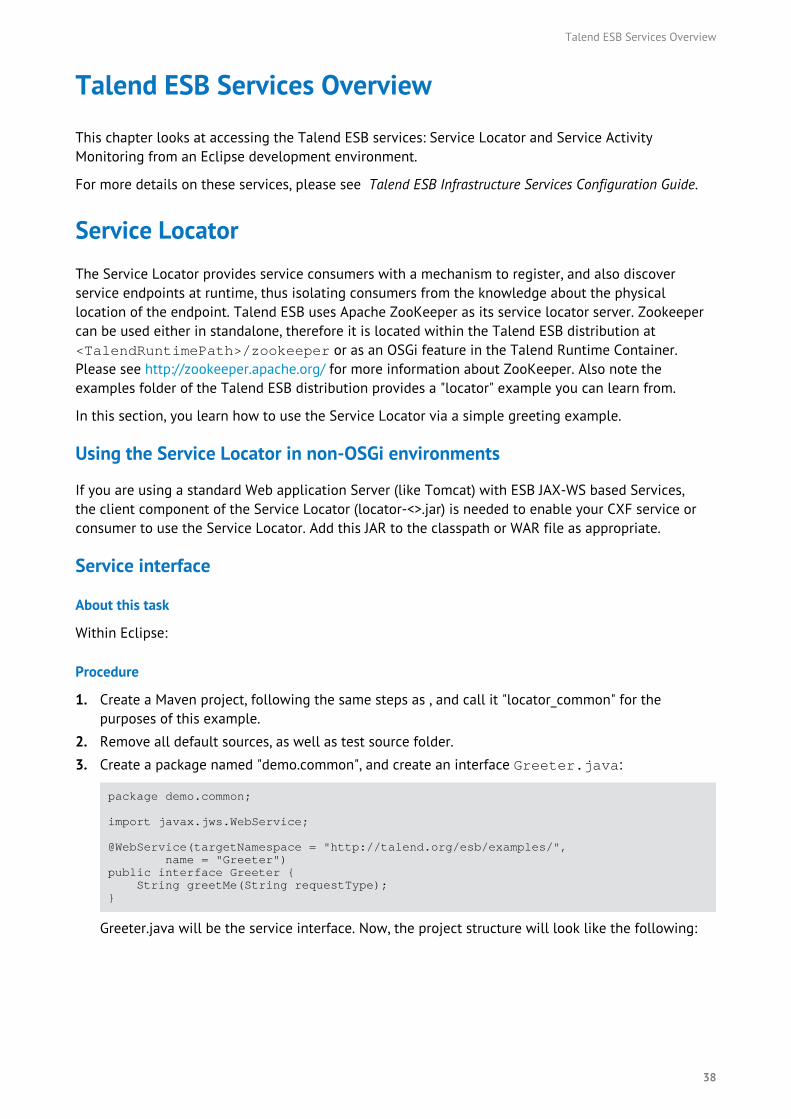
3. Create a package named "demo.common", and create an interface Greeter.java:
package demo.common;
import javax.jws.WebService;
@WebService(targetNamespace = "http://talend.org/esb/examples/", name = "Greeter")public interface Greeter { String greetMe(String requestType);}
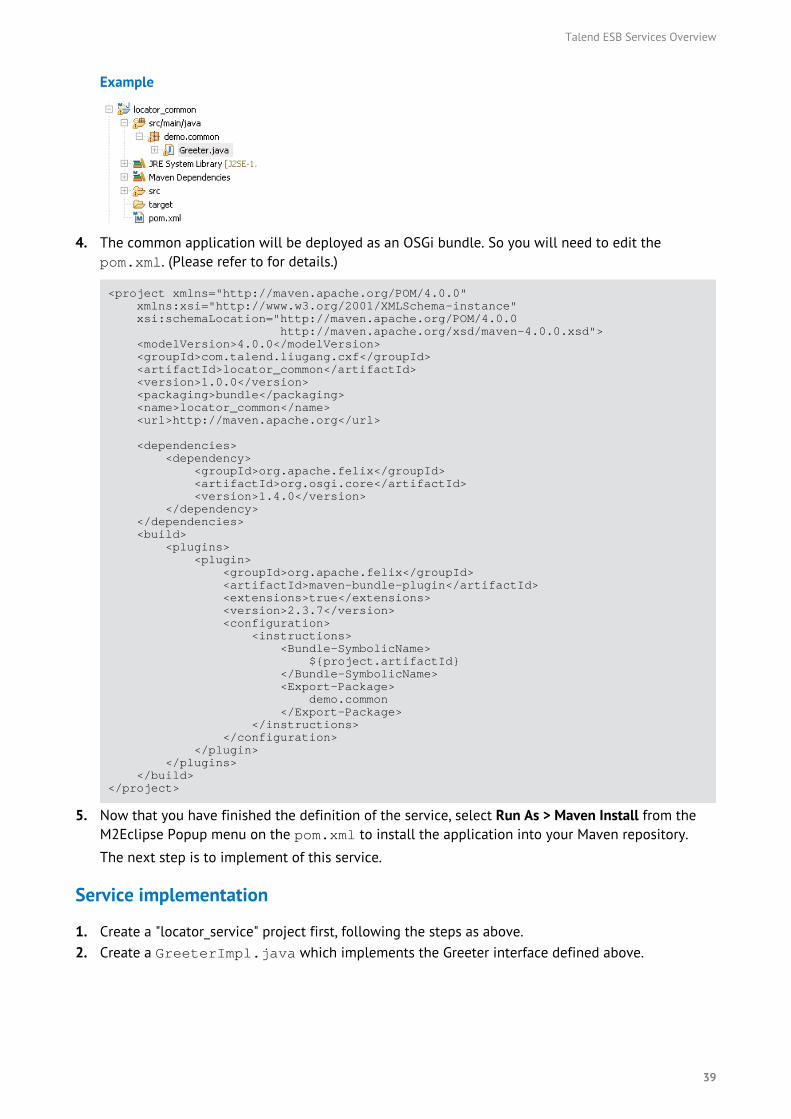
Greeter.java will be the service interface. Now, the project structure will look like the following:
38
Talend ESB Services Overview
Example
4. The common application will be deployed as an OSGi bundle. So you will need to edit thepom.xml. (Please refer to for details.)
<project xmlns="http://maven.apache.org/POM/4.0.0" xmlns:xsi="http://www.w3.org/2001/XMLSchema-instance" xsi:schemaLocation="http://maven.apache.org/POM/4.0.0 http://maven.apache.org/xsd/maven-4.0.0.xsd"> <modelVersion>4.0.0</modelVersion> <groupId>com.talend.liugang.cxf</groupId> <artifactId>locator_common</artifactId> <version>1.0.0</version> <packaging>bundle</packaging> <name>locator_common</name> <url>http://maven.apache.org</url>
<dependencies> <dependency> <groupId>org.apache.felix</groupId> <artifactId>org.osgi.core</artifactId> <version>1.4.0</version> </dependency> </dependencies> <build> <plugins> <plugin> <groupId>org.apache.felix</groupId> <artifactId>maven-bundle-plugin</artifactId> <extensions>true</extensions> <version>2.3.7</version> <configuration> <instructions> <Bundle-SymbolicName> ${project.artifactId} </Bundle-SymbolicName> <Export-Package> demo.common </Export-Package> </instructions> </configuration> </plugin> </plugins> </build></project>
5. Now that you have finished the definition of the service, select Run As > Maven Install from theM2Eclipse Popup menu on the pom.xml to install the application into your Maven repository.
The next step is to implement of this service.
Service implementation
1. Create a "locator_service" project first, following the steps as above.2. Create a GreeterImpl.java which implements the Greeter interface defined above.
39
Talend ESB Services Overview
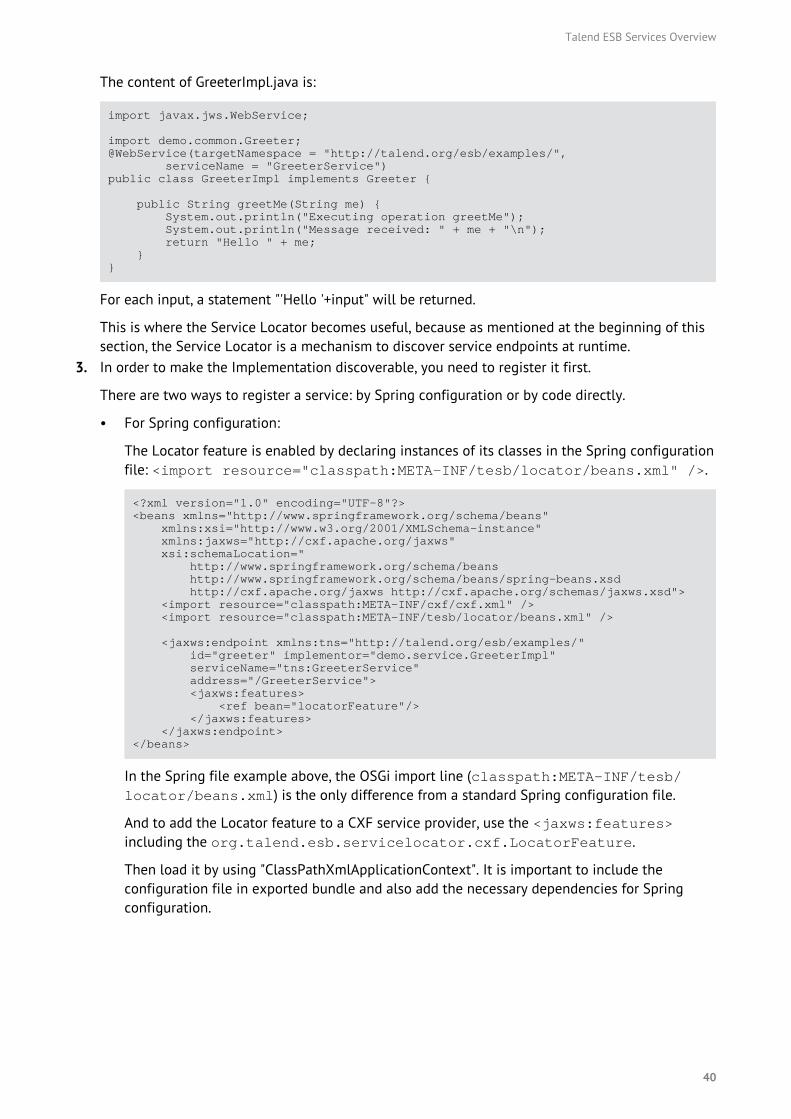
The content of GreeterImpl.java is:
import javax.jws.WebService;
import demo.common.Greeter;@WebService(targetNamespace = "http://talend.org/esb/examples/", serviceName = "GreeterService")public class GreeterImpl implements Greeter {
public String greetMe(String me) { System.out.println("Executing operation greetMe"); System.out.println("Message received: " + me + "\n"); return "Hello " + me; }}
For each input, a statement "'Hello '+input" will be returned.
This is where the Service Locator becomes useful, because as mentioned at the beginning of thissection, the Service Locator is a mechanism to discover service endpoints at runtime.
3. In order to make the Implementation discoverable, you need to register it first.
There are two ways to register a service: by Spring configuration or by code directly.
• For Spring configuration:
The Locator feature is enabled by declaring instances of its classes in the Spring configurationfile: <import resource="classpath:META-INF/tesb/locator/beans.xml" />.
<?xml version="1.0" encoding="UTF-8"?><beans xmlns="http://www.springframework.org/schema/beans" xmlns:xsi="http://www.w3.org/2001/XMLSchema-instance" xmlns:jaxws="http://cxf.apache.org/jaxws" xsi:schemaLocation=" http://www.springframework.org/schema/beans http://www.springframework.org/schema/beans/spring-beans.xsd http://cxf.apache.org/jaxws http://cxf.apache.org/schemas/jaxws.xsd"> <import resource="classpath:META-INF/cxf/cxf.xml" /> <import resource="classpath:META-INF/tesb/locator/beans.xml" />
<jaxws:endpoint xmlns:tns="http://talend.org/esb/examples/" id="greeter" implementor="demo.service.GreeterImpl" serviceName="tns:GreeterService" address="/GreeterService"> <jaxws:features> <ref bean="locatorFeature"/> </jaxws:features> </jaxws:endpoint></beans>
In the Spring file example above, the OSGi import line (classpath:META-INF/tesb/locator/beans.xml) is the only difference from a standard Spring configuration file.
And to add the Locator feature to a CXF service provider, use the <jaxws:features>including the org.talend.esb.servicelocator.cxf.LocatorFeature.
Then load it by using "ClassPathXmlApplicationContext". It is important to include theconfiguration file in exported bundle and also add the necessary dependencies for Springconfiguration.
40
Talend ESB Services Overview
• The alternative code version is:
LocatorFeature locatorFeature = new LocatorFeatureImpl();Greeter greeterService = new GreeterImpl();svrFactory = new JaxWsServerFactoryBean();// WSDL operations that service will implementsvrFactory.setServiceClass(Greeter.class); // endpoint service will listen onsvrFactory.setAddress("http://localhost:8082/services/Greeter"); // implementation of WSDL operationssvrFactory.setServiceBean(greeterService); // attach LocatorFeature to web service providersvrFactory.getFeatures().add(locatorFeature); svrFactory.create();
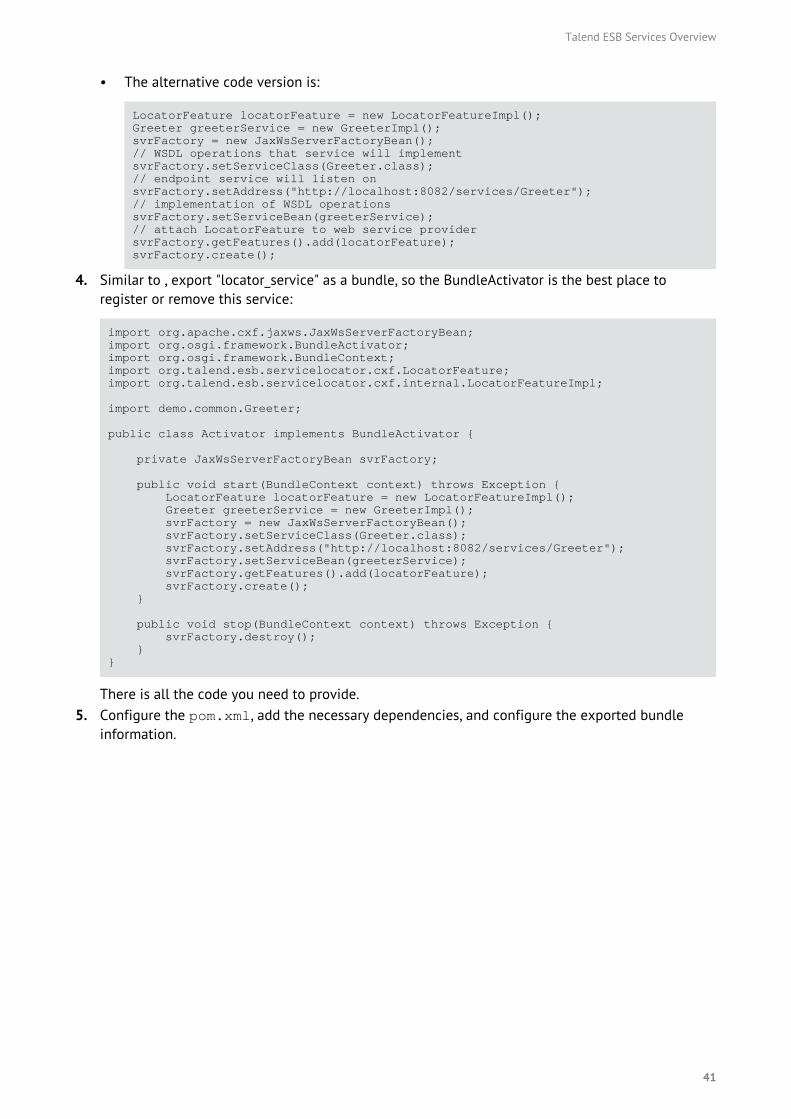
4. Similar to , export "locator_service" as a bundle, so the BundleActivator is the best place toregister or remove this service:
import org.apache.cxf.jaxws.JaxWsServerFactoryBean;import org.osgi.framework.BundleActivator;import org.osgi.framework.BundleContext;import org.talend.esb.servicelocator.cxf.LocatorFeature;import org.talend.esb.servicelocator.cxf.internal.LocatorFeatureImpl;
import demo.common.Greeter;
public class Activator implements BundleActivator {
private JaxWsServerFactoryBean svrFactory;
public void start(BundleContext context) throws Exception { LocatorFeature locatorFeature = new LocatorFeatureImpl(); Greeter greeterService = new GreeterImpl(); svrFactory = new JaxWsServerFactoryBean(); svrFactory.setServiceClass(Greeter.class); svrFactory.setAddress("http://localhost:8082/services/Greeter"); svrFactory.setServiceBean(greeterService); svrFactory.getFeatures().add(locatorFeature); svrFactory.create(); }
public void stop(BundleContext context) throws Exception { svrFactory.destroy(); }}
There is all the code you need to provide.5. Configure the pom.xml, add the necessary dependencies, and configure the exported bundle
information.
41
Talend ESB Services Overview
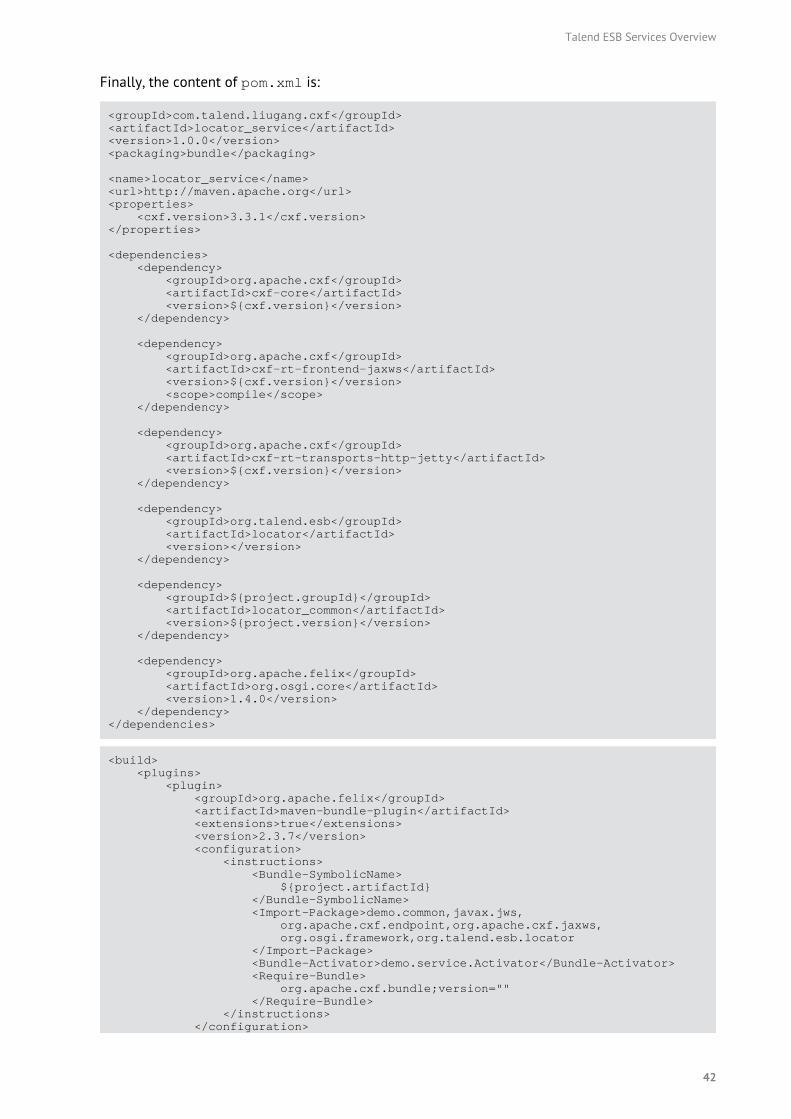
Finally, the content of pom.xml is:
<groupId>com.talend.liugang.cxf</groupId><artifactId>locator_service</artifactId><version>1.0.0</version><packaging>bundle</packaging>
<name>locator_service</name><url>http://maven.apache.org</url><properties> <cxf.version>3.3.1</cxf.version></properties>
<dependencies> <dependency> <groupId>org.apache.cxf</groupId> <artifactId>cxf-core</artifactId> <version>${cxf.version}</version> </dependency> <dependency> <groupId>org.apache.cxf</groupId> <artifactId>cxf-rt-frontend-jaxws</artifactId> <version>${cxf.version}</version> <scope>compile</scope> </dependency> <dependency> <groupId>org.apache.cxf</groupId> <artifactId>cxf-rt-transports-http-jetty</artifactId> <version>${cxf.version}</version> </dependency> <dependency> <groupId>org.talend.esb</groupId> <artifactId>locator</artifactId> <version></version> </dependency> <dependency> <groupId>${project.groupId}</groupId> <artifactId>locator_common</artifactId> <version>${project.version}</version> </dependency> <dependency> <groupId>org.apache.felix</groupId> <artifactId>org.osgi.core</artifactId> <version>1.4.0</version> </dependency></dependencies>
<build> <plugins> <plugin> <groupId>org.apache.felix</groupId> <artifactId>maven-bundle-plugin</artifactId> <extensions>true</extensions> <version>2.3.7</version> <configuration> <instructions> <Bundle-SymbolicName> ${project.artifactId} </Bundle-SymbolicName> <Import-Package>demo.common,javax.jws, org.apache.cxf.endpoint,org.apache.cxf.jaxws, org.osgi.framework,org.talend.esb.locator </Import-Package> <Bundle-Activator>demo.service.Activator</Bundle-Activator> <Require-Bundle> org.apache.cxf.bundle;version="" </Require-Bundle> </instructions> </configuration>
42
Talend ESB Services Overview
</plugin> </plugins></build>
6. Install it into Maven by running Maven Install.
Now the Service interface is defined, and implemented. It is time to write a client which willconsume the service.
Service Consumer
About this task
This time, you will try to consume the service above by using Service Locator instead of referencingthe implementor directly. As for the service registration, you can use Spring configuration or codedirectly.
Procedure
1. To make the consumer discoverable:
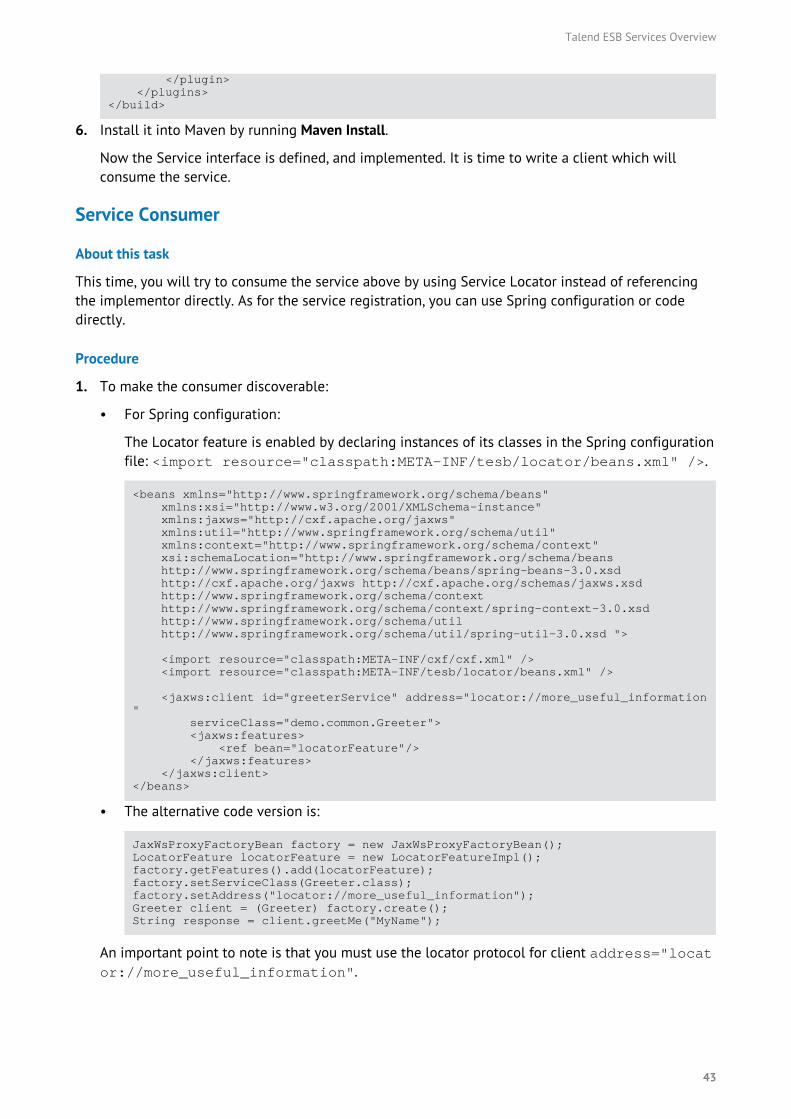
• For Spring configuration:
The Locator feature is enabled by declaring instances of its classes in the Spring configurationfile: <import resource="classpath:META-INF/tesb/locator/beans.xml" />.
<beans xmlns="http://www.springframework.org/schema/beans" xmlns:xsi="http://www.w3.org/2001/XMLSchema-instance" xmlns:jaxws="http://cxf.apache.org/jaxws" xmlns:util="http://www.springframework.org/schema/util" xmlns:context="http://www.springframework.org/schema/context" xsi:schemaLocation="http://www.springframework.org/schema/beans http://www.springframework.org/schema/beans/spring-beans-3.0.xsd http://cxf.apache.org/jaxws http://cxf.apache.org/schemas/jaxws.xsd http://www.springframework.org/schema/context http://www.springframework.org/schema/context/spring-context-3.0.xsd http://www.springframework.org/schema/util http://www.springframework.org/schema/util/spring-util-3.0.xsd ">
<import resource="classpath:META-INF/cxf/cxf.xml" /> <import resource="classpath:META-INF/tesb/locator/beans.xml" />
<jaxws:client id="greeterService" address="locator://more_useful_information" serviceClass="demo.common.Greeter"> <jaxws:features> <ref bean="locatorFeature"/> </jaxws:features> </jaxws:client></beans>
• The alternative code version is:
JaxWsProxyFactoryBean factory = new JaxWsProxyFactoryBean();LocatorFeature locatorFeature = new LocatorFeatureImpl();factory.getFeatures().add(locatorFeature);factory.setServiceClass(Greeter.class);factory.setAddress("locator://more_useful_information");Greeter client = (Greeter) factory.create();String response = client.greetMe("MyName");
An important point to note is that you must use the locator protocol for client address="locator://more_useful_information".
43
Talend ESB Services Overview
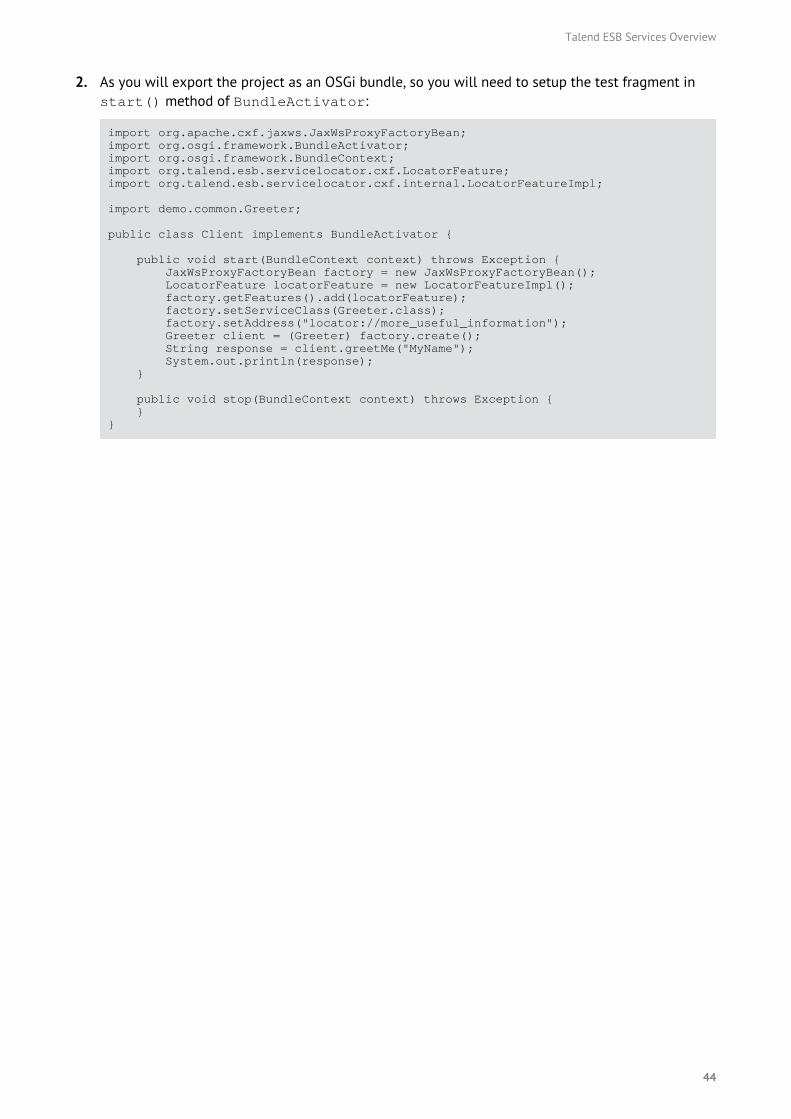
2. As you will export the project as an OSGi bundle, so you will need to setup the test fragment instart() method of BundleActivator:
import org.apache.cxf.jaxws.JaxWsProxyFactoryBean;import org.osgi.framework.BundleActivator;import org.osgi.framework.BundleContext;import org.talend.esb.servicelocator.cxf.LocatorFeature;import org.talend.esb.servicelocator.cxf.internal.LocatorFeatureImpl;
import demo.common.Greeter;
public class Client implements BundleActivator {
public void start(BundleContext context) throws Exception { JaxWsProxyFactoryBean factory = new JaxWsProxyFactoryBean(); LocatorFeature locatorFeature = new LocatorFeatureImpl(); factory.getFeatures().add(locatorFeature); factory.setServiceClass(Greeter.class); factory.setAddress("locator://more_useful_information"); Greeter client = (Greeter) factory.create(); String response = client.greetMe("MyName"); System.out.println(response); }
public void stop(BundleContext context) throws Exception { }}
44
Talend ESB Services Overview
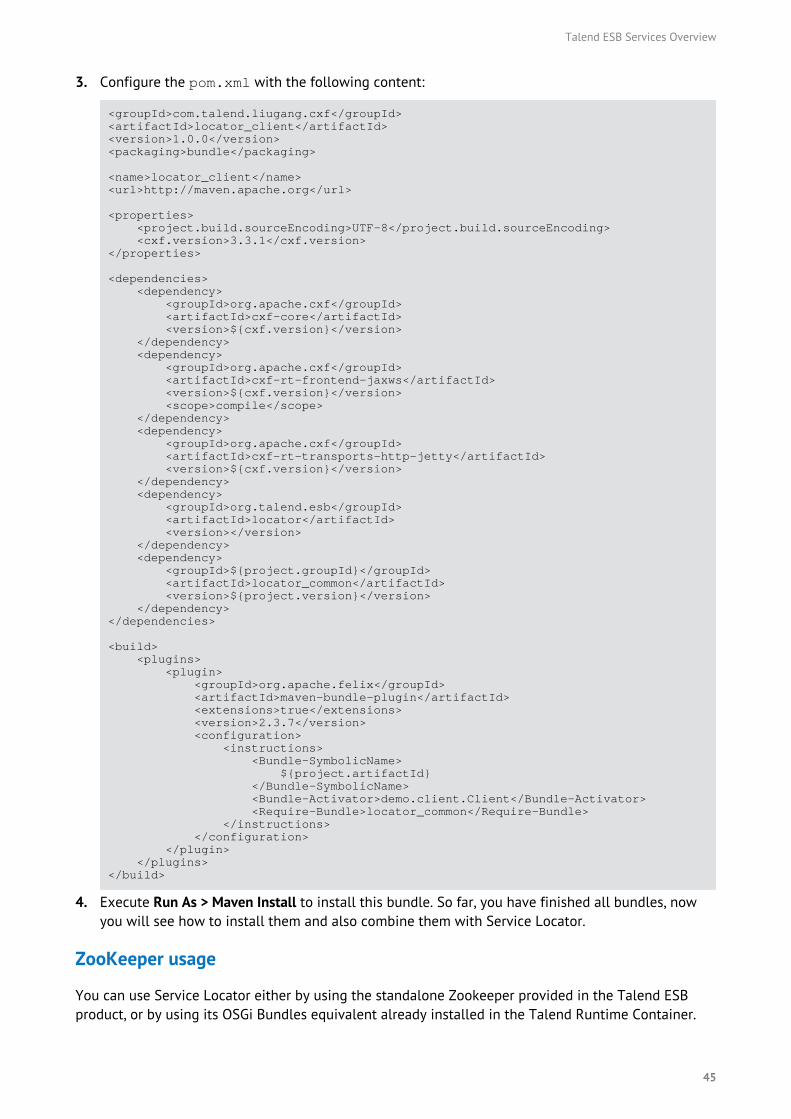
3. Configure the pom.xml with the following content:
<groupId>com.talend.liugang.cxf</groupId><artifactId>locator_client</artifactId><version>1.0.0</version><packaging>bundle</packaging>
<name>locator_client</name><url>http://maven.apache.org</url>
<properties> <project.build.sourceEncoding>UTF-8</project.build.sourceEncoding> <cxf.version>3.3.1</cxf.version></properties>
<dependencies> <dependency> <groupId>org.apache.cxf</groupId> <artifactId>cxf-core</artifactId> <version>${cxf.version}</version> </dependency> <dependency> <groupId>org.apache.cxf</groupId> <artifactId>cxf-rt-frontend-jaxws</artifactId> <version>${cxf.version}</version> <scope>compile</scope> </dependency> <dependency> <groupId>org.apache.cxf</groupId> <artifactId>cxf-rt-transports-http-jetty</artifactId> <version>${cxf.version}</version> </dependency> <dependency> <groupId>org.talend.esb</groupId> <artifactId>locator</artifactId> <version></version> </dependency> <dependency> <groupId>${project.groupId}</groupId> <artifactId>locator_common</artifactId> <version>${project.version}</version> </dependency></dependencies>
<build> <plugins> <plugin> <groupId>org.apache.felix</groupId> <artifactId>maven-bundle-plugin</artifactId> <extensions>true</extensions> <version>2.3.7</version> <configuration> <instructions> <Bundle-SymbolicName> ${project.artifactId} </Bundle-SymbolicName> <Bundle-Activator>demo.client.Client</Bundle-Activator> <Require-Bundle>locator_common</Require-Bundle> </instructions> </configuration> </plugin> </plugins></build>
4. Execute Run As > Maven Install to install this bundle. So far, you have finished all bundles, nowyou will see how to install them and also combine them with Service Locator.
ZooKeeper usage
You can use Service Locator either by using the standalone Zookeeper provided in the Talend ESBproduct, or by using its OSGi Bundles equivalent already installed in the Talend Runtime Container.
45

Talend ESB Services Overview
Service Locator standalone installation
Procedure
1. Go into <TalendRuntimePath>/zookeeper.
2. Before starting Zookeeper, you need to provide a configuration file. Two configuration filesare provided: <TalendRuntimePath>/zookeeper/conf/zoo.cfg, the default one, andzoo_sample.cfg. For a testing purpose, if you do not want to edit the default file, you can justrename the zoo_sample.cfg to zoo.cfg.
Edit it and change the settings as follows:
tickTime=2000 dataDir=./var/locator clientPort=2181
• The tickTime refers to the basic unit of time measurement used by ZooKeeper, used for laterconfiguration of timeouts and other parameters.
• The dataDir holds database snapshots and transaction logs. Check the ZooKeeperAdministration Manual for information on all possible parameters.
• The clientPort number should be same as the endpointPrefix defined inLocatorFeature above.
3. Once the zoo.cfg file configured, you can start or stop the zooKeeper by running:
• <TalendRuntimePath>/zookeeper/bin/zkServer.cmd start/stop on Windows.• <TalendRuntimePath>/zookeeper/bin/zkServer.sh start/stop on Linux.
Example
4. Start the Container, for details on this please refer to .
Service Locator installation as an OSGi bundle
Procedure
1. You first need to start the Talend Runtime Container and start the Service Locator feature viathe tesb:start-locator. For more information on how to start them, see the Talend ESBInfrastructure Services Configuration Guide.
2. Once the Service Locator feature started, a container/etc/org.talend.esb.locator.server.cfg configuration file is created. It is the Talend ESB equivalent to theZookeeper zoo.cfg configuration file.
46
Talend ESB Services Overview
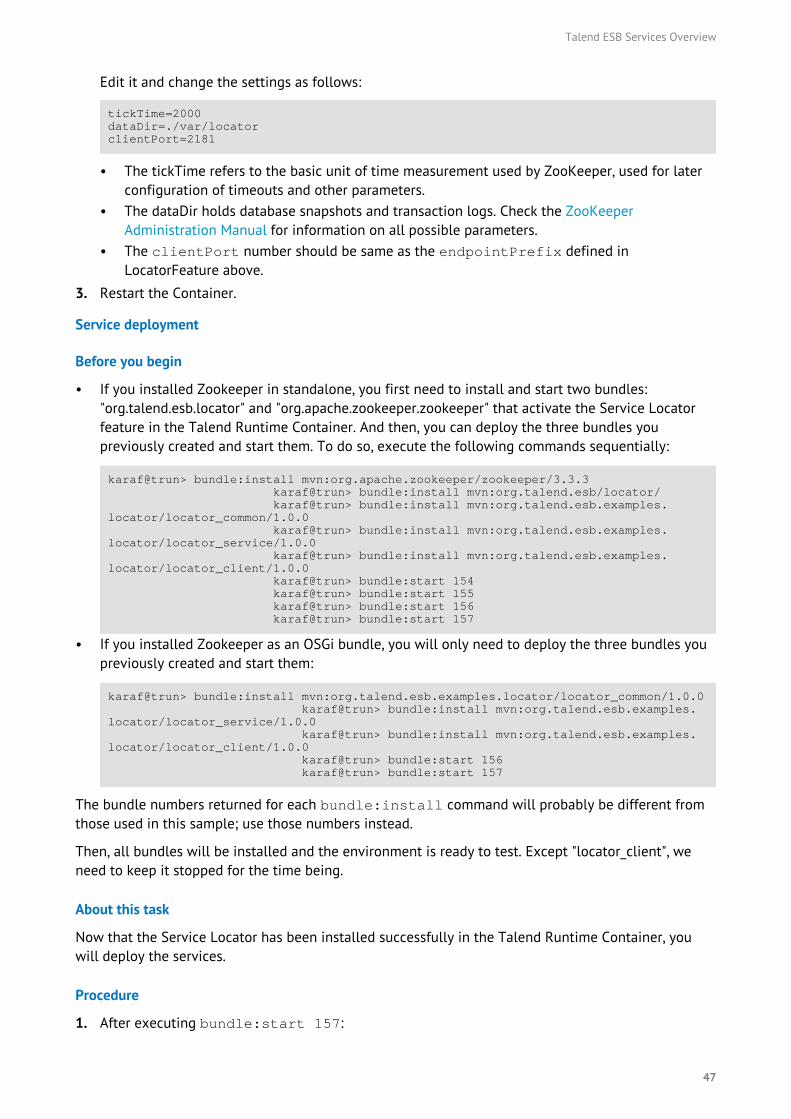
Edit it and change the settings as follows:
tickTime=2000 dataDir=./var/locator clientPort=2181
• The tickTime refers to the basic unit of time measurement used by ZooKeeper, used for laterconfiguration of timeouts and other parameters.
• The dataDir holds database snapshots and transaction logs. Check the ZooKeeperAdministration Manual for information on all possible parameters.
• The clientPort number should be same as the endpointPrefix defined inLocatorFeature above.
3. Restart the Container.
Service deployment
Before you begin
• If you installed Zookeeper in standalone, you first need to install and start two bundles:"org.talend.esb.locator" and "org.apache.zookeeper.zookeeper" that activate the Service Locatorfeature in the Talend Runtime Container. And then, you can deploy the three bundles youpreviously created and start them. To do so, execute the following commands sequentially:
karaf@trun> bundle:install mvn:org.apache.zookeeper/zookeeper/3.3.3 karaf@trun> bundle:install mvn:org.talend.esb/locator/ karaf@trun> bundle:install mvn:org.talend.esb.examples.locator/locator_common/1.0.0 karaf@trun> bundle:install mvn:org.talend.esb.examples.locator/locator_service/1.0.0 karaf@trun> bundle:install mvn:org.talend.esb.examples.locator/locator_client/1.0.0 karaf@trun> bundle:start 154 karaf@trun> bundle:start 155 karaf@trun> bundle:start 156 karaf@trun> bundle:start 157
• If you installed Zookeeper as an OSGi bundle, you will only need to deploy the three bundles youpreviously created and start them:
karaf@trun> bundle:install mvn:org.talend.esb.examples.locator/locator_common/1.0.0 karaf@trun> bundle:install mvn:org.talend.esb.examples.locator/locator_service/1.0.0 karaf@trun> bundle:install mvn:org.talend.esb.examples.locator/locator_client/1.0.0 karaf@trun> bundle:start 156 karaf@trun> bundle:start 157
The bundle numbers returned for each bundle:install command will probably be different fromthose used in this sample; use those numbers instead.
Then, all bundles will be installed and the environment is ready to test. Except "locator_client", weneed to keep it stopped for the time being.
About this task
Now that the Service Locator has been installed successfully in the Talend Runtime Container, youwill deploy the services.
Procedure
1. After executing bundle:start 157:
47
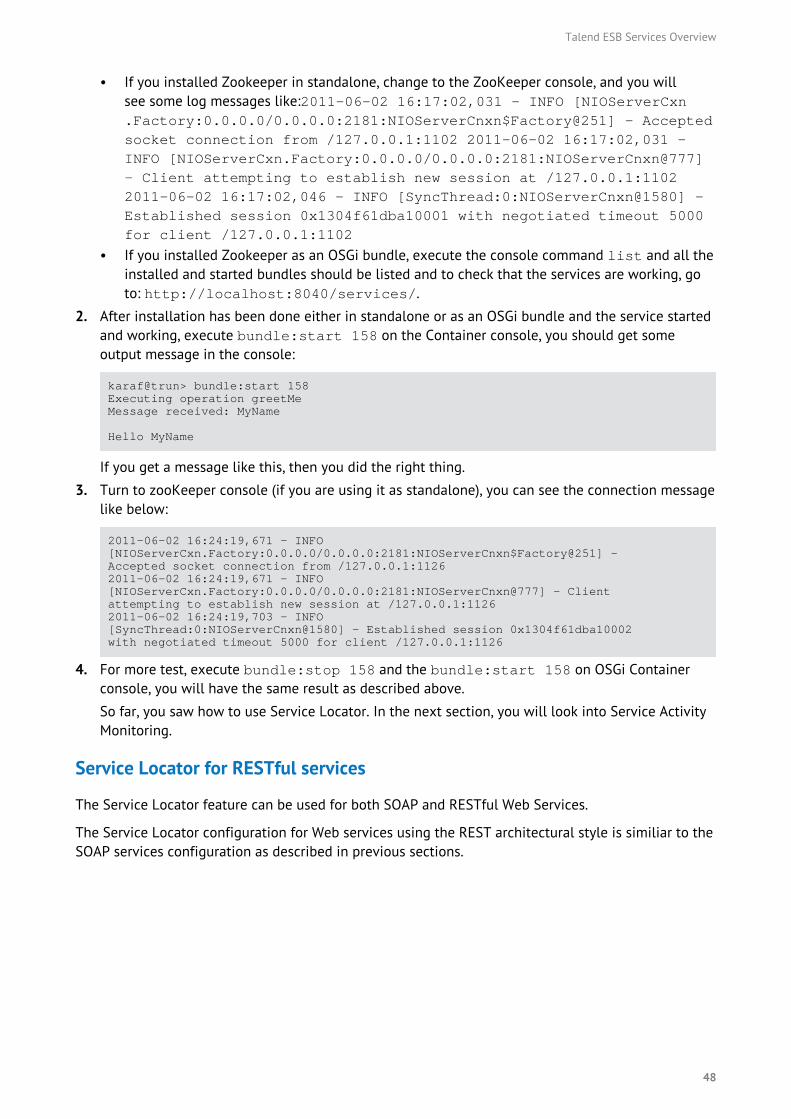
Talend ESB Services Overview
• If you installed Zookeeper in standalone, change to the ZooKeeper console, and you willsee some log messages like:2011-06-02 16:17:02,031 - INFO [NIOServerCxn.Factory:0.0.0.0/0.0.0.0:2181:NIOServerCnxn$Factory@251] - Acceptedsocket connection from /127.0.0.1:1102 2011-06-02 16:17:02,031 -INFO [NIOServerCxn.Factory:0.0.0.0/0.0.0.0:2181:NIOServerCnxn@777]- Client attempting to establish new session at /127.0.0.1:11022011-06-02 16:17:02,046 - INFO [SyncThread:0:NIOServerCnxn@1580] -Established session 0x1304f61dba10001 with negotiated timeout 5000for client /127.0.0.1:1102
• If you installed Zookeeper as an OSGi bundle, execute the console command list and all theinstalled and started bundles should be listed and to check that the services are working, goto: http://localhost:8040/services/.
2. After installation has been done either in standalone or as an OSGi bundle and the service startedand working, execute bundle:start 158 on the Container console, you should get someoutput message in the console:
karaf@trun> bundle:start 158Executing operation greetMeMessage received: MyName
Hello MyName
If you get a message like this, then you did the right thing.
3. Turn to zooKeeper console (if you are using it as standalone), you can see the connection messagelike below:
2011-06-02 16:24:19,671 - INFO [NIOServerCxn.Factory:0.0.0.0/0.0.0.0:2181:NIOServerCnxn$Factory@251] - Accepted socket connection from /127.0.0.1:11262011-06-02 16:24:19,671 - INFO [NIOServerCxn.Factory:0.0.0.0/0.0.0.0:2181:NIOServerCnxn@777] - Client attempting to establish new session at /127.0.0.1:11262011-06-02 16:24:19,703 - INFO [SyncThread:0:NIOServerCnxn@1580] - Established session 0x1304f61dba10002 with negotiated timeout 5000 for client /127.0.0.1:1126
4. For more test, execute bundle:stop 158 and the bundle:start 158 on OSGi Containerconsole, you will have the same result as described above.
So far, you saw how to use Service Locator. In the next section, you will look into Service ActivityMonitoring.
Service Locator for RESTful services
The Service Locator feature can be used for both SOAP and RESTful Web Services.
The Service Locator configuration for Web services using the REST architectural style is similiar to theSOAP services configuration as described in previous sections.
48
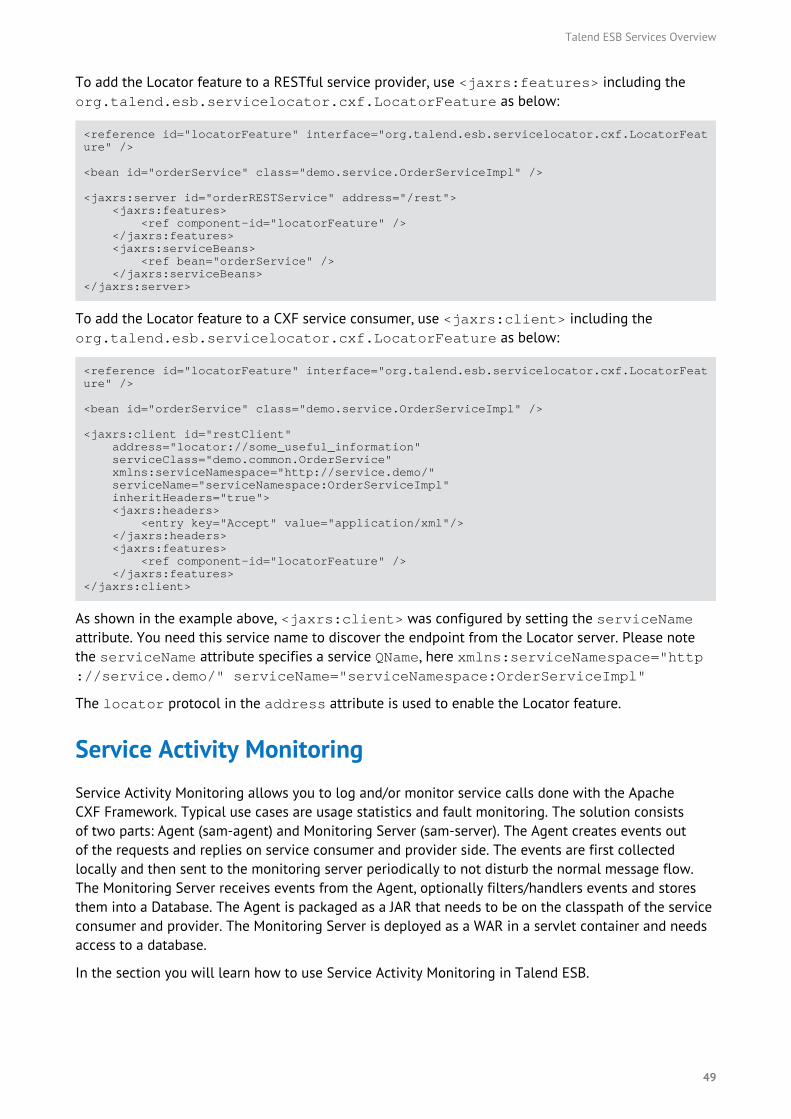
Talend ESB Services Overview
To add the Locator feature to a RESTful service provider, use <jaxrs:features> including theorg.talend.esb.servicelocator.cxf.LocatorFeature as below:
<reference id="locatorFeature" interface="org.talend.esb.servicelocator.cxf.LocatorFeature" />
<bean id="orderService" class="demo.service.OrderServiceImpl" />
<jaxrs:server id="orderRESTService" address="/rest"> <jaxrs:features> <ref component-id="locatorFeature" /> </jaxrs:features> <jaxrs:serviceBeans> <ref bean="orderService" /> </jaxrs:serviceBeans></jaxrs:server>
To add the Locator feature to a CXF service consumer, use <jaxrs:client> including theorg.talend.esb.servicelocator.cxf.LocatorFeature as below:
<reference id="locatorFeature" interface="org.talend.esb.servicelocator.cxf.LocatorFeature" />
<bean id="orderService" class="demo.service.OrderServiceImpl" />
<jaxrs:client id="restClient" address="locator://some_useful_information" serviceClass="demo.common.OrderService" xmlns:serviceNamespace="http://service.demo/" serviceName="serviceNamespace:OrderServiceImpl" inheritHeaders="true"> <jaxrs:headers> <entry key="Accept" value="application/xml"/> </jaxrs:headers> <jaxrs:features> <ref component-id="locatorFeature" /> </jaxrs:features></jaxrs:client>
As shown in the example above, <jaxrs:client> was configured by setting the serviceNameattribute. You need this service name to discover the endpoint from the Locator server. Please notethe serviceName attribute specifies a service QName, here xmlns:serviceNamespace="http://service.demo/" serviceName="serviceNamespace:OrderServiceImpl"
The locator protocol in the address attribute is used to enable the Locator feature.
Service Activity MonitoringService Activity Monitoring allows you to log and/or monitor service calls done with the ApacheCXF Framework. Typical use cases are usage statistics and fault monitoring. The solution consistsof two parts: Agent (sam-agent) and Monitoring Server (sam-server). The Agent creates events outof the requests and replies on service consumer and provider side. The events are first collectedlocally and then sent to the monitoring server periodically to not disturb the normal message flow.The Monitoring Server receives events from the Agent, optionally filters/handlers events and storesthem into a Database. The Agent is packaged as a JAR that needs to be on the classpath of the serviceconsumer and provider. The Monitoring Server is deployed as a WAR in a servlet container and needsaccess to a database.
In the section you will learn how to use Service Activity Monitoring in Talend ESB.
49

Talend ESB Services Overview
Run the Monitoring Server
The Monitoring Server can be run on the Talend Runtime Container or in an embedded Jetty server,but only the Talend Runtime Container way is covered here.
The Service Activity Monitoring configuration file is <TalendRuntimePath>/container/etc/org.talend.esb.sam.server.cfg. Please edit this file if you want to change the default values:
monitoringServiceUrl=/MonitoringServiceSOAPdb.driver=org.apache.derby.jdbc.ClientDriverdb.url=jdbc:derby://localhost:1527/db;create=truedb.username=testdb.password=testdb.incrementer=derbyIncrementer
db.recreate=truedb.createsql=create.sql
Then start the OSGi container by running <TalendRuntimePath>/container/bin/trun.bat on Windows or <TalendRuntimePath>/container/bin/trun on Linux. Once the OSGiContainer is started, you can setup the server by executing the following commands on the OSGiConsole:
feature:install tesb-derby-starterfeature:install tesb-sam-serverfeature:install tesb-sam-agent
The Database, sam-server and sam-agent will be installed and are ready to be used.
Prepare the sample
Reuse the sample from .
In , in order to use the Service Locator, you needed to add a LocatorFeature. This time, you need toadd "org.talend.esb.sam.agent.feature.EventFeature".
50
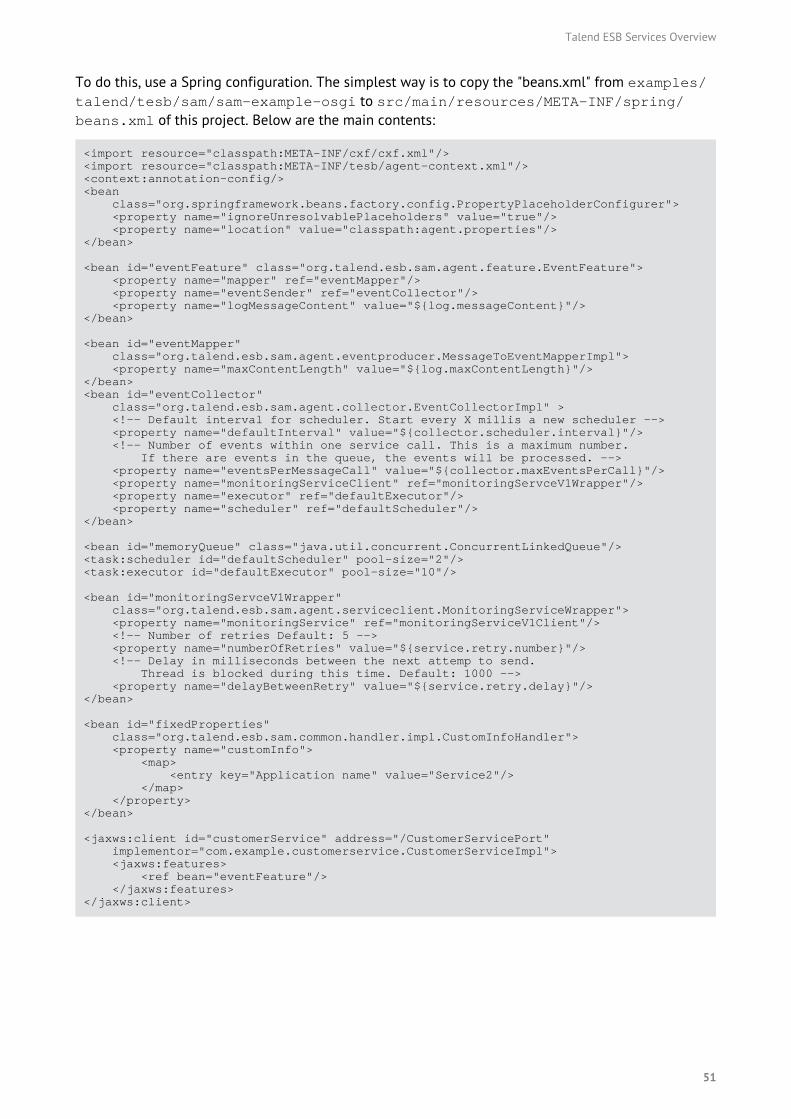
Talend ESB Services Overview
To do this, use a Spring configuration. The simplest way is to copy the "beans.xml" from examples/talend/tesb/sam/sam-example-osgi to src/main/resources/META-INF/spring/beans.xml of this project. Below are the main contents:
<import resource="classpath:META-INF/cxf/cxf.xml"/><import resource="classpath:META-INF/tesb/agent-context.xml"/><context:annotation-config/><bean class="org.springframework.beans.factory.config.PropertyPlaceholderConfigurer"> <property name="ignoreUnresolvablePlaceholders" value="true"/> <property name="location" value="classpath:agent.properties"/></bean>
<bean id="eventFeature" class="org.talend.esb.sam.agent.feature.EventFeature"> <property name="mapper" ref="eventMapper"/> <property name="eventSender" ref="eventCollector"/> <property name="logMessageContent" value="${log.messageContent}"/></bean>
<bean id="eventMapper" class="org.talend.esb.sam.agent.eventproducer.MessageToEventMapperImpl"> <property name="maxContentLength" value="${log.maxContentLength}"/></bean><bean id="eventCollector" class="org.talend.esb.sam.agent.collector.EventCollectorImpl" > <!-- Default interval for scheduler. Start every X millis a new scheduler --> <property name="defaultInterval" value="${collector.scheduler.interval}"/> <!-- Number of events within one service call. This is a maximum number. If there are events in the queue, the events will be processed. --> <property name="eventsPerMessageCall" value="${collector.maxEventsPerCall}"/> <property name="monitoringServiceClient" ref="monitoringServceV1Wrapper"/> <property name="executor" ref="defaultExecutor"/> <property name="scheduler" ref="defaultScheduler"/></bean>
<bean id="memoryQueue" class="java.util.concurrent.ConcurrentLinkedQueue"/><task:scheduler id="defaultScheduler" pool-size="2"/><task:executor id="defaultExecutor" pool-size="10"/>
<bean id="monitoringServceV1Wrapper" class="org.talend.esb.sam.agent.serviceclient.MonitoringServiceWrapper"> <property name="monitoringService" ref="monitoringServiceV1Client"/> <!-- Number of retries Default: 5 --> <property name="numberOfRetries" value="${service.retry.number}"/> <!-- Delay in milliseconds between the next attemp to send. Thread is blocked during this time. Default: 1000 --> <property name="delayBetweenRetry" value="${service.retry.delay}"/></bean>
<bean id="fixedProperties" class="org.talend.esb.sam.common.handler.impl.CustomInfoHandler"> <property name="customInfo"> <map> <entry key="Application name" value="Service2"/> </map> </property></bean>
<jaxws:client id="customerService" address="/CustomerServicePort" implementor="com.example.customerservice.CustomerServiceImpl"> <jaxws:features> <ref bean="eventFeature"/> </jaxws:features></jaxws:client>
51

Talend ESB Services Overview
And you also need to give an agent.properties file used to configure sam-agent:
collector.scheduler.interval=500collector.maxEventsPerCall=10
log.messageContent=truelog.maxContentLength=-1service.url=http://localhost:8040/services/MonitoringServiceSOAPservice.retry.number=3service.retry.delay=5000
You can give a logging.properties file for logger:
handlers = java.util.logging.ConsoleHandler, java.util.logging.FileHandler
# Set the default logging level for the root logger .level = INFO
# Set the default logging level for new ConsoleHandler instances java.util.logging.ConsoleHandler.level = INFO
# Set the default logging level for new FileHandler instances java.util.logging.FileHandler.level = ALL
# Set the default formatter for new ConsoleHandler instances #java.util.logging.ConsoleHandler.formatter = java.util.logging.SimpleFormatter java.util.logging.ConsoleHandler.formatter = // org.sopera.monitoring.util.CustomLogFormatter
# Set the default logging level for the logger named com.mycompany #org.talend.esb.sam.level = FINE #org.eclipse.persistence.level = INFOorg.talend.esb.sam.level = FINE org.eclipse.persistence.level = WARNING
You also need to change pom.xml to add more dependencies and plugins:
Add a dependency for sam-agent:
<dependency> <groupId>org.talend.esb</groupId> <artifactId>sam-agent</artifactId> <version></version></dependency>
52
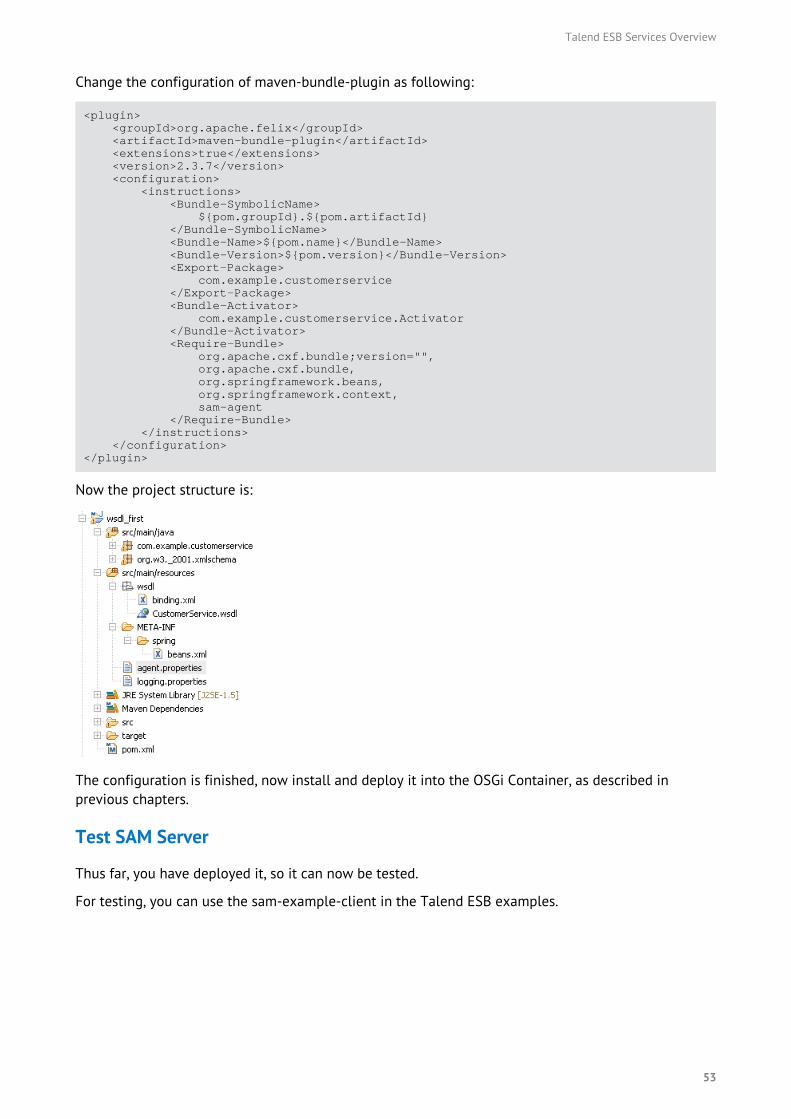
Talend ESB Services Overview
Change the configuration of maven-bundle-plugin as following:
<plugin> <groupId>org.apache.felix</groupId> <artifactId>maven-bundle-plugin</artifactId> <extensions>true</extensions> <version>2.3.7</version> <configuration> <instructions> <Bundle-SymbolicName> ${pom.groupId}.${pom.artifactId} </Bundle-SymbolicName> <Bundle-Name>${pom.name}</Bundle-Name> <Bundle-Version>${pom.version}</Bundle-Version> <Export-Package> com.example.customerservice </Export-Package> <Bundle-Activator> com.example.customerservice.Activator </Bundle-Activator> <Require-Bundle> org.apache.cxf.bundle;version="", org.apache.cxf.bundle, org.springframework.beans, org.springframework.context, sam-agent </Require-Bundle> </instructions> </configuration></plugin>
Now the project structure is:
The configuration is finished, now install and deploy it into the OSGi Container, as described inprevious chapters.
Test SAM Server
Thus far, you have deployed it, so it can now be tested.
For testing, you can use the sam-example-client in the Talend ESB examples.
53

Talend ESB Services Overview
The file agent.properties:
collector.scheduler.interval=500collector.maxEventsPerCall=10
log.messageContent=truelog.maxContentLength=-1service.url=http://localhost:8040/services/MonitoringServiceSOAPservice.retry.number=3service.retry.delay=5000
Spring configuration file contents:
<import resource="classpath:META-INF/cxf/cxf.xml" /><import resource="classpath:META-INF/cxf/cxf-extension-soap.xml" /><import resource="classpath:META-INF/cxf/cxf-servlet.xml" />
<import resource="classpath:META-INF/tesb/agent-context.xml" />
<bean id="fixedProperties" class="org.talend.esb.sam.common.handler.impl.CustomInfoHandler"> <property name="customInfo"> <map> <entry key="Application name" value="Client" /> </map> </property></bean>
<bean class="org.talend.esb.sam.examples.client.CustomerServiceTester"> <property name="customerService" ref="customerService" /></bean>
<jaxws:client id="customerService" address="${serviceUrl}" serviceClass="com.example.customerservice.CustomerService"> <jaxws:features> <!-- <bean class="org.apache.cxf.feature.LoggingFeature" />--> <ref bean="eventFeature"/> </jaxws:features></jaxws:client>
Then provide the following code:
// read configurationSystem.setProperty("serviceUrl", "http://localhost:9090/CustomerServicePort/CustomerServiceService");ClassPathXmlApplicationContext context = new ClassPathXmlApplicationContext("/client.xml");CustomerServiceTester tester = context.getBean(CustomerServiceTester.class);tester.testCustomerService();
54

Talend ESB Services Overview
As you see, the value of "serviceUrl" is sent with service URL, which will fill the contents of bean"customerService". Now you willl turn to the CustomerServiceTester to do a real test:
public void testCustomerService() throws NoSuchCustomerException { List<Customer> customers = null; // First we test the positive case where customers are found and we retrieve // a list of customers System.out.println("Sending request for customers named Smith"); customers = customerService.getCustomersByName("Smith"); System.out.println("Response received"); Assert.assertEquals(2, customers.size()); Assert.assertEquals("Smith", customers.get(0).getName()); try { Thread.sleep(1000); } catch (InterruptedException e1) { } // Then we test for an unknown Customer name // and expect a NoSuchCustomerException try { customers = customerService.getCustomersByName("None"); Assert.fail("We should get a NoSuchCustomerException here"); } catch (NoSuchCustomerException e) { System.out.println(e.getMessage()); Assert.assertNotNull("FaultInfo must not be null", e.getFaultInfo()); Assert.assertEquals("None", e.getFaultInfo().getCustomerName()); System.out.println("NoSuchCustomer exception was received as expected"); }
System.out.println("All calls were successful");}
As you can see, the test consisted in requesting a customer. Every time a test is executed, a logmessage will be recorded into the database you configured in "org.talend.esb.sam.server.cfg". Adatabase viewer can be used to confirm that, for example DbVisualizer:
55