the photoshop and painter artist tablet book: creative techniques
TRANSCRIPT
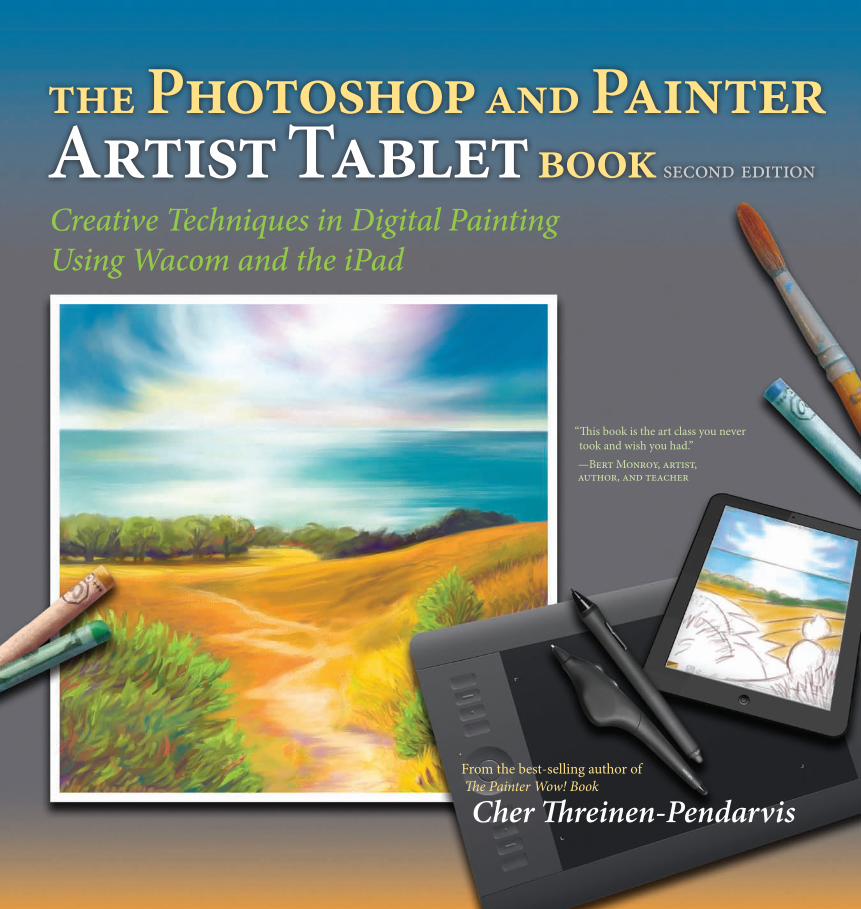
Cher Threinen-PendarvisFrom the best-selling author of The Painter Wow! Book
the Photoshop and PainterArtist Tablet book second edition
“This book is the art class you never took and wish you had.” —Bert Monroy, artist, author, and teacher
Creative Techniques in Digital Painting Using Wacom and the iPad

the Photoshop and Painter Artist Tablet book
Creative Techniques in Digital Painting Using Wacom and the iPad
Cher Threinen-Pendarvis
Peachpit Press

The Photoshop and Painter Artist Tablet Book, Second Edition
Cher Threinen-Pendarviswww.pendarvis-studios.com
Peachpit Presswww.peachpit.com
To report errors, please send a note to [email protected]
Peachpit Press is a division of Pearson Education.
Copyright © 2014 Cher Threinen-Pendarvis
Peachpit Press editor: Karyn JohnsonCover design: Mimi HeftCover illustration: Cher Threinen-Pendarvis Book design, art direction, and layout: Cher Threinen-PendarvisTechnical Editor: Jennifer LynnCopyeditor: Jennifer LynnProofreader: Linda Seifert Indexer: Joy Dean LeeProduction and prepress manager: Jonathan ParkerProduction editor: Tracey Croom
This book was set using the Minion and Helvetica families. It was written and composed in Adobe InDesign CS3. Final output was computer to plate at Courier Kendallville, Kendallville, Indiana.
Notice of Rights:All rights reserved. No part of this book may be reproduced or transmitted in any form by any means, electronic, mechani-cal, photocopying, recording, or otherwise, without the prior written permission of the publisher. For information on get-ting permission for reprints and excerpts, contact [email protected].
Notice of LiabilityThe information in this book is distributed on an “as is” basis, without warranty. While every precaution has been taken in the preparation of the book, neither the author nor Peachpit shall have any liability to any person or entity with respect to any loss or damage caused or alleged to be caused directly or indirectly by the instructions contained in this book or by the computer software and hardware products described in it.
TrademarksMany of the designations used by manufacturers and sellers to distinguish their products are claimed as trademarks. Where those designations appear in this book, and Peachpit was aware of a trademark claim, the designations appear as requested by the owner of the trademark. All other product names and services identified throughout this book are used in editorial fashion only and for the benefit of such companies with no intention of infringement of the trademark. No such use, or the use of any trade name, is intended to convey endorsement or other affiliation with this book.
ISBN-13: 978-0-321-90335-8ISBN-10: 0-321-90355-8
Printed and bound in the United States of America.
To our Creator, from whom all inspiration comes.To my husband, Steven, for his friendship and love.To my mother, Wanda, my father, Claude, and my brother, Larry.— Cher Threinen-Pendarvis
iv
Acknowledgments
The Photoshop and Painter Artist Tablet Book, Second Edition would not have been possible without a great
deal of help from some extraordinary people and sources. This book was in progress for a year—and it was a won-derful journey.
Heartfelt thanks go to my special friend and colleague Linnea Dayton, who brainstormed with me during the first edition book development process. My warmest thanks also go to my longtime artist friend Bert Monroy, for writing such a wonderful foreword for the book.
A special thank you goes to the talented designer John Odam, for his inspiration and friendship. John designed the clever sidebar icons and also gave helpful critiques of the early book cover designs. Warmest thanks go to my gifted photographer friend Melinda Holden for her beau-tiful photographs of my studio and location painting.
I’d like to thank my co-workers “behind the scenes” on The Photoshop and Painter Artist Tablet Book team. I’m grateful to Jennifer Lynn for her helpful technical reads and copy editing. Warmest thanks go to Linda Seifert for her detailed proofreading, Joy Dean Lee for her careful indexing, and production manager Jonathan Parker for his thorough production and prepress expertise.
Sincere thanks go to my friends and colleagues at Peachpit Press. The inspiration for this book came to me several years ago. A special thank you goes to Nancy Ruenzel for understanding my vision and for her support of the book. My warmest thanks go to Karyn Johnson for her advice through the development of the project and to the rest of the publishing team for their support. Thank you very much, Peachpit, for giving me the opportunity to write this book.
My special thank you goes to Ted Nace and Linnea Dayton for giving me the opportunity to publish my first book, The Painter Wow! Book, twenty years ago.
A big thank you goes to the wonderful folks at Wacom for their incredible pressure-sensitive tablets that help us artists unlock the creative power of Painter and Photo-shop. Sincere thanks goes to Hope Hadduck for her sup-port of the project and to Douglas Little and Don Varga for their support. Special thanks go to Darren Higgins for his stunning photographs of the Wacom tablet and pen that are shown in Chapter 3. A warm thank you also goes to the Wacom folks that I’ve enjoyed working along-side at the trade shows and conferences—Peter Deitrich, Weston Maggio, and the rest of the Wacom team.
My warmest thanks go to the brilliant creators of Painter—Mark Zimmer, Tom Hedges, and John Derry—for creating such an incredible program.
My sincere thank you goes to Stephen Bolt and Andy Church, the User Interface Designer and Product Man-ager for Painter, and to Tanya Lux, the Senior Product Marketing Manager, for their support. I’m also grateful to Project Manager Lee Genereau and the Painter devel-opment team: Christopher Tremblay, Vladmir Makarov, Caroline Suave, Pascal Becheiraz, Alex Piasko, Andrew Carmichael, Rina Fougere, Ruby Quesnel, Melanie Becker, and the rest of the team.
My special thanks go to the great people at Adobe—Tom and John Knoll, Mark Hamburg, Chris Cox, and to Jerry Harris (PixelPaint co-creator and creator of the Brush engine in Photoshop), and to the rest of the team for creat-ing such an awesome program. Sincere thanks go to the other people at Adobe who were supportive of this book.
v
My warm thank you goes to Dan Steinhardt and all of the folks at Epson for their scanner and color printers that were helpful for testing printmaking techniques.
Thank you to all of our inspiring artist friends, col-leagues, and family: Carol Benioff; Mary, Bob, and Brittany Envall; Ken and Robert Goldman; Rick and Joelle Geist; Drew and Susannah Bandish; David Lucas; Dr. Walter Munk and family; David Murline and family; Glenn and Heidi Hening; Glenn Sakamoto; Jamie Welsh Watson; Dirk and Maria Brandts; Bruce and Morgan Cowan; Jon, Rosa and Sydney Wegener; Michele Jacquin and Jim; Janine Reese Packett; Annie Wynhausen; Mark Snovell; Thomas Threinen and family; Linnea and Paul Dayton; Jack and Jill Davis; Bert Monroy and Zosia; Sharon Steuer and Jeff; Mark and Mary Zimmer; John, Pam, and Logan Derry; Chelsea Sammel and Peter; Kathy Hamon; Claude Szwimer; Jean-Luc Touillon; Lynda Weinman, Bruce, and Jaimie; Tanya Staples and Matt; Rick and Alice Champagne; Katrin Eismann and John; Pedro Meyer; Renata and Mario Spiazzi; Richard and Rita Cefalu; Mike and Susan Hickey; Valentine Ching Jr. and family; Jan Sunn Carrea and family; John Clark; Bud Scelsa; Larry and Michaelanne Gephart; Stevie, Betsy and Amber Lis; Jeff Ching; Tom and Jenny Wolverton; Eric and Amy Huffman; Marshall Myrman; Marcus and Lori Hale; Julie Roulette and Dane Perlee; Mike, Pam, April, and Kai Casey; and other friends and family. I love you all.
My sincere thank you goes to my inspiring art profes-sors, Professor Daryl Groover, Dr. Paul Lingren, and Dr. Jean Swiggett. Thank you for encouraging my work.
My heartfelt thanks goes to our Pendarvis and Stanhope families for their support and love. Special
thanks goes to our grand-nephew Brady and grand-niece Brooke who loaned me their colorful wooden trains so that I could use them for reference when painting The Three Trains illustration for Chapter 10. Warm thanks goes to our nieces Paige and Bryn, grand-niece Morgan and grand-nephew Jake, whose colorful artwork deco-rates our kitchen and brings us smiles. A warm acknowl-edgment goes to Jenna Klein and Armand Barolotti, two very talented young friends. You have a wonderful life ahead of you.
A heartfelt thank you to these special “co-workers:” to my husband, Steve, for his loving encouragement and pa-tience; and to our cats, Sable and Marika, the close com-panions who keep me company in the studio. (Sable and Marika provided me with [sometimes] welcome inter-ruptions that caused me to take breaks, by volleying their toy mouse onto my desk so we could play fetch.) Warm-est thanks go to my brother Larry Stanhope, my aunt and uncle Natalie and John Stanhope, my cousins Cathy and Naomi, my sister-in-law Joy Young and dear friends Lisa Baker, Susan Bugbee, Elaine Chadwick, Skip Frye, Libby Goodman, Don Jolley, Linda King, Julie Klein, Elizabeth Meyer, Anna Trent Moore, Mary Mills, and Andrea Siedsma, who shared sincere encouragement and prayers. Thanks for checking in with me while I worked and for the fun lunch breaks that we shared in the water at our favorite surf spots.
Finally, I would like to thank all the other family, friends, and colleagues who have been so patient and understanding during the development of this book.
vi
About the Author and Artist
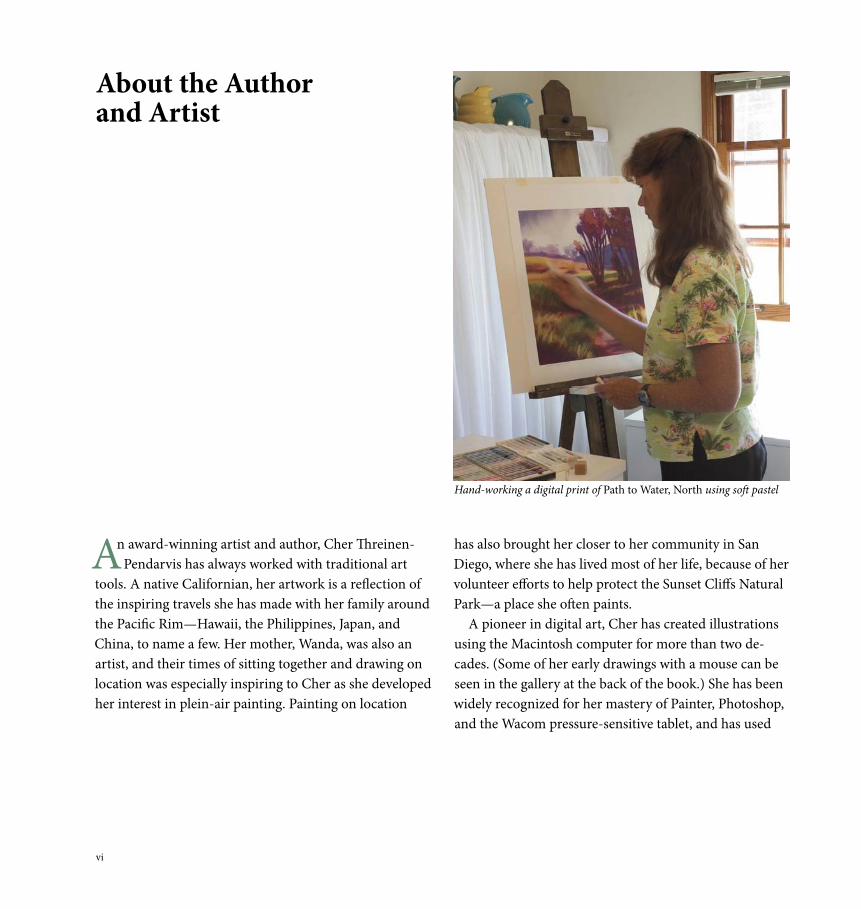
Hand-working a digital print of Path to Water, North using soft pastel
An award-winning artist and author, Cher Threinen- Pendarvis has always worked with traditional art
tools. A native Californian, her artwork is a reflection of the inspiring travels she has made with her family around the Pacific Rim—Hawaii, the Philippines, Japan, and China, to name a few. Her mother, Wanda, was also an artist, and their times of sitting together and drawing on location was especially inspiring to Cher as she developed her interest in plein-air painting. Painting on location
has also brought her closer to her community in San Diego, where she has lived most of her life, because of her volunteer efforts to help protect the Sunset Cliffs Natural Park—a place she often paints.
A pioneer in digital art, Cher has created illustrations using the Macintosh computer for more than two de-cades. (Some of her early drawings with a mouse can be seen in the gallery at the back of the book.) She has been widely recognized for her mastery of Painter, Photoshop, and the Wacom pressure-sensitive tablet, and has used
vii
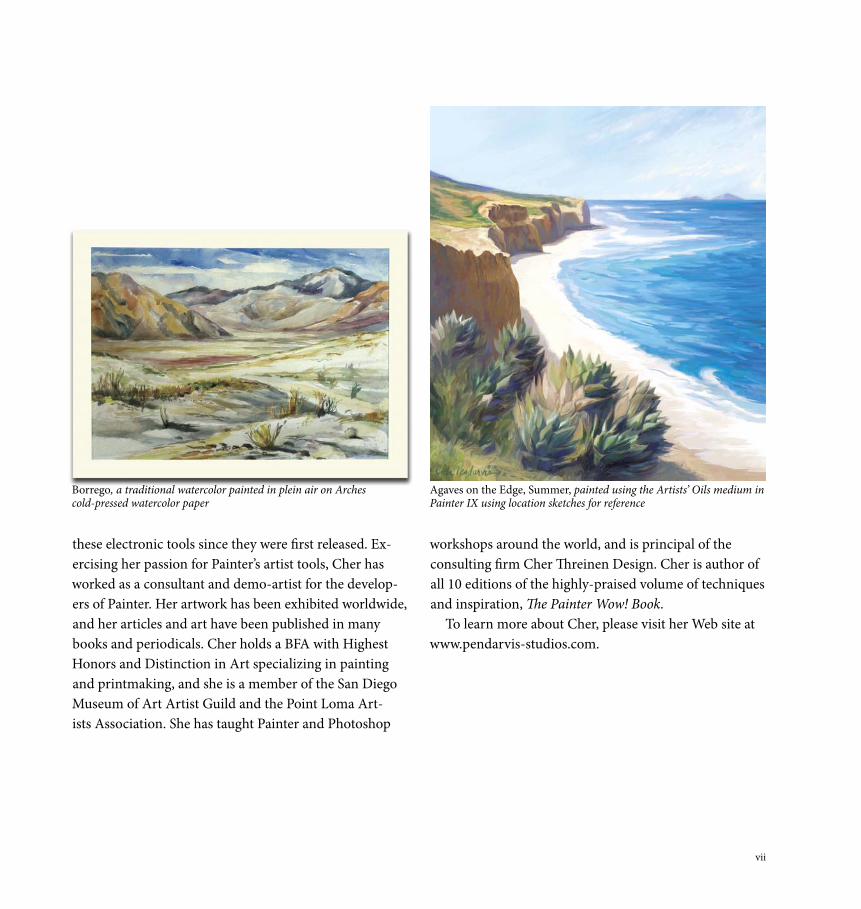
Borrego, a traditional watercolor painted in plein air on Arches cold-pressed watercolor paper
Agaves on the Edge, Summer, painted using the Artists’ Oils medium in Painter IX using location sketches for reference
these electronic tools since they were first released. Ex-ercising her passion for Painter’s artist tools, Cher has worked as a consultant and demo-artist for the develop-ers of Painter. Her artwork has been exhibited worldwide, and her articles and art have been published in many books and periodicals. Cher holds a BFA with Highest Honors and Distinction in Art specializing in painting and printmaking, and she is a member of the San Diego Museum of Art Artist Guild and the Point Loma Art-ists Association. She has taught Painter and Photoshop
workshops around the world, and is principal of the consulting firm Cher Threinen Design. Cher is author of all 10 editions of the highly-praised volume of techniques and inspiration, The Painter Wow! Book.
To learn more about Cher, please visit her Web site at www.pendarvis-studios.com.
viii
The computer, in one way or another, touches every facet of our daily lives. Most households today have
a computer. Usually it is used to perform the basic func-tions of today’s technology-driven society: email, access to the Internet, work and, of course, games. The com-puter also puts at your disposal the tools that allow you to be creative.
Whether we admit it or not, we all possess a left side to our brain. We all share a creative side. Some take advan-tage and pursue that calling in the form of photography, whether it’s taking photos with a simple point-and-shoot camera or with a truckload of expensive equipment.
If painting is one’s pursuit, the media choices can range from a simple pencil to a collection of the finest oil paints. The computer has opened enormous opportuni-ties, with new tools that once we could only dream about. From an endless collection of paintbrushes to a piece of chalk in any possible color, every tool for the photogra-pher and painter is available when you need them, at the touch of a button. All without the need for toxic dark-room chemicals or paint thinners or the smell that goes with them. Did I mention no clean-up afterwards?
For traditionally trained painters and photo retouchers, technology, like the Wacom pressure-sensitive tablet, has reached a point where the very tool that is held by the hand to interact with the computer looks and feels like a
pen. Devices such as the Wacom Cintiq now let you work directly on the screen as if you were standing before an easel and canvas. Yes, there is a learning curve. All this great stuff, but how do you use it?
Standing in the computer graphics books section of a bookstore makes you feel like you’re standing in front of a haystack faced with the task of finding a needle. If you happened to pick up this book, then you can stop search-ing. Let me tell you what sets this book apart from the rest. One of the things that make this book so crucial for tackling that learning curve is the level of detail that Cher has gone into to help you master these tools. Most impor-tant is how she makes it easy to understand what is being taught.
Cher Threinen-Pendarvis is an artist who I have had the pleasure of calling my friend since the computer screen measured only nine inches and offered pixels that were either black or white. I have seen her talent and vi-sion evolve through many years of dedication and explo-ration of graphics software and digital tools.
Many companies that produce graphics software and hardware have commissioned her to demonstrate the features of their products. Cher’s vast experience, coupled with her amazing talent for teaching, has produced a book that will be of tremendous help to you for master-ing these digital tools. The many illustrations throughout
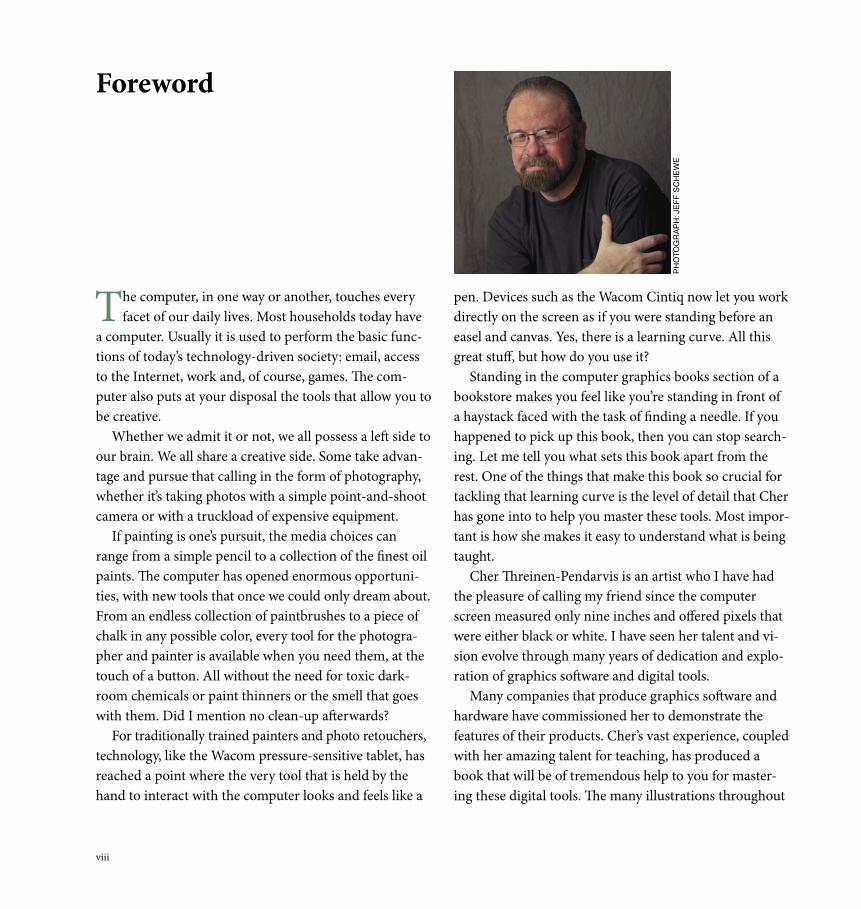
Foreword
Ph
oTo
gr
aP
h: J
ef
f S
Ch
ew
e
ix
Somehow she has managed to transfer the patience and understanding she demonstrates as a teacher onto the words in this book.
As an expert in both Photoshop and Painter, Cher shows you the processes for effects from within either program or a combination of the two. She guides you through the nuances achieved by the use of pressure-sensitive tablets. Then she teaches you how to take your concepts beyond the obvious—to that realm where cre-ativity takes on a life of its own.
As I mentioned earlier, there are bountiful illustrations throughout the book that take you clearly through the processes she is explaining. This book is the art class you never took and wish you had. It might not make you a Michelangelo, but it will give you an understanding of the basics of art. It will give you the confidence to take your doodles to the next level.
Painting on a computer with a tablet can seem com-plex, but Cher brings it down to a manageable level so you can use them to let your creative juices run wild.
I have no doubt you will refer to this book over and over again, not just for the techniques but also for inspiration.
Bert MonroyBerkeley, California, 2013
the book clearly demonstrate the point being made and are beautiful to look at. It’s great just to have in your collection.
Many do have a talent but never had any training. Others might not have great talent but enjoy playing. In either case, a little education can make a vast difference in the end result. That’s where this book comes in.
Cher comes from a traditional background with train-ing in the fundamentals of art. Composition and shading are terms that rarely enter the vocabulary of the aver-age person, yet are so vital to the creation of a piece of artwork—these are the subjects she lives with.
What she is doing with this book is filling in those educational gaps that the average computer user is ham-pered by. Cher is an educator. But that is not the whole story. She makes each project a personal experience. She starts with the inspiration. What she sees and feels about her subjects. The steps she takes in preparing for the task ahead. She then takes you on a detailed journey to the finished product.
If you have ever attended any of her seminars or heard her speak at a trade show, you know how eloquently she can dispense information. She has a soothing voice, yet it conveys the excitement she feels about the digital me-dium. I see her as a female Bob Ross painting “Happy Trees” while eliminating the stress of everyday life.
x
About the Author and Artist viForeword viiiIntroduction xii
1The Digital Art Studio 1Setting Up the Digital Art Studio 2The Power of Color 5Pixels and Image Resolution 7Fine Art Printmaking in the Studio 9
2Sketching on the iPad 10Favorite iPad Painting Tools 12Using Brushes 3 for a Quick Color Sketch 14Making a Pencil and Sketching in Brushes 3 16Sketching a Pencil Portrait Using ArtStudio 18Painting a Color Study Using ArtStudio 20Painting with Wet Paint in ArtStudio 24Drawing with Sketchbook Express 26Coloring a Drawing with Sketchbook Pro 28Making a Quick Color Study Using Procreate 30
Sketching with Adobe Ideas 34Coloring with Adobe Ideas 36Making a Collage Sketch with
Adobe Photoshop Touch 38
3Photoshop, Painter, and Tablet Basics for Artists 42Introduction 44Anatomy of a Tablet and Stylus 45Getting Started with Your Tablet 46
Getting Comfortable with Your Tablet Drawing and Navigating with the Stylus Choosing Your Settings for Your Stylus Customizing the Stylus Buttons Customizing Buttons on an Intuos5 Tablet Using the Airbrush StylusUsing the Art Pen Stylus
Photoshop Basics for Painters 58Customizing BrushesCustomizing Your Photoshop Workspace
Painter Basics for Artists 66Customizing BrushesCustomizing Your Painter Workspace
4Assembling Brushes and Paint 74Exploring Brushes and Paint in Photoshop 76Exploring Brushes and Paint in Painter 80
5Drawing and Tablet Exercises 84Warming Up and Sketching 86Sketching in Photoshop 90
6The Illusion of Volume 92Sketching a Cube 94Drawing a Textured Round Object 96Drawing Rounded Forms 98Drawing a Hollow Rounded Form 100
7Sensitive Tone and Modeling 104Using Sensitive Tone and Blending 106Using Interesting Strokes to Build Tonal
Variations 111
Contents

xi
8A Sense of Atmosphere 112Building Form and Atmosphere Using
Hatching 114Achieving Sparkling Light 120
9Starting with a Scanned Drawing 122Scanning a Pencil Drawing 124Using Photoshop to Work Over a Pencil
Drawing 126Using Painter to Work Over a Pencil Drawing 136Adding Washes to a Drawing Using Painter 144Adding Washes to a Drawing Using Photoshop 146
10Using a Photo Reference for Painting 148Using a Photo Reference While Painting 150Making Brushes for Sketching and Painting 152Using Painter’s “Digital Lightbox” 159
11Defining the Focal Point 160Strengthening the Focal Point 162Oil Paint Looks with Photoshop 169Enhancing the Focal Point 170
12Simulating Paper and Canvas 174Achieving Texture in a Photoshop Image 176Adding Texture with the Texturizer Filter 183Adding Texture with the Lighting Effects Filter 184Painting with Oil, Pastel, and Impasto Paint
on Canvas 186Building a Colored Paper Texture Surface 189Building a Gessoed Canvas 190Embossing Texture on an Image 198Using Distortion and Surface Texture 199
13Retouching, Tinting, and Painting 200Retouching and Adding a Vignette 202Painting with History in Photoshop 208Working Over a Portrait with Chalk 210Building a Rich Paper Surface 212Painting an Expressive Oil Portrait 218
14Composing from the Imagination 226Collage and Retouching 228Adding Painter Brushwork to the Collage 230Compositing Sketches and Scans in Photoshop 232Adding Colored Brushwork in Painter 236Enhancing Lighting Using a Gradient
Layer Mask 243
Gallery 248
Appendices 258
Index 260
Chapter 3: Photoshop, Painter, and Tablet Basics for Artists 53
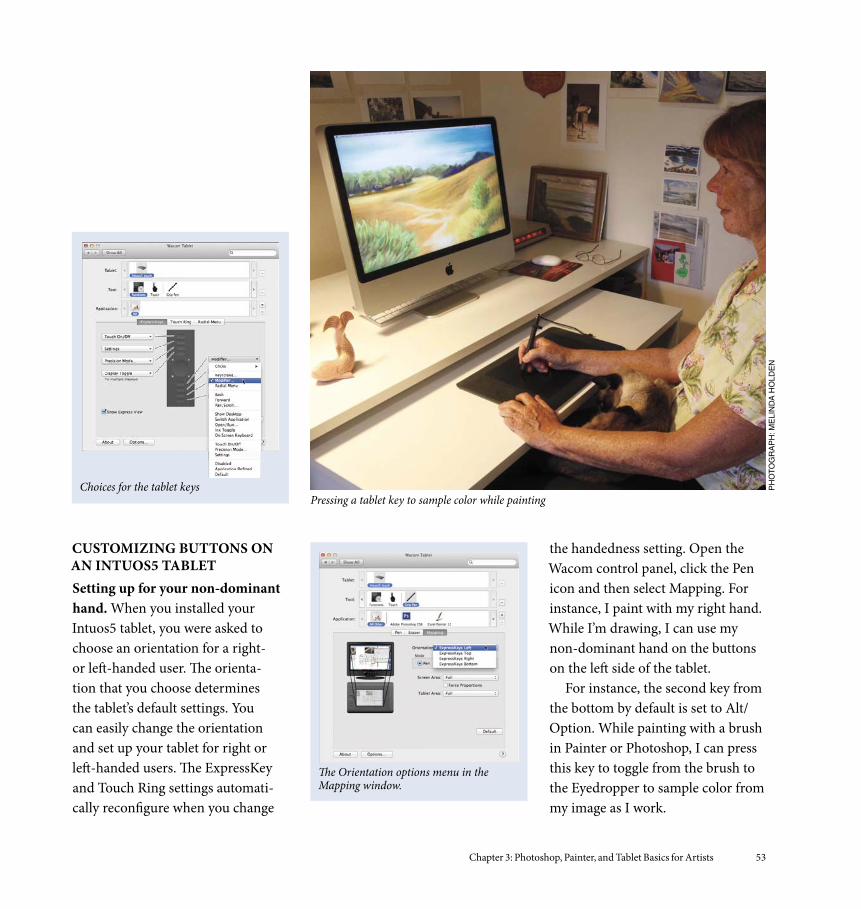
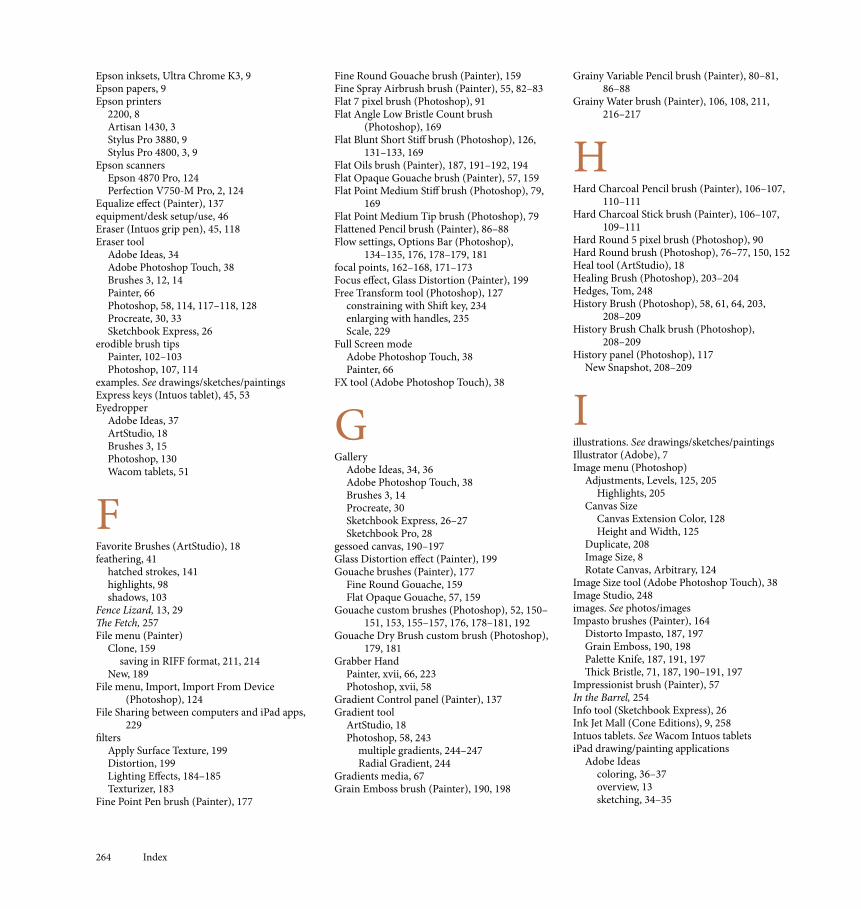
CuSTomIzInG buTTonS on An InTuoS5 TAbleTSetting up for your non-dominant hand. When you installed your Intuos5 tablet, you were asked to choose an orientation for a right-or left-handed user. The orienta-tion that you choose determines the tablet’s default settings. You can easily change the orientation and set up your tablet for right or left-handed users. The ExpressKey and Touch Ring settings automati-cally reconfigure when you change
the handedness setting. Open the Wacom control panel, click the Pen icon and then select Mapping. For instance, I paint with my right hand. While I’m drawing, I can use my non-dominant hand on the buttons on the left side of the tablet.
For instance, the second key from the bottom by default is set to Alt/Option. While painting with a brush in Painter or Photoshop, I can press this key to toggle from the brush to the Eyedropper to sample color from my image as I work.
Choices for the tablet keysPressing a tablet key to sample color while painting
Ph
oto
gr
aP
h: M
eli
nd
a h
old
en
The Orientation options menu in the Mapping window.

98 Chapter 6: The Illusion of Volume
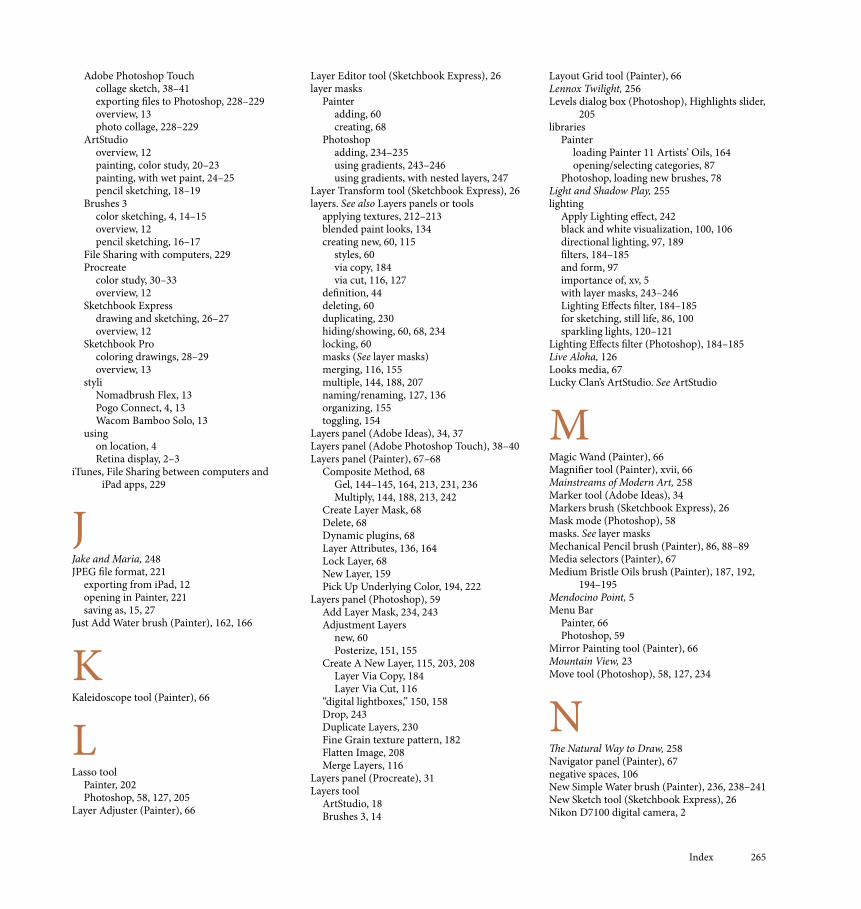
1Setting up and laying in values. Create a new file that measures
1500 × 2000 pixels. Choose a medi-um gray in the Color panel, click on the Brush tool in the Toolbox, and choose the Pastel Medium Tip preset from the Dry Media Brushes.* Set the Opacity to 100% in the Options Bar. Click to open the Brush Preset picker on the Options Bar, and re-duce the size of the Pastel Medium Tip to about 5 pixels using the Brush Size slider. Make a new layer, and draw a loose sketch.
Now click on the image back-ground. Using the default Pastel Medi-um Tip preset, block in large areas of value, starting with the midtones. The midtones will help to unify your im-age, and will connect the lighter and darker values. I simplified the number of values at this stage, using a medium gray, a light gray, and a darker gray.
2Painting more values. Before beginning to paint the darker
values, I set the Pastel Medium Tip brush to vary its opacity with stylus pressure and saved the new preset.* While applying light pressure, gradu-ally build up darker values, changing the size of the brush as you work. Let your strokes follow the curves of the forms.
Next, I feathered in the highlights on the side of the shaker and on its base. By applying very light pressure to the modified Pastel Medium Tip, I was able to subtly brush lighter value over the darker tones to give the im-pression of a blend.
LEARN MORE ABOUT. . .
* Dry Media Brushes. . . pages 91, 95
* saving a brush preset. . . pages 61, 99
Drawing Rounded Forms
ARTisT’s MATERiALs
Tablet: Medium pressure
Program: Photoshop
Paint: Grays chosen in the Color panel
Brushes:• Pastel Medium Tip: low opacity
brush that applies subtly textured strokes
• Pastel Medium Tip: modified to cover underlying paint and to make stroke thickness vary with pressure
• Pastel on Charcoal Paper: low opacity brush with texture saved in the preset
• Pastel on Charcoal Paper: modified to cover underlying paint and to make stroke thickness vary with pressure
Pastel Medium Tip, small
Pastel Medium Tip, default (top), Pastel Medium Tip, modified (bottom)
Pastel on Charcoal Paper, default (top), Pastel on Charcoal Paper, modified (bottom) The first values Building up darker values
Chapter 6: The Illusion of Volume 99
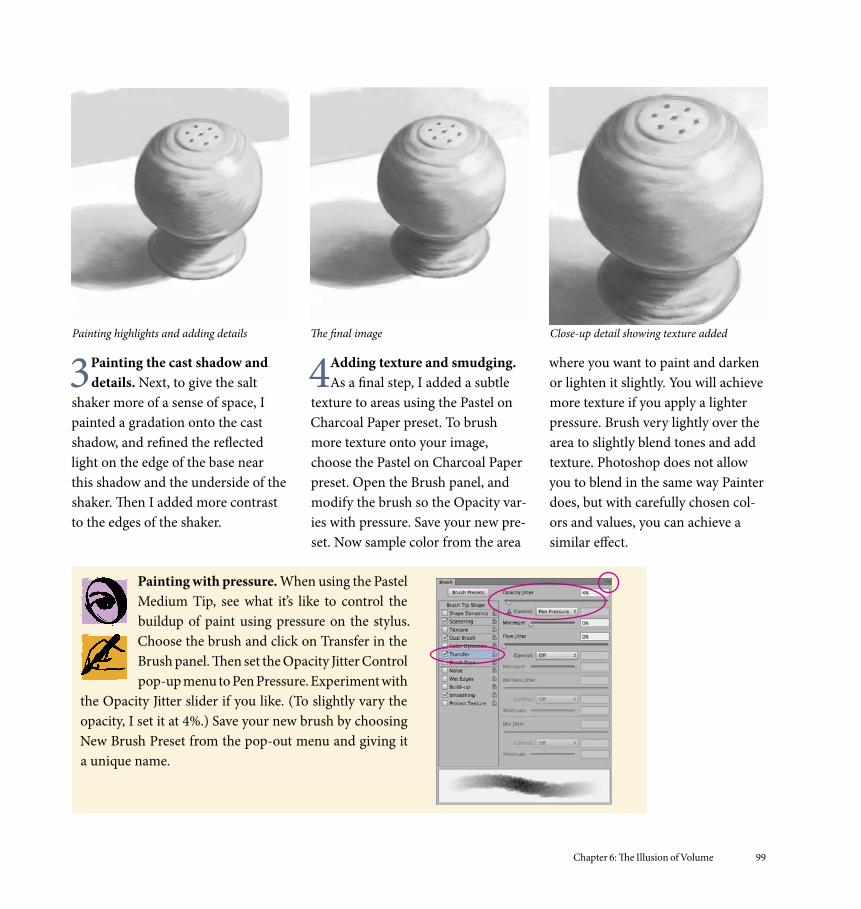
Painting with pressure. When using the Pastel Medium Tip, see what it’s like to control the buildup of paint using pressure on the stylus. Choose the brush and click on Transfer in the Brush panel. Then set the Opacity Jitter Control pop-up menu to Pen Pressure. Experiment with
the Opacity Jitter slider if you like. (To slightly vary the opacity, I set it at 4%.) Save your new brush by choosing New Brush Preset from the pop-out menu and giving it a unique name.
3Painting the cast shadow and details. Next, to give the salt
shaker more of a sense of space, I painted a gradation onto the cast shadow, and refined the reflected light on the edge of the base near this shadow and the underside of the shaker. Then I added more contrast to the edges of the shaker.
4Adding texture and smudging. As a final step, I added a subtle
texture to areas using the Pastel on Charcoal Paper preset. To brush more texture onto your image, choose the Pastel on Charcoal Paper preset. Open the Brush panel, and modify the brush so the Opacity var-ies with pressure. Save your new pre-set. Now sample color from the area
where you want to paint and darken or lighten it slightly. You will achieve more texture if you apply a lighter pressure. Brush very lightly over the area to slightly blend tones and add texture. Photoshop does not allow you to blend in the same way Painter does, but with carefully chosen col-ors and values, you can achieve a similar effect.
Close-up detail showing texture addedPainting highlights and adding details The final image
170 Chapter 11: Defining the Focal Point
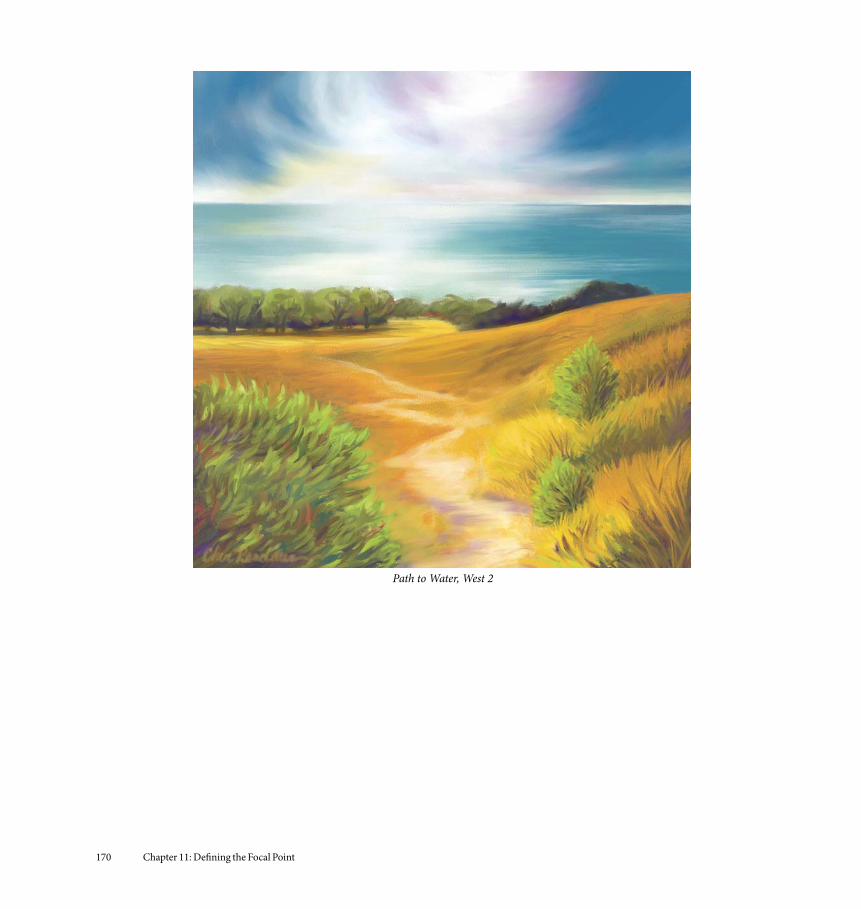
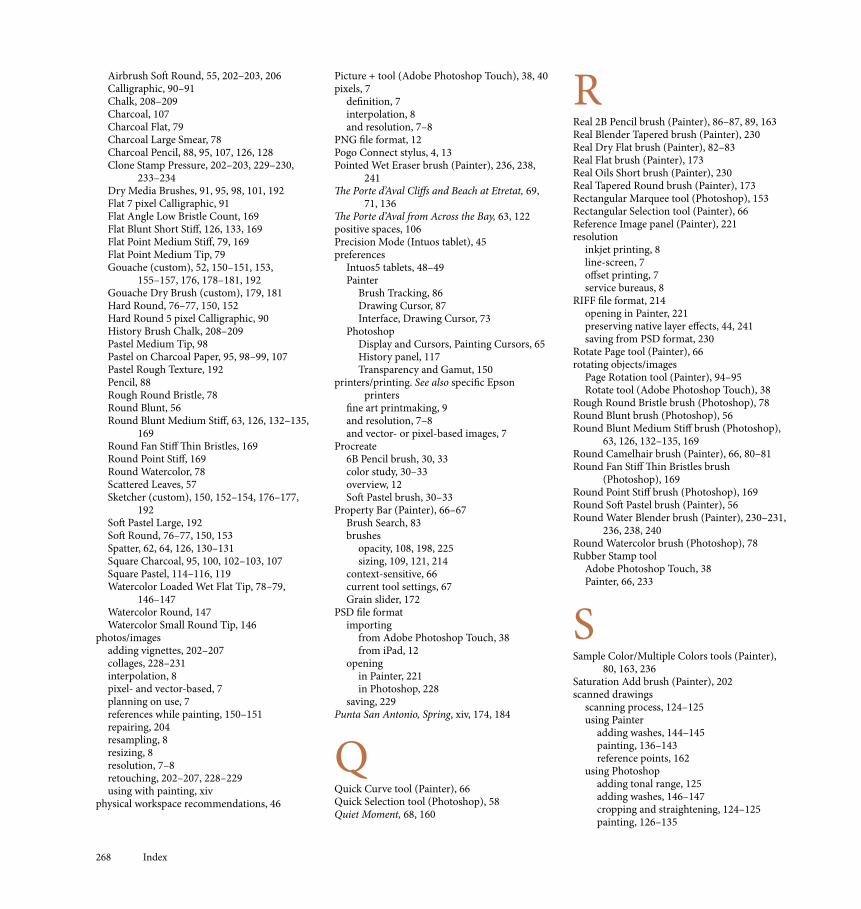
Path to Water, West 2

Chapter 11: Defining the Focal Point 171
The colorful plein air sketch drawn using Brushes on the iPad was inspiring.
This plein air pencil sketch also gave inspiration for the painting.
For Path to Water, West 2 (shown on the facing page), I designed a square composition with depth, atmosphere, and perspective. To focus attention on the pathway, water, and sky, I set the horizon about one-fifth of the way from the top of the paint-ing. The meandering path leads the viewer’s eye into the heart of the composition and into the light.
Path to Water, West 2 is a mixed media piece. I began by sketching freely with Pastel, and then painted over areas with the Oils and a Palette Knife.
Rather than follow every detail of the painting process, this project focuses on the composition process, simulating natural-media textures and creatively resolving the work.
Square Grainy Pastel strokes
Real Flat and Real Tapered Round strokes
Real Tapered Round and Palette Knife strokes, using various sizes
leArN MOre ABOUt. . .
* sketchingontheiPad. . .pages11–41
* puttingasketchonalayer. . .page164
Artist’s MAteriAls
Tablet: Medium-soft pressure
Program: Painter
Paper:ArtistsRoughPaper
Paint: Mix color using the Mixer
Brushes:•SquareGrainyPastel:opacity
and grain change based on pressure and stroke changes withtherotationofthestylus
•RealFlatandRealTaperedRound:strokeschangebasedon pressure and the bearing (direction)ofthestylus
•PaletteKnife:thicknessofthepaint and stroke width change based on pressure and the bearing(direction)ofthestylus
1Planning the composition. To begin, make conventional sketch-
es and scan them, or sketch on your iPad* using an application such as Brushes, as I did. (The color sketch shown above is profiled in Chapter 2 on page 14.) You can also draw directly in Painter using a Pastel. For Path to Water, West 2, I wanted a square composition, so I opened a file that measured 2250 × 2250 pixels.
If you’ve scanned or imported a drawing, cut the image to a layer* so that you can lower the opacity of your reference and use it as a guide while creating your underpainting and reworking the composition.
Enhancing the Focal Point
172 Chapter 11: Defining the Focal Point
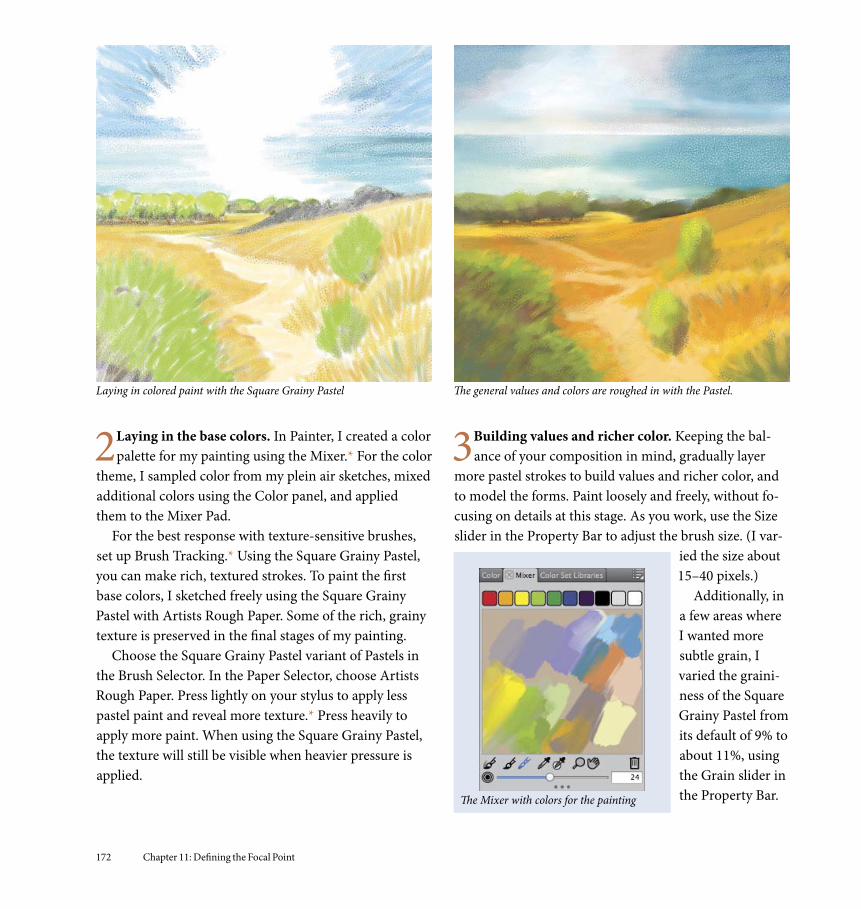
Laying in colored paint with the Square Grainy Pastel The general values and colors are roughed in with the Pastel.
2Laying in the base colors. In Painter, I created a color palette for my painting using the Mixer.* For the color
theme, I sampled color from my plein air sketches, mixed additional colors using the Color panel, and applied them to the Mixer Pad.
For the best response with texture-sensitive brushes, set up Brush Tracking.* Using the Square Grainy Pastel, you can make rich, textured strokes. To paint the first base colors, I sketched freely using the Square Grainy Pastel with Artists Rough Paper. Some of the rich, grainy texture is preserved in the final stages of my painting.
Choose the Square Grainy Pastel variant of Pastels in the Brush Selector. In the Paper Selector, choose Artists Rough Paper. Press lightly on your stylus to apply less pastel paint and reveal more texture.* Press heavily to apply more paint. When using the Square Grainy Pastel, the texture will still be visible when heavier pressure is applied.
3Building values and richer color. Keeping the bal-ance of your composition in mind, gradually layer
more pastel strokes to build values and richer color, and to model the forms. Paint loosely and freely, without fo-cusing on details at this stage. As you work, use the Size slider in the Property Bar to adjust the brush size. (I var-
ied the size about 15–40 pixels.)
Additionally, in a few areas where I wanted more subtle grain, I varied the graini-ness of the Square Grainy Pastel from its default of 9% to about 11%, using the Grain slider in the Property Bar.The Mixer with colors for the painting

Chapter 11: Defining the Focal Point 173
Painting richer color and more contrast with the Pastels and Oils to strengthen the center of interest
4Adding details and accents. For Path to Water, West 2, I wanted energetic, expressive brushwork to come
through in the final painting. More saturated color and dramatic contrast leads the viewer’s eye to the focal point in the distance. After the general forms were established, I switched from the Pastels to painting with the Oils. Us-ing the Real Flat and Real Tapered Round variants of Oils, I added more detailed brushwork to the plant life, path, and hills. Then, to blend and dramatically move paint in areas of the sky and water, I used the Palette Knife in small and large sizes (from about 10–65 pixels).
Painting light over dark with a grainy pas-tel. The Square Grainy Pastel uses the Cover method in the General panel of the Brush
Controls. The Cover method allows you to paint light accents of color over darker values. Additionally, the Grainy Hard Cover submethod helps give the Square Grainy Pastel its grainy character.
leArN MOre ABOUt. . .
* BrushTracking...page86
* the Mixer. . . page 80
* revealingtexture...page81
The Real Flat is an expressive brush that paints thick to thin stokes depending on how you hold the stylus. I used it to add varied blue brushstrokes on the ocean. The Real Tapered Round is useful for painting leaves on the foreground plants and for adding expressive details to the trees in the background.
Now choose the Palette Knife variant of Palette Knives. In an area where you want to blend and move paint, practice with the Palette Knife. Using the Palette Knife in a small size, you can achieve an interesting, expressive brushstroke for the horizon.
Good work! You have completed this project. In the next chapter, we will work with mixed media paint, paper, and canvas.
In this detail, the Palette Knife strokes can be seen on the water. I used the Real Tapered Round to paint details on the shrubs and trees.

Gallery 255
For Light and Shadow Play, I painted the live, blooming orchid plant from observation using a Wacom pressure-sensitive tablet and a variety of Oils brushes in Painter X, 2007.
256 Gallery
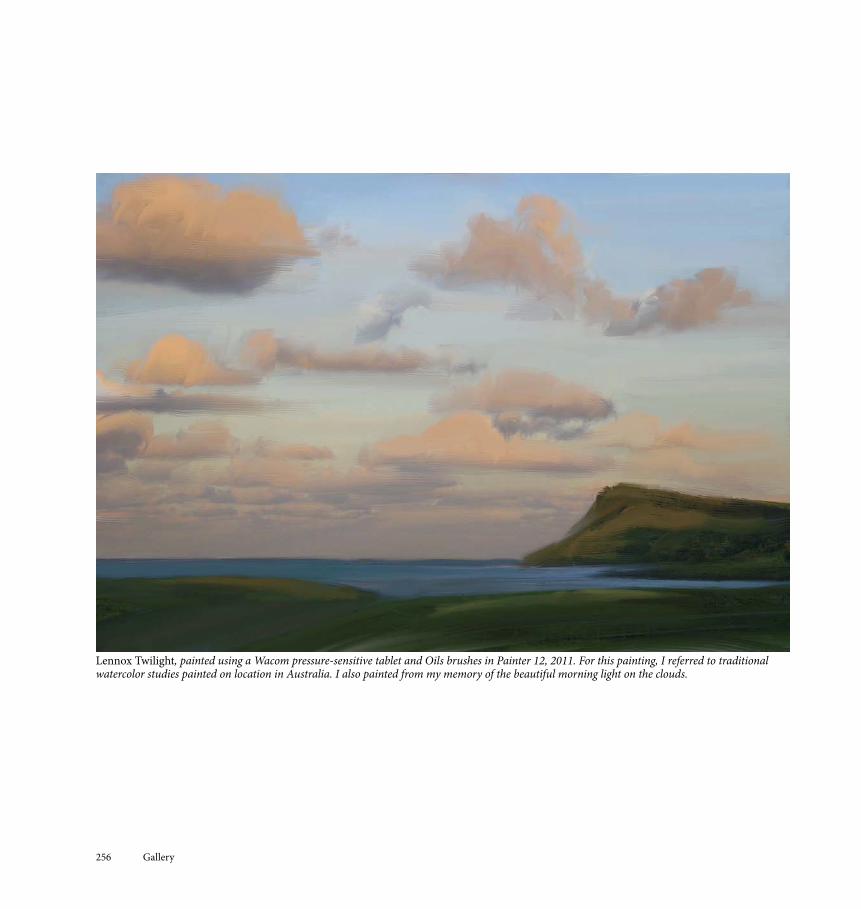
Lennox Twilight, painted using a Wacom pressure-sensitive tablet and Oils brushes in Painter 12, 2011. For this painting, I referred to traditional watercolor studies painted on location in Australia. I also painted from my memory of the beautiful morning light on the clouds.

Gallery 257
A study for The Fetch. Beginning with a color study painted with traditional opaque watercolor paint, I scanned my study and painted more brushwork using a Wacom pressure-sensitive tablet and Oils brushes in Painter X3. 2013.
260 Index
Index
AAcrylics brushes (Painter), 164, 198
Real Dry Flat, 82–83Thick Acrylic Round, 52
Adjustments tool (Adobe Photoshop Touch), 38Adobe Ideas
coloring, 36–37overview, 13sketching, 34–35
Adobe Illustrator, 7Adobe Photoshop. See PhotoshopAdobe Photoshop Touch
collage sketch, 38–41exporting files to Photoshop, 13, 228–229File Sharing with computers, 229overview, 13
Adobe Systems, 258Advanced Brush Controls (Painter), 67Afternoon Self Portrait, 218Agave Meadow, 250Agaves on the Edge, Summer, vii, 251Airbrush Hard Round brush (Photoshop), 54Airbrush Soft High Density Grainy brush
(Photoshop), 75–77Airbrush Soft Round brush (Photoshop), 55,
202–203, 206Airbrush stylus (Painter), 3Airbrushes brushes (Painter)
Coarse Spray Airbrush, 55, 83Digital Airbrush, 3, 55Fine Detail Airbrush, 220Fine Spray Airbrush, 55, 82–83Soft Airbrush, 82Tapered Detail Air, 82
Aloha, 38Along Tomales Bay, 9Alt/Opt Modifier key (Intuos tablet), 45Apple Computers, Inc., 258Apply Color tool (Painter), 80, 120Apply Surface Texture effect (Painter)
Appearance of DepthAmount, 213Shine, 213
Light Direction, 213Using menu, Paper, 213
Art History Brush (Photoshop), 58, 61The Art of Color, 258Art Through the Ages, 258Artists’ Oils brushes (Painter), 163–164, 166,
168, 219–222Impressionist, 57
ArtStudiooverview, 12painting
color study, 20–23with wet paint, 24–25
pencil sketching, 18–19artwork (examples). See drawings/sketches/
paintingsAt work in the studio, xviiiatmosphere, building with hatching, 114–121,
138, 141–143, 250Autodesk’s Sketchbook. See Sketchbook
BBamboo Solo stylus, 13Basic Paper (Painter), 86, 94, 96, 106–107, 136Bird of Paradise, 12, 25Blend modes, 60
Color Burn, 63, 182Dissolve, 115, 153Multiply, 63, 129, 146–147, 235, 243Normal, 114–115, 155Overlay, 38–40, 63, 182–183Soft Light, 63, 182–183, 185transparent, 38, 40, 182
Blender Bristle brush (Painter), 165–166Blender Palette Knife brush (Painter), 164Blenders brushes (Painter), 164
Blender Bristle, 165–166Grainy Water, 106, 108, 211, 216–217Just Add Water, 162, 166Pointed Stump, 108Real Blender Tapered, 230Soft Blender Stump, 106, 108, 111
Blue Nude, 252Bluetooth and PogoConnect stylus, 13Blunt Chalk brush (Painter), 70Blur tool
Adobe Photoshop Touch, 38Photoshop, 58, 61
Broad Water Brush (Painter), 236–239, 241Brush Controls (Painter)
Angle ExpressionBearing, 57Rotation, 57
Color Expression, Rotation, 56Color Variability, Hue and Value, 70Dab Preview, 70Depth, 197Expression options, 71General, Cover method, 173Impasto panel, 190, 197Size, Expression
Pressure, 70, 194Wheel, 55
Size, Min Size, 70Spacing, 194Stroke Jitter, Expression, Rotation, 57Stroke Preview, 70
Brush EditorSketchbook Express, 26Sketchbook Pro, 28–29
Brush Ghost (Painter), 73, 87Brush panel (Brushes 3), 16Brush panel (Photoshop)
Brush Tip Shape, 61, 77, 153Color Dynamics
Brightness Jitter, 64Control options, 64Foreground/Background Color Jitter, 64Hue Jitter, 64Purity, 64Saturation Jitter, 64
Erodible Square tip, 102–103New Tool Preset, 179Scatter, Count Jitter Control, Rotation, 57Shape Dynamics
Angle Jitter Control, Rotation, 56Size Jitter Control, Pen Pressure, 62, 77,
152Size Jitter Control, Stylus Wheel, 55
Smoothing, 65Softness slider, 103Texture
consistency of, 156Fine Grain, 152, 182, 184Wrinkles, 157
TransferFlow Jitter Control, Stylus Wheel, 55Opacity Jitter Control, Pen Pressure, 63,
99, 203Brush panel (Procreate), 30–32Brush Presets/Brush Preset Picker (Photoshop),
90–91, 128Brush Size slider, 98, 102, 116, 155loading new libraries, 64, 73, 78options, 61Small List, 62, 77, 152
Brush Properties PuckSketchbook Express, 26–27Sketchbook Pro, 28
Brush Selector (Painter)Brush Library, 69
loading Painter 11 Artists’ Oils, 164categories
displaying as list, 69exporting/saving, 71naming new, 71opening/selecting, 47, 67, 87
Recent Brushes, 69Brush Size and Brush Opacity (ArtStudio), 18
Index 261
Brush toolAdobe Ideas, 34–37Adobe Photoshop Touch, 38Brushes 3, 12, 14Painter, 66
brushes, 47categories, 47
Photoshop, 58presets, 61selecting brushes, 47, 130switching to Mixer Brush tool, 131
Brush Tracking (Painter)preferences, 86setting, 80
brushesin general, 61
adding/replacing, 90–91creating, 61custom, 62–64, 132–135, 150–157, 169,
176–180, 194custom, saving/naming, 23, 71, 99, 152,
215deleting, 153grain settings, 172opacity, 108, 198, 225presets, saving as Tool Presets, 65presets, selecting, 47restoring default settings, 194, 215searching for, 67, 83sharpening, 102for sketching and painting, 151–153spacing between strokes/dabs, 77, 153switching between, 59tips, erodible, 102–103, 107, 114tips, shape of, 77toggling, 61, 152
Painter Acrylics, 164, 198Real Dry Flat, 82–83Thick Acrylic Round, 52
Painter AirbrushesCoarse Spray Airbrush, 55, 83Digital Airbrush, 3, 55Fine Detail Airbrush, 220Fine Spray Airbrush, 55, 82–83Soft Airbrush, 82Tapered Detail Air, 82
Painter Artists’ Oils, 163–164, 166, 168, 219–222
Impressionist, 57loading version 11 brushes into library, 164
Painter Blenders, 164Blender Bristle, 165–166Grainy Water, 106, 108, 211, 216–217Just Add Water, 162, 166Pointed Stump, 108Real Blender Tapered, 230Soft Blender Stump, 106, 108, 111
Painter Chalk, 81, 250
Painter Chalk & CrayonsBlunt Chalk, 70Square Chalk, 211, 213, 215–217
Painter Charcoal & Conté, xiiHard Charcoal Pencil, 106–107, 110–111Hard Charcoal Stick, 106–107, 109–111
Painter ClonersSoft Cloner, 211, 214, 222Square Chalk Cloner, 211, 215–216
Painter Digital Watercolor, 177Broad Water Brush, 236–239, 241New Simple Water, 236, 238–241Pointed Wet Eraser, 236, 238, 241Round Water Blender, 230–231, 236, 238,
240Simple Water, 145Soft Broad Brush, 144–145Soft Diffused Brush, 145, 230–231, 236,
241Soft Round Blender, 145versus Watercolor, 144Wet Eraser, 241
Painter Gouache, 177Fine Round Gouache, 159Flat Opaque Gouache, 57, 159
Painter Impasto, 164Distorto Impasto, 187, 197Grain Emboss, 190, 198Palette Knife, 187, 191, 197Thick Bristle, 71, 187, 190–191, 197
Painter Oil PastelsChunky Oil Pastel, 69, 71–72, 136,
138–140, 143Variable Oil Pastel, 136, 138–143
Painter Oils, 164, 251Flat Oils, 187, 191–192, 194Medium Bristle Oils, 187, 192, 194–195Oily Bristle, 162–164, 167–168, 219–225Real Flat, 173Real Oils Short, 230Real Tapered Round, 173Round Camelhair, 66, 80–81Soft Oils, 198Tapered Bristle, 163, 167–168Tapered Oils, 162, 164–165Thick Oil Bristle, 75, 82–83Wet Oily Brush, 163–164, 219–221, 224
Painter Palette Knives, 164Blender Palette Knife, 164Oil Palette Knife, 219, 224Palette Knife, 173, 187, 191, 197, 220Tiny Smeary Knife, 219, 222–223, 225Wet Oily Palette Knife, 162, 164, 168
Painter Pastels, 250Round Soft Pastel, 56Sharp Pastel Pencil, 94, 96Soft Pastel, 120Soft Pastel Pencil, 96
Square Grainy Pastel, 4, 172–173Square Hard Pastel, 94–96, 187, 191, 196Square Soft Pastel, 3–4Square X-Soft Pastel, 80–81, 96Tapered Pastel, 4, 48–49
Painter PencilsCover Pencil, 50Flattened Pencil, 86–88Grainy Variable Pencil, 80–81, 86–88Mechanical Pencil, 86, 88–89Real 2B Pencil, 86–87, 89, 163Thick and Thin, 89
Painter PensCroquil Pen, 233Fine Point Pen, 177
Painter PhotoBurn, 202Dodge, 202Saturation Add, 202Scratch Remover, 202
Painter RealBristle, 82–83Painter Watercolor, 237
versus Digital Watercolor brushes, 144Photoshop
#2 Pencil, 91, 100–101Airbrush Hard Round, 54Airbrush Soft High Density Grainy, 75–77Airbrush Soft Round, 55, 202–203, 206Calligraphic, 90–91Chalk, 208–209Charcoal, 107Charcoal Flat, 79Charcoal Large Smear, 78Charcoal Pencil, 88, 95, 107, 126, 128Clone Stamp Pressure, 202–203, 229–230,
233–234Dry Media Brushes, 91, 95, 98, 101, 192Flat 7 pixel Calligraphic, 91Flat Angle Low Bristle Count, 169Flat Blunt Short Stiff Tip, 126, 169Flat Point Medium Stiff Tip, 79, 169Flat Point Medium Tip, 79Gouache (custom), 150–151, 153, 155–157,
176, 177, 178–181, 192Gouache Dry Brush (custom), 179, 181Hard Round, 76–77, 150, 152Hard Round 5 pixel Calligraphic, 90History Brush Chalk, 208–209Pastel Medium Tip, 98Pastel on Charcoal Paper, 95, 98–99, 107Pastel Rough Texture, 192Pencil, 88Rough Round Bristle, 78Round Blunt, 56Round Blunt Medium Stiff, 63, 126,
132–135, 169Round Fan Stiff Thin Bristles, 169Round Point Stiff, 169
262 Index
Round Watercolor, 78Scattered Leaves, 57Sketcher (custom), 150, 152–154, 176–177,
192Soft Pastel Large, 192Soft Round, 76–77, 150, 153Spatter, 62, 64, 126, 130–131Square Charcoal, 95, 100, 102–103, 107Square Pastel, 114–116, 119Watercolor Loaded Wet Flat Tip, 78–79,
146–147Watercolor Round, 147Watercolor Small Round Tip, 146Watercolor versus Painter Digital
Watercolor, 144Procreate
6B Pencil, 30, 33Soft Pastel, 30–33
Sketchbook ExpressMarkers, 26Pencils, 26Pens, 26
Brushes 3 (iPad application)color sampling, 15color sketching, 4, 14–15exporting images, 14–15overview, 12pencil sketching, 16–17
Brushes and paint with a study of Etretat, 74Brushes library (Painter), 87
loading Painter 11 Artists’ Oils, 164Brushes panel (Brushes 3), 14–17brushstrokes
with Pen mode, 47previewing, 83with texture, 81thick and thin, 146
with flat brushes, 82with hard/soft edges, 77with varied edges, 78with varied tilt, 77
with varied opacity and/or width, 78, 81Bucket Fill tool (ArtStudio), 18Burlap texture, 183Burn brush (Painter), 202Burn tool
ArtStudio, 18Painter, 66Photoshop, 58, 61, 204
CCalifornia pottery, 92Calligraphic brushes (Photoshop), 90–91Camera Roll (iPad), 12Canon EOS 6D digital camera, 2
Canvas (Painter), 212–213Resize, 8Surface Lighting, 190, 197Tracing Paper, 159, 214
Chalk & Crayons brushes (Painter)Blunt Chalk, 70Square Chalk, 211, 213, 215–217
Chalk brushes (Photoshop), 208–209Chalk brushes (Painter), 81, 250Channels panel
Painter, 67Photoshop
alpha channels, 205layer masks, 244–246saving selections, 207Subtract from Selection, 206
Charcoal & Conté brushes (Painter), xiiHard Charcoal Pencil, 106–107, 110–111Hard Charcoal Stick, 106–107, 109–111
Charcoal brushes (Photoshop), xii, 88Charcoal Flat brush (Photoshop), 79Charcoal Large Smear brush (Photoshop), 78Charcoal Pencil brush (Photoshop), 88, 95, 107,
126, 128Chunky Oil Pastel brush (Painter), 69, 71–72,
136, 138–140, 143Cintiq display, 2Clone Stamp Pressure brush (Photoshop),
202–203, 229–230, 233–234Clone Stamp tool (Photoshop), 58, 61, 202–204,
229Clone tool (ArtStudio), 18Cloner Source panel (Painter), 214Cloner tool (Painter), 66, 68, 202Cloners brushes (Painter)
Soft Cloner, 211, 214, 222Square Chalk Cloner, 211, 215–216
Coarse Spray Airbrush brush (Painter), 55, 83Color Editor
ArtStudio, 18–21Sketchbook Express, 26, 28Sketchbook Pro, 28
Color Overlay effect (Painter)Dye Concentration, 212Hiding Power, 212Using menu, Paper, 212
Color panelAdobe Ideas, 34–37Brushes 3, Color Well, 14–16Painter
Additional Color, 56, 66, 68adjustment slides, 68Clone Color, 211, 215, 221–222, 224Color Sets, 67HSV/RGB Square, 68Hue Ring and Saturation/Value triangle,
5–6, 66–68, 80Main Color, 56, 66, 68
Mixer/Mixer Pad tools, 6, 67–68, 120, 138, 230
Mix Color tool, 6, 68, 80, 120, 236Sample Color/Multiple Colors tools, 80,
163, 236Photoshop, 58
Color Bar, 59–60Select Foreground Color field, 76Swatches panel, 114–115
Procreate, 30–31Color Picker (Photoshop)
mixing, 130saving custom, 130selecting, 59–60, 76, 169, 178
color(s). See also Color Editor; Color panel; Color Picker; painting
accents, 173backgrounds, 28, 37, 58–59
layers, leaving white, 127opacity, 208–209
base colors, 21, 172opaque, 130underpainting, 164
color over color, 21fills, 36–37
fine grain patterns, 182, 184foregrounds, 129gradients, 243gray, 183
foregrounds, 5, 58–59, 76, 129, 167glazes, 134–135, 145–147, 231HSB sliders
Adobe Ideas, 36–37Painter, 68
hue and saturation, 5–6, 66–68, 80for inspiration and interpretation, 193mixing, 138modulating, 165–166pastels, 31posterizing, 151power of, 5–6RGB mode
Adobe Ideas, 37converting modes, 136Painter, 136Photoshop, 114
roughing in, 155sampling (See Dropper [Painter]; Eyedropper
[ArtStudio, Brushes 3, Photoshop, and Wacom tablets]; White Point Dropper [Photoshop])
saving, 21shading, 5–6swapping, 21, 58texture, 157–158tinting, 5–6
sepia, 129, 137values, 5, 97–98, 172

Index 263
washes, 144–147, 236–243watercolors, wet-into-wet, 238–241
Conch Shell Study, xiii, 112Cone Editions’ Ink Jet Mall, 9, 258Cone Editions Press, 9Corel, 258Corel Draw, 7Corel Painter. See PainterCover Pencil brush (Painter), 50Crop tool
Adobe Photoshop Touch, 38Painter, 66Photoshop, 58, 124
Croquil Pen brush (Painter), 233Ctrl/Cmd Modifier key (Intuos tablet), 45
DDefault colors (Photoshop), 58desk/equipment setup/use, 46Digital Airbrush brush (Painter), 3, 55Digital Art Supplies, 9, 258“digital lightboxes”
Painter, 159Photoshop, 150, 158
digital studies, xiiidigital tools, importance of, xiii–xvDigital Watercolor brushes (Painter), 177
Broad Water Brush, 236–239, 241New Simple Water, 236, 238–241Pointed Wet Eraser, 236, 238, 241Round Water Blender, 230–231, 236, 238, 240Simple Water, 145Soft Broad Brush, 144–145Soft Diffused Brush, 145, 230–231, 236, 241Soft Round Blender, 145versus Watercolor brushes, 144Wet Eraser, 241
Dirty Brush Mode tool (Painter), 80Display Toggle (Intuos tablet), 45Distorto Impasto brush (Painter), 187, 197Divine Proportion tool (Painter), 66Document window (Painter), 67Dodge brush (Painter), 202Dodge tool
ArtStudio, 18Painter, 66Photoshop, 58, 61, 204
Dots tool (ArtStudio), 18Downstream Path, Summer, xiii, 69, 71, 186Draw (Corel), 7Draw Style tool (Sketchbook Express), 26drawing. See sketching/drawingDrawing Cursor preferences (Painter), 87Drawing Lessons from the Great Masters, 258
drawing/painting applications for iPadAdobe Ideas
coloring, 36–37overview, 13sketching, 34–35
Adobe Photoshop Touchcollage sketch, 38–41overview, 13
ArtStudiooverview, 12painting, color study, 20–23painting, with wet paint, 24–25pencil sketching, 18–19
Brushes 3color sketching, 4, 14–15overview, 12pencil sketching, 16–17
Procreatecolor study, 30–33overview, 12
Sketchbook Expressdrawing and sketching, 26–27overview, 12
Sketchbook Procoloring drawings, 28–29overview, 13
styliNomadbrush Flex, 13Pogo Connect, 4, 13Wacom Bamboo Solo, 13
usingon location, 4Retina display, 2–3
drawings/sketches/paintings (examples)Afternoon Self Portrait, 218Agave Meadow, 250Agaves on the Edge, Summer, vii, 251Along Tomales Bay, 9At work in the studio, xviiiBird of Paradise, 12, 25Blue Nude, 252Brushes and paint with a study of Etretat, 74California pottery, 92California Pottery Fish, 84Conch Shell Study xiii, 112,Downstream Path, Summer, xiii, 69, 71, 186Fence Lizard, 13, 29The Fetch, 257In the Barrel, 254Jake and Maria, 248Lennox Twilight, 256Light and Shadow Play, 255Live Aloha, 126Mendocino Point, 5Mountain View, 23Path to Water, North, vi, xvPath to Water, West 2, 73, 170Peppers, 7–8
The Porte d’Aval Cliffs and Beach at Etretat, 69, 71, 136
The Porte d’Aval from Across the Bay, 63, 122Punta San Antonio, Spring, xiv, 174, 184Quiet Moment, 68, 160Sunrise, 61Think of the iPad as your mobile digital
sketchbook, 10The Three Engines, 60, 148Tranquil Beach, Color, 249View From Point Loma, 253Wanda, 1945, 200Wanda, 1945, Study, 210Where All Creativity Comes From, 247
The sketch composition for, 232White Orchid, 104
Dropper (Painter), 66, 163, 166, 213, 223Dry Media Brushes (Photoshop), 91, 95, 98,
101, 192
EEdit menu (Photoshop)
Define Brush Preset, 153Fill
with Foreground Color, 129Use Gray, 183Use Pattern, Fine Grain, 182, 184
Free Transform, 127constraining with Shift key, 234enlarging with handles, 235Scale, 229
Undo, 245Effects menu (Painter)
Apply Surface Texture effectAppearance of Depth, 213Light Direction, 213Using menu, Luminance, 199Using menu, Paper, 213
Color Overlay effectDye Concentration, 212Hiding Power, 212Using menu, Paper, 212
Focus, Glass Distortion, 199Surface Control
Apply Lighting, 242Apply Surface Texture, 199, 213Color Overlay, 212
Tonal Control, Equalize, 137Effects tool (Brushes 3), 14Elliptical Marquee tool (Photoshop), 153, 207embossing
canvas, 190, 197paper texture, 198
Enhanced Brush Ghost (Painter), 73, 87Epson America, 258
264 Index
Epson inksets, Ultra Chrome K3, 9Epson papers, 9Epson printers
2200, 8Artisan 1430, 3Stylus Pro 3880, 9Stylus Pro 4800, 3, 9
Epson scannersEpson 4870 Pro, 124Perfection V750-M Pro, 2, 124
Equalize effect (Painter), 137equipment/desk setup/use, 46Eraser (Intuos grip pen), 45, 118Eraser tool
Adobe Ideas, 34Adobe Photoshop Touch, 38Brushes 3, 12, 14Painter, 66Photoshop, 58, 114, 117–118, 128Procreate, 30, 33Sketchbook Express, 26
erodible brush tipsPainter, 102–103Photoshop, 107, 114
examples. See drawings/sketches/paintingsExpress keys (Intuos tablet), 45, 53Eyedropper
Adobe Ideas, 37ArtStudio, 18Brushes 3, 15Photoshop, 130Wacom tablets, 51
FFavorite Brushes (ArtStudio), 18feathering, 41
hatched strokes, 141highlights, 98shadows, 103
Fence Lizard, 13, 29The Fetch, 257File menu (Painter)
Clone, 159saving in RIFF format, 211, 214
New, 189File menu, Import, Import From Device
(Photoshop), 124File Sharing between computers and iPad apps,
229filters
Apply Surface Texture, 199Distortion, 199Lighting Effects, 184–185Texturizer, 183
Fine Point Pen brush (Painter), 177
Fine Round Gouache brush (Painter), 159Fine Spray Airbrush brush (Painter), 55, 82–83Flat 7 pixel brush (Photoshop), 91Flat Angle Low Bristle Count brush
(Photoshop), 169Flat Blunt Short Stiff brush (Photoshop), 126,
131–133, 169Flat Oils brush (Painter), 187, 191–192, 194Flat Opaque Gouache brush (Painter), 57, 159Flat Point Medium Stiff brush (Photoshop), 79,
169Flat Point Medium Tip brush (Photoshop), 79Flattened Pencil brush (Painter), 86–88Flow settings, Options Bar (Photoshop),
134–135, 176, 178–179, 181focal points, 162–168, 171–173Focus effect, Glass Distortion (Painter), 199Free Transform tool (Photoshop), 127
constraining with Shift key, 234enlarging with handles, 235Scale, 229
Full Screen modeAdobe Photoshop Touch, 38Painter, 66
FX tool (Adobe Photoshop Touch), 38
GGallery
Adobe Ideas, 34, 36Adobe Photoshop Touch, 38Brushes 3, 14Procreate, 30Sketchbook Express, 26–27Sketchbook Pro, 28
gessoed canvas, 190–197Glass Distortion effect (Painter), 199Gouache brushes (Painter), 177
Fine Round Gouache, 159Flat Opaque Gouache, 57, 159
Gouache custom brushes (Photoshop), 52, 150–151, 153, 155–157, 176, 178–181, 192
Gouache Dry Brush custom brush (Photoshop), 179, 181
Grabber HandPainter, xvii, 66, 223Photoshop, xvii, 58
Gradient Control panel (Painter), 137Gradient tool
ArtStudio, 18Photoshop, 58, 243
multiple gradients, 244–247Radial Gradient, 244
Gradients media, 67Grain Emboss brush (Painter), 190, 198
Grainy Variable Pencil brush (Painter), 80–81, 86–88
Grainy Water brush (Painter), 106, 108, 211, 216–217
HHard Charcoal Pencil brush (Painter), 106–107,
110–111Hard Charcoal Stick brush (Painter), 106–107,
109–111Hard Round 5 pixel brush (Photoshop), 90Hard Round brush (Photoshop), 76–77, 150, 152Heal tool (ArtStudio), 18Healing Brush (Photoshop), 203–204Hedges, Tom, 248History Brush (Photoshop), 58, 61, 64, 203,
208–209History Brush Chalk brush (Photoshop),
208–209History panel (Photoshop), 117
New Snapshot, 208–209
Iillustrations. See drawings/sketches/paintingsIllustrator (Adobe), 7Image menu (Photoshop)
Adjustments, Levels, 125, 205Highlights, 205
Canvas SizeCanvas Extension Color, 128Height and Width, 125
Duplicate, 208Image Size, 8Rotate Canvas, Arbitrary, 124
Image Size tool (Adobe Photoshop Touch), 38Image Studio, 248images. See photos/imagesImpasto brushes (Painter), 164
Distorto Impasto, 187, 197Grain Emboss, 190, 198Palette Knife, 187, 191, 197Thick Bristle, 71, 187, 190–191, 197
Impressionist brush (Painter), 57In the Barrel, 254Info tool (Sketchbook Express), 26Ink Jet Mall (Cone Editions), 9, 258Intuos tablets. See Wacom Intuos tabletsiPad drawing/painting applications
Adobe Ideascoloring, 36–37overview, 13sketching, 34–35
Index 265
Adobe Photoshop Touchcollage sketch, 38–41exporting files to Photoshop, 228–229overview, 13photo collage, 228–229
ArtStudiooverview, 12painting, color study, 20–23painting, with wet paint, 24–25pencil sketching, 18–19
Brushes 3color sketching, 4, 14–15overview, 12pencil sketching, 16–17
File Sharing with computers, 229Procreate
color study, 30–33overview, 12
Sketchbook Expressdrawing and sketching, 26–27overview, 12
Sketchbook Procoloring drawings, 28–29overview, 13
styliNomadbrush Flex, 13Pogo Connect, 4, 13Wacom Bamboo Solo, 13
usingon location, 4Retina display, 2–3
iTunes, File Sharing between computers and iPad apps, 229
JJake and Maria, 248JPEG file format, 221
exporting from iPad, 12opening in Painter, 221saving as, 15, 27
Just Add Water brush (Painter), 162, 166
KKaleidoscope tool (Painter), 66
LLasso tool
Painter, 202Photoshop, 58, 127, 205
Layer Adjuster (Painter), 66
Layer Editor tool (Sketchbook Express), 26layer masks
Painteradding, 60creating, 68
Photoshopadding, 234–235using gradients, 243–246using gradients, with nested layers, 247
Layer Transform tool (Sketchbook Express), 26layers. See also Layers panels or tools
applying textures, 212–213blended paint looks, 134creating new, 60, 115
styles, 60via copy, 184via cut, 116, 127
definition, 44deleting, 60duplicating, 230hiding/showing, 60, 68, 234locking, 60masks (See layer masks)merging, 116, 155multiple, 144, 188, 207naming/renaming, 127, 136organizing, 155toggling, 154
Layers panel (Adobe Ideas), 34, 37Layers panel (Adobe Photoshop Touch), 38–40Layers panel (Painter), 67–68
Composite Method, 68Gel, 144–145, 164, 213, 231, 236Multiply, 144, 188, 213, 242
Create Layer Mask, 68Delete, 68Dynamic plugins, 68Layer Attributes, 136, 164Lock Layer, 68New Layer, 159Pick Up Underlying Color, 194, 222
Layers panel (Photoshop), 59Add Layer Mask, 234, 243Adjustment Layers
new, 60Posterize, 151, 155
Create A New Layer, 115, 203, 208Layer Via Copy, 184Layer Via Cut, 116
“digital lightboxes,” 150, 158Drop, 243Duplicate Layers, 230Fine Grain texture pattern, 182Flatten Image, 208Merge Layers, 116
Layers panel (Procreate), 31Layers tool
ArtStudio, 18Brushes 3, 14
Layout Grid tool (Painter), 66Lennox Twilight, 256Levels dialog box (Photoshop), Highlights slider,
205libraries
Painterloading Painter 11 Artists’ Oils, 164opening/selecting categories, 87
Photoshop, loading new brushes, 78Light and Shadow Play, 255lighting
Apply Lighting effect, 242black and white visualization, 100, 106directional lighting, 97, 189filters, 184–185and form, 97importance of, xv, 5with layer masks, 243–246Lighting Effects filter, 184–185for sketching, still life, 86, 100sparkling lights, 120–121
Lighting Effects filter (Photoshop), 184–185Live Aloha, 126Looks media, 67Lucky Clan’s ArtStudio. See ArtStudio
MMagic Wand (Painter), 66Magnifier tool (Painter), xvii, 66Mainstreams of Modern Art, 258Marker tool (Adobe Ideas), 34Markers brush (Sketchbook Express), 26Mask mode (Photoshop), 58masks. See layer masksMechanical Pencil brush (Painter), 86, 88–89Media selectors (Painter), 67Medium Bristle Oils brush (Painter), 187, 192,
194–195Mendocino Point, 5Menu Bar
Painter, 66Photoshop, 59
Mirror Painting tool (Painter), 66Mountain View, 23Move tool (Photoshop), 58, 127, 234
NThe Natural Way to Draw, 258Navigator panel (Painter), 67negative spaces, 106New Simple Water brush (Painter), 236, 238–241New Sketch tool (Sketchbook Express), 26Nikon D7100 digital camera, 2

266 Index
Nomadbrush Flex stylus, 13Nozzles media, 67#2 Pencil brush (Photoshop), 91, 100–101
OOil Palette Knife brush (Painter), 219, 224Oil Pastels brushes (Painter)
Chunky Oil Pastel, 69, 71–72, 136, 138–140, 143
Variable Oil Pastel, 136, 138–143Oils brushes (Painter), 164, 251
Flat Oils, 187, 191–192, 194Medium Bristle Oils, 187, 192, 194–195Oily Bristle, 162–164, 167–168, 219–225Real Flat, 173Real Oils Short, 230Real Tapered Round, 173Round Camelhair, 66, 80–81Soft Oils, 198Tapered Bristle, 163, 167–168Tapered Oils, 162, 164–165Thick Oil Bristle, 75, 82–83Wet Oily Brush, 163–164, 219–221, 224
Oily Bristle brush (Painter), 162–164, 167–168, 219–225
Options Bar (Photoshop)Airbrush Style Build Up Effects, 203, 206Brush Preset Picker, 91Brush Size, 90–91, 102, 116, 155context-sensitive, 58–59Flow settings, 134–135, 176, 178–179, 181Foreground to Background gradient, 244Load the Brush After Each Stroke, 133Mixer Brush tool, 131, 169
Clean Brush/Load Brush, 133custom brushes, 179Flow, 134presets, 61, 63switching to Brush tool, 131
Opacity, 90–91, 98, 153, 155Radial gradient, 244Tool Preset Picker, New Tool Preset, 203, 208Useful Mixer Brush Combinations, Dry,
Moist, Wet, or Very Wet settings, 132–135, 169, 178–180
Oval Selection tool (Painter), 66
PPage Rotation tool (Painter), 94–95Paint Brush tool (ArtStudio), 18, 20–25Paint Bucket
Adobe Ideas, 34, 36–37Painter, 66
Paint tool (Procreate), 30, 33Painter brushes
Acrylics, 164, 198Real Dry Flat, 82–83Thick Acrylic Round, 52
AirbrushesCoarse Spray Airbrush, 55, 83Digital Airbrush, 3, 55Fine Detail Airbrush, 220Fine Spray Airbrush, 55, 82–83Soft Airbrush, 82Tapered Detail Air, 82
Artists’ Oils, 163–164, 166, 168, 219–222Impressionist, 57loading version 11 brushes into library, 164
Blenders, 164Blender Bristle, 165–166Grainy Water, 106, 108, 211, 216–217Just Add Water, 162, 166Pointed Stump, 108Real Blender Tapered, 230Soft Blender Stump, 106, 108, 111
Chalk, 81, 250Chalk & Crayons, 250
Blunt Chalk, 70Square Chalk, 211, 213, 215–217
Charcoal & Conté, xiiHard Charcoal Pencil, 106–107, 110–111Hard Charcoal Stick, 106–107, 109–111
ClonersSoft Cloner, 211, 214, 222Square Chalk Cloner, 211, 215–216
Digital Watercolor, 177Broad Water Brush, 236–239, 241New Simple Water, 236, 238–241Pointed Wet Eraser, 236, 238, 241Round Water Blender, 230–231, 236, 238,
240Simple Water, 145Soft Broad Brush, 144–145Soft Diffused Brush, 145, 230–231, 236,
241Soft Round Blender, 145versus Watercolor, 144Wet Eraser, 241
Gouache, 177Fine Round Gouache, 159Flat Opaque Gouache, 57, 159
Impasto, 164Distorto Impasto, 187, 197Grain Emboss, 190, 198Palette Knife, 187, 191, 197Thick Bristle, 71, 187, 190–191, 197
Oil PastelsChunky Oil Pastel, 69, 71–72, 136,
138–140, 143Variable Oil Pastel, 136, 138–143
Oils, 164, 251Flat Oils, 187, 191–192, 194Medium Bristle Oils, 187, 192, 194–195Oily Bristle, 162–164, 167–168, 219–225Real Flat, 173Real Oils Short, 230Real Tapered Round, 173Round Camelhair, 66, 80–81Soft Oils, 198Tapered Bristle, 163, 167–168Tapered Oils, 162, 164–165Thick Oil Bristle, 75, 82–83Wet Oily Brush, 163–164, 219–221, 224
Palette Knives, 164Blender Palette Knife, 164Oil Palette Knife, 219, 224Palette Knife, 173, 187, 191, 197, 220Tiny Smeary Knife, 219, 222–223, 225Wet Oily Palette Knife, 162, 164, 168
Pastels, 250Round Soft Pastel, 56Sharp Pastel Pencil, 94, 96Soft Pastel, 120Soft Pastel Pencil, 96Square Grainy Pastel, 4, 172–173Square Hard Pastel, 94–96, 187, 191, 196Square Soft Pastel, 3–4Square X-Soft Pastel, 80–81, 96Tapered Pastel, 4, 48–49
PenCroquil Pen, 233Fine Point Pen, 177
PencilCover Pencil, 50Flattened Pencil, 86–88Grainy Variable Pencil, 80–81, 86–88Mechanical Pencil, 86, 88–89Real 2B Pencil, 86–87, 89, 163Thick and Thin Pencil, 89
PhotoBurn, 202Dodge, 202Saturation Add, 202Scratch Remover, 202
RealBristle, 82–83Watercolor, 237
versus Digital Watercolor, 144The Painter Wow! Book, 9The Painter Wow! Book CD-ROM, 73painting. See also sketching/drawing
accents, 173atmosphere, 115, 138backgrounds, 28, 37blending, 108, 145on canvas, 187–188
gessoed, 190–197with chalks, 211, 214–217color over color, 21contrast, 119

Index 267
dots and dabs, 111, 131expressive strokes, 111, 131, 197
oil portrait, 219–225feathering, 41
hatched strokes, 141–143highlights, 98shadows, 103
gessoed canvas, 190–197glazes, 134–135, 145–147, 231grainy strokes, 216–217hatching, 19, 115–121, 138, 250
angled, 110, 142cross-hatching, 101, 111, 115, 119curved, 117feathered, 141–143layered, 111linear, 111patched, 111
highlights, 109, 118, 165with History Brush, 208–209layering, 180–181light accents over darker values, 173on location, 3–4modes, 206oil paint looks, 169oil portraits, 219–225with oils, 230–231opacity, 78, 81pastels, 31preferable time of day, 3pressure, 28, 99references, 176–177retouching images, 202–207scumbling, 4, 103, 140, 143shadows, 5–6, 109–110, 119
adding, 97, 109cast shadows, 95, 99, 103, 110
smearing, 140smoothing, 145smudging, 18, 20, 22, 99–100, 99–103, 249
(See also Smudge tool)texture, 81, 176–181
with Dissolve, 115embossing on images, 198filters, Apply Surface Texture, 199filters, Distortion, 199filters, Lighting Effects, 184–185filters, Texturizer, 183fine grain, 182grainy pastel, 196paper, 182paper, colored, 189paper, surface of, 212–213varying, 32
thick and thin strokes, 146with flat brushes, 82with hard/soft edges, 77with varied edges, 78with varied tilt, 77
tonesequalizing, 137and modeling, 105–110and value, 95–97, 109variations with strokes, 111
underpainting, 130–131, 138, 147, 164–166, 171, 192–194
volumeillusion of, 93–103and value and depth, 109
washes, 144–147, 177, 236–243watercolors, wet-into-wet, 238–241wet and dry paints, 132, 134wet paints, 24–25
retaining wetness, 241paintings (examples). See drawings/sketches/
paintingsPalette Knife brush (Painter), 173, 187, 191, 197,
220Palette Knives brushes (Painter), 164
Blender Palette Knife, 164Oil Palette Knife, 219, 224Palette Knife, 173, 187, 191, 197, 220Tiny Smeary Knife, 219, 222–223, 225Wet Oily Palette Knife, 162, 164, 168
palettes, customPainter, 72Photoshop, 130, 151
Pan/Scroll (Intuos tablet), 45papers
for digital printmakingArches, 9Concorde Rag, 9Crane Museo, 9Hahnemuehle’s German Etching, 9Somerset, 9
EpsonEnhanced Matte, 9Somerset Velvet, 9
Painter’s Paper Selectorapplying Surface Texture, 189Artists’ Canvas, 219Artists Rough Paper, 171Basic Paper, 86, 94, 96, 106–107, 136, 138,
211–212Charcoal Paper, 120Coarse Cotton Canvas, 187, 196Current paper texture indicator, 66French Watercolor Paper, 230, 236scale size, 198textures, selecting, 81
Photoshop, Sketchbook Paper, 100Pastel Medium Tip brush (Photoshop), 98Pastel on Charcoal Paper brush (Photoshop), 95,
98–99, 107Pastel Rough Texture brush (Photoshop), 192Pastels brushes (Painter), 250
Round Soft Pastel, 56Sharp Pastel Pencil, 94, 96
Soft Pastel, 120Soft Pastel Pencil, 96Square Grainy Pastel, 4, 172–173Square Hard Pastel, 94–96, 187Square Soft Pastel, 3–4Square X-Soft Pastel, 80–81, 96Tapered Pastel, 4, 48–49
Patch tool (Photoshop), 58Path Selection tools (Photoshop), 58Path to Water, North, vi, xvPath to Water, West 2, 73, 170Pattern Stamp tool (Photoshop), 58, 61Patterns media, 67Pen brushes (Painter)
Croquil Pen, 233Fine Point Pen, 177
Pen brushes (Sketchbook Express), 26Pen tools
Painter, 66Photoshop, 58
Pencil brushesPhotoshop, 88Sketchbook Express, 26
pencil drawings. See also Pencil brushes and tools
ArtStudio, 18–21Brushes 3, 16–17iPad, 12–13Painter, reference points, 162Photoshop, 125
cropping, 124–125scanning process, 124straightening, 124–125
Wacom Grip Pen, 4Pencil tool. See also Pencil brushes
Adobe Ideas, 34Adobe Photoshop Touch, 38, 41ArtStudio, 18Photoshop, 58, 61Sketchbook Express, 26–27
Pencils brushes (Painter)Cover Pencil, 50Flattened Pencil, 86–88Grainy Variable Pencil, 80–81, 86–88Mechanical Pencil, 86, 88–89Real 2B Pencil, 86–87, 89, 163Thick and Thin Pencil, 89
Peppers study, 7–8Perspective Grid tool (Painter), 66Photo brushes (Painter)
Burn, 202Dodge, 202Saturation Add, 202Scratch Remover, 202
Photo Library (iPad), 27–28Photoshop brushes
#2 Pencil, 91, 100–101Airbrush Hard Round, 54Airbrush Soft High Density Grainy, 75–77
268 Index
Airbrush Soft Round, 55, 202–203, 206Calligraphic, 90–91Chalk, 208–209Charcoal, 107Charcoal Flat, 79Charcoal Large Smear, 78Charcoal Pencil, 88, 95, 107, 126, 128Clone Stamp Pressure, 202–203, 229–230,
233–234Dry Media Brushes, 91, 95, 98, 101, 192Flat 7 pixel Calligraphic, 91Flat Angle Low Bristle Count, 169Flat Blunt Short Stiff, 126, 133, 169Flat Point Medium Stiff, 79, 169Flat Point Medium Tip, 79Gouache (custom), 52, 150–151, 153,
155–157, 176, 178–181, 192Gouache Dry Brush (custom), 179, 181Hard Round, 76–77, 150, 152Hard Round 5 pixel Calligraphic, 90History Brush Chalk, 208–209Pastel Medium Tip, 98Pastel on Charcoal Paper, 95, 98–99, 107Pastel Rough Texture, 192Pencil, 88Rough Round Bristle, 78Round Blunt, 56Round Blunt Medium Stiff, 63, 126, 132–135,
169Round Fan Stiff Thin Bristles, 169Round Point Stiff, 169Round Watercolor, 78Scattered Leaves, 57Sketcher (custom), 150, 152–154, 176–177,
192Soft Pastel Large, 192Soft Round, 76–77, 150, 153Spatter, 62, 64, 126, 130–131Square Charcoal, 95, 100, 102–103, 107Square Pastel, 114–116, 119Watercolor Loaded Wet Flat Tip, 78–79,
146–147Watercolor Round, 147Watercolor Small Round Tip, 146
photos/imagesadding vignettes, 202–207collages, 228–231interpolation, 8pixel- and vector-based, 7planning on use, 7references while painting, 150–151repairing, 204resampling, 8resizing, 8resolution, 7–8retouching, 202–207, 228–229using with painting, xiv
physical workspace recommendations, 46
Picture + tool (Adobe Photoshop Touch), 38, 40pixels, 7
definition, 7interpolation, 8and resolution, 7–8
PNG file format, 12Pogo Connect stylus, 4, 13Pointed Wet Eraser brush (Painter), 236, 238,
241The Porte d’Aval Cliffs and Beach at Etretat, 69,
71, 136The Porte d’Aval from Across the Bay, 63, 122positive spaces, 106Precision Mode (Intuos tablet), 45preferences
Intuos5 tablets, 48–49Painter
Brush Tracking, 86Drawing Cursor, 87Interface, Drawing Cursor, 73
PhotoshopDisplay and Cursors, Painting Cursors, 65History panel, 117Transparency and Gamut, 150
printers/printing. See also specific Epson printers
fine art printmaking, 9and resolution, 7–8and vector- or pixel-based images, 7
Procreate6B Pencil brush, 30, 33color study, 30–33overview, 12Soft Pastel brush, 30–33
Property Bar (Painter), 66–67Brush Search, 83brushes
opacity, 108, 198, 225sizing, 109, 121, 214
context-sensitive, 66current tool settings, 67Grain slider, 172
PSD file formatimporting
from Adobe Photoshop Touch, 38from iPad, 12
openingin Painter, 221in Photoshop, 228
saving, 229Punta San Antonio, Spring, xiv, 174, 184
QQuick Curve tool (Painter), 66Quick Selection tool (Photoshop), 58Quiet Moment, 68, 160
RReal 2B Pencil brush (Painter), 86–87, 89, 163Real Blender Tapered brush (Painter), 230Real Dry Flat brush (Painter), 82–83Real Flat brush (Painter), 173Real Oils Short brush (Painter), 230Real Tapered Round brush (Painter), 173Rectangular Marquee tool (Photoshop), 153Rectangular Selection tool (Painter), 66Reference Image panel (Painter), 221resolution
inkjet printing, 8line-screen, 7offset printing, 7service bureaus, 8
RIFF file format, 214opening in Painter, 221preserving native layer effects, 44, 241saving from PSD format, 230
Rotate Page tool (Painter), 66rotating objects/images
Page Rotation tool (Painter), 94–95Rotate tool (Adobe Photoshop Touch), 38
Rough Round Bristle brush (Photoshop), 78Round Blunt brush (Photoshop), 56Round Blunt Medium Stiff brush (Photoshop),
63, 126, 132–135, 169Round Camelhair brush (Painter), 66, 80–81Round Fan Stiff Thin Bristles brush
(Photoshop), 169Round Point Stiff brush (Photoshop), 169Round Soft Pastel brush (Painter), 56Round Water Blender brush (Painter), 230–231,
236, 238, 240Round Watercolor brush (Photoshop), 78Rubber Stamp tool
Adobe Photoshop Touch, 38Painter, 66, 233
SSample Color/Multiple Colors tools (Painter),
80, 163, 236Saturation Add brush (Painter), 202scanned drawings
scanning process, 124–125using Painter
adding washes, 144–145painting, 136–143reference points, 162
using Photoshopadding tonal range, 125adding washes, 146–147cropping and straightening, 124–125painting, 126–135
Index 269
scannersEpson 4870 Pro, 124Epson Perfection V750-M Pro, 124
Scattered Leaves brush (Photoshop), 57Scratch Remover brush (Painter), 202Screen modes (Photoshop), 58Select menu
PainterAll, Background, Delete, 211Feather, 202
PhotoshopAll, 127Feather, 204, 207Float, 136, 144Inverse, 207Load Selection, 206Save Selection, 205
Selection Adjuster (Painter), 66Selection tools
Adobe Photoshop Touch, 38, 41Photoshop, 58
selections, definition, 44sepia coloring, 129, 137Shape Selection tools (Painter), 66Shape tools (Painter), 66Sharp Pastel Pencil brush (Painter), 94, 96Sharpen tool (Photoshop), 58, 61Shift Modifier key (Intuos tablet), 45Simple Water brush (Painter), 1456B Pencil brush (Procreate), 30, 33Sketchbook Express
drawing and sketching, 26–27Markers brush, 26overview, 12Pencils brush, 26Pens brush, 26
Sketchbook Procoloring drawings, 28–29overview, 13
sketchbooks, importance of, xiiiSketcher custom brush (Photoshop), 150,
152–154, 176–177, 192sketches (examples). See drawings/sketches/
paintingssketching/drawing, 26–27. See also painting
circles, loose, 87cleaning areas with Eraser tool, 128compositing with scans, 233–235“contour,” 19, 87cubes, 94–95diamond shapes, 94dots, 111gestures, 88gradients, 111hatching, 19, 115–121, 138, 250
angled, 110, 142cross-hatching, 101, 111, 115, 119curved, 117feathered, 141–143
layered, 111linear, 111patched, 111
highlights, 97lines
broad, 111calligraphic, 91horizontal, 88parallel, 88“sketchy lines,” 19, 26, 31, 89–90wiggly, 79
over portraits with chalk, 211, 214–217plein air sketches, 14, 20, 171rounded forms/objects, 96–99
hollow, 100–103scumbling, 4, 103, 140, 143shading, 95shadows, 5–6
adding, 97, 109cast shadows, 95, 99, 103
smudging, 18, 20, 22, 99–100, 99–103, 249 (See also Smudge tool)
squares, 87squiggles
ringlet, 88tight circular, 111
stippling, 111thick and thin strokes, 146
with flat brushes, 82with hard/soft edges, 77with varied edges, 78with varied tilt, 77
tinting, sepia, 129, 137tones, 96, 107
with charcoal, 102Equalize feature, 137variations, 111
Smudge toolArtStudio, 12, 18, 20, 22Photoshop, 58, 61, 100, 103Procreate, 30, 33Sketchbook Pro, 28–29
Soft Airbrush brush (Painter), 82Soft Blender Stump brush (Painter), 106, 108,
111Soft Broad Brush (Painter), 144–145Soft Cloner brush (Painter), 211, 214, 222Soft Diffused Brush (Painter), 145, 230–231,
236, 241Soft Oils brush (Painter), 198Soft Pastel brush (Painter), 120Soft Pastel brush (Procreate), 30–33Soft Pastel Large brush (Photoshop), 192Soft Pastel Pencil brush (Painter), 96Soft Round Blender brush (Painter), 145Soft Round brush (Photoshop), 76–77, 150, 153spaces, positive and negative, 106Spatter Brush (Photoshop), 62, 64, 126, 130–131Sponge tool (Photoshop), 58, 61, 204
Spray Paint tool (ArtStudio), 18Square Chalk brush (Painter), 211, 213, 215–217Square Chalk Cloner brush (Painter), 211,
215–216Square Charcoal brush (Photoshop), 95, 100,
102–103, 107Square Grainy Pastel brush (Painter), 4, 172–173Square Hard Pastel brush (Painter), 94–96, 187,
191, 196Square Pastel brush (Photoshop), 114–116, 119Square Soft Pastel brush (Painter), 3–4Square X-Soft Pastel brush (Painter), 80–81, 96Status Bar (Photoshop), 59still life, lighting
for photography, 150for sketching, 86, 100, 106
Sunrise, 61Surface Control effect (Painter)
Apply Lighting, 242Apply Surface Texture, 199, 213Color Overlay, 212
Swatches panel (Photoshop), 60, 114–115Switch Foreground and Background Colors
(Photoshop), 58Symmetry Mode tool (Sketchbook Express), 26
TTapered Bristle brush (Painter), 163, 167–168Tapered Detail Air brush (Painter), 82Tapered Oils brush (Painter), 162, 164–165Tapered Pastel brush (Painter), 4, 48–49Taptrix, Inc.’s Brushes 3, 12Ten One Design’s Pogo Connect, 4, 13Text tool
Adobe Photoshop Touch, 41ArtStudio, 18Painter, 66Sketchbook Express, 26
texture, 81, 176–181with Dissolve, 115embossing on images, 198filters
Apply Surface Texture, 199Distortion, 199Lighting Effects, 184–185Texturizer, 183
fine grain, 182grainy pastel, 196paper, 182paper, colored, 189paper, surface of, 212–213varying, 32
Texturizer filter (Photoshop), 183Thick Acrylic Round brush (Painter), 52Thick and Thin Pencil brush (Painter), 89

270 Index
Thick Bristle brush (Painter), 71, 187, 190–191, 197
Thick Oil Bristle brush (Painter), 75, 82–83Think of the iPad as your mobile digital
sketchbook, 10The Three Engines, 60TIFF file format, 208, 211Tiny Smeary Knife brush (Painter), 219,
222–223, 225Tonal Control effect, Equalize (Painter), 137Toolbox (Painter), 66–67Tools Panel (Photoshop), 58–59
Mixer Brush tool, 169brushes/paints, testing, 178custom brushes, 179presets, 61, 63switching to Brush tool, 131
Touch Ring (Intuos tablet), 45, 53Tracing Paper feature (Painter), 159Tranquil Beach, Color, 249transforming elements, 127
Free Transform (Photoshop), 127constraining with Shift key, 234enlarging with handles, 235Scale, 229
Layer Transform tool (Sketchbook Express), 26
Transform tool (Adobe Photoshop Touch), 38–40
Trillium Press, 9
Uunderpainting, 130–131, 138, 147, 164–166, 171.
See also paintingUndo/Redo tools
Adobe Ideas, 34ArtStudio, 18Brushes 3, 14Sketchbook Express, 26
Useful Mixer Brush Combinations (Photoshop), Dry, Moist, Wet, or Very Wet settings, 132–135, 169, 178–180
VVariable Oil Pastel brush (Painter), 136, 138–143vector-based images, 7View From Point Loma, 253vignettes, 202–207
WWacom Bamboo Solo stylus, 13Wacom Intuos tablets, 75
Cintiq display, 2customizing
applications, 49buttons, 50–53drivers, 48Express keys, 45Touch Ring, 45
default settings, returning to, 48drawing/navigating, 47Express keys, 45, 53features, 44–45Macintosh and Windows platforms, 2Mapping tab, 50, 53Modifier keys, 45, 51Pen tab
Duoswitch, 45, 50Eraser, 45, 51, 118Pressure Hold, 52
resolution, 44styli
Airbrush, 54–55Art Pen, 56–57Bamboo, 13customizing buttons, 50–52features, 45Grip Pen stroke nibs, 4positioning in hand, 47switching tools, 51
Tip Feel controls, 48–49Touch Ring, 45, 53
Wacom Technology Corp., 258Wanda, 1945, 200Wanda, 1945, Study, 210Watercolor brushes (Painter), 237
versus Digital Watercolor brushes, 144Watercolor Loaded Wet Flat Tip brush
(Photoshop), 78–79, 146–147Watercolor media layers, 144, 237Watercolor Round brush (Photoshop), 147Watercolor Small Round Tip brush (Photoshop),
146Weaves media, 67Well panel (Painter), Resat values, 240Wet Eraser brush (Painter), 241Wet Oily Brush (Painter), 163–164, 219–221,
224Wet Oily Palette Knife brush (Painter), 162, 164,
168
Wet Paint Brush tool (ArtStudio), 18, 20, 23–25Where All Creativity Comes From, 247
The sketch composition for, 232White Orchid, 104White Point Dropper (Photoshop), 125Wilhelm, Henry, 9Wilhelm Imaging Research, Inc., 9Window menu
PainterArrange Palettes, Save Layout, 72Brush Control Panels, 70, 240Clone Source, 214Custom Palette, Organizer, 72Interface, 73Media Library Panels, Gradients, 137Paper Panels, Paper Libraries, 72Paper Panels, Papers, 81, 212Reference Image, 221Show Colors, 80Show Mixer, 80, 120
PhotoshopBrush, 62Brush Presets, 77History, 117, 208Interface, 73Workspace, New Workspace, 59Workspace, Painting, 59
workspacescomputers and tablets, 2customizing
Painter, 72–73Photoshop, 59, 65
desk/equipment setup/use, 2–3, 46digital art studio, 2–4
ZZimmer, Mark, 248zooming/magnification
Magnifier (Painter), xvii, 66Zoom and Pan tool (Painter), 80Zoom tool/Magnification (Photoshop), xvii,
58–59