the principles of composition - calregionphoto.org · framing devices ‐natural framing your...
TRANSCRIPT
The Principles of CompositionPoor composition can make a stunning subject fall flat or merely become a snapshot!

Simplify the Scene
▪ The human eye zeroes in on what it wishes to view
▪ The camera captures an entire scene without regard to a focal point
▪ You must pick the subject then choose what lens or camera position to make it the center of attention in the frame
▪ Silhouettes, textures and lines are all compositional devices to use in your images

Simplifying the Scene
1. Move in closer – crop out distracting elements 2. Silhouettes and shapes draw the eye3. Lines allow the eye to follow and lead to the subject
1 2
3

Fill the Frame
▪ Zoom in on the subject – Leaving too much space around the subject may confuse your viewers, so that they won’t know what to look at
▪ Physically move in closer to the subject – getting closer will allow your viewers to see more detail or change the effect of the scene
Filling the Frame
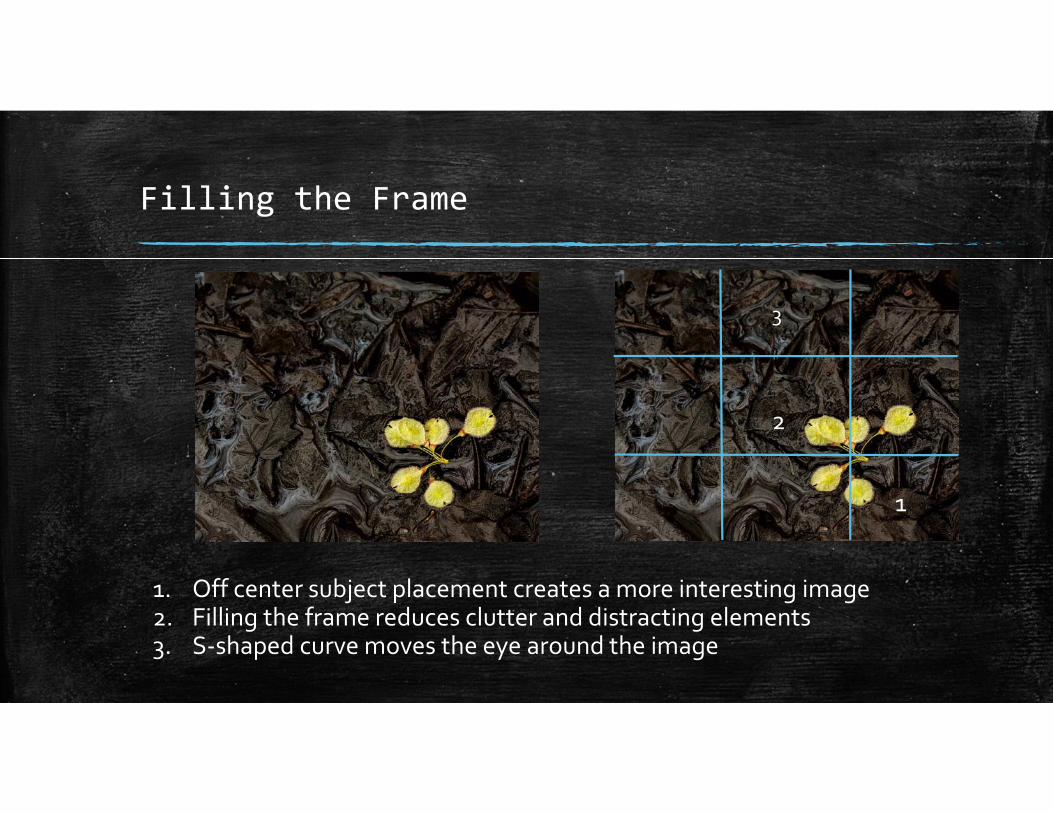
1. Off center subject placement creates a more interesting image2. Filling the frame reduces clutter and distracting elements3. S‐shaped curve moves the eye around the image
1
2
3

Rule of Thirds
Divide up your viewfinder in the camera with imaginary lines both horizontal and vertical in 1/3rd intervals until you have 9 equal segments.
At the intersection of these lines you will have 4 dots in which to place your point of interest. See figure at right.

Rule of Thirds – Subject Placement
You don’t want to place your object dead center in the frame because it gives the appearance of a bullseye and the subject becomes static.
In the image of the waterfall, the falling water is placed to the left to give the water a place to flow into.

Horizontal versus Vertical
Many beginning photographers get stuck in the horizontal rut Try turning the camera vertical to create a new perspective Remember many images just look better vertical than horizontal, i.e.
tall buildings, trees, single flowers and the list is endless
Horizontal versus Vertical
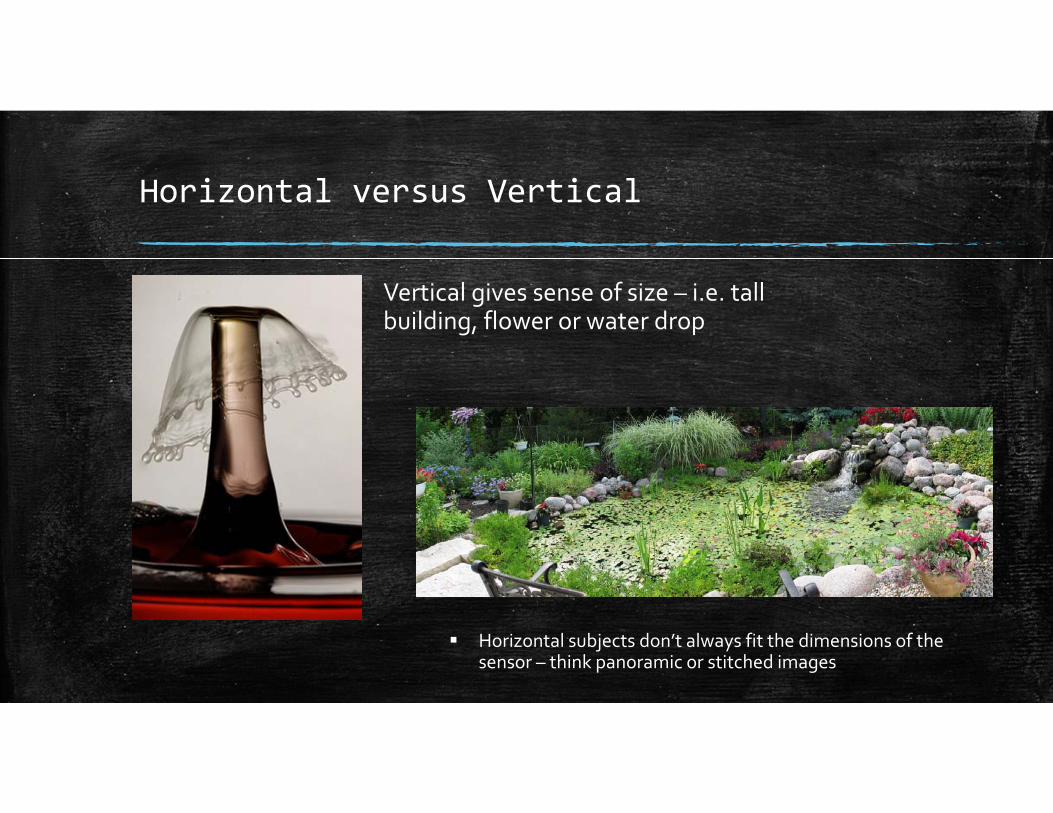
Vertical gives sense of size – i.e. tall building, flower or water drop
Horizontal subjects don’t always fit the dimensions of the sensor – think panoramic or stitched images

Avoid the Center
Many beginning photographers place the subject in the center of the famethereby creating a static, boring image.
Moving the subject to the corners, top or bottom of the frame creates a more pleasing image.
When showing apparent movement, space in front of the object is preferable – i.e. a bird or plane flying across the field of view. The space gives the subject a place to look into or area to move.

Giving Space to the Subject
Notice how the soldier is placed in this frame. By being situated to the left, there is space for him to move right within the frame and not out of it.
The placement also causes tension – i.e. the viewer may ask what is the soldier looking at?

Leading Lines
When a viewer’s eyes can’t find the subject matter as it is presented, then the photograph has failed to convey the meaning of what the photographer had in mind when he/she clicked the shutter.
Lines are a device to control how and where the viewer’s eyes move inside the frame.
Converging Lines show perspective and depth while Curved Lines lead the viewer around the frame
Lines may take the form of walls, fences, roads, buildings, wires, railroad tracks and the examples are endless.
Lines may also be implied by the direction a person in the image may be looking.

Notice how the grassy edge and the road lead your eyes further into the scene towards the far edge of the dirt lane.
This fall image is an example of converging lines and the effect they have on a viewer’s eyes.

Foregrounds & Backgrounds
Before pressing the shutter look carefully at the foreground and background of your image. Are there distracting elements that will take away from your image?
If something is distracting, try moving to a different position high above eye level or low to the ground.
Change to a wider aperture or try a longer lens to remove the clutter.

Controlling Foregrounds & Backgrounds
Notice how there is nothing in the foreground and the busy background has been reduced to soft colors and shadows
The data for this image:Lens: 70‐200mm set at 175mmAperture: F2.8ISO: 200Time: 9 AM Season: Mid Spring

Framing Devices ‐ Natural
Framing your subject adds a different dimension to your photograph and keeps the viewer’s eye on what is important in the frame.
Here I used a tree branch to frame the scene.

Framing Devices – Man‐Made
Look for man‐made items that form a frame.
The hole in the wall and the woman who appears to be looking through it at the flag is a frame.

Composition Summary
Devices1. Simplify the Scene2. Fill the Frame3. Rule of Thirds4. Horizontal versus Vertical5. Leading Lines6. Avoid the Center7. Foregrounds and backgrounds8. Framing Devices – Natural & Man‐Made
Assignment – Use one of the devices below to shoot a subject for our next meeting
Devices1. Simplify the Scene2. Fill the Frame3. Rule of Thirds4. Horizontal versus Vertical5. Leading Lines6. Avoid the Center7. Foregrounds and backgrounds8. Framing Devices – Natural & Man‐Made

Text and photos by Dave DornbergPlease do not distribute or use this presentation without written authorization of author. All rights reserved