troubleshooting tips 11-14 - sears parts direct · manual. whenusingthewasher • never reach into...
TRANSCRIPT

GEApp/iances.com
Safety Instruaio_ .......... 2
Operating InstruotionsClothes Care Cycles ........... 5Controls ................... o
Controls Features ............ 6
Cycle Options ............... 7
Loading and Usingthe _J\hsher ............... 9, 10
One Touch C,vcles .......... 3, 4Other Features .............. 7
_¢\hsher Features ............ 5-8
Troubleshooting Tips ..... 11-14
Consumer SupportConsumer Support . . . Back (:overWarrant},' .................. 15
EWA 4000
Write the model and serialnumbers here:
Model #
Serial #
You can find them in the
upper right corner on theback of wmr washer.
175D1807P387 49-90124 12-07 Jl_

IMPORTANTSAFETYINFORMATION.READALLINSTRUCTIONSBEFOREUSING.
WARNING! Foryoursafe theinformationinthismanualmustbefollowedtominimizetheriskof fire or explosion, electric shock, or to prevent property damage, personal injury,or loss of life.
WATERHEATERSAFETYUnder certain conditions hydrogen gas may be produced in a water heater that has not been used for two weeksor more. Hydrogen gas can be explosive under these circumstances.
If the hot water has not been ttsed fin" two x_eks or more, prevent the possibility of damage or iqjm T by turning
on all hot x_ter fimcets and allowing them to run fin" several minutes. Do this befin'e using any electrical
appliance which is connected to the hot water system. This simple procedure will allow any built-u l) hydrogengas to escape. Since the gas is flammable, do not smoke or tt_;ean open flanle or appliance dunng this process.
%PROPERINSTALLAtiONThis washer must be properly installed and located in accordance with the Installation Instructions before itis used. ff you did not receive an Installation Instructions shee_ you can receive one by visiting GEAppliances.cem,or by calling 800.GE.CARE$(800.432.2737).
• Install or store M_ere it will not be exposed totemperatures below fl'eezing or exposed to thewear]let.
• Remove the colored protective fihn fi'om the
control panel,
• Properly ground _asher to confi)rm _ith all
goxeming codes and ordinances. Follo_ details
in Installation Instructions.
YOURLAUNDRYAREA• Keep tile area underneath and around _otu"
appliances fl'ee of combustible materials such aslint, paper; rags, chemicals, etc.
• Close sui)ervision is necessary if this appliance is
used b'_ or near children. Do not allow children to
pla) on, with or inside this c,r an) other appliance.
Use thisapplianceonly for itsintended
purpose asdescribed inthis Owner'sManual.
WHENUSINGTHEWASHER• Never reach into washer while it is moving,. Wait
until the machine has completely stopped beforeopening the lid.
Do not mix chlorine bleach with ammonia or
acids such as vinegar and/or rust remover Mi_ng
different chemicals can produce a toxic gas whichmay cause death.
Do not x_:_shor d_y articles that have been cleanedin, washed in, soaked in, or spotted with combustible
or explosive substances (such as wax, oil, paint,gasoline, degreasers, d_T-cleaning solvents, kerosene,
etc.) _hich _l)r ig_3im or explode. Do not add thesesubstances to the _Jsh _lte_: Do not use or place
these substances around your washer or (hTerduring operation,
• The latm&y process can reduce the flame reta_dancy
oftiJbfics. To avoid such a result, carefiflly fi_llow thegarment mantdiJcturer's wash and care instructions.
• To minimize the possibiliD, of electric shock,tmI)lug this appliance fl'om the power supi)lyor disconnect the washer at the household
distribution panel by removing the Rise or
switching off the drcuit breaker before attemptingany maintenance or cleaning. NOTE."PressingSTART or STOP does NOYdisconnect the
appliance fl'om the power sui)pl >
• Never attempt to operate rids appliance if it isdamaged, malfunctioning, partiall} disassembled,
or has missing or broken parts, including adamaged cord or plug.
WHENNOTINUSE• Turn off water faucets to relieve pressure on hoses
and \_flves and to minimize leakage if a break orrulxure should occm: Check the condition ot the
fill hoses; they should be replaced every 5 vea_s.
• Before discarding a washe_; or removing it fl'om
service, remove the washer lid to prevent childrenfl'om hiding inside.
READANDFOLLOWTHISSAFETYSAgE TttESE INSTRUCTIONS
Do not attempt to repmr or replace any part of
this appliance unless specifically recommended inthis Owner's Manual, or in published use>repairinstruct.ions that w_u trade,stand and have theskills to carry out.
Do not tamper with controls.
INFORMAtiONCAREFULLY.

Easy ONE TOUCH Cycles. GEAppliances.com
Your new washer offers the convenience of starting _our wash loads with our eas_ ONETOUCHcycles. Make one simple
selection, and _'OllI" LOAD SIZE SOIL LEVEL, WASH/RINSE TEMPERATURE and WASH/SPIN SPEED aye alltoinaticall_ set.
Then all _ou ]Ea'_e to do is press START
ONE TOUCH
• Add detergent
• Add dilutedfabricsoftener(on modelswith a fabric softenerdispenser)
• Addclothes
O_E TOUCH
s_
• Select wash cycle
• Checkload sizesetting
• Closelid
• PushSTART
WashercontrolpanelYoucan locate your model number behind the top edge of the control panel.
LADDE :
QUICK DRAIN ............RINSE &SPIN
MEDIUM
MEDIUM WArM EXTENDWAKM SPIN
UGHT WARM 2NOCOLD RINSE
ES_TIME_MAINING
PerlecTemp Plus SOAK WASH RINSE 2NO RINSE AUTO BALANCE FINAL SPIN
CYCLE STATUS
3

ONE TOUCHselections.
PRESS... AUTOMATICALLYSELECTS...
LOAD SOIL TEM PSIZE LEVEL WASH/RINSE
..............................................HOTLARGE ) )NEDiUM COLD
For heavy to lightly soiled cottons, household linens,work and play clothes.
THENPRESS...
For heavy to lightly soiled cottons, household finens,work and play clothes.
For non-colorfast cottons and blends, and items thatare labeled cold wash by the fabric manufacturer.
MED(UM MED(UM WARM..... COLD
For knits, wrinkle-free and permanent press items.
For lingerie and items labeled hand-washable withlight soils. Provides periods of agitation and soakduring wash and rinse.
For wrinkle-free and permanent press items andknits. Provides agitate/pause cycles to clean yourheavily soiled #ems.
Changingthe automatic settings.You can chanoe_ anx, of the automatic settings, simplx, 1)x, I)ressin°" _ the desired pads.
4

About ClothesCare Cycles. GEAppliances.com
PRE-SOAK
Appearance may var,¢
PRESOAK
To presoak a load and go straight into a wash cycle:
Select v(:,ur wash cycle, press the PRESOAK pad, then press the START pad.
• Starts with three ininutes of agitation, then 12 ininutes of soaking, followed bv theselected wash cycle.
• Uses the speed and water temperatm'e of your selected wash cycle.
To presoak a load without going straight into a wash cycle:
Press the PRESOAKpad. The washer will till. You may change the automatic settingsif desired.
• Three minutes of agitation is ti)llowed by up to 94 horus of soaking.
• To soak less than 24 hours, press the DRAIN & SPIN pad or choose a wash cycle.
QUICKRINSE
QUICKRINSE (on some models)
Use this featm'e to qtfickly rinse chlorine, perspiration, stains, etc. out of clothes.
• The washer flls with water; agitates ti)r three minutes, drains and spins. You may
change the automatic settings if desired.
HANG DRYFAST/ SLOW
HANG DRY (on some models)
It you air dry your clothes without the aid of a dryer, you may fad that the slower fnal
spin speed of the Hang Dry setting produces fewer wrinkles in your clothing. This may
significantly reduce your ironing chore.
DRAIN& SPIN
DRAIN & SPIN
DRAIN & SPIN any c_cle at am tim e.
CUSTOMCYCLE
PRESS 3SEC TO STOItE
CUSTOM CYCLE
Set up yore" favorite combination of settings and save them here tot one-touch recall.
These custom settings cannot be set while a cycle is in progress.
To store a custom combination of settings:
l. Select a ONETOUCHsetting.
2. Change LOAD SIZE, SOIL LEVEL, TEMPERATURE, WASH SPEED or SPIN SPEED t(> fitVOIII" needs.
3. Select any OPTIONSyou want.
4. Press and hold the CUSTOM CYCLEpad tmtil the washer beeps to store vom" selection.
To recall your stored combination:
Press the CUSTOM CYCLEpad, then press START.
NOTE: DELAY I-8 HRS. cannot be used in CUSTOM CYCLEsettings.
To reprogram the custom settings:
Repeat steps I-4 above.

About controlsfeatures.
START
• After you have selected a new cycle, press once to start the cycle.
• Press twice to select the last cycle used and start the washer.
• If the washer is _tmning, press once to interrupt the cycle; press again to continuethe cycle.
STOP
This pad should not be used to interrupt or pause a cycle.
Pressiw,.._ this pad will cancel the current settings, and the settings, will be lost.
EST.TINE RENANING
Estimated Time Remaining
• Displays the approximate time remaining m_til the end ot the cycle.
• If the estimated time remaining is more than 60 minutes, "1 H" will flash in the
displa> tollowed bv the additional remaining minutes. When the time remaining isless than 60 minutes, the timer will count down.
• Cycle time is alt'ected by how long it takes the washer to fill. This depends on the
water pressure in wmr home. The "smart" timer "learns" the amount of time it
takes to fill wmr washer and at!justs the total time accordingly:
NOTE: If PRESOAKis selected and a follow up wash cycle is not chosen, two dashes
will come up in the display.
SpotSpral,Pro_ides a short spray ot water to allow _ou to dampen clothing when you pretreat stains.
_] Open the washer lid.
_-_ Press the SPOTSPRAYbumm. (Ym will see a short stream of watex:)
_] Dampen your soiled gaxment with the SPOT SPRAYoption and rub your tmofitepretreatment product into soiled area.
NOTE:The SPOT SPRAY option will not work if
• the washer hd is down
• the washer tub is filling
• the water has already reached the level you selectecL
BLEACHSIGNAL
BLEACH SIGNAL (on some models)
The Bleach Signal is a reminder signal that can be turned on to remind you to add bleach at
the proper time in the wash cycle. Adding detexgent and bleach at the same time reduces the
efli_ctiveness of both the enzymes in the detergent and the chlorine in the bleach. By adding
bleach later in the wash cycle, you allow the dem_gent's enzymes to remove dirt and stains fi_t,
and then provide a more eltective close of liquid bleach to whiten and sanitize your clothes.
About cycle options. G ..liancescom
......SiGN_V̧̧,_
Appearancemayvar_¢
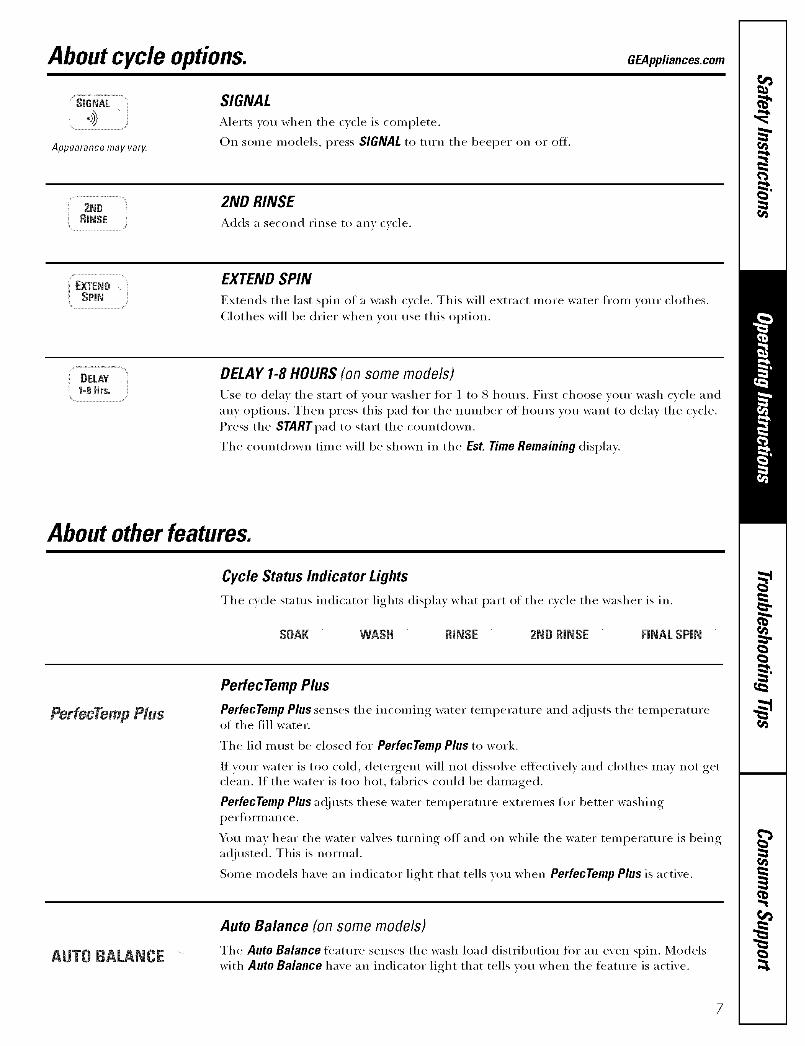
SIGNAL
Alerts you when the (_('le is (onq)lete.
On seine Inodels, press SIGNAL to turn the beeper on or off.
2NDRINSE
2ND RINSE
Adds a second rinse to any ('_ (-le.
EXTEND SPIN
Extends tile last spin of a wash ('v('le. This will extract more water h'om _our (h)thes.
Ch)thes will be drier when _ou use this option.
DELAY1=8Hrs.
DELAY 1-8 HOURS (on some models)
Use to delay tile start ot yore" washer for 1 to 8 hou_. First choose yore" wash cwle and
any options. Then press this pad fl)r the nmnber of ho/u_ you want to delay the cycle.
Press the SYARYpad to start the countdown.
The countdown time will be shown in the Est. Time Remaining display.
About otherfeatures.
Cycle Status Indicator Lights
The c_('le status indicator lights displa) what part oI the ('_cle the washer is in.
SOAK WASH RINSE 2NDRINSE FINALSPIN
Perfecremp Plus
Perfec TempPlus
PerfecTemp Plus senses tile incoming water temperatm'e and a@_sts tile temperatm'eof the fill water.
The lid must be closed for PerfecTemp Plus to work.
If veto" water is to() cold, detergent will not dissolve efli_ctivelv and clothes may not get
clean. If the water is too hot, rid)tics could be damaged.
PerfecTemp Plus a(!iusts these water temperatm'e extremes for better washing
l)e I'J[O YIIl _1IT ce.
You may hear the water wflves tm'ning off and on while the water temperature is being
at!lusted. This is normal.
Some models have an indicator light that tells you when PerfecTemp Plus is active.
AUTO BALANCE
Auto Balance (on some models)
Tile Auto Balance feature senses the wash h)ad distribution for an e_en spin. Modelswith Auto Balance ha_e an indicator light that tells _ou when the feature is active.
7

About washer features.
Liquid Bleach Dispenser
The dispenser dilutes liquid chlorine bleach before it reaches into your wash load.
F_] Check clothing care labels fi)r special instructions.
['_ Measm'e liquid bleach careflfll> following instructions on the bottle.
• Never pour undiluted liquid chlorine bleach directly onto clothes or into the wash basket.
• Do not pour powdered bleach into bleach dispenser
I-j] gefbre starting the washe_; pour measm'ed amount of bleach directly into bleachdispense_: Axoid splashing or oxe>filling dispense_: If )ou prefer to use powderedbleach, add it into the wash basket with veto" detergent.
• Do not talk chlorine bleach with ammonia or acids such as wne_ar and/or rust remove_ Mixing
canproduce a toxic gas which may cause death.
TheAgitator Cap or Fabric Softener Dispenser
The agitator cap fits into the top of the _ Add water to dispenser tmtil it reachesagitato_; If it accidentall_ comes off, simply _ the maximmn fill line.put it back on.
The fabric softener dispenser automaticallyreleases liquid fabric softener at the propertime during the cycle.
Do not step the washer during the first spin.This will cause the dispenser to empty teeSOOn.
Touse, follow these steps."
E_ Make st/I'e dispenser is sect/relyattached to agitatm:
_-_lJse only liquid fabric softenerPour into dispense_; using amount
recommended on package.
Never pour fabric softener directly on
clothes. It may stain them.
Do not pour anything into flTeagitator ifflTeagitator cap or dispenser is removed.
Separate for cleaning.
Cleaning the Fabric Softener Dispenser
_] Remove the dispenser ti'om the top of the agit;mn:
I I ,, I , I I ,_-] Separate the dis )enser cu ) fl'om the coxer by gras )ing the to ) and )ushing down onthe inside of the cup with "_or:u"finge_. Dispenser cup will pop free from the coxe_:
[-_To clean the dispense_; soak both the dispenser cup and the dispenser coxer in thefollowing solution:
• 1 USgallon (3.8 liters) warm water• 1/4 cup (60 mi) heavy duty liquid detergent
• I cup (240 ml) bleach
[-_]f necessary, loosen buildup with a clean soft cloth after soaking. Do not use a stiffbrush; you'ina) roughen the sui_filce of the dispensei:
N Rinse and reassemble dispense_: Place dispenser back on the agitat(n:

Loadingandusing the washer.Always follow fabric manufacturer's care label when laundering. GEApp/iance&com
SortingWashLoadsSort by color (whites, lights, colo_s), soil level,
fi_bric _])e (sturdy cottons, easy care, delicates),and whether the ti_b_ic produces lint (ten T cloth,
chenille) or collects lint (velvemen, corduroy).
ProperUseof DetergentUsing too in uch detelgent is a common ca useof laundry problems. Today's detergents arefommlated to be effective without highly visible
sudsing. Be sure to carefully read and fl}lh}wiilantlJ[ilCttli'ei"s i'ecoii/iilendations ilk)i" how
nluch {lem_gent to use in your wash.
You can use less detergent if }ou ha_e sott water;a smaller load or a lightly soiled load.
Loadingthe Washeri,oad dry items loosely; no higher than tiletop row of holes in the washer basket.
When loading wet items make sure you setthe load/water level high enough to allowtile items to move fi'eelv. _.V_ter level should
just cover the clothes. To add items alter
washer has started, lift tile lid and submergeadditional items next to tile agitator.
• Do not wrap long items like sheets orpantsaround the agitator
• Do not wash fabrics containing flammablematerials (waxes, cleaning fluids, etc.).
• Agitation will not start with the lid up.

Loading and usingthe washer. AIways follow fabric manufacturer's care label when laundering.
Careand Cleaningof the WasherWash Basket: i,eave the lid open after washing to
allow illoisttli'e to evaporate. If Vail want to clean
the basket, use a clean soft cloth (laml)ened with
liquid detergent, then rinse. (Do not use harshor gritty cleane_.)
Fill Hoses: Hoses connecting washer to fitucetshould be replaced every 5 vem_.
Lint Filter. The lint fil ter is located trader th e agitat(mIt is self:cleaning and reqtfires no maintenance.
Exterior'. hnm ediately wipe off any spills. Wipe withdamp cloth. Try not to hit StliS_itce_ith shaq) objects.
Moving and Storage:Ask the service technician to
remove water ti'om drain pump and hoses. See the]nstalhtfion Instructions packed with product for
infimnation on how to reinst;tll the shipping rod tokee I) the tub stationary when moving the washe_:For more infimnafion, visit aEAppliances.com, or
call 800.GE.CABE$ (800.432.2737). Do not store
the washer where it will be exposed to the weather.
Long Vacations:Be sure water supply is shut off atfitucets. Drain all water ti'om hoses if weather will
be below ti'eezing.
FabricCareLabels
Below are titbric care label "s)mbols" that afli_ct the clothing )ou will be latmdering.
WASH LABELS
wash __ __cycle Nor,,,o,p..........._Press/Gent,e'--'/ DonotwoshDonotwr,,g
wrinkle resistant delicate Hand wash
Water O0 • O0 •temperature Hot W ..... Cold/coN
(50'C/120 F) (40 C/105°F) (30 C/85'F)
DRY LABELS
_r. Donotdry
Dry Normal Permanent Press/ Gentle/ Do )lot tumble dry (used withwrinkle resistant delicate do not wash)
.00, e ® ® •setting
High Medium Low No heat/air
Fq ?qLine dry/ Drip dry Dry flat In the sMde
hang to dry
BLEACHLABELS
symbols An_ bleach Only ....... hlorine bleach Do not bleach
(when needed) (when needed)
7O

Before you call for service... GEAppliances.com
Troubleshooting -tipsSave time and money! Reviewthe charts on the following pages,or visit GEAppliances.com.Youmay not need to call for service.
PERFECTEMPPLUS Possible Causes What ToDo
PeffecTemp Plus wash The washer is in a cold rinse cycle • This is nomml. The PeffecTemp Plus feature is designedtemperature is incorrect not to actiw_te during a cold rinse cycle to improve the
energy' efficiency of your washe_:
(Review PerfecTemp All the water in the household • _A'ait tmtil the water in the water heater is heated to thePlus in the About other water heater has been used correct temperature,features section)
PERFORMANCE Possible Causes What ToBe
Clothes too wet Incorrect spin speed • Make sm'e the spin cycle selected matches the load youselected are washing. Some ihbrics will feel wetter when rinsed
with cold watel:
Colored spots Incorrect use of fabric • Check ti_bric softener package fi)r instructions and fi)llowsoftener directions for using dispensel:
• Pretreat stain and rewash.
Dye trm_sfer • Sort whites or lightly colored items fl'om clark colo*_.
Grayed or yellowed Not enough detergent * Use more detergent (espedally with larger loads).clothes Be sm'e to tbllow detergent manufilcturer's directions.
Hard water • Use a water conditioner like Calgon brand or installa water sottelleE
Water is not hot enough • Make sure water heater is delivering water at120° F-140 °F (48°C-60 °(:).
Washer is overloaded * Select load size to match clothes load.
Detergent is not * Add detergent as wash basket fills with water befiwedissolving you load clothes.
Dye traxtsfer • Sort clothes by color If ti_bric label states wash separately,trustable dyes may be indicated.
tint or residue on _othes axe air or line dried • If you do not &Y yore" clothes with a clothes dryeg yourclothes clothes may retain more lint,
Incorrect sorting " Separate lint producel_ t_'om lint collectol_.
Washing too long • Wash small loads tot a sho_er time thin* larger loads.
Detergent not dissolving " Add detergent as wash basket fills with watel; beflwe youload clothes.
" Tr} a liquid detergent.
• Use W;ll'l//er water tel//perattlre.
Overloading • Load clothes no higher than the top ro,_ of holes in thewasher tub.
• Make sure load size selected matches clothes load size.
Incorrect use of fabric softener * Check fitbric softener package fi)r instructions and fl)llowdirections for using dispensel:
11

Before you call for service...
PERFORMANCE (cont.) Possible Causes What To Do
Pilling Result of normal wear on = _'_qfile this is not caused b) the _ashei, yon can slow thepoly-cotton blends and pilling process by washing gam_ents inside out.fuzzy fabrics
Snags, holes, team, rips Pins, snaps, bogles, sharp * Fasten snaps, hooks, buttons and zippel_.or excessive wear buttons, belt bucldes,
• Remo',v loose items like pins, objects in pocketszippers and sharp objectsleft in pockets and shm'p buttons.
• Turn knits (which snag easily) inside out.
Un_uted chlorine bleach * Check bleach package instructions flw proper amotmt.
• Ne\er add mxdiluted bleach to wash or allow clothesto come ix*contact with mxdiluted bleach.
Chemicals like hair bleach * Pdnse items that may have chemicals on them befin'eor dye, perma_aent wave washing.solution
Wrinkling Improper sorting * Avoid mi_ng heavv items (like work clothes) withlight items (like blouses).
• T U a lid)tic sottener.
Overloading or * I,oad your washer so clothes have enough roomincorrect water level to m o\e fl'eel>
Incorrect wash and • Match Cycle selection to the _'pe of fiibric you aredry cycles washing (especially fin" easy care loads).
Repeated washing in • \_xslx in _am_ or cold _ater.water that is too hot
OPERATION Possible Causes What To Do
Washerpauses in cycle The HAND WASH or CASUALS • This is nomml. The washer alternates between agitatecycle was chosen and soak dtwing the HAND WASH and CASUALS cycles
to get your clothes cleaner with less weal:
Washer won't operate Washer is unplugged • Make sure cord is plugged securely into a _x)rking outlet.
Water supply is turned off " Turi_ both hot and cold taucets flfllv oil
Controls are not set properly " Check controls.
Lid is open-safety feature • Close lid and reset cycle, to the begilming if necessaly:prevents agitation mid spinningwhen lid is up,
Circuit brea_ker/fuse is " Check house circuit breakei_/tilses. Replace fllses ortripped/blown reset breakei: X_'asher should haxe separate outlet.
Eleclrolfics need to be reset * Uiq)lug washei; wait 2 minutes, plug back ill and pressSTART.
START was not pressed • Press START.
Exwemely low water pressure • Press START again.
/2

GEAppliances.com
WATER Possible Causes What ToDo
Toomanysuds Type of detergent * Switch to a lower sudsing detergent brand and fi>llowinstrHctiolls on package.
Very soft water • Tr_ less detergent.
Too much detergent + Measure your dete*gent carefifll> Use less soap if youhave soft watel; a smaller load or a lightly soiled load.
Water leaks Fill hoses or drain hose is + Make sure hose connections are tight at fimcetsimproperly connected and at *<_she_:
= Make sure end of drain hose is properly omnected
to washer and correcdy inserted ill and seem'ed to
drain fhcilit}.
Household drain may + Check househokl plumbing. You may need to call abe dogged plumbe_:
Constant water pressure * Tighten hoses at tile fimcets and tm'n tile water off aDerto the flU hoses at the each use.
water source * Check condition of the fill hoses; tile} should bereplaced eve_T 5 yem_.
Using too much detergent + Use less detexgent. Use less soap if you hare sod watecin washer a smaller load or a lightly soiled load.
Water temperature Control is not set properly * Check water temperature control and at!inst.is incorrect
Water supply is turned off = T(li'll both hot :llld cokl fimrets full} on alld make sHreor improperly connected hoses are com,ected to correct fimcets.
Water valve screens aye + Turn off the _;_ter source and discoimect ,_tter fill
stopped up hoses fix)m the upper back of the x_ztsheI: Use a brush ortoothpick to cle;m the screens in the m;Mfine. Re((mnerttile hoses and turn tile x_ter back on.
House water heater is • Make sHre hollse water heater is delivering waternot set properly at 120°F-140°F (48°C-60°C).
PerfecYemp Plus feature • Tile lid must be closed for PeffecYemp Plus to work.was not activated
Water pumped out Lid lifted or cycle was put in + Reset cycle.before cycle is pause for over 24 hourscomplete
Water won't drain DrMn hose is Mnked or * Straighten drain hose and make sure washer is not sittingimproperly connected on it.
+ Top of drain outlet shoukl be less than 8 ft (2.5 m)above tool:
Water spraying during Washer in spin cycle * Sprit} rinse dining a spin c}cle is normal.spin cycle
Washer did net fill Extremely low water pressure • Press tile START button again.to chosen level
(PeffecTempPlus Inlet hoses aye ldnked + Straighten hoses.and START lightsare flashing) Water valve screens m_e = Turn off the _;Jter source lind disroimert *_v_terfill
stopped up hoses fi'om tile upper back of tile _Jshe*: Use a brush ortoothpick to dean the screens in the machine, Rec(mnectthe hoses and turn tile x_tter bark (m.
Waterfills and drains Drain stand pipe is too low * Drain stand pipe must be abo\e 30" (7(;.2 cm).
at the same time /3

Before you call for service...
NOISE PossibleCauses WhatToDo
Washer is noisy Washer is uneven " To level the ti'ont ot the washe_; a(!iust the ti'ont leveling
legs by rotating the individual leg in the prol)er direction
fin" up or down. To level back of washei, lift back ot
machine 4" (] 1 cm) and set down.
Washer load is • Press START to pause the washex; open the lid and
unbalanced redistribute the load evenly: Close the lid and press
START again,
Shipping rod is still assembled • To relnoxe shii)l)ing rod from washei; pull )ellow tag and
in unit attached rod fl'oln the bottoln right hand side ot washei:
Washer is sitting too close • Ptfll washer away fl'Oln the wall; about 4" (l 1 tin)
to wall (causes knocking is needed,
during cycle)
PeffecTempPlus feature " This is noi_nal. PeffecTempPlusttu'ns water valves off
is being used and on to ac!iust water teml)erattu'e.
OTHER PossibleCauses WhatToDo
Labels on the exteriorof the washer will not
peel off cleanly
OccasJonaJly the adhesiveused on the labels does
not release clemfly
• Use a hair dlyer set at the lowest heat setting, (lirecfingthe air at the lal)el for a short au_ount oI time. This will
release the adhesive easily, without daumging the suriiaceof the washei;
74

GEWasher Warranty.
All warranty service provided by our Factory Service Centers,or an authorized Customer Care® technician. To schedule service,on-line, 24 hours a day, vis# us at GEAppliances.com, or call800.GE.CARES(800.432.2737).
Staple your receipt here.Proof of the original purchase
date is needed to obtain serviceunder the warrantg
For The Period Of: We Vlli//Replace:
One Year Anypart at the washer which tifils due to a defect ill inaterials or worknlanshil). During thisFrom the date of the full one-year warranty, GE will also provide, free of charge, all labor and related se_Mce costsoriginal purchase to replace the (leiective part.
Second through The transmission,suspension rod and spring assembly, if any of these parts should tid] dueFifth Year to a (lefect in materials or workmanship. GE will also replace the washer lid or cover,From the date of the if they should rust under natural operating conditions. Dining this additional four-yearoriginal purchase limited warranty, you will be responsible ti)r any labor or related se_Mce costs.
Second through The washer tub, if it should tifil due to a (lefect in matexJals or workn/anshil). DtlxJng thisTenth Year additional nine-year limited warranty,you will be responsible ti)r any labor or relatedFrom the date of the service costs.
original purchase
SecondthroughTwentiethYearFromthe date of theoriginalpurchase
The washer basket, if it should tifil due m a (lefect in materials or workmanship. During this
additional nineteen-year limited warranty, you will be responsible tor any labor or relatedservice costs.
What Is Net Covered'.
• Service trips to your home to teach you how to use
the product.
• Improper installation.
• Failure of the product if it is abused, misused, or used for
other thml the intended purpose or used commercially.
• Replacement of house fuses or resetting of circuitbreakers.
• Damage to the product caused by accident, fire, floodsor acts of God.
• h_ddental or consequential dmnage caused by possible
defects with this appliance.
Thiswarranty is extended to the on_?inalpurchaserand any succeedingowner forproducts purchasedfor home use withlh the USA.In Alaska, thewarranty excludes thecost of shipping orservice calls to yourhome.
Somestates do not allow the exclusionor hrnitationof incidental orconsequentialdamages. Thiswarranty gives youspecific legal @ts, and youmay also have other Whts which van/from state to state. Toknow what yourlegal nghts are, consult your local or state consumeraffairs office oryourstate_ Attorney General
Warrantor:GeneralElectricCompany.Louisville,KY 40225
15

ConsumerSupport.
GEAppliancesWebsite GEAppliances.comHave a question or need assistance with your appliance? Try the GE Appliances Website 24 hom_ a day,any day of the year'. For greater convenience and tipster seiMce, you can now download Owner's Manuals,
order parts, catalogs, or even schedule service on-line. Y_)u can also "_sk Our Team of EN)erts .....your questions, and so much more...
ScheduleService GEAppliances.comExpert (;E repair sei_ice is onl_ one step away fi'om _our (looi: Get on-line and schedule your sei_ice at
)our comenience 24 hom_ any (lax of the year! Or call 800.(;E.CARES (800.432.2737) during naturalbusiness hom_.
RealLifeDesignStudio GEAppliances.comGE supports the Univei_al Design concept-products, services and enviromnents that can be used bypeople of all ages, sizes and capabilities. We recognize the need to design fin" a wide range of physical and
mental abilities and impaimmnts. For details of GE's Univei_al Design applications, including kitchendesign ideas fin" i)eople with disabilities, check out our Websim today. For the hearing impaired, please call800.TDD.GEAC (800.833.4322).
ExtendedWarranties GEAppliances.comPro'chase a (;E extended wari'ant_ and learn about special discounts that are axailable while yam" wari'ant_is still in effect. You can imrchase it on-line an)time, or call 800.626.2224 during natural business houi_.
(;E Consulner Home Ser\ices will still be there alter )our warrant} expires.
PartsandAccessories GEAppliances.comIndividuals qualified to service their own appliances can have parts or accessories sent directly to their
homes (VISA, MasterCard and Discover cards are accepted). Order on-line todd 5 24 hom_ every day or byphone at 800.626.2002 during natural business hom_.
Instructions contained in this manual cover procedures to be performed by any user. Other servicing generallyshould be referred to qualified service personnel Caution must be exercised, since improper servicing may cause
unsafe operation.
ContactUs GEAppliances.comIf you are not satisfied with the service you receive ti'om (;E, contact us on our _'ebsite with all the details
including your phone numbei; or write to: General Managei; Customer ]?,elationsGE Appliances, Appliance ParkI,ouisville, KY 40225
RegisterYourAppliance GEAppliances.comRegister your new applim_ce on-lhle-at your convenience! Timel) product registration will allow fin"
enhanced communication and prompt serxice under the temps ofxour warranty should the need arise.You may also mail in the pre-printed registration card included in the I)ackiw"_material.
Printed in flTeUnited States