ultimate guide to build scalable home labs using … guide to build scalable... · ultimate guide...
TRANSCRIPT

Ultimate Guide to Build Scalable Home Labs Using VMware vSphere
Steve Jin
DoubleCloud Inc.
The Infrastructure Search and Automation Company
2017-04-03

DoubleCloud Inc. Infrastructure Search and Automation Engine 2
Table of Contents Hardware Choice ........................................................................................................................................... 5
SSD and Sizing ............................................................................................................................................... 6
Installing ESXi on Hardware .......................................................................................................................... 8
Install vCenter Server .................................................................................................................................... 9
Design Your vCenter Inventory ................................................................................................................... 10
Install Nested ESXi ....................................................................................................................................... 12
Configure and Export Nested ESXi .............................................................................................................. 14
Cloning the Nested ESXi VM ....................................................................................................................... 15
Naming Convention .................................................................................................................................... 16
Build CentOS VM Template......................................................................................................................... 17
Moving Up to Virtual Layer ......................................................................................................................... 18
Populate Most VMs in Least Time .............................................................................................................. 19
Auto Start Your pLab ................................................................................................................................... 20
Conclusion ................................................................................................................................................... 22
About the Author ........................................................................................................................................ 22

DoubleCloud Inc. Infrastructure Search and Automation Engine 3
For technical professionals especially in IT field, having home lab is always
advantageous so that we can play with different technologies easily and quickly.
More importantly, building a lab from scratch by itself is a great learning
experience that you will consider through all aspects of technologies. You cannot
do the same on job working in a typical company where scope is divided and
limited, for example networking, storage, networking, etc.
Just like everything else, you can build your lab in different ways and different
scales. If you don’t have to play with low level infrastructure like multiple
hypervisors, you can simply download the Oracle VirtualBox. Over the years, the
free hypervisor has improved a lot and can help you build a small lab of multiple
virtual machines quickly on your current hardware. No extra hardware purchase is
needed at all. If you can add extra memory, the experience would be great.
Compared with the bare metal hypervisors like ESXi from VMware, the VirtualBox
is limited on the scale and performance. This may or may not be a problem
depending the lab size and nature. Should that be an issue, you can try the free
ESXi server from VMware and run many more VMs there.
Note that the free version of ESXi does not allow you to do operations like cloning
which is one of the most useful features using VMware. Neither can you use the
vSphere APIs. Since the free ESXi is licensed only on single instance, the APIs is not
very useful anyway.
Given the topic of this white paper, we’ll focus on the VMware product here and
cover all the steps in helping you to build a scalable lab with minimum cost. After
reading this document, you will be able to build a relatively big size infrastructure
that will satisfy most of your needs on exploring new technologies, especially the
VMware technologies.
Here is what the final lab looks like:
1. One vCenter server 2. 10 ESXi (nested) 3. 100 or so VMs running on nested
DoubleCloud Inc. Infrastructure Search and Automation Engine 4
The budget is around $700. If you have extra budget, you can always go bigger scale. For most of use cases in a home lab, that setting is more than enough.

DoubleCloud Inc. Infrastructure Search and Automation Engine 5
Hardware Choice For enterprise purchases, VMware always recommend customers to check its HCL (hardware compatibility library). For building home labs, however, you will find most affordable computers are not on the list. So the HCL is mostly useless for home labs unless you want to spend similar budgets. Luckily the Intel NUC can be used besides many other consumer oriented desktop computers like Lenovo. I have personally used both and they worked pretty well. The Intel NUC is a great choice for that because it’s quite affordable on both initial purchase and continuous operation. The latter is sometimes easy to be ignored when we make a purchase decision, but it could cost you hundreds on extra electricity bills each month. Intel NUC is pretty lower on that which may cost you a few dollars each month. It’s like you have 20 watts light bulb turned on all the time. Another important factor is that the noise level should be low because you will run it at home. I once ran the Dell C6100 4 node server in my garage, and I can hear it clearly from the living room. So it’s not a good choice if you need to run all the time. There is nothing wrong with the Dell server though. In fact, it’s a great server product but wasn’t designed for home lab. Here is the configuration of the server I bought for $665. It’s possible to buy the basic box and other components separately, but I decided to buy a whole system so that I don’t have to research the compatibilities of different memory chips and device interfaces. Even if I can save a few bucks (not quite positive on that), it doesn’t worth the time and sometimes frustration.
Intel NUC6I5SYH (Swift Canyon) Core i5 NUC System Features;6th Generation (Skylake) Intel Core i5-6260U Processor
32GB Dual Channel DDR4 (1.2V) Memory , 240GB M.2 Solid State Drive Intel Gigabit LAN, Intel Dual Band Wireless-AC 8260 and Bluetooth 4.1 Intel HD Graphics 540 with HDMI 1.4b and Mini DisplayPort 1.2 connectors
As you can see, the Wireless and Bluetooth is not useful for running the ESXi. If you will assemble it by yourself, you can safely skip these two.

DoubleCloud Inc. Infrastructure Search and Automation Engine 6
SSD and Sizing This is essentially still a hardware question, but I decided to single it out because it’s an important decision and could get you confused easily. There are two questions here: should you go with SSD? And how big disk should you buyg? If you can afford SSD, you should definitely go for it because the performance and energy saving (no spinner thus less power). Of course, it’s not always the case – there are actually SSDs that run slower on ESXi. I did face an issue with the SSD, which ran very slow while install a vCenter server. It turned out to be a BIOS issue. To upgrade the hardware BIOS, simply follow this article from Intel which includes PDFs and videos. (http://www.intel.com/content/www/us/en/support/boards-and-kits/000005636.html) The second question is the size. Again, if you can afford bigger disk, go for it. To be rational, you should do some math about it. For my usage, for example, I will need to create one vCenter server, 10 hosts, and 100+ small VMs.
vCSA 35GB (including swap)
1 35
ESXi (nested) 2GB 10 20GB
VM 1.8GB 100GB 180GB
Total 235GB
As you will see the nested ESXi does not have much contribution to final disk, let me explain why. The VMs running on the nested ESXi will be stored in the nested VM’s vmdk, thus the final nested ESXi VM will use about 2+(1.8*1)=20GB. We just accounted the storage required by ESXi installation itself. Depending on the running state, each VM may use different size of storage mostly due to the XXX-****.vswp file. Powered-off virtual machines use less disk storage. If we don’t have 100 VMs running concurrently, we can have a few more VMs there. Another factor to keep in mind is that we will all use thin provision across all the nested ESXi and above VMs. We want to balance the loads among the nested ESXi, not only because we don’t want to overload a particular host, but also because

DoubleCloud Inc. Infrastructure Search and Automation Engine 7
once the nested ESXi’s VMDK file is pushed up, it won’t come back as typical thin provisioned disks. In other words, don’t push the limit of a host so the thin provision eventually becomes thick provision.

DoubleCloud Inc. Infrastructure Search and Automation Engine 8
Installing ESXi on Hardware This is a very basic step for VMware users. Once you have the ESXi image downloaded, you can simply convert it onto a USB key. There are other ways to install it like using VMware PXE server. But because you just need to install one here, using the USB key is simple and fast. To create a bootable USB drive, you’ll need tools like Rufus (http://rufus.akeo.ie/). The usage of the tool is quite straight-forward, but you can always find this article (http://www.virten.net/2014/12/howto-create-a-bootable-esxi-installer-usb-flash-drive/) helpful if you need help. NOTE: if you have old version of NUC, you want to double check its firmware and update it to latest before moving forward. Performance on disk IO may become a big problem otherwise. After you plug in the USB and power on the NUC, you can simply follow the steps to install the software. Although I have done so many times from old versions like ESXi 3.5, I cannot remember all the details there because you just simply follow the wizard and get the work done quite easily. But if this is your first time installation and would like to get some helps, here are a few links for you to follow through. Of all things we covered here, this part should be the easiest part. https://vcdx133.com/2015/02/04/vsphere-6-0-basics-part-1-esxi-install/ Because the hardware for home lab is most likely not on the HCL, you can occasionally get into issues with device drivers. I highly recommend you take a look at the blog (https://www.v-front.de/) by Andreas Peetz. It should have answers and customized drivers for you there. On my personal experience, I found the driver of Intel E1000, which was removed from ESXi 6.0 installer. If you cannot find a driver, the site is your best bet.

DoubleCloud Inc. Infrastructure Search and Automation Engine 9
Install vCenter Server Although you can connect to ESXi directly and do quite a lot of things with HTML5 client, you would miss the cloning feature which makes life a lot easier. So the first virtual machine you should install and run there is the vCenter VM. As it’s a home lab, it’s a natural choice to use the vCenter Virtual Appliance (vCSA) so that you don’t have to pay any licensing fee for Windows. The vCSA is a simple virtual appliance that you can upload and power on to configure and run. With the version 6 and 6.5, it has changed in that you need to install external PSC. It should take about 20 minutes or so. But it took me a few hours before the installation is done. As I asked around the vExpert community, was told it could be a driver issue. But after reading Andreas Peetz’s great blog on the storage drivers, I found that my driver there seems all correct. Because we were extremely busy with vSearch development, I postponed it a bit until I bumped later onto another article on upgrading NUC firmware. After the firmware update, it’s quite fast. Honestly, I haven’t retried things from start – reinstall the vCenter server after the firmware update. It works so no bother to try it. If you try the new steps, please feel free to share in the comments and we’ll add your validation.

DoubleCloud Inc. Infrastructure Search and Automation Engine 10
Design Your vCenter Inventory After the vCenter server is ready, you can login into the system and add the ESXi into the vCenter server. You have a very simply lab with one ESXi and one vCenter server. Now is a big and tricky part with some design decisions you will have to think through. Let’s take a look at the high level goals. In other words, what does the future lab look like? That would help guide the design decisions. The future lab is going to have two layers, both virtual. You can have two vCenter servers, one just manage one ESXi server and all the VMs on it. These VMs include the vCenter server itself and the Nested ESXi that we are going to build. You can create second vCenter server to manage the nested ESXi as hosts and all the VMs running on top of these nested ESXi servers. This approach works and offers a very clean separation of both layers. But a vCenter server uses a lot of resources, mostly with 8G memory even for smallest installation. Not a big deal for real enterprise environment, but it is a big deal for home lab. That is pretty much 25% extra on the small NUC. Accounting two vCenter servers, that would be half of 32GB memory. So I recommend against this approach for sure, not only the resource usage, but also the convenience. In the future, you will have to jump back and forth these two vCenter servers, especially while building the whole lab at the beginning. Having one vCenter for the both layers is the choice. But soon you will find yourself get confused when something is a virtual machine and also an ESXi host. When the VMs running on the nested ESXi comes in, things will get really complicated. You will sometimes find hard to refer these VMs – they are different on layer but they look the same in the vCenter. After playing around with it, I found a good solution to it. You can create two different data centers in the vCenter. The first one you can simply name it pLab as physical lab, and the other as vLab as virtual lab. As their names suggest, each of them will cover their own layers.

DoubleCloud Inc. Infrastructure Search and Automation Engine 11
In the pLab data center, you will add the physical ESXi as a host object there. You will use this datacenter for the physical layer. As result, you will have only one host, one vCenter server VM, and a few VMs to install nested ESXi. In the vLab data center, you will add the nested ESXi as hosts and run other VMs there later. For now, you don’t need it yet, but feel free to create it. The pLab and vLab are just sample names. Please feel free to name them whatever you want as long as you have TWO datacenters with meaningful names. When I worked on my home lab, I normally collapse the pLab data center.

DoubleCloud Inc. Infrastructure Search and Automation Engine 12
Install Nested ESXi Now you have pLab ready and let’s use it to create a nested ESXi VM. Unless you’ve got ESXi OVA already, you have to prepare it from beginning. Depending how many nested ESXi VM you will need, you can think of the PXE boot. Since we just need several nested ESXi, we decided to install it manually with the same process as installing it onto a physical one. The process will be similar but slightly different from installing onto physical hardware. For one thing, you don’t need the USB key any more. As the first step, we need to upload the ESXi ISO image into the datastore. You can open the datastore onto the VM and upload the file. To make it easier to manage, I always create a folder called iso for all the ISO images. You will upload Linux image later into this folder as well. Next, you can move forward to create a new virtual machine. There are a few parameters you will need to provide like number of vCPUs, memory size, disk size and type. In our case, we just picked 2 vCPUs, 4GB memory, and 40GB disk with thin provision. You can change the disk size depending on the size of your physical SSD. For our lab, we will use CentOS minimal which uses about 2G disk space. That 40GB storage can later support about 20 CentOS VMs. Once you have the VM created, you want to change the setting so that you will get into BIOS in next power on. You should change the order of boot devices to make CDROM as the first so that VM will boot from the ISO image in the datastore we uploaded earlier. For the nested ESXi to work, you will need to turn on promiscuous mode on the virtual switch to which the ESXi VM connects to. On the configuration tab of the physical host, you can find the networking and change the properties there. After that, you can power on the VM. The installation is pretty much the same as early installation on a physical server. Please feel free to refer early sections on installing ESXi. When it’s done, you should edit the VM settings to disconnect the ISO image in datastore so that the nested ESXi won’t boot into installer again. Somehow, I kept

DoubleCloud Inc. Infrastructure Search and Automation Engine 13
getting into the installer again even after the CD is disconnected in the settings. We ended up changing the boot order in BIOS settings. You can do that same if that happens to you.
DoubleCloud Inc. Infrastructure Search and Automation Engine 14
Configure and Export Nested ESXi On the VM console of the nested ESXi, you want to change a few things:
1. Enable ESXi Shell 2. Enable SSH service 3. Configure the network like static IP address, subnet, etc.
Although the #1 and #2 are regarded as security risks, but it would make life easier for your home lab. You can turn them off later, but for now keep them enabled. You can now export the nested ESXi VM as OVA for later use, maybe building another lab. Here is a command sample you can change and use for your own environment. "C:\Program Files\VMware\VMware OVF Tool\ovftool" --overwrite --
noSSLVerify vi://[email protected]/ESX65
C:\Users\Steve\Downloads\demo\ESX65_tpl.ova
DoubleCloud Inc. Infrastructure Search and Automation Engine 15
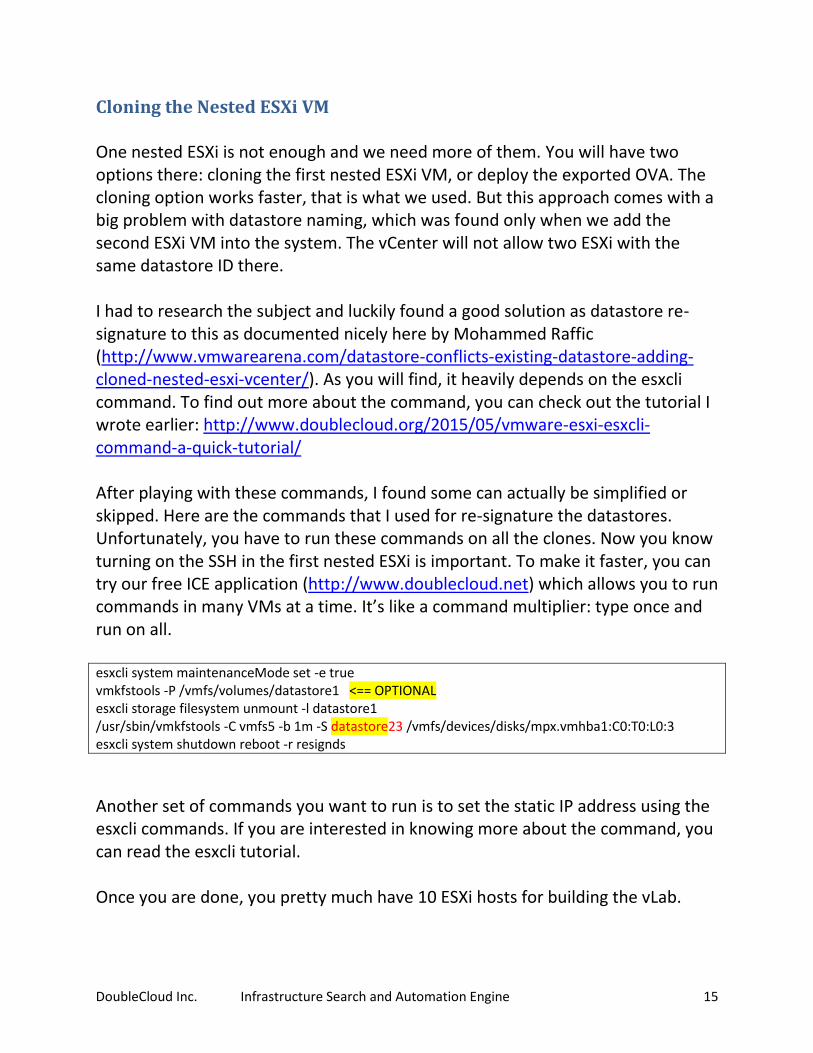
Cloning the Nested ESXi VM One nested ESXi is not enough and we need more of them. You will have two options there: cloning the first nested ESXi VM, or deploy the exported OVA. The cloning option works faster, that is what we used. But this approach comes with a big problem with datastore naming, which was found only when we add the second ESXi VM into the system. The vCenter will not allow two ESXi with the same datastore ID there. I had to research the subject and luckily found a good solution as datastore re-signature to this as documented nicely here by Mohammed Raffic (http://www.vmwarearena.com/datastore-conflicts-existing-datastore-adding-cloned-nested-esxi-vcenter/). As you will find, it heavily depends on the esxcli command. To find out more about the command, you can check out the tutorial I wrote earlier: http://www.doublecloud.org/2015/05/vmware-esxi-esxcli-command-a-quick-tutorial/ After playing with these commands, I found some can actually be simplified or skipped. Here are the commands that I used for re-signature the datastores. Unfortunately, you have to run these commands on all the clones. Now you know turning on the SSH in the first nested ESXi is important. To make it faster, you can try our free ICE application (http://www.doublecloud.net) which allows you to run commands in many VMs at a time. It’s like a command multiplier: type once and run on all. esxcli system maintenanceMode set -e true vmkfstools -P /vmfs/volumes/datastore1 <== OPTIONAL esxcli storage filesystem unmount -l datastore1 /usr/sbin/vmkfstools -C vmfs5 -b 1m -S datastore23 /vmfs/devices/disks/mpx.vmhba1:C0:T0:L0:3 esxcli system shutdown reboot -r resignds
Another set of commands you want to run is to set the static IP address using the esxcli commands. If you are interested in knowing more about the command, you can read the esxcli tutorial. Once you are done, you pretty much have 10 ESXi hosts for building the vLab.

DoubleCloud Inc. Infrastructure Search and Automation Engine 16
Naming Convention Since there are multiple nested ESXi servers, you want to have a consistent naming there. A naming convention will help a lot here. Although we discuss this in the context of home lab, the principles apply to other environments including large scale production systems. Here is an ESXi name I used: HQ-ESXi-21 From the name, you can probably guess out the pattern already. But let’s add more details. The name consists of three parts and combined with dash. The first part is the location or physical data center name. For all I have, I just use HQ as abbreviation for headquarter. You can use the same, or country code, state code, city code, etc. If needed, you can use three letter abbreviation as well. The second part is the ESXi, denoting the entity type. You don’t want to the change it. The last part is the most important part. The 21 is not a random number. It’s actually part of the IP address assigned to the nested ESXi.: 10.8.8.21. From the ESXi name, I can know the IP address; same from the IP to VM name as well. For highest consistency, I also use the same VM name as the host name for the ESXi. If you have larger environment involving multiple subnet, you can expand the last part to include more of the IP address. For example, HQ-ESXi-22-201 for an ESXi whose IP is 10.8.22.201. I know the naming convention is highly depending on personal preferences. The point here is not to follow this one, but to have one and follow through.

DoubleCloud Inc. Infrastructure Search and Automation Engine 17
Build CentOS VM Template If you already have a good VM template as OVA, you can skip this part. Because this is used for home lab for scalability, you want a small VM but not too small so that you can install VMware Tools there. I looked the Damn Small Linux which you can comfortably run with 128GB memory, or even less, with basic applications like browser, but I wasn’t sure we can VMware Tools installed there. The 512MB CentOS 7.2 minimal is small enough in size, and I know it can install VMware Tools. The installation of the VM is pretty similar as the nested ESXi – you install it from uploaded CentOS ISO. Once it’s successfully installed, you want to get onto the VM console and install the VMware Tools. It’s quite easy with the following command on bash: yum -y install open-vm-tools By default, the CentOS is configured with DHCP and you want to keep it this way. Configuring each VM with static IP is time consuming and also not necessary most of the time. Again, you want to export the CentOS as OVA so that you can re-use it again later on any other projects. We will use it to deploy VM onto different nested ESXi later. Till this step, you are pretty much done with preparation, and the rest of the article will go onto the vLab. "C:\Program Files\VMware\VMware OVF Tool\ovftool" --overwrite --
noSSLVerify vi://[email protected]/CentOS-7-x86_64-min-tpl
C:\Users\Steve\Downloads\vSearch\demo\CentOS-7-x86_64-min-tpl.ova

DoubleCloud Inc. Infrastructure Search and Automation Engine 18
Moving Up to Virtual Layer From this part, life will be easy. Just imagine you now have 10 real hosts with ESXi installed. After you login the vSpher Client and open vLab datacenter. To make it less confusing, you can collapse the pLab datacenter as if it were not there. In the vLab, you can create clusters or simply add ESXi as standalone. Because you have about 10 ESXi, you can create two clusters of 3 hosts, and 4 standalone hosts. Adding hosts into these clusters, or by itself, is quite straightforward. I believe you’ve probably done many times with physical ESXi servers. In this vLab, you don’t think of it as nested but real ESXi. The processes and configurations are exactly the same. That is the beauty of virtualization getting nested. Once you are done, you will have clusters and hosts ready for running VMs.

DoubleCloud Inc. Infrastructure Search and Automation Engine 19
Populate Most VMs in Least Time The infrastructure is ready to run VMs. Let’s get VMs there as quickly as possible, and as efficiently as possible. One challenge now is that these ESXi, even some of them clustered, they don’t have shared storage. You can of course install NAS VM for sharing the storage, or even use an external NAS server as shared datastore. If you don’t want these additional hassles, you can still run VMs using each (nested) ESXi’s local storage. Here is probably the fastest way to populate VMs in two steps: first, deploy a CentOS from local OVA exported in early step into each ESXi/datastore; second, clone the first VM in each host/datastore. For the first step, you can use the ovftool command line with each ESXi. The following is a script you can use to speed up the deployment. Simply copy and save it as deploycentos.bat file in your local file system. "C:\Program Files\VMware\VMware OVF Tool\ovftool" --acceptAllEulas -
ds="%~2" -dm="thin" --net:"VM Network"="VM Network"
C:\Users\Steve\Downloads\vSearch\demo\CentOS-7-x86_64-min-tpl.ova
vi://root@%1/
Then, you can run a much simpler command as follows: deploycentos.bat 10.20.50.21 datastore21
The second step, which to clone VMs, is easier, and you can either manually do it on the GUI, or write some scripts do this. Optionally, you can use the vSearch appliance (http://www.doublecloud.net/prod_vsearch.php) which allows you to clone many VMs at a time with one simple click.

DoubleCloud Inc. Infrastructure Search and Automation Engine 20
Auto Start Your pLab
Once you have everything ready, you want to do one more thing to make life easier for later operation – auto-start your pLab datacenter. Whenever there is a power outage or some accidental power cable issue, the lab can easily come up with one power on button on the NUC server. Another important reason for that is your vCenter server runs as virtual machine on the single host. You would have to connect to the ESXi host and manually power it on before you can connect to your vCenter. Although not absolutely necessary, we highly recommend you to set up the auto start at least in the pLab. Luckily the setup is pretty easy. You can just go to the vCenter and select the only physical host there. In the configure part, select the VM Startup/Shutdown menu on the left side. Clicking on the Edit button on the top right of the right pane. From there, you want to turn on the “Automatically start and stop the virtual machines with the system.” For this use case, there is no need to have delay. Simply put these as zero. Once the default setting is done, you can use up arrow to move all the VMs up the automatic startup or “Any Order.” After saving it, it’s pretty done for the pLab. Now, you may wonder: should I do the same for the vLab? It’s all up to you. From running the lab point of view, it’s not really necessary unless you have critical virtual machine that must be running. If that is case, I would recommend you to run the critical virtual machines directly on the physical ESXi server and configure the auto-start there. The reason is pretty simply: you will have better performance and easier management. You can include these critical VMs in the auto start as discussed above. Think about how many steps you will need to get your critical VMs running otherwise. As you see in the diagram, we have our vSearch appliance configured similarly as vCenter appliance.

DoubleCloud Inc. Infrastructure Search and Automation Engine 21
DoubleCloud Inc. Infrastructure Search and Automation Engine 22
Conclusion Intel NUC + vSphere can help you to create a scalable lab quickly with much lower cost than running it in public clouds. This whitepaper has discussed all the design considerations and implementation steps in building the lab. Although the discussion comes with the context of home lab, most of the design principles and techniques are applicable in other environments for staging and production. The process in building a home lab takes a bit time, but you will be surprised at the end how much you can actually learn by getting hands dirty. For one thing, this relative small project covers all aspects of the infrastructure that you wouldn’t be able to experience in most work places. For these reasons, I highly recommend our readers build one lab from scratch. I would love to hear your stories and feedbacks. Let’s work together to improve this guide.
About the Author
Steve Jin, Founder and CEO of DoubleCloud Inc.(http://www.doublecloud.net), a startup company focusing on search and automation engine for the clouds including private clouds like VMware. He is the author of VMware vSphere and VI SDK (Prentice Hall, 2009), and creator of vijava - the de-facto Java API for the No. 1 virtualization platform. You find his personal blog at http://www.doublecloud.org, and follow him on Twitter (@sjin2008).