user id service - forcepoint...how to integrate forcepoint user id service 1.3 with other forcepoint...
TRANSCRIPT
User ID ServiceHow to integrate Forcepoint User IDService with other Forcepoint products1.3Revision B

© 2019 ForcepointForcepoint and the FORCEPOINT logo are trademarks of Forcepoint.
Raytheon is a registered trademark of Raytheon Company.All other trademarks used in this document are the property of their respective owners.
Published 2019
Every effort has been made to ensure the accuracy of this document. However, Forcepoint makes no warranties withrespect to this documentation and disclaims any implied warranties of merchantability and fitness for a particular purpose.Forcepoint shall not be liable for any error or for incidental or consequential damages in connection with the furnishing,performance, or use of this manual or the examples herein. The information in this documentation is subject to changewithout notice.
How to integrate Forcepoint User ID Service 1.3 with other Forcepoint products
Table of contents1 Introduction to the Forcepoint User ID Service............................................................................................... 5
Introduction..................................................................................................................................................... 5Requirements................................................................................................................................................. 6
2 Prepare for installation........................................................................................................................................7Installation overview.......................................................................................................................................7Obtain installation files...................................................................................................................................8
3 Installing the Forcepoint User ID Service.......................................................................................................11Prepare your environment........................................................................................................................... 11Install the UID Service and DAS.................................................................................................................12
4 Configuring the Forcepoint User ID Service.................................................................................................. 17Using the Forcepoint User ID Service Configuration Wizard...................................................................... 17Start the Configuration Wizard.................................................................................................................... 18Configuring certificates and security settings for the Forcepoint User ID Service.......................................19Configuring settings for services in the Forcepoint User ID Service...........................................................24Enable log forwarding from the Forcepoint User ID Service to the SMC....................................................28Configuring settings for DAS....................................................................................................................... 30Restart services in Forcepoint User ID Service.......................................................................................... 45Reset the UID Service and DAS configurations to default values.............................................................. 46Refresh the DAS database..........................................................................................................................47Check component and service status in the Forcepoint User ID Service................................................... 48
5 Installing and configuring the DC Agent........................................................................................................ 51Overview to installing and configuring the DC Agent..................................................................................51Install the DC Agent.....................................................................................................................................52Modify the DC Agent service.......................................................................................................................53Configure which AD domains, Domain Controllers, and Exchange Servers the DC Agent polls................ 54Configure the DC Agent to ignore specified users or IP addresses........................................................... 56Disable autodetection of AD servers in the DC Agent configuration...........................................................57Enable logging for the DC Agent................................................................................................................ 58
6 Using the Forcepoint User ID Service in an HA configuration.....................................................................59Introduction to using the Forcepoint User ID Service in an HA configuration............................................. 59Overview to configuring HA for the Forcepoint User ID Service.................................................................61Enable HA on the master node...................................................................................................................62Enable HA on the replica nodes................................................................................................................. 63Update the list of HA nodes in the UID Service configuration.................................................................... 64Enable HA for the DC Agent.......................................................................................................................65
7 Maintenance........................................................................................................................................................67Upgrade the Forcepoint User ID Service and the DC Agent...................................................................... 67Uninstall the Forcepoint User ID Service or the DC Agent.........................................................................70
A Appendix.............................................................................................................................................................73Default communication ports for Forcepoint User ID Service..................................................................... 73Control the UID Service...............................................................................................................................74Control DAS................................................................................................................................................. 74Control the DC Agent.................................................................................................................................. 75
3

How to integrate Forcepoint User ID Service 1.3 with other Forcepoint products
Check component versions..........................................................................................................................75Collect configuration and server log data for troubleshooting.....................................................................76Copyrights and trademarks..........................................................................................................................76
4
CHAPTER 1
Introduction to the ForcepointUser ID Service
Contents
• Introduction on page 5• Requirements on page 6
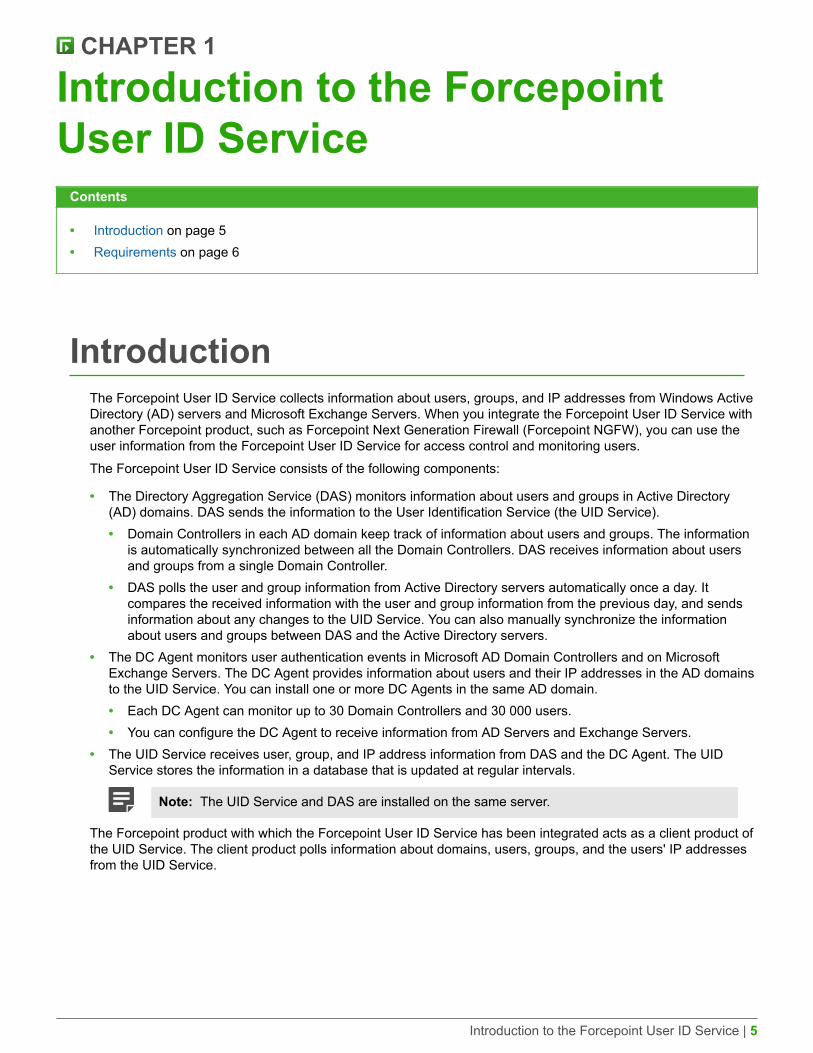
IntroductionThe Forcepoint User ID Service collects information about users, groups, and IP addresses from Windows ActiveDirectory (AD) servers and Microsoft Exchange Servers. When you integrate the Forcepoint User ID Service withanother Forcepoint product, such as Forcepoint Next Generation Firewall (Forcepoint NGFW), you can use theuser information from the Forcepoint User ID Service for access control and monitoring users.The Forcepoint User ID Service consists of the following components:
• The Directory Aggregation Service (DAS) monitors information about users and groups in Active Directory(AD) domains. DAS sends the information to the User Identification Service (the UID Service).• Domain Controllers in each AD domain keep track of information about users and groups. The information
is automatically synchronized between all the Domain Controllers. DAS receives information about usersand groups from a single Domain Controller.
• DAS polls the user and group information from Active Directory servers automatically once a day. Itcompares the received information with the user and group information from the previous day, and sendsinformation about any changes to the UID Service. You can also manually synchronize the informationabout users and groups between DAS and the Active Directory servers.
• The DC Agent monitors user authentication events in Microsoft AD Domain Controllers and on MicrosoftExchange Servers. The DC Agent provides information about users and their IP addresses in the AD domainsto the UID Service. You can install one or more DC Agents in the same AD domain.• Each DC Agent can monitor up to 30 Domain Controllers and 30 000 users.• You can configure the DC Agent to receive information from AD Servers and Exchange Servers.
• The UID Service receives user, group, and IP address information from DAS and the DC Agent. The UIDService stores the information in a database that is updated at regular intervals.
Note: The UID Service and DAS are installed on the same server.
The Forcepoint product with which the Forcepoint User ID Service has been integrated acts as a client product ofthe UID Service. The client product polls information about domains, users, groups, and the users' IP addressesfrom the UID Service.
Introduction to the Forcepoint User ID Service | 5
How to integrate Forcepoint User ID Service 1.3 with other Forcepoint products
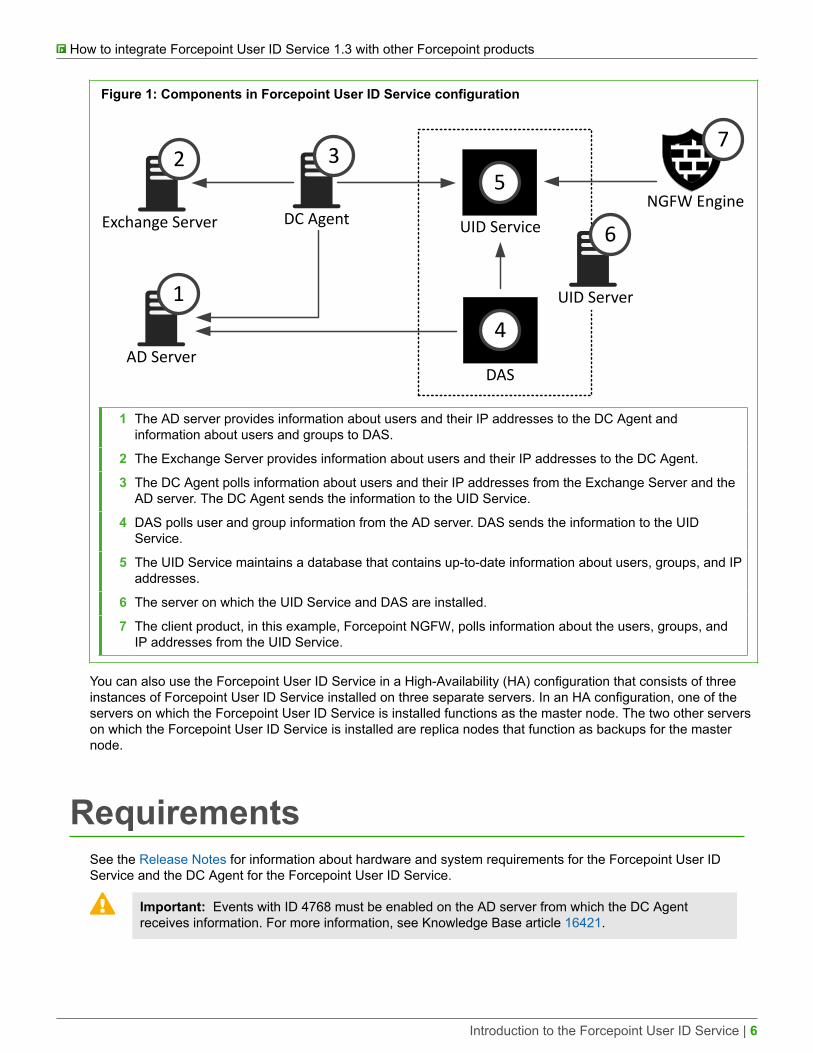
Figure 1: Components in Forcepoint User ID Service configuration
Exchange Server
2
DC Agent
3
AD Server
1 UID Server
6NGFW Engine
7
5
UID Service
4
DAS
1 The AD server provides information about users and their IP addresses to the DC Agent andinformation about users and groups to DAS.
2 The Exchange Server provides information about users and their IP addresses to the DC Agent.
3 The DC Agent polls information about users and their IP addresses from the Exchange Server and theAD server. The DC Agent sends the information to the UID Service.
4 DAS polls user and group information from the AD server. DAS sends the information to the UIDService.
5 The UID Service maintains a database that contains up-to-date information about users, groups, and IPaddresses.
6 The server on which the UID Service and DAS are installed.
7 The client product, in this example, Forcepoint NGFW, polls information about the users, groups, andIP addresses from the UID Service.
You can also use the Forcepoint User ID Service in a High-Availability (HA) configuration that consists of threeinstances of Forcepoint User ID Service installed on three separate servers. In an HA configuration, one of theservers on which the Forcepoint User ID Service is installed functions as the master node. The two other serverson which the Forcepoint User ID Service is installed are replica nodes that function as backups for the masternode.
RequirementsSee the Release Notes for information about hardware and system requirements for the Forcepoint User IDService and the DC Agent for the Forcepoint User ID Service.
Important: Events with ID 4768 must be enabled on the AD server from which the DC Agentreceives information. For more information, see Knowledge Base article 16421.
Introduction to the Forcepoint User ID Service | 6

CHAPTER 2
Prepare for installationContents
• Installation overview on page 7• Obtain installation files on page 8
Installation overviewYou must complete the following high-level steps to integrate the Forcepoint User ID Service with otherForcepoint products (such as Forcepoint NGFW).
1) Obtain the installation files.
2) Prepare your environment for installing the UID Service and DAS.
3) Install the UID Service and DAS components.
4) Configure the UID Service and DAS using the Forcepoint User ID Service Configuration Wizard.
5) To use the Forcepoint User ID Service in a high-availability (HA) configuration, install the UID Service andDAS components on two more servers, then configure the UID Service and DAS using the Forcepoint UserID Service Configuration Wizard.
6) Install and configure the DC Agent.
7) In the product that receives information from the Forcepoint User ID Service, configure the settings for theForcepoint User ID Service.For information about configuring the Forcepoint User ID Service settings in Forcepoint NGFW, see theForcepoint Next Generation Firewall Product Guide.
8) Configure the UID Service server and the Forcepoint product that receives information from the ForcepointUser ID Service to authenticate each other with a certificate.
Prepare for installation | 7
How to integrate Forcepoint User ID Service 1.3 with other Forcepoint products
Obtain installation filesObtain the installation files for the Forcepoint User ID Service and the DC Agent for the Forcepoint User IDService, then check the file integrity.
Download installation filesDownload the installation files for the Forcepoint User ID Service and the DC Agent for the Forcepoint User IDService.
• The Forcepoint User ID Service installation package is provided as a .tar.gz file that contains the combinedinstaller for the UID Service and DAS.
• The installer for the DC Agent for the Forcepoint User ID Service is provided as an .exe file.
Steps1) Go to https://support.forcepoint.com/Downloads.
2) Enter your license code or log on using an existing user account.
3) Under Network Security, select the version of the Forcepoint User ID Service software and the DC Agentfor the Forcepoint User ID Service that you want to download, then download both installation packages.
Note: Make sure that you download installation packages for the same product version.
Check file integrityBefore installing the components from the downloaded files, check that the installation files have not becomecorrupt or been changed.Using corrupt files might cause problems at any stage of the installation and use of the system. Check fileintegrity by generating a file checksum of the files. Compare the checksum of the downloaded files with thechecksum for the software version in the Release Notes or on the download page at the Forcepoint website.
Note: In Windows environments, you can use Windows PowerShell to generate checksums.Several third-party programs are also available.
Steps1) Look up the correct checksum at https://support.forcepoint.com.
2) Change to the directory that contains the files to be checked.
3) Generate a checksum of the file using the following command, where filename is the name of theinstallation file:
sha256sum filename
Prepare for installation | 8
How to integrate Forcepoint User ID Service 1.3 with other Forcepoint products
4) Compare the output to the checksum for the software version. They must match.
CAUTION: Do not use files that have invalid checksums. If downloading the files again doesnot help, contact Forcepoint support to resolve the issue.
Prepare for installation | 9

How to integrate Forcepoint User ID Service 1.3 with other Forcepoint products
Prepare for installation | 10
CHAPTER 3
Installing the Forcepoint User IDService
Contents
• Prepare your environment on page 11• Install the UID Service and DAS on page 12
Prepare your environmentYou must prepare your environment before you install the UID Service and DAS.
Before you beginCarefully read the hardware requirements and system requirements for the UID Service and DAS in theRelease Notes.
Note: The following installation steps are required in CentOS 7 environments thatwas installed with the Minimal Install option. Depending on how CentOS 7 or RedHat Enterprise Linux 7 was installed, some of the steps might not apply.
Steps1) Log on to the CentOS or Red Hat Enterprise Linux server as root.
Note: Alternatively, you can use sudo when you enter the commands.
2) Install Unzip using the following command:
yum -y install unzip
3) Install LDAP Utilities using the following command:
yum -y install openldap-clients
Installing the Forcepoint User ID Service | 11
How to integrate Forcepoint User ID Service 1.3 with other Forcepoint products
4) Configure the CentOS 7 or Red Hat Enterprise Linux 7 host firewall to allow incoming connections fromthe DC Agent and from clients, such as NGFW Engines and Forcepoint User ID Service API users, to theForcepoint User ID Service server.For more information, see Knowledge Base article 16537.
Note: The host firewall blocks incoming connections from the DC Agent and the clients unlessyou allow the connections. Also make sure that all the firewalls between the components,including the host firewalls, allow the communications.
Related conceptsDefault communication ports for Forcepoint User ID Service on page 73
Install the UID Service and DASInstall the UID Service and DAS on a Linux server that has CentOS 7 or Red Hat Enterprise Linux 7 installed.
Before you beginDownload the Forcepoint User ID Service installation package from the Forcepoint download site, thensave it in a location that you can access from the server on which you want to install the ForcepointUser ID Service.
Note: If you use a server installed from a minimal CentOS 7 image, make sure thatthe openldap-client package in installed on the server on which you want to installthe UID Service and DAS.
CAUTION: Make sure that the server on which you want to install or upgrade theUID Service and DAS has connectivity to the Internet and to the operating systempackage repository. If there is no connectivity, the installation might fail or the UIDService and DAS might not work correctly.
Steps1) Log on to the server as root.
Note: Alternatively, you can use sudo when you enter the commands.
2) In the directory where you saved the Forcepoint User ID Service installer .tar.gz file, decompress the fileusing the following command:
tar -zxvf <name of .tar.gz file>
Installing the Forcepoint User ID Service | 12
How to integrate Forcepoint User ID Service 1.3 with other Forcepoint products
3) In the directory where the decompressed files were saved, start the installation using the followingcommand:
./Setup.bin
4) Press Enter to start the UID installer.The UID installer starts, then the Forcepoint Subscription Agreement is shown.
5) Press Enter to scroll through the Subscription Agreement, then enter Y to accept it.
6) Press Enter to install the Forcepoint User ID Service in the default installation directory.
CAUTION: You must install the Forcepoint User ID Service in the default installationdirectory. The default installation directory is /opt/Forcepoint.
7) Enter the IP address of the AD server from which DAS receives information about users and groups, thenpress Enter.
Note: You can add multiple AD servers to the DAS configuration through the UID installer.You can also add AD servers or modify the AD server information after the installation byusing the Forcepoint User ID Service Configuration Wizard.
8) Enter the port that the AD server listens on, then press Enter.The default port is 3268. If you press Enter without specifying the port, the DAS service uses port 3268 tocontact the AD server.
9) Enter the credentials for the administrator account that DAS uses when it polls information about usersand groups from the Active Directory.a) Enter the user name, then press Enter.
b) Enter the password, then press Enter.
10) Enter the name of the AD container where the administrator account credentials are stored, then pressEnter.The default AD container is users. If you press Enter without specifying the name of the AD container,DAS uses the administrator account under the users container.
11) Enter the fully-qualified domain name (FQDN) of the AD domain, then press Enter.
12) Check the following information for the AD server: the IP address, the port it listens on, the user name andpassword for the administrator account, and the FQDN name of the AD domain.The AD distinguished name of the administrator is also shown. For example:cn=administrator,cn=users,dc=example,dc=company, dc=com
• If the AD server information is correct, enter Y, then press Enter.
Installing the Forcepoint User ID Service | 13
How to integrate Forcepoint User ID Service 1.3 with other Forcepoint products
• To change the AD server information, press Enter, then enter the AD server information again.
Note: By default, the AD container in which the administrator account credentials are storedis also used as the container for the users that are monitored. If the users are located inanother AD container, use the Forcepoint User ID Service Configuration Wizard after theinstallation to define where the users to be monitored are located on the AD server.
13) If the installer cannot verify the AD server configuration information, you are prompted to select whetheryou want to enter the AD server information again or continue with the installation.• To enter the AD server information again, enter Y, then press Enter.• To continue with the installation and to finalize the AD server configuration through the Forcepoint User
ID Service Configuration Wizard after the installation, enter N, then press Enter.
14) Select whether you want to add another AD server from which DAS receives information about users andgroups.
Note: If the installer was unable to verify the information for the first AD server that youwanted to add to the configuration, you cannot add any other AD servers in the UID installer.You can add other AD servers through the Forcepoint User ID Service Configuration Wizardafter the installation.
• To add another AD server, enter Y, press Enter, then enter the AD server information as described inthe previous steps.
• If you do not want to add another AD server, enter N, then press Enter.
15) Press Enter to start the installation.
Result
The UID Service and DAS are installed.
The following services start to run as child services of the main UID Service (emperor.uwsgi.service):
• UID service (uid_uwsgi) runs on port 5000.• LDIF service (ldif_uwsgi) runs on port 5001 internally (on the localhost).• IFMAP service (ifmap_uwsgi) runs on port 5002.
Next steps
• A self-signed certificate is created during the installation to authenticate the communication between the UIDService and the client product. If you want to use this certificate, or you do not want to modify the settingsfor the UID Service or DAS, or you do not want to enable log forwarding to the Forcepoint NGFW SecurityManagement Center (SMC), install the DC Agent.
Note: In production environments, we do not recommend that you use the self-signed certificatethat was created during the installation to authenticate the communications between the UIDService and the client product. Use the Forcepoint User ID Service Configuration Wizard to addanother certificate to the configuration.
• If you want to modify the UID Service and DAS settings, enable log forwarding to the Forcepoint NGFWSecurity Management Center (SMC), or use a new certificate to authenticate the communication between the
Installing the Forcepoint User ID Service | 14
How to integrate Forcepoint User ID Service 1.3 with other Forcepoint products
UID Service and the client product, start the Forcepoint User ID Service Configuration Wizard, then configurethe UID Service and DAS as needed.
Related conceptsConfiguring certificates and security settings for the Forcepoint User ID Service on page 19Configuring settings for services in the Forcepoint User ID Service on page 24Configuring settings for DAS on page 30
Related tasksEnable log forwarding from the Forcepoint User ID Service to the SMC on page 28
Installing the Forcepoint User ID Service | 15

How to integrate Forcepoint User ID Service 1.3 with other Forcepoint products
Installing the Forcepoint User ID Service | 16
CHAPTER 4
Configuring the Forcepoint UserID Service
Contents
• Using the Forcepoint User ID Service Configuration Wizard on page 17• Start the Configuration Wizard on page 18• Configuring certificates and security settings for the Forcepoint User ID Service on page 19• Configuring settings for services in the Forcepoint User ID Service on page 24• Enable log forwarding from the Forcepoint User ID Service to the SMC on page 28• Configuring settings for DAS on page 30• Restart services in Forcepoint User ID Service on page 45• Reset the UID Service and DAS configurations to default values on page 46• Refresh the DAS database on page 47• Check component and service status in the Forcepoint User ID Service on page 48
Using the Forcepoint User ID ServiceConfiguration Wizard
You can use the Forcepoint User ID Service Configuration Wizard (Configuration Wizard) to configure most of thebasic settings for the UID Service and DAS.
Note: When you have installed the UID Service and DAS, it is not mandatory to immediatelymodify any of the settings by using the Configuration Wizard. However, if you do not want to use theself-signed certificate and private key that were created during the installation to authenticate thecommunication between the UID Service and the client product, we recommend that you use theConfiguration Wizard to add an other certificate in the UID Service configuration.
You can do the following in the Configuration Wizard:
• Manage certificates — create a self-signed certificate, create a certificate request, or add a signed certificatein the UID Service configuration.
• Configure settings for services that run in the UID Service.• Enable log forwarding between the Forcepoint User ID Service and the Forcepoint NGFW Security
Management Center (SMC).• Configure DAS — modify the AD server and AD container settings for DAS, change the AD container, add
new AD servers and AD containers to the DAS configuration, and remove AD servers and AD containers fromthe AD server and AD container configuration.
• Restart the services in the Forcepoint User ID Service.
Configuring the Forcepoint User ID Service | 17
How to integrate Forcepoint User ID Service 1.3 with other Forcepoint products
• Reset the settings in the Forcepoint User ID Service to default values.• Synchronize information about users and groups between DAS and AD servers.• Configure HA for the Forcepoint User ID Service.
CAUTION: To use the Forcepoint User ID Service in an HA configuration, you must first installthe Forcepoint User ID Service on three different servers and verify that the Forcepoint UserID Service works as expected on each server. Do not start configuring HA before you havecompleted these steps. See the section about the HA configuration for more information.
• Check status information for the UID Service, DAS, and the services that run in the Forcepoint User IDService.
• Configure settings for the Forcepoint User ID Service API. For more information about the Forcepoint User IDService and the API settings in the Configuration Wizard, see Knowledge Base article 16151.
Related conceptsIntroduction to using the Forcepoint User ID Service in an HA configuration on page 59
Start the Configuration WizardThe Configuration Wizard is a command-line tool that you can use to configure many basic settings for the UIDService and DAS.To use some functions of the Configuration Wizard, root privileges are required. You can log on as root, or youcan use sudo to start the Configuration Wizard.
Steps1) Log on as root to the server on which the Forcepoint User ID Service is installed.
2) Change to the following directory:
/opt/Forcepoint/bin/UID_Server/
3) Enter the following command:
./uid-server-configuration.sh
Configuring the Forcepoint User ID Service | 18
How to integrate Forcepoint User ID Service 1.3 with other Forcepoint products
Configuring certificates and securitysettings for the Forcepoint User IDService
You can use the Configuration Wizard to configure certificates and security settings for the Forcepoint User IDService.If the client product that polls user and IP address information from the UID Service is the Forcepoint NGFWEngine, TLS encryption is used for the communication between the UID Service and the Forcepoint NGFWEngine.
CAUTION: If you configure HA for the Forcepoint User ID Service, all the nodes in the HAconfiguration must use certificates that have the same value, such as the DNS name, for the TLSserver identity.
Note: TLS encryption is only used in communication between the UID Service and the clientproduct.
Note: TLS encryption is automatically enabled for communication between the UID Service andthe client product. You must manually enable TLS encryption for communication between DASand Windows AD servers. If you do not enable TLS encryption for communication between DASand AD, make sure that the communication is routed only over secured networks. Make sure thatcommunication between the UID Server, DAS, and the DC Agent is routed over secured networks.
An RSA key (UserIDServer.key) and a self-signed certificate (UserIDServer.crt) are created during the UIDService installation. They are stored in the /opt/Forcepoint/bin/UID_Server/ directory. The use of the RSA keyand the self-signed certificate that were created during the installation is automatically enabled in the UID Serviceconfiguration (uid_uwsgi.ini).
To use the automatically generated RSA key and self-signed certificate to encrypt the communication betweenthe UID Service and the client product, you only need to configure the client product to trust the self-signedcertificate that the UID Service server uses. For information about configuring certificate authentication in theForcepoint NGFW, see the Forcepoint Next Generation Firewall Product Guide.
To use a custom certificate signed by a trusted Certificate Authority, you must add the certificate and the privatekey to the UID Service configuration.
Create a self-signed certificate for the UIDServiceYou can use the Configuration Wizard to create a self-signed certificate and a private key for the UID Service.The self-signed certificate and the private key that you create in the Configuration Wizard are automaticallyadded to the UID Service configuration.
Tip: In most parts of the Configuration Wizard, you can enter c, then press Enter to return to theprevious menu or to cancel an action.
Configuring the Forcepoint User ID Service | 19
How to integrate Forcepoint User ID Service 1.3 with other Forcepoint products
Steps1) If you are not yet logged on as root and the Configuration Wizard is not running, start the Configuration
Wizard:a) Log on as root to the server on which the Forcepoint User ID Service is installed.
b) Change to the following directory:
/opt/Forcepoint/bin/UID_Server/
c) Enter the following command:
./uid-server-configuration.sh
2) In the Configuration Wizard, select 1 - Configure Security and Certificates, then press Enter.
3) Select 1 - Create a Self-Signed Certificate, then press Enter.You are prompted to confirm that you want to create a new private key and a self-signed certificate.
4) Enter Yes, then press Enter to create a new private key and a self-signed certificate.
5) Define how long the self-signed certificate is valid.By default, the self-signed certificate is valid for 1825 days.• To set the self-signed certificate to be valid for 1825 days, press Enter.• To define the length of time for which the self-signed certificate is valid, enter the number of days, then
press Enter.
6) Enter the common name to be used in the self-signed certificate.
• To use the FQDN of the server on which the Forcepoint User ID Service is installed as the CommonName, press Enter.
• To use another Common Name, enter the Common Name, the press Enter.
A new private key “UserIDServer.key” and a self-signed certificate “UserIDServer.crt” are created and savedin /opt/Forcepoint/bin/UID_Server/. The self-signed certificate and the private key are automatically added tothe UID Service configuration.
Next stepsRestart the services in the Configuration Wizard to apply the changes.
Related tasksRestart services in Forcepoint User ID Service on page 45
Configuring the Forcepoint User ID Service | 20
How to integrate Forcepoint User ID Service 1.3 with other Forcepoint products
Create a certificate request for the ForcepointUser ID ServiceYou can create a certificate request for the Forcepoint User ID Service in the Configuration Wizard.
Tip: In most parts of the Configuration Wizard, you can enter c, then press Enter to return to theprevious menu or to cancel an action.
Steps1) If you are not yet logged on as root and the Configuration Wizard is not running, start the Configuration
Wizard:a) Log on as root to the server on which the Forcepoint User ID Service is installed.
b) Change to the following directory:
/opt/Forcepoint/bin/UID_Server/
c) Enter the following command:
./uid-server-configuration.sh
2) In the Configuration Wizard, select 2 - Configure Security and Certificates, then press Enter.
3) Select 2 - Create a Certificate Request, then press Enter.
4) Enter a Common Name for the certificate request, then press Enter.A certificate request "UserIDServer.csr” is created and saved in /opt/Forcepoint/bin/UID_Server/.
Next stepsSign the certificate request with a trusted Certificate Authority, then add the signed certificate and the private keyfor it in the UID Service configuration.
Note: A certificate request generated by the Configuration Wizard only includes the Common Nameas the server identity. When you sign the certificate request with the CA, you might need to addmore identity values to the generated certificate, such as the Subject Alternative Name fields. Agood practice is to add the Subject Alternative Name of the type DNS with proper DNS name for theserver.
Related tasksAdd a signed certificate to the UID Service configuration on page 22
Configuring the Forcepoint User ID Service | 21
How to integrate Forcepoint User ID Service 1.3 with other Forcepoint products
Add a signed certificate to the UID ServiceconfigurationYou can use the Configuration Wizard to add a signed certificate and a private key for the certificate to the UIDService configuration.
Before you beginCopy the signed certificate and the private key to the server on which the Forcepoint User ID Service isinstalled.
Tip: In most parts of the Configuration Wizard, you can enter c, then press Enter to return to theprevious menu or to cancel an action.
The signed certificate and the private key must meet the following requirements:• The signed certificate must be in PEM format.• The private key must be an unencrypted RSA key.• You can use a certificate that has been signed by an external CA and a private key from the CA.
Steps1) If you are not yet logged on as root and the Configuration Wizard is not running, start the Configuration
Wizard:a) Log on as root to the server on which the Forcepoint User ID Service is installed.
b) Change to the following directory:
/opt/Forcepoint/bin/UID_Server/
c) Enter the following command:
./uid-server-configuration.sh
2) In the Configuration Wizard, select 2 - Configure Security and Certificates, then press Enter.
3) Select 3 - Install Certificate, then press Enter.
4) Enter the full path to the signed certificate and the file name of the signed certificate, then press Enter.
5) Enter the full path to the private key and the file name of the private key, then press Enter.
ResultThe signed certificate and the private key are added to the UID Service configuration.
Configuring the Forcepoint User ID Service | 22
How to integrate Forcepoint User ID Service 1.3 with other Forcepoint products
Next stepsRestart the services in the Configuration Wizard to apply the changes.
Related tasksRestart services in Forcepoint User ID Service on page 45
Manage password authentication for the UIDService databaseYou can use the Configuration Wizard to enable or disable password authentication for the UID Service databaseas needed.
Note: If you use the Forcepoint User ID Service in an HA configuration, we recommend that youenable password authentication for the UID Service database. The password must be the same onall the servers in the HA configuration.
Tip: In most parts of the Configuration Wizard, you can enter c, then press Enter to return to theprevious menu or to cancel an action.
Steps1) If you are not yet logged on as root and the Configuration Wizard is not running, start the Configuration
Wizard:a) Log on as root to the server on which the Forcepoint User ID Service is installed.
b) Change to the following directory:
/opt/Forcepoint/bin/UID_Server/
c) Enter the following command:
./uid-server-configuration.sh
2) In the Configuration Wizard, select 2 - Configure Security and Certificates, then press Enter.
3) Select if you want to use password authentication for the User ID Service database:
• To enable password authentication, select 4 - Enable UID Service Database Password, then pressEnter.
• To disable password authentication, select 5 - Disable UID Service Database Password, then pressEnter.
You are prompted to confirm that you want to enable or disable password authentication.
4) Enter Yes, then press Enter to enable or disable password authentication.
Configuring the Forcepoint User ID Service | 23

How to integrate Forcepoint User ID Service 1.3 with other Forcepoint products
5) If you selected that you want to enable password authentication, enter the new password, then press Enter.
6) Enter s, then press Enter to view the status of the node, or press Enter to continue.
ResultPassword authentication for the UID Service database is enabled or disabled as selected.
Next stepsRestart the services in the Configuration Wizard to apply the changes.
Related tasksRestart services in Forcepoint User ID Service on page 45
Configuring settings for services in theForcepoint User ID Service
You can use the Configuration Wizard to configure settings for the services that run in the Forcepoint User IDService.
Select log level for services in the UID ServiceSeveral services run in the UID Service. You can configure how much log data is generated for the services byselecting the log level for the services in the Configuration Wizard.
Tip: In most parts of the Configuration Wizard, you can enter c, then press Enter to return to theprevious menu or to cancel an action.
Steps1) If you are not yet logged on as root and the Configuration Wizard is not running, start the Configuration
Wizard:a) Log on as root to the server on which the Forcepoint User ID Service is installed.
b) Change to the following directory:
/opt/Forcepoint/bin/UID_Server/
c) Enter the following command:
./uid-server-configuration.sh
Configuring the Forcepoint User ID Service | 24
How to integrate Forcepoint User ID Service 1.3 with other Forcepoint products
2) In the Configuration Wizard, select 2 - Configure Services, then press Enter.
3) Select the service for which you want to configure the log level, then press Enter.• To select the log level for the service that stores information about users, groups, and the users' IP
addresses, and sends the information to the client product, select 1 - UID Service (user_id).• To select the log level for the service that receives information about users and IP addresses from the DC
Agent, select 2 - Service for Receiving Log Data (ifmap).• To select the log level for the service that stores information about users and groups from DAS, select 3 -
Service for Storing User and Group Information (ldif).• To select the log level for the service that maintains the database of the UID Service, select 4 - Service
for Maintaining the UID Service Database (monitor).
4) Select 1 - Select Log Level or 3 - Select the Log Level, then press Enter.
5) Select the log level to define how much log data is generated for the service, then press Enter.
Note: When you select a log level, both the logs of that severity level and higher severity logsare generated.
• 1 - DEBUG — All available information is logged. This log level is useful for troubleshooting purposes.• 2 - INFO — Information that is generally useful is logged.• 3 - WARNING — Only warnings are logged.• 4 - ERROR — Only errors are logged. This log level is the default log level.• 5 - CRITICAL — Only critical errors are logged. This log level produces the least amount of log data.
Log data for the services is stored in /opt/Forcepoint/bin/UID_Server/ in the following files: uid_service.log,ifmap_service.log, ldif_service.log, and monitor_service.log.
Next stepsRestart the services in the Configuration Wizard to apply the changes.
Related tasksRestart services in Forcepoint User ID Service on page 45
Define settings for maintaining the UID ServicedatabaseYou can define in the Configuration Wizard how often expired IP address mappings are removed from the UIDService database. You can also define the length of time before the IP address mappings expire.
Tip: In most parts of the Configuration Wizard, you can enter c, then press Enter to return to theprevious menu or to cancel an action.
Configuring the Forcepoint User ID Service | 25
How to integrate Forcepoint User ID Service 1.3 with other Forcepoint products
Steps1) If you are not yet logged on as root and the Configuration Wizard is not running, start the Configuration
Wizard:a) Log on as root to the server on which the Forcepoint User ID Service is installed.
b) Change to the following directory:
/opt/Forcepoint/bin/UID_Server/
c) Enter the following command:
./uid-server-configuration.sh
2) In the Configuration Wizard, select 2 - Configure Services, then press Enter.
3) Select 4 - Service for Maintaining the UID Service Database (monitor), then press Enter.
4) To define how often expired IP address mappings are removed from the UID Service database, do thefollowing:a) Select 1 - Configure When IP Address Mapping Information is Removed, then press Enter.
b) Enter the time in seconds, then press Enter.By default, expired IP address mappings are removed every 60 seconds.
5) To define the length of time before IP address mappings expire, do the following:a) Select 2 - Configure When IP Address Mapping Information Expires, then press Enter.
b) Enter the time in seconds, then press Enter.By default, IP address mappings expire after 21600 seconds (360 minutes).
Next stepsRestart the services in the Configuration Wizard to apply the changes.
Related tasksRestart services in Forcepoint User ID Service on page 45
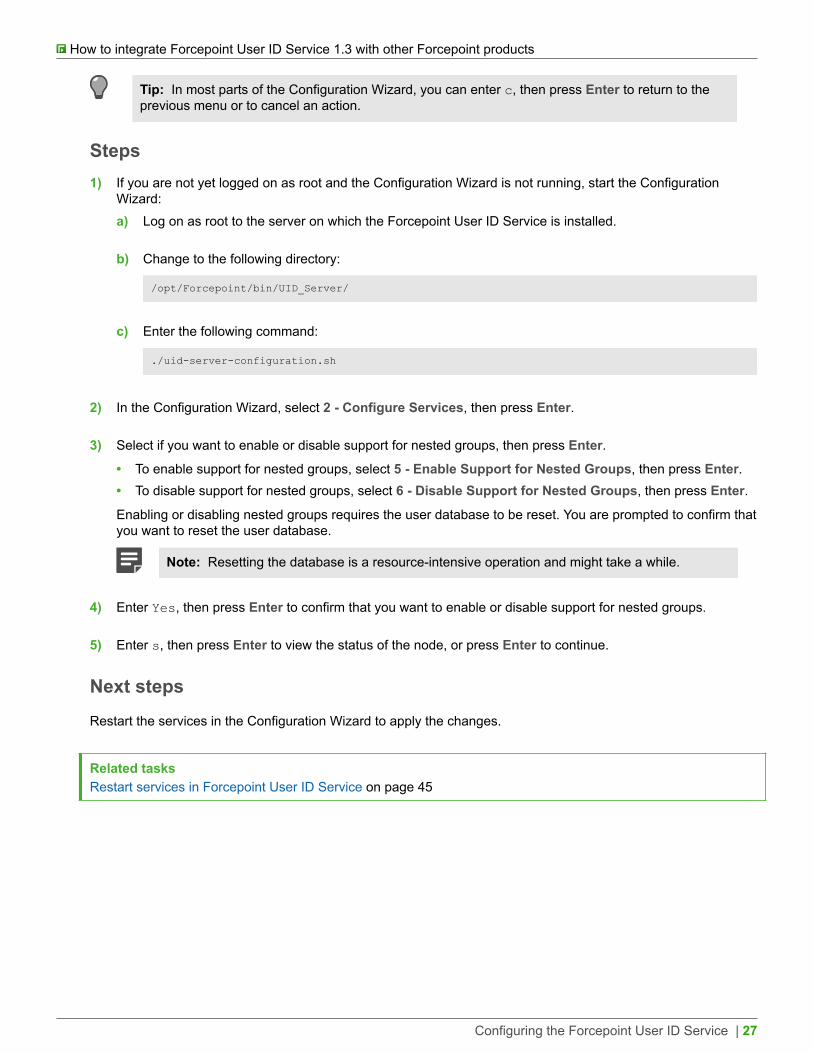
Configure support for nested groupsThe Forcepoint User ID Service supports security groups and distribution groups in AD server domains but bydefault the use of nested security groups and distribution groups is not enabled. You can use the ConfigurationWizard as needed to enable or disable support for nested groups.
Configuring the Forcepoint User ID Service | 26
How to integrate Forcepoint User ID Service 1.3 with other Forcepoint products
Tip: In most parts of the Configuration Wizard, you can enter c, then press Enter to return to theprevious menu or to cancel an action.
Steps1) If you are not yet logged on as root and the Configuration Wizard is not running, start the Configuration
Wizard:a) Log on as root to the server on which the Forcepoint User ID Service is installed.
b) Change to the following directory:
/opt/Forcepoint/bin/UID_Server/
c) Enter the following command:
./uid-server-configuration.sh
2) In the Configuration Wizard, select 2 - Configure Services, then press Enter.
3) Select if you want to enable or disable support for nested groups, then press Enter.• To enable support for nested groups, select 5 - Enable Support for Nested Groups, then press Enter.• To disable support for nested groups, select 6 - Disable Support for Nested Groups, then press Enter.
Enabling or disabling nested groups requires the user database to be reset. You are prompted to confirm thatyou want to reset the user database.
Note: Resetting the database is a resource-intensive operation and might take a while.
4) Enter Yes, then press Enter to confirm that you want to enable or disable support for nested groups.
5) Enter s, then press Enter to view the status of the node, or press Enter to continue.
Next stepsRestart the services in the Configuration Wizard to apply the changes.
Related tasksRestart services in Forcepoint User ID Service on page 45
Configuring the Forcepoint User ID Service | 27
How to integrate Forcepoint User ID Service 1.3 with other Forcepoint products
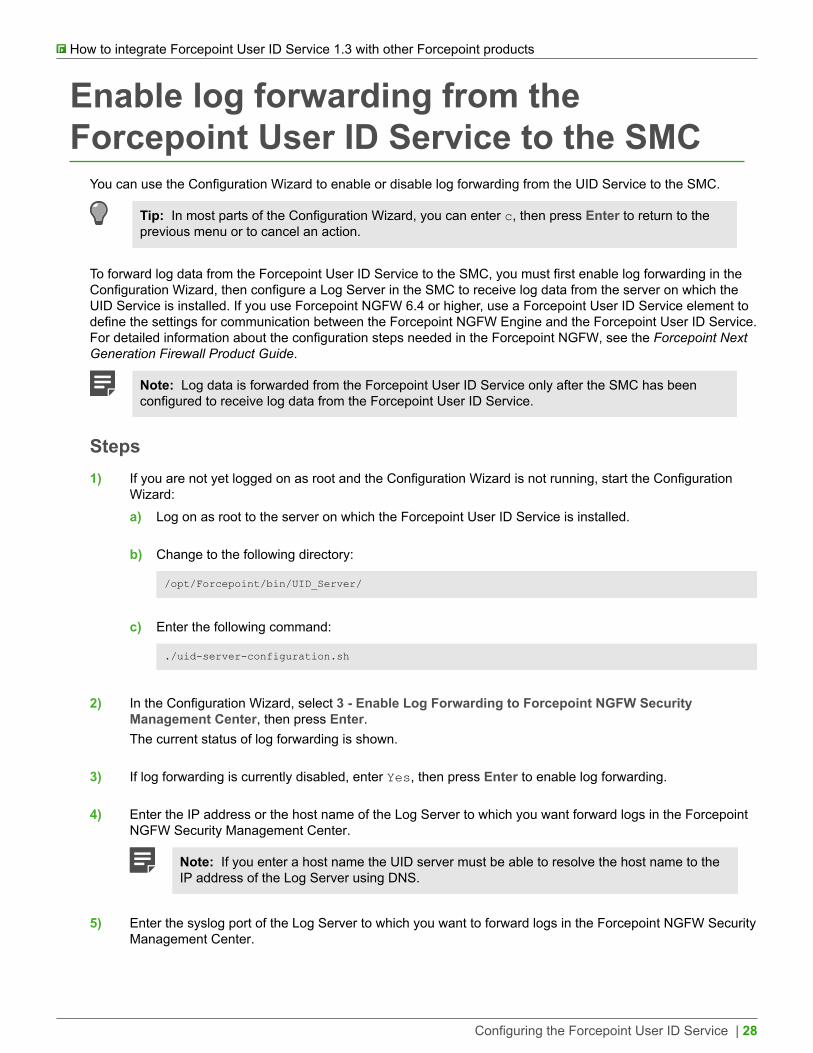
Enable log forwarding from theForcepoint User ID Service to the SMC
You can use the Configuration Wizard to enable or disable log forwarding from the UID Service to the SMC.
Tip: In most parts of the Configuration Wizard, you can enter c, then press Enter to return to theprevious menu or to cancel an action.
To forward log data from the Forcepoint User ID Service to the SMC, you must first enable log forwarding in theConfiguration Wizard, then configure a Log Server in the SMC to receive log data from the server on which theUID Service is installed. If you use Forcepoint NGFW 6.4 or higher, use a Forcepoint User ID Service element todefine the settings for communication between the Forcepoint NGFW Engine and the Forcepoint User ID Service.For detailed information about the configuration steps needed in the Forcepoint NGFW, see the Forcepoint NextGeneration Firewall Product Guide.
Note: Log data is forwarded from the Forcepoint User ID Service only after the SMC has beenconfigured to receive log data from the Forcepoint User ID Service.
Steps1) If you are not yet logged on as root and the Configuration Wizard is not running, start the Configuration
Wizard:a) Log on as root to the server on which the Forcepoint User ID Service is installed.
b) Change to the following directory:
/opt/Forcepoint/bin/UID_Server/
c) Enter the following command:
./uid-server-configuration.sh
2) In the Configuration Wizard, select 3 - Enable Log Forwarding to Forcepoint NGFW SecurityManagement Center, then press Enter.The current status of log forwarding is shown.
3) If log forwarding is currently disabled, enter Yes, then press Enter to enable log forwarding.
4) Enter the IP address or the host name of the Log Server to which you want forward logs in the ForcepointNGFW Security Management Center.
Note: If you enter a host name the UID server must be able to resolve the host name to theIP address of the Log Server using DNS.
5) Enter the syslog port of the Log Server to which you want to forward logs in the Forcepoint NGFW SecurityManagement Center.
Configuring the Forcepoint User ID Service | 28
How to integrate Forcepoint User ID Service 1.3 with other Forcepoint products
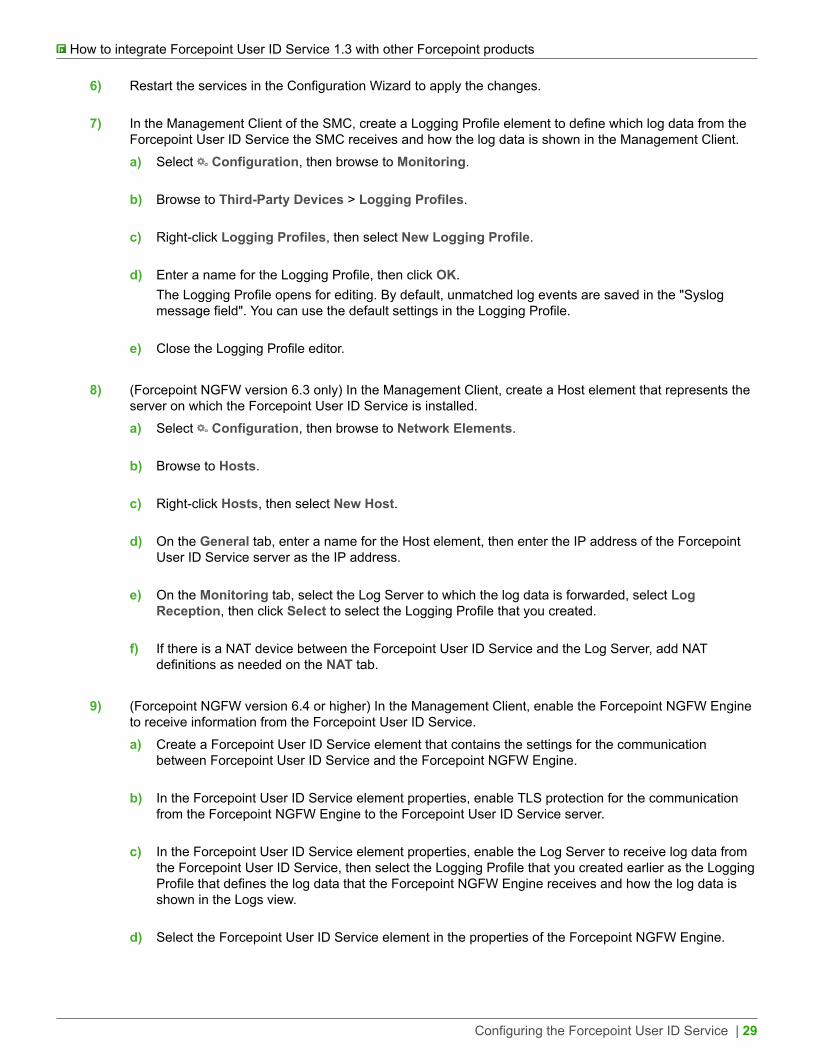
6) Restart the services in the Configuration Wizard to apply the changes.
7) In the Management Client of the SMC, create a Logging Profile element to define which log data from theForcepoint User ID Service the SMC receives and how the log data is shown in the Management Client.a) Select Configuration, then browse to Monitoring.
b) Browse to Third-Party Devices > Logging Profiles.
c) Right-click Logging Profiles, then select New Logging Profile.
d) Enter a name for the Logging Profile, then click OK.The Logging Profile opens for editing. By default, unmatched log events are saved in the "Syslogmessage field". You can use the default settings in the Logging Profile.
e) Close the Logging Profile editor.
8) (Forcepoint NGFW version 6.3 only) In the Management Client, create a Host element that represents theserver on which the Forcepoint User ID Service is installed.a) Select Configuration, then browse to Network Elements.
b) Browse to Hosts.
c) Right-click Hosts, then select New Host.
d) On the General tab, enter a name for the Host element, then enter the IP address of the ForcepointUser ID Service server as the IP address.
e) On the Monitoring tab, select the Log Server to which the log data is forwarded, select LogReception, then click Select to select the Logging Profile that you created.
f) If there is a NAT device between the Forcepoint User ID Service and the Log Server, add NATdefinitions as needed on the NAT tab.
9) (Forcepoint NGFW version 6.4 or higher) In the Management Client, enable the Forcepoint NGFW Engineto receive information from the Forcepoint User ID Service.a) Create a Forcepoint User ID Service element that contains the settings for the communication
between Forcepoint User ID Service and the Forcepoint NGFW Engine.
b) In the Forcepoint User ID Service element properties, enable TLS protection for the communicationfrom the Forcepoint NGFW Engine to the Forcepoint User ID Service server.
c) In the Forcepoint User ID Service element properties, enable the Log Server to receive log data fromthe Forcepoint User ID Service, then select the Logging Profile that you created earlier as the LoggingProfile that defines the log data that the Forcepoint NGFW Engine receives and how the log data isshown in the Logs view.
d) Select the Forcepoint User ID Service element in the properties of the Forcepoint NGFW Engine.
Configuring the Forcepoint User ID Service | 29

How to integrate Forcepoint User ID Service 1.3 with other Forcepoint products
10) If there is a Firewall between the Forcepoint User ID Service server and the Log Server, create an Accessrule in the Firewall's policy to allow the communication between the Forcepoint User ID Service server andthe Log Server.
ResultThe SMC starts receiving log data from the Forcepoint User ID Service. The log data is shown in the "Syslogmessage" field in the Logs view of the Management Client. For more information, see the Forcepoint NextGeneration Firewall Product Guide.
Configuring settings for DASYou can use the Configuration Wizard to configure settings for DAS.
Enable TLS encryption for communicationbetween DAS and Windows AD serversTo protect the information that is communicated between DAS and AD servers, enable TLS encryption.
Before you beginBefore enabling TLS encryption in the DAS configuration, enable LDAPS on each AD server.
Note: Enabling TLS encryption enables it for all AD servers.
Steps1) If you are not yet logged on as root and the Configuration Wizard is not running, start the Configuration
Wizard:a) Log on as root to the server on which the Forcepoint User ID Service is installed.
b) Change to the following directory:
/opt/Forcepoint/bin/UID_Server/
c) Enter the following command:
./uid-server-configuration.sh
2) In the Configuration Wizard, select 4 - Configure Directory Aggregation Service (DAS), then press Enter.
3) Select s - Configure TLS, then press Enter.The TLS configuration options are shown.
Configuring the Forcepoint User ID Service | 30
How to integrate Forcepoint User ID Service 1.3 with other Forcepoint products
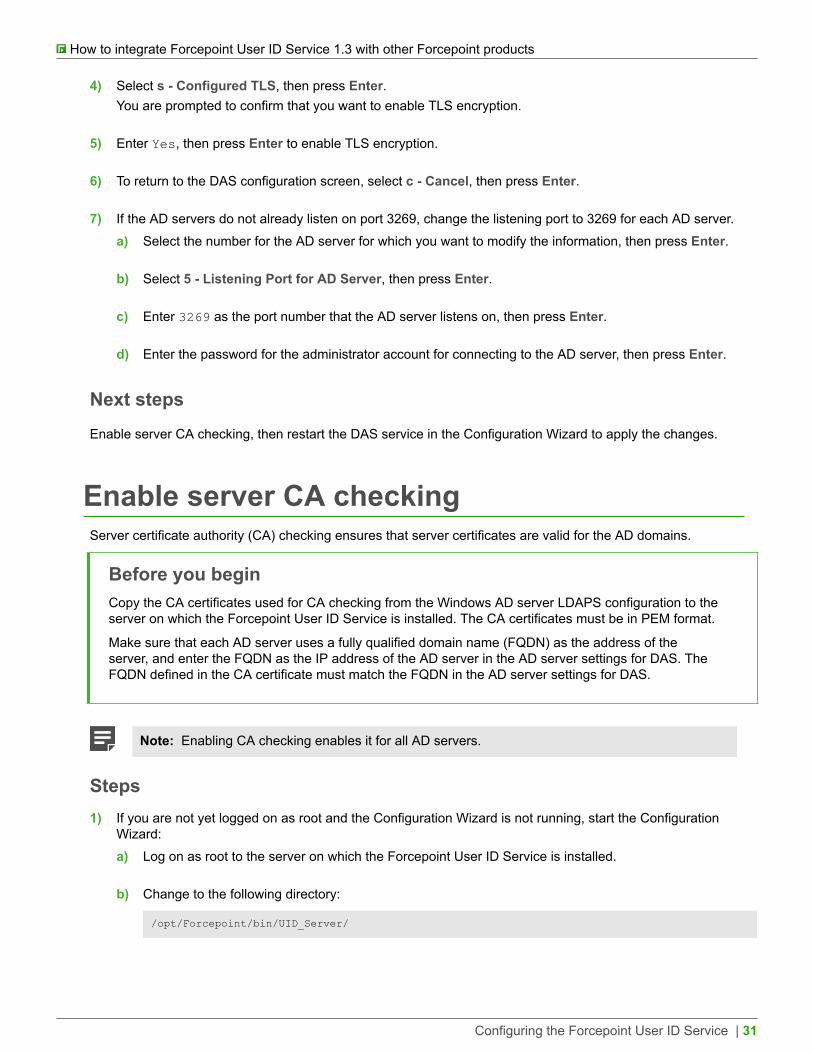
4) Select s - Configured TLS, then press Enter.You are prompted to confirm that you want to enable TLS encryption.
5) Enter Yes, then press Enter to enable TLS encryption.
6) To return to the DAS configuration screen, select c - Cancel, then press Enter.
7) If the AD servers do not already listen on port 3269, change the listening port to 3269 for each AD server.a) Select the number for the AD server for which you want to modify the information, then press Enter.
b) Select 5 - Listening Port for AD Server, then press Enter.
c) Enter 3269 as the port number that the AD server listens on, then press Enter.
d) Enter the password for the administrator account for connecting to the AD server, then press Enter.
Next stepsEnable server CA checking, then restart the DAS service in the Configuration Wizard to apply the changes.
Enable server CA checkingServer certificate authority (CA) checking ensures that server certificates are valid for the AD domains.
Before you beginCopy the CA certificates used for CA checking from the Windows AD server LDAPS configuration to theserver on which the Forcepoint User ID Service is installed. The CA certificates must be in PEM format.
Make sure that each AD server uses a fully qualified domain name (FQDN) as the address of theserver, and enter the FQDN as the IP address of the AD server in the AD server settings for DAS. TheFQDN defined in the CA certificate must match the FQDN in the AD server settings for DAS.
Note: Enabling CA checking enables it for all AD servers.
Steps1) If you are not yet logged on as root and the Configuration Wizard is not running, start the Configuration
Wizard:a) Log on as root to the server on which the Forcepoint User ID Service is installed.
b) Change to the following directory:
/opt/Forcepoint/bin/UID_Server/
Configuring the Forcepoint User ID Service | 31
How to integrate Forcepoint User ID Service 1.3 with other Forcepoint products
c) Enter the following command:
./uid-server-configuration.sh
2) In the Configuration Wizard, select 4 - Configure Directory Aggregation Service (DAS), then press Enter.
3) Select s - Configure TLS, then press Enter.The TLS configuration options are shown.
4) (Optional) Change the location where server CA certificates are stored.All server CA certificates are stored in the same file. Each new server CA certificate that you import isappended to the end of the file. The default path and file name are:
/etc/openldap/certs/fuid_das_cacert.pem
a) Select d - Configure CA File, then press Enter.
b) Enter the path and file name, then press Enter.
5) Import a CA certificate for each AD server.a) Select i - Import a CA certificate, then press Enter.
b) Enter the path to the certificate.The details of the certificate are shown and you are prompted to confirm whether you want to import thiscertificate.
c) Enter Yes.
6) Select a - Configure Server CA Checking, then press Enter.You are prompted to confirm that you want to enable server CA checking.
7) Enter Yes.
Next stepsRestart the DAS service in the Configuration Wizard to apply the changes.
Related tasksModify AD server settings for DAS on page 36
Configuring the Forcepoint User ID Service | 32
How to integrate Forcepoint User ID Service 1.3 with other Forcepoint products
Change administrator account passwordYou can use the Configuration Wizard to change the password for the administrator account that DAS uses forpolling user and group information from an Active Directory server.
Tip: In most parts of the Configuration Wizard, you can enter c, then press Enter to return to theprevious menu or to cancel an action.
Steps1) If you are not yet logged on as root and the Configuration Wizard is not running, start the Configuration
Wizard:a) Log on as root to the server on which the Forcepoint User ID Service is installed.
b) Change to the following directory:
/opt/Forcepoint/bin/UID_Server/
c) Enter the following command:
./uid-server-configuration.sh
2) In the Configuration Wizard, select 4 - Configure Directory Aggregation Service (DAS), then press Enter.A list of AD servers from which DAS receives user and group information is shown.
3) Select the number of the AD server for which you want to modify the information, then press Enter.
4) Select 1 - Administrator Password, then press Enter.
5) Enter the new password, then press Enter.
Note: DAS encrypts the password when you have saved the changes in the DAS configurationand the DAS service starts again.
The password is changed.
6) Enter s to view the status of DAS and save the changes in the DAS configuration, or press Enter to save thechanges in the DAS configuration without viewing the status of DAS.
Next stepsRestart the DAS service in the Configuration Wizard to apply the changes.
Related tasksRestart the DAS service on page 45
Configuring the Forcepoint User ID Service | 33

How to integrate Forcepoint User ID Service 1.3 with other Forcepoint products
Change user name for administrator accountYou can use the Configuration Wizard to change the user name for the administrator account that DAS uses forpolling user and group information from an Active Directory server.
Tip: In most parts of the Configuration Wizard, you can enter c, then press Enter to return to theprevious menu or to cancel an action.
Steps1) If you are not yet logged on as root and the Configuration Wizard is not running, start the Configuration
Wizard:a) Log on as root to the server on which the Forcepoint User ID Service is installed.
b) Change to the following directory:
/opt/Forcepoint/bin/UID_Server/
c) Enter the following command:
./uid-server-configuration.sh
2) In the Configuration Wizard, select 4 - Configure Directory Aggregation Service (DAS), then press Enter.A list of AD servers from which DAS receives user and group information is shown.
3) Select the number for the AD server for which you want to modify the information, then press Enter.
4) 2 - User Name for the Administrator Account, then press Enter.
5) Enter the current user name for the administrator account, then press Enter.
6) Select the user name type for the administrator account, then press Enter.• To use a common name as the user name, select s - Single Common Name, then press Enter.• To use a full distinguished name, select f - Full Distinguished Name, then press Enter.
7) If you selected s - Single Common Name, enter the required information, then press Enter.a) Enter the domain for the directory in which the administrator account is stored, then press Enter.
b) Enter the common name for the directory in which the administrator account is stored, then press Enter.
8) If you selected f - Full Distinguished Name, enter the required information, then press Enter.a) Enter the full distinguished name for the directory in which the administrator account is stored, then
press Enter.
b) Enter the password for the administrator account, then Enter.
Configuring the Forcepoint User ID Service | 34
How to integrate Forcepoint User ID Service 1.3 with other Forcepoint products
c) Enter Yes, then press Enter to confirm the changes.
9) Enter s to view the status of DAS and save the changes in the DAS configuration, or press Enter to save thechanges in the DAS configuration without viewing the status of DAS.
Next stepsRestart the DAS service in the Configuration Wizard to apply the changes.
Related tasksRestart the DAS service on page 45
Change the AD container for user and groupinformationYou can use the Configuration Wizard to change the AD container, the user directory from which DAS polls userand group information from an AD server.
Tip: In most parts of the Configuration Wizard, you can enter c, then press Enter to return to theprevious menu or to cancel an action.
Steps1) If you are not yet logged on as root and the Configuration Wizard is not running, start the Configuration
Wizard:a) Log on as root to the server on which the Forcepoint User ID Service is installed.
b) Change to the following directory:
/opt/Forcepoint/bin/UID_Server/
c) Enter the following command:
./uid-server-configuration.sh
2) In the Configuration Wizard, select 4 - Configure Directory Aggregation Service (DAS), then press Enter.A list of AD servers from which DAS receives user and group information is shown.
3) Select the number for the AD server for which you want to modify the information, then press Enter.
4) Select 3 - User Directory, then press Enter.
5) Select which type of name you want to enter for the user directory, then press Enter.• To use a common name for the directory, select s - Single Common Name, then press Enter.
Configuring the Forcepoint User ID Service | 35
How to integrate Forcepoint User ID Service 1.3 with other Forcepoint products
• To use a full distinguished name, select f - Full Distinguished Name, then press Enter.
6) If you selected s - Single Common Name, enter the required information, then press Enter.a) Enter the domain for the user directory, then press Enter.
b) Enter the common name for the user directory, then press Enter.
c) Enter the password for the account for accessing the user directory, then press Enter.
7) If you selected f - Full Distinguished Name, enter the required information:a) Enter distinguished name for the user directory, then press Enter.
b) Enter the password for the account for accessing the user directory, then press Enter.
8) Enter Yes, then press Enter to confirm the changes.
9) Enter s to view the status of DAS and save the changes in the DAS configuration, or press Enter to save thechanges in the DAS configuration without viewing the status of DAS.
Next stepsRestart the DAS service in the Configuration Wizard to apply the changes.
Related tasksRestart the DAS service on page 45
Modify AD server settings for DASYou can use the Configuration Wizard to modify the settings that DAS uses to receive information about groupsfrom AD servers.You can add new AD servers in the DAS configuration, modify the AD server information, and change thecredentials for the accounts that DAS uses for polling user and group information from Active Directories.
Tip: In most parts of the Configuration Wizard, you can enter c, then press Enter to return to theprevious menu or to cancel an action.
Steps1) If you are not yet logged on as root and the Configuration Wizard is not running, start the Configuration
Wizard:a) Log on as root to the server on which the Forcepoint User ID Service is installed.
b) Change to the following directory:
/opt/Forcepoint/bin/UID_Server/
Configuring the Forcepoint User ID Service | 36
How to integrate Forcepoint User ID Service 1.3 with other Forcepoint products
c) Enter the following command:
./uid-server-configuration.sh
2) In the Configuration Wizard, select 4 - Configure Directory Aggregation Service (DAS), then press Enter.A list of AD servers from which DAS receives user and group information is shown.
3) Select the number for the AD server for which you want to modify the information, then press Enter.
4) Select the setting that you want to modify, enter the required information, then press Enter.• To change the AD server's IP address, select 4 - AD Server's IP Address, then press Enter.• To change the port that the AD server listens on, select 5 - Listening Port for AD Server, then press
Enter.
5) If you selected 4 - AD Server's IP Address, enter the required information, then press Enter.a) Enter the IP address, then press Enter.
b) Enter the password for the administrator account for connecting to the AD server, then press Enter.The IP address of the AD server is changed.
6) If you selected 5 - Listening Port for AD Server, enter the required information, then press Enter.a) Enter the new port number that the AD server listens on, then press Enter.
b) Enter the password for the administrator account for connecting to the AD server, then press Enter.The listening port for the AD server is changed.
7) Enter s to view the status of DAS and save the changes in the DAS configuration, or press Enter to save thechanges in the DAS configuration without viewing the status of DAS.
Next stepsRestart the DAS service in the Configuration Wizard to apply the changes.
Related tasksRestart the DAS service on page 45
Configuring the Forcepoint User ID Service | 37
How to integrate Forcepoint User ID Service 1.3 with other Forcepoint products
Test the account for accessing the ActiveDirectoryYou can use the Configuration Wizard to test that DAS can connect to the AD server and the AD container usingthe specified AD account and administrator credentials.
Tip: In most parts of the Configuration Wizard, you can enter c, then press Enter to return to theprevious menu or to cancel an action.
Steps1) If you are not yet logged on as root and the Configuration Wizard is not running, start the Configuration
Wizard:a) Log on as root to the server on which the Forcepoint User ID Service is installed.
b) Change to the following directory:
/opt/Forcepoint/bin/UID_Server/
c) Enter the following command:
./uid-server-configuration.sh
2) In the Configuration Wizard, select 4 - Configure Directory Aggregation Service (DAS), then press Enter.A list of AD servers from which DAS receives user and group information is shown.
3) Select the number for the AD server for which you want to modify the information, then press Enter.
4) Select t - Test Container AD account, then press Enter.
5) If the password for the administrator account has been encrypted, enter the password for the administratoraccount, then press Enter.
ResultIf the connection to the AD server works with the specified credentials, the Configuration Wizard confirms that theaccount has been verified.
Remove an AD server from the DASconfigurationYou can use the Configuration Wizard to remove an AD server from the list of AD servers that DAS polls for userand group information.
Tip: In most parts of the Configuration Wizard, you can enter c, then press Enter to return to theprevious menu or to cancel an action.
Configuring the Forcepoint User ID Service | 38
How to integrate Forcepoint User ID Service 1.3 with other Forcepoint products
Steps1) If you are not yet logged on as root and the Configuration Wizard is not running, start the Configuration
Wizard:a) Log on as root to the server on which the Forcepoint User ID Service is installed.
b) Change to the following directory:
/opt/Forcepoint/bin/UID_Server/
c) Enter the following command:
./uid-server-configuration.sh
2) In the Configuration Wizard, select 4 - Configure Directory Aggregation Service (DAS), then press Enter.A list of AD servers from which DAS receives user and group information is shown.
3) Select the number for the AD server for which you want to modify the information, then press Enter.
4) Select d - Delete this AD Container, then press Enter.You are prompted to confirm that you want to remove the AD server and AD container from the DASconfiguration.
5) Enter Yes, then press Enter.
ResultThe AD server and the AD container are removed from the DAS configuration.
Next stepsRestart the DAS service in the Configuration Wizard to apply the changes.
Related tasksRestart the DAS service on page 45
Add a new AD server to the DAS configurationYou can use the Configuration Wizard to add a new AD server to the list of AD servers from which DAS receivesinformation about groups.
Tip: In most parts of the Configuration Wizard, you can enter c, then press Enter to return to theprevious menu or to cancel an action.
Configuring the Forcepoint User ID Service | 39
How to integrate Forcepoint User ID Service 1.3 with other Forcepoint products
Steps1) If you are not yet logged on as root and the Configuration Wizard is not running, start the Configuration
Wizard:a) Log on as root to the server on which the Forcepoint User ID Service is installed.
b) Change to the following directory:
/opt/Forcepoint/bin/UID_Server/
c) Enter the following command:
./uid-server-configuration.sh
2) In the Configuration Wizard, select 4 - Configure Directory Aggregation Service (DAS), then pressEnter.A list of AD servers and AD containers from which DAS receives group information is shown.
3) Select n - Add a New AD Server and AD container, then press Enter.
4) Enter the IP address of the AD server from which DAS receives information about groups, then pressEnter.
5) Specify the port that the AD server listens on.• The default port is 3268. To use the default port, press Enter without specifying the port.• If you have enabled TLS encryption for communication between DAS and Windows AD servers, or plan
to enable TLS encryption, enter 3269, then press Enter.
6) Enter the user name for the administrator account that DAS uses when it queries the Active Directory forgroup information, then press Enter.
7) Enter the password for the administrator account, then press Enter.
8) Enter the name of the AD container where the administrator account credentials are stored, then pressEnter.
9) Enter the domain name of the AD domain, then press Enter.You are prompted to check the information for the AD server.
10) Check the following information for the AD server: the IP address, the port it listens on, the user name andpassword for the administrator account, and the domain name of the AD domain.The AD distinguished name of the administrator is also shown. For example:cn=administrator,cn=users,dc=example,dc=company, dc=com
a) If the AD server information is correct, enter Y, then press Enter.
b) If the AD server information is incorrect, enter N, press Enter, then enter the AD server informationagain.
Configuring the Forcepoint User ID Service | 40

How to integrate Forcepoint User ID Service 1.3 with other Forcepoint products
11) Enter s to view the status of DAS and save the changes in the DAS configuration, or press Enter to savethe changes in the DAS configuration without viewing the status of DAS.
Next stepsRestart the DAS service in the Configuration Wizard to apply the changes.
Related tasksEnable TLS encryption for communication between DAS and Windows AD servers on page 30Restart the DAS service on page 45
Define logging settings for DASYou can use the Configuration Wizard to define logging settings for DAS.
Tip: In most parts of the Configuration Wizard, you can enter c, then press Enter to return to theprevious menu or to cancel an action.
Steps1) If you are not yet logged on as root and the Configuration Wizard is not running, start the Configuration
Wizard:a) Log on as root to the server on which the Forcepoint User ID Service is installed.
b) Change to the following directory:
/opt/Forcepoint/bin/UID_Server/
c) Enter the following command:
./uid-server-configuration.sh
2) In the Configuration Wizard, select 4 - Configure Directory Aggregation Service (DAS), then press Enter.A list of AD servers and AD containers from which DAS receives group information is shown.
3) Select d - Configure Logging, then press Enter.
4) Select the setting that you want to modify, enter the required information, then press Enter.• To select the log level for DAS, select 1 - Select Log Level, then press Enter.• To define the maximum log file size for DAS, select 2 - Change Maximum Log file Size, then press
Enter.
Configuring the Forcepoint User ID Service | 41
How to integrate Forcepoint User ID Service 1.3 with other Forcepoint products
5) If you selected 1 - Select Log Level, select the log level to define how much log data is generated for DAS,then press Enter.Log data for DAS is stored in the WebsenseDAService.log file in /opt/Forcepoint/bin.
Note: When you select a log level, both the logs of that severity level and higher severity logsare generated.
• 1 - OFF — Logs are not saved for DAS.• 2 - FATAL — Only fatal errors are logged.• 3 - ERROR — Only errors are logged. This log level is the default log level.• 4 - WARN — Only warnings are logged.• 5 - INFO — Information that is generally useful is logged.• 6 - DEBUG — Information that is useful for support is logged.• 7 - ALL — All available information is logged.
6) If you selected 2 - Change Maximum Log File Size, enter in megabytes the maximum file size for storinglogs before the log file is overwritten, then press Enter.By default, the maximum file size for storing logs for DAS is 10 MB.When the log file size reaches the specified maximum size, the log file is overwritten.
Next stepsRestart the DAS service in the Configuration Wizard to apply the changes.
Related tasksRestart the DAS service on page 45
Define whether DAS polls information aboutusers without email addressesBy default, DAS only polls information about users that have an email address. You can use the ConfigurationWizard to define that DAS also polls information about users who do not have an email address.
Note: When you enable DAS to poll information about users without an email address, DAS firstpolls information about all user groups from the AD servers. This might take a while.
Tip: In most parts of the Configuration Wizard, you can enter c, then press Enter to return to theprevious menu or to cancel an action.
Steps1) If you are not yet logged on as root and the Configuration Wizard is not running, start the Configuration
Wizard:a) Log on as root to the server on which the Forcepoint User ID Service is installed.
Configuring the Forcepoint User ID Service | 42

How to integrate Forcepoint User ID Service 1.3 with other Forcepoint products
b) Change to the following directory:
/opt/Forcepoint/bin/UID_Server/
c) Enter the following command:
./uid-server-configuration.sh
2) In the Configuration Wizard, select 4 - Configure Directory Aggregation Service (DAS), then press Enter.A list of AD servers and AD containers from which DAS receives group information is shown.
3) Select e - Enable DAS to Poll Information About Users Without Email Addresses, select whether youwant to enable or disable the feature, then press Enter.• If DAS does not currently poll information about users without an email address and you want to enable
this feature, enter Yes, then press Enter.• If DAS currently polls information about users without an email address and you want to disable this
feature, enter Yes, then press Enter.
ResultDAS polls information about users without an email address as specified.
Next stepsRestart the DAS service in the Configuration Wizard to apply the changes.
Related tasksRestart the DAS service on page 45
Configure when DAS polls users and groupsinformation from AD serversDAS polls information about users and groups from Active Directory (AD) servers automatically once a day. Youcan use the Configuration Wizard to define when DAS polls the user and group information.
CAUTION: Polling the user and group information from AD servers is a resource intensiveoperation. It is best to schedule that DAS polls the user and group information outside normal officehours.
Tip: In most parts of the Configuration Wizard, you can enter c, then press Enter to return to theprevious menu or to cancel an action.
DAS must poll the user and group information at least once a week.
Configuring the Forcepoint User ID Service | 43
How to integrate Forcepoint User ID Service 1.3 with other Forcepoint products
Steps1) If you are not yet logged on as root and the Configuration Wizard is not running, start the Configuration
Wizard:a) Log on as root to the server on which the Forcepoint User ID Service is installed.
b) Change to the following directory:
/opt/Forcepoint/bin/UID_Server/
c) Enter the following command:
./uid-server-configuration.sh
2) In the Configuration Wizard, select 4 - Configure Directory Aggregation Service (DAS), then press Enter.A list of AD servers and AD containers from which DAS receives user and group information is shown.
3) Select t - Configure When DAS Polls Group Data, then press Enter.By default, DAS polls user and group information once a day between 21 hours and 6 hours (9 p.m. and 6a.m).You are prompted to confirm that you want to change the time range.
4) Enter Yes, then press Enter.
5) Enter the start hour for the time range, then press Enter.
Note: The value for the start hour and the end hour must be 1-24.
6) Enter the end hour for the time range, then press Enter.
Result
When DAS starts and each time after the information between DAS and the AD servers has been synchronized,DAS selects a random time within the specified time range for the next synchronization operation.
DAS polls the group and user information from the AD servers once a day at a random time between thespecified start time and the end time.
Next stepsRestart the DAS service in the Configuration Wizard to apply the changes.
Related tasksRestart the DAS service on page 45
Configuring the Forcepoint User ID Service | 44
How to integrate Forcepoint User ID Service 1.3 with other Forcepoint products
Restart the DAS serviceWhen you change the settings for DAS and modify the DAS configuration, you must restart the DAS service toapply the changes. You can use the Configuration Wizard to restart DAS.
Tip: In most parts of the Configuration Wizard, you can enter c, then press Enter to return to theprevious menu or to cancel an action.
Steps1) If you are not yet logged on as root and the Configuration Wizard is not running, start the Configuration
Wizard:a) Log on as root to the server on which the Forcepoint User ID Service is installed.
b) Change to the following directory:
/opt/Forcepoint/bin/UID_Server/
c) Enter the following command:
./uid-server-configuration.sh
2) In the Configuration Wizard, select 4 - Configure Directory Aggregation Service (DAS), then press Enter.A list of AD servers and AD containers from which DAS receives group information is shown.
3) Select r - Restart DAS, then press Enter to restart the DAS service.
ResultThe DAS service restarts. If you just modified some setting for DAS or modified the DAS configuration, thesettings are applied when DAS has restarted.
Restart services in Forcepoint User IDService
You can use the Configuration Wizard to restart the services that run in the Forcepoint User ID Service.
Tip: In most parts of the Configuration Wizard, you can enter c, then press Enter to return to theprevious menu or to cancel an action.
The services that run in the UID Service (user_id, ifmap, and ldif) are restarted when you restart the services inthe Configuration Wizard.
Configuring the Forcepoint User ID Service | 45
How to integrate Forcepoint User ID Service 1.3 with other Forcepoint products
Steps1) If you are not yet logged on as root and the Configuration Wizard is not running, start the Configuration
Wizard:a) Log on as root to the server on which the Forcepoint User ID Service is installed.
b) Change to the following directory:
/opt/Forcepoint/bin/UID_Server/
c) Enter the following command:
./uid-server-configuration.sh
2) In the Configuration Wizard, select 5 - Restart Services, then press Enter.The services that run in the UID Service (user_id, ifmap, and ldif) are restarted.
3) Enter s to view detailed information about the services, or press Enter to continue.
Reset the UID Service and DASconfigurations to default values
You can use the Configuration Wizard to reset the configurations of the UID Service and DAS to default values.
CAUTION: Do not reset the configurations of the UID Service and DAS to default values unless youhave been instructed to do so by Forcepoint support.
Tip: In most parts of the Configuration Wizard, you can enter c, then press Enter to return to theprevious menu or to cancel an action.
When you reset the UID Service and DAS configurations to default values in the Configuration Wizard, thefollowing happens:• The UID Service database that stores information about users, IP addresses, and groups is emptied.• The services that run in the UID Service (uid_service, ldif, ifmap, and monitor) are replaced with the default
versions of the services. Any modifications that you have made in the settings of the services are lost.• All the modifications that have been made in the DAS configuration are lost. All the information about AD
servers and AD containers is removed. One placeholder AD container that has the IP address of the local hostis added to the DAS configuration. You must configure DAS again.
Note: Certificates and private keys are not removed if you set the UID Service and DASconfigurations to default values.
Configuring the Forcepoint User ID Service | 46

How to integrate Forcepoint User ID Service 1.3 with other Forcepoint products
Steps1) If you are not yet logged on as root and the Configuration Wizard is not running, start the Configuration
Wizard:a) Log on as root to the server on which the Forcepoint User ID Service is installed.
b) Change to the following directory:
/opt/Forcepoint/bin/UID_Server/
c) Enter the following command:
./uid-server-configuration.sh
2) In the Configuration Wizard, select 6 - Reset Configuration to Default Values, then press Enter.You are prompted to confirm that you want to set the configurations of the UID Service and DAS to defaultvalues.
CAUTION: If you reset the configurations of the UID Service and DAS to default settings, youlose all the modifications that have been made in the configurations. The UID Service databasethat contains information about users, IP addresses, and groups is emptied. You must alsoconfigure DAS again.
3) Enter Yes, then press Enter.
ResultThe UID Service and DAS are reset to default values. A placeholder AD container that has the IP address of thelocal host is added to the DAS configuration.
Next stepsAdd the necessary AD servers and AD containers to the DAS configuration. Modify the placeholder AD containerthat has the IP address of the localhost, or remove the placeholder AD container and add the AD servers and ADcontainers that are used in your network environment.
Related tasksChange the AD container for user and group information on page 35Add a new AD server to the DAS configuration on page 39
Refresh the DAS databaseDAS polls user and group information from Active Directory (AD) servers automatically once a day. You can usethe Configuration Wizard to update group information in the DAS database.
Note: Updating the DAS database might be a resource intensive operation.
Configuring the Forcepoint User ID Service | 47
How to integrate Forcepoint User ID Service 1.3 with other Forcepoint products
Tip: In most parts of the Configuration Wizard, you can enter c, then press Enter to return to theprevious menu or to cancel an action.
Steps1) If you are not yet logged on as root and the Configuration Wizard is not running, start the Configuration
Wizard:a) Log on as root to the server on which the Forcepoint User ID Service is installed.
b) Change to the following directory:
/opt/Forcepoint/bin/UID_Server/
c) Enter the following command:
./uid-server-configuration.sh
2) In the Configuration Wizard, select 7 - Refresh DAS data, then press Enter.You are prompted to confirm that you want to refresh the set the configurations of the UID Service and DASto default values.
3) Enter Yes, then press Enter.
ResultThe user and group information is updated on DAS. If there are any changes in the user and group information,DAS sends information about the changes to the UID Service.
Check component and service status inthe Forcepoint User ID Service
You can use the Configuration Wizard to check the status of components and services in the Forcepoint User IDService.
Tip: In most parts of the Configuration Wizard, you can enter c, then press Enter to return to theprevious menu or to cancel an action.
You can view the following status information in the Configuration Wizard:• When you start the Configuration Wizard, the status of the user database, the UID Service, and the DAS
service are shown above the main menu of the Configuration Wizard. The status is OK when there areno issues with the status of the user database, and the UID Service and the DAS service are functioningcorrectly.
• If you need more detailed information about the status of the Forcepoint User ID Service, use the statusoptions in the Configuration Wizard to gain more information.
Configuring the Forcepoint User ID Service | 48
How to integrate Forcepoint User ID Service 1.3 with other Forcepoint products
Steps1) If you are not yet logged on as root and the Configuration Wizard is not running, start the Configuration
Wizard:a) Log on as root to the server on which the Forcepoint User ID Service is installed.
b) Change to the following directory:
/opt/Forcepoint/bin/UID_Server/
c) Enter the following command:
./uid-server-configuration.sh
2) In the Configuration Wizard, select s - Show Detailed Status, then press Enter.You are shown more detailed information, such as information about the services that run in the UID Service.If you have configured HA, you can also see the list of the nodes in the HA configuration and the status ofthe nodes.
3) (Optional) If you need even more detailed information, select s - Show System Status, then press Enter.The status of the individual services that run in the UID Service and the location of the services is shown.
Configuring the Forcepoint User ID Service | 49

How to integrate Forcepoint User ID Service 1.3 with other Forcepoint products
Configuring the Forcepoint User ID Service | 50
CHAPTER 5
Installing and configuring the DCAgent
Contents
• Overview to installing and configuring the DC Agent on page 51• Install the DC Agent on page 52• Modify the DC Agent service on page 53• Configure which AD domains, Domain Controllers, and Exchange Servers the DC Agent polls on page 54• Configure the DC Agent to ignore specified users or IP addresses on page 56• Disable autodetection of AD servers in the DC Agent configuration on page 57• Enable logging for the DC Agent on page 58
Overview to installing and configuringthe DC Agent
DC Agent can monitor information about users and their IP addresses from multiple AD domains. If thereare a large number of AD domains in your network environment, you might want to install two DC Agents forredundancy.The installation of DC Agent consists of the following high-level steps.1) Install the DC Agent software on a Windows server that is connected to the domain that you want to monitor.
2) Modify the DC Agent service properties.
3) Create a configuration file for the DC Agent, then add AD domains and domain controllers in theconfiguration.
4) (Optional) Configure the DC Agent to ignore specific users and IP addresses.
Note: To use the Forcepoint User ID Service in an HA configuration, you must later install andconfigure the DC Agent on another server. For more information, see the separate section about HAconfiguration for the Forcepoint User ID Service.
Installing and configuring the DC Agent | 51

How to integrate Forcepoint User ID Service 1.3 with other Forcepoint products
Install the DC AgentInstall the DC Agent on a Windows server that is a Domain member but not on an AD server or on an Exchangeserver. The DC Agent must be able to communicate with the AD domain from which it receives information aboutusers and their IP addresses.
CAUTION: Make sure that communication between the UID Service and the DC Agent andcommunication between the DC Agent, the Domain Controllers, and the Exchange Servers is routedover secure networks.
Note: Do not install the DC Agent for the Forcepoint User ID Service and the DC Agent used withForcepoint Web Security on the same server. The DC Agent installation fails if the DC Agent usedwith Forcepoint Web Security is already installed on the server.
Steps1) Download the DC Agent installation package .exe file from the download site, then save it in a location that
you can access from the Windows server on which you want to install it.
Note: We do not recommend installing the DC Agent on an AD server or on an Exchangeserver unless you install the DC Agent for testing purposes.
2) Log on to the server with credentials that allow you to install software.
3) To start the installer, double-click the executable file.
4) To start the installation, press Enter.
5) Enter the information for the IFMAP server, the Linux server on which the Forcepoint User ID Service isinstalled.a) Enter an IP address for the server.
b) Enter 5002 as the port that the server listens on, then press Enter.
6) When you are prompted to specify a path to a certificate that is used to authenticate the communicationbetween the DC Agent and the IFMAP server, press Enter.
7) Check the information for the IFMAP Server.a) If the information is correct, enter Y, then press Enter.
b) If there is any incorrect information, enter N, press Enter, then enter the IFMAP Server informationagain.
8) Select the installation folder for the DC Agent.Press Enter to install the DC Agent in the default folder. The default folder is C:\Program Files\Forcepoint.
Installing and configuring the DC Agent | 52
How to integrate Forcepoint User ID Service 1.3 with other Forcepoint products
9) Check the selected installation folder.a) If the information is correct, enter Y, then press Enter.
b) If the information is incorrect, enter N, press Enter, then enter the installation folder again.
10) Check that enough memory is available on the server for the DC Agent, then press Enter.8 GB of RAM is recommended.
11) Check the pre-installation summary, then press Enter to start the installation.
ResultThe DC Agent is installed in the specified folder.
Next stepsModify the DC Agent service properties.
Modify the DC Agent serviceYou must modify the DC Agent service to use an account that has read permissions to the Domain Controller andExchange Server event logs.
Steps1) Use the Windows Services tool to stop the DC Agent service.
2) Modify the DC Agent service properties.a) Right-click the DC Agent service, then select Properties.
b) On the Log On tab, select a suitable account for the DC Agent service to use.
Note: The DC Agent service must use a domain account that is in the Event Log Readersgroup.
3) If the DC Agent service does not run using an account that has administrator permissions, add permissionsfor the DC Agent service to write log data in the installation folder.a) Go to the DC Agent installation folder.
The default installation folder is C:\Program Files\Forcepoint\DC Agent.
b) Right-click the folder, then select Properties.
c) On the Security tab, select Full control as the permissions, then click OK.
Installing and configuring the DC Agent | 53
How to integrate Forcepoint User ID Service 1.3 with other Forcepoint products
Next stepsCreate a configuration file for the DC Agent, then add information about the AD domains, the Domain Controllers,and the Exchange Servers to be monitored to the configuration.
Configure which AD domains, DomainControllers, and Exchange Servers theDC Agent polls
You must configure manually which Exchange Servers the DC Agent polls. In some network environments, ADdomains and Domain Controllers might be automatically discovered and added to the DC Agent configuration.The AD domains, Domain Controllers, and Exchange servers that the DC Agent polls must be included in theDC Agent configuration file (dc_config.txt). By default, dc_config.txt is located in C:\Program Files\Forcepoint\DCAgent.
After you have installed the DC Agent, verify if dc_config.txt has been automatically created and check whetherall the necessary AD domains and Domain Controllers are included in dc_config.txt. If the file has not beencreated, you must manually create it and add AD domains and Domain Controllers in it.
Note: If AD domains and Domain Controllers are automatically detected in your networkenvironment and you do not want the DC Agent to poll certain AD domains and Domain Controllers,you must manually disable the polling for the AD domains and Domain Controllers in dc_config.txt.
Steps1) Go to the bin folder under the DC Agent installation folder.
By default, the default installation folder is C:\Program Files\Forcepoint\DC Agent.
2) If dc_config.txt has not yet been created, use a text editor, such as Notepad, to create a file calleddc_config.txt.
3) In the dc_config.txt file, enter the information about the AD domains and the Domain Controllers, and theExchange Servers that you want the DC Agent to poll:
Note: The DC Agent host must be able to resolve the IP addresses of the AD servers from theDNS names used in the dc_config.txt file.
a) Enter the name of each AD domain between square brackets [ ].
b) Under the AD domain information, enter the name of each Domain Controller to be polled on a separateline using the following syntax: <name of Domain Controller>=on
Note: Use NetBIOS names, not FQDN names for the domains.
Installing and configuring the DC Agent | 54
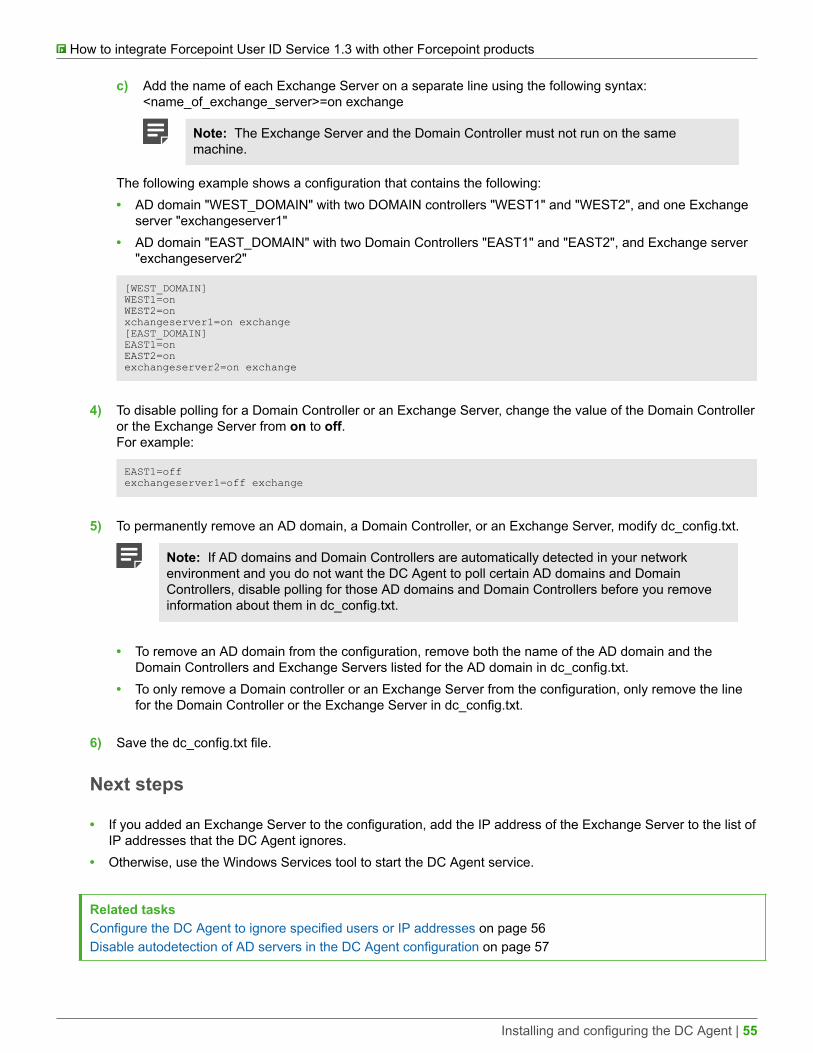
How to integrate Forcepoint User ID Service 1.3 with other Forcepoint products
c) Add the name of each Exchange Server on a separate line using the following syntax:<name_of_exchange_server>=on exchange
Note: The Exchange Server and the Domain Controller must not run on the samemachine.
The following example shows a configuration that contains the following:• AD domain "WEST_DOMAIN" with two DOMAIN controllers "WEST1" and "WEST2", and one Exchange
server "exchangeserver1"• AD domain "EAST_DOMAIN" with two Domain Controllers "EAST1" and "EAST2", and Exchange server
"exchangeserver2"
[WEST_DOMAIN]WEST1=onWEST2=onxchangeserver1=on exchange[EAST_DOMAIN]EAST1=onEAST2=onexchangeserver2=on exchange
4) To disable polling for a Domain Controller or an Exchange Server, change the value of the Domain Controlleror the Exchange Server from on to off.For example:
EAST1=offexchangeserver1=off exchange
5) To permanently remove an AD domain, a Domain Controller, or an Exchange Server, modify dc_config.txt.
Note: If AD domains and Domain Controllers are automatically detected in your networkenvironment and you do not want the DC Agent to poll certain AD domains and DomainControllers, disable polling for those AD domains and Domain Controllers before you removeinformation about them in dc_config.txt.
• To remove an AD domain from the configuration, remove both the name of the AD domain and theDomain Controllers and Exchange Servers listed for the AD domain in dc_config.txt.
• To only remove a Domain controller or an Exchange Server from the configuration, only remove the linefor the Domain Controller or the Exchange Server in dc_config.txt.
6) Save the dc_config.txt file.
Next steps
• If you added an Exchange Server to the configuration, add the IP address of the Exchange Server to the list ofIP addresses that the DC Agent ignores.
• Otherwise, use the Windows Services tool to start the DC Agent service.
Related tasksConfigure the DC Agent to ignore specified users or IP addresses on page 56Disable autodetection of AD servers in the DC Agent configuration on page 57
Installing and configuring the DC Agent | 55
How to integrate Forcepoint User ID Service 1.3 with other Forcepoint products
Configure the DC Agent to ignorespecified users or IP addresses
You can configure the DC Agent to ignore specified users or users from specific servers. You can also configurethe DC Agent to ignore specific IP addresses.Ignoring users or IP addresses can be useful, for example, if you do not want to monitor service accounts onclient machines. You can also configure the DC Agent to ignore the IP addresses of multi-user servers, such asterminal servers or file servers.
Note: If the DC Agent polls information from Exchange Servers, configure the DC Agent to ignorethe IP addresses of the Exchange Servers for all users.
Steps1) Use the Windows Services tool to stop the DC Agent service.
2) Go to the bin directory under the DC Agent installation directory.The default DC Agent installation directory is C:\Program Files\Forcepoint\DC Agent.
3) Locate the text file called "ignore.txt", then open the file with a text editor such as Notepad.
4) Edit the file as needed.a) Add each user name that the DC Agent must ignore on a separate line.
If you only specify the user name, DC Agent ignores the user name regardless of the machine on whichit is used.
CAUTION: The following entries are included by default in ignore.txt: "local service","network service", and "anonymous logon". Do not edit or remove these entries.
For example, to ignore the user name "admin" on any machine, enter the following:
admin
b) To ignore a user name on a specified machine, enter the user name, a comma, then the host name orthe IP address of the machine.For example, to ignore user "admin" on workstation "WKSTA-NAME", enter the following:
admin, WKSTA-NAME
c) To ignore all user names on a specified machine, enter an asterisk (*), a comma, then the host name,the IP address, or the IP address range of the machine.For example:
*, WKSTB-NAME*, 10.209.34.56*, 10.203.34.1-10.203.34.255
The DC Agent ignores the logons for WKSTB-NAME, IP address 10.209.34.56, and IP address range10.203.34.1-10.203.34.255.
Installing and configuring the DC Agent | 56
How to integrate Forcepoint User ID Service 1.3 with other Forcepoint products
d) If the DC Agent polls information from an Exchange server, enter an asterisk (*), a comma, then the hostname or the IP address of the Exchange server.For example:
*, 192.168.1.1
5) Save the changes.
6) Use the Windows Services tool to restart the DC Agent service.
Disable autodetection of AD servers inthe DC Agent configuration
The AD servers from which the DC Agent polls information about users and IP addresses are defined in the DCAgent configuration file that is automatically generated when the DC Agent service starts. If necessary, you candisable the autodetection of AD servers when the DC Agent service starts.
Steps1) Use the Windows Services tool to stop the DC Agent service.
2) Go to the config directory under the DC Agent installation directory.The default DC Agent installation directory is C:\Program Files\Forcepoint\DC Agent\.
3) Locate the text file called "transid.ini", then open the file with a text editor such as Notepad.
4) Locate the DiscoveryInterval parameter, then change the value of the parameter to the following:
DiscoveryInterval=0
5) Make sure that only the AD servers from which the DC Agent should poll information about users and IPaddresses are included in the dc_config.txt file.a) Go to the bin folder under the DC Agent installation folder.
The default folder is C:\Program Files\Forcepoint\DC Agent
b) If there are references to any AD servers that you do not want the DC Agent to poll, remove theinformation about the AD servers.
6) Save the changes.
7) Use the Windows Services tool to restart the DC Agent service.
Installing and configuring the DC Agent | 57
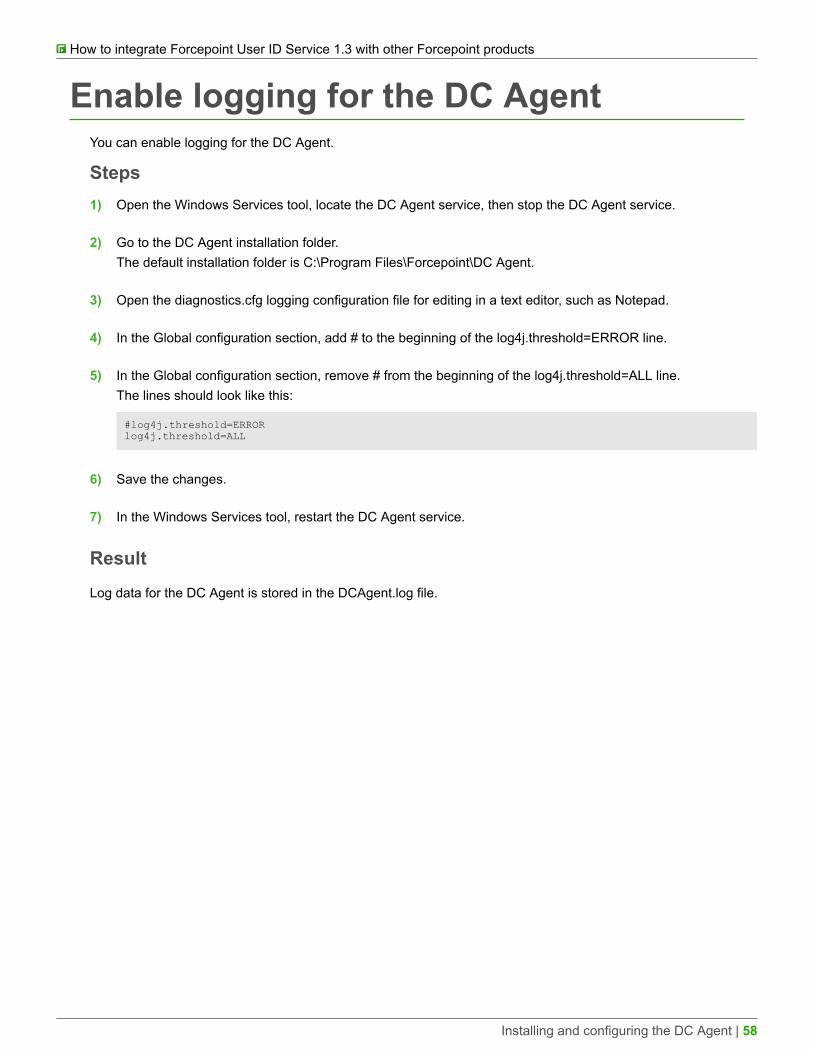
How to integrate Forcepoint User ID Service 1.3 with other Forcepoint products
Enable logging for the DC AgentYou can enable logging for the DC Agent.
Steps1) Open the Windows Services tool, locate the DC Agent service, then stop the DC Agent service.
2) Go to the DC Agent installation folder.The default installation folder is C:\Program Files\Forcepoint\DC Agent.
3) Open the diagnostics.cfg logging configuration file for editing in a text editor, such as Notepad.
4) In the Global configuration section, add # to the beginning of the log4j.threshold=ERROR line.
5) In the Global configuration section, remove # from the beginning of the log4j.threshold=ALL line.The lines should look like this:
#log4j.threshold=ERRORlog4j.threshold=ALL
6) Save the changes.
7) In the Windows Services tool, restart the DC Agent service.
ResultLog data for the DC Agent is stored in the DCAgent.log file.
Installing and configuring the DC Agent | 58
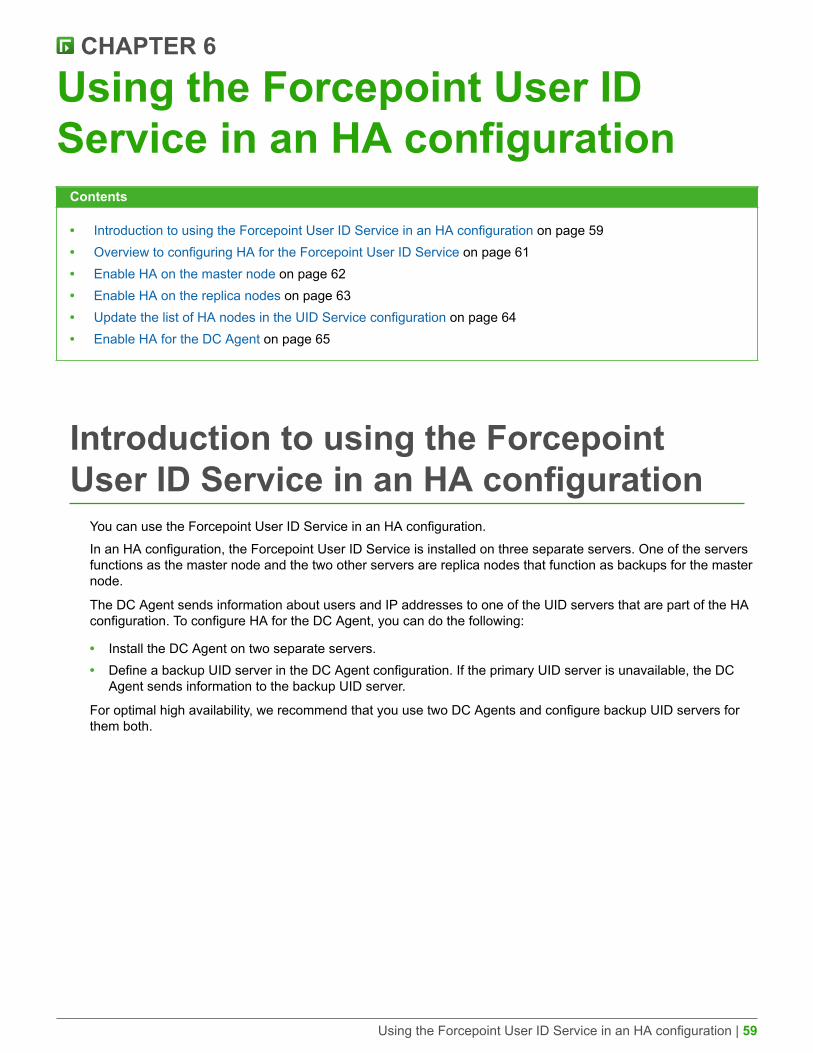
CHAPTER 6
Using the Forcepoint User IDService in an HA configuration
Contents
• Introduction to using the Forcepoint User ID Service in an HA configuration on page 59• Overview to configuring HA for the Forcepoint User ID Service on page 61• Enable HA on the master node on page 62• Enable HA on the replica nodes on page 63• Update the list of HA nodes in the UID Service configuration on page 64• Enable HA for the DC Agent on page 65
Introduction to using the ForcepointUser ID Service in an HA configuration
You can use the Forcepoint User ID Service in an HA configuration.In an HA configuration, the Forcepoint User ID Service is installed on three separate servers. One of the serversfunctions as the master node and the two other servers are replica nodes that function as backups for the masternode.
The DC Agent sends information about users and IP addresses to one of the UID servers that are part of the HAconfiguration. To configure HA for the DC Agent, you can do the following:
• Install the DC Agent on two separate servers.• Define a backup UID server in the DC Agent configuration. If the primary UID server is unavailable, the DC
Agent sends information to the backup UID server.
For optimal high availability, we recommend that you use two DC Agents and configure backup UID servers forthem both.
Using the Forcepoint User ID Service in an HA configuration | 59

How to integrate Forcepoint User ID Service 1.3 with other Forcepoint products
Figure 2: Example HA configuration of the Forcepoint User ID Service integrated with Forcepoint NGFW
Node A Node B Node C
1
Primary Backup
2 3 4
AD Server
5
7
DC Agents
8
NGFW Engine
6
1 The Forcepoint User ID Service is installed on three servers in an HA configuration. The configurationof Forcepoint User ID Service on all three servers must be exactly the same. The database that storesinformation about users, groups, and IP addresses is replicated between all three nodes.
2-4 One of the nodes in the HA configuration is the master node, and the other two nodes are replicanodes. The status of the nodes and the connectivity between the nodes is constantly monitored. If themaster node stops replying to requests for database updates from the replica nodes, one of the replicanodes takes the role of the master node.
5 The AD server from which all the nodes receive information about users and groups. All the nodes inthe HA configuration periodically poll information about users and groups from the AD server.
6 The client product, in this example, Forcepoint NGFW, can poll information about users, groups, and IPaddresses from all three nodes, but it only polls one node at a time.
7-8 Two instances of the DC Agent are installed on separate servers. Both DC Agents send informationabout users and IP addresses to a node in the HA configuration.You can define one of the nodes as a backup UID server in the configuration of each DC Agent. If theprimary server to which the DC Agent has been configured to send information becomes unavailable,the DC Agent starts sending the information to the backup server.
Using the Forcepoint User ID Service in an HA configuration | 60

How to integrate Forcepoint User ID Service 1.3 with other Forcepoint products
Overview to configuring HA for theForcepoint User ID Service
You must complete the following steps to configure HA for the Forcepoint User ID Service.
CAUTION: Review the steps in the HA configuration overview carefully. Before enabling HA for theForcepoint User ID Service, you must install and configure the Forcepoint User ID Service on threedifferent servers, and install and configure two DC Agents on two different servers. The ForcepointUser ID Service must be fully functional and integrated with the client product before you enable HA.
1) Install and configure the Forcepoint User ID Service on three servers.
CAUTION: The configuration on all three servers must be exactly the same.
CAUTION: Use NTP or other suitable protocol to synchronize the time between the servers.
2) In the client product that receives information from the Forcepoint User ID Service, configure the settings forthe Forcepoint User ID Service.If you integrate the Forcepoint User ID Service with the Forcepoint NGFW, create a single Forcepoint UserID Service element, and enter the IP addresses of all the three servers on which the Forcepoint User IDService is installed as IP addresses in the Forcepoint User ID Service element. For more information, seethe Forcepoint Next Generation Firewall Product Guide.
3) Verify that the client product receives information from all the three servers.
4) Enable HA on the Forcepoint User ID Service servers:• Configure one of the servers as the master node in the HA configuration.• Configure the two other servers as replica nodes in the HA configuration.
5) On each Forcepoint User ID Service server, update the list of nodes to add the master node and the replicanodes to the UID Service configuration.• Update the list of nodes in the UID Service configuration first on the master node, then update the list of
nodes on the replica nodes.
CAUTION: If the UID Service configuration of all three nodes does not contain informationabout all of the nodes, the nodes are not able to communicate with each other and HA modedoes not work.
6) Install and configure the DC Agent on two servers:a) Install the DC Agent on each server, then configure both DC Agents to send information about users and
IP addresses to one of the UID nodes in the HA configuration.
b) In each DC Agent configuration, define a UID node as a backup server.
CAUTION: The two DC Agents must use different nodes as backup servers.
Using the Forcepoint User ID Service in an HA configuration | 61
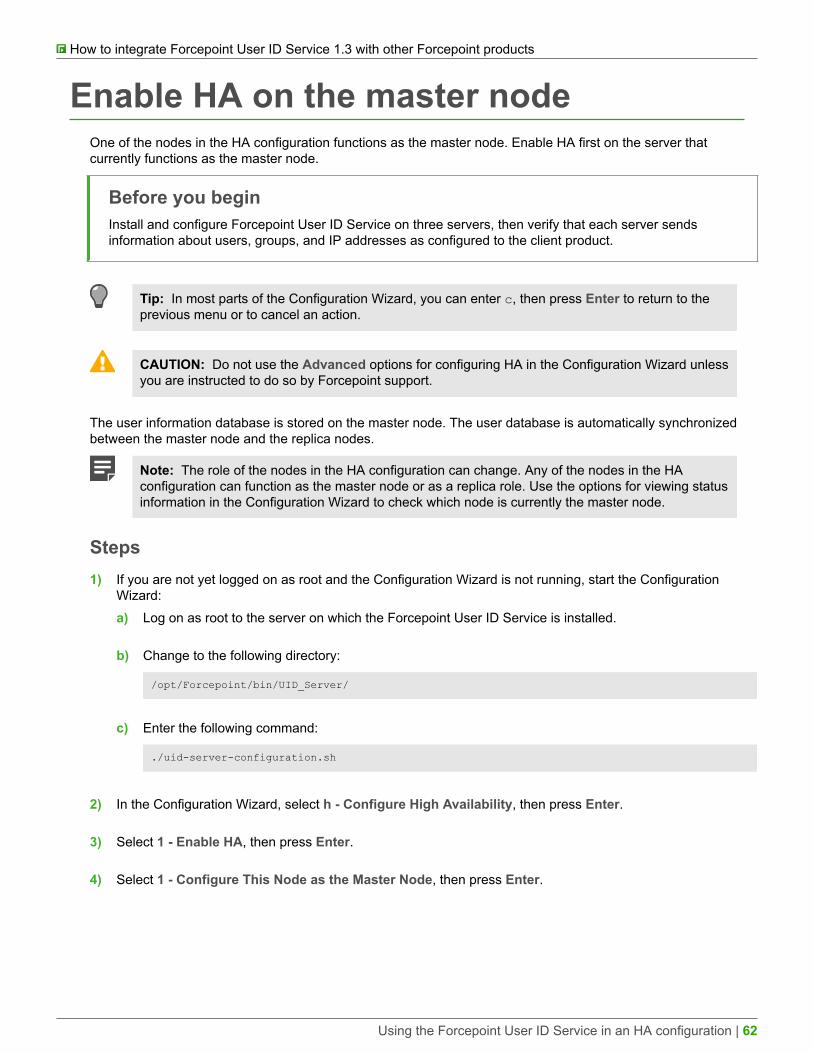
How to integrate Forcepoint User ID Service 1.3 with other Forcepoint products
Enable HA on the master nodeOne of the nodes in the HA configuration functions as the master node. Enable HA first on the server thatcurrently functions as the master node.
Before you beginInstall and configure Forcepoint User ID Service on three servers, then verify that each server sendsinformation about users, groups, and IP addresses as configured to the client product.
Tip: In most parts of the Configuration Wizard, you can enter c, then press Enter to return to theprevious menu or to cancel an action.
CAUTION: Do not use the Advanced options for configuring HA in the Configuration Wizard unlessyou are instructed to do so by Forcepoint support.
The user information database is stored on the master node. The user database is automatically synchronizedbetween the master node and the replica nodes.
Note: The role of the nodes in the HA configuration can change. Any of the nodes in the HAconfiguration can function as the master node or as a replica role. Use the options for viewing statusinformation in the Configuration Wizard to check which node is currently the master node.
Steps1) If you are not yet logged on as root and the Configuration Wizard is not running, start the Configuration
Wizard:a) Log on as root to the server on which the Forcepoint User ID Service is installed.
b) Change to the following directory:
/opt/Forcepoint/bin/UID_Server/
c) Enter the following command:
./uid-server-configuration.sh
2) In the Configuration Wizard, select h - Configure High Availability, then press Enter.
3) Select 1 - Enable HA, then press Enter.
4) Select 1 - Configure This Node as the Master Node, then press Enter.
Using the Forcepoint User ID Service in an HA configuration | 62
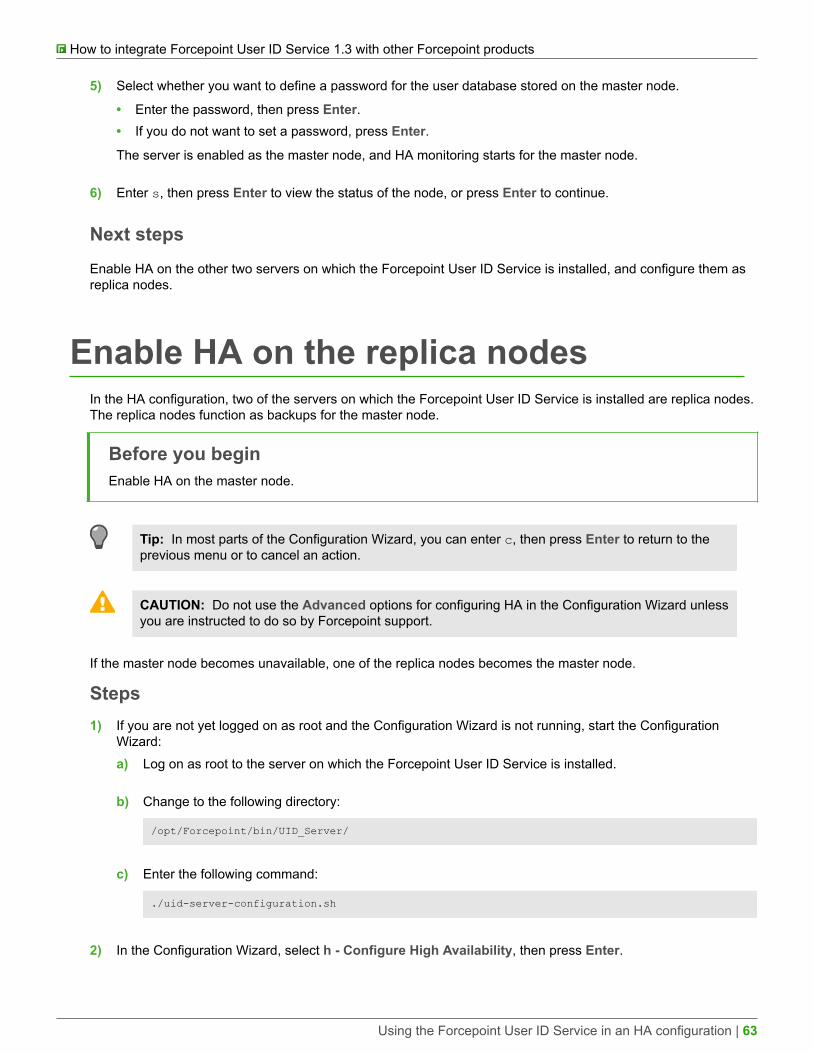
How to integrate Forcepoint User ID Service 1.3 with other Forcepoint products
5) Select whether you want to define a password for the user database stored on the master node.
• Enter the password, then press Enter.• If you do not want to set a password, press Enter.
The server is enabled as the master node, and HA monitoring starts for the master node.
6) Enter s, then press Enter to view the status of the node, or press Enter to continue.
Next stepsEnable HA on the other two servers on which the Forcepoint User ID Service is installed, and configure them asreplica nodes.
Enable HA on the replica nodesIn the HA configuration, two of the servers on which the Forcepoint User ID Service is installed are replica nodes.The replica nodes function as backups for the master node.
Before you beginEnable HA on the master node.
Tip: In most parts of the Configuration Wizard, you can enter c, then press Enter to return to theprevious menu or to cancel an action.
CAUTION: Do not use the Advanced options for configuring HA in the Configuration Wizard unlessyou are instructed to do so by Forcepoint support.
If the master node becomes unavailable, one of the replica nodes becomes the master node.
Steps1) If you are not yet logged on as root and the Configuration Wizard is not running, start the Configuration
Wizard:a) Log on as root to the server on which the Forcepoint User ID Service is installed.
b) Change to the following directory:
/opt/Forcepoint/bin/UID_Server/
c) Enter the following command:
./uid-server-configuration.sh
2) In the Configuration Wizard, select h - Configure High Availability, then press Enter.
Using the Forcepoint User ID Service in an HA configuration | 63
How to integrate Forcepoint User ID Service 1.3 with other Forcepoint products
3) Select 1 - Enable HA, then press Enter.
4) Select 2 - Configure This Node as a Replica Node, then press Enter.
5) Enter the IP address of the server that is currently used as the master node in the HA configuration, thenpress Enter.
6) Enter the password for the user database stored on the master node.
• If you have defined a password for the user database, enter the password, then press Enter.• If you have not defined a password for the user database, press Enter.
The server is enabled as a replica node, and HA monitoring starts for the replica node.
7) Enter s, then press Enter to view the status of the node, or press Enter to continue.
Next steps
• Enable HA on the other server that you want to use as the second replica node.• When you have enabled HA on the three Forcepoint User ID Service servers, update and verify the list of the
servers that are part of the HA configuration.
Update the list of HA nodes in the UIDService configuration
When you have enabled HA on the three Forcepoint User ID Service servers, then configured the servers asa master node and two replica nodes, update the list of the nodes in the UID Service configuration on all theservers.Update the list of nodes in the UID Service configuration first on the master node, then separately on each replicanode.
CAUTION: If the UID Service configuration of all three nodes does not contain information about allof the nodes, the nodes are not able to communicate with each other and HA mode does not work.
Tip: In most parts of the Configuration Wizard, you can enter c, then press Enter to return to theprevious menu or to cancel an action.
Steps1) If you are not yet logged on as root and the Configuration Wizard is not running, start the Configuration
Wizard:a) Log on as root to the server on which the Forcepoint User ID Service is installed.
b) Change to the following directory:
/opt/Forcepoint/bin/UID_Server/
Using the Forcepoint User ID Service in an HA configuration | 64
How to integrate Forcepoint User ID Service 1.3 with other Forcepoint products
c) Enter the following command:
./uid-server-configuration.sh
2) In the Configuration Wizard, select h - Configure High Availability, then press Enter.
3) Select 3 - Update List of Nodes, then press Enter to update the list of nodes in the UID Serviceconfiguration.The Configuration Wizard shows information about the nodes and the IP addresses that are included in theHA configuration.
4) Verify that the list of IP addresses includes the localhost IP address of the node that you are currently loggedon and the IP addresses of the other two nodes in the HA configuration.
• If the list of nodes and IP addresses is correct, enter Yes, then press Enter to update the list of nodes inthe UID Service configuration.
• If the list of IP addresses and nodes is not correct, press Enter to cancel updating the list of nodes, thencheck the configuration for each node and verify that there is connectivity between the nodes. Make surethat a firewall does not block connections between the nodes.
Next steps
• Log on to both replica nodes in turn, then repeat the previous steps to update the list of nodes in the HAconfiguration on each server.
• When you have updated the list of HA nodes on all the servers, enable HA for the DC Agent.
Enable HA for the DC AgentIf HA has been configured for the Forcepoint User ID Service, you can define a backup UID server to whichthe DC Agent sends information about users and IP address mappings if the primary UID server becomesunavailable.The primary UID server to which the DC Agent sends information can be either the master node or one of thereplica nodes in the HA configuration of the Forcepoint User ID Service. If a replica node receives informationfrom the DC Agent, it forwards the information to the current master node.
Note: In addition to defining a backup UID server to which the DC Agent can send information, youcan also install one or more additional DC Agent instances for scalability and for HA availability ofthe DC Agent.
Steps1) Open the Windows Services tool, locate the DC Agent service, then stop the DC Agent service.
2) Go to <installation folder>\config.The default installation folder is C:\Program Files\Forcepoint\DC Agent.
3) Open the transid.ini configuration file for editing in a text editor, such as Notepad.
Using the Forcepoint User ID Service in an HA configuration | 65
How to integrate Forcepoint User ID Service 1.3 with other Forcepoint products
4) Add the following line to define the backup server for the Forcepoint User ID Service:
BackupIFMapServer=
5) Enter the IP address of the node that functions as the Forcepoint User ID Service backup server and thelistening port of the UID Service as the values for the "BackupIFMapServer" line.The default listening port for the UID Service is 5002.For example, if the IP address of the node is 10.10.10.2 and the listening port is 5002, the"BackupIFMapServer" line looks like this:
BackupIFMapServer=http://10.10.10.2:5002
6) Save the changes.
7) In the Windows Services tool, restart the DC Agent service.
ResultIf the primary UID server becomes unresponsive, the DC Agent starts sending user and IP address information tothe backup server.
Next stepsTo maximize HA for the DC Agent, install and configure the DC Agent on a second server, then define a backupUID server in the DC Agent configuration.
CAUTION: Make sure that you configure the two DC Agents to use different nodes as the UIDbackup servers.
Using the Forcepoint User ID Service in an HA configuration | 66
CHAPTER 7
MaintenanceContents
• Upgrade the Forcepoint User ID Service and the DC Agent on page 67• Uninstall the Forcepoint User ID Service or the DC Agent on page 70
Upgrade the Forcepoint User ID Serviceand the DC Agent
We recommend that you upgrade all the components in the Forcepoint User ID Service (the UID Service, DAS,and the DC Agent for the Forcepoint User ID Service) when a new version of the Forcepoint User ID Servicebecomes available.
Obtain upgrade filesObtain the upgrade files for the Forcepoint User ID Service and the DC Agent for the Forcepoint User ID Service,then check the file integrity.
Steps1) Go to https://support.forcepoint.com/Downloads.
2) Enter your license code or log on using an existing user account.
3) Under Network Security, select the version of the Forcepoint User ID Service software and the DC Agentfor the Forcepoint User ID Service that you want to download, then download both installation packages.
Note: Make sure that you download installation packages for the same product version.
4) Look up the correct checksum at https://support.forcepoint.com.
5) Change to the directory that contains the files to be checked.
6) Generate a checksum of the file using the following command, where filename is the name of theinstallation file:
sha256sum filename
Maintenance | 67
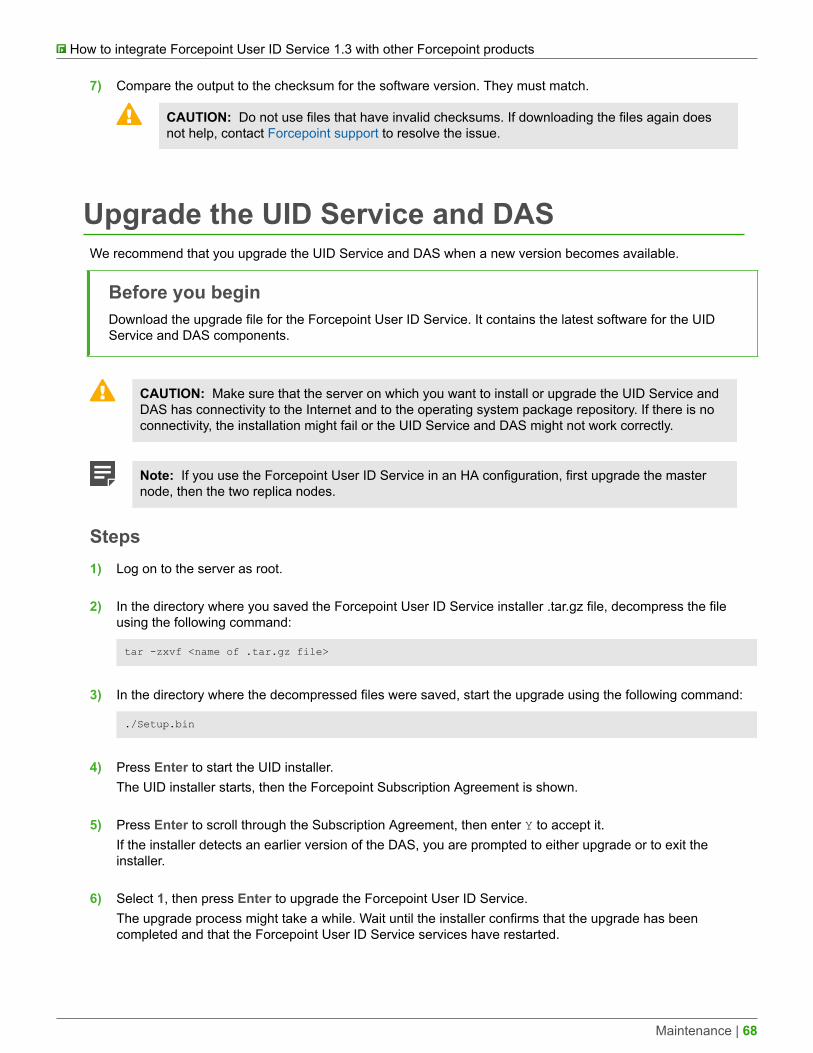
How to integrate Forcepoint User ID Service 1.3 with other Forcepoint products
7) Compare the output to the checksum for the software version. They must match.
CAUTION: Do not use files that have invalid checksums. If downloading the files again doesnot help, contact Forcepoint support to resolve the issue.
Upgrade the UID Service and DASWe recommend that you upgrade the UID Service and DAS when a new version becomes available.
Before you beginDownload the upgrade file for the Forcepoint User ID Service. It contains the latest software for the UIDService and DAS components.
CAUTION: Make sure that the server on which you want to install or upgrade the UID Service andDAS has connectivity to the Internet and to the operating system package repository. If there is noconnectivity, the installation might fail or the UID Service and DAS might not work correctly.
Note: If you use the Forcepoint User ID Service in an HA configuration, first upgrade the masternode, then the two replica nodes.
Steps1) Log on to the server as root.
2) In the directory where you saved the Forcepoint User ID Service installer .tar.gz file, decompress the fileusing the following command:
tar -zxvf <name of .tar.gz file>
3) In the directory where the decompressed files were saved, start the upgrade using the following command:
./Setup.bin
4) Press Enter to start the UID installer.The UID installer starts, then the Forcepoint Subscription Agreement is shown.
5) Press Enter to scroll through the Subscription Agreement, then enter Y to accept it.If the installer detects an earlier version of the DAS, you are prompted to either upgrade or to exit theinstaller.
6) Select 1, then press Enter to upgrade the Forcepoint User ID Service.The upgrade process might take a while. Wait until the installer confirms that the upgrade has beencompleted and that the Forcepoint User ID Service services have restarted.
Maintenance | 68
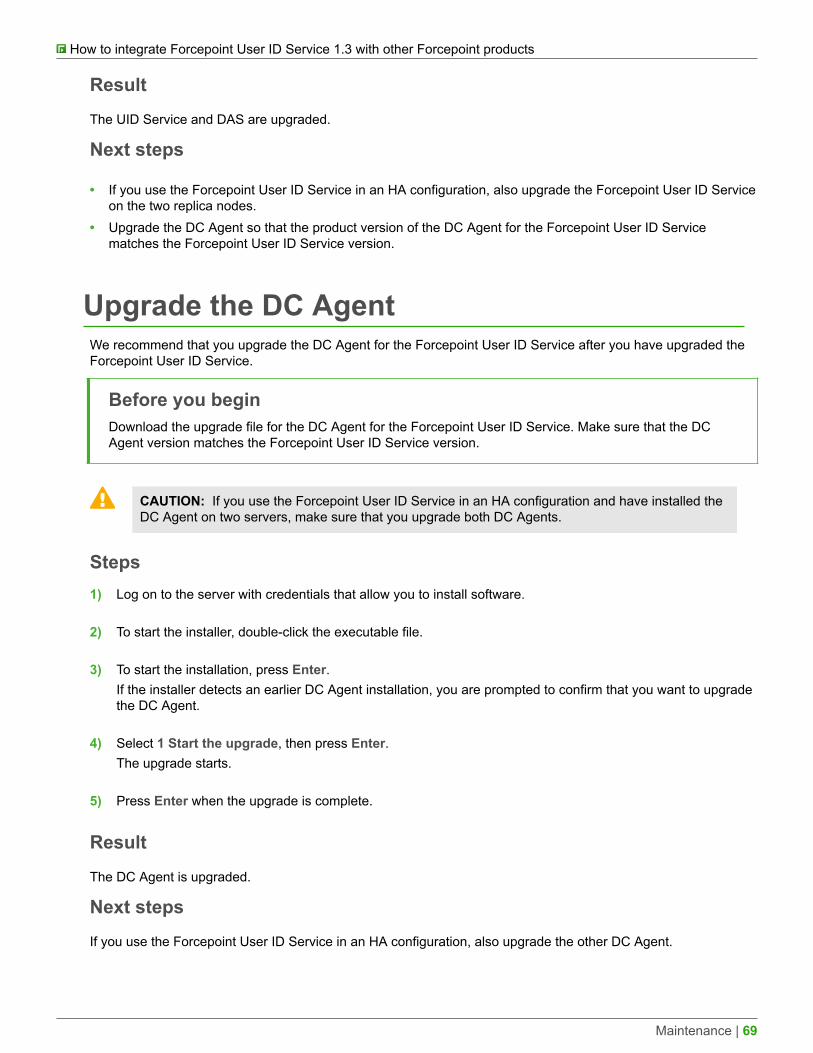
How to integrate Forcepoint User ID Service 1.3 with other Forcepoint products
ResultThe UID Service and DAS are upgraded.
Next steps
• If you use the Forcepoint User ID Service in an HA configuration, also upgrade the Forcepoint User ID Serviceon the two replica nodes.
• Upgrade the DC Agent so that the product version of the DC Agent for the Forcepoint User ID Servicematches the Forcepoint User ID Service version.
Upgrade the DC AgentWe recommend that you upgrade the DC Agent for the Forcepoint User ID Service after you have upgraded theForcepoint User ID Service.
Before you beginDownload the upgrade file for the DC Agent for the Forcepoint User ID Service. Make sure that the DCAgent version matches the Forcepoint User ID Service version.
CAUTION: If you use the Forcepoint User ID Service in an HA configuration and have installed theDC Agent on two servers, make sure that you upgrade both DC Agents.
Steps1) Log on to the server with credentials that allow you to install software.
2) To start the installer, double-click the executable file.
3) To start the installation, press Enter.If the installer detects an earlier DC Agent installation, you are prompted to confirm that you want to upgradethe DC Agent.
4) Select 1 Start the upgrade, then press Enter.The upgrade starts.
5) Press Enter when the upgrade is complete.
ResultThe DC Agent is upgraded.
Next stepsIf you use the Forcepoint User ID Service in an HA configuration, also upgrade the other DC Agent.
Maintenance | 69
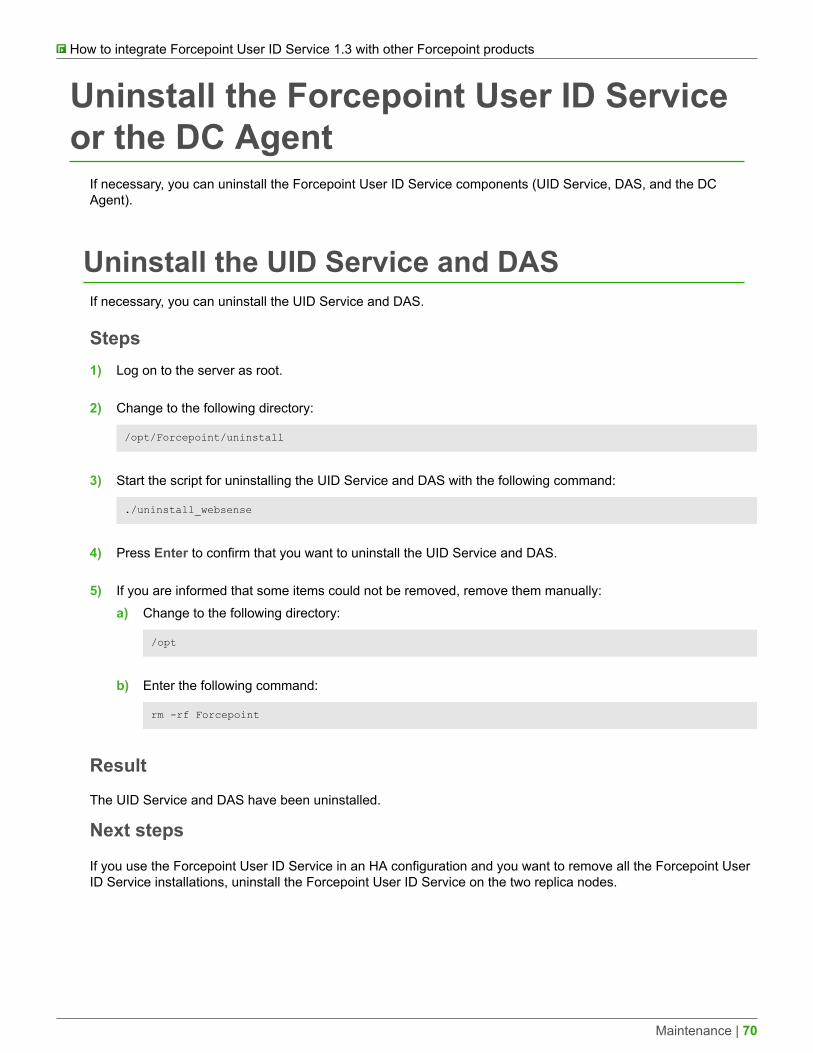
How to integrate Forcepoint User ID Service 1.3 with other Forcepoint products
Uninstall the Forcepoint User ID Serviceor the DC Agent
If necessary, you can uninstall the Forcepoint User ID Service components (UID Service, DAS, and the DCAgent).
Uninstall the UID Service and DASIf necessary, you can uninstall the UID Service and DAS.
Steps1) Log on to the server as root.
2) Change to the following directory:
/opt/Forcepoint/uninstall
3) Start the script for uninstalling the UID Service and DAS with the following command:
./uninstall_websense
4) Press Enter to confirm that you want to uninstall the UID Service and DAS.
5) If you are informed that some items could not be removed, remove them manually:a) Change to the following directory:
/opt
b) Enter the following command:
rm -rf Forcepoint
ResultThe UID Service and DAS have been uninstalled.
Next steps
If you use the Forcepoint User ID Service in an HA configuration and you want to remove all the Forcepoint UserID Service installations, uninstall the Forcepoint User ID Service on the two replica nodes.
Maintenance | 70
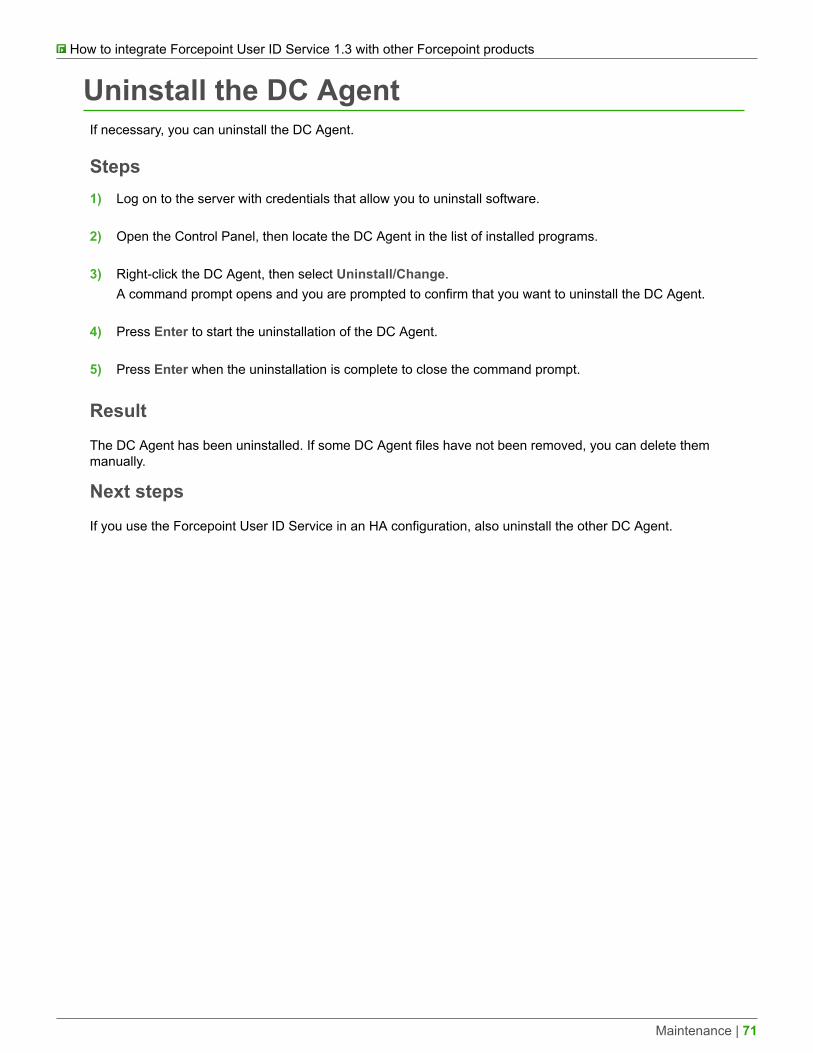
How to integrate Forcepoint User ID Service 1.3 with other Forcepoint products
Uninstall the DC AgentIf necessary, you can uninstall the DC Agent.
Steps1) Log on to the server with credentials that allow you to uninstall software.
2) Open the Control Panel, then locate the DC Agent in the list of installed programs.
3) Right-click the DC Agent, then select Uninstall/Change.A command prompt opens and you are prompted to confirm that you want to uninstall the DC Agent.
4) Press Enter to start the uninstallation of the DC Agent.
5) Press Enter when the uninstallation is complete to close the command prompt.
ResultThe DC Agent has been uninstalled. If some DC Agent files have not been removed, you can delete themmanually.
Next stepsIf you use the Forcepoint User ID Service in an HA configuration, also uninstall the other DC Agent.
Maintenance | 71

How to integrate Forcepoint User ID Service 1.3 with other Forcepoint products
Maintenance | 72
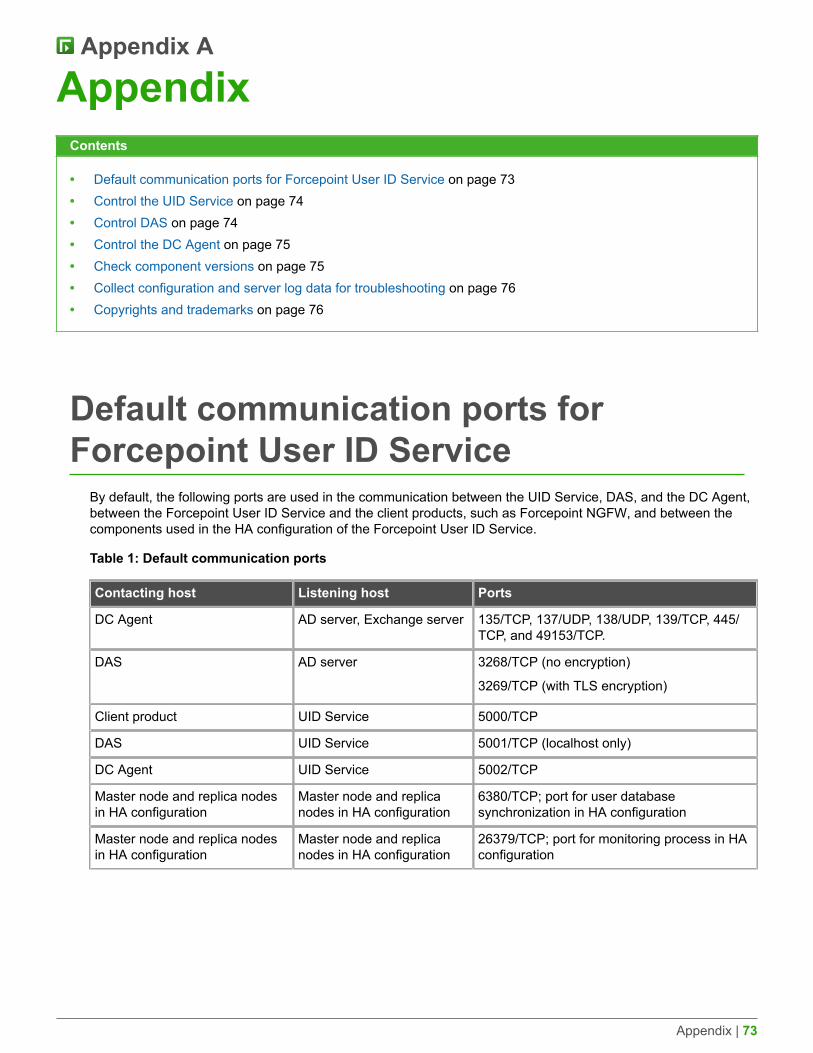
Appendix A
AppendixContents
• Default communication ports for Forcepoint User ID Service on page 73• Control the UID Service on page 74• Control DAS on page 74• Control the DC Agent on page 75• Check component versions on page 75• Collect configuration and server log data for troubleshooting on page 76• Copyrights and trademarks on page 76
Default communication ports forForcepoint User ID Service
By default, the following ports are used in the communication between the UID Service, DAS, and the DC Agent,between the Forcepoint User ID Service and the client products, such as Forcepoint NGFW, and between thecomponents used in the HA configuration of the Forcepoint User ID Service.
Table 1: Default communication ports
Contacting host Listening host Ports
DC Agent AD server, Exchange server 135/TCP, 137/UDP, 138/UDP, 139/TCP, 445/TCP, and 49153/TCP.
DAS AD server 3268/TCP (no encryption)
3269/TCP (with TLS encryption)
Client product UID Service 5000/TCP
DAS UID Service 5001/TCP (localhost only)
DC Agent UID Service 5002/TCP
Master node and replica nodesin HA configuration
Master node and replicanodes in HA configuration
6380/TCP; port for user databasesynchronization in HA configuration
Master node and replica nodesin HA configuration
Master node and replicanodes in HA configuration
26379/TCP; port for monitoring process in HAconfiguration
Appendix | 73

How to integrate Forcepoint User ID Service 1.3 with other Forcepoint products
Control the UID ServiceYou can start or stop the UID Service or check the status of the UID Service as needed.The name of the UID Service is emperor.uwsgi.service. uWSGI is the web server, which loads three services:• UID service (uid_uwsgi) runs on port 5000.• LDIF service (ldif_uwsgi) runs on port 5001 internally (on the localhost).• IFMAP service (ifmap_uwsgi) runs on port 5002.
The UID API listens for requests on port 5000. UID service, LDIF service, and IFMAP service are enabled torestart after the server has been rebooted.
Check the status of the servicesTo check the status of the services, enter the following command:
systemctl status emperor.uwsgi.service
When the UID service (uid_uwsgi), LDIF service (ldif_uwsgi), and IFMAP serverice (ifmap_uwsgi) are runningcorrectly, the services are shown as active and they are running on the ports listed above. Each service has fourprocesses running inside uWSGI.
Start the servicesTo start the services, enter the following command:
systemctl start emperor.uwsgi.service
Stop the servicesTo stop the services, enter the following command:
systemctl stop emperor.uwsgi.service
Check if ports for services are listeningTo check if the ports for the UID service, LDIF service, and IFMAP service are listening, enter the followingcommand:
netstat -na | grep 500[012]
• If the services do not respond, check the following log files for the services in each service's home directory:uid_service.log, ifmap_service.log, and ldif_service.log. Also check the uWSGI log file in /var/log/uwsgi.log.If you need to contact Forcepoint support, send the log data in uid_service.log, ifmap_service.log,ldif_service.log, and /var/log/uwsgi.log to support.
• If the services work locally but they do not respond externally, a firewall might be blocking the connections.Disable the firewall to check if this fixes the issue, then adjust the firewall's rules to allow connections toports 5000 and 5002. For more information, see the section about the Forcepoint User ID Service defaultcommunication ports.
Control DASYou can view logs for DAS. You can also start, stop, and restart the DAS service or check the status of the DASservice as needed.DAS logsThe DAS log file is called WebsenseDAService.log. Older log files have the same name with a numberappended. ".1" is the most recent log file.
Appendix | 74
How to integrate Forcepoint User ID Service 1.3 with other Forcepoint products
Check if DAS is runningDAS posts user attributes that have been retrieved from AD using LDAP on UID Server port 5001. To check if theDAS process is running, enter the following command:
ps auwwx | grep DAS
Start the DAS serviceTo start the DAS service, enter the following command:
/opt/Forcepoint/WebsenseAdmin start
Stop the DAS serviceTo stop the DAS service, enter the following command:
/opt/Forcepoint/WebsenseAdmin stop
Restart the DAS serviceTo restart the DAS service, enter the following command:
/opt/Forcepoint/WebsenseAdmin restart
Control the DC AgentYou can view logs for the DC Agent. You can also start, stop, and restart the DC Agent service as needed.DC Agent logs and error codesThe DC Agent log data is stored in a file called DCAgent.log.
The error codes for the DC Agent are standard Windows error codes.• 5 - ACCESS DENIED — The DC Agent service permissions are insufficient to perform the required actions.• 259 - NO MORE ITEMS — Because SMBv1 has been disabled, certain Windows APIs might get this error.
You might need to create the dc_config.txt file.
Check if the DC Agent process is runningTo check if the DC Agent process is running, open the Windows Task Manager. The DC Agent communicateswith the UID Service by posting user details on port 5002.
Start the DC Agent serviceTo start the DC Agent service, open the Windows Services tool, locate the DC Agent service, then start theservice.
Stop the DC Agent serviceTo stop the DC Agent service, open the Windows Services tool, locate the DC Agent service, then stop theservice.
Check component versionsIf necessary, you can check the component version for the UID Service, DAS, and the DC Agent.Check the UID Service versionTo check the UID version, enter the following command:
rpm -qa | grep UID_Server
Appendix | 75
How to integrate Forcepoint User ID Service 1.3 with other Forcepoint products
Check the DAS versionTo check the DAS version, enter the following commands:
export LD_LIBRARY_PATH=$LD_LIBRARY_PATH:/opt/Forcepoint/bin/opt/Forcepoint/bin/DAS -v
Check the DC Agent versionTo check the DC Agent version, open the command prompt, go to the DC Agent installation folder, then enter thefollowing command:
XidDcAgentS.exe -v
By default, the installation directory is C:\Program Files\Forcepoint\DC Agent.
Collect configuration and server log datafor troubleshooting
If instructed by Forcepoint support, you can run a script that collects configuration and server log data fortroubleshooting.
Steps1) Log on as root to the server on which the Forcepoint User ID Service is installed.
2) Change to the following directory:
/opt/Forcepoint/bin/UID_Server/
3) Enter the following command:
./collect_logs.sh
ResultA file named uid_logs-<timestamp>.tar.gz is saved in the current directory.
Copyrights and trademarksFor information about copyrights and trademarks, see the document about Legal Notices and Acknowledgmentsin /opt/Forcepoint/bin/UID_Server.
Appendix | 76

© 2019 Forcepoint