using every-day things to create fun experiments in your...
TRANSCRIPT
sCIEnCE aRoUnD uS... Using Every-Day Things to create
Fun Experiments in Your School’s Science Club
Teacher’s Guide
2
All of Science
is Nothing More
than the Refinement
of Everyday Thinking.
- Albert Einstein
3
TABLE OF CONTENTS
INTRODUCTION 5
WORKSHEETS 6
How to conduct a Scientific investigation
The Scientific Method 7
Hoe om ‘n Wetenskaplike ondersoek uit te voer
Die Wetenskaplike Metode 18
TERM 1 EXPERIMENTS 30
Life and Living
Bendy Chicken Bone 31
Invisible Citrus Ink 32
My Body – Testing my Dominant Side 33
TERM 2 EXPERIMENTS 35
Matter and Materials
Walking Water 36
Dancing Raisins 37
Cutting Ice Cubes 39
Moving Molecules 40
Making Sherbet 41
Corn starch Ooze 42
Steel Wool Science 44
Cola Explosion 45
Cleaning Coins 46
Flash Experiments 48
o Transparent Egg
o Bouncy Egg
Magic Tomato Sauce 49
Make Yummy Ice-cream 51
Colourful Milk 52
Make Fizzy Lemonade 53
Make a Lava Jar 54

4
Magic Balloons 56
Pepper Escape 58
Pop-Safe Balloon 60
Does “Soft” Water foam better? 62
The Colour of Light 64
Dancing Popcorn 65
Rising Water 66
Fizz Inflator 68
TERM 3 EXPERIMENTS 69
Energy and Electricity
Flash Experiments 70
o Singing Balloon
o Singing Wine Glass
o Balancing a Ball with a Hair Dryer
Make a Balloon Rocket 71
How long can my Candle burn? 72
Make a Paper Helicopter 73
Egg in a Bottle 74
Fireproof Balloon 76
Roll a Cooldrink Can 77
Bouncy Snake Surprise 79
Crushed Cooldrink Can 80
How to make an Electric Circuit 81
Candle See-Saw 82
Electro-Magnet 83
TERM 4 EXPERIMENTS 84
Planet Earth and Beyond
Make a Balloon Rocket 85
How Gravity Works 86
Ocean in a Bottle 87
Magic Water 88
REFERENCES 89
5
INTRODUCTION
This collection of simple experiments is intended for use by the teachers in their
natural science classes and / or in the school’s science club. The experiments are
directed at the grade 4 to 7 grades, but the learners in the other grades will also gain
from them.
The experiments make use of every-day objects and substances that can be found
around the home and school and it can easily be demonstrated in the class context.
The aim of this booklet is to stimulate the learners’ interest in the Natural Sciences
and moreover, for them to experience science in a fun way.
All of the experiments are linked to the Curriculum and Assessment Policy Statement
for Natural Sciences and Technology (Intermediate Phase) and Natural Sciences
(Senior Phase). These activities are intended to supplement projects and activities
recommended by CAPS and in the various Natural Sciences text books that are used in
these phases.

6
WORKSHEETS:
HOW TO CONDUCT A SCIENTIFIC
INVESTIGATION
HOE OM ‘n WETENSKAPLIKE
ONDERSOEK UIT TE VOER

7
THE SCIENTIFIC METHOD
1. Ask a Question.
2. Research your Topic.
3. Formulate your Hypothesis.
4. Test your Hypothesis.
5. Analyse your Data.
6. Write your Report.
7. Display your Project.

8
1) Ask a Question.
Take a look at the world:
Is there something that you find interesting?
Is there something that you are curious about?
Make observations and ask questions:
What would happen if...
I wonder why...
Why...
List your questions:
Select a question to investigate.
Circle this question on your worksheet.

9
2) Research your Topic.
Find information about your topic:
Search the internet.
Ask an expert.
Visit a library.
Write down the information that you find:
(use a journal / rough work book)
Was your question answered? _______
Write down your final question:

10
3) Formulate your Hypothesis.
A Hypothesis is an educated guess. Write your original question here:
Think of a way to test your question and write it down:
Form and write down your hypothesis here:

11
4) Test your Hypothesis.
What is the Independent Variable?
(What you will CHANGE)
What is the Dependent Variable?
(What you will MEASURE)
What is the Controlled Variable?
(What stays the SAME)
Write down the processes (steps) that you will follow in
the investigation:
1.
2.
3.
4.
5.

12
5) Analyse the Data.
Record your findings (What happened?):
Are you able to draw a graph of the information?
Was your hypothesis correct? Provide reasons:

13
6) Write your Report.
Title page: Write the project name and your name.
Problem Statement: State the question you asked / the problem you
investigated / the aim of your project.
Hypothesis: State your Hypothesis.

14
Introduction: Explain how you began your project. Use your
background research. Give keywords and relevant research
questions. Explain where and how you gathered information.
Procedure:
- Write in the 3rd person
- Give variables
- Explain materials and / or special location and /or special equipment
required
- Use numbering
- Be logical and concise
- Give each step and important detail
- Give relevant diagrams and / or photographs

15
Results:
- Observations
- Data and Results in tables
- Graphs, pie-charts, bar charts, etc.
- Analysis of Results
- Discuss and interpret your results
- Be honest
- Explain errors and / or deviations
Conclusions:
- State what you have learned
- Give ideas for future research
- Bibliography
- List all your sources of information and references that you
consulted
Acknowledgements
- Thank the people and / or organisations that helped you.
What Do I Need To Take Along To The Science Expo?
- Journal (rough work)
- Project File
- Summary of your project on A4 paper
- Science Project Display Board

16
7) Display your Project.
Display your information on a Project Display Board
All information must be printed on A4 sheets. All sheets must be
pasted in either landscape or portrait format.
Aim
Hypothesis
Variables
PROJECT TITLE
Name and Grade
Materials and Procedures
Data Charts / Photo’s /
Models
Results
(interpretation)
Conclusion
Further Research
Acknowledgements

17
Aim
Hypothesis
Variables
PROJECT TITLE
Name and Grade
Materials and Procedures
Data Charts / Photo’s / Models
Results
Conclusion
Further Research
Acknowledgements

18
DIE WETENSKAPLIKE METODE
1. Stel ‘n vraag.
2. Doen navorsing oor jou
Onderwerp.
3. Formuleer jou Hipotese.
4. Toets jou Hipotese.
5. Analiseer jou Data.
6. Skryf jou Verslag.
7. Tentoonstelling van jou
Projek.

19
?
1) Stel ‘n Vraag.
Kyk na die wêreld:
Is daar iets wat jy interessant vind?
Is daar iets waaroor jy nuuskierig is?
Maak observasies en stel vrae:
Wat sal gebeur as...
Ek wonder waarom ...
Waarom...
Lys jou vrae:
Kies ‘n ondersoek vraag:
Omkring hierdie vraag op jou werksblad.

20
2) Doen Navorsing.
Vind inligting oor jou onderwerp:
Soek inligting op die internet.
Vra ‘n deskundige (ekspert).
Besoek ‘n biblioteek.
Skryf die inligting wat jy vind neer:
(Gebruik ‘n joernaal / ‘n rowwe werkboek)
Was jou vraag beantwoord? ________________
Skryf jou finale vraag hier neer :

21
3) Formuleer jou Hipotese.
‘n Hipotese is ‘n ingeligte raaiskoot.
Skryf jou oorspronklike vraag hier:
Dink aan ‘n manier om jou vraag te toets en skryf dit neer:
Formuleer en skryf jou hipotese hier:

22
4) Toets jou Hipotese.
Wat is die Onafhanklike Veranderlike?
(Wat sal jy VERANDER?)
Wat is die Afhanklike Veranderlike?
(Wat sal jy AFMEET?)
Wat is die Kontrolerende Veranderlike?
(Wat bly DIESELFDE?)
Skryf die prosesse (stappe) neer wat jy in die ondersoek sal volg:
1.
2.
3.
4.
5.

23
5) Analiseer jou Data.
Rekord van my bevindings (Wat het gebeur?):

24
Is jy in staat om die inligting op ‘n grafiek te teken?
Was jou hipotese korrek? Verskaf redes:

25
6) Skryf jou Verslag.
Titel bladsy: Skryf jou projek naam en jou eie naam neer.
Probleem Stelling: Stel die vraag wat jy gevra het / die probleem
wat jy ondersoek het / die doel van jou projek.
Hipotese: Vermeld jou Hipotese.
Inleiding: Verduidelik hoe jy jou projek begin het. Gebruik jou
agtergrondse navorsing. Verskaf sleutelwoorde en relevante vrae.
Verduidelik waar en hoe jy inligting ingesamel het.

26
Prosedure:
- Skryf in die 3de persoon
- Gee die veranderlikes
- Verduidelik die materiale en / of spesiale aanwysings en /of spesiale
toerusting wat benodig word
- Nommer die stappe
- Wees logies en saaklik
- Gee elke stap en verskaf belangrike detail (besonderhede)
- Sluit relevante diagramme en / of foto’s in

27
Resultate:
- Observasies (waarnemings)
- Data en Resultate in tabelle
- Grafieke: sirkel grafiek, kolom grafiek, lyngrafiek, ens.
- Analise van Resultate
- Bespreek en interpreteerjou resultate
- Wees eerlik
- Verduidelik foute en / of afwykings
Gevolgtrekkings:
- Verklaar wat jy geleer het
- Gee navorsingsidees vir die toekoms
- Bibliografie
- Lys al jou inligtingsbronne en verwysings wat jy geraadpleeg het
Erkennings:
- Bedank die mense en / of organisasies wat jou gehelp het.
Wat behoort ek saam te neem na die Wetenskap Ekspo?
- Joernaal (rowwe werk)
- Projek Lêer
- Opsomming van jou projek op A4 papier
- Wetenskap Projek Tentoonstellings Aanplakbord

28
7) Tentoonstelling van
jou Projek.
Vertoon jou inligting op die Projek Tentoonstellings Aanplakbord.
Alle inligting moet op A4 papier gedruk word.
Al die A4 papiere moet konsekwent in of portret- of landskap
formaat geplak word.
Verwys na voorbeeld op die volgende blad.
Doelstelling
Hipotese
Veranderlikes
PROJEK TITEL
Naam en Graad
Materiale en Metodes /
Prosedures
Grafieke / Foto’s /
Modelle
Resultate
(Interpretasie)
Gevolgtrekking en
Verdere Navorsing
Erkennings

29
Doelstelling
Hipotese
Veranderlikes
PROJEK TITEL
Naam en Graad
Materiale en Metodes / Prosedures
Grafieke / Foto’s / Modelle
Resultate (Interpretasie)
Gevolgtrekking en Verdere Navorsing
Erkennings

30
TERM 1: EXPERIMENTS
LIFE AND LIVING

31
This experiment can be linked to the following Science topics:
Grade 5: Animal skeletons
Grade 6: Nutrients in food
Apparatus / Ingredients
A glass jar with lid large enough to fit a chicken bone
A chicken bone - a leg or "drumstick" bone works best
Vinegar
Method
1. Rinse off the bone under running water to remove any meat or fat.
2. Gently bend the bone to feel how bendable it is.
3. Place the bone in the jar and cover it with vinegar.
4. Cover the jar with a lid or cling wrap. Leave the jar for 3 days.
5. Remove the bone after 3 days. It should feel different. Now rinse it off and try
bending it again. Is it really a rubber bone?
What Happened and How does it Work?
So what happened? What is so special about vinegar that it can make a hard bone squishy?
Vinegar is considered a mild acid, but it is strong enough to dissolve away the calcium in the
bone. Once the calcium is dissolved, there is nothing to keep the bone hard - all that is left is
the soft bone tissue. Now you know why your mom is always trying to get you to drink milk -
the calcium in milk goes to our bones to make our bones stronger. With some effort you can
really get the bone to bend.
How can I change this Demonstration into an Experiment?
The project above is a DEMONSTRATION. To make it a true experiment, you can try to
answer these questions:
1. Does the length of time that the bone is in vinegar affect how much the bone bends?
2. Do smaller size bones become "bendy" sooner?
3. Do different types of vinegar affect how bendy bones become?
Science Club Experiment
Bendy Chicken Bone
32
This experiment can be linked to the following Science topic:
Grade 6: Nutrients in food
Ingredients / Tools
Lemon or Lime Juice
Paper
Paint brush
Iron
Method
1. Squeeze lemon or lime into a bowl.
2. Paint the juice onto your paper with a paint brush.
3. Wait for the paper to dry.
4. Heat the paper with an iron, hair dryer, light bulb or other heat source. Be careful that
you do not hold it there too long, as it could burn the paper.
What Happened and How does it Work?
- Lemon juice is an organic substance that oxidizes and turns brown when heated.
- Diluting the lemon juice in water makes it very hard to notice when you apply it on
paper.
- No one will be aware of its presence until it is heated and the secret message is
revealed.
- Other substances which also work in the same way include orange juice, honey, milk,
onion juice, vinegar and wine.
- Invisible ink can also be made by using chemical reactions or by viewing certain liquids
under ultraviolet (UV) light.
Notes
Experiment with other liquids: milk, orange juice, white wine, vinegar and apple juice are good
bets.
Sources: http://tinkerlab.com/invisible-ink-a-citrus-painting-experiment/
http://www.sciencekids.co.nz/experiments/invisibleink.html
Science Club Experiment
Invisible Citrus Ink

33
This experiment can be linked to the following Science topic:
Grade 7: Biodiversity
This experiment will teach you more about how your body and brain work together. Test your
dominant side by completing a series of challenges.
Ingredients / Tools:
A pen or pencil
Paper or a notepad to write your findings on
An empty tube (an old paper towel tube is good)
A cup of water
A small ball (or something soft that you can throw)
Instructions:
1. Write ‘left’ or ‘right’ next to each task depending on what side you used/favoured.
2. When you have finished all the challenges review your results and make your own
conclusions about which is your dominant eye, hand and foot.
Eye tests:
1. Which eye do you use to wink?
2. Which eye do you use to look through the empty tube?
3. Extend your arms in front of your body. Make a triangle shape using your fore fingers
and thumbs. Bring your hands together to make the triangle smaller (about the size of
a coin is good). Find a small object in the room and focus on it through the hole in your
hands (using both eyes). Try closing just your left eye and then just your right [If
your view of the object changed when you closed your left eye mark down ‘left’ and if
it changed when you closed your right eye mark down ‘right’].
Hand/Arm tests:
1. Which hand do you use to write?
2. Pick up the cup of water, which hand did you use?
3. Throw the ball, which arm did you use?
Science Club Experiment
My Body – Testing My Dominant Side

34
Foot/Leg tests:
1. Run forward and jump off one leg. Which leg did you jump off?
2. Drop the ball on the ground and kick it. Which foot did you use?
What is happening and how does it work?
What side do you favour? Are you left handed or right handed? Left footed or right footed?
Is your right eye dominant or is it your left eye?
Around 90% of the world’s population is right handed. Why most people favour the right side
is not completely understood by scientists. Some think that the reason is related to which
side of your brain you use for language. The right side of your body is controlled by the left
side of your brain and in around 90% of people the left side of the brain also controls
language.
Others think the reason might have more to do with culture. The word ‘right’ is associated
being correct and doing the right thing while the word ‘left’ originally meant ‘weak’. Favouring
the right hand may have become a social development as more children were taught
important skills by right handed people and various tools were designed to be used with the
right hand.
Around 80% of people are right footed and 70% favour their right eye. These percentages
are lower than those who are right handed and this could be because your body has more
freedom of choice in choosing its favoured foot and eye than that of its favoured hand. In
other words you are more likely to be trained to use your right hand than your right foot and
even more so than your right eye.
It is not strange to find people who favour the opposite hand and foot (e.g. left hand and
right foot) and some people are lucky enough to be ambidextrous, meaning they can use their
left and right sides with equal skill.
Try testing others and coming to your own conclusions about what side the human body
favours and why.
Extra: Are you more likely to be left handed if one of your parents is left handed? What are
some of the possible disadvantages for left handed people? (E.g. tools, writing materials,
etc.). Do left handed people have an advantage in sports?
Is it better to be left handed in some sports than others? What do you think?
Source: http://www.sciencekids.co.nz/experiments/dominantside.html

35
TERM 2: EXPERIMENTS
MATTER AND MATERIALS

36
This experiment can be linked to the following Science topics:
Grade 4: Materials around us: solids, liquids and gases
Grade 6: Solids, liquids and gases
Grade 7: Physical properties of materials
Ingredients / Tools:
A glass of water
An empty glass
Some paper towels
Method
1. Twist a couple of pieces of paper towel together until it forms something that looks a
little like a piece of rope. This will be the 'wick' that will absorb and transfer the
water (a bit like the wick on a candle transferring the wax to the flame).
2. Place one end of the paper towel into the glass filled with water and the other end into
the empty glass.
3. Watch what happens (this experiment requires a little bit of patience).
What Happened and How does it Work?
- Your paper towel rope (or wick) starts getting wet.
- After a few minutes you will notice that the empty glass is starting to fill with water.
- It keeps filling until there is an even amount of water in each glass.
- How does this happen?
Science Club Experiment
Walking Water

37
This experiment can be linked to the following Science topics:
Grade 4: Materials around us – changing states of matter
Grade 6: Solids, liquids and gases
Grade 7: Properties of materials
Carbon dioxide gas dissolved in soft drinks gives them their fizz. You can use the carbon
dioxide fizz from a soft drink to make raisins dance.
Apparatus / Ingredients
A can of colourless soda (such as 7-Up or Sprite)
A tall, clear glass or plastic cup
Several raisins (fresh raisins work the best; e.g. sultanas; currants and seedless raisins)
Method
1. Pour the can of soda into the tall glass. Notice the bubbles coming up from the bottom of
the glass. The bubbles are carbon dioxide gas that is being released from the liquid.
2. Drop 6 or 7 raisins into the glass. Watch the raisins for a few seconds. Describe what is
happening to the raisins. Do they sink or float? Keep watching to see what happens in the
next several minutes?
What Happened and How does it Work?
Raisins are denser than the liquid in the soda, so initially they sink to the bottom of the
glass. The carbonated soft drink releases carbon dioxide bubbles. When these bubbles stick
to the rough surface of a raisin, the raisin is lifted because of the increase in buoyancy. The
bubbles pop when the raisin reaches the surface and the carbon dioxide gas escapes into the
air. This causes the raisin to lose buoyancy and it sinks. This rising and sinking of the raisins
continues until most of the carbon dioxide has escaped and the soda goes flat. Furthermore,
with time the raisin gets soggy and becomes too heavy to rise to the surface.
Another way to do this experiment is to generate the carbon dioxide gas using the reaction
of baking soda and vinegar. Fill your glass about ½ full with water. Add one teaspoon of
baking soda and stir until it is dissolved in the water. Add 6 or 7 raisins to the glass.
SLOWLY pour in vinegar until the glass is about ¾ full. The vinegar and baking soda react to
form carbon dioxide bubbles and the raisins will dance just as in the soft drink!
Science Club Experiment
Dancing Raisins

38
How do you think you can change this Demonstration into an Experiment?
- You might want to try other objects to see if they exhibit this behaviour.
- Any object which has a density that is just slightly greater than water’s and has a
rough surface to which the gas bubbles can attach should be able to dance in the
carbonated water.
- Some of the more common dancing substances are mothballs and pieces of uncooked
pasta.
- Try putting other objects in the carbonated water.
- Can you find other substances that dance?
- Carbonated beverages are prepared by putting the beverage into a can under high
pressure of carbon dioxide gas.
- This high pressure causes the carbon dioxide gas to dissolve in the liquid.
- When you open a can of soda, the noise you hear is produced by the carbon dioxide gas
as it rushes out of the can.
- When the can is opened, the decreased pressure allows some of the carbon dioxide
gas that has dissolved in the liquid to escape.
- This is what makes the bubbles in a soft drink.

39
This experiment can be linked to the following Science topics:
Grade 4: Materials around us – changing states of matter
Grade 6: Solids, liquids and gases
Grade 7: Properties of materials
Apparatus / Ingredients
One ice cube
A piece of fishing line with a weight (the heavier the better) tied to each end
A container
A tray or large cloth to work over
Method
1. Turn the container upside down and put it on the tray.
2. Place the ice cube on top of the upside down container.
3. Rest the fishing line over the ice cube so that the weights are left dangling
over the side of the container.
4. Watch it for around 5 minutes.
What happened and how does it work?
- The pressure from the two weights pulls the string through the ice cube by
melting the ice directly under the fishing line.
- This is similar to ice skating where the blades of a skater melt the ice directly
underneath, allowing the skater to move smoothly on a thin layer of water.
Science Club Experiment
Cutting Ice Cubes

40
This experiment can be linked to the following Science topics:
Grade 4: Materials around us – changing states of matter
Grade 6: Solids, liquids and gases
Grade 7: Properties of materials
Ingredients / Tools:
A clear glass filled with hot water
A clear glass filled with cold water
Food colouring
An eye dropper
Instructions:
1. Fill the glasses with the same amount of water, one cold and one hot.
2. Put one drop of food colouring into both glasses as quickly as possible.
3. Watch what happens to the food colouring.
What happened and how does it work?
- If you watch closely you will notice that the food colouring spreads faster throughout
the hot water than in the cold water.
- The molecules in the hot water move at a faster rate, spreading the food colouring
faster than the cold water molecules which move slower.
Science Club Experiment
Moving Molecules

41
This experiment can be linked to the following Science topics:
Grade 5: Processing materials
Grade 6: Solids, liquids and gases / Mixtures
Grade 7: Properties of materials
Apparatus / Ingredients
6 teaspoons citric acid crystals - get them from the baking section of the
supermarket or from chemists. Make sure they are suitable for adding to food (some
citric acid crystals are not edible).
3 tablespoons bicarbonate of soda
4 tablespoons icing sugar
Mixing bowl
Spoon
Method
Ask an adult to help you find citric acid crystals.
1. Mix the citric acid crystals and bicarbonate of soda.
2. Bash the mixture to a fine powder with a spoon.
3. Mix the icing sugar with the citric acid crystals and bicarbonate of soda.
Try a bit of sherbet! What does it taste like? Does it feel fizzy on your tongue?
What Happened and How does it Work?
- When you put the sherbet on your tongue, the saliva in your mouth causes the citric
acid crystals to dissolve.
- The citric acid reacts with the bicarbonate of soda and produces carbon dioxide gas.
The bubbles of carbon dioxide make the fizzy feeling on your tongue.
- Icing sugar is needed to make the mixture taste sweet and nice. Do not eat too much
sherbet too quickly. You could end up with a lot of carbon dioxide in your stomach,
which could be uncomfortable!
- Remember to brush your teeth after eating sweets!
Science Club Experiment
Making Sherbet

42
This experiment can be linked to the following Science topics:
Grade 5: Processing materials
Grade 6: Mixtures
Grade 7: Properties of materials
Apparatus / Ingredients
Newspaper
Measuring cups
1 cup of dry corn starch
Large bowl or pan
Food colouring (if you want)
½ cup of water
Method
1. Put newspaper down on your counter or table top.
2. Put the corn starch into the bowl. Add a drop or two of food colouring. (Use whatever
colours you like). Add water slowly, mixing the corn starch and water with your
fingers until all the powder is wet.
3. Keep adding water until the Ooze feels like a liquid when you are mixing it slowly. Then
try tapping on the surface with your finger or a spoon. When the Ooze is just right, it
will not splash--it will feel solid. Add a little more water if your Ooze is too powdery.
Add more corn starch if it is too wet.
4. Play around with your Ooze. Pick up a handful and squeeze it. Stop squeezing and it will
drip through your fingers.
5. Rest your fingers on the surface of the Ooze. Let them sink down to the bottom of
the bowl. Then try to pull them out fast. What happens?
6. Take a blob and roll it between your hands to make a ball. Then stop rolling. The Ooze
will trickle away and drip from your fingers.
7. Put a small plastic toy on the surface. Does it stay there or does it sink?
Science Club Experiment
Corn starch Ooze

43
What Happened and How does it Work?
- Tomato Sauce (Ketchup), like Ooze, is a non-Newtonian fluid.
- Physicists say that the best way to get ketchup to flow is to turn the bottle over and
be patient.
- Smacking the bottom of the bottle actually slows the ketchup down!
- Your Ooze is made up of tiny, solid particles of corn starch suspended in water.
Chemists call this type of mixture a colloid.
- As you found out when you experimented with your Ooze, this colloid behaves
strangely.
- When you bang on it with a spoon or quickly squeeze a handful of Ooze, it freezes in
place, acting like a solid.
- The harder you push, the thicker the Ooze becomes.
- But when you open your hand and let your Ooze ooze, it drips like a liquid.
- Try to stir the Ooze quickly with a finger and it will resist your movement. Stir it
slowly, and it will easily flow around your finger.
- Smack water with a spoon and it splashes.
- Smack Ooze with a spoon and it acts like a solid.
- Most liquids do not act like that.
- If you stir a cup of water with your finger, the water moves out of the way easily--and
it does not matter whether you stir it quickly or slowly.
- Your finger is applying what a physicist would call a sideways shearing force to the
water.
- In response, the water shears or moves out of the way.
- The behaviour of Ooze relates to its viscosity or resistance to flow.
- Water's viscosity does not change when you apply a shearing force--but the viscosity
of your Ooze does.
- Back in the 1700’s, Isaac Newton identified the properties of an ideal liquid.
- Water and other liquids that have the properties that Newton identifies are call
Newtonian fluids. Your Ooze does not act like Newton's ideal fluid. It is a non-
Newtonian fluid.
- There are many non-Newtonian fluids.
- They do not all behave like your Ooze, but each one is weird in its own way. Ketchup,
for example, is a non-Newtonian fluid. (The scientific term for this type of non-
Newtonian fluid is thixotropic. That comes from the Greek words thixis, which means
"the act of handling" and trope, meaning "change").
- Quicksand is a non-Newtonian fluid that acts more like your Ooze--it gets more
viscous when you apply a shearing force.
- If you ever find yourself sinking in a pool of quicksand (or a vat of corn starch and
water), try swimming towards the shore very slowly.
- The slower you move, the less the quicksand or corn starch will resist your movement.
Source: https://www.exploratorium.edu/science_explorer/ooze.html

44
This experiment can be linked to the following Science topic:
Grade 7: Acids, bases and neutrals
Apparatus / Ingredients
Steel wool
Vinegar
Two beakers
Paper or a lid (something to cover the beaker to keep the heat in)
Thermometer
Method
1. Place the steel wool in a beaker.
2. Pour vinegar onto the steel wool and allow it to soak in the vinegar for about one
minute.
3. Remove the steel wool and drain any excess vinegar.
4. Wrap the steel wool around the base of the thermometer and place them both in the
second beaker.
5. Cover the beaker with paper or a lid to keep the heat in (make sure you can still read
the temperature on the thermometer, having a small hole in the paper or lid for the
thermometer to go through is a good idea).
6. Check the initial temperature and then monitor it for around five minutes.
What happened and how does it work?
- The temperature inside the beaker should gradually rise; you might even notice the
beaker getting foggy.
- When you soak the steel wool in vinegar it removes the protective coating of the steel
wool and allows the iron in the steel to rust.
- Rusting (or oxidation) is a chemical reaction between iron and oxygen; this chemical
reaction creates heat energy which increases the temperature inside the beaker.
- This experiment is an example of an exothermic reaction [a chemical reaction that
releases energy in the form of heat].
Science Club Experiment
Steel Wool Science

45
This experiment can be linked to the following Science topics:
- Grade 4: Materials around us: Solids, liquids and gases
- Grade 6: Solids, liquids and gases
- Grade 7: Properties of materials
Ingredients and Tools
1 or 2 litres of Cola Soft Drink
1 or 2 Rolls of chewable round Menthol sweets
1 tube or use a rolled paper as a tube
Method
1. Use the rolled up paper to pour the Mentos candy into the Cola and see what happens.
Science Club Experiment
Cola Explosion

46
This experiment can be linked to the following Science topics:
- Grade 4: Properties of materials
- Grade 5: Metals and non-metals
- Grade 7: Properties of materials / Acids, bases and neutrals
Apparatus / Ingredients
A few old (not shiny) coins
¼ cup white vinegar
1 teaspoon salt
A glass or plastic bowl (not metal)
Paper towels or serviettes
Method
1. Pour the vinegar into the bowl and add the salt - stir it up.
2. Put about 5 coins into the bowl and slowly count to 10.
3. Take out the coins and rinse them off in some water.
What Happened and How does it Work?
The vinegar is an acid and the acid in the vinegar reacts with the salt to remove what
chemists call “copper oxide” which was making your coins dull.
Let us try another experiment:
Add more coins to the bowl for 10 seconds, but this time, do not rinse them off. Place them on a
paper towel to dry off. In time the coins will turn greenish-blue as a chemical called “malachite”
forms on your coins. But wait, you are still not done yet!
Place one or two nuts and bolts in the vinegar and watch - they may become COPPER in colour! The
vinegar removed some of the copper from the coins. If there is enough copper in the vinegar, the
copper will become attracted to the metal in the nuts and bolts and they will take on a new copper
colour.
How can I change this Demonstration into an Experiment?
The project above is a DEMONSTRATION. To make it a true experiment, you can try to answer
these questions:
1. Will other acids (like lemon juice or orange juice) work as well?
2. Does this cleaning chemistry work on other coins?
3. Do other amounts of salt make a difference in the chemistry of the experiment?
Science Club Experiment
Cleaning Coins

47
Transparent Egg
This experiment can be linked to the following Science topic:
Grade 7: Properties of materials / Acids, bases and neutrals
Place a raw egg in a jar and cover it with vinegar. You will notice the reaction of the egg
shell with calcium carbonate and vinegar. It will bubble for the first day (as above). Change
the vinegar on the second day. Carefully rinse the raw egg after 48 hours. What happened?
Bouncy Egg
This experiment can be linked to the following Science topic:
Grade 7: Properties of materials / Acids, bases and neutrals
Place a raw egg and a hard-boiled egg each in a jar with a lid. Label the jars: “raw egg” and
“hardboiled egg”. Pour vinegar into the jars to cover the eggs. Cover the jars and put them
somewhere away from the sun. They should be left in the vinegar for 2 - 3 days (48 - 72
hours).
After 2 to 3 days, rinse the eggs in cold water to remove any shell. Now bounce the eggs.
What happened?
Science Club Experiment
Flash Experiments

48
This experiment can be linked to the following Science topics:
- Grade 4: Materials around us: Solids, liquids and gases
- Grade 6: Solutions as special mixtures
- Grade 7: Mixtures / Physical properties of materials
Apparatus / Ingredients
A plastic 2 litre cooldrink bottle
Pack of tomato sauce from fast-food restaurant
Salt
Method
1. Remove any labels from the bottle and fill it all the way to the top with water.
2. Add a tomato sauce pack to the bottle.
3. If the tomato sauce floats, you are all set - go to step 4. If the tomato sauce sinks in
the bottle, go to step 5.
4. For the floating tomato sauce pack, simply screw the cap on the bottle and squeeze the
sides of the bottle hard. If the tomato sauce sinks when you squeeze it and floats when
you release it, congratulations, you are ready to show it off! If it does not sink when you
squeeze it, try a different kind of tomato sauce pack or try a mustard or worcester sauce
pack.
5. If the tomato sauce pack sinks, add about 3 tablespoons (45 ml) of salt to the bottle. Cap
it and shake it up until the salt dissolves. (Kosher salt will keep the water from getting
too cloudy, although it will usually clear up over time if using regular table salt.)
6. Continue adding salt; a few tablespoons at a time until the tomato sauce is just barely
floating to the top of the bottle.
7. Once it is consistently floating, make sure the bottle is filled to the top with water and
then cap it tightly.
8. Now squeeze the bottle. The magic tomato sauce should sink when you squeeze the bottle
and float up when you release it. With some practice you can get it to stop in the middle
of the bottle.
Science Club Experiment
Magic Tomato Sauce

49
What Happened and How does it Work?
- This experiment is all about buoyancy and density.
- Buoyancy describes whether objects float or sink.
- This usually describes how things float in liquids, but it can also describe how things
float or sink in various gasses.
- Density deals with the amount of mass an object has.
- Adding salt to the water adjusted the water's density to get the tomato sauce to
float. Sounds complicated?
- It is, but here is the basics on the tomato sauce demo...there is a little bubble inside
the tomato sauce packet.
- As we know bubbles float and the bubble in the tomato sauce sometimes keeps the
heavy packet from sinking.
- When you squeeze the bottle hard enough, you put pressure on the packet.
- That causes the bubble to get smaller and the entire packet to become DENSER than
the water around it and the packet sinks.
- When you release the pressure, the bubble expands, making the packet less dense
(and more buoyant) and, alas, it floats back up.
- This demonstration is sometimes known as a CARTESIAN DIVER.
How can I change this Demonstration into an Experiment?
The project above is a DEMONSTRATION. To make it a true experiment, you can try to
answer these questions:
1. Do different food packs (tomato sauce, mustard and worcester sauce) have the same
density?
2. Does the temperature of the water affect the density of the tomato sauce packet?
3. Does the size of the bottle affect how much you have to squeeze to get the packet to
sink?

50
This experiment can be linked to the following Science topics:
Grade 4: Materials around us (solids, liquids and gases)
Grade 5: Processing materials
Grade 6: Mixtures / Solids, liquids and gases
Grade 7: Physical properties of materials
Ingredients and Tools
1 tablespoon sugar
½ cup milk or cream
¼ teaspoon vanilla extract (or other flavouring) – this is optional
6 tablespoons salt (ordinary or cause salt)
Enough ice to fill the larger sized bag halfway
1 A4-sized Ziploc bag
1 small-sized Ziploc bag
Method
1. Mix the salt around in the ice and set aside.
2. Pour the milk, sugar and vanilla extract into a container and mix.
3. Carefully pour the mixture into the smaller sized bag.
4. Close the bag, making sure it is completely sealed.
5. Put the smaller bag into the larger (A4) bag.
6. Make sure the small bag gets buried in the ice. Seal the large bag. Shake the bags
vigorously for five minutes. You might want to use a towel to hold the bags, since they will
be very cold and slippery from condensation.
7. Remove the small bag. Open it up. Your ice cream is ready.
Tips
- Milk will provide a less rich, lower calorie ice cream, whilst using heavy cream will have
the opposite effect.
- This method will make a small amount of ice cream, about enough for two people to
enjoy. Experimenting with other methods can allow you to make more. One version uses
two coffee cans of different sizes instead of plastic bags.
- Flavour combinations are almost limitless. Chocolate syrup is a basic option. Try
combining mint extract with chocolate or adding small chocolate chips.
Science Club Experiment
Make Yummy Ice Cream in a Flash

51
This experiment can be linked to the following Science topics:
Grade 5: Processing materials
Grade 6: Mixtures / Solutions as special mixtures / Dissolving
Grade 7: Separating mixtures
Ingredients and Tools
A flat tray (such as a baking tray)
Food colouring (at least 3 different colours)
Full cream milk - low fat milk will not work for this experiment
Dishwashing liquid soap
Method
1. Carefully pour the milk into the tray so that it just covers the base.
2. Add about 6-8 drops of different coloured food colouring onto the milk in different
spots.
3. Add about 5 drops of the liquid soap onto the drops of food colouring and watch the show!
Science Club Experiment
Colourful Milk

52
This experiment can be linked to the following Science topics:
Grade 4: Materials around us (Solids, liquids and gases)
Grade 5: Processing materials
Grade 6: Mixtures / Solids, liquids and gases
Grade 7: Physical properties of materials
Ingredients and Tools
Lemon
Drinking glass
Water
1 teaspoon of baking soda
Some sugar to make it sweet
Method
1. Squeeze as much of the juice from the lemon as you can into the glass.
2. Pour in equal parts of water and lemon juice.
3. Stir in the teaspoon of baking soda.
4. Add sugar to taste.
Science Club Experiment
Make Fizzy Lemonade

53
This experiment can be linked to the following Science topics:
Grade 4: Materials around us (Solids, liquids and gases)
Grade 5: Processing materials
Grade 6: Mixtures / Solids, liquids and gases
Grade 7: Physical properties of materials
Apparatus / Ingredients
A clear glass jar
¼ cup cooking oil
1 teaspoon salt
Water
Food colouring (optional)
Method
1. Fill the jar about ¾ full of water.
2. Add about 5 drops of food colouring.
3. Slowly pour the cooking oil into the glass jar. See how the oil floats on top.
4. Now for the fun part: sprinkle the salt on top of the oil.
5. Watch blobs of lava move up and down in your “lava jar”!
If you liked that, add another teaspoon of salt to keep the effect going.
What Happened and How does it Work?
- This is not real lava, but it does look a bit like a lava lamp.
- First of all, the oil floats on top of the water because it is lighter than the water.
- Since the salt is heavier than the oil, it sinks down into the water and takes some oil
with it, but then the salt dissolves and the oil goes back up!
Science Club Experiment
Make a Lava Jar

54
How can I change this Demonstration into an Experiment?
The project above is a DEMONSTRATION. To make it a true experiment, you can try to
answer these questions:
1. How long will the effect go on if you keep adding salt?
2. Do different kinds of food oil give different effects?
3. Will other substances (sand, sugar, etc.) work the same as salt?
4. Does the height or shape of the glass affect the experiment?

55
This experiment can be linked to the following Science topics:
Grade 4: Materials around us (Solids, liquids and gases)
Grade 5: Processing materials
Grade 6: Mixtures / Solids, liquids and gases
Grade 7: Physical properties of materials
Version 1
Ingredients and Tools
Balloon
About 40 ml of water (a cup is about 250 ml, so you do not need much)
Soft drink bottle
Drinking straw
Juice from a lemon
1 teaspoon of baking soda
Method
1. Before you begin, make sure that you stretch out the balloon to make it as easy as
possible to inflate.
2. Pour the 40 ml of water into the soft drink bottle.
3. Add the teaspoon of baking soda and stir it around in the bottle with the straw until it
has dissolved.
4. Pour the lemon juice in and quickly put the stretched balloon over the mouth of the
bottle and see what happens!
Science Club Experiment
Magic Balloons
56
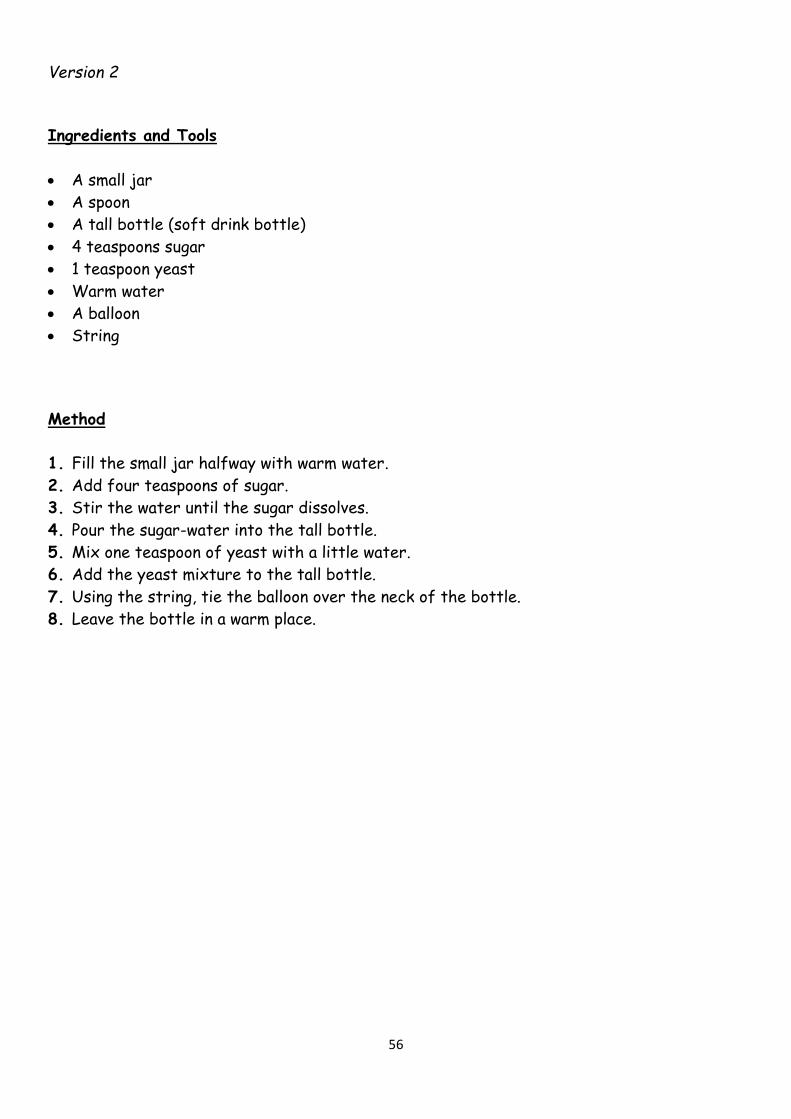
Version 2
Ingredients and Tools
A small jar
A spoon
A tall bottle (soft drink bottle)
4 teaspoons sugar
1 teaspoon yeast
Warm water
A balloon
String
Method
1. Fill the small jar halfway with warm water.
2. Add four teaspoons of sugar.
3. Stir the water until the sugar dissolves.
4. Pour the sugar-water into the tall bottle.
5. Mix one teaspoon of yeast with a little water.
6. Add the yeast mixture to the tall bottle.
7. Using the string, tie the balloon over the neck of the bottle.
8. Leave the bottle in a warm place.
57
This experiment can be linked to the following Science topics:
Grade 4: Materials around us
Grade 5: Processing materials
Grade 6: Mixtures
Grade 7: Physical properties of materials
Apparatus / Ingredients
A bowl
Black pepper
Dish liquid
Method
1. Pour water into the bowl.
2. Add some black pepper into the bowl with water. [There is no limit to the amount of
pepper you can add].
3. Put some detergent onto your finger and put your finger with the liquid soap into the
water with pepper and then see what happens.
4. You can use different kinds of detergents and different kinds of powders to control the
experiment.
What Happened and How does it Work?
- This experiment is all about the relationship between water molecules and soap
molecules.
- Water at the surface of a container, through its interaction with other molecules
within its vacuum, creates surface tension.
- The surface tension results in the powder floating and not sinking.
- In the experiment it happens when the soap molecules push away the smaller water
molecules that were creating surface tension as they were clumped-up against each
other.
- The water molecules which are sticking to the powder thus pull the powder away with
them to the edges of the bowl when they are pushed away by the soap molecules.
Science Club Experiment
Pepper Escape

58
How can I change this Demonstration into an Experiment?
The project above is a DEMONSTRATION. To make it a true experiment, you can try to
answer these questions:
1. Do different powders (cake flour, baby powder and yeast) have different results?
2. Does the type or form of soap effect the experiment?
3. Does the temperature of water influence the experiment?

59
This experiment can be linked to the following Science topic:
Grade 7: Physical properties of materials
If I stick a needle through a balloon, will it pop?
Apparatus / Ingredients
Balloons
Long wooden or metal skewers
Petroleum jelly (Vaseline)
A sharp pin
Sticky tape
Method
1. Blow up a balloon – not too full – and tie the opening shut.
2. Dip the tip of a skewer in Vaseline and spread the Vaseline along the entire length of the
skewer. If you are careful, you should be able to push the skewer all the way through the
balloon without popping it.
3. Insert the skewer with a gentle twisting motion into the end of the balloon opposite the
knot.
4. Continue pushing and twisting the skewer until the tip emerges from the other end, near
the knot. Why doesn't the balloon pop?
5. Now try to stick the skewer into the side of the balloon. What happens?
What Happened and How does it Work?
- The rubber in the balloon consists of many long molecules that are linked together.
These long molecules are called polymers.
- When molecules of a polymer are chemically attached to each other, it is called cross-
linking.
- These links hold the polymer molecules together and allow them to stretch…up to a
point.
Science Club Experiment
Pop-Safe Balloon

60
- When the force or tension pulling on the cross-links is too great, they will break, and
the polymer will pull apart.
- Look at the rubber near the ends of the balloon where you first inserted the skewer.
- Does it look lighter or darker than the rubber of the rest of the balloon?
- The rubber at the ends of the balloon is stretched out less than in the middle of the
balloon.
- Therefore, there is less force pulling on it.
- This allows the tip of the skewer to break some polymer cross-links, push aside the
molecules of rubber, and slide into the balloon.
- However, enough cross-links remain so that the balloon holds together.
- There are fewer polymer molecules in the side of the balloon.
- When you push the tip of the skewer through the rubber in the side of the balloon and
the skewer breaks a few of the cross-links, the tension on the remaining cross-links is
too great and the balloon pops.
- Do you think there is a way to stick a sharp pin through the side of a balloon without
popping it?
- Put a small piece of sticky tape on the side of the balloon and press it down well.
- Now take the pin and press it through the tape and into the balloon.
- Does the balloon pop?
- The tape sticks to the rubber in the balloon and it will not allow the rubber to stretch
to the breaking point when the pin pierces the balloon.
- In other words, the tape reinforces the cross links and the balloon stays together.
How do you think you can change this Demonstration into an Experiment?

61
This experiment can be linked to the following Science topics:
Grade 5: Processing materials
Grade 6: Mixtures
Grade 7: Physical properties of materials
In some parts of South Africa, soap powder and other detergents do not foam well in tap
water. This is because the tap water contains minerals that can interfere with the cleaning
ability of detergents. That is why water softeners, such as Stasoft, are popular in these
locations. The water softener removes the minerals from the water.
In this experiment you will make "hard" water from distilled water, which contains no
minerals and is therefore "soft." You can then compare the foaming ability of a detergent in
soft and hard water.
Apparatus / Ingredients
500 millilitres (2 cups) distilled water
5 millilitres (1 teaspoon) Epsom salt
2 x 2 litre empty plastic cooldrink bottles
Dishwashing liquid (detergent)
Method
1. Pour 250 millilitres (1 cup) of distilled water into each of the empty soft-drink bottles.
2. Add 1 teaspoon of Epsom salt to one of the bottles. Swirl the bottle until the Epsom salt
dissolves.
3. Add several drops of dishwashing liquid detergent to both bottles.
4. Seal the bottles with their caps.
5. Shake both bottles. A large amount of foam will form in the bottle without Epsom salt.
Far fewer foam will form in the bottle containing the Epsom salt. The foam formed in this
experiment is made of tiny bubbles. The bubbles are formed when air is trapped in a film of
liquid. The air is trapped when it is shaken into the water. The film of liquid surrounding each
bubble is a mixture of water and detergent. The molecules of detergent form a sort of
framework that holds the water molecules in place in the film. If there was no detergent,
the bubbles would collapse almost as soon as they are formed. You can see what this would
look like by repeating the experiment, but leaving out the detergent.
Science Club Experiment
Does “Soft” Water Foam Better?

62
What Happened and How does it Work?
- The minerals that make water hard usually contain calcium and magnesium.
- In this experiment you made water hard by adding Epsom salt, which is magnesium
sulphate.
- Calcium and magnesium in water interfere with the cleaning action of soap and
detergent.
- They do this by combining with soap or detergent and forming a scum that does not
dissolve in water.
- Because they react with soap and detergent, they remove the soap and detergent,
thereby reducing the effectiveness of these cleaning agents.
- This could be overcome by adding more soap or detergent.
- However, the scum that is formed can adhere to what is being washed, making it
appear dull.

63
This experiment can be linked to the following Science topics:
Grade 5: Processing materials
Grade 6: Mixtures
Grade 7: Physical properties of materials
Apparatus / Ingredients
A flashlight
A transparent container with flat parallel sides (such as a fish tank)
250 millilitres (1 cup) of milk
Method
1. Place the container on a table where you can view it from all sides.
2. Fill it ¾ full with water.
3. Switch on the flashlight and hold it against the side of the container so that its beam
shines through the water.
4. Try to see the beam as it shines through the water. You may be able to see some
particles of dust floating in the water; they appear white. However, it is rather difficult
to see exactly where the beam passes through the water.
5. Add about 60 millilitres (¼ cup) of milk to the water and stir it. Hold the flashlight to the
side of the container as before. Notice that the beam of light is now easily visible as it
passes through the water. Look at the beam both from the side and from the end where
the beam shines out of the container. From the side the beam appears slightly blue and
on the end it appears somewhat yellow.
6. Add another ¼ cup of milk to the water and stir it. Now the beam of light looks even
bluer from the side and more yellow, perhaps even orange, from the end.
7. Add the rest of the milk to the water and stir the mixture. Now the beam looks even
bluer, and from the end, it looks quite orange. Furthermore, the beam seems to spread
more now than it did before; it is not quite as narrow.
Science Club Experiment
The Colour of Light

64
What Happened and How does it Work?
What causes the beam of light from the flashlight to look blue from the side and orange
when viewed head on? Light usually travels in straight lines, unless it encounters the edges
of some material. When the beam of a flashlight travels through air, we cannot see the
beam from the side because the air is uniform and the light from the flashlight travels in a
straight line. The same is true when the beam travels through water, as in this experiment.
The water is uniform and the beam travels in a straight line. However, if there should be
some dust in the air or water, then we can catch a glimpse of the beam where the light is
scattered by the edges of the dust particles.
When you added milk to the water, you added many tiny particles to the water. Milk contains
many tiny particles of protein and fat suspended in water. These particles scatter the light
and make the beam of the flashlight visible from the side. Different colours of light are
scattered by different amounts. Blue light is scattered much more than orange or red light.
Because we see the scattered light from the side of the beam, and blue light is scattered
more, the beam appears blue from the side. Because the orange and red light is scattered
less, more orange and red light travels in a straight line from the flashlight. When you look
directly into the beam of the flashlight, it looks orange or red.
What does this experiment have to do with blue sky and orange sunsets? The light you see
when you look at the sky is sunlight that is scattered by particles of dust in the atmosphere.
If there was no scattering, and all of the light travelled straight from the sun to the earth,
the sky would look dark as it does at night. The sunlight is scattered by the dust particles in
the same way as the light from the flashlight is scattered by particles in milk in this
experiment. Looking at the sky is like looking at the flashlight beam from the side: you are
looking at scattered light that is blue. When you look at the setting sun, it is like looking
directly into the beam from the flashlight: you are seeing the light that is not scattered,
namely orange and red.
What causes the sun to appear deep orange or even red at sunset or sunrise? At sunset or
sunrise the sunlight we observe has travelled a longer path through the atmosphere than the
sunlight we see at noon. Therefore, there is more scattering and nearly all of the light
direct from the sun is red.

65
What you need
Baking Soda (1 tsp.)
Vinegar (1/4 cup)
Water (1 cup)
Un-popped popcorn kernels
Measuring cup
Shallow pan
Tall glass or jar
Teaspoon
What to do
1. Place the glass in the centre of the shallow pan and add several popcorn kernels into the
glass.
2. Predict what will happen when each of the following steps occurs:
250 ml (1 cup) of water is poured into the glass.
60 ml (1/4 cup) of vinegar is poured into the glass containing water.
5 ml (1 tsp) of baking soda is added to the vinegar/water solution (without mixing)
3. Pour 250 ml (1 cup) water into the glass and observe what happens.
4. Add 60 ml (1/4 cup) of vinegar into the water in the glass and observe what happens.
5. Add 5 ml (1 tsp) of baking soda to the vinegar solution (do not mix!) and observe what
happens. Is this what you expected to happen? Why or why not?
What's happening?
When the vinegar and baking soda are combined, a chemical reaction occurs between the
acetic acid in vinegar and the sodium bicarbonate in baking soda. This causes a release of
chemical energy and the formation of a gas (carbon dioxide).
Some gas bubbles that form will adhere (stick) to the outside of the popcorn kernels and
raise them to the surface of the liquid. This is because the kernels and bubbles together
have a lower density than water and thus rise to the surface of the liquid. At the surface,
the gas bubbles burst, releasing the carbon dioxide into the air. Once the bubbles have
burst, the density of the kernel is once again greater than that of water and the kernel sinks
to the bottom of the glass. Acid-Base reactions are often used in baking to make bubbles
form in cakes or cookies as they are baking. This helps make baked goods light and spongy,
rather than heavy and dense.
Science Club Experiment
Dancing Popcorn

66
Materials
Supply of Room Temperature Water
Large Glass or Cup
Standard Pie Pan (or flat-bottom baking dish with sides)
Candle
Large glass jar
Food colouring
Lighter or Matches
Procedure
1. Fill the glass with water.
2. Place a few drops of food colouring in the water.
3. Pour the entire glass of coloured water into the pie pan about three-quarters deep.
4. Place the candle straight up in the center of the pan of coloured water.
5. Light the candle.
6. Hold the open end of the glass jar straight down, place it over the lighted candle, and
move it down into the water. The jar will be upside down in the water resting on the
pie plate with the candle burning inside of it.
How Does It Work?
The rising water does not happen because the flame uses up all the oxygen (O2) in the air
inside the glass jar. If this was the case, the water would rise at a steady rate inside the
glass jar as the candle flame got smaller and smaller. Instead, the water rises quickly after
the flame goes out.
As the glass jar is lowered, the candle flame heats the air trapped in the upside down glass
jar. This hot air expands rapidly and pushes outward in all directions. Some of the hot,
expanding air is pushed out of the opening of the glass jar and you see it as bubbles if the
rim is below the water level.
The candle burns dimly for a short time until the oxygen is gone. When the flame goes out,
the air in the glass jar quickly cools and contracts (takes up less space). The cooling,
contracting air creates a vacuum (a lower pressure) in the glass jar. Lower pressure inside
and higher pressure outside means the water is pushed up into the glass jar until the air
pressure inside is equal to the air pressure outside the glass jar.
Science Club Experiment
Rising Water

67
You might be thinking, “The vacuum sucked the water into the glass jar.” That is the right
idea, but scientists do not like to use the term “suck” when describing the effects of a
vacuum. Instead, they will explain it as, ”Gases exert a push from an area of high pressure
into an area of low pressure.”
So the truth is that nothing ever sucks – not straws, not vacuum cleaners and not even black
holes. Things are only being pushed or pulled by differences in pressures or forces.

68
Materials
One small empty plastic soda or water bottle
1/2 cup of vinegar
Small balloon
Baking soda
Funnel or piece of paper
Procedure
1. Carefully pour the vinegar into the bottle.
2. Loosen up the balloon by stretching it a few times and then use the funnel to fill it a bit
more than half way with baking soda. If you do not have a funnel you can make one using
the paper and some tape.
3. Now carefully put the neck of the balloon all the way over the neck of the bottle without
letting any baking soda into the bottle.
4. Lift the balloon up so that the baking soda falls from the balloon into the bottle and mixes
with the vinegar. Watch the fizz-inflator at work!
How does it work?
The baking soda and the vinegar create an acid-base reaction and the two chemicals work
together to create a gas, (carbon dioxide). Gasses need a lot of room to spread out and the
carbon dioxide starts to fill the bottle, and then moves into the balloon to inflate it.
Make it an experiment
To make this project a true experiment, you can try to answer these questions:
1. Does water temperature affect how fast the balloon fills up?
2. Does the size of the bottle affect how much the balloon fills?
3. Can the amount the balloon fills-up be controlled by the amount of vinegar or baking
soda?
Science Club Experiment
Fizz Inflator

69
TERM 3: EXPERIMENTS
ENERGY AND CHANGE

70
Singing Balloon
This experiment can be linked to the following Science topic:
- Grade 4: Energy and sound
Place a coin in a large balloon. Then you inflate and tie off the balloon. Swirl the balloon
rapidly to cause the coin to roll inside the balloon. The coin will roll for a very long time on
the smooth balloon surface. At high coin speeds, the frequency with which the coin circles
the balloon may resonate with one of the balloon's "natural frequencies," and the balloon may
hum loudly.
Singing Wine Glass
This experiment can be linked to the following Science topic:
- Grade 4: Energy and sound
Place a wine glass on a flat surface. Dip your finger in water and place it on the rim of the
glass. Let your finger follow the rim of the glass in a circle – either clockwise or anti-
clockwise. What happens after a while?
Balancing a Ball with a Hair Dryer
This experiment can be linked to the following Science topic:
- Grade 5: Energy and movement
A light ball, such as a ping pong ball or Styrofoam ball, can be balanced in the air stream of a
hair dryer. According to Bernoulli's Principle, the pressure in the fast-moving air stream is
less than the pressure of the surrounding quiet air. If the ball strays from the air stream,
the surrounding higher pressure air tends to push it back.
Science Club Experiment
Flash Experiments

71
This experiment can be linked to the following Science topics:
- Grade 4: Energy and energy transfer
- Grade 5: Energy and movement
- Grade 7: Potential and kinetic energy
Ingredients and Tools
A balloon
A straw
Strong sticky tape
Scissors
Strong thread
Method
1. Cut a straw in half.
2. Push one end of the thread through the straw.
3. Tie the thread tightly across a room (from wall to wall).
4. Cut two pieces of sticky tape.
5. Blow a little air into the balloon.
6. Hold the end of the balloon tightly so that the air does not escape.
7. Tape the balloon to the straw (with a friend’s help).
8. Blow some more air into the balloon.
9. Let the balloon go.
Science Club Experiment
Make a Balloon Rocket

72
This experiment can be linked to the following Science topics:
- Grade 4: Energy around us
- Grade 5: Stored energy in fuels
Ingredients and Tools
2 tea-light candles
A saucer
A clear jar/glass
Prestik
Method
Fix two tea-light candles firmly to a saucer, using Prestik.
Light both candles.
Place a glass/jar over one of the candles.
Which candle burns the longest? Why?
Questions for discussion:
1. When lighting a candle, identify the heat source that provides the starting energy
and the fuel supply.
The heat sources are the lit match, fuel and the wax.
2. Why did the candle go out once you put the glass jar over the candle?
The candle used up all the oxygen in the air. Burning cannot happen without oxygen.
3. Why do you think there is a difference in the time taken for the candle to go out?
The small jar has less air and hence less oxygen than the bigger jars. The smaller the
amount of oxygen, the quicker it gets used up and the quicker the candle goes out.
Science Club Experiment
How long can my Candle Burn?

73
This experiment can be linked to the following Science topics:
- Grade 4: Movement energy in a system
- Grade 5: Energy and movement
- Grade 7: Potential and kinetic energy
Ingredients and Tools
Paper (21 cm by 6 cm)
A paperclip
Scissors
A ruler
Method
1. Draw a shape shown in the picture.
2. Cut along the centre line.
3. Fold along the solid line so that one rotor
bends forward and the other backward.
4. Push the paperclip onto the other end of the
paper.
5. Drop your helicopter from a height and watch
how it spins.
Science Club Experiment
Make a Paper Helicopter
FOLD BACK FOLD FORWARD

74
This experiment can be linked to the following Science topics:
- Grade 4: Energy around us
- Grade 5: Energy and movement
- Grade 7: Potential and kinetic energy / Heat transfer
Is it possible to get a hard-boiled egg into a bottle, even if the opening of the bottle is
smaller than the egg?
Apparatus / Ingredients
A hard-boiled egg
A glass bottle with a mouth just slightly smaller than the egg (a fruit-drink bottle works
well)
A square piece of newspaper (8 cm by 8 cm)
A match
Method
1. Remove the shell from the egg. Hold the egg over the opening of the bottle to see that
the egg does not fit through the mouth of the bottle.
2. Fold the piece of newspaper into a strip that can be dropped into the bottle, about 1 cm
by 8 cm.
3. Light the match and use it to ignite the folded strip of paper.
4. Drop the burning strip of paper into the bottle.
5. Before the fire goes out, place the egg on the opening (mouth) of the bottle.
Within a few seconds the egg will squeeze through the opening and drop into the bottle.
As it entered the bottle, the egg may have broken into pieces. This happens when the
diameter of the egg is more than about 0.5 cm larger than the diameter of the bottle's
opening. A medium or small egg may be small enough to enter the bottle without breaking.
Also, rubbing some cooking oil onto the mouth of the bottle will make it easier for the egg to
slide into the bottle without breaking.
A similar effect can be produced by using a water-filled balloon in place of an egg. Just pour
water into a round balloon to fill it without stretching it and then tie it shut. When the
filled balloon is the size of an egg, it can be used in the same way as the hard-boiled egg.
Science Club Experiment
Egg in a Bottle

75
What Happened and How does it Work?
Why does the egg slide into the bottle, even though no one is pushing it?
Answer: The pressure of the air is pushing it.
- Before the burning paper was put into the bottle, the pressure of the air inside the
bottle was the same as the pressure outside the bottle.
- The burning paper, however, heats the air inside the bottle.
- This causes the air inside to expand.
- When the egg is placed on top of the bottle, it seals the bottle, and the fire
eventually goes out.
- When the fire goes out, the air inside the bottle cools.
- As it cools, the air contracts, and the pressure of the air inside the bottle becomes
less than the pressure outside.
- Then, the higher outside pressure pushes the egg into the bottle!

76
This experiment can be linked to the following Science topics:
- Grade 5: Stored energy in fuels
- Grade 6: Electrical conductors and insulators
- Grade 7: Heat transfer / Insulation and energy saving
In this experiment you will find out how you can hold a balloon directly in a flame without
popping it.
Apparatus / Ingredients
two round balloons, not inflated
several matches
¼ cup of water
Method
1. Inflate one of the balloons and tie it closed. Place a ¼ cup of water in the other balloon,
inflate it and then you tie it.
2. Light a match and hold it under the first balloon. Allow the flame to touch the balloon.
What happens?
3. Light another match. Hold it directly under the water in the second balloon. Allow the
flame to touch the balloon. What happens with this balloon?
What Happened and How does it Work?
Why does the balloon with no water break in the flame? The flame heats whatever is placed
in it. It heats the rubber of both balloons. The rubber of the balloon without water
becomes so hot, that it becomes too weak to resist the pressure of the air inside the
balloon.
How does the balloon with water in it resist breaking in the flame? When water inside the
balloon is placed in the flame, the water absorbs most of the heat from the flame. Then the
rubber of the balloon does not become very hot. Because the rubber does not become hot, it
does not weaken and the balloon does not break.
Science Club Experiment
Fireproof Balloon

77
This experiment can be linked to the following Science topics:
Grade 4: Energy and energy transfer
Grade 5: Energy and movement
Grade 7: Potential and kinetic energy
Ingredients and Tools
An empty cooldrink can
Balloon
A head of hair
Method
1. Place the can on its side on a flat smooth surface like a table or a smooth floor.
2. Rub the blown-up balloon back and forth through your hair really fast.
3. Hold the balloon close to the can without actually touching the can. The can will start to
roll towards the balloon without you even touching it!
Try This Too: Tear up part of a tissue into tiny pieces. Rub the balloon in your hair again and
bring it close to the tissue pieces. The tissue pieces will be attracted to the balloon and then
jump away.
Why did this happen?
- When you rub the balloon through your hair, invisible electrons (with a negative
charge) build up on the surface of the balloon.
- This is called static electricity, which means "non-moving electricity".
- The electrons have the power to pull very light objects (with a positive charge)
towards them - like the soda can.
Science Club Experiment
Roll a Cooldrink Can

78
How do I make this an experiment?
The project above is a DEMONSTRATION. To make it a true experiment, you can try to
answer these questions:
1. Does the size of the balloon change the power of the pull?
Answer: Yes the bigger the balloon, the wider it is and thus it has more of a pull as a
greater area of the balloon is subjected to static energy.
2. Does the length of the person’s hair affect the power of the static electricity?
3. How much water can you put in the can until the balloon cannot pull it anymore?

79
This experiment can be linked to the following Science topics:
Grade 4: Energy and energy transfer
Grade 5: Stored energy in fuels / Energy and movement
Grade 7: Heat transfer / Potential and kinetic energy
Ingredients and Tools
Coloured or Recycled paper (the type used for newspaper inserts work well)
A pencil
Scissors
Thread
Tape or prestik
A thin stick (dowel)
Tea-light candle
Method
1. Draw a spiral snake on the paper.
2. Cut out the snake.
3. Attach one end of the thread to the snake (any side).
4. Tie the thread to the thin stick and hang the stick above the tea-light candle.
5. Light the candle and see what happens.
Science Club Experiment
Bouncy Snake Surprise

80
This experiment can be linked to the following Science topic:
Grade 7: Heating as a transfer of energy: Conduction; Convection and Radiation
Apparatus / Ingredients
An empty aluminium soft-drink can
A 2 / 3-litre saucepan
A pair of kitchen tongs
Water
Stove
Method
1. Fill the saucepan with cold water.
2. Put 1 tablespoon of water into the empty cooldrink can.
3. Heat the can on the kitchen stove to boil the water. When the water boils, a cloud of
condensed vapour will escape from the opening in the can.
4. Allow the water to boil for about 30 seconds. Using the tongs, grasp the can and quickly
invert it and dip it into the water in the pan. The can will collapse almost immediately.
What Happened and How does it Work?
What caused the can to collapse? When you heated the can, you caused the water in it to
boil. The vapour from the boiling water pushed air out of the can. When the can was filled
with water vapour, you cooled it suddenly by inverting it in the water. Cooling the can caused
the water vapour in the can to condense, creating a partial vacuum. The extremely low
pressure of the partial vacuum inside the can made it possible for the pressure of the air
outside the can to crush it.
A can is crushed when the pressure outside is greater than the pressure inside, and the
pressure difference is greater than the can is able to withstand. You can crush an open
aluminium can with your hand. When you squeeze on the can, the pressure outside becomes
greater than the pressure inside. If you squeeze hard enough, the can collapses. Usually, the
air pressure inside an open can is the same as the pressure outside. However, in this
experiment, the air was driven out of the can and replaced by water vapour. When the water
vapour condensed, the pressure inside the can became lesser than the air pressure outside.
Then the air outside crushed the can.
Science Club Experiment
Crushed Cooldrink Can

81
Materials Needed
Insulated copper wire
Wire stripper / pair of pliers
single-pole switch
mini light bulb
battery
Step 1: Cut the insulated wire in 3 equal size pieces.
Step 2: Strip a piece of insulation off the end of each wire.
Step 3: Attach both ends of the loose wire to the battery holder. Connect one side to
the positive (+) side and the other side to the negative (-) side. Do not insert
the battery yet.
Step 4: Connect the other side of the positive wire to one side of the switch.
Step 5: Connect one side of the 3rd wire that was prepared in Step 1 to the other side
of the switch.
Step 6: Connect the other side of the wire just connected in Step 5 to one side of the
light bulb base.
Step 7: Using the loose side of the wire connected to the negative side of the battery,
connect the other side of the light bulb base.
A flashlight is an example of a simple DC light circuit with a switch. In this experiment, we
set up a simple light switch circuit to show how a switch can complete an electronic circuit
and make the light bulb light-up or turn off.
Science Club Experiment
How to make an Electric Circuit

82
Materials
long candle
needle
2 glasses or jars that are the same height
Procedure
1. Expose the wick at both ends of the candle
2. Push the needle through the candle about halfway down its length. If the candle
wax is soft, you may be able to push the needle through the candle with minimal
effort, but if the wax is hard or your candle is thick, then grasp the needle with pliers
or tweezers, heat it in a flame and push it through the candle. The hot needle should
pass through the wax fairly easily. The trick still works if you accidentally bend the
needle.
3. Balance the needle and candle between a pair of glasses. It is okay if one end of
the candle is heavier than the other.
4. Light both ends of the candle. The candle will rock up and down, like a see-saw.
How it Works
The candle moves in response to forces acting on it, trying to reach equilibrium. The
combustion reaction turns the candle wax into carbon dioxide gas and water vapor, making
the burning end of a candle lighter. If one side of the candle burns more quickly than the
other, the lighter side of the candle moves up. The lower side of the candle is angled in such
a way that the flame melts the wax, causing it to drip down. This not only lessens the mass at
that end of the candle, but the force from the dripping wax actually pushes the end of the
candle up! This is Newton's Third Law of Motion, which states that for every action, there is
an equal and opposite reaction.
Science Club Experiment
Candle See-Saw

83
Materials
One iron nail fifteen centimetres long
Three metres of 22 gauge insulated, stranded copper wire
One or more D-cell batteries
A pair of wire strippers
Procedure
1. Use a pair of wire strippers to remove a few centimetres of insulation from each end
of the wire.
2. Wrap the wire around the nail. The more wire you wrap around the nail, the stronger
your electromagnet will be. Make certain that you leave enough of the wire unwound
so that you can attach the battery. Make sure that you wrap all the wire in the same
direction. You need to do this because the direction of a magnet field depends on the
direction of the electric current creating it. The movement of electric charges
creates a magnetic field. If you wrap some of the wire around the nail in one
direction and some of the wire in the other direction, the magnetic fields from the
different sections fight each other and cancel out, reducing the strength of your
magnet.
3. Connect the battery. Attach one end of the wire to the positive terminal of the
battery and the other end of the wire to the negative terminal of the battery. If all
has gone well, your electromagnet is now working!
The more turns of wire your magnet has, the better. Keep in mind that the further the
wire is from the core, the less effective it will be. The more current that passes through
the wire, the better it would be.
Be careful! Too much current can be dangerous! The more current that flows through a
wire, the more heat is generated. If you double the current passing through a wire, the
heat generated will increase 4 times! If you triple the current passing through a wire, the
heat generated will increase 9 times!
Science Club Experiment
Electro-Magnet

84
TERM 4: EXPERIMENTS
PLANET EARTH & BEYOND
85
This experiment can be linked to the following Science topic:
Grade 4: Rocket systems
Ingredients and Tools
A balloon
A straw
Strong sticky tape
Scissors
Strong thread
Method
1. Cut a straw in half.
2. Push one end of the thread through the straw.
3. Tie the thread tightly across a room (from wall to wall).
4. Cut two pieces of sticky tape.
5. Blow a little air into the balloon.
6. Hold the end of the balloon tightly so that the air does not escape.
7. Tape the balloon to the straw (with a friend’s help).
8. Blow some more air into the balloon.
9. Let the balloon go.
Science Club Experiment
Make a Balloon Rocket
86
This experiment can be linked to the following Science topics:
Grade 4: Planet Earth
Grade 5: Planet Earth
Grade 6: Movement of the moon
Grade 7: Relationship of the Moon to the Earth
The Moon revolves around the Earth because of the pull of gravity. It does not crash into
the Earth because of the speed it is traveling around the Earth.
Materials
Empty thread spool
String
Ping pong ball
Washer
Method
1. Cut a piece of string of about 1 metre in length.
2. Slip the string through the thread spool.
3. Tie one end of the string to the ping pong ball.
4. You might make a hole through the centre with a nail or tape it to the string.
5. Tie the other end of the string to a metal washer.
6. Hold the string in your hand with the ping pong ball on top of the thread spool and the
washer hanging below it.
7. Slowly move the spool in a circle forcing the ping pong ball to turn in a circle around
the thread spool.
8. What happens to the ping pong ball as you increase or decrease its spin around the
spool?
9. The thread spool represents the Earth.
10. The ping pong ball represents the Moon.
11. The washer represents the force of gravity pulling the Moon towards the Earth.
12. Try using different weights for the force of gravity.
Science Club Experiment
How Gravity works

87
This experiment can be linked to the following Science topics:
Grade 4: Planet Earth
Grade 5: Planet Earth
Ocean waters are layered as shown in this science activity. The ocean waters are separated
by density and temperature.
Materials:
Clean plastic bottle (e.g. 2 Litre cooldrink bottle)
Water
Cooking oil
Blue food colouring
Sticky tape
Method:
1. Fill the bottle about one-third full of cooking oil.
2. Mix blue food colouring with water in a glass.
3. Pour the blue water into the plastic bottle until it is about two-thirds (⅔) full.
4. Replace the cap on the bottle and tape it shut.
5. Turn the bottle on its side to see the two different layers form inside the bottle.
6. Notice the water is denser than the cooking oil because it forms the lowest layer.
7. Gently move the bottle back and forth in a horizontal motion to see waves form.
8. What do you think will happen if you shake it up? Try it.
What Happened and How does it Work?
- Extremely cold ocean water from the poles is denser that the surface water so it
settles to the bottom of the ocean.
- As more extremely cold water descends into the depths, the water is pushed into a
stream of water that flows towards the warm equators where the water rises because
of the warmth of the sun.
Source: http://www.kids-earth-science.com/ocean-activity.html
Science Club Experiment
Ocean in a Bottle
88
This experiment can be linked to the following Science topics:
Grade 4: Planet Earth
Grade 5: Planet Earth
Grade 7: Gravity
What goes up must come down, right? Well try bending the rules a little with a cup of water
that stays inside the glass when held upside down. You will need the help of some cardboard
and a little bit of air pressure.
Materials / Tools:
A glass filled right to the top with water
A piece of cardboard
Method:
1. Put the cardboard over the mouth of the glass, making sure that no air bubbles enter
the glass as you hold onto the cardboard.
2. Turn the glass upside down (over a sink or outside until you get good).
3. Take away your hand that is holding the cardboard.
What happened and how does it work?
- If all goes to plan then the cardboard and water should stay put.
- Even though the cup of water is upside down the water stays in place, defying gravity!
- So why is this happening?
- With no air inside the glass, the air pressure from outside the glass is greater than
the pressure of the water inside the glass.
- The extra air pressure manages to hold the cardboard in place, keeping you dry and
your water where it should be, inside the glass.
Source: http://www.sciencekids.co.nz/experiments/gravityfreewater.html
Science Club Experiment
Magic Water

89
REFERENCES
Bennett, A.T. and Kessler, J. H. 1996. Apples, Bubbles and Crystals. McGraw-Hill.
Brown, B. 1987. More Science for You – 112 Illustrated Experiments. Tab Books.
Gardner, M. 1981. Entertaining Science Experiments with Everyday Objects. Dover
Publications.
Nicholson, L. 1996. Simple but Significant Science using Everyday Materials. Paper
delivered at Science is Fun! Symposium at annual meeting of the American Association for
the Advancement of Science. Baltimore, Maryland.
Sarquis, M and Sarquis, J. 1993. Fun with Chemistry: A Guidebook of K-12 Activities,
Volume 2. The Institute for Chemical Education.
Shakhashiri, B et al. 1992. Chemical Demonstrations: A Handbook for Teachers of
Chemistry. Volume 4. The University of Wisconsin Press.
Shakhashiri. B.Z. Undated. Chemical Demonstrations: A Handbook for Teachers of
Chemistry. (Volume 2). The University of Wisconsin Press. Wisconsin.
Vivian, C. 1967. Science Experiments and Amusements for Children. Dover Publications.