using motorola gm-360 radios - kjen.dkkjen.dk/download/emergencyrepeater.pdf · using motorola...
TRANSCRIPT

Using Motorola GM-360 radiosRed Cross IT & Telecom Emergency Response Unit Training, Washington 2010
Building an Emergency Repeater
Version 1.0, September 2010, Kjeld Jensen <[email protected]> http://kjen.dk/download
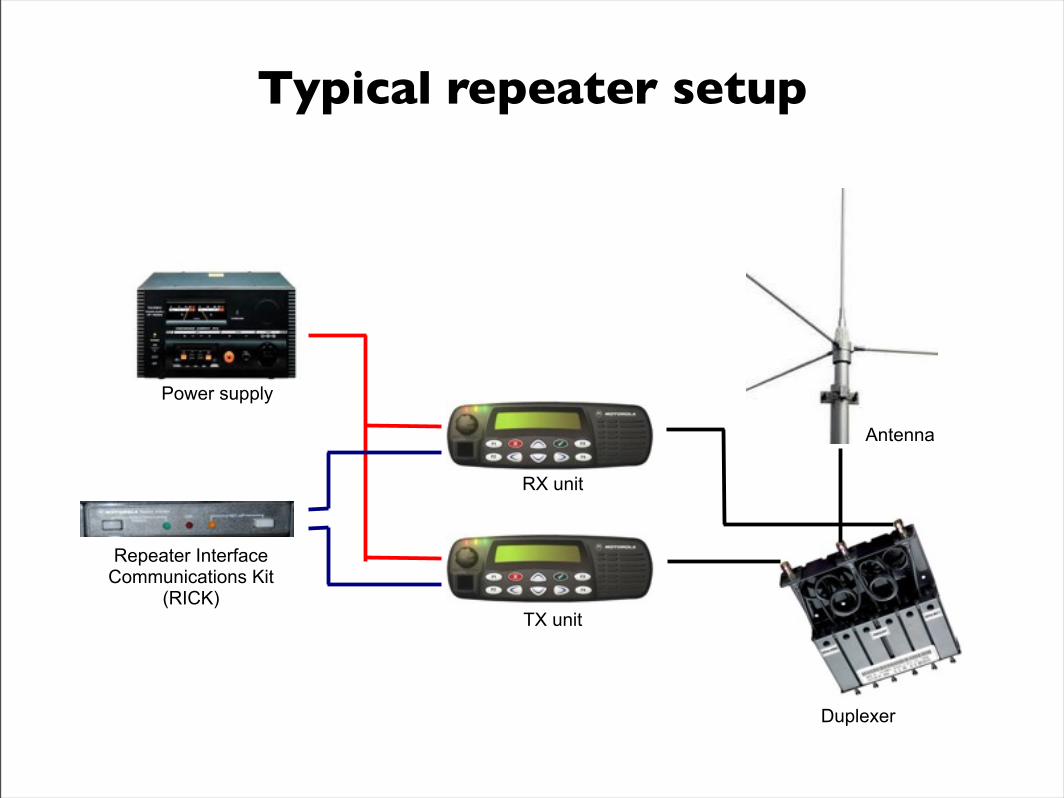
Repeater InterfaceCommunications Kit
(RICK)
Power supply
RX unit
TX unit
Duplexer
Antenna
Typical repeater setup

Power supply
RX unit
TX unit
Emergency repeater setup
RX antenna
TX antenna
Duplexer replaced byan extra antenna.
RICK replaced bya simple cable
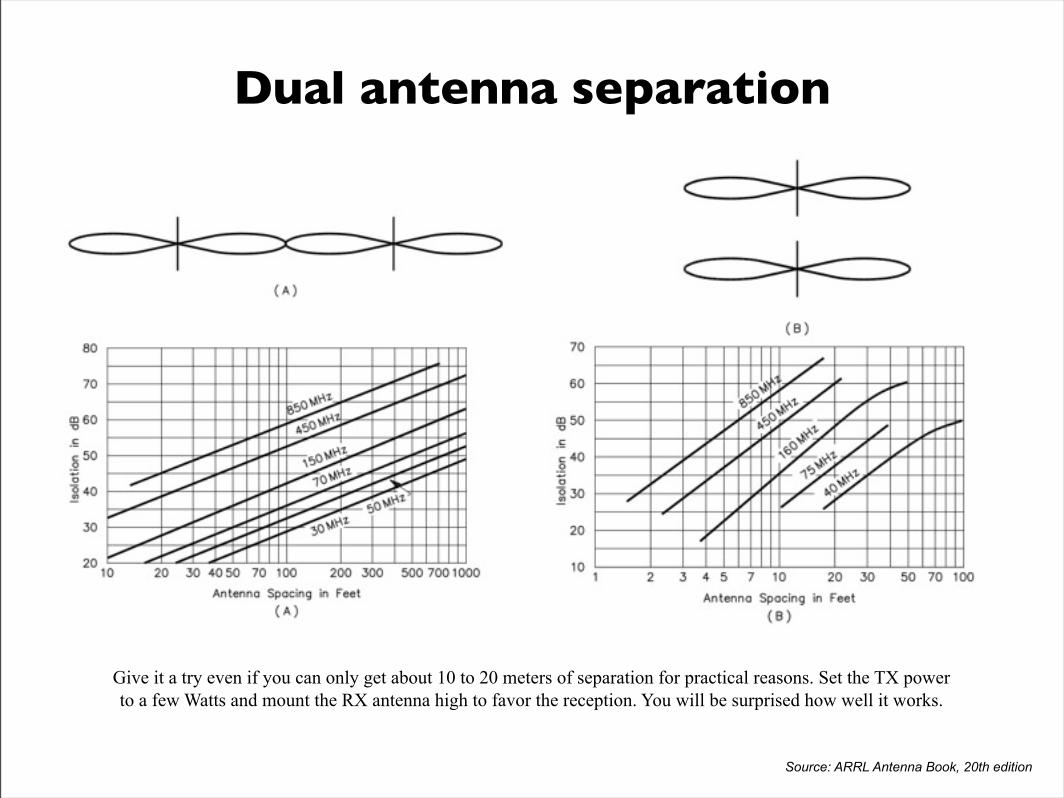
Dual antenna separation
Source: ARRL Antenna Book, 20th edition
Give it a try even if you can only get about 10 to 20 meters of separation for practical reasons. Set the TX powerto a few Watts and mount the RX antenna high to favor the reception. You will be surprised how well it works.

Digital out 4 (8) (3) Digital in 1
Flat RX audio (11)
(5) Flat TX audio
Ground (7) (7) Ground
+2.2 uF
1.5 KOhm4.7 KOhm
Use the information at your own risk!
GM-360 RX Accessory Connector GM-360 TX Accessory Connector
Emergency repeater cable

GM-360 Accessory Connector
20 2 4 6 8 10 12 14 16 1819 1 3 5 7 9 11 13 15 17
GM-360 Accessory connector as seen from behind the radioPrevious radio models had only 16 pins causing the special numbering.
3) Digital in 1 (input)5) Flat TX audio (input)7) Ground8) Digital out 4 (output)11) Flat RX audio (output)
Use the information at your own risk!
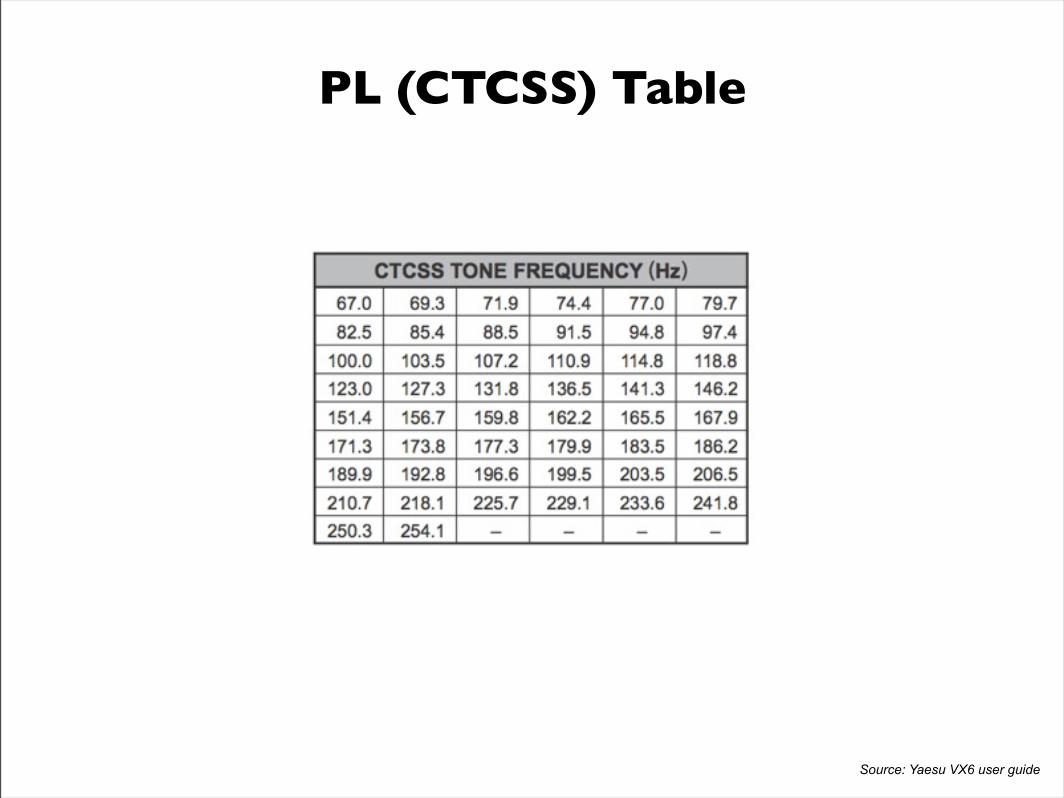
PL (CTCSS) Table
Source: Yaesu VX6 user guide
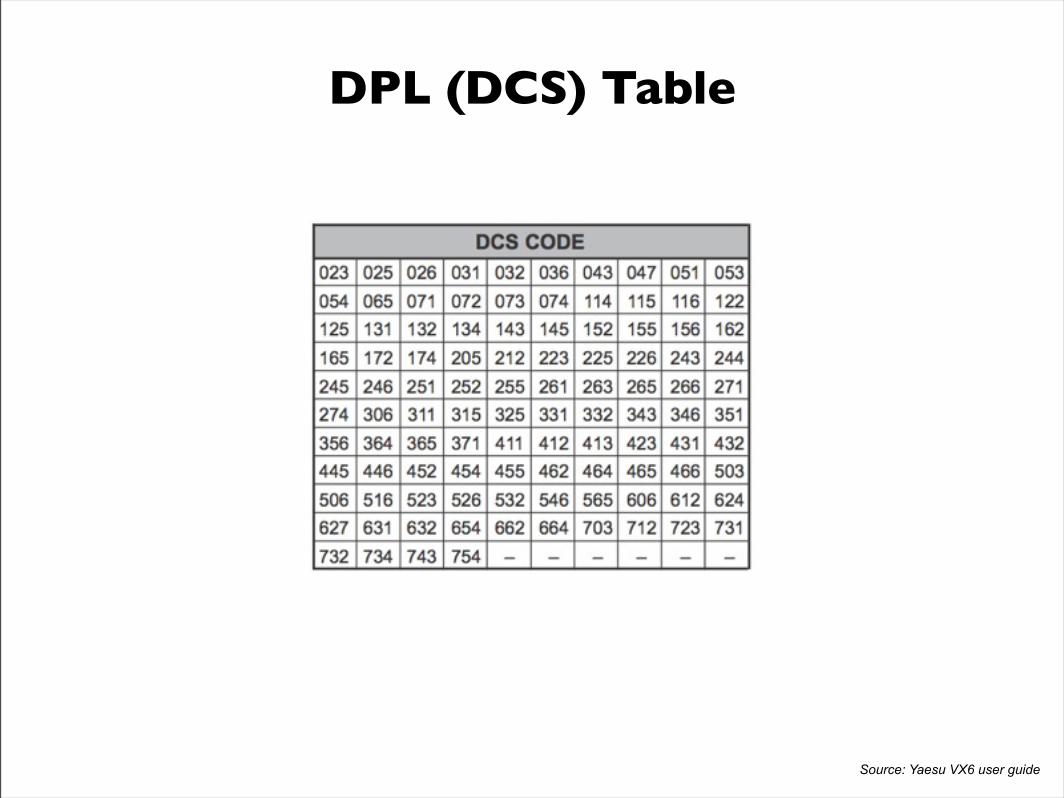
DPL (DCS) Table
Source: Yaesu VX6 user guide

RX - Channel Settings
1) Delete all existing channels except one.2) Set RX Frequency to the repeater RX frequency (user TX frequency).3) Set Channel Spacing to 12.5 KHz or 25 KHz dependent on country standard (or existing network).
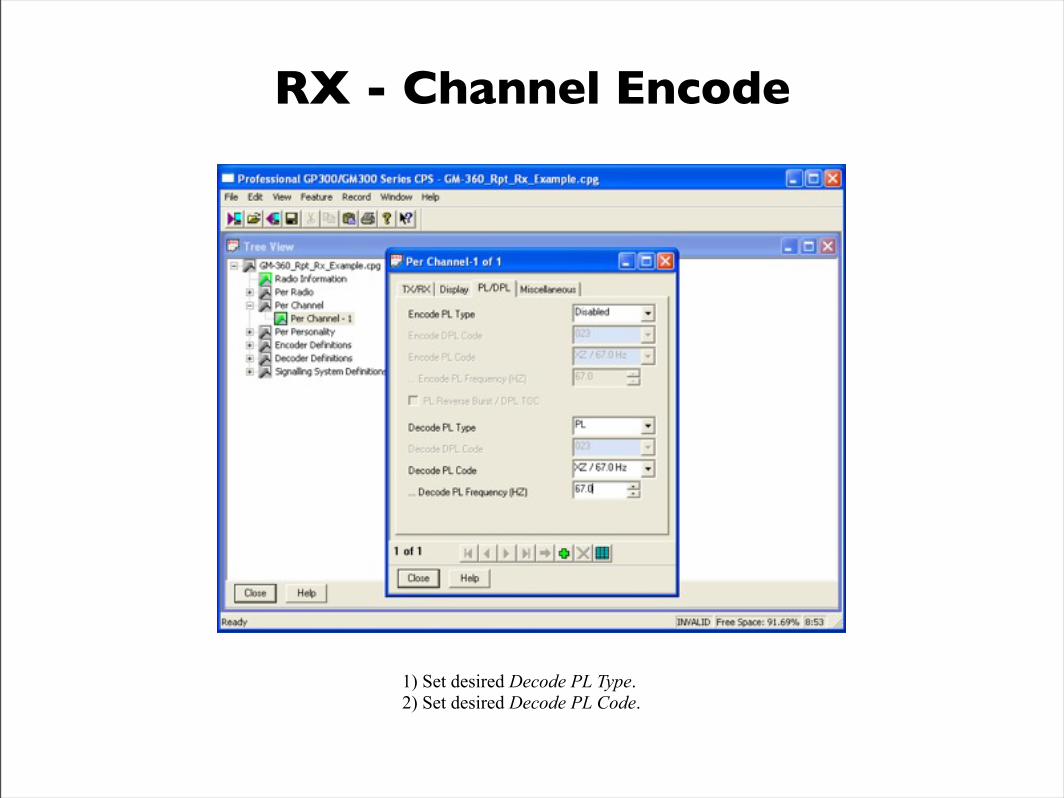
RX - Channel Encode
1) Set desired Decode PL Type.2) Set desired Decode PL Code.

RX - Encode Signal I/O
1) Set Pin 8 to PL/DPL Detect (do not use Squelch Detect).2) Disable all other pin functions.
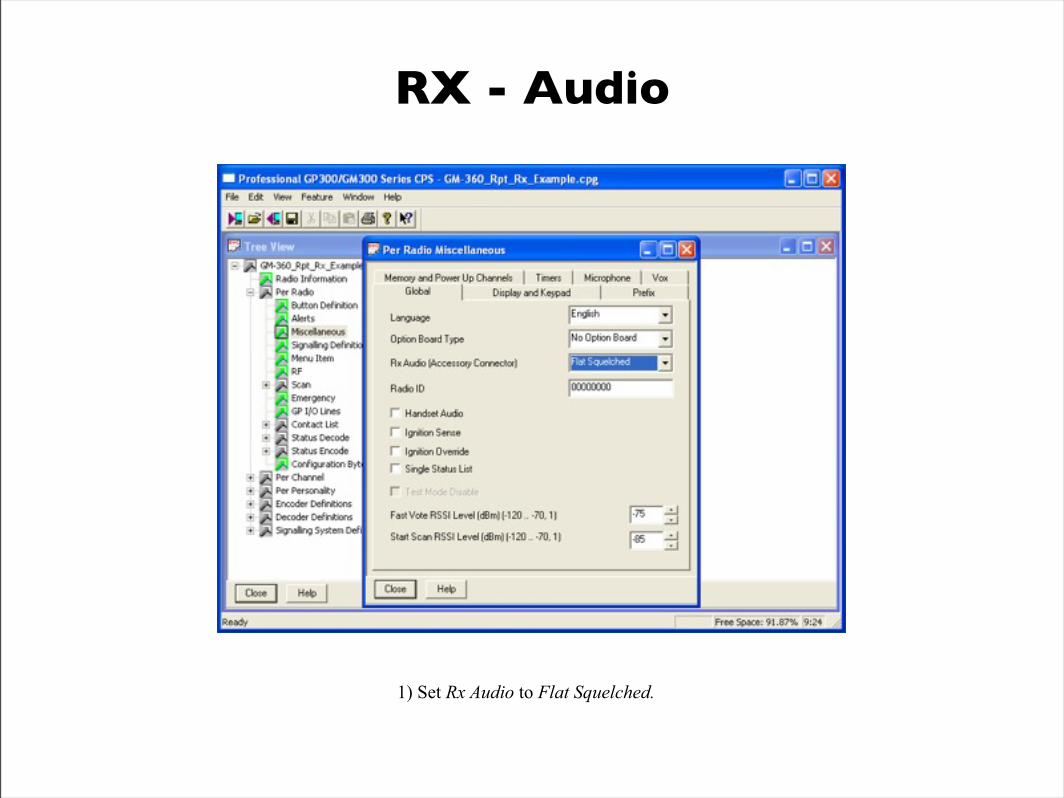
RX - Audio
1) Set Rx Audio to Flat Squelched.

TX - Channel Settings
1) Delete all existing channels except one.2) Set TX Frequency to the repeater TX frequency (user RX frequency).3) Set Channel Spacing to 12.5 KHz or 25 KHz dependent on country standard (or existing network).4) Set Power Level to Low or High dependent on desired output power.

TX - Channel Encode
1) Set desired Encode PL Type.2) Set desired Encode PL Code.

TX - PTT Signal I/O
1) Set Pin 3 to Data PTT or Voice or Data PTT (do not use Voice PTT).2) Disable all other pin functions.

TX - Output Power
1) Set desired Tx Low Power value if Low is selected under Channel settings.2) Set desired Tx High Power value if High is selected under Channel settings.

TX - Microphone Enable
1) Check Accessory Connector Mic. Enable to enable rear microphone input.

TX - Time Out
1) Set TX Time Out Time to e.g. 60 seconds (mandatory in some countries).