supportforums.cisco.com · web viewchange to a simple password as this will be removed soon, click...
TRANSCRIPT

Initial setup of Cisco RV325 with OpenVPN
Login using cisco and cisco
Change to a simple password as this will be removed soon, click “Save” then login using cisco and the new password.

Set time and date, click “Save”
This is the current Certificate, notice it is five years old.

Lets get the latest firmware, download and browse to it, the latest is 3.2.02 as of 12/16, click “Firmware Upgrade”
Click “Yes” The red diag light will flash on the router while this is uploading; the router will flash and reset then the diag light will be red while it reboots, this will take about a minute, it will flash again and then the pwr light will be green.
Now we want to create a new Certificate, click “Factory Default including Certificates”

Click “Yes”
The router will flash and reset then the diag light will be red while it reboots, this will take about a minute, it will flash again and then the pwr light will be green.
Now, create a strong password, there is no such thing as overkill, here; use a password manager to create a complex one that cannot be broken easily.
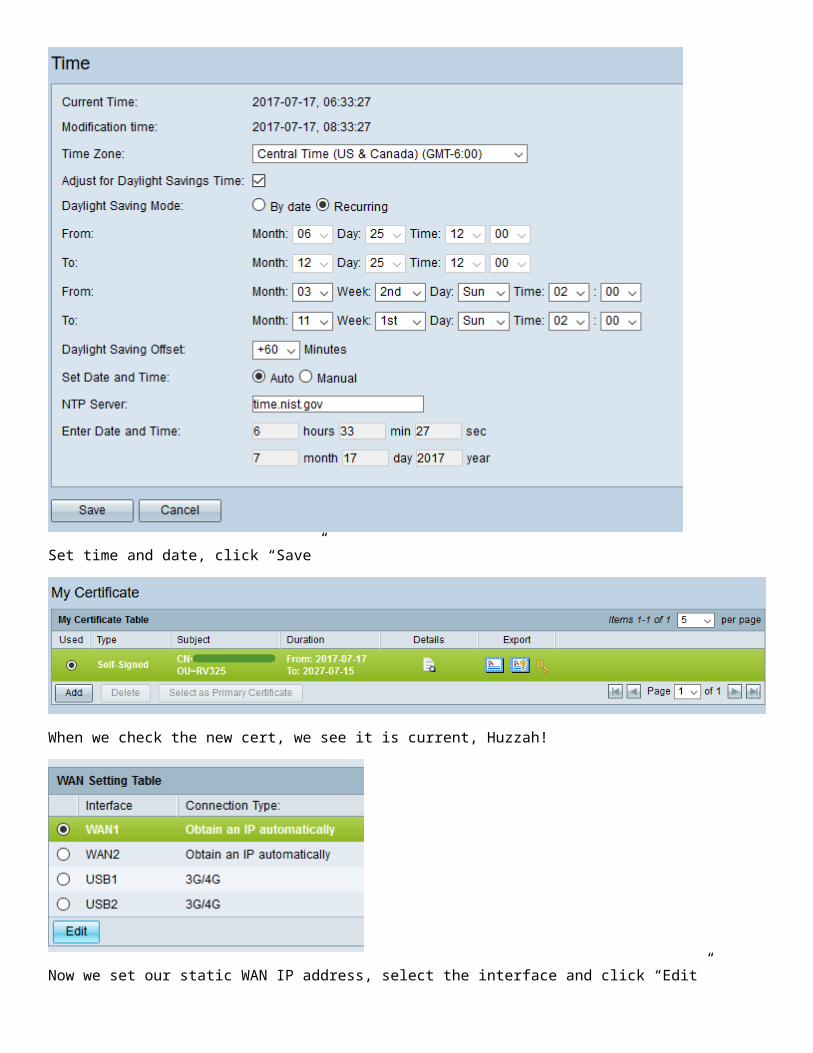
Set time and date, click “Save”
When we check the new cert, we see it is current, Huzzah!
Now we set our static WAN IP address, select the interface and click “Edit”

Enter relevant info and click “Save”
Now we want to create an OpenVPN Server Certificate, so select that on the “Type:” dropdown, enter correct info and click “Save”
Notice the “Valid Duration:” is set for 3700 days, this is longer than the main cert so when that is redone, this will be lost so 10950 is unnecessary; same for Client, below.

Now we want to create an OpenVPN Client Certificate, so select that on the “Type:” dropdown, enter correct info and click “Save”
Now you have a server cert and a client cert for OpenVPN, create additional client certs as needed.
NOTE: you may wish to complete the setup and test the first client before creating other users.
Select “Enable” and click “Save”

I change the “Encryption:” to AES-256 and click “Save”
Click “Yes” This is why we flash the firmware and reset with factory defaults before we generate users, etc. 😊

Now we create the user account, select the appropriate Client Certificate, enter a username and password, click “Save”
Download the .ovpn file, I click the OpenVPN icon on the left
I edit with Notepad++
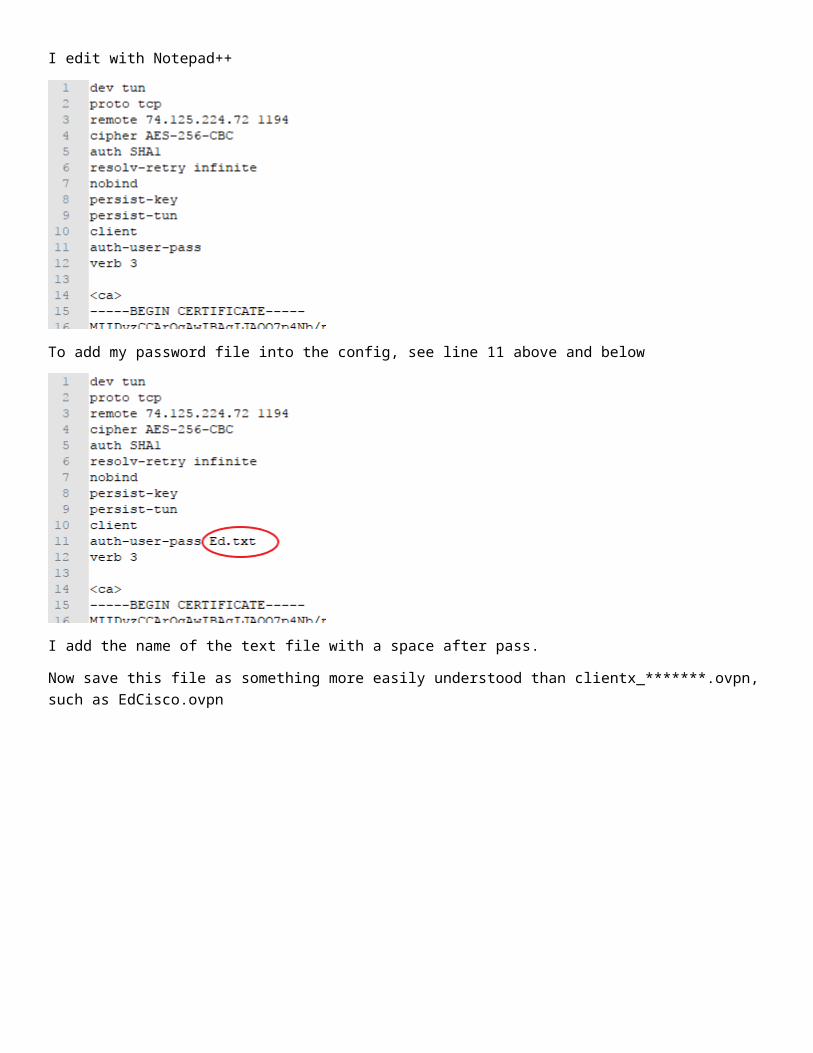
To add my password file into the config, see line 11 above and below
I add the name of the text file with a space after pass.
Now save this file as something more easily understood than clientx_*******.ovpn, such as EdCisco.ovpn
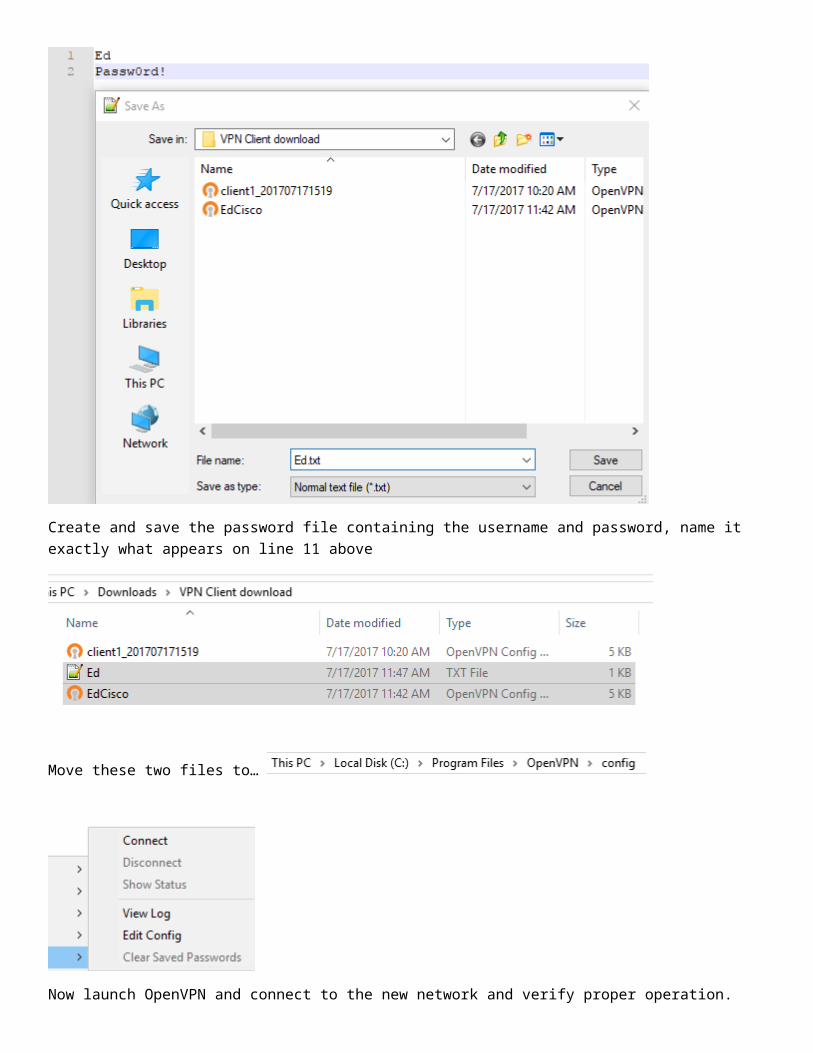
Create and save the password file containing the username and password, name it exactly what appears on line 11 above
Move these two files to…
Now launch OpenVPN and connect to the new network and verify proper operation.
