tutorials.render-test.comtutorials.render-test.com/worddocs/photometric... · web viewphotometric...
TRANSCRIPT

Photometric Lighting
In this tutorial we will briefly discuss the advantages of photometric lights and Final Gather.
In the real world light is all around us.
Have you ever noticed how even if it's dark inside and bright outside that even a little bit of light entering a room through the blinds seems to light up the entire room?
We don't necessarily notice it, but light comes from a variety of sources, and then it has the habit of bouncing off of every surface it comes in contact with and then transfers itself and the colors of said surfaces all around us as well.
These are called photons, and if we wish to make our 3D models, scenery, and animation look equally as real then we have to understand how it works, and then how to simulate it in 3DS Max.
To Start, let's make ourselves a box. This box will stand in as a "room" in our scene. 4 walls that when a light source gets added, will reflect and bounce light and color all around the room lighting everything up and adding a bit more reality to our scene by softening the colors throughout it.
Go to your create tab, and under geometry select Box, drag a box out in your scene and then go to your modifier tab to adjust its settings:
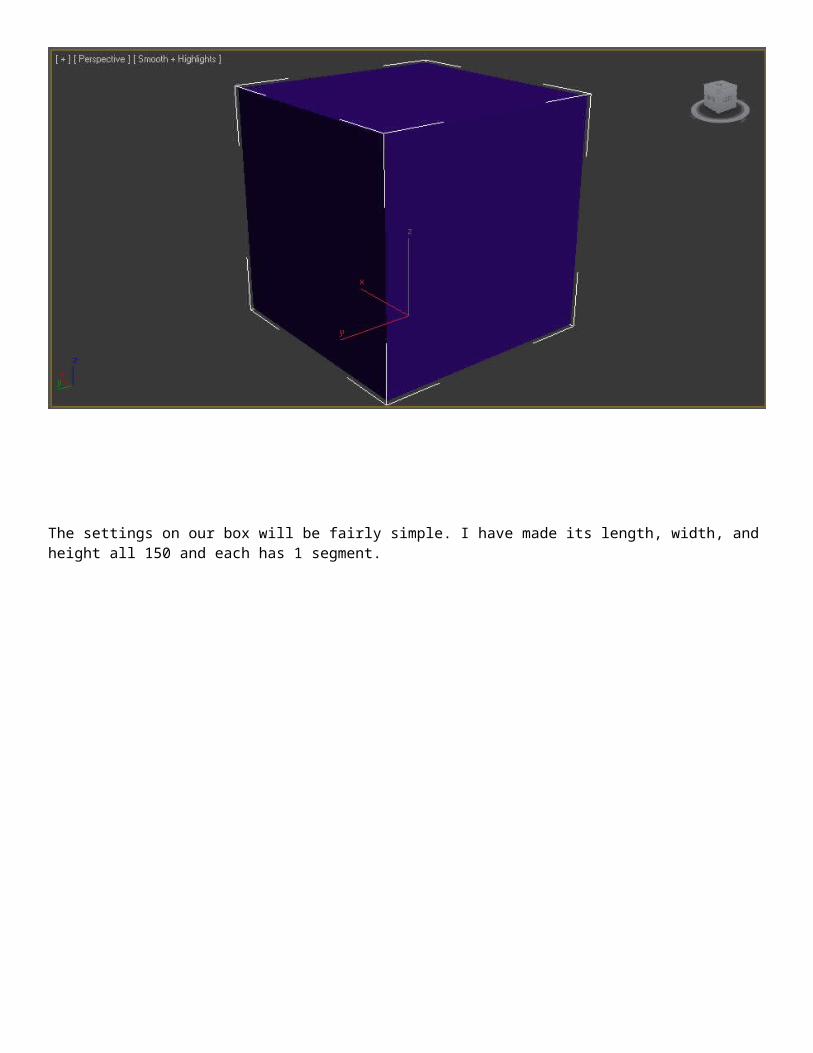
The settings on our box will be fairly simple. I have made its length, width, and height all 150 and each has 1 segment.
When using photometric lighting we have to do our best to keep things as close to real world size as possible. If you take a look at the grid in your perspective viewport, you should try and keep everything inside of or close to the size of said grid if possible. Our box is going to simulate our entire room, and therefore with these size settings should go just outside of this grid.

After you have the size settings correct, go up to the Modifier List drop down at the top, and from the list select a "Shell" modifier.
------------------->
----------->
With the Shell modifier on top of our box in the modifier stack, we have added some thickness to the walls of our box, which both gives us an interior of our room, as well as helps keep light out or in the room as well.
I have set an Outer Amount: of thickness to the shell modifier of 5.0.
Now, let's make another box. This one will serve as sort of a pedestal onthe inside of the box so we can put something in the room with some color for the lights to reflect.
Go back to the create tab, choose box, and drag a box out in your Top viewport on the inside of our room like this:

I have placed this box in the upper right corner of our larger box, and given it a Height, Width, and Length of 35.
Now we can zoom inside of our large box and get a view of what's happening on the inside of our room.Use your mouse wheel, or the magnifying glass tool in the bottom right corner of your screen to zoom into the box until you have yourself an inside view of your room like this:
Once you do have a view like the above, then press 'Ctrl + C' on your keyboard to create a camera that matches your current view.
Next we will make 3 spheres. On the create tab, under geometry, click on sphere. Then in your top viewport drag out 3 spheres and place one on either side of the pedestal, and one on top of it like this:

Once you have your 3 spheres in place we need to make some textures so our light has something to bounce off of. Pull up your material editor by hitting 'M' on the keyboard.

Nothing fancy here, we are just going to make 4 textures. One of each red, blue, green, and white textures.
In each texture, all you will be changing is the Diffuse color box. You can see the above one is set to bright red. Make one for each of our 3 colors, and a white one for the room and pedestal color.

Once you have created these textures, assign them to the objects in your scene accordingly by dragging them from your material editor to the objects in your scene. In the end you should have 3 colored spheres, and the boxes should be white. Like this:
Our next step is to create our light source.
On the create tab, the third button over from the left (geometry, shapes, lights) is our lights button.
<-------
<-------

Click it, and then select Free Light from the menu. You will get a warning that looks like this:
Select No, we are not going to be using Exposure Control for this demonstration.
Once the warning is gone, you can click anywhere in your top viewport to create your Free Light. I have placed mine right in the middle of our room, and then moved it up to the ceiling like below.
Try a test render of your scene.

We have our colored spheres and white room, and now a light. It is quite dark however, so now comes the most important part of the process. Changing our settings around.
In new 3D artists, it is very easy to simply create another light to add more light to the scene, and when that doesn't work, add another ... and another.... and another ... etc. Soon you are drowning in lights, and still getting a mediocre to poor rendered image.
Instead try adjusting the settings in both the current lights modifier tab settings, as well as your render settings.

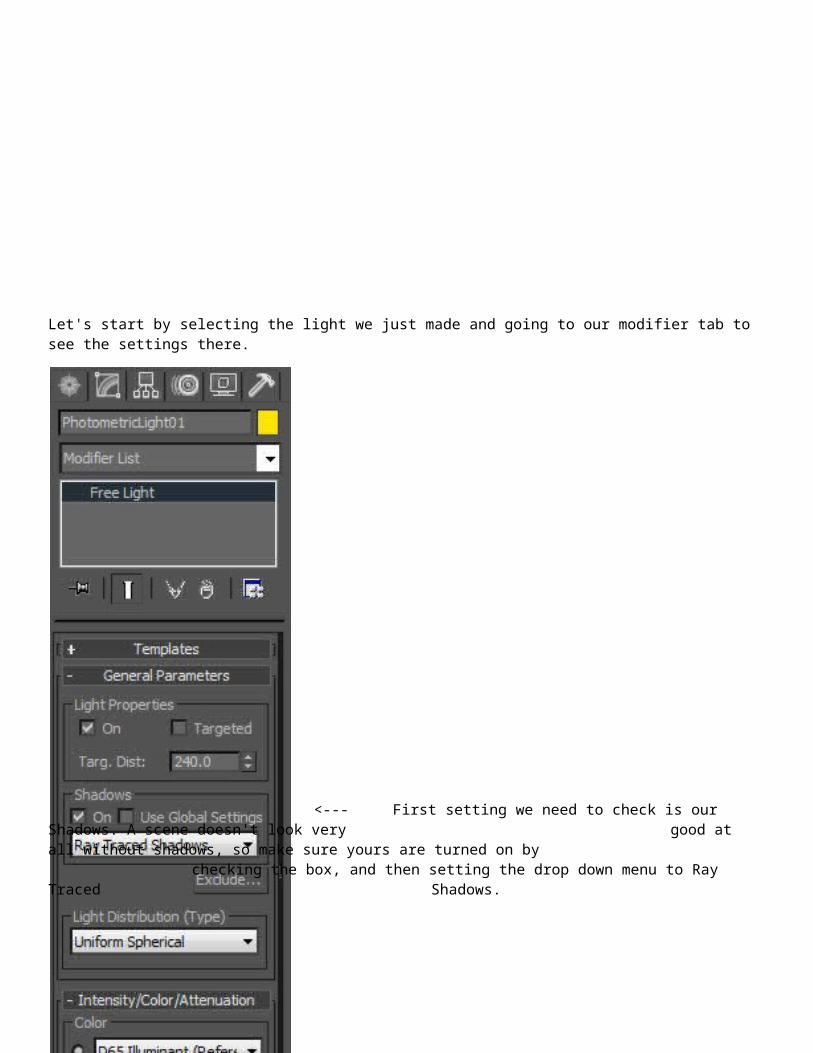
Let's start by selecting the light we just made and going to our modifier tab to see the settings there.
<--- First setting we need to check is our Shadows. A scene doesn't look very good at all without shadows, so make sure yours are turned on
by checking the box, and then setting the drop down menu to Ray Traced Shadows.
Next, go down to the rollout labeled Intensity/Color/Attenuation. In here <--- you have several settings that you could change in order to increase the
amount of light in your scene. The first one under "Color" is a drop down menu, there are many presets in this list you can experiment with to find one that might work for what you are trying to do in your scene. Under that is the Kelvin settings. Light is measured on a Kelvin scale, true daylight is 3600 degrees Kelvin in the real world, so selecting and adjusting these settings might give you some degree of control as well.
The Filter Color is the color of your light, so if you need something other than white ... change the color in the Filter color box.
Last, the Intensity area, defaulted at cd, the number below is at 1500.0 adjusting this number either up or down will make your light
burn brighter, or darker, so this might also be a good way to increase light in your scene. We will leave these settings at the default for now.

Instead of changing anything else in our light settings, let's go find our "Render" setup and change some things there. You can get there by pressing F10 on your keyboard, or the third from the right button above, in the series of teapots.
or you can find it in the main Rendering menu, by finding Render Setup. You will come to a window that looks like this:
On the Common Tab, we first and foremost need to change our renderer from the Default Scanline Renderer, to Mental Ray.

Scroll all the way to the bottom of this window until you see the Rollout labeled "Assign Renderer"
<--- Click the first button marked ' ... '
Select Mental Ray Renderer from the list it brings up. Mental Ray is a renderer that Autodesk has included with the 3DS Max program, because it is a much more capable piece of software and can accomplish things like advanced lighting, which the Default Scanline cannot.
Once you have changed your renderer you should see next to Production: that it says Mental Ray.
Scroll back to the top of the Render Setup window and make any other changes to the Common Parameters that you like. Things like Size, single frame, or animation, and where to save the files and what type of files can be found on this tab as well.

Once it is to your liking, select the tab on top marked "Indirect Illumination" This tab houses all of our advanced lighting settings and is probably one of the most important groups of settings in the entire program. Once on this tab you will see some settings that look like this:
The first thing to check on is at the very top left of the settings. a Checkbox marked Enable Final Gather:This should be defaulted to on, but in case it isn't, put a checkmark in the box. Final Gather is what is going to allow us to bounce light and color off of one object to another throughout our scenes.
Over to the right of that box is the Multiplier: number. Defaulted at 1, sometimes increasing this number will give you more light in a scene without any other fuss.
Below these are the presets , drag the slider from left to right and see the differences in the numbers below and the words to the right. Notice that on the last jump from High, to Very High that the numbers go astronomically high. Most of the time you really don't need that much, so it is always better to adjust these settings yourself so as not to end up wasting resources and time later on when you are waiting on it to render out.Below the presets, we find the actual Final Gather settings.

Initial FG Point Density: This number will give you a more densely packed point of light, raising it can give you some nice results, but be ready for longer and longer wait times. We can leave it at 0.1 for now. Raising this number can help reduce the splotchy look of your light in the future though, so don't forget about it.
Rays per FG Point Density: This is a big one, for every point of light (however dense you made them above) is assigned a certain number of light Rays. It's default is at 30, which doesn't do much at all, to the Very High setting shoots it up to 10,000. Which for most cases, goes way too far overboard. Let's start this number at a nice round 300, and do another test render to see what happens to our scene.
Did you render? Not much happened still did it?
Below the Rays setting is the Interpolate Over Num. FG Points: This usually starts out around 50, which is ok. Sometimes you won't need it even that high. This lets the rays know how far spread out they are going to be along the FG points.
Lets reduce it slightly to about 30 or so, and try rendering again.
Still not much eh?
Then let’s go down and over to the left again to another very important number. Diffuse Bounces. Remember what we talked about in the beginning of this thing, how light bounces from one object to another in the real world transferring colors and light along with each bounce? This is where we can tell it to do just that.
Defaulted at 0, means that light isn't bouncing around at all, if we raise this number up it bounces further and further which each number. Start low and increase as needed. Try 1 and test your render. Got a little brighter didn't it? Try 2 and test again. Brighter still! Lets bump it up to a solid 4.
We are seeing a lot more light in our scene now, and look at the walls of the room and the sides of the pedestal. We can start to notice that the color of our spheres is bleeding off of them and onto the walls in our room, softening hard edges and bringing a bleed through of varying colors out of our objects and into the scene as a whole.
Remember that Multiplier: number we mentioned at the top of the screen. Instead of adding more Bounces lets add some more there and see what happens, give it a Multiplier: of 2.
Now our light is reflecting off of everything and really brightening up our dark dreary room. Don't be afraid to experiment with these numbers in different amounts in your own scenes to really get a feel for how Final Gather lighting works.
You might notice about now that the colors are looking a little splotchy on the walls. If you go to the Advanced area below the Diffuse bounces, and turn up the Noise Filtering (Speckle Reduction): to High or Very High you can reduce that splotchy look, you may also end up reducing your bouncing light and color as well, so practice your balancing act with all these settings and see how you like it.

Our final rendered result should look something like this:
Remember that these are flat colors we have been practicing with, and in your 3D Artwork, any colors from your textures, other lights, etc. will also bleed onto other objects and bounce around a room as well.
This can add a serious degree of reality to your artwork, so never forget to adjust your light settings.