· web viewsetting up your mla word document. step 1: select “no spacing” under the...
TRANSCRIPT

SETTING UP YOUR MLA WORD DOCUMENT
Step 1: Select “NO SPACING” under the “Styles” heading.
Step 2: Change the font to TIMES NEW ROMAN and Select a “12” pt font.

Step 3: From within the insert tab in the top left tab on your menu, hover over the Page number tab until a dropdown menu appears. Hover over the “top of page” option until yet another dropdown menu appears. Click on the “Page Number 3” option which shows the page number appearing in the top left corner of your document.
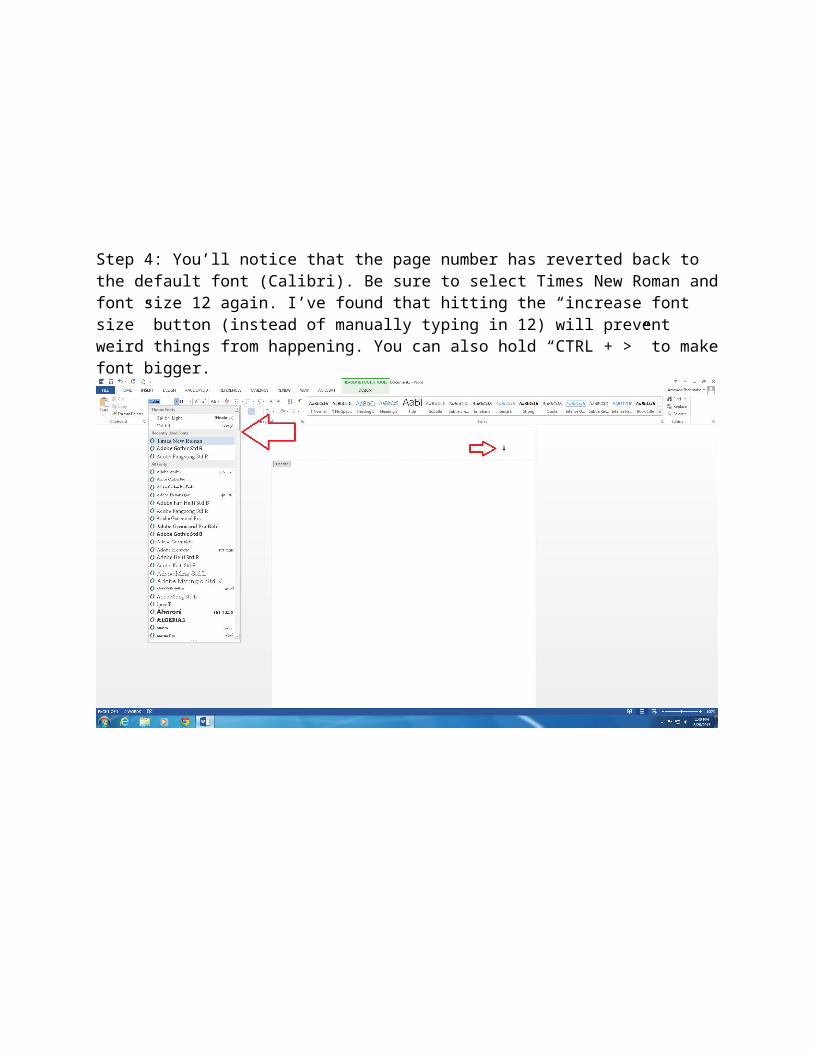
Step 4: You’ll notice that the page number has reverted back to the default font (Calibri). Be sure to select Times New Roman and font size 12 again. I’ve found that hitting the “increase font size” button (instead of manually typing in 12) will prevent weird things from happening. You can also hold “CTRL + >” to make font bigger.
Step 5: Add your LAST NAME before the page number. Leave a space between the end of your name and the number.

Step 6: Select the “Header & Footer Tools” tab (highlighted in Green). From that tab check the box “Different First Page”. This will seemingly remove the header that you just created. No worries! Because you include a heading in your MLA document on the first page, it becomes redundant to include a page number with your name on the first page. By clicking the “different first page” option, your header will appear once you have 2 or more pages.

Step 7: Fill in your Heading (See the completed MLA document below). Your heading should include YOUR name, your professor’s name, your class information INCLUDING your section number, and finally the DUE date (Date Month Year) of the assignment.
Here I have typed out a sample assignment. Notice that the space for the title is center-spaced and capitalized. The first paragraph is indented by exactly one TAB space. Also notice the arrow pointing “Blank Page” under the “Insert” tab. When you are ready to include your Work(s) Cited page, select “insert blank page” to prevent any change in format during the writing process.

Step 8: After you have inserted a blank page, you will notice that your header has reappeared (told you so). Notice that you will need to include a centered header declaring that the last page of your completed document is the Work(s) Cited page—please note that “Work” means ONE citation and “Works” means TWO OR MORE. Your citation should be left-aligned (NO TAB SPACE). If you have a citation that goes on to a second line, you will need to select a “hanging Indent” from the “paragraph” tab on the Home tab.

Step 9: You’ll notice that the above documents are single-spaced. This is just a personal preference for me while writing. Feel free to double space (highlight text and then CTRL + 2) at any time AFTER selecting “No spacing” in step 1. Remember: ONE SPACE between every line INCLUDING paragraphs.
Completed Document: