we thank you for choosing this product ... - swarovski optik · especially of any dried-on mineral...
TRANSCRIPT

Z5/Z3 1
WE THANK YOU FOR CHOOSING THIS PRODUCT FROM SWAROVSKI OPTIK. IF YOU HAVE ANY QUESTIONS, PLEASE CONSULT YOUR SPECIALIST DEALER OR CONTACT US DIRECTLY AT SWAROVSKIOPTIK.COM.

Z5/Z3 Z5/Z32 3
1. OVERVIEW
4.1
55.1
64
1
2
8
3
7
9
1 Dioptric correction2 Magnification adjustment ring3 Screw-on cap4 Elevation adjustment turret4.1 Zero point adjustment5 Windage adjustment turret
5.1 Zero point adjustment6 Knurled knob7 Parallax turret (depending on model)
8 Transparent scope covers
9 Coin opener (depending on model)
2.1 ADJUSTING THE FOCUSSimply turn the dioptric correction ring to achieve the best focus for your individual setting of the reticle.
First turn the dioptric cor-rection ring all the way to the left (counter-clock- wise) and then to the right, until the reticle is optimally focused.The adjustment ranges
depend on the individual models. Please consult the technical data sheet enclosed.
2.2 CHANGING THE MAGNIFICATIONYou can set the desired magnification by turning the (stepless) magnifica- tion adjustment ring through 180°. The scale on the adjustment ring allows simple and easy reading of the setting. The
soft, ribbed covering of the adjustment ring has a nose for better orientation.
2.3 THE RETICLE IN THE SECONDIMAGE PLANE (EYEPIECE IMAGE PLANE)
If the magnification increases, then the reticle remains the same size – the size of the image is increased but not the size of the reticle. Even for large magnifications only a little of the target is covered. The reticle can only be used for estimating the distance to a limited extent.
2. OPERATION

Z5/Z3 Z5/Z34 5
2.4 PARALLAX
Rifle scope models without Adjustable Parallax are set to be free at 109 yds (100 m) – or in the case of the BRH and BRX reticles at a target distance of 219 yds (200 m). This means that at a distance of 109 yards (100 m) and 219 yards (200 m) respectively, the image of the object aimed at and the image of the reticle are in a single plane.
Please take into consideration:With shots at distances greater or less than 109 yards (100 m) and 219 yards (200 m) respec-tively, take care to position the eye carefully central to the scope. This will prevent shifting of the impact point due to parallax errors.
2.5 OPERATION OF THE PARALLAX TURRET(DEPENDING ON THE MODEL)
Using the parallax turret, you can adjust the opti-mum focus for every target distance thus preventing aiming errors due to par-allax.
a) Quick AdjustmentThe target distances are printed on the parallax turret from 50 to ∞. Turn the parallax turret until the index point indicates the desired distance.
b) Precision adjustmentSet the magnification as high as possible and turn the parallax turret until the image appears at its sharpest. Now move the eye backwards and forwards within the range of the exit pupil. If in the process the reticle moves in relation to the image, correct the distance setting until it is no longer possible to discern any difference between the movement of the reticle and the movement of the image.
3.1 BASIC ALIGNMENTTo ensure perfect alignment of the scope to the rifle, have a competent gunsmith mount the scope.The reticle has been factory-set to the mechani-cal middle position. Prior to mounting you can check the correct position of the reticle. To do this, unscrew the screw-on caps of the elevation adjustment turret and windage adjustment turret.Now turn the respective knurled knob of the eleva- tion adjustment turret and windage adjustment turret clockwise until it reaches the stop. Then turn the knurled knob back again counter-clockwise until it reaches the stop and count the clicks at the same time.Halve the number of clicks and you will have the exact middle position. Repeat this procedure for the second turret.
Note:When mounting the rifle scope onto the rifle, please make sure that you comply with the eye relief specified (see technical data sheet).
3.2 ALIGNMENT OF THE SCOPE TO THE RIFLEIf the point of impact of the bullet deviates from the aiming point, this can be easily and precisely corrected by adjusting the elevation turret and the windage turret of the scope.Regardless of corrections, the middle point of the reticle always stays in the middle of the field of view.
Preparations for sighting the rifle scope in:Before sighting the rifle scope in, please make sure that the following parameters are set correctly:- Parallax- Diopter adjustment- Level of magnification
To make adjustments, simply unscrew the screw-on caps of the elevation and windage turrets.
3. SIGHTING THE RIFLE SCOPE IN

Z5/Z3 Z5/Z36 7
3. Pushing the knurled knob back down re- engages the reticle adjustment and the knurled knob. Your individual setting is now precisely adjusted as the zero point.
3.4 TIPS AND TRICKS FOR MOUNTING RIFLE SCOPESNowadays, there is an enormous choice of tech-nically advanced rifle scope mounts which allow rifle scopes to be attached securely to firearms.By using the right tools and amount of effort, desired levels of stability and accuracy can be achieved. Please read the installation instructions provided by the individual manufacturer carefully. These contain detailed information about the appropriate tool to use and a few tips and tricks to make installation easier.
Here are a few examples:• Depending on the type of mount (please read the particular manufacturer’s instructions), when fitting the mount base it may be helpful to remove the finish from the contact surfaces, then degrease them and, when screwing the contact surfaces into place for the final time, first coat them with a suitable adhesive.• If necessary, you could readjust the rings to make sure that the fitting is perfectly centred, e.g. by lapping the rings.• Also degrease the clamping surfaces and inner sides of the rings and apply a suitable adhesive to at least the lower halves of the rings for complete stability when shooting.• Please take particular care when adjusting the reticle.• Eye relief distance:The correct eye relief distance for the rifle scope can be found in the technical information section.Individual settings and adjustments allow users to achieve an optimum field of view and a comfor-table firing position.• Torque:Tighten the screws for the rings on both sides to a maximum 200 Ncm (maximum 17.7 inch pounds). This ensures that the tubular bodies are not placed under unnecessary pressure and guarantees accurate, tension-free installation. To obtain the right amount of force, a torque wrench is recommended.
When the shot is lowTurn the knurled knob of the elevation turret in the direction of H (counter-clockwise).
When the shot is highTurn the knurled knob of the elevation turret in the opposite direc-tion to H (clockwise).
When the shot is to the leftTurn the knurled knob of the windage turret in the direction of R (counter-clockwise).
When the shot is to the rightTurn the knurled knob of the windage turret in the opposite direction to R (clockwise).
The impact point correction per click can be taken from the enclosed technical data sheet or the information printed on the elevation or windage adjustment turret of your rifle scope.
3.3 ZERO POINT ADJUSTMENTOnce you have aligned the scope to the rifle, you can retain this basic setting. The scale for this is located on the respective knurled knob of the elevation/windage adjustment turret.
1. Pull the knurled knob upwards.
In this position the reticle is not adjusted when the knurled knob is twisted.
2. Turn the knurled knob until the zero point of the scale is aligned with the index point on the scope.

Z5/Z3 Z5/Z38 9
Under no circumstances should the rings be tightened instead of sticking together the bottom halves of the rings, which is an essential step. If you have a right and a left half please follow the instructions of the ring/mounting-manufacturer.If the right tools are used with the right amount of force and the manufacturer’s instructions are followed closely, the rifle scope should require little correction when focusing in to shoot. Use the individual components to obtain the highest levels of accuracy for your chosen firearm/mount/rifle scope combination.SWAROVSKI OPTIK provides no guarantee that the content of this page is correct, current or com-plete as information and products are constantly changing.
3.5 PBC – PERSONALIZED BALLISTIC CAM
SWAROVSKI OPTIK has developed a personalized ballistic cam (PBC) for all its rifle scopes that are equipped with a ballistic turret. The ballistic cam makes longrange shooting even easier.
BALLISTICPROGRAMS.SWAROVSKIOPTIK.COM
15032
4. MAINTENANCE AND CARE
4.1 LENS-CLEANING CLOTHThe special microfibre cloth can be used to clean even the most sensitive glass surfaces. It is suit- able for objective lens, eyepieces and spectacles. Please keep the microfiber cloth clean as dirt particles can damage the lens surface. If the cloth is dirty, it may be washed in lukewarm soapy water and allowed to dry naturally. Please use it exclusively for cleaning lens surfaces.
4.2 CLEANINGWe have designed all elements and surfaces to require very little care. The SWAROCLEAN non- stick outer surface coating makes it much easier to clean objective lenses and eyepiece lenses, especially of any dried-on mineral deposits (e.g. water marks from condensation), insect repellents and tree resin. To ensure the long-lasting optical brilliance of your rifle scope, you should keep the glass sur-faces free from dirt, oil and grease. To clean the lens, first remove larger particles with an optical lens brush. For the subsequent thorough cleaning we recommend breathing lightly onto the lens and then cleaning it with the moist cleaning cloth. It is recommended to clean the metal parts with a clean, soft cleaning cloth.
4.3 STORAGE
You should keep your rifle scope in a well-ventila-ted, dry, dark place. If the rifle scope is wet, it must be dried prior to storage.
5. FOR YOUR SAFETY
5.1 WARNING!Never use the rifle scope to look at the sun! This will lead to damage to your eyes! Please protect your rifle scope from unnecessary solar radiation.
Please note the eye relief distance specified for a mounted rifle scope (see technical data sheet for dimensions).
Z5/Z3 Z5/Z310 11
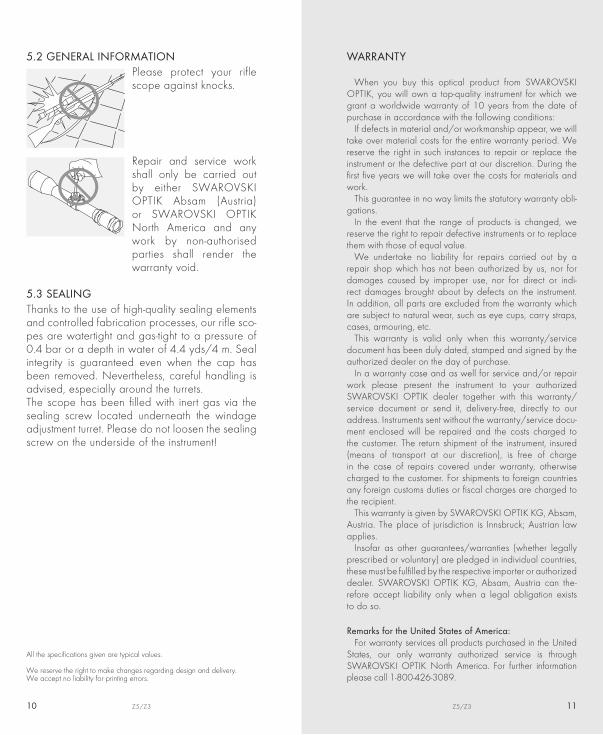
5.2 GENERAL INFORMATIONPlease protect your rifle scope against knocks.
Repair and service work shall only be carried out by either SWAROVSKI OPTIK Absam (Austria) or SWAROVSKI OPTIK North America and any work by non-authorised parties shall render the warranty void.
5.3 SEALINGThanks to the use of high-quality sealing elements and controlled fabrication processes, our rifle sco-pes are watertight and gas-tight to a pressure of 0.4 bar or a depth in water of 4.4 yds/4 m. Seal integrity is guaranteed even when the cap has been removed. Nevertheless, careful handling is advised, especially around the turrets.The scope has been filled with inert gas via the sealing screw located underneath the windage adjustment turret. Please do not loosen the sealing screw on the underside of the instrument!
All the specifications given are typical values.
We reserve the right to make changes regarding design and delivery.We accept no liability for printing errors.
Z5/Z3
WARRANTY
When you buy this optical product from SWAROVSKI OPTIK, you will own a top-quality instrument for which we grant a worldwide warranty of 10 years from the date of purchase in accordance with the following conditions:
If defects in material and/or workmanship appear, we will take over material costs for the entire warranty period. We reserve the right in such instances to repair or replace the instrument or the defective part at our discretion. During the first five years we will take over the costs for materials and work.
This guarantee in no way limits the statutory warranty obli- gations.
In the event that the range of products is changed, we reserve the right to repair defective instruments or to replace them with those of equal value.
We undertake no liability for repairs carried out by a repair shop which has not been authorized by us, nor for damages caused by improper use, nor for direct or indi-rect damages brought about by defects on the instrument. In addition, all parts are excluded from the warranty which are subject to natural wear, such as eye cups, carry straps, cases, armouring, etc.
This warranty is valid only when this warranty/service document has been duly dated, stamped and signed by the authorized dealer on the day of purchase.
In a warranty case and as well for service and/or repair work please present the instrument to your authorized SWAROVSKI OPTIK dealer together with this warranty/service document or send it, delivery-free, directly to our address. Instruments sent without the warranty/service docu- ment enclosed will be repaired and the costs charged to the customer. The return shipment of the instrument, insured (means of transport at our discretion), is free of charge in the case of repairs covered under warranty, otherwise charged to the customer. For shipments to foreign countries any foreign customs duties or fiscal charges are charged to the recipient.
This warranty is given by SWAROVSKI OPTIK KG, Absam, Austria. The place of jurisdiction is Innsbruck; Austrian law applies.
Insofar as other guarantees/warranties (whether legally prescribed or voluntary) are pledged in individual countries, these must be fulfilled by the respective importer or authorized dealer. SWAROVSKI OPTIK KG, Absam, Austria can the-refore accept liability only when a legal obligation exists to do so.
Remarks for the United States of America:For warranty services all products purchased in the United
States, our only warranty authorized service is through SWAROVSKI OPTIK North America. For further information please call 1-800-426-3089.
11

Z5/Z312