windows xp service pack 2 · windows xp service pack 2 galileo international© ... print manager...
TRANSCRIPT

Windows XP Service Pack 2 Galileo International©
WINDOWS XP SERVICE PACK 2 & GALILEO PRODUCTS With Microsoft’s XP Service Pack 2, Microsoft is introducing a set of security technologies that will help to improve Windows XP based computers’ ability to withstand malicious attacks from viruses and worms. Follow the steps below to configure your computer for access with these new security features.
To verify whether Windows XP Service Pack 2 is installed:
1. Click Start, Control Panel.
2. Double click the System Icon.
The System Properties screen displays.
The Service Pack version (if installed) is located in the System area.
3. Click OK to close.
If you have determined that Service Pack 2 is installed, follow the steps starting on page 2 configure the Windows Security settings.
Windows XP Service Pack 2 1

Windows XP Service Pack 2 Galileo International©
CONFIGURING SERVICE PACK 2 TO WORK WITH GALILEO PROVIDED PRODUCTS 1. Click Start, Control Panel and double-click the Security Center Icon in Control
Panel.
The Windows Security Center dialog displays
2. In the “Security essentials” area, verify that both Firewall and Automatic Updates are
turned on (green). Follow the steps starting on page 3 to manage Automatic Updates and the Windows Firewall.
Windows XP Service Pack 2 2
Windows XP Service Pack 2 Galileo International©
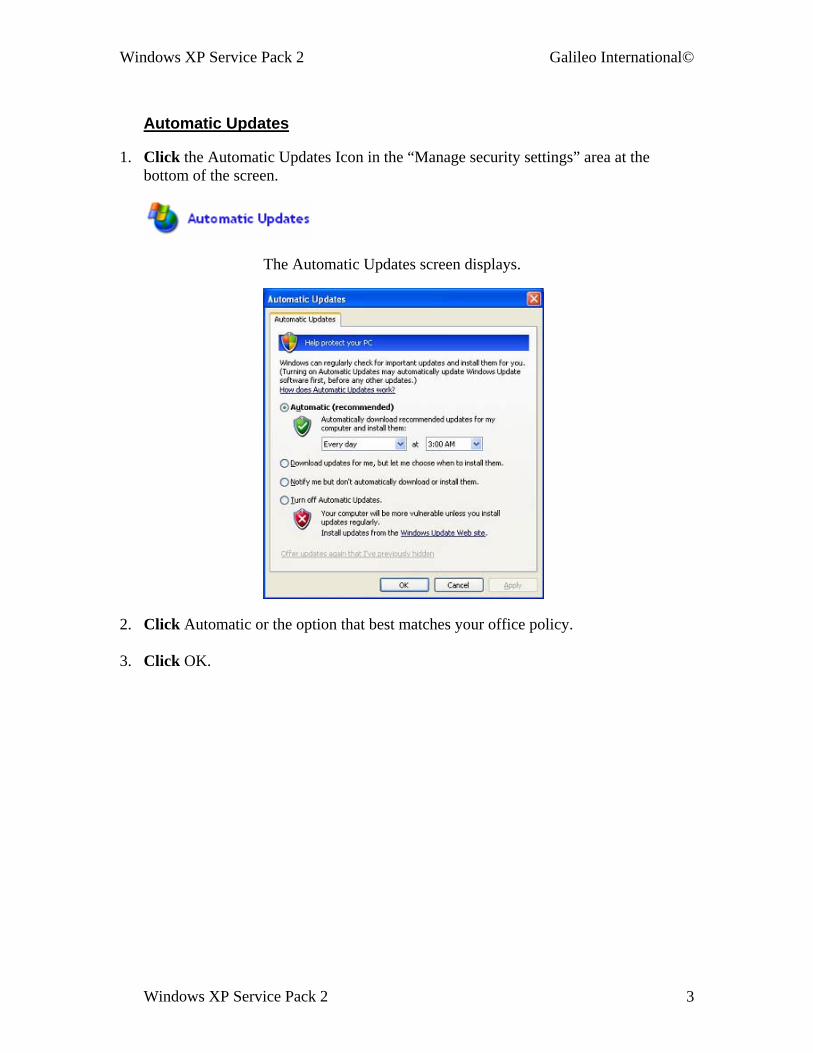
Automatic Updates
1. Click the Automatic Updates Icon in the “Manage security settings” area at the
bottom of the screen.
The Automatic Updates screen displays.
2. Click Automatic or the option that best matches your office policy.
3. Click OK.
Windows XP Service Pack 2 3
Windows XP Service Pack 2 Galileo International©
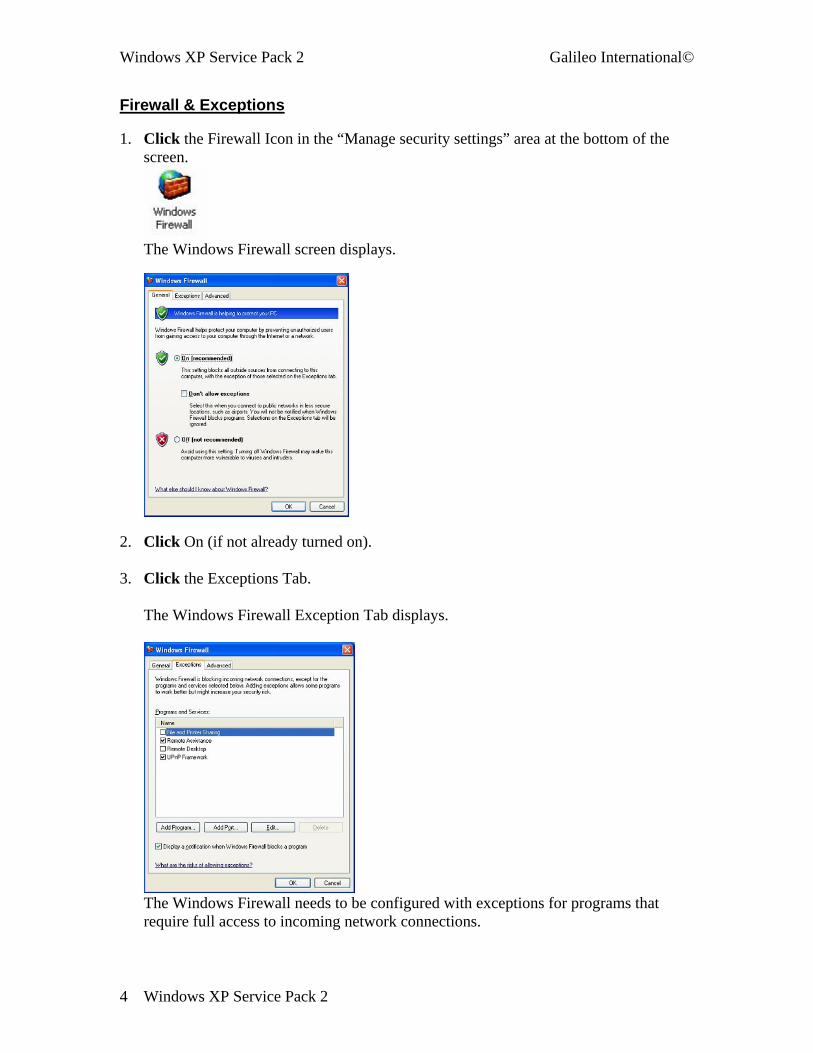
Firewall & Exceptions 1. Click the Firewall Icon in the “Manage security settings” area at the bottom of the
screen.
The Windows Firewall screen displays.
2. Click On (if not already turned on).
3. Click the Exceptions Tab. The Windows Firewall Exception Tab displays.
The Windows Firewall needs to be configured with exceptions for programs that require full access to incoming network connections.
Windows XP Service Pack 2 4

Windows XP Service Pack 2 Galileo International©
The following programs need to be added to function properly.
Program Environment Focalpoint 3.5 (Page 5)
Dedicated TCP/IP (Frame Relay) Managed or Unmanaged VPN FocalpointNet
Focalpoint/Galileo Print Manager (Page 7)
Any computer that is running Focalpoint Print Manager or Galileo Print Manager
Nortel Extranet Contivity Client (Page 8)
FocalpointNet (DSL/Cable modem or dialup) FocalpointNet WinGate PC
Wingate proxy server (Page 10)
FocalpointNet Wingate PC FocalpointNet (DSL/Cable modem or dialup)
From the above chart, determine which program (if any) applies to your computer, then follow the appropriate steps below to configure.
FOCALPOINT 3.5 1. Click the Add Program button
The Add a Program screen displays.
2. Click Browse
Windows XP Service Pack 2 5

Windows XP Service Pack 2 Galileo International©
3. In the File name field type C:\WINDOWS\SYSTEM32\NTVDM.EXE
4. Click Open The Add a Program screen redisplays.
5. Click OK
Windows XP Service Pack 2 6

Windows XP Service Pack 2 Galileo International©
FOCALPOINT PRINT MANAGER / GALILEO PRINT MANAGER 1. Click the Add Program button
The Add a Program screen displays.
2. Click Browse
3. In the File name field type C:\PROGRAM FILES\FOCALPOINT\DPS\GALSA.EXE
Windows XP Service Pack 2 7

Windows XP Service Pack 2 Galileo International©
4. Click Open
The Add a Program screen redisplays.
5. Click OK FOCALPOINTNET – EXTRANET “CONTIVITY CLIENT” 1. Click the Add Program button
The Add a Program screen displays.
2. Click Contivity VPN Client from the list of programs.
3. Click OK
Windows XP Service Pack 2 8

Windows XP Service Pack 2 Galileo International©
The Windows Firewall screen redisplays.
4. Click OK to close the Windows Firewall and then close the Control Panel window.
Windows XP Service Pack 2 9
Windows XP Service Pack 2 Galileo International©
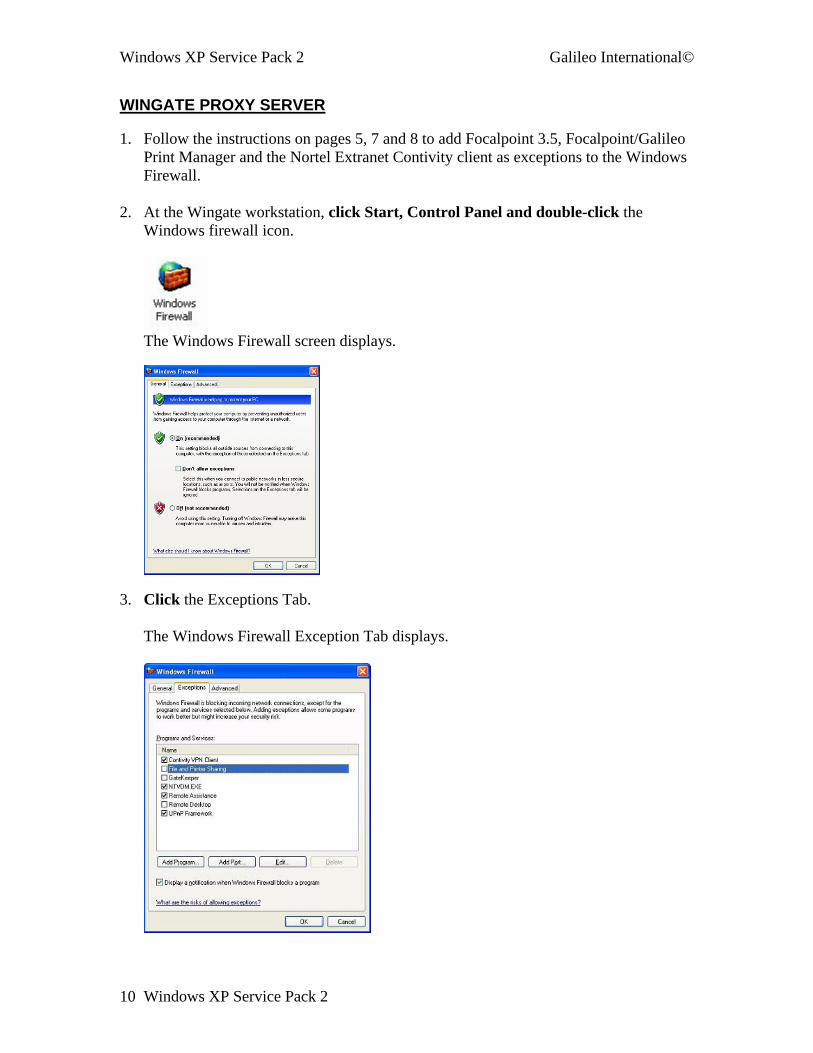
WINGATE PROXY SERVER 1. Follow the instructions on pages 5, 7 and 8 to add Focalpoint 3.5, Focalpoint/Galileo
Print Manager and the Nortel Extranet Contivity client as exceptions to the Windows Firewall.
2. At the Wingate workstation, click Start, Control Panel and double-click the Windows firewall icon.
The Windows Firewall screen displays.
3. Click the Exceptions Tab. The Windows Firewall Exception Tab displays.
Windows XP Service Pack 2 10

Windows XP Service Pack 2 Galileo International©
4. Check the option for “File and Printer Sharing”.
5. Click the Add Program button. The Add a Program screen displays
Windows XP Service Pack 2 11

Windows XP Service Pack 2 Galileo International©
6. Click the browse button.
7. In the File name field type C:\PROGRAM FILES\WINGATE\WINGATE.EXE
8. Click Open The Add a Program screen redisplays.
9. Click OK.
Windows XP Service Pack 2 12

Windows XP Service Pack 2 Galileo International©
ALLOWING ACCESS FOR OTHER KNOWN PROGRAMS
Note: The Windows Firewall will display a popup message as shown in the example below if it is blocking access to a program. To allow access (if it’s a known program that you wish to grant access), click the unblock button.
Windows XP Service Pack 2 13