woodsmith 62 - apr 1989 - working with plywood
TRANSCRIPT
8/13/2019 Woodsmith 62 - Apr 1989 - Working With Plywood
http://slidepdf.com/reader/full/woodsmith-62-apr-1989-working-with-plywood 1/24
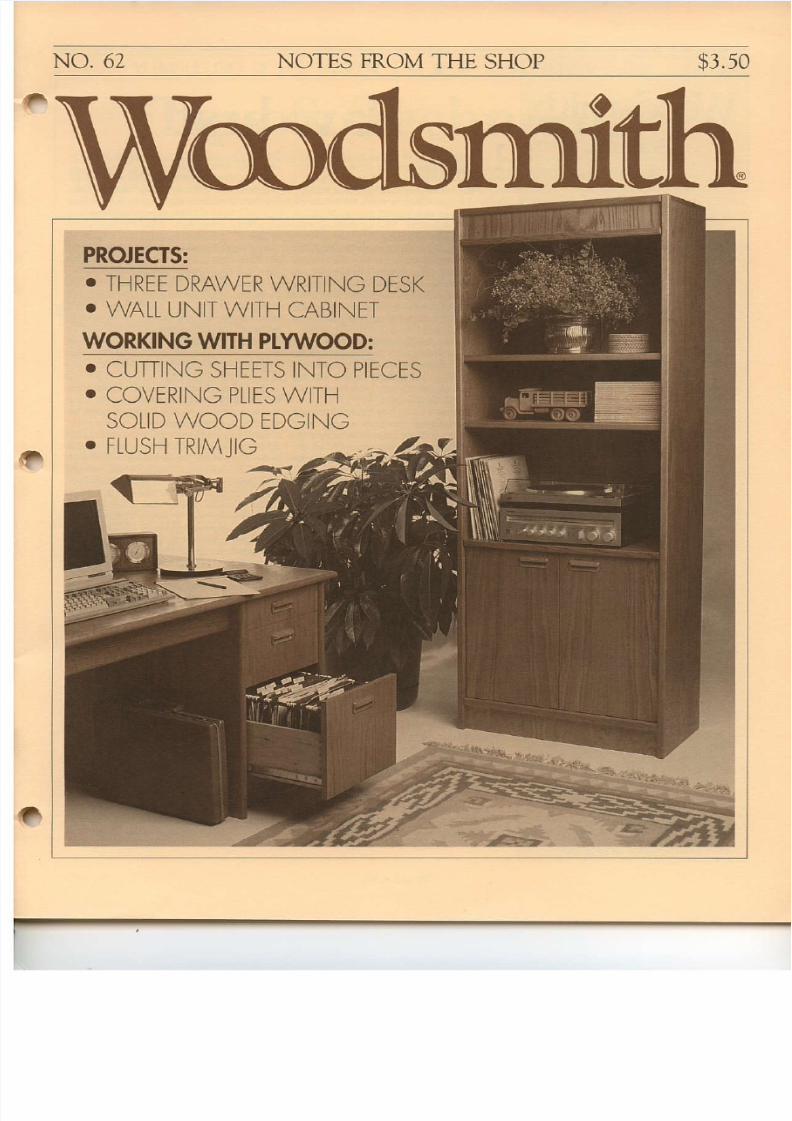
NO. 62 NOTES FROMTHE SHOP $3.50

8/13/2019 Woodsmith 62 - Apr 1989 - Working With Plywood
http://slidepdf.com/reader/full/woodsmith-62-apr-1989-working-with-plywood 2/24
NO.62 APRIL1989 E D I T O R ' S C O L U M N
Wodsmitkr Sawdust ,(
EdirorDonald B. P.schkeDesign ir€clor ed Kralice*
Managing ditorDouglas L HicksAsislantEdikns Douglas M. Lidster
Kent A- BucktonP@iect esigner en tunkel
Tednical llustratolsOavid KeylingCary ChrislensenRod SloakesCh.is Glowacki
Cusromer €M@Sandy gaum, rgr.Jackie StsoudPat KoobLisa Thompson
PojectSupplies eslie Ann GearhartT€rryJ. Slrohman
compuleropera$ons en Mine.Adminisrrarivessrs. Cheryl Scotl
Jeen CareyBuilding aintonance rchie Krause
WOODSMITHSTORES
YI n the ldqt ssue f lvodd\pil, we nlrGlduced our newaraphic styl€ the new
way the an and text are aid out on a page.wasboth excited ndnervousaboutmakingthese changes. For ten years we ve alwaysreceived ery n;ce compliments bout heIook of l{/oods,titr. So, my feclins wasidon chanse a sood irins.
Butthechanseswevenadea€intended1obe t p,tf€r?€rls nr he way he arficlesare presented. ow thal we have wo ssu esunder our bel1s, 'vebeen ery happy withal lthechanges.Theyletuspresenttheprojectsin a slepby-stepformatthat'seasierto ead.And I lhink;t's easier o see he process ihowea€h projecl s built.
Most of the chanses lalked aboul n the
last ssue had o do with the sraphics of hearticles. ut here are several lher chanseswe ve made parliculely in the way wepresent woodworking techniq es as-sociated i& the projects.
Every project has: few nteres ting ech-niques r some ips hal apply o many olherpmjects swell. r the past,we've feseniedthese echniques isht alons with atl theother delaits about buildins each padicular
That approach s okay the informationis n the ssue. But it's usuallybuned n fiearticle.And, to be honesl aboul t, ifyou renot particularly nlerested n that project,there's notmuch poinl nreadinglhrough tjusl to see l lhere sa sood ip or two buried
Anleay, we fell that there were a lot ofsood iips being $issed. So, we decided ohishlight hese ips so hey re easiertofind.Actually, we re doing that in two ways.
sHop NnrEs. F'irst, we've added a regrlarfealure called Shop Notes. Allhoush ihispage has appeared n a few previorls issues,itwas never he e!'rldrleaturewe ntendedit to be.
The deabehind Shop Notesis o sene asa collection of tips from the lvoodd,iitlshop. As we're building he projects or anissue, here almys seems o be a lew soodglrneral ipswe want o show.
For nstance, n thisissueweve ncludedfour tips that could be used on a variely oiprojects. How to inslall reccsscd woodendrawcr pulls.How to nake a s;mplcjis hathelps alisn a rolrtcr to cut a dado. How 10moun( false drawer fronts and get thenalisned. nd howto rip hin stripsolwood obe used or edsins plwood.
That's quite a collection. n thc past,thesetips misht have been buried n the projectanicle, bul cou ld have been easily nissed.
Now we're putting them in Shop Noles 10highlight hern a ittle more.
TIp Bo)(Es. Anolher approach we're ex-perjmentingwith s the use ofwhatw€ calaTip Box. fwe have a spccia] ipforbuildinsa projecl, ulil alsohassereral pplications,we will try 10 hichlicht it in a Tlp Box in the
For exaorple, when we were assenblinsthe wall Unit shown on pase 4, we had loahe ed clamp larse plyvood sides to thepl)1vood shelves. To get even pressurealo.s the lengtlt of the joint, I uscd taperedclampins blocks. These blocks ae a niceidea, so we pul th;s tip in a tinted box tohighlght i 1a inle, see page 7.
TEcHNreuE ARncLEs. While I'n on the
subject, he one request we've had con-sistendy over the years s 1() how more techniques on woodworkins . n addi t ion oaddins Shop Noles as a regular eatur e ndincludingTipBoxes, eare alsosoinsto putnore emphasis on fulHendh anicles onwoodworkngtechniques.
In this ssue or example, we ve ncludedthree articles on fie techniquesw e sed osolve some of the problems ssocialed ithpltqood. How o cu1 he pieces ou need outof a larse sheet. How 10 apply solid'woodedging stripstohide the plies on he edgesofthe pllvood pieces. And a special is tohelp trim the edging strips flusb with the
we will continue o present hese ech'nique articles n tuhrre ssues. n fact, weofren hoose rojects ust or he echniquesthat are involved in buildins them.
supr,uEs. Thal lakes care of most of themajorchanseswe've ade o Woodsr?iil nthe pasl two issues. However, there s onemore small additionwodh mentioning-
Alo.g with the exploded view of the prcject, he cuttins diasram, nd he malerialslis1,we will always ry to include an nJorma'lionboxonthe suppliesweusedlo uildtheproject.Specifically, e want to provide n-fonnation on he unber, the hardware, ndthefinishinssupplies.
We receive a lot ofrequests asking howmuch t costs o build a project panicu-larlyhowmuch he umbercosts. ince um-ber prices vary dramatically around thecount y, wecouldn come up with one easydollar tslre. Instead,we decid€d o ist t]'enumber of board eel ol lumber we used obu;ld he project.Aquick call o your localsupplier will tel you the p.ice per board oot.
n*nolssuE.TheJuneissueof yooL Lith(No. 63) willbe maiied during he wcek ofJune26.19i l9 .
Operarions SleveKrohmerMalkeringManager Steve Doter
Sr. Louis,MO Jon Behile
Berkerey,cA tlch*l DeHavenOesMoines,A Kentwblsh
WOODSMmI ISSN 164-4114)s pub-lished bimonlhly February Apdl,June,A u g u s l , O c t o b e r , D e c e m b e r ) ywoodsmilh Publishing Co., 2200 GrandAve.,DesMoines, A50312.Woodsmith s a regislered radomark olWoodsmilh ublishing o.Ocopyright 19&9 by woodsmith Publish'ingCo. All Righlsneserved.Subsc.ipllons: One year (6 issues)$12.95,Two Years 12 issues) $22-95.Canada nd Foreagn: dd$2 per yea( tJ.S.
fundsonly.Single opy price,$3.50.Second Class Postage Paid at Des
Postmaster Send change ol address 10Woodsmith, ox 491 Nlt.Monis, L 61054.SUBSCRImON UESnONS? all 8oG435-0715 lL residents: 00-892-0753).7:30 AM o 8:30 PM, CSI weekdays.BACK ISSIJES: For a booklet describingback ssues, end o address bove.SAMPLE OPY Wewillsend free am-ple @W d WbodsniAl o anyone. Juslsend s his/her ame nd address.
Voodsrnitlt N o . 6 Z

8/13/2019 Woodsmith 62 - Apr 1989 - Working With Plywood
http://slidepdf.com/reader/full/woodsmith-62-apr-1989-working-with-plywood 3/24
F R O M F E L L O W W O O D W O R K E R S
Tips & TechniquesR.OPEGLATPf youve ever slued up a frame,and ound hatyourweb lampislost somewhere, o what domake a rope clamp.This clampis made rom two readily availa-ble tems a hand screw and alength frope.
GUIDE FOR Hll|GE tORflSE
To use this clamp, open hefront jaws while closins heback aws so he clamp orms a'qr'",reier to the drawing. Forma oop with the ends of the ropeand ay t on a lat surface. Now,lay te "V'of t]le clamp ver heendsoftherope.
Applyglue o the miters oftheframe and assemble he frame,Thefl place he loop of ropearound he fram€. Noq wNIeholding he ends of the rope,slide he hand screw up close othe hame.
To keep he ends of the ropefrom sl ippins hrough heclanp, tighten down the backhandte so the back aws pinchthe rope. Now, to get the righttersion around he frame,slowlyclose botzhandles n he
hand screw imultaneously.MortA RobbinsPleasant Gmrq Utah
Ed,itor's Note: We rietl, hi"srope clamp method usingLarious tApes of rope. Wefound.l/,'nyLonhrpe orks hebest. And,, t's faiLy cheap atabout 30 cen$ per Joot. Also,V!" uide nslon flat webbing
Cutting hinse mortises with achisel can be dif6cull The prob'lem is t ryins to keep theshoulders of the mort isesstraisht and he bottom laL Tohelp simplify his task, built achisel guide.
The sdde is nadeout of four piec€s ofTarltlick stock. One
stop against he faceof the door or stile.The other three
pieces are slued othe top of the edgestop and guide hechisel when cuttingthe mortise's width and enstl
To mal(e he chisel slide, frstrip apiece ofstock -r,vide or theedge stop. Cut t to length about6rronger han he hinge.
Ther, cuta dado n hispieceequal o the depth of the hinge
shoulders fthe dado.Finally, uta piece or the back
andglue t to he backedge ofthetwowidth stops o create "win-dow" or the chisel.
To use he chisel sride, markthe location of the hinge. Now
look throush the '\rindow inthe guide and alisn he suide othe ayout ines. Then, clamp heguide o the workpiece.
To cut the mortise, start byoudining he three sides of themortise. First, set the chisel
against he twowidth stops, and ap
mortise nds. hen,
hotd the chis€lagairst the length
along the lenet} of
wast€, hopa series freliefcutsalong he length of the window,about every Yl6rr, efer o abawingat eft. Then ay he chisel latin the dado n the edge stop andpare straight n to remove hewaste o the back ofthe guide.
Roger St-DeniARbon,
Quehec
ourcK lPs.Cut Pbwood EasierCutting arse sheets ofpblvoodonsawhorses rjust by yourse[canbeareal hassle. Wlen I don'thave help, and I need o makelong cuts on a sheet ofpl'-vrood,Iput he plywood n op of a 4x8sheet of Stt rofoam bead board.
Set the depth of cut on thecir€ular sa]v so it cuts throughthe pbryood, but barely nto thebead board. You dont have oworry about he blade beinsdamaged n the bead oard. And,idseasy o crawl along he op ofthe pl'.rood to make ong cuts.
Dahiel Mo,LinShaknee, Kansda
. Clean ShouldersWhenever 'm handcutt ingtenons, 've had problems eetrins the shoulders clean. Thebladealwayswants o wanderotrthe scribe ine right at he begin-ning of the irst cut.
To make t easier o start thesawand o help keep he blade nlinewhilecutting, €ut a startingtrowh,r7ith a sharp hisel on he&oste sidr of the scribe ine. Todo this, llst pare straight downon the scribe ine lirst. Then,male a second ut, holding hechisel at a 45' ansle on he wasteside of the score ine. Thiscreates a channel or the sawblade so t rides n the score ine.
Randnll PrestridqeStuttgai.t, Genna.W
. Dowel CentersDowel centers are usetul ormarkins matchins dowel holesin adjoining ieces if theydon't alloutbeforemakins heirrnarL To prev€nt his, place apieceofmasking ape across hedowel centers- The points willstill so throush the tape andmake heir mark.
Richnrd, DornOelwein,Ioua
want or the mortise. Ahinge susually set nto a mortise hethickness of one teaf.) Thelensth of this dado must natchthe englh ofthe hinge.
After he edge top s nished,next cut he hree pieces o formthe U'shaped hisel guide. First,tv,/owidth stops are added o thetopofthe edge top. The widthofthese pieces s caitical becausethis s]vhat determines he widthof the hinge mortise.
To determine he width ofthese two pieces, measure hewidth of one eaj on lie hinse,and add |r (for the width oftheedge stop). Then rip the twowidth stops o size. Now, sluethem o the top ofthe edse stopso the ends al isn with the
sEl|D |la tOUt ftP3IJ]'ou'd [k€ to sharc a tip
with others, s€nd n yoff ideato Woodrr?it 4 Tips & Tech-niques, 220{GrandAve., DesMoines, owa 50312.
We p6y $15 for acceptedtip€. Pleale send an explana-tion and a sketch f n€eded(we'drawarcwone).
H|IGI r4t EDaiioe-o;;;;';o;
'{HN ;fii''IN'H RO'E
No. 62 \foodsmirh

8/13/2019 Woodsmith 62 - Apr 1989 - Working With Plywood
http://slidepdf.com/reader/full/woodsmith-62-apr-1989-working-with-plywood 4/24
F E A T U R E P R O ] E C T
Displaywall UnitWith just woand a hnlfsheets fpLywoodoucanbuild hiswaIL nit.
The shelues re deep enough o displny stereo quipment. And the doors tthe bottommake a nice abinet o heID onceal nt clutter
r r tlA/ hcn ou c'oul obuild rhickn"* iroushourie .heel7 V a larse projpcl l ikF}l i . rusualyduFlo Jre nalsandinc
Display Wall Unit, plla,vood s an each sheet sers) _So, ather thanide3l natenal to work with. It's taLe a chance on a sloppy fit, orflat, dimensionatly stable, and on a oint line that ooks wa!y,comesinsheetslarseenoushso cuta y{i,wide dado, nd hencutyou don have o go hrough he a tongue o t.tediousprocessofedge-gluinga EDcrNG.n addiliontousi.qlol
or boanl. I ocedrer. tonsre u d sroovco;nery
a. h;However, here &e two main primary joint to assenble rhedisadvantases o pl)'rvood. The case,l also used t to a$ach eds-Fdge" hare ro b . covered n ings l r ipsrohidFrheedgAo| lh isone way to hide the plies. And, case sides and shelves.the project has to be desisned Althoush be edginscould bearound the fact that p])vood slued on with just a plain buttcomes n 4 x 8 sheets. joinl, usins a ton$e and sroove
Togetthemostefficienluseof joint helps alisn the edsins.each sheet, you have to jusgle wlen you re working with lonsthe size ofallthe pieces o fit a pieces (as on ihe front of thecedain cutting diasram. also case), ou need all the helpyouhad 1(}watch the grain direclion can get to get those long strips
especially with the doors. slu€d on - without sliding allHereltriedtoarrangethepieces overlheplace.on the sheet o get the nicest FrNrsH.When the case wasgrain pattem on he wo doors. done, I decided to apply two
ToINERY. fter working out coats of Minwax golden oakthe cufting diasram, I had to de- staio. Then I finished the Walltermine he oinery.I decided o Unit with two coats ofuse tong'le and groove Mccloskey Heirloom emi€tossjoints throughout his project, !"mish.besinninq with the ori-marvoint o o;nGe SUPPLIESthree fixed shekes to
To oin fiese pieces,I cul a Y4,'wide dadoa c r o s s t h e i n s i d eface ofthesides.Thentongues are cul on the
tsutwhycut a Yr'-wide dado? Why notmake jt Ta ' rwide tomatch the thickness of
We usedYairoakp lywood, which is rarelyexactly Tarrthick it'susual ly us t s l i sh t lyless. It can also haves l ight var ia t ions in
TUNBER. 112 re€b Tarr{'ickoakdn!,ood. 5Board €€tYa".*icksotid 6k. 1Sheet Yarr-thickakpbryood
HAIDWATI(S€e age24 or kit). 2 Recessed ed oak door pulls.2Pairpivothins€s.l2Brasssheusupports. 2Adiustablelewlers. 1 Doubleplatema8neticcatch
H||t3H. Stain:MinwaxSolden at. Vamish: Mccloskey Heirloom lear
s€midoss vamish
Woodsmith N o . 6 2

8/13/2019 Woodsmith 62 - Apr 1989 - Working With Plywood
http://slidepdf.com/reader/full/woodsmith-62-apr-1989-working-with-plywood 5/24
EXPTODED IEW
CUTTING DIAGRAM
CROSS SEGIION
I
r i x 2 . 3 0 l . a B d . F L If
It,tAIERIALS TISTA C*esids(2) 3/4 y 155/s\79118 FixedSheres13) 't py 151a\29rAc lopBrm n 2) %^py281hx3r2D CaseBacklll fa"pty 291h\1(P4E IopAdt heves12) !'ply 14hx2831F BoiomSheill) %"ply. 8lb 1312G Doors2) %"py.13,1623!4SOLIOTFIMDGINGH TopBonom(4) ,tx1 15:AI Frontdes 2) !r'lxl 80J Fredshereq3) -1'1t 28{ AdjShalves3) Yi r 1 28hL PanelSp&ere121/ix1.28M TopPanerm1l) ; /a 1 .28N Fre .Srdp(1) A\ 1\ t 2811
N, , . 6 ,1 W,r smith

8/13/2019 Woodsmith 62 - Apr 1989 - Working With Plywood
http://slidepdf.com/reader/full/woodsmith-62-apr-1989-working-with-plywood 6/24
\Vall Unili)y naking
plywood, thev pre
shelves B) and hcsc rladoeshave 0 beperiectly alisned so hc shclv€s ay nat.The1nckis ocutdre adocsacrossoneblukolply{ood, henctrtlheblankin halftoget woidcnticalpieces, ee FiL. 1.
THECASESIDES
THE SHEI.VES
clnm srzri--lb nrakc he sides, Ftcrt alarse blank to a rorgh width oI34'. and afnished --nsth lT9lrr ,see Fis. 1. See ascl0 forclltlingplywood.)
ToNctrEs, Jter Llre blank s cut 10 size,tongu€s are cut on allfourcdgcs. Ton$esare used oanachhardwood dgiig, rcfcrtoIrig. i. (llcgimingon page 20, |crc s an ar-ticlcaboutaddingedsing o plywood withtonLue and sroove oints . )
Procedural Notc:Wl]en I had the routerset up o rout hc ongues,I wenrahead ndrouted he same onaucs or the si\ shelves(B, EandF). (See he scctionbelow.)
D]1r)(JIis.oRsHELvEs. fterclltlinLall heton!au--s. cLrt hree dadocs or the fixedshelves (B) across he larsc blank. rirst.nrark he location of the three dadocs, eeFig. L Then claDrp slrai,rhtedge cnce othc plywood blank and rout each dado. InShop Notcs on pase 12,we show a snnpl.sausc ohelp align hc frnce.)
cL"rcAsE rDr.is. o{ togetthe two casesides (A). I ripped he pllnvood luk inlotwo pieccs. ach 15.rS'\ridc.
BAcrips-EL RrBBrr.'thc last hing s torollt a rabbeton hc back edge on cach crseside o attach hc cas€ ack (D),sec Fis.2c.
(F). I starled bl' cuttins all six of thcseshelves o size. e-- .'ig.3.
ToNcriEs. Jter re s|elves arc cut 1o ize,tongues re out.d on tre./'rnt e.lg.s olall
the shelves or thc cdginla ldps, see 'ig 3.Next. out ton$rcs o bolh.rdsoft|cfixcdshelves ll) only.Thesc, onexes nt into hcdadocsin hecasesides, cc Fis. r.
TRIMmNc{i},isBACK. hcslep on the tongues. Thc loneues on dr--ront edsc ol the ilxed shelves havc to betrimmcd back o all{)w pacc or he edgingwhcn t's applied o thc casc sidr,s.Trim hetonsuesback r' onboth ends,s--e ,'iS.4.
Hor-Ds .oRprvmHrNc€. hter. \rhen hcdoo$ are mounlcd, used pivot hingcs omouot hem, kief ro I.ig.1.Thc only prob
lemwithlheseI ingcs is tha l rouhavelodr i l lthe holes n t|c botlom i\ed shelf ll) D./br.the case s assenrblcd. fyoudon drill hesehoics ro{ . you can get thc dr i l l c losecrough to he comeraftcras scmbly.
Also, hese hol--s mlst bc drilled ;n thedght location or the doors o s\ring prop'erlr'.scc Fig.1. Mark Lhe eDterpoint llheIolcs i/i" lrom the.,.1slo|/dr1 oflhe bo1-tom shelfaDd ,/r'from lhe front shoulder.Alter ma*insthc localiorr. lillthe holes atbothendsof hc shclf oacceplthe ushingsfor thchi ge .seeFiL. .1 .
(B). two top ad-
(E), and one boftom
FIRST:
5ECOND:
@
3
rf I nxrD HEr.vEs lar.\=
t
i "oi%" l\aDJUSTAT|I HETFI' l''!' I
ADJUSTABIE SHILVES2 flEcF- -
o.cur B^cK __:JZi .\_-[Z D.[L HrNcE
\foo.lsrnittr

8/13/2019 Woodsmith 62 - Apr 1989 - Working With Plywood
http://slidepdf.com/reader/full/woodsmith-62-apr-1989-working-with-plywood 7/24
ASSEIIIBIE TIIE GASEOnce hc shrlvrs were mrde.l be,aan o assembie hc casc. slarled by laetting hreeclanrpsin osition n hefloor. spacingt|emso they rvouldbe in li ne with thc dadoes.Then stand he sideson edgcwith hetr\edsheives B) mselvinplacc
TAPDR€DLocKs.
Vhenou re clampingrride picccs ike hese ase ides, he clanrps
gluc in th€ dado. lren clamp he shelf nplacc, hcckinglorsqtrare ,rainst he idcswith a lraming square. Clmp tbe otherfwoli\ed shelves snrs hc samc procedure.
As the clamps arc tightcnrd, nake surethe front shoulders of thc tong1les n the
shelves re ush with the shouklcrs of thctooereson he case ides.
lhe middle . To set
i n s b l o c k s . ( F o r
Shop ip . Wlct
GUTEDGINGdrying, cut l2 edla
(H) , two ror lhefront edges I), andsixfortheshelfedg
in eacb strip Lo it ovcr thc longxes on lhecase es and shclvcs. cc Fis. 6. Since he
cdgins s 1' wide and th-- plt$ood is only.L 'lhick, lhe stuoves afe cul slishtly otr{cntcr.This producesa ip on Lhe nside dgc ofL\ecasesidcsand ntbcbotlomolfi shetves.'lbcut thc oltsctsroove,I used a yr dadobladc on drc ablr saN sc,t i,i deep. ee ri!..7 . (The Jrfoove s 16 ' dccpcr han thcLongue o allow a gluc rclicl) Position begroove so lhe edginJa ill sti ck ust a |airabove he ace oI the pl\qood (about ir )\!he iLsialued n place, e--liia. i.Intcr.you
can trim lh is slig ht lip lush wilh the ply-wood. l used a flush rinrjis. sccDast 22.)
pRoFILE DGEs.AJterbe gfooves rc c11t,ro!nd ovrr th€ ronl edlaes lallrhe edgings t r ips$i th 1 round{ver i lonLhercuLcrtabl,-. ee iC.ll
Shop Noic Snrcc }.s. l]dgiilastrips arefanly narrow, uscd agroul trorvelto pushthen firousb lhe rcund ovcrbit. scc Fig.3.AlLhourrh he ound ovcrbitlras alall-btar-ing pilot. used he ence o guide he ongstrirrs. ligr the ence wirh the e dgc ol thcpilot. hcn push he sLrips lonJa he cncc
\ f r ine(J , l0.crrrDI)(;rNG.tart !'ripping {ideedg
ingslripsfronr.tr' thickstock.-l.lrcncutthctvelve pieces eeded o rough cngt l.
oFF.CE\"IER ROO!.. N -xt. cut gfoovcs
TAPERED LOGKSTo get even prcssure on the entire lengthof the tonsue and dado oint, I lradetapered clamping blocks. The taperedblocksare nothing more han cnsths ol2 x2 scrap. Usually you can nd some
lhat ae already lishtlywarped nd ormIf no1.use a plane or belt sandcr to
creale a bowed shape rom the middle ofthc 2 x 2 outlo the ends.You on have owork too hard - about h6' per foot isenoush. l just has o bowenough so iemiddle ouches before he ends.
cRoss SEcTtoN
N o . 6 l \ \ ' , ^ , , 1 ] . r ' r, rh

8/13/2019 Woodsmith 62 - Apr 1989 - Working With Plywood
http://slidepdf.com/reader/full/woodsmith-62-apr-1989-working-with-plywood 8/24
E D G I N G - , , , . 0
Next. cut the front strips (I) thar go onthe front cdg.s of the sides, d round overlhecnds.Also, since he aroove n hisstripexlends hrough he opcnd,cut afillerplurato it this hole, see F'ig.9a.
Noiv. cut th-- shelfedging (J and D 10lengtlr round over ]]le nds, d alue t ontothc shclves.When sluins the fixed slclfstrips on. he lip on lhe top shelf faces up. Ihclipsonrhemiddlea bottom helves ce doM.
DRn-uNG EMPLTTE,ller attaching heedsirs strips, drilled holes or the pin suppor ts used o mouni hc top adjus labieshelves l.l). Ib position he holes, crt adrillinA emplatc o ilt letween th e rop andmiddle shelves-Then rill tr' holcs. pa(das sbown n the CrossSectio n, agc 5
Afterusingthis emplate o drill the holesin the uppcr scctior ofthe $Iall Llnit, rin itdown o dr i l l thc olcs n he owersect ion .
rOP AND BASE
€dging slips, I cutthem all 10 enllh.
bottom strips (H)
sides. ee 'is.9a.
complctcdbyaddinla
(D) out ot l l ply
on back oflhe case sides, nd bcnvccn hetop and bottom ix.d shelves, ee ig. 10.Then screw t into he rabbets.
ft)p .\ND B()TroM pn-\El.s. AJter attachingthe case back,I added hetop md bottompanels(C).The roppanel scurto itbehindthc lips ol Lhe ed,rins slrips abovc h€ top
shell see .ig . 10. Be sure o notc the graindirectioD this panel s oolr'.lt/,.\larobecause hegraio direction mns verlicall!'. t'scutwidc cnough o it behind he ips of thcrronledsinsstrips l) on he sides.The anelon he boLldn s cut o flithe same way.
Aflercutiing he panelsto izc,glue hemin pl:ce behind h-- ips of hc cdsing strips.
spAcERs. o complele thcsc panels,added dsins piecesmadc olooklike alllheotheredging.'ro do his. irstadd a spacer(L) 10 he op edgc of he 1op del, see 'ig.
11.Cut another spacer 0 6t on the bottonrcdgc of he bollom panel, ec Fig. 13.Now, on the top panel only, cut a top
panel tlim strip (M) I' wide (to duplicatethe ook ofthe edsins) and round over hefrontedscs and ends with a 14'round,overbit. Then glue this trim strip to the front ofthe spacer L),sce Fis.12.
roltl9lloM riocrrc
b.
a-__-'
Vorxlsni th N o . 6 2

8/13/2019 Woodsmith 62 - Apr 1989 - Working With Plywood
http://slidepdf.com/reader/full/woodsmith-62-apr-1989-working-with-plywood 9/24
rHE DOORSThe cabine! s rcally
However, addeddoors(G) to he bo1-
deleminefiebcishtof thc doors, measure between hc rdgti!'li|ips on the wo owcr shelves.Then ublract yr forthe f3'r slace above nd belo.xthe doors, and subtract another yd' for the116'thickedgins slrips hattrim thc doors.'lb gcr the widrh of the dbelween he edgin,a trips on drc case ides,subtract sr (for hc t'3"sp:rces n each sirleoI he doors nd he one b€tween he doors).dd subtract l'for the eddnta trips.'lhendivideby two and cut he doors 1owidth.
EDcrNGsTRn,s. itcr cuting the doors osize, cut yr6r thickedging strjps o cover allfour ed ses of the doors. (Refer o ShopNotesonpalae :tonhowtocuithese strips.)
Afterthe stripsare cut,glue and clanrp hcshps on the sklc edges of the doors irst.Then add he strips on the top and botromcdges. inally, rim the edges l sh with the
puus- Befde mounting he doors,I cutrecesses or the pulls ad mountcd hem.(See Shop Notes on pase 12).
HINGES.he doors are mountcd benreenthe wo ower helves ilh pivothinges. nrc
holes or thcse hinses are alreadydrillcd n
As for the top holes, vou need o add a
fi €r stlip (N) behind hc ip oI the ed,.insslrip on hemiddleshclt se€ Fig.16.Cutthissrrip o fit, then drill the holes n the sanreposition son he botlom hell see F-is.l5a.
Then mount the h inses and screwthem to thebacks ollhedoors, seet'is. 16 .I alsomo!nted adouble asneticdoorcatchu n d e r n c a t h h e n 1 i d d l e i x e d s h c l f ,s e e F i g . 1 7 .
I.EVELERSAlthough his wall Unit may be perfecdy
square nd evel, he loorit rests onmaynotbe-especialyilthe nitis ncarpetinsandagainst a wall. There's usually a iack stipunder he carpet near he wall. This can iltthe op of the WallUnit out rom ie wall.
To evel t , added wo adjustable evelersbebind }le bottom panel, see Fig. 18. Thetrickio adjustjnseach eveler s o drill a holethroush the bottom shef for access o thes{rew n the leveler. rcate this hole so talignswith the op ofthe screw. hen mountthe eveter racket o the bottom prnel, andlevel he Wall Unit. Cover he accesss olewith the plug hat comes withthe eveler.
N o . 6 2 Wooclsmrth

8/13/2019 Woodsmith 62 - Apr 1989 - Working With Plywood
http://slidepdf.com/reader/full/woodsmith-62-apr-1989-working-with-plywood 10/24

8/13/2019 Woodsmith 62 - Apr 1989 - Working With Plywood
http://slidepdf.com/reader/full/woodsmith-62-apr-1989-working-with-plywood 11/24
pans C,D) s not a iactoryedsc"- one ofthe original edges It s the rough,cur edlaeleit overfron cuttingoffpans c,lL
As mentioned earlier, wh€n you make a'touAh cut, as when cutting oll parls (;,H,make sure he enc€ s perlendicularro hetop edge (the factory edse). mis just{ulrolrgh edge s the edge that will now beasainst he ence o cutoflpafls C,D.'lhcpointhere is hat roush cuts arc Dorsupposed o e roush-'lhcyare i,irel cutsthat get thc pieces down to a nanageablcsize.'lheyshould emadcwithcee so othcrcuts hat ollowwon be messed p.
flNAt tutsAlter rough'culling the picces down to amuaaeablc size, ou can rim the edges ogel them o thefinalsize. This usually allsrora senes ofcuts, noljusLone.
curm LrNclrr. Pi€ces E and I,'are nowcutto fin:l width, butnot tofnal leng lh. Theproblem herc is that they arc very long. fyou place hcm against a stardard milergauge o cut ofl1he end o cngth,lhe piecemay cnd o wisl (bccar e he afend drass)and or don getagood ut .
To solve b s prouem, add a fcncc10 hemiler gargc to suppod thc lons piece ormost of ts englh, seeFig.4.
lRllttltNc wttH a RoutERThere's a diflerent set ofprobi€ms with cuttjng apnrt pairs ikc C,H, or wheD dcalingwith a very arse piccc ike pad A.
In bolh cases o! have a lactory edgc owork offof. brt the piecesarcmore han 2.1'lons morethancanbecrltwithastandardnp ience on most able saws.
You cou ld use a portable circular sarv o
Fr-L:srr Rm lllr. Anolher method is toLrin the rough edge offrlitha lush rin bir.'l}is is a very similarlechniquc o sins hestraighl bit,exccpt or the encc.
A fiushLrinbit has a ball bearins ilol hatrides on thc bottom ofthc bil. So, hc fcncehas o be clanped o thc boltom sidc oIlhepltNood while the rouler rides
on the ropside, see .'ig.5.Also, heedsc ollhe fence salsned riaht where ou want he cutlnrc.
GUTIII{G AT AN ANGIE
Ityouneed o nrake n dgled col on a dgeprece, sonpansCand D. hereareacouDle
This ypc olrngle cut sdilficulton a ablesaiv. So that lio ts you ro using a circularsaw. ora sabre ai! - both ofwhich mishiproduce a fairly rough edgc hal has to bccleancd p n some way.
the middle o l therorgh piecc. would
FrRsT P]rss.Ihc
roulahru! cdge (lhe
clean 1 up, scc Fig.
with a slraight bi! tocut through he ply
carbide- l ipped i t .
LOIIG PIEGES
able to g€r a good cut here because hefactory edge s against he fencc. All youneed s 10 make a ver) slight rim air to pro-duce a new, cleanel edge.
SECOND Ass. Aiter trintming off tltcrough{ut cdge, make bro tnal cuLs o riDthe Dicces o fina] widlh. But instcad olmakingthecutwith hcficrorr-'edgc gai srthe cnce as on thc firs1pass,I lip he piecearound and un hejustrut edge againstthelence o cut oll piece E firs1, ee Fig.3b.
F-\cToRy DGlr.fhc reason as o do withthe actorycdge. ithough h;s edse can bclrusted o make nilial ough curs, don't ikeil as a finai edge. ts usually bansed up insomc vay - with splintered and denrededges hal ought o be Lrimmed ff
THrRD .,Lss.So_ ot ollpiece E using hetresh{ut edge asajnst |c rip ience.lhcnyou have o make athird pass ocurparl 'totnalwidth,see ris. 3c .
makc the l ina l t r inr cu1. (Since or l ' re,naking a fine cul on the ed,a--, sc a goodplys--.oodlade nd ake r slowand casy.)
Ilowevcr, fyourcncular saw produ.es aroulah, plintered djre, r lyou use asabrcsawon he oughcut, Lherc'sarrothef ayrogctagood edAe.lwould 1dm hc cdgewirha roulcr. And therc arc {o ways ogo here
sith a straightbit,ora nush rinr ir.s'fli,crcl{rBn.]b trim witha saaightbit.l
likc to use a arge slraight bit (usually 31lbit).Then clamp a straightedge cncc o theplrlvood to guide the router. Adjusr thefence o he bit msaboLrlfrd o r's'otrtheedseof heplrlvood.prod cinsafresl cdge.
The ence orlhis tdmming opcralion anbe he same ypcas used or hc circular aw(see Fi,a. ) exccpl et up or hc router. Tlreonelhingvou have o watdr s hal the encc's per?endicL r to the cdgc olthe piecc soyoulc not cutlingat an angle.
as s nlreded o separale he hfee parrsB.Tomake his type ofcut, I usc a panel{utiingjig.Thisjis is a poor-man version ola slk!ingplaltomr ound o somelargcsaws.
Il sbasicallyjusta ieceofplylvoodwirhanmner screwed o the boLlom. he runnerides in thc milerslot togui de the plryooriplafornr.'nrere s also a fcnce on the back
edge o glIide ie piecc square o thc blade,seeFis . . ( l l i s j i s i sd iscussed n deta i l rtinodsr,ti, No. 18.)
I use it to cut pieces oIJa long, nanowpiece like pafts B). JusL ay rhe ong piecco thepanekutiingjisr{rsuppodiltocutthcpieces lf to rough enlath.' Iocut tbem onnal lcngth , lampastoprothe rencc n thejis. Place he eftend ol rherough c!tpiece agains!rhe ropand rim olfthc right end. lhc stop allows 'ou o cut offthc olier tlvo pieces at --xactl)' he samclcnglh, wilhout mcasuring.
1 lN , , . 62
Woodsmith

8/13/2019 Woodsmith 62 - Apr 1989 - Working With Plywood
http://slidepdf.com/reader/full/woodsmith-62-apr-1989-working-with-plywood 12/24
S O M E
DRAWERPUILglMy frst thought about rout-i.s recesses or drawer ulls onthe wall Unit and Desk) was omake a emplate and use a routerand a suide bushins . That ' sprobably h€ best approach fyou're doing a whole kitchen.
Since I only had a fewrecessesto out,I did hem ree'hand. he pulls have a *2'-widelip around he outside thal senoush room to allow some
LAYoL-r. began by locatingthe position of the recesses nthe workpiece. (lhe measure-ments are on t}le plan drawings.)
F R O M S H O PI P S O U R
Whe]lftut i)tg ont the rccessfota ptlL, ralt deeperc lth sotheI p of th e N L seatu ilt ht elta u 6tthe dn et or doarflnltt.
Shop NotesUse a square o draw ayout linesformins a rectargie, see Fis. 3.
Now, se1 drawer pull insidethe ayoul ines as a template odraw he round ends. ee Fig. 1.
FREEHAND ur WASTE, oroul out most ol the recess,mount a Ya' straight bi1and set tto depth to alisn with the.l€€pstpadofthepull, see Flg.2. Note:On ihe pulls I used, he back ssanded at an ansle. So he di$tance f.on the lip to the back ofthe pull is inconsistent.) Tberecess has to be routed deepenough orthelipwonl seal ighiagainst he ront of the the door
or drawer tront. ($lth a slllalrouter, mal(e lwo cuts, increas-ing the depth belween cuts.)
Now, tum on the router andplunse the bit into &e center ofthe layout ines. Slowly clean outwaste moving in a clockwisedirection holn the center to thelayout lines, see Fig. 3. Stopabout h6" ftom the lines.
cHrsEl-'ro uNE. After most olthe waste is cleared out with arouier, switch to a chisel to cleanoul to the ayou tline, see Fig.4.The lip is wider on the ends ofthe pull, so you dont have tochisel out a perfect radius.
us o n*ro',. aatstt4
ROUTER ENGE LIGNMENTI when routins a dado acrosswide panel su€h as on the wallUnit) usually nark he ocationof he dado 6rst. Then I clamp astraightedAe a?llel to h e lay-oul l ines to guide the router.
The problem is t ry ing tofisure out the ri?ct location ofthe tence. You have o measure
the distancehon heedse of lerouterbase o he cutlingedge ofthe b i t , then t ransfer th ismeasurement o the workpiece.Somewhere n th is process ,there's ikely o be some erors.
caucE. To be a little more aL'curate, I made a simple dadoalignment auge. t'sjust: pieceol scrap with a dado cul acrossitthat you can use to al; gn thestraightedge ence parallel to!'our ayout ines, see Fis. 2.
To make the sauge, clamp apiece of scrap own o he benchand clamp a bigher fenc€ at oneend, see Fig. 1. Now mount hebit in thc router and run therouter base asainst the hishfence to rout a shallow dadoacross he piece ofscrap.
usrNcrHE G{ucE,'lb use hegauge, um i l ove r on the work-pieceso he dado alisrs wi& thelayout l ines . Then but t thestraightedge fence againsl theend of the gauge and clamp thestraishtedse down, see Fis. 2.Now rout alons ie edse ofthe
straishtedge.The ado shouldnatch the layoul lines pedectly.
Since outer bases can bemounted trcenler n relation othe bit, always eep he routerfacing the same direction fiat itwas whenyou outed he dado n
gl!'S:-i!ocl novrsxnuow-orooAcaNn2r4 "iicliEi-riixi
Voodsmith No

8/13/2019 Woodsmith 62 - Apr 1989 - Working With Plywood
http://slidepdf.com/reader/full/woodsmith-62-apr-1989-working-with-plywood 13/24
S H O P N O T E S
DRAWER AIIGNTENTI When nlount ins rhe fa iselronts 1o he front of rhe Deskdrawers, I used a four-screwtechnique.The rwo bot tomscrews get the false front closeto he conecr posirion,white hetwo top screws fir in oversizeshankholessoyou an ine unethe fnal Dositionoftle fatse nonr
SrrAN'KHolls. Begin by locat-ins and driline four :,,li,!dia.counterbored hankhotes n thedrawer front. Drill the bottornb{o holes a little .s,rQll?f ha!standard hank holes (dritl r^,lIor No. 8 screws) so the screwtnreads will siishdy "srab th€wood Thcn, drill rhe toD rwoholes k6'r ior"€f than usual(drillta" Ior No. screws).
AIter the holes are drilled, n,sert rou.dhead screws into rtcbotrom *o holes su thc purntsJUsts t jckourf romhelronrol rhedmwer, see Fis. L Then, slidelhe drawer nto he desk.
ALIGNINGTHE FRoivT_Nex1,hold he alse ionr n position nthe front of the drawer so ir'ssquare and there are unilormeaps on allsides. Once he atsefiont is in pos;tion, each utrder
ttedrawerand squeeze hefalseiront and the drawer loqether.see Fis. L The screw pointstcmporarily hold fie fatse ronrin position.(O. he niddte Deskdraweryou wiii have 10puli thedrawer out slightly so your fineers wiliclear he divider.)
scRL-woN ttoN"r. Now, caretully pull lhe drawer our of rhecase and clamp the false fronl roLhedrawer, see Fis. 2. Norer'Ioprolect the false front, use padsunder the clamps. Wlren theclamps are tight, remove rhebottom crews. nren driilp;totholes for the two 1op screwsand dr ive two roundhcadscrews nlo place n dre hotes.
AJter the top screws are inplace, emove the clamps adpush the drawer back nlo th.opening. f the front js our ofposition, ullout he drawerandgently ap he fJse front wirh amallet until t sinpositon. (Thetop oversize holes allow someminor adjustnents o be made.)
Once he front is square andthe gaps even, drill the pilotholes or thc boftom screws nd
2 onu nLor
r{ ltrotr Rt ovtNc
IHIN EDGINO STRIPSlTo coler the edaes of rtreply-$ood doorson heWall Unirandthe pLvood lalse drawer rontson he Desk, slued on hin eds,ins strips. The only problen ishowto serup he able sawtocuta e'irs of
h6'r-thick trips.ll you set up to cut the strips,el&zfl the ence nd he bladeon lhe talle saw, he thin piecescan easily get caueht and kickback. nstead, he best method sto cut the strips off the x,aste
But his can alsopresent rot>tems How do you move theIence the exact same distzncceach imc 10cut multiple stripsro a I n tinl) thi. kn es ?
smP. The solurion s to use asimpie stop. The stop s jusr ablocknounted oarunnerthat sin the mitergauge slo1, ee Fis.1. And, on the edse oflhe stopthere saDanhead crewfor"fi e
tunins thewidthofcur.usrNc THEsrop. To use thestop,move talongside hebtadeand adjusl the screw until rhedistance efween he blade andthe screwhead qudsthe rhick,ness of he edging srrip.
When i1's ser, pull rhe stopabout r n frontof he biade, ndscrew a llathead scrcw into rheend of the runner ro kcep thestop rum moving orwtrd agarn.
Now, \ l ide rhe workpieLe
against the screw head. Andthen slide he rip fence againstthe workpiece. After lockinsdown he ence, ut ofl a strjD.T;
cut s t r ips exact ly the samewidth,slide tbe workpiece andlence against the screw headagain and eset he ence.
No.62Wu smith 1 l

8/13/2019 Woodsmith 62 - Apr 1989 - Working With Plywood
http://slidepdf.com/reader/full/woodsmith-62-apr-1989-working-with-plywood 14/24
F E A T U R E P R O J E C T
Study Desk'Whetheryou
build thisdesk or a home fice or a kid's roomit' s designed or fficient use of space The top s extra deep or morewablesurface rea and he bottomdrawer s specifically iTedo hold iIe olders
\l/r,"n r.", ourro uuitd his desk. he 6rsrouesV Y tion had was:what sizeshould r be? naL
question, t tumed out, had a number ofanswers.Starting with the top, there are two "standard"
depths:24rr eep and 30r'deep. Strndard enslhs endto be an even nunber of feer 4 feet. 5 feet, etc.
To get he mostamount f]vorksurfacewhile rkingup the east wall space, made he desk 30'rdeep butonly 4 feet ong. This msl€s the top seem deep or itslength,but t provides mar.jmum fusetul workarea.Next, had o size be drawers. his dep€nded ntwocompletely ifierentcriteria. irsl h?nted atleastone drawer o hold ile folders. So, sized he bofiomdrawerto cced standard ffice leholdcr tamF.
The other criteria or the size of the drawers as odo with the oinery. Since wanted o assemble medrawers with routercut dovetaits, sized hem aroundstandard ncrements orthe dovetail emplate.This otto be sort ofa headache. ntil I decided o use alsefronts or the drawers. Then t rras easy o size each''r€al" drawer o fit the dovetait emplate.
DItq|ER suDEs. Since lle bottom draw€r s a filedrawer and subject o a ot ofweisht, mounted t witha set of metal, ull extension rawer slides. For he optwo drawers, made wooden unners.
plywooD. This desk s made out of oak plwood,and aI of the pieces are sized o lay out on sheets ofplrryood with a minimum of waste. Because usedpbryood, t actuallydictated orne of the other desicnfeatures. or example, added -wide solid-wood dc,ing o he desk op o make t lookthicker (whi€hhelpsget away om that standard arr tywood ook).
The samewas oneon he tluee "legs. Sincebothsides of the eft "leg"are visible, had o add a pieceofyai plywood o the Va!' bYood o fil the void b€hindthe edging.However, n he othertwo egs he '-wideedging and he drawer tonts conceal he void.
nNIsH.To finish he desk, started y staining vithtwo coats of Minwax'sgolden oak.Then, o provideadurable surface, applied two coats of satin poly-u efiane. nother ption ould c o glue lastic arni-nate o the op and add oaLedsins around t.
Woodsmith No.62

8/13/2019 Woodsmith 62 - Apr 1989 - Working With Plywood
http://slidepdf.com/reader/full/woodsmith-62-apr-1989-working-with-plywood 15/24
marERtats stOESK
B TopFd Bk Edq 9 2l 1! r I 49C TopS eEdq g 2) 4x1 31D D,awscases(2) 3ltdy 27ir \2siaE CaseBek l l ) i lp ry - t s t t x 281 , !F DEre .Dr idds{2r %py 16!x2591 tG DrawerFunieG(41 !1r ltt 25-rlH CaseEdgrq 6 i l l r1 28r !I Drawer lde pace612) , : r l3 t 25!1
J ( ckboard paceG 21 1.r 1 - 11.2K (ickboa'd 1) l'trpy 151ix4r-:L Aprons(2t 1,1 4 a r2gM AprcnConneclorsl2i l,i al/]x 23r.:N LeiLeglll 1t pty 271t! 2Bi\O Le l lLeg,e rPa ie i l t i 11py.261 : r28 l lOFAWEFSP TopDrawerFn . rBack21 t ,x3 r ! 110 ropDfawe ,Sda2) 1 r t31 24R Md DrawerFd . iBack{21' : 51 : - 4S Md.Dra \YerSes (2 r 1 . ,2x5 / :24
T BlmDra{erFd i sack l2 l rx i 14U Bh1m.D6"erSd6(2 ) 1 .N7 21V DnwsBonomsl3 l / ipy. r31a r23r, !W TopDcwsFron t l r ) 3 \py 1411NX Midd€orawerron l l l l ? : p ly 43 tx7Y Bhlm.ra re rFron l{ r l 1 /p ty 141 i r12 .'MeasuremenrWrlhoutLl6Edq g Str
suPPr.tEs
EXPLODED IEW1
as
o
@
o
\ /2- /71a {
@
lIUIYtBER
. I !'rSheets r./r',oak lryood. r,'2SbeeL 4 c,ak l!1lood
. r0 Board 1i. l.iLtlrick solkloak
. l0Boardfi. h" thickpoplar drawers)
HARDWARE AIID FINISH. Hardrvarc: ee projccr it. pase 24. Stain; linw:LXgoklcn ak. \rarnish:Salinpolvu er|nne
@o
o
CUTTING DIAGRAM
' .1. 4 - 7e" t7.a 3d..i,\
r : " r 6 " 7 3 t 3 . 3 B d ,h . )
I 2 r r t . 2 " - 7 a " 6 . 1 6 d . F t . l
r d r o 3 6 " L s . r. d , F t , )
3 4 ' x 7" s r " { 3 . eB d .E . )
"1:.... !..i t
W,rr.l .mrrlr 1 i

8/13/2019 Woodsmith 62 - Apr 1989 - Working With Plywood
http://slidepdf.com/reader/full/woodsmith-62-apr-1989-working-with-plywood 16/24
-
TOP
29lr ' rvkl . y Tfr 'lonjr. ee . ig.
s ize . r 'oucancut longuescenterednal l ouredges or lhc cdgirrg slrips. To nuke t| cLonsues. uscd a slr:tlahL it witb an edgcguide on he cutef o cu!Li,riforrrnbbets nboth :ices ol the pharood. Sncak up or theInaldcpLh lcut uni i l hc hlckncss I lhe
tonguc nratcles the \ridLh of a li lcslgroovc lhal you\'e cul in a pi.c. olcfr:rD.(For nrorlrnriormaLnm n { dging ply$ood.
Pn)cedu al Nolc: O cc the urLer s set otbe conect dcpth o cul the Longues n thctop, Id idnlwant o s (op. Ikcpt ngoing ndcut he othef i -- picccs hat havo ongues osize: Lhedraver case sides (D) and th,-dras€r dividers (F) (sec pasc 7). as sellas hc efi lcg(N) (see pasc 3). llrc I cutlhclongueson hese i{csbcforc procecd-
rIn; IN(;. \ficrcuttiIrg ll he onsu--s, .!1the edgingstrips(B,C)torlhe toD run :l/r'
shon poiils oI Lhe mirers aliJtn rith t| c
shouklcrs ftirr to gues. e,- .ig. 1.(;r-rrri N s'TRrps. ltel a snip is.ut toIenslh, Jllue l lo thc tolguc o lhe edge ofLheplFvood. uscd aclamp;rgloard (withrcunded edgcs) agrinsl the edgins o belpappl!' u iform pressufe, ee ig :]. lb prot€ct the lonsue oD hr oppositc sklc lrogellinla damal]ed v thc clanlrs. I also cutsomc scrap locks witb r,,i'Jarlnves . thcm.
slocli10a unild n iridth of I 'lhcn cuL ilolronl arrd rckedgine srrips ll) and he r$osid. slrips (C) ro fouJlh cnglh (2' lonser
Next. 11t €roorc on all our edsing stripsLo lt thc tongucs o! lhe phavood crl thcgroole sith a
dado bladr on he labie saw,and used a feathcrboard 0 hold the s nipagainsl he fcncc. scc Fis.2. Thisgroolc iscul ./r widetofittheionguc. but Li deepefihan he enlatb fth. tonglrc o allowagluefriiel.,ql$, Lhe roovc s rrosilioned o heedgnrssticlisjusrahair l:rr') abovc hc rccoflhc pllnvood hen il s tlued nr placc. ccl;iJt.2a. lhlslip islrinnned flush atcr.)
\!lcn:rlliour sLripsareLhed n flacc, |c
toD cdgc of Lhe strips should bc slightlyhjghcr }an the ace olthe pl\sood.'lb trjnri t nush. l sed l l ' sh r im ig.see ase :2 .
Ror r!D r \'riR Dcris,To complete he op,I found.d olcr lhc toD ard botto m edgessith a l.r' r ound ovef bit. sec ig ,1.'lbkcepthe outerliom ippiDg$'hllc orlinglhelot.tom edJte, placcd a piccc oI t/:1' lasonilencar hc iD of he edsins, see .jg..1a
f
APPTY EDGINGAllefcutLing he groovcs. he next step s to
n erfieedgingstrips(B,C) rolength o iIi|tIT'I To lItr'cTH-The procedurc uscd
iras to mibr one piece ofedging to lcnglh,and hrn glue l in place bfforc nrcasuringandcut t ins thcadjacc s ide and narcundlhe op).Ilcgin b! miterinsrheedging tripsI longcr thal each side ol th"- rop pancl.\ow. sneak up on hc final e lalhuntilthe
JJ
I
1 6 V (r\ lsmith N o . 6 l
A't

8/13/2019 Woodsmith 62 - Apr 1989 - Working With Plywood
http://slidepdf.com/reader/full/woodsmith-62-apr-1989-working-with-plywood 17/24
t
7
I i
DRAWERCASE
cas€ sides (D) and
a ose back (E) tofrnished ir, sec Fis. S.
dEwer dividere (F') to widLh so they re .]/J,,wider the the back (I). (This allows fo rthc l3'LlonC tonCues o Jlr nlo the caseqid€s.l Then cutthr rluders ro.uush .ng1htu cqual he widtlrntlhe slLle- jFtore.ourinAthe onsucs on hese dividers. add a trr '-rhickedsing strip 10 he fronr edge ofeach djvidef.
}lqrc ro\criEs. The ncxt step s to cultongxes on thc rolt and back --dses frhecase sides D) and he sidcs olrhe dividers(F) (The ongue on he ba(l of he dividersis cut ater.) jsc the same procedure s onthe op o roul Lhe on$es, see 'ig.5.
DADoEs.The ividersde nrounled o hcs ides by rout in la dadoes o accepr hctonexes. l'hese dadoes are positioncd l,and 23r,/.jlromlhe1opedge, ee Fig.5
Next. I cut another sct ot dadoes n rhesides orthewoodcn unners c) thar,.uidcthe top fwo drawers. (The botton draweruses melal slides.) cut thesc wo dadoesacross hc nside ace ofthe case ides2a 'and 9'/i' from the op, se€ Fig. 5.
There sone morc dado rcally, ts,-widekerf) o cut or he metal op asreners. t sonthe nside of he narl case ide, see F_ig. .
EDGr\c. Nex1, ip l, wide edging sbips(H) or thceaqe ides . eEI s 8 Thcn qluethe srnL's ,' lrF ront ud ba.k eJqE\ of rh.c€sc sides ll). and ound hciredses usinsthe sante rocedure s on he op (A).
RIJNNERS,he top t$o drawers are sutrported by ourwoodcn unners (G). Theserunners arc cul 13,!rwideand usr a hair essthan. t r ' th ick ( to s l idc €as i ly n a 3,1 'groove), ee Fig. 7. Rolrta longue on eachrunnerto it n thedadoes n thecase sidcs.
To delcnnine he lcnSlh otthe runners,Irst placc a scrap of.j/rrplywood n lront ofthebackcdsingsLrip,sccFig. _ 'lhisaltowsforthelhicknessotthecaseback.) hen cutthc runnef to cngth so thc back end burlsagains t he scrap , and the f ronr end isrecesscd ti' ff om thc ionr edgirg srrip.
No$youcansluctherunners c) intoLhetop wo ylrrdadocs I each asc side,leavinsroon tor tbc case back (D),see Fis.8.
crfrl DrvrDERs rJ }iNGTr, AIlef thc run-nersaresiued in,culrhcdiv iders 0 tonnallensth.Trim offthe backend ofrhe d;vidersso hc ront end alisns wiLh he ronlend ofthc sooden runners (C). Ilc sure ro allowenougl lergth for a 78'r-lon,a onguc n rhebackcdse.Then outlhe on!'ues n hebackedse o nt fie dadocs n lhe cas€ back €).
,!ssr,rMBlr'.ller thc divide.s arecot, hecasecarr € assemblcd, ee Fi!a.9.Begin by
placins he case back (E) betwcen he runners and he backcdsins. Besurelhesidewith the y3rkerf s on he ri./r t side.)
Now appl)'slue n dre boltom hvodadoesineach cascsideand n thecaseback,and i1the dividcrs l) intothc dadoes. Makesurethc ront end of rhe dividers re allned wirhthe iont end of he wooden lnners_
Once evefihing is in place, cldp thecase ogcther. o makc sureclanrpingpres-sufe is alplied in thc niddle ofthc joinr,used apcred lampinsblocks, ec p:se 7.
sp.rcERs..qfter he glue sas dr,v. addedsp:cers o both case ides. clrFis. 10.'twodrawer slide spacers I) are added abovethcbottom dividcrto mounrthc melal slide.-Ihen.,rlueh{o snall kickboard space.s(J) beloirthebottondividerto illin frontofthe kickboard ti. Finally, ura kickboard(I0, ardslue it behind hese pacers.
NOTE:
cA'EBACK2<\r ,iDEo;aaa;
r'\lrzlr' .liiTl"%f.oNT \ar6d:r,.
N, , . 6 l \(rrrLlsmirh

8/13/2019 Woodsmith 62 - Apr 1989 - Working With Plywood
http://slidepdf.com/reader/full/woodsmith-62-apr-1989-working-with-plywood 18/24
I
APRON }RAI'IE AND I.EG
cr:rPrEcris-ieginbuildins h€ apron
aprons (L) aDd so apron connecto6 ( )ro *idlh and engtb. see i g. ll .
rolriERt. h-- rame pieccs rc oined wiLhdado and abbet oiJrts. --eDetail n Fis I 1Nole thal the dado s located so thc picceswon t be quite Jlush oD he oulsidc. This isintentional. henl'ou scrcw ic connectots
to the leLs, Lhc cnds ol the aPrors will bepulled up ighl aganrst he egs.
ntoRl.i TEPs,'llrcre re a e* more stepsbelore asscmblinla he lram-'. iNt, foundover hc Dol i . r r edge of th- 'aprons L) .Then, cut 1{r ker ls lor the 'ne t t r l op
fastcncrs n each conncctof M). Also,drillholcs n each on €ctor o asten hern o |elegs. Ihc frame car now bc slued ogcthcr'
r-rIr l}rc. Thc,l€ftleg(N) s rnadc y ami-nating f'asd lr' pllNood panels ogether.Bcgin by cutli g t|c leg (N) to hc same izeas thecascs ides D) ,sec 'Fis . 2 . ' l enmakctonsues on he --dges nd add edeing(H).
Nex1. ul a h'fillcr panel (O) to 1ilbcnvccn beedgingoDlheinsiile lthcleg,see
Fis. 12. slishlly cveled (l]') thc cdses oftlr Fnel ro ge1 a tig|t fit Aitergluirg thepancl n place, dm both edgesofthc dginsnush vilhbolh pllNood accs.
RorrND vriREDGI\G.To omplete he eftles. ou d ovcr he edlaing trips, ee ig. 13.
Ilowcvcr, there s a littleprcblen slrcn
rounding ov--r he second dge.Since 4'hdd\ood pllsood is usurlyless
thar / 'thicL Lhecs and rllerpmelcoInbinedarc css thm 1 lhick. \\l]ren foLnding ovcr thesecond d,ae.he bcaring n he bitnlns bclowthe cenLeeoifi nd reales ridgc. b prevenlthis.l stuck 1m aters oftapcjustbelot ll)ecenleroltbc dginJainthelcaringto nd€ on.secFig . l i la .
4
f,l
ASSEflTBtYNowlhat alloI tbe nrain Darts re colr\tctc!hedesk an eassemucd.
hR ,\IETo I Ir;- SLart .{ a.ving he eft cgdow flat and center hc apn)n ralnc on heles. Chcfk ihal the Lop dges are Jlush andthen scrc$'the ieces ogcther. ee Fig. 4a
FR,\LDTo Drd\\!ER Asli.l'o scrcw thc
iLhL sidr of Lhe ranrc o ihe dr2$er casc,stand hc picces p thcir finished osition.see Fig. 1{. Ce lcr lhc aPron ralnc oD hedla{cr case wirh thc top edges nush, andthe clamp he parts ogcther o hokl th.m
while driviig lhe screws.,rDDToP. o atlach helop, !un ilupside
doiln ard ccnier he basc on t. s-'e ig. 15.\ow. slip bree m€tal able op asteners ntoeach kcrf in the apron ramc and ghL egofthe cav. and scrc* them o drelop.
ll I [email protected].. +
coNNEcroR, 2
HotEs - -= . .= . - :
, - . '
WLr smnh N o . 6 l

8/13/2019 Woodsmith 62 - Apr 1989 - Working With Plywood
http://slidepdf.com/reader/full/woodsmith-62-apr-1989-working-with-plywood 19/24
DRAWERS
wood,scc Fis. 16.
a router and cmplate 0 ut doverail oinls {)join he our drawer pieces. sized he heishtof he drawcrsto producean vcnhalfpin atthc op and bottom of cach drawer ide. Fbrnrorcon dovetailjoint s. ee l'oods,,ii, No.s8.) This neant the top dratler pa s are al l3!1rwide.thcm dle drawer 5 L/{rvide, ndthe bottonr drawer 7'wide, scc _ig.16.
Next,cut all of he drawer sides (Q,S,U)2.1 lons. Then o dctcmrine he ensth of heftonts dd backs(P,R,T), measur hc dis-lance befwecn he rxnners and add h' .
('ltis alloivs or the ta'r dccp srooves hatthe ru nrcrs $ill nt nto, see .'is 17.)
rorn_rtRy. ext,Icut Lhe l]]"dovelailjoinrsat.ach comef. I also cut a aroove or a lt'plywoodbottonr n cachpiece see Fis.18),a d cut the dmwer bouoms O) to it.
Bcforeassemblins hc drawers, rill fouholcs neach dfawerliontto attach he alscfronts. Refer o Shop Notes, ase 13.)
RTiNNER RoovE. Ilcforc attaching Lhefdse fronls. out a l/a widc mnner grooveon thc sides olthe topand middle drawers,seeFig .19.
Nowplace hc top ivo drawers n thc caseto check Lhe it. Yor nray have o slightlyplanc h€ unne.s o gei hc drawers o slidesmoothiy. lsonmuntihclotlom nle draweraccording o the nstructioos hal come withthe ull extcnsion metalslide.
r,sri rio\'Is- Its besl f thc talse ronrsare cut iron one piece of plywood so the
srain lossliom toptoboftorn, ee ig.17.Allthree ronts are cut o &,idil to allow a
h6' space nd a 146' lick edging strip oneach s;d-- whichneans theyre yrrnarrowerthan rc draweropeni,rg).
Theheisht oteach alse ront slesscriri
cal since hev float in thevertical space.Icut the drawer fronts 10 heights of 4' (rop,rD,7' (niddle, x), and 12' (bonon, r) .
EDGD{G,N pl,Lls, Next,all our sid€s oIcacb talse rcnt arc €dsed with Z6',thickcdgins (see ase 13).Then routed ecessesand mountcd he drawer pulls (see age 2)
MoI;NIrAlsE FRoiitS.l o rtount the alsclronls, nscrl he drawers nto hecase.ThenI rsed the lechnique escr ibed n ShopNotesonpage 3 tomount Lhe ronts.
FI\ISH ANDFILE il,.txntlaRri.Once thefroDtswcre ounted, stained nd inishcdthc dcsk. Finalll',laddcd a melalrack n thebotlorn drawer or hansinsnle oklcrs.
I 9
1!.135^?#Xil@ \
MIDDIEDRAWERfRONT/BACK
@-.
-6)L r6p
.,,,, DRAWIR
l'srDEs
i ;-t0",.slt DRAWER
@BOTIAMDRAWER
5IDE5
MIDDIEORAWERFRONT AOTIOM
DRAWERFRONT/BACK
TOPDRAWERFRONT
4 . OAOTTOM
irDRAw:a
i:\.
. ! : I
i-
I8 DRAWER 55EMALY
..- cRoovE aof, 60EoM !r' D;EP
NOI€r
N o . 6 2\flr'.,clsnith

8/13/2019 Woodsmith 62 - Apr 1989 - Working With Plywood
http://slidepdf.com/reader/full/woodsmith-62-apr-1989-working-with-plywood 20/24
Edging PlywoodY 'I I nJonunately, he beauty of plywoodt\-,, is only skin deep. t's nice to work
with pllvood when a project cals for larsepieces, ut some wayyou have o cover heeds€s o hide he plies.
Covering he edges s usually hought ofas ust a cosmetic overup. But besides id-ins the ply ayers, here's another ood ea-son or addins edsins o pb.i/ood.
APPEARANCE-n the Wall Unit and theStudy Desk shown n this issue, all offtemain pieces are cut ftom pllvood. Thismakes onstruction easier, but it creates aproblem rom a design tandpoint.
The problem s that he main pieces ooktoo hin if edcins snl added. For example,on the Wa[ Unit the sides are over 6 feethish, yet onlyyatrthick - a ittle out of pro-ponion. On the Study Desk, he top reallyought o ook a ittle thicker han 74rr.
The solution s to add solid'wood dginsstrips o the plywood.By addins 3 l"-widestrip o the plwood, the piece ooks hickerandmore n proportion. It alsoallows ou oround over he edses)
IO EUE AIID GIOOVEWhen I want to apply solid'wood edsinsstrips o plyvood, us€ a onsue and sroovejoint.Butwhynotjustglue he skips right onthe edse?
Granted, ou can simply gtue on edgingstrips with ust a simple butt oinL But thatmaynotactua y be he easiest method. Theproblem has o do with alignmenl
On he WaltUnit forexample, wanted oadd lLwide edcinc strips to the pbvoodsides. could have ust c1lt he skips andglued hem onwitha simple buttjoint.
AucNMENr.t sounds asy, ut whenyouactually tan dealingwith tripsthatare ver6 e€t ons, and ry to set he edse oftne sripalisned $,ith the face of th€ plwood, it canlead to headaches. s the clamps aretightened, he edging willtend o slip on heglue.The pressure ppliedwith each clamp
] O I N E R Y T E C H N I Q U E
can actua y push the edsins out of alisn-ment in different directions.
Ifthe edging slipsdownbelow he ace oftheplNood, you'I see he exposed dse. Toprevent his, I try to alisn the efuins justslighdy L32r!)bor€ he ace ofthe plywood,
This litde lip ensures he edging stripcov€rs he edge of the pllvood completely,even f there are variations n the thicknessofth€pLryrood. lso,by creatins his ip. youdont have o try to set the edgins o fit ex-acdyflushwith he ace ofthe pbryood. fterthe edging s slued on, you can come backand sim otrfte lip so fs perfectly lush.
Trimming off this lip is easier than itsounds. On smal pieces, use a hand plane
or s.rap€r o trim otr the ip. r I'n workingwith arse pieces widla ot ofedgins), us€a routerwidl aflush rim biL (we'reshowinsa flush trim jis to help with this trimminsprocess npage 22)
ror|cu: oR eroovE !!ttt?The easiest way o align the edging o getthis !d2rr ip is to use a tongue and groovejoint.That s, cut a ongue on he edge oftheplywood, ndcut a sroove down he edsinsstrip o it overthe onsue. But which doyouflrt frst, the ongue or the g?oove?
pRoBrxMs.Most of the fitting probl€msstem rom cutting he groove, because ou
have o be concemed boutboth $e oridt,ofthe groove and he posiliotl ofthe groove.
The groove has o be he right ?r?di, o fitthe tonsne. Ar?d, t has o be pxitiolwd,onthe edging stripso he strip sdcks up o ormthe ip above he surface fthe plywood.
So,go ahead nd cut he erooves n aI lheedging stsips irsl risht? We[, you coulddothat, but onc€ he grooves are cuL you'recommitted o the po&tion of the groove.That is, you wont know f it's in the rightposition o create hat ittle 162rrlip ntil afterthe ongue s cuL
So, €ut he tonsues rst? Well ifyou cutthe tongues irst, and hen cut the grooveslater with a dado blade, you have o makesur€ the tonsre fits the exact width of thedado cut - but the sroove snt c1lt yet, soyou can check t.
Ifs a pmblem either way. Sowhat do scut both ofthem rst. That s, cut he actualtonsue on the pl''wood irsl Brrl, I also setup he dado blade and cut a sroove n a testpiece o test he it ofthe ton$€.
cUlT @ Hr to euEAlthough he tongue can be cut on a tablesaw, think you get tlle best esults with aro ter. Router bits don't splinter the ply,woodas sawblades ometirnes o.
ff I'n workins with smal pieces, use a
router table, sliding he workpiece aainstfte fence. With large piec€s as on the twoprojects n this issue), I use a hand-heldrouter. It's a whole ot easer to handle arouter on a large piece of pL'rvood atherthan having o man-handle he sheet on arouter able or on a table saw
Rorn P"cBBEIS. o make a tongue. ustrout a rabbet on each ace of the plwood.Since you're working hom both faces withan dendcal €fting on he outer, h€ esulting tongre wil be perfecdy entered n hethickness of the pb'wood. That's exactly
Ro('IERBII. Okay. et s back up a minute.
LOolllsuNlKrr \rz'rHtatatA|lEts oit to||{ slDts -roNGUE
TDGEOUIDE 'T:3 ..-%"THrc(
Voodsmith N o . 6 2

8/13/2019 Woodsmith 62 - Apr 1989 - Working With Plywood
http://slidepdf.com/reader/full/woodsmith-62-apr-1989-working-with-plywood 21/24
Since you're going to be routing rabbets,there are wo ways o go about l us€ a rabbet bit $'ith a ball-bearing ilo! or, use astrajght bit with ,n edge gride attachnent
RABBETn The mbbet bit (see Fig. 1) sthe quickest o set up, but may not give hebest esults. Often he pilot hits a itde voidin the core plies or runs overa ittle splinteron he edse. fthat happens, he shoulder fthe rabbet gets a ittle bump n it.
EDGE UTDE.lthough t takes onger oset up, I like to use an edge suide on therouter widr a straight bit, s€e Fis. 2. (For a%"'wide abbet, usea 14r' traisht bit so 'msure o clear a*?y all he waste n one pass.)
The edse guide smoothes over anybumps or dips n the plyaood edge andtends oAiv€ etter es'rltsfor e should€r.Most routers have some sort of€dge guideaccessory hat attaches o the base of therouter so you can cut rabbets or ma&e ro-fileson he edge of a board.)
Also, since standard abbetins bits onlycut ide rabbets, ou can use an edgestide ifyou onlywant a yarlwidembbet.
sE-tuP RorrIER, o make he tongue onthe edse of the pl,v,/ood, et up the edseslid€ to rout a 9€ir-r,videabbet. Then thedepth has o be set. This is when you needthe est piecewith the groove n it.
Use a dado blade on he able saw o cut agroove n apiece ofscrap.Then et he depthofcut on he router and out rabbets nbothfaces of a piece of scrap pbvood. (Makesure he scrap s ftom the same heer s he"real pieces.)
Gradualy adjust he depth of cut, alwaysmakins cuts
on bol, faces ntil he esultins
tongue fits the groove n the test piece-Wlen the tonsue its the sroove, out mbbets on both aces f a[ the lea]" pieces.
As each ongle is completed, se he estpiece o check he it in the Sroove.Run hetest piece down he ength of the tongre tosee f there's a tight area. f you hit a thickspot, un the router back over hat area, orclean t up with a chisel.
CUTflr|G THE GROOYEAfter the tongre is formed on the edges ofthe pL1l'ood, cut he edsing strips o width,nd to roush leneth (about 2r' onger hanneeded). hen I set up the table saw o cutthe groove n the edging. There are tlreethinss o consider ere.
3
First, he width of the groove must makhthe thickness f the tonsue youve ust cut.Thafs taken care ofwith the est sroove.
S€cond. he depth ofthe sroove houldbea litde (k6") de€per han the ensth of theton$e. This allows the shoulders of thetongue o "bottom out" agajnst he edgingstrip before he end of the tongle hits thebottom of the Sroove.
Finally, he groove as o be ocated o hefaceofthe edging ticks upabout 142'r bovethe uceof the plywood.
PostfioN GRoo\,T. o get the goove in
thatposition,ifsbasica a matter fsneak,ing up on he cut. To get close,measure hesize ofthe shoulder bove he ongr.le. henset he lence hat distance om the blade,plus16zi'.
Nowmake a test cul cutting a groove n apiece of scrap rst. Then hold he groove onthe ongue on he edge of the plr.wood. oushould be abl€ o eel he slisht ip on he opedse. Slide t along all the tonsues o makesureyou eel helip everyvhere. 1youdon't,move he fence oads' tom the blade ust ahair more and cnt another est sroove.
The dea s to feel a ip. (Ihe tt2,, s usr anapproyimate measurement, ut t shouldn'tbe much more han k6',.) W}len he groovein the est piece hecks ut,youcanworkonthe eal edging stdps.
wARpEDrEcEs. syou stan, ook or anywarp n the edging strips. t nahes hings alittle more diffi€ult f a strip s warped, ut twill still work because he tonsue andsroove oint will force he strip nto position.
X a strip is waryed, ace he bowed edgetoward he rip f€nce, ee Frg.3. Then use afeatherboard o force the strip against hefence as he groove s cut.
TEsr FIr. As each groove s cut in eachedging strip, est ts it on he pwood edse.If it s too tight, don't change he ence untilgrooves recut n all the pieces.
For any strips with grooves hat are tootisht, move he fence o?ray roln the bladeslightly, and make another pass. Thiswidens he groove, ut keeps he same r,,lipon he op edse ofthe strip.
AJter he grooves re cut, the edgingstrips can be gtued and clamp€d o the edse
of the plwood, see Box below.
HOtr' tO CrArnP EDOll{OtO PTYWOODThe problem with most pipeclamps and bar clamps) s thatthey applypressue oo high up.The pressure s applied n linewith the screw on the €lamphead, whichonmostpipe lampsis centered about tr' to ?arlabove he surface f the pipe.
This can be a problem whenyou're gluing -wide edging oTarlthick lt'wood, reven n theusual practice f edge-gluins7a"-thick tock ogether.
ff I'Insluins an edging tsip opl'.wood, lay the cia.rnps n ailat surface and push he work-pieces doM against he pipes.However, as the clamps aretightened, he clamping ressure will be applied at the topedse ofthe edsins strip,see Fig.l. Thiscauses he edging trip o
Mst so the bottom edge pillsaway rom he pllrood.
RotNDEDcEs. ne solution sto rnahe a clamping board withround,ed ed,ges. he roundedses redistribute he force of
the clampso fs centered n hethickness f he clampingboard,see Fig. 2.
To clamp edging to Tarr ly,wood, rip a clamping board outofVarr-thicktockard round over
all four edses with a %'r round-over bit. The round edse ,,villtransfer he pressure o the cen-terpoint of the radius %,, abovethe pipe exactly he center ofthe 7al plywood.
TlirNsrRrPs,Wlen gluingonthin strips (such as the Yt6r'-thick strips on he doors oftheWall Unit), I make a slisht al-teration. hese strips are sothin that I all the pressure s atthe c€nter, he top and bottonedges mayactually url out andwon get enough ressure.
So, I nake the clampinsboard with only one roundedge which s placed sainstthe clamp head. t still distributes he clamping ressureevenly o the other (flat)edgethat s against he hin strip.
aNo.62 \Toodsmith z l

8/13/2019 Woodsmith 62 - Apr 1989 - Working With Plywood
http://slidepdf.com/reader/full/woodsmith-62-apr-1989-working-with-plywood 22/24
Flush TiimmingY V wooden edsing stripson plyi lood fuf plas t ic ami
natc), vou bavc hc problen ofhow tolrin the edginsdown soit s nusb silh the suriace oftheplwood. lJsnrg a routcr with anush rinr bitis probably he casiest method. lul, there can beaproblc r.11s diificult o balancethcbascot lherouleronf t naFro\rcdgina srripwilhout havingit lipand creatinaan nglcd ui.'ii prevent his, wc dcsigncda flush rinr jig. I1s actually a''outrigger" thal s arhched to
the botton ofthe router.NErvB^\E. lb nuke the ig .begii by nraki0g a base plate(A)f.om -v{'Masooile. irst, cutthc basc platc 7'x 7r, see Fi!a.1. Then useyour router's lastic ase laieas a cmplatcto ay ort the bit hole dd dre screw holcs
No\r drill the holes, counterborins hcscrcw hol.s to keep he screws bel.^v hesurfacc lthe plate, ee Fis.2.
srrpporr RArr,s. ftcr nraking h€ baseplate, cut fwo suppon rails (B) 10 size
t I couNrEn.onEoswHE^D'- l
trom 71' sLock, ccFig.3.Also. here:re wolhrrkerfs nrr from thc cnd of these ails.Thesekerlsare used o mouotthcend suplon (C) and pemit aliltnment lthe bit.
Now, screw he suppolt ails o thc bascplate, ee ig.3. Then screw dre base platcto !hc routcr Lrsing he orisinal routerscrcws. .e Fis. 4. To keep he chips rom
ting edlae s only on !hccdgirg. Then placethe is on thc workliece so t ides on thcbit'spilot and he end suppon.
Nowtum oD he rotrler and pull t towardyou. concentra t ing n keeping ressuredownon he/,ar.llr. not on herouler.Ilthebit is cutlingat u angle, aise orlo$crtheend suppod, see Figs.6aand 6b.
l r G S A N D F I X T U R E S
flying nr my fac.,I ndded a plas-
tic chip shield, ee Fic. LEND uPPoRr- he lasl piece
to make sthe end support(C).This coDtrols he ansle of he bi tandacts sahandle . u l lheendsupDod 10 nt between he suttsport rails,seeFi!a.5.Then lueaI YJ'wide grip on he op edge.
sErrrPrrc.'lb set plhe iglorroutinA.mountaflush rimbit inthe fouter. lhen hold a squar€alo g the cuttin,aedge f the bita d align he botlom edgeofthcend suppor t (C) , sec Fis .5 .W h c n t h e e n d s u p p o r L s
aligred, dghlen puhead screwst is r \c TIr r. J rc .To se hej ig ,
adjust he bn dcpth so the cut-
illtx">Y-,''PTATE
,r"?o-"i-\'.fi--*,i" > 5UPPORI
t FAIT
END UPPORT
AUCNSWEHWOTX SURFACE
b.
ENDoF I ||/ii r: ,jlncToo | -
WooJsrni th

8/13/2019 Woodsmith 62 - Apr 1989 - Working With Plywood
http://slidepdf.com/reader/full/woodsmith-62-apr-1989-working-with-plywood 23/24
C O M M E N T S A N D Q U E S T I O N S
Thlking ShopFTUSH ilT B|rS
bits so the cutting edge s setback veryslighdy rom he bear-ins. (Amana sets the cuttingedse back 007rr.) hey make tthis way so there sn't any waythat the cutting edge willstsikethe surface hat the bearing sridingon.
Note: Flush tsnn bits usmlyshouldn' t be resharpened-Sharp€ning nly increases heset back between he siz€of thebearing and he cutting edge.
PRoBrxMs. or the most part,flush trim bits are easy o us€.But here canbe a e]vproblems.The rst is when you're unningthe router base along a narrowedse. The bit can ip at an ansleto the efue. solved hiswith hejis shown on he opposite age.
BAIL BEARINC CONCERNS.The other problems have o dowift the bal bearing nd ts oca-tion. Theoretically, ou sho0ldbe able o set he bearing so truns right beyond he oint linebetween he edgins and he ply-wood or laminate. But I usuallyset the depth of the bit so thebearings about ,i6rrbeyondhejointline.Then,ifherouterbaseshould ock slishdy otr the sur,face while roujing, I won't miss
trimminganyareas.There's another eason orsettins the bit beyond he ointline. Sometimes little gluesqueezes ut right around hejoint ine. don'tlike o scrape frthe glue ifs too easy o lift upwood nbers while scraping. n-
stead, et he lush rim bircleanup the glue as t's tdrnmins hewood. Since he bearing has torun on a smooth surface, set tbeAonl,My squeezeout
ANoTEERPRoBLEM.Wlydoes he area hat the bearinghas un over have a ons scratchline or look bumished? Beforeyou use a flush trim bit, checkthatthere aren't anyburrs or dirton the ball bearinc, and hat hebearing spins reely. Burrs canleave scratch n the work.Also, don't press he berrinshard against he work surface(especially across the srain).This can crush the fibers andburnish he surface and youmay not see he bumished areauntil after he inish s applied.
I Flush rim bits are most com,monly used o trim plastic ami-nate or veneer. hey can also beused to follow a pattem whenyou re trying to reproduce anexact duplicate of a shape. And,for the projects n this ssue, weused flush trim bits to trimwooden dsing strips lush withthe ace of the p\vood.
nush trim bitshave ithertwoor three cutting edges nda ballbearins on he end ofthe bit that
runs against he work surface.Theoretically, f ifs a flush trimbit, the cutting edges shouldalignp€r'lectlywith he ba]lbear-ing. But that's not usually rue.
We checked witl the AmanaTool Company nd ound out t'sa common practice o mal{e he
DOVEIilTJrc FOI]OW.UPa I made he d&etuil jig thnt?ras z Woodsmith No. ,8 azdam rery pleased. with the re-sult8'.An .t .litional featurethat u,ould be northuhile i.s aVr," emplate ot jewelr! bofts
DougBreedPlAmouth,Michigen
We've eceived number of let-ters about he dovetail ig thatwas n No. 58.Many ofthe r€ad,ers wanted o know if you canmake Yarr ovebns or throushdovetailswith this r.pe ofjis.
uMnAToNs. The jig is designed to make half-bl inddovetails oints, basically ordrawers. t can not makethrough dovetails. hese areusuallycut by hand. (However,there are a few router iss, suchas the high jig, or templates,such as he Keller system, hatrnall<ehrough dovetails with a
%' DovEraIE. As for small€rhaff-blind ov€tails, did make atemplate or routing dovetailswith a Yarr ovetail bit. It worksgreat for small boxes and
dra\aers. o make Y!" dovetails,you wil reed a Ya" doverailbitand a 5,16"uidebushing, srvelas a different emplat€.
I.EMPrATE.oucan make hetemplate ut of Masonite aswedescribed or the 2r'template nWoodsnit, No. 58) or you canbuy a Yal plastic €mplate. SeeSources, age24.)
MATcNGTl{E TEMPI-ATE. omake your o$,n Yar! emplat€,start $'ith the same Masoniteblank as the lrrr template, butyou have to cut dilJerent sizenotches. Ifyou want to use the
same stop nut setting on tbefront of thejis, the notches aveto
be s€t backrrftom the oontedge ofthe blanl. (Settins hem
back bogets youclose.Youmayhave to shim out slishdy withwashers o get it exact.) To setthe notches ack 2", cut a widenotch in the f:ont edg€ of theblank, s€e Fig. 1.
Then, o cut the individualnotches, used an ndexing sls-tem on the able saw, se€ Fig.2.First, mount a 516r'-wideadoblade n the saw and raise t 74rl
Then puta546rLthickindeingkey n the auxiliary ence and setthe key 532" iom the blade, seeFig. 2a. (This will cut s16"notches with ins between
The actual rocedure or routing Ya[ dovetails s exactly hesame as or ,r!r dovetails.Sinc€the individual Yarr ovetailpinsarent very thick or strong, 'vefound then best to use only ifboth pieces o be oined are ttrlthick or ess.
I|lllr, cuT o;F wA5tt S0 rE lrafE
N o.62 \0oodsmah zl

8/13/2019 Woodsmith 62 - Apr 1989 - Working With Plywood
http://slidepdf.com/reader/full/woodsmith-62-apr-1989-working-with-plywood 24/24
SourcesDISPI.]AYWALI. UNIT
All of the hardwae that we usedon heWall Unitisavailable romWoodsmith ProjectSupplies.This hardwee or similar hardware is a lso avai lable romseveral of the sources isted atthe right. tr)ok or lhe codc /Ulolowin&the address.
Wa Unit HardwareOrd€r No. 762-300...... $17.95.2 PairofPivot Hinces. 1Double PlateMasnetic Calch. 2 Adjuslable Levelers.12 BrassShefSuppods.2
Recessed ed Oak PullsIn the anicle on page 22, we
talked about using a fl sh trimrouler bit. Woodsmith ProjectSupplies is otrerinla these car-bide bitsin ],, and Y{" shanks.
wcrecommend he r'r shankbits, llheywill fitin yourrouler.
Flush Trim BitsOrderNo. 71-aas . . . . . . 16 .95. Y1'Shank ush Trim BitOrderNo.271-487. . . . . . ,$19.95. 1/r"Shank Flush Trim Bi1
This type of routcr bi1 nray
also be purchased ocal ly orlronr one olthe suppliers istedat he riaht. Code r 71
P R O J E C T S U P P L I E S
SIUDY DESK
'Ihewooden pulls, he extensiondrawer slides, he top asteners,ad the file lolder packase usedon he deskare allavailablefromWoodsmith PrcjectSupplies.
This hardware or s imi larhardware may be found fromsomc of the suppliers isted atthe right. ok for code ,9 followine he suppliers' anrc.
Desk HardwareOrder No. 762- 00....... S44.95.3 Recessed ed Oak Pulls. 1 PairAccurideDrawer Slides.9TableTop Fasteners.1 Fi le ! 'o lder Packasc (In-
cludes one file frame and 12hangingfiles.)Ifyou wish to order he desk
hardware package erilliori rhenle rame and hansinsfiles, usethe ollowins order number:order No. 762-200....... 34.9s
The Accuride drawer slidescan a lso be pu.chased epa-ra te ly. These ful l extens ionslides re 24" orsand oad atedto 110 bs. ihe qualily of thesc
Accuride Draw€r Slidesotder No. 762-r2o .$27 95 pt .
oRDrRNFoRr{anoN-$Hb?.ffi:b**"To order, use &€ form or the Des Moines, IA 50306protective overofthis ssue or Please llow 4 to 6 r,veeks orwrilFyour order oo a sheFr t d elivery. or asl rsewice sepaper, and send t alons with our Toll Free order ine. Haveyour check or money order. your\4sAorMcreadymdcall:
(Please rcfude S1.50 hippins taOO-444-7OO2chargeperorder.) Aresidents Note: Prices subject oadd4% ales ax. S€nd rder o: chanse allet 12/89
GATA]OG SOURGESSinilar hard,bare nd, supplies maa befolmd
in thelollowing catalogs. HoueDer t|Ies and sizes maa uary.PIeaEe efei. o each atatasfor o anns iltfomtion.
AJbert CoNtartine2050Eastchester d.Bron-Y, Y 10461
DH,WU,FT
Bob Morgan woodworking1123 ardstown oad
Louisville,KY 40201F?
AlleD Speciaity Hardware Woodcraft Suppv3321v. ruceton d. P.O.Box4000Pittsbursh, PA 15236 Woburn, MA01888
DH,WU FT
Woodline173lClementAve.Alameda, A94501
FT
The Woodworkers' Stor€21801 ndustrial Boutevard
Rogers, MN 55374DH,WLI,FTCraftsrnan Wood Service Woodworkers Supply1735Wcortland Ct. 5604 lameda lace .E .Addison,ll 60101 Albuquerque, M87113
F? DH,WU,F']'
PROJECT SUPPI.Y UPDATEWoodsmith Project Suppliesis now offerinslhe hardwarc orthcl4'oods,,illi projects lisled
ot D oaK tcEBoxwe rc offering the hardware for
the oak cebox hal we eaturcdin llhods,rill No.36.'nrehardware lhat we reofferinsdi{Ie$ slishtlt, n appearancelrom the sqvle hal se orisinallyused on the ccbox. However, tis still solidbrass, nd he priceis substant ia l ly ess han hclrardware risinally hown.
Note: You need o purchase
The hardwarc ir ncludes:
Oak lceboxord€r No. 736-200...... S39.95.2 Bmss -eft Hand atches.I Brass RichtHand btch.6 Brass Hinces .'lJ'offset).l "wlile Clad Nmreplate. 8 Table Top Fasteners.8 Brass ShelfSuppods
BUNK BEDS
We've heard rom nany readersabout he problems heyne hadin obta in ing he knock downhardware we recommended orihe bunk beds in lYoodsriilnNo. 38.The sou ce wc orisin:llylistedno ongercarries he hardware shown n the ssue.
H owevcr, we are now offering
the orisinal hardware hat wasl i s ted in the i ssue throushWoodsmith ProjectSupplies.
Bunk Bed HardwareOrderNo.73a-11 . . .S1 .00 a..Knock Down l ' i t t incs (4
.eededtomake unkbeds . )Ordcr No. 7s6 3o7 ......-. 3.95.5'ftreaded Inseds (r,46'r.D.,
orderNo. 56 3o4. . . . . . . . 4 .95. l0lhrcaded Inseds (Vr6ril.D.,
for one bed Vstorasc drawers.)Ord€r No. 756-309 .......$9.95.25 Threaded nserts tu6'lD.,
forbunkhalsVslomsE drMF)OrderNo. 38-112. . .S3.95 r ..l pair 2" Plate Casters 2 pair
needed or each drawer.)
I,/4" DOVETAIL IEMPI.TATE
h l|'oadsntith No. 58 we fealured a shoftmade ovetail ig .
Sbce then we've been -trork-ing on a Ylrlemplale hatwjllfitour dovetail ig. (See asc 23.)
We now have a Yi" dovet ailtemplatc available. t's nudcfrom thc same Delrin plasticasour !r'.rremplates. he emplatecomes with mounring rackets,bolts,and adjuslins zshers. nstr ctions de included.
Dovetail Hardwd€Order No. 75ai41 ....... S27.95. Ya Dovelail TemplateOrder No. 762 5oo.........S6.95. Yi DovetailBit (H.S.Sleel)
l7oodsmith N o . 6 2