word 2010 procedures
TRANSCRIPT

1
WORD 2010 PROCEDURES
Starting Word
1. Click the Start button .
2. Click All Programs.
3. Click the Microsoft Office folder icon.
4. Click Microsoft Word 2010.
OR
1. Click the Start button .
2. Click Microsoft Word 2010 in the list of recently used programs.
OR
Double-click the Microsoft Word 2010
shortcut icon on the desktop.
OR
Click the Word icon on the Taskbar.
Exiting Word Click the Close button
at the right end of the Word title bar.
OR
1. Click the File tab.
2. Click Exit.
Changing the Word Window
Displaying a ScreenTip:
Rest the mouse pointer on a window element.
Showing or Hiding the Ruler
Click the View Ruler
button above the vertical scroll bar.
OR
1. Click the View tab.
Show Group
2. Click the Ruler check box.
√ A check in the check box indicates the ruler is displayed.
Minimizing/Expanding the Ribbon
To minimize, click the Minimize the Ribbon
button .
OR
Double-click any tab on the Ribbon to minimize it.
To expand, click the Expand the Ribbon
button .
OR
Double-click any tab on the Ribbon to expand it.
Changing the View
1. Click the View tab.
Document Views Group
2. Click the desired View button:
Print Layout
Full Screen Reading
Web Layout
Outline
Draft
OR
Click a View icon on the status bar:
Print Layout
Full Screen Reading
Web Layout
Outline
Draft

2
Showing or Hiding Nonprinting Characters 1. Click the Home tab.
Paragraph Group
2. Click the Show/Hide 
button .
3. Click the Show/Hide 
button again to toggle off.
Typing in a Document Press Enter to start a
new paragraph.
Press Backspace to delete one character to the left of the insertion point.
Press Delete to delete one character to the right of the insertion point.
Press Escape to cancel a command or close a dialog box.
Typing in the Header or Footer 1. Double-click in the header
or footer area to make it active.
2. Type the header or footer information.
3. Double-click in the main document area to make it active.
OR
1. After typing the header or footer information, click the Header & Footer Tools tab.
Close Group
2. Click the Close Header &
Footer button .
Splitting a Word Window 1. Click the View tab.
Window Group
2. Click the Split button .
3. Drag the resize pointer to the location where you want the split to occur and click.
Removing a Split
1. Click the View tab.
Window Group
2. Click the Remove Split
button .
Saving a File (Ctrl+S)
Click the Save button on the Quick Access Toolbar.
OR
1. Click the File tab.
2. Click Save.
3. In the File name text box, type the name of the file.
4. Use the Navigation pane to navigate to the location where you want to save the file.
5. Click Save or press Enter.

3
Creating a New, Blank Document (Ctrl + N) 1. Click File.
2. Click New.
3. Click the Blank
Document icon , if necessary.
4. Click the Create button.
Closing a Document Click the Close button
.
OR
1. Click File.
2. Click Close.
Using Click and Type Position the mouse
pointer so it changes to indicate the horizontal alignment of the new text, as follows:
Text will be flush left with the margin.
Text will be centered.
Text will be flush right with the margin.
The first line of text will be indented 0.5”.
Opening a Saved Document (Ctrl + O) 1. Click File.
2. Click Open.
3. Navigate to file’s location.
4. Double-click the file to open it.
OR
4. Click the file.
5. Click Open.
Opening a Recently Used Document 1. Click File.
2. Click Recent.
3. Under Recent Documents, click the file to open.
Saving a Document with a New Name 1. Click File.
2. Click Save As.
3. Type the file name in the File name text box.
4. Navigate to the location where you want to save the file.
5. Click Save.
Applying a Built-In Style 1. Click within the line of
text.
2. Click the Home tab.
Styles Group
3. Click the desired style from the Styles gallery.
Changing the Style Set 1. Click the Home tab.
Styles Group
2. Click the Change Styles button .
3. Click Style Set.
4. Click the desired style set.
Applying a Theme 1. Click the Page Layout
tab.
Themes Group
2. Click the Themes button
.
3. Click the desired theme from the Themes gallery.

4
Inserting Text 1. Click to position the
insertion point where you want to begin typing.
2. Type the text.
Using Overtype Mode 1. Right-click the status bar.
2. Click Overtype on the shortcut menu.
√ A check mark next to the command on the shortcut menu indicates it is selected.
3. Click Insert on the status bar to change to overtype mode.
Setting the Insert Key to Toggle Overtype Mode
1. Click File.
2. Click Options.
3. In the Word Options dialog box, click the Advanced tab.
4. If necessary, click the Use the Insert key to control overtype mode check box.
5. Click the Use overtype mode check box.
6. Click OK.
7. Right-click the status bar.
8. Click to mark Overtype on the shortcut menu.
9. Press the Insert key to toggle overtype mode on and off.
Selecting and Replacing Text 1. Select the text.
2. Type the replacement text.
Canceling a Command Click anywhere outside
selected text to cancel the selection.
Press Escape to cancel a command or close a dialog box.
Click anywhere outside a displayed menu to close it without making a selection.
Using Undo (Ctrl + Z), Redo (Ctrl + Y), and Repeat (Ctrl + Y)
Click the Undo button on the Quick Access Toolbar to reverse a single action or series of actions.
Click the Redo button on the Quick Access Toolbar to reinstate any action that you reversed with Undo.
Click the Repeat button
on the Quick Access Toolbar to repeat the most recent action.

5
Aligning Text Horizontally 1. Click the Home tab.
Paragraph Group
2. Click the desired alignment button:
Align Text Left
Center
Align Text Right
Justify
Aligning a Document Vertically 1. Click the Page Layout
tab.
2. Click the Page Setup group dialog box launcher
.
3. Click the Layout tab.
4. Click the Vertical alignment drop-down arrow.
5. Select the desired alignment from the menu.
6. Click OK.
Setting Line Spacing 1. Click the Home tab.
Paragraph Group
2. Click the Line and Paragraph Spacing
button .
3. Click the desired line spacing option from the menu.
OR
1. Click the Home tab.
2. Click the Paragraph group dialog box launcher
.
3. Click the Indents and Spacing tab.
4. Click the Line spacing drop-down arrow.
5. Select the desired spacing option from the menu.
6. Click OK.
Setting Paragraph Spacing Click the Page Layout
tab.
Paragraph Group
Use the Spacing Before box increment arrows to set the spacing before the paragraph.
Using the Spacing After box increment arrows to set the spacing after the paragraph.
OR
1. Click the Page Layout tab.
2. Click the Paragraph group dialog box launcher
.
3. Click the Indents and Spacing tab.
4. Under Spacing, enter the desired spacing in the Before and After boxes.
5. Click OK.
OR
1. Click the Home tab.
2. Click the Line and Paragraph Spacing
button .
3. Click the Remove Space Before Paragraph or Remove Space After Paragraph option from the menu.

6
Setting Indents
Adjusting the Left Indent by 0.5”
1. Click the Home tab.
Paragraph Group
2. Click the indent option as follows to adjust the indent by 0.5”:
Decrease Indent
button
Increase Indent button
Setting a Left or Right Indent Precisely
Click the Page Layout tab.
Paragraph Group
Use the Indent Left box increment arrows to set the left indent.
Using the Indent Right box increment arrows to set the right indent.
Setting Indents Using the Paragraph Dialog Box
1. Click the Page Layout tab.
2. Click the Paragraph group dialog box launcher
.
3. Click the Indents and Spacing tab.
4. Under Indentation, use the Left and Right increment arrows to set the left and right margins, respectively.
5. If desired, click the Special drop-down arrow to set the indent on the first line.
6. Click the By increment arrows to adjust the indent on the first line, if desired.
Setting a Hanging Indent Using the Paragraph Dialog Box
1. Click the Page Layout tab.
2. Click the Paragraph group dialog box launcher
.
3. Click the Indents and Spacing tab.
4. Click the Special drop-down arrow and click Hanging.
5. Click the By increment arrows to adjust the indent on the hanging indent, if desired.
Setting Tabs
Setting Tabs Using the Horizontal Ruler
1. To select a tab type, click the Tab selector box at the left end of the horizontal ruler until the tab you want to use displays, as follows:
Left
Right
Center
Decimal
Bar
2. Click at the position on the horizontal ruler where you want to set the tab.
Setting Tabs in the Tab Dialog Box
1. Click the Home tab.
2. Click the Paragraph group dialog box launcher
.
3. Click the Tabs button.
4. Type the tab stop position in the Tab stop position text box.
5. From the Alignment option, select the desired tab type.
6. Click Set.
7. Click OK.
Using the Horizontal Ruler to Adjust and Clear Tab Stops
Position the insertion point in the line of text for which the tab has been set.
To clear a tab stop, drag the tab stop off the horizontal ruler.
To adjust a tab stop, drag it to the desired position on the horizontal ruler.
Selecting a Tab Leader
1. Click the Home tab.
2. Click the Paragraph group dialog box launcher
.
3. Click the Tabs button.
4. In the Leader section, click the desired leader style.
5. Click OK.
6. In the document, press Tab to advance to the tab stop and insert the selected leader.
7
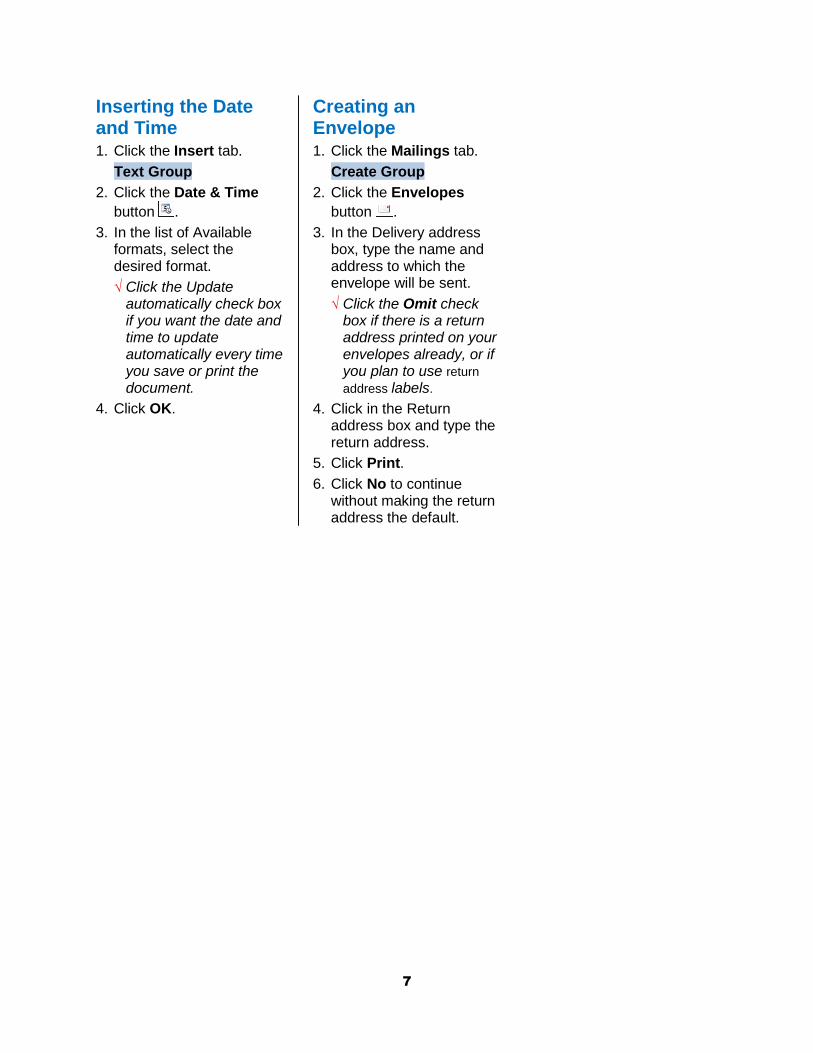
Inserting the Date and Time 1. Click the Insert tab.
Text Group
2. Click the Date & Time
button .
3. In the list of Available formats, select the desired format.
√ Click the Update automatically check box if you want the date and time to update automatically every time you save or print the document.
4. Click OK.
Creating an Envelope 1. Click the Mailings tab.
Create Group
2. Click the Envelopes
button .
3. In the Delivery address box, type the name and address to which the envelope will be sent.
√ Click the Omit check box if there is a return address printed on your envelopes already, or if you plan to use return
address labels.
4. Click in the Return address box and type the return address.
5. Click Print.
6. Click No to continue without making the return address the default.

8
Changing the Font 1. Click the Home tab.
Font Group
2. Click the Font button drop-down arrow
.
3. Click the desired font.
OR
1. Click the Home tab.
2. Click the Font group
dialog box launcher .
3. In the Font list, click the desired font.
4. Click OK.
Changing the Font Size 1. Click the Home tab.
Font Group
2. Click the Font Size button
drop-down arrow .
3. Click the desired font size.
OR
Click the Home tab.
Font Group
Click the Grow Font
button to increase the font size.
Click the Shrink Font
button to decrease the font size.
OR
1. Click the Home tab.
2. Click the Font group
dialog box launcher .
3. In the Size list, click the desired font size.
4. Click OK.
Changing the Font Color 1. Click the Home tab.
Font Group
2. Click the Font Color button drop-down arrow
.
3. Click the desired font color.
OR
1. Click the Home tab.
2. Click the Font group
dialog box launcher .
3. Click the Font color drop-down arrow.
4. Click the desired font color.
5. Click OK.
Applying Font Styles 1. Click the Home tab.
Font Group
2. Click the desired font style, as follows:
Bold (Ctrl + B)
Italic (Ctrl + I)
OR
1. Click the Home tab.
2. Click the Font group
dialog box launcher .
3. In the Font style list, click the desired style.
4. Click OK.
Applying Font Effects 1. Click the Home tab.
2. Click the Font group
dialog box launcher .
3. Under Effects, click the desired effect.
4. Click OK.
Applying Underlines 1. Click the Home tab.
Font Group
2. Click the Underline button drop-down arrow
.
3. Click the desired underline style.
OR
1. Click the Home tab.
2. Click the Font group
dialog box launcher .
3. Click the Underline style drop-down arrow.
4. Click the desired underline style.
5. Click OK.
Clearing Formatting 1. Click the Home tab.
Font Group
2. Click the Clear
Formatting button .

9
Creating a Bulleted List 1. Click the Home tab.
Font Group
2. Click the Bullets button
drop-down arrow .
3. Click the desired bullet style from the Bullet Library.
OR
1. Click the Home tab.
Font Group
2. Click the Bullets button
drop-down arrow .
3. Click Define New Bullet on the menu.
4. In the Define New Bullet dialog box, click the Symbol button, Picture button, and/or Font button to define a new bullet.
Creating a Numbered List 1. Click the Home tab.
Font Group
2. Click the Numbering button drop-down arrow
.
3. Click the desired numbering style from the Numbering Library.
Changing an Item Level in a Numbered List
1. Click the Home tab.
Paragraph Group
2. Click the Decrease
Indent button to promote the item one level, or click the Increase Indent button
to demote the item one level.
Changing the Bullet or Number Formatting 1. Right-click the bullet or
number.
2. On the shortcut menu, click Font or Paragraph to open the corresponding dialog box and change formats as desired.
Sorting Paragraphs 1. Click the Home tab.
Paragraph Group
2. Click the Sort button .
3. In the Sort dialog box, click the Ascending button or the Descending button.
4. Click OK.

10
Inserting Pictures
Inserting a Picture File
1. Click the Insert tab.
Illustrations Group
2. Click the Picture button
.
3. In the Insert Picture dialog box, navigate to and select the picture you want to insert.
4. Click Insert.
Inserting Clip Art
1. Click the Insert tab.
Illustrations Group
2. Click the Clip Art button
.
3. In the Clip Art task pane, click in the Search for text box and type the name of the art you want to insert.
4. Click a picture in the task pane to insert it.
Inserting a Screenshot
1. Click the Insert tab.
Illustrations Group
2. Click the Screenshot
button .
3. From the gallery of windows currently open on the desktop, select the window you want to insert.
Inserting a Text Box 1. Click the Insert tab.
Text Group
2. Click the Text Box button
.
3. Click the desired style from the gallery.
OR
1. Click the Insert tab.
Text Group
2. Click the Text Box button
.
3. Click Draw Text Box on the menu.
4. Click and drag to draw the text box as desired.
Inserting Shapes 1. Click the Insert tab.
Illustrations Group
2. Click the Shapes button
.
3. Click the desired shape from the gallery.
4. Click and drag to draw the shape as desired.
Resizing an Object 1. Click the object to select
it.
2. Drag a sizing handle to adjust the size as desired.
OR
1. Click the object to select it.
2. Click the Drawing Tools Format tab.
Size Group
3. Use the Shape Height increment arrows and the
Shape Width increment arrows to adjust the object’s size.
Deleting an Object 1. Click the object to select
it.
2. Press Delete or Backspace.
Scanning Content into Microsoft Clip Organizer
1. Click Start .
2. Point to All Programs.
3. Click Microsoft Office, click Microsoft Office 2010 Tools, and then click Microsoft Clip Organizer.
4. In the Microsoft Clip Organizer, click File.
5. Click Add Clips to Organizer and then click From Scanner or Camera.
√ Follow the prompts for your scanner to select resolution and other options.
6. Click Insert.
Inserting a Picture from the Clip Organizer
1. Click Start .
2. Point to All Programs.
3. Click Microsoft Office, click Microsoft Office 2010 Tools, and then click Microsoft Clip Organizer.
4. In the Microsoft Clip Organizer, navigate in the Collection List to the picture you want to insert.
5. Click the selected clip’s drop-down arrow and click Copy.
6. Click in the document where you want to insert the selected clip.
7. Click the Home tab.
Clipboard Group
8. Click the Paste button .

11
Wrapping Text Around an Object 1. Click the object to select
it.
2. Click the Picture Tools Format tab.
Arrange Group
3. Click the Wrap Text
button .
4. Click the desired wrap option from the menu.
Moving and Positioning an Object
Moving an Object
1. Position the mouse pointer over the selected picture until the mouse pointer changes to a four-
headed arrow .
2. When the vertical bar in the move pointer displays in the position where you want to move the object, release the mouse button to move the picture.
Positioning an Object
1. Click the Picture Tools Format tab.
Arrange Group
2. Click the Position button
.
3. Select the desired position from the gallery.
OR
1. Click the Picture Tools Format tab.
Arrange Group
2. Click the Align button .
3. Select the desired alignment option from the menu.
OR
1. Click the object to select it.
2. Press the up, down, left, or right arrow keys to nudge the object in the desired direction.
Rotating an Object
1. Click the object to select it.
2. Position the mouse pointer over the object’s green rotation handle so it resembles a circular
arrow .
3. Drag to rotate the object as desired.
OR
1. Click the object to select it.
2. Click the Picture Tools Format tab.
Arrange Group
3. Click the Rotate button
.
4. Click the desired rotation option from the menu.
Layering and Grouping Objects
Layering Objects
1. Click an object to select it.
2. Click the Picture Tools Format tab.
Arrange Group
3. Click the Bring Forward
button or the Send
Backward button to layer it with other objects.
Grouping Objects
1. Click an object to select it.
2. Hold down Shift to select other objects to include in the group.
3. Click the Picture Tools Format tab.
Arrange Group
4. Click the Group button
.
5. Click Group on the menu.
Formatting Objects
Applying a Style to a Shape
1. Click the shape to select it.
2. Click the Drawing Tools Format tab.
Shape Styles Group
3. Click the More button .
4. Click the desired style in the gallery.

12
Applying a Fill, Outline, and Effects to a Shape
1. Click the shape to select it.
2. Click the Drawing Tools Format tab.
Shape Styles Group
3. Click to apply the desired format, as follows:
Shape Fill .
Shape Outline .
Shape Effects .
Applying a Style to a Picture
1. Click the picture to select it.
2. Click the Picture Tools Format tab.
Picture Styles Group
3. Click the More button .
4. Click the desired style in the gallery.
Applying a Border, Effects, and Layout to a Picture
1. Click the picture to select it.
2. Click the Picture Tools Format tab.
Picture Styles Group
3. Click to apply the desired format, as follows:
Picture Border .
Picture Effects .
Picture Layout .
Modifying Pictures 1. Click the picture to select
it.
2. Click the Picture Tools Format tab.
Adjust Group
3. Click an option to make the desired modification, as follows:
Corrections to adjust the contrast and brightness
Color to change the color
Artistic Effects to add special effects
Compress Pictures
to reduce the file size
Change Picture to change to a different picture, preserving the formatting and size of the current picture
Reset Picture to remove all formatting applied to the picture
Modifying a Text Box
Changing the Font
1. Click the text box to select it.
2. Click the Home tab.
Font Group
3. Click options to apply the desired font formatting.
Changing the Text Direction
1. Click the text box to select it.
2. Click the Drawing Tools Format tab.
Text Group
3. Click the Text Direction
button .
4. Click the desired rotation option.

13
Adding Text to a Shape 1. Right-click the shape.
2. Click Add Text on the shortcut menu.
3. Type the text and apply formats as desired.
Changing a Shape 1. Click the shape to select
it.
2. Click the Drawing Tools Format tab.
Insert Shapes Group
3. Click the Edit Shape
button .
4. Click Change Shape.
5. Click the desired shape in the Shapes gallery.
Working with SmartArt
Inserting a SmartArt Graphic
1. Click the Insert tab.
Illustrations Group
2. Click the SmartArt button
.
3. Click the desired SmartArt from the Choose a SmartArt Graphic dialog box.
4. Click OK.
Entering Text in a SmartArt Graphic
1. Click the SmartArt object to select it.
2. Click the SmartArt Tools Design tab.
Create Graphic Group
3. If necessary, click the Text Pane button to display it.
4. Enter text in the placeholders as desired.
Modifying the Design of a SmartArt Graphic
1. Click the SmartArt object to select it.
2. Click the SmartArt Tools Design tab.
3. Select options on the tab to modify the layout, style, and text levels as desired.
Applying Text Effects 1. Select the text.
2. Click the Home tab.
Font Group
3. Click the Text Effects
button .
4. Click the desired effect from the gallery.
Applying a Page Border 1. Click the Page Layout
tab.
Page Background Group
2. Click the Page Borders
button .
3. In the Borders and Shading dialog box, click the Page Border tab.
4. Select the Setting, Style, Color, and Width as desired.
5. Click OK.

14
Selecting Spelling and Grammar Options 1. Click File.
2. Click Options.
3. In the Word Options dialog box, click Proofing.
4. Check options as necessary under the When correcting spelling and grammar in Word section.
√ A check in the check box indicates the option is already selected.
Correcting Spelling as You Type 1. Right-click the misspelled
word.
√ A red wavy line under a word indicates a possible spelling error. A blue wavy underline indicates a possible word choice error.
2. Click the desired option on the shortcut menu.
Correcting Grammar as You Type 1. Right-click the misspelled
word.
√ A green wavy line under a word indicates a possible grammatical error.
2. Click the desired option on the shortcut menu.
Checking Spelling and Grammar 1. Click the Review tab.
Proofing Group
2. Click the Spelling &
Grammar button .
3. Click options to correct or ignore errors identified in the Spelling & Grammar dialog box.
Editing the Custom Dictionary 1. Click File.
2. Click Options.
3. In the Word Options dialog box, click Proofing.
4. Click Custom Dictionaries.
5. In the Custom Dictionaries dialog box, click Edit Word List.
6. Edit words in the custom dictionary as desired.
Using the Thesaurus 1. Select the word you want
to research.
2. Click the Review tab.
Proofing Group
3. Click the Thesaurus
button .
4. In the Research task pane, select the desired synonym or antonym.
Controlling Hyphenation 1. Click the Page Layout
tab.
Page Setup Group
2. Click the Hyphenation
button .
3. On the menu, select from None, Automatic, Manual, or Hyphenation Options.
Inserting a Non-Breaking Space 1. If necessary, delete space
between the words you do not want to break.
2. Press Ctrl + Shift + Space to insert a non-breaking space.
15
Moving Text
Using Keyboard Shortcuts
1. Select the text (including paragraph mark, if necessary) to move.
2. Press F2.
3. Click where you want to move the text.
4. Press Enter.
Using Drag-and-Drop
1. Select the text (including paragraph mark, if necessary) to move.
2. Move the mouse pointer anywhere over the selection.
3. Press and hold the left mouse button.
4. Drag to the desired location and release the mouse button.
Using Cut (Ctrl+X) and Paste (Ctrl+V)
1. Select the text (including paragraph mark, if necessary) to move.
2. Click the Home tab.
Clipboard Group
3. Click the Cut button .
4. Click where you want to move the text.
5. Click the Home tab.
Clipboard Group
6. Click the Paste button .
Using Paste Options 1. Click the Home tab.
Clipboard Group
2. Click the Paste button
drop-down arrow .
3. Click the desired paste option on the menu.
Using Paste Special 1. Click the Home tab.
Clipboard Group
2. Click the Paste button
drop-down arrow .
3. Click Paste Special.
4. In the Paste Special dialog box, click the desired paste option.
Copying Text
Using Copy (Ctrl+C) and Paste (Ctrl+V)
1. Select the text (including paragraph mark, if necessary) to copy.
2. Click the Home tab.
Clipboard Group
3. Click the Copy button .
4. Click where you want to copy the text.
5. Click the Home tab.
Clipboard Group
6. Click the Paste button .
Using Drag-and-Drop Editing to Copy Text
1. Select the text (including paragraph mark, if necessary) to copy.
2. Move the mouse pointer anywhere over the selection.
3. Press and hold Ctrl.
4. Press and hold the left mouse button.
5. Drag to the desired location and release the mouse button.

16
Inserting and Deleting a Table
Inserting a Table
1. Click the Insert tab.
Tables Group
2. Click the Table button .
3. On the menu, highlight the number of rows and columns in the grid.
OR
3. Click Insert Table.
4. In the Insert Table dialog box, set the number of rows and columns and the AutoFit options as desired.
5. Click OK.
Deleting a Table
1. Click in any cell of the table.
2. Click the Table Tools Layout tab.
Rows & Columns Group
3. Click the Delete button
.
4. Click Delete Table on the menu.
Inserting Text in a Table Click in a cell and type the
entry.
OR
Press Tab or an arrow key to move to a cell and type an entry.
Selecting in a Table 1. Click in the table.
2. Click the Table Tools Layout tab.
Table Group
3. Click the Select button .
4. Click the desired selection on the menu.
Selecting a Table
To select the table, click the Table Selector button
that appears outside the upper left corner of the table.
Selecting a Row
1. To select a row, position the mouse pointer outside the table, to the left of the row.
2. When the mouse pointer
changes to , click to select the row.
Selecting a Column
1. To select a column, position the mouse pointer outside the table, just above the column.
2. When the mouse pointer
changes to , click to select the column.
Selecting a Cell
1. To select a cell, position the mouse pointer outside the cell, at the bottom left corner.
2. When the mouse pointer changes to , click to select the cell.
Selecting Multiple Components in a Table
To select contiguous cells, drag across them.
OR
Select the first cell and press and hold Shift to select additional cells.
To select noncontiguous cells, select the first cell and press and hold Ctrl to select additional cells.
Changing Table Structure
Inserting Rows and Columns
1. Click where desired in the table.
2. Click the Table Tools Layout tab.
Rows & Columns Group
3. Click the options, as follows:
Insert Above
Insert Below
Insert Left
Insert Right
Deleting in a Table
1. Click in the cell, row, or column to be deleted.
2. Click the Table Tools Layout tab.
Rows & Columns Group
3. Click the Delete button
.
4. Click the desired option to delete on the menu.

17
Formatting a Table
Applying a Table Style
1. Click in the table to select it.
2. Click the Table Tools Design tab.
Table Styles Group
3. Click the Table Styles
More button .
4. Click the desired style. Applying Formats to Cell Contents
1. Select the text to be formatted.
2. Click the Home tab.
3. Apply formats from the Font and Paragraph groups as desired.
Viewing Gridlines 1. Click in the table to select
it.
2. Click the Table Tools Layout tab.
Table Group
3. Click the View Gridlines button .
Converting Text to a Table 1. Select the text to convert.
2. Click the Insert tab.
Tables Group
2. Click the Table button .
3. On the menu, click Convert Text to Table.
4. In the Convert Text to Table dialog box, click OK.
Inserting Existing Text into a Table Cell 1. Click in the cell where you
want to insert the text.
2. Click the Home tab.
Clipboard Group
3. Click the Paste button .
Setting Column Width and Row Height 1. Click a cell in the column
or row you want to adjust.
2. Click the Table Tools Layout tab.
Cell Size Group
3. Click the AutoFit button .
4. Click the desired option from the menu.
OR
1. Rest the pointer on the column divider or row divider.
2. Drag to the desired width or height.
OR
1. Click a cell in the column or row you want to adjust.
2. Click the Table Tools Layout tab.
Cell Size Group
3. Click the Table Row
Height increment arrows or the Table
Column Width increment arrows to adjust the size as desired.
OR
1. Click the Table Selector
button to select the table.
2. Click the Table Tools Layout tab.
Cell Size Group
3. Click the Distribute Rows
button to distribute the rows evenly, or the Distribute Columns
button to distribute the columns evenly.
Setting Alignment in a Table Cell 1. Click in the cell(s) in which
you want to set the alignment.
2. Click the Table Tools Layout tab.
Alignment Group
3. Click from the alignment options, as follows:
Align Top Left
Align Top Center
Align Top Right
Align Center Left
Align Center
Align Center Right
Align Bottom Left
Align Bottom Center
Align Bottom Right

18
Setting Tabs in a Table Cell 1. Click in the cell in which
you want to set the tab.
2. Click the Tab selector box at the left end of the horizontal ruler until the tab you want to use displays, as follows:
Left
Right
Center
Decimal
Bar
3. Click at the position on the horizontal ruler where you want to set the tab.
4. Press Ctrl+Tab to advance to the tab stop.
Setting Cell Margins 1. Click in any cell.
2. Click the Table Tools Layout tab.
Alignment Group
3. Click the Cell Margins
button .
4. In the Table Options dialog box, use the increment arrows to set the top, bottom, left, and right margins as desired.
5. Click OK.
Aligning a Table Horizontally on the Page 1. Click anywhere in the
table.
2. Click the Table Tools Layout tab.
Table Group
3. Click the Properties
button .
4. In the Table Properties dialog box, click the Table tab if necessary.
5. Select the desired alignment option.
6. Click OK.

19
Drawing a Table 1. Click the Insert tab.
Tables Group
2. Click the Table button .
3. Click Draw Table.
√ The mouse pointer
changes to .
4. Drag to create table cells as desired.
Merging and Splitting Cells
Merging Cells
1. Select the cells to merge.
2. Click the Table Tools Layout tab.
Merge Group
3. Click the Merge Cells
button .
OR
1. Click the Table Tools Design tab.
Draw Borders Group
2. Click the Eraser button
.
√ The mouse pointer
changes to .
3. Click on a cell divider to merge the cells.
Splitting Cells
1. Select the cell to split.
2. Click the Table Tools Layout tab.
Merge Group
3. Click the Split Cells
button .
4. In the Split Cells dialog box, set the number of columns and rows for the split cell.
5. Click OK.
Changing Text Direction in a Table Cell 1. Click in the cell.
2. Click the Table Tools Layout tab.
Alignment Group
3. Click the Text Direction button to rotate through the different options.
Moving and Resizing Tables
Moving Tables
1. Click the Table selector
button to select the table.
2. Drag the mouse pointer to the new location and release.
Resizing Tables
1. Rest the mouse pointer over the table so the sizing handle displays in the lower right corner.
2. Click and drag the sizing handle to the desired size.
Setting Text Wrapping Around a Table 1. Click in any cell in the
table.
2. Click the Table Tools Layout tab.
Table Group
3. Click the Properties
button .
4. In the Table Properties dialog box, click the Table tab if necessary.
5. In the Text wrapping section, select the desired option.
6. Click OK.
20
Performing Addition in a Table 1. Click in the cell that will
contain the formula.
2. Click the Table Tools Layout tab.
Data Group
3. Click the Formula button
.
4. Verify that the Formula box contains =SUM(ABOVE).
5. Click OK.
Applying a Number Format 1. Click in the cell that
contains, or will contain, the formula.
2. Click the Table Tools Layout tab.
Data Group
3. Click the Formula button
4. In the Formula dialog box, click the Number format drop-down arrow.
5. Click the desired format.
6. Click OK.
Sorting Rows in a Table 1. Select the column to sort
by.
2. Click the Table Tools Layout tab.
Data Group
3. Click the Sort button .
4. In the Sort dialog box, verify the column(s) to sort by and the sort order.
Applying Cell Borders and Shading
Applying Cell Borders
1. Select the cell(s).
2. Click the Table Tools Design tab.
Draw Borders Group
3. Click the Line Style button .
4. From the Line Style gallery, click the desired line style.
5. Click the Line Weight button .
6. From the Line Weight gallery, click the desired line weight.
7. Click the Pen Color button drop-down arrow
.
8. From the palette, click the desired color.
9. Click the Table Tools Design tab.
Table Styles Group
10. Click the Borders button drop-down arrow .
11. From the Borders gallery, click the desired border style.
Applying Cell Shading
1. Select the cell(s).
2. Click the Table Tools Design tab.
Table Styles Group
3. Click the Shading button drop-down arrow .
4. From the color palette, click the desired shade.
21
Using Find 1. Click the Home tab.
Editing Group
2. Click the Find button .
3. In the text box at the top of the Navigation pane, enter the text you want to find. Word displays a list of occurrences in the Navigation pane.
Using Advanced Find 1. Click the Home tab.
Editing Group
2. Click the Find button drop-down arrow .
3. Click Advanced Find.
4. In the Find and Replace dialog box, enter the text to find in the Find what text box.
5. Click Find Next. A message box appears when all occurrences have been found.
Using Find and Replace 1. Click the Home tab.
Editing Group
2. Click the Replace button
.
3. In the Find and Replace dialog box, enter the text to find in the Find what text box.
4. Enter the replacement text in the Replace with text box.
5. Click the Replace button to replace each separate occurrence; click Replace All to replace all occurrences.
Using Go To 1. Click the Home tab.
Editing Group
2. Click the Find button drop-down arrow .
3. Click Go To.
4. On the Go To tab of the Find and Replace dialog box, select the desired option from the Go to what list box.
Using the Navigation Pane 1. Click the View tab.
Show Group
2. Click the Navigation Pane check box.
3. Choose to browse the headings in the document, browse the pages, or browse the search results.
Browsing by Object 1. Click the Select Browse
Object button at the bottom of the vertical scroll bar.
2. Select the object you want to browse by from the gallery of browse objects.
Using AutoCorrect
Reversing AutoCorrect Changes
1. Rest the mouse pointer on the blue rectangle that appears below the corrected text.
2. When the AutoCorrect
Options button appears, click it to display the options from which you can choose.
Editing the AutoCorrect List
1. Click File.
2. Click Options.
3. In the Word Options dialog box, click Proofing.
4. Click AutoCorrect Options to open the AutoCorrect Options dialog box.
5. In the Replace text box, type the text you want replaced.
6. In the With text box, type the AutoCorrect replacement text.
7. Click Add.
8. Click OK.
22
Opening and Saving Compatible File Types
Opening Compatible File Types
1. Click File.
2. Click Open.
3. In the Open dialog box, click the File Type button to display a list of available file types.
√ The text on the File Type
button changes depending on your most recent selection. If you have never changed the file type, it will display All Word Documents.
4. Select the desired file type.
5. Select the file to open.
6. Click Open.
Saving Compatible File Types
1. Click File.
2. Click Save As.
3. In the Save As dialog box, click the Save as type button to display a list of compatible file types.
4. Select the desired file type.
5. Enter the file name and select the location where the file will be saved.
6. Click Save.
7. Click OK in the File Conversion dialog box.
Saving a Word Document as a Web Page 1. Click File.
2. Click Save As.
3. In the Save As dialog box, enter the file name and select the location where the file will be saved.
4. Click the Save as type button.
5. Click Single File Web Page.
6. Click Change Title.
7. In the Page title text box, enter the desired page title and click OK.
8. In the Save As dialog box, click Save.
Using Web Layout View Click the Web Layout
button on the status bar.
Saving a Word Document as a PDF 1. Click File.
2. Click Save As.
3. In the Save As dialog box, enter the file name and select the location where the file will be saved.
4. Click the Save as type button.
5. Click PDF.
6. Click Save.
Creating a Document Based on a Template 1. Click File.
2. Click New.
3. Click Sample templates.
4. Click the desired template.
5. Click the Create button.
Saving a Word Document as a Template
1. Click File.
2. Click Save As.
3. In the Save As dialog box, enter the file name and select the location where the file will be saved.
4. Click the Save as type button.
5. Click Word Template.
6. Click Save.
Exploring Templates on Office.com
1. Click File.
2. Click New.
3. Under Office.com Templates, search for and select the desired template.
Using Content Controls 1. Click a content control to
select it.
2. Type replacement text as desired.
Removing a Content Control
1. Right-click the content control.
2. On the shortcut menu, click Remove Content Control.

23
Using Uppercase Mode 1. Press the Caps Lock key.
2. Type the desired text in all caps.
Showing Caps Lock on the Status Bar
1. Right-click the status bar.
2. On the shortcut menu, click Caps Lock to select it.
√ A check beside a command indicates it is turned on.
3. Press the Caps Lock key to show the Caps Lock indicator on the status bar.
Changing Case 1. Select the text whose
case you want to change.
2. Click the Home tab.
Font Group
3. Click the Change Case
button .
4. On the menu, click the desired case option.
Managing Document Properties 1. Click File.
2. On the Info tab, in the Preview pane under Properties, review the document’s properties or click available content controls as desired.
3. If desired, click Show All Properties to display all properties.
OR
1. Click File.
2. On the Info tab, in the Preview pane, click Properties.
3. Click Show Document Panel to display the panel below the Ribbon.
4. Add or modify properties as desired.
Viewing a Properties Dialog Box
1. Click File.
2. On the Info tab, in the Preview pane, click Properties.
3. Click Advanced Properties to display the document’s Properties dialog box.
4. Add or modify properties as desired.
5. Click OK to close the dialog box.
Printing Document Properties
1. Click File.
2. Click Print.
3. Under Settings, click the top button.
4. On the menu, click Document Properties.
5. Click the Print button .
24
Selecting a Preset Margin 1. Click the Page Layout
tab.
Page Setup Group
2. Click the Margins button
.
3. On the menu, click the desired margin setting.
Setting Custom Margins 1. Click the Page Layout
tab.
Page Setup Group
2. Click the Margins button
.
3. On the menu, click Custom Margins.
4. In the Page Setup dialog box, under Margins, set the margins as desired.
5. Click OK.
Showing or Hiding Text Boundaries 1. Click File.
2. Click Options.
3. In the Word Options dialog box, click Advanced.
4. Under Show document content, click to select the Show text boundaries check box.
5. Click OK.
Inserting a Section Break 1. Position the insertion
point where you want to insert the break.
2. Click the Page Layout tab.
Page Setup Group
3. Click the Breaks button
.
4. From the Breaks gallery, click the desired break type.
Setting Page Orientation 1. Click the Page Layout
tab.
Page Setup Group
2. Click the Orientation
button .
3. On the menu, click the desired orientation.
Inserting Page Numbers 1. Click the Insert tab.
Header & Footer Group
2. Click the Page Number
button .
3. On the menu, click the desired location for the page number.
4. On the gallery, click the desired format for the page number.
Changing the Page Number Format
1. Double-click in the header or footer containing the page number.
2. On the Header & Footer Tools Design tab, click the Page Number button
.
3. On the menu, click Format Page Numbers.
4. In the Page Number Format dialog box, set the formatting as desired.
Viewing the Word Count 1. If the word count is not
automatically displayed on the status bar, right-click the status bar.
2. On the shortcut menu, click Word Count to display the number of words in the status bar.
√ Selecting text will display the word count for the selection as well as the entire document.
OR
1. Click the Review tab.
Proofing Group
2. Click the Word Count
button .
3. View information in the Word Count dialog box.
4. Click Close.
25
Inserting a Hard Page Break 1. Position the insertion
point where you want to insert the page break.
2. Click the Insert tab.
Pages Group
3. Click the Page Break button .
OR
2. Click the Page Layout tab.
Page Setup Group
3. Click the Breaks button
.
4. From the Breaks gallery, click Page.
Controlling Pagination 1. Click the Page Layout
tab.
2 Click the Paragraph group
dialog box launcher .
3. Click the Line and Page Breaks tab.
4. Click the desired settings.
5. Click OK.
Inserting Footnotes 1. Position the insertion
point where you want to insert the footnote marker.
2. Click the References tab.
Footnotes Group
3. Click the Insert Footnote
button .
4. Type the footnote.
Inserting Endnotes 1. Position the insertion
point where you want to insert the endnote marker.
2. Click the References tab.
Footnotes Group
3. Click the Insert Endnote
button .
4. Type the endnote.
Inserting Citations 1. Position the insertion
point where you want to insert the citation.
2. Click the References tab.
Citations & Bibliography Group
3. Click the Style button
drop-down arrow .
4. On the menu of available citation styles, click the desired style.
5. Click the Insert Citation
button .
6. From the menu, click Add New Source.
7. In the Create Source dialog box, select the type of source and enter the source information.
8. Click OK.
Creating a Reference Page 1. Position the insertion
point at the end of the document and insert a hard page break.
2. Click the References tab.
Citations & Bibliography Group
3. Click the Bibliography
button .
4. From the gallery, click the desired format.

26
Creating Newsletter Columns 1. Select the text or click in
the section of text that you want to format in columns.
2. Click the Page Layout tab.
Page Setup Group
3. Click the Columns button .
4. From the gallery, select the desired number of columns.
Setting Column Width 1. Click the Page Layout tab.
Page Setup Group
2. Click the Columns button .
3. Click More Columns.
4. In the Columns dialog box, set the column width and spacing as desired.
5. Click OK.
Inserting a Column Break 1. Position the insertion point
where you want to insert the break.
2. Click the Page Layout tab.
Page Setup Group
3. Click the Breaks button
.
4. From the Breaks gallery, click Column.
Balancing Columns 1. Position the insertion point
at the end of the text in the last column on the page.
2. Click the Page Layout tab.
Page Setup Group
3. Click the Breaks button
.
4. From the Breaks gallery, click Continuous.

27
Inserting Dropped Capitals 1. Click in the paragraph
where you want to insert the dropped capital.
2. Click the Insert tab.
Text Group
3. Click the Drop Cap button
.
4. From the menu, click the desired format.
Customizing a Dropped Capital
1. Click in the paragraph where you want to insert the dropped capital.
2. Click the Insert tab.
Text Group
3. Click the Drop Cap button
.
4. From the menu, click Drop Cap Options.
5. In the Drop Cap dialog box, click the desired position for the drop cap.
6. Under Options, set the desired font, lines to drop, and distance from text.
7. Click OK.
Enhancing a Paragraph with Borders 1. Position the insertion point
in the paragraph to which you want to add a border.
2. Click the Page Layout tab.
Page Background Group
3. Click the Page Borders button .
4. In the Borders and Shading dialog box, click the Page Border tab.
5. In the Style list box, click the desired line style for the border.
6. Click the Color drop-down arrow and click the desired color for the border.
7. Click the Width drop-down arrow and click the desired line width for the border.
8. In the Setting list, click the desired effect for the border.
9. Click OK.
Enhancing a Paragraph with Shading 1. Position the insertion point
in the paragraph to which you want to add shading.
2. Click the Page Layout tab.
Page Background Group
3. Click the Page Borders button .
4. In the Borders and Shading dialog box, click the Shading tab.
5. Click the Fill drop-down arrow and click the desired color for the shading.
6. Under Patterns, click the Style drop-down arrow and click the desired patterns for the shading.
7. Under Patterns, click the Color drop-down arrow and click the desired color for the pattern.
8. Click OK.
28
Using the Format Painter to Copy Formats 1. Select the text whose
format you want to copy.
2. Click the Home tab.
Clipboard Group
3. Click the Format Painter
button .
4. Select the text to which you want to apply the copied format.
Copying Formatting to Multiple Selections
1. Select the text whose format you want to copy.
2. Click the Home tab.
Clipboard Group
3. Double-click the Format
Painter button .
4. Select the text to which you want to apply the copied format, and repeat for additional blocks of text.
Highlighting Text 1. Select the text you want
to highlight.
2. Click the Home tab.
Font Group
3. Click the Text Highlight Color drop-down arrow
.
4. Click the desired highlight color.
OR
1. Click the Home tab.
Font Group
2. Click the Text Highlight Color drop-down arrow
.
3. Click the desired highlight color.
√ The mouse pointer changes to the Highlight Text pointer
.
4. Drag across the text you want to highlight.
5. Click the Text Highlight
Color button again to turn off the feature.
29
Inserting Symbols 1. Position the insertion
point where you want to insert the symbol.
2. Click the Insert tab.
Symbols Group
3. Click the Symbol button
..
√ If the symbol you want displays in the Symbols gallery, click it to insert it in the document.
4. Click More Symbols.
5. In the Symbol dialog box, select a font if necessary, and then click the desired symbol.
6. Click Insert.
Inserting a Special Character 1. Position the insertion
point where you want to insert the character.
2. Click the Insert tab.
Symbols Group
3. Click the Symbol button
..
4. Click More Symbols.
5. In the Symbol dialog box, click the Special Characters tab.
6. Click the desired character.
7. Click Insert.

30
Using the Mail Merge Wizard
Setting up Labels
1. Click the Mailings tab.
Start Mail Merge Group
2. Click the Start Mail
Merge button .
3. Click Step by Step Mail Merge Wizard.
4. In the Mail Merge task pane, click the Labels button.
5. Click Next: Starting document.
6. Under Change document layout, click Label options.
7. Click the Label vendors drop-down arrow and click the desired label type.
8. In the Product number list, click the desired label size.
9. Click OK.
Creating an Address List and Selecting Recipients
10. In the Mail Merge task pane, click Next: Select recipients.
11. Under Select recipients, click the Type a new list button, and then click
Create. The New Address List dialog box displays.
√ If you have an existing Address List in a compatible format, click the Use an existing list option button, click Browse, and then navigate to and open the file.
12 Type the address of the first recipient.
13. Click New Entry to complete the entry and move to a new row to enter another recipient, if desired.
14. When you have entered all the recipients, click OK.
15. In the Save Address List dialog box, enter a name for the list and select the location where you want to save the file.
16. Click OK.
Arranging the Labels
17. In the Mail Merge task pane, click Next: Arrange your labels.
18. Click Address block. The Insert Address Block dialog box displays.
19. Verify that the Insert recipient’s name is in the
desired format. Verify that the Insert postal address check box is selected and that the Only include the country/region if different than option button is selected. Verify that the Format address according to the destination country/region check box is selected.
20. Click OK.
21. In the Mail Merge task pane, click Update all labels to copy the layout from the first cell to the remaining cells.
Previewing the Labels
22. In the Mail Merge task pane, click Next: Preview your labels.
23. If necessary, click Previous in the Mail Merge task pane to make adjustments to the label arrangement.
Completing the Merge
24. In the Mail Merge task pane, click Next: Complete the merge.
25. Click Print.
26. In the Merge to Printer dialog box, click OK.
31
Performing a Mail Merge with the Mail Merge Wizard 1. Click the Mailings tab.
Start Mail Merge Group
2. Click the Start Mail
Merge button .
3. Click Step by Step Mail Merge Wizard.
4. In the Mail Merge task pane, click the Letters button, if necessary.
5. Click Next: Starting document.
6. In the Step 2 of 6 Mail Merge task pane, click Use the current document, if necessary.
7. Click Next: Select recipients.
8. In the Step 3 of 6 Mail Merge task pane, click Browse, and navigate to the location where the recipient list is stored.
9. Select the recipient file and click Open. If the Mail Merge Recipients dialog box opens, click OK.
10. Click Next: Write your letter.
11. In the Step 4 of 6 Mail Merge task pane, add the address block, greeting line, and other recipient information as desired.
12. Click Next: Preview your letters.
13. In the Step 5 of 6 Mail Merge task pane, click the double arrows to preview your letters as desired.
14. Click Next: Complete the merge.
15. In the Step 6 of 6 Mail Merge task pane, click Print.
16. In the Merge to Printer dialog box, click OK.
Performing a Mail Merge Manually 1. Click the Mailings tab.
Start Mail Merge Group
2. Click the Select Recipients button .
3. On the menu, click the desired type of recipient list.
4. Click the Mailings tab.
Write & Insert Fields Group
5. Click the Address Block
button to insert the desired address block.
6. Click Greeting Line
button to insert the desired greeting line.
7. Click the Insert Merge Field drop-down arrow
to insert other fields, as desired.
8. Click the Mailings tab.
Preview Results Group
9. Click the Preview
Results button to preview the letters if desired.
10. Click the Mailings tab.
Finish Group
11. Click the Finish &
Merge button .
12. On the menu, click Edit Individual Documents.
13. In the Merge to New Document dialog box, click OK.
Creating a New Address List 1. Click the Mailings tab.
Start Mail Merge Group
2. Click the Select Recipients button .
3. On the menu, click Type New List.
4. In the New Address List dialog box, enter recipient names and addresses as desired.
5. Click OK.
6. In the Save Address List dialog box, enter the file name for the list and select the location where you want to save it.
7. Click OK.
Removing Extra Space from the Address Block 1. Click in the Address Block
field.
2. Click the Home tab.
Paragraph Group
3. Adjust spacing as needed by using the Line and Paragraph Spacing options.
32
Starting an Envelope Mail Merge 1. Click the Mailings tab.
Start Mail Merge Group
2. Click the Start Mail
Merge button .
3. Click Envelopes.
4. In the Envelope Options dialog box, click OK to accept the default settings.
Starting a Labels Mail Merge 1. Click the Mailings tab.
Start Mail Merge Group
2. Click the Start Mail
Merge button .
3. Click Labels.
4. In the Label Options dialog box, click the Label vendors drop-down arrow and click the desired label type.
5. In the Product number list, click the desired label size.
6. Click OK.
Specifying the Data Source 1. Click the Mailings tab.
Start Mail Merge Group
2. Click the Select Recipients button .
3. On the menu, click the desired type of data source.
Adding Records to the Data Source
1. Click the Mailings tab.
Start Mail Merge Group
2. Click the Edit Recipient List button .
3. In the Data Source box, click the data source you want to edit.
4. Click Edit.
5. In the Edit Data Source dialog box, click New Entry.
6. Enter new recipients as desired.
Customizing Fields in the Address List 1. Click the Mailings tab.
Start Mail Merge Group
2. Click the Edit Recipient List button .
3. In the Data Source box, click the data source you want to edit.
4. Click Edit.
5. Click Customize Columns. If prompted to save changes, click Yes.
6. In the Customize Address List dialog box, modify fields as desired.
Using an Excel File as a Data Source 1. Click the Mailings tab.
Start Mail Merge Group
2. Click the Select Recipients button .
3. On the menu, click Use Existing List.
4. Navigate to and open the desired Excel file.
5. In the Select Table dialog box, click the sheet to be used as the data source.
6. Click OK.
Matching Fields to a Data Source
1. Click the Mailings tab.
Write & Insert Fields Group
2. Click the Match Fields
button .
3. In the Match Fields dialog box, match the fields in the data source as desired.
4. Click OK.
Inserting Merge Fields on an Envelope
1. Click in the address placeholder in the center of the envelope.
2. Click the Mailings tab.
Write & Insert Fields Group
3. Click the Address Block
button .
4. Specify the address elements as desired.
5. Click OK.
6. If desired, click the Preview Results button
to check the labels.
Inserting Merge Fields on a Label
1. The main document for the label merge should be open.
2. Click the Mailings tab.
Write & Insert Fields Group
3. Click the Address Block
button .
4. Specify the address elements as desired.
5. Click OK.
6. Click the Update Labels
button .
7. If desired, click the Preview Results button
to check the labels.
33
Starting a Directory Merge 1. Click the Mailings tab.
Start Mail Merge Group
2. Click the Start Mail
Merge button .
3. Click Labels.
4. Click the Mailings tab.
Start Mail Merge Group
5. Click the Select Recipients button .
6. On the menu, click the type of recipient list.
Inserting Merge Fields
1. Click the Mailings tab.
Write & Insert Fields Group
2. Click the Insert Merge Field drop-down arrow
to insert fields for the directory, as desired.
Previewing and Merging the Directory
1. Click the Mailings tab.
Preview Results Group
2. Click the Preview
Results button to check the directory.
Finish Group
3. Click the Finish & Merge
button .
4. On the menu, click Edit Individual Documents.
5. In the Merge to New Document dialog box, click OK.
Adding Numeric Formatting to a Field Code 1. Right-click the desired
field.
2. On the shortcut menu, click Edit Field.
3. In the Field dialog box, click the Field Codes button.
4. In the Field Codes text box, enter the desired formatting code.
5. Click to mark the Preserve formatting during updates check box.
6. Click OK.
Sorting Records in the Data Source 1. Click the Mailings tab.
Start Mail Merge Group
2. Click the Edit Recipient List button .
3. In the Mail Merge Recipients dialog box, click the desired column heading to sort the list by that column.
OR
3. Click the Sort hyperlink below the records in the Mail Merge Recipients dialog box.
4. In the Filter and Sort dialog box, select the field(s) by which to sort and the sort order.
5. Click OK to close the Filter and Sort dialog box.
6. Click OK to close the Mail Merge Recipients dialog box.
Selecting Specific Records 1. Click the Mailings tab.
Start Mail Merge Group
2. Click the Edit Recipient List button .
3. In the Mail Merge Recipients dialog box, click the check box for each record you want included in the merge.
4. Click OK to close the Mail Merge Recipients dialog box.
34
Creating an E-mail Merge 1. Click the Mailings tab.
Start Mail Merge Group
2. Click the Start Mail
Merge button .
3. Click E-mail Messages.
4. Click the Mailings tab.
Start Mail Merge Group
5. Click the Select Recipients button .
6. On the menu, click the type of recipient list.
7. Type the e-mail message.
8. Click the Mailings tab.
Finish & Merge Group
9. Click the Finish &
Merge button .
10. Click Send E-mail Messages.
11. In the Merge to E-mail dialog box, enter information as desired.
12. Click OK to send the e-mail.
Filtering Recipients 1. Click the Mailings tab.
Start Mail Merge Group
2. Click the Edit Recipient List button .
3. Click the Filter hyperlink below the records in the Mail Merge Recipients dialog box.
4. In the Filter and Sort dialog box, set up the filter as desired.
5. Click OK to close the Filter and Sort dialog box.
6. Click OK to close the Mail Merge Recipients dialog box.
Applying Rules to a Merge 1. Click the Mailings tab.
Write & Insert Fields Group
2. Click the Rules button .
3. On the menu, click the desired rule you want to apply.

35
Opening a Web Page in Word 1. Click File.
2. Click Open.
3. Navigate to the Web page file.
4. Double-click the file.
OR
1. Open a Computer window.
2. Navigate to the Web page file.
3. Right-click the file.
4. On the shortcut menu, point to Open With and click Microsoft Word.
Saving a Web Page 1. Click File.
2. Click Save As.
3. Type the file name and select the location where you want to store the file.
4. Click the Save as type drop-down arrow.
5. Click Single File Web Page.
6. Click Save.
Assigning a Title to a Web Page
1. Click File.
2. Click Save As.
3. Click the Change Title button.
4. In the Enter Text dialog box, type the title text.
5. Click OK.
6. Click Save.
Applying a Background 1. Click the Page Layout
tab.
Page Background Group
2. Click the Page Color button .
3. Click the desired color from the color palette.
OR
3. Click Fill Effects on the menu.
4. In the Fill Effects dialog box, select the gradient, texture, pattern, and picture formats as desired.
5. Click OK.
Creating a Hyperlink to a Web Site 1. Click the Insert tab.
Links Group
2. Click the Hyperlink button .
3. In the Insert Hyperlink dialog box, type the Web site address in the Address text box.
4. Click OK.
Creating an E-mail Hyperlink 1. Click the Insert tab.
Links Group
2. Click the Hyperlink button .
3. In the Insert Hyperlink dialog box, in the Link to section, click E-mail Address.
4. Enter the e-mail information as necessary.
5. Click OK.
Testing a Hyperlink
Hold down the Ctrl key and click the hyperlink.
Editing a Hyperlink
1. Right-click the hyperlink.
2. On the shortcut menu, click Edit Hyperlink.
3. Edit the link as desired.
4. Click OK.
Removing a Hyperlink
1. Right-click the hyperlink.
2. On the shortcut menu, click Remove Hyperlink.

36
Viewing a Web Page in a Browser
1. Click Start .
2. Point to All Programs.
3. Click Internet Explorer.
4. Click in the Address bar and enter the desired Web page address.
Using Favorites in Internet Explorer 1. Display the desired Web
page in Internet Explorer.
2. Click the Favorites button.
3. Click Add to Favorites.
4. In the Add a Favorite dialog box, enter a name for the favorite if desired.
5. Click Add.

37
Copying Data from a Web Page to a Word Document
Copying Text
1. Display the Web page in Internet Explorer.
2. Select the text you want to copy.
3. Press Ctrl+C.
4. Click in the Word document where you want to paste the copied text.
5. Press Ctrl+V.
Copying Graphics
1. Display the Web page in Internet Explorer.
2. Right-click the graphic you want to copy.
3. On the shortcut menu, click Copy.
4. Click in the Word document where you want to paste the graphic.
5. Press Ctrl+V.
Printing a Web Page 1. Display the Web page in
Internet Explorer.
2. Press Ctrl+P.
3. In the Print dialog box, click Print. (In some browsers, you might have to click OK.)
OR
1. Click File.
2. Click Print Preview.
3. Click the Print button .
Sending a Word Document as an E-mail Attachment 1. Click File.
2. Click Save & Send.
3. Under Send Using E-mail, click Send as Attachment.
4. Enter the e-mail information as necessary.
5. Click Send.
Saving a Word Document as a PDF File 1. Click File.
2. Click Save & Send.
3. Under File Types, click Create PDF/XPS Document.
4. Click Create PDF/XPS.
5. In the Publish as PDF or XPS dialog box, enter the file name and select the location where you want to save the file.
6. Click the Save as type drop-down arrow.
7. Click PDF.
8. Click Publish.
Saving a Word Document as an XPS File 1. Click File.
2. Click Save & Send.
3. Under File Types, click Create PDF/XPS Document.
4. Click Create PDF/XPS.
5. In the Publish as PDF or XPS dialog box, enter the file name and select the location where you want to save the file.
6. Click the Save as type drop-down arrow.
7. Click XPS.
8. Click Publish.
Starting a Blog Post 1. Click File.
2. Click New.
3. Click Blog Post.
4. Click Create.
5. Register your blog service if desired.
6. Type the blog text.
Registering a Blog Server
√ You must have a blog account in order to register a blog server.
1. In your blog file, click the Blog Post tab.
Blog Group
2. Click the Manage Accounts button .
3. In the Blog Accounts dialog box, click New.
4. In the New Blog Account dialog box, click the Blog drop-down arrow and click your provider.
5. Click Next.
6. Enter your user name and password, and click OK.
7. Click Yes to confirm.
8. At the message that the registration was successful, click OK.
9. Click Close.

38
Publishing to Your Blog
√ You must have a blog account in order to register a blog server.
1. In your blog file, click the Blog Post tab.
Blog Group
2. Click the Publish button .
3. If prompted, type your user name and password for your blogging service in the boxes provided.
4. Click OK.
5. If prompted to confirm, click Yes. (You may see this prompt more than once.)
√ When the post is successfully published, a message appears in an information bar at the top of the document in Word.