zimbra web manual - welcome to bucknell university · zimbra web is powered by zimbra™...
TRANSCRIPT

Zimbra™ Web at Bucknell

ii ZCS 4.5
Copyright Zimbra, Inc. 2007. All rights reserved. The Zimbra logo and logo types are trademarks of Zimbra, Inc. All other trademarks are property of their respective owners.
Zimbra, Inc. 1500 Fashion Island Boulevard, Suite 100 San Mateo, California 94404 USA 650.212.0505 www.zimbra.com
For ZCS Release 4.5 Published June 2007
Rev. 1-61907

Zimbra Web Client User Guide
ZCS 4.5 i
Table of Contents
Getting Started .......................................................................................................................................... 1 Navigating your Web Client mailbox ..................................................................................................................................... 1 Logging in and logging out ...................................................................................................................................................... 1
Logging in .............................................................................................................................................................................. 2 Logging out ............................................................................................................................................................................ 2
Forget your password? ............................................................................................................................................................. 2
Using the Web Client ............................................................................................................................... 3 User interface features and shortcuts...................................................................................................................................... 4 Using email system folders ...................................................................................................................................................... 5 Saving your work ...................................................................................................................................................................... 5 Keyboard shortcuts ................................................................................................................................................................... 5 Using Zimbra Assistant for quick access ................................................................................................................................ 5 Setting your preferences ........................................................................................................................................................... 7
Setting up your Mail Identity .............................................................................................................................................. 7 New mail notifications ......................................................................................................................................................... 7 Setting a forwarding address .............................................................................................................................................. 7 Creating an Away Message ................................................................................................................................................. 8
Customizing your initial view ................................................................................................................................................. 8 Accessing Help .......................................................................................................................................................................... 9
Managing Your Email ............................................................................................................................ 10 Message view ........................................................................................................................................................................... 10 Conversation view .................................................................................................................................................................. 10 Categorizing email messages ................................................................................................................................................. 11 Using your Junk folder ........................................................................................................................................................... 11 Checking for new messages ................................................................................................................................................... 12 Reading email .......................................................................................................................................................................... 12
Displaying HTML in email messages ............................................................................................................................... 12 Printing an email message ...................................................................................................................................................... 13 Managing attachments............................................................................................................................................................ 13
Save attachments. ................................................................................................................................................................ 13 Writing messages .................................................................................................................................................................... 14
Finding addresses ............................................................................................................................................................... 14 Composing your message with HTML ............................................................................................................................ 15 Using Spell Check ............................................................................................................................................................... 15 Adding your signature automatically .............................................................................................................................. 16 Attaching files to your message ........................................................................................................................................ 16 Saving sent messages .......................................................................................................................................................... 16 Saving messages as drafts .................................................................................................................................................. 17 Composing a new message ................................................................................................................................................ 17
Replying to messages .............................................................................................................................................................. 17 Forwarding messages ............................................................................................................................................................. 18
Managing Your Address Books ............................................................................................................ 19 Adding new contacts .............................................................................................................................................................. 19
ii ZCS 4.5
Creating Group Contact Lists ................................................................................................................................................ 20 Viewing your contact information ........................................................................................................................................ 21 Editing contact information ................................................................................................................................................... 21 Finding a Contact .................................................................................................................................................................... 21 Printing contact information .................................................................................................................................................. 22 Sharing your Address Book ................................................................................................................................................... 22
Editing or revoking permission ........................................................................................................................................ 23 Importing an Address Book ................................................................................................................................................... 23 Exporting an Address Book ................................................................................................................................................... 24
Managing Your Calendar ...................................................................................................................... 25 Creating calendars ................................................................................................................................................................... 25
Printing a calendar .............................................................................................................................................................. 26 Deleting calendars............................................................................................................................................................... 26
Customize your Calendar view ............................................................................................................................................. 26 Viewing multiple calendars ............................................................................................................................................... 27
Scheduling appointments, meetings and events ................................................................................................................. 28 Scheduling a single meeting .............................................................................................................................................. 29 Using QuickAdd ................................................................................................................................................................. 30
Creating a meeting request from messages and contacts ................................................................................................... 30 Turning messages and conversations into meeting requests ........................................................................................ 31 Turning Contacts into meeting requests .......................................................................................................................... 31
Viewing free/busy times ........................................................................................................................................................ 31 Scheduling resources .............................................................................................................................................................. 31 Creating recurring appointments .......................................................................................................................................... 31 Changing recurring appointments ........................................................................................................................................ 32 Deleting an appointment ........................................................................................................................................................ 32 Responding to a meeting invitation ...................................................................................................................................... 32 Sharing your Calendar with others ....................................................................................................................................... 32
Editing or revoking permission ........................................................................................................................................ 34 Accepting access to a shared calendar ............................................................................................................................. 34 Declining access to a shared calendar .............................................................................................................................. 34
Searching for Items ................................................................................................................................. 35 Searching for messages ........................................................................................................................................................... 35
Creating queries .................................................................................................................................................................. 36 Using Quick Search ............................................................................................................................................................. 36 Using Advanced Search ..................................................................................................................................................... 36 Searching for messages ...................................................................................................................................................... 37 Saving search queries ......................................................................................................................................................... 37 Search examples .................................................................................................................................................................. 38
Using Tags ................................................................................................................................................ 39 Creating new tag definitions .................................................................................................................................................. 39 Flagging a message ................................................................................................................................................................. 40
Using Folders ........................................................................................................................................... 41 Creating custom folders ......................................................................................................................................................... 41 Renaming folders .................................................................................................................................................................... 41 Deleting folders ....................................................................................................................................................................... 41
Creating Filters ........................................................................................................................................ 42
Zimbra Web Client User Guide
ZCS 4.5 iii
About Zimlets .......................................................................................................................................... 43 Setting Your Preferences ....................................................................................................................... 44
General ................................................................................................................................................................................. 44 Mail ....................................................................................................................................................................................... 44 Mail Identities ...................................................................................................................................................................... 45 POP Accounts ...................................................................................................................................................................... 46 Mail Filters ........................................................................................................................................................................... 46 Address Book....................................................................................................................................................................... 46 Calendar ............................................................................................................................................................................... 46 Shortcuts ............................................................................................................................................................................... 47
Restoring default options ....................................................................................................................................................... 47 Mailbox quotas ........................................................................................................................................................................ 47 Subscribing to a RSS/ATOM feed ......................................................................................................................................... 48
iv ZCS 4.5

ZCS Advanced Web Client User Guide
ZCS 4.5 1
GGeettttiinngg SSttaarrtteedd
Zimbra Web is powered by Zimbra™ Collaboration Suite, a full-feature messaging and collaboration application offering reliable, high-performance email, address book, calendar, and web document authoring capabilities. This provides an introduction to many Zimbra Web features. Please refer to the Help in the Web Client for more information about these features.
Your account may not include all the features mentioned. Check with your system administrator to see which features are enabled for your account.
If you are using the standard Web Client, many of the advanced Web Client features, such as drag and drop, right-click and HTML editing are not supported.
This guide describes the advanced Zimbra Web features. Many of the same features are available for the standard Zimbra Web but are not accessed as described in this guide. If you use the Standard Web, refer to the Help that is available on the from within the Help menu.
Navigating your Zimbra Web Client mailbox
Your Zimbra Web mailbox combines email, calendar and address book tools under one easy log in.
The Web Client is designed to work within an internet browser. Microsoft Internet Explorer, Mozilla Firefox, and Macintosh Safari are three of the most popular. Not all browsers are supported, so check with your administrator if you have questions.
Some general guidelines when using Zimbra Web within a browser:
• Do not use the browser's Back button. This will take you out of Zimbra Web.
• To log out, click . If you browse to a different site without logging out first, your session may remain active.
• Do not use the browser's Reload or Refresh buttons. Doing so will download the client and start your session over.
Logging in and logging out
Two versions of Zimbra Web are available: advanced and standard.
Advanced Zimbra Web offers the full set of web collaboration features. This Web Client works best with newer browsers and the faster internet connections.
Standard Zimbra Web is a good option when internet connections are slow or users prefer HTML-based messaging for navigating within their mailbox.

2 ZCS 4.5
Note: Many of the Web Client features described in this book do not apply to the basic Web Client.
You must log in and be authenticated in order to use Zimbra Web
Logging in Open a browser window and enter the URL provided by your administrator.
When the log in dialog appears, you can log in to the advanced Zimbra Web or, before you enter your name and password, you can click on the Click here to switch to the basic web client link.
If you check the Remember me on this computer checkbox, you do not have to log into Zimbra Web every time you restart the browser during a day. If you do not log out your session will remain active until the session expires or until your session times out.
When the log in screen appears, type your user name and password. You may be required to type your full email address as the user name.
Logging out To prevent others from logging in to your email account, you should always use the Log Out link, located in the upper right of Zimbra Web page to close your session.
Forget your password?
If you forget your password, contact your administrator to reset it for you.

ZCS Advanced Web Client User Guide
ZCS 4.5 3
UUssiinngg ZZiimmbbrraa WWeebb
When you log into the advanced Zimbra Web you see a full window view similar to the one shown below. The view changes with the different application that you are using. This view is the Mail view.
Description of Zimbra Web page Search area. You can enter a word in the search field to do a Quick Search of the Inbox, and you can click Advanced Search to create a query to search for specific types of information such as dates, types of attachment, tags, etc. You can also save a search query to quickly perform the same search again.
Your name and quota. The user name you used to log in and your mailbox quota are displayed in this area.
Application tabs. The applications that you can access are listed in the tabs at the top. Click on the tab to open the application. On the right of the tabs are Help and Log Out links.
Toolbar. Shows actions available for the application you are currently using. In this example, the Mail application toolbar is displayed.
4 ZCS 4.5
Content pane. The content of this area changes depending on which application is in use. All messages or conversations in your Inbox are displayed in the Inbox view.
Overview pane. Displays folders necessary for the application you are using. When you are in the Mail application, the Overview pane displays system folders (Inbox, Sent, Drafts, Junk, and Trash), as well as any custom folders you created, searches you saved, tags you created, and Zimlet links that may have been created within your mailbox.
Mini-calendar can be displayed below the Overview pane. Displaying the mini-calendar is optional and can be enabled from the Options>Calendar tab.
User interface features and shortcuts
Zimbra Web interface includes many convenient features.
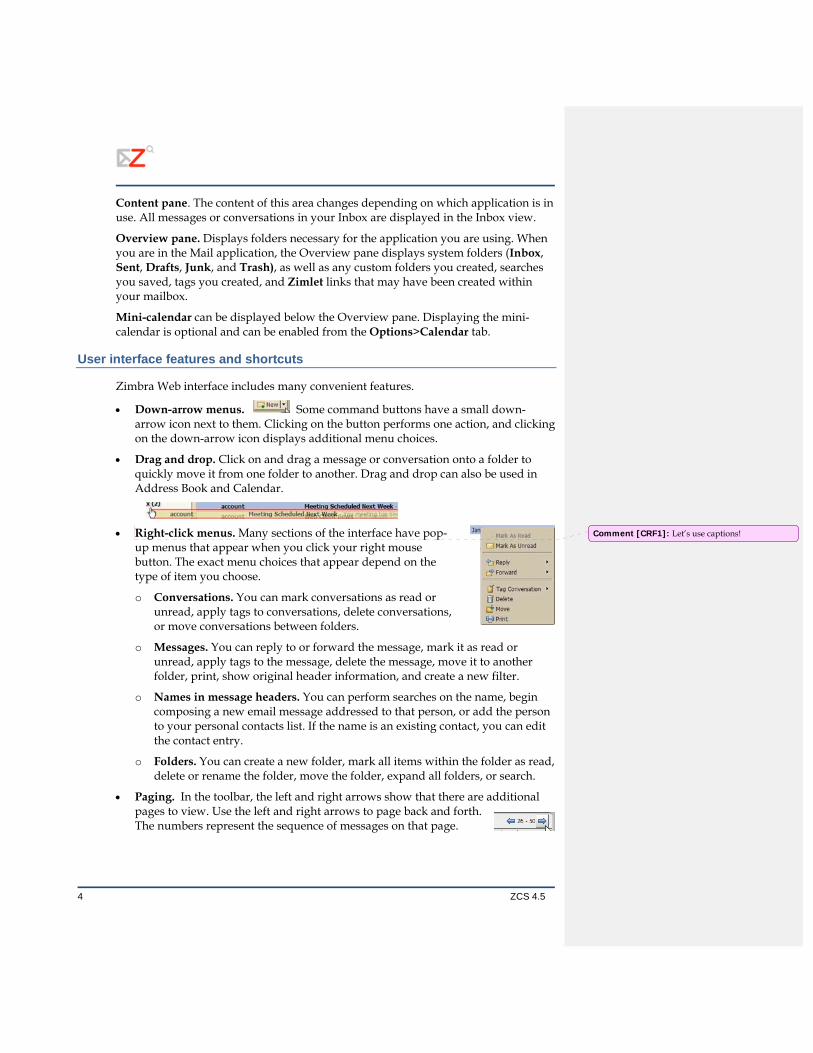
• Down-arrow menus. Some command buttons have a small down-arrow icon next to them. Clicking on the button performs one action, and clicking on the down-arrow icon displays additional menu choices.
• Drag and drop. Click on and drag a message or conversation onto a folder to quickly move it from one folder to another. Drag and drop can also be used in Address Book and Calendar.
• Right-click menus. Many sections of the interface have pop-
up menus that appear when you click your right mouse button. The exact menu choices that appear depend on the type of item you choose.
o Conversations. You can mark conversations as read or unread, apply tags to conversations, delete conversations, or move conversations between folders.
o Messages. You can reply to or forward the message, mark it as read or unread, apply tags to the message, delete the message, move it to another folder, print, show original header information, and create a new filter.
o Names in message headers. You can perform searches on the name, begin composing a new email message addressed to that person, or add the person to your personal contacts list. If the name is an existing contact, you can edit the contact entry.
o Folders. You can create a new folder, mark all items within the folder as read, delete or rename the folder, move the folder, expand all folders, or search.
• Paging. In the toolbar, the left and right arrows show that there are additional pages to view. Use the left and right arrows to page back and forth. The numbers represent the sequence of messages on that page.
Comment [CRF1]: Let’s use captions!

ZCS Advanced Web Client User Guide
ZCS 4.5 5
Using email system folders
The system folders are Inbox, Sent, Drafts, Junk, and Trash. You cannot move, rename, or delete these folders. System folders are always displayed at the top of your folder list, followed by any folders you create.
• Inbox. New email arrives in your Inbox. By default, your Inbox is displayed after you log in.
• Sent. A copy of each message you send is saved in the Sent folder.
• Drafts. Messages you have composed but have not sent can be saved in the Drafts folder. If you open a message in the Drafts folder, it opens in the Compose view.
• Junk. Messages that the spam filter identifies as possibly being junk are placed in your Junk folder. You can review these messages and either move them or delete them. If you don't delete them, they will be purged after the period of time specified by your administrator.
• Trash. Deleted items are placed in the Trash folder and remain there until you manually empty the trash or until the folder is purged automatically.
Saving your work
It is not always possible for Zimbra Web to detect when you have done something that you might want to save.
Within Zimbra, the following rules apply:
• If you are in the middle of composing an email message, and you click another portion of the window, you are prompted to save your work. You can subsequently find the message in your Drafts folder.
• If you use the browser's Back button (as opposed to Zimbra Web’s Close button), or you use that same browser window to navigate to a different site, you will not be prompted to save your work.
• Reloading Zimbra Web from the same browser window will restart your session, causing you to lose any unsaved changes.
Keyboard shortcuts
Shortcut keys can be used to navigate in Zimbra Web. To see a list of shortcut keys, go to the Options>Shortcut tab and select Shortcut List.
Zimbra Assistant for quick access
Zimbra Assistant is an advanced user feature that provides a quick way to interact with Zimbra Web using the keyboard to do the following tasks:
• Create new appointments

6 ZCS 4.5
• Go to a specific date in your calendar
• Create new contacts
• Send a new email message without switching context from what you are currently doing
You can open Zimbra Assistant using a keyboard shortcut. This will work in any Zimbra Web view except Options. The keyboard shortcut to open Zimbra Assistant is Shift + ~ (tilde).
The Zimbra Assistant dialog offers detailed help. Below are the general steps for using Zimbra Assistant.
1. From within Zimbra Web, enter a tilde (~). The Zimbra Assistant dialog displays.
2. Enter one of the following commands o To create an appointment, type appointment. You can then enter a subject in
closed quotation marks, and the time, day of week, and date of the appointment. Optionally, type the location in brackets and any notes for the appointment in parentheses. (If you do not use brackets or parentheses, the location and notes will appear in the subject line.) Click OK.
If you want more advanced appointment features, click More Details to go to the Calendar Appointment page.
o To go to a specific date in your calendar, type calendar and the date, or the day of the week. Click OK.
After the date you can enter the calendar view you prefer: Day, Work Week, Week, or Month view. The Calendar then opens in that view.
o To create a new contact, type contact and enter the contact name, email address, etc. Click OK.
If you want to open the Contacts detail form, click More Details. On this form you can specify which address book to add the contact name.
o To send an email without opening the compose windows, type mail. Enter the subject in quotes; type to:name@address and then type the body of the message. Click OK.
Comment [CRF2]: Do we have any icons depicting keys on a keyboard? If so, let's use those here since ty'd be far more clear.

ZCS Advanced Web Client User Guide
ZCS 4.5 7
Setting your preferences
Your default user preferences are configured when your account is created. These options define how your mailbox, address books, and calendar applications work. You change these settings from the Options tab. When you open Options, a series of sub-tabs are displayed. You can change any of the items listed under the sub-tabs.
The Options tab is described in Setting your Preferences section on page 44. The following preferences are described here because these are frequently customized.
Setting up your Mail Identity A Mail Identity is the name and email address used in your email correspondence. Having multiple mail identities can help you manage different roles in your job and personal life from one email account. If you set up your email account to retrieve email from your other POP accounts, you can set up mail identities to make sure that reply email is sent to the correct address.
Each Mail Identity has a Reply-to name and email address. You can also set up your Zimbra Web to use a specific identity when replying to a message sent to one of your email addresses or when replying to a message in a named folder.
New mail notifications You can configure your mailbox to notify you at another email address when you receive email in your Inbox. This feature may be useful if you do not receive a lot of email to your account, but when you do receive email it is important enough to require a timely response.
To set notification: 1. Click Options and then click Mail. 2. Scroll down and check Enable address for new mail notifications. 3. Enter the address where the notification should be sent. 4. Click Save. The notification feature is enabled immediately.
Setting a forwarding address You can identify an email address to forward your messages. You can then choose to retain the message in your mailbox or automatically delete the message when forwarded.
To set a forwarding address: 1. Click Options and then Mail.
8 ZCS 4.5
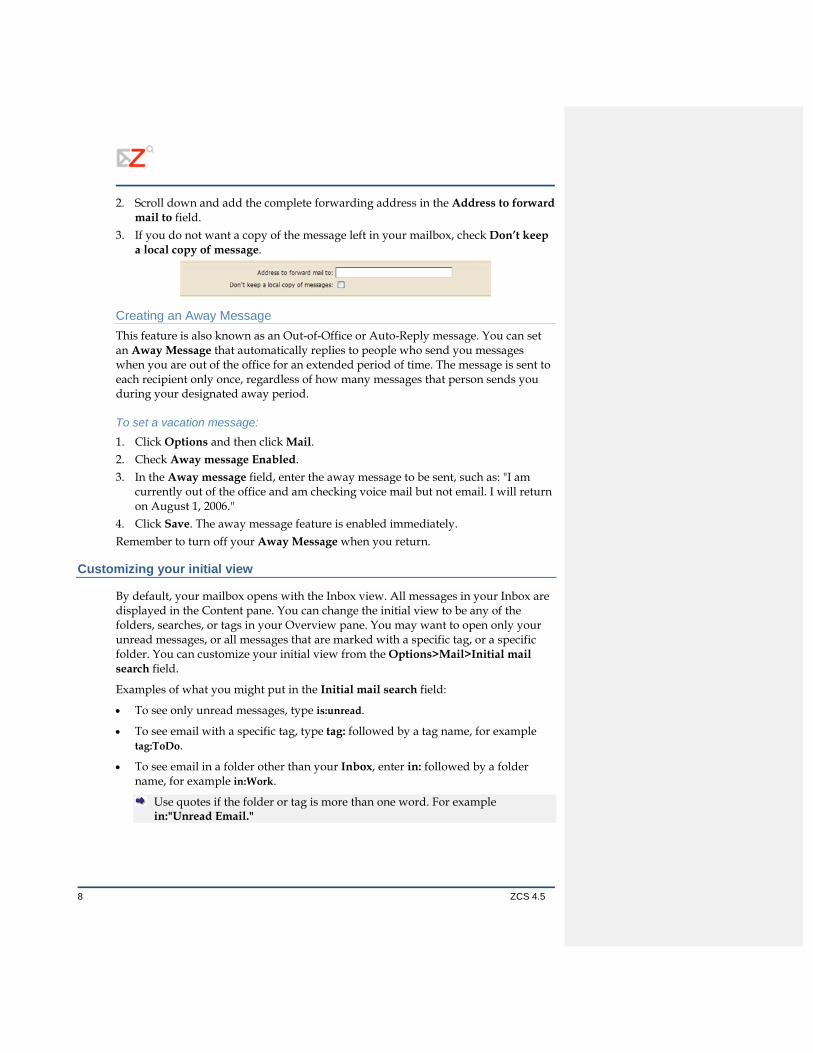
2. Scroll down and add the complete forwarding address in the Address to forward mail to field.
3. If you do not want a copy of the message left in your mailbox, check Don’t keep a local copy of message.
Creating an Away Message This feature is also known as an Out-of-Office or Auto-Reply message. You can set an Away Message that automatically replies to people who send you messages when you are out of the office for an extended period of time. The message is sent to each recipient only once, regardless of how many messages that person sends you during your designated away period.
To set a vacation message: 1. Click Options and then click Mail. 2. Check Away message Enabled. 3. In the Away message field, enter the away message to be sent, such as: "I am
currently out of the office and am checking voice mail but not email. I will return on August 1, 2006."
4. Click Save. The away message feature is enabled immediately. Remember to turn off your Away Message when you return.
Customizing your initial view
By default, your mailbox opens with the Inbox view. All messages in your Inbox are displayed in the Content pane. You can change the initial view to be any of the folders, searches, or tags in your Overview pane. You may want to open only your unread messages, or all messages that are marked with a specific tag, or a specific folder. You can customize your initial view from the Options>Mail>Initial mail search field.
Examples of what you might put in the Initial mail search field:
• To see only unread messages, type is:unread.
• To see email with a specific tag, type tag: followed by a tag name, for example tag:ToDo.
• To see email in a folder other than your Inbox, enter in: followed by a folder name, for example in:Work.
Use quotes if the folder or tag is more than one word. For example in:"Unread Email."

ZCS Advanced Web Client User Guide
ZCS 4.5 9
Accessing Help
You can access the Help for information while working within Zimbra Web. Help is located on the upper right side of Zimbra Web, next to Log Out. Comment [CRF3]: Screen shot of where Help
is might be nice here.
10 ZCS 4.5
MMaannaaggiinngg YYoouurr MMaaiill
By default all new email messages are placed in your Inbox. You have the option to group your messages if you do not want a long list of messages in your Inbox. Traditionally, you view your email messages as single messages arranged by date, but you can choose to group your messages by conversations.
The Conversation view groups messages that have the same subject line under one heading in your Inbox. The message thread of the original message, replies, and forwarded messages can easily be viewed.
To change how messages are grouped for your current session, click the arrow next to view in the box above the Overview pane. To change the default view permanently, go to the Options>Mail, and select the view you want in the Group Mail by drop-down menu.
Message view
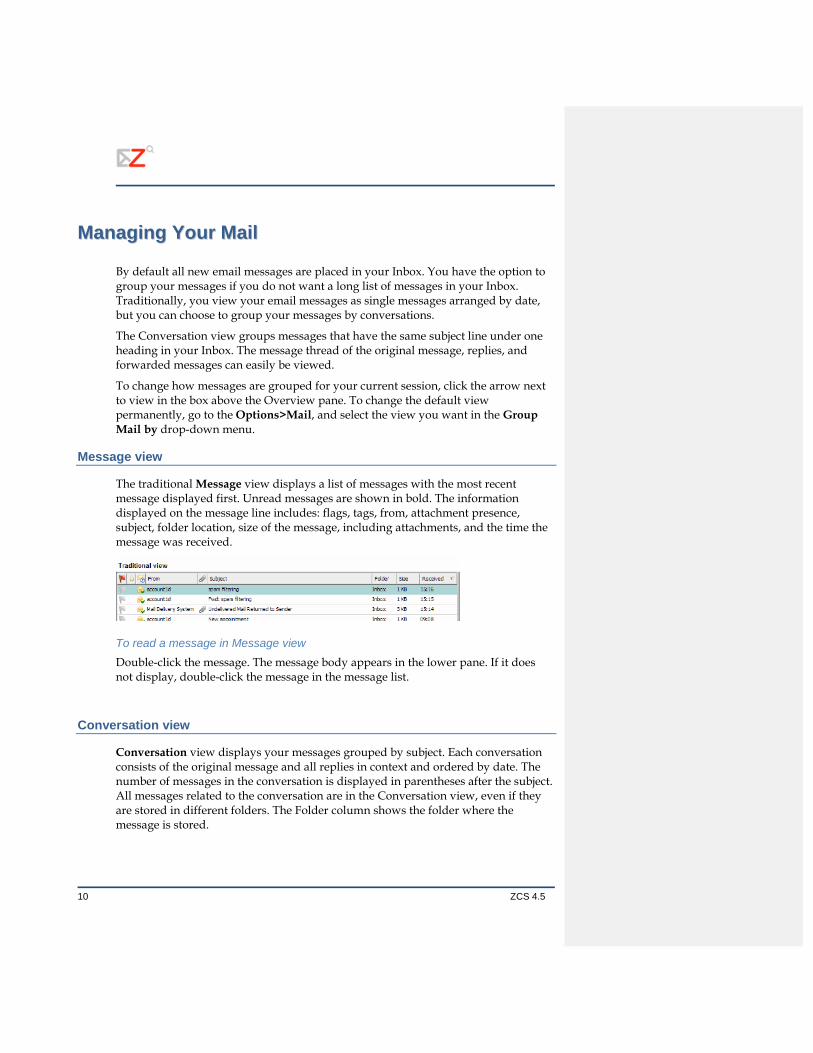
The traditional Message view displays a list of messages with the most recent message displayed first. Unread messages are shown in bold. The information displayed on the message line includes: flags, tags, from, attachment presence, subject, folder location, size of the message, including attachments, and the time the message was received.
To read a message in Message view Double-click the message. The message body appears in the lower pane. If it does not display, double-click the message in the message list.
Conversation view
Conversation view displays your messages grouped by subject. Each conversation consists of the original message and all replies in context and ordered by date. The number of messages in the conversation is displayed in parentheses after the subject. All messages related to the conversation are in the Conversation view, even if they are stored in different folders. The Folder column shows the folder where the message is stored.

ZCS Advanced Web Client User Guide
ZCS 4.5 11
Double-click the conversation to display the messages within the conversation. Click on a message to display its contents. Conversations containing unread messages are shown in bold.
Conversations do not continue indefinitely. If the last message in the conversation is 30 days old or older, messages sent with the same subject begin a new conversation.
You can transfer email messages or entire conversations from one folder to another. Drag and drop the message onto the desired folder in the left-hand pane. It is added to the folder.
Categorizing email messages
In addition to email views, the Web Client provides several other methods for categorizing email messages. You can use these along with Search to quickly locate and retrieve messages.
• Folders. You can create folders to organize your messages and you can move email from one folder to another, for example taking an email out of a To Do folder and moving it to a Done folder.
• Tags. You can use tags as labels on email messages and then use Search to show all email with a certain tag.
• Filters. In your Options>Mail Filters tab, you can create filter rules for classifying inbound email according to items in the subject line, sender, recipient, or other characteristics and having them sent to a folder you created or tagged with one of your tags.
• Keyboard Shortcuts. To quick access a tag, Saved Search or email folder, you can create shortcut keys from your Options>Shortcuts tab.
Using your Junk folder
Most filtering of unsolicited automated email, also referred to as spam or junk mail, is handled by a spam filter before those email messages reach your Inbox. Email that might possibly be junk is placed in your Junk folder. You can review these messages
Comment [CRF4]: Perhaps we can mention that the message that you're dragging has a red outline until it is hovered over a folder that it can be moved to. The outline then turns green.
12 ZCS 4.5
and either move them out of the Junk folder or delete them. If you don't move or delete the messages, they are purged after the number of days specified by your administrator.
If you find that you are receiving a large number of unwanted email messages, contact your administrator. Reporting email as spam helps your email administrator to fine-tune any spam filtering that may be in use at your site.
If you find an email message in your Inbox that is spam, you can highlight it and click Junk on the toolbar. The email is moved to your Junk folder and the spam-training filter is taught that the email is junk.
You can empty the Junk folder by right-clicking the folder and choosing Empty Junk.
Checking for new messages
New messages are received when you log on, at automatic intervals that you set, and on-demand when Check Mail is clicked.
You can set how often to poll for new messages in the Options>Mail tab. The default poll time is every 5 minutes.
To receive new messages immediately, click Get Mail on the toolbar. You automatically go to your Inbox.
Reading email
If you have the Reading pane enabled, when you click on an email message, the message displays in a pane below the message header information. Once displayed, the message is marked as read.
By default, viewing messages in the Reading pane is on. You can turn it off from the Options>Mail tab by unchecking Always show the reading pane.
You can also change the Reading pane option from the View drop-down menu on the toolbar, but when you do it from here, the change will only be in effect until you log off. When you log in again, your Options>Mail>Always show the reading pane setting determines whether the Reading pane is enabled.
If the Reading pane is disabled, when you double-click on a message, the message opens in the Content pane.
Displaying HTML in email messages You can view email messages in two formats.
• Plain text. Plain text messages are messages that contain no HTML formatting code. Messages sent in plain text can always be read by other email clients.
• HTML. HTML messages can have text formatting, numbering, bullets, colored background, and links which can make messages easier to read.
ZCS Advanced Web Client User Guide
ZCS 4.5 13
Plain text viewing is the default. To always view email messages that are sent as HTML in HTML, check the View Mail as HTML (when possible) box on the Options>Mail tab. Messages are displayed in formatted layout, if they were sent in HTML.
Printing an email message
To send a message to the printer, open the conversation, select the message, and click Print. The selected message appears in a separate window, along with a standard print dialog.
You can also select an entire conversation for printing. You cannot, however, select multiple individual messages within a conversation for printing.
Do not use the browser's File>Print feature. The page will not be well-formatted, and your message may be difficult to read.
Managing attachments
Email messages can include attached files such as word processing documents, spreadsheets, text files, ZIP files, images, executable applications, or any other type of computer file that resides on the sender's computer network. Messages that contain attachments display a paper clip next to the subject.
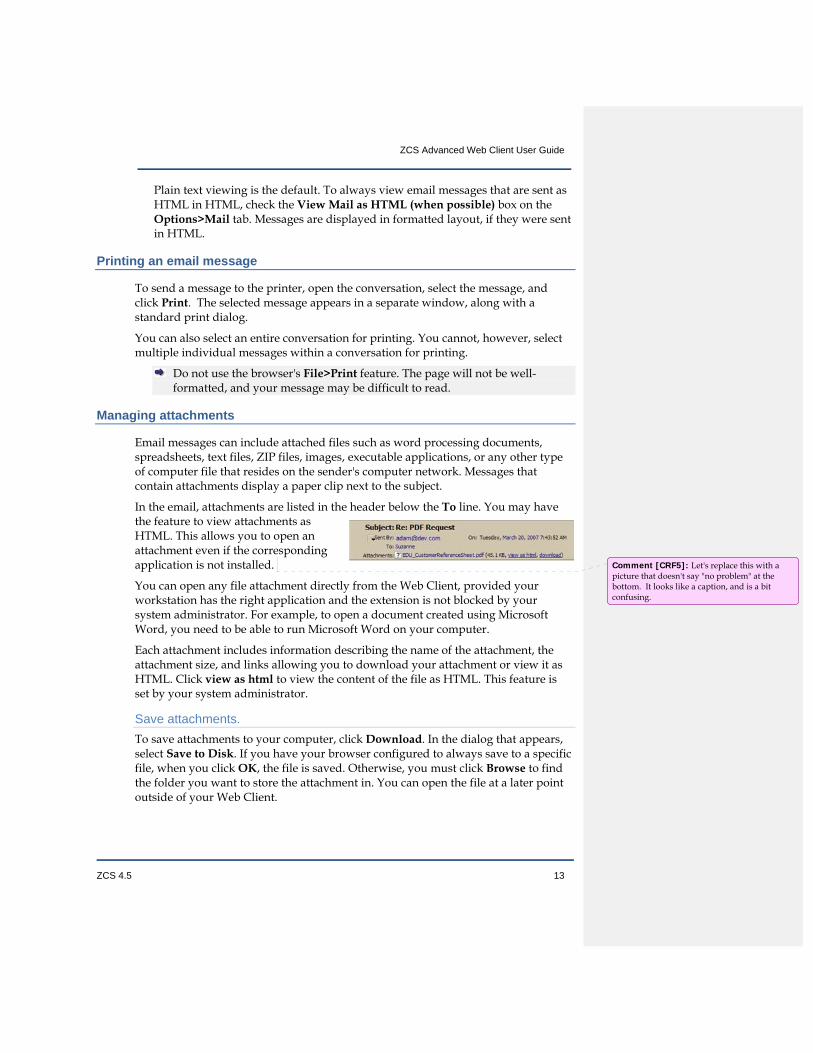
In the email, attachments are listed in the header below the To line. You may have the feature to view attachments as HTML. This allows you to open an attachment even if the corresponding application is not installed.
You can open any file attachment directly from the Web Client, provided your workstation has the right application and the extension is not blocked by your system administrator. For example, to open a document created using Microsoft Word, you need to be able to run Microsoft Word on your computer.
Each attachment includes information describing the name of the attachment, the attachment size, and links allowing you to download your attachment or view it as HTML. Click view as html to view the content of the file as HTML. This feature is set by your system administrator.
Save attachments. To save attachments to your computer, click Download. In the dialog that appears, select Save to Disk. If you have your browser configured to always save to a specific file, when you click OK, the file is saved. Otherwise, you must click Browse to find the folder you want to store the attachment in. You can open the file at a later point outside of your Web Client.
Comment [CRF5]: Let's replace this with a picture that doesn't say "no problem" at the bottom. It looks like a caption, and is a bit confusing.

14 ZCS 4.5
Writing messages
You can quickly create an email message and address it to one or more persons, insert links, include attachments, and add your signature.
You only need to enter an address to send a message, but most of the time you will compose a more detailed message, including the following steps:
• Add recipient addresses to the To and Cc fields. To add an address to the Bcc field, click Options on the Compose toolbar.
• Enter a text indicating the topic of the message in the Subject line.
• Type your message in the text field. You can either compose your message in HTML or in plain text.
• Check the spelling of the message before sending.
• Add your signature.
• Add attachments to the email message you are sending.
You can quickly send a new email to the sender of the message you are reading. Right-click in the Sent By section of an email and select New Email to open a blank compose page. The sender’s email address is automatically placed in the To field of the new message.
Finding addresses You can find addresses using either automatic address completion or by searching your Address Book.
The auto-complete feature suggests names as you type directly into the To, Cc, and Bcc fields for a new message. A list of possible addresses from your address books that start with the text you typed is displayed below the field.
Auto-complete will only match addresses that start with the text that you type. If you are looking for David Brink’s email address, <[email protected]>, you will not be able to find it by typing brinks. You must type db or dbrinks for a match.
As you continue to type into the address field, the list of matching addresses will become smaller, as fewer matches are available. The list disappears if there are no more matches.
The Comma (,), Semicolon (;), Return/Enter, and Tab keys trigger special auto-complete behavior. Entering one of these keys will automatically replace the text you typed with the currently selected match. If you know a few characters that will cause a certain contact to be the first match, you can type those and then a semicolon, and that contact’s address will appear. For example, if I know that typing db results in a first match of David Brinks, I can type db; and the full address David Brinks <[email protected]> will appear in the address field.

ZCS Advanced Web Client User Guide
ZCS 4.5 15
You can look up the email address from either your address books or from your company directory (called the Global Address List (GAL)). To look up a person’s email address, click To in the compose window. A Select Addresses dialog opens.
1. Type the recipient’s name in the Search field. 2. Select whether to search the Global Address
List, or your Address Book. 3. Click Search. The results are shown in the left pane. 4. Select the name and click either To, Cc, or Bcc. The name you selected will
appear in the right pane. 5. If you wish to search for any other contacts, type the name in the Search field
and repeat the above steps. 6. Once you have finished searching for all the addresses you want to include in
this email, click OK. The names you selected are added to the appropriate field in the compose window.
Composing your message with HTML You can compose your message using either HTML or plain text formatting. The default editor is plain text.
• HTML formatting. This is a rich-text editor. Messages created using HTML can have text formatting, numbering, bullets, colored background, tables, and links, which can enhance the appearance of a message. You can set the default font settings, including style, size and color from the Options>General tab.
• Plain Text formatting. This produces text with no style or formatting. Any computer can read this type of message. All email clients can read messages sent in the plain text format.
In order to change your default editor, go to General>Mail and use the Default Editor drop-down menu to select the editor you prefer.
To quickly change the format for this message only, click Options on the Compose toolbar and select either HTML or Plain Text.
Using Spell Check
To check the spelling of your message, click , on the toolbar. Misspelled words and words that the spell checker does not recognize are highlighted in the body of the message.
Click on a highlighted word. A drop-down menu displays suggested corrections. Select the correct word. To accept your changes and close the spell checker, click on Resume editing.
Comment [CRF6]: This needs a screen shot.
16 ZCS 4.5
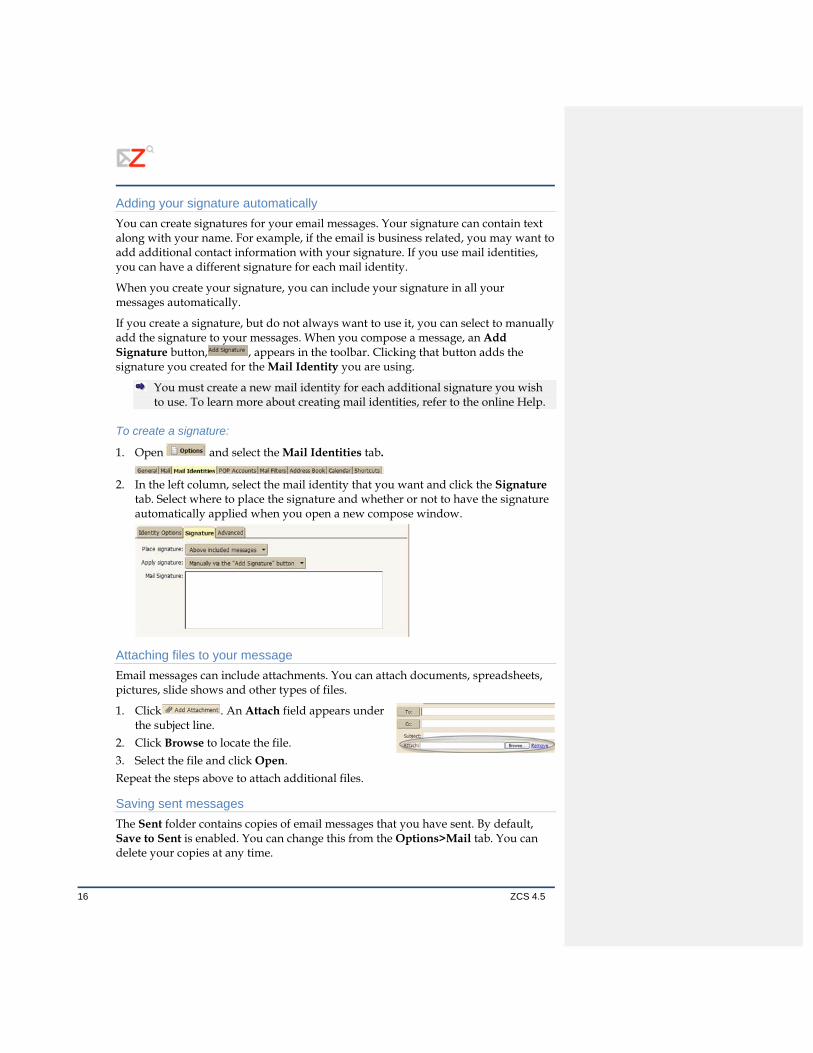
Adding your signature automatically You can create signatures for your email messages. Your signature can contain text along with your name. For example, if the email is business related, you may want to add additional contact information with your signature. If you use mail identities, you can have a different signature for each mail identity.
When you create your signature, you can include your signature in all your messages automatically.
If you create a signature, but do not always want to use it, you can select to manually add the signature to your messages. When you compose a message, an Add Signature button, , appears in the toolbar. Clicking that button adds the signature you created for the Mail Identity you are using.
You must create a new mail identity for each additional signature you wish to use. To learn more about creating mail identities, refer to the online Help.
To create a signature:
1. Open and select the Mail Identities tab.
2. In the left column, select the mail identity that you want and click the Signature tab. Select where to place the signature and whether or not to have the signature automatically applied when you open a new compose window.
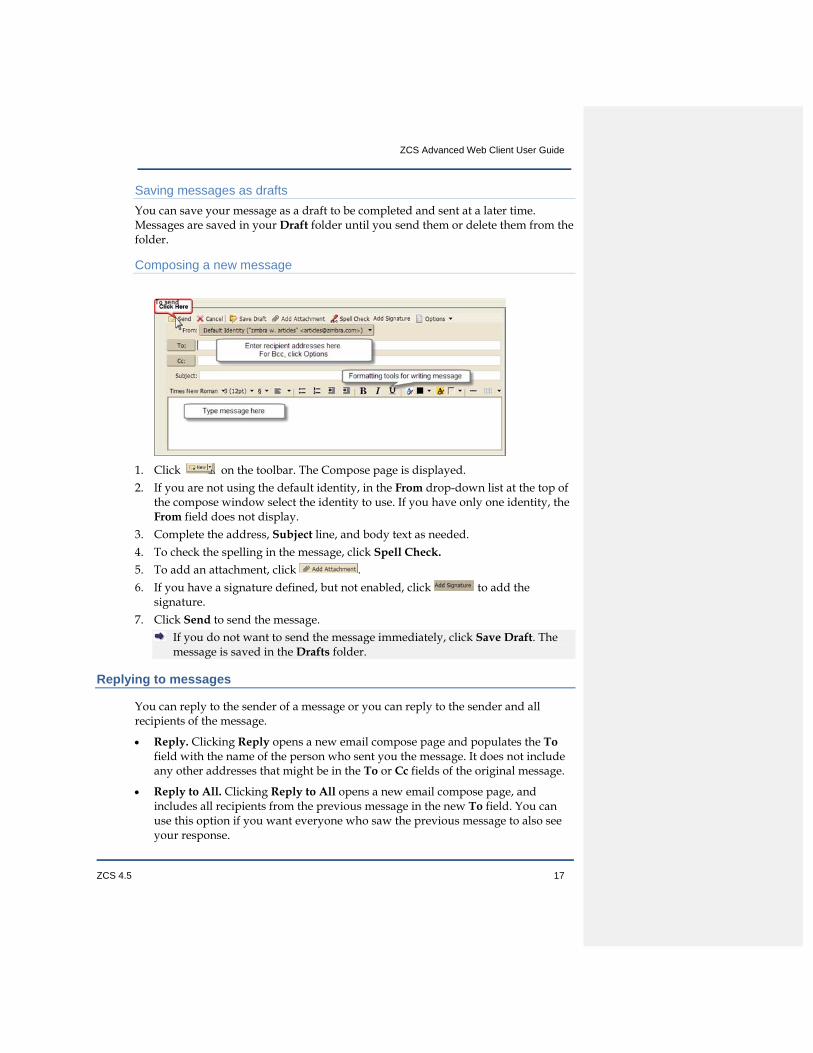
Attaching files to your message Email messages can include attachments. You can attach documents, spreadsheets, pictures, slide shows and other types of files.
1. Click . An Attach field appears under the subject line.
2. Click Browse to locate the file. 3. Select the file and click Open. Repeat the steps above to attach additional files.
Saving sent messages The Sent folder contains copies of email messages that you have sent. By default, Save to Sent is enabled. You can change this from the Options>Mail tab. You can delete your copies at any time.
ZCS Advanced Web Client User Guide
ZCS 4.5 17
Saving messages as drafts You can save your message as a draft to be completed and sent at a later time. Messages are saved in your Draft folder until you send them or delete them from the folder.
Composing a new message
1. Click on the toolbar. The Compose page is displayed. 2. If you are not using the default identity, in the From drop-down list at the top of
the compose window select the identity to use. If you have only one identity, the From field does not display.
3. Complete the address, Subject line, and body text as needed. 4. To check the spelling in the message, click Spell Check. 5. To add an attachment, click . 6. If you have a signature defined, but not enabled, click to add the
signature. 7. Click Send to send the message.
If you do not want to send the message immediately, click Save Draft. The message is saved in the Drafts folder.
Replying to messages
You can reply to the sender of a message or you can reply to the sender and all recipients of the message.
• Reply. Clicking Reply opens a new email compose page and populates the To field with the name of the person who sent you the message. It does not include any other addresses that might be in the To or Cc fields of the original message.
• Reply to All. Clicking Reply to All opens a new email compose page, and includes all recipients from the previous message in the new To field. You can use this option if you want everyone who saw the previous message to also see your response.

18 ZCS 4.5
To reply to a message: 1. With the message open, click or click the arrow to select Reply to All. A
new message window is displayed with the addresses in the header and the original message in the body.
2. Type your reply. 3. If you want to change which part of the original message should be included in
the reply, click Options on the Compose toolbar. Your default option is marked but you can change it for this email only.
4. Click Send. When replying to a message, if the message is in a conversation, changing the
Subject line will cause your reply to appear in a new conversation.
If you add your signature automatically to your messages, your signature is automatically placed in the message according to the preference you enabled, either at the end of all messages in the compose window or at the end of the message you compose, above the quoted text.
Forwarding messages
You can forward an email message on to someone else. Forwarding a message includes all file attachments, whereas using Reply preserves the body text and does not include the attachments.
To forward a message: 1. With the message open, click . A new message window is displayed. The
text of the forwarded message appears in the body unless you have chosen to forward messages as attachments in the Options>Mail tab.
2. Enter addresses in the To, Cc, or Bcc fields. 3. Optional, add a few lines of new text before the forwarded message so that the
recipient knows why you are forwarding the message. 4. Click Send.
ZCS Advanced Web Client User Guide
ZCS 4.5 19
MMaannaaggiinngg YYoouurr AAddddrreessss BBooookkss
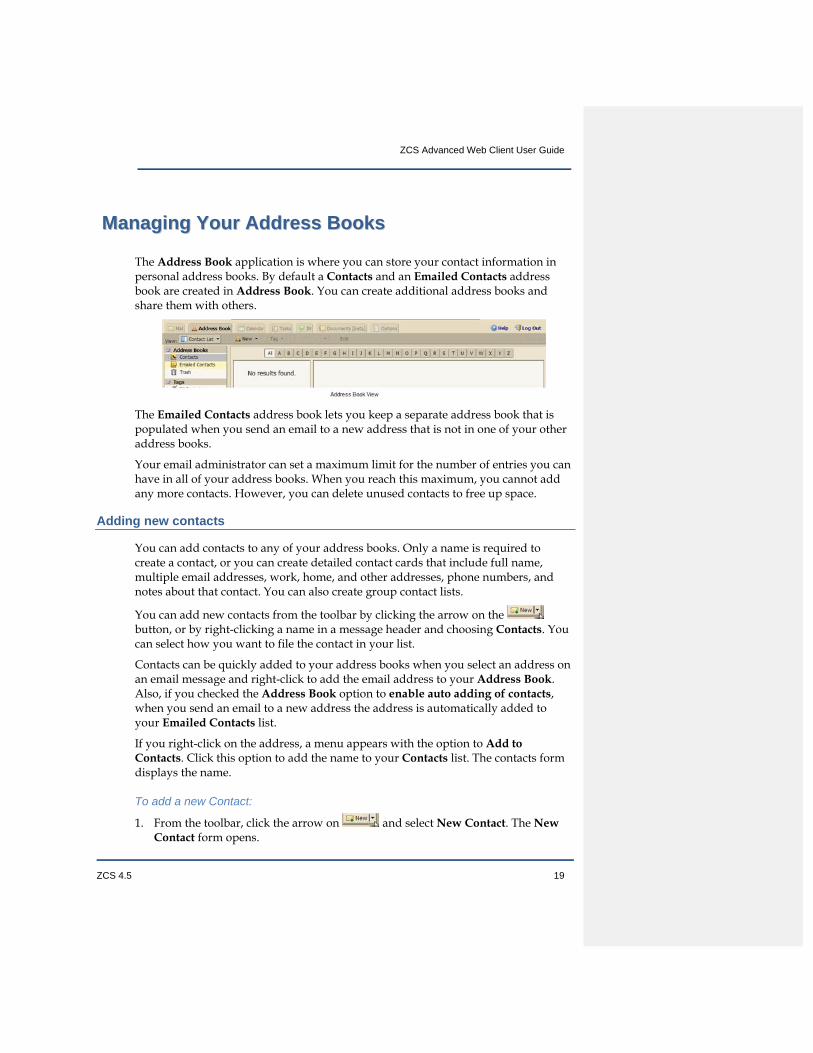
The Address Book application is where you can store your contact information in personal address books. By default a Contacts and an Emailed Contacts address book are created in Address Book. You can create additional address books and share them with others.
The Emailed Contacts address book lets you keep a separate address book that is populated when you send an email to a new address that is not in one of your other address books.
Your email administrator can set a maximum limit for the number of entries you can have in all of your address books. When you reach this maximum, you cannot add any more contacts. However, you can delete unused contacts to free up space.
Adding new contacts
You can add contacts to any of your address books. Only a name is required to create a contact, or you can create detailed contact cards that include full name, multiple email addresses, work, home, and other addresses, phone numbers, and notes about that contact. You can also create group contact lists.
You can add new contacts from the toolbar by clicking the arrow on the button, or by right-clicking a name in a message header and choosing Contacts. You can select how you want to file the contact in your list.
Contacts can be quickly added to your address books when you select an address on an email message and right-click to add the email address to your Address Book. Also, if you checked the Address Book option to enable auto adding of contacts, when you send an email to a new address the address is automatically added to your Emailed Contacts list.
If you right-click on the address, a menu appears with the option to Add to Contacts. Click this option to add the name to your Contacts list. The contacts form displays the name.
To add a new Contact:
1. From the toolbar, click the arrow on and select New Contact. The New Contact form opens.
20 ZCS 4.5
2. Enter contact information, including first and last name, email address, job title, company information, birthday and notes.
3. In File As, select how you want to file the name. The default is to file the contact by last name, first name.
4. In Address Book select one of your personal address books to save the name to. 5. Click Save.
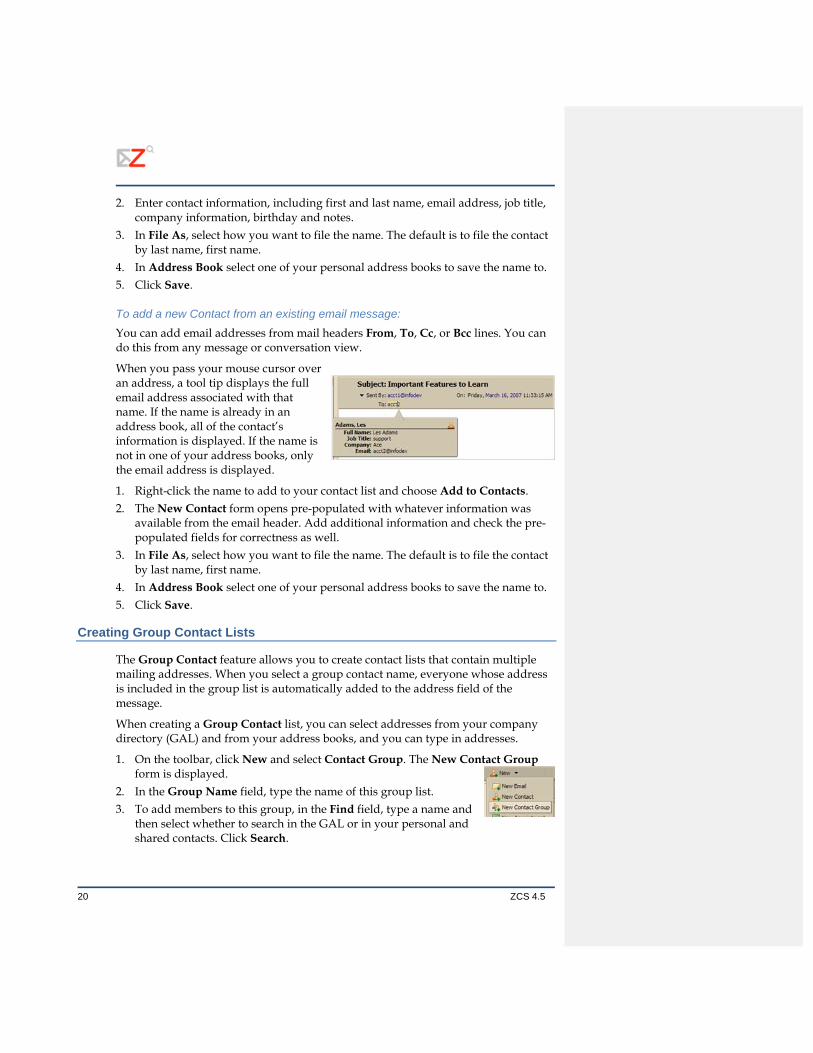
To add a new Contact from an existing email message: You can add email addresses from mail headers From, To, Cc, or Bcc lines. You can do this from any message or conversation view.
When you pass your mouse cursor over an address, a tool tip displays the full email address associated with that name. If the name is already in an address book, all of the contact’s information is displayed. If the name is not in one of your address books, only the email address is displayed.
1. Right-click the name to add to your contact list and choose Add to Contacts. 2. The New Contact form opens pre-populated with whatever information was
available from the email header. Add additional information and check the pre-populated fields for correctness as well.
3. In File As, select how you want to file the name. The default is to file the contact by last name, first name.
4. In Address Book select one of your personal address books to save the name to. 5. Click Save.
Creating Group Contact Lists
The Group Contact feature allows you to create contact lists that contain multiple mailing addresses. When you select a group contact name, everyone whose address is included in the group list is automatically added to the address field of the message.
When creating a Group Contact list, you can select addresses from your company directory (GAL) and from your address books, and you can type in addresses.
1. On the toolbar, click New and select Contact Group. The New Contact Group form is displayed.
2. In the Group Name field, type the name of this group list. 3. To add members to this group, in the Find field, type a name and
then select whether to search in the GAL or in your personal and shared contacts. Click Search.

ZCS Advanced Web Client User Guide
ZCS 4.5 21
4. Names that match your entry are listed in the box. Select the names to enter and click Add, the names are added to the Group Members list.
5. You can also add email addresses directly in the Group Members list box. Typed addresses can be separated by a Comma (,), Semicolon (;) or Return to start the address on a new line.
6. Click Save on the toolbar. The new group contact is added to your Address Book.
The icon shows that the contact name is a group contact.
Viewing your contact information
You can view the contact names in a list or as detailed cards. The Contact List view is a vertical list of all of your contacts. The Detailed Cards view shows all the information you entered on the contact form.
You can change the view for one session from the Address Book view drop-down menu. You can change the default view for Address Book from the Options>Address Book tab, Default contact view setting.
Editing contact information
After you create a contact you can add additional information, change information, and move the contact to another address book.
To open a contact for editing: 1. In the Address Book, right-click the contact to be modified and choose Edit
Contact. 2. In the Edit Contact form, make the changes and click Save to commit your
changes.
To move a contact to another address book: 1. Select the contact and open the contact edit form. 2. In the Address Book pull-down menu, select the address book where you want
to move the contact. Click Save.
Finding a Contact
You can use Search to find a contact in your Address Book.
1. In the Search box, enter search criteria such as a first or last name, or group name.
To search by email address, the complete address must be entered. First or last name must be a whole-word match. For example, you could enter something like Smith or [email protected].

22 ZCS 4.5
2. Select the address book or select GAL from the drop-down list on the right to search. The results are displayed in the Content pane.
Printing contact information
You can print a complete address book or just print the information for one contact.
Select an address book and either select a specific contact name and click the Print icon, , or to print the complete list, click the arrow next to the Print icon and select Print Address Book.
For Group Contact lists, if the list is long, only the first few names on the list are printed and More displays, to let you know that there are additional names that were not printed.
Sharing your Address Book
You can share any of your address books with others. Sharing an address book can be useful if your address books are for specific categories of contacts and you want other users to have access to the names. Depending on the role you assign to the grantee, the shared contacts list can be view-only or can have full access privileges to add, edit, and delete names.
You can share your Address Book with the following:
• Internal users or groups. You select the type of privileges to grant to internal users:
o Viewer. The grantee can read but cannot change the address book content.
o Manager. The grantee has full permission to view, edit the contacts, add new contacts to the address book, and delete contacts.
• External guests. You create a password for the address book that guests must enter to view the contacts. The address book displays in a .csv file. They cannot make any changes to the address book in your account.
• Public. Anyone that knows the URL to the address book can view the Contact list. The address book displays in a .csv file. They cannot make any changes to the address book in your account.
To share your Address Book with Internal guests: 1. Right-click on the address book to share and select Share Address Book. 2. On the Share Properties dialog select whom to share with. 3. When you choose Internal, you can choose addresses from the list that appears
as you type, or type addresses that are not in the list. The user or group must be a valid address in your company's mail server.
4. In the Role area, select the access permissions. 5. In the Message area, select which type of message to send. The options are:
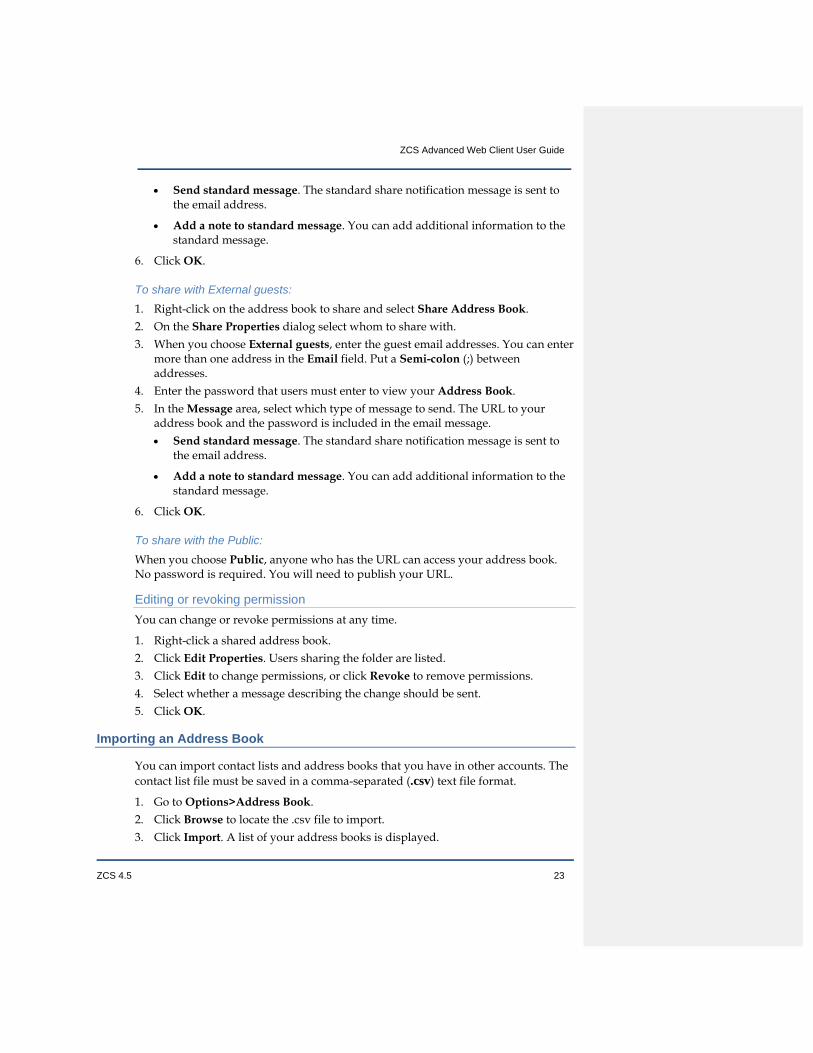
ZCS Advanced Web Client User Guide
ZCS 4.5 23
• Send standard message. The standard share notification message is sent to the email address.
• Add a note to standard message. You can add additional information to the standard message.
6. Click OK.
To share with External guests: 1. Right-click on the address book to share and select Share Address Book. 2. On the Share Properties dialog select whom to share with. 3. When you choose External guests, enter the guest email addresses. You can enter
more than one address in the Email field. Put a Semi-colon (;) between addresses.
4. Enter the password that users must enter to view your Address Book. 5. In the Message area, select which type of message to send. The URL to your
address book and the password is included in the email message. • Send standard message. The standard share notification message is sent to
the email address.
• Add a note to standard message. You can add additional information to the standard message.
6. Click OK.
To share with the Public: When you choose Public, anyone who has the URL can access your address book. No password is required. You will need to publish your URL.
Editing or revoking permission You can change or revoke permissions at any time.
1. Right-click a shared address book. 2. Click Edit Properties. Users sharing the folder are listed. 3. Click Edit to change permissions, or click Revoke to remove permissions. 4. Select whether a message describing the change should be sent. 5. Click OK.
Importing an Address Book
You can import contact lists and address books that you have in other accounts. The contact list file must be saved in a comma-separated (.csv) text file format.
1. Go to Options>Address Book. 2. Click Browse to locate the .csv file to import. 3. Click Import. A list of your address books is displayed.

24 ZCS 4.5
4. Select the address book to import into or create a new address book. Contacts are alphabetized by last name.
Exporting an Address Book
Your address books are exported and saved in a comma-separated (.csv) text file format.
1. Go to Options>Address Book. 2. Click Export. A list of your address books is displayed. 3. Select the address book to export. Click OK. An Open Contacts.csv dialog
displays. 4. Select Save to Disk, and click OK. 5. Select a location for your file and click Save.

ZCS Advanced Web Client User Guide
ZCS 4.5 25
MMaannaaggiinngg YYoouurr CCaalleennddaarr
In Calendar, you can create different business and personal calendars, schedule appointments and meetings, set up recurring activities, set your free/busy option to show your schedule, and share your calendars with others.
To open the Calendar view, select the Calendar tab. The Work Week view is the default and is displayed when Calendar is opened the first time.
Creating calendars
One calendar is created for you, and you can create additional calendars to keep track of different types of functions. For example, you can create a calendar for work, for personal, and for company activities. You can also create calendars and synchronize the activities to your Web Client Calendar from calendars you keep on other websites.
Personal calendars can be maintained separate from your business calendar. You do not need to share your schedules on these calendars. You can select the option to not show your schedule in the free/busy report. When you do this, others cannot view your schedule to select available times to schedule a meeting.
When you select a color for your calendar, activities are displayed with this color as the background. If you have multiple calendars, the color code makes it easy to identify activities for a specific calendar.
To create a calendar: 1. In the Calendar application, right-click on Calendars and select New Calendar.
26 ZCS 4.5
2. In the Create New Calendar dialog, type the name of the calendar and select a color to display the Calendar activities.
3. If you do not want to include this calendar in the free/busy reporting, check Exclude this calendar when reporting free/busy times.
4. Click OK. The new calendar displays in the Calendar list.
To create a calendar and synchronize appointments from a remote calendar: Unlike other calendar options, the option to synchronize appointments from
a remote calendar is only available when you create your new calendar. Before following these instructions, be sure to have the URL to your iCal remote calendar.
1. On the toolbar, click and select New Calendar, or select the Calendar tab and in the Overview pane right-click and select New Calendar. Select a color to display the Calendar activities.
2. If you do not want to include this calendar in the free/busy reporting, check the box for Exclude this calendar when reporting free/busy times.
3. Check the box for Synchronize appointments from remote calendar. Enter a valid iCal file URL for the remote calendar.
4. Click OK.
Printing a calendar You can print individual calendars in any of the views. The meetings are displayed per day. If you print a view that includes more than one calendar, all the schedules are combined, but the printed calendar does not specify the individual calendar names for the activities.
To print a calendar, select the calendar and display the Calendar view to print—Daily, Weekly, or Monthly. Click on the toolbar. Your printer dialog appears and the Calendar view to be printed displays.
Deleting calendars You can delete any calendar in your Calendar list, except your original calendar.
To delete a calendar, in the Calendar list right-click on the calendar. Select Delete. The calendar is immediately deleted. There is no undo.
Meetings that were created from this calendar are not automatically deleted from invited attendee's calendars.
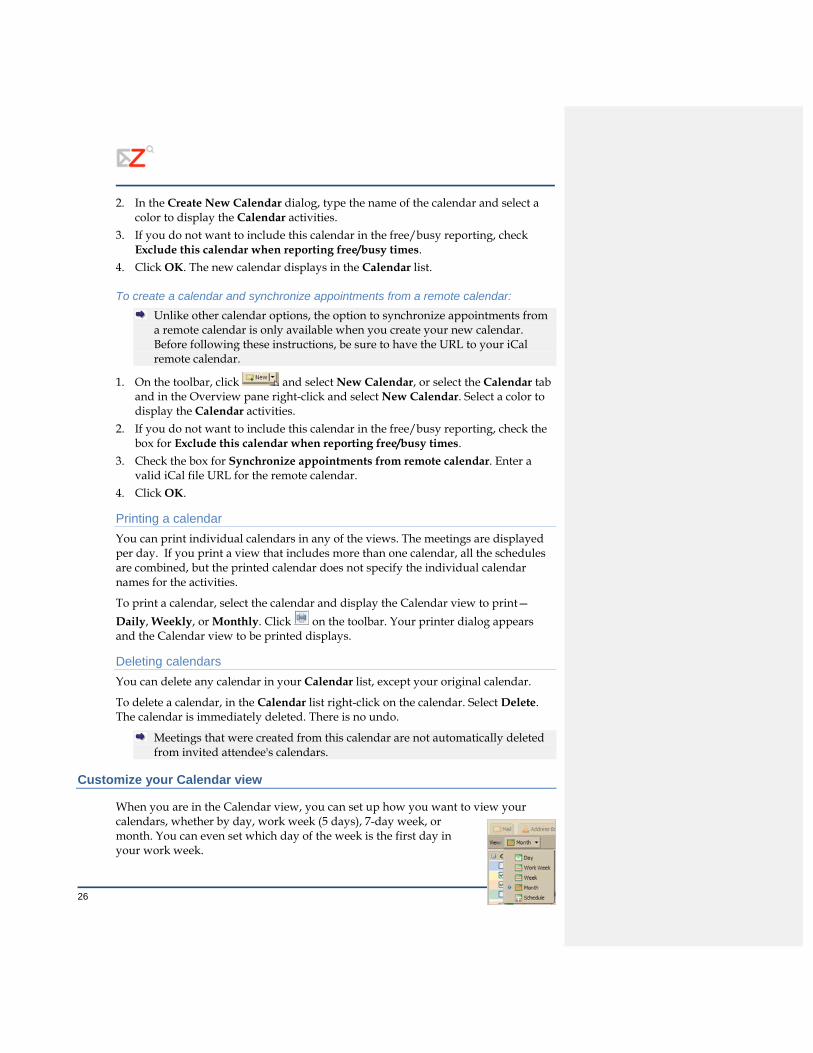
Customize your Calendar view
When you are in the Calendar view, you can set up how you want to view your calendars, whether by day, work week (5 days), 7-day week, or month. You can even set which day of the week is the first day in your work week.
ZCS Advanced Web Client User Guide
ZCS 4.5 27
You can change your view at any time from the Calendar toolbar.
Changing the Calendar view from the toolbar only changes the view for that session. You can set your default initial Calendar view from the Options>Calendar tab. The views are as follows:
• Day view is one day's activities
• Work Week view displays Monday through Friday activities
• Week view displays seven days of activities
• Month view displays a month's activities
• Schedule view is used when you have more than one calendar. Each calendar is displayed in a separate column
You can also set the day that displays as the first day of the week, so if your work week starts on Wednesday, you can view calendars that start the week with Wednesday.
Viewing multiple calendars You can view your different calendar activities, displayed by the calendar color in one calendar view. If you have more than two or three calendars, viewing them this way can be confusing. The schedule view lets you see multiple calendars selected from your calendar list. The Content pane shows a time bar, a free/busy indicator, and the calendars side-by-side. Each calendar name is displayed in the header.
All of your calendars including shared calendars are visible in your calendar list. Each calendar has a check box to the left of its name. Check the boxes for the calendars you want to view.

28 ZCS 4.5
The All column is a color-coded free/busy indicator for the viewed calendars. White means that no activity is schedule at that time on any of the shown calendars. As more calendars have activities scheduled at the same time, the color in the Add columns become deeper. When the color is deep red, most calendars have activity during that time.
Mouse-over the All column, to quickly see which calendars have activity scheduled within a time period.
Scheduling appointments, meetings and events
Activities you schedule are appointments, meetings, or events.
• Appointments. An appointment is an activity without other people. When you schedule an appointment, no email is sent to confirm the appointment. You can set recurring appointments. QuickAdd can be used to quickly create an appointment.
• Meetings. Meetings are appointments that include other people. When you create a meeting, you select attendees and send an email invitation to them. You can reschedule meetings and set up recurring meetings.
• Events. An event is an activity that lasts all day. Events do not display as time on the calendar, they appear as a banner at the top of the calendar schedule.
All three types of activities can be entered in several ways. You can schedule an activity from any view except Options. To create an activity you can do one of the following:

ZCS Advanced Web Client User Guide
ZCS 4.5 29
• On the toolbar, click the arrow on and select New Appointment. This is available in any view, except the Options view.
• Enter appointments directly on the calendar. In any view, except month view, select the date and a start time, double-click or drag through the time and the QuickAdd Appointment dialog opens.
• Right-click on either the mini-calendar or the start time in one of the calendar views. You can select to create a New appointment or a New all day appointment.
Within an email message, certain text is interpreted as a date and triggers the ability to right-click to create an appointment. Text such as today, tomorrow, and a day of the week or an exact date are highlighted in messages. Hover the mouse over this type of text to see if you have an appointment scheduled. Click on the highlighted text to open your calendar.
Scheduling a single meeting You can schedule an appointment for yourself, or you can schedule a meeting and invite attendees.
1. In any view except Options, from the toolbar click the arrow on and select Appointment.
2. Enter the Subject. The subject is required. The subject becomes the description in the calendar.
3. Enter a location. You can enter any location. Locations that have been created as resource accounts by your system administrator can be reserved. If you know the name of the location, enter it in the Location field. If you do not, go to the Find Location tab to search for the location. When you select it, the location appears in this field.
4. Set the meeting date and time. Enter the Start date or click the down arrow to display a calendar and pick a date. Select the End date.
If the time zone is displayed (Options>Calendar allows you to chose whether the time zone is displayed or not), it reflects the time zone that you are in. You usually do not need to change this. When you schedule meetings with attendees in different time zones, the invitation is sent reflecting the meeting time in their time zone. For example, if you create a meeting with attendees in California and New York, the invitation displays Pacific Time for attendees in California and displays Eastern Time (three hours later) for attendees in New York.
5. If you have multiple calendars, use the Calendar drop-down menu to select which calendar is setting up the event.
6. Add resources. If you know the name of the resource, enter it in the Resource field. If you do not, go to the Find Resources tab to search for available resources.

30 ZCS 4.5
7. Enter the names of the attendees. You can enter attendee names in any of the following ways: o Go to the Find Attendees tab. Type a name and select which list to use, either
Contacts or Global Address List. Select the names and press Add. When complete, click OK.
o In the Attendees field, type the email addresses, separating addresses by a semicolon (;).
o To see the free/busy schedules for attendees, click the Schedule Attendees tab. As you enter attendees' names and email addresses, if attendees' schedules are known, availability appears in horizontal bars next to the names. Return to the Appointment tab when the attendee's list is complete.
8. Use the Text field to add additional information to include in the email. To add attachments, click Add Attachments on the toolbar.
9. Click Save. An email invitation is sent to all attendees and the appointment is displayed in their calendars.
If you are adding an appointment to a shared calendar, you may need to refresh the screen to see the appointment.
Using QuickAdd The QuickAdd dialog makes it easy to quickly create an appointment. On your calendar, you select a start time, double-click or drag through the time and the QuickAdd Appointment dialog opens.
QuickAdd is an option. If you would prefer to always open the Appointment page when you double-click or drag on a calendar, disable this feature from your Options page.
To create an appointment using QuickAdd: 1. On the calendar for the appointment, click the time for the appointment or click
and drag from the start time to the end time for the appointment. The QuickAdd Appointment dialog appears.
To create an all-day appointment, from the Day or Week view, at the top of the calendar, click and drag over one or more days.
2. Enter the subject, location, and, if this is a repeat appointment, select a repeat mode.
3. Click OK. The appointment displays on the calendar. If you need to invite attendees or change repeat options, click More Details to open the Appointment page.
Creating a meeting request from messages and contacts
You can quickly create a meeting request by simply dragging and dropping a message, conversation, or contact to a date on the mini-calendar. When you drag and

ZCS Advanced Web Client User Guide
ZCS 4.5 31
drop a message or conversation, the information in the message is used to populate many of the fields on the Appointment page.
• The Subject of the appointment is the subject of the message.
• The attendees are the email addresses in the To and Cc fields of the message or for conversations, the most recent message in a conversation. When you drag a contact from your Contacts list to the mini-calendar, the contact's first email address is added to the attendee field.
• The text of a message or the text of all messages in a conversation thread becomes the text of the invitation. Message attachments are not attached to the appointment request.
Turning messages and conversations into meeting requests 1. Click on a specific message or conversation and drag it to a date on the mini-
calendar. The Appointment page opens. 2. Accept the information that was taken from the message or you can change any
of the Appointment fields. 3. Set the time constraints for the meeting hours and recurrence if required. 4. Click OK to send the invitation.
Turning Contacts into meeting requests 1. Click on a name from your Contact list and drag the name to a date on the mini-
calendar. The appointment page opens with the contact name in the Attendees field.
2. Complete the appointment information and click OK to send the invitation.
Viewing free/busy times
When you schedule meetings, you can view attendees, locations, and resource schedules as you set up the meeting in the Find Attendees tab.
The free/busy information shows whether the attendee is busy, out of office, tentative, or free.
Scheduling resources
When you schedule your meetings, you can reserve a location or equipment for the meeting. When you want to schedule these resources, you invite them to a meeting. The resource receives the invite and if it is free, accepts the meeting.
Creating recurring appointments
Recurring appointments are appointments that repeat on some sort of schedule. You can schedule recurring meetings to repeat daily, weekly, monthly, or yearly. In addition, you can customize recurring appointments schedules.

32 ZCS 4.5
Changing recurring appointments
If you created the recurring meeting, you can change and delete one occurrence or the series of meetings. An email is sent to attendees.
1. Double-click on the meeting to change, or right-click and select Edit. 2. Select whether to open only the selected date or to open the series. The
Appointment page opens. 3. Make your changes. You can change the schedule, the attendees, add an
explanation in the Text field, and add attachments. 4. Click OK. An email is sent to the attendees.
Deleting an appointment
Only the originator of an appointment can cancel the appointment.
1. Click on the appointment to delete. Right-click and select Delete. 2. If the appointment is a recurring series, you can delete an instance of the series or
the complete series. An email is sent to the attendees and the appointment is deleted from their calendars.
Responding to a meeting invitation
When you receive an email notification for a meeting, the meeting is added to your calendar and marked New. You can quickly respond to the invitation either from the email Inbox or from the Calendar pane.
1. Open the message that contains the meeting request or right-click the appointment in the Calendar list.
2. To respond to the meeting invitation, click the appropriate action. If the meeting is a recurring meeting, you have the option to select Instance or Series to respond to.
3. Click Accept, Tentative, or Decline. A reply is automatically sent. You can add comments before you send your response. To add comments when in Calendar view, right-click and select Edit Reply. After you make your choice, the email message is moved to the Trash, and New is removed from the calendar notice. Declined appointments display on your calendar in a faded view, as a reminder of the meeting you declined. You can delete declined appointment any time.
To read the message or to see any attachments that may have been sent, click the meeting notice.
Sharing your Calendar with others
You can share your Calendar with the following type of grantees:
• Internal users or groups. You select the type of privileges to grant:

ZCS Advanced Web Client User Guide
ZCS 4.5 33
o Viewer. The Grantee can see the activities posted to your calendar and the status of meeting requests, but cannot make any changes to your calendar.
o Manager. The Grantee has full permission to create meetings, accept or decline invitations, and edit and delete activities from your calendar.
None is an option to temporarily disable access to a grantor's shared calendar without revoking the share privileges. The Grantee still has the calendar in their calendar list but cannot view or manage activities on the grantor's shared calendar.
• External guests. You create a password to access the shared calendar. Guests must enter this password to view the calendar. They cannot make changes to the calendar.
• Public. Anyone that knows the URL to the shared calendar can view it. They cannot make any changes to the calendar.
Sharing your Calendar with Internal guests: 1. Right-click on the calendar to share and select Share Calendar. 2. On the Share Properties dialog select with whom to share. 3. When you choose Internal, you can choose addresses from the list that appears
as you type or type addresses that are not in the list. The user or group must be a valid address in your company's mail server.
4. In the Role area, selected the access permissions. 5. In the Message area, select which type of message to send. The options are as
follows: o Send standard message. The standard share notification message is sent to
the email address.
o Add a note to standard message. You can add additional information to the standard message.
6. Click OK.
Sharing with External guests: 1. Right-click on the calendar to share and select Share Calendar. 2. On the Share Properties dialog select with whom to share. 3. When you choose External guests, enter the guest email addresses. You can enter
more than one address in the Email field. Put a semi-colon (;) between addresses. 4. Enter the password that users must enter to view your calendar. 5. In the Message area, select which type of message to send. The URL to your
calendar and the password is included in the email message. • Send standard message. The standard share notification message is sent to
the email address.

34 ZCS 4.5
• Add a note to standard message. You can add additional information to the standard message.
6. Click OK.
Sharing with the Public: When you choose Public, anyone who has the URL can view your calendar. No password is required.
Editing or revoking permission You can revoke permissions to view or manage your calendars at any time.
1. Right-click a shared calendar. Click Edit Properties. Users sharing the folder are listed.
2. Click Edit to change permissions, or click Revoke to remove permissions. 3. Select whether a message describing the change should be sent. 4. Click OK.
Accepting access to a shared calendar If you receive an email notice that you have been granted access to share another person's calendar, you can accept or reject the share.
When you accept to share a calendar, the shared calendar displays in your Calendar list.
To accept: 1. Click Accept Share in the email. The Accept Share dialog opens and describes
the role granted to you. 2. Before you accept you can customize the calendar name and select a color for the
calendar items to be displayed. 3. Check the Send mail about this share, to send a confirmation back to the
Grantor. (optional) 4. Click Yes. The calendar is added to your Calendar list. The message is moved to
your Trash folder.
Declining access to a shared calendar When you get an invitation to share a calendar, the email message gives you the option to decline the share invitation.
When you click Decline, a Decline Share dialog displays. You can either decline and not send a message to the grantor, or you can send a reply and explain why you are declining.
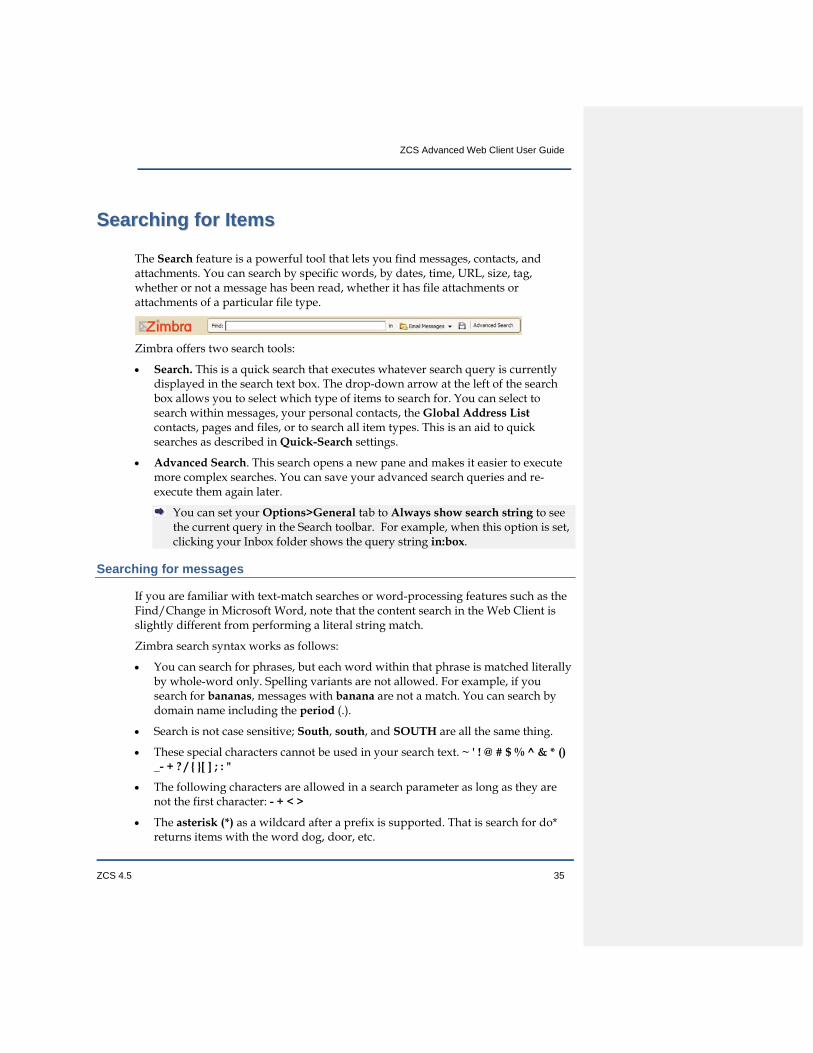
ZCS Advanced Web Client User Guide
ZCS 4.5 35
SSeeaarrcchhiinngg ffoorr IItteemmss
The Search feature is a powerful tool that lets you find messages, contacts, and attachments. You can search by specific words, by dates, time, URL, size, tag, whether or not a message has been read, whether it has file attachments or attachments of a particular file type.
Zimbra offers two search tools:
• Search. This is a quick search that executes whatever search query is currently displayed in the search text box. The drop-down arrow at the left of the search box allows you to select which type of items to search for. You can select to search within messages, your personal contacts, the Global Address List contacts, pages and files, or to search all item types. This is an aid to quick searches as described in Quick-Search settings.
• Advanced Search. This search opens a new pane and makes it easier to execute more complex searches. You can save your advanced search queries and re-execute them again later.
You can set your Options>General tab to Always show search string to see the current query in the Search toolbar. For example, when this option is set, clicking your Inbox folder shows the query string in:box.
Searching for messages
If you are familiar with text-match searches or word-processing features such as the Find/Change in Microsoft Word, note that the content search in the Web Client is slightly different from performing a literal string match.
Zimbra search syntax works as follows:
• You can search for phrases, but each word within that phrase is matched literally by whole-word only. Spelling variants are not allowed. For example, if you search for bananas, messages with banana are not a match. You can search by domain name including the period (.).
• Search is not case sensitive; South, south, and SOUTH are all the same thing.
• These special characters cannot be used in your search text. ~ ' ! @ # $ % ^ & * () _- + ? / { }[ ] ; : "
• The following characters are allowed in a search parameter as long as they are not the first character: - + < >
• The asterisk (*) as a wildcard after a prefix is supported. That is search for do* returns items with the word dog, door, etc.
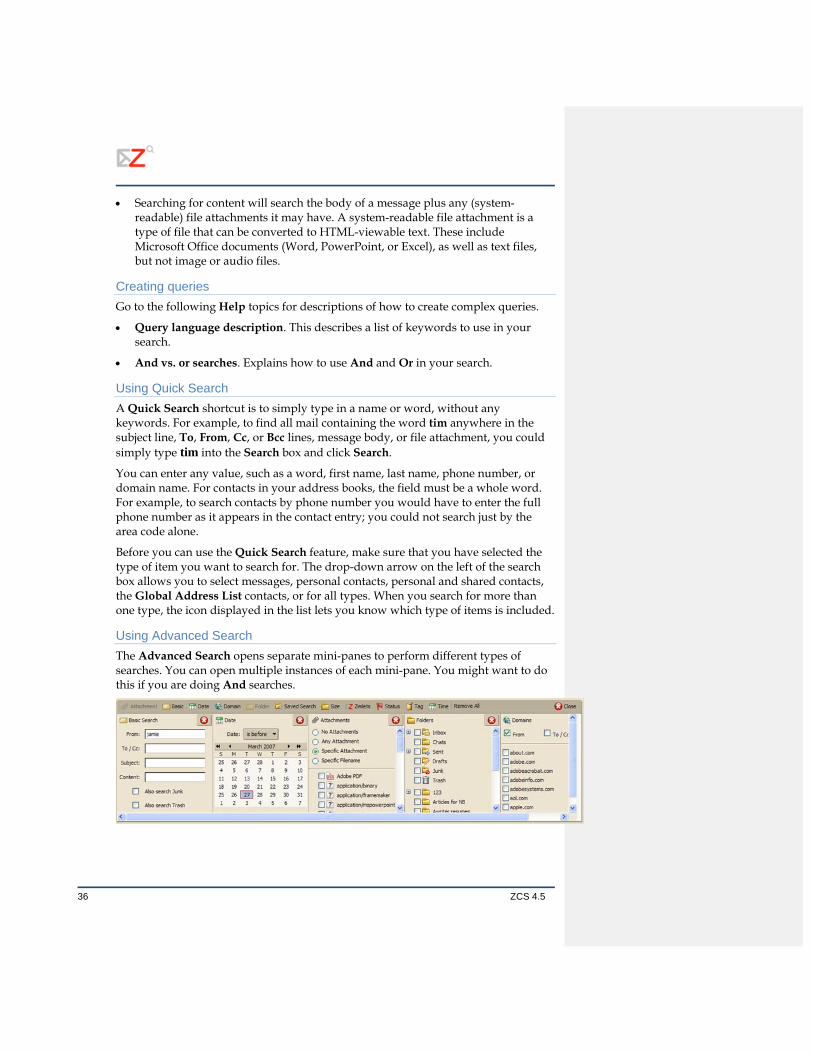
36 ZCS 4.5
• Searching for content will search the body of a message plus any (system-readable) file attachments it may have. A system-readable file attachment is a type of file that can be converted to HTML-viewable text. These include Microsoft Office documents (Word, PowerPoint, or Excel), as well as text files, but not image or audio files.
Creating queries Go to the following Help topics for descriptions of how to create complex queries.
• Query language description. This describes a list of keywords to use in your search.
• And vs. or searches. Explains how to use And and Or in your search.
Using Quick Search A Quick Search shortcut is to simply type in a name or word, without any keywords. For example, to find all mail containing the word tim anywhere in the subject line, To, From, Cc, or Bcc lines, message body, or file attachment, you could simply type tim into the Search box and click Search.
You can enter any value, such as a word, first name, last name, phone number, or domain name. For contacts in your address books, the field must be a whole word. For example, to search contacts by phone number you would have to enter the full phone number as it appears in the contact entry; you could not search just by the area code alone.
Before you can use the Quick Search feature, make sure that you have selected the type of item you want to search for. The drop-down arrow on the left of the search box allows you to select messages, personal contacts, personal and shared contacts, the Global Address List contacts, or for all types. When you search for more than one type, the icon displayed in the list lets you know which type of items is included.
Using Advanced Search The Advanced Search opens separate mini-panes to perform different types of searches. You can open multiple instances of each mini-pane. You might want to do this if you are doing And searches.

ZCS Advanced Web Client User Guide
ZCS 4.5 37
Searching for messages
To search for messages using the Search text box: 1. Enter search criteria in the Search box, such as has:attachment or perhaps the
sender's name.
2. Click the Search arrow, and select the type of search from the list. 3. Click Search.
To search for a message using detailed criteria: 1. Click Advanced to open the Advanced Search area. 2. Click icons in the toolbar to open the pane for the type of criteria you want to use
for your search. 3. Enter information. If you enabled the option to Always Show Search String, the
Search text box updates as you type or make selections. 4. As soon as you enter a criteria in a Search pane, or as soon as you have made any
selection change in any other Search pane, such as changing a radio button or a drop-down search option, the search executes.
5. Items matching the search criteria are listed in the lower right. If the Conversation feature is enabled, conversations containing messages that match the search criteria are listed.
6. To refresh the Search Results area, click Search.
Using a wildcard in Search: The asterisk (*) can be used as a wildcard in a search to find content that contains words that have similar spellings.
Use the asterisk (*) as a wildcard after a prefix. That is search for do* returns items with the word dog, door, etc.
Saving search queries If you create a search that you think you will want to use again, you can save it.
1. Create the search query, either by entering text in the Search bar or by creating a query with Advanced Search.
2. To save the search, click on the Search bar. The Save Search dialog opens. 3. Type the name for your Saved Search. Searches are saved as a search folder in
the Searches section of the Overview pane by default, but you can select another folder.
4. Click OK. Your search is saved. To use a Saved Search, click the Search folder. The search results immediately display in the Content pane.

38 ZCS 4.5
Search examples The different panes in the Advanced Search area can be used to search by different criteria. The following examples include which Advanced Search panes you would use.
Here are a few possible search examples:
• To search for a specific type of attachment file. A message with next year's budget spreadsheet attached. You don't remember who it's from or what date it was sent, but the filename has an .XLS extension.
Open just the Attachments pane and choose Specific Attachment. A list of check boxes appears beneath the radio button. Scroll down and check the box next to Microsoft Excel.
• To search for a contact within a specific company. A contact who works at a company called Rivendell.
Use the down-arrow to select Search Contacts. In the Advanced Search area, open the Basic Search pane and enter Rivendell under the Content field. (You could also do this search without using advanced search.)
• To search for an attachment that may be one type or another. Messages with either PDF attachments or JPEG attachments.
In the Attachments pane, choose Specific Attachment and then check both Adobe PDF and JPEG Image.
• To search for an item that was tagged. Description of the new procedures for your workgroup, which you had tagged as High Priority.
Open the Tags pane and select the check box for the High Priority tag. Note that tags are user-defined, so this assumes that you have previously created the tag definition, and applied it to the mail message.
• To search by a date range. A message someone claims to have sent you in early December, which you think was never received.
To set a date range, open two instances of the Date pane. In the first one, set the Date drop-down to is before and select an end date. Use the other Date pane to specify is after and a start date. You can also search by sender.
• To search for a specific type of attachment that included a specific phrase. A message with a PDF file that contains the phrase Mixed Nuts.
In the Basic Search pane, under Content, enter Mixed Nuts. In the Attachments pane, choose Specific Attachments and check Adobe PDF. Note that the search does not distinguish between content found in the body of an email message versus content found in a file attachment.

ZCS Advanced Web Client User Guide
ZCS 4.5 39
UUssiinngg TTaaggss
Tags are your personal classification system for mail messages and contacts and are an aid to finding those items. For example, you might have one tag for Immediate Turnaround and another for Medium Priority. The mail messages that are tagged can be in different folders. You can search for a tag and all messages with that tag are displayed, no matter which folder they are in.
• You can create as many tags as you want.
• You can apply multiple tags to the same mail message and contacts.
Creating new tag definitions
You can access the New Tag feature in any of the following ways:
• From the toolbar, click the down arrow next to New and choose Tag.
• Select Tag from the toolbar.
• Right-click an item in List view and choose Tag Conversation.
• Right-click on Tags or a tag in the Overview pane and choose New Tag.
To tag an item using drag and drop: Drag and drop the tag from the left-hand Overview pane onto the item on the Content pane.
To apply a tag to an item using menus: 1. Right-click the item from the Content pane. 2. Choose Tag Message (or Tag Conversation or Tag Contact). 3. Choose the tag name from the list that appears. Only tags not already applied to
the selected item are listed.
To create a new tag and apply it to an item: 1. Right-click the item from the list and choose the Tag menu option that appears. 2. Choose New Tag. 3. Enter a name for the tag and click OK.
To remove a tag from an item: 1. Right-click the item from the list and choose the Tag menu option that appears. 2. Choose Remove Tag. If the item has multiple tags, you can choose to remove one
or all tags.

40 ZCS 4.5
To apply/remove a tag to multiple items at once: 1. Select all the items to be tagged using Control-Click or Shift-Click. 2. Right-click over any one of the selected items and choose the Tag menu option
that appears. 3. Choose the tag to add or remove.
To find tagged messages quickly: Click a tag in the Overview pane. All messages that are tagged are displayed in the Contents pane.
Flagging a message
The flag icon in the message list is a yes/no indicator that denotes whether the mail message has been flagged. To turn the flag on or off, click once directly over the flag icon for the message or conversation.
ZCS Advanced Web Client User Guide
ZCS 4.5 41
UUssiinngg FFoollddeerrss
Folders can be used to store your mail messages. You can move items from one folder to another by dragging and dropping or by clicking Move from the right-click button on the mouse. You can move items from one folder to another by checking the message or contact and then select the folder from the Move to list.
Creating custom folders
You can create custom folders. Custom folders can be created inside other folders, including the system folders.
You cannot create two folders with the same name within the same parent folder. For example, you cannot have two folders named Shopping under your Inbox folder, but you could have one folder named Shopping under your Inbox folder, and another one with the same name under the Sent folder.
To create a new folder:
1. From the toolbar, click the arrow on the New button ( ) and select Folder, or right-click in the Overview pane in the folders list and select New Folder. A Create New Folder dialog opens.
2. Type a folder name. 3. Select where to place the new folder. Click Folders to have the folder at the top
level or choose a location from the list of existing folders. Your new folder is placed within the selected folder.
4. Click OK. To create a folder tied to an RSS or ATOM feed, check Subscribe to
RSS/ATOM feed, then enter a URL. The feed is automatically sent to the folder in your Mailbox.
Renaming folders
You can rename user-defined folders by right-clicking on the folder and choosing Rename Folder. Folder names can have any character except colon (:), forward slash (/), or double quotes (“”). System folders cannot be renamed.
Deleting folders
You can delete custom folders. You cannot delete system folders.
When you delete a folder, its contents are moved to the Trash. You can recover contents from the Trash by dragging and dropping them to another folder.

42 ZCS 4.5
CCrreeaattiinngg FFiilltteerrss
Mail filters are defined from the Options>Mail Filters tab. Mail filtering allows you to define a set of rules and corresponding actions to apply to incoming email.
You can filter your incoming email messages to sort them into folders, automatically tag them, forward them, or discard them. When an incoming email message matches the conditions of a filter rule, the corresponding actions associated with that rule are applied. For example, you could define a filter rule to identify email coming from your immediate supervisor and move it to a folder called From My Boss or to automatically move messages from a specific address to the Trash folder.
Each incoming message is tested against your filter rules at the time that the email is delivered and the filter actions are applied to matching messages at that time.
• Filter rules are not case-insensitive, meaning that the rules ignore capitalization.
• Three of the comparison methods for filter conditions are Contains, Matches, and Is. These options appear for some items such as the Subject line.
• Wildcards can be used in comparisons that use the Matches comparison operator. The two wildcard characters are asterisk (*) and question mark (?).
To create or edit a new filtering rule: 1. Click the Options tab and then open the Mail Filters tab and click New Filter. 2. The Add Filter dialog displays. 3. In Filter Name type the name for the rule. 4. In the If the following conditions are met area, choose a grouping preference.
o Any conditions means that if any of the conditions in the filter are met, apply the action.
o All conditions mean that all of the conditions in the filter must be met in order to apply the filter action.
You can also create a new filter from an email message. Right-click on the message, choose New Filter. The Edit Filter dialog displays with From, To, and Subject set with this information from the email message. If the filter conditions are correct, give the filter a name and click OK.

ZCS Advanced Web Client User Guide
ZCS 4.5 43
AAbboouutt ZZiimmlleettss
Zimlets are small programs created as a mechanism to integrate third-party information and content with the Web Client features. Zimlets let you interact with different content types in your email messages.
• Click on the URL in a message to launch a browser window to go to that URL. Hover above the URL to see a preview of the site.
• Right-click on a phone number to make a call from your computer soft phone, such as Skype or a Cisco VOIP phone.
• Right-click on a date within a message to see your Calendar and to schedule a meeting without leaving the message.
• Right-click on a name, address, or phone number to update your address book.
Other Zimlets may be available from the Overview pane.
If you do not see Zimlets listed in your Overview pane, your system administrator has disabled them.
44 ZCS 4.5
SSeettttiinngg YYoouurr PPrreeffeerreenncceess
Your default user preferences are configured when your account is created. These options define how your Mailbox, Address Book, and Calendar applications work. You can also set up your Mail Identities and POP accounts and select a theme for your mailbox.
You can change the settings from the Options tab. If the option described here is not visible in your view, the preference is not available for your account.
You can set preferences in the following tabs.
General • You can choose to automatically include the Junk folder and Trash folder in any
searches. By default these folders will not be searched.
• To always show the search string in the Search text box, check Always Show Search String. When this is enabled, the search text box displays the search query that produced the list of items that display in the Content pane.
• Set which text editor you want as the default, either HTML or plain text.
• Set the default font settings to be used when using HTML to compose in Mail, Documents and Calendar. You can define the font style, size and color to use as your default style. Arial, 12 pt black is the default.
• To change your Bucknell password please visit http://www.bucknell.edu/passwordchange.
• Select the UI Theme to define the background color for the Mailbox interface.
Mail • Select how you want to group your email, by conversation or message. If you
have the Conversation feature, Conversation is the default.
• Select how many items (messages or conversations) to display per page. The default is to display 25 items per page, but you can select 10, 50, or 100 items per page.
• The search defined in the Initial mail search field defines the search to execute when you log in. The default search is your Inbox. When you log in, the results of your Inbox display. You can change this field to have another folder, tag, or a Saved Search displayed when you first open the Web Client. See Query Language Description for the syntax.
• Polling interval is how often your computer checks for new email. The default is every 5 minutes. The minimum length of time is defined by your administrator.

ZCS Advanced Web Client User Guide
ZCS 4.5 45
• Set whether to show the Reading pane when viewing email. The default is to always show the Reading pane.
• By default, the Save copies of messages to sent folder is enabled. Copies of messages you send are saved to your Sent folder.
• Specify whether to reply to incoming email with a vacation message saying that you are out of the office, and what the message should say. This is also sometimes referred to as an out-of-the-office auto-reply.
• Enable and specify an address to send notifications that you have received new email.
• Specify an address to forward your email to. You can have the original email deleted from your mailbox.
• Specify whether to view email as HTML, for messages that have been formatted as HTML. Turning this off causes email to be displayed as plain text, showing the HTML tags themselves rather than applying them as markup.
• Configure If I send a message that I then receive to handle messages that you send that include your address as one of the recipients of the message, or that go an address such as a mailing list that includes you.
• Always compose in new window opens a new Compose window, separate from your mailbox, when you compose a message. You can view and navigate your mailbox while the Compose pane is open.
Mail Identities You can create different Mail Identities to manage different roles in your job and personal life from one account.
Identity Options. Used to set up your Mail Identity.
Signature.
• Specify the placement of the signature in your email messages: either add the signature below all messages in the email, or have the signature added at the end of your composed, replied to, or forwarded text.
• Enter the signature that should appear on your email messages.
• Specify whether to automatically add a signature to all outgoing email messages. You can create a signature and not enable it. When you compose a message, an Add Signature button displays in the compose tool bar. When you click it, your signature is added to your message.
Advanced. The advanced tab is used to configure how you would like reply to and forward messages. The default style is defined in the Default Identity configuration. When you create new identities, you can use the same settings as the Default Identity or you can set different preferences.

46 ZCS 4.5
• Select the Reply/Forward format to use to compose the message. Choose either to compose using the same format as the original received message, using plain text, or using HTML.
• Specify whether to prefix each line with > or | for the previous email messages that are forwarded or replied to, if you chose to quote original text.
• Select whether to include the original text in the body of your reply message. You can choose to include original text, not include the text, include the text as an attachment, include the text in the body with a prefix that you choose, or include only the most recent message. (In other words, it will quote only what was written by the person who sent the message, and not previous text.)
• Specify how to include the original text of a message when you forward a message, in the body of the message, in the body with a prefix, or as an attachment.
POP Accounts Instead of logging in to each of your POP email accounts, you can check your POP accounts for email messages directly from the Web Client. When you set this up, you can organize where the messages will be saved and create a Mail Identify to be used when you reply to or forward a message received from the POP account.
Mail Filters Use this tab to define your mail filtering rules.
Address Book • Enable the feature to automatically add addresses to your Address Book when
you send email. If this is enabled, addresses are saved to your Email Contacts folder.
• Enable to use the Global Address List when auto completing addresses.
• Select whether you would prefer to view Contacts as a list or as business cards.
• Select the number of Contacts to display per page. The default is 25.
• Import contacts to your Contacts list. The file to import must be in a comma-delimited format (.cvs).
• Export your Contacts list. The file exports in a coma-delimited format (.cvs).
Calendar • Select how you would like to view your Calendar. The default is by work week.
• Specify which day of the week should be the first day of the week in your calendar.
• If you travel between time zones, you may want to select to show the time zone list in the appointment view.
ZCS Advanced Web Client User Guide
ZCS 4.5 47
• If you create many appointments without attendees, check Use the QuickAdd dialog.
• A mini-calendar is displayed in Calendar. You can enable mini-calendar to be visible from any view.
• Set the number of minutes before an appointment to be reminded. The default is five minutes.
Shortcuts Keyboard shortcuts let you use the application without going to the mouse. A large number of shortcuts is available. You can also create custom shortcuts by assigning numeric aliases to folders, tags, and Saved Searches.
• The Shortcut list shows all the existing keyboard shortcuts.
• The Mail Folder Shortcuts tab is used to create a shortcut to quickly go to your email folders and to move a message to that folder. You select the folder and assign a number to it. For example, if you assign 3 to the Inbox folder: From anywhere in your mailbox, typing v3 will move you to the Inbox. Selecting an item and typing 3, will move the item to the Inbox.
• The Saved Search Shortcuts tab is used to create shortcuts to quickly access Saved Searches. You select a Saved Search and assign a number to it. For example, if you assign 3 to your favorite search, then from anywhere in your mailbox, you can type s3 to quickly run that search.
• The Tag Shortcuts tab is used to create shortcuts to quickly access all items with a specific tag or apply a tag to a message or contact. You select a tag and assign a number to it. For example, a tag called Followup is assigned 3. From anywhere in your mailbox, you can type y3 to see all items marked with Followup. Select an item and type t3 to tag that item with Followup.
You can assign any number, but it cannot be repeated within a shortcut tab.
Restoring default options
On each of the Options tabs except for the Filter Rules section, the Restore Defaults button resets any changes you have made to your user preferences, to the default system settings that were in effect when you first logged in to your new account. You must click Save in order to commit these changes.
This reset feature does not affect changes to passwords.
Mailbox quotas
In order to keep disk and resource usage to a manageable level, your administrator may enforce quotas to limit the amount of disk space your mailbox can consume.
The display banner under your name in Web Client shows a bar showing how much of your quota you have used.
48 ZCS 4.5
If you are over quota, the following things may happen:
• You receive a notification.
• Your email interface may display a notification when you log in.
• Email sent to you may be returned (bounced), along with a notification that your mailbox is full.
To reduce the size of your mailbox, you can do the following:
• Delete old messages that are no longer needed.
• Look for messages with large file attachments and delete those. Save the file attachments locally if you want to preserve them.
• Empty the Trash folder.
The Web Client also supports automatic purging of messages that are over a certain number of days old. Your email administrator sets the policy for when messages are purged, how old they have to be, and which folders are purged.
Subscribing to a RSS/ATOM feed
You can subscribe to Web sites that provide your favorite RSS (Really Simple Syndication) and podcast feeds to send updated information directly to your mailbox.
You create a folder for each RSS feed.
To subscribe to a RSS/Atom feed: Before proceeding, find out the URL for the RSS.
1. From the toolbar, click the arrow on the New button ( ) and select Folder, or right-click in the Overview pane in the folders list and select New Folder. A Create New Folder dialog opens.
2. Type the folder name and check Subscribe to RSS/ATOM feed. The URL field displays.
3. Enter the RSS URL from the web site to the URL field. 4. Click OK. The folder is created in your Overview pane. Open the folder to access the link. To update the content, right-click and select Reload in the folder.