a guide to teaching english - 72p
TRANSCRIPT

8/9/2019 A Guide to Teaching English - 72p
http://slidepdf.com/reader/full/a-guide-to-teaching-english-72p 1/72
Lucy Pollard’s Guide to
Teaching EnglishA book to help you through your first two years in teaching

8/9/2019 A Guide to Teaching English - 72p
http://slidepdf.com/reader/full/a-guide-to-teaching-english-72p 2/72
LUCY POLLARD’S GUIDE TO
TEACHING ENGLISH
A book to help you through your first two years in teaching
visit http://Obama-OMama.blogspot.com/for more eBooks and Software
8/9/2019 A Guide to Teaching English - 72p
http://slidepdf.com/reader/full/a-guide-to-teaching-english-72p 3/72
INTRODUCTION
This book is intended as a guide for those of you who are new to teaching English. It
will be a great resource to you as you begin your teaching career. It will help you inmost of the situations you will encounter in your first two years of teaching.
In Chapters 1 and 2, I will present the key aspects of teaching and explain some termsthat will be used throughout the book. Subsequent chapters will cover some of thesepoints in greater detail. You can read this book in any order that suits you; you canread it from cover to cover; you can dip into it as and when necessary; you can decideto just read the chapters that are of interest or relevance to you. However, I advise allreaders to start with a complete reading of Chapters 1 and 2.
All books mentioned throughout this e-book are listed at the end, under References,
along with details of author and publisher.
ABOUT THE AUTHOR Lucy Pollard has worked as a teacher, teacher trainer, writer, TEFL consultant andDirector of Studies for over 18 years. Her experience is varied: she has taught generalEnglish, English for specific purposes and English for academic purposes to adults.She has also taught teenagers and young children. She has the UCLES Diploma inTEFL, the Certificate in TEFL from the University of London, a Bachelor’s degree in
Psychology and the Diploma in Life Coaching. She is passionate about teaching and learning and has shared her knowledge withstudents, teachers and colleagues for many years.
THANKS The author would like to thank the following people for their help in the production of
this book: Josef Essberger Ann Harrison
Maggie James
2 Copyright © Lucy Pollard 2008 All Rights Reserved
This e-book may not be reproduced in part or in full without the express written permission of the author.
8/9/2019 A Guide to Teaching English - 72p
http://slidepdf.com/reader/full/a-guide-to-teaching-english-72p 4/72
INTRODUCTION................................................................................................................................2
ABOUT THE AUTHOR...........................................................................................................2
THANKS...................................................................................................................................2
CHAPTER 1: THE BASICS OF TEACHING ENGLISH ..................................................................61.1 Use of English and use of mother tongue ................................................................................6
1.2 Using the blackboard, whiteboard ...........................................................................................6
1.3 Who talks in class?...................................................................................................................7
1.4 Eliciting....................................................................................................................................8
1.5 Pair work and group work........................................................................................................8
1.6 How to organise group and pair work......................................................................................9
1.7 What does the teacher do during pair and group work?...........................................................9
1.8 Some disadvantages of group and pair work and what to do about it......................................10
1.9 What to do in your first lesson? ...............................................................................................10
1.10 Giving instructions...................................................................................................................11
1.11 How to seat students ................................................................................................................12
1.12 Levels .......................................................................................................................................12
1.13 Essential elements for students to learn ...................................................................................13
1.14 Free and controlled language practice .....................................................................................14
1.15 Activities that provide controlled and freer language practice ................................................15
1.16 Accuracy and fluency...............................................................................................................16
1.17 Using a course book.................................................................................................................17
1.18 Choosing a course book ...........................................................................................................17
1.19 Roles of the teacher..................................................................................................................18
CHAPTER 2: APPROACHES TO THE TEACHING OF ENGLISH..............................................19
2.1 Grammar translation method ...................................................................................................192.2 Audio-lingual method ..............................................................................................................19
2.3 Communicative approach ........................................................................................................20
2.4 PPP...........................................................................................................................................22
2.5 Task-based learning .................................................................................................................22
2.6 ESA ..........................................................................................................................................23
2.7 Humanistic ...............................................................................................................................24
2.8 Lexical approach ......................................................................................................................24
2.9 A final word on teaching methods ...........................................................................................24
CHAPTER 3: PRESENTING AND PRACTISING LANGUAGE...................................................25
3.1 Stage 1: Pre-checking knowledge ............................................................................................253.2 Stage 2: Presentation................................................................................................................27
3.2.1 Explanation ..............................................................................................................................27
3.2.2 Demonstration..........................................................................................................................28
3.2.3 Illustration ................................................................................................................................28
3.2.4 Discovery / deducing meanings ...............................................................................................28
3.3 Stage 3: Check students’ understanding ..................................................................................30
3.4 Stage 4: Practising language points .........................................................................................30
3.5 Stage 5: Revision .....................................................................................................................31
3.6 A final word on presenting and practising language................................................................31
3 Copyright © Lucy Pollard 2008 All Rights Reserved
This e-book may not be reproduced in part or in full without the express written permission of the author.
8/9/2019 A Guide to Teaching English - 72p
http://slidepdf.com/reader/full/a-guide-to-teaching-english-72p 5/72
CHAPTER 4: SPEAKING.................................................................................................................33
4.1 Language..................................................................................................................................33
4.2 Preparation ...............................................................................................................................34
4.3 Reason for speaking .................................................................................................................34
4.4 Types of speaking activities ........................................................................................34
4.4.1 Information gap........................................................................................................................344.4.2 Discussions: reaching a consensus...........................................................................................35
4.4.3 Discussions: moral dilemma ....................................................................................................35
4.4.4 Discussions involving opinions ...............................................................................................35
4.4.5 Debates.....................................................................................................................................36
4.4.6 Spontaneous conversations ......................................................................................................36
4.4.7 Role play ..................................................................................................................................36
Tips and advice for role plays: ...........................................................................................................36
4.4.8 Problem solving: reorganising the zoo.....................................................................................37
4.4.9 Discussion about jobs (based on an activity in Discussions A-Z Intermediate)......................37
4.4.10 Discussions based on pictures .................................................................................................37
4.4.11 Topic prompts .........................................................................................................................384.5 A final word on speaking activities..........................................................................................38
CHAPTER 5: LISTENING................................................................................................................39
5.1 Listening for gist ......................................................................................................................39
5.2 Extensive listening ...................................................................................................................40
5.3 Listening for specific information............................................................................................40
5.4 Listening for detailed information ...........................................................................................40
5.5 Predicting .................................................................................................................................40
5.6 A template for a listening activity lesson.................................................................................41
5.7 A final word on listening activities ..........................................................................................43
CHAPTER 6: READING...................................................................................................................446.1 Reading skills and sub-skills....................................................................................................44
6.1.1 Reading for gist ........................................................................................................................44
6.1.2 Reading to extract detailed information...................................................................................45
6.1.3 Reading to extract specific information...................................................................................45
6.1.4 Predicting .................................................................................................................................45
6.1.5 Extensive reading.....................................................................................................................46
6.2 Template for a reading skills lesson.........................................................................................46
6.3 A final word on reading activities............................................................................................48
CHAPTER 7: WRITING ...................................................................................................................49
7.1 Language..................................................................................................................................497.2 Time for preparation ................................................................................................................49
7.3 Reason for writing....................................................................................................................49
7.4 Creating interest in the topic and activating students’ knowledge...........................................50
7.5 Coherence and cohesion...........................................................................................................50
7.6 Publication ...............................................................................................................................50
7.7 Approaches to teaching writing: process writing.....................................................................51
7.8 Approaches to teaching writing: the genre approach to writing ..............................................53
7.9 Shorter writing activities ..........................................................................................................53
7.10 Using computers ......................................................................................................................54
4 Copyright © Lucy Pollard 2008 All Rights Reserved
This e-book may not be reproduced in part or in full without the express written permission of the author.

8/9/2019 A Guide to Teaching English - 72p
http://slidepdf.com/reader/full/a-guide-to-teaching-english-72p 6/72
7.11 Penpals .....................................................................................................................................54
CHAPTER 8: PLANNING A LESSON ............................................................................................55
8.1 Recent work .............................................................................................................................55
8.2 Language work.........................................................................................................................56
8.3 Skills work ...............................................................................................................................56
8.4 Level of the students ................................................................................................................56
8.5 Overall aims of students...........................................................................................................56
8.6 Aims of the lesson....................................................................................................................56
8.7 Stages .......................................................................................................................................57
8.8 Timing......................................................................................................................................57
8.9 Variety......................................................................................................................................57
8.10 Interest......................................................................................................................................57
8.11 Interaction ................................................................................................................................58
8.12 Level of motivation..................................................................................................................58
8.13 Problems and solutions ............................................................................................................58
8.14 Materials and equipment required............................................................................................588.15 Homework................................................................................................................................58
8.16 Extra activities..........................................................................................................................58
8.17 A final word about lesson plans...............................................................................................59
CHAPTER 9: ERROR CORRECTION.............................................................................................60
9.1 Correcting mistakes in oral work .............................................................................................61
9.1.1 What to correct.........................................................................................................................61
9.1.2 How much to correct................................................................................................................61
9.1.3 When to correct ........................................................................................................................62
9.1.4 Who corrects ............................................................................................................................62
9.1.5 How to correct..........................................................................................................................62
9.2 Correcting mistakes in written work........................................................................................639.2.1 How much to correct................................................................................................................63
9.2.2 How to correct..........................................................................................................................64
9.3 A final word on error correction ..............................................................................................64
CHAPTER 10: PRONUNCIATION..................................................................................................65
10.1 Individual sounds .....................................................................................................................66
10.2 Word stress...............................................................................................................................67
10.3 Sentence stress .........................................................................................................................68
10.4 Intonation .................................................................................................................................69
10.5 Connected speech.....................................................................................................................69
10.6 A final word on pronunciation.................................................................................................70
REFERENCES 71
5 Copyright © Lucy Pollard 2008 All Rights Reserved
This e-book may not be reproduced in part or in full without the express written permission of the author.
8/9/2019 A Guide to Teaching English - 72p
http://slidepdf.com/reader/full/a-guide-to-teaching-english-72p 7/72
CHAPTER 1: THE BASICS OF TEACHING ENGLISH
1.1 Use of English and use of mother tongue
We should try to use English as much as possible with our students. When teachingstudents at intermediate level and above, all teaching can be done in English. Thereshould really be no need to use the students’ mother tongue at these levels. Grammar explanations and definitions of words can be given in English. Explanations for activities and instructions can also be given in English.
At lower levels, you might find yourself using the students’ mother tongue more often.Nevertheless, try to use English as much as possible. As your students progress, youwill find that you’ll use English for instructions more and more frequently. When youare presenting new language, try to illustrate the language through the use of picturesand/or mime. This is preferable to translating. Techniques for presenting language canbe found in Chapter 3.
You might want to dedicate one of your first lessons with a class to the study of classroom language. By classroom language I mean phrases such as: open your books, turn to page 10, work with a partner, etc, etc. You can write the language on theboard, demonstrate it through mime or show pictures of people opening their books,working with a partner etc. It’s important to practise the pronunciation of these phrasesand to revise them regularly. In a subsequent lesson, you can give the phrases to
students with the words jumbled up (for example: 10 to page turn); and ask them to re-order the words and match them to pictures. Finally, you can write the phrases onlarge pieces of card and display them in your classroom so that they are constantlyvisible.
You might occasionally decide to use the students’ mother tongue (if you speak it, of course). A time when this is advisable is when your students just haven’t grasped whatyou are saying in English. If you need to deal with something quickly, it is generallyquicker in the students’ mother tongue (if you speak their language). For example, itcould take a very long time to explain the word “soul” using only English and thestudents might misunderstand if their culture doesn’t have a similar concept. You might
also need to give some information about an open day or a special event at school andyou think it will be done more quickly in their language.
1.2 Using the blackboard, whiteboard
You will need to learn how to write on a board. This is not as easy as it appears.Getting a line straight and writing at a size that can be seen takes practice. Practise inan empty classroom one day. While you’re there practise writing on the board side on(i.e. positioned in such a way that your back is not to the class). This will be very usefulespecially if you intend to teach children. You’ll be able to keep an eye on what’shappening whilst writing.
6 Copyright © Lucy Pollard 2008 All Rights Reserved
This e-book may not be reproduced in part or in full without the express written permission of the author.
8/9/2019 A Guide to Teaching English - 72p
http://slidepdf.com/reader/full/a-guide-to-teaching-english-72p 8/72
You will also need to think about what you write on the board. Remember thatwhatever goes on the board generally finds its way into students’ notes. If you wantthem to retain something, be it homework exercises or a new grammar explanation,write it on the board. You will need to get the balance right: you need to write justenough for it to make sense to students when they come back to look at it and not
write so much that your students spend all their time in class copying. When you firststart teaching, you could note on your lesson plan which elements you intend to writeon the board.
Some teachers divide their board into sections: one section for grammar, one for vocabulary, one for pronunciation, one for homework, etc. Decide whether this sort of organisation would work for you and whether you would like to use it.
You can also think about whether you will write things on the board during class or write them up before class and mask them in some way: this is easy enough whenusing a flipchart (an easel with pages that you can turn over). With a traditional board,
you can cover your writing with paper and reveal it at the appropriate moment.
1.3 Who talks in class?
Obviously the teacher talks in class. Our roles include explaining language points,giving instructions for what to do, asking questions, etc, etc. The students also need tospeak; learning a language involves speaking the language. My question here really is:who speaks most in class? When setting up an activity, explaining what to do for homework, the teacher will do a lot of the speaking. However, in other activities, thegoal is to get students speaking and using English as much as possible. This involvesthe teacher being silent, listening to what the students say and setting up tasks that
give students opportunities to express themselves.
The issue about who speaks is also known as: student-talking time (STT) and teacher talking-time (TTT). We should aim for our students to be talking more than we do and if possible 80% STT to 20% TTT. I know this is not easy when you’re a new teacher; our tendency at the beginning is to speak a lot. This could be due to nerves or a desire todo something to help things go well. However, with time, we speak less because weget more confident and because we learn techniques for getting the students to do allthe speaking. At the end of a lesson (or in the middle of it) think about who is doingmost of the speaking. If the answer is the teacher, think about ways to redress thebalance in future lessons. Some techniques you can use to get students speaking
more are: pair work, group work and eliciting. These are all explained below. You’ll findactivities throughout this book that are focused on getting students to speak.
If students are speaking, they are actively involved in what is going on in theclassroom. They are using and re-using language that they have studied. Of course,when the teacher is speaking, the students are getting valuable listening practice witha native speaker. You might occasionally decide to tell your students a story of whatyou did at the weekend, something that happened to you, etc. This type of activity willgive students exposure to natural pronunciation but it shouldn’t be overused.
7 Copyright © Lucy Pollard 2008 All Rights Reserved
This e-book may not be reproduced in part or in full without the express written permission of the author.

8/9/2019 A Guide to Teaching English - 72p
http://slidepdf.com/reader/full/a-guide-to-teaching-english-72p 9/72
1.4 Eliciting
This is another handy tool for a teacher’s toolkit. When you are presenting languageyou should try to get the explanations from your students (elicit) rather than giving allthe explanations yourself. Practise asking questions that will draw responses out of
students rather than always giving the explanations yourself. An advantage of usingthis method is that you find out how much students know before you start teaching. If you are aware of students’ knowledge, you’ll know how much time needs to be spenton the language point.
You can show students a picture of a sitting room and ask them what the variousobjects are to elicit vocabulary around the topic of furniture.
You can give two or three adjectives and their comparative and superlative forms andask students to provide the comparative and superlative forms of other adjectives:
Cold colder coldest
Beautiful more beautiful most beautiful
Students provide the comparative and superlative of: comfortable, small, etc.
1.5 Pair work and group work
These will be essential tools as a teacher.
Pair work involves students working together in pairs; so, in a group of 18 students,you’d have 9 pairs working independently. Group work involves students working
together in groups of 3, 4, 5 etc.
You can ask students to work in pairs or groups to complete a course book exercise, toproduce a piece of writing, to prepare what they will present to the class, to carry out aspeaking activity or to check their answers to homework. In fact the possibilities areendless.
There are many advantages to having your students working in groups or in pairs:
First of all, it provides variety. It gives a different focus by taking the attention awayfrom the teacher;
When working in pairs or groups, students go at the speed that suits them. Whenworking as a whole class, the pace is set by the teacher or by other students.Working at their own pace, students can spend more time on points that cause themdifficulties and less time on points that they find easy. Thus using time moreefficiently;
Students are more actively involved in their work: no snoozing at the back of theclassroom!;
Students can share their knowledge, explain things to each other; this is anadvantage over having students work individually;
8 Copyright © Lucy Pollard 2008 All Rights Reserved
This e-book may not be reproduced in part or in full without the express written permission of the author.
8/9/2019 A Guide to Teaching English - 72p
http://slidepdf.com/reader/full/a-guide-to-teaching-english-72p 10/72
It increases STT whilst reducing TTT;
Students learn to work autonomously; they learn to do things without the teacher.This will help them in their learning outside the classroom. Of course, the teacher ison hand if required;
Every student has the opportunity to contribute; this is almost impossible whenconducting teacher-led activities. Consider a 20-minute speaking activity. If youchoose to perform it as a whole-class activity with a group of 20 students, eachstudent will speak for an average of 1 minute. If your students do the same activityin pairs for 20 minutes, each student gets the chance to speak for 10 minutes. Muchmore efficient use of time!
1.6 How to organise group and pair work
At the beginning, it’s probably easiest if you just ask the students to work with whoever is sitting next to them. You can go around the class saying, “you two work together”,“you two work together” etc. Have students work with their neighbours for a few
lessons. This allows students to get used to pair work and group work; it might becompletely new to them. Always working with the same person will provide acomforting routine until they are used to this way of working. If they work with a familiar person, it will be easier for them.
You can start grouping students differently when they are used to that way of working.In fact, it’s advisable to change the make-up of groups to help avoid over-familiarity. Byworking with others, students can discover other ways of working and speaking.Dividing students in different ways helps you to separate the noisy students and also tosee which students work well together. It also contributes to a sense of cooperation inthe classroom.
If you have a group of students of mixed-level, you might ask all the strong students towork together which allows them to do a more challenging task whilst the students whoare not so strong do a less challenging task. Alternatively, you could put stronger students to work with weaker students, which allows strong students to explain difficultpoints to the weaker ones.
If the class are discussing a gender-related topic, it might be interesting to ask allfemales to work together and all males to work together. Alternatively, you could mixmales and females. The same might be applied to age-related topics, city and suburbdwellers, etc. Think about how you would like groups to be formed before going intoclass.
Always remember that if you are asking students to move to form a group (rather than just asking them to work with their closest neighbours), it will take a few minutes toorganise. You will need to factor this into your lesson plan.
1.7 What does the teacher do during pair and group work?
You can quite simply let students get on with the task. However, this doesn’t meanignoring them and letting the task disintegrate.
9 Copyright © Lucy Pollard 2008 All Rights Reserved
This e-book may not be reproduced in part or in full without the express written permission of the author.

8/9/2019 A Guide to Teaching English - 72p
http://slidepdf.com/reader/full/a-guide-to-teaching-english-72p 11/72
You allow them to work at their pace and in a way that suits them.
You offer help when necessary.
You answer students’ questions.
You can let them know that time is closing in; e.g. “just five minutes to completewhat you’re doing”.
You monitor what is going on. Whilst monitoring, the teacher notes downmistakes and examples of good work.
There are two ways of monitoring: walk around the class, hover over every pair or group for a minute or so to listen to what they are doing. This allows you to focusintensively on each group or pair. There is a disadvantage here, however: studentssometimes freeze up and look to the teacher for assistance, which defeats the purposeof group and pair work. Personally, I prefer a different approach in a classroom wherethe size permits. I arrange the groups or pairs in a horseshoe around the room and I sitin the middle of that horseshoe. I then concentrate my attention on each pair or groupin turn without moving. You’d be amazed at how much you can hear. This approachalso means that you don’t have your back to some of the students.
After pair work or group work, ask students what they discussed, check answers, askthem what decisions they came to, and so on (depending on the task you set). Duringthis stage you can also clear up any questions the students may have and reviewerrors and examples of good work.
1.8 Some disadvantages of group and pair work and what to do about it
Students might go off task; if they haven’t understood what is required of them theymight do something completely different. Explain carefully and check that they haveunderstood before forming groups.
Students might get noisy. Monitor carefully and say something immediately if it getstoo loud.
Students might use their own language. Make it clear from the start that you expectstudents to use English, monitor carefully. Say something as soon as you hear students using their own language. You might want to introduce a points system and
competition; students lose points for using their mother tongue, gain points for usingEnglish. At the end of the day or week, add up points and display them for the class tosee.
1.9 What to do in your first lesson?
You should think about whether the students know each other or not. If they don’tknow each other, spend some time allowing them to get to know their classmates.There are many ways to go about this and I suggest you put “getting to know youactivities” or “first day activities” into a search engine and choose one that suits you.
10 Copyright © Lucy Pollard 2008 All Rights Reserved
This e-book may not be reproduced in part or in full without the express written permission of the author.

8/9/2019 A Guide to Teaching English - 72p
http://slidepdf.com/reader/full/a-guide-to-teaching-english-72p 12/72
Check with a colleague whether the activity you find will go down well in the cultureyou’re working in.
If they already know each other, you could spend a short time allowing the students toget to know you. They could interview you. For this, they prepare questions together in
pairs and then ask you their questions. An activity where students get to know their teacher isn’t suitable to all cultures; find out about this from more experiencedcolleagues.
Try to avoid reading and writing in the first lesson. Listening to a recording is not agood choice either; listening can be stressful and you need to be sure it will be pitchedat the right level. I suggest some language work (either grammar or vocabulary) whichshould be kept quite light and a speaking activity to give you a chance to evaluate your students’ abilities. If they have been together recently as a group, find out what thestudents have been studying recently and work on something related to that or something that builds on it.
For the first lesson with an unknown group, choose a neutral topic that will interestmost people or at least a topic that everybody can contribute to, e.g. holidays, work,school, families.
1.10 Giving instructions
The success of various stages of your lesson will depend upon your ability to give clear instructions. If the students understand your instructions, they will carry out the task asyou had planned. If instructions are misunderstood, students will not do the right thing.If you realise in time, you can give your instructions again; but if you only notice this at
the end of the activity, some students will have done the wrong thing. In any case, inorder to use time efficiently, it is essential to give clear instructions and to check thatstudents have understood what is required of them before they start work.
When planning your lesson, think about what you will ask the students to do. Thenthink about how you will say that to them in a way they understand. When you firststart teaching, you might want to write your instructions on your lesson plan, or on aseparate piece of paper, to help you when you are in class. Giving instructions willsoon become second nature to you and students will get used to your way of workingand your explanations and things will go more smoothly.
Before giving your instructions, make sure everybody is listening. Explain carefully andprecisely. Once you’ve done this, check that the students have understood. Don’tassume anything. It’s not enough to say have you understood? Am I clear? Themajority of students will just say ‘yes’. A far better way is to ask students to explainback to you what they will be doing. You can then move onto a demonstration of whatis required. You could do an example together as a whole class or ask a stronger student to carry out the task with you.
Don’t give your instructions too far in advance of the task itself. Explain what is neededimmediately before students start the activity. If there’s a gap between the instructions
11 Copyright © Lucy Pollard 2008 All Rights Reserved
This e-book may not be reproduced in part or in full without the express written permission of the author.

8/9/2019 A Guide to Teaching English - 72p
http://slidepdf.com/reader/full/a-guide-to-teaching-english-72p 13/72
and the activity, students might forget what to do. For example, if your students will bemoving to work in groups, first ask them to move, and then give the instructions.
Finally, if you realise that the students are not on track, don’t hesitate; stop them andgo over your instructions again.
1.11 How to seat students
There are various ways of seating students and each serves a different purpose:
In a horseshoe or circle: this is good for whole class discussions and for creating acooperative environment. If the chairs have small moveable tables attached, thisconfiguration works well as students can move around easily to form pairs or groups.
Groups of 4 or 6 around a table, a number of such groups around the room: also goodfor discussion but lends itself more to group work than whole class discussion. If theclassroom is small, it’s not easy for the teacher to go around and monitor. Thisorganisation works well for small children.
In rows with desks separated: good for tests and exams.
Before going into class, think about what you’ll be doing and which seatingarrangement will suit you best.
1.12 Levels
Levels can be broken up into:
beginner,
false beginner (a false beginner has probably studied some English previously butwill need revision of the basics, including the alphabet and numbers),
elementary,
pre-intermediate,
intermediate,
upper-intermediate,
advanced.
Course books are generally published with one book at each of the levels. Somecourse book writers choose to focus on some of the levels and to omit others (e.g.elementary and false beginner are often omitted). Different schools give differentnames to the levels; a school might use numbers or letters rather than names.
You can generally expect an absolute beginner class to have students all at the samelevel. However, as you move up the levels, differences become apparent. In anadvanced class, you might have a student who has lived in the UK and who has a verygood level of colloquial, spoken English alongside a university student who mastersgrammar but not spoken English. In such cases, it will be necessary to provide work
12 Copyright © Lucy Pollard 2008 All Rights Reserved
This e-book may not be reproduced in part or in full without the express written permission of the author.

8/9/2019 A Guide to Teaching English - 72p
http://slidepdf.com/reader/full/a-guide-to-teaching-english-72p 14/72
that caters to all needs; for example, sometimes focusing on language work and atother times on spoken English. It will be more important to create balance and doactivities that cater to different needs at higher levels. Generally speaking, at the lower levels, students have very similar needs.
For a new teacher, the intermediate levels are the easiest to teach. If you have achoice, request those levels when you first start teaching.
1.13 Essential elements for students to learn
These are the aspects of language that students need to learn and as such are thethings you’ll be concentrating on in class. They can be broken down into aspects of language and language skills.
Aspects of language include grammar, vocabulary, pronunciation, functions and levelsof formality. Let’s take a look at each of these:
Grammar includes tenses, formation of questions and negatives, prepositions,pronouns. This is how many of us have studied languages at school. Before starting toteach you should consult a good grammar book. Books by Michael Swan are excellent;they’re very detailed and technical and you might find them difficult at the beginning. If you prefer an easier option, you can look at Advanced Grammar in Use by MartinHewings; this book is intended for high level students but teachers can also learn a lotfrom it.
Vocabulary: this is a basic building block of language learning. Students need to knowwords, their meanings, how they are spelt and how they are pronounced. When
teaching vocabulary, make sure you explain the meaning as well as the spelling andpronunciation.
Pronunciation: students need to know how to pronounce individual sounds as well ascombinations of sounds. As a teacher, you’ll focus on the sounds students find difficult.This basically means the sounds that do not exist in the students’ mother tongue. For example, the “th” sound is difficult for many learners because their language doesn’thave that sound.
Functions are set phrases that we use in specific situations. Examples of functions arethe use of “how do you do” when you first meet somebody. “I’ll have the fish” when
ordering in a restaurant. Functions cannot be translated word for word into another language and they usually only carry meaning in specific situations.
Levels of formality: students need to develop an awareness of and an ability toproduce language of varying degrees of formality. Certain situations and contexts callfor the use of formal language; e.g. a business letter, a discussion with one’s universityprofessor. In other situations, more informal language can be used; e.g. an event for students; an e-mail exchange with a friend. As teachers, we need to raise students’awareness of the varying degrees of formality and help them distinguish between themas well as use them.
13 Copyright © Lucy Pollard 2008 All Rights Reserved
This e-book may not be reproduced in part or in full without the express written permission of the author.
8/9/2019 A Guide to Teaching English - 72p
http://slidepdf.com/reader/full/a-guide-to-teaching-english-72p 15/72
Apart from language itself, there are four language skills that students need to learn:listening, reading, writing and speaking.
It may be that it is more important for your students to learn one particular skill. For example, an intellectual property attorney might want to focus on reading documents
and speaking. Personal assistants might say that speaking and listening are importantskills for them to learn. The amount of time you spend on each skill can vary but theyshould all be covered to some extent.
Skills can be broken down into written (reading and writing) and oral (speaking andlistening). Another, more common, way of classifying the skills is as productive skillsand receptive skills. The receptive skills are reading and listening: the students receiveand understand the input; the productive skills are speaking and writing because theyinvolve the students in producing language.
However, skills are not entirely separate. We rarely use one skill in isolation. When we
speak, we also listen to what others say to us; we read an e-mail and write a reply, wemight at the same time ask the person sitting next to us how to spell a certain word –this action will involve listening and speaking. Exceptions might be a day at homereading a favourite novel or watching a film. However, we often talk about what wehave read or watched, at a later date. A teacher will attempt to integrate the skills inorder to mimic the real world.
You will find that students do not have a uniform level across all the skills and all theelements of language. Students are inevitably stronger in some areas than in others.Some students have a musical ear and can pronounce words and phrases well. Othershave a good grasp of grammar or vocabulary. Students are usually stronger in
receptive skills than in productive skills meaning that they can understand more thanthey can produce. This is entirely understandable if you compare it to our competencein our own language; for example we could watch a play by Shakespeare andunderstand what is going on without being able to produce that type of language. Wecan also read and understand (most of!) a legal document but we would have difficultywriting one ourselves. It is our role to cater to the varying needs of students, wherever possible.
1.14 Free and controlled language practice
Language can generally be practised in two ways: controlled or free practice.
In controlled practice, the teacher will choose a language structure that they want their students to focus on. For example, you might want your students to use the presentperfect (have + past participle) to talk about experiences. You might organise anactivity whereby students ask and answer questions such as:
Student A: Have you ever been to Mexico?
Student B: Yes, I have.
14 Copyright © Lucy Pollard 2008 All Rights Reserved
This e-book may not be reproduced in part or in full without the express written permission of the author.

8/9/2019 A Guide to Teaching English - 72p
http://slidepdf.com/reader/full/a-guide-to-teaching-english-72p 16/72
Student A: Have you ever eaten snails?
Student B: Yes, I have.
Student A: Have you ever climbed a mountain?
Student B: No, I haven’t.
This type of activity involves students in a discussion but the language is verycontrolled and is pre-determined by the teacher. Such activities are useful at lower levels or where the objective is to get students producing language automaticallywithout having to think about it too much.
Whilst controlled language practice will help with automatic reactions, it does notreplicate real-world conversations. The example above is very false, it appears to bean interrogation and there is no sharing of information. In real-life, student A mightreply: “so what did you think of Mexico? I might be going there on holiday myself”.Teachers should try to incorporate activities that imitate real-life conversations in theclassroom as much as possible in order to prepare students for conversations in thereal world.
In free language practice, students use all and any language they know to expressthemselves. An example of free language practice is a classroom debate on smokingin public. Students give their opinions, others agree or disagree, and counter arguments are put forward. There are no limits on the language that can be used,except for staying polite! There is a greater emphasis on this type of activity at higher levels. For more examples of free language practice, see Chapter 4, Speaking.
Alternatively, the teacher might create situations where certain language is likely to beused. For example, when talking about holiday plans, future tenses will probably beused; in an interview simulation, the present perfect (I’ve never worked in a shopbefore) and simple past (I worked for the council from 2000 to 2004) will probably beused. We can predict what might be used but the actual language output is veryunpredictable and can contain almost any language the students know. This issometimes known as freer practice. This type of task is useful to practise a languagestructure that has been presented recently where it is unnecessary to engage the
students in controlled practice.
1.15 Activities that provide controlled and freer language practice
The Communication Games series by Jill Hadfield provides controlled and freer language practice in fun situations.
Find somebody who... is a popular activity to provide controlled and freer practice of language. Students are given a sheet with the following:
15 Copyright © Lucy Pollard 2008 All Rights Reserved
This e-book may not be reproduced in part or in full without the express written permission of the author.
8/9/2019 A Guide to Teaching English - 72p
http://slidepdf.com/reader/full/a-guide-to-teaching-english-72p 17/72
Find somebody who takes the bus to work
Find somebody who always eats a big breakfast
Find somebody who likes snakes
Find somebody who plays tennis
Find somebody who lives in the suburbs
Find somebody who reads an English newspaper
Students take their sheets, stand up and move around the classroom askingclassmates “do you take the bus to work?” “Do you always eat a big breakfast?” etc.When they find a classmate who replies “yes”, they note the name of that person nextto the question. They continue until they have the name of a student for each question.The teacher stops the activity at an appropriate point and asks students what theyhave found out about their classmates. By repeating the questions, students areengaging in controlled practice of the question form in a communicative setting.Depending on how students treat the answers, they can also get freer languagepractice; i.e. if they choose to ask further questions of their classmates and whether the teacher encourages this approach.
1.16 Accuracy and fluency
Accuracy and fluency usually refer to oral language work but can refer to written worktoo. I will describe the differences here in the context of activities to practise speaking.
Accuracy refers to correct use of language; this is often used just after presentation of new language. The objective is to produce correct language rather than tocommunicate ideas. When the focus is accuracy, the teacher usually deals with error correction immediately; we will look at this in further detail in Chapter 9. Typical tasksinclude: repetition, drills, controlled conversations, (these terms are explained in thischapter and in Chapter 2). These tasks are useful when introducing and practising newlanguage.
If the focus is fluency, the teacher allows students to express themselves freely withoutinterruption. The aim is to help students speak fluently and with ease. The teacher does not correct immediately, the idea being that too much correction interferes with
the flow of conversation. In such situations, the teacher notes down errors andcomments on them after the activity. The role of the teacher in this type of activity is toease difficulties in communication and prompt where necessary.
Students need practice in both accuracy and fluency if they are to speak proficiently. Atlow levels, there will be more focus on accuracy, simply because students don’t knowenough language for lengthy fluency work. At higher levels, the focus will be mainly,but not entirely, on fluency.
16 Copyright © Lucy Pollard 2008 All Rights Reserved
This e-book may not be reproduced in part or in full without the express written permission of the author.
8/9/2019 A Guide to Teaching English - 72p
http://slidepdf.com/reader/full/a-guide-to-teaching-english-72p 18/72
1.17 Using a course book
You should look at any course book you are about to use with a critical eye. Checkover each unit to see whether it suits your students’ goals. If so, you can go ahead withit. If not, you might want to choose a different book or stick with it and find other
material that covers the areas that are lacking. This can apply to whole units or parts of them. There might be parts of the book that are too difficult or too easy for your students; you might consider leaving those bits out or supplementing them. You mightalso want to do things in a different order to how it appears in the course book. Thekey is to think about your students. Remember you’re teaching students not teaching acourse book. It’s important to look at these aspects before you start using the book. It’smore difficult to change a book when you’ve started using it.
1.18 Choosing a course book
If you are asked to choose a course book, here are some guidelines to help you
through. It is a list of questions; I suggest you go through the course book, answeringeach of the questions.
Topics: do you think the topics will interest your students? Will students havesomething to say about the subjects?
Aims of students: will the book cater to your students’ needs? First think aboutyour students’ reasons for learning; their aims might be to learn general English.On the other hand, you might have a class who are studying because they have aspecific purpose in mind, e.g. participating in meetings in English. If so, checkwhether the book will provide enough practice in such work.
Completeness: does the book provide enough explanation and practice of language and skills? Is there enough practice of vocabulary, grammar, andpronunciation? Is there enough skills work? Or will you need to supplement?Remember, supplementing will take time.
Skills: how does the book deal with the four skills? Are they all dealt withadequately? Does this correspond to the needs of your learners?
Approach: think about the approach to the activities and language – will it suityour students and your own teaching style?
Syllabus: is the book pitched at the right level (e.g. not all intermediate books areat the same level); check this carefully by looking at how language work ispresented. Does the book follow on from the students’ previous course book?
Additional materials: what extras accompany the course book? Is there ateacher’s book, a workbook, a cassette or CD? What are these like? Can you gethold of them easily? If not, can the book be used without them?
Availability: how easily can you get hold of multiple copies of a book? Even if it’sthe best course book on earth, it won’t help you if it can’t be delivered on time.
17 Copyright © Lucy Pollard 2008 All Rights Reserved
This e-book may not be reproduced in part or in full without the express written permission of the author.
8/9/2019 A Guide to Teaching English - 72p
http://slidepdf.com/reader/full/a-guide-to-teaching-english-72p 19/72
Flickability: this refers to the attractiveness of the book; flick through the book andnote whether it looks appealing or dry and boring. Obviously, not the mostimportant of the criteria!
Finally, you have to like the book.
1.19 Roles of the teacher
You will find yourself in various roles in the classroom. The most common are:
Giving instructions: obviously in the classroom, the teacher will tell students whatactivities they are going to do and how they are going to do them.
Facilitating: this involves creating situations where students can use English. You willdo this through your choice of activities.
Setting up activities: similar to giving instructions. Giving instructions entails tellingstudents what they are going to do; setting up the activity involves organising studentsinto work groups, handing out worksheets, preparing a cassette or CD for a listeningactivity.
Correcting: this is vital if your students are going to learn. If your students don’t knowthey’ve made a mistake, they’ll continue making the same mistake.
Eliciting: this involves getting explanations from your students rather than alwaysproviding them yourself.
Motivating: a teacher needs to keep his/her students motivated and engaged in the
work being done. You will do this through your own positive approach to activities andstudents and careful choice of material, bearing in mind what interests your students.
Explaining language: look at where this comes, not top of the list. Whilst languageexplanations are important, it is not your only job in the classroom; use your studentsfor language explanations and elicit rules from them, where possible.
The roles described above differ from traditional teaching styles where the teacher explained everything and led all activities. Students who are used to traditionalteaching might feel uncomfortable when faced with a teacher taking on different roles.You should be aware of this and be sensitive to their opinions. However, you should
continue teaching in a way that has been proved effective and maybe explain tostudents why you are teaching in that way. A little knowledge will help reduce students’resistance.
18 Copyright © Lucy Pollard 2008 All Rights Reserved
This e-book may not be reproduced in part or in full without the express written permission of the author.

8/9/2019 A Guide to Teaching English - 72p
http://slidepdf.com/reader/full/a-guide-to-teaching-english-72p 20/72
CHAPTER 2: APPROACHES TO THE TEACHING OF ENGLISH
In language teaching theory, a distinction is often made between teaching approaches
and teaching methodologies. For ease of understanding, I will refer to all the followingas methods. I have described the methods in chronological order, starting withtraditional methods and moving towards more contemporary methods. Please don’tassume that the first ones I describe are the most prominent or ones I recommend.
2.1 Grammar translation method
This method was prevalent in schools throughout the beginning of the 20th century; itsuse continued long afterwards and many cultures still expect language to be taughtusing this method.
The method consists of studying written texts, translating them into the students’ ownlanguage and carrying out a study of grammar. There is little attention given to the useof the spoken language. I learnt French through this method and whilst I was able toread and translate complicated texts, I was unable to buy a loaf of bread when I wenton holiday to France.
It has been replaced by methods that focus on spoken language and I advise you tofamiliarise yourself with these newer methods and to use them. However, if you’regoing to teach in a traditional culture that values the grammar-translation method, youcould do the occasional activity of that type just out of respect for students’preferences.
2.2 Audio-lingual method
This method grew out of behaviourist psychology. It involves providing a stimulus towhich students respond; if the response is correct, the students are praised in order toreinforce the correct use of language and ultimately to reinforce learning. Language ispresented in a very controlled way; i.e. one language point at a time is studied andworked on. Grammar explanations are kept to a minimum and progress is madethrough repetition.
In a typical lesson, the teacher might show pictures of people in various situations: for example 3 people with their possessions; one woman has got a big house, a beautifulcar, etc; one man has a small house and an old car and one man has nothing.
The assumption is that the students know the words: house, car, some and any. Theteacher shows a picture and says “she’s got a big house”, the teacher repeats thephrase and invites students to repeat. Students are praised if they get it correct. If theyget it wrong, the teacher repeats and asks students to say it again. The teacher thenmoves onto the next picture and says, “ he’s got an old car” this is repeated by theteacher and then students are asked to repeat. The teacher continues with the thirdperson and the phrase “he hasn’t got any money”. The teacher continues until all formshave been presented and practised. The teacher might then show pictures randomly
19 Copyright © Lucy Pollard 2008 All Rights Reserved
This e-book may not be reproduced in part or in full without the express written permission of the author.

8/9/2019 A Guide to Teaching English - 72p
http://slidepdf.com/reader/full/a-guide-to-teaching-english-72p 21/72
(known as a prompt) and invite students to say what possessions the characters havegot.
Oral prompts can also be given and students are invited to make sentences with theprompts. For example:
Teacher (T) says: she / big house
Students (Ss) say: she’s got a big house
T: he / old car
Ss: he’s got an old car
T: she / old car
Ss: she hasn’t got an old car
Such exercises are known as drills and are used to encourage automatic use of language; i.e. students respond automatically without stopping to think about whatthey’re saying.
When students have mastered the structure (in the same lesson or in the followinglesson) the teacher might present the question form by showing the picture of thewoman and saying “big house; has she got a big house?”. The lesson will continue inthe same way as above. This description of a lesson has been adapted from thecourse book “Streamlines”.
Lessons in this approach are very predictable but at lower levels they provide a familiar environment where students at least get the chance to produce the phrase orally andcorrectly. This method has been criticised for not being communicative; i.e. there is noreal communication; there is no need to say ‘she’s got a big house; everybody can seeshe has!
2.3 Communicative approach
This approach developed out of a need to have students communicating for real. It isbased on the theory that children acquire language rules by using language rather thanthrough the study of grammar. It involves creating situations where the students have a
genuine need to say something, just as children do. I’ll illustrate this by describing twoapproaches to the same activity.
Let’s say you’ve set up an activity where your students are planning a dinner party.They’ve decided what food to cook and serve and have the recipes as well asingredients and quantities required. They’re about to go shopping and are writing uptheir shopping lists. You could give each student the list of ingredients and quantitiesand tell them to perform the following dialogue:
20 Copyright © Lucy Pollard 2008 All Rights Reserved
This e-book may not be reproduced in part or in full without the express written permission of the author.

8/9/2019 A Guide to Teaching English - 72p
http://slidepdf.com/reader/full/a-guide-to-teaching-english-72p 22/72
Ingredients and quantities:
1kg lamb
1 kg potatoes
500g tin of tomatoes
50g butter
500g apricots
1 pot of yoghurt
Conversation:
How much lamb do we need to buy?
1 kilo will be enough.
Do we need any butter?
Yes, 50g will be enough.
This will provide speaking practice but will not create a real need for communication;students already know what they need to buy from the shops because they all have
the list.
If you prepare 2 lists – each contains all the ingredients needed but on one list thequantities for some items are noted and the other list contains the quantities neededfor the remaining items. Thus:
List A List B
1kg lamb lamb
1 kg potatoes potatoes
500g tin of tomatoes tomatoes
Butter 50g butter
Apricots 500g apricots
Yoghurt 1 pot of yoghurt
You can now give list A to one student and list B to another student and instruct themto carry out the dialogue below in pairs:
21 Copyright © Lucy Pollard 2008 All Rights Reserved
This e-book may not be reproduced in part or in full without the express written permission of the author.

8/9/2019 A Guide to Teaching English - 72p
http://slidepdf.com/reader/full/a-guide-to-teaching-english-72p 23/72
How much lamb do we need to buy?
1 kilo will be enough.
Do we need any butter?
Yes, 50g will be enough.
There will be a real need for communication because the student with list A doesn’tknow how much butter is required. Similarly, the student with list B doesn’t know howmuch lamb is needed. Such activities are called information gaps because there is agap between the various bits of information the students have.
The communicative approach often refers to speaking activities, however the other skills can also be practised in a communicative way. The essential element is toensure that there is a reason for carrying out the task other than just practisinglanguage.
2.4 PPP
PPP stands for presentation, practice, and production. It is a fairly traditional way tostructure a lesson that was popular throughout the 1980’s. It proved to be beneficial atlower levels and is still widely used today.
Presentation involves, as the name suggests, presenting a language point. This isusually done by the teacher. Presentation might be similar to the audio-lingualapproach through the use of pictures and focused learning. It can also be achievedthrough explanation and demonstration (for definitions, see Chapter 3). Practice refers
to controlled practice (see Chapter 1); it involves students using the target language ina controlled way. This might involve drills, controlled written and speaking activities,and repetition. Production refers to freer practice; students use the target language insentences of their own. They might also combine it with other language they know. It isnot the same as free speaking practice. For example, after studying “have you ever”question forms to talk about experiences (e.g. have you ever been to Mexico? haveyou ever eaten snails?) students work in pairs to ask each other about their ownexperiences. The structure “have you ever” will be the same throughout, but thevocabulary will vary. This is known as freer practice.
2.5 Task-based learning
In a task-based lesson, the teacher sets a task for students to do that involves the useof language not yet studied in class or language studied previously that the teacher wishes to revise. The language point chosen is known as target language. The taskmight be an activity from the course book that was intended as practice of a languagepoint or an activity from a supplementary source. The teacher sets up the task andobserves students as they get on with it. The teacher pays particular attention to thestudents’ performance with the target language. The teacher should note down errorsbut not correct them during the activity. For example in an exercise to check students’knowledge of prepositions of time, the teacher might set up an activity which involves
22 Copyright © Lucy Pollard 2008 All Rights Reserved
This e-book may not be reproduced in part or in full without the express written permission of the author.

8/9/2019 A Guide to Teaching English - 72p
http://slidepdf.com/reader/full/a-guide-to-teaching-english-72p 24/72
students deciding when and where to meet. While students are speaking, the teacher might note the use of prepositions (both good and poor use): on Monday, in theafternoon, at 5pm, etc.
Depending on how well (or how badly) students performed, the teacher will decide
whether to conduct thorough presentation and practice of the language or whether torevise and practise it briefly. The decision is made according to performance on thetask. This can then be followed up with a repetition of the original activity or one that issimilar. You and your students can compare performance on the original and final task.
I am outlining the structure of a task-based lesson but I do not advise its use if you arevery new to teaching. It requires thorough knowledge of the language point and anability to handle unexpected questions about the language. You will need to knowabout it because some course books (e.g. Cutting Edge) follow this format. You canexperiment with this approach when you are more experienced and with a languageitem you know well.
2.6 ESA
ESA stands for engage – study – activate. Let’s take a look at each individualcomponent.
Engage involves getting the students’ attention or interest, getting them involved. Youcould achieve this through the use of a personal story told by the teacher, a picturethat stimulates discussion or anything else that awakens students’ interest. The idea isthat if students are involved or engaged, they are more open to the learning process.
Study as the name suggests involves focus on a language point. This could begrammar, vocabulary, pronunciation or how a written text is organised. Thepossibilities are endless. It can involve the teacher explaining or students working outthe rules for themselves using examples as a basis.
Activating involves having students use the language, preferably in a realistic contextthat is as close to real life as possible. Try to incorporate activities that have studentsusing any language they know and not just focused on one structure (controlledlanguage use).
You can use all three ESA stages in one lesson but not necessarily in that order. You
could engage the students, then activate language through a speaking activity andthen study language difficulties arising from the activity. You might also have a lessondevoted wholly to the skill of speaking; in which case students would be engaged andlanguage activated. Language study could take place in the previous lesson.
I particularly like this method because it highlights the necessity of engaging studentsin what they are doing.
23 Copyright © Lucy Pollard 2008 All Rights Reserved
This e-book may not be reproduced in part or in full without the express written permission of the author.

8/9/2019 A Guide to Teaching English - 72p
http://slidepdf.com/reader/full/a-guide-to-teaching-english-72p 25/72
2.7 Humanistic
The involvement of the whole person in the learning experience is central to thehumanistic approach. A supportive atmosphere is encouraged in the classroom wherestudents are listened to, their comments accepted without judgement and they are
encouraged to share their feelings and experiences. Activities are used that involvestudents talking about their feelings and experiences. Students may be involved infixing the aims for the course or for one lesson. A teacher may enter the classroomwith no plan and just ask students what they want to do that day and the teacher goeswith the flow (maybe not an approach to be adopted by a very new teacher).
Speaking as a Psychology graduate, I think care is needed in this type of approach;some people or some cultures might be uncomfortable unveiling their feelings in frontof people they might not know well. However, I fully agree with the advantages of creating a supportive, non-judgemental learning environment.
2.8 Lexical approach
The underlying principle of this method is that grammar and vocabulary cannot bestrictly divided as is often the case in traditional teaching methods. A further notion isthat language is made up of lexical items using grammar to support them rather thanbeing made up of grammatical structures incorporating lexis. Lexical items are wordsor chunks of words, which have their own meaning. For example, the followingcombinations of words have different meanings to the individual elements that makethem up: by the way, look into, video recorder. Longer structures are also consideredto be lexical items, e.g. I just wanted to say that….
The theory is that we learn a language by learning lexical items and not by learninggrammar. Accordingly, the main focus of the work is lexical items rather than syntax or grammatical rules. Critics have said that it difficult to know in which order lexical itemsshould be taught. Proponents of this method counter this by saying that the syllabus isorganised according to collocation. Collocation refers to words that are frequently usedtogether, e.g. make a phone call, make an appointment, heavy rain, by accident.
A further principle of this method is to teach through: observation, hypothesis andexperimentation. The observe phase involves being exposed to language, for examplea text to be read. Students are encouraged to deduce the meaning of unknownlanguage (this will be covered in Chapter 3), this phase is known as hypothesis. The
experiment phase involves using the language. 2.9 A final word on teaching methods
Of course there are other approaches to teaching, however, the above are the mainones you should be aware of. I suggest you look at any course book you’re about touse and see whether it favours one of the approaches above. You will find that after some time teaching, you will have a preference for one (or more) approach over theothers. You might also find that different approaches work well with different studentsand with different levels. Don’t worry too much about methodology at the beginning; just do what feels right to you and what you see produces results in your classes.
24 Copyright © Lucy Pollard 2008 All Rights Reserved
This e-book may not be reproduced in part or in full without the express written permission of the author.
8/9/2019 A Guide to Teaching English - 72p
http://slidepdf.com/reader/full/a-guide-to-teaching-english-72p 26/72
CHAPTER 3: PRESENTING AND PRACTISING LANGUAGE
As stated in Chapter 1, students need to learn various aspects of language: grammar,
vocabulary, pronunciation and functions. In order to learn this language, teachers needto present the new language to students and create situations where the language canbe practised. Revision and further practice are also essential in subsequent lessons.The amount of revision carried out in later lessons will depend on the students’ leveland on their mastery of the language point.
Here we will look at how to present grammar, vocabulary and functions, how to reviselanguage and how to create situations to practise both new and known language.Pronunciation will be the topic of a separate chapter.
From a language learner’s point of view, presentation of language is probably the most
important aspect of studying English. Students expect lessons to contain some degreeof language study, either long and intensive or short and sharp, depending onwhichever is appropriate – it’s most often what they note in their books and take awaywith them.
The stages are:
1. find out how much students already know about the language point;
2. presentation;
3. check students have understood the presentation;
4. practice (controlled and/or free).
In following lessons:
1. If it was the first time the students encountered the language item, you can doanother brief presentation and then do some more activities to practise thelanguage.
2. If students are familiar with the language item, you can go immediately to morepractice activities.
3.1 Stage 1: Pre-checking knowledge
Before presenting any language, it is useful to find out how much your students knowabout the language point in question. You can get an idea of what they have studiedby looking through their course book and previous work. However, the fact that thestudents have studied a particular language point does not mean they know it. In class,you can check to what extent they know the language by eliciting phrases that includethe language point. This can be done relatively quickly; e.g. you can show pictures of people in action to your students and ask them what the characters are doing to check
25 Copyright © Lucy Pollard 2008 All Rights Reserved
This e-book may not be reproduced in part or in full without the express written permission of the author.
8/9/2019 A Guide to Teaching English - 72p
http://slidepdf.com/reader/full/a-guide-to-teaching-english-72p 27/72
knowledge of present continuous and / or verbs of action (he’s running, she’s dancing,they’re playing tennis).
You can also check the extent of their knowledge by asking them to carry out aspeaking activity that requires use of the language point e.g. speaking about last year’s
holidays to ascertain students’ knowledge of the simple past and other past tenses.This will take longer but you will have more of an idea of what students know.
You can take an exercise from your course book or workbook for this pre-checkingstage. Course books contain many exercises that are intended to be used as practiceafter the presentation stage. You can take one of these exercises and use it beforepresentation to find out students’ level.
You can also design your own exercises. For example, if you want to find out whether beginner or elementary level students are familiar with “wh” question words (who,what, when, where, why) you could prepare a list of questions with “wh” words and the
corresponding answers. Mix up the questions and answers and ask students to re-organise them. Below is an example:
What did she do? At 3pm.
What time did she do it? Because she thinks Meryl Streep is a brilliant actress.
Who did she do it with? She went to see “The Devil Wears Prada”.
When did she do it? At the cinema.
Where did she do it? Her best friend.
Why did she do it? On Saturday.
Comment: each question is similar to avoid giving away too many clues and to keepthe focus on the “wh” word.
You can prepare similar exercises where students match items to practise other language points: e.g. words and their definitions to check knowledge of vocabulary.You can also use matching exercises to teach first and second conditionals. The firstconditional involves the use of simple present and will, e.g. if it rains tomorrow, I’ll stayat home. The second conditional involves the use of simple past and would, e.g. if I
won a million dollars, I’d buy a big house.
A further example is: if you are about to teach your students how to form questionsthrough word order inversion; you can first of all check to what extent they can formquestions already.
A quick and simple way to check students’ knowledge of word order is to write outsome simple sentences and then to jumble up the words. I suggest you useapproximately ten sentences varying in difficulty. Give students the jumbled sentencesand ask them to put words in the right order.
26 Copyright © Lucy Pollard 2008 All Rights Reserved
This e-book may not be reproduced in part or in full without the express written permission of the author.
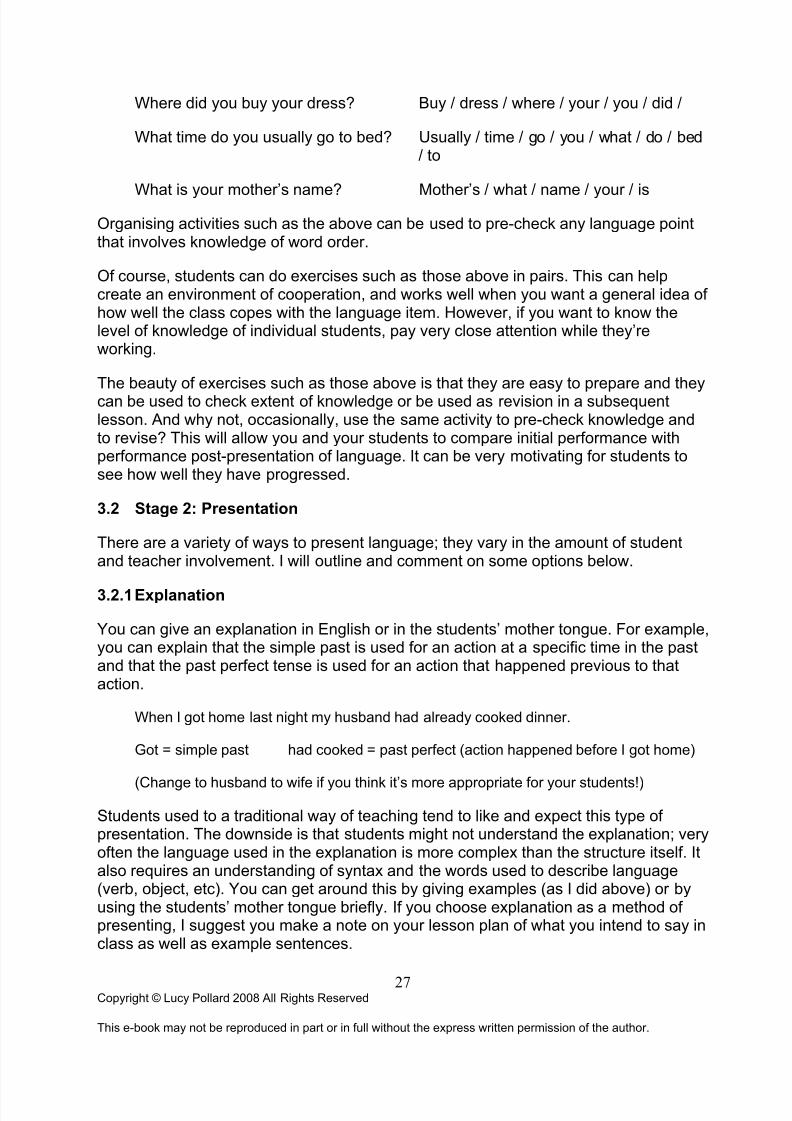
8/9/2019 A Guide to Teaching English - 72p
http://slidepdf.com/reader/full/a-guide-to-teaching-english-72p 28/72
Where did you buy your dress? Buy / dress / where / your / you / did /
What time do you usually go to bed? Usually / time / go / you / what / do / bed/ to
What is your mother’s name? Mother’s / what / name / your / is
Organising activities such as the above can be used to pre-check any language pointthat involves knowledge of word order.
Of course, students can do exercises such as those above in pairs. This can helpcreate an environment of cooperation, and works well when you want a general idea of how well the class copes with the language item. However, if you want to know thelevel of knowledge of individual students, pay very close attention while they’reworking.
The beauty of exercises such as those above is that they are easy to prepare and theycan be used to check extent of knowledge or be used as revision in a subsequentlesson. And why not, occasionally, use the same activity to pre-check knowledge andto revise? This will allow you and your students to compare initial performance withperformance post-presentation of language. It can be very motivating for students tosee how well they have progressed.
3.2 Stage 2: Presentation
There are a variety of ways to present language; they vary in the amount of studentand teacher involvement. I will outline and comment on some options below.
3.2.1 Explanation
You can give an explanation in English or in the students’ mother tongue. For example,you can explain that the simple past is used for an action at a specific time in the pastand that the past perfect tense is used for an action that happened previous to thataction.
When I got home last night my husband had already cooked dinner.
Got = simple past had cooked = past perfect (action happened before I got home)
(Change to husband to wife if you think it’s more appropriate for your students!)
Students used to a traditional way of teaching tend to like and expect this type of presentation. The downside is that students might not understand the explanation; veryoften the language used in the explanation is more complex than the structure itself. Italso requires an understanding of syntax and the words used to describe language(verb, object, etc). You can get around this by giving examples (as I did above) or byusing the students’ mother tongue briefly. If you choose explanation as a method of presenting, I suggest you make a note on your lesson plan of what you intend to say inclass as well as example sentences.
27 Copyright © Lucy Pollard 2008 All Rights Reserved
This e-book may not be reproduced in part or in full without the express written permission of the author.

8/9/2019 A Guide to Teaching English - 72p
http://slidepdf.com/reader/full/a-guide-to-teaching-english-72p 29/72
3.2.2 Demonstration
You can demonstrate the language you wish to teach. For example, if you getstudents’ attention and drop your pen on the floor, you can say, “I’ve just dropped mypen”. You can also use demonstration to teach the present continuous for actions
happening at the moment; e.g. I’m writing on the board; Susan is listening to me. Youcan use mime to demonstrate action verbs: climbing, running, walking, etc. You canalso use objects or the students themselves to teach comparatives and superlatives:John is taller than Susan. Stephen is the tallest person in the class.
Demonstration works well for some language points but not all; it’s best for thingshappening around the present moment and action verbs. One disadvantage is thatstudents may not understand the demonstration; it is advisable to follow up ademonstration with an explanation.
3.2.3 Illustration
This method is excellent for teaching vocabulary, especially at lower levels. You canshow pictures of objects you want to teach; you can draw items on the board or cutpictures out of magazines. You can even use the real item (known as realia); it is verymemorable for students to see spoons, forks, plates, bracelets, watches, buttons, etcin class. The use of pictures is also memorable, especially for visual learners. It is alsoeasy and time efficient to go back to the language item: you just hold up the item andinvite students to tell you what it is, no need for an explanation or complicatedelicitation.
You can also use this method to teach structures. For example, if you want to teach
the present perfect continuous, e.g. He’s been doing his homework since 7pm. Youcan show, or draw, a picture of John at 7pm settling down to his homework. You canthen show a picture of him at 9pm, still doing his homework. You can use the situationto teach or elicit “he’s been doing his homework since 7pm”.
One drawback of illustration is that it is time-consuming for the teacher to gather together items before the lesson and they can be heavy to carry in to class. Picturescan help you get around this; I suggest your start building up a picture bank as soon aspossible.
3.2.4 Discovery / deducing meanings
This approach guides students to learn for themselves rather than the teacher teachingthe language point directly. The discovery method involves students studying languageitems in a text or in isolated sentences. If isolated sentences are used, it’s preferable toprovide a context. Students deduce grammatical rules, use of tenses, use of theinfinitive contrasted with use of verb with –ing. or meanings of words from what theyread. (The possibilities are endless). Students then check with the teacher whether their deductions are correct.
For example, you can give your students the following sentences and ask them to tellyou the names of the tenses used (present perfect and simple past) and to tell you why
28 Copyright © Lucy Pollard 2008 All Rights Reserved
This e-book may not be reproduced in part or in full without the express written permission of the author.
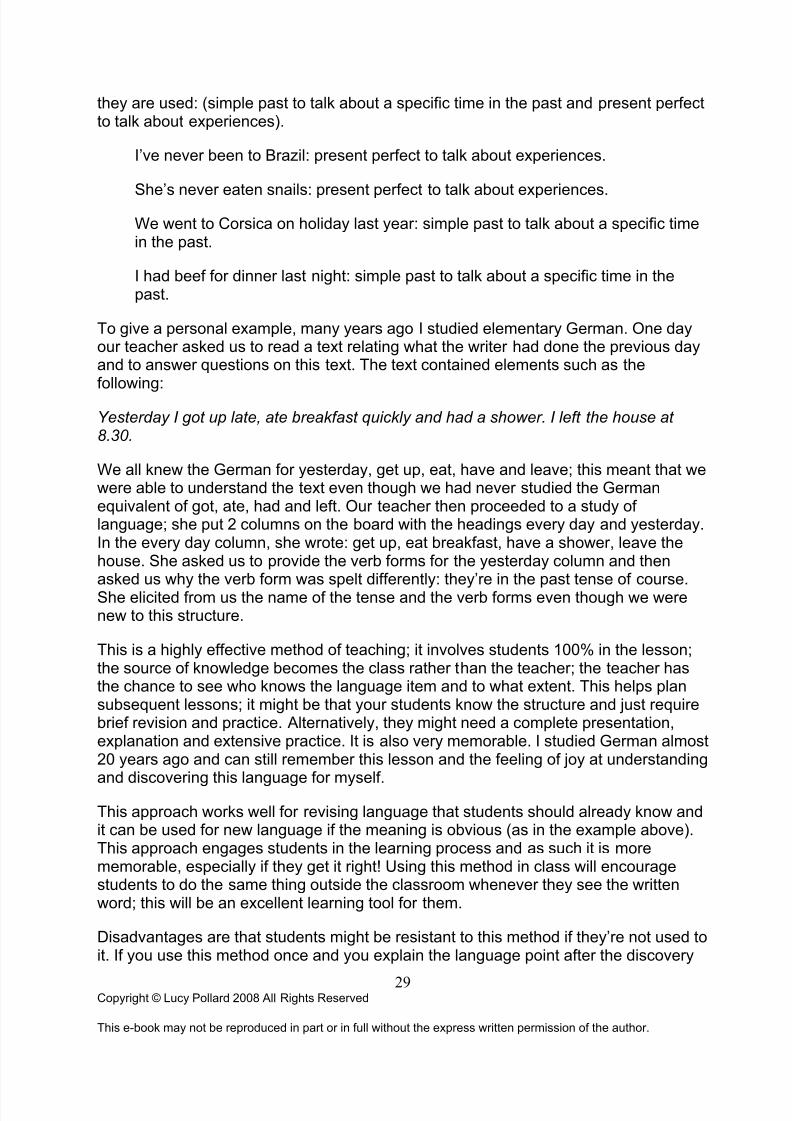
8/9/2019 A Guide to Teaching English - 72p
http://slidepdf.com/reader/full/a-guide-to-teaching-english-72p 30/72
they are used: (simple past to talk about a specific time in the past and present perfectto talk about experiences).
I’ve never been to Brazil: present perfect to talk about experiences.
She’s never eaten snails: present perfect to talk about experiences.
We went to Corsica on holiday last year: simple past to talk about a specific timein the past.
I had beef for dinner last night: simple past to talk about a specific time in thepast.
To give a personal example, many years ago I studied elementary German. One dayour teacher asked us to read a text relating what the writer had done the previous dayand to answer questions on this text. The text contained elements such as thefollowing:
Yesterday I got up late, ate breakfast quickly and had a shower. I left the house at 8.30.
We all knew the German for yesterday, get up, eat, have and leave; this meant that wewere able to understand the text even though we had never studied the Germanequivalent of got, ate, had and left. Our teacher then proceeded to a study of language; she put 2 columns on the board with the headings every day and yesterday.In the every day column, she wrote: get up, eat breakfast, have a shower, leave thehouse. She asked us to provide the verb forms for the yesterday column and thenasked us why the verb form was spelt differently: they’re in the past tense of course.She elicited from us the name of the tense and the verb forms even though we werenew to this structure.
This is a highly effective method of teaching; it involves students 100% in the lesson;the source of knowledge becomes the class rather than the teacher; the teacher hasthe chance to see who knows the language item and to what extent. This helps plansubsequent lessons; it might be that your students know the structure and just requirebrief revision and practice. Alternatively, they might need a complete presentation,explanation and extensive practice. It is also very memorable. I studied German almost20 years ago and can still remember this lesson and the feeling of joy at understanding
and discovering this language for myself.
This approach works well for revising language that students should already know andit can be used for new language if the meaning is obvious (as in the example above).This approach engages students in the learning process and as such it is morememorable, especially if they get it right! Using this method in class will encouragestudents to do the same thing outside the classroom whenever they see the writtenword; this will be an excellent learning tool for them.
Disadvantages are that students might be resistant to this method if they’re not used toit. If you use this method once and you explain the language point after the discovery
29 Copyright © Lucy Pollard 2008 All Rights Reserved
This e-book may not be reproduced in part or in full without the express written permission of the author.
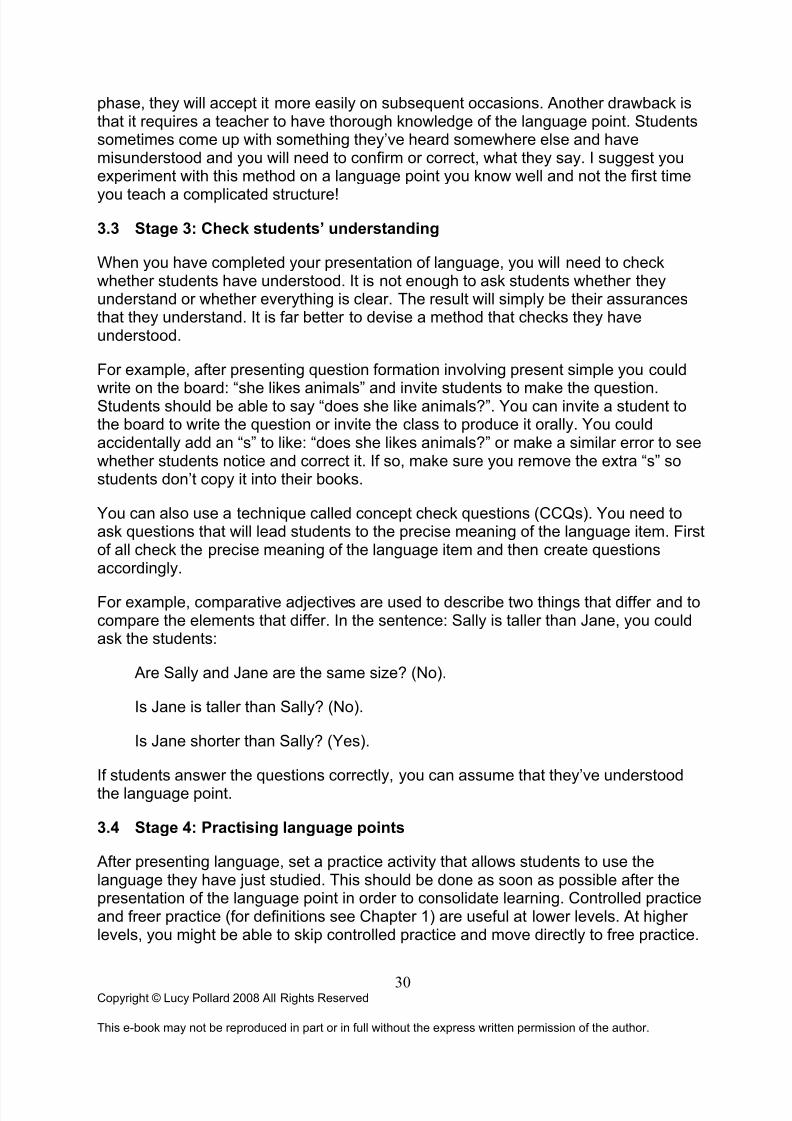
8/9/2019 A Guide to Teaching English - 72p
http://slidepdf.com/reader/full/a-guide-to-teaching-english-72p 31/72
phase, they will accept it more easily on subsequent occasions. Another drawback isthat it requires a teacher to have thorough knowledge of the language point. Studentssometimes come up with something they’ve heard somewhere else and havemisunderstood and you will need to confirm or correct, what they say. I suggest youexperiment with this method on a language point you know well and not the first time
you teach a complicated structure!
3.3 Stage 3: Check students’ understanding
When you have completed your presentation of language, you will need to checkwhether students have understood. It is not enough to ask students whether theyunderstand or whether everything is clear. The result will simply be their assurancesthat they understand. It is far better to devise a method that checks they haveunderstood.
For example, after presenting question formation involving present simple you could
write on the board: “she likes animals” and invite students to make the question.Students should be able to say “does she like animals?”. You can invite a student tothe board to write the question or invite the class to produce it orally. You couldaccidentally add an “s” to like: “does she likes animals?” or make a similar error to seewhether students notice and correct it. If so, make sure you remove the extra “s” sostudents don’t copy it into their books.
You can also use a technique called concept check questions (CCQs). You need toask questions that will lead students to the precise meaning of the language item. Firstof all check the precise meaning of the language item and then create questionsaccordingly.
For example, comparative adjectives are used to describe two things that differ and tocompare the elements that differ. In the sentence: Sally is taller than Jane, you couldask the students:
Are Sally and Jane are the same size? (No).
Is Jane is taller than Sally? (No).
Is Jane shorter than Sally? (Yes).
If students answer the questions correctly, you can assume that they’ve understoodthe language point.
3.4 Stage 4: Practising language points
After presenting language, set a practice activity that allows students to use thelanguage they have just studied. This should be done as soon as possible after thepresentation of the language point in order to consolidate learning. Controlled practiceand freer practice (for definitions see Chapter 1) are useful at lower levels. At higher levels, you might be able to skip controlled practice and move directly to free practice.
30 Copyright © Lucy Pollard 2008 All Rights Reserved
This e-book may not be reproduced in part or in full without the express written permission of the author.
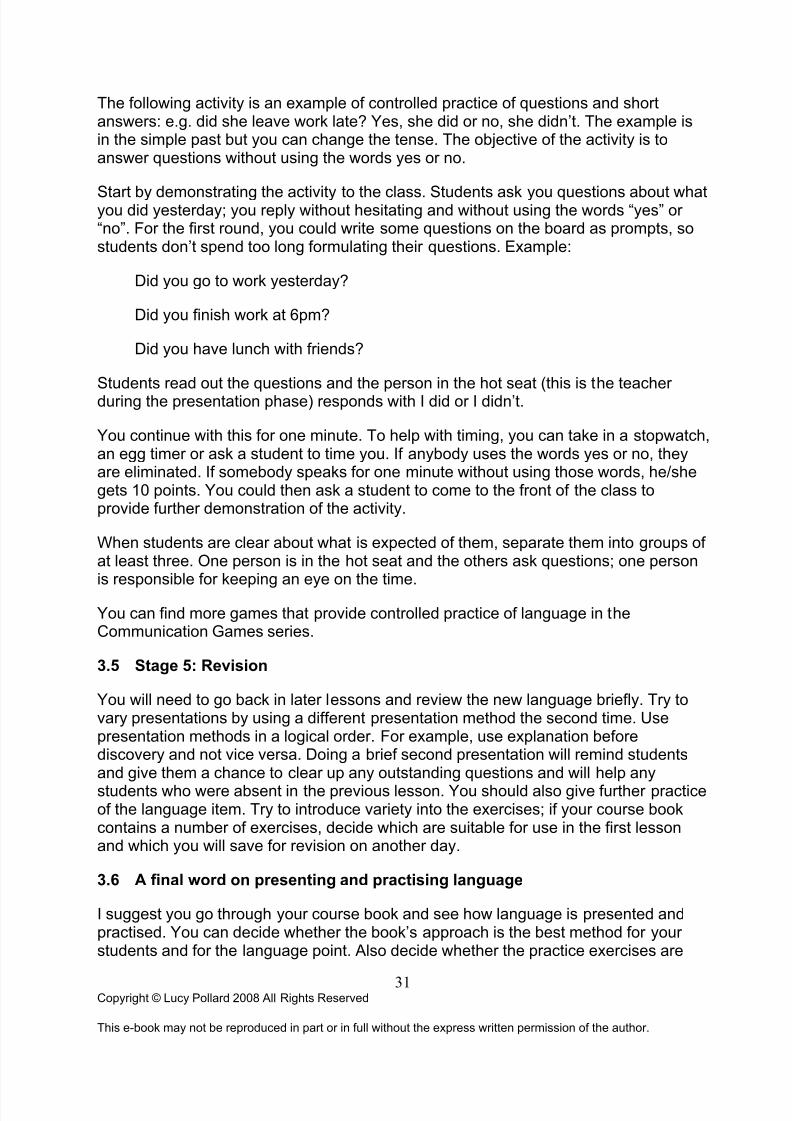
8/9/2019 A Guide to Teaching English - 72p
http://slidepdf.com/reader/full/a-guide-to-teaching-english-72p 32/72
The following activity is an example of controlled practice of questions and shortanswers: e.g. did she leave work late? Yes, she did or no, she didn’t. The example isin the simple past but you can change the tense. The objective of the activity is toanswer questions without using the words yes or no.
Start by demonstrating the activity to the class. Students ask you questions about whatyou did yesterday; you reply without hesitating and without using the words “yes” or “no”. For the first round, you could write some questions on the board as prompts, sostudents don’t spend too long formulating their questions. Example:
Did you go to work yesterday?
Did you finish work at 6pm?
Did you have lunch with friends?
Students read out the questions and the person in the hot seat (this is the teacher during the presentation phase) responds with I did or I didn’t.
You continue with this for one minute. To help with timing, you can take in a stopwatch,an egg timer or ask a student to time you. If anybody uses the words yes or no, theyare eliminated. If somebody speaks for one minute without using those words, he/shegets 10 points. You could then ask a student to come to the front of the class toprovide further demonstration of the activity.
When students are clear about what is expected of them, separate them into groups of at least three. One person is in the hot seat and the others ask questions; one personis responsible for keeping an eye on the time.
You can find more games that provide controlled practice of language in theCommunication Games series.
3.5 Stage 5: Revision
You will need to go back in later lessons and review the new language briefly. Try tovary presentations by using a different presentation method the second time. Usepresentation methods in a logical order. For example, use explanation beforediscovery and not vice versa. Doing a brief second presentation will remind studentsand give them a chance to clear up any outstanding questions and will help any
students who were absent in the previous lesson. You should also give further practiceof the language item. Try to introduce variety into the exercises; if your course bookcontains a number of exercises, decide which are suitable for use in the first lessonand which you will save for revision on another day.
3.6 A final word on presenting and practising language
I suggest you go through your course book and see how language is presented andpractised. You can decide whether the book’s approach is the best method for your students and for the language point. Also decide whether the practice exercises are
31 Copyright © Lucy Pollard 2008 All Rights Reserved
This e-book may not be reproduced in part or in full without the express written permission of the author.

8/9/2019 A Guide to Teaching English - 72p
http://slidepdf.com/reader/full/a-guide-to-teaching-english-72p 33/72
sufficient. You can follow the procedure in the book, adapt it, supplement it or omitexercises as you think necessary.
32 Copyright © Lucy Pollard 2008 All Rights Reserved
This e-book may not be reproduced in part or in full without the express written permission of the author.

8/9/2019 A Guide to Teaching English - 72p
http://slidepdf.com/reader/full/a-guide-to-teaching-english-72p 34/72
CHAPTER 4: SPEAKING
Speaking is one of the most difficult aspects for students to master. This is hardlysurprising when one considers everything that is involved when speaking: ideas, whatto say, language, how to use grammar and vocabulary, pronunciation as well as
listening to and reacting to the person you are communicating with. Any learner of aforeign language can confirm how difficult speaking is.
It is important to give students as many opportunities as possible to speak in asupportive environment. Gaining confidence will help students speak more easily. Youcan achieve this by:
setting controlled speaking tasks and moving gradually towards freer speaking tasks;
setting tasks that are at the right level for the students or at a level lower than their receptive skills;
setting tasks that are easily achievable and gradually moving towards morechallenging tasks;
praising students’ efforts;
using error correction sensitively (more about this in Chapter 9);
creating an atmosphere where students don’t laugh at other people’s efforts.
The focus of this chapter will be free speaking activities and fluency, not controlledactivities and accuracy. For comments on controlled and freer practice, see Chapter 1.
There are three key elements to remember when planning and setting up speakingactivities:
1. Language used
2. Preparation
3. Why are the students speaking?
4.1 Language
When planning any speaking activity with students, analyse carefully the languagethey will be using to carry out the activity. If you use an activity from an EFL book, you
will probably find comments on the language. If not, think about what you would sayyourself when doing the activity and consider whether your students have learnt thelanguage items yet.
Don’t make any assumptions about students’ knowledge. Spend some time in classreviewing the language that will be used. If students don’t have the language requiredto carry out the task, the results will be demotivation and frustration. Students mighteven resort to doing the task in their own language. Of course, you can work on thelanguage in one lesson and review it very quickly in the following lesson before doingthe speaking work.
33 Copyright © Lucy Pollard 2008 All Rights Reserved
This e-book may not be reproduced in part or in full without the express written permission of the author.

8/9/2019 A Guide to Teaching English - 72p
http://slidepdf.com/reader/full/a-guide-to-teaching-english-72p 35/72
4.2 Preparation
Preparation is vital as it will help students to speak more easily.
One aspect of preparation is warming students up to the subject matter. If they are to
communicate well, it’s important to engage them in the topic. This can be done bychecking their prior knowledge and experience of the topic; e.g. if the speaking task isbased on driving in big cities, ask them about their experiences of driving in big cities,what they think about it, do they have any anecdotes or unpleasant experiences theycould share with the class? and so on. This phase can also be used to introducevocabulary.
It’s also important to give students time to prepare what they are going to say and howthey’re going to say it. This preparation can be done in pairs or groups. Give them timeto consider their ideas and think about the language they will use. They can also domini-rehearsals, which will build up their confidence and improve the end result.
4.3 Reason for speaking
Students need to feel that there is a real reason for speaking. This is often referred toas the communicative element. Make sure there is a reason for speaking; i.e. that thestudents are communicating something the others don’t know or that the others wouldlike to hear about. Examples of tasks involving real communication include: informationgap, tasks involving an element of persuasion, problem solving and role play (seeexamples below).
Finally, as with all aspects of teaching, it is important to introduce variety and to
choose topics that you think will interest your students.
4.4 TYPES OF SPEAKING ACTIVITIES
4.4.1 Information gap
Each student in the group has some information required to complete the task or activity; the aim is to share the information and to complete the task. Students don’tknow what the others are going to say; and as such it imitates real life conversation.An example being: Students work in pairs; student A has a simple picture which (s)hedoesn’t show to B; student B has a blank piece of paper. Student A describes the
picture; student B listens and draws it. Finally, students compare what B drew with theoriginal.
You can also use spot the difference pictures; this is where you have two picturesidentical apart from a number of small differences. Students work in pairs, they haveone picture each; they each describe their picture without showing it to their partner.Through detailed description, they try to find the differences between the two pictures.
In the examples above, your choice of picture will determine the type of languageused. For example, a street scene will generate different language to a picture of a
34 Copyright © Lucy Pollard 2008 All Rights Reserved
This e-book may not be reproduced in part or in full without the express written permission of the author.
8/9/2019 A Guide to Teaching English - 72p
http://slidepdf.com/reader/full/a-guide-to-teaching-english-72p 36/72
dinner party. Bear this in mind when planning and during the language preparationstage.
4.4.2 Discussions: reaching a consensus
Choose one of the following subjects: 10 things to take into space, 10 things to take toa desert island, 10 things to take into a desert....
Ask students to work alone and to brainstorm 10 things they would take with them.Alternatively, prepare a list of 20 objects and each person chooses ten from the list.Ask students to discuss their lists in pairs and to come to a consensus; they will needto convince each other that their chosen objects are the most useful. When the pairshave agreed on their lists i.e. they have a new list of 10 items, pair up pairs so thatstudents are working in groups of four. The groups of 4 now have to come to aconsensus. Continue pairing up groups to form larger groups until you think thestudents have lost interest. Conduct feedback on the outcome and the language used.
This is commonly known as the NASA game; I first read about it in The NewCambridge English Course by Swan and Walter.
4.4.3 Discussions: moral dilemma
A variation on the theme of consensus. Explain to students that a single mother whodoesn’t have much money has been caught stealing milk. She explains why she did it:to feed her young children. Give students roles, e.g. store detective, social worker, andshoplifter’s friend. Allow time for preparation in groups: all the social workers together,all the store detectives work together, and all the friends work together. When
everybody is ready, regroup the students so that there is 1 store detective, 1 socialworker and 1 friend in each group; students say how they would deal with the situation.They have to convince each other that their opinion is the valid one.
4.4.4 Discussions involving opinions
Try to use topics that will generate varying opinions rather than having everybodyagree. Typical examples include life in the city and life in the country, environmentalissues, and traditional and alternative medicine. You can also use controversialsubjects and topics that are currently in the news.
Discussions involving opinions work well in a group that has something to say. If theclass is short on ideas or afraid of voicing a controversial opinion, these activities don’twork so well. You can overcome this by giving students time to prepare what they’llsay. You can also outline the various general attitudes to the subject e.g. opinions for and against the new underground transport system in the town where you work.Students decide what their opinions are. They prepare in groups first; put students withthe same opinion together and tell them to prepare their arguments as well as counter-arguments to what the others will say. You can then regroup students so that studentswith different opinions are together.
35 Copyright © Lucy Pollard 2008 All Rights Reserved
This e-book may not be reproduced in part or in full without the express written permission of the author.

8/9/2019 A Guide to Teaching English - 72p
http://slidepdf.com/reader/full/a-guide-to-teaching-english-72p 37/72
4.4.5 Debates
This involves choosing a controversial topic; one speaker presents one point of viewon the topic and a second speaker presents a differing opinion. Debates are good atadvanced levels. It’s a good idea to give some input on the topic matter first. For
example, you could do a listening or reading activity on the same subject. Givestudents time to prepare what they will say; you might even prompt them by givingthem ideas on the topic and outlining common opinions. Students can prepare ingroups and practise the debates in groups before they present to the whole class.Students can ask each other questions after the presentation and vote on whichopinion is the most convincing.
4.4.6 Spontaneous conversations
Sometimes real uncontrolled conversation breaks out in class. This can be wherestudents communicate something about themselves that others are interested in
(something the student did at the weekend, a film they saw, a place they visited). If time allows, it is good to allow this type of conversation to continue because it has areal communicative purpose. The teacher’s role throughout is to prompt, help withlanguage or communication difficulties. Correction should be kept to a minimum andcarried out at the end of the discussion. This type of conversation can be excellentwhen it is spontaneous but it works less well if the teacher contrives to make it happen.
4.4.7 Role play
This involves students taking on a role and carrying out a discussion with each personplaying their role. For example, the local council wishes to introduce a new system and
location for dumping waste. Some students play local councillors, others are localresidents, others are members of an environmental organisation and others aremanagers and employees of the company being asked to carry out the work. Theteacher describes and sets up the situation. The students prepare in groups, thoseplaying the same roles prepare together. They then form new groups to carry out thediscussion.
Tips and advice for role plays:
choose the topic carefully because if students don’t have anything to say, the roleplay won’t work;
this type of activity can take a long time to set up; the preparation phase is essentialif the activity is to work well. Don’t be tempted to skip preparation to save time;
the time needed for input of the topic and language as well as preparation, theactual role play and feedback means that you need to allow a lot of time. Don’texpect to be able to do a role play quickly;
during feedback after a role play it is important to comment on the content of whatwas said as well as on language used.
If you want to introduce an element of role play without making it into a long andextended exercise, incorporate the work into a reading or listening skills lesson. After
36 Copyright © Lucy Pollard 2008 All Rights Reserved
This e-book may not be reproduced in part or in full without the express written permission of the author.
8/9/2019 A Guide to Teaching English - 72p
http://slidepdf.com/reader/full/a-guide-to-teaching-english-72p 38/72
reading a text or listening to a recording, students role play a television interviewer andone of the characters from the text or recording. Interviewers prepare questionstogether in groups; interviewees flesh out the character in groups. Students then pair up as one interviewer and one interviewee.
4.4.8 Problem solving: reorganising the zoo
Explain to the students that the local zoo is undergoing re-organisation and/or that newanimals are being welcomed into the zoo. The students are given a plan of the zoo; thenames of types of animals and certain criteria e.g. some animals cannot be close toeach other e.g. the deer and tiger: the deer would be afraid. Some animals don’t smelltoo good so they should not be close to the café. Avoid frightening or dangerousanimals at the entrance: children would be put off. They need to decide where eachanimal will be housed; it’s important to come to a consensus within the group sostudents will need to persuade each other that their opinion is the best. I first readabout this activity in Penny Ur’s Discussions That Work.
4.4.9 Discussion about jobs (based on an activity in Discussions A-ZIntermediate)
Give students a list of occupations; dictate the list or show pictures to elicit the job title.Examples include: teacher, stockbroker, waiter, secretary, dentist, nurse, taxi driver,dinner lady, window cleaner, architect, hairdresser, cleaner, air traffic controller.
Ask students to discuss the jobs freely using the following questions as prompts:
What are the daily tasks carried out in each of the jobs?
In your opinion, which job is the most interesting, boring, unpleasant, stressful,rewarding, important to society?
Which job is best-paid, most badly-paid?
Do you know someone who does any of these jobs?
Which job would you most like to do and why?
Which job would you least like to do and why?
4.4.10 Discussions based on pictures
It is a good idea to make a collection of pictures from magazines, newspapers, the
Internet, etc. You can use them for a variety of purposes including using them asprompts in your speaking classes. Here are three simple ideas that can be used withany picture:
You can ask students to simply describe the pictures: what is happening? Howmany people are there? and so on.
What are the people in the picture thinking? How do you think they are feeling? Whyare they sitting there? (or whatever it is they’re doing). What happened previously?What is going to happen next? What are they talking about?
37 Copyright © Lucy Pollard 2008 All Rights Reserved
This e-book may not be reproduced in part or in full without the express written permission of the author.
8/9/2019 A Guide to Teaching English - 72p
http://slidepdf.com/reader/full/a-guide-to-teaching-english-72p 39/72
Prepare and act out a conversation between the characters.
The last two activities involve students interpreting and imagining about the content of the picture.
4.4.11 Topic prompts
Prepare a list of topics that you have been working on recently in class and/or topicsyou know your students are interested in. Write each topic on a slip of paper and putall the slips in a box, bag, hat or envelope. In class, invite students to take out a slip of paper and to speak to the class about the topic. Other students can ask questions andmake comments.
4.5 A final word on speaking activities
I have described the role of speaking separately from other skills but it is quite rare for a lesson to be devoted wholly to speaking. As a lead up to a speaking activity,
students might listen to a cassette or read a text on the subject. If students arespeaking, obviously some of them are also listening. So we can see that skills arerarely practised in isolation. It is also not desirable for the lesson to be structured inthat way since it would not imitate real life situations.
38 Copyright © Lucy Pollard 2008 All Rights Reserved
This e-book may not be reproduced in part or in full without the express written permission of the author.

8/9/2019 A Guide to Teaching English - 72p
http://slidepdf.com/reader/full/a-guide-to-teaching-english-72p 40/72
CHAPTER 5: LISTENING
Listening is one of the receptive skills and as such it involves students in capturing andunderstanding the input of English. Reading, the other receptive skill, involves studentsin understanding and interpreting the written word. Listening is probably more difficult
than reading because students often recognise the written word more easily than theyrecognise the spoken word. Furthermore when reading, students can go back and re-read a phrase whereas with listening they only get one chance. With reading, it’s thereader who sets the pace whereas with listening it’s the speaker or recording that setsthe pace.
Because of these issues, many students find listening difficult. Listening tasks can bevery disheartening and demotivating, especially if students have had a previousnegative experience. It is therefore important to give our students plenty of opportunities to practise the skill of listening in a supportive environment that helpsthem to learn. We need to design tasks that help them learn rather than merely testing
their abilities. This means that we guide them through the recording, pre-teachlanguage and highlight the essential points of the recording. This is in contrast totesting, where the teacher simply plays the recording and the students listen andanswer questions.
We can help learning through a variety of methods including preparing studentscarefully for the listening activities they are about to do, pre-teaching difficult language,by choosing a recording that is suitable for their level. Techniques for teaching listeningcan be found in this chapter.
Before describing how to approach a listening activity, let’s look at the skills and sub-
skills associated with listening:
5.1 Listening for gist
This is where somebody listens in order to get the main idea of what is being saidwithout focusing on specific details and without hesitating over unknown words. For example, a native English speaker says to a non-native English speaker: “would youlike to join us for dinner one evening?”. In this instance, it is important that the listener understands (s)he is being invited to dinner. It is not essential for the listener tounderstand every word. If the words “join us” are new to the listener, we would hopethat (s)he can still recognise the statement as an invitation, i.e. (s)he is listening for
gist. Students are often reluctant to practise listening for gist; many of them think it isessential to understand every word that is said. Many would argue that this is so, but itis essential for students to master the skill of listening for gist; if not, they will find itvery difficult to converse with native speakers of English. Gist listening preparesstudents for real life situations. Remember that with gist listening, the aim is to practiselistening, not to study language. Of course, you can follow up the gist listening phasewith other activities that help develop language skills.
39 Copyright © Lucy Pollard 2008 All Rights Reserved
This e-book may not be reproduced in part or in full without the express written permission of the author.

8/9/2019 A Guide to Teaching English - 72p
http://slidepdf.com/reader/full/a-guide-to-teaching-english-72p 41/72
Gist listening activities include: asking students to listen to a recording and to tell youwhether the speakers are generally in agreement or not or to tell you whether thespeaker’s opinion is negative or positive. Students can merely listen to a recording andtell the teacher what the main topic is. 5.2 Extensive listening
This involves students listening for long periods and usually for pleasure. If a studentchooses to watch a film in English or to listen to a recording of a novel being read, thiswould be extensive listening. This type of listening is rarely practised in the classroom.We tend to assign tasks rather than allowing students to simply listen.
5.3 Listening for specific information
This is where we listen to specific information and disregard the rest. For example,recently I was very interested in Paul McCartney’s divorce. When the news was on the
television, it was generally running as background noise. As soon as McCartney’sname was mentioned, I stopped whatever I was doing and listened to the news. I waslistening to specific information.
5.4 Listening for detailed information
This is the type of listening you engage in when listening to announcements in arailway station or when listening to directions in a street. You are listening intensively inorder to understand all information given.
5.5 Predicting
When we are listening in our mother tongue, we are constantly predicting what is goingto come next. This action of predicting helps us understand the thread of thediscourse. Start encouraging your students to predict; you can even do this at lowlevels.
For example, if you’re about to listen to a recording of Richard Branson talking abouthis life, before listening you can ask students what things they think he’ll mention.Possibilities include: sports, ballooning, Virgin, etc. Students can listen to checkwhether their predictions are correct.
You can also do a prediction exercise during the listening task. You can stop a
recording at appropriate points and ask your students what they think will come next,e.g. when listening to a song with a simple rhyme, stop and ask students to guess thefinal word in the sentence that completes the rhyme. When listening to instructions for a recipe, the final phrase might be “serve up and enjoy!” Stop the recording before thephrase and ask students what they think will be said.
Your students will need practice in all of the above sub-skills if they are to become trulyproficient. Extensive listening is more difficult to organise in class and is not the bestuse of time. You can however, encourage your students to do this outside theclassroom.
40 Copyright © Lucy Pollard 2008 All Rights Reserved
This e-book may not be reproduced in part or in full without the express written permission of the author.

8/9/2019 A Guide to Teaching English - 72p
http://slidepdf.com/reader/full/a-guide-to-teaching-english-72p 42/72
5.6 A template for a listening activity lesson
The following is a useful template for lessons where the aim is to practise listeningskills (it can be adapted and used for reading skills). It can be used to practise theskills of listening for gist and listening for specific information or listening for detailed
information.
(1) Introduce the topic of the recording and arouse students’ interest in it. You canachieve this in a variety of ways:
show a picture linked to the topic and discuss the picture;
choose some words or phrases from the recording and ask students to predict whatit is about (take care that the subject can be inferred from the language you select);
outline the subject of the recording and ask students to describe their experiences of such a situation, e.g. if they are going to listen to a recording of a job interview, ask
them to describe what they know about job interviews. Describe an interview theyhad. If they have never had an interview, ask them what they think happens.
(2) Pre-teach any difficult language. Do this quickly and efficiently so as not todistract from the topic of the recording. Five or six items is the maximum; you shouldalso consider words that students know in their written form but that they might notrecognise when spoken. It is important that they hear the pronunciation of the wordsduring this stage. If there is a lot of unfamiliar language, you might consider using adifferent recording; you don’t want to put students off listening skills work through theuse of material that is too difficult. There might be some language that can be guessedfrom context; in which case you might decide to work on those language items after listening.
(3) Set a task to be completed during the first listening. Explain what the task is andmake sure everybody understands what is expected of him or her. The initial taskshould involve listening for gist; for example you could ask students what the speaker’sopinion is, is it generally critical or approving of the topic? Are the speakers agreeing or disagreeing? What is being described in the recording? Alternatively, you might decidenot to set a task. Students can just listen and tell you anything they heard. Allowstudents a few minutes to check their answers in pairs then conduct feedback with allthe class. There are many advantages to asking your students to compare their answers in pairs before conducting whole class feedback: students might have heardthe answer but not had time to write down the answer, this will give them time; theycan also check their answers in a non-threatening environment; you can go around theclass listening to what the students say, this will give you a good indication of whodealt well with the task and who didn’t do so well.
(4) Give students a task to complete while they are listening again. You should focuson listening for specific information or listening for detailed information during thisstage.
41 Copyright © Lucy Pollard 2008 All Rights Reserved
This e-book may not be reproduced in part or in full without the express written permission of the author.
8/9/2019 A Guide to Teaching English - 72p
http://slidepdf.com/reader/full/a-guide-to-teaching-english-72p 43/72
Examples of questions to use are:
A list of statements about the recording that students note as being true or false, or don’t know from the recording.
Questions starting with how many…? When…? What did…? Who did…? What time
did…? Why did they…?
If you design the questions yourself, focus on sections that are essential tounderstanding the whole text and not on subjects of secondary importance.
Give students time to read over the questions so they know beforehand what isexpected of them. Answer any questions they might have. Play the recording again,students note down their answers. Students compare answers in pairs and thenteacher conducts feedback as a whole class.
(5) If necessary, play the recording again. You need to get the balance right here
between how often you play the recording and the level of interest of the students. Iwould say play it once for general understanding and a maximum of twice for listeningfor specific or detailed information. You might exceptionally play it one more time, butthis doesn’t necessarily increase students’ understanding and they can just get morefrustrated and demotivated. A wiser approach is to help them more with eachsuccessive listening; give more hints and clues each time based on the answers thestudents provide. If you set questions on difficult sections of the recording, keep thesequestions short and simple and make sure they focus on the points that are essentialto understanding the recording. This approach will help guide your students throughthe recording. If students have all answers to the question in (4) correct, it is notnecessary to listen again. If they have all answers correct except one, you might
choose to play only that section of the recording.
(6) After listening, do some oral work and/or language work linked to the recording.For example: if students have been listening to a recording portraying a scene in ashop, have them role-play a shop scene. If the recording was a debate about healthand lifestyle, they can discuss their opinions of the topic.
(7) You can also choose some language items as a focus; for example during a jobinterview the present perfect and simple past questions are frequently used (have youever worked in a restaurant? When did you leave your last job?). Ask your students tolisten again to a particular sentence or question and to write it down. Alternatively, you
can give them part of the phrase and ask them to complete it. Note their answers onthe board and focus on the structure(s). You can then do some controlled and/or freer language practice around the tenses (see Chapter 1). Language work can be done ongrammar, vocabulary or pronunciation (for ideas, see Chapter 10, Pronunciation).
Guessing words from context is also a useful language exercise after a listeningactivity. Choose 2 or 3 words that are unfamiliar to your students and that you didn’tpre-teach at the beginning of the lesson. Write the sentence or phrase that containsthe word on the board and help students to guess the meaning from the context.
42 Copyright © Lucy Pollard 2008 All Rights Reserved
This e-book may not be reproduced in part or in full without the express written permission of the author.

8/9/2019 A Guide to Teaching English - 72p
http://slidepdf.com/reader/full/a-guide-to-teaching-english-72p 44/72
For example: in the desert, the temperature can drop very low at night.
Let’s assume that your students know the word desert and temperature, you can askstudents to guess the meaning of the word “drop”. They should be able to guess it fromtheir knowledge of the world and from the other words they see in the sentence. If not,
you can guide them with questions such as: is the word a verb, noun or adjective?Does it describe movement, thought, etc?
5.7 A final word on listening activities
The framework above can be used for listening skills activities. If you’re using a coursebook, there will be activities and exercises to accompany the recordings. I suggest youanalyse these activities and if one of the stages above is missing, design a task tomake sure it is covered.
43 Copyright © Lucy Pollard 2008 All Rights Reserved
This e-book may not be reproduced in part or in full without the express written permission of the author.

8/9/2019 A Guide to Teaching English - 72p
http://slidepdf.com/reader/full/a-guide-to-teaching-english-72p 45/72
CHAPTER 6: READING
Reading is considered by many to be the neglected aspect of language teaching. It is ashame that it is considered so. How has this come about? Many teachers focus onpresenting and practising language; they practise the skills of speaking and listening in
class; they might set writing tasks for homework but where does reading come into theprogramme? It is easy to see how it can be neglected.
However, it is essential for students to practise the skills of reading; they need to beintroduced to and given opportunities to practise various sub-skills. If we give studentsthe right sort of support to tackle a text in the classroom, we can hope that they willcontinue to do the same out of the classroom. Reading is a great source of languagelearning: language can be acquired from reading as opposed to studied directly (for adefinition of acquisition, see Chapter 1). If overt study is preferred, structures andvocabulary can be seen in context and paragraph construction can be analysed.
There is a great choice of texts for use in class: apart from textbooks and other EFLresource books, we can take texts from magazines, newspapers, the Internet,brochures, menus. The opportunities are endless. If we encourage reading in theclassroom, we can expect students to continue doing the same long after they havestopped studying with us.
Reading is similar to listening in that it is a receptive skill. It involves studentsinteracting with visual input of language, which they need to process and understand. Isay interacting because reading is most definitely an active process; the efficientreader interacts with a text, predicting what will come next, and bringing his or her knowledge of the subject and language to the text. For example, a British person
reading about the Victorians will bring to the text his or her knowledge of the period:industrialisation, puritanical ideas, empire, strict upbringing for children, etc. It isessential to train our students in these skills and to encourage their use.
I will start by describing the various sub-skills that are involved in reading and thenprovide a template, which you can use when designing your own reading skillslessons. You can also use the template to analyse reading exercises in your coursebook; if you see that any of the stages of the plan below are not covered in your coursebook you might decide to add some activities. The approach is similar to alesson to practise listening skills; I am repeating it for those readers who do not intendto read the entire book and are just dipping into chapters. However, if you are looking
to have a thorough view of the skills of teaching, don’t skip this chapter.
6.1 Reading skills and sub-skills
6.1.1 Reading for gist
This involves reading to get the main message of the text; it doesn’t involve studyingevery word. For example, you might ask students to read quickly or glance over amagazine article on stress in the workplace and to say what the author’s opinion is.
44 Copyright © Lucy Pollard 2008 All Rights Reserved
This e-book may not be reproduced in part or in full without the express written permission of the author.

8/9/2019 A Guide to Teaching English - 72p
http://slidepdf.com/reader/full/a-guide-to-teaching-english-72p 46/72
To practise reading for gist, you can give 3 summaries of a text, only one of which iscorrect. Students read the text and say which summary is the most accurate. If youchoose this option, make sure the summary focuses on generalities and not onspecifics.
You can quite simply set a time limit – two minutes will be enough – ask students toread the text and to tell you what it is about.
6.1.2 Reading to extract detailed information
Here students read to understand certain aspects of the text thoroughly. For example,when reading the manual that accompanies your new mobile phone you might focuson the use of the answering machine and endeavour to understand it in detail and notread about Internet connection.
6.1.3 Reading to extract specific information
This involves passing over a text to gather specific information. We look over a text toget the information that interests us, for example the departure time of a train. In suchcases we usually ignore the remaining information.
Questions that practise reading for specific and detailed information include:
A list of statements about the text that students note as being true or false (or don’tknow from the text).
Questions starting with how many…? When…? What did…? Who did what? Whattime did…? Why did they…?
6.1.4 Predicting
As competent readers we are constantly predicting what will come next. If we read ashort story where a man and woman meet, we might predict that they will fall in love.We bring our knowledge of the world to the text; the skill of predicting helps usunderstand what will come next.
To practise prediction, you can:
tell students the topic of the text and ask them to write questions they would like toknow about the text. They then read to see whether their questions are answered.
When the answers are contained in the text it is very motivating. The danger however, is that students will write questions that are not answered in the text;
give students some vocabulary items from the reading and ask them to predict whatthey think it will be about. They read to check their prediction;
ask students to read the first paragraph (or first two paragraphs) of a text and topredict what will come next.
45 Copyright © Lucy Pollard 2008 All Rights Reserved
This e-book may not be reproduced in part or in full without the express written permission of the author.

8/9/2019 A Guide to Teaching English - 72p
http://slidepdf.com/reader/full/a-guide-to-teaching-english-72p 47/72
6.1.5 Extensive reading
This involves lengthy reading, often for pleasure. If we curl up on the sofa with afavourite novel, we are engaging in extensive reading. We are not trying to understandevery word. The objective is to follow the story. Although, if you’re anything like me,
your mind might wander while you’re reading! It is not easy to organise the practice of this skill in class and it’s probably not the best use of time. However, you canencourage your students to read extensively outside the classroom: they can readnovels, simplified readers, Cosmopolitan, Homes and Gardens or anything else theyenjoy.
6.2 Template for a reading skills lesson
(1) Start by awakening students’ interest in the topic. You can do this by telling themthe subject matter of the text and asking them what they know about the topic, whatexperiences they have, etc. You can show students a picture related to the topic and
discuss it. You can tell the students some words or phrases from the text and ask themto predict what it will be about. Keep the discussion general at this stage and don’t giveaway too much information about the text. This stage serves to activate their knowledge and arouse their interest.
(2) Pre-teach any unfamiliar vocabulary that will affect the students’ understanding of the text. If there are unfamiliar words that won’t hinder comprehension, you can studythose at a later stage.
(3) Set a task that will practise reading for gist; you can set a time limit on this task tomake sure students aren’t reading word for word. If so, keep the time limit short: 2 or 3
minutes is usually enough. If you think your students are not used to reading for gist,you can explain to them that they can achieve this by reading the first and lastsentences in paragraphs or by running their eyes down the centre of the page withoutpaying too much attention to what is to the left and right. Make sure all the studentsunderstand the question before they start reading. Ask students to check their answersin pairs and then conduct whole class feedback. The checking of answers in pairsallows students to work in a non-threatening environment. Pairs are responsible for answers and not individuals.
(4) Set some questions that will practise reading for specific or detailed information.For ideas, see above. Check that all students understand the questions and give them
a time limit to answer them. You can allow about 10 minutes for this. At this point, youshould just allow your students to read. Try to avoid the trap of the new teacher, whichis to help while they are reading, this only serves to interrupt and break their concentration. Allow students time to check their answers together in pairs and thenconduct feedback as a whole class. When checking answers, also ask students toexplain where they found the answers to their questions; this will help you to see towhat extent they have understood the text and to what extent they are guessing.
46
(5) After feedback on the second of the reading tasks, there are 4 related activitiesyou can do; these are outlined below. You can choose to do one, two, three or all of them and you can do them in the order that seems to suit the text and your class on
Copyright © Lucy Pollard 2008 All Rights Reserved
This e-book may not be reproduced in part or in full without the express written permission of the author.

8/9/2019 A Guide to Teaching English - 72p
http://slidepdf.com/reader/full/a-guide-to-teaching-english-72p 48/72
that particular day. I would advise including a speaking exercise to give a change of focus and tempo after the reading tasks; I also wouldn’t do the speaking last of all the4 post-reading activities. I think it is also respectful to the class to spend some timeexplaining the words that they didn’t know or that caused them difficulty during thereading; by this, of course, I’m referring to language that hasn’t been studied
elsewhere in the lesson.
(i) You can spend some time satisfying the students’ natural desire to want tounderstand everything in the text. Tell them to pick 3 or 4 words from the text that theywould like to know the meaning of. Answer their questions within reason or allow themto use dictionaries.
(ii) You can study language work arising from the text. This could be vocabularyaround the theme of the text; for example holiday activities if students have beenreading about holidays. There might be a tense that is prevalent in the text, e.g. simplepast or a variety of past tenses if the text is a narrative. You will need to focus
students’ attention on the structure or language; you can do this by simply writing it onthe board. Alternatively, you can ask students to find a phrase (or phrases) thatexpresses past actions. You can elicit the meaning of the phrase and/or do a brief presentation. This can be followed by practice of the language point.
The structure you choose to focus on might not be in the text. For example, a textabout somebody who was late for an interview because he overslept could give rise toa study of the third conditional (if he hadn’t overslept he would have arrived on time) or I wish to express past regrets (he wishes he hadn’t overslept). You can ask studentswhy the character was late for his interview (because he overslept) then present one,or both, of the following: he wishes he hadn’t overslept; if he hadn’t overslept, he would
have arrived on time. For ideas on presenting and practising language, see Chapter 3.
Language work could also involve studying the specific organisation of the genre; for example in a film review the first paragraph might describe the film, the secondparagraph might compare it to others of its type, the third paragraph mightrecommend, or not, the reader to go and see it. For further information on the study of genre, see Chapter 7. After this language focus, you can do some oral or writtenpractice of the structure or text type.
(iii) You can do a related speaking activity. Examples include:
students give their opinion on the subject of the text;students can talk about their experiences of the subject; e.g. “have you ever donethis?” “If so, describe what you did and how you felt”. “If not, what would you finddifficult / enjoyable”, “Do you know anybody who has done this?” and so on;
students can talk about how the text makes them feel;
students can say how they would react in such a situation;
students can compare the text to their own lives: focusing on what is different andwhat is similar;
47 Copyright © Lucy Pollard 2008 All Rights Reserved
This e-book may not be reproduced in part or in full without the express written permission of the author.
8/9/2019 A Guide to Teaching English - 72p
http://slidepdf.com/reader/full/a-guide-to-teaching-english-72p 49/72
students can role-play an interview with one of the characters from the text for thelocal newspaper;
students can invent a dialogue between 2 or more of the characters from the text.
(iv) You can encourage the students to deduce meanings from the text. Take a word
that is unfamiliar and that you think students can deduce from the context. You cangive clues to help them out, e.g.
Is it a verb, noun, adjective or other?
If verb: is it connected to movement, to thinking, etc?
If noun: is it found in the house? The street? Etc...
Help your students to get at least an approximation of the meaning.
For example, if you want your students to deduce the meaning of the word “sideboard”,you could use the following sentence and questions:
Mr Jones came home, walked into the sitting room, took off his shoes and put his keyson the sideboard.
Is sideboard a noun, verb or adjective? Noun.
Where would you find a sideboard? In a home, in a sitting room.
What category does a sideboard belong to: food, clothes or furniture? Furniture.
Using the above, students can guess that a sideboard is a piece of furniture found in asitting room.
At lower levels, or where students are not used to guessing meaning from context, youcan choose 5 or 6 unfamiliar words and write their definitions in disorder. Ask studentsto match the words with their definitions; they can use the text as a guide, but not their dictionaries.
6.3 A final word on reading activities
The framework above can be used for reading or listening skills activities. If you’reusing a course book, there will be activities and exercises to accompany the texts. Isuggest you analyse these activities and if one of the stages above is missing, designa task to make sure it is covered.
48 Copyright © Lucy Pollard 2008 All Rights Reserved
This e-book may not be reproduced in part or in full without the express written permission of the author.

8/9/2019 A Guide to Teaching English - 72p
http://slidepdf.com/reader/full/a-guide-to-teaching-english-72p 50/72
CHAPTER 7: WRITING
Writing is a productive skill and, as such, the way we treat it in class has somesimilarities with the teaching and learning of speaking. The focus of this chapter will belonger written assignments and creative writing; we will not cover written exercises that
are designed to practise a language point. Let’s first of all review what was mentionedin Chapter 4 and apply the principles to the teaching of writing.
The key elements to consider in the teaching of writing are:
7.1 Language
It is essential to make sure that your students have the level of English required to dothe task. Analyse any tasks for language required before deciding whether to use it inclass. If you are using an activity from an EFL resource, then there should becomments on the language required. If you don’t have any guidelines on the language
required, think about how you would do the task yourself and what sort of languageyou’d use. Check whether the level is suitable, and then decide how you will revise andpractise language items with your students. This language work can be done in thesame lesson as the writing activity or in a previous lesson. At higher levels (upper-intermediate and above), this language review can be very brief. Depending on thetype of written task, the language work might include analysis and practice of genre.Genre refers to a type of writing, e.g. recipes, lonely hearts ads, newspaper articlesthat have similar organisation and language. Language study might also involve workon linkers, for example: although, furthermore, alternatively. Students also need to beaware of the level of formality that is required; for example a business letter will bemore formal than a postcard or e-mail to a friend.
7.2 Time for preparation
Allow students time to prepare their ideas; they can do this individually, in pairs or ingroups. You can also work on the topic as a whole class and integrate other skills workbefore students start planning their writing. For example before planning a piece of writing about environmental issues, you could do some or all of the following: read atext on the topic, listen to a recording and discuss the subject in class. If you don’thave time for lengthy preparation, you should at least brainstorm ideas with the class.Once students have their ideas, they will find the actual writing easier.
7.3 Reason for writing
Students need to have a reason or purpose for writing, even if this reason is fictitious.If you identify the audience, i.e. who the intended reader is, you will add a sense of purpose. For example, if you want students to write a description of their town, tellthem it is for inclusion in a brochure or on a website for tourists to the area. You mighteven decide to send their work to the tourist information centre!
49 Copyright © Lucy Pollard 2008 All Rights Reserved
This e-book may not be reproduced in part or in full without the express written permission of the author.

8/9/2019 A Guide to Teaching English - 72p
http://slidepdf.com/reader/full/a-guide-to-teaching-english-72p 51/72
7.4 Creating interest in the topic and activating students’ knowledge
Try to choose topics that will interest your students and introduce variety into the typeof writing activities you do with your classes to keep their interest. In business Englishclasses it is also important to practise styles of writing that your students are likely to
do in real life; e.g. a sales letter or an e-mail confirming a meeting. You can arouseyour students’ interest in and activate their knowledge of the topic, possibly through adebate (especially recommended if they will be writing about their opinions), bywatching a video or listening to a recording on a related subject. Other ways of activating their knowledge of the topic are by asking them what they know about thetopic and what experience they have of it.
7.5 Coherence and cohesion
These are two terms that apply to the skill of writing. Coherence applies to the way apiece of writing is organised; a logical progression of ideas and careful organisation
within and between paragraphs. Cohesion refers to how ideas are linked; this iscommonly achieved by the use of reference words (e.g. the latter) and linkers (e.g. onthe other hand, alternatively). These language items are mostly, but not only, used inwriting and help guide a reader through the piece of work, showing relationshipsbetween ideas.
At a lower level, you can work on linkers such as: but, both, and. You can show twopictures of different people and ask students to write sentences comparing andcontrasting the two characters and using the three linkers mentioned. She’s tall but heisn’t. She’s fair and he is too. They’re both fair. They’ve both got fair hair.
At a higher level you can cover more complex ways of linking. You can give phrasesthat serve as both the beginnings and ends of sentences; ask students to combinethem using the linkers. The following is inspired by a Jane Austen novel I’m currentlyreading, not by my own opinions!
He loved her / she had no money
Although she had no money, he loved her.
He loved her despite the fact she had no money.
7.6 Publication
You should also think about ways of publishing the students’ work. Ideas include:
inclusion in a class or school magazine;
produce a collection of work written by the class that you could bind or staple andgive to all members of the class;
produce an e-book of students’ work;
display students’ work on a school or class notice board. You can also ask studentsto go around and read the work on the notice boards. You could set a simple task,
50 Copyright © Lucy Pollard 2008 All Rights Reserved
This e-book may not be reproduced in part or in full without the express written permission of the author.
8/9/2019 A Guide to Teaching English - 72p
http://slidepdf.com/reader/full/a-guide-to-teaching-english-72p 52/72
e.g. what is the main theme of each piece of writing? Is the author’s opinionnegative or positive?
7.7 Approaches to teaching writing: process writing
Process writing, as the name suggests, focuses on the process of writing rather than
on the final product. This involves teaching students about the stages involved inwriting; i.e. the process. The aim is to help students see each stage as being importantand to dedicate time to each of them. The teacher’s role is to guide students throughthe stages one uses when writing. The stages are:
Brainstorming and noting down any ideas connected to the topic.
Deciding from the brainstormed list which ideas are the most relevant to the topic,task or title.
Deciding which order to put those ideas in. This can be done in the form of a plan or a mind map.
Preparation of the first draft; the focus at this stage is organisation of the piece of writing. This doesn’t mean that grammar and accuracy are not important; it justmeans that they are not the focus at this stage.
Revision and editing of drafts, focusing initially on content, relevance andorganisation. Then moving onto correcting grammar, punctuation, vocabulary andlinkers.
The final stage is the production of a finished piece of work.
To raise awareness in students of the stages of writing, you can brainstorm the stepswith your students. Alternatively, you can present them with the list above and ask for
their comments on it. Finally, you could give them the list above, jumbled up and askthem to put the stages in order.
You can guide your students through the stages by:
(1) Brainstorming: write the topic/title on the board and invite students to sayanything at all connected to the topic. Anything and everything is acceptable at thisstage; accept all ideas and comments.
(2) Go through the brainstormed items and decide which are the most relevant to thetopic and the most interesting. This can be done as a whole class, in groups or in
pairs. If you do this as a whole class, all the students’ essays will have the samecontent. If you choose to do it in groups or pairs, essays will have different content.Both approaches are suitable, you can decide which is best suited to your class.
(3) From the list of chosen items, students decide how the comments will beorganised. Different students or groups of students might choose different ways of organising the ideas. For example in an essay that asks students to compare andcontrast living in a town and in the country, some students might want to group allcomments about the city together and all comments about the country together andconclude with a paragraph comparing and contrasting the two. Other students might
51 Copyright © Lucy Pollard 2008 All Rights Reserved
This e-book may not be reproduced in part or in full without the express written permission of the author.

8/9/2019 A Guide to Teaching English - 72p
http://slidepdf.com/reader/full/a-guide-to-teaching-english-72p 53/72
prefer to group together ideas about traffic and then compare traffic in the city and inthe country in the same paragraph.
At the end of this stage, students will have a plan or mind map that they can use for writing.
(4) Students write the first draft of their piece of work. Tell your students that theyshould think about the content and how it relates to the title, organising their ideas intoparagraphs and about how the paragraphs hang together.
(5) In the same lesson, in later lessons, or for homework, students can revise their first drafts, improving on the content and organisation.
(6) When they have a good second draft, i.e. the content, relevance and organisationsatisfies them, they can move onto improving the language. I suggest that theyapproach language improvement in stages. For example, they could start by focusing
on vocabulary, the correct choice of word. Then they could look at aspects of grammar: tenses, verb agreement, use of pronouns etc. Then move onto spelling andpunctuation. You can, of course, organise this language work differently. During thisstage, students can review their own work or the work of their classmates.
(7) Finally, students can copy out their essays, in a clean, final version.
There are various ways to organise the work; initially it is best if you do the stagestogether as a whole class. Later and when the students are used to process writing,you can start work as a whole class and then the students can work together in pairsor groups. Some stages can also be done for homework. The teacher’s role throughout
is to provide ideas, guidance and feedback. You will also need to encourage studentsto edit their own work and to incorporate your feedback.
One advantage of the process approach to writing is that it helps students see that apiece of writing goes through a number of stages including revision and editing. Bybreaking down these stages and working on each one individually, you can helpstudents see the importance of them. They can see that writing does not have to beperfect from the outset and this will make it easier for them to tackle any writing task. Itwill also help alleviate writer’s block that sometimes occurs when students are facedwith a blank piece of paper! If students are writing in pairs or groups, there will also bea lot of interaction when they’re discussing their revisions.
However, there are drawbacks. Initially, students will find this a novel way to approacha piece of writing and they might not see the importance of the initial stages and try toskip to writing the final product immediately. However, the effort and time invested willpay off as this approach often generates lengthier pieces of writing. Process writingtakes longer than other approaches to writing. If you have access to computers, douse them. Computers lend themselves very well to this sort of activity.
To help students see the benefits, you could give them a writing task at the beginningof the course. When they’ve completed it, ask them to note how they approached thetask. Take in their work and keep it without marking it. At the end of the course and
52 Copyright © Lucy Pollard 2008 All Rights Reserved
This e-book may not be reproduced in part or in full without the express written permission of the author.
8/9/2019 A Guide to Teaching English - 72p
http://slidepdf.com/reader/full/a-guide-to-teaching-english-72p 54/72
after various process-writing activities, ask students to do the same writing task as atthe beginning. Return the students’ initial work to them and ask them to compare thetwo final products as well as their approaches to the task. You can also conduct aclass discussion on the results, the benefits and the drawbacks.
7.8 Approaches to teaching writing: the genre approach to writing
Genre refers to the way that texts of the same nature are organised and the way thatlanguage frequently re-occurs in texts of the same type. For example, recipes are allorganised in the same way. Ingredients are listed and then the steps are described. Allrecipes contain similar language. If we want our students to write a recipe, it is usefulfor them to start by studying how recipes are organised and the type of language thatis commonly used, before starting on the work themselves.
If you want your students to write a film review (or any other genre of writing), start outby studying various film reviews in class. Firstly, do some comprehension work on the
reviews (for ideas see Chapter 6, Reading). Then study the film reviews with a view toanalysing how they are organised. Ask students whether they can see anycharacteristics regarding both language and organisation that are similar between thereviews. For example, do all the reviews finish with the author’s opinion? Does thewriter make a recommendation? Where is it placed, at the beginning or the end?Which tenses are used to describe the film? When you think that students haveenough information, summarise the characteristics for all to see. You can elicit thisfrom your students. They can then use the summary to start planning and organisingtheir own film reviews. They can also incorporate examples of language items that theyencountered, without copying directly.
When using the genre approach to writing, try to set tasks that students are likely to beinvolved in outside of class or that have some sort of relevance. For example, don’task students studying English for their university course to write lonely hearts ads,unless of course it’s for fun in class!
I have outlined two approaches to the teaching of writing; of course others exist. EFLwriters have debated the issues surrounding the genre and process approach towriting. I think that both have their advantages and both can help students producegood pieces of writing. I also think that the two approaches can be combined in onewriting activity through study of texts and then movement through the stages of writing.This, of course, will take time and can be developed into a writing project spanning
over a few weeks.
7.9 Shorter writing activities
The two approaches above can take time to complete. If you want to include shortwriting tasks into your lessons, here are two ideas:
(i) After a reading or listening activity, choose a character from the text or recording.Ask students to imagine they are that character and to write a postcard, e-mail or letter in character. Remember to define the audience by indicating who the correspondencewill be sent to, e.g. friend or family member.
53 Copyright © Lucy Pollard 2008 All Rights Reserved
This e-book may not be reproduced in part or in full without the express written permission of the author.
8/9/2019 A Guide to Teaching English - 72p
http://slidepdf.com/reader/full/a-guide-to-teaching-english-72p 55/72
(ii) If you want to revise the organisation of a certain style of essay or the format of aletter, you can prepare an essay or letter, cut it up and ask students to reorganise it.
7.10 Using computers
If you have access to computers for use with your classes, it is good to have your students do their written work on the computer. Organise the students in pairs or groups and have them create their piece of writing on the screen. They will be able toedit their work more easily on the screen than work handwritten in a book. The benefitof working in pairs or groups is that there will be real collaboration and discussionsurrounding the piece of writing. Before starting out, you should choose whether youwant students to use the spell check or not and set up the programmes or giveinstructions accordingly.
7.11 Penpals
This is something that motivated me to write when I was at school and it still workstoday. Students can get very involved with penpals. The advantage today is thatstudents can correspond by e-mail; a quick response to their e-mails is far moremotivating than waiting 2 weeks for the post to come around!
Try to set up a penpal project for your students. You can match them with people inanother country or city; you can find such possibilities on TEFL websites and in TEFLchat forums. If you don’t come across any, try to match your students up with studentsin another school in the same city or even with a different class in the same school.
You can allow time in class for conversing with penpals and encourage students to
continue outside the class. If you don’t do penpal work in class, let students know thatyou’re interested in them and their penpals. Ask them how they are getting on, whatthey are learning about the other person and what language they are learning. Do thiswithout criticising those who are not participating.
54 Copyright © Lucy Pollard 2008 All Rights Reserved
This e-book may not be reproduced in part or in full without the express written permission of the author.

8/9/2019 A Guide to Teaching English - 72p
http://slidepdf.com/reader/full/a-guide-to-teaching-english-72p 56/72
CHAPTER 8: PLANNING A LESSON
In this unit we will look at how to set about planning a lesson. It is important for you toengage in some form of planning for each lesson. At the beginning, planning will take alot of time; it might even take longer than the actual lesson itself! However, all is not
bleak; with time you will get more experienced and you will be able to plan much morequickly, pulling out lesson plans and activities you have already used. Manyexperienced teachers plan their lessons in no time at all.
First of all, let’s take a look at the benefits of having a good lesson plan. The plan willgive you aims for your lessons; it will remind you what to take with you when you go into class; it will give you guidelines whilst you are in the classroom and it will preventyou from drying up while you are there. Having a plan will also provide your lesson withstructure; whilst the students might not notice this, they will certainly notice if your lessons lack structure.
The format that your lesson plan takes will depend on many factors: the situation youare in, how much time you have and even how long you have been teaching. Speakingfor myself, my lesson plans are more a series of notes; I note which pages andexercises of the course book I’ll do with my class; I also note supplementary activitiesand language to pre-teach or focus on. I think about how much time each activity willtake but probably don’t write everything down on the plan. But then I have beenteaching for over 14 years; when I started out, my lesson plans were very different!Some teachers might go into class with no plan at all; others might go in with just thecourse book and work through it page by page. Lesson plans are very much a case of what works for you and the situation you find yourself in. They are possibly the mostpersonal and individual part of teaching
The comments below will help you consider the aspects that should be included inlesson plans or at least considered during the planning stages. In some settings it isnecessary to produce a very detailed plan; for example, if you are being observed aspart of a course or as part of a school evaluation. If your plan is to be used in asituation where you will be tested or observed, I suggest you check with your tutor or assessor exactly what they would like to see in your plan. I can give guidelines butdifferent people and different situations require different aspects to be covered.
The things to consider when planning a lesson are:
8.1 Recent work
Think about what students have been working on recently. If they have done a lot of skills work recently, it might be time now to do some language work. If there has beena theme through the last 2 or 3 lessons, it might be time to consolidate that workand/or move on. Aim to get balance over the lessons so that students don’t loseinterest.
55 Copyright © Lucy Pollard 2008 All Rights Reserved
This e-book may not be reproduced in part or in full without the express written permission of the author.

8/9/2019 A Guide to Teaching English - 72p
http://slidepdf.com/reader/full/a-guide-to-teaching-english-72p 57/72
8.2 Language work
What language would you like your students to learn or practise during the lesson?How much time will you spend on the language work? Think about the time you spendpresenting it and practising it. You will need to get the balance right; if the lesson lasts
2 hours, it is not a good idea to spend all the time on one language point. You shouldalso aim to spend more time on language practice than on language presentation.
8.3 Skills work
Which skills or sub-skills do you want your students to practise during the course of thelesson? Try to get a balance here between work on the various skills. Try not to spenda two-hour lesson working on just one skill.
8.4 Level of the students
This is obvious but I’ll say it anyway. Make sure the activities you choose are suited tothe level of your students.
8.5 Overall aims of students
Think about your students’ reasons for learning English. Your main aim is to help themachieve what it is they are hoping to do with English. They will need to get a balancebetween what is important to them and what knowledge they are lacking; e.g. hotelworkers who mostly need spoken English in order to greet guests and communicatewith them. These students will need a lot of practice in spoken English and work onparticular functions. They might also need to brush up on their listening skills, grammar and vocabulary. In such a situation, you will need to strike a balance betweenspeaking, listening, language presentation and practice.
8.6 Aims of the lesson
Note: I have used the term aims for ease of reference. A distinction is often madebetween aims, objectives and learning outcomes. Preferences for use of the threeterms can vary. I have chosen to keep it simple and to use only the term aims. There is often more than one aim in a lesson. You should think of aims in terms of what the students will do and not what the teacher will do. Thus, to teach the simplepast is not a suitable aim, it doesn’t describe what the students will be doing. It is better
to say that the students will use the question and affirmative forms of the simple past todiscuss what they did at the weekend. You should also try to get your aims specific,measurable, realistic and achievable. Achievable means making sure the students cando the task; it’s at the right level for them. By realistic, I mean it can be done in the timeavailable. Specific means being detailed about your aims; instead of saying studentswill practise going to, say the students will use question and answer forms of going toto discuss future plans. Measurable: if an aim is worded in specific terms, it is easy tomeasure. So, for the aim above, you can easily measure whether or not the studentshave used going to questions and answers to talk about plans.
56 Copyright © Lucy Pollard 2008 All Rights Reserved
This e-book may not be reproduced in part or in full without the express written permission of the author.

8/9/2019 A Guide to Teaching English - 72p
http://slidepdf.com/reader/full/a-guide-to-teaching-english-72p 58/72
8.7 Stages
You need to think about progression through the stages of a lesson. You couldconsider your lesson as a play or film unfolding Many teachers like to use a warmer atthe beginning of the lesson. Students come into the classroom “cold”, i.e. from a non-
English environment (unless of course they are studying in an English-speakingcountry). A short activity that engages the students in something fun will warm them upand get them using English. A warmer should ideally last around 5 to 10 minutes; anylonger and it’s moving towards a main activity, not a warmer.
For the main activities try to get a natural progression through them, where each onebuilds on what came before. Move from presentation towards practice, receptive skillstowards productive. If there is a lot of speaking or language work, try to break it up withthe inclusion of other activities. You should also think about how you end your lessons;it is more pleasant if you wind up the lesson and have time to take your leave fromyour students. A pleasant way to end a lesson is to ask students what they have learnt
during the lesson; asking students what they learnt reinforces the learning process andhas them thinking about the activities, what the teacher did, as well as their owncontribution. You could also ask them which activities they enjoyed and didn’t enjoy;you need to feel confident to do this but it will give you very valuable clues for planningfuture lessons. You could word it as what would you like to do more of? Less of? Justbecause they don’t like an activity, it doesn’t mean you failed as a teacher or that youshould leave it out of future lessons. There are many reasons for disliking something.You can introduce it with a smile next time: “your favourite activity coming up!”
8.8 Timing
How long will each activity last? This will also help you to see whether you haveachieved balance in the lesson. For example if your presentation of language takes 10minutes and the practice takes 5 minutes, you’ll need to add some practice activities tobalance it out. Aim to spend more time on practice than on presentation.
8.9 Variety
Aim to get variety in and between your classes. Of course there are some things thatstudents will need to study at length even if they don’t enjoy it e.g. phrasal verbs (putup with, do without, etc.). In such cases, aim for variety in the way you deal with thelanguage point; e.g. listen to a recording that contains examples of phrasal verbs, do a
presentation of the language, use activities to practise the language, revise it, work onthe pronunciation of the language. You can approach the same topic from a variety of angles.
8.10 Interest
When you know your students well, you will know what interests them and will be ableto choose accordingly. If a topic is uninteresting and it has to be covered as part of asyllabus, think of ways to make it more interesting, maybe by introducing an element of fantasy, imagination or role-play.
57 Copyright © Lucy Pollard 2008 All Rights Reserved
This e-book may not be reproduced in part or in full without the express written permission of the author.
8/9/2019 A Guide to Teaching English - 72p
http://slidepdf.com/reader/full/a-guide-to-teaching-english-72p 59/72
8.11 Interaction
Aim to get a balance within the lessons between different forms of interaction. Try toavoid a lesson which is entirely teacher-led or based entirely on pair work. Involve thestudents in pair work, group work, individual work as well as whole class work. Of
course, you don’t need to have all of these types of interaction in one lesson.
8.12 Level of motivation
This might sound obvious but if you have a class that meets at the end of the day onWednesdays and Fridays, you might see a pattern to their levels of energy. It could bethat they are very tired on Friday evenings; in which case, it would be wiser to do in-depth language work or difficult skills work on a Wednesday.
8.13 Problems and solutions
You should also think about any problems that your students might encounter duringthe lesson and think about what you could do to solve them. For example, thepronunciation of the words photograph and photographer might cause problems for your students; your solution might be to write the words on the board with the stressedsyllables indicated and to ask your students to repeat the words after you. For anexplanation of stress, see Chapter 10, Pronunciation. Consider any problems thestudents might have (language use, pronunciation, difficulty in understanding) andthink of ways to overcome these problems.
8.14 Materials and equipment required
Make a note of the materials and equipment needed. This will help you be prepared for your class and avoid a situation where you have to run out of class to look for arecording or a bunch of exercises.
8.15 Homework
You can also make a note of which exercises your students will do for homework. If theclass will be meeting again within a couple of days, set an exercise that can becompleted quickly. If the class are not meeting again for a week, you can set alengthier task such as essay writing. It is important for students to do homework thatwill consolidate what they have studied in class; this work will reinforce the learningprocess. Be careful to choose exercises that are at the right level.
Of course, you can also make a decision about homework assignments at the end of the lesson. The advantage of this approach is that you will have seen how the studentsperform with the target language and how much follow-up is required.
8.16 Extra activities
You should also have extra activities ready in case the students get through the workquickly or if you decide to do things differently when you are in class. The time spentthinking about extra activities won’t be wasted: if you don’t use the extras, you can use
58 Copyright © Lucy Pollard 2008 All Rights Reserved
This e-book may not be reproduced in part or in full without the express written permission of the author.

8/9/2019 A Guide to Teaching English - 72p
http://slidepdf.com/reader/full/a-guide-to-teaching-english-72p 60/72
them in another lesson. If you find you do need them, you’ll be very pleased you tookthe time to consider them!
8.17 A final word about lesson plans
The above might seem like a lot to think about, but once you have your plan, you cananalyse it to see whether the above guidelines have been met. Of course, you mightbe using a course book. In such cases the book will provide the outline for your lessonplan. I advise you to look ahead through the unit of the book you are about to start.Look at it with a critical eye: you might find that the beginning of the unit focuses onlanguage presentation and practice and that the end of the unit is more skills focused.You might decide to cover all aspects of the unit but to approach them in a differentorder. You might also decide to omit parts of the unit because your students don’t needpractice in that point; you might also think that your students need more practice in oneaspect of the unit and decide to supplement it. In any case, when planning it isessential to bear in mind your students; many textbooks are excellent but only you
know your students.
Finally, whilst I think it is wise to use a plan, I also think there are times when you canmove away from it and even discard it totally. If something is too difficult or too easy for your students, you might decide to abandon the task at an appropriate moment. If your students arrive and talk excitedly about a topic of importance to them, I suggest you gowith the flow. Just take advantage of their chattiness and use it as a learning point.
59 Copyright © Lucy Pollard 2008 All Rights Reserved
This e-book may not be reproduced in part or in full without the express written permission of the author.

8/9/2019 A Guide to Teaching English - 72p
http://slidepdf.com/reader/full/a-guide-to-teaching-english-72p 61/72
CHAPTER 9: ERROR CORRECTION
Errors are a natural part of the learning process. Students make mistakes when theyare learning a new language item; even when language has been presented, revisedand practised repeatedly, students can still make mistakes. Errors and mistakes will
always occur, it’s how we deal with them that determines whether or not our studentslearn from their mistakes. Correcting errors is essential for students to learn andimprove and to avoid a situation where they continue making the same mistake andeventually believe that what they are saying is correct. Errors and their correction canbe used to help students consolidate their knowledge of a language point and to foster good learning habits. This approach to students’ errors will be the focus of this chapter.
Firstly, we’ll take a look at the different types of errors that students make. According toJulian Edge, there are 3 categories of error: slips, errors and attempts. Slip refers to asituation where a mistake has been made, the student knows the language point, (s)heis capable of correcting the mistake. An example of a slip is an intermediate student
saying, “I’ve ate my dinner”. In this case the learner knows the correct answer “I’veeaten my dinner” but forgot it momentarily or it just came out the wrong way. Whenprompted the student can correct a slip. Native speakers also make this type of error.
The second category, Julian Edge calls errors. These are mistakes that the studentcannot correct himself. There are 2 main categories of this type of error: false-friendsand over-generalisations. False friends refer to words that exist in the student’s ownlanguage and that have a similar word in English with a different meaning; the learner might assume the word is the same. An example of this is the Spanish word“embarazada” which means pregnant. A Spanish student might use the word“embarrassed” incorrectly, believing it is a translation of “embarazada”. An over-
generalisation occurs at a point where the student is assimilating language but hasn’tfully mastered it yet. For example, an elementary student who says “I taked the busyesterday” demonstrates that they have learnt that an “ed” ending denotes a pasttense. They have just over-generalised the rule and applied it to a verb that is irregular in the past tense. Young children also make this type of error in their mother tongue;for example, you might hear a child talking about sheeps as the plural of sheep.
The final type of error is where the student quite simply doesn’t know or hasn’tencountered the language item yet. This type of error frequently occurs during freespeaking practice and free writing practice. The student has an idea that (s)he wishesto express but doesn’t know the corresponding language item. They try to put their
idea into words; J Edge refers to this as an attempt. For example, a low-intermediatestudent might say, “If I knew, I would done it”. Obviously, the student has madeincorrect choices of tense but the student hasn’t yet encountered or studied the thirdconditional: “If I had known, I would have done it”.
The above is a summary of Julian Edge’s definition of errors. Our role as teachers is todistinguish between the different types of error and decide which need to be correctedimmediately, which we will focus on later and which we will not correct. Our decisionswill be based on the level that our students are at; what we have been working onrecently in class and what we think the students should have mastered by now. We
60 Copyright © Lucy Pollard 2008 All Rights Reserved
This e-book may not be reproduced in part or in full without the express written permission of the author.

8/9/2019 A Guide to Teaching English - 72p
http://slidepdf.com/reader/full/a-guide-to-teaching-english-72p 62/72
also need to consider what the focus of the activity is: during accuracy work, theteacher will correct more often and sooner than during fluency work (for definitions of accuracy and fluency see Chapter 1).
9.1 Correcting mistakes in oral work
9.1.1 What to correct
As a general rule, correct the errors and slips described above. If students try toexpress something and make the third type of error above (attempt), it is not essentialto correct it. However, depending on the context and depending on whether other students start to use the incorrect form, you might want to briefly explain the correctusage. You can also correct attempts if they cause a breakdown in communication.
During activities designed for accuracy, you will correct all mistakes in the languagepoint being practised. For example, during a speaking exercise designed to practise
the simple past, correct all errors in the use of the simple past. If the students makemistakes in other areas of language, use your discretion as to whether it is necessaryto correct or not. During fluency activities, you’ll correct less and probably at the end of the activity.
9.1.2 How much to correct
Think about the activity your students are doing. If you are doing a speaking activity topractise fluency, avoid correcting too much as this will interrupt the flow. If a teacher over-corrects during a fluency activity, the students might get frustrated because theydon’t have the opportunity to express themselves without the teacher interrupting. Our
role in this type of activity is to focus on correcting errors that might hinder comprehension or cause a breakdown in communication. As for errors that don’tinterfere with communication, make a note of them and go over them when the activityis finished. However, if you hear the same mistake being made repeatedly, it’s better tocorrect it sooner rather than later. If the aim of the activity is accuracy, you should dealwith all mistakes in the target language immediately. As for errors in other languagepoints, correct them if: very few errors are made in the target language, if the mistakehinders communication or if other students notice it.
Some students feel uncomfortable if the teacher isn’t seen to be correcting mistakes. If so, you might like to share this methodology with your students; explain to them that
some speaking activities focus on fluency and others on accuracy. Explain that in thelatter, you will correct more often and almost immediately; during the former, you willsave comments for when the activity is finished. Students will soon get used to thisway of dealing with errors. A further advantage of dealing with errors after a fluencyactivity is that you can spend time presenting or explaining language items, writingsome examples on the board and giving students time to copy them down. Studentswill soon understand the benefits of this approach. During feedback at the end of afluency activity, it’s also important to highlight examples of good work.
61 Copyright © Lucy Pollard 2008 All Rights Reserved
This e-book may not be reproduced in part or in full without the express written permission of the author.
8/9/2019 A Guide to Teaching English - 72p
http://slidepdf.com/reader/full/a-guide-to-teaching-english-72p 63/72
9.1.3 When to correct
In accuracy activities, correct immediately. In fluency activities, correct at the end of the task unless a) the error affects communication, b) the mistake is made repeatedlyor c) students notice and comment on it. If in doubt, make a note and correct it later.
You will need to adapt an attitude of silence, and avoid a common error of newteachers which is to do too much and speak too much (even if this is born out of goodintentions).
9.1.4 Who corrects
When you’ve decided which errors to correct, think about who corrects it. Try to givethe student who made the mistake first chance. This allows them to show whether theyknow the language point or not and is also a very good way of reinforcing their knowledge and the learning process. If the student doesn’t find the right answer, youcan correct yourself or ask someone else in the class to try. If you invite another
student to correct, try to do this in a sensitive way so as not to negatively highlight theerrors of the student in question. You’ll also need to consider how much time you wantto spend on this. Having the teacher correct is usually the quickest method.
9.1.5 How to correct
You can correct directly yourself. This can be done in the interests of speed but thisapproach doesn’t give students the opportunity to self-correct and learn. If you prefer to have students correct their own mistakes, you will need to indicate to them that amistake has been made. Below are some useful techniques for highlighting a mistakeand for inviting students to correct them.
repeat the sentence back to the student, stressing or changing the intonation on theincorrect word(s);
point out which word(s) is wrong and invite the student to correct. If so, do thissensitively and not in a mocking way. E.g. “I taked the bus yesterday”; “taked is notthe correct verb form, can you correct it?”;
give a gentle hint; e.g. verb form? with a rising intonation when the student says “hego” instead of “he goes”;
when a student makes a mistake, respond genuinely to what they are saying, usingthe correct language; “I go to the cinema yesterday”; “Oh, so you went to the cinema
yesterday. What did you see?”.
For indicating that a mistake has been made, without saying what it is and for invitingthe student to find it for him or herself, use the following techniques:
say: “I’m not sure that’s right”;
give a hesitant movement of the head, saying mmmmm;
an outstretched hand that moves from side-to-side;
say: “do you think that’s correct?”;
62 Copyright © Lucy Pollard 2008 All Rights Reserved
This e-book may not be reproduced in part or in full without the express written permission of the author.
8/9/2019 A Guide to Teaching English - 72p
http://slidepdf.com/reader/full/a-guide-to-teaching-english-72p 64/72
ask the student to repeat the sentence “could you say that again?”; this serves as ahint that something is wrong. However, if you use this technique regularly and thenwhen you genuinely don’t hear and ask a student to repeat, they can misinterpretyour question as an indication that something is wrong.
Things to consider when using the above are: the amount of time available and howsuccessful you think your students will be at finding the mistake.
A final point to remember is that you should ask the student(s) to repeat the correctform any time you correct something. This will reinforce the learning process.
9.2 Correcting mistakes in written work
As a teacher, you will also need to think about your approach to correcting errors inwritten work. The above categories used to describe oral work also apply to correctingwritten work.
9.2.1 How much to correct
As with oral work, you need to consider the aim of the activity. So if you are doingcontrolled writing practice, e.g. a gap-fill exercise to practise a recently-studiedlanguage point, you will need to correct all errors and especially errors in the targetlanguage.
For a piece of creative writing or extensive writing, you should correct some (but notall) of the errors. You should also think about responding to the content of the piece of prose as well as focusing on language.
When marking written work, you can comment on and give a grade on a variety of categories, e.g.:
content – is the argument good or not?;
organisation of the work;
grammar;
vocabulary;
spelling;
punctuation.
You can choose to comment on all these areas and add some of your own if you like.This is especially important if the students are preparing for an exam. Alternatively, youcould tell students before they start writing that you will only focus on one area whencorrecting. This could be use of linkers, punctuation, organisation of paragraphs,tenses, vocabulary, spelling; whatever you think they need to work on. You could evengive a different focus to each student depending on his or her needs. This approachhelps students to focus on their weak points while they are writing; it also makesmarking easier for the teacher!!
63 Copyright © Lucy Pollard 2008 All Rights Reserved
This e-book may not be reproduced in part or in full without the express written permission of the author.
8/9/2019 A Guide to Teaching English - 72p
http://slidepdf.com/reader/full/a-guide-to-teaching-english-72p 65/72
In all feedback on written work, you should include a positive comment. For example,“your use of linkers was excellent”; “you used the tenses well”. Positive feedback isarguably more important on written work than in others areas because the student willretain a record of what was written as well as your comments. However, we also needto give students pointers on how to improve, one or two will be enough. For example,
“think about linking paragraphs and work on punctuation for your next piece of writing”.
9.2.2 How to correct
Consider very carefully how you will correct errors in a piece of creative or communicative writing (letter, essay, etc.) It can be very disheartening for students tohave their work returned to them covered in corrections. One way to avoid coveringstudents’ work in red ink is to use symbols to indicate to the students that something iswrong. For example:
sp = spelling;
p = punctuation;
wo = word order;
t = tense.
When marking, indicate the spot at which there is a mistake and put the correspondingsymbol in the margin. The students can attempt to correct the errors themselves. For higher-level students, or for errors which lower level students should be able to correcteasily, you could put the symbol in the margin without indicating exactly where theerror is. This shows the students that something is wrong without telling them where.Students go through that particular sentence to identify the error and correct itthemselves. These approaches are more encouraging as students are usually able tocorrect themselves. It also supports the learning process by getting students to thinkfor themselves and by getting them into the habit of reviewing their work.
An important comment about the use of symbols is that students must know what theymean. Keep your list of symbols on view in the classroom and spend some timeexplaining to students what the symbols mean and by doing some work to practisethem. Invent some incorrect phrases, write them on the board with the correspondingsymbol and ask students to make suggestions as to the correct form.
9.3 A final word on error correction
After correcting work, you should allow time in class for students to review what theyhave done and to consider your feedback. Feedback works best when students spendtime reflecting on it. This will also give students the opportunity to ask you questions if they are unable to find the correction themselves.
In all, it is essential to get the balance right as to how much we correct. We also needto deal with errors sensitively and in a supportive way.
64 Copyright © Lucy Pollard 2008 All Rights Reserved
This e-book may not be reproduced in part or in full without the express written permission of the author.

8/9/2019 A Guide to Teaching English - 72p
http://slidepdf.com/reader/full/a-guide-to-teaching-english-72p 66/72
CHAPTER 10: PRONUNCIATION
Pronunciation is an essential aspect of learning to speak a foreign language. If a
student does not pronounce a word correctly, it can be very difficult to understandhim/her. On the other hand, if students make grammatical mistakes e.g. in a verbtense, the listener still has an idea of what is being said. So, it can be seen that goodpronunciation is vital if a student is to be understood.
It is essential to work on pronunciation regularly. I always suggest that new teacherswork on pronunciation through short tasks on a regular basis. It is easy enough toincorporate some sort of pronunciation work into every lesson. Whenever you presentnew language, you should also work on its pronunciation.
You will need to decide whether to introduce your students to the phonemic alphabet.
The phonemic alphabet is a series of symbols that represent the sounds of English.You can find a copy of the phonemic alphabet in any good book on pronunciation, e.g.Sound Foundations by Adrian Underhill. One drawback of teaching the phonemicalphabet is that it can be daunting for students to learn all these symbols especially if they use a non-Latin writing system. That makes just too many new symbols to learn.However, if a student knows the phonemic alphabet, they can use that knowledge tocheck the pronunciation of words in a dictionary. If you don’t want to present thephonemic alphabet to your students, I suggest that you at least introduce the phoneticsymbols for the letters that your students find difficult to pronounce.
This brings me neatly to another point: which sounds do students find difficult and
which should we focus on? Unfortunately, there is not one answer to this; it will dependvery much on your students’ mother tongue. Many students have difficulty pronouncing“th” but this is not a problem for most Arabic speakers who have the sound in their ownlanguage. Speakers of some Asian languages find it difficult to differentiate between “l”and “r”. Some languages don’t have the “h” sound at the beginning of words and willneed to work on its production. I suggest you consult a copy of Learner English byMichael Swan. He gives very comprehensive coverage of problems encountered byspeakers of various languages. If you cannot get hold of a copy, I suggest you speakto some people who have been teaching in your particular setting for some time andask them which sounds the students find difficult. You’ll also notice it yourself in thefirst few lessons with your students.
Apart from the difficult sounds specific to certain language groups, students will needto know about the aspects of pronunciation that are described below.
65 Copyright © Lucy Pollard 2008 All Rights Reserved
This e-book may not be reproduced in part or in full without the express written permission of the author.
8/9/2019 A Guide to Teaching English - 72p
http://slidepdf.com/reader/full/a-guide-to-teaching-english-72p 67/72
10.1 Individual sounds
Individual sounds are letters “s” “k” etc. and combinations of letters “sh” tch” etc.
To teach individual sounds, you can:
1) demonstrate. For example, exaggerate the production of the sound “th” or showthat there is an expulsion of air when producing the initial “h”;
2) explain to students how to make the sound. For example say, “you put your tongue between your teeth to produce the sound “th””. You can instruct students to puttheir hands in front of their mouths and to say “house” if they pronounce it correctly,they should feel the breath on their hands;
3) show a picture of the inside of the mouth (diagrams are available in many bookson pronunciation) and point to where the sound is made. For example, some vowelsare produced towards the front of the mouth e.g. the sound ‘e’ in met and ‘ee’ in meet;whereas others are produced at the back of the mouth e.g. ‘ore’ in bore.
Below are some exercises to practise the pronunciation of individual sounds.
1) Use tongue twisters e.g. “Red leather, yellow leather” to practise thepronunciation of “l” and “r”. You can find many tongue twisters on the internet. Askstudents to repeat them and insist on correct pronunciation of the target sound(s).
2) You can also play the game odd one out; show students 4 words and ask them tosay which is pronounced differently:
Example: thought, bought, caught, through.
3) A useful exercise for working on individual sounds is minimal pairs. For this, youchoose a sound that your students have difficulty with. I’ll take “h” as an examplebecause many learners find this sound difficult.
Choose some words (five to ten will be enough) that begin with the sound “h” andsome words that sound similar but without the initial “h” sound. For example:
Column 1 Column 2
Ham am
Hat at
Hash ash
Try to choose words that your students are familiar with. If this isn’t possible, don’tworry, the important thing here is pronunciation.
An essential first step in working on any aspect of pronunciation is to have your students listen to the sound. So, read out column 1 whilst students listen, then do the
66 Copyright © Lucy Pollard 2008 All Rights Reserved
This e-book may not be reproduced in part or in full without the express written permission of the author.

8/9/2019 A Guide to Teaching English - 72p
http://slidepdf.com/reader/full/a-guide-to-teaching-english-72p 68/72
same with column 2. This is to focus on the different individual sounds. Then read oneword from column one and the corresponding word from column 2. This is so thatstudents hear the 2 different sounds side by side.
Then read out one of the words randomly and ask students to say whether it is in
column 1 or column 2. Continue with this until most of the students get it correct. Bythis stage students will be able to recognise the sound. You can then move onto aproduction phase. Point to a word, say it and ask students to repeat after you, as agroup first, then individually. When most students get it right, you can make this moredifficult by pointing to a word, not giving the model and asking students to say theword.
You can adapt this exercise to practise any sound. I first saw this activity in “Tree or Three” by Ann Baker.
10.2 Word stress
Word stress refers to which syllable(s) in a word carries more emphasis, e.g. the firstsyllable in the word ‘teacher’ is stressed. Sometimes more than one syllable in a wordis stressed, in which case one is usually stressed more than the other. This is knownas primary and secondary stress. For example, in the word pronunciation, the primarystress falls on the “a” sound and the secondary stress falls on the “nun” sound. TheEnglish language has a particular sound that is called a “schwa”; this is the unstressedsound that often (but not always) occurs at the end of words. Think about thepronunciation of “er” in words such as teacher and painter; this is the schwa. It alsooccurs in the middle of words e.g. the first “o” in photographer, as well as the –er ending; so the word photographer actually contains 2 schwas. The phonetic symbol for
the schwa resembles a reverted letter “e” (i.e. upside down). You might consider introducing this symbol to your students. When teaching vocabulary, you should markstress and schwas on the new words. To find out where stress and schwas occur, youcan consult your dictionary.
Ways of marking word stress include:
'picture
picture
!
picture
PICture
! ! pronunciation
67 Copyright © Lucy Pollard 2008 All Rights Reserved
This e-book may not be reproduced in part or in full without the express written permission of the author.

8/9/2019 A Guide to Teaching English - 72p
http://slidepdf.com/reader/full/a-guide-to-teaching-english-72p 69/72
To practise word stress you can:
1) ask students to repeat words after you, exaggerating their pronunciation whilstpunching the air in time with the stressed syllables. Such activities can be fun if you getsome rhythm going.
2) show students words whilst saying them and ask students which syllable thestress falls on. A further activity is to group words that have stress on the samesyllable. For example, show students the words below and ask them to group thewords according to whether the stress falls on the first, second or third syllable.
Omission, understand, arrangement, normally, overflow, argument
Answers:
First syllable: normally, argument
Second syllable: arrangement, omission
Third syllable: overflow, understand
10.3 Sentence stress
Sentence stress refers to words in a sentence that carry more emphasis. If each wordin a sentence is pronounced with the same stress, the sentence will sound stilted andunnatural. For example, try reading the following sentence giving each word andsyllable the same emphasis: what are you going to do after class? Then re-read it in anatural way. Do you hear the difference? The schwa also occurs in sentences and
phrases; think about the pronunciation of “are” and “to” in the sentence above, this isthe schwa.
When teaching grammar or functions, remember to give one or two examples of phrases with sentence stress marked on them. You can use the same symbols youuse for word stress for consistency.
For example: Have you ever been to Brazil?
To practise sentence stress you can:
1) ask students to repeat words after you, exaggerating their pronunciation whilstpunching the air in time with the stressed words or syllables.
2) practise reading a sentence repeatedly but stressing a different word each timeand see how the meaning changes. E.g. I don’t know why he phoned her. If you stressthe word “I” you’re actually saying: “I don’t know, but somebody else might know whyhe phoned her”. Practise this yourself on the different words of the sentence aboveand I’m sure you’ll come up with lots of creative ideas.
68 Copyright © Lucy Pollard 2008 All Rights Reserved
This e-book may not be reproduced in part or in full without the express written permission of the author.

8/9/2019 A Guide to Teaching English - 72p
http://slidepdf.com/reader/full/a-guide-to-teaching-english-72p 70/72
10.4 Intonation
Intonation refers to the music of the language; how it rises and falls over a chunk of speech, a phrase or a sentence. Languages vary in how much intonation is used. For example German is not very “sing songy” whereas spoken English carries a lot of
intonation. If a student, doesn’t master intonation, they can sound monotonous or bored when speaking English, which might not be the impression he or she wants togive. Intonation can indicate meaning. For example, a rising intonation on a questioncan indicate we didn’t understand. A falling intonation is often used when giving orders,e.g. do it now. Intonation can also show how we’re feeling; for example, a fallingintonation can indicate that the speaker is bored.
To teach intonation, you can:
1) mark phrases on the board with rising or falling arrows.
For example:
That’s lovely
What time is it?
2) say the sentence and exaggerate the intonation; you can say the sentence and atthe points where intonation rises and falls, use a rising or falling motion with your hand.
Remember to ask students to repeat after you.
To practise intonation, you can ask students to listen to phrases on a recording whilelooking at the written form of the phrases. Students mark on the phrases whether theintonation goes up or down. They can then practise saying the sentences.
To practise intonation that carries feeling, you can read out various phrases and askstudents what message you are conveying through your tone of voice. For example,say, “I’d simply love to go out tonight” in a bored voice, an excited voice, a resignedvoice. Ask students what they think the meaning is. Then students can practise it ingroups or pairs.
10.5 Connected speech
Connected speech involves sentence stress, intonation, as well as sounds that aresilent in connected speech, for example: we usually say “goo boy” and not “good boy”.It also refers to sounds that are introduced e.g. “w” in “shall we go (w) out”.
To practise pronunciation in connected speech, you can take a sentence that you thinkthe students will understand and read it out at a natural speed used between nativespeakers. Ask students to write it down as you speak. Repeat the sentence until they
69 Copyright © Lucy Pollard 2008 All Rights Reserved
This e-book may not be reproduced in part or in full without the express written permission of the author.

8/9/2019 A Guide to Teaching English - 72p
http://slidepdf.com/reader/full/a-guide-to-teaching-english-72p 71/72
have most of it; then invite students to tell you what the sentence is and to mark up allthe pronunciation features (stress, intonation, silent letters and letters that areintroduced). Students can then practise reading the sentences.
You can also work on connected speech after a listening activity. After listening to a
recording, you can ask students to focus their attention on certain phrases. You caneither write the phrases on the board or dictate them slowly. Ask students to markstress (both word stress and sentence stress) and intonation on the phrases. They canalso mark connected speech. Students can then practise saying the phrases andpossibly compare what they say with the recording. Take short sections of thetranscript for this, 2 or 3 lines will be enough.
10.6 A final word on pronunciation
There are 2 basic rules to remember when teaching pronunciation:
After working on features of pronunciation, remember to correct students as youwould with any other errors both during the pronunciation lesson and in subsequentlessons;
Students should listen to sounds before being asked to produce them themselves.
A lot of the work we do on pronunciation will be awareness-raising. We shouldn’texpect our students to produce perfectly pronounced words all the time. Somestudents don’t have a musical ear and/or just don’t hear the differences betweensounds. Even if they can hear the difference, they can’t always produce the differentsounds. If your students can’t produce the sounds correctly at least they will be awarethat a difference exists and be aware of what they are aiming for. A knowledge of
sounds will also help them understand spoken English.
I suggest that you work on pronunciation regularly. You can incorporate this in twosimple ways: by doing pronunciation work as a warmer or to fill a gap at the end of alesson, though not in every lesson in order to maintain variety. Secondly, this can beachieved by incorporating pronunciation work into language presentations andspeaking and listening lessons.
70 Copyright © Lucy Pollard 2008 All Rights Reserved
This e-book may not be reproduced in part or in full without the express written permission of the author.
8/9/2019 A Guide to Teaching English - 72p
http://slidepdf.com/reader/full/a-guide-to-teaching-english-72p 72/72
REFERENCES
Practical English Usage by Michael Swan. Oxford.
Advanced Grammar in Use by Martin Hewings. Cambridge University Press.
Streamline English: Departures by Bernard Hartley. Oxford University Press.
Cutting Edge: A Practical Approach to Task Based Learning by Sarah Cunningham and Peter Moor. Longman.
Communication Games Intermediate by Jill Hadfield. Longman (Pearson P T R).
New Cambridge English Course by Michael Swan and Catherine Walter. CambridgeUniversity Press.
Discussions that Work: Task-centred Fluency Practice by Penny Ur. CambridgeHandbooks for Language Teachers
Discussions A-Z : Intermediate Teacher's Book by Adrian Wallwork. CambridgeUniversity Press.
Mistakes and Correction by Julian Edge. Longman UK.
Sound Foundations by Adrian Underhill. Heinemann.
Learner English: A Teacher's Guide to Interference and Other Problems by MichaelSwan and Bernard Smith. Cambridge Handbooks for Language Teachers (CambridgeUniversity Press).
Tree or Three? Student's Book: An Elementary Pronunciation Course by Ann Baker.Cambridge University Press.