calredie system requirements - cdph home document library... · calredie system requirements ....
TRANSCRIPT

CalREDIE System Requirements
Contents
Section 1: Browser Settings .................................................................................................. 1
Section 2: Windows XP Requirements ................................................................................ 11
Section 3: Troubleshooting .................................................................................................. 12

1
Section 1: Browser Settings
The following browser settings are required for access to CalREDIE:
Please note: If you are unable to access or change any of these settings please contact your system administrator or IT personnel. 1. You will need to have Internet Explorer 7.0 or higher installed on your
computer 2. Clear Internet Explorer Browser cache
a. Select “Tools”b. Select “Internet Options”
c. Click the “General” tabd. Click “Delete” under “Browsing
history”
e. Mark the Checkbox for at least“Temporary Internet files andwebsite files” and “Cookies andwebsite data”
f. Click “Delete”

2
3. Set Internet Explorer to “Check for newer versions of stored pages”:
a. Select “Tools”b. Select “Internet Options”c. Click the “General” tabd. Click “Settings” under “Browsing
history”
e. Mark the radio button for “Every time I start Internet Explorer”
f. Click “OK”g. Click “Apply”

3
4. Add the CalREDIE URLs as trusted sites:
a. Select “Tools”b. Select “Internet Options”
c. Click the “Security” tabd. Select “Trusted Sites”e. Click “Sites”

4
f. Enter the following CalREDIEURLs in the “Add this website tothe zone” box:
https://calredie.cdph.ca.gov https://calrediestaging.cdph.ca.gov
g. Click “Add”h. Click “Close”
5. Enable Active X and Javascript for the trusted sites
(Please note: The following security settings will only apply to secure websites listed as Trusted Sites)
a. From the security tab used above,click “Trusted Sites”
b. Click “Custom Level”
5
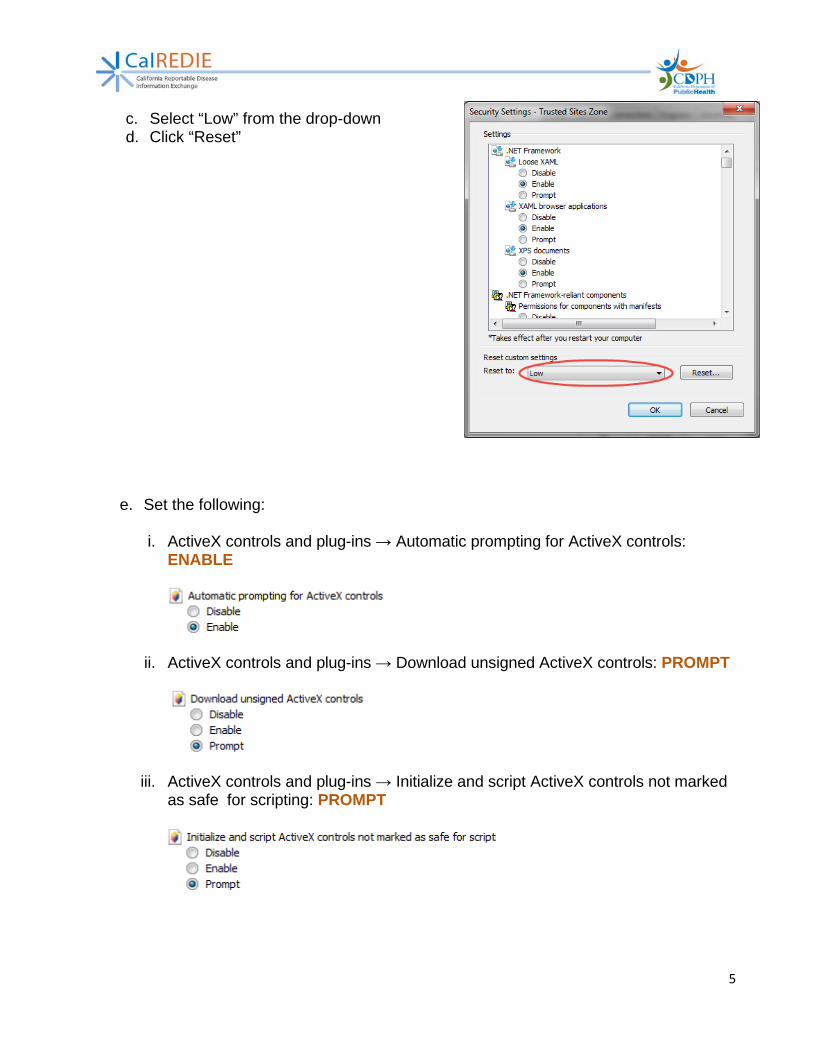
c. Select “Low” from the drop-downd. Click “Reset”
e. Set the following:
i. ActiveX controls and plug-ins → Automatic prompting for ActiveX controls:ENABLE
ii. ActiveX controls and plug-ins → Download unsigned ActiveX controls: PROMPT
iii. ActiveX controls and plug-ins → Initialize and script ActiveX controls not markedas safe for scripting: PROMPT
6
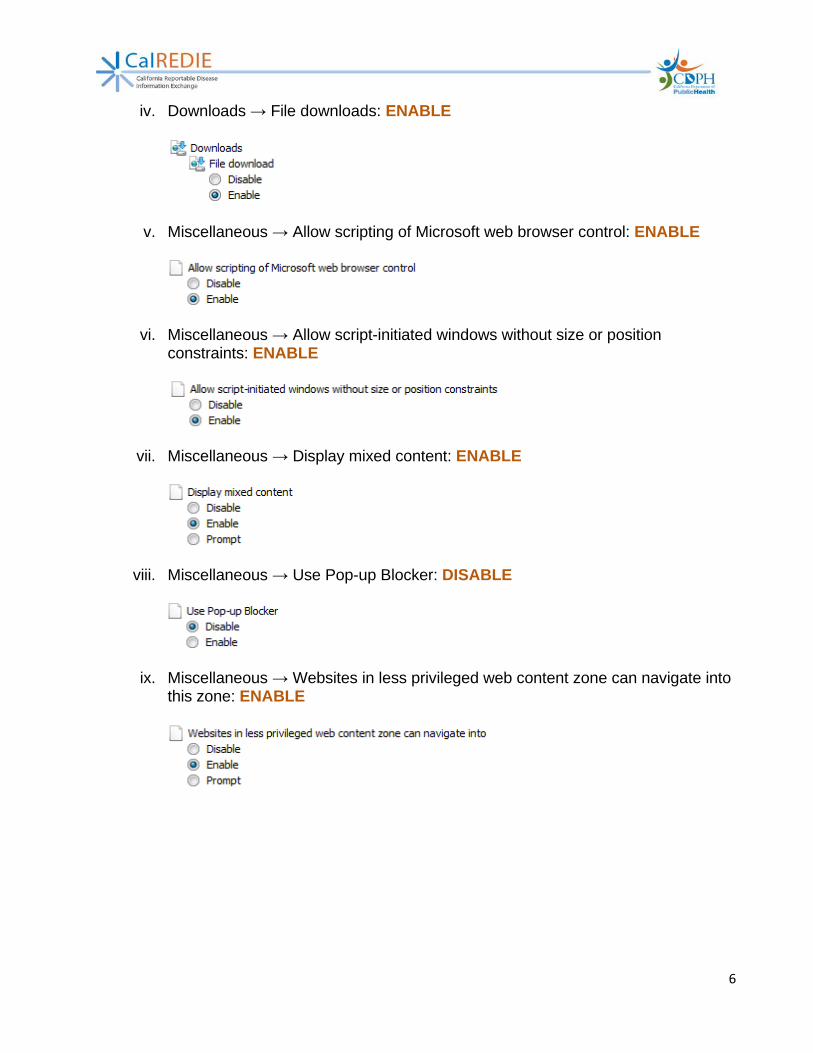
iv. Downloads → File downloads: ENABLE
v. Miscellaneous → Allow scripting of Microsoft web browser control: ENABLE
vi. Miscellaneous → Allow script-initiated windows without size or positionconstraints: ENABLE
vii. Miscellaneous → Display mixed content: ENABLE
viii. Miscellaneous → Use Pop-up Blocker: DISABLE
ix. Miscellaneous → Websites in less privileged web content zone can navigate intothis zone: ENABLE
7
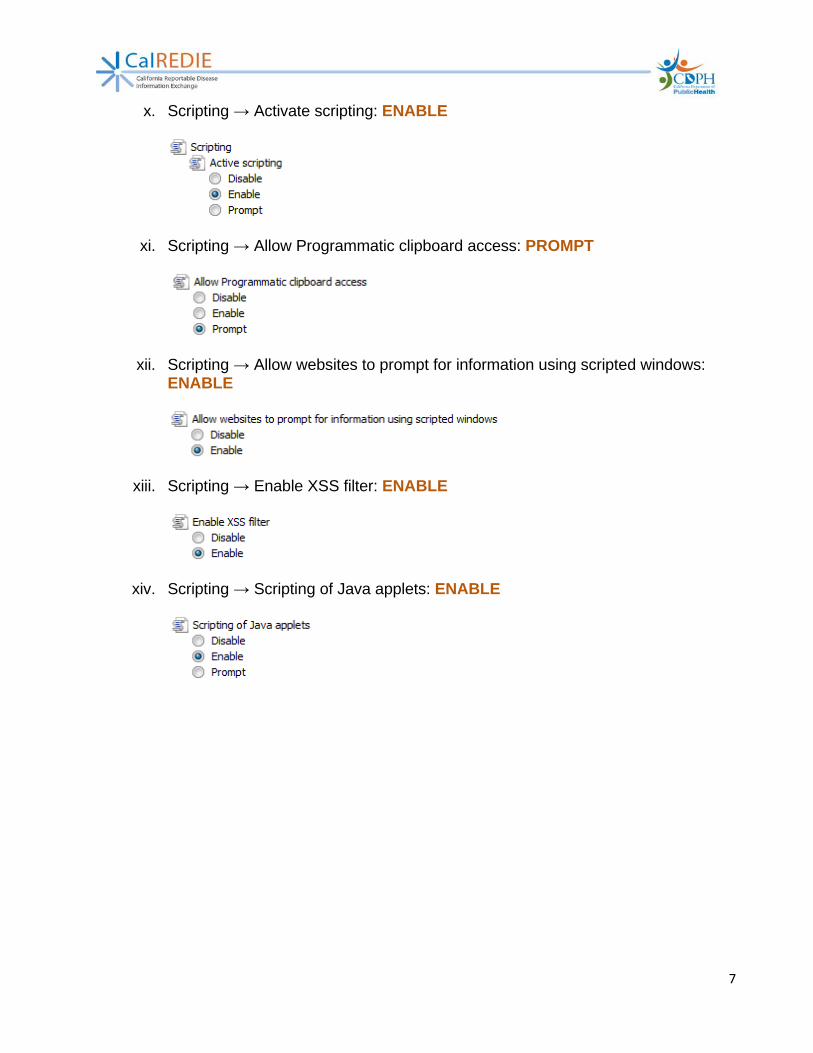
x. Scripting → Activate scripting: ENABLE
xi. Scripting → Allow Programmatic clipboard access: PROMPT
xii. Scripting → Allow websites to prompt for information using scripted windows:ENABLE
xiii. Scripting → Enable XSS filter: ENABLE
xiv. Scripting → Scripting of Java applets: ENABLE

8
f. Disable Security Setting:i. Click the “Advanced” tabii. Under “Security” settings, un-check
the “Do not save encrypted pages to disk” setting
iii. Click “OK”
6. Install ActiveX Controls:
a. Navigate to the CalREDIE login page:
https://calredie.cdph.ca.gov
b. Click on the “Install ActiveXControls” link
c. Follow the instructions on the newpage that will open

9
7. IE 11 Only – Update for Internet Explorer 11 (KB3025390):a. Have your system administrator install the following update for IE 11:
https://support.microsoft.com/en-us/kb/3025390
8. IE 8 Only – DisableAutoComplete:
a. Click the “Content” tabb. Under the “AutoComplete” section,
select “Settings”
c. Uncheck the “User names andpasswords on forms” setting
d. Click the “Delete AutoCompletehistory” button
e. Click “OK”

10
9. IE 7 Only – DisableAutoComplete:
a. Click the “Content” tabb. Under the “AutoComplete” section,
select “Settings”c. Uncheck the “User names and
passwords on forms” settingd. Click “OK”
e. Select the “General” tabf. Click “Delete…”g. Check the “Passwords” settingh. Click the “Delete”

11
Section 2: Windows XP Requirements The following settings are required to access CalREDIE using Windows XP
1. Set text DPI to 96 DPIa. Right-Click your Desktopb. Select “Properties”c. Click the “Settings” tabd. Select “Advanced”
e. Select “Normal size (96 DPI)”f. Click “OK”g. Click “Yes” on pop-up window to
reboot your computer
12
Section 3: Troubleshooting
The following can help resolve common issues:
Please note: If you are unable to access or change any of these settings please contact your system administrator.
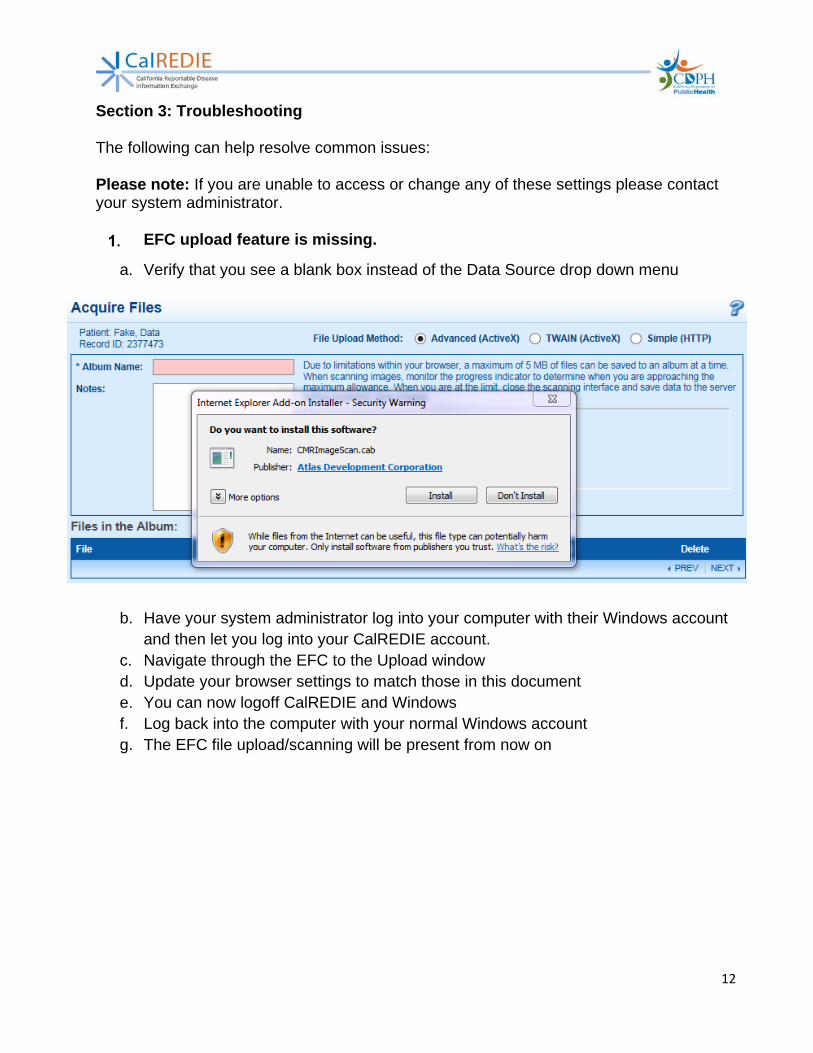
1. EFC upload feature is missing.
a. Verify that you see a blank box instead of the Data Source drop down menu
b. Have your system administrator log into your computer with their Windows accountand then let you log into your CalREDIE account.
c. Navigate through the EFC to the Upload windowd. Update your browser settings to match those in this documente. You can now logoff CalREDIE and Windowsf. Log back into the computer with your normal Windows accountg. The EFC file upload/scanning will be present from now on