chem f110 -first six experiments.pdf
DESCRIPTION
bits first six experimentTRANSCRIPT

CHEM F110, CHEMISTRY LABORATORY
DEPARTMENT OF CHEMISTRY
EDUCATIONAL DEVELOPMENT DIVISION
BIRLA INSTITUTE OF TECHNOLOGY AND SCIENCE, PILANI– K. K. BIRLA
GOA CAMPUS, GOA

© Department of chemistry,
BITS, Pilani- K K Birla Goa Campus, 2012
i
Table of Contents
INDEX Page no.
Preface ii
General Chemistry Laboratory Safety iii
General glasswares discription v
Experiment 1: Determination of the pH curve of an acid-base titration 1
Experiment 2: Kinetics of the iodination of acetone by
spectrophotometry 7
Experiment 3: Determination of unknown strength of weak acid by
conductometric titration
12
Experiment 4: Estimation of copper by iodometry 14
Experiment 5: Identification of some organic compounds 17
Experiment 6: Preparation of methyl salicylate (oil of wintergreen) 21
Experiment 7: Dissociation constant of a weak electrolyte by conductometry
---
Experiment 8: Identification of some inorganic ions by standard tests ---
Experiment 9: Determination of total hardness of water ---
Experiment 10: Determination of strength of a coloured complex by
spectrophotometry
---

ii
PREFACE Chemistry is mainly an experimental science. Thus, it is essential that students of
chemistry have more hands on experience in the laboratory. The laboratory can also help
the students in the study of the science by clearly illustrating the principles and concepts
involved. As a whole, laboratory experimentation allows students the opportunity to
develop their laboratory skills.
The faculty of the Department of Chemistry at BITS, Pilani— K. K. Birla Goa Campus
clearly understands the importance of basic concepts of chemistry and its demonstration
in the laboratory. The Department is committed to this component of your education and
hopes that you will take full advantage of this opportunity to explore the science of
chemistry.
The sequence of experiments in this Laboratory Manual is designed to follow the lecture
curriculum. Prior to each lab period, you will need to spend some time reading the
Laboratory Manual. This reading will provide background information and an outline of
the procedures to be performed. Questions (Points to consider) are presented
throughout each experiment. It is important that you try to answer each question as it
appears in the manual, as it will help you understand the experiment as you do it. In
addition, you are encouraged to complete the report in allotted time.
Finally, we hope you find this laboratory manual helpful in your study of chemistry.
iii
GENERAL CHEMISTRY LABORATORY SAFETY The chemistry laboratory is a place of discovery and learning. However, due to the nature
of laboratory work, it can be a place of danger if proper common sense precautions are
not taken. Do consult/inform your instructor when you have any doubts regarding safety.
Attire:
1. Always use protective eye wear (safety goggles) and lab coat with full
sleeves. Contact lenses should be avoided.
2. Shoes must be worn in the Lab. Avoid very loose fitting clothes. Long hair must
be tied back.
Handling of Chemicals and Equipment:
1. Consider all chemicals to be hazardous. Know what chemicals you are using.
2. Avoid contact of chemicals with your skin or eyes. If such contact does occur,
flush immediately with copious amounts of water, and inform the instructor
3. Do not use flammable regents near open flames.
4. Be careful while pipetting. Use a pipette bulb, or a burette for corrosive, toxic or
hazardous chemicals. Get advice from instructor.
5. Never point a test tube, while heating, towards yourself or a neighbor or
vertically upwards.

iv
6. Always pour acids into water, and not the other way around.
7. Excess reagents should not be returned to stock bottles. Dispose off excess
reagents properly.
8. Never taste or directly smell chemicals. To detect odor, by means of your cupped
hand, waft a small sample of vapour towards your nose.
9. Dispose off chemical waste properly as directed by the instructor.
10. Follow directions carefully while using instruments.
11. Do not leave burners unattended. Turn them off when you leave. If the burner
goes off, turn off the supply valve immediately. Open again only while relighting
the burner. Never use paper torches for lighting burner.
12. Beware, hot glass looks just the same as cold glass. Conduct:
1. Eating and drinking are strictly prohibited in the laboratory.
2. No unauthorized experiments are to be performed.
3. It is important to engage only the work area assigned to you and not disturb
working of other people. Keep your work area clean. Put paper trash and
broken glass, if any, in the dustbins. Clean your work area before you leave.
4. Avoid spills. If you do spill something, clean up the area immediately taking
adequate precautions. Inform the instructor.
5. Keep the area around instruments clean and free of trash paper.
6. Always wash your hands thoroughly before you leave the laboratory.

v
Wash the buret with water ,rinse with little distilled water and then rinse with little of titrant (titrant is the solution that is dispensed via the buret)
Fill the buret with titrant using a funnel. Leave an airgap between the funnel and buret while filling and remove the funnel after filling.
Drain the solution a littleout to make sure no air bubble trapped in the lower tip of the buret and then correct the upper level to a marking in the eye level. Buret reading is measured for the lower meniscus for a colorless solution as shown in figure
Place the conical flask (Erlenmeyer flask) filled with the analyte solution underneath the buret. (Placing a white paper underneath the flask would be helpful to observe the color changes at the end point)
Cup the stopcock with your left hand (as shown in figure for a right handed person)and usethe thumb and finger tips to control the stopcock and hence flow of the titrant.
Hold the flask neck with your right hand and swirl in a circular pendulum like motion
As the end point is approached titrant should be dropped into the conical falsk drop wise and endpoint should be obtained for a single drop addition.
Volumetric glassware
i) Buret
A buret is a specialized graduated tube (cylinder) with a stopcock at the bottom for dispensing solutions in accurately measured variable volumes (usually with a precision of
0.01 mL

vi
ii) Pipet a) Bulb Pipet
A volumetric pipet (bulb pipet,transfer pipet) has a single calibration mark and is designed to deliver (TD) the indicated volume.
Wash the pipet with distilled water, then rinse with a little of the solution (that is going to be transferred out with the pipet) If you are using a pipet bulb
Evacuate the bulb by squeezing and while keeping it squeezed seal it over the top of the pipet.
Immerse the tip pf the pipet into the solution to be transferred, simultaneously release the squeeze pressure to draw the solution to about half the pipet volume. Remove the bulb, rinse the pipette and drain out (discard into the sink) the solution . Repeat it one more time.
Fill the pipet well past the calibration mark using the pipet bulb (taking care not to drawl the solution up inside the bulb) and quickly remove the bulb and place your index finger over the top of the pipet.
With the index finger firmly in place to prevent solution from draining out, remove the tip of the pipet from the solution and tilt the pipet to an angle and wipe the tip with a tissue paper.
Controlling index finger pressure on top of the pipette, bring the solution lower meniscus to the calibration mark, stop it there and touch the pipet tip outside of the receive vessel to remove any solution that may be suspended there.
Touch the pipet tip to the inside (lower) of the receiving vessel (conical flask) and completely release the finger. The tip should stay in contact with the inside wall of the receiving vessel until the end of the delivery.
When draining is complete give the pipet a half twist (or with the pipet tip tap wall of the receiving vessel two times) and remove the pipet from the receiving vessel The volumetric pipet is NOT calibrated for BLOWOUT. Never blowout the last drop in a volumetric pipet into the receiving vessel.The tip of the pipet should never contact the solution in the receiving vessel
Analytical Chemistry for Technicians John Kenkel, 3rd Edn, CRC Press,2003

vii
b) Graduated pipet (Measuring pipet) These pipets are used whenever variable volumes are need to be dispensed Mohr pipet Serological pipet Mohr pipet has calibration lines stopping short of tip. With Mohr pipet meniscus must be read twice, one before the deliver and one after the delivery. Delivery of 4.6 mL of solution is shown in figure. Serological pipet has calibration lines going all the way to the tip (right in the figure). Meniscus need be read only once. Solution can be allowed to drain completely out. The last drop of the solution has to be blown out to the receiving vessel in this case.
c) Volumetric flasks (standard flasks) Volumetric flask is used to make a solution of fixed volume very accurately by making it
up to the mark on the stem.
A general scheme of preparation of a standard solution of any solute in a volumetric flask
(or standard flask)
(General Chemistry, Principles, Patterns and Applications by Bruce Averill and Patricia
Eldredge, Prentice Hall)

viii
Other common glassware used in General chemistry laboratory
The glassware shown below though have graduations on them do not measure accurate volumes like volumetric glassware mentioned previously.
Beaker Conical flask (Erlenmeyer flask)
Measuring cylider
1
EXPERIMENT – 1 DETERMINATION OF THE pH CURVE OF AN ACID-BASE TITRATION
Objective:
To carry out the titration of a given weak acid solution using strong base, obtain the pH curve and
determine the concentration as well as the dissociation constant of the weak acid. I Principles:
A Acid–Base Titration (Nuetralisation titration)
Titration is one of the universal techniques, used to determine the concentration of a substance
in solution (the analyte). Suppose, there is a solution of an acid in which the amount of acid is
to be determined. This may be done by an acid–base titration (neutralization titration), in which a
sample of this solution, the analyte, is taken in a conical flask, and a solution of base of known
concentration (the titrant), is added in a controlled manner from a burette. The stoichiometric point
(equivalence point or theoretical end point), is the point at which amount of base (OH-) that have
been added is chemically equivalent to the amount of acid initially taken . This point may be
determined by using a suitable acid-base indicator (neutralization indicator) or may be
determined by monitoring the pH [= -log10(H3O+)] of the solution as the titration progress and
plotting the pH curve (neutralization curve or titration curve).
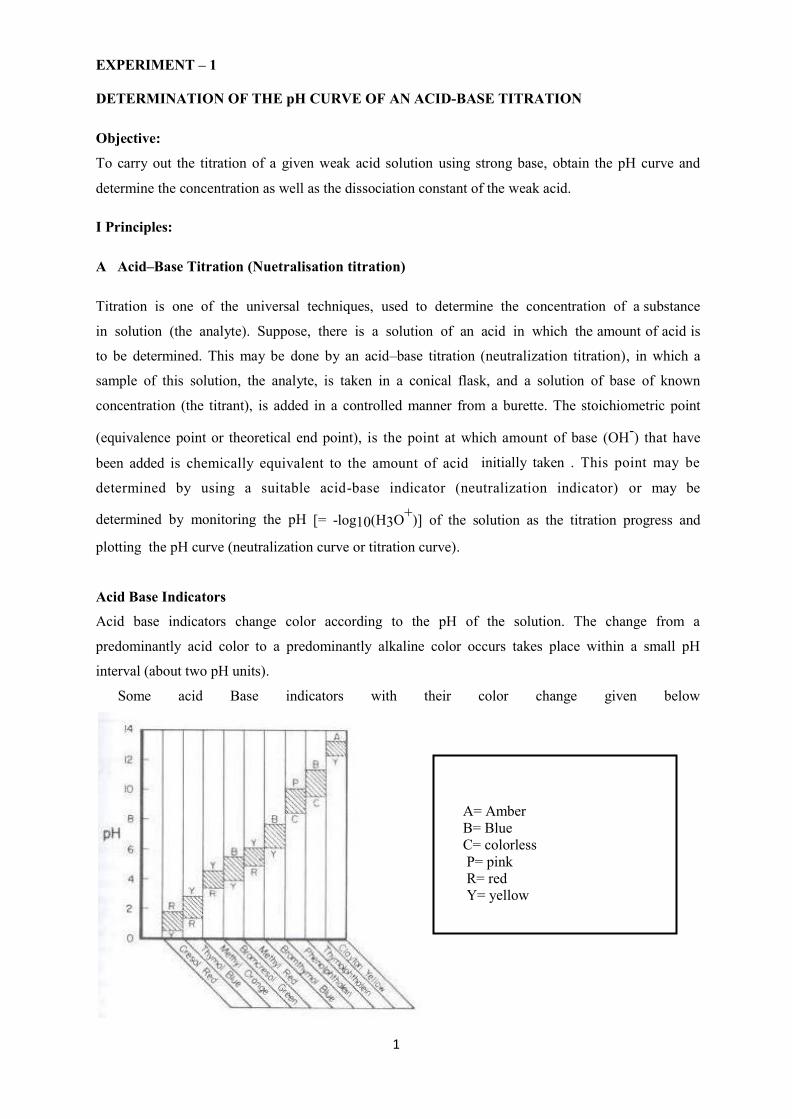
Acid Base Indicators
Acid base indicators change color according to the pH of the solution. The change from a
predominantly acid color to a predominantly alkaline color occurs takes place within a small pH
interval (about two pH units).
Some acid Base indicators with their color change given below
A= Amber B= Blue C= colorless P= pink R= red Y= yellow

2
Figure below illustrates how phenolphthalein acts as an indicator.
Structure A has a lactone ring . It opens in presence of dilute alkali to give B (triphenylcarbinol
structure). B loses a molecule of water and gives C (resonance forms) which has the charectiristic
color(pink).
pH curve (neutralization curve or titration curve)
The pH curve (plot of the pH of the analyte solution as a function of the volume of base added),
for a titration in which a strong base is added to a strong acid is shown in figure 1. The pH, which is
initially low, increases slightly as titrant added. However, in the immediate vicinity of the
stoichiometric point, which occurs at pH 7.0, it increases sharply, and then levels off again as
excess base is added. (It is a useful exercise to obtain by calculation, the pH curve for the
titration of an acid and a base of known concentration).

3
Fig.1. pH curves for the titration of a strong acid using strong base and a weak acid using strong base
The pH curve for the titration of a solution of a weak acid HA, of dissociation constant Ka, using a
strong base is also shown in figure 1(rightmost graph). The pH at the stoichiometric point is greater
than 7.00 in this case. For the same starting concentrations of acid, the change in pH near
equivalence point is not as sharp as in the earlier case. Furthermore, from definition of dissociation
constant
[H3O+] [A−] Ka =
[HA]
(1)
and the resulting Henderson –Hasselbalch equation
pH = pKa + log10 ([A−]/[HA]) (2)
It follows that at the half way point of the titration where [A−] = [HA], pKa = pH, which
yields the dissociation constant of given weak acid. Note further that in the vicinity of the
halfway point, the pH curve is very flat, indicative of buffer action.
B Measuring of pH using a glass electrode:
The pH is most conveniently and accurately measured using a glass electrode. The
glass electrode consists of reversible internal reference electrode, usually the Ag/AgCl electrode
surrounded by a solution of constant pH and constant [Cl−] say 0. 1 M HCl. This solution is
contained in a bulb made of a very thin, soft glass membrane, situated at the end of a hard glass
tube or epoxy body. The physical mechanism of action of the glass electrode is attributed to the
exchange of metal ions coordinated to oxygen atoms in the silicate network of glass
membrane with H+ ions in which the glass bulb is immersed. The potential of this glass
electrode varies with the pH of the solution in which it is immersed is given by
E = E0 + 2.303 RT (pH) (3)

4
Where the pH refers to the solution of interest, R is the gas constant, T is absolute
temperature and Eo includes the standard electrode potential and various constant junction
potentials present in the system. At 25 oC, this becomes E = (Eo + 0.059 pH) V, so that there is a 59 mV change in the potential for a change of 1 pH unit.
The potential of the glass electrode is measured relative to the steady potential of an external
reference electrode such as the calomel electrode. This external reference electrode is
often built around the glass electrode thus yielding a so called combination electrode. The glass
electrode and the external reference electrode together form the cell of the following
type: Ag ,AgCl(s) HCl (0.1 M) glass membrane test solution KCl(sat), Hg2Cl2 (s) Hg
The voltage of this cell is measured using a pH meter, which is basically an electronic
voltmeter with a very high internal resistance, so that it measures the voltage, drawing only a
negligibly small current. As seen from the expression above (equation 3), the potential is dependent
on the temperature. Most pH meters have an in built provision to take into account this dependence,
and so the temperature must be set correctly on the dial provided before the meter is calibrated and
used for measurement. Calibration of the meter is done by using a buffer of accurately known pH. Combination electrode

5
II Experimental procedure:
In this experiment, a given solution of a weak monoprotic acid (say acetic acid) is to be
titrated against a standardized NaOH solution. The pH curve will be obtained, and the strength of the
acid and its acid dissociation constant will be calculated. A: Standardization of NaOH solution
The strength of the NaOH solution given is to be determined accurately. This can be done by
titrating it against a standard solution of oxalic acid using an acid-base indicator. An acid-base
indicator is itself a dye with differently coloured acidic and basic forms, and so will undergo a sharp
change in colour near the stoichiometric point of the titration.
Pipette out 10 mL of the standard solution of oxalic acid provided into a conical flask.
Add one or two drop of phenolphthalein indicator solution.
Titrate using the given NaOH solution till a permanent pink colour is observed.
Repeat to obtain at least two consecutive concordant readings. Record your observations.
Determine the molar concentration of the NaOH solution. B : Titration of the given weak acid solution using the standardized NaOH solution
Pipette out 20 mL of the weak acid (acetic acid) solution into a clean 100 mL beaker. Immerse
the glass electrode, making sure the bulb is completely within the solution. ( If it is not, a little
distilled water can be added)
Swirl (stir) the solution very carefully and read the pH.
Add NaOH solution from the burette in increments of 2 mL , stir and note down the volume
of NaOH added and the pH of the solution after each addition. Continue this till pH becomes
about 5.5.
Once pH becomes about 5.5 add NaOH solution in increments of 0.2 mL.
Stop the titration when the pH curve levels off beyond the stoichiometric point, say pH value
about 10.5
Plot the pH as a function of the volume of titrant added
Plot the derivative plot, (∆pH/∆V) Vs Volume of titrant added.
(∆pH) is the difference between two sequential pH values and ∆V is the difference
between their respective volumes. ∆pH/∆V can be plotted against the volume halfway
between the two volumes making the difference (∆V) in the denominator.
6
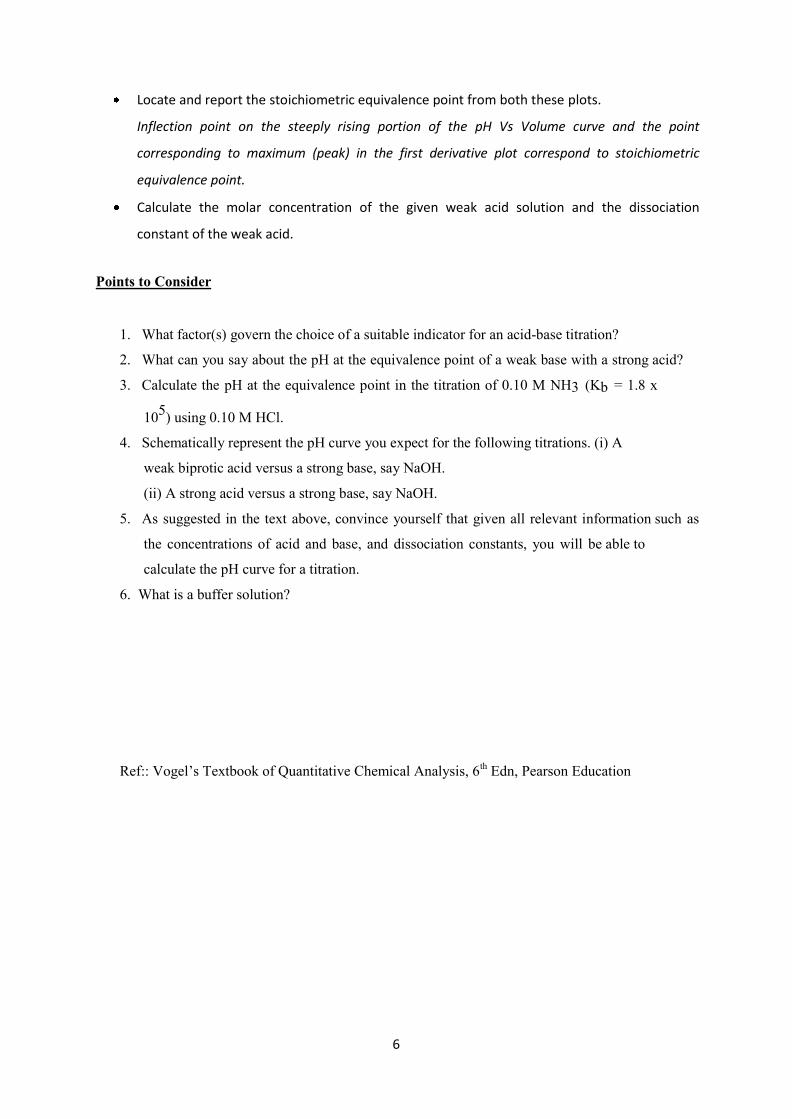
Locate and report the stoichiometric equivalence point from both these plots.
Inflection point on the steeply rising portion of the pH Vs Volume curve and the point
corresponding to maximum (peak) in the first derivative plot correspond to stoichiometric
equivalence point.
Calculate the molar concentration of the given weak acid solution and the dissociation
constant of the weak acid.
Points to Consider
1. What factor(s) govern the choice of a suitable indicator for an acid-base titration?
2. What can you say about the pH at the equivalence point of a weak base with a strong acid?
3. Calculate the pH at the equivalence point in the titration of 0.10 M NH3 (Kb = 1.8 x
105) using 0.10 M HCl.
4. Schematically represent the pH curve you expect for the following titrations. (i) A
weak biprotic acid versus a strong base, say NaOH.
(ii) A strong acid versus a strong base, say NaOH.
5. As suggested in the text above, convince yourself that given all relevant information such as
the concentrations of acid and base, and dissociation constants, you will be able to
calculate the pH curve for a titration.
6. What is a buffer solution?
Ref:: Vogel’s Textbook of Quantitative Chemical Analysis, 6th Edn, Pearson Education

7
EXPERIMENT-2 KINETICS OF THE IODINATION OF ACETONE BY SPECTROPHOTOMETRY
Objective:
To study the kinetics of the iodination of acetone in acidic medium using photometry, find out the differential rate law and calculate the rate constant.
O
C H3C
CH3
+ I2
O
H C
H3C
CH2 I
+ HI
The rate law may be written as
-d[I2]
dt
= k [I2]x[CH3COCH3]y[H+]z (1)
The aim is therefore to determine the orders of the reaction viz ,. x, y and z with respect to I2, CH3COCH3 and H+ respectively, and calculate k, the rate constant.
I Principles:
A. Determination of orders of reaction
Determination of the order x with respect to I2
For the determination of the order x with respect to I2, the reaction rate is studied using a large excess
of acetone, and a high concentration of H+. Under these conditions, [CH3COCH3] and [H+] remain
virtually constant
as the reaction proceeds, constant to the extent that the concentrations of CH3COCH3 and H+ may be
considered to be fixed and the rate law reduces approximately to
_ d[I2]
dt
= k [I2]x
(2)
Where k = k [CH3COCH3]y [H+]z is a “ pseudo rate constant”,. By measuring [I2] as a function of
time as the reaction proceeds, and by comparing this to the integrated form of (2)
for simple choices of x (say 0, 1 and 2), the order x with respect to I2 may be found.

8
Dispersing Device
Light Source
Sample Cell
{If x = 0, then [I2] = [I2]0 - k t
x = 1, [I2] = [I2]0 e-k’t
x = 2, 1/ [I2] = 1/ [I2]0 + k t} (3)
Determination of the order with respect to CH3COCH3 and H+
The orders of the reaction with respect to CH3COCH3 and H+ are found by the method of initial
rates as follows. Holding the initial concentration of I2 and H+ fixed, and then varying the initial
concentration of acetone, the change in initial reaction rate is used to determine y,
the order with respect to CH3COCH3. Similarly by holding the initial concentration of I2 and
CH3COCH3 and determining the initial rate for different concentrations of H+, the order z with
respect to H+ is found. B. Photometry:
The kinetics of the reaction is monitored by exploiting the fact that of all the species
involved, the only colored one is iodine, and that the concentration of such a light absorbing species in
solution may be quantitatively determined by measuring the fraction of incident light that the solution
absorbs. A block diagram of a simple photometer is shown below:
Detector Meter Light from the sources falls on a dispersing element or monochromator. This may be a prism or
grating, or a simple filter. While a grating or prism enable one to select radiation of a fairly narrow
band of wavelengths for falling on the sample, this bandwidth is considerably greater in the case of a
filter. Light transmitted by the sample then falls on a light detector which is a light sensitive device
such as photoconductor or a photocell that produces an electrical response proportional to the
intensity of light reaching it.

9
If at a particular wavelength, I0 and I are the intensities respectively of the incident and transmitted
light, then the transmittance T of the sample at that wavelength is defined as T = I/I0 and the
absorbance A as A= -log10 T= log (I0/I). It is found that the absorbance of a
solution varies with the (molar) concentration c of the absorbing species according to the Beer-Lambert law
A= εcl (4) where ε is the (molar) absorption coefficient, characteristic of the absorbing species and of the
wavelength of light used, and l is the length of sample through which the light passes. The product
εc is sometimes called the optical density (often imprecisely used as synonymous with
absorbance) of the sample. The Beer-Lambert law provides a means of accurately determining the
amount of a light absorbing species in solution by photometry. Most commercial instruments are
provided with meters which enable one to read both the transmittance and the absorbance (or optical
density).
Figure: Image of a cuvette used in specrophotometer
C. Kinetics of the Iodination reaction by photometry: Iodine is a dark red (almost black) solid, while a dilute aqueous solution of iodine is yellow. However
it is only slightly soluble in water. If one uses a solution of KI ( in excess) instead of pure water to
dissolve the iodine, the solubility is enhanced due to the reaction.
I2 + I− I3−
The triodide ion I3- is a brown red species. Both I2 and I3− act as iodinating agents. Further, both
have nearly the same molar absorption coefficient at a wavelength of 565 nm so that absorbance measurements centered on this wavelength, which we will perform, enable a determination of the total
concentration of iodine, I2 and I3−.

10
II Experimental Procedure:
A. Calibration Curve:
Turn on the spectrophotometer and let it warm up.
Set the absorbance to zero at 565 nm using distilled water taken in the cuvette.
Using a measuring cylinder, measure out 1, 2, 3, 4 & 5 mL respectively of the stock solution
of iodine into 5 clean dry test tubes.
Dilute each of these with distilled water such that the total volume of solution in each test
tube is 10 mL. Mix the individual solutions properly.
Measure the absorbance at 565 nm for each of these solutions, starting from the lowest
concentration, following the instructions on the photometer.
Plot a graph of the absorbance versus [I2] and calculate the slope.
B. Rate Measurements
The kinetics must be followed for four cases with various staring concentrations (suggested in the
table below). In each case, follow the sequence of steps given below.
Into a clean test tube, accurately measure out the indicated volumes of CH3COCH3
solution, HCl solution and distilled water using measuring cyl inders and mix
thoroughly.
Into a second clean test tube, accurately measure out the desired volume of iodine stock
solution with measuring cylinder.
Exp No.
Volume of
Acetone Solution
Volume of
HCl solution
Volumeof
I2 solution
H2O
1 2.0 mL 2.0 mL 2.0 mL 4.0 mL
2 4.0 mL 2.0 mL 2.0 mL 2.0 mL
3 2.0 mL 4.0 mL 2.0 mL 2.0 mL
4 2.0 mL 2.0 mL 4.0 mL 2.0 mL

11
Add the contents of the first test tube to the second, mix rapidly and thoroughly transfer
some of the mixture solution to the cuvette immediately and measure the absorbance.(At
this stage the spectrophotometer is set at kinetics mode with time interval for measurement
as one minute)
Note down the absorbance as a function of time, taking reading after every one
minute for 15minutes.
Plot the absorbance (or corresponding [I2]) as a function of time in each case.
(Can you tell the the order with respect to iodine from these graphs?)
Find out the values of k from each of the graphs and then tabulate the initial rate data.
From experiments 1 and 2, find the order with respect to CH3COCH3. Similarly from the
experiments 1 and 3 find the order with respect to H+
Calculate the rate constant and report with correct units.
Points to Consider
1. With concentrations in moles/L and time in sec, what will be the units of the rate constant and
overall order of this reaction?
2. For each of the runs you carried out, verify the extent to which the approximation that the
concentrations of CH3COCH3 and H+ are constant is valid.
3. For a zero order (or pseudo zero order) reaction, how does the half life depend on the initial
concentration C0?
4. Propose one or more mechanisms for the reaction which is consistent with the rate law you
have found.
5. Consider the effect of temperature on rate equation.
6. Why Iodine solution is stored in amber colored bottle?

12
EXPERIMENT-3 DETERMINATION OF UNKNOWN STRENGTH OF WEAK ACID BY
CONDUCTOMETRIC TITRATION Objective: To determine the concentration of weak acid by conductometric titration with a strong
base. Principle: The conductance of a solution depends on factors such as the concentration of the
ions present, charge of the ions , the size of the ions and temperature. As the concentration or charge
of a particular ion increases, the conductance of the solution increases. When a weak acid like
CH3COOH is titrated by a strong base like NaOH, at the beginning there is a slight drop in
conductance due to replacement of highly conducting H+ by low conducting Na+ but almost
immediately the dissociation equilibrium shifts towards right compensating the loss of H+ ion.
Result is accumulation of Na+ ions and CH3COO− ions. Due to this conductance slowly rises up
towards end point. After the end point if the addition of base is continued, conductance will increase
more sharply due to increase of Na+ ion and highly conducting OH─ ion in the solution.
CH3COOH H+ + CH3COO─
NaOH
H+ + CH3COO─ CH3COO─ + Na+ + H2O Procedure:
A. Standardization of NaOH solution
Pipette out 10 mL of the standard solution of oxalic acid solution provided into a conical flask.
Add one or two drops of phenolphthalein indicator solution
Titrate using the given NaOH solution till a permanent pink colour is observed.
Repeat to obtain at least two consecutive concordant readings. Record your observations
Determine the concentration of the NaOH solution.
Conductometric titration Procedure
Pipette out 20 mL of the weak acid (acetic acid) solution into a clean 100 mL beaker. Dip the
electrode, making sure the bulb is completely immersed within the solution. ( If it is not, a
little distilled water can be added)

13
Co
nd
uct
ance
Swirl (stir) the solution very carefully and note down the conductance of the solution.
Add NaOH from the burette in increments of 0.5 mL to the CH3COOH solution. Stir well
after each addition and note down the conductance of the solution.
Repeat the measurements for 10 more reading beyond the endpoint.
Plot the graph of conductance Vs volume of alkali and find out the end point from the graph.
Calculate the concentration of the acid and report.
Vol. of NaOH
Fig 1. A model graph of conductrometric titration of a weak acid by strong base. Points to Consider
1. On which factors the conductance of a solution depends?
2. Why there is a momentary drop in the conductance of the solution in this experiment when 1-
2 drops of NaOH was added in the beginning?
3. What will be the shape of the conductrometric titration curve for HCl and NaOH, and that of
HCl and NH4OH?
4. Does the conductometer directly measure the conductance of the solution or it
measures individual ion conductance and then sum up?
5. Is it possible to titrate a mixture of strong and weak acids by a strong base using
conductometer? What will be the shape of the conductance curve in this case?

14
EXPERIMENT-4
ESTIMATION OF COPPER BY IODOMETRY
Objective:
To estimate the amount of CuSO4 in a solution by iodometry.
I Principles:
In neutral or faintly acidic solutions, cupric salts react with iodide ion to liberate iodine. The reaction
goes in two steps as follows:
2CuSO4 + 4KI 2CuI2 + 2K2SO4 2CuI2 Cu2I2 + I2
(1) (2)
giving the overall reaction as
_ 2Cu2+ + 4I Cu2I2 + I2 (3)
The equilibrium of the redox reaction (3) is shifted towards right by continuous removal of
Cu2I2 as insoluble complex.
The liberated I2 is titrated against the sodium thiosulfate (Na2S2O3.5H2O) solution (hypo
solution) using starch as indicator as follows. I2 + 2S2O32− S4O6 2− + 2I− (4) (blue starch iodine complex) (colorless)
Two possible sources of error can influence the outcome of the iodometric titration. One is the
aerial oxidation of acidic iodine solution i.e. iodine in acid medium is slowly oxidized by oxygen in
air
4I + 4H+ + O2 2I2 + 2H2O (5)
Furthermore, this reaction is accelerated by the presence of Cu+ ions. [The cuprous ions
formed in equation (3) catalyze the reaction and the cycle itself repeats indefinitely]. This error can
be reduced by not allowing the solution to stand for a long time before titration. However, the most
effective way of retarding reaction (5) is to remove oxygen in reaction vessel. This is done by adding
sufficient Na2CO3 (or NaHCO3) in the reaction vessel.
.

15
The other source of error is the volatility of I2 formed in equation (3). Practically this problem
is eliminated by using excess iodine solution which captures liberated iodine to form
tri-iodine ions. _
I + I2 I3 (6) II Experimental Procedure:
Because of its efflorescent nature, sodium thiosulphate is not suitable as a primary standard.
So, to determine the strength of the given CuSO4 solution, one has to follow a double titration
method. The first one involves the standardization of thiosulphate solution with a standard CuSO4
solution and then in the second step, the standardized thiosulphate is used to titrate the CuSO4
solution of unknown strength.
The equivalent weight of copper sulfate (CuSO4. 5H2O) is equal to its molecular weight
(249.7 g) for this experiment A Preparation of standard CuSO4.5H2O solution
Carefully weigh about 0.3 g of copper sulphate on a watch glass. Note down the weight. Also
note down the molecular weight and equivalent weight of copper sulphate
Transfer this weighed copper sulphate into a clean 100 mL standard flask carefully, through a
funnel.
Wash down into the standard flask, any copper sulfate crystals sticking to watch glass or funnel
or the neck of the standard flask, with minimum amount of distilled water from a wash bottle.
Amount of water in standard flask after this stage should not be more than 1/3 rdof its volume.
Remove the funnel and shake the standard flask well till all the copper sulphate crystals
dissolve.
Add one small test tube of Na2CO3 solution into the flask. A bluish white precipitate is formed.
Add glacial acetic acid few drops at a time so as to dissolve the precipitate. After each addition
shake the standard flask well to see if precipitate has dissolved.
(Glacial acetic acid is kept in fume hood. Take your standard flask to fumehood, place it inside
the fumehood and do the acid additions. Do not stopper the standard flask during this stage, as
the gas evolved inside the flask can throw the stopper off)
Once the precipitate completely dissolves and the solution turns clear transparent blue make
up the volume up to the mark on the neck of the flask using distilled water.

16
B Standardization of sodium thiosulphate
Fill the burette (after rinsing) with the hypo (sodium thiosulphate)
Pipette 10 mL of standard copper sulfate solution in a 250 mL conical flask.
Add one small test tube full of KI solution to it.
(This addition of KI liberates I2 which dissolves in excess of KI, thereby imparting yellowish
brown color to the solution and a white precipitate of Cu2I2 is formed)
Cover the flask with a watch glass and allow the solution to settle for a minute. Rinse down
the sides of the flask and dilute the mixture to about 50 mL.
Add hypo solution from burette till the brown color fades to a pale yellow.
Then add one small test tube full of KSCN (potassium thiocyanate) solution and one small test
tube full of starch solution. A dirty blue color is developed.
Keep adding hypo drop by drop till this blue color disappears.
Repeat to obtain at least two consecutive concordant readings. Record your observations
(This titration has to be done fast to avoid Iodine, being very volatile, escaping.)
C Determination of the strength of unknown copper sulfate solution
Repeat the above procedure with copper sulfate solution o f u n k n o w n s t r e n g t h
Points to Consider
(1) Why is excess Na2CO3 added to the reaction vessel during iodine titration by hypo
solution?
(2) Standardization of hypo solution can also be done by standard K2Cr2O7 solution. Find out the
redox reaction for that titration.
(3) What is the role of KSCN in the experiment? (4 ) What is a redox reaction ? 5) Why starch indicator is not added right from the beginning of titration?

17
EXPERIMENT – 5 IDENTIFICATION OF SOME ORGANIC COMPOUNDS
Objective:
Illustrate organic qualitative analysis using some carboxylic acids and carbohydrates. I Experimental Procedure:
A For compound containing –COOH functional group
1. Oxalic Acid
i) Dissolve a small quantity of the compound in distilled water (2-3 grains of sample in 2 mL
of water) in a test tube. Add NaHCO3 solution to this. Immediate effervescence indicates presence
of the acidic group in the compound. RCOOH + NaHCO3 RCOONa + H2O + CO2 (effervescence)
Prepare of neutral solution of the acid
Dissolve a small quantity of the compound in 3-5 mL distilled water in a test tube. Heat if required to
dissolve. Add dil. NH4OH solution drop by drop to the solution of the compound till you get the
smell of NH3, then add 3-5 mL of distilled water. Heat the solution until the smell of NH3 is no longer
there. Cool and use this solution for the following test.
ii) Take a small amount of the neutral solution prepared as stated above, add 3 or 4 drops of glacial
acetic acid to it to make it acidic and dilute it with half a test tube of water. Add CaCl2 solution to it,
white ppt. confirms oxalic acid.
(COOH)2 .2 H2O + CaCl2 Ca(COO)2 + 2HCl
2. Citric Acid i) Test for the presence of –COOH group in this compound by performing test no 1(i) given for oxalic
acid.
Prepare of neutral solution of the acid Follow the procedure as given for oxalic acid
ii) Take small amount of neutral solution in a boiling tube. Add few drops of CaCl2
solution. to it No ppt, heat to boiling for 2 minutes. Appearance of white ppt confirms citric acid.

18
O
COOH
O
O
COO
ONa O
Na
Con.H2SO4
Heat
OHHOHOCH2COOH
CH2COOH+
CH2COOH
C(OH)COOH.H2O + CaCl2 ppt. of calcium citrate
CH2COOH
3. Tartaric acid
i) Perform test (similar to test no 1(i) for oxalic acid) with this compound to detect the presence of
acidic functional group. ii) Take small amount (few grains) of solid acid and solid β-naphthol in a clean and dry test tube and
add 5 drop of conc. H2SO4 (kept in fumehood) Heat the test tube by waving very gently in the
reducing flame for 1 min with shaking in order to mix the contents. A green colour confirms tartaric
acid.
COOH
CHOH
CHOH
COOH Tartaric acid 4. Succinic Acid
In a clean and dry test tube take small amount (a tiny speck) of the compound and 2 times of this
amount of resorcinol. Add 2 drops of conc. H2SO4 carefully along the test tube walls. Heat gently till
the mixture becomes reddish brown. Cool it and add some NaOH solution to make it alkaline. Pour
small amount of this solution in 50 mL water taken in a beaker. Appearance of green yellowish
fluorescence confirms succinic acid.

19
B For Carbohydrates Molisch’s reaction (Do th i s te s t f or each carbohydrate g iven)
Dissolve a small amount of the compound in water. Take a portion of this solution in test tube and
add 2 drops of 10% alcoholic solution of α-naphthol. Add about 3 drops of conc. H2SO4 carefully,
along the sides of the test tube, such that it forms a separate layer at the bottom of the test tube. A
red colour changing to violet at the junction of two layers indicates carbohydrate.
(The colour formed is due to the reaction of alpha-naphthol with furfural and/or its derivatives formed
by the dehydration of sugars by concentrated sulphuric acid. All carbohydrates react positively with this
reagent.) Fehlings Test (Do thi s t es t f or each carbohydrate g iven) To few drops of Fehling’s solution add few drops of an aqueous solution of the original solid.
Heat and observe as follows.
i) Red ppt. - Glucose or fructose
ii) No red ppt. - Cane sugar (sucrose) or starch (Fehling’s Solution: It is a mixture of two solutions: Solution 1 and Solution 2.
Solution 1: CuSO4 crystals in water containing a few drops of dil. H2SO4 (to remove any
hydroxide present).
Solution 2: Prepared by dissolving sodium hydroxide and sodium potassium tartarate in water.
The mixture of solutions 1 & 2 is called Fehling solutions and it is of blue color.
Both Glucose and fructose are reducing sugars. They reduce Fehling’s solution to red Cu(I) oxide. Sucrose is a disaccharides and starch is a polysaccharide. They are non reducing sugars
so they will not give Fehling’s test.)
Test to Distinguish between Sucrose and Starch (Do this te s t f or each carbohydrate g iven) To few drops of an aqueous solution of each the original solid add few drops of dil. I2 solution and
observe as follows:
Blue color - Starch No Blue color -Sucrose

20
Starch forms a blue colored complex with I2. (Starch, a polysaccharide comprises of amylose and amylopectin. Amylose is a glucose polymer which
has a helical structure. Tri iodide slips inside of the coils of the amylose helix and this results in the
characteristic blue colour due to charge transfer complex). Seliwanoff’s Test- Test to Distinguish between Glucose and Fructose
Take a few drops of the concentrated solution of the compound in a test tube and add 3 to 4 drops of
conc. HCl and a small amount of resorcinol. Stand the tube in boiling water for 5 min. Deep red
color, usually followed by ppt. confirms fructose. In case of glucose colour appear after sometimes and
is light pink.
(In concentrated HCl, ketoses undergo dehydration to yield furfural derivatives more rapidly than
aldoses. These derivatives form complexes with resorcinol to yield deep red colour..)
Report
Report should be written in the three column format of Experiment Observation Inference
Equations and structures have to be written in the report wherever required. Points to consider
1. Learn the structures of all the acids you have analyzed.
2. Learn the chemical reaction and chemistry involved in each of the tests.
3. Why are we preparing a neutral solution of the acid?
4. How do the structure of glucose and fructose differ?
5. What is a reducing sugar?
6. What is the chemistry of Molisch’s reaction?
7. What is Seliwanoff’s reagent?
8. What is the reaction between furfural derivatives and resorcinol?
9. What is furfural? Learn its structure.
10. 10. What is a reducing flame?

21
EXPERIMENT – 6 PREPARATION OF METHYL SALICYLATE (OIL OF WINTERGREEN)
Objective:
To provide hands on experience in synthesis of organic compounds, purification etc. The
reaction chosen illustrates formation of ester under acid catalyzed condition. Principles: This is an illustration of acid catalyzed ester formation reaction. Salicylic acid in
presence of catalytic amount of conc. H2SO4 gets protonated to form a reactive electrophilic
centre. Methanol being a nucleophile attacks the carbonyl centre of this activated species and
forms a new bond with the removal of water molecule. Methyl salicylate, commonly called
“Oil of Wintergreen”, is a standard derivative of salicylic acid with a characteristic sweet
smell.

22
Procedure
Weigh out about 0.5 g salicylic acid in a DRY watch glass.
Transfer the salicylic acid to a DRY 100 mL round bottom flask and dissolve it by
adding 4.0 mL of methanol.
Add 8 drops of concentrated H2SO4 to the solution.
Add boiling chips (1-2 pcs) to promote smooth boiling.
Attach a reflux condenser with the round bottom flask and circulate cold water.
Reflux the reaction mixture for 30 minutes.
After 30 minutes, remove the burner and allow the reaction mixture to cool down.
Separation and Purification of final product
Pour the reaction mixture into a 25 mL conical flask, add a boiling chip, heat in a water
bath to remove excess methanol, and cool it down.
Add 10 ml of water to the 25ml conical flask and shake to dissolve excess mineral acid.
Then add 3-4 mL ethyl acetate to it and shake vigorously.
Transfer this mixture to a 25 ml measuring cylinder (or a boiling tube) and allow it to
stand for some time so that two layers separate.

23
Carefully transfer the upper layer using a pasture pipette to a 10 ml measuring cylinder
containing 2 mL of saturated NaHCO3 solution and mix it well. This will neutralize
unreacted salicylic acid from the organic layer.
Add a boiling chip into a clean dry 25ml conical flask and note down the weight of it with
the boiling chip.
Now, carefully take out the organic layer from the 10 ml measuring cylinder by a
pasture pipette and pass it through a funnel containing a bed of anhydrous sodium
sulphate (to absorb the last trace of water) to the previously weighed conical flask.
[CAUTION must be taken while taking out the organic layer, the tip of the pipette should
not touch the aqueous layer. You may leave last trace of organic layer in the test tube to
avoid contamination of aqueous layer with the organic layer].
Place the flask on a water bath and heat to remove all solvent.
Cool the conical flask and take the weight. Questions:
1. What is the role of H2SO4 in this reaction?
2. Why sodium bicarbonate is added during the purification process?
3. How to calculate the %yield of a reaction?
4. How to purify a crude liquid product?