designed by trictle | backyard...
TRANSCRIPT
Medium Chicken Coop Design Designed by trictle | BackYard Chickens
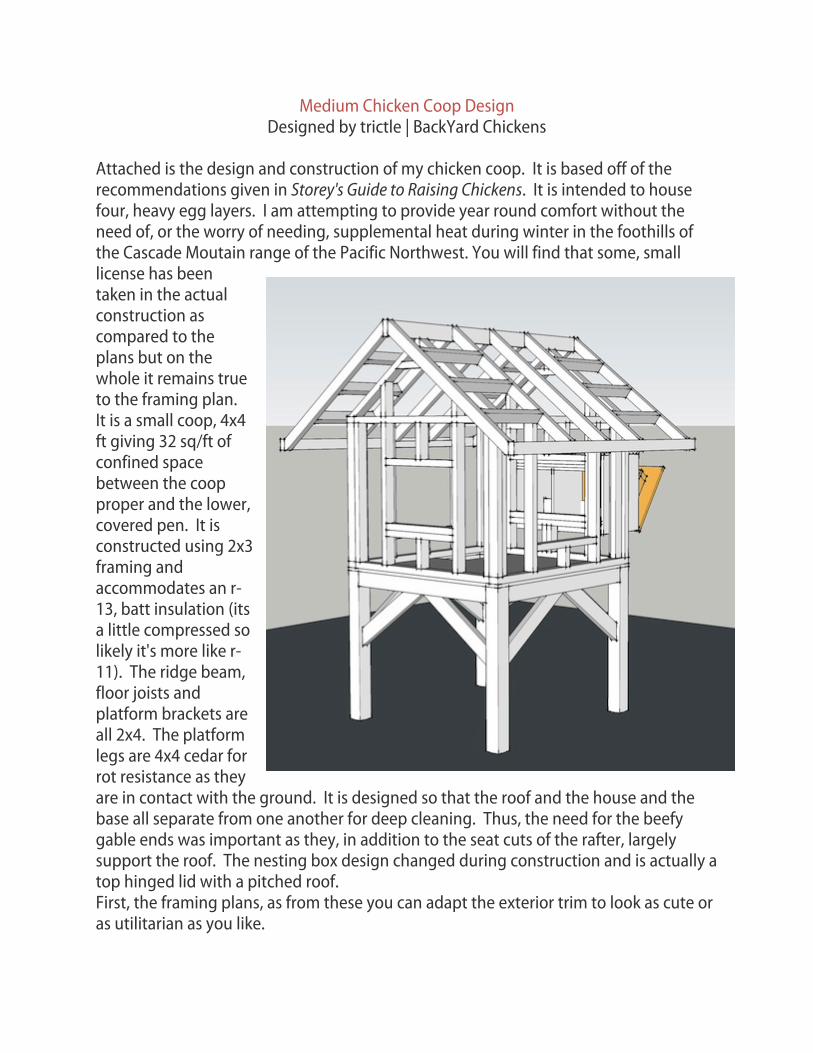
Attached is the design and construction of my chicken coop. It is based off of the recommendations given in Storey's Guide to Raising Chickens. It is intended to house four, heavy egg layers. I am attempting to provide year round comfort without the need of, or the worry of needing, supplemental heat during winter in the foothills of the Cascade Moutain range of the Pacific Northwest. You will find that some, small license has been taken in the actual construction as compared to the plans but on the whole it remains true to the framing plan. It is a small coop, 4x4 ft giving 32 sq/ft of confined space between the coop proper and the lower, covered pen. It is constructed using 2x3 framing and accommodates an r-13, batt insulation (its a little compressed so likely it's more like r-11). The ridge beam, floor joists and platform brackets are all 2x4. The platform legs are 4x4 cedar for rot resistance as they are in contact with the ground. It is designed so that the roof and the house and the base all separate from one another for deep cleaning. Thus, the need for the beefy gable ends was important as they, in addition to the seat cuts of the rafter, largely support the roof. The nesting box design changed during construction and is actually a top hinged lid with a pitched roof. First, the framing plans, as from these you can adapt the exterior trim to look as cute or as utilitarian as you like.
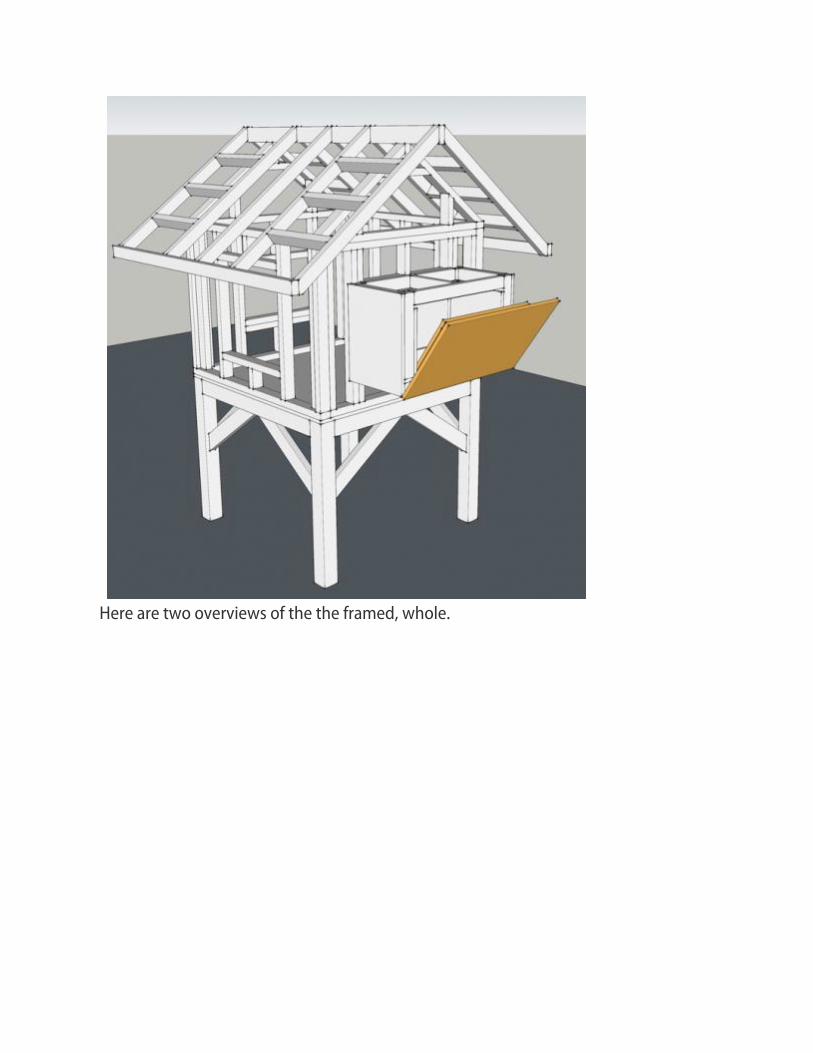
Here are two overviews of the the framed, whole.
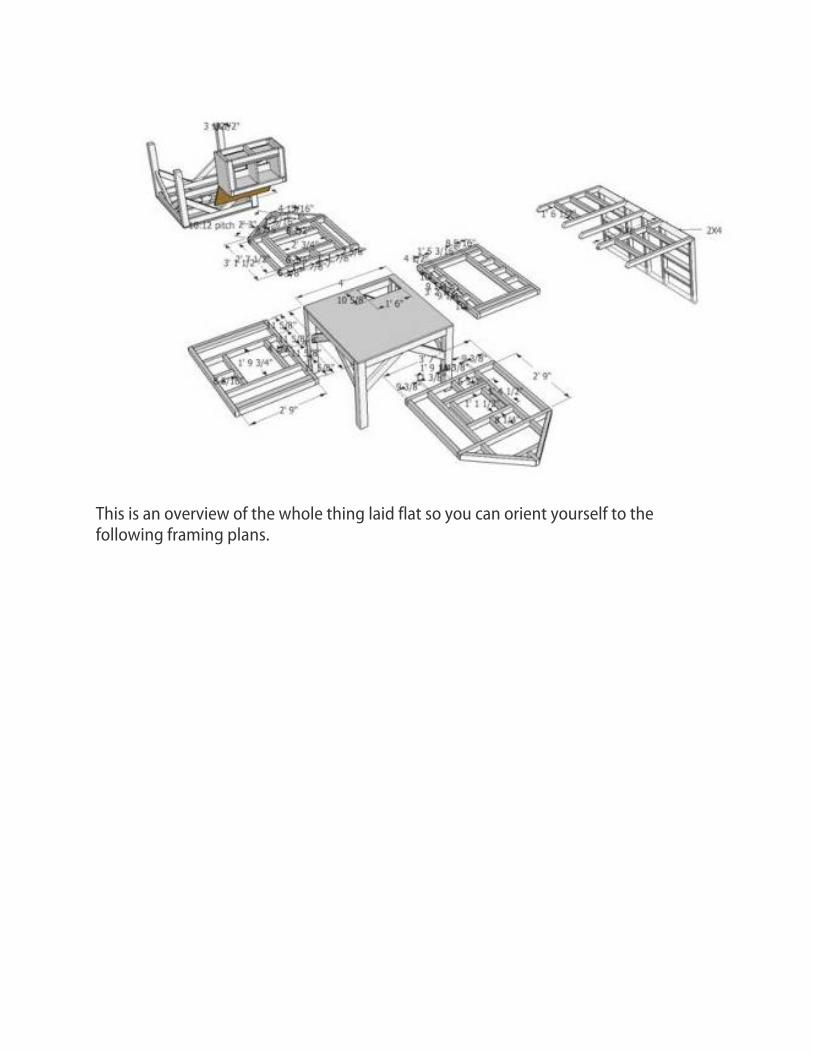
This is an overview of the whole thing laid flat so you can orient yourself to the following framing plans.
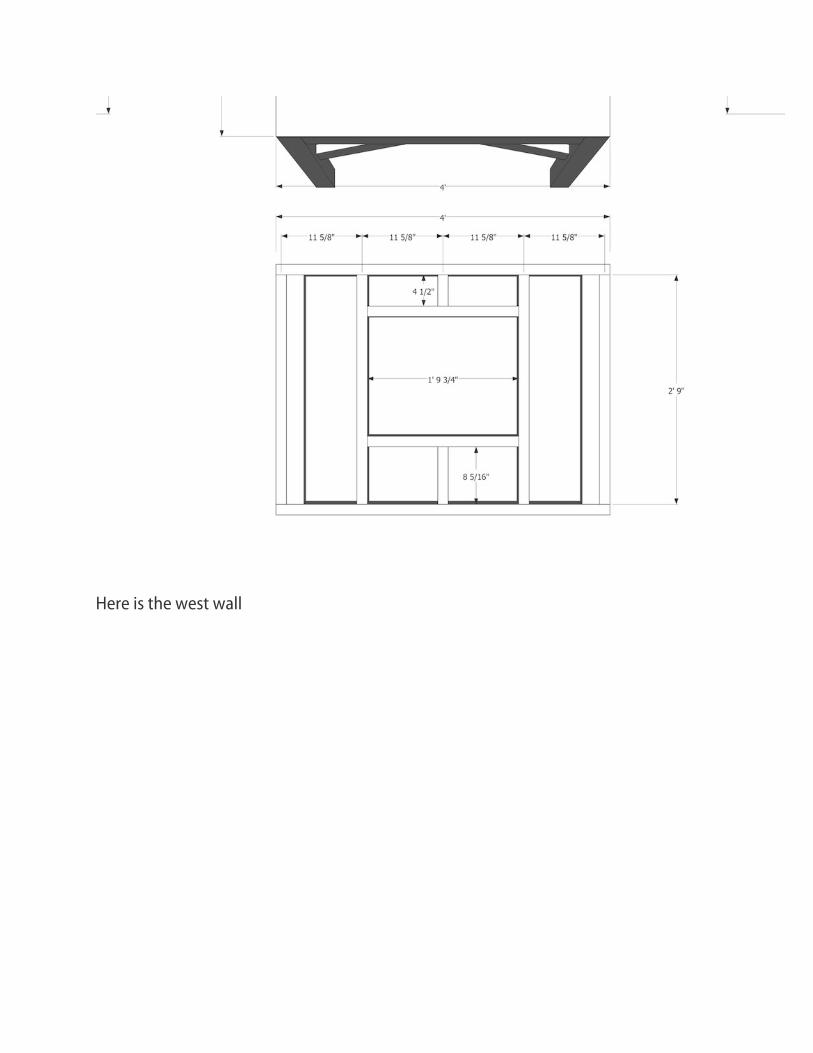
Here is the west wall
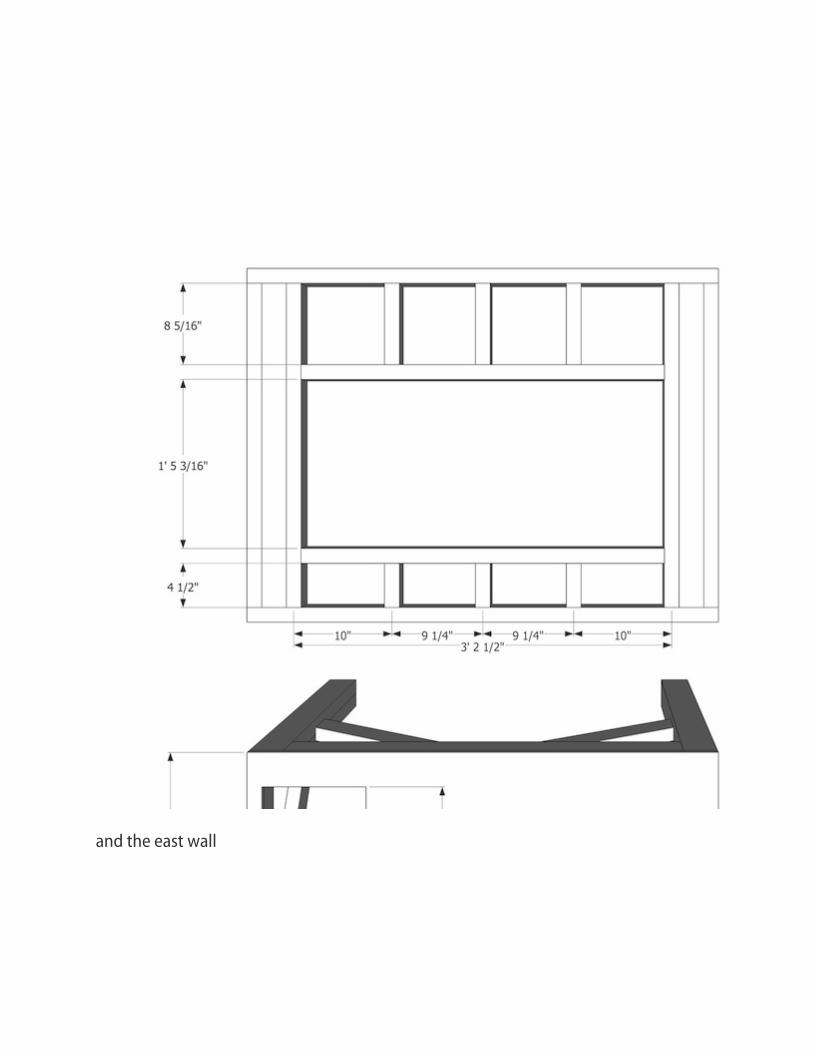
and the east wall
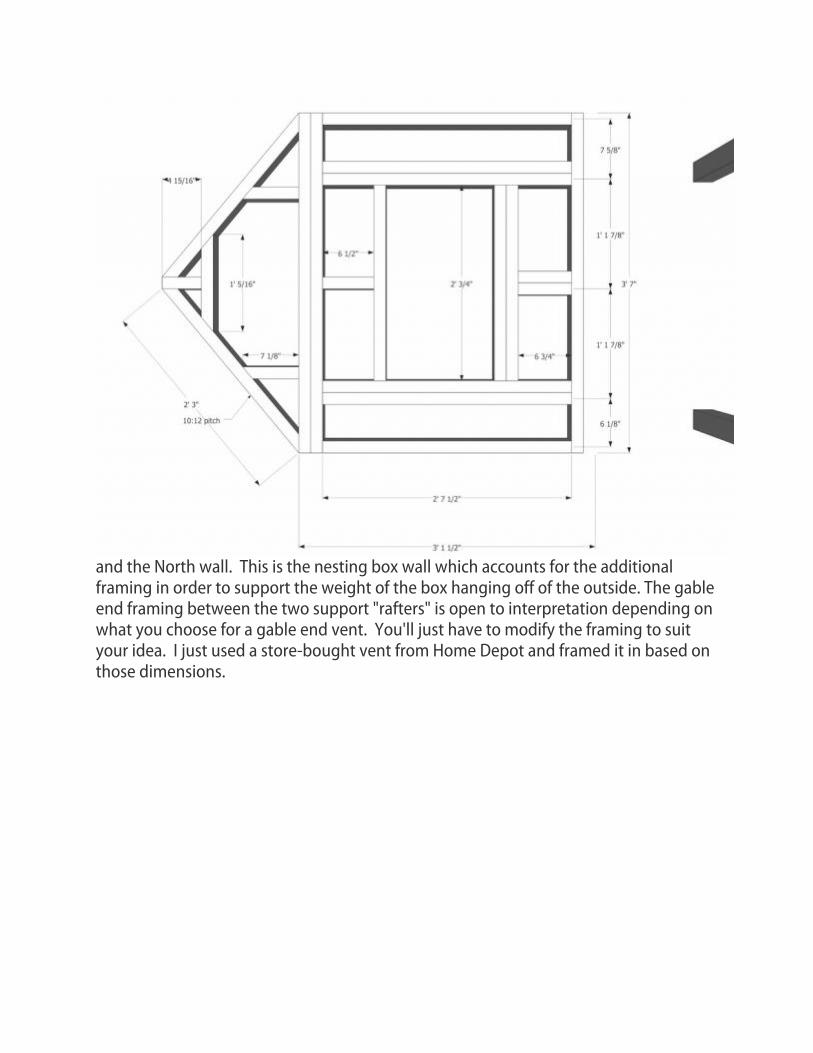
and the North wall. This is the nesting box wall which accounts for the additional framing in order to support the weight of the box hanging off of the outside. The gable end framing between the two support "rafters" is open to interpretation depending on what you choose for a gable end vent. You'll just have to modify the framing to suit your idea. I just used a store-bought vent from Home Depot and framed it in based on those dimensions.
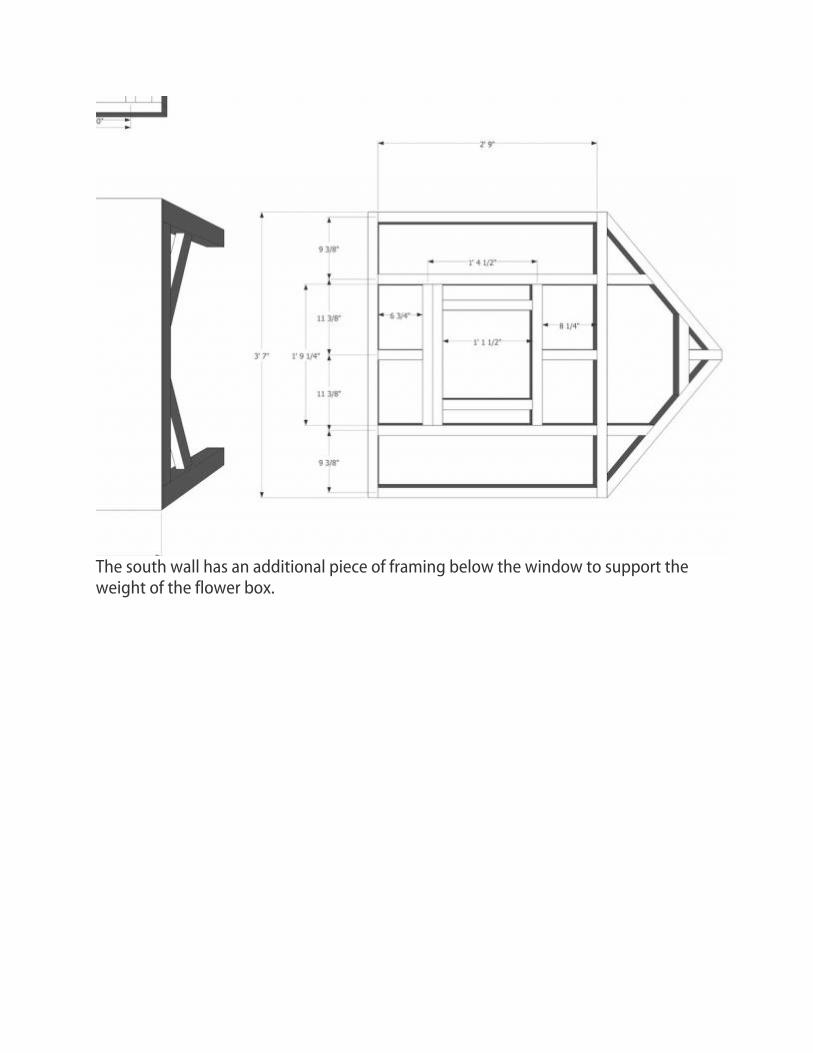
The south wall has an additional piece of framing below the window to support the weight of the flower box.
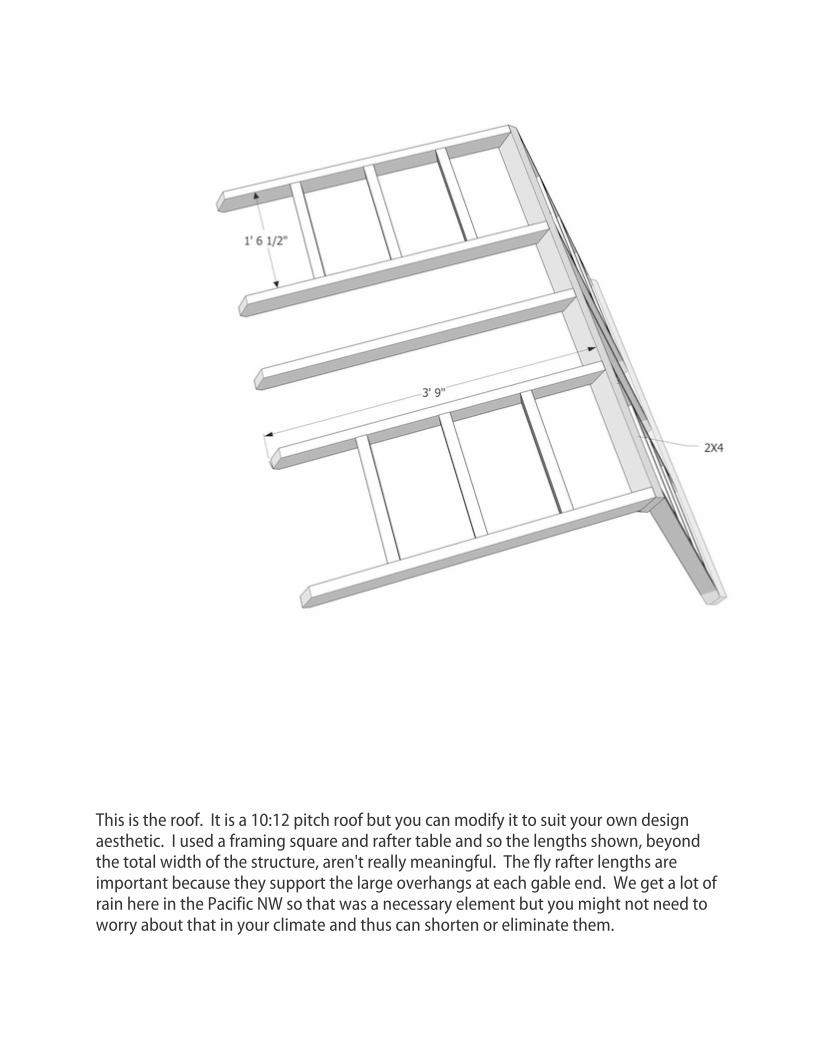
This is the roof. It is a 10:12 pitch roof but you can modify it to suit your own design aesthetic. I used a framing square and rafter table and so the lengths shown, beyond the total width of the structure, aren't really meaningful. The fly rafter lengths are important because they support the large overhangs at each gable end. We get a lot of rain here in the Pacific NW so that was a necessary element but you might not need to worry about that in your climate and thus can shorten or eliminate them.
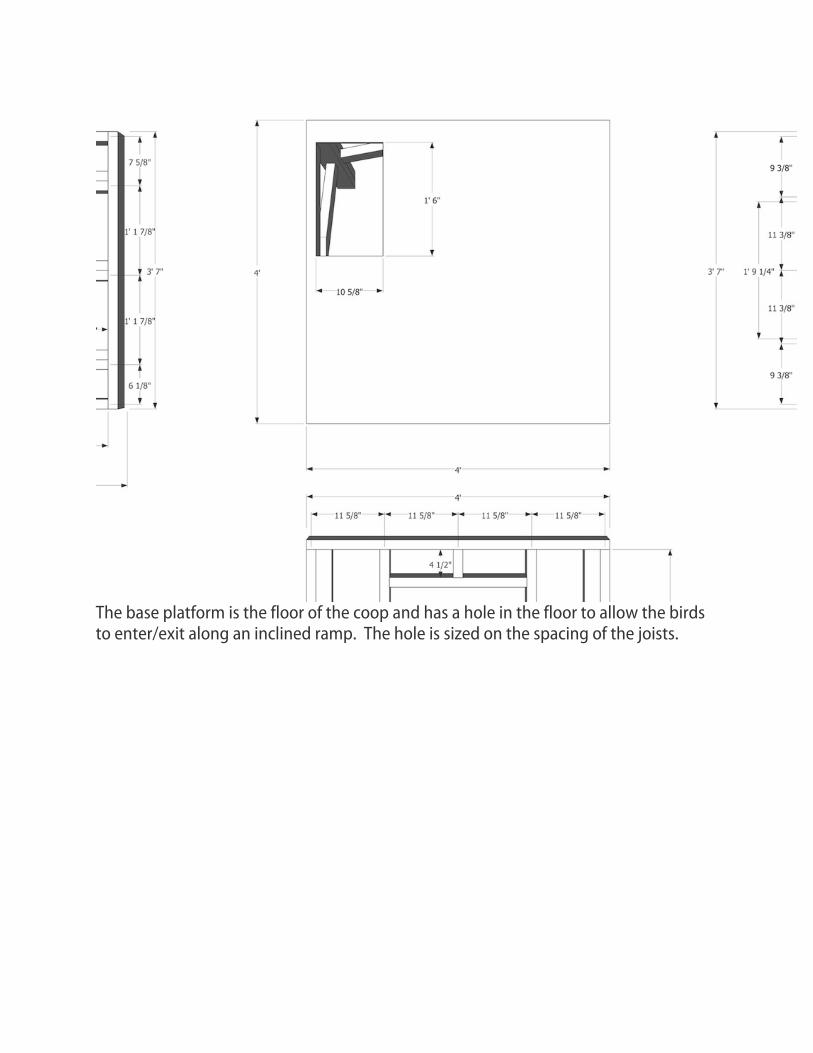
The base platform is the floor of the coop and has a hole in the floor to allow the birds to enter/exit along an inclined ramp. The hole is sized on the spacing of the joists.

This is upside down for clarity. The base uses 4x4 cedar for rot resistance. The joists are hung on joist hangers and the braces make for a very stable base. The whole thing will be enclosed with chicken wire to form a small but secure pen for the mornings and evenings: effectively doubling the available space of the coop from 16sq/ft to 32sq/ft (4, insulated sq/ft per chicken or 8sq/ft total if counting the pen), based on Storey's recommendation. Here are the construction photos:
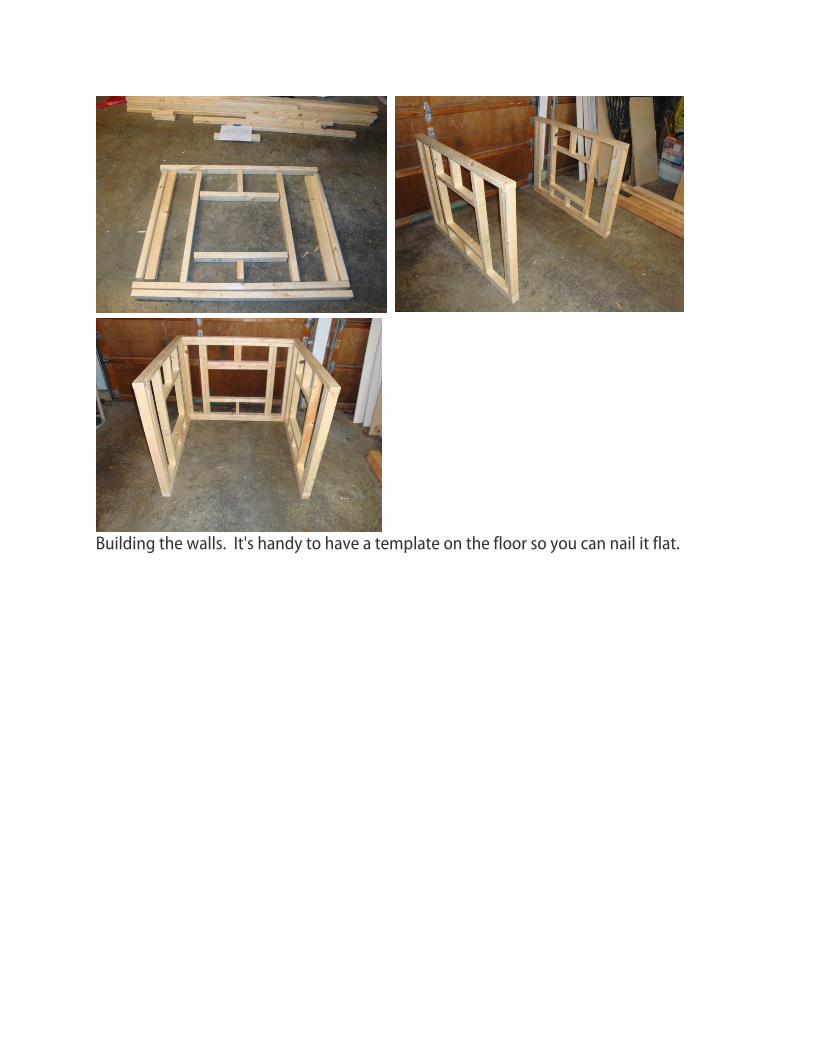
Building the walls. It's handy to have a template on the floor so you can nail it flat.
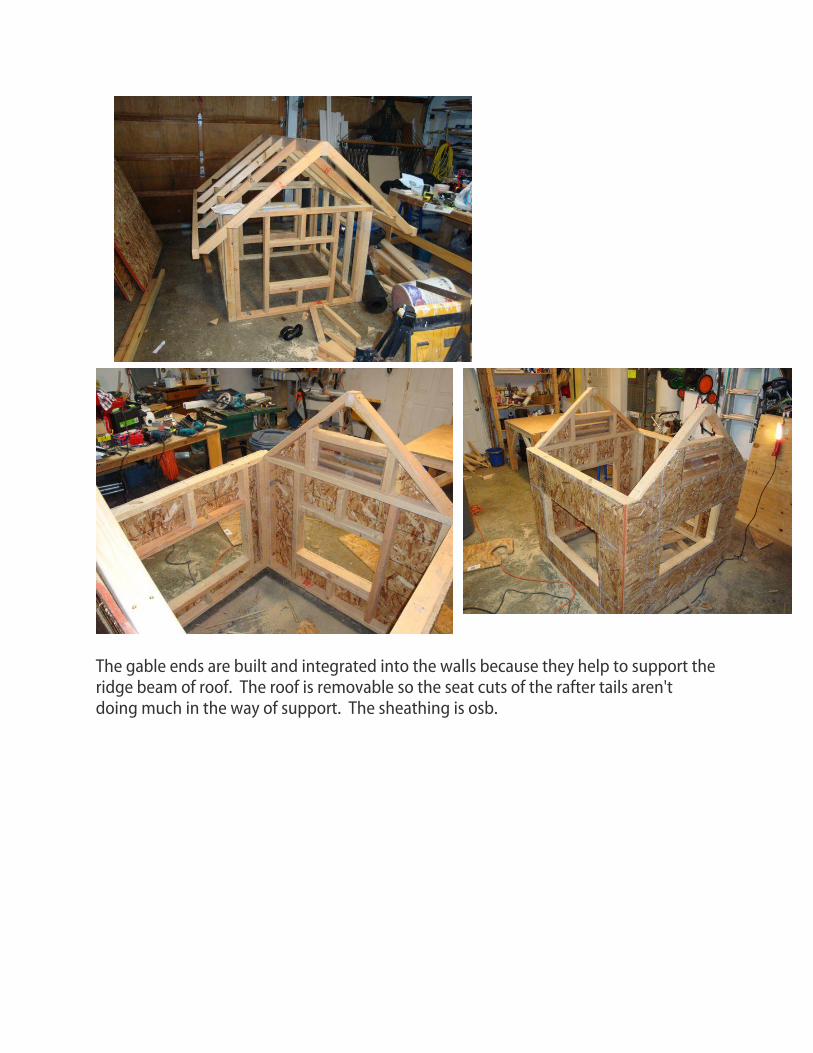
The gable ends are built and integrated into the walls because they help to support the ridge beam of roof. The roof is removable so the seat cuts of the rafter tails aren't doing much in the way of support. The sheathing is osb.
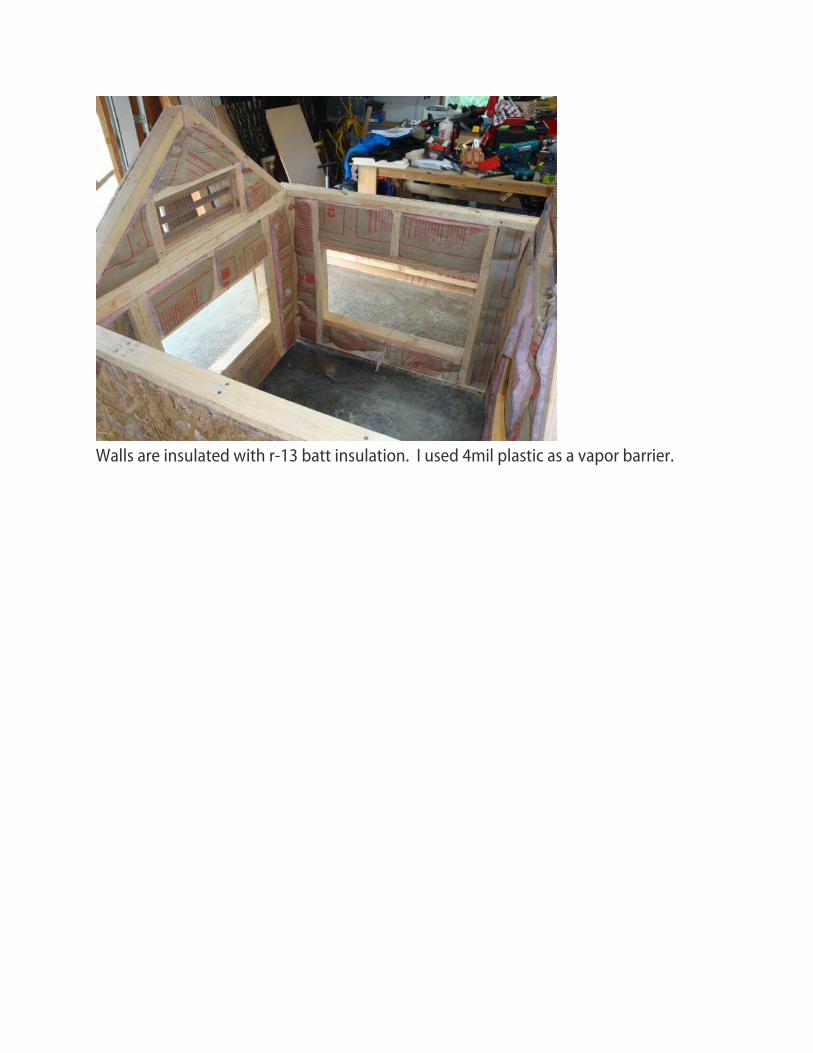
Walls are insulated with r-13 batt insulation. I used 4mil plastic as a vapor barrier.
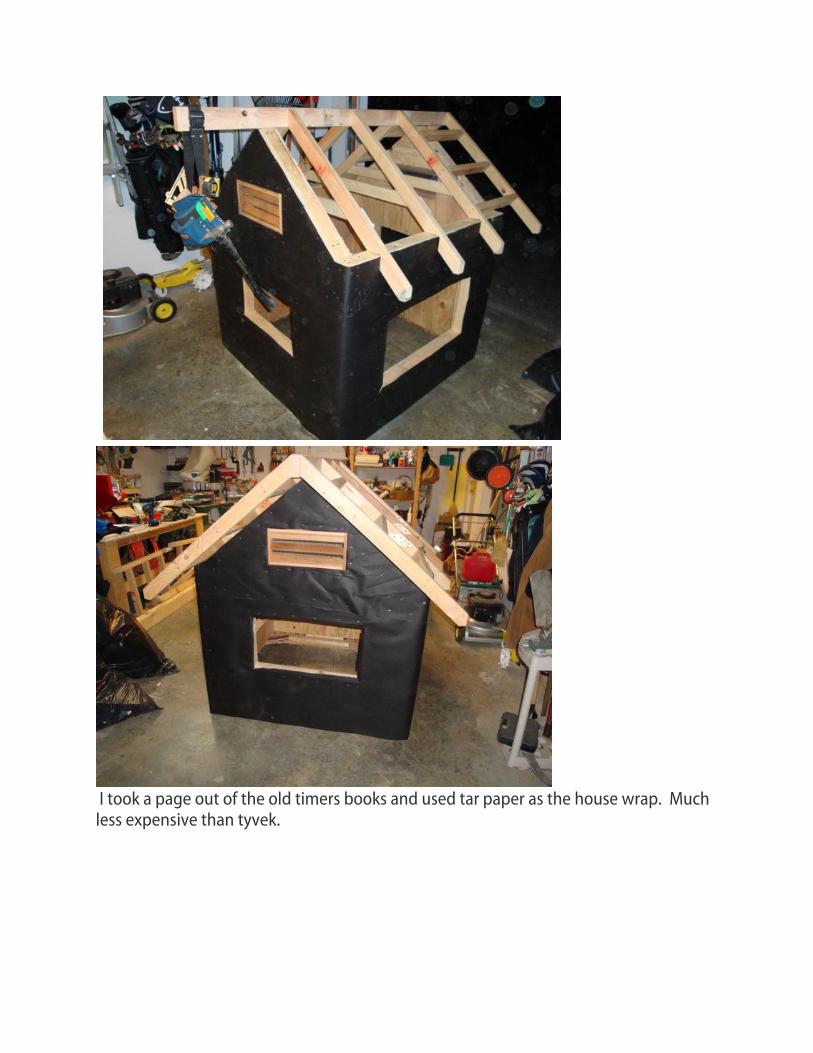
I took a page out of the old timers books and used tar paper as the house wrap. Much less expensive than tyvek.
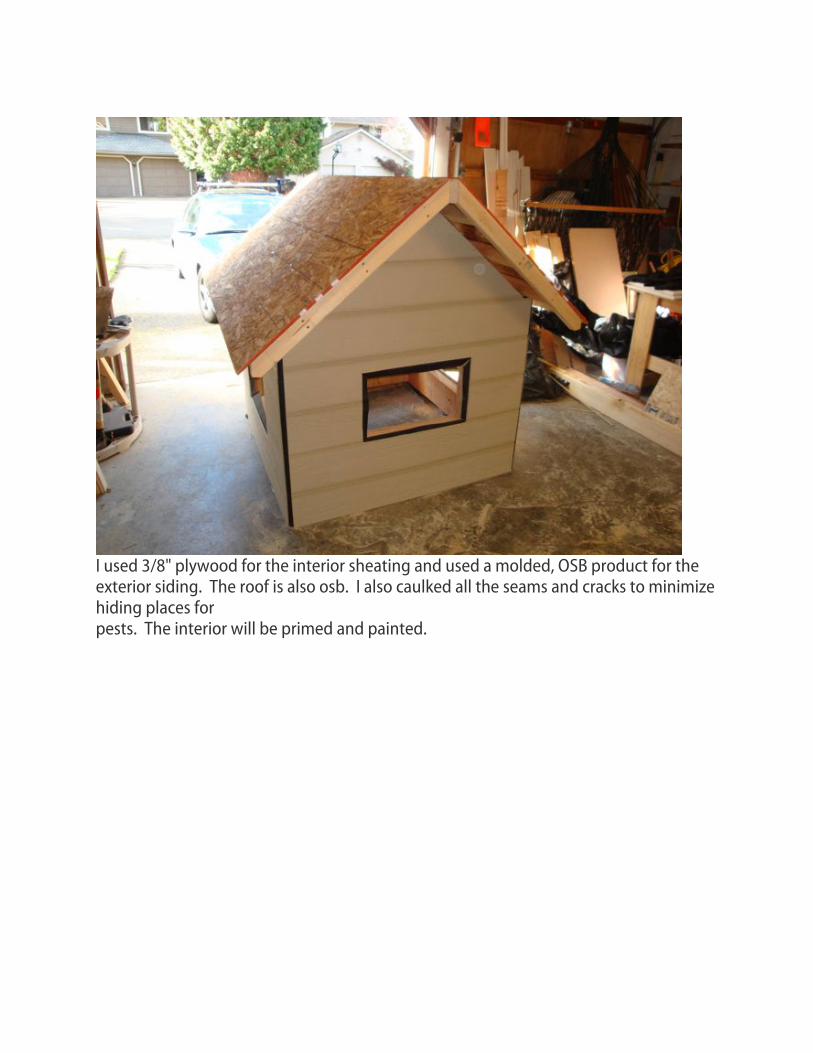
I used 3/8" plywood for the interior sheating and used a molded, OSB product for the exterior siding. The roof is also osb. I also caulked all the seams and cracks to minimize hiding places for pests. The interior will be primed and painted.
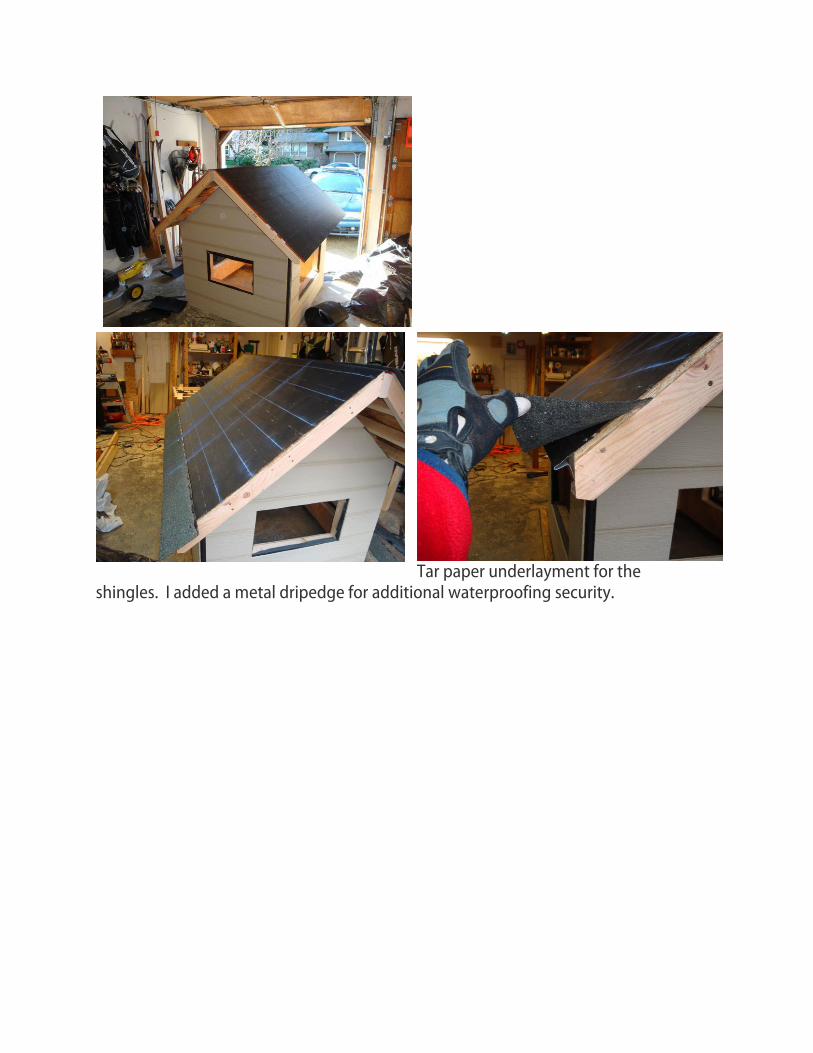
Tar paper underlayment for the
shingles. I added a metal dripedge for additional waterproofing security.
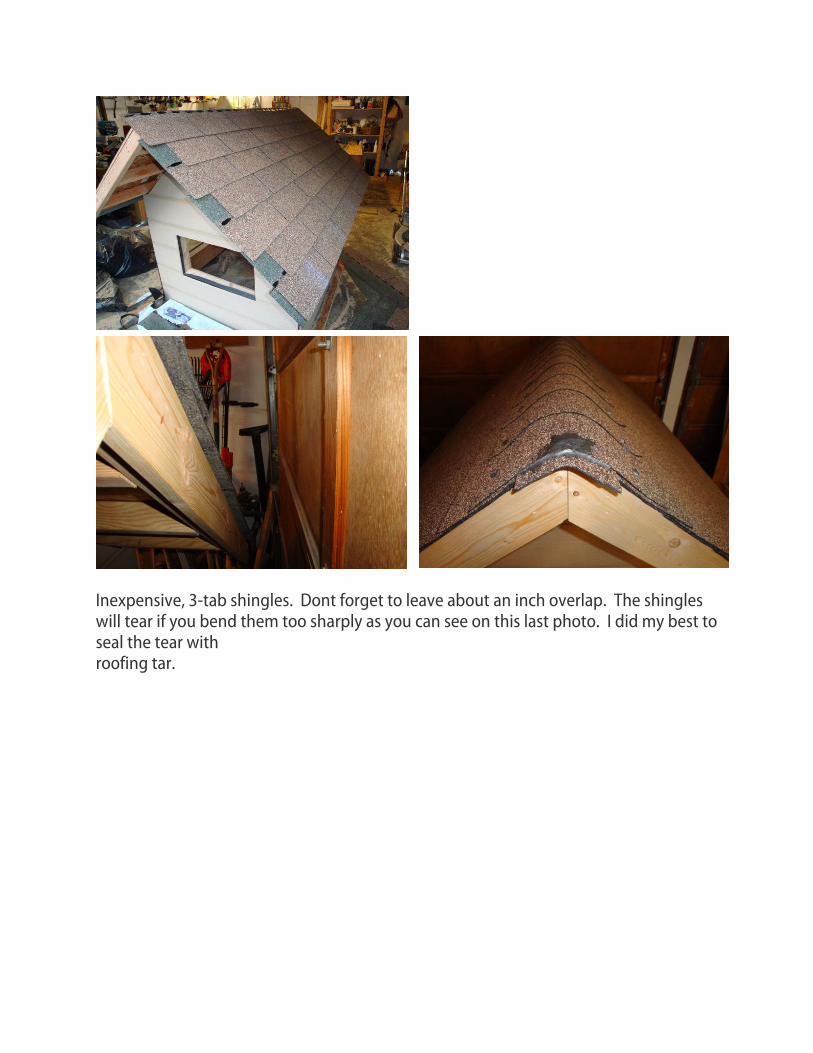
Inexpensive, 3-tab shingles. Dont forget to leave about an inch overlap. The shingles will tear if you bend them too sharply as you can see on this last photo. I did my best to seal the tear with roofing tar.

Paint is always tricky. This first color was too icy so i took it back to HD and had them deepen the color a bit. I much prefer it now. You can still see the exposed lookouts supporting the gable fly rafters. These will be closed in after being insulated. The rafter tails now have blocking between them to keep out pests and clean up the look. The drop down access door is big enough to access all the feeders and clean the interior. It's made of vertical t&g cedar held together by by the rails and siles and braced with the diagonal.
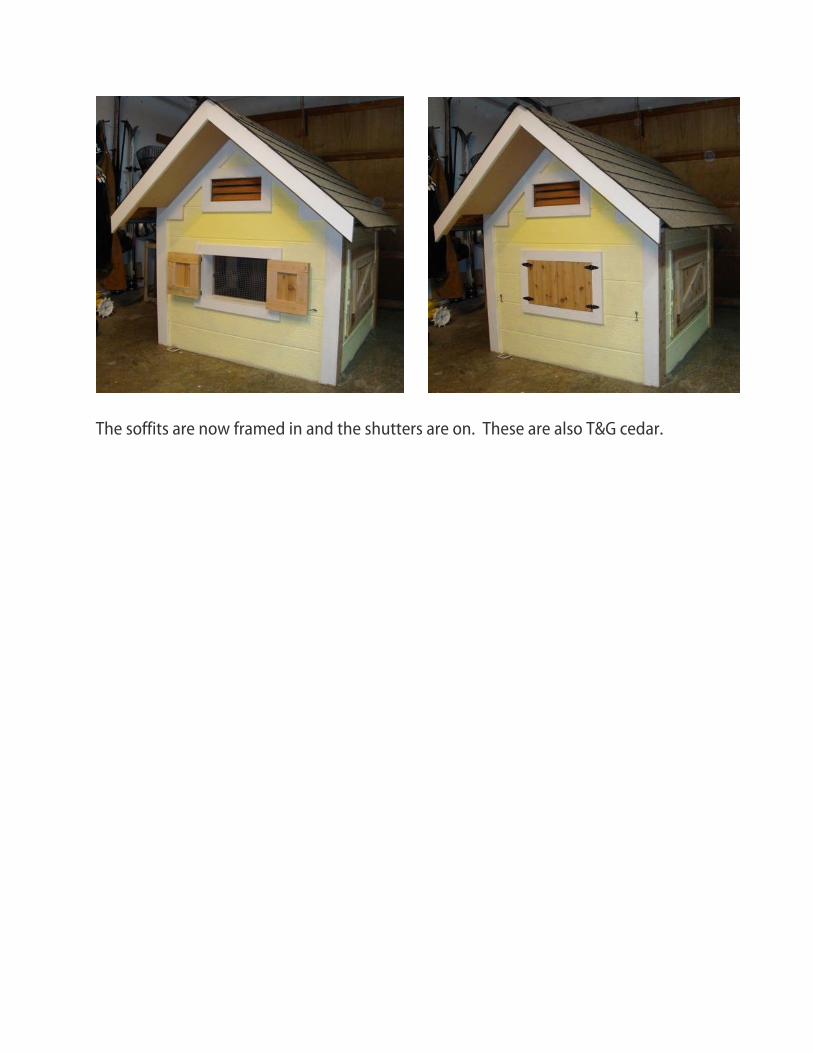
The soffits are now framed in and the shutters are on. These are also T&G cedar.
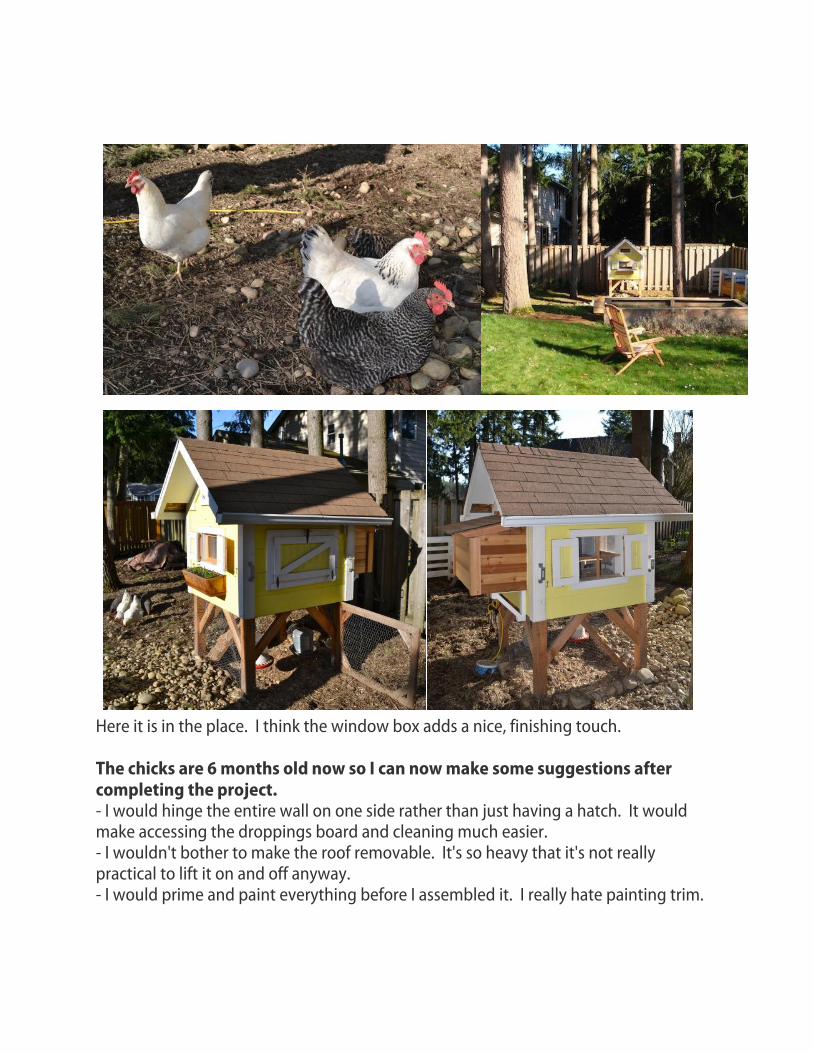
Here it is in the place. I think the window box adds a nice, finishing touch. The chicks are 6 months old now so I can now make some suggestions after completing the project. - I would hinge the entire wall on one side rather than just having a hatch. It would make accessing the droppings board and cleaning much easier. - I wouldn't bother to make the roof removable. It's so heavy that it's not really practical to lift it on and off anyway. - I would prime and paint everything before I assembled it. I really hate painting trim.
- I would design the window openings to fit off the shelf glass windows in order to make winter weatherproofing easier. I have to make custom windows in order to fit the existing openings. - I will add a covered run that can attach to the side of the house so that they have more room in the early morning and don't wake me at 6am with their squawking to be let out: perhaps 4x8'. - I will add gutters to reduce the splashing of dirt at the ground. - I would get quieter chickens. The Delawares are LOUD! Don't rely upon what you hear or read in the books; hens might not be as loud as roosters, but they are still loud enough to hear through closed windows at a distance of 75 feet at 6am.