file management extensions user guide - oracle · file management extensions user guide 8 mapping...
TRANSCRIPT

FFiillee MMaannaaggeemmeenntt EExxtteennssiioonnss UUsseerr GGuuiiddeeVVeerrssiioonn 1199
MMaarrcchh 22001199


3
Contents
About This Guide ............................................................................................................................... 5
Accessing File Extension URLs ......................................................................................................... 5
Access the Root Workspace File Extension URL .................................................................................. 5
Access a Workspace File Extension URL .............................................................................................. 5
Access a Project File Extension URL ..................................................................................................... 6
Access a Portfolio File Extension URL ................................................................................................... 6
Access a Programs File Extension URL ................................................................................................. 6
Access an Idea File Extension URL ........................................................................................................ 7
Access a Folder or File Extension URL .................................................................................................. 7
File Management Using a Desktop Client ........................................................................................ 7
Mapping the Prime Projects Network Drive .......................................................................................... 8
Map to Files Using a Windows Client .......................................................................................... 8
Map to Files Using a Linux Client ................................................................................................ 8
Map to Files Using a Mac Client .................................................................................................. 9
Add a Folder or File ................................................................................................................................ 9
Cut and Paste a Folder or File ............................................................................................................... 9
Delete a Folder or File ............................................................................................................................ 9
Check Out a File.................................................................................................................................... 10
Check In a File ...................................................................................................................................... 10
View a File ............................................................................................................................................. 10
Configuration Settings for Desktop Integration for Windows ............................................................ 10
File Management Using a Browser ................................................................................................. 11
Access the Prime Projects WebDAV Server ........................................................................................ 12
View and Download a File .................................................................................................................... 12
Appendix of Referenced Navigation Steps ..................................................................................... 13
Navigate to the WBS page ................................................................................................................... 13
Navigate to the Milestone Summary page.......................................................................................... 13
Navigate to the Activities page ............................................................................................................ 13
Navigate to the project Activities page................................................................................................ 13
Navigate to the project or program Activities page ............................................................................ 13
Navigate to the Baselines page ........................................................................................................... 14
Navigate to the workspace resource page ......................................................................................... 14
Navigate to the project resources page .............................................................................................. 14
Navigate to the workspace or project resources page ...................................................................... 14
Navigate to the workspace roles page ................................................................................................ 14
Navigate to the project roles page ...................................................................................................... 15
Navigate to the workspace or project roles page ............................................................................... 15

File Management Extensions User Guide
4
Navigate to the workspace resource assignments page ................................................................... 15
Navigate to the project, program, or project collection resource assignments page ...................... 15
Navigate to the workspace resource analysis page ........................................................................... 15
Navigate to the project, program, or project collection resource analysis page .............................. 16
Navigate to the files page .................................................................................................................... 16
Navigate to the project files page ....................................................................................................... 16
Navigate to the project or portfolio files page .................................................................................... 16
Navigate to the project Details page ................................................................................................... 16
Navigate to the project codes page .................................................................................................... 17
Navigate to the project settings page ................................................................................................. 17
Navigate to the program General page ............................................................................................... 17
Navigate to the program codes page .................................................................................................. 17
Navigate to a dictionary page .............................................................................................................. 18
Navigate to the Calendars dictionary page ......................................................................................... 18
Navigate to the Codes dictionary page ............................................................................................... 18
Navigate to the Curve Profiles dictionary page .................................................................................. 18
Navigate to the Units of Measure dictionary page ............................................................................. 19
Navigate to the Locations dictionary page ......................................................................................... 19
Navigate to the Currencies dictionaries page .................................................................................... 19
Navigate to an object configuration page ........................................................................................... 19
Navigate to the Activity configuration page ........................................................................................ 19
Navigate to the Project configuration page ........................................................................................ 20
Navigate to the Program configuration page ...................................................................................... 20
Navigate to the Resource Assignment configuration page................................................................ 20
Navigate to the WBS configuration page ............................................................................................ 20
Navigate to the Manage Services page .............................................................................................. 21
Navigate to the Preferences page ....................................................................................................... 21
Legal Notices .................................................................................................................................. 22
5
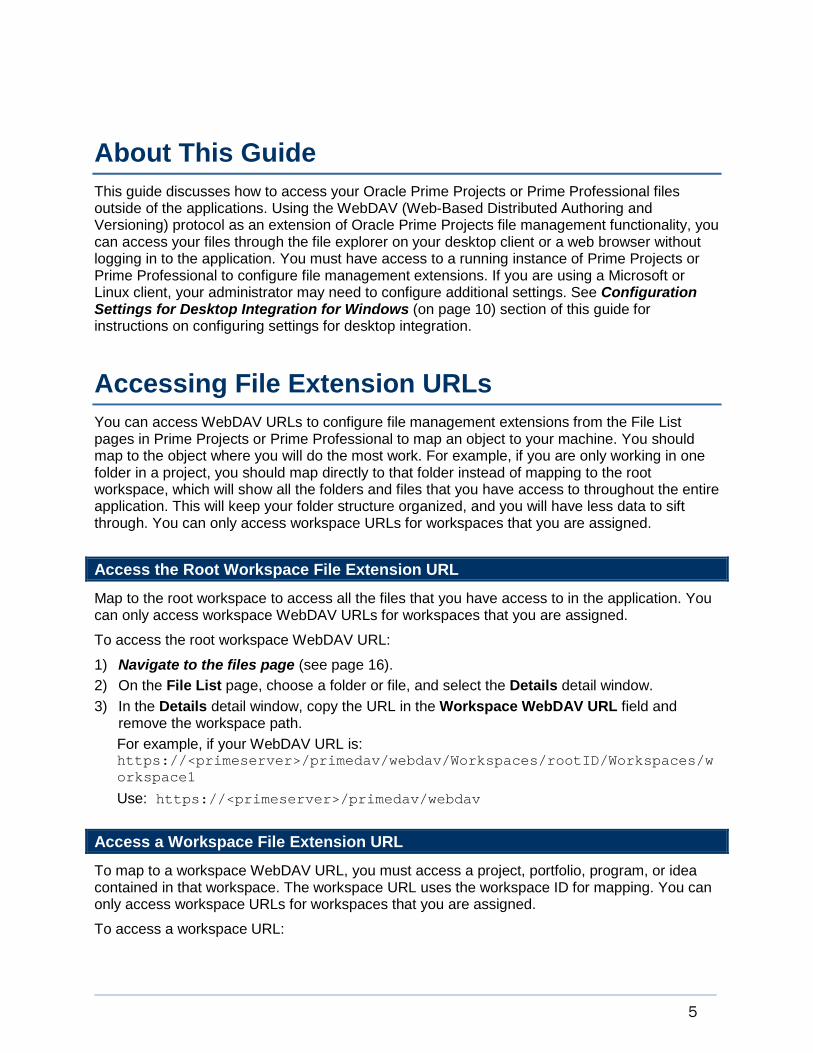
About This Guide
This guide discusses how to access your Oracle Prime Projects or Prime Professional files outside of the applications. Using the WebDAV (Web-Based Distributed Authoring and Versioning) protocol as an extension of Oracle Prime Projects file management functionality, you can access your files through the file explorer on your desktop client or a web browser without logging in to the application. You must have access to a running instance of Prime Projects or Prime Professional to configure file management extensions. If you are using a Microsoft or Linux client, your administrator may need to configure additional settings. See Configuration Settings for Desktop Integration for Windows (on page 10) section of this guide for instructions on configuring settings for desktop integration.
Accessing File Extension URLs
You can access WebDAV URLs to configure file management extensions from the File List pages in Prime Projects or Prime Professional to map an object to your machine. You should map to the object where you will do the most work. For example, if you are only working in one folder in a project, you should map directly to that folder instead of mapping to the root workspace, which will show all the folders and files that you have access to throughout the entire application. This will keep your folder structure organized, and you will have less data to sift through. You can only access workspace URLs for workspaces that you are assigned.
Access the Root Workspace File Extension URL
Map to the root workspace to access all the files that you have access to in the application. You can only access workspace WebDAV URLs for workspaces that you are assigned.
To access the root workspace WebDAV URL:
1) Navigate to the files page (see page 16).
2) On the File List page, choose a folder or file, and select the Details detail window.
3) In the Details detail window, copy the URL in the Workspace WebDAV URL field and remove the workspace path.
For example, if your WebDAV URL is: https://<primeserver>/primedav/webdav/Workspaces/rootID/Workspaces/workspace1
Use: https://<primeserver>/primedav/webdav
Access a Workspace File Extension URL
To map to a workspace WebDAV URL, you must access a project, portfolio, program, or idea contained in that workspace. The workspace URL uses the workspace ID for mapping. You can only access workspace URLs for workspaces that you are assigned.
To access a workspace URL:

File Management Extensions User Guide
6
1) Navigate to the files page (see page 16).
2) On the File List page, select the Details detail window.
3) In the Details detail window, copy the URL in the Workspace WebDAV URL field.
Access a Project File Extension URL
You can map to project files to quickly access your files from your desktop. The project WebDAV URL uses the project ID for mapping.
To access a project URL:
1) Navigate to the project files page (see page 16).
2) On the File List page, select the Details detail window.
3) In the Details detail window, copy the URL in the WebDAV URL field.
Tips
If you have access to the owning workspace, you can also copy the workspace URL from the Workspace WebDAV URL field in the Details detail window.
You can access Field files using the Workspace WebDAV URL or WebDAV URL.
Access a Portfolio File Extension URL
You can map to portfolio files to quickly access your files from your desktop. The portfolio WebDAV URL uses the portfolio name for mapping.
To access a portfolio URL:
1) In the object selector, select a portfolio.
2) In the sidebar, hover over Files, and select File List.
3) On the File List page, select the Details detail window.
4) In the Details detail window, copy the URL in the WebDAV URL field.
Tips
You must specify a complete path when mapping to a portfolio as the names are only unique per workspace.
If you have access to the owning workspace, you can also copy the workspace URL from the Workspace WebDAV URL field in the Details detail window.
Access a Programs File Extension URL
You can map to program files to quickly access your files from your desktop. The program WebDAV URL uses the program name for mapping.
To access a program URL:
1) In the object selector, select a program.
2) In the sidebar, hover over Files, and select File List.
3) On the File List page, select the Details detail window.
File Management Using a Desktop Client
7
4) In the Details detail window, copy the URL in the WebDAV URL field.
Tips
You must specify a complete path when mapping to a program as the names are only unique per workspace.
If you have access to the owning workspace, you can also copy the workspace URL from the Workspace WebDAV URL field in the Details detail window.
Access an Idea File Extension URL
You can map to idea files to quickly access your files from your desktop. The idea WebDAV URL uses the idea name for mapping.
To access an idea URL:
1) In the object selector, select an idea.
2) In the sidebar, hover over Files, and select File List.
3) On the File List page, select the Details detail window.
4) In the Details detail window, copy the URL in the WebDAV URL field.
Tips
If you have access to the owning workspace, you can also copy the workspace URL from the Workspace WebDAV URL field in the Details detail window.
Access a Folder or File Extension URL
Map to the folders and files you work with the most for easy access without the browser interface.
To map to a folder or file:
1) Navigate to the files page (see page 16).
2) On the File List page, choose a folder or file and select the Details detail window.
3) In the Details detail window, copy the URL in the WebDAV URL field.
Tips
If you have access to the owning workspace, you can also copy the workspace URL from the Workspace WebDAV URL field in the Details detail window.
File Management Using a Desktop Client
File management extensions provide a way to remotely author and manage your content using desktop clients that support the WebDAV (Web-Based Distributed Authoring and Versioning) protocol. For example, you can use Windows Explorer to check in, check out, and modify content in the repository rather than using the application interface.
WebDAV can be used with all content servers.

File Management Extensions User Guide
8
Mapping the Prime Projects Network Drive
You can map to a Prime Projects or Prime Professional network drive using a variety of clients such as Microsoft, Mac, or Linux.
Map to Files Using a Windows Client
You can map to files in Prime Projects or Prime Professional by mapping to the network drive using Windows Explorer.
To map to a network drive:
1) In Windows Explorer, select Map network drive.
2) In the Map Network Drive dialog box:
a. Select an open drive.
b. Enter the WebDAV URL in the Folder field.
For example: https://<primeserver>/primedav/webdav
c. Select Reconnect at logon.
d. Select Connect using different credentials.
e. If prompted, enter your username and password.
f. Select Finish.
Map to Files Using a Linux Client
You can map to files in Prime Projects by mapping to the network drive using a Linux client.
To map to a network drive:
If you are using KDE:
1) Launch Dolphin File Manager.
2) In the Location field, enter the WebDAV URL.
For example: dav://<primeserver>/primedav/webdav
3) Press Enter.
4) If prompted, enter your username and password.
If you are using Gnome:
1) Launch Nautilus File Manager.
2) Select Connect to Server.
3) In the Connect to Server dialog box, enter the WebDAV URL in the Server Address field.
For example: dav://<primeserver>/primedav/webdav
4) Select Connect.
5) If prompted, enter your username and password.
File Management Using a Desktop Client
9
Map to Files Using a Mac Client
You can map to files in Prime Projects or Prime Professional by mapping to the network drive using Finder.
To map to a network drive:
1) Select Go, and then select Connect to Server.
2) In the Connect to Server dialog box, enter the WebDAV URL in the Server Address field.
For example: https://<primeserver>/primedav/webdav
3) Select Connect.
4) If prompted, enter your username and password.
Add a Folder or File
If you have the required security privileges to create a folder in the web-based application, you can create a new folder in Windows Explorer or from the Open or Save As dialog in a desktop client.
To create a folder:
1) Select an existing web folder, right-click, and select New and then select Folder.
2) Enter a folder name and press Enter.
Tips
You cannot create new folders at the system, workspace, or project levels.
All required naming conventions that exist in the browser interface will exist in desktop integration. For example, you cannot create a name for a folder that begins with the following special characters: ~ # % & * [ ] \ : < > ? / | '.
Files and folders with very long names may present issues when mapped to a network drive. Consider reducing the length of the name if you encounter any issues.
Cut and Paste a Folder or File
Cut and paste folders and files to move them to and from folders.
To cut and paste a folder or file:
Drag and drop a folder or file from one folder to another.
Delete a Folder or File
Deleting a file from a virtual folder deletes all revisions of the content item. You must have the required security privileges to delete a folder or file.
To delete a folder or file:
Select the folder or file and press Delete.

File Management Extensions User Guide
10
Check Out a File
Checking out a file enables you to create new versions of existing files.
To check out a file:
Select an existing file.
Notes:
Files are downloaded or opened depending on the file opening procedures of your browser.
All users may view a checked out file, but only the user who has checked out the file may modify it until it is either checked in or check out is canceled.
Check In a File
You can check in a checked out file to upload a new version of the file.
To check in a file:
1) Save your file.
2) Exit the file.
View a File
You can view a file without affecting the version number by opening the file and then closing the file without saving it. Closing the file without saving cancels the checkout. However, if you make changes and save the file, a new version will be created each time you save.
Configuration Settings for Desktop Integration for Windows
If you use WebDAV on a Windows 7 or Windows 8 client, consider the following issues:
1) Registry changes are necessary for WebDAV use.
The WebDAV implementation used by Windows 7 (Mini-Redirector) does not implement the WebDAV locking protocol correctly (still the case as of WebDAV version 6.1.7601.17514). This means that on a drag and drop using Explorer, you will get an error. The file will likely be checked in correctly, though.
To avoid the error, you can turn off the locking protocol through a registry setting. Set HKEY_LOCAL_MACHINE\SYSTEM\CurrentControlSet\Services\WebClient\Parameters\SupportLocking to 0.
2) Drag and drop creates an empty first revision.
The WebDAV implementation used by Windows 7 (Mini-Redirector) creates an empty file for an initial revision on a drag and drop using Explorer. This just means that you will get two revisions for your first drag and drop of a file, and the first revision will be zero bytes.
3) The Network Location shortcut to WebDAV in Windows Explorer stops working.

File Management Using a Browser
11
The typical method for accessing and browsing the WebDAV share for Oracle Prime Projects or Prime Professional is through creating a network location in Explorer, as follows:
a. Select Computer in the Explorer navigation tree on the left, and select Add a network location on the right.
b. Enter the Oracle Prime Projects or Prime Professional WebDAV URL to Content Server. For example: https://<primeserver>:<port>/primedav/webdav
c. Log in.
After you log in, a shortcut to the Oracle Prime Projects or Prime Professional WebDAV URL will be displayed in Explorer under the list of drives for the client computer.
You will initially be able to access the WebDAV share for Content Server through this shortcut, as expected. However, after your session expires (typically after 2 hours of inactivity, as configured), you will not be able to access the WebDAV share through this shortcut again. The reason this occurs seems to be the way the shortcut data is stored and used for reconnecting.
If you delete the shortcut and re-create it the same way, it should work correctly.
4) Deleting a folder may cause a performance issue. The Windows 7 (Mini-Redirector) client will navigate the entire folder tree, deleting each item in the tree recursively. Microsoft's previous WebDAV client sent a single DELETE command to the server and relied on the server to perform the delete folder action. The new behavior may have performance and network traffic repercussions for large folder trees.
5) Deleting a folder shortcut will delete the contents of the entire tree. The base WebDAV protocol does not distinguish between shortcuts to folders and normal folders. That means deleting a folder shortcut will cause all the items contained in the target folder of the shortcut to be deleted. This will not typically happen with other WebDAV clients, like the Microsoft XP Web Folders implementation. The reason for this is the behavior described in item 4 above.
To configure desktop integration on a Windows 7, Windows 8, or Windows 10 client:
Add the WebDAV server address as a trusted site in your Microsoft Internet Explorer or Microsoft Edge browser.
1) In your browser, select the Tools menu, and then select Internet Options.
2) In the Internet Options dialog box, select the Security tab, and then select Trusted Sites.
3) Select Sites, and enter the WebDAV server address.
4) Select Add.
5) Select OK.
File Management Using a Browser
File management extensions provide a way to remotely view your files using a browser that supports the WebDAV (Web-Based Distributed Authoring and Versioning) protocol. For example, you can use Microsoft Internet Explorer to view and download files rather than logging into the application.
You cannot edit, check out, or check in files using browser integration. You can only view and download files. Downloading files does not check them out. Any changes you make will not be reflected in the application.

File Management Extensions User Guide
12
Access the Prime Projects WebDAV Server
You can access the Prime Projects or Prime Professional WebDAV Server using a variety of supported browsers manually or from the web-based application.
To access the Prime Projects or Prime Professional WebDAV Server:
1) Navigate to the files page (see page 16).
2) On the File List page, select a folder or file and then select the Details detail window.
3) In the Details detail window, under Workspace WebDAV URL or WebDAV URL, select the URL.
4) Log in using your credentials.
To access the Prime Projects WebDAV Server manually:
1) Launch a supported browser.
2) In the Address bar, enter the WebDAV URL and press Enter.
3) Log in using your credentials.
View and Download a File
You can view and download files from the Prime Projects or Prime Professional WebDAV Server. You must have the Download Files security privilege to download files.
To view and download a file:
1) Navigate to the folder where the file is stored.
2) Select the file.
3) Download the file according to your browser specifications.

13
Appendix of Referenced Navigation Steps
Navigate to the WBS page
In Prime Projects:
a) In the object selector, select a project.
b) In the sidebar, hover over Scope or Schedule, and select WBS.
In Prime Professional:
On the Project menu, select WBS.
Navigate to the Milestone Summary page
In Prime Projects:
a) In the object selector, select a program.
b) In the sidebar, hover over Schedule, and select Milestone Summary.
In Prime Professional:
On the Program menu, select Milestone Summary.
Navigate to the Activities page
In Prime Projects:
a) In the object selector, select a project, program, or project collection.
b) In the sidebar, hover over Schedule, and select Activities.
In Prime Professional:
On the Project or Program menu, select Activities.
Navigate to the project Activities page
In Prime Projects:
a) In the object selector, select a project.
b) In the sidebar, hover over Schedule, and select Activities.
In Prime Professional:
On the Project menu, select Activities.
Navigate to the project or program Activities page
In Prime Projects:
a) In the object selector, select a project or program.
File Management Extensions User Guide
14
b) In the sidebar, hover over Schedule, and select Activities.
In Prime Professional:
On the Project or Program menu, select Activities.
Navigate to the Baselines page
In Prime Projects:
a) In the object selector, select a project.
b) In the sidebar, hover over Scope or Schedule, and select Baselines.
In Prime Professional:
On the Project menu, select Baselines.
Navigate to the workspace resource page
In Prime Projects:
a) In the object selector, select a workspace.
b) In the sidebar, hover over Resources, and select Resource List.
In Prime Professional:
On the Workspace menu, select Resources.
Navigate to the project resources page
In Prime Projects:
a) In the object selector, select a project.
b) In the sidebar, hover over Resources, and select Resource List.
In Prime Professional:
On the Project menu, select Resources.
Navigate to the workspace or project resources page
In Prime Projects:
a) In the object selector, select a workspace or project.
b) In the sidebar, hover over Resources, and select Resource List.
In Prime Professional:
On the Workspace or Project menu, select Resources.
Navigate to the workspace roles page
In Prime Projects:
a) In the object selector, select a workspace.

Appendix of Referenced Navigation Steps
15
b) In the sidebar, hover over Resources, and select Role List.
In Prime Professional:
On the Workspace menu, select Roles.
Navigate to the project roles page
In Prime Projects:
a) In the object selector, select a project.
b) In the sidebar, hover over Resources, and select Role List.
In Prime Professional:
On the Project menu, select Roles.
Navigate to the workspace or project roles page
In Prime Projects:
a) In the object selector, select a workspace or project.
b) In the sidebar, hover over Resources, and select Role List.
In Prime Professional:
On the Workspace or Project menu, select Roles.
Navigate to the workspace resource assignments page
In Prime Projects:
a) In the object selector, select a workspace.
b) In the sidebar, hover over Resources, and select Assignment List.
In Prime Professional:
On the Workspace menu, select Resource Assignments.
Navigate to the project, program, or project collection resource assignments page
In Prime Projects:
a) In the object selector, select a project, program, or project collection.
b) In the sidebar, hover over Resources or Schedule, and select Assignment List.
In Prime Professional:
On the Project or Program menu, select Resource Assignments.
Navigate to the workspace resource analysis page
In Prime Projects:
a) In the object selector, select a workspace.

File Management Extensions User Guide
16
b) In the sidebar, hover over Resources, and select Analysis.
In Prime Professional:
In the Workspace menu, select Resource Analysis.
Navigate to the project, program, or project collection resource analysis page
In Prime Projects:
a) In the object selector, select a project, program, or project collection.
b) In the sidebar, hover over Resources, and select Analysis.
In Prime Professional:
On the Project or Program menu, select Resource Analysis.
Navigate to the files page
In Prime Projects:
a) In the object selector, select a project, portfolio, program, or idea.
b) In the sidebar, hover over Files, and select File List.
In Prime Professional:
On the Project or Program menu, select Files.
Navigate to the project files page
In Prime Projects:
a) In the object selector, select a project.
b) In the sidebar, hover over Files, and select File List.
In Prime Professional:
On the Project menu, select Files.
Navigate to the project or portfolio files page
In Prime Projects:
a) In the object selector, select a project or portfolio.
b) In the sidebar, hover over Files, and select File List.
In Prime Professional:
On the Project menu, select Files.
Navigate to the project Details page
In Prime Projects:
a) In the object selector, select a project.

Appendix of Referenced Navigation Steps
17
b) In the sidebar, select Summary & Settings.
c) On the Summary & Settings menu, select Details.
In Prime Professional:
On the Project menu, select Details.
Navigate to the project codes page
In Prime Projects:
a) In the object selector, select a project.
b) In the sidebar, select Summary & Settings.
c) On the Summary & Settings menu, select Codes.
In Prime Professional:
On the Project menu, select Project Codes.
Navigate to the project settings page
In Prime Projects:
a) In the object selector, select a project.
b) In the sidebar, select Summary & Settings.
c) On the Summary & Settings menu, select Settings.
In Prime Professional:
On the Project menu, select Project Settings.
Navigate to the program General page
In Prime Projects:
a) In the object selector, select a program.
b) In the sidebar, select Summary & Settings
c) On the Summary & Settings menu, select General.
In Prime Professional:
On the Program menu, select General.
Navigate to the program codes page
In Prime Projects:
1) In the object selector, select a program.
a) In the sidebar, select Summary & Settings.
b) On the Summary & Settings menu, select Codes.
In Prime Professional:
File Management Extensions User Guide
18
On the Program menu, select Program Codes.
Navigate to a dictionary page
In Prime Projects:
a) In the object selector, select a workspace.
b) In the sidebar, select Summary & Settings.
c) On the Summary & Settings menu, select Dictionaries, and then select a dictionary item.
In Prime Professional:
On the Dictionaries menu, select a dictionary item.
Navigate to the Calendars dictionary page
In Prime Projects:
a) In the object selector, select a workspace.
b) In the sidebar, select Summary & Settings.
c) On the Summary & Settings menu, select Dictionaries, and then select Calendars.
In Prime Professional:
On the Dictionaries menu, select Calendars.
Navigate to the Codes dictionary page
In Prime Projects:
a) In the object selector, select a workspace.
b) In the sidebar, select Summary & Settings.
c) On the Summary & Settings menu, select Dictionaries, and then select Codes.
In Prime Professional:
On the Dictionaries menu, select Codes.
Navigate to the Curve Profiles dictionary page
In Prime Projects:
a) In the object selector, select a workspace.
b) In the sidebar, select Summary & Settings.
c) On the Summary & Settings menu, select Dictionaries, and then select Curve Profiles.
In Prime Professional:
On the Dictionaries menu, select Curve Profiles.
Appendix of Referenced Navigation Steps
19
Navigate to the Units of Measure dictionary page
In Prime Projects:
a) In the object selector, select a workspace.
b) In the sidebar, select Summary & Settings.
c) On the Summary & Settings menu, select Dictionaries, and then select Units of Measure.
In Prime Professional:
On the Dictionaries menu, select Units of Measure.
Navigate to the Locations dictionary page
In Prime Projects:
a) In the object selector, select a workspace.
b) In the sidebar, select Summary & Settings.
c) On the Summary & Settings menu, select Dictionaries, and then select Locations.
In Prime Professional:
On the Dictionaries menu, select Locations.
Navigate to the Currencies dictionaries page
In Prime Projects:
a) In the object selector, select a workspace.
b) In the sidebar, select Summary & Settings.
c) On the Summary & Settings menu, select Dictionaries, and then select Currencies.
In Prime Professional:
On the Dictionaries menu, select Currencies.
Navigate to an object configuration page
In Prime Projects:
a) In the object selector, select a workspace.
b) In the sidebar, select Summary & Settings.
c) On the Summary & Settings menu, select Defaults & Options, and then select an object.
In Prime Professional:
On the Workspace menu, select Configuration, and then select an object.
Navigate to the Activity configuration page
In Prime Projects:
a) In the object selector, select a workspace.

File Management Extensions User Guide
20
b) In the sidebar, select Summary & Settings.
c) On the Summary & Settings menu, select Defaults & Options, and then select Activity.
In Prime Professional:
On the Workspace menu, select Configuration, and then select Activity.
Navigate to the Project configuration page
In Prime Projects:
a) In the object selector, select a workspace.
b) In the sidebar, select Summary & Settings.
c) On the Summary & Settings menu, select Defaults & Options, and then select Project.
In Prime Professional:
On the Workspace menu, select Configuration, and then select Project.
Navigate to the Program configuration page
In Prime Projects:
a) In the object selector, select a workspace.
b) In the sidebar, select Summary & Settings.
c) On the Summary & Settings menu, select Defaults & Options, and then select Program.
In Prime Professional:
On the Workspace menu, select Configuration, and then select Program.
Navigate to the Resource Assignment configuration page
In Prime Projects:
a) In the object selector, select a workspace.
b) In the sidebar, select Summary & Settings.
c) On the Summary & Settings menu, select Defaults & Options, and then select Resource Assignment.
In Prime Professional:
On the Workspace menu, select Configuration, and then select Resource Assignment.
Navigate to the WBS configuration page
In Prime Projects:
a) In the object selector, select a workspace.
b) In the sidebar, select Summary & Settings.
c) On the Summary & Settings menu, select Defaults & Options, and then select WBS.
Appendix of Referenced Navigation Steps
21
In Prime Professional:
On the Workspace menu, select Configuration, and then select WBS.
Navigate to the Manage Services page
In Prime Projects:
a) In the header, select your username.
b) On the User menu, select Manage Services.
In Prime Professional:
On the User menu, select Manage Services. On the User menu, select Manage Services.
Navigate to the Preferences page
In Prime Projects:
a) In the header, select your username.
b) On the User menu, select Preferences.
In Prime Professional:
On the User menu, select Preferences.
22
Oracle Prime Projects File Management Extensions User Guide
Copyright © 2014, 2019, Oracle and/or its affiliates. All rights reserved. Oracle and Java are registered trademarks of Oracle and/or its affiliates. Other names may be trademarks of their respective owners.
Intel and Intel Xeon are trademarks or registered trademarks of Intel Corporation. All SPARC trademarks are used under license and are trademarks or registered trademarks of SPARC International, Inc. AMD, Opteron, the AMD logo, and the AMD Opteron logo are trademarks or registered trademarks of Advanced Micro Devices. UNIX is a registered trademark of The Open Group.
This software and related documentation are provided under a license agreement containing restrictions on use and disclosure and are protected by intellectual property laws. Except as expressly permitted in your license agreement or allowed by law, you may not use, copy, reproduce, translate, broadcast, modify, license, transmit, distribute, exhibit, perform, publish or display any part, in any form, or by any means. Reverse engineering, disassembly, or decompilation of this software, unless required by law for interoperability, is prohibited.
The information contained herein is subject to change without notice and is not warranted to be error-free. If you find any errors, please report them to us in writing.
If this is software or related documentation that is delivered to the U.S. Government or anyone licensing it on behalf of the U.S. Government, the following notice is applicable:
U.S. GOVERNMENT END USERS: Oracle programs, including any operating system, integrated software, any programs installed on the hardware, and/or documentation, delivered to U.S. Government end users are “commercial computer software" pursuant to the applicable Federal Acquisition Regulation and agency-specific supplemental regulations. As such, use, duplication, disclosure, modification, and adaptation of the programs, including any operating system, integrated software, any programs installed on the hardware, and/or documentation, shall be subject to license terms and license restrictions applicable to the programs. No other rights are granted to the U.S. Government.
This software or hardware is developed for general use in a variety of information management applications. It is not developed or intended for use in any inherently dangerous applications, including applications that may create a risk of personal injury. If you use this software or hardware in dangerous applications, then you shall be responsible to take all appropriate failsafe, backup, redundancy, and other measures to ensure its safe use. Oracle Corporation and its affiliates disclaim any liability for any damages caused by use of this software or hardware in dangerous applications.
This software or hardware and documentation may provide access to or information on content, products and services from third-parties. Oracle Corporation and its affiliates are not responsible for and expressly disclaim all warranties of any kind with respect to third-party content, products, and services. Oracle Corporation and its affiliates will not be responsible for any loss, costs, or damages incurred due to your access to or use of third-party content, products, or services.
Legal Notices