impression materials and procedures in removable partial denture presented by: dr. kamleshwar singh...
TRANSCRIPT

IMPRESSION MATERIALSIMPRESSION MATERIALSAND AND
PROCEDURES IN REMOVABLE PARTIAL DENTUREPROCEDURES IN REMOVABLE PARTIAL DENTURE
Presented by:Presented by:
Dr. Kamleshwar SinghDr. Kamleshwar Singh
BDS, MDS, ICMR-IF(Japan) BDS, MDS, ICMR-IF(Japan)
Assistant ProfessorAssistant Professor
Department of ProsthodonticsDepartment of Prosthodontics
King George’s Medical University, Lucknow King George’s Medical University, Lucknow

INTRODUCTIONINTRODUCTION
Impression
A negative likeness or copy in reverse of the surface of an object ; imprint of teeth and adjacent structures for use in dentistry. GPT – 8
Partial denture impression
A negative likeness of a part or all of a partially edentulous arch - GPT – 8

An impression of partially edentulous arch must record accurately the anatomic form of teeth and surrounding tissues.
Unless the cast upon which the prosthesis is to be constructed is an exact replica of mouth, the prosthesis can‘t be expected to fit properly and accurate cast can be obtained only from an accurate impression.

Impression trays
A receptacle in to which suitable impression material is placed to make negative likeness
ORA device that is used to carry, confine and control
impression material while making an impression.


Impression trays can be classified broadly into
stock trays
and
custom trays
Stock trays for partially edentulous patients may be perforated to retain the impression material or they may be constructed with a rimlock for this purpose.
Another type of stock tray designed for the reversible type of hydrocolloid is water cooled trays. It contains tubes through which water can be circulated for purpose of cooling the tray.


Modified stock tray (individual tray)Robert R Renner’s technique The stock tray can be modified with
modeling composition and with wax to create an accurately fitting tray.
This technique can be employed in class I and class II cases.
Technique: Softened modeling compound is placed in
the stock impression tray in such a way that it may capture the edentulous areas of mouth and include one or two teeth adjacent to the space.
The tray is positioned in the mouth and compound is allowed to cool but it not permitted to harden completely, so that it is prevented from becoming hard when in contact with the adjacent teeth.
When it is hardened sufficiently to contour it is removed from the mouth and thoroughly chilled.

The compound is trimmed so that it does not contact the adjacent teeth and surface of compound in the edentulous areas is scraped to a depth of 2 - 4 mm to provide space for a uniform layer of impression material.
In maxillary impression the compound should cover the edentulous ridges and the palate and should accurately fit to post dam area.

Modification of the tray to make it adhesive
If Impression material to be used is either alginate or agar, we can heat surface of compound with a flame.
An alternate method Is to paint the surface of compound with a solvent such an chloroform to make it tacky and then to embed cotton fibers in it, the impression material will become enmeshed in cotton fiber. And if rubber base material is to be employed rubber adhesive is painted on the compound
Advantages over custom tray:
1. Impression can be accomplished in one appointment.
2. Can be used inpatient with tendency to gag.
Advantages over conventional use of stock stray:
Especially useful for mouth that is either exceptionally large or small or the one with anomalous contour which cannot be accurately fitted with conventional stock tray.

Disadvantages: STOCK TRAY
a. The peripheral borders cannot be accurately recorded.
b. Considerably more bulkier than a custom tray.

Custom impression trays:
a. Peripheral borders can be precisely recorded in the impression
b. Thickness of impression material can be controlled. This is important consideration when using rubber base type material, which should not exceed thickness of 2-4 mm because a section thicker than this is subject to distortion.

C. Well fitted tray will better support the impression in the palate, then avoiding even present danger of material slumping in vital areas.
Custom trays are sometimes needed for mouths that are abnormally or of unusual configuration.

Impression MaterialsImpression Materials
Factors that influence the selection of impression materials are:
Convenience of use Time of manipulation and set Cost Need for special trays Operator training and preference

Impression Materials
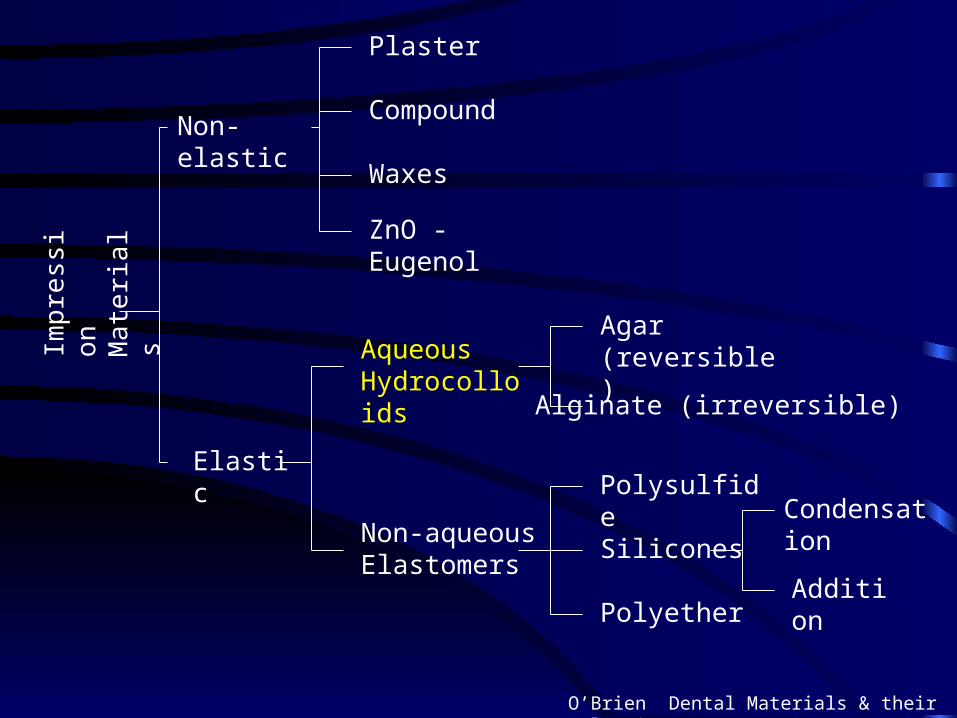
Impr
essi
on
Mat
eria
ls
Non-elastic
Elastic
Aqueous Hydrocolloids
Non-aqueous Elastomers
Polysulfide
Silicones
Polyether
Condensation
Addition
Agar (reversible)
Alginate (irreversible)
Plaster
Compound
ZnO - Eugenol
Waxes
O’Brien Dental Materials & their Selection 1997

Reversible Hydrocolloid (Agar)
• Indications– crown and bridge
• high accuracy
• Example– Slate Hydrocolloid (Van R)

Composition• Agar
– complex polysaccharide
• seaweed
– gelling agent
• Borax– strength
• Potassium sulfate– improves gypsum
surface
• Water (85%)
agar hydrocolloid (hot) agar hydrocolloid (cold)
(sol) (gel)
cool to 43 C
heat to 100 C
O’Brien Dental Materials & their Selection 1997

Manipulation
• Gel in tubes– syringe and tray material

Manipulation
• 3 chamber conditioning unit– (1) liquefy at 100C for
10 minutes• converts gel to sol
– (2) store at 65C– place in tray– (3) temper at 46C for 3 minutes– seat tray– cool with water at 13C for 3 minutes
• converts sol to gel
O’Brien Dental Materials & their Selection 1997
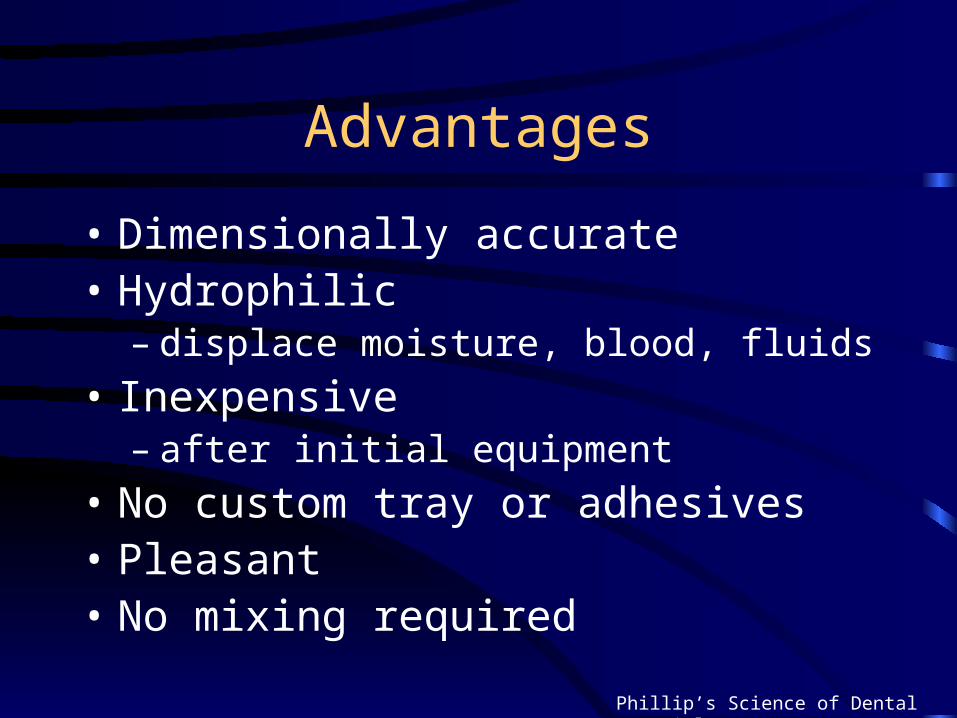
Advantages
• Dimensionally accurate• Hydrophilic
– displace moisture, blood, fluids
• Inexpensive– after initial equipment
• No custom tray or adhesives• Pleasant• No mixing required
Phillip’s Science of Dental Materials 1996
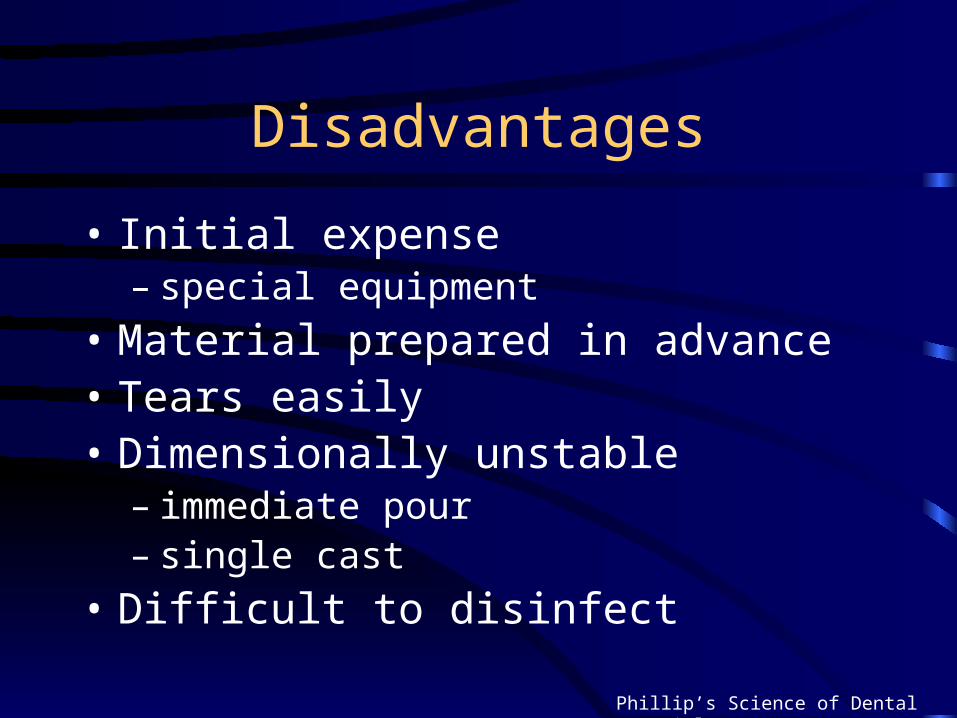
Disadvantages
• Initial expense– special equipment
• Material prepared in advance• Tears easily• Dimensionally unstable
– immediate pour– single cast
• Difficult to disinfect
Phillip’s Science of Dental Materials 1996
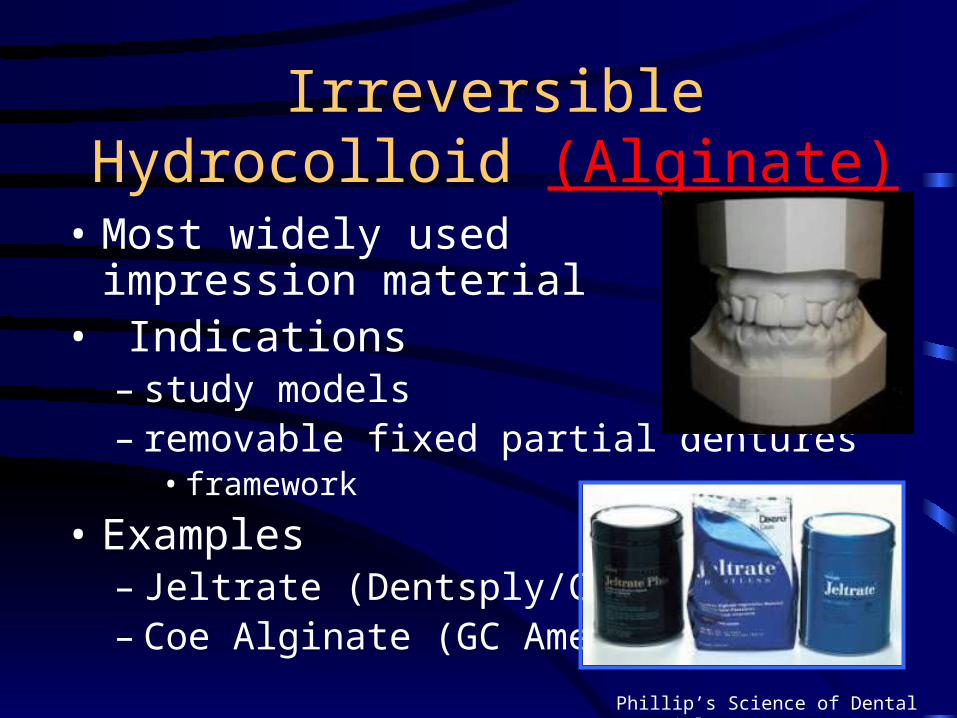
Irreversible Hydrocolloid (Alginate)
• Most widely used impression material
• Indications– study models– removable fixed partial dentures
• framework
• Examples– Jeltrate (Dentsply/Caulk)– Coe Alginate (GC America)
Phillip’s Science of Dental Materials 1996

Composition• Sodium alginate
– salt of alginic acid• mucous extraction of
seaweed (algae)
• Calcium sulfate– reactor
• Sodium phosphate– retarder
• Filler• Potassium fluoride
– improves gypsum surface
2 Na3PO4 + 3 CaSO4 Ca3(PO4)2 + 3 Na2SO4
Na alginate + CaSO4 Ca alginate + Na2SO4
(powder) (gel)
H2O
O’Brien Dental Materials & their Selection 1997
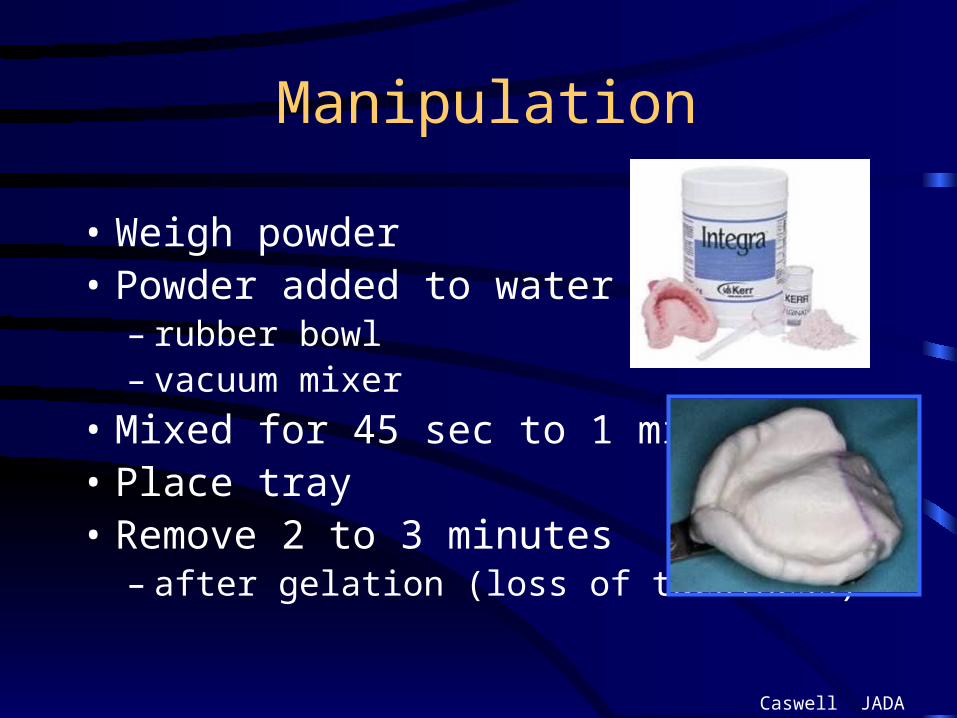
Manipulation
• Weigh powder• Powder added to water
– rubber bowl– vacuum mixer
• Mixed for 45 sec to 1 min• Place tray• Remove 2 to 3 minutes
– after gelation (loss of tackiness)
Caswell JADA 1986

Advantages
• Inexpensive
• Easy to use
• Hydrophilic– displace moisture, blood, fluids
• Stock trays
Phillip’s Science of Dental Materials 1996

Disadvantages
• Tears easily• Dimensionally unstable
– immediate pour – single cast
• Lower detail reproduction– unacceptable for fixed prosthodontics
• High permanent deformation• Difficult to disinfect
Phillip’s Science of Dental Materials 1996

RPD IMPRESSION Vs COMPLETE DENTURE
The complete denture impression records the edentulous mucosa with underlying bone only, whereas partial denture impression records not only relative soft yielding tissues (the oral mucosa) as well as a hard unyielding substance (the remaining teeth).

Removable partial denture impression need to record the teeth that are irregular in contour as well as varying in their vertical relations to occlusal plane. The chosen impression material must be capable of recording the tissue contours as accurately as possible without distortion, which occurs as impression is withdrawn.

PRIMARY IMPRESSION
Objectives:
To obtain an impression of all the standing teeth and denture - supporting tissues of each jaw from which study casts may be prepared.
The purpose of the study casts are:

To enable special trays and occlusion rims to be constructed if necessary.
To examine the occlusion in detail on an articulator.
By use of a surveyor, to plan the path of insertion of the proposed denture, arrive at a tentative design and plan any mouth preparation.

Checking Maxillary Tray For Correct Size
Checking Mandibular Tray for Correct Size
Mixing Impression Material
Alginate may be mixed by hand spatulation, mechanical spatulation, or mechanical spatulation under vacuum.
The objective is to obtain a smooth, bubble- free mix of alginate. In hand spatulation a measured amount of distilled water at approximately 22 °C is placed in a rubber mixing bowl The pre-weighed alginate powder is sifted from its container into the water.

The mixing should begin slowly using a stiff, broad - bladed spatula.When the powder is thoroughly wet, the speed of the spatulation should be increased The spatula should crush the material against the sides of the bowl to ensure that the material is completely mixed. The spatulation should continue for a minimum of 45 seconds.

The strength of the gel can be reduced to 50 % if the mixing is not complete. Insufficient spatulation can result in failure of the ingredients to dissolve sufficiently. Then the chemical reaction of changing from sol to gel will not proceed uniformly throughout the mass of alginate. An incompletely spatulated mix will appear lumpy and granular and will have numerous areas of trapped air.
Complete spatulation will result in a smooth, creamy mixture. The mixing should be completed by wiping the alginate against the side of the bowl with the spatula to remove any trapped air. The most consistent method of making a smooth, bubble- free mix is mechanical spatulation under vacuum.

The pre-weighed powder is added to the pre-measured water in the mechanical mixing bowl .The powder is thoroughly incorporated into water by hand spatulation. The mix is then mechanically spatulated under 20 pounds of vacuum for 15 seconds.

Longer spatulation will result in a greatly reduced setting time of the alginate and could affect the strength of the gel.

Loading the Impression Tray
Small increments of the impression material should be placed in the tray and forced under the rim lock. Placing too large a portion of alginate at one time increases the possibility of trapping air The tray should be filled to the level with the flanges of the tray.
Overfilling should be avoided.

Making the Impression
The mandibular impression is made first because it usually entails less patient discomfort patient confidence is increased when an impression has been successfully completed while holding the tray with the left hand the dentist uses the right hand to remove the gauze pads from the patient’s mouth.
The syringe is used to inject the impression material over the occlusal surface of the teeth and into the vestibular and alveolingual sulcus areas. The impression material will remain in place if the tissues are fairly dry. A tendency for the alginate to form a ball and not remain where placed indicates that the tissues are too moist and that voids are likely to be present in the impression.
There is not enough time to repack the mouth before gelation begins, so the impression procedure should be completed. The impression should be carefully inspected and if voids are present in critical areas, the impression procedure should be repeated. Packing the mouth with more or larger gauze pads and avoiding removal of the gauze until ready to apply the alginate will usually prevent this problem.

The layer of alginate applied with the syringe should be 3 to 4 mm thick; If it is too thin, the heat of the tissues of the oral cavity may cause the material to set before the tray is seated, resulting in a layered impression.
The fingers of the left hand that are retracting the right cheeks should depress the lower lip to provide good visibility. When the tray is correctly lined up over the teeth, the patient is asked to protrude the tongue. The tray is carefully seated so that its flanges are below the gingival margins of the teeth.

The tray should not be over seated because this could result in the cusps of the teeth contacting the tray, causing an inaccurate impression. Great care must be exercised in seating the tray if the patient has mandibular tori or other exostoses, or the making of this impression can be a very painful experience for the patient.

As the tray is being seated, the cheeks are pulled out to prevent the trapping of buccal tissues under the tray. The patient is asked to keep the tip of the tongue in contact with the upper surface of the tray during the gelation of the impression material.

The dentist must maintain the position of the tray during the entire gelation period. This can be accomplished most conveniently and effectively by placing the forefinger of each hand on the top of the tray in the premolar area and by placing the thumbs under the patient ‘s chin.
The dentist through tactile sense can maintain an even amount of pressure on the tray even if the patient swallows or opens or closes the mouth. Any movement of the tray during the gelation period will result in an inaccurate impression.
Allowing the patient or the assistant to hold the
tray or leaving the patient unattended must be avoided.
Within 3 to 4 minutes the alginate should be set.

For maxillary impression, the patients is prepared by using the rinses and placing the gauzes pads described for making the mandibular impression. While holding the loaded tray with the left hand the dentist uses the right hand to remove the gauze pads.
Alginate is injected onto the occlusal surfaces and in all vestibular areas as for the mandibular arch. In addition, a fairly large amount should be wiped onto the palate. Failure to accomplish this step will usually result in an impression with a large void in the palatal area.

The loaded maxillary tray is grasped by the thumb and forefinger of the right hand. As the right posterior flange of the impression tray stretches the right corner of the mouth, the dentist ‘s left arm should be behind the patient’s head and headrest so that the thumb and index finger may grasp the left corner of the mouth and distend it slightly to allow the impression tray to enter the mouth in a straight line.
No attempt should be made to seat the tray until the tray is in its correct anteroposterior position. Once the tray is in the mouth, the thumb and forefinger of the left hand should raise the upper lip to allow the dentist to see the relationship between the labial flange of the tray and the anterior teeth or the residual ridge.

The tray must be centered and properly aligned. This position can best be verified by looking at the patient ‘s face from above and observing the position of the handle of the tray.

It should protrude straight from the center of the mouth. After the proper position has been verified the tray is seated by using the fingers of both hands over the premolar areas. As the tray is being seated the cheeks must be lifted outward and upward to prevent the buccal tissues from being trapped under the flanges of the tray.

The lip must also be lifted up and out to allow good visibility and to avoid trapping the lip between the flanges of the tray and the anterior teeth. Care must be taken not to over seat the tray to avoid. contact between the tray and cusp tips of incisal edge of the teeth.

The tray should be stabilized throughout the set of the impression material by keeping light pressure over the premolar areas on both sides of the arch The alginate should set in 3 to 4 minutes.

Effect of movement of tray:
Gelation of alginate occurs by a chemical reaction. When mixed with water, the sodium alginate and calcium sulfate in the powder react to form a lattice work of fibrils of insoluble calcium alginate. The heat of the oral tissues accelerates the chemical reaction, causing the alginate next to the tissues to gel first .
If the dentist exerts pressure or allows the tray to move during gelation of the remainder of the alginate, internal stresses are created that can distort the impression as it is removed from the mouth.

Removal of Impression from Mouth:
Clinically, the initial set of alginates is determined by a loss of surface tackiness. The impression should be left in the mouth for an additional 2 to 3 minutes to allow the development of additional strength. Early removal of the weak alginate may lead to unnecessary tearing of the impression.

The gel strength doubles during the first 4- minutes after initial gelation. No further strengthening is found after that time. In fact, Impression is left in the mouth for 5 minutes rather than the recommended 2 to 3 minutes after initial gelation exhibits definite distortion.

Most alginates improve their elasticity with time, providing a better opportunity for accurate reproduction of undercuts. Impressions removed too early after initial gelation produce a rough surface of the poured cast. These data indicate the alginate impressions should not be removed from the mouth for at least 2 to 3 minutes after initial gelation.
There are two reliable methods of determining the
correct time for removal of the impression
1. A timer can be used to measure the 2 to 3 minute period after initial gelation or
2. A small mound of the original mix of alginate can be placed on a glass or metal surface; when this alginate will fracture cleanly with finger pressure, the impression is ready to be removed from the mouth.

Impression Methods:
There are basically two dual impression techniques. The physiologic, or functional, impression technique records the ridge portion by placing an occlusal load on the impression tray as the impression is being made.

For this dual impression a custom impression tray was constructed over a preliminary cast of the arch, a function impression of the distal extension ridge was made, and then hydrocolloid impression was made with the first impression held in its functional position with finger pressure.

The underlying s tissues will be displaced because displacement will normally occur under function.
The physiologic impression techniques that discussed are as follows: Mc Lean’s and Hindel’s methods, the functional relining method, and the fluid wax method.

The selected pressure impression technique not only equalizes the support between the abutment teeth and the soft tissue, but has the added advantage of directing the force to the portions of the ridge that are most capable of withstanding the force.
This is accomplished by providing relief in the impression tray in selected areas and permitting the impression to be recorded.
The need for physiologic impressions was first recognized by McLean and others
They realized the need of recording the tissues of the residual ridge that would eventually support a distal extension denture base in the functional or supporting form and then relating this functional impression to the remainder of the arch by means of a second impression.


For the production of accurate master cast the impression technique far out weights the selection of the impression material.
No available knowledge of the person making the impression material will produce results greater than the skill and knowledge of the person making the impression.

MCQSMCQS

1.1. Which is true regarding maxillary residual Which is true regarding maxillary residual ridgeridge
a)a) Crest is cortical boneCrest is cortical bone
b)b) Crest is cancellous bone with firm mucosaCrest is cancellous bone with firm mucosa
c)c) Crest is cancellous bone without firm Crest is cancellous bone without firm mucosamucosa
d)d) Preesure placed on the crest result in Preesure placed on the crest result in irritation of these tissuesirritation of these tissues

2. In a maxillary denture, relief must be 2. In a maxillary denture, relief must be providedprovided
a)a) Crestal regionCrestal region
b)b) Buccal slopesBuccal slopes
c)c) Palatal slopesPalatal slopes
d)d) Median palatal rapheMedian palatal raphe
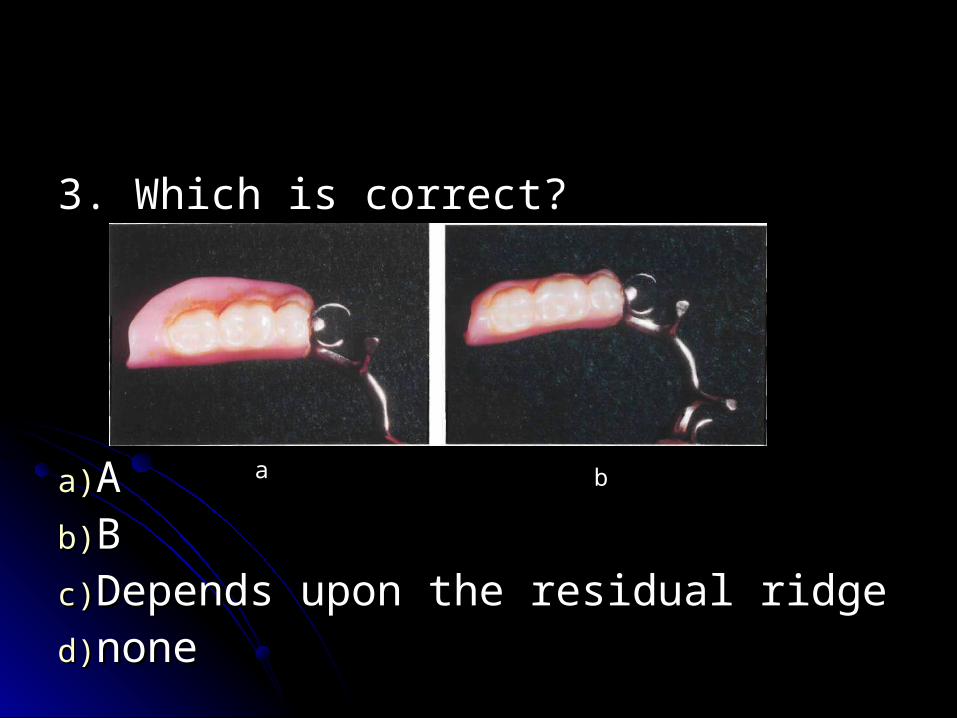
3. Which is correct? 3. Which is correct?
a)a) AAb)b) BBc)c) Depends upon the residual ridgeDepends upon the residual ridged)d) nonenone
aa bb

4. For a distal extension base, which should 4. For a distal extension base, which should be followed?be followed?
a)a) Make a functional impressionMake a functional impression
b)b) Make an anatomic impressionMake an anatomic impression
c)c) Make an anatomic impression with stress Make an anatomic impression with stress breakersbreakers
d)d) Both a and cBoth a and c

5. Functional form of the residual ridge is not 5. Functional form of the residual ridge is not recorded by which of the following means?recorded by which of the following means?
a)a) Under some loading, occlusal or fingerUnder some loading, occlusal or fingerb)b) By specially designed traysBy specially designed traysc)c) By soft impression material, such as ZnO, By soft impression material, such as ZnO,
if the entire impressionn tray is uniformly if the entire impressionn tray is uniformly relievedrelieved
d)d) Maintaining the consistency of the Maintaining the consistency of the recording mediumrecording medium

6.In order to increase the amount of 6.In order to increase the amount of vertically directed forces on the residual vertically directed forces on the residual ridgeridge
a)a) Move the rest posteriorlyMove the rest posteriorly
b)b) Move the rest anteriorlyMove the rest anteriorly
c)c) Reduce the number of restsReduce the number of rests
d)d) None is correctNone is correct
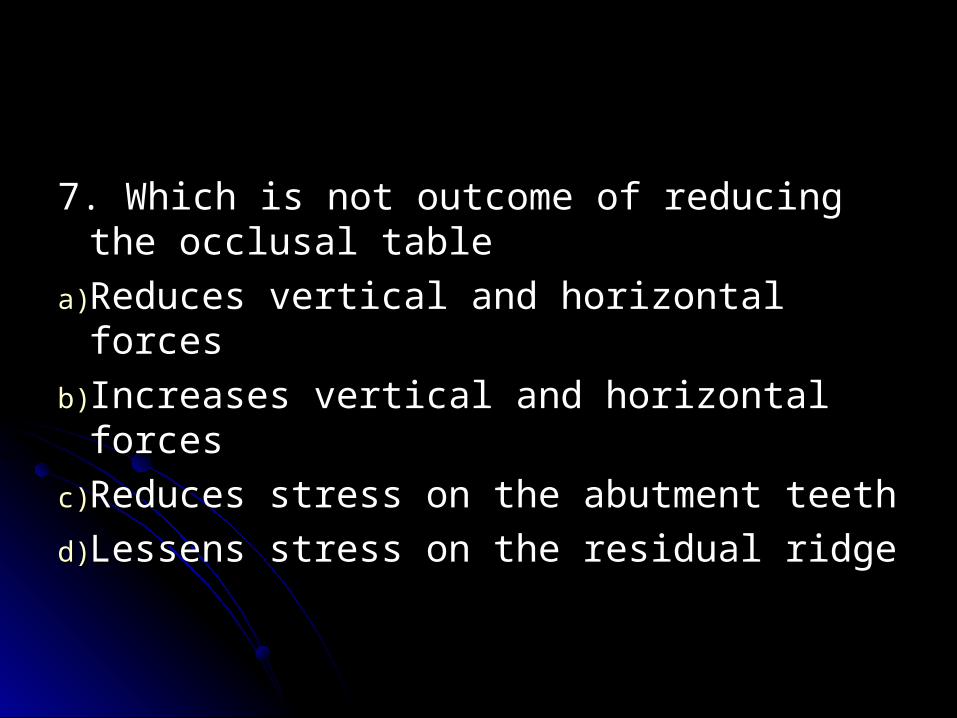
7. Which is not outcome of reducing the 7. Which is not outcome of reducing the occlusal tableocclusal table
a)a) Reduces vertical and horizontal forcesReduces vertical and horizontal forces
b)b) Increases vertical and horizontal forcesIncreases vertical and horizontal forces
c)c) Reduces stress on the abutment teethReduces stress on the abutment teeth
d)d) Lessens stress on the residual ridgeLessens stress on the residual ridge
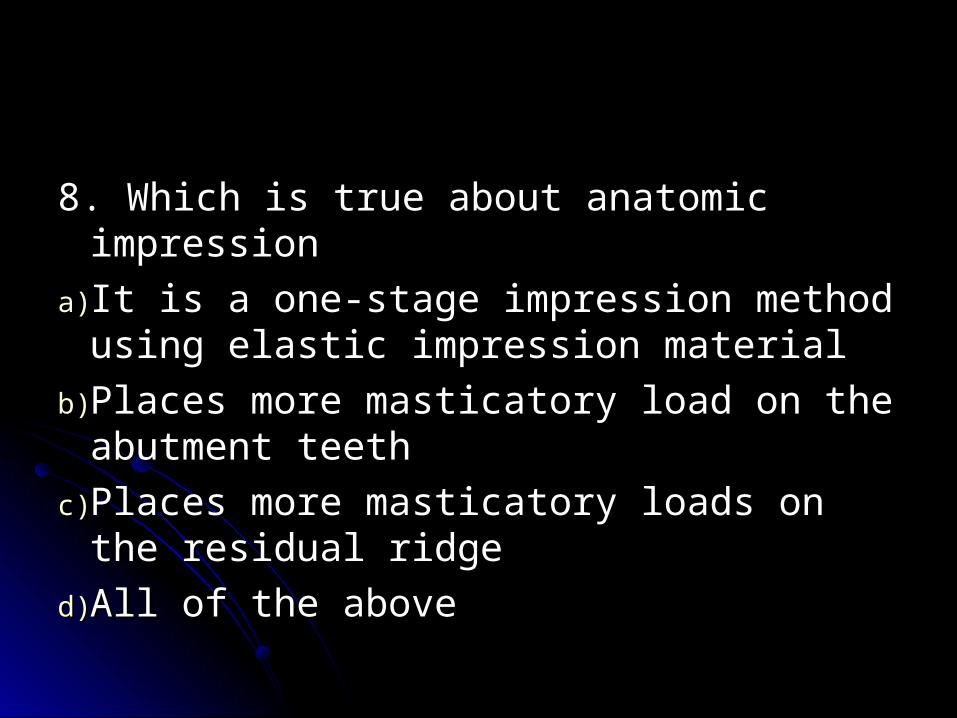
8. Which is true about anatomic impression8. Which is true about anatomic impression
a)a) It is a one-stage impression method using It is a one-stage impression method using elastic impression materialelastic impression material
b)b) Places more masticatory load on the Places more masticatory load on the abutment teethabutment teeth
c)c) Places more masticatory loads on the Places more masticatory loads on the residual ridgeresidual ridge
d)d) All of the above All of the above

9. To evaluate complete seating of the 9. To evaluate complete seating of the framework several types of disclosing framework several types of disclosing media are used. Which one is wrongly media are used. Which one is wrongly written?written?
a)a) RougeRouge
b)b) ChloroformChloroform
c)c) Pencil correction fluidPencil correction fluid
d)d) Waxes Waxes
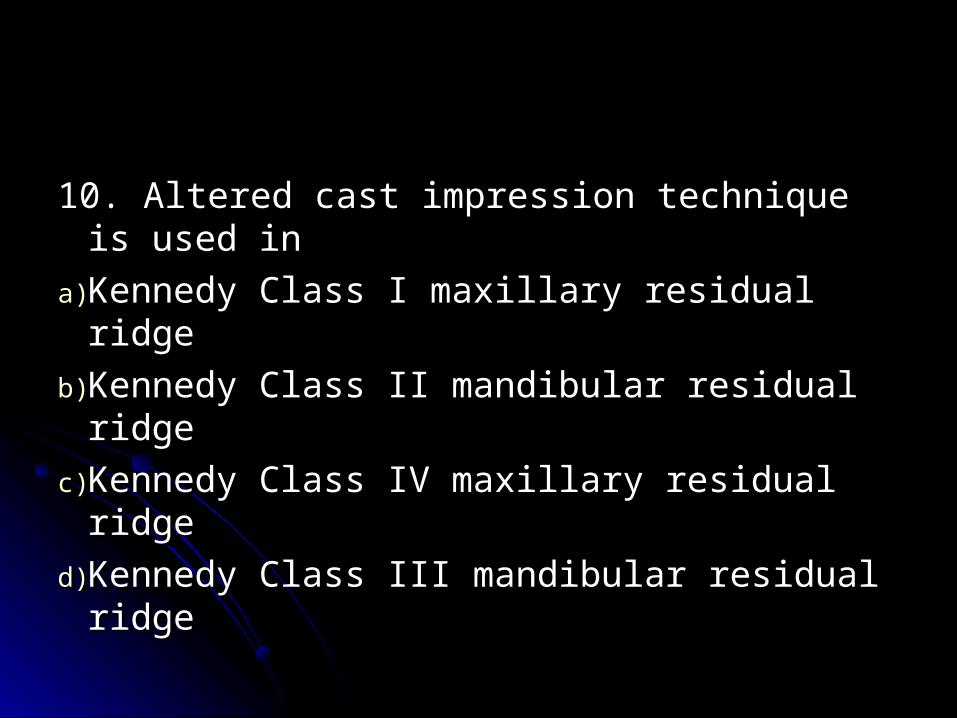
10. Altered cast impression technique is 10. Altered cast impression technique is used inused in
a)a) Kennedy Class I maxillary residual ridgeKennedy Class I maxillary residual ridge
b)b) Kennedy Class II mandibular residual Kennedy Class II mandibular residual ridgeridge
c)c) Kennedy Class IV maxillary residual ridgeKennedy Class IV maxillary residual ridge
d)d) Kennedy Class III mandibular residual Kennedy Class III mandibular residual ridgeridge

1. b1. b 2. d2. d 3. a3. a 4. d4. d 5. c5. c 6. b6. b 7. b7. b 8. d8. d 9. c9. c 10. b10. b