lyric2 patient selection en lrc - … · tragus with other hand to straighten ... •tube and...
TRANSCRIPT

Patient Selection


Lyric Candidacy• Patients are evaluated for Lyric candidacy using four primary
criteria:
– Fitting Range
– Lifestyle
– Ear Geometry / Anatomical Features
– Medical History and Condition

Candidacy - Fitting Range
Be cautious of steeply sloping losses

Candidacy - Lifestyle
• Lyric use is not recommended for patients who engage in the
following:
– Underwater swimming (complete submersion of the head)
– Regular scuba diving
– Regular sky diving
– Routine MRIs

Candidacy - Ear Geometry / Anatomical Features
• Visualization of the entire ear canal, especially to note
challenging canal shapes or anatomical features, is vital for
ensuring a comfortable fit
– Noteworthy Canal Shapes:
• Hourglass shape
• Anterior or Anterior/Posterior bulge
• V shaped canal at any location
• Substantial step up, or shelf in canal

Candidacy - Medical Clearance
• Prior to Lyric use, medical clearance is recommended for
patients with the following conditions:
– Prescription anticoagulation therapy
– Diabetes
– Compromised immune system (including, but not limited to):
• Chemotherapy within the last 6 months
• HIV
• Sickle Cell Disease
• Lupus
• Advanced Rheumatoid Arthritis
• Organ transplant

Middle Ear Conditions
– Chronic or acute drainage
– TM Perforation
– PE Tubes
– Cholesteatoma
Skin Conditions
– Chronic external otitis
– Keratosis obturans
Other Conditions
– Radiation to the head or
neck ever
– Cognitive ability
(insufficient to understand
device use)
– Chronic ear pain
Candidacy - Medical Contraindications
Lyric use is contraindicated for patients with the following
conditions:

Contraindicated Placements
• Placing Lyric in a contraindicated canal will likely result in:
– Trial cancellation
– Discomfort/pain for the patient
– Ear canal concerns:
• Hematoma
• Laceration
• Abrasion
• Moisture accumulation

Ear Canal Hematomas and Cerumen

Ear Canal Laceration

Hematoma on the TM

Moisture Accumulation

Equipment
• Before sizing or fitting Lyric, it is important to obtain and
become comfortable using the appropriate equipment
– Placement of Lyric deep in the canal can be difficult to visualize
without proper equipment
• Magnification and illumination: microscope or head loupe
• Ergonomics: patient chair, provider stool
• Tools: Lyric fitting kit
– Lyric recommended equipment is also very useful for cerumen
management
Magnification and canal illumination are
paramount to your Lyric success!
9/25/2012 Page 15
Otoscopy
Objectives:
•Visualize complete ear canal to develop « flight path » for sizer and
device insertion
•Ensure clean and healthy skin throughout the whole canal
•Detect any abnormalities in the ear canal regarding skin condition,
canal shape and the ear drum to rule out contraindications
•Detect any abnormalities before refitting an ear canal
If any abnormalities are detected, refer to an ENT for
clarification

9/25/2012 Page 16
Otoscopy
Approach:
Work your way in starting at the
concha through the cartilagenous and
bony part to the eardrum

9/25/2012 Page 17
Otoscopy
What are we looking for?
A clean, healthy and straight canal without significant changes in
shape and diameter
However, for most ears the reality looks different…
9/25/2012 Page 18
Otoscopy
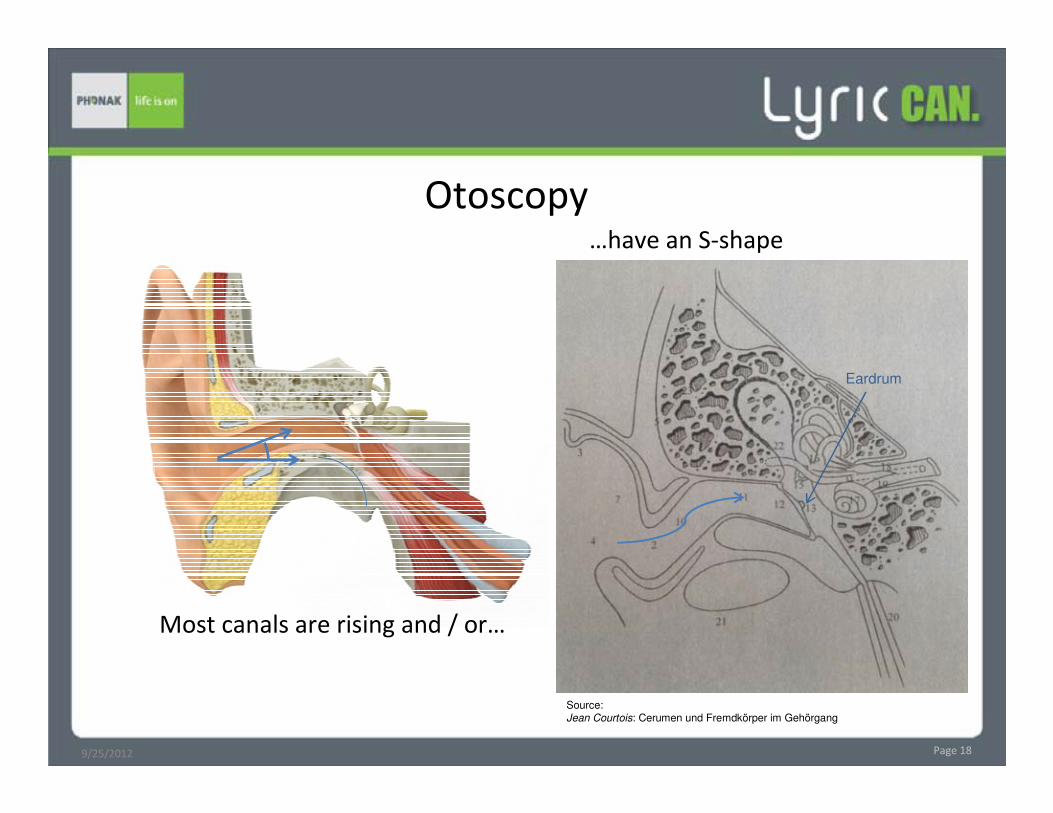
Eardrum
Most canals are rising and / or…
…have an S-shape
Source: Jean Courtois: Cerumen und Fremdkörper im Gehörgang

9/25/2012 Page 19
Otoscopy
Tilt head to compensate for rise, turn head to compensate for bend
Move the head of the patient to aid with otoscopy:

9/25/2012 Page 20
Otoscopy
For a first overview, start otoscopy
without speculum, …
... it focuses the view to a small area.

9/25/2012 Page 21
pull ear backwards and up and move
tragus with other hand to straighten
ear canal
Otoscopy
pull ear backwards and up and
hold speculum with index finger
and thumb of other hand
Watch out for fingernails and always brace with the hand holding the speculum!
Without speculum… With speculum…
9/25/2012 Page 22
Otoscopy
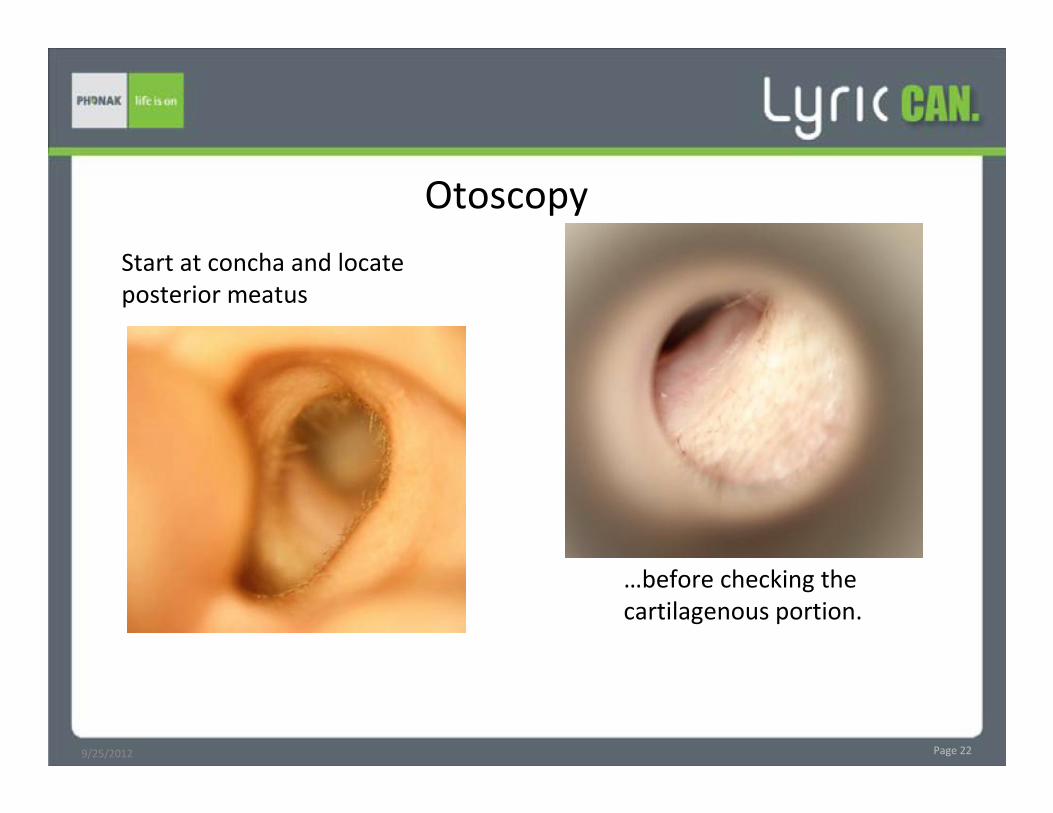
Start at concha and locate
posterior meatus
…before checking the
cartilagenous portion.

9/25/2012 Page 23
Otoscopy
The bony portion is most critical for fitting success!
Cerumen that needs to be removed
Bulge at front, round shape at the back (common shape)
+ cerumen
+ small exostoses
Bulge on both sides leading to strong v-shape
Exostoses

9/25/2012 Page 24
Otoscopy
Finally: the ear drum
Cerumen that needs to be removed
With the help of head movements,
the whole drum can be visualized
Contraindicated ear with perforation
and finally the ear drum

9/25/2012 Page 25
To fit or not to fit?

9/25/2012 Page 26
To fit or not to fit?

9/25/2012 Page 27
To fit or not to fit?

9/25/2012 Page 28
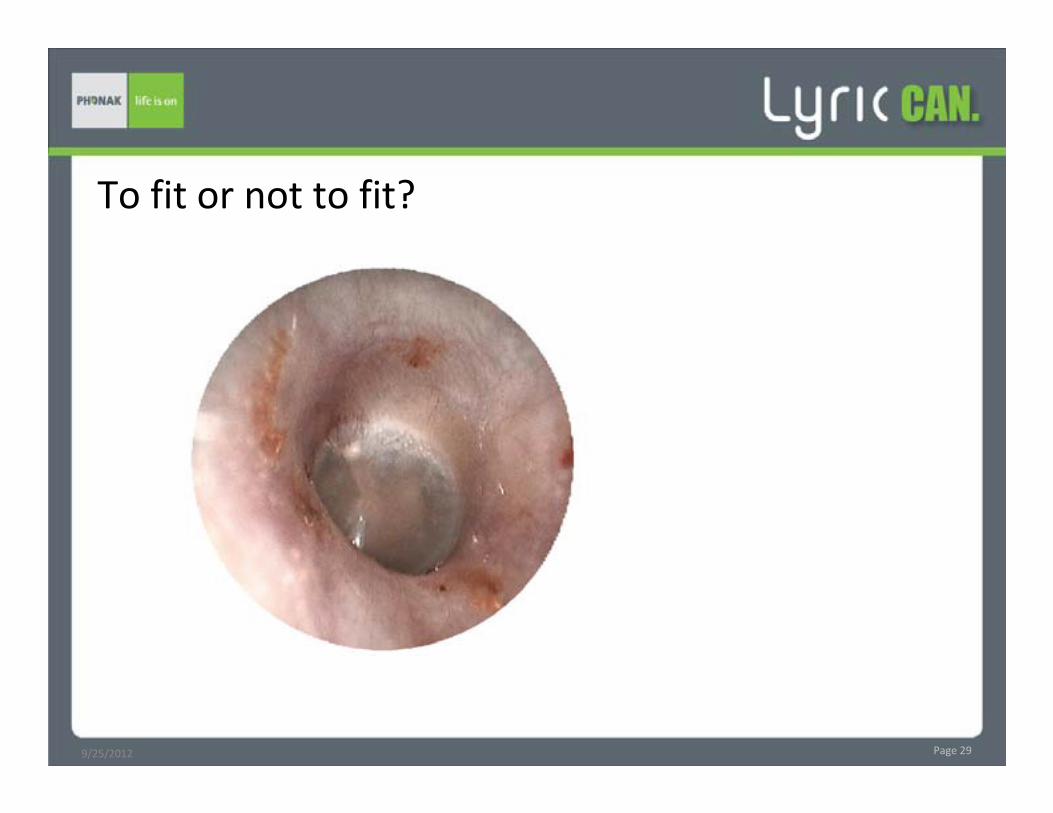
To fit or not to fit?
9/25/2012 Page 29
To fit or not to fit?

9/25/2012 Page 30
To fit or not to fit?

9/25/2012 Page 31
These ears have worn
Lyric for 6 years!
2005
2011
Lyric Hall of Fame


Inspect Ear Canal Prior to Sizing and Placement
Ear must be healthy and completely free of cerumen and debris
• Carefully inspect entire ear canal for candidacy and trajectory; look at:
– First bend in canal
– Bony cartilaginous juncture
– Medial seal location (4 mm from TM)
– TM
• Will be working blind during insertion, it is important to visualize the
canal (know your flight plan)
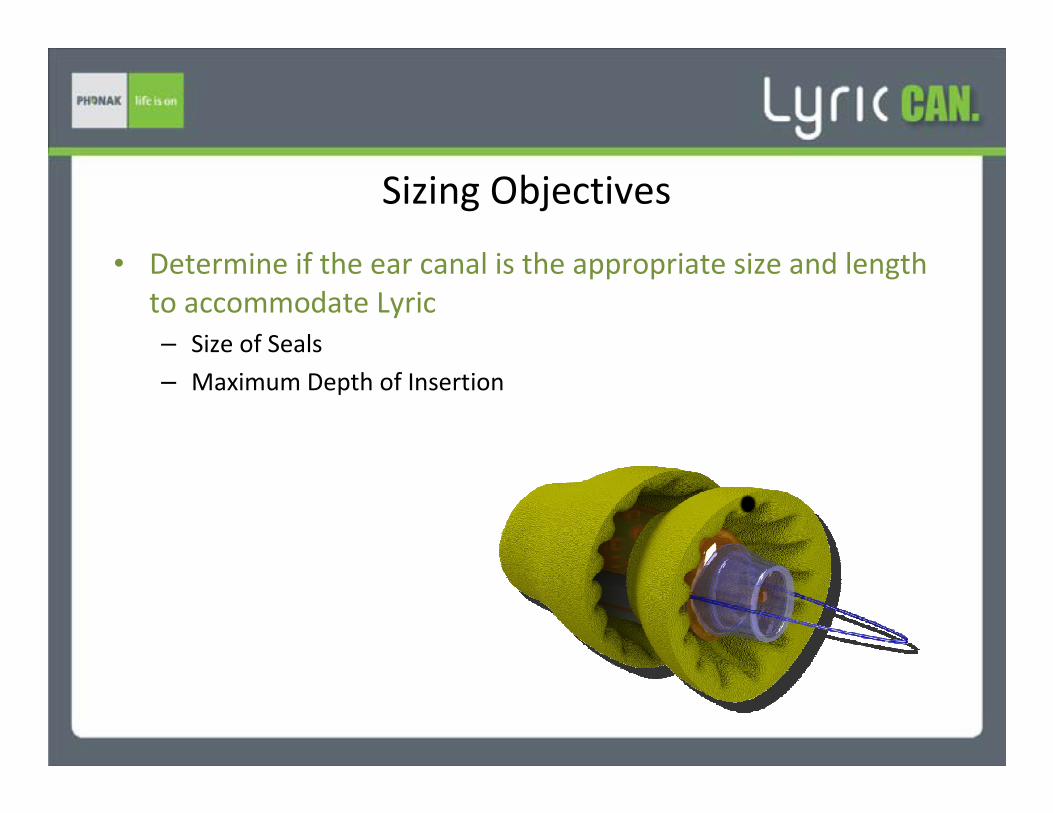
Sizing Objectives
• Determine if the ear canal is the appropriate size and length
to accommodate Lyric
– Size of Seals
– Maximum Depth of Insertion

Sizing & Placement Reference Point
• Use the posterior
meatus as a reference
for sizing and placing
Lyric

Canal and Device Dimensions
Lateral Seal Medial Seal
Posterior Meatus Lyric2 Device Tympanic Membrane
4 mm 12 mm 4 mm
20 mm

Lyric2 Sizing System

Length Sizer
Handle
Flexible Tip Body of Sizer

Device Sizers
Removal loops
Insertion handle
Pressure vent
Superior indicator
Device Size Sizer color
XS
S
M
L
XL
• Replicas of the actual device
– Have the same look and feel of actual
devices
– Represent device “drivability”
– Require less guesswork in size decision
• Not ear specific
• Vented through the core
• Seal sizes vary from XS-XL
– The core is the same size throughout

Lubrication
• 100% glycerin or sterile/distilled water is
recommended as lubrication during
device sizing and device insertion
• Neither option leaves a residue
• Apply with a cotton swab lightly to the canal wall
and medial seal of sizer or device
– Apply gently
– Do not over apply
– Avoid plugging the microphone or receiver with
excessive lubricant
• Re-apply as necessary

Insertion Tool
Lyric2 Insertion Tool
• Spring loaded
• Three rings allow for natural finger
placement
– Ergonomic design
• Allows for user control when
inserting and removing
– Tension can be increased or decreased
– Allows for flexible device “driving”
• Device stays on tool
– Even with fingers relaxed or no tension
on tool, device remains in place

Parts of Insertion Tool
Depth Scale
Sliding Depth Ring
Loading Notch
Removal Notch
Tip
Fixed Finger Ring
Moving Tension Ring
Fixed Thumb Ring
Depth Collar

Lyric fitting kit

Loading the insertion tool
•To load a device or sizer, start by completely squeezing
the moving tension ring toward the thumb ring
•This extends the loading hook forward to the tip

Loading Devices/Sizers on Insertion Tool
•Position the device face down and just
above the insertion tool•Dot is towards you
•Tube and removal loops toward the floor
•Squeeze the finger rings while threading
removal loops into the loading notch
•Once the loops are in place slowly release
your finger grip while placing the device on
the tip of the insertion tool
Remember finger rings
control tension

Determining Lyric2 size
• For new patients, start with S Device sizer (Green core)– For existing Lyric patients start with the medial seal size
• Gently lubricate the canal wall using water or glycerin on a cotton swab
• Load the S sizer on the insertion tool using the black dot as superior indicator
• The insertion tool is designed to allow variable tension (by extending or
retracting the moving tension ring)– For most ears, varied tension will be required to maintain the appropriate device angle
when navigating the bends of the canal
– Once device is past posterior meatus, tension should be relieved to prevent undue
pressure being applied to canal walls
• Release sizer and check seal for gaps or folds
• If there are folds in the seal, the sizer is too big and an XS should be tried
• If gaps are present between the seal and canal wall, the sizer is too small and the
M or eventually L should be tried
• Insert multiple sizers for comparison to determine best fit

Device activation prior to insertion
• Wash hands thoroughly
• Remove the device from its packaging
• Send Target settings to device via programming wand (one-way
transmission)
• Perform listening check with device connected to a sterilized stethoclip
bell

Inserting Lyric2 device
• If warranted, gently re-lubricate the canal wall
• Load the device on the insertion tool using the black dot as superior indicator
• As with sizers:– Be mindful of the need for variable tension as you steer through the ear canal
– Varied tension will be required to maintain the appropriate device angle when navigating
the bends of the canal
– Once past the posterior meatus, tension should be relieved to prevent undue pressure
being applied to canal walls
• Completely squeeze moving tension ring
• Release the device and check for gaps/folds
• Verify comfort

Insertion tips
Tricks of the Trade• Squeeze = Release
– The insertion tool releases tension when squeezed!
• Widen = Tighten
• Device is no longer jointed
– Line up the tool in whatever direction you want to move the device
• Still need to develop that flight plan!
• Look for 12 mm of real estate to “park” this device
• Leave device “ON” while inserting
– Listen for feedback to subside
– Tool does not allow easy repositioning
• May need to use Lyric forceps to make positional changes once device is
in place
– Must remove device for gross device placement changes

Practitioner device/sizer removal
• Enter the canal with the removal
notch up
• “Scoop” the removal lines into
the removal notch
• Once engaged, gently “wiggle”
the device outward

Removal tips
Removal can be more difficult on deeper insertions
and narrower ear canals• Removal lines can fall to canal floor over time
– Be careful not to abrade canal walls while finding removal loops
• You can't always remove the device using the removal loops or insertion tool
– Use blunt nose tweezers or forceps to grab the removal loops
– Device does have a handle inside the protection tube
– Pulling on seals or the protection tube will often leave them compromised
• Gently lift up as you remove from canal to ensure device retention in removal
notch
– Be careful not to let tip of insertion tool fall once out of the canal

Patient device removal
Use circular motion to
engage removal loops on
device, once engaged,
gently pull
Once patient removes
device, it cannot be
reused

Patient practice: Device removal
Sizers are replicas of devices, equipped with
removal loops. Patients can “practice” self -
removal in your office

Care and use in the office:
• Store devices away from electromagnetic interference (e.g. microwave, x-ray machine, autoclave)
• Do not use if foil package seal has been compromised
• Do not use if temperature indicator has changed color
• Handle device hygienically

Infection Control
Clean insertion tool and
specula by:
– Autoclave
• Note that the plastic
components of the tool
may discolor but
functionality will remain
intact
– Cold sterilization
• Complete submersion in
cold sterilant in designated
tray overnight
• Rinse and pat or air dry
9/25/2012

Patient Selection