manipulate graphics skill area 213.2. lecture overview photoshop’s gui basic function basic image...
TRANSCRIPT

ManipulateGraphicsSkill Area 213.2

Lecture Overview
• Photoshop’s GUI• Basic Function• Basic Image Manipulation

POPULAR IMAGE EDITING SOFTWARE

Popular Image Editing Software
• Pixelmator– Pixelmator is a fast and powerful image
editing software for the Mac operating system. With its intuitive and beautiful Graphical User Interface (GUI), support for layers to organize your document, a large assortment of painting tools, and simple-to-use photo correction tools
Popular Image Editing Software
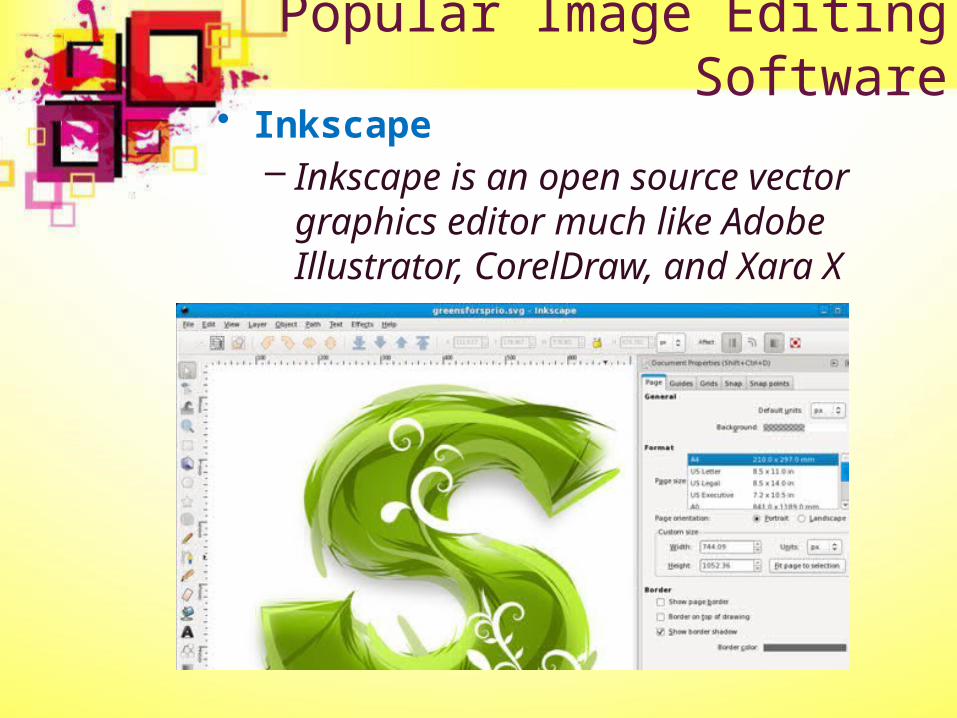
• Inkscape– Inkscape is an open source vector
graphics editor much like Adobe Illustrator, CorelDraw, and Xara X

Popular Image Editing Software
• Fireworks – Fireworks is Adobe’s image editing
software for the web designers. t is also a raster and vector hybrid, being able to work with raster-based images and vector-based graphics better and more symbiotically than Photoshop

Popular Image Editing Software
• GIMP– GIMP – which stands for the GNU Image
Manipulation Program – is a feature-packed and powerful open source image editor that can be used in all major operating systems (Linux, Mac, and Windows). It has a customizable interface so that you can easily set the view and behavior of GIMP.

Popular Image Editing Software
• Photoshop – With an insurmountable amount of features that
help you manipulate and enhance photos as well as create web graphics, all while helping you manage your workflow and image editing environment – Photoshop comes in at numero uno as the best image editing software currently in the market.
GUI OF PHOTOSHOP

Graphic User Interface
GUI for Mac OS quite similar with GUI for Windows OS

Graphic User Interface
• The Color palette displays the current foreground and background colors and RGB values for these colors. You can use the sliders to change the foreground and background colors in different color modes. You can also choose a color from the spectrum of colors displayed in the color ramp at the bottom of the palette.
Graphic User Interface
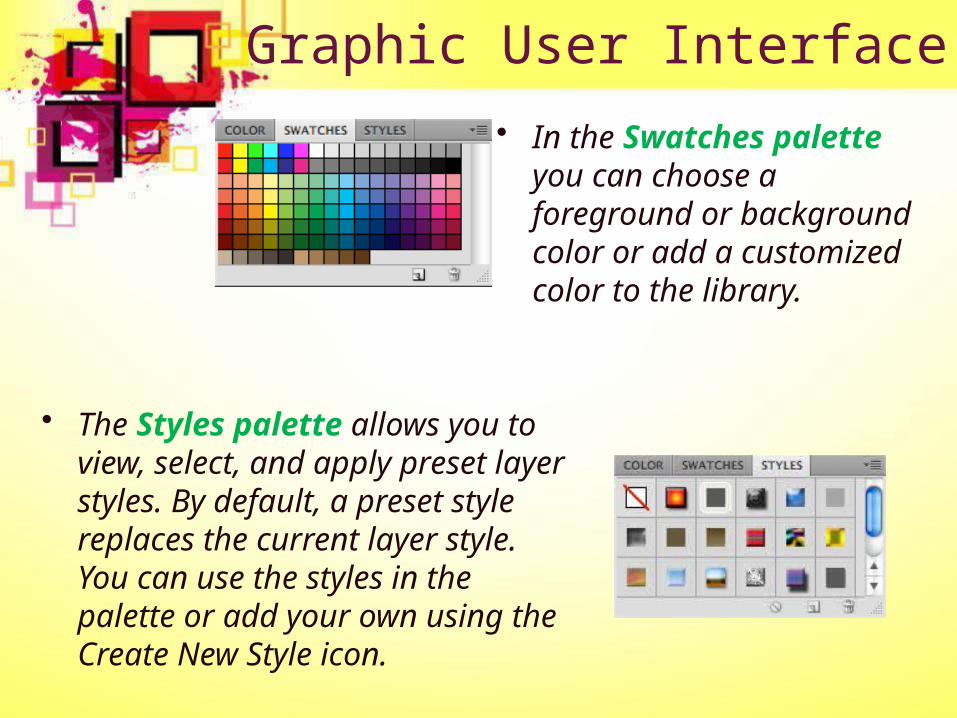
• In the Swatches palette you can choose a foreground or background color or add a customized color to the library.
• The Styles palette allows you to view, select, and apply preset layer styles. By default, a preset style replaces the current layer style. You can use the styles in the palette or add your own using the Create New Style icon.

Graphic User Interface• The History palette stores and displays
each action performed allowing you jump to any recent stage of the image alteration.
• The alterations should be created during the current working session; after saving or closing the document the History palette clears all the contents.
• Each time you apply a change to an image, the new state of that image is added to the palette.
• The History palette can store up to 20 stages.
• However, you can always go back to the first stage, for example opening the document.
• It is important to know that once you click on any of the previous stages, all the changes that were made after it will be lost.

Graphic User Interface
• Adjustment layers give you the ability to apply an effect to a group of layers in Photoshop, and then you can edit that effect later, while preserving the original layers.
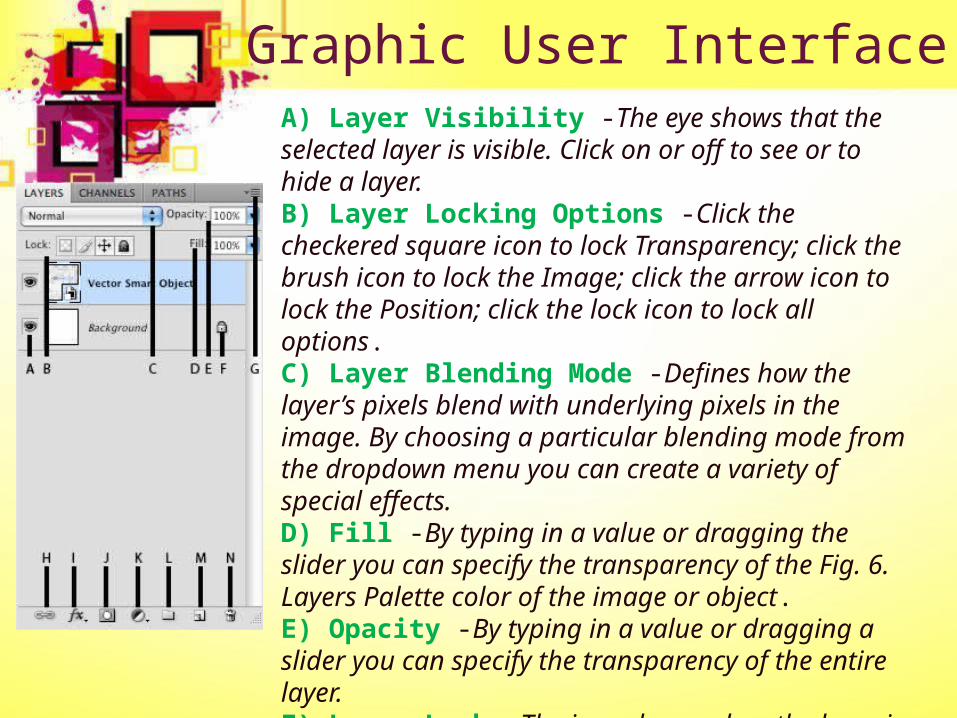
Graphic User InterfaceA) Layer Visibility -The eye shows that the selected layer is visible. Click on or off to see or to hide a layer. B) Layer Locking Options -Click the checkered square icon to lock Transparency; click the brush icon to lock the Image; click the arrow icon to lock the Position; click the lock icon to lock all options. C) Layer Blending Mode -Defines how the layer’s pixels blend with underlying pixels in the image. By choosing a particular blending mode from the dropdown menu you can create a variety of special effects. D) Fill -By typing in a value or dragging the slider you can specify the transparency of the Fig. 6. Layers Palette color of the image or object. E) Opacity -By typing in a value or dragging a slider you can specify the transparency of the entire layer. F) Layer Lock -The icon shows when the layer is locked and disappears when it is unlocked. Double-click the icon to unlock the layer.
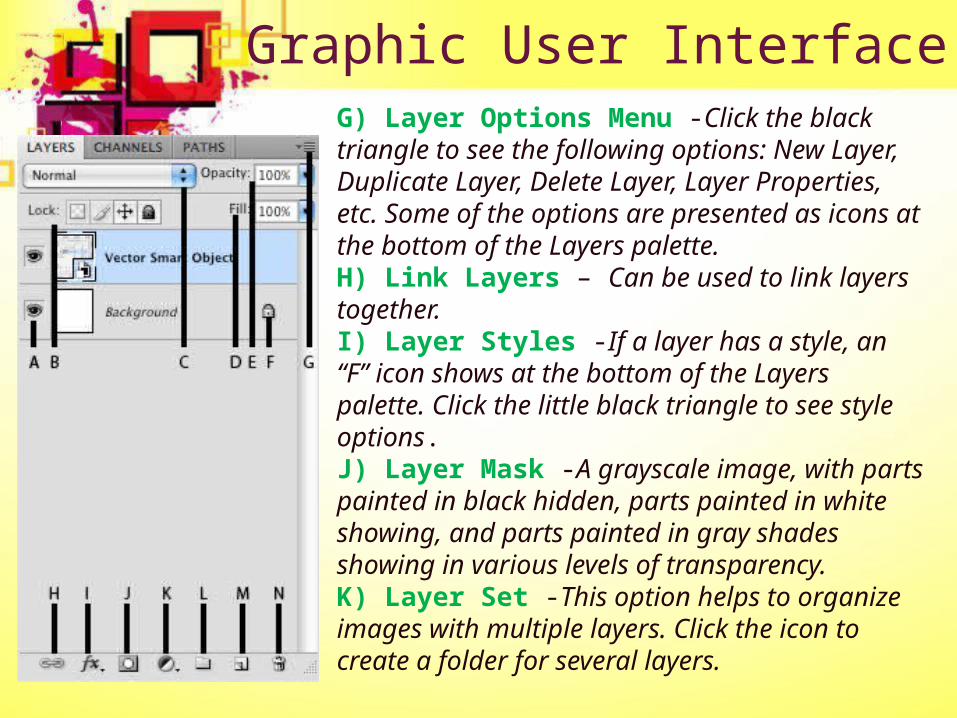
Graphic User InterfaceG) Layer Options Menu -Click the black triangle to see the following options: New Layer, Duplicate Layer, Delete Layer, Layer Properties, etc. Some of the options are presented as icons at the bottom of the Layers palette. H) Link Layers – Can be used to link layers together. I) Layer Styles -If a layer has a style, an “F” icon shows at the bottom of the Layers palette. Click the little black triangle to see style options. J) Layer Mask -A grayscale image, with parts painted in black hidden, parts painted in white showing, and parts painted in gray shades showing in various levels of transparency. K) Layer Set -This option helps to organize images with multiple layers. Click the icon to create a folder for several layers.
Graphic User Interface
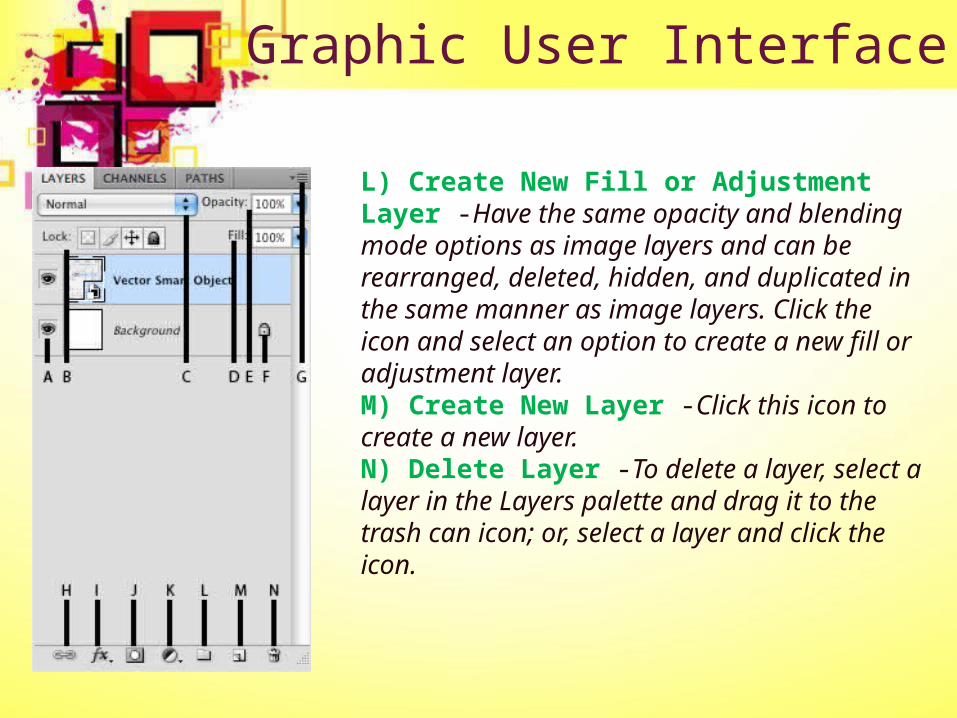
L) Create New Fill or Adjustment Layer -Have the same opacity and blending mode options as image layers and can be rearranged, deleted, hidden, and duplicated in the same manner as image layers. Click the icon and select an option to create a new fill or adjustment layer. M) Create New Layer -Click this icon to create a new layer. N) Delete Layer -To delete a layer, select a layer in the Layers palette and drag it to the trash can icon; or, select a layer and click the icon.
Graphic User Interface
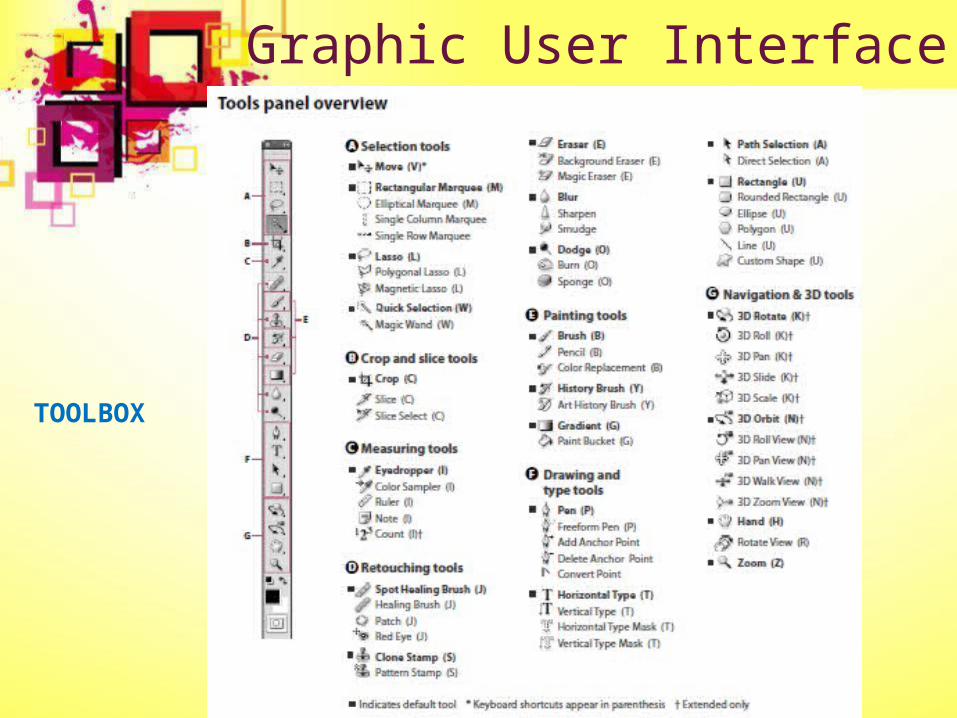
TOOLBOX

BASIC FUNCTIONS

Basic Functions
• Familiarize yourself to do the following actions:– Open File– Close File– Save File– Print

BASIC IMAGE MANIPULATION

Basic Selection Skills
Selection Tools Gallery

Crop Image
Crop and Slice tools Gallery

Basic Graphic Manipulation
• Go to “IMAGE” Menu:– Auto Tone– Auto Color– Auto Contrast

Retouching Tools

Retouching Tools

Painting Tools

Drawing and Type Tools

Notes, Measuring & Navigation Tools

Saving a File• Click “File” -> Save as:

END