ms word 2007 the basics workbook - intranet home formatting ... editing. scroll bars ... page 6 ms...
TRANSCRIPT
Centre for Learning and Academic Development
IT Training
MS Word 2007
The Basics Workbook
Version 1.0 www.skills.bham.ac.uk

MS Word 2007: The Basics
Author: Linda Clark Version: 1.0, August 2010 © 2010 The University of Birmingham All rights reserved; no part of this publication may be photocopied, recorded or otherwise reproduced, stored in a retrieval system or transmitted in any form by any electrical or mechanical means without permission of the copyright holder.
Trademarks: Microsoft Windows is a registered trademark of Microsoft Corporation. All brand names and product names used in this handbook are trademarks, registered trademarks, or trade names of their respective holders.
MS Word 2007: The Essentials Page i
Contents Introduction ................................................................................................................................................ 1 Word 2007 Screen ...................................................................................................................................... 1
Title Bar ............................................................................................................................................. 2 Office Button ...................................................................................................................................... 2 Quick Access Toolbar ........................................................................................................................ 2 Ribbon ................................................................................................................................................ 2 Scroll Bars .......................................................................................................................................... 2 Status Bar ........................................................................................................................................... 2 Views and Zoom ................................................................................................................................ 2 Window Control Buttons .................................................................................................................... 3 Document window ............................................................................................................................. 3 Cursor/Insertion Point ........................................................................................................................ 3 Help button ......................................................................................................................................... 3
Creating a Document .................................................................................................................................. 3 Start a New Blank Document ................................................................................................................. 3
Exercise .............................................................................................................................................. 3 Keying in Text ........................................................................................................................................ 4
Exercise .............................................................................................................................................. 4 Moving around your text .................................................................................................................... 5 Moving around your text using the arrow keys .................................................................................. 5 Moving around your text using the mouse ......................................................................................... 5
Inserting and Deleting Text .................................................................................................................... 5 Exercise .............................................................................................................................................. 5
Saving a Document ................................................................................................................................ 5 Exercise .............................................................................................................................................. 6
Close a Document .................................................................................................................................. 6 Exercise .............................................................................................................................................. 6 Exercise .............................................................................................................................................. 7
Open a Document ................................................................................................................................... 8 Exercise .............................................................................................................................................. 8
Scrolling through a document ................................................................................................................ 8 Spellcheck .............................................................................................................................................. 9
Exercise .............................................................................................................................................. 9 Selecting text .......................................................................................................................................... 9
Removing a Selection ....................................................................................................................... 10 Exercise ............................................................................................................................................ 10 Typing Replaces Selection ............................................................................................................... 11
Undo ..................................................................................................................................................... 11 Redo ..................................................................................................................................................... 11 Cut and Paste ........................................................................................................................................ 12 Copy and Paste ..................................................................................................................................... 12 Print Preview ........................................................................................................................................ 13 Print Options ........................................................................................................................................ 14
Character Formatting ................................................................................................................................ 15 Apply Character Formatting ................................................................................................................. 15
Paragraph Formatting ............................................................................................................................... 17 Further Exercise ....................................................................................................................................... 19


MS Word 2007: The Essentials Page 1
Introduction Microsoft Word is a powerful word-processing software program that
gives its users the tools to create a variety of professional documents.
Word automatically checks your spelling and grammar, and corrects
common mistakes. For example, if one types teh, Word will
automatically change it to the. It even lets you insert charts, tables, and
pictures into your documents. Microsoft Word is the most widely used
and, according to most reviews, the most powerful and user-friendly
word-processor available.
To Start Word Click the Start button at the bottom left of the screen
Select All Programs
Select Microsoft Office
Select Microsoft Office Word 2007
Word 2007 starts and automatically opens a blank document ready for
use.
Word 2007 Screen Let’s take a look at the Word 2007 screen.
Page 2 MS Word 2007: The Basics Workbook
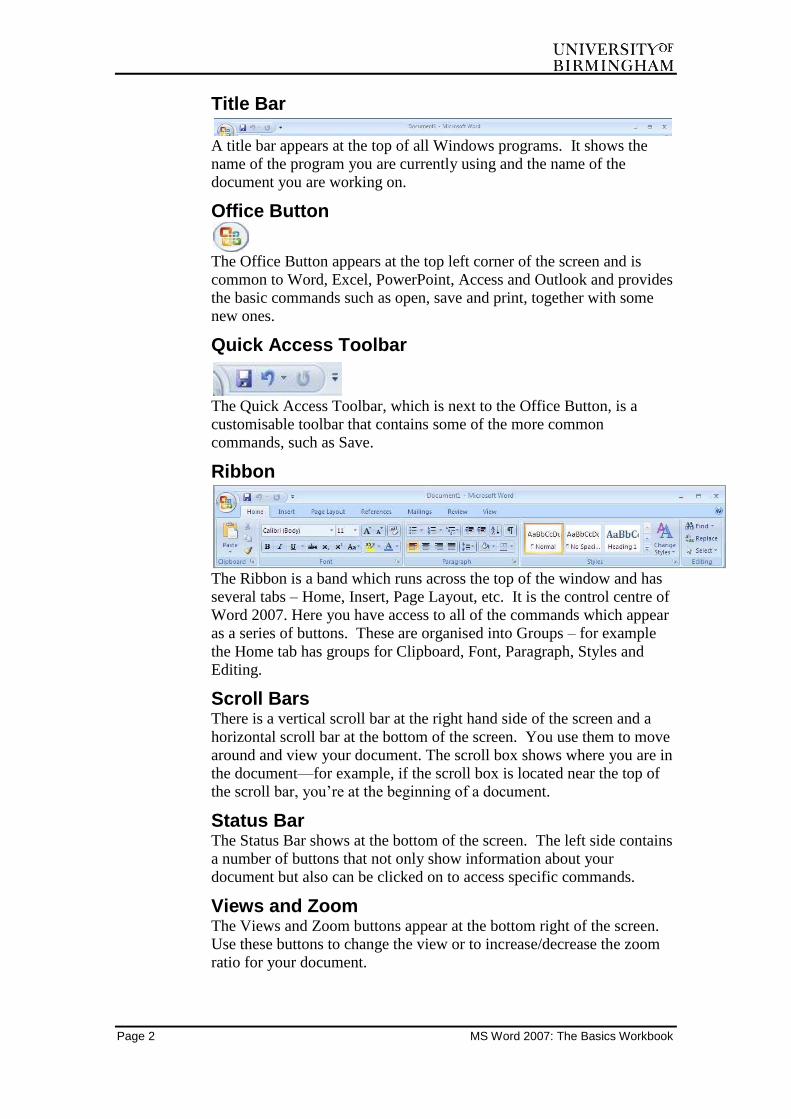
Title Bar
A title bar appears at the top of all Windows programs. It shows the
name of the program you are currently using and the name of the
document you are working on.
Office Button
The Office Button appears at the top left corner of the screen and is
common to Word, Excel, PowerPoint, Access and Outlook and provides
the basic commands such as open, save and print, together with some
new ones.
Quick Access Toolbar
The Quick Access Toolbar, which is next to the Office Button, is a
customisable toolbar that contains some of the more common
commands, such as Save.
Ribbon
The Ribbon is a band which runs across the top of the window and has
several tabs – Home, Insert, Page Layout, etc. It is the control centre of
Word 2007. Here you have access to all of the commands which appear
as a series of buttons. These are organised into Groups – for example
the Home tab has groups for Clipboard, Font, Paragraph, Styles and
Editing.
Scroll Bars There is a vertical scroll bar at the right hand side of the screen and a
horizontal scroll bar at the bottom of the screen. You use them to move
around and view your document. The scroll box shows where you are in
the document—for example, if the scroll box is located near the top of
the scroll bar, you’re at the beginning of a document.
Status Bar The Status Bar shows at the bottom of the screen. The left side contains
a number of buttons that not only show information about your
document but also can be clicked on to access specific commands.
Views and Zoom The Views and Zoom buttons appear at the bottom right of the screen.
Use these buttons to change the view or to increase/decrease the zoom
ratio for your document.

MS Word 2007: The Essentials Page 3
Window Control Buttons Located in the top right corner of the Word screen, these are used to
minimise the Word window to the taskbar, switch between full screen
and a smaller window and close the current application.
Document window This is the main white area in the middle of the screen and is where you
type in text and work on your documents. You can have more than one
document window open at a time, allowing you to work on several
documents
Cursor/Insertion Point The small, blinking bar is where the text you type appears in the
document. You can move the insertion point by moving your mouse to a
new location in the document window (the pointer should change to )
and clicking, or by using the arrow keys on the keyboard.
Help button Gives access to extensive Help and How To information.
Creating a Document
Start a New Blank Document First, we will start a new blank document
Exercise 1. Click on the Office button
2. Click on New.
The New Document dialog box opens.

Page 4 MS Word 2007: The Basics Workbook
3. Click on Blank Document
4. Click on Create.
A new document is opened.
Keying in Text We will now enter a small amount of text. When typing, note that:
You do not need to press Enter at the end of each line, as if the
text is too long to fit within the space available it will
automatically be carried over to the next line. This is known as
word wrap.
At the end of a paragraph press the Enter key once.
After a heading, press the Enter key once.
To type capital letters, hold down the Shift key and then press the key for the letter that you want to type.
If you are typing a block of capital letters, press the Caps Lock
key to start typing in capitals and press the Caps Lock key again to stop.
Don't worry if you make mistakes, you can correct them later
Exercise 1. With the new Word document on your screen, type in the
following text:
Trees
A tree is a plant that grows on a single central woody stalk. There are many varied types of tree found in different parts of the world.
MS Word 2007: The Essentials Page 5
Moving around your text We will look at two ways of moving the cursor (or insertion point) around the text:
Using the arrow keys
Using the mouse
Moving around your text using the arrow keys The arrow keys ←↑→↓ (located at the bottom right of the main
keyboard) allow you to move the cursor (a flashing black vertical line)
in the direction of the arrow, either left or right one character at a time, or up and down one line at a time.
You can move one space forwards or backwards at a time, or you can
move up or down one line at a time. If you keep an arrow key pressed
down, the cursor will move quickly through the document. Remember to release the arrow key when you reach the required place.
Moving around your text using the mouse As you move the mouse around the screen, you will notice that the I-
beam moves with you. Move it until you have reached the required
position, click the mouse button once and the I-beam will be replaced by the cursor.
Inserting and Deleting Text After typing a document, you will often discover that you need to make
several changes to your text. You can easily edit a document by inserting and deleting text.
To delete text, move the cursor to the left or right of the text you want to
delete, then press either the <Backspace> key (deletes text to the left) or the <Delete> key (deletes text to the right).
To insert text place the insertion point where you want to place the new text, and start typing.
Exercise 1. Insert the word upright between the words single and central.
2. Delete the word central.
Saving a Document After you’ve created a document, you need to save it if you intend on
using it again. Saving a document stores it in a file on your computer’s
hard disk, similar to putting a file away in a filing cabinet so you can
use it later.
Page 6 MS Word 2007: The Basics Workbook
Exercise Save your document
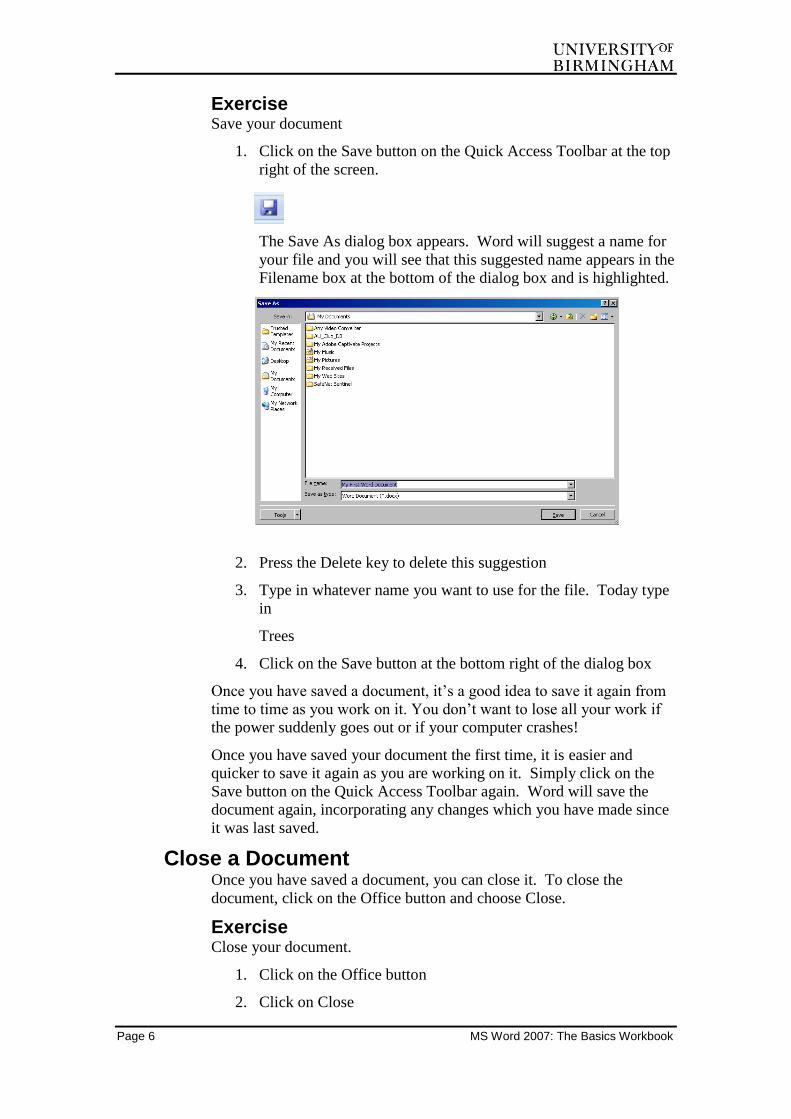
1. Click on the Save button on the Quick Access Toolbar at the top
right of the screen.
The Save As dialog box appears. Word will suggest a name for
your file and you will see that this suggested name appears in the
Filename box at the bottom of the dialog box and is highlighted.
2. Press the Delete key to delete this suggestion
3. Type in whatever name you want to use for the file. Today type
in
Trees
4. Click on the Save button at the bottom right of the dialog box
Once you have saved a document, it’s a good idea to save it again from
time to time as you work on it. You don’t want to lose all your work if
the power suddenly goes out or if your computer crashes!
Once you have saved your document the first time, it is easier and
quicker to save it again as you are working on it. Simply click on the
Save button on the Quick Access Toolbar again. Word will save the
document again, incorporating any changes which you have made since
it was last saved.
Close a Document Once you have saved a document, you can close it. To close the
document, click on the Office button and choose Close.
Exercise Close your document.
1. Click on the Office button
2. Click on Close
MS Word 2007: The Essentials Page 7
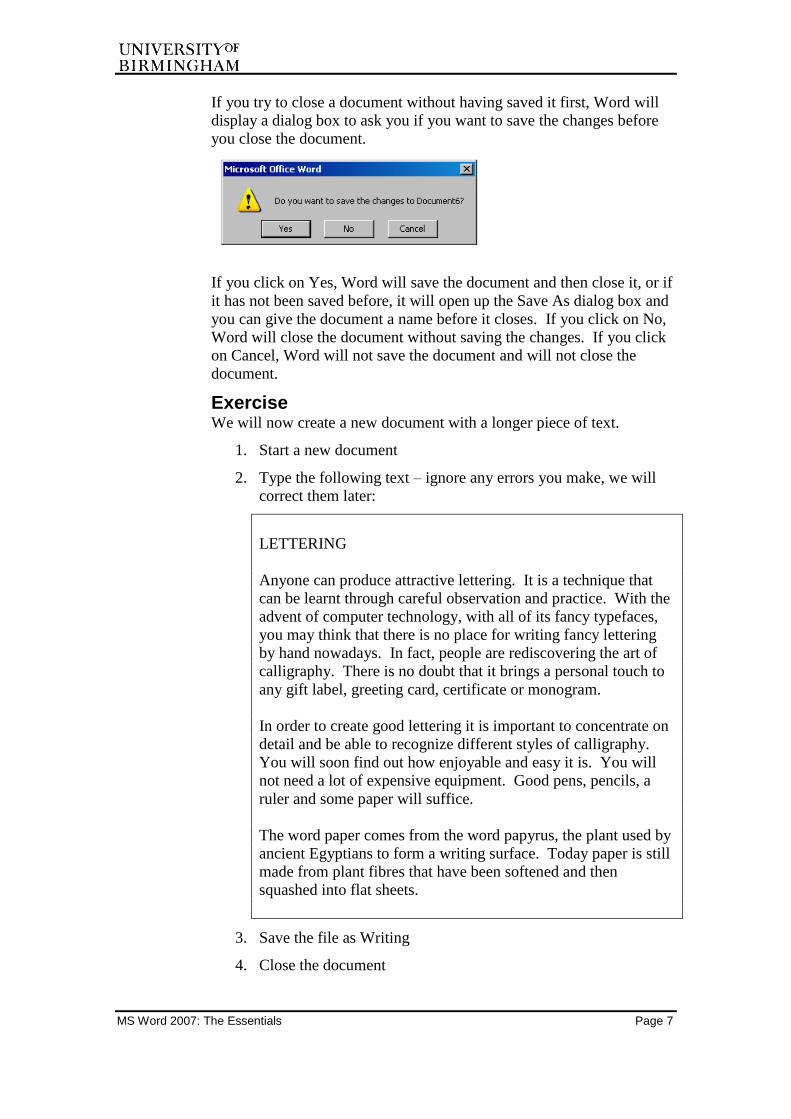
If you try to close a document without having saved it first, Word will
display a dialog box to ask you if you want to save the changes before
you close the document.
If you click on Yes, Word will save the document and then close it, or if
it has not been saved before, it will open up the Save As dialog box and
you can give the document a name before it closes. If you click on No,
Word will close the document without saving the changes. If you click
on Cancel, Word will not save the document and will not close the
document.
Exercise We will now create a new document with a longer piece of text.
1. Start a new document
2. Type the following text – ignore any errors you make, we will
correct them later:
LETTERING
Anyone can produce attractive lettering. It is a technique that
can be learnt through careful observation and practice. With the
advent of computer technology, with all of its fancy typefaces,
you may think that there is no place for writing fancy lettering
by hand nowadays. In fact, people are rediscovering the art of
calligraphy. There is no doubt that it brings a personal touch to
any gift label, greeting card, certificate or monogram.
In order to create good lettering it is important to concentrate on
detail and be able to recognize different styles of calligraphy.
You will soon find out how enjoyable and easy it is. You will
not need a lot of expensive equipment. Good pens, pencils, a
ruler and some paper will suffice.
The word paper comes from the word papyrus, the plant used by
ancient Egyptians to form a writing surface. Today paper is still
made from plant fibres that have been softened and then
squashed into flat sheets.
3. Save the file as Writing
4. Close the document
Page 8 MS Word 2007: The Basics Workbook
Open a Document Once a document has been saved and closed, you can open it again to
work on it further.
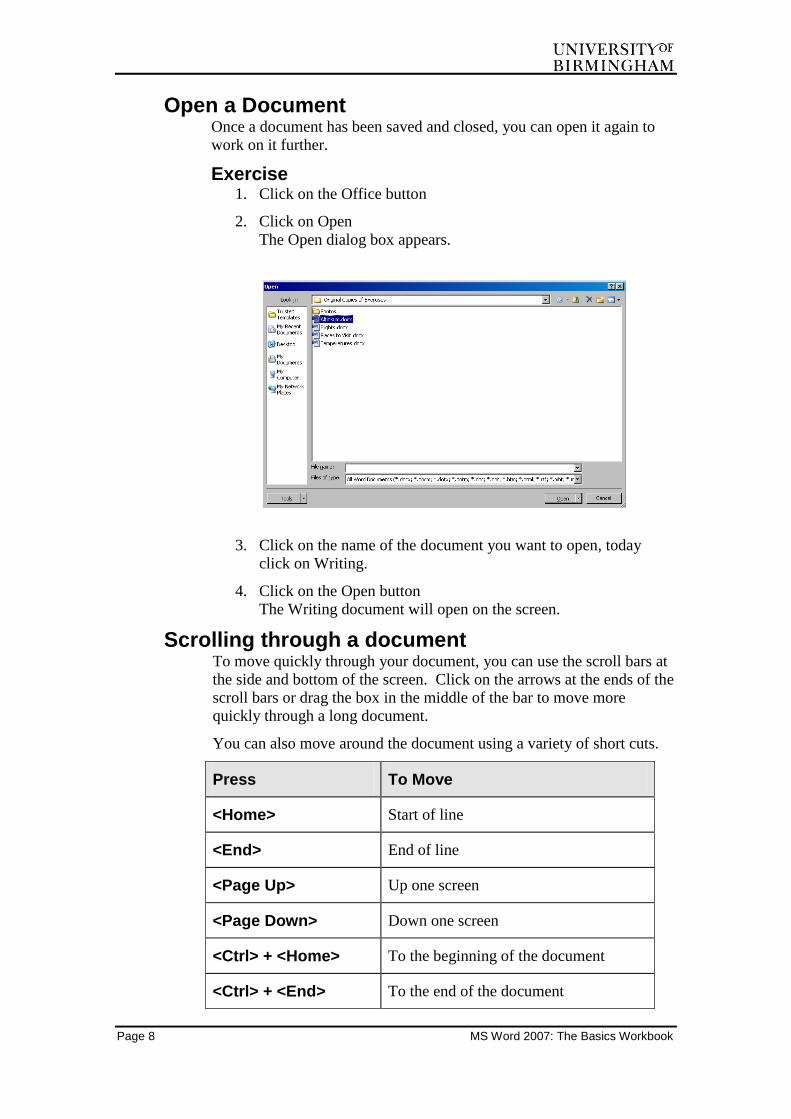
Exercise 1. Click on the Office button
2. Click on Open
The Open dialog box appears.
3. Click on the name of the document you want to open, today
click on Writing.
4. Click on the Open button
The Writing document will open on the screen.
Scrolling through a document To move quickly through your document, you can use the scroll bars at
the side and bottom of the screen. Click on the arrows at the ends of the
scroll bars or drag the box in the middle of the bar to move more
quickly through a long document.
You can also move around the document using a variety of short cuts.
Press To Move
<Home> Start of line
<End> End of line
<Page Up> Up one screen
<Page Down> Down one screen
<Ctrl> + <Home> To the beginning of the document
<Ctrl> + <End> To the end of the document

MS Word 2007: The Essentials Page 9
Spellcheck As you type, Word automatically spellchecks the text. If you type a
word which does not appear in Word’s dictionaries, it will mark it with
a red squiggly line.
It may be that that the word is in fact correct. It may be that it is a place
name for example but as it doesn’t appear in Microsoft’s dictionaries,
Word will highlight it. If you know that the word is correct, you can
ignore the red lines. If the word is a spelling error however, Word will
help you by suggesting the correct version.
Point to the word to be corrected and press the right mouse button – this
is known as right-clicking.
Word will display a list of suggested corrections. Click on the correct
spelling and Word will correct it in your text.
The green lines which appear on the screen indicate that Word believes
the grammar could be improved. Word is, however, not good at
detecting grammatical errors and so this feature is often of limited use.
Exercise 1. Check through the Writing document on screen for any red
squiggly lines indicating possible spelling errors. If there
are any which need correcting, right click on the error and
click on the appropriate option in the menu which appears.
Save the document
Selecting text Selecting text is an important technique. It is used to identify a portion
of text so that something can be done to that text. For example, selected
text can be formatted, deleted, copied or moved. Text can be selected
using the mouse or a variety of keyboard shortcuts.
Page 10 MS Word 2007: The Basics Workbook
To select text using the mouse: Point to the place where you want the selection to begin
Hold down the left mouse button
Drag the mouse in any direction to where you want the selection
to end
Release the mouse button
You can use the cursor arrow keys to select text. To do this, position
the cursor where you want the selection to begin. Hold down the Shift
key and use the cursor arrow keys to move the cursor to where you
want the selection to end and then release the Shift key.
You can also select text using a variety of shortcuts. The selection bar
is the white space immediately to the left of the text.
To select Do this
A word Double-click the word.
Several bits of text Select the first block of text, then press
and hold <Ctrl> as you select the
remaining blocks of text.
A sentence Press and hold <Ctrl> and click
anywhere in the sentence.
A line of text Click in the selection bar next to the
line.
A paragraph Triple-click in the paragraph, or
double-click in the selection bar next to
the paragraph.
The entire document Triple-click in the selection bar, or
press and hold <Ctrl> and click
anywhere in the selection bar, or press
<Ctrl> + <A>.
Removing a Selection To remove a selection, you can click the mouse away from the selection
or press one of the cursor arrow keys.
Exercise Select and then deselect the following in the Writing document on
screen:
1. The word attractive
2. The word observation
3. The words computer technology
4. The first line of the second paragraph

MS Word 2007: The Essentials Page 11
5. The sentence You will soon find out how enjoyable and easy
it is in the second paragraph.
6. The words expensive equipment in the second paragraph
7. The third paragraph
8. The words ancient Egyptians
Typing Replaces Selection Take care once you have selected text – if you press any key on the
keyboard, the selected text will be deleted and replaced with the letter
you typed! If this does happen, don’t panic. You can use the Undo
button.
Undo As you add to or edit a document, Word records all of your actions and
makes them available via the Undo button.
If, for example, you delete a word, you can use the Undo button to undo
the action and bring it back. This function is only helpful if you realise
reasonably quickly that you have made a mistake. This is because all of
your actions from the time you open a document until you close it are
recorded, and therefore the more editing you do to a document, the
longer the list of actions which can be undone.
To Undo your last action, click the Undo button on the Quick Access
Toolbar once only.
If you click the arrow at the side of the Undo button, you are able to
view a list of all the actions that can be undone. Clicking on any of the
items in the list will cause that action and all actions above it, to be
undone.
Redo If you undo an action, you can redo the action by clicking on the Redo
button on the Quick Access Toolbar. The Redo button is located to the
right of the Undo button.
Page 12 MS Word 2007: The Basics Workbook
Exercise
1. Select everything in the Writing document
2. Type the letter z
All of the selected text is replaced
3. Click on the Undo button on the Quick Access Toolbar
The text is brought back
Cut and Paste Once you have selected text, you can move it to another place in the
document by cutting, and then pasting it elsewhere. Cutting and pasting
text is one of the most common tasks you’re likely to do when you use
Word. When you cut text, it is removed from its original location and
placed in a temporary storage area called the Clipboard. You can then
move the insertion point to a new location in a document and paste the
cut text from the Clipboard. The Clipboard is available in any Windows
program, so you can cut and paste text between various software
programs.
Exercise
With the Writing document open on the screen:
1. Select the last sentence of the first paragraph, beginning ―There
is no doubt …‖
2. Go to the Home tab on the Ribbon
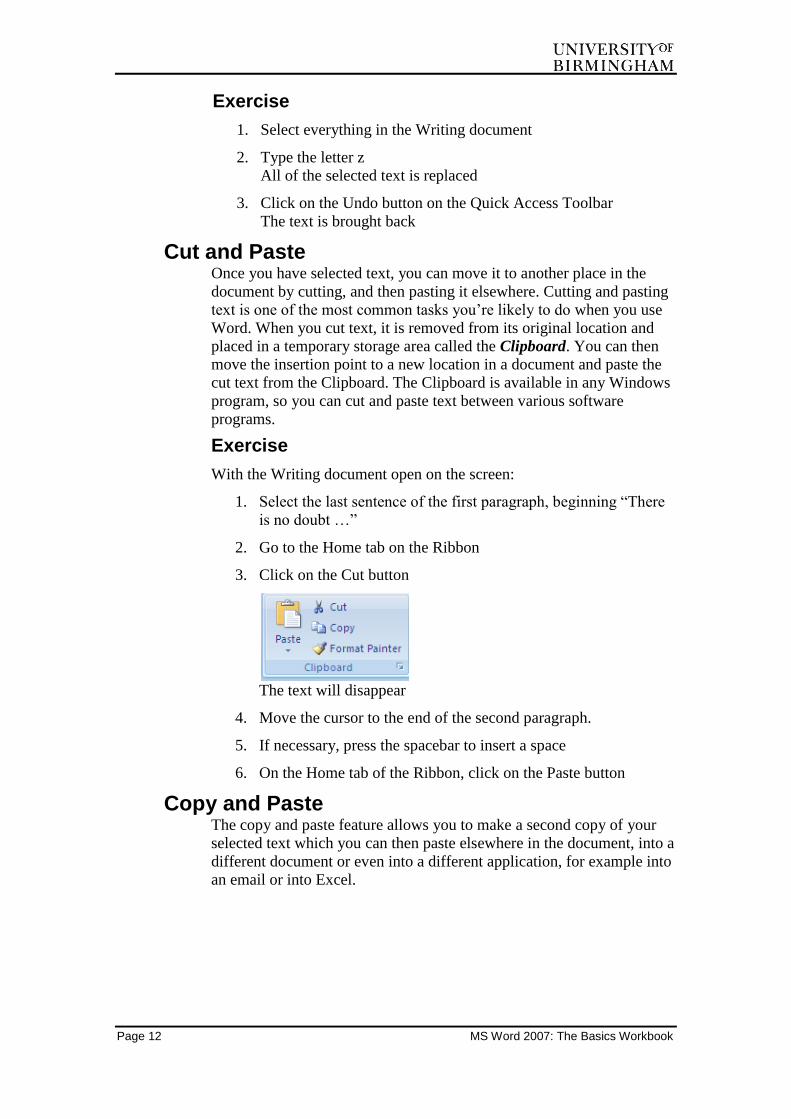
3. Click on the Cut button
The text will disappear
4. Move the cursor to the end of the second paragraph.
5. If necessary, press the spacebar to insert a space
6. On the Home tab of the Ribbon, click on the Paste button
Copy and Paste The copy and paste feature allows you to make a second copy of your
selected text which you can then paste elsewhere in the document, into a
different document or even into a different application, for example into
an email or into Excel.

MS Word 2007: The Essentials Page 13
Exercise
With the Writing document open on the screen:
1. Select the main heading
2. Go to the Home tab on the Ribbon
3. Click on the Copy button
This time, the text does not disappear
4. Move the cursor to the end of the last paragraph.
5. Press the enter key to start a new line
6. On the Home tab of the Ribbon, click on the Paste button
Note that you now have two copies of the heading, one at the top
of the document and one at the end of it.
7. Move the cursor to the end of the word Lettering at the end of
the document
8. Press the Enter key to start a new line
9. On the Home tab of the Ribbon, click on the Paste button again.
The text is copied again and now appears three times in all. The
copied text remains on the clipboard and so you can paste it
again to make another copy of the text without having to Copy it
again.
10. Save the document
Print Preview You use the Print Preview option to display each page as it will look
when printed.
Exercise
Preview the Writing document:
1. Click on the Office button
2. Point to Print (but do not click)
A list of options appears on the right of the menu
3. Move across and click on Print Preview
Page 14 MS Word 2007: The Basics Workbook
4. Whilst in Print Preview, you will see the Print Preview tab on
the Ribbon. When you have finished previewing the document,
click on the Close Print Preview button on the Ribbon.
Print Options If you are happy with what you see in Print Preview, you are now ready
to print the document.
Exercise
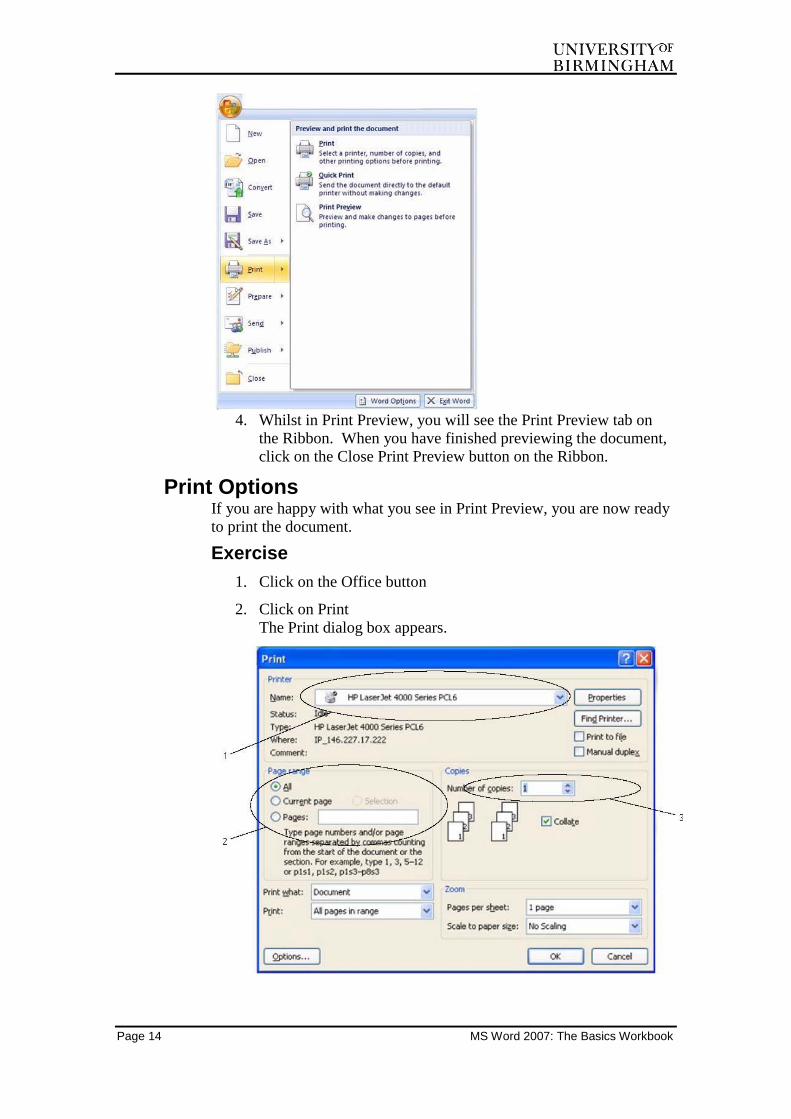
1. Click on the Office button
2. Click on Print
The Print dialog box appears.

MS Word 2007: The Essentials Page 15
As you can see, this dialog box offers you a number of options.
The ones you are likely to use most often are as follows:
1. The printer to be used
2. The page range to be printed
3. The number of copies to be printed
3. Click OK
Assuming the printer is switched on your document will now
print.
Character Formatting Character formatting can be applied to individual characters in a
document. For example, bold formatting can be applied to any
character anywhere in a document without affecting the appearance of
any other text.
In general, it is necessary to select the text to be formatted, before
applying character formatting. When no text is selected, Word applies
character formatting to the word containing the insertion point.
Apply Character Formatting
To apply character formatting, select the text and then go to the Home
Tab on the Ribbon and use the commands in the Font group.
When you click on a drop down arrow you are presented with a variety
of options. When you point the mouse to one of the options, the Live
Preview feature in Word immediately changes your selected text to
show you how this option would affect your text. You can see very
quickly and easily what the text would look like. To select an option
and apply it to the text, click on it.
Option: Used to:
Font Click on the drop down arrow and select the font
name (e.g. Arial, Courier New, Times New Roman)
Size Click on the drop down arrow and select the size of
the characters
Grow Font Increase the font size
Shrink Font Decrease the font size

Page 16 MS Word 2007: The Basics Workbook
Option: Used to:
Clear Formatting
Clear all the formatting from the selection, leaving
only the plain text.
Bold Make the selected text bold
Italic Italicise the selected text
Underline Underline the selected text
Strikethrough Draw a line through the middle of the selected text
– example.
Subscript Create small letters below the line of text – used for
example in H2O
Superscript Create small letters above the line of text– used for
example in 3m2
Change Case Change all the selected text to UPPERCASE,
lowercase, Sentence case, Capitalise Each Word,
tOGGLE cASE
Text Highlight Colour
Make text look like it was marked with a
highlighter pen. Click on the drop down arrow and
select a colour to mark text. To remove colour
from already highlighted text, select No Colour.
Clicking the button rather than the drop down arrow
will apply the last colour used.
Font Colour Change the text colour. Click on the drop down
arrow and select a colour. Click on More Colours
to select from the full colour palette. Clicking on
the button rather than the drop down arrow will
apply the last colour used.
Exercise
Select the heading at the top of the document
1. Go to the Home tab on the Ribbon
2. Click on the Bold button to apply bold
The text becomes bold and remains selected
3. Click on the Italics button to apply italics
4. Click on the Underline button to apply underline
5. Click on the Underline button again to remove underline
6. Click on the drop down arrow next to the Font name
MS Word 2007: The Essentials Page 17
7. From the list which appears, choose any font
8. Click on the drop down arrow next to the Font Size
9. Click on 18
10. Click on the drop down arrow next to the Font Colour
11. Click on any colour
12. Click outside of the heading to remove the selection and see the
newly formatted text
Paragraph Formatting Paragraph formatting is applied to whole paragraphs. For example,
when text is centred, all of the text in the paragraph will be centred. As
with character formatting, more than one type of paragraph formatting
can be applied to a paragraph though some are mutually exclusive.
When no text is selected and paragraph formatting is applied, the
paragraph containing the insertion point will be formatted. If text from
one or more paragraphs is selected then paragraph formatting will be
applied to all paragraphs touched by the selection.
The Home tab on the Ribbon contains some basic paragraph formatting
commands.
Option: Used to:
Bullets Start a bulleted list or remove bullets from an
existing list. Click on the drop down arrow to choose
different bullet styles. Click on Define New Bullet to
create a new bullet character.
Numbering Start a numbered list or remove numbering from an
existing list. Click on the drop down arrow to choose
different numbering formats. Click on Define New
Number Format to create a new format.
Multilevel List Start a multilevel list. Click on the drop down arrow
to choose different styles. You can also define new
list styles. Multilevel lists are covered in more detail
in the online part of the course.
Decrease Indent
Decrease the indent level of the paragraph
Page 18 MS Word 2007: The Basics Workbook
Option: Used to:
Increase Indent
Increase the indent level of the paragraph
Sort Alphabetise the selected data or sort numerical data.
Show/Hide ¶ Show (or hide) paragraph marks and other hidden
formatting symbols
Align Text Left Align text to the left.
Centre Centre text.
Align Text Right
Align text to the right.
Justify Align text to both the left and right margins, adding
extra space between words as necessary. This
creates a clean look along the left and right side of
the page.
Line Spacing Change the spacing between lines of text. Click on
the drop down arrow to select from the list. You can
also customise the amount of space added before and
after paragraphs.
Shading Colour the background behind the selected text or
paragraph. Click on the drop down arrow to select a
colour. Choose More Colours to select from the full
colour palette. Choose No Colour to remove existing
shading. Clicking on the button rather than the drop
down arrow will apply the last colour used.
Borders Customise the borders of the selected cells or text.
Click on the drop down arrow to select a border to
apply. Click on Borders and Shading in the drop
down menu to choose various border options, for
example line colour, style and width.

MS Word 2007: The Essentials Page 19
Further Exercise 1. Start a new document
2. Key in the following text:
ALTINKUM, TURKEY
Turkey's Aegean coast enjoys a typical Mediterranean climate with
mild winters and hot summers.
Altinkum has summer temperatures which often reach well over
thirty degrees with long days of sunshine and sometimes the odd
breeze.
Save the document as Altinkum Temperatures and close it.
3. Open the document called Altinkum Temperatures and key in the
following new paragraph at the end of the existing text:
Showers are unlikely in the summer months but there is quite a high
rainfall in the winter.
4. Make the following edits to the text:
Add the word beautiful in front of Aegean
Add the word very in front of hot summers
Delete the words well over in the second paragraph
Change thirty degrees to forty degrees
Save the changes to the document.
5. Correct any spelling errors indicated.
6. Copy the paragraph beginning Turkey’s Aegean coast … and paste it
at the end of the document
7. Move the paragraph beginning Showers are unlikely … to in front of
the paragraph beginning Altinkum has summer temperatures …
8. Save the document.
9. Format the main heading as follows:
Bold, Change the font, Font size 18, Change font colour
10. Format the first paragraph as follows:
Italics, Same colour as heading, Same font as heading, Font size 8
11. Centre the main heading
12. Save and close the document.