‘my witness’ video badge users guide. operating protocol incident driven warning caution ...
TRANSCRIPT

‘‘My Witness’ Video BadgeMy Witness’ Video Badge
Users GuideUsers Guide
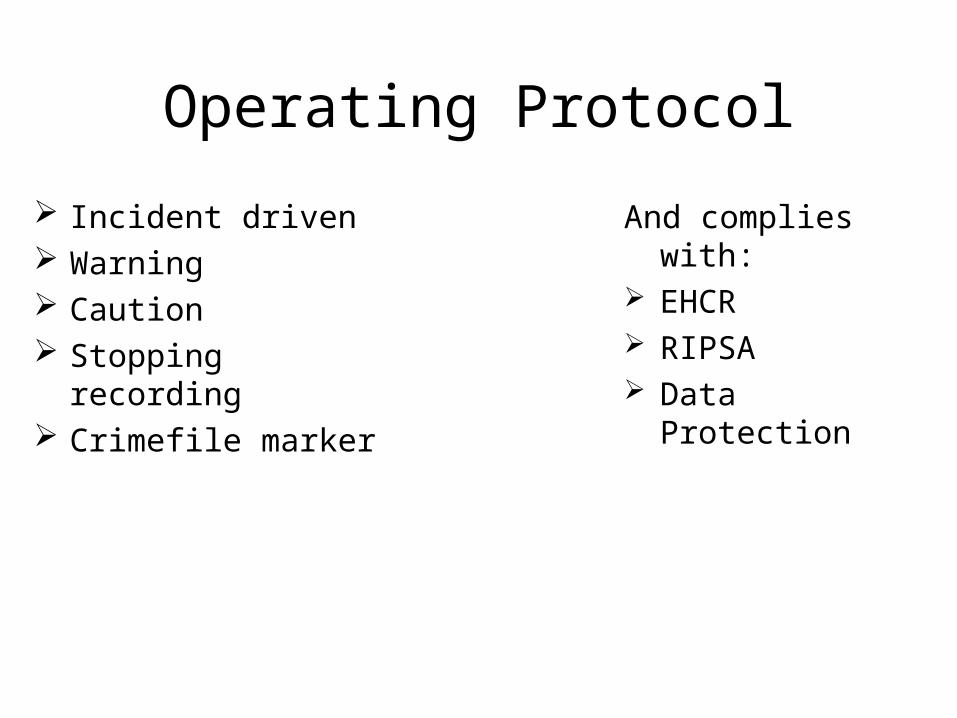
Operating Protocol
Incident driven Warning Caution Stopping recording Crimefile marker
And complies with: EHCR RIPSA Data Protection

Key Performance Indicators
Number of reassurance patrols Number of ASB offenders identified using equipment Number of crimes/offences detected through use of
equipment Number of times evidence used by court/reporter Number of graffiti tags recorded (mark for keeping
indefinitely) Business benefits – reduce complaints, officer reassurance etc
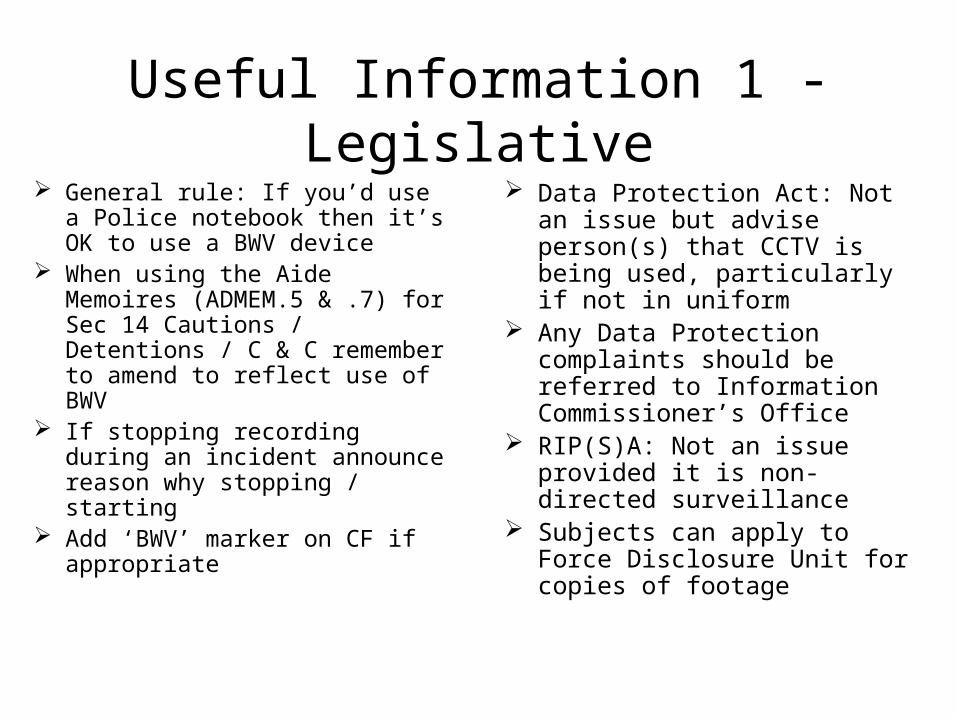
Useful Information 1 - Legislative
General rule: If you’d use a Police notebook then it’s OK to use a BWV device
When using the Aide Memoires (ADMEM.5 & .7) for Sec 14 Cautions / Detentions / C & C remember to amend to reflect use of BWV
If stopping recording during an incident announce reason why stopping / starting
Add ‘BWV’ marker on CF if appropriate
Data Protection Act: Not an issue but advise person(s) that CCTV is being used, particularly if not in uniform
Any Data Protection complaints should be referred to Information Commissioner’s Office
RIP(S)A: Not an issue provided it is non-directed surveillance
Subjects can apply to Force Disclosure Unit for copies of footage

Useful Information 2 – Where Someone Objects to Use of BWV
Counter that Police have been requested to attend an incident
Police presence is required to prevent BOP or injury, etc to any person
Secure best quality of evidence for all parties
Continuing to record will safeguard all parties against future allegations
An incident may occur again in the immediate future
And remember to switch off the device after any incident otherwise you may also be a Defence witness!
Normally encountered during domestic abuse cases or when dealing with persistent complainers vs. Police

Operation of BWV Units
Issue of ‘My Witness’ BWV units
Wearing Care of unit Security Health & Safety Recording Downloading

BWV Unit Warning LightsPower LED Green = Device fully charged Blinking Green = Device plugged in & charging Off = Device Switched off Orange/Red = Device running low on batteries
Management LED Green = Device needs to be configured before use.
Plug in to computer Blinking Green = Device connected to Video Manager
& needs to be configured or assigned to operator before use
Off = Device configured & ready for use
Recording LED Green = Device recording
Power LED
Management LED
Recording LED

Getting Started
Click on ‘My Witness’ Video manager icon Log in screen appears – enter unique 4 digit Force
No. & password Everyone will have sufficient authorisation to do
all day to day actions, however, only those with Administrator status (Supervisors & BWV Trainers) will be able to manually delete footage e.g. when a Court case is disposed or the external hard drive is full
To comply with Information Governance, when downloading to another Base Station, all Users/Administrators will require someone from that Station to log on and create an ID for them if necessary, before footage can be downloaded and burnt to DVD
In these instances it is critical that the BWV software and Officer’s notebook are properly indexed for future retrieval

Creating a User & Permission
Accessed through ‘Settings’ on Menu, then ‘Users & Permissions’

Creating a User & Permission
Select ‘New’ (or ‘Edit’ to amend)
Then enter Users’ details as shown to the right to create their account on the system
Although the User now exists the Operator details still need to be created in order to Assign the device

Creating an Operator
Accessed through ‘Settings’ on Menu then ‘Device Operators’
Can also be created when Assigning a device
All Users will require to have an Operator ID at their Base Station which must be created for them by an ‘Administrator’
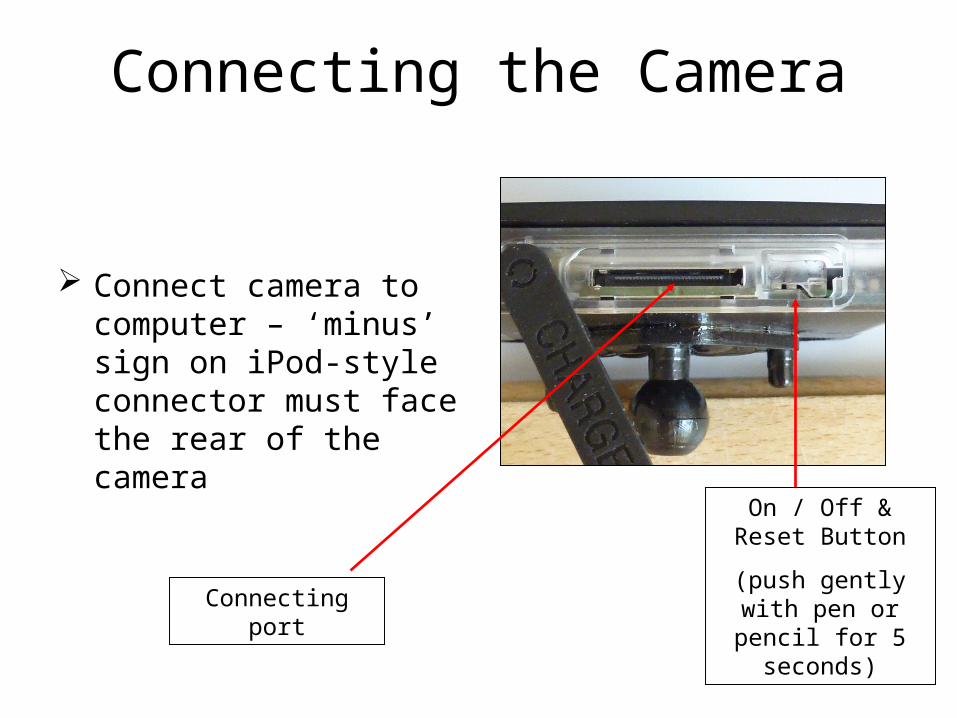
Connecting the Camera
Connect camera to computer – ‘minus’ sign on iPod-style connector must face the rear of the camera
On / Off & Reset Button
(push gently with pen or pencil for 5
seconds)
Connecting port

Assigning a Camera Having connected the camera
highlight the relevant device in blue on the screen
Select ‘Assign device’ Device will not work if it isn’t
assigned to someone
Select ‘Edit Operators’ if you need to create a new Operator
Select ‘Automatically re-assign with the same settings’ if the camera is personal issue
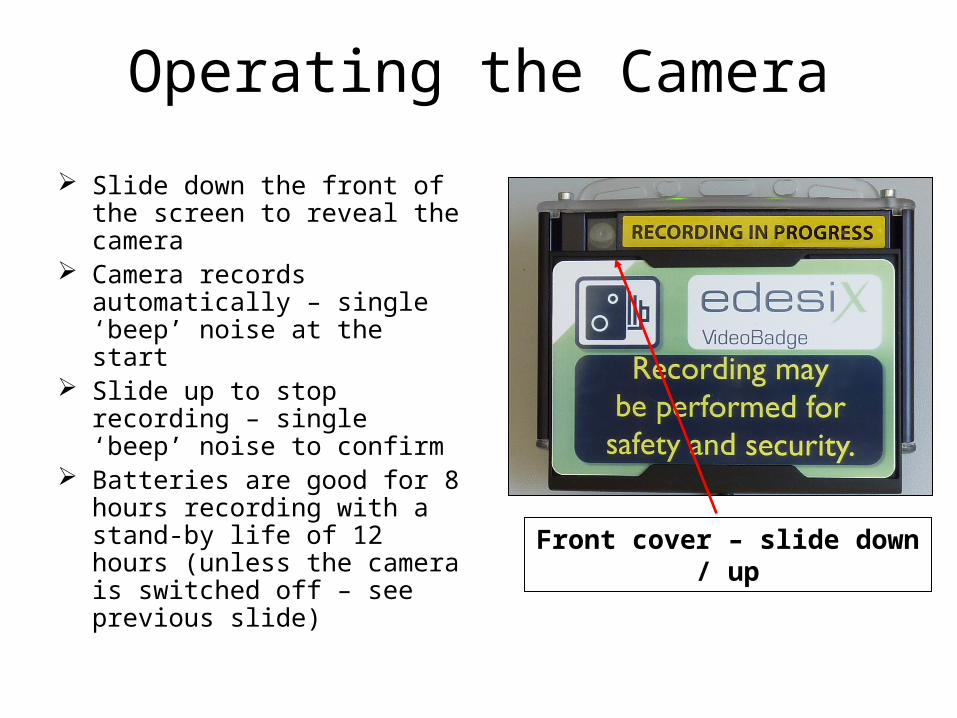
Operating the Camera
Slide down the front of the screen to reveal the camera
Camera records automatically – single ‘beep’ noise at the start
Slide up to stop recording – single ‘beep’ noise to confirm
Batteries are good for 8 hours recording with a stand-by life of 12 hours (unless the camera is switched off – see previous slide)
Front cover – slide down / up

Returning the Camera
Connect camera to computer Footage is automatically
downloaded to external hard drive and device is ready for next deployment
Multiple cameras can be simultaneously downloaded using docking station
If there is no footage stored, click ‘Return device’ button to ready device for re-deployment
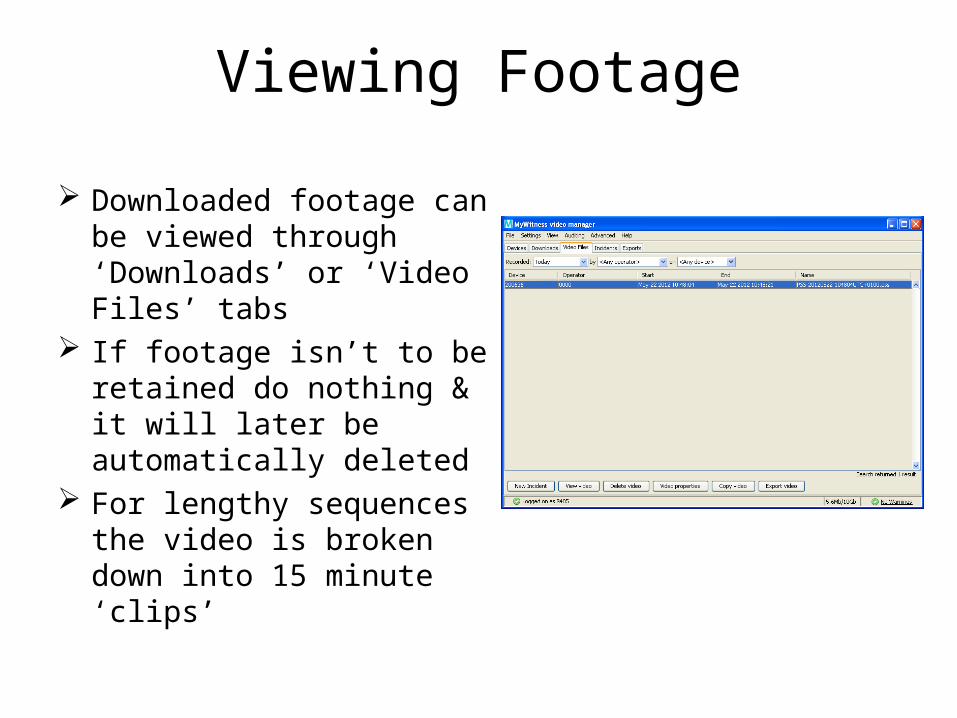
Viewing Footage
Downloaded footage can be viewed through ‘Downloads’ or ‘Video Files’ tabs
If footage isn’t to be retained do nothing & it will later be automatically deleted
For lengthy sequences the video is broken down into 15 minute ‘clips’

Viewing Footage
Viewing footage window is shown to the right
As the footage is being replayed a ‘pause’ icon appears in place of the ‘play one, allowing a snapshot jpg image to be taken
This can be uploaded on to CF or other databases for assistance regarding identification

Creating an Incident If it is to be retained select ‘New
Incident’ & enter CF other Ref No. & freetext in ‘Notes’ window to aid future identification of footage
It is possible to add more than one Video File to an Incident e.g. Corroborating Officer also has BWV footage of the same incident
Incident is highlighted in yellow
Window to the right opens and can be completed

Manual Deletion or Copying of Video
‘Delete Video’ allows immediate deletion of footage at Administrator level
‘Copy Video’ allows video to be copied to desktop or any folder on the computer
Both the above are likely to be disabled, or alternatively only be available to those with Administrator-type status

Searching for Incidents
Advanced search facility is available through ‘Advanced’ button on top right of ‘Incidents’ page
Screen below appears

Deleting Incidents
Incidents can still be manually deleted by highlighting the file and selecting ‘Delete Incident’
As with all transactions the action is recorded on the Audit Log facility
The screen to the left appears This option will only be available to
those with Administrator status

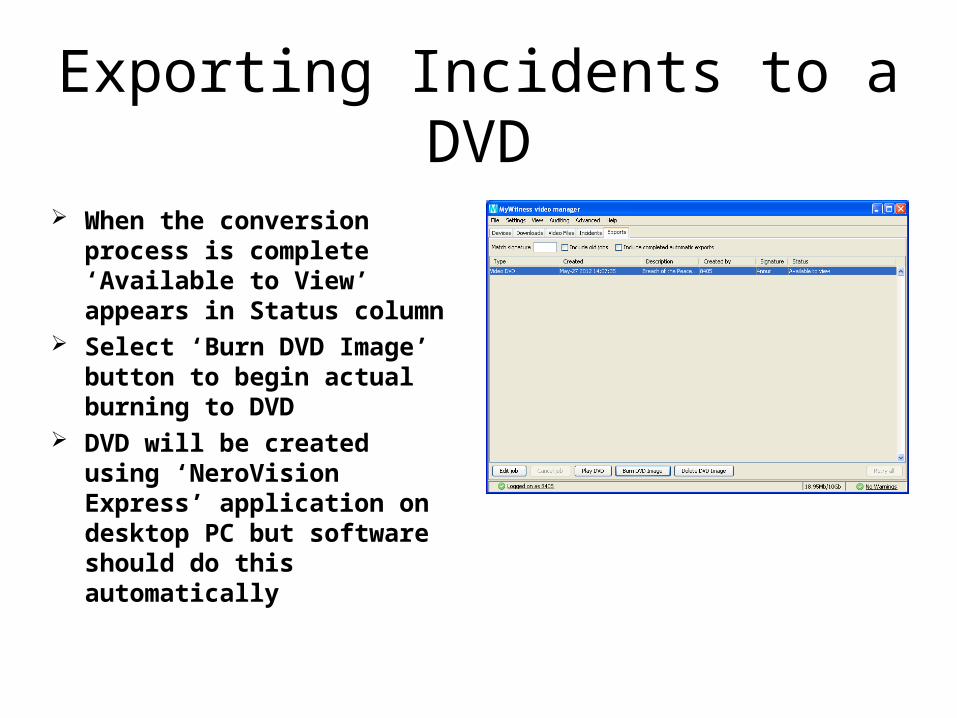
Exporting Incidents to a DVD Footage can be exported to DVD via
‘Export Video’ button on ‘Video Files’ and ‘Incidents’ tabs
‘Preserved’ status not a pre-requisite
All footage shown as ‘UTC’ - ‘Co-ordinated Universal Time’ (generally synonymous with GMT)
Export Video Footage Wizard appears
Click ‘Next’

Exporting Incidents to a DVD
Click ‘Next’ through ‘Export Video Footage – Export Format’
Fill in details on ‘Export Video Footage - Content Details’
Click ‘Next’

Exporting Incidents to a DVD
Click ‘Finish’ on ‘Export Video Footage – Apply’
Screen will disappear
Select ‘Exports’ tab to view progress of file conversion ready for DVD burning
Exporting Incidents to a DVD
When the conversion process is complete ‘Available to View’ appears in Status column
Select ‘Burn DVD Image’ button to begin actual burning to DVD
DVD will be created using ‘NeroVision Express’ application on desktop PC but software should do this automatically

Downloading to Another Computer
Footage can be downloaded to a computer other than the one used to assign the device
First plug in camera and select ‘Configure Device’ button (Note - this is only possible if the operator has Administrator-type status
Select ‘Associate with this basestation’ button and click ‘OK’

Downloading to Another Computer The following window appears –
click ‘Yes’ This will allow footage to be
downloaded to the new computer where an incident can be created and a DVD made
When the camera is returned to its ‘home’ computer, it will show ‘Managed by another basestation’ in the My Witness Video Manager
If the hard drive is running out of memory the warning above will appear, allowing the footage to be managed
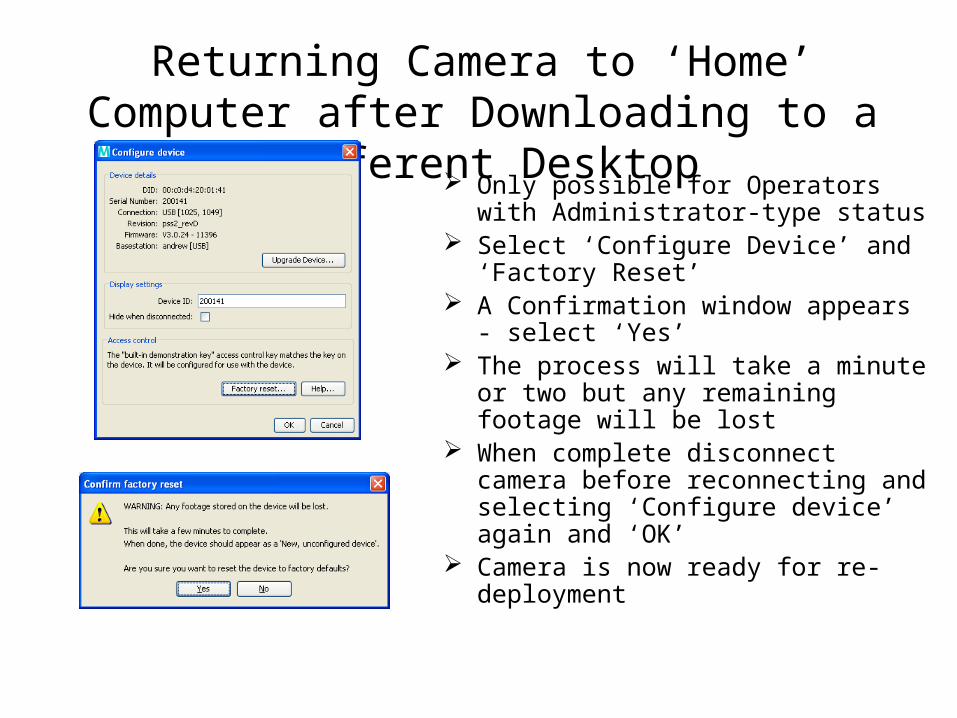
Returning Camera to ‘Home’ Computer after Downloading to a Different Desktop
Only possible for Operators with Administrator-type status
Select ‘Configure Device’ and ‘Factory Reset’
A Confirmation window appears - select ‘Yes’
The process will take a minute or two but any remaining footage will be lost
When complete disconnect camera before reconnecting and selecting ‘Configure device’ again and ‘OK’
Camera is now ready for re-deployment
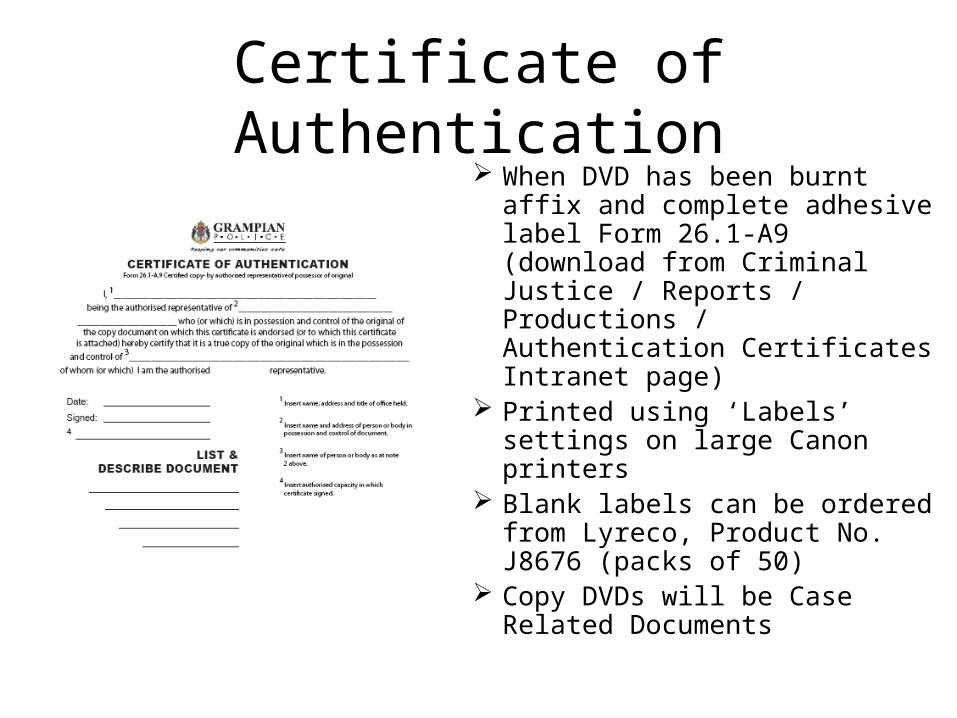
Certificate of Authentication
When DVD has been burnt affix and complete adhesive label Form 26.1-A9 (download from Criminal Justice / Reports / Productions / Authentication Certificates Intranet page)
Printed using ‘Labels’ settings on large Canon printers
Blank labels can be ordered from Lyreco, Product No. J8676 (packs of 50)
Copy DVDs will be Case Related Documents

Report Writing Productions SPR2 Summary
‘This entire incident was captured on Body Worn Video (BWV).’ ‘The accused brandished a stick at the witness Smith. This was captured on Police Body Worn
Video.’ SPR2 Analysis of evidence
‘This incident is captured on Police BWV, the quality is good and the actions of the accused are clearly identifiable. A narrative of the footage is as follows;15:29:38 UTC (15:29:38 GMT (or BST if appropriate)) – the accused Twaddle walks towards the witness Hood’s Volvo motor vehicle and makes a ‘wanker’ gesture.’
SPR2 Remarks ‘The BWV footage is retained at Tillydrone Police Office where it can be viewed by the PF if
required.’ ‘At 15:35:00 UTC (15:35:00 GMT (or BST if appropriate)) a member of the public speaks to the
reporting officer in relation to an unconnected matter. This information should not be disclosed.’

VieVu Body Worn Video
A separate Powerpoint presentation exists for the ‘VieVu’ BWV devices
SOP document covers ‘My Witness’ BWV devices Forcewide but is generic enough to apply to remaining ‘VieVu’ devices within Aberdeen Division which will be withdrawn from Stations to be used at specific events

Questions
For any BWV-related queries please contactyour Divisional or Departmental S.P.O.C.